David Tucker
-
Laser Calorimeter
04/02/2021 at 04:45 • 0 commentsIt would be nice to be able to work out the lasers peak power, and to check out how linear the power response is as we lower or raise the input power. The tool we use to do that is a laser calorimeter. This is a device that measures the temperature change on an object from the beam of the laser being shown on it for a fixed amount of time. It is really nothing much more than a regular oven thermometer that has been calibrated accurately. The problem is the simplest ones start at $100 and quickly go up to $500 for fancy ones with digital displays.
The NBS published a nice writeup on how laser calorimeter's work. It is a bit heavy on the math but the ideas are hiding in there if you are patient.
We can still try to make our own calorimeter but it will be uncalibrated and only good for relative measurements. The user Warsky posted an interesting take on a calorimeter on the laser pointer forums. This is basically a piece of tinfoil of a known size that has been painted black and is held a fixed distance from an IR thermometer. You hit it with an unfocused laser for a set amount of time and measure the change in temp. They have some funny math to try and work out the power, but you can ignore that part.
![]()
![]()
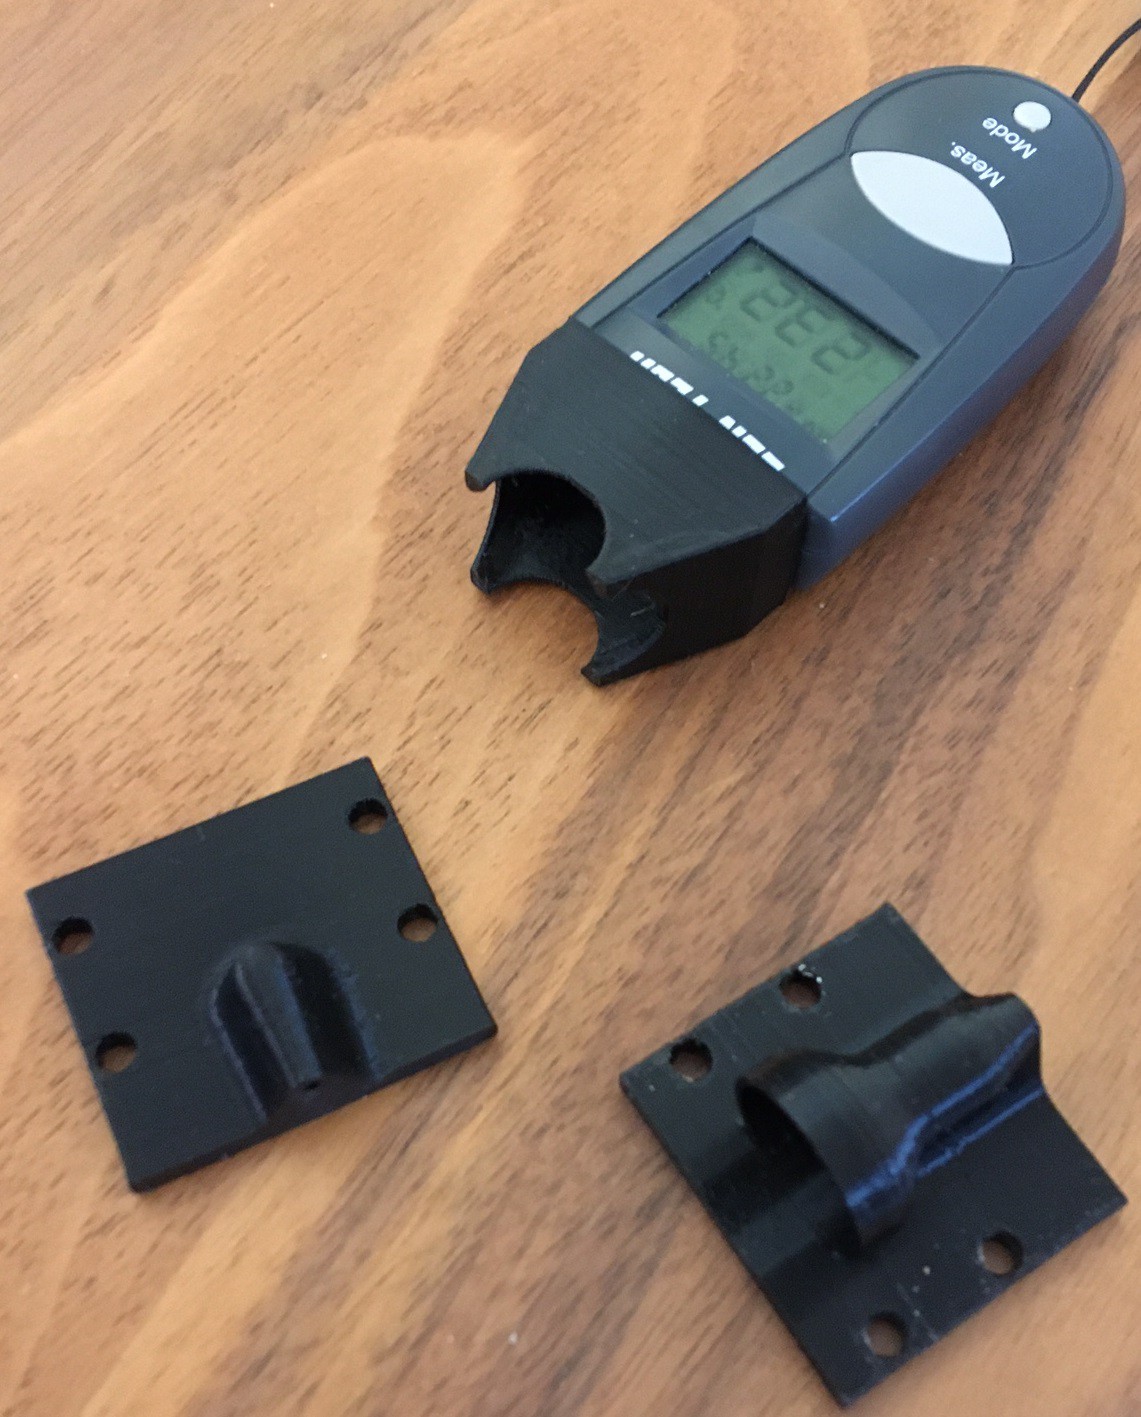
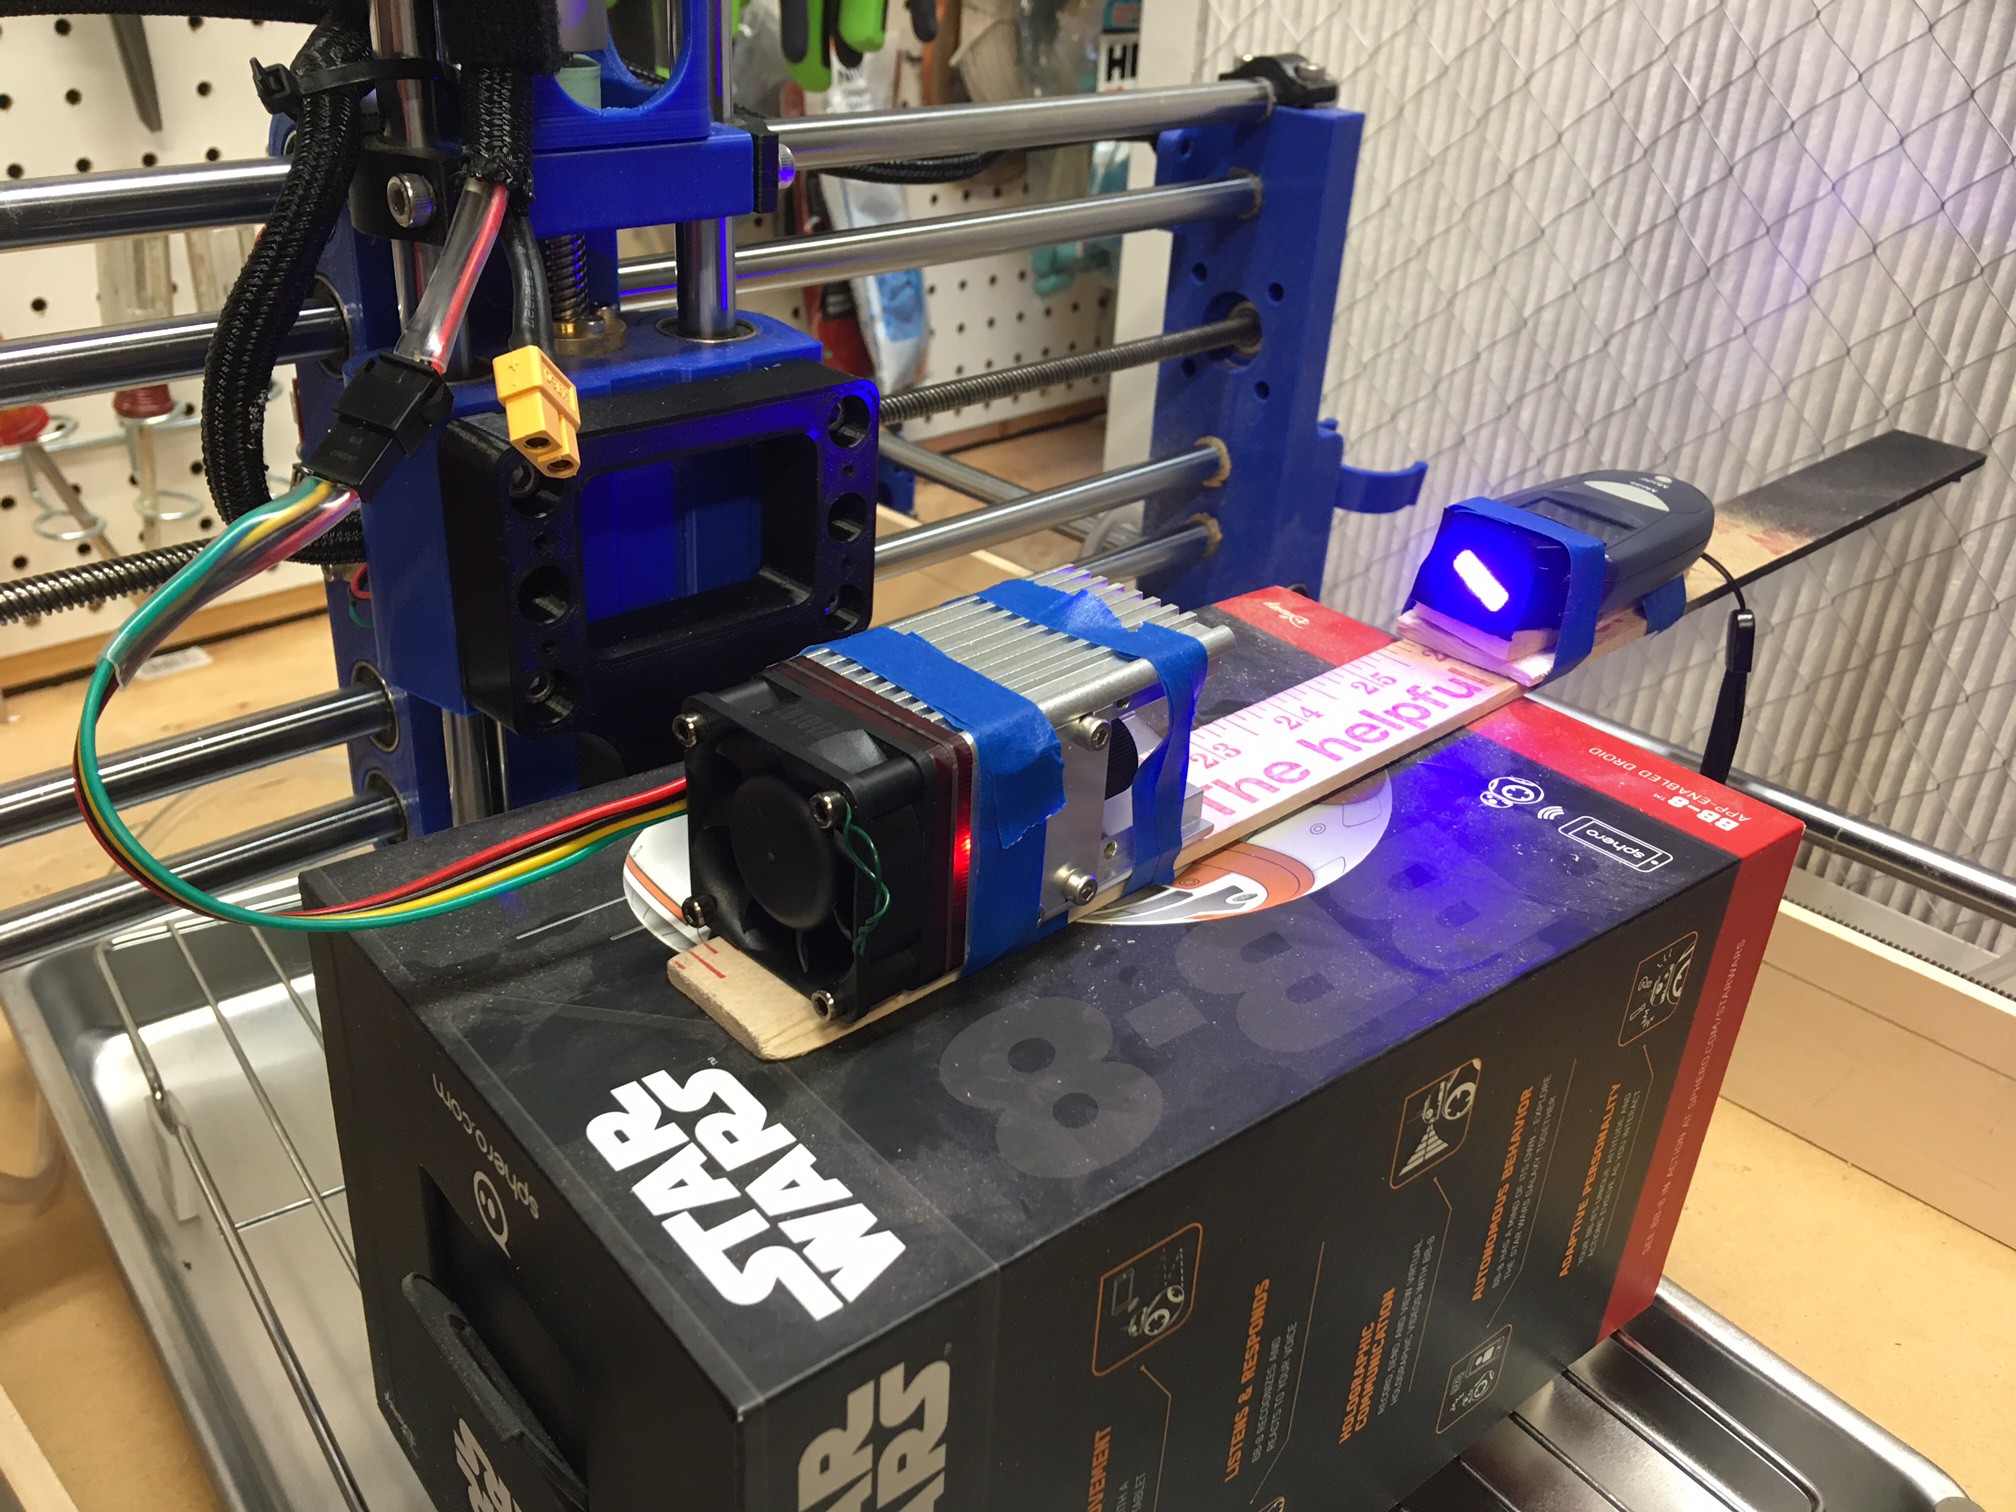
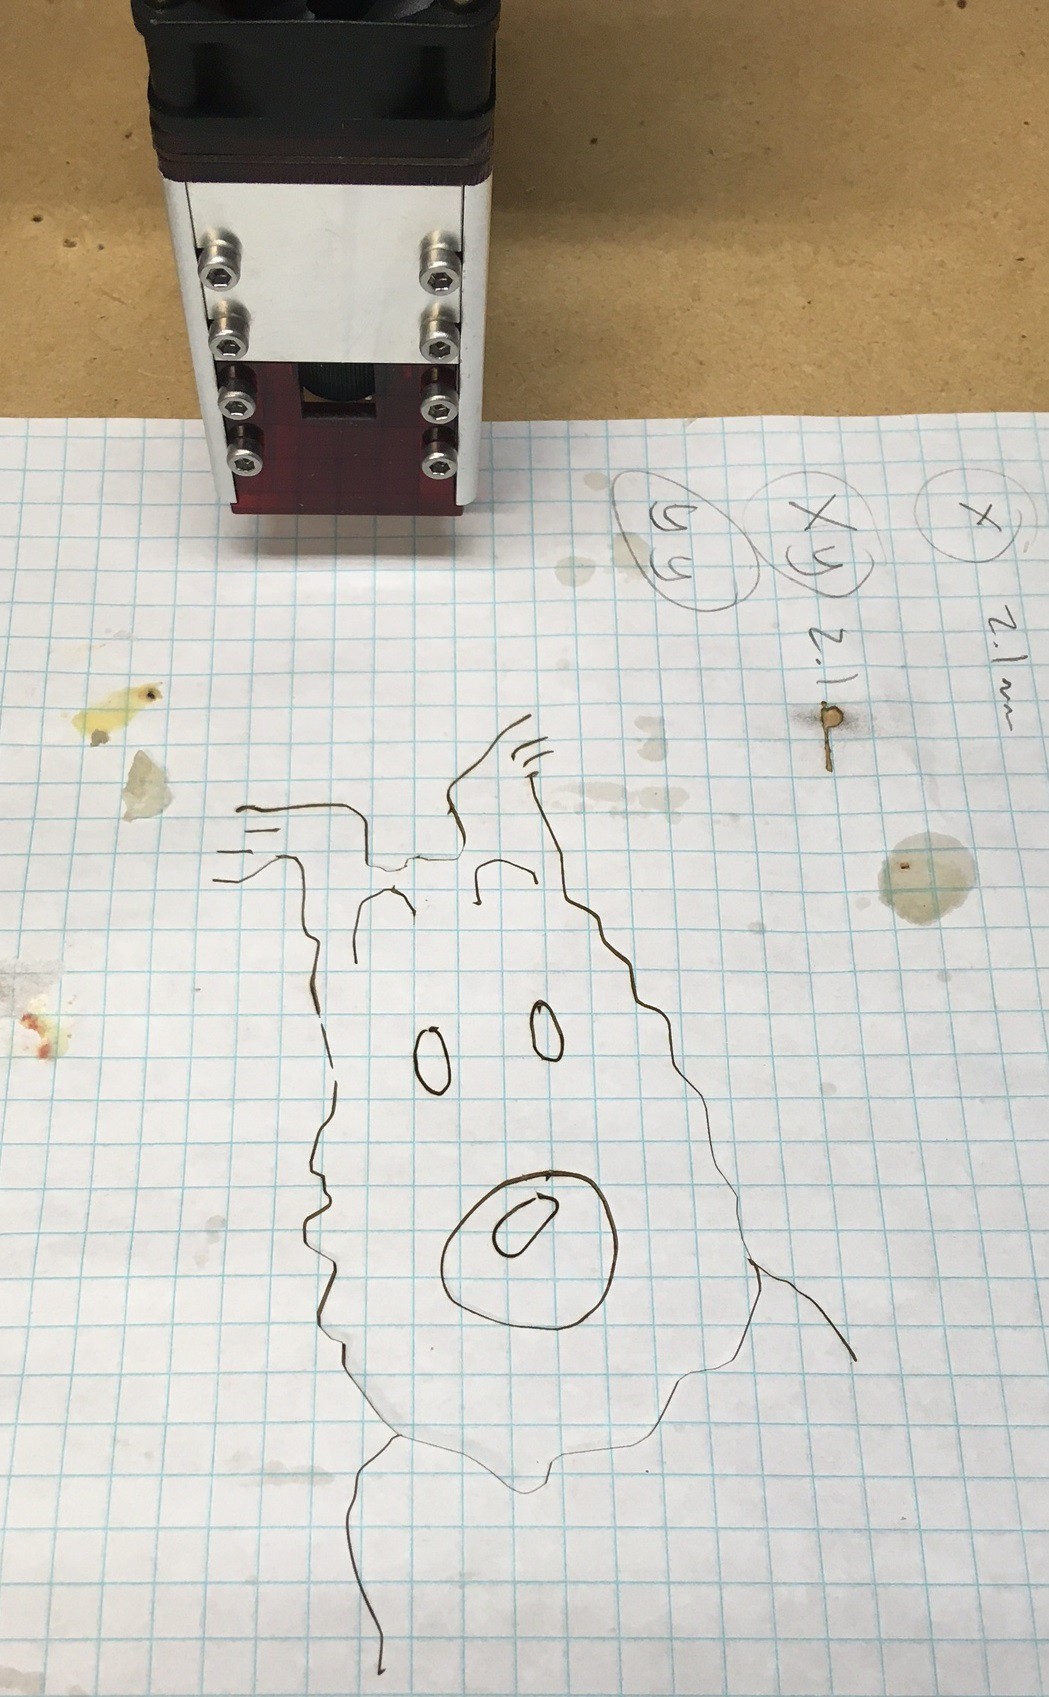
I decided to take there idea and apply 3D printing to the solution. I have a small Cen-Tech IR thermometer from Harbor Freight that can be put into continuous mode. I printed a small holder that slips on the front that can hold a square of foil a fixed distance from the thermometer. The idea is to paint the foil black to increase the absorption of the laser light, shine an unfocused laser at it for a set time and hopefully get a repeatable and linear increase in temperature based on power.
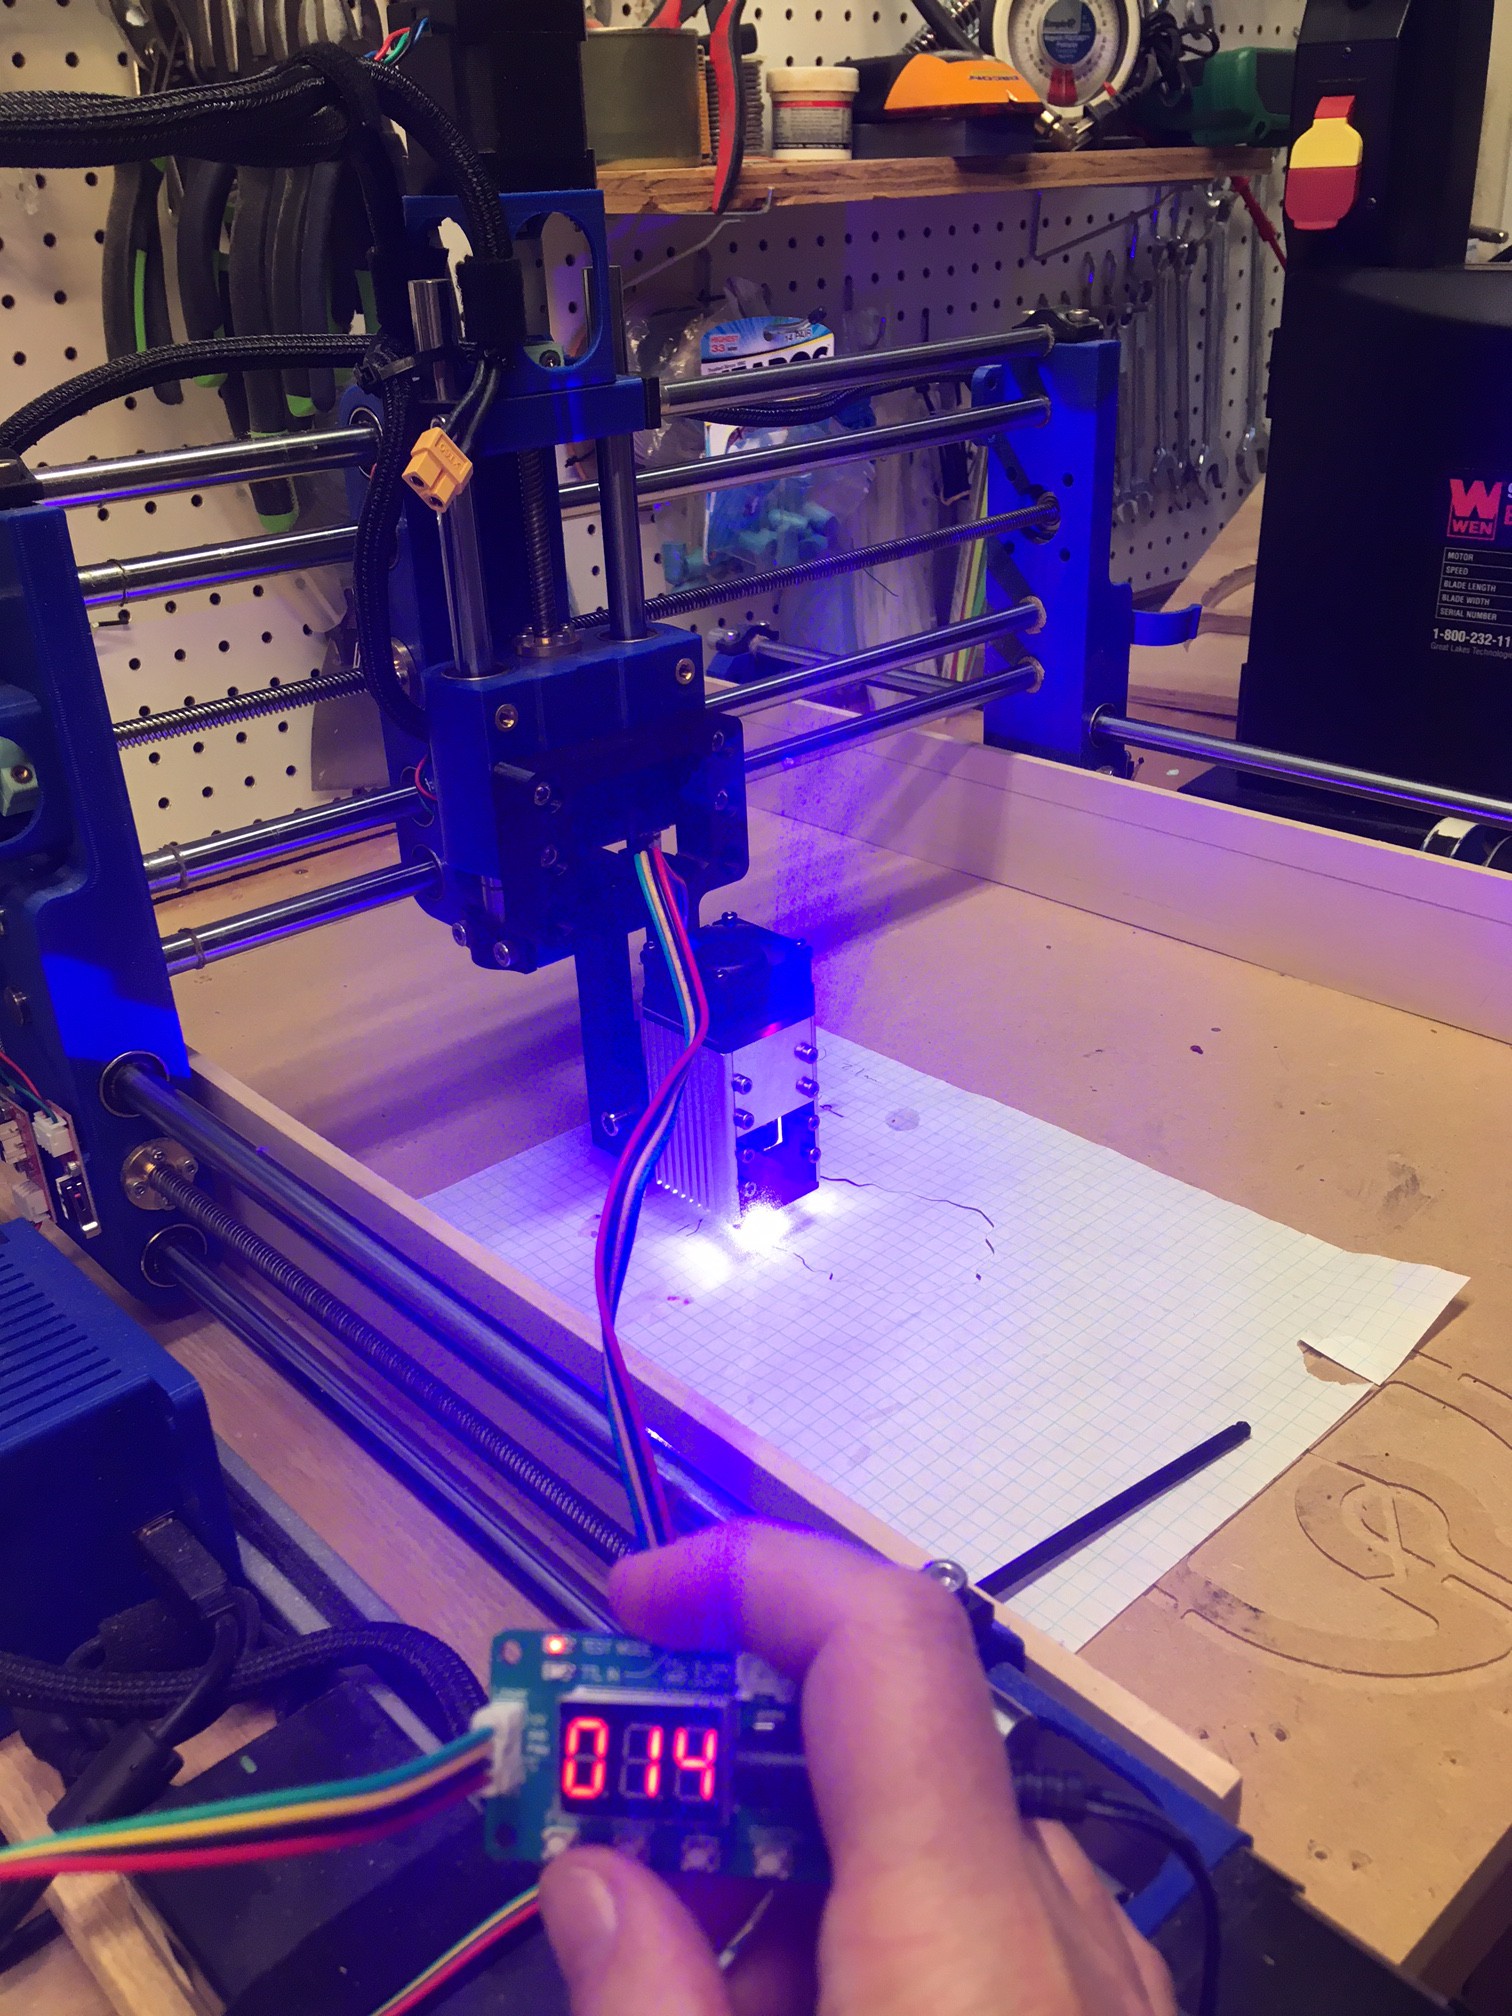
I wrote a simple program that will turn the laser on for a precise amount of time at a fixed power level. Then I ran through a series of power levels and recorded the peak temperature. Unfortunately with a 5 second pulse I was only able to go up to 50% before my IR thermometer maxed out It seems to max out at around 110 C (230F). I was surprised that an unfocused laser can heat the foil that much in 5 seconds. I will try again with a much shorter pulse but that will make it less stable and harder to see the temperature climb on the LCD panel.
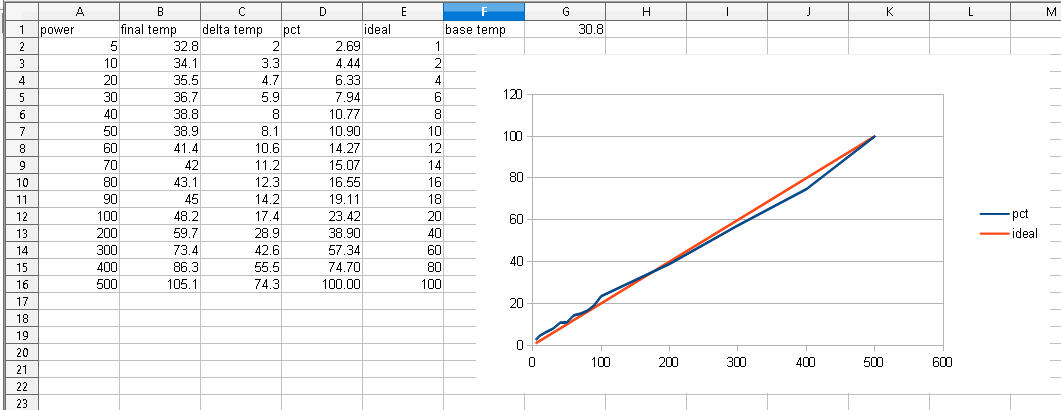
Here are my results, you can see for the lower half of the power range the optical power is very linear with respect to the requested power. This is great news, it should make engraving more easy to handle.
![]()
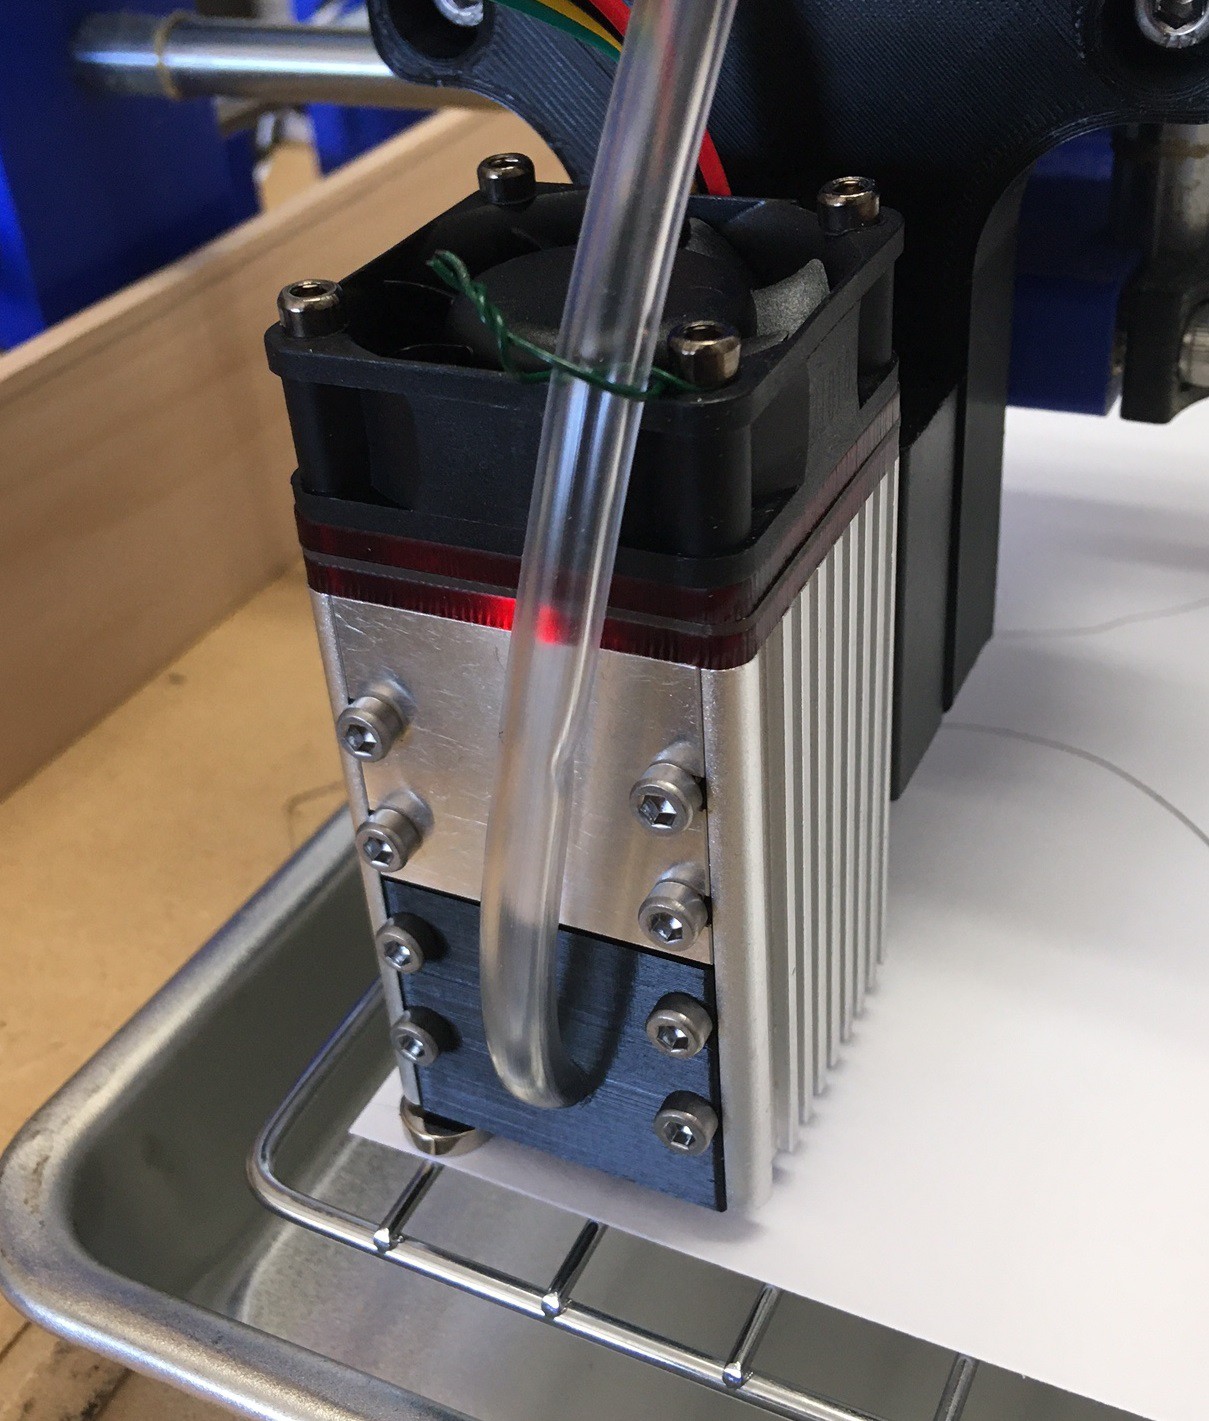
Anyway this is working great, even if my laser is a bit too powerful for the test. I need to find a piece of metal with a bit more mass to it, maybe some steel flashing or something. It would also be nice to have a lower power laser to compare against so we can see how the power numbers hold up. Maybe someday...
-
Smoke!
03/28/2021 at 02:02 • 0 commentsMy initial stab at cutting produced more smoke than it should have and was leaving a lot of smoke marks on my cuts, along with stinking up the place. So I decided to put some effort into cleaning things up.
![]()
I had been cutting straight on my particle board waste board and that was causing a lot of the smoke from the waste board being damaged by the laser. I picked up a cheap cookie sheet and cooling rack from Walmart that fit perfectly together to form a raised bed with a metal base. It allows me to raise the part off the base and provides some fire protection as well. I used some neodymium magnets to hold paper to the cooling rack so it does not flutter around. This cost about $9 and seems to work really well.
![]()
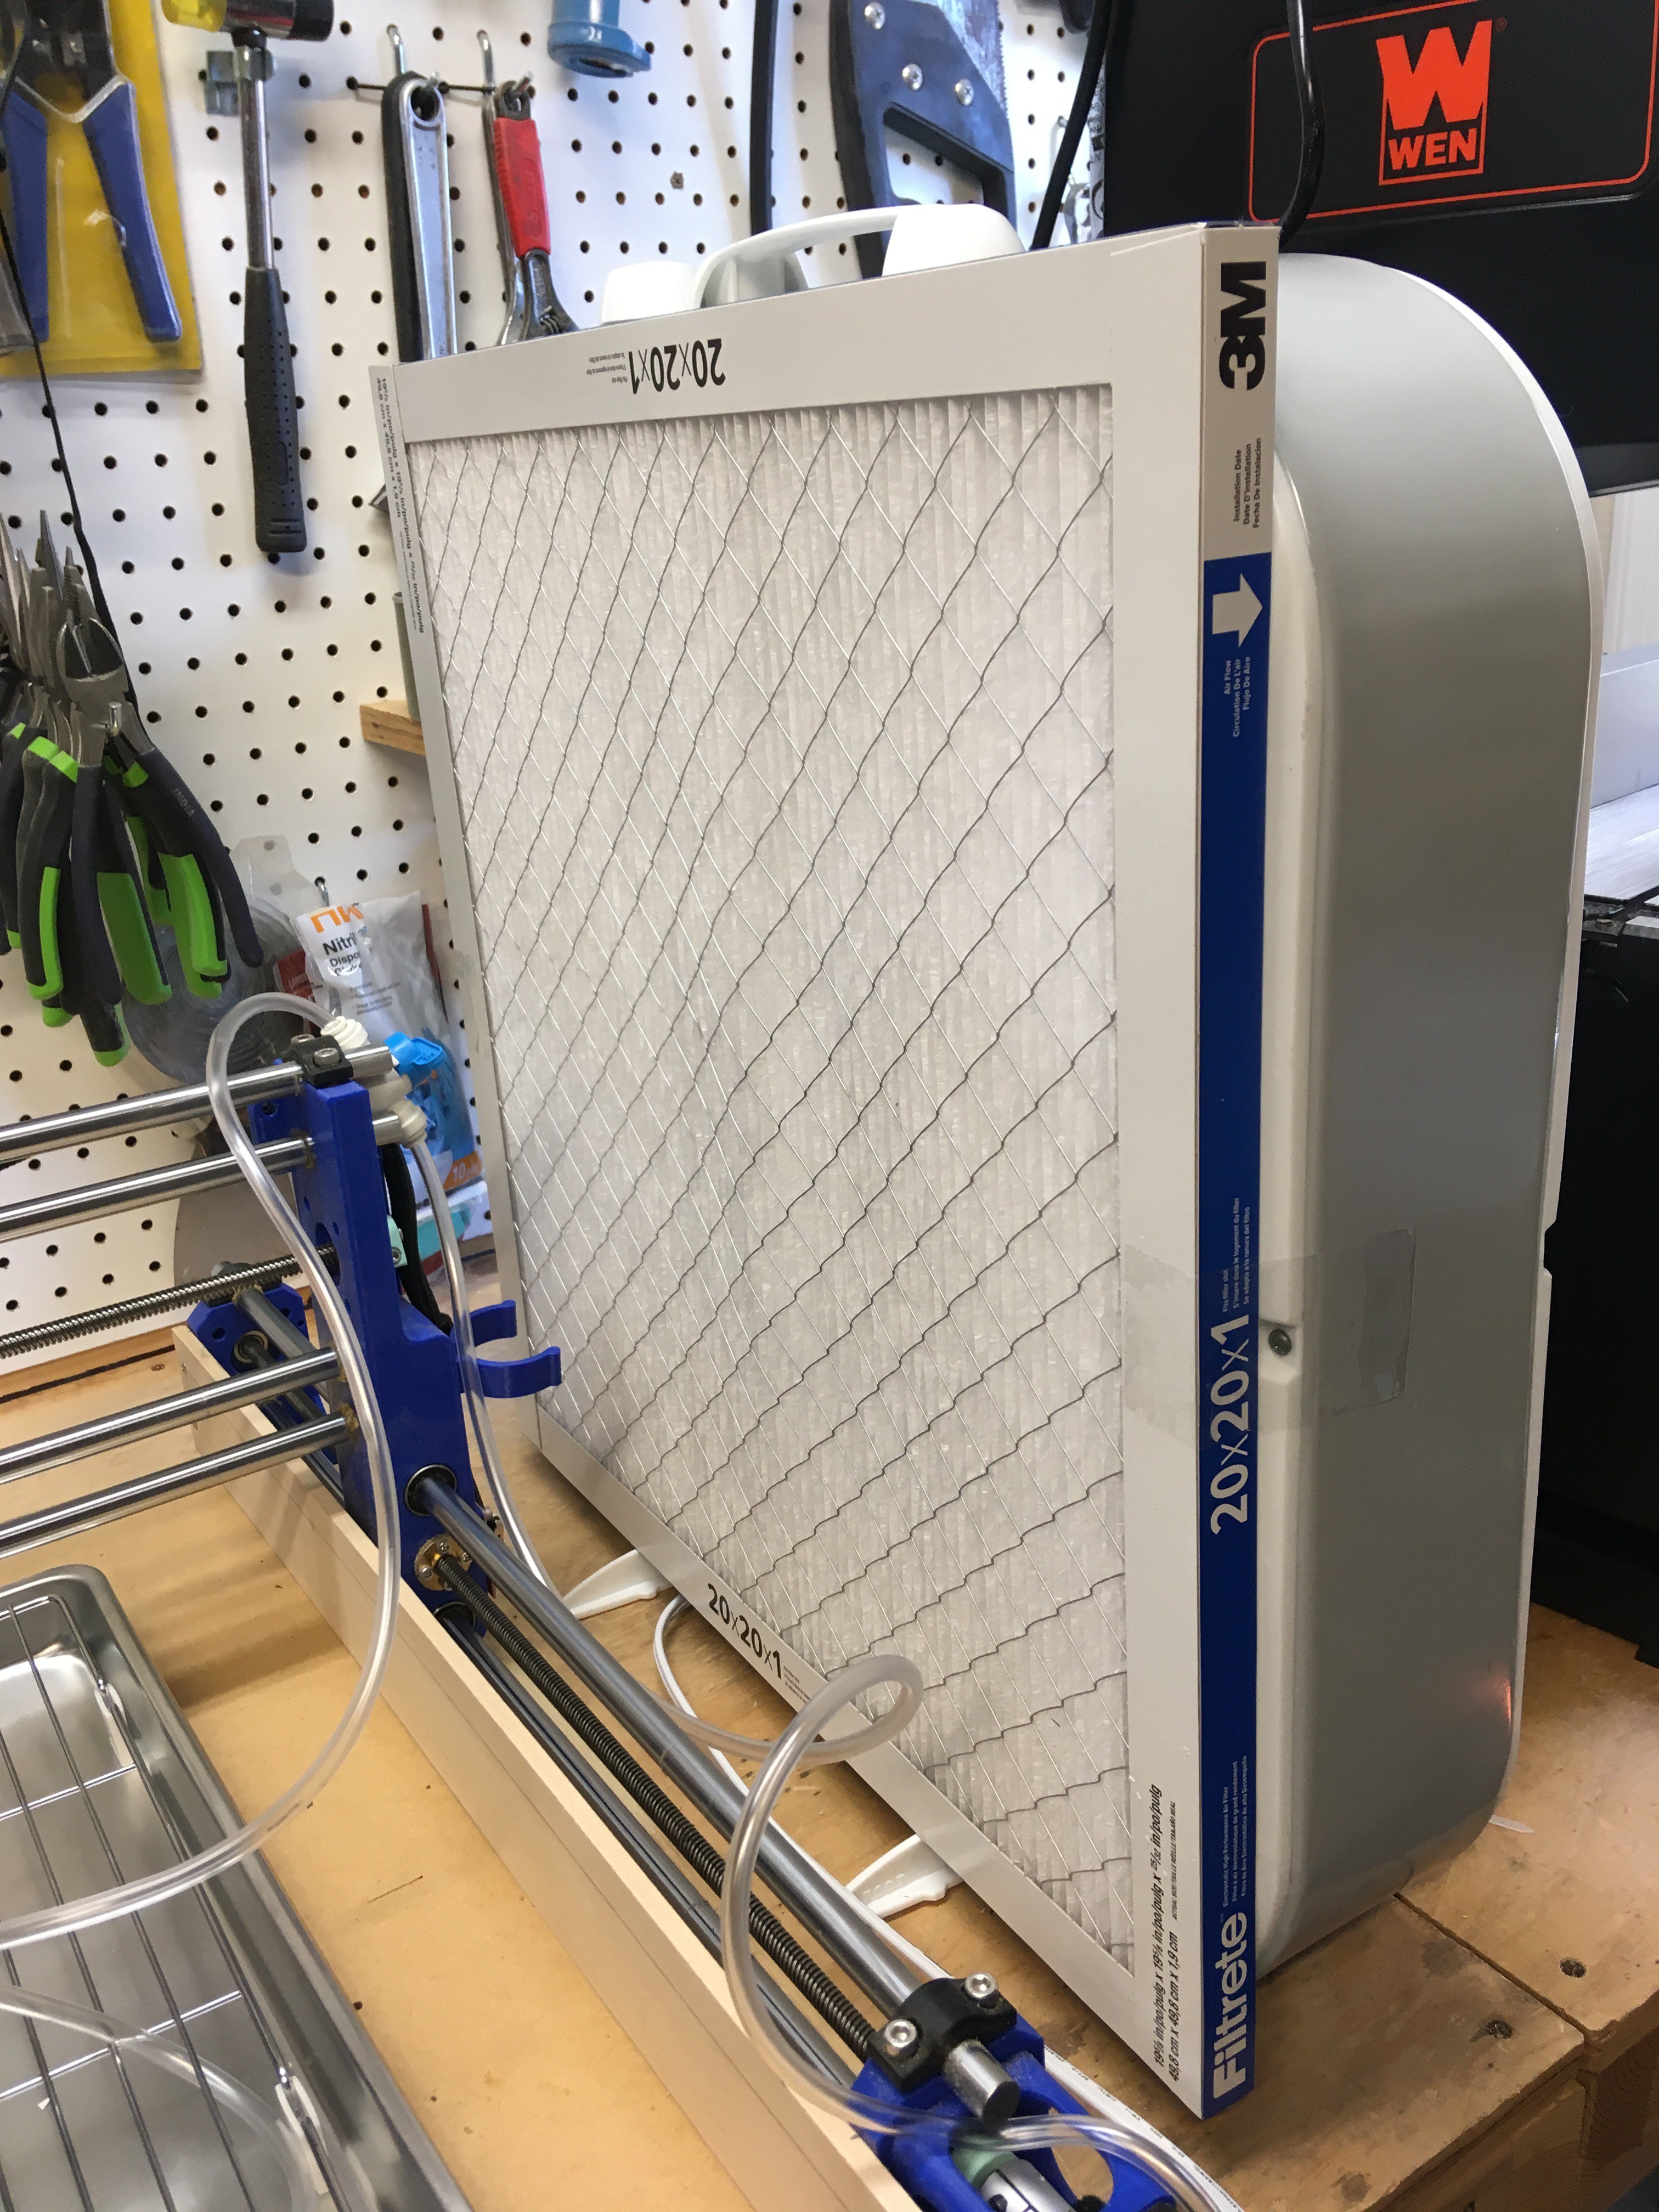
Next I picked up a 20"x20"x1" MERV 13 filter and a 20" box fan from Walmart to act as an air filter to suck up any smoke that is produced. The box fan was a mess, it vibrated like mad and made a horrible noise. After taking it appart I could see that the blade was just horribly cast, it had flashing all over it and was off balance. A little time with a file and it is no longer making noise and is much more in balance. Still it would be worth while spending more than $17 on a fan.
![]()
Anyway this seems to work well, it has no trouble sucking smoke away from the cut and it seems to suppress flames at the cut as well. It is not perfect but the smoke smell is much reduced.
![]()
![]()
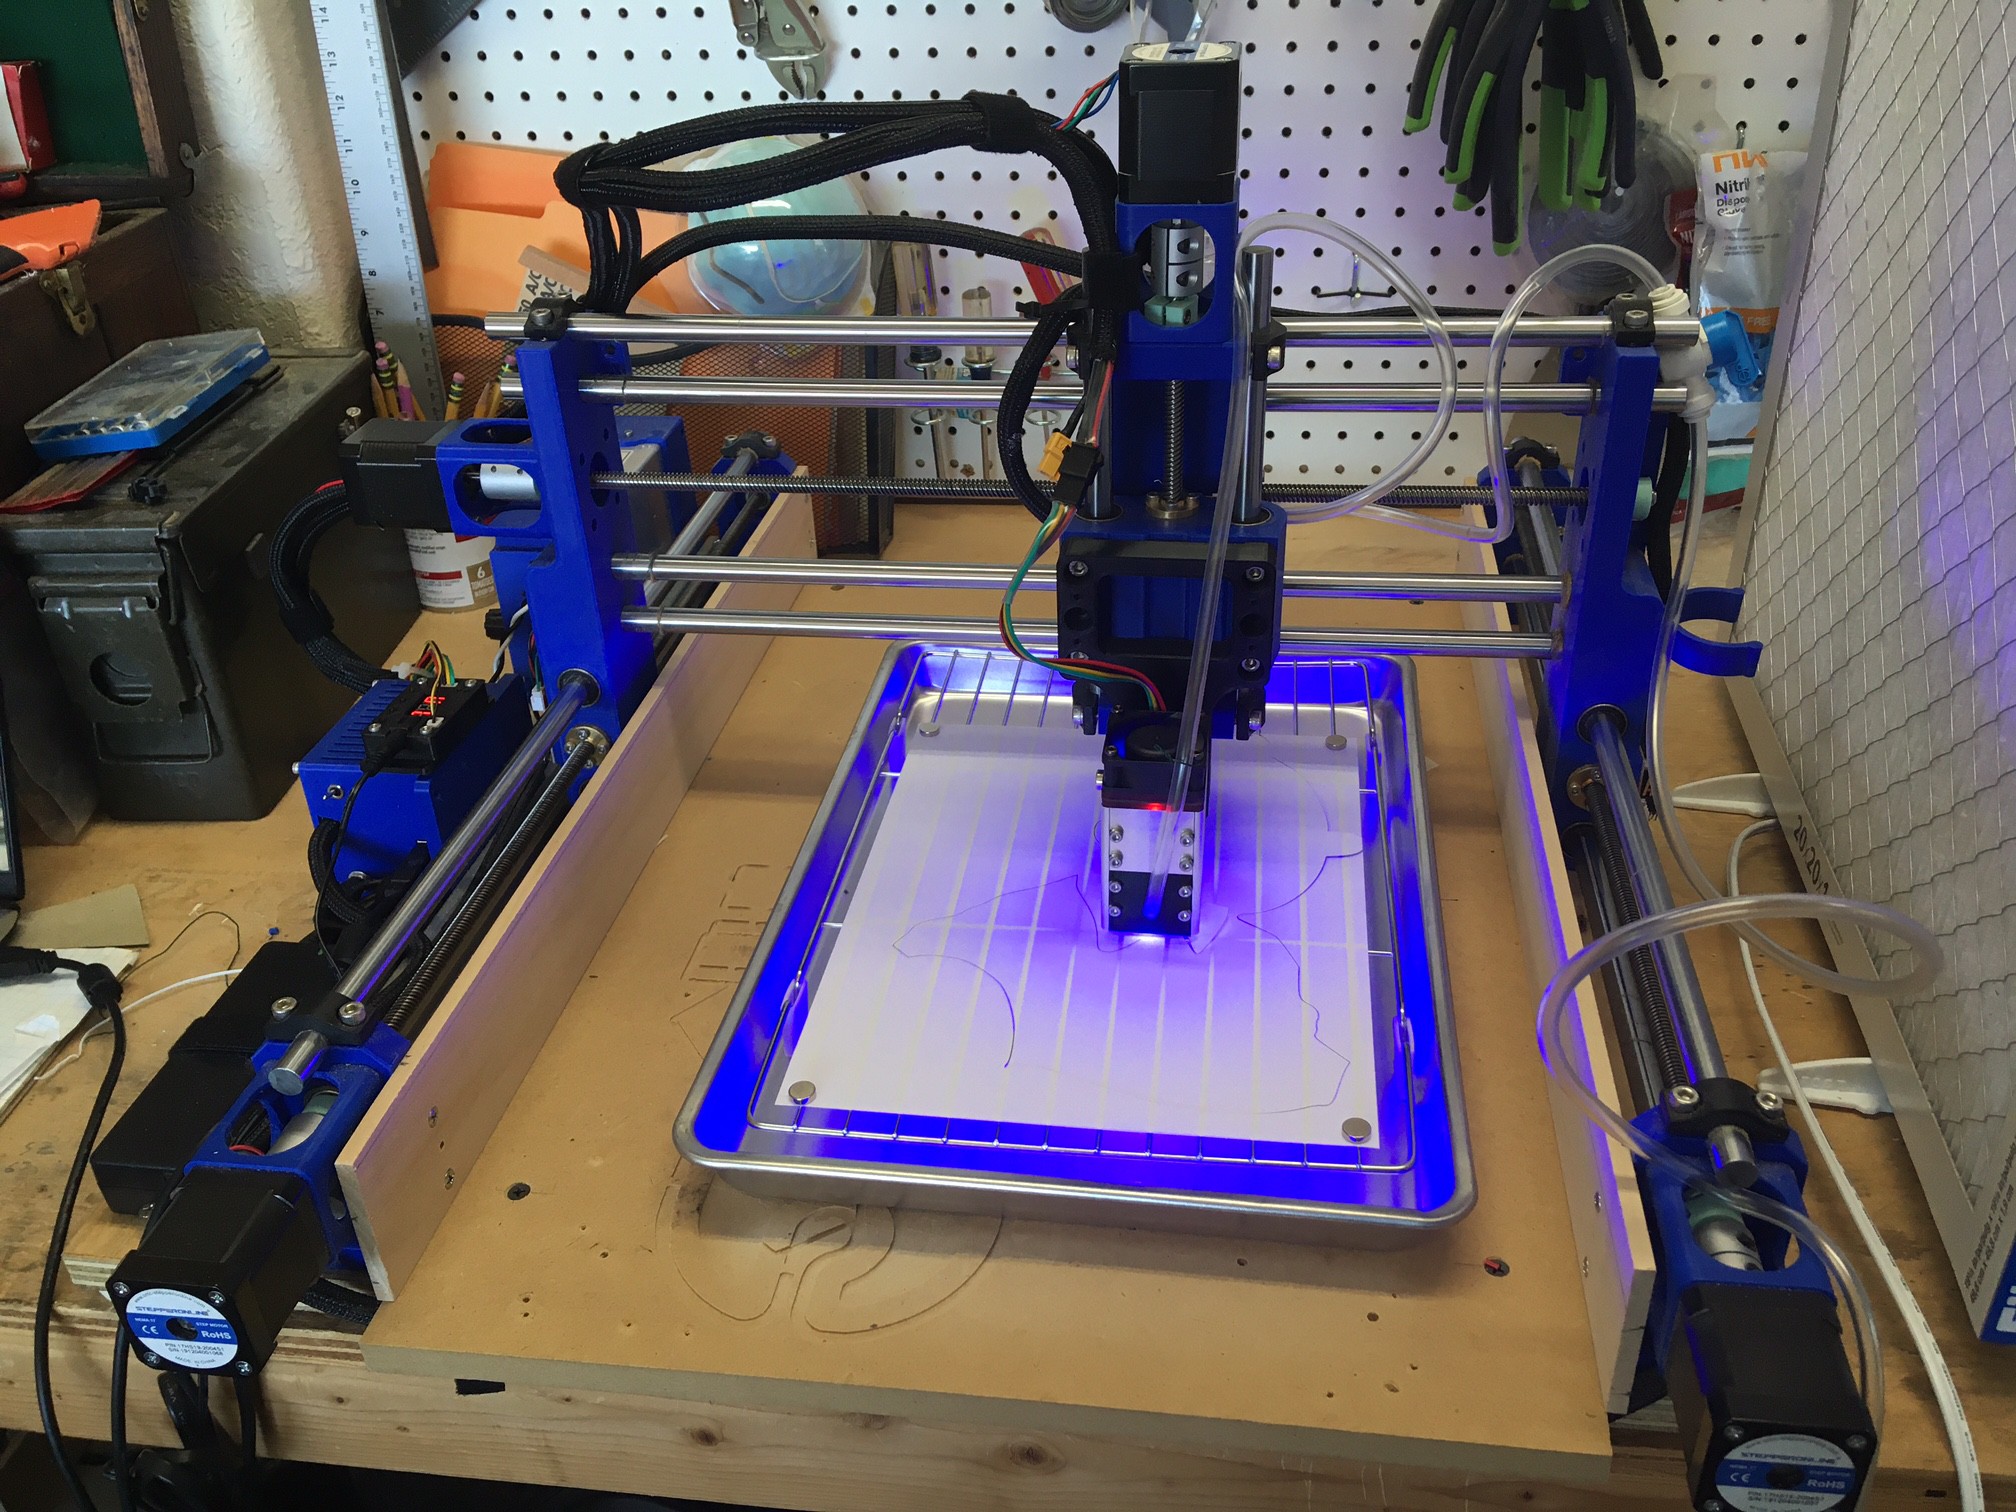
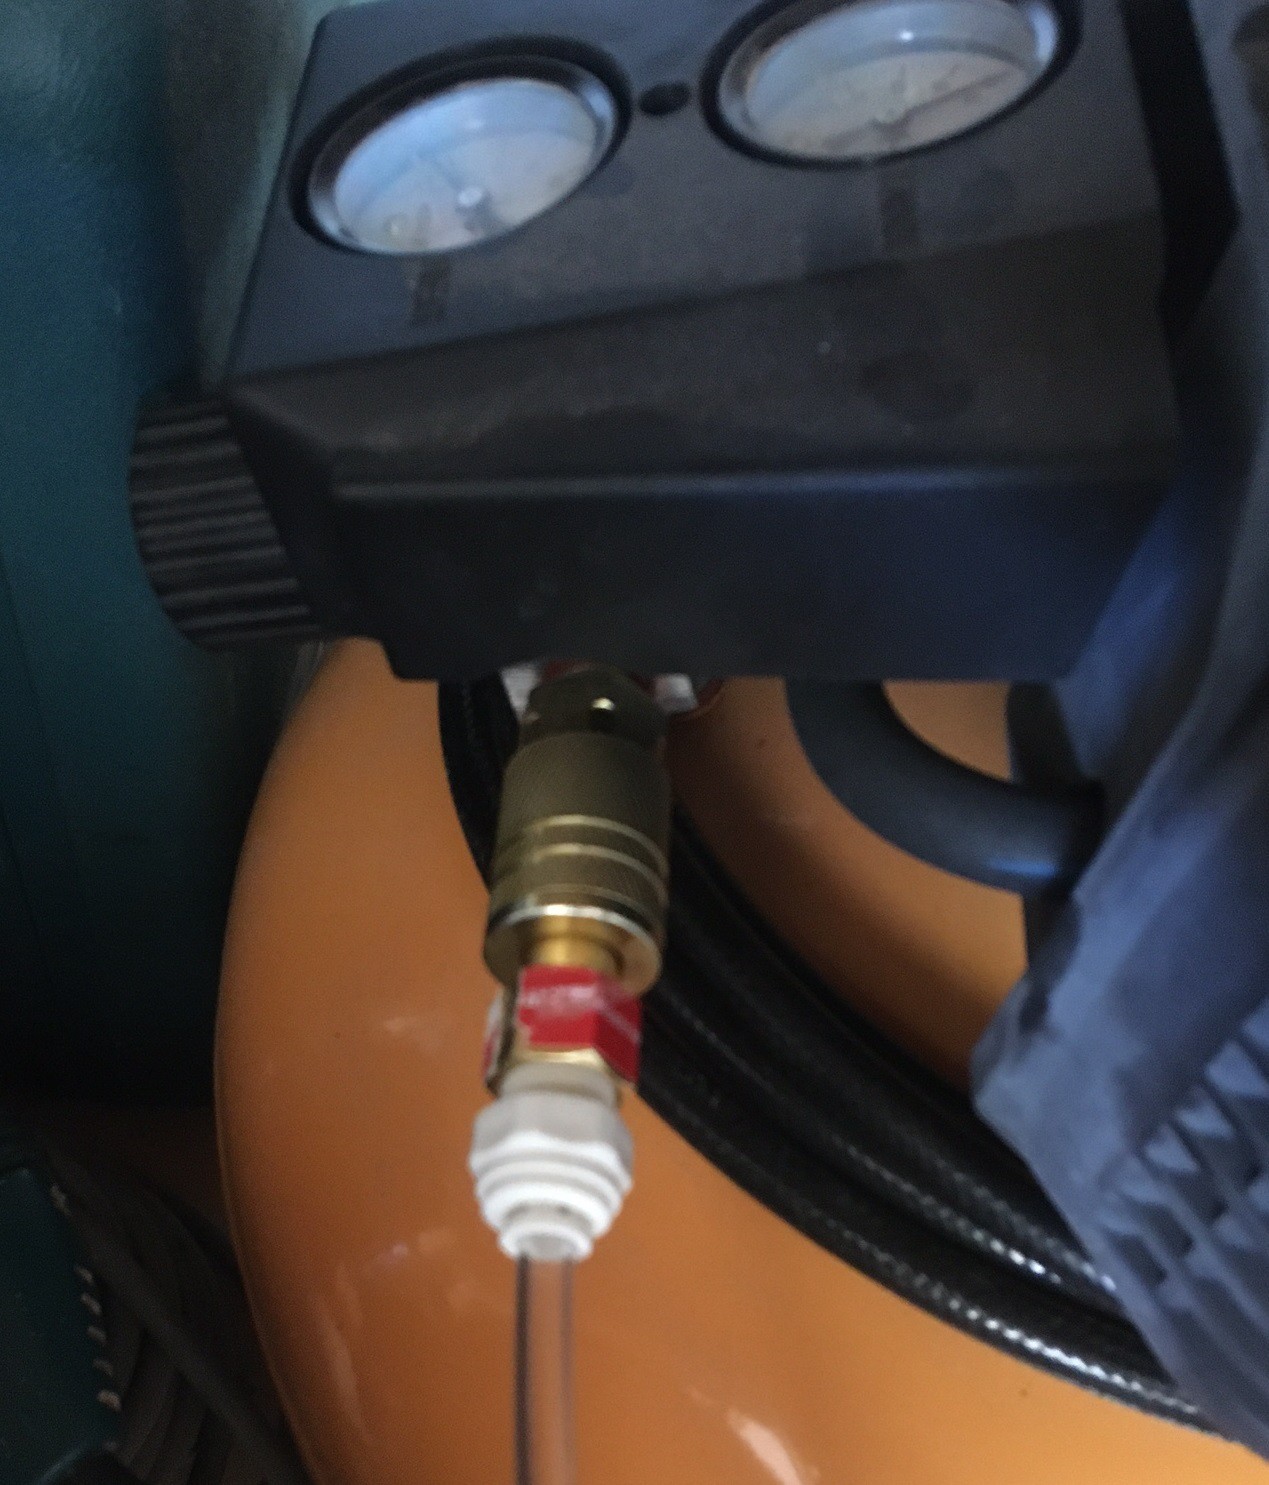
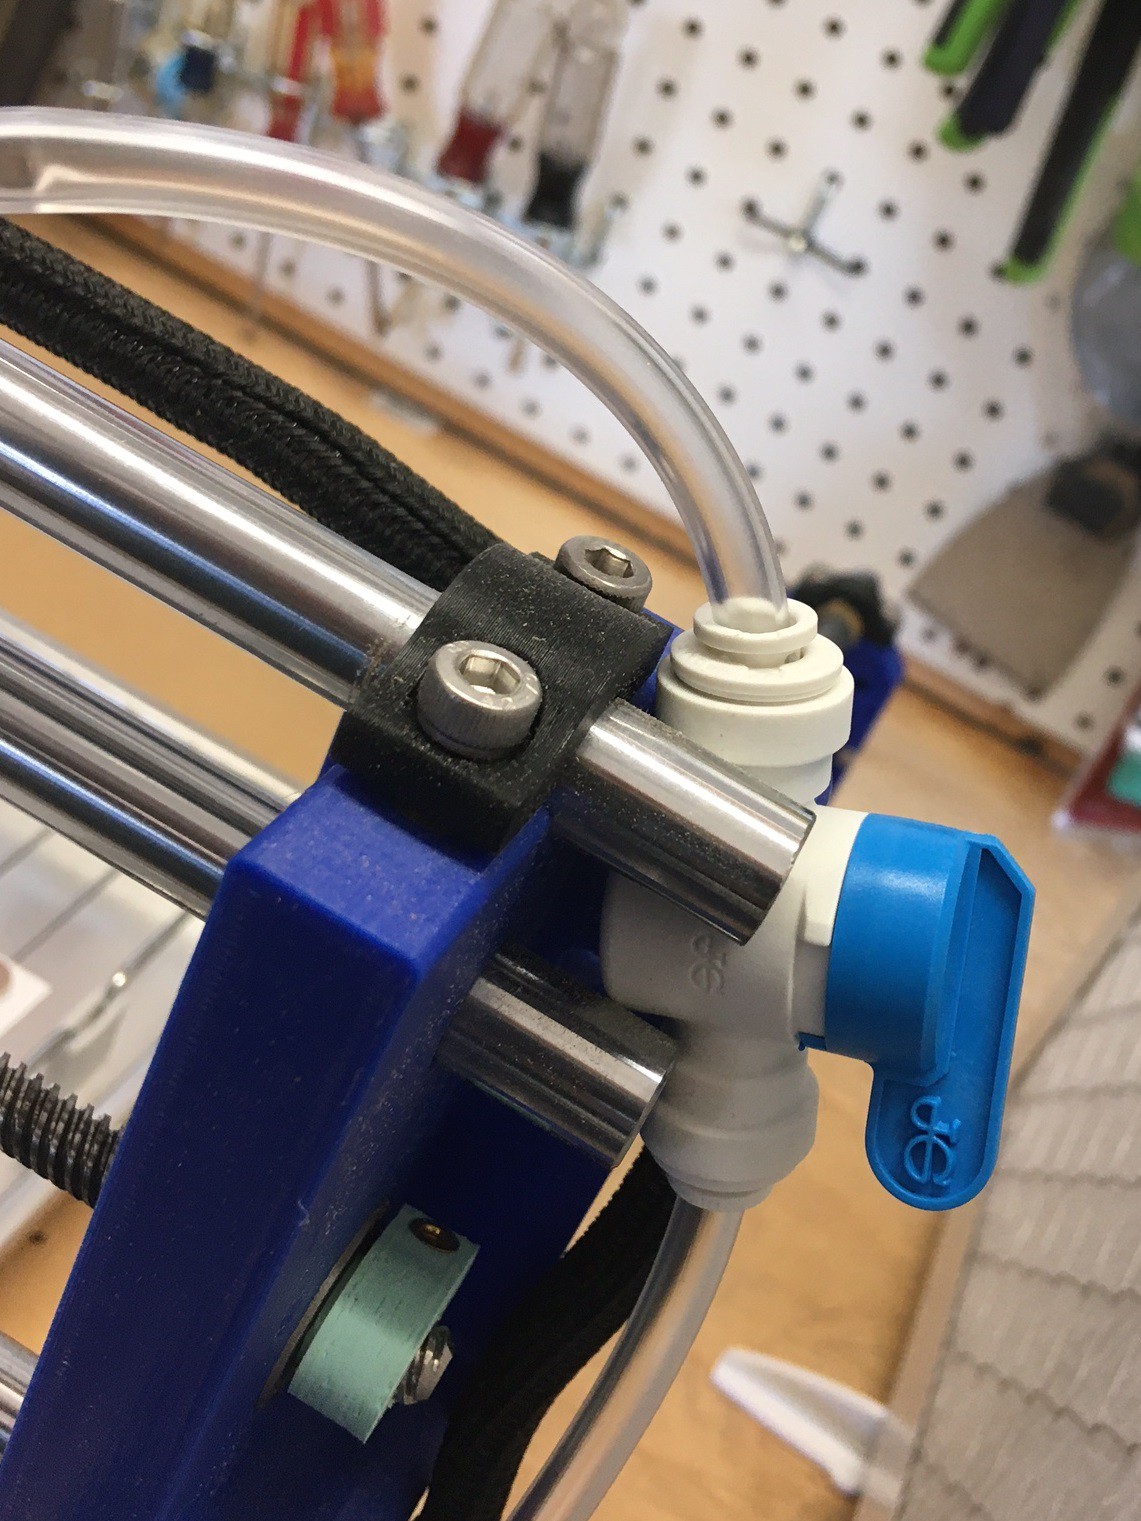
Finally I picked up some 1/4" tubing and a coupler for my air compressor along with a valve to make it easy to turn the air on and off. Then I printed a nozzle for the laser that goes around the lens and blows straight down on the cut. This is working great! I'm running about 30 psi through it and it blows quite hard and completely suppresses any flames at the cut.
This is working well except there is a lot of air leak around the top by the lens. I'm planning on putting a bit of silicon there to block that end up. I'm also still trying to work out the proper nozzle size, a small hole makes a fine stream but it really restricts the air flow. Anyway the core problem is my compressor is crazy loud and all the lost air is making it run nearly all the time. It is something that needs more attention.
![]()
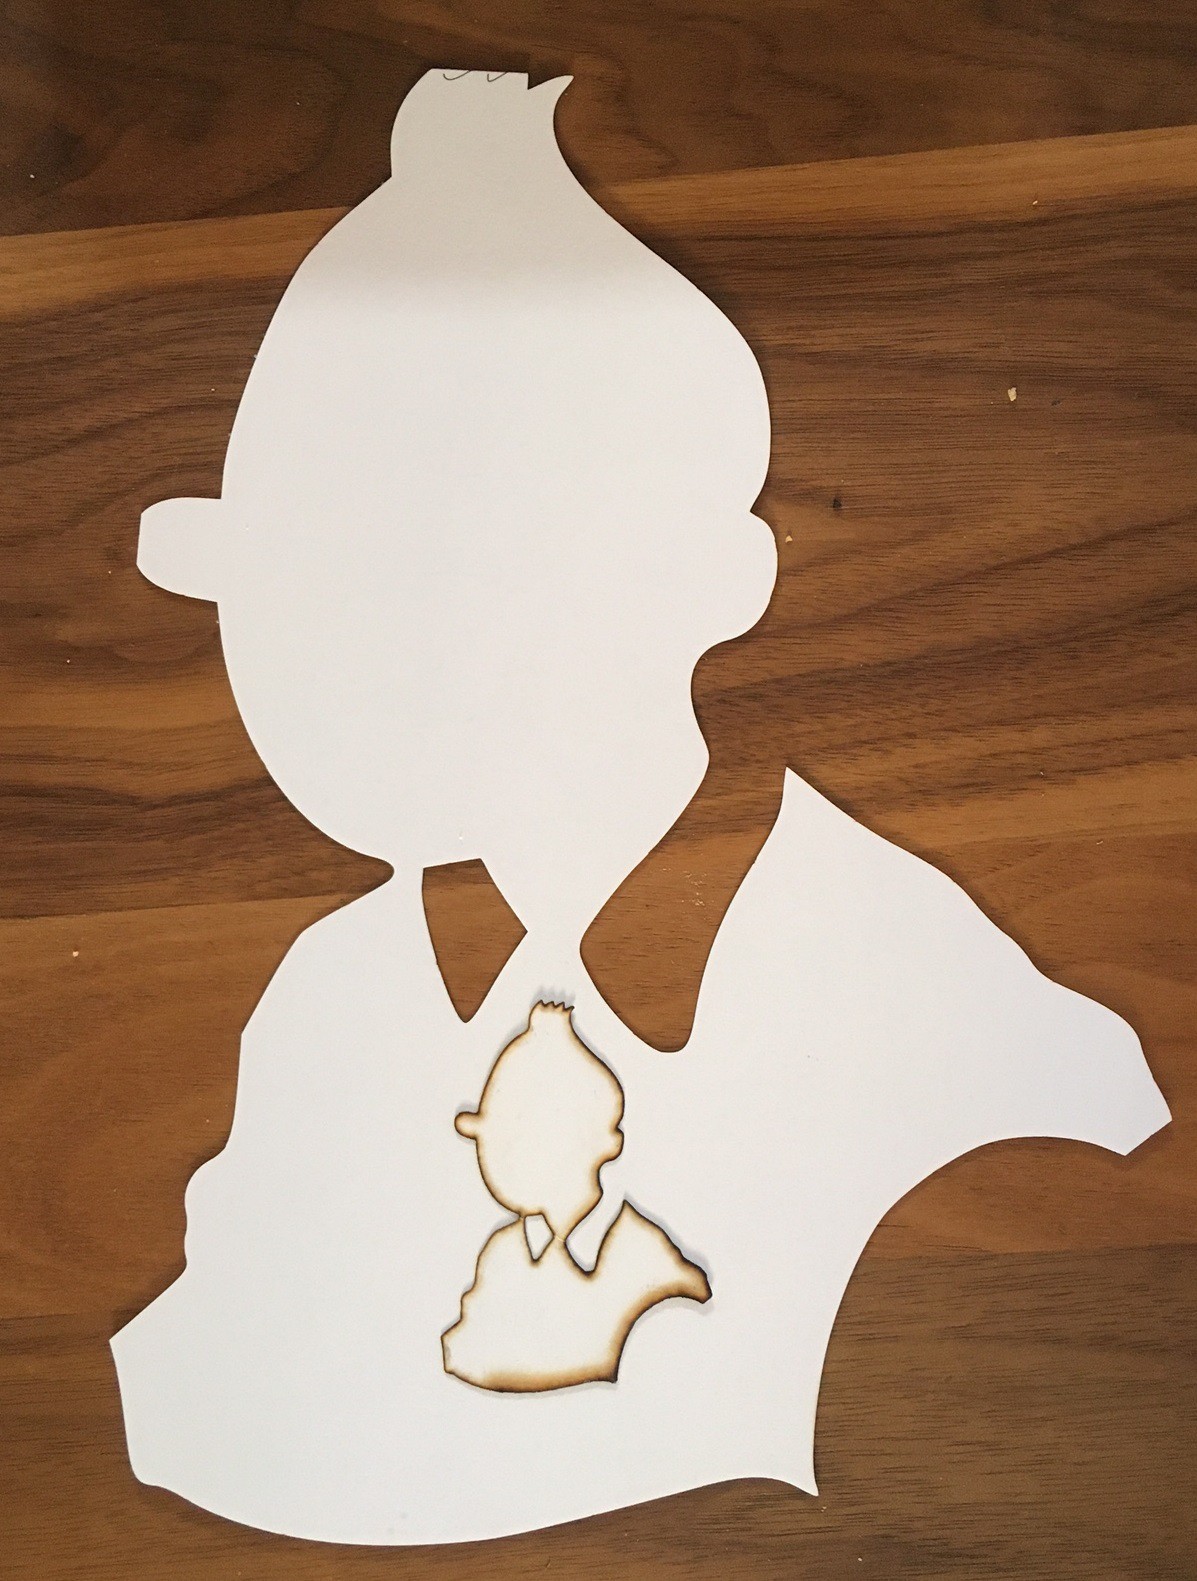
The results speak for themselves. The small Tintin was my first cut, and the larger one is after all the modifications. This is the bottom side of each cut but the top side looks very similar. The larger Tintin does not even have soot on the edges. Overall this probably cost me $60 and it has made a big difference in the cut quality and made this more safe as well. Now to experiment with smaller and more quiet compressors.
![]()
-
Progress
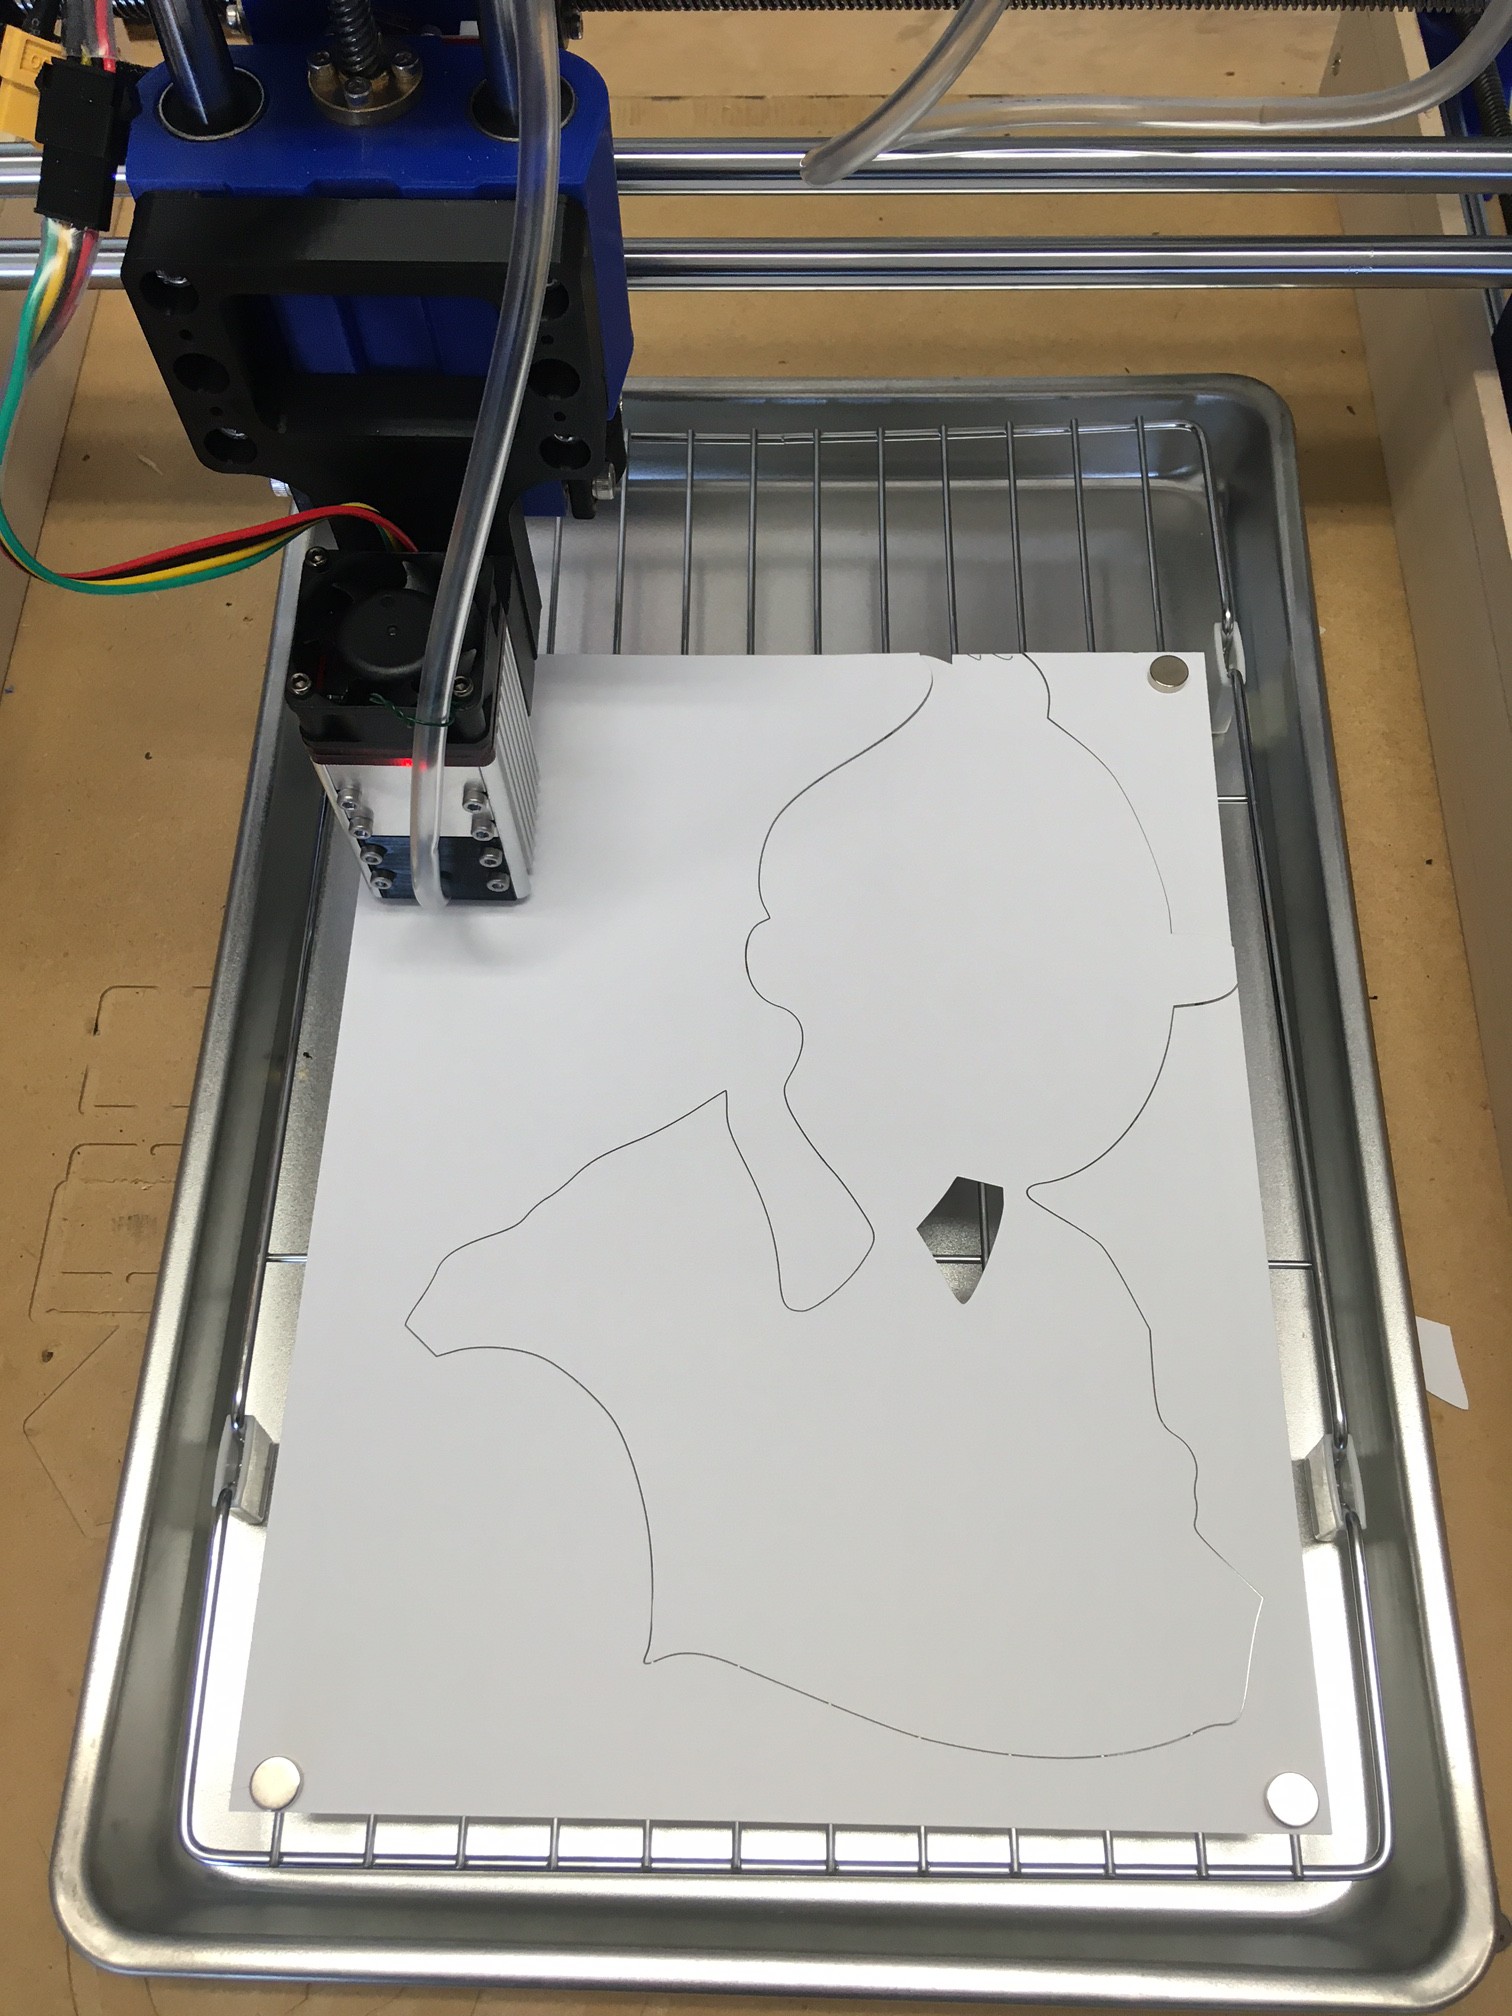
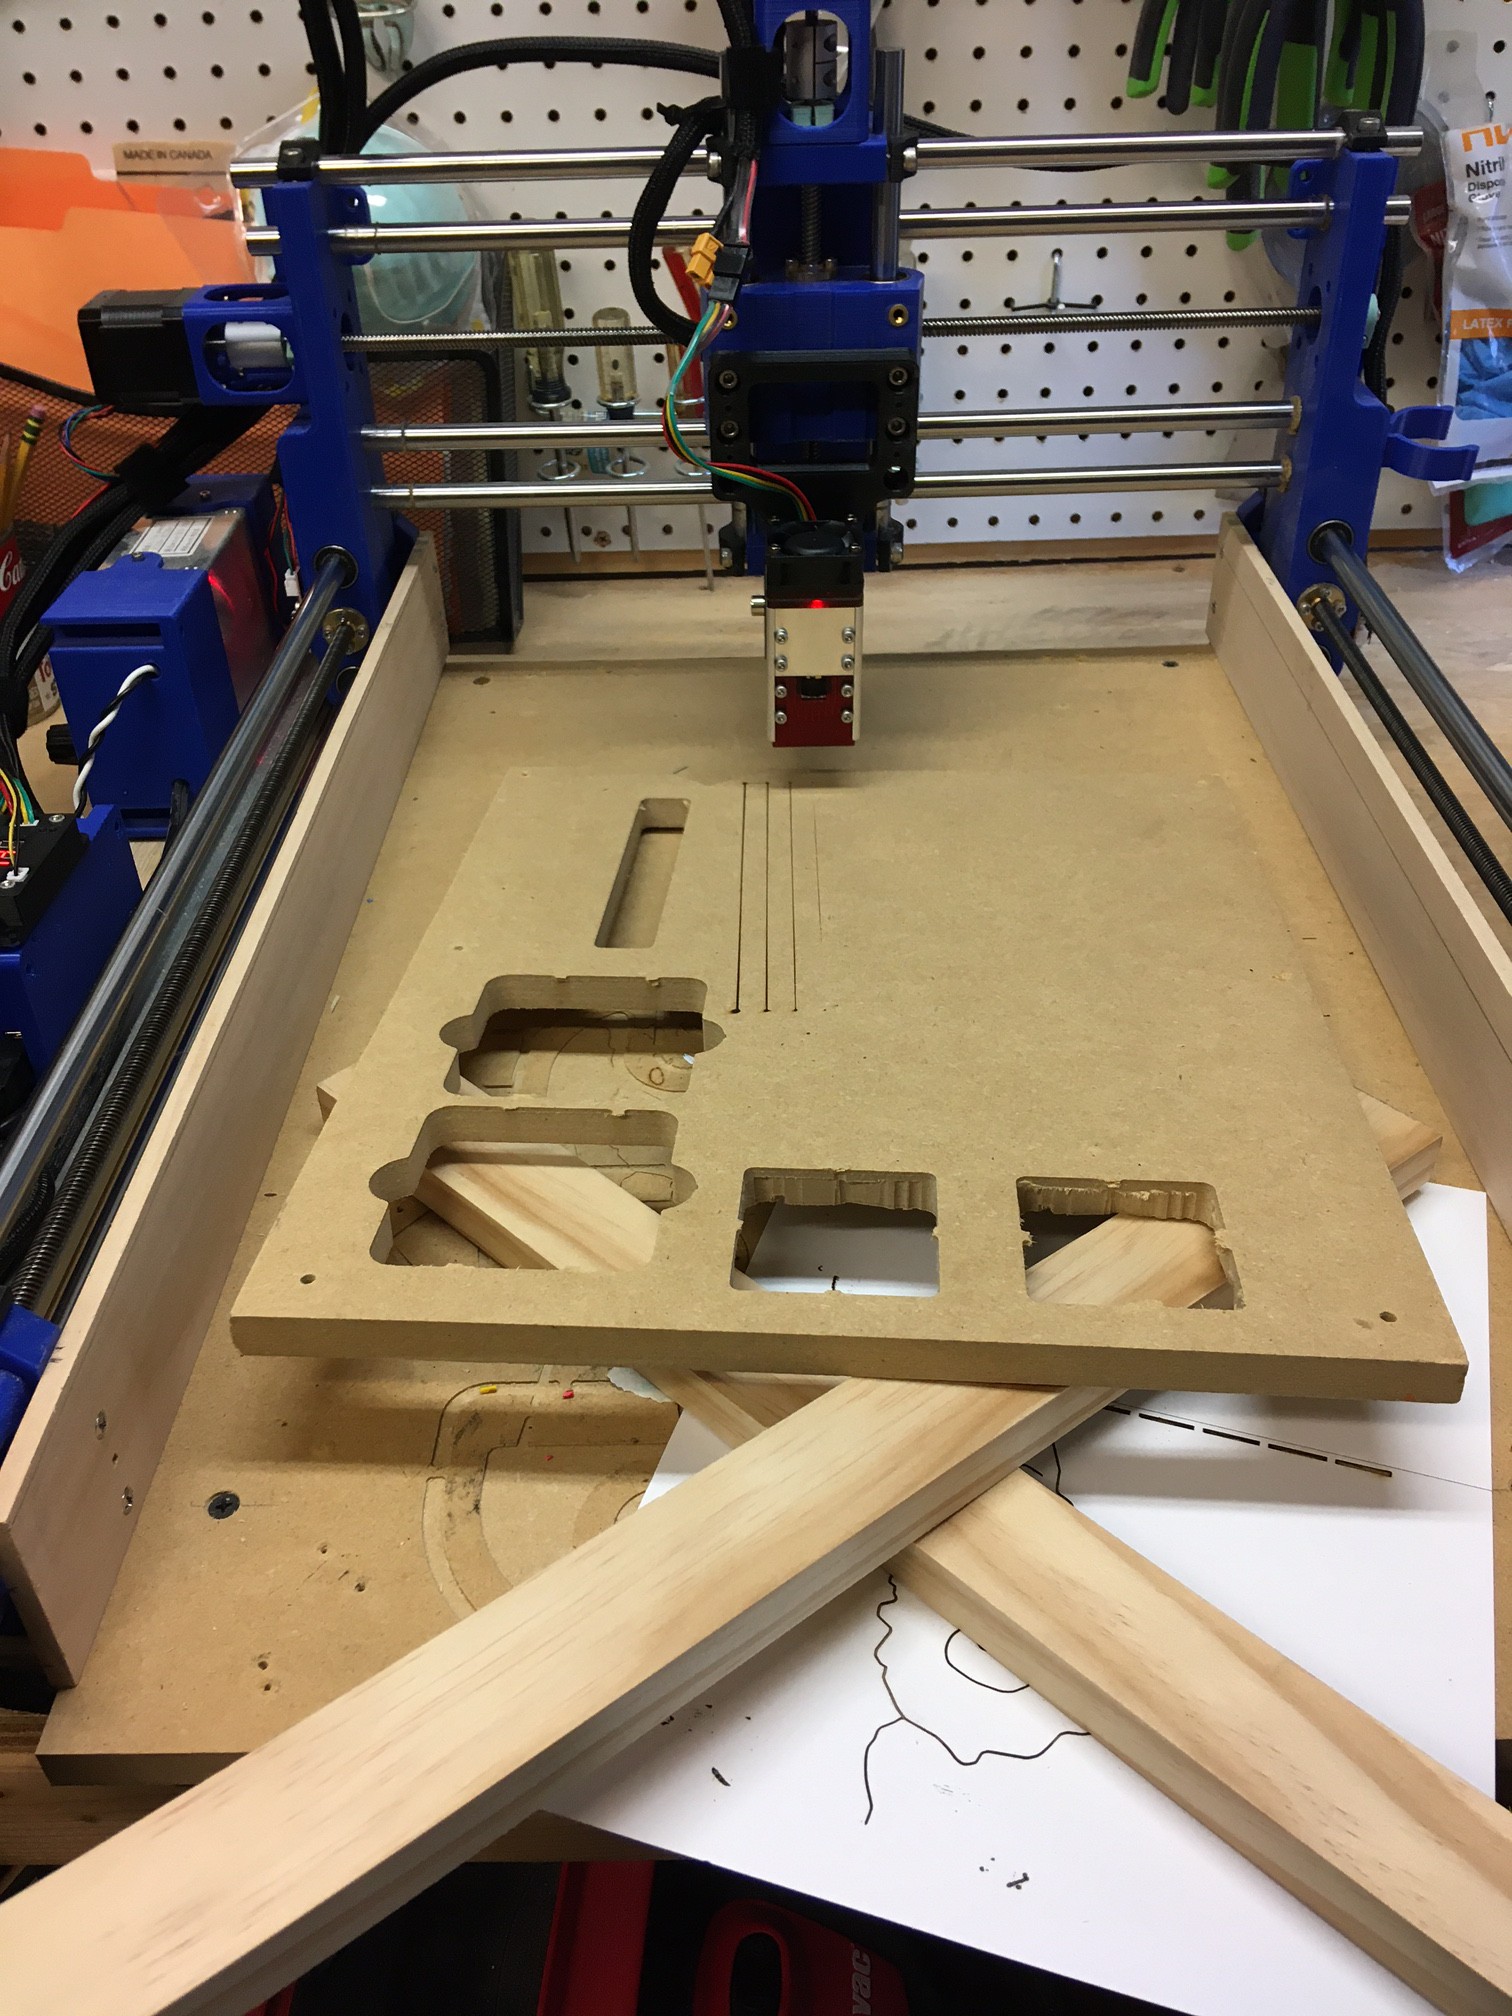
03/26/2021 at 01:38 • 0 commentsI have my laser wired up and running now with full control over power in GRBL. So far I have been able to slice up a few sheets of paper and burn some wood. I have not tried cutting wood yet.
![]()
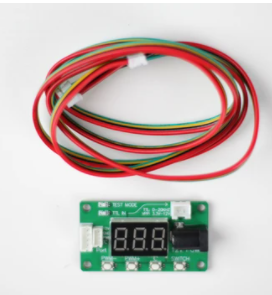
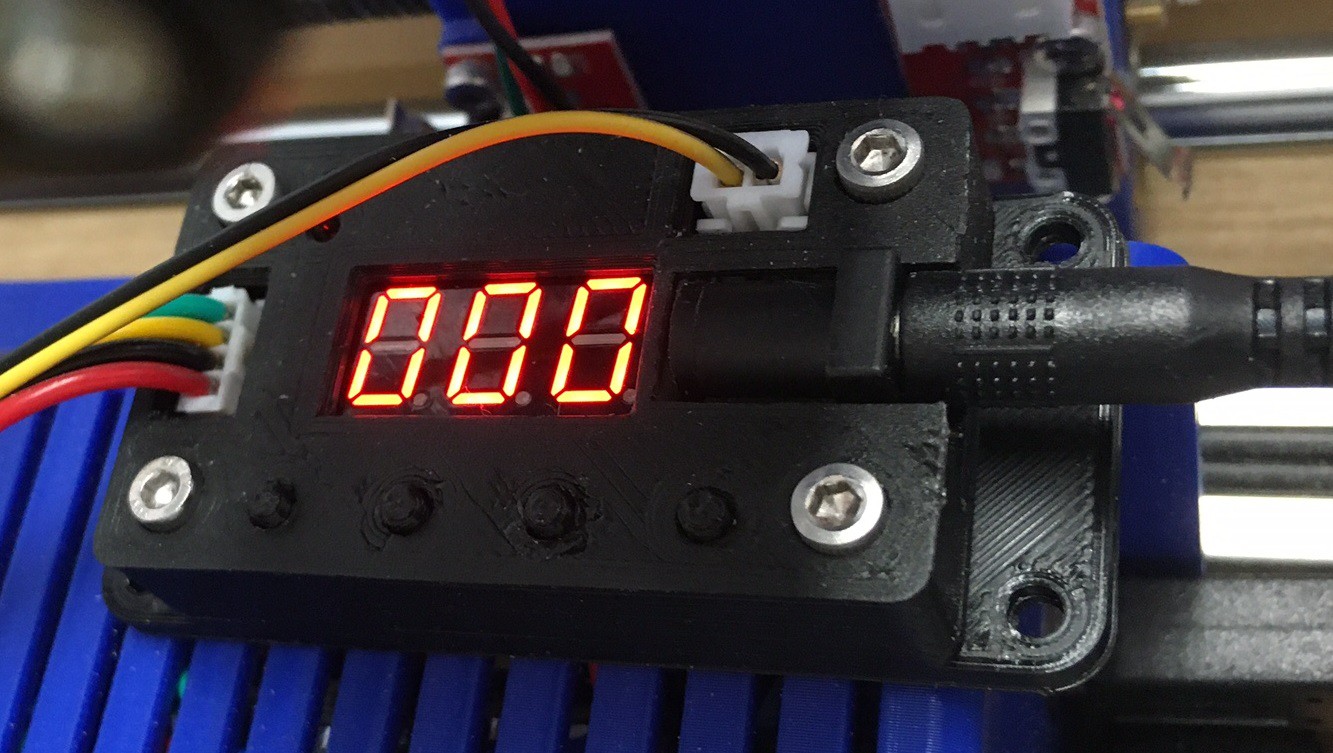
I went ahead and used the NEJE PWM/Temp module to act as an intermediary between the laser and GRBL. It is not needed but it has a few nice features. First it can read out the temp of the laser module and display it at the push of a button, even while the laser is running. It can also be used to manually drive the laser for focusing. It also displays the requested laser power when under GRBL control, that acts as a nice double check so I can see if GRBL is doing the right thing. Finally it has an on/off button so you are less likely to accidentally trigger the laser when your not ready for it.
![]()
I printed out a nice housing for the module so it is not quite so sketchy.
I'm just getting started but here are some observations so far
- This laser produces smoke, but less than I was picturing. Still it is enough that it is no fun to breath and it can give you a headache. I would say it is less smoke than an incense stick. Still it is not nice smoke, it is enough that I will be getting carbon filters for my respirator and working on a proper air filtration system for the shop.
- It takes only a tiny amount of air to blow out the flame and smoke produced by the laser. I experimented with different levels of air using a compressed air duster and even the smallest trickle I could produce was good enough. This explains why fish pumps are so popular.
- The glasses mess up your vision, they very effectively block all blue and green light and after wearing them for an hour your eyes become overly sensitive to those colors making you feel off. It takes a half hour for this to go away afterwards. You probably get a similar effect from tinted sun glasses.
- It is hard to dial down the power on this 30W module, on top of that GRBL is only capable of 256 levels of PWM. I found that for MDF above about 20% power just burns the wood, and below 5% power has little effect on the wood so you only have around 40 shades of grey that you could produce at best. In practice you are probably limited to something closer to 15 shades if you dial your power in just right. The spot is definitely rectangular as well and relatively large. I'm seriously considering picking up the 2W module as well to do engraving. It is only $30 if you don't get any accessories, and in theory it should fit the same mounting bracket and use the same wires.
- The controll software side of things is not great:
- I really love Universal GCode Sender but it does not officially have a laser mode. If you could produce gcode from another tool you could still use UGS to control the machine but that sounds complicated.
- LaserWeb is screwy, I could not make any progress with it.
- LaserGRBL is nice but it has quirks. For example you have to tweak the image as you import it, once you bring it in there is no going back and editing the line spacing or speeds. There is no real layout mode, you import the image, trim it and that is it. Its jog mode is not perfect either. On the upside it is free, and fairly functional as long as your working with an image that was already processed in another program.
- LightBurn is reasonably priced at $40, much better than the several hundred dollars needed to get VCarve working on the milling side. It has very strong page layout tools and some ability to convert images to vectors and edit them. With that said it is no as intuitive to edit with as Inkscape or Illustrator, but if your doing something fast it works. On the down side the GRBL support is confusing. Jogging is horrible, and there is a lot of confusion in my head about where the origin is. No matter how I set things up it seems to shoot off in a different random direction every time I start a job. Also the laser power seems to be running at 1/3 what it should be. Anyway it has potential but it is a bit overwhelming and confusing to start with. I will need to spend some serious time with it before my demo runs out.
- Safety wise this feels better than I thought it would. Having the fixed bed and everything mounted solid helps a lot. It is still hard to remember to reach for the safety goggles and to not take them off ever. A fully enclosed case is a much better idea for sure.
-
Focus
03/26/2021 at 01:21 • 0 commentsI found focusing the laser to be confusing at best, but eventually hit on a bright idea. Others have done a trick where you tilt a piece of wood at an angle then draw a series of lines at right angles to the slope. Then by carefully looking at the lines you can work out what one is the thinest and therefore what height is an optimal focus.
![]()
I don't like this trick, it is too complicated and not very accurate. However I decided to try a different method that seems to work much better. I used a board at an angle and manually jogged the laser up and down the ramp while adjusting the speed/power till I only burned a line when the laser was roughly in focus. Then by measuring the line and marking the center point I have a very precise record of the optimal focus point. Finally I set the laser to a very low power and manually jogged it to that focus point and then measured the height to the base of the laser housing.
I came up with an optimal laser height of 15 mm to the bottom of the housing. NEJE says 5mm is a more optimal height, so I need to play with the lenses a bit, but I will save that for another day.
-
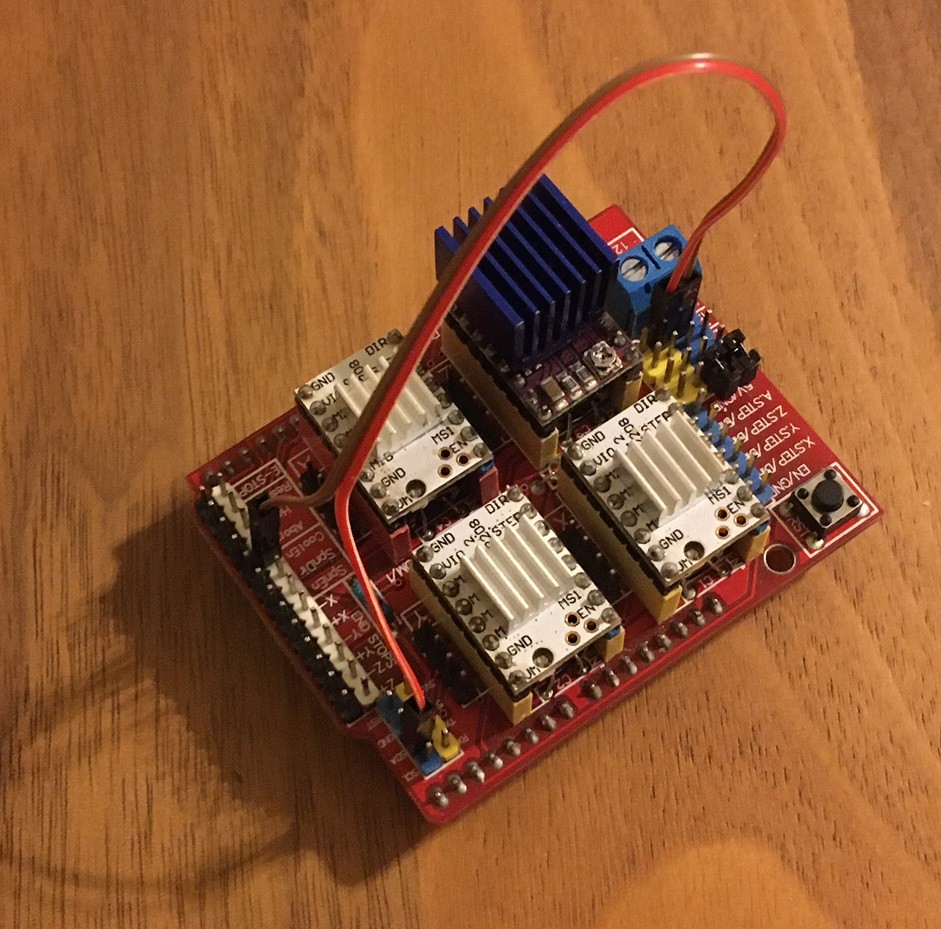
Cnc shield clone conversion
03/14/2021 at 03:07 • 0 commentsI have a CNC shield clone that I have been using as my controller. For the most part this has worked out well and the price was right (about $5). However since I'm using auto squaring (4th axis support) in GRBL and now that I'm adding in laser support I need to either replace it or find a way to convert it so it matches a proper protoneer cnc shield version 3.51. I should point out that the real protoneer shield is only $20, if you don't have a shield already it is a good deal.
I don't want to throw this shield away so I worked out the difference in pinouts. The first column below is the arduino pin name, the second column is the default connection on the cnc shield, and the third column (in the brackets) is the new mapping when you enable auto squaring in grbl. For some reason this is not well documented online, I had to pull info from several sources to verify this is the proper pinout.
CNC Shield v3.0 (ebay clone)
 D11 z limit
 D12 spindle enabled   (A motor step)
 D13 spindle direction (A motor dir)
 A3  coolant enabled   (spindle enabled)
 A4  not used          (coolant enabled)
 *** variable spindle/laser not supported!!!

CNC Shield v3.51 (protoneer.co.nz)
 D11 spindle enabled/pwm
 D12 z limit
 D13 spindle direction (coolant enabled)
 A3  coolant enabled   (A motor step)
 A4  not used          (A motor dir)
The big difference between these two shields is that the A-motor step/dir pins have been moved from D12/D13 to A3/A4 and the spindle enabled and z limit pins have been swapped. The z/spindle can be taken care of just by swapping the pins we plug into, that is no problem. But the A-motor needs a small modification on the board to make it work. Fortunately there is no need to cut any traces on the board. Simply remove the 4th axis clone jumpers and instead connect the A Step pin to the coolant enable pin, and the A Dir pin to the SDA pin. I chose to use connectors for this, but you could solder in a wire permanently if you want.
![]()
With that modification in place you can then tell GRBL that you have the newer Protoneer v3.51 cnc shield and it will enable TTL control of the laser for you. Just remember to plug the laser control line into the Z limit switch pin and the z limit switch into the spindle enable (SpnEn) pin.
Anyway I have this wired up but still need to actually test it out. I'm looking forward to giving it a proper go when I get back from vacation.
*** Note, I may have the a-step and a-dir pins backwards. If you try this and the stepper does not seem to move try swapping them. -
You'll Shoot Your Eye Out!
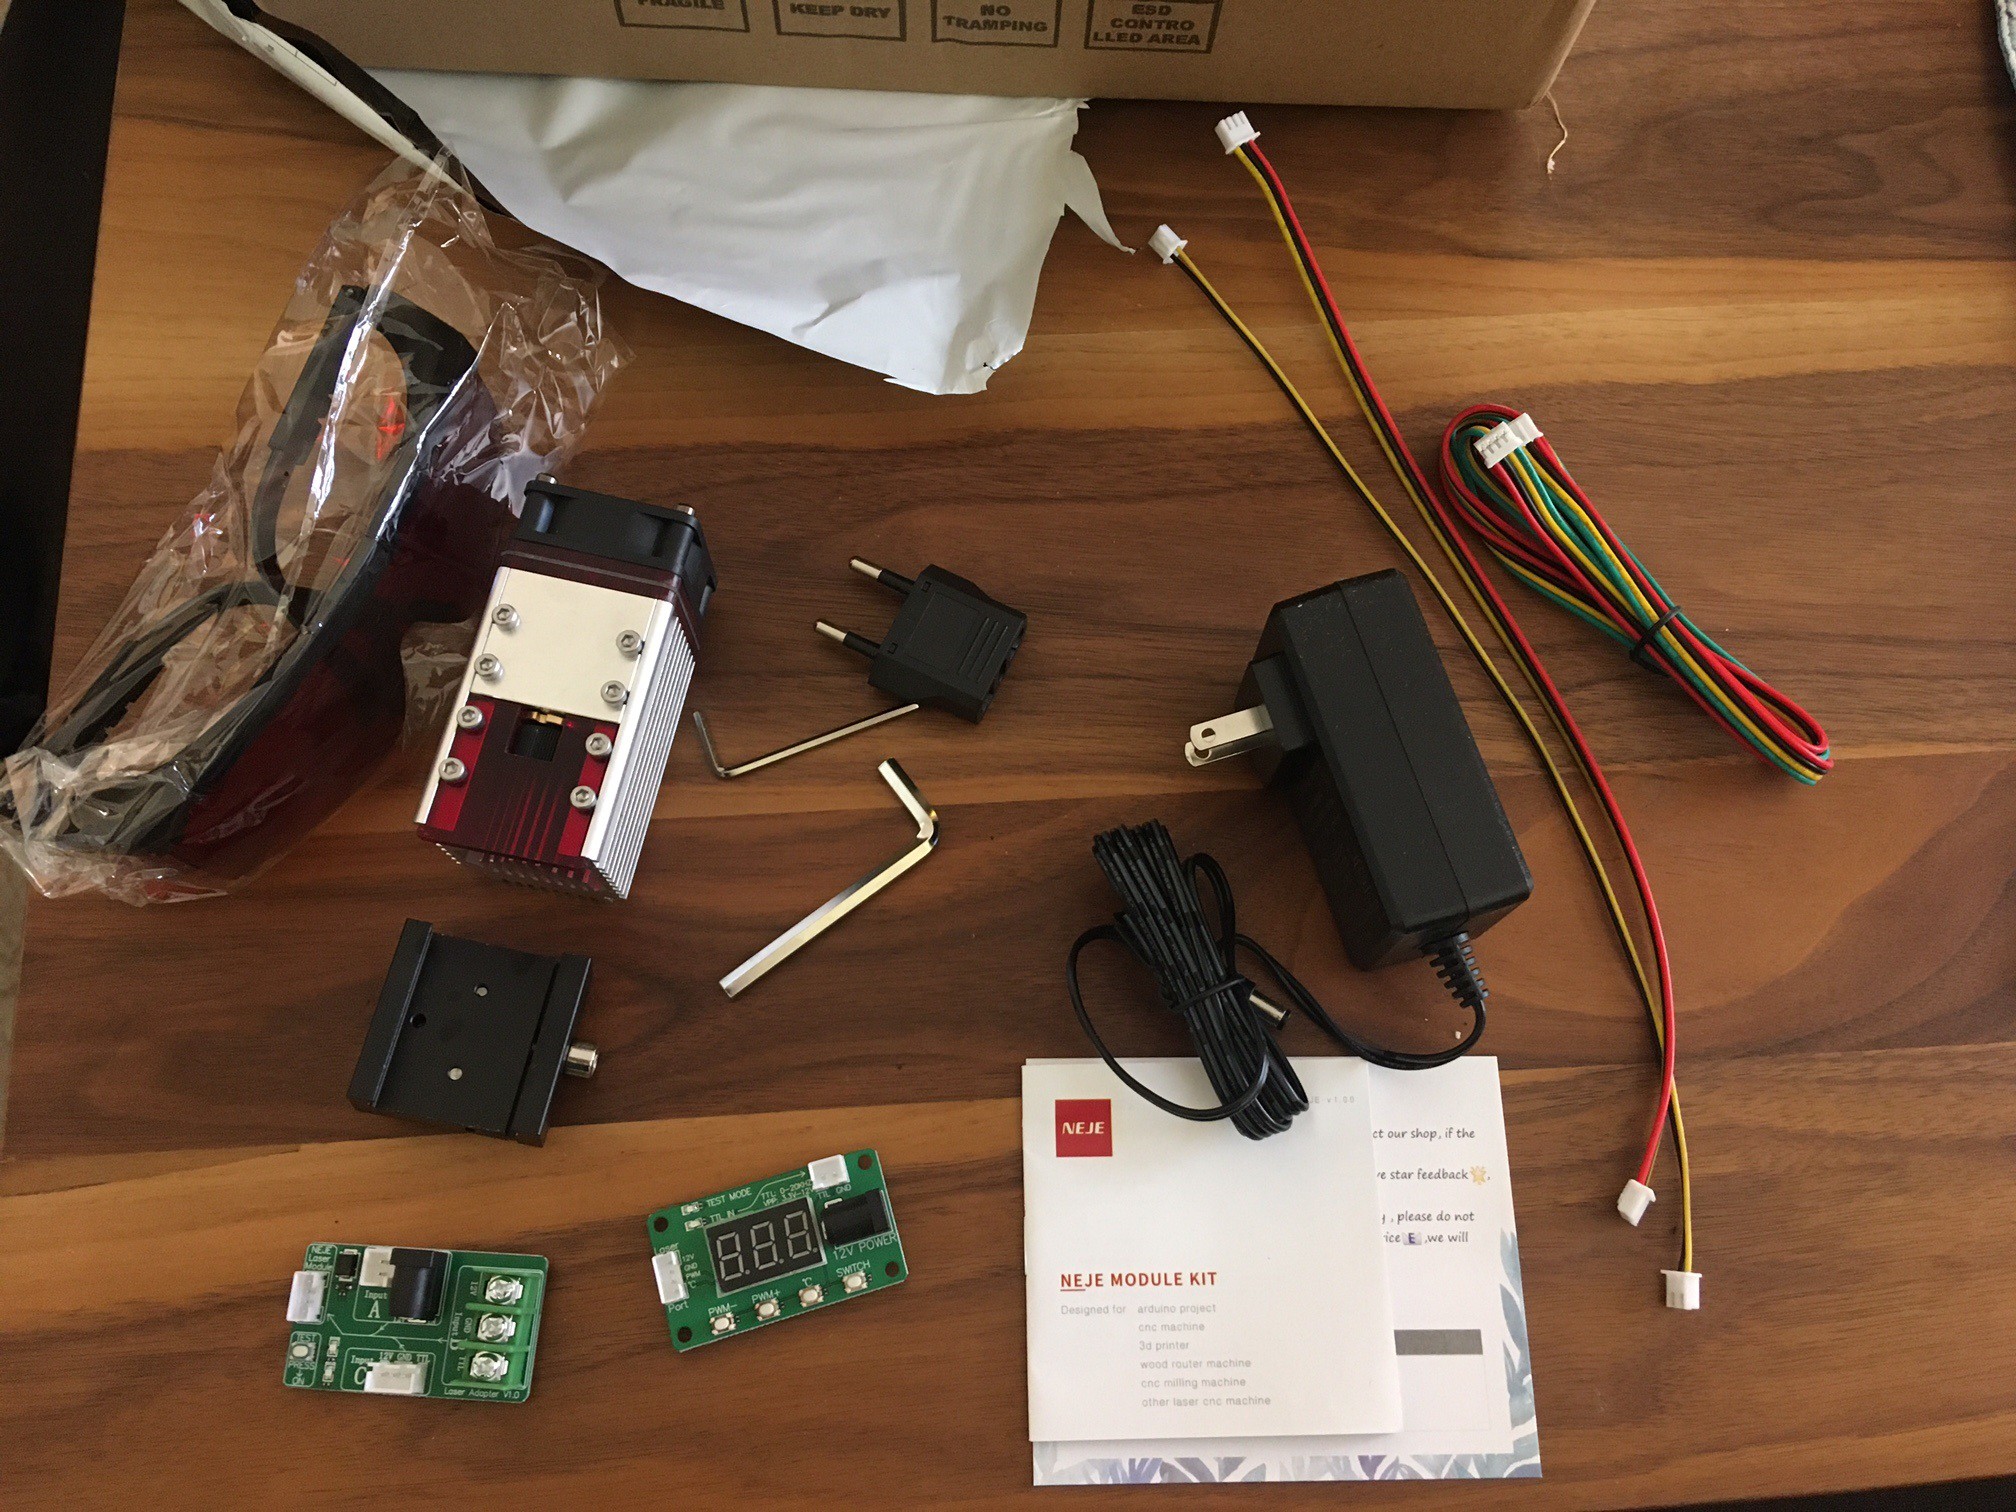
03/13/2021 at 01:51 • 0 commentsWell in spite of Neje.shop saying my laser would ship form California it finally arrived from China. At least it only took two weeks rather than 2 months! Anyway I made my first attempt at a mount for the laser and in the spirit of stupidity I fired it up. I can say it works and works quite well!
The kit comes with quite a lot of parts for the extra $10 over the base module. You get glasses, two adapter boards, 3 cables (one about a meter long), a power supply, 24v adapter, two Allen wrenches and some simple instructions all packaged up nicely in a well padded box. I would say this is worth it for the price. You may not need it all but just the power supply alone is worth $7 or so.
![]()
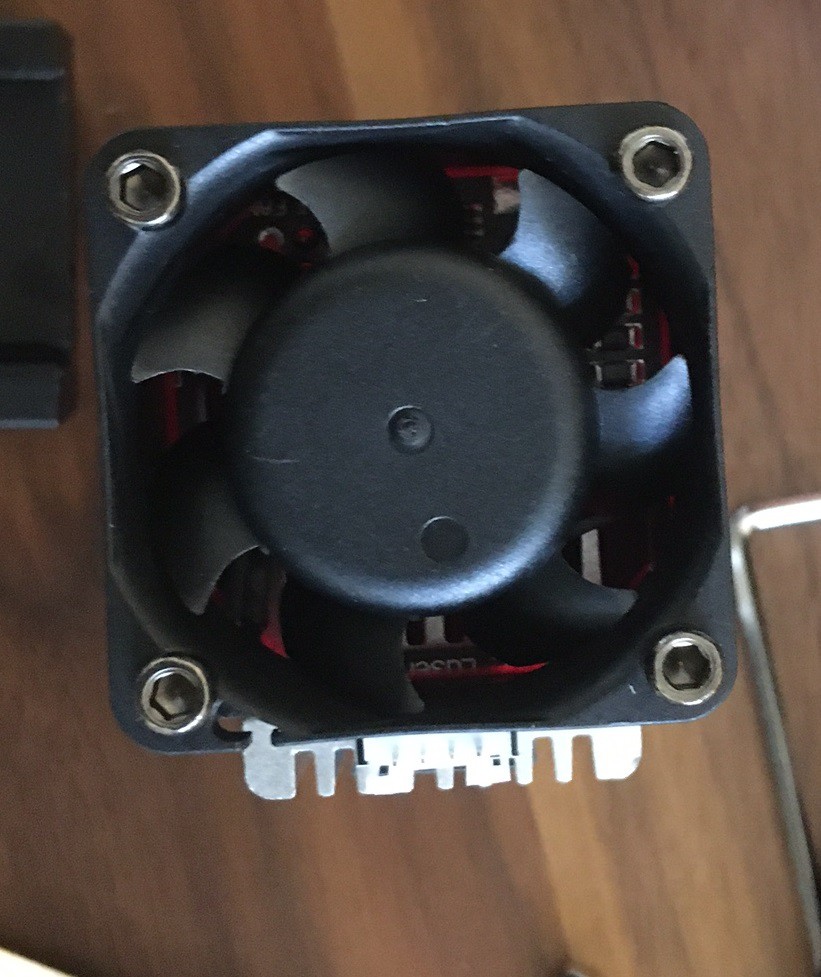
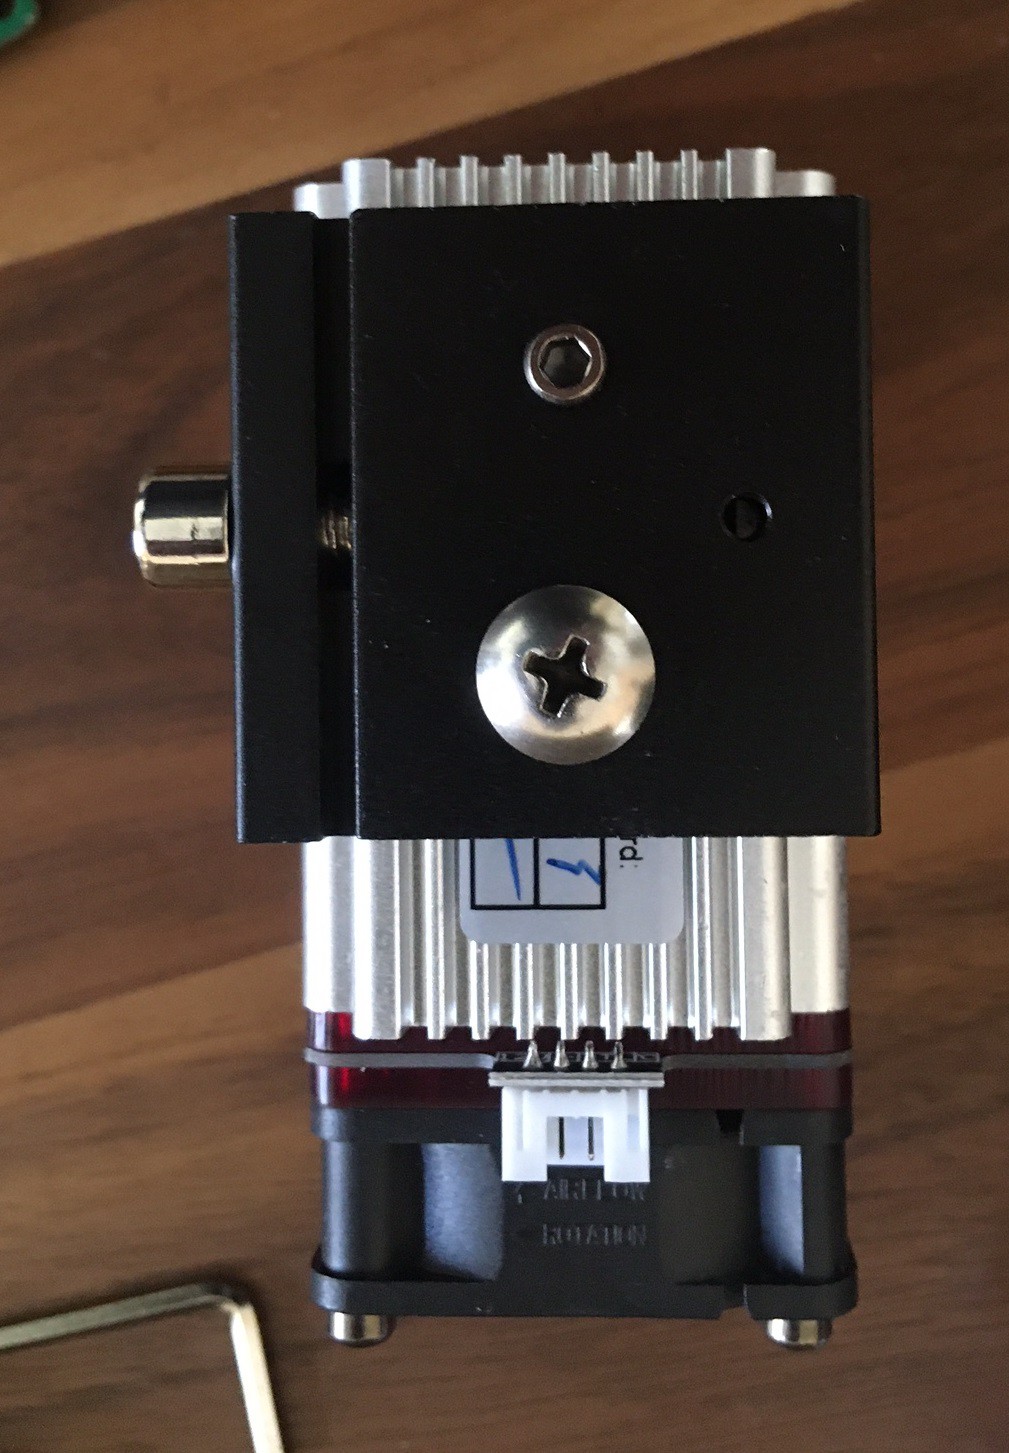
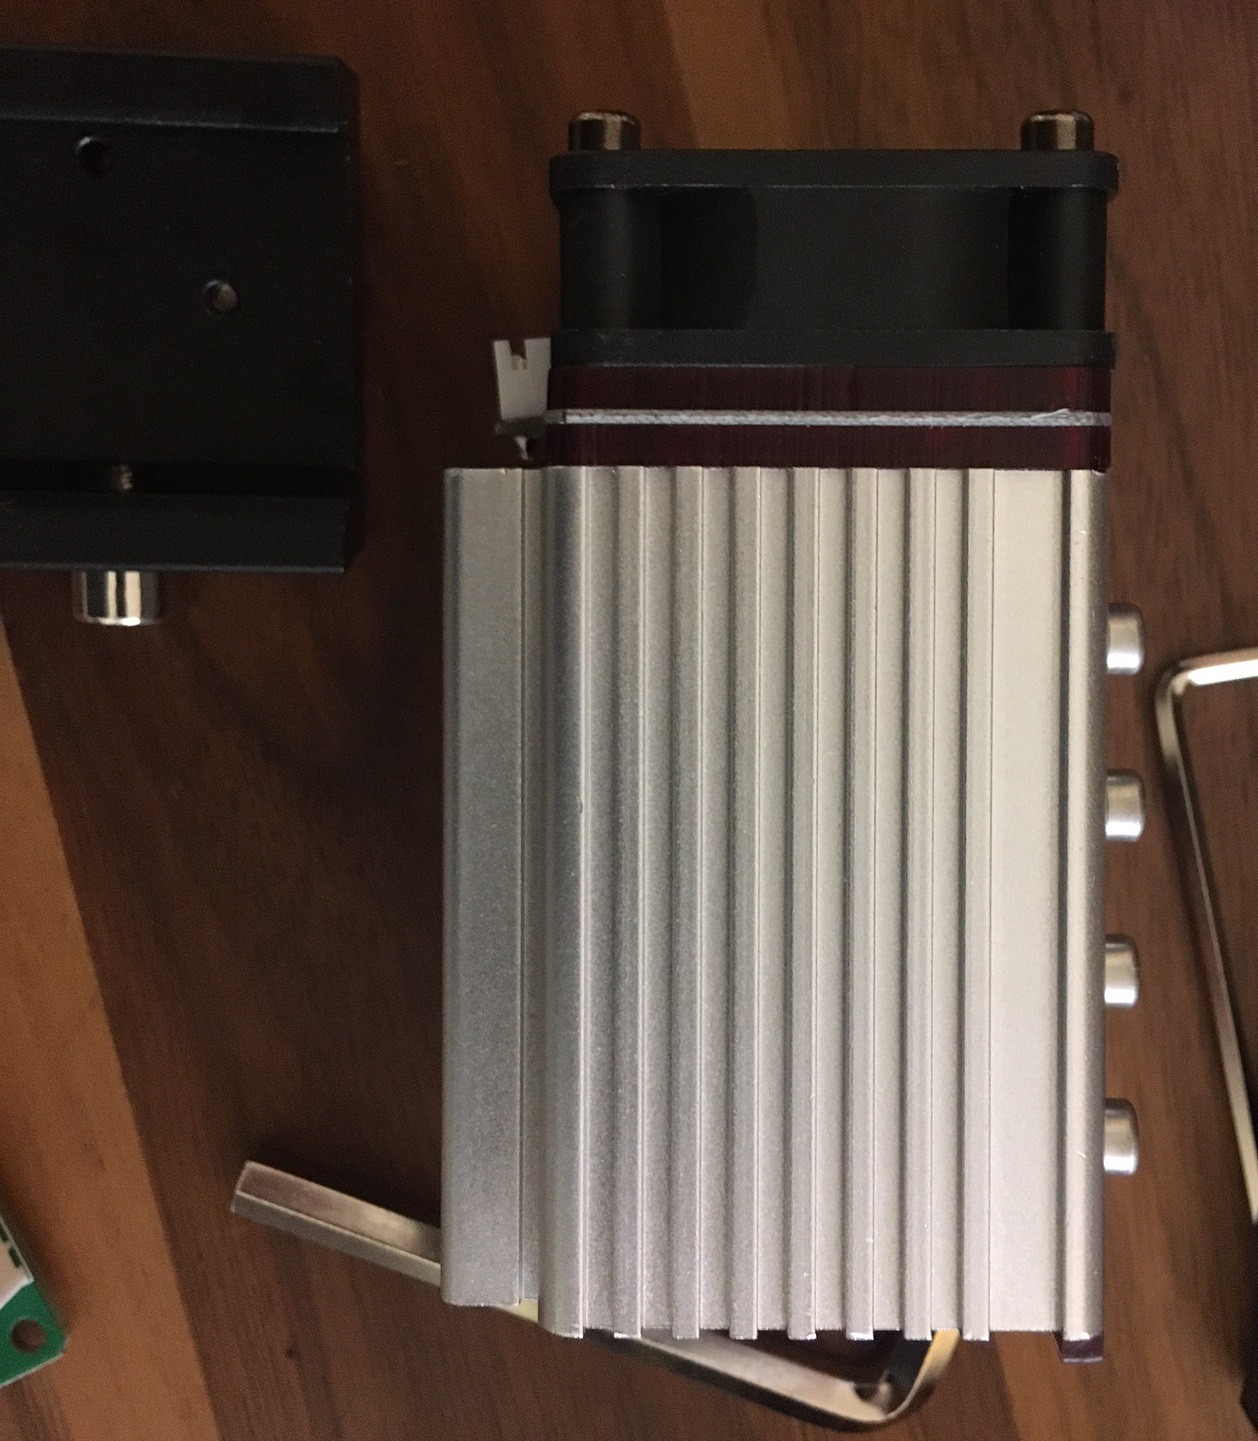
There was not a lot online about this module, so here are some up close images of it. The mount is roughly 40x40 mm square, and there is about 20 mm of range for moving the mount up and down.
![]()
![]()
![]()
![]()
I can see why they suggest a much smaller laser would be better for engraving. At only 20% power this 30w laser can burn a hole almost completely through a pad of paper. I was using 14% power to cut through a sheet of paper no problem.
![]()
It should be clear from the picture above that the small piece of red plastic at the front of the laser is NOT enough to run the laser without glasses. It is still better than the older design with the end of the laser being fully exposed. This version is much harder to accidentally touch the laser beam when adjusting focus. But still you must wear the glasses at all times and/or add a fully enclosed box.
![]()
Anyway now I need to make a better mount, and rework my cnc shield so it can control the laser properly. Judging by the snowy shaped lines on my spoiler board I need to come up with some sort of a way to elevate parts off the bed and while cutting paper did not create a lot of smoke it made enough that I need to work out some sort of a vent or filter as well.
I'm heading out on a camping trip with the family, so all that will need to wait, but I hope to have a proper writeup soon.
-
Quantifying Laser Power
03/03/2021 at 04:54 • 0 commentsI was trying to work out how best to compare laser diode modules together.
You would think taking the reported power as a reference would be enough, but it is not. First most modules report there input power, which is several times higher than the optical power coming out of the diode with little correlation from module to module.
Next each module has a certain amount of beam divergence, that is the spread of the light coming out of the laser. A larger amount of beam divergence will result in a larger spot after focusing relative to a diode with a smaller beam divergence. To make mattes worse the beam divergence is not symmetrical, with one side having a much wider beam than the other.
Knowing the optical power and beam divergence (and beam aspect ratio) will get us much closer to being able to predict the cutting power of a given module and compare its relative performance. On top of that knowing the rated max optical power of the diode will give us a hint of how much it is being over driven.
NEJE has quite a few laser modules but from the hints I found on the internet I feel that they are only using three different laser diodes:
// Nichia 5.5w, 450nm laser diode
// possibly Nichia NUBM44, 6W
// beam divergence 9.7 and 60 deg
40W, 15w optical power
30W, 7.5w optical power
20W, 5.5w optical power// Osram 2.2w, 450nm laser diode
// possibly PLPT5 450KA
// beam divergence 8.5 and 48 deg
7w, 2.5w optical power// Sharp 350mw, 405nm laser diode
// possibly GH04W102GC
// beam divergence 14 and 41 deg
3.5w, 0.5w optical power
2.5w, 0.35w optical powerThe Nichia diode does not have a data sheet available online, but I found some info gleaned from laser diode enthusiasts. I'm not very confident in the beam divergence calculations, divergence is measured at the 50% threshold and not the edge of the light, but it is safe to say the divergence is probably not over estimated by more than 20%.
We can see that the 2.5w, 7w, and 20w modules are driving there respective laser diodes at close to there limit but not too far over (assuming we guessed right on the module). The 3.5w, 30w, and 40w modules are overdriving there respective diodes (assuming the 40w is using a 5.5w module).
I'm interested in the 30w module, it is overdriving the laser module by about 35%, we can probably extend the life of the module a bit by not running it past 75% power (certainly not for very long). It does appear to have a wider beam divergence in the fast axis (the long axis) by about 25% to 45% over the other laser diodes, that will reduce the cutting power and make for more of an asymmetrical line formation. But it should still have a lot more cutting power than the lower power laser diodes.
The 2.5w module does have a lower 3:1 beam ratio (fast vs slow) while the others are close to 6:1, that should give it a more symmetrical dot when cutting or engraving. The three element lenses that come with these modules have a tendency to square up the aspect ratio a bit, and that has a more pronounced effect the more out of square things are, so the difference may be closer to 2x worse with the more powerful modules rather than 3x worse.
-
Lasers part two
03/02/2021 at 04:25 • 0 commentsSo I bit the bullet and ordered a laser and some safety equipment to go with it. I ordered the following:
- NEJE 30W (7.5w optical) laser module with power supply, mount and safety glasses
- Eagle 190nm-540nm OD6 laser goggles.
- Kidde 3-A:40-B:C fire extinguisher.
- Kidde battery operated smoke detector and carbon monoxide alarm.
I picked the laser module because it was a solid price vs performance. I have an idea of also picking up a 0.5watt laser module to compare with. There is a rumor that the smaller modules may be better for engraving because the laser spot is smaller and more square. I want to see what the larger laser can do first.
The smoke detector may not be the right choice. The rumor is that you should use a heat detector rather than a smoke detector, I guess we will find out.
Arkipita did a test of various laser glasses from ebay and found that the proper colored glasses did ok with 450 nm wavelength lasers, but they did not do as well as a certified pair of glasses. I decided to keep the glasses that came with my laser but pony up the money for good glasses as well. I can use the others as a backup set.
For now I'm going to hold off on the laser bed and vent system till I get a better sense of what is needed. I suspect you can get by with a minimal bed and smoke may be a small problem or a large one. I have several ideas but want to know how bad it is before investing heavily in equipment.
Anyway I don't know when it will all show up, but I'm nervous and exited.
-
New controller
02/26/2021 at 05:39 • 0 commentsSince I have been thinking of lasers that has brought up the limitations of my current controller. The advantage of the current controller is the ridiculously low cost, but it is very tight on I/O pins and generally not a very solid setup with most connections being bare pins without any sort of a key or lock.
![]()
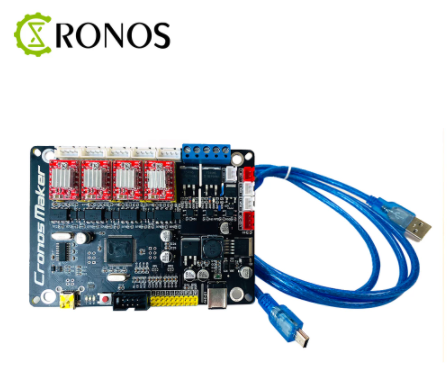
One idea for an upgrade is the Cronos Maker V3 board. This is a 32 bit controller complete with 4 stepper drivers, support for loads of I/O, can directly drive the spindle, and has an optional offline controller that can be used to drive the machine around for $40 to $56 depending on the configuration. The big advantage here is the included housing (nice) and integrated spindle driver that should allow you to not only control the spindle from GRBL, but if I understand it right will allow you to use a single power supply to drive both the spindle and stepper motors.
It would be nice to have another stepper motor axis, having only 4 does not allow us to add a rotary axis to the machine. With a rotary axis we can etch the paint off of a hydro flask, or we could build a small chuck that would allow us to turn the machine into a mini lathe.
![]()
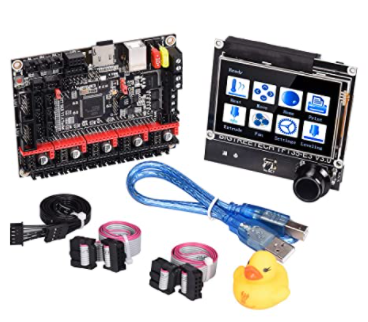
The BIGTREETECH SKR v1.4 with touch screen display looks like a great upgrade at $68. This improves on the Cronos by adding in a SD card reader and touch screen, but while it does have a heat bed driver that is probably not strong enough to drive the spindle. On the upside this can become a fully stand alone controller but you will need to use something other than GRBL as the firmware. Marlin would probably work just fine.
![]()
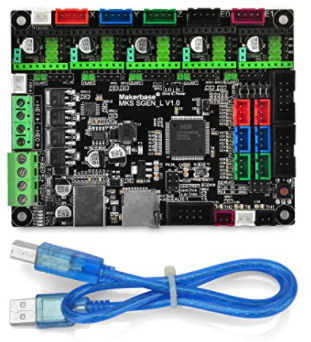
If that all sounds too pricey then the KOOKYE SGen_L 32-bit Controller at $20 is another option that is much closer in price to the original GRLB controller we have been using. The downside here is you get nothing with it at this price, not even motor stepper drivers. And without some sort of LCD display you can't use it as a stand alone controller since there is no way to select the gcode file or to set zero without a computer. Once you put all the missing parts back in you may be right back up to the price of the other two controllers. However if you just want to upgrade your existing controller this may be a viable upgrade path.
Keep in mind I have done about 15 minutes of research on each of these controllers. You should take your time and investigate what firmware works with each and read reviews before settling on one. And of course the current controller gets the job done for a very low cost.
![]()
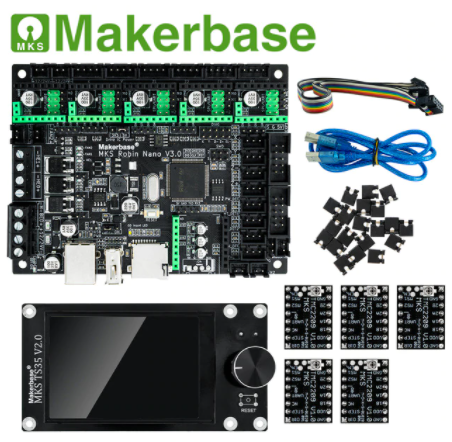
Here is a new one, the Makerbase MKS Robin Nano V3. It has usb thumb drive support, so no need to use sd cards when moving designs around. It is full 32 bit, comes with a large touch screen with a thumb wheel, has support for 5 axis, and has support for switchless homing, wich may or may not work well with a cnc machine. The price varies, but for $47 you get a wifi module as well as 5 TMC2209 stepper drivers and the MKS TS35 touch screen.
With all of these controllers you would want to verify what firmware they run and how you would go about customizing it. They will be setup for 3D printers for the most part so you want to have the power to change things as needed for your own use. I suspect the BIGTREETECH has the best firmware support, but it is possible the rest work just as well with Marlin 2.0
-
Lasers!
02/26/2021 at 04:37 • 0 commentsI have been thinking about how to improve this machine recently and lasers are starting to call to me. I have avoided the idea of adding a laser because I felt it was too dangerous for this style of a machine. I still feel it is dangerous but I think there are ways we can work things to minimize the danger.
First off, lasers are dangerous. Anything that can engrave or cut a material is classified as a class 4 laser (that is 500 mw or stronger). That is the highest level of classification and basically says the laser can cause permanent damage to skin and eyes almost instantly if you get hit by the beam. This is not something to mess around with!
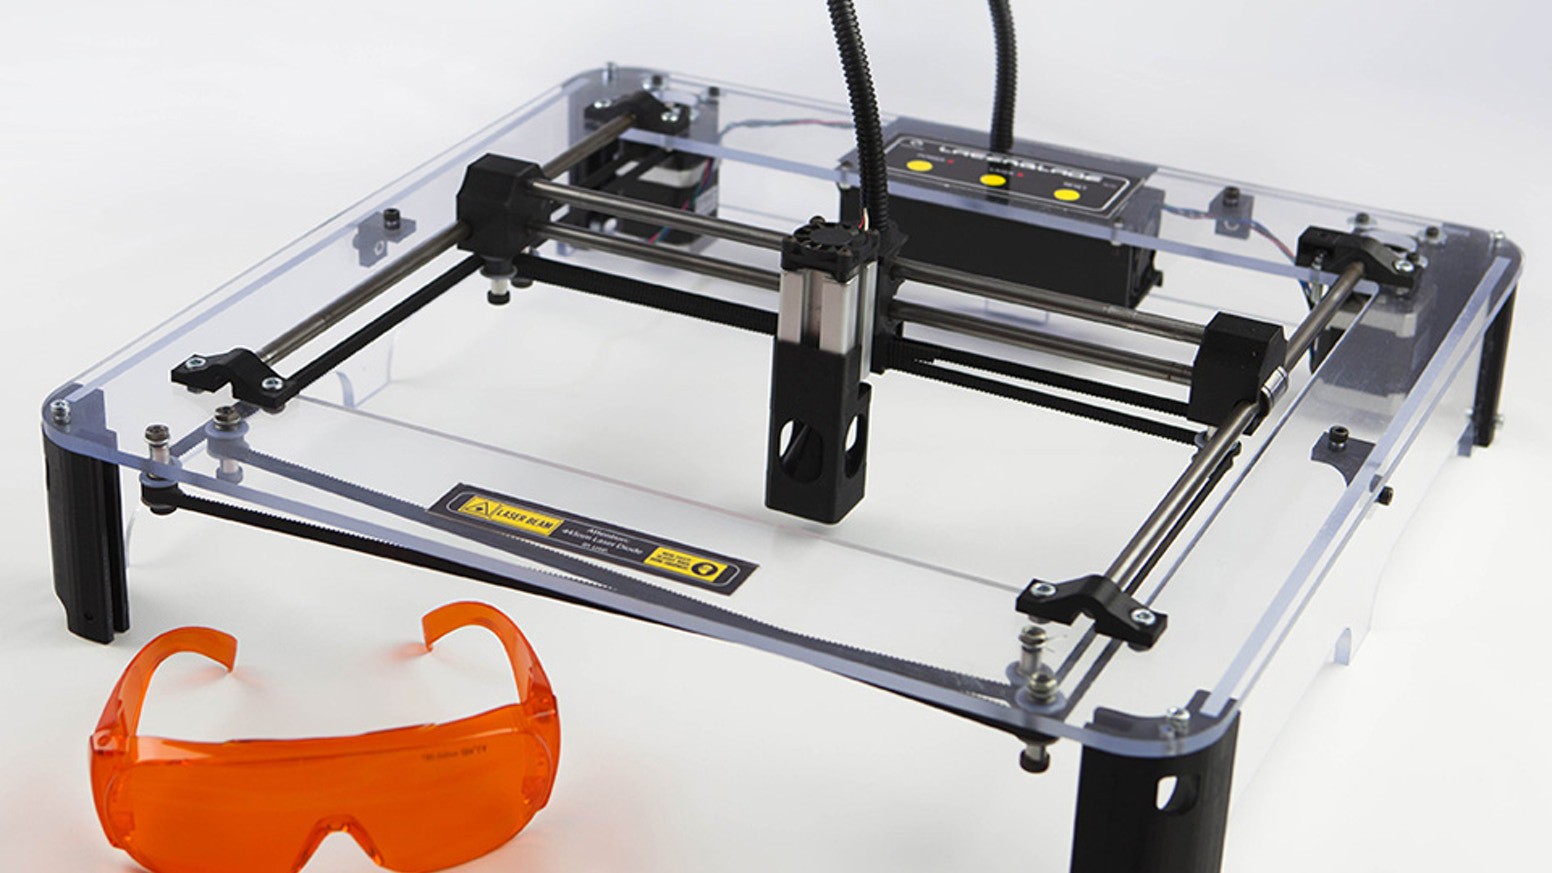
The only way to make a laser safe would be to block the laser beam from escaping the machine. I thought you would need a fully enclosed box around the machine to achieve this, but then I came across a KickStarter add for the LaserBlade. They use a shield around the base of the laser that sits only a few mm above the work surface effectively stopping you from accidentally putting your hand in the lasers path, and effectively blocking 90% of the reflected light.
![]()
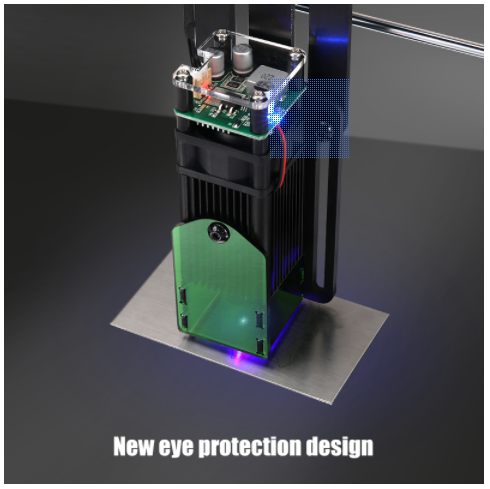
Looking around some more I found they were not the only ones with this idea, the AtomStack A5 also uses a light shield (this one transparent) to keep fingers away from the laser.
![]()
The Engravenatoropen source laser project uses 1/8" thick orange plexiglass from estreet plastics for there safety enclosure. It would probably be suitable material to act as an addon shield for our laser module.
That shield combined with a quality set of laser goggles that cover the 450 nm wavelength and have an OD6 rating would help keep any stray reflections out of your eyes. Here is a suitable pair of glasses from Survival Laser that won't break the bank.
That is all good for when the machine is in use, but what about when you have the laser module removed from the spindle mount. My idea is to put a normally open switch on the back of the laser module that cuts power as soon as you remove the module from the machine. That way if you forget to disconnect the power from the module you won't end up shooting a hole in the wall.
That leaves us with the little details, like the fumes. You would want some sort of a fume extractor. Fortunately the indoor hydroponics community has created a large demand for small carbon fume extractors that are very efficient and low priced.
You also would want a quality fire extinguisher near by.
And finally some sort of a table that will elevate the pieces you are cutting and provide some protection to the machine once the laser cuts through the piece. You can buy a prebuilt table that uses a metal honeycomb material to elevate the part and has a metal backing to prevent the laser from penetrating. You can also build your own by pushing thumbtacks through a screen, or screws and so on. It helps if you rough up the surface of your metal bottom before assembling it to increase the scatter.
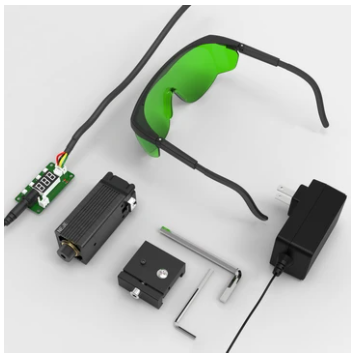
That is the safety out of the way but what laser module to buy. I have been looking at a lot of modules and have narrowed things down to the NEJE laser modules. These are available in a complete kit with adapter boards, power supply's, and a pair of safety glasses that should probably be used as a backup set. One nice thing about NEJE, the thing that gives me the most confidence in them, is that they tell you what laser module they use and what wattage they drive it with.
They are available in 0.5 watt, 2.5 watt, 5.5 watt, 7.5 watt, and 15 watt power levels. The 0.5w for $50 and the 7.5w for $120 feel like the best solutions to me.
![]()
You would be hard pressed to get anything cheaper than the 0.5w solution (advertised as 3.5w), not with a controller and power supply anyway. This is good enough for etching softer materials, and it probably will cut most paper. It is possible that a lower power module will produce a better engraving, although I could not find any firm evidence of this. It is quite possible that the few anecdotal cases online were just down to poor setup.
![]()
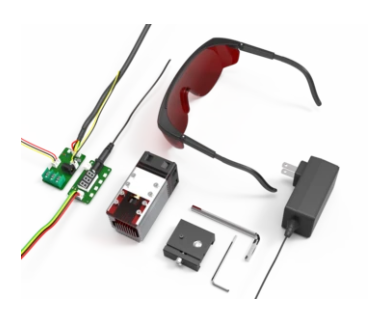
The 7.5w module (advertised as 30w) is almost as powerful as the 15w module, but 1/3 the price and it is a much better deal than the 5.5w unit (that is only $10 cheaper). It has a small cover over the focus ring that would make it much safer when adjusting the ring. It is also strong enough to cut thin plywood (I have seen reports of 3mm to 5mm being cut in 3-4 passes).
You can increase the cutting power of the machine by adding in a small air assist nozzle to blow away the charred material from the cut. This can be as simple as using an aquarium air pump with a bit of plastic tubing and a 3D printed nozzle at the end to help focus the air flow at the cut. The rumors are that this greatly increases the cutting power and reduces charring of the edges, but we will need to experiment to see if this is the case.
The benefit of a laser are:
- It can make much finer cuts than the CNC.
- It can cut materials the CNC can't easily handle like paper, rubber, fabric and foam.
- It can etch materials like wood, glass, plastic, metal and leather
- It can cut without need for tabs, making for faster post processing.
The drawbacks of the laser are:
- More dangerous, you can easily damage your eye with a stray reflection.
- More toxic, your burning material, not just carving it, you really don't want to breath this stuff in.
- More prone to starting a fire, although a regular CNC is also a fire hazard, a stuck bit can start a friction fire easily enough.
- Can't handle very thick material, you need a much stronger laser if you want to do any serious cutting.
- Very much a 2D tool, you can engrave or cut but you can't carve.
Anyway right now this is just a thought experiment. I'm sorely tempted to pull the trigger on all of it but I'm still nervous about lasers in general. Hopefully it gives you a starting point if you are interested in lasers. But never underestimate the power of a laser, be careful and wear your safety glasses at all times.
MultiBot CNC v2
A low cost 3D printed CNC that can be built with minimal tools yet is capable of great things.