David Tucker
-
Christmas take 2
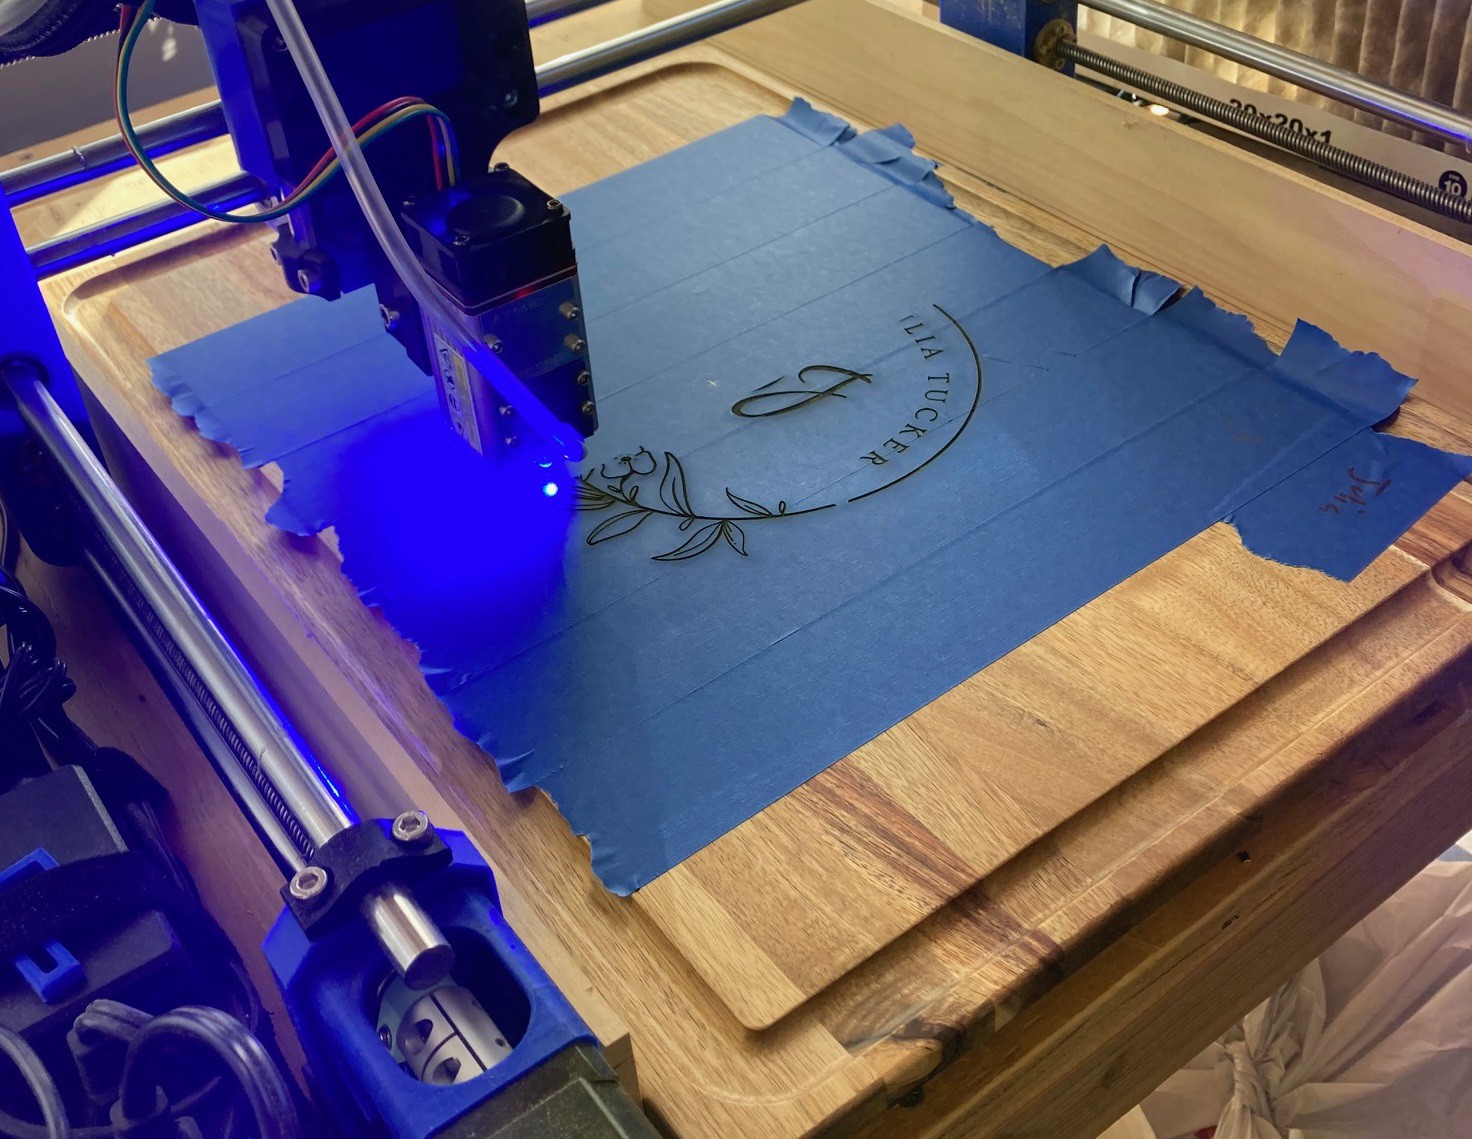
01/02/2024 at 22:00 • 0 commentsSo this year for Christmas my wife wanted to make cutting boards for family. We spent some time using Canva to generate the logo's. Then a bit of effort to export things to a format that light burn can handle. And finally were ready to burn.
![]()
I used blue painters tape to mask out the wood, this prevents the smoke from marring the wood. And after I finished burning I used a wet q-tip to remove the loose ash from the cut lines.
![]()
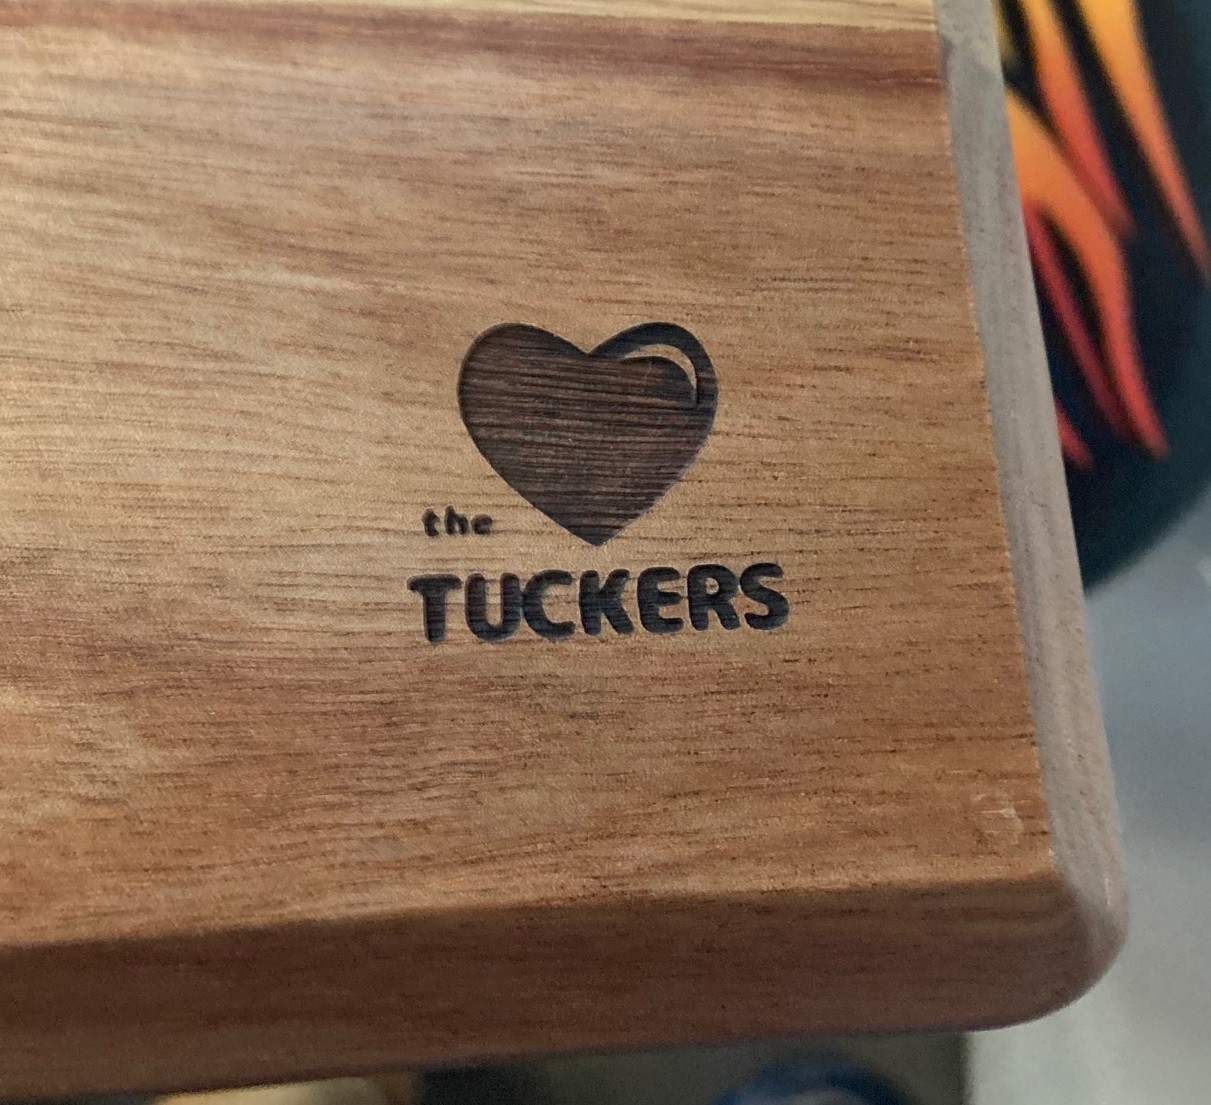
They turned out really great! I'm not sure they are useful as an actual cutting board. For starters you would probably destroy the pattern, and there probably not food safe. There is a lot of confusion over the food safety. Some say never, the pores in the cut are too big. Others say just oil it and your golden, and finally there is the fill in the cut with epoxy crowd. Personally I think these are fine to use as is for a cheese board, or as decoration, but you probably should not let raw meat touch them.
![]()
Top it off with a little note on the back and there good to go. These took about 2 hours each to design, and an hour or two to cut. Not nearly fast enough for commercial work, but plenty fast enough for gifts.
-
Christmas Ornaments
12/10/2022 at 21:49 • 0 commentsMy wife is a school teacher and among other things she runs a sign language club for 3rd graders.
![]()
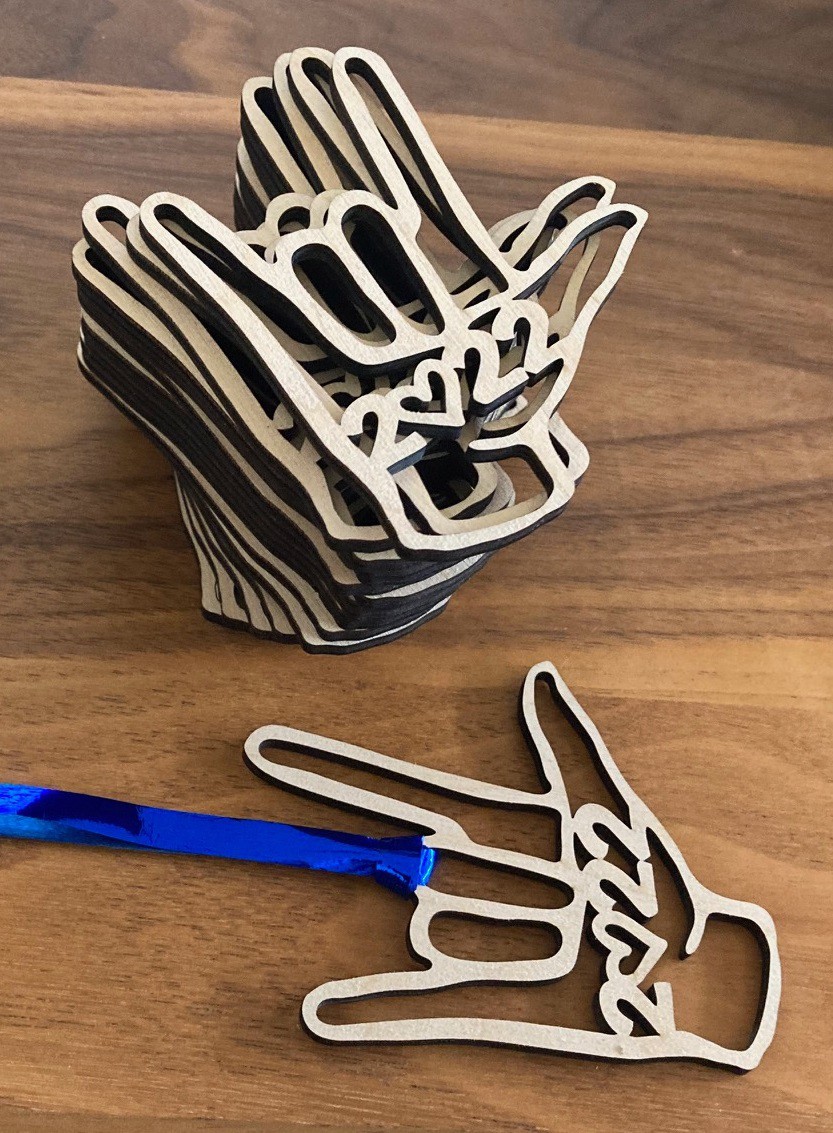
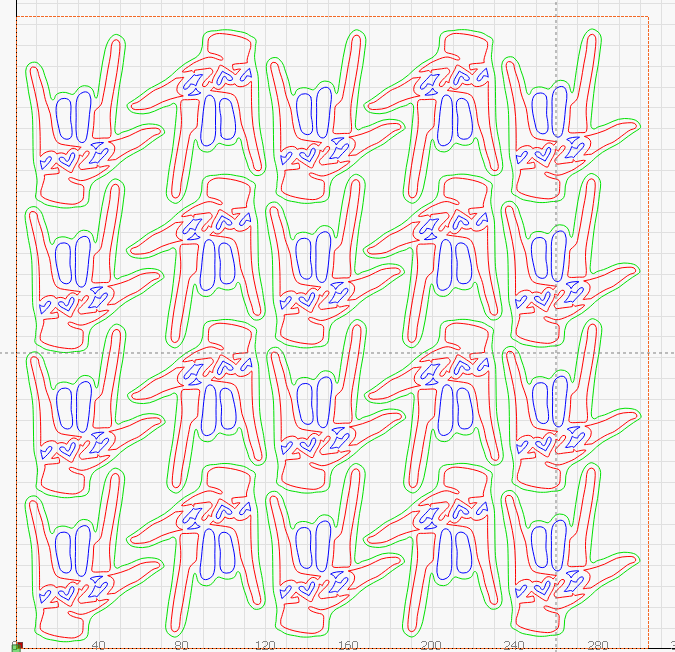
They have a Christmas concert coming up and she wanted to give her students a present. So we came up with the idea of laser cutting these I Love You ornaments.
![]()
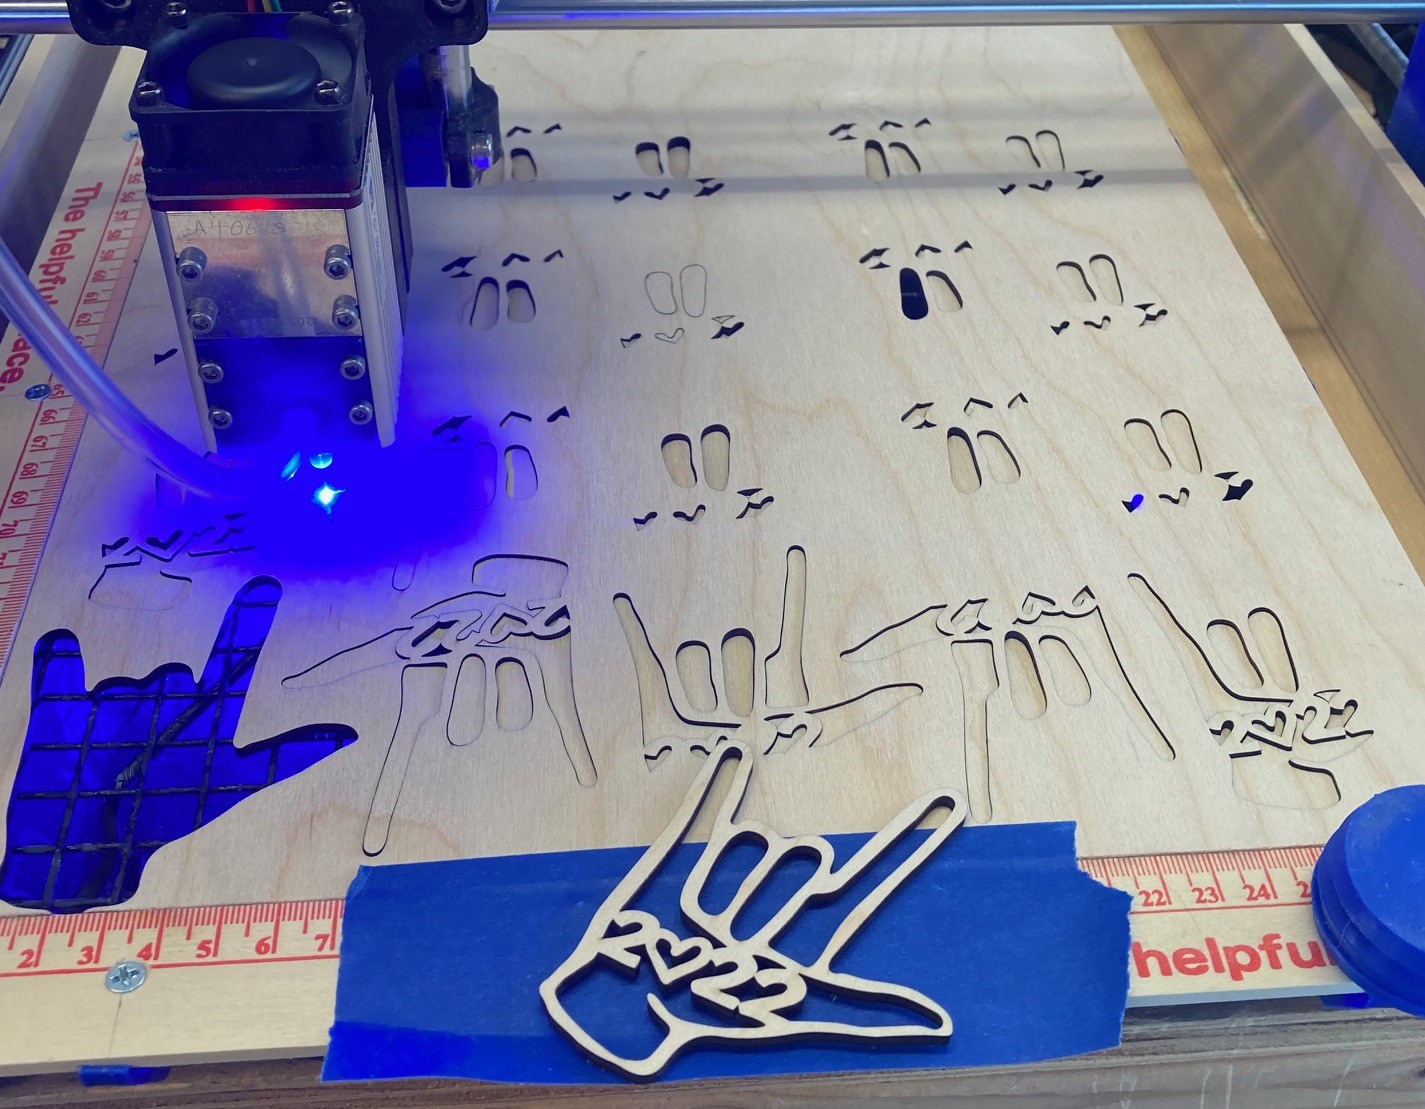
I was able to cut 20 on a 12" square piece of 3 mm plywood. It took about 2 hours to cut them at 160 mm/min and 80% power on my NEJE A40640 laser module.
The design came from a picture we found online so I'm not going to give away the vector file. I spent 15 minutes in inkscape outlining the image, a fairly simple job once you work out the kinks.
-
Shop Reorganization
11/21/2022 at 00:07 • 0 commentsSo I'm thinking about starting a reorganization of my workshop. Hopefully this will include rebuilding my workbench as well as building some portable carts to hold various power tools as well as my cnc machine. I'm going to document this work over on a new project log, since this one seems to go on forever and these are really not cnc related updates.
If you want to follow along with this then check that out over here.
-
Sticky Situation
11/04/2022 at 04:36 • 0 commentsSo I have been experimenting with different ways to hold down my material when milling. I have tried tabs, they work but they are frustrating to deal with, slow down the cut, and leave a scar on the side of the material. I tried double sided carpet tape, it worked ok but left a sticky goo on my blade and was generally a pain to work with. I tried painters tape and CA glue, that works relatively well except it takes a lot of tape and it is nearly impossible to line up the tape strips so you end up with glue on the workpiece or spoiler board.
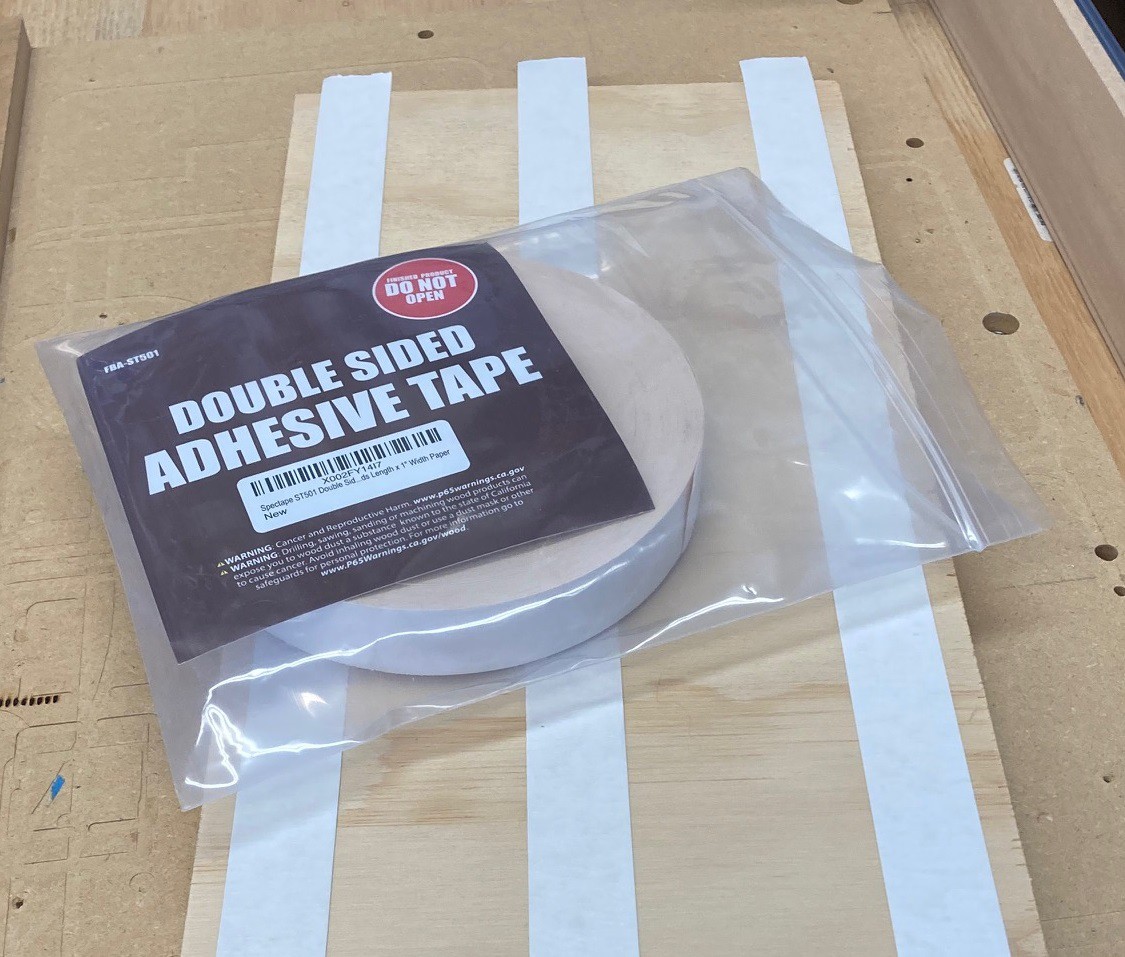
What I really wanted was double sided painters tape. Something with a paper back and not a plastic one, that was sticky enough but did not leave a residue, and that was relatively inexpensive. I'm not sure I hit the low cost mark but I came across a product called Spectape ST501 for $19 a roll. It goes on easily, can be ripped by hand, grips good enough, and does not seem to leave any residue on the cutter.
![]()
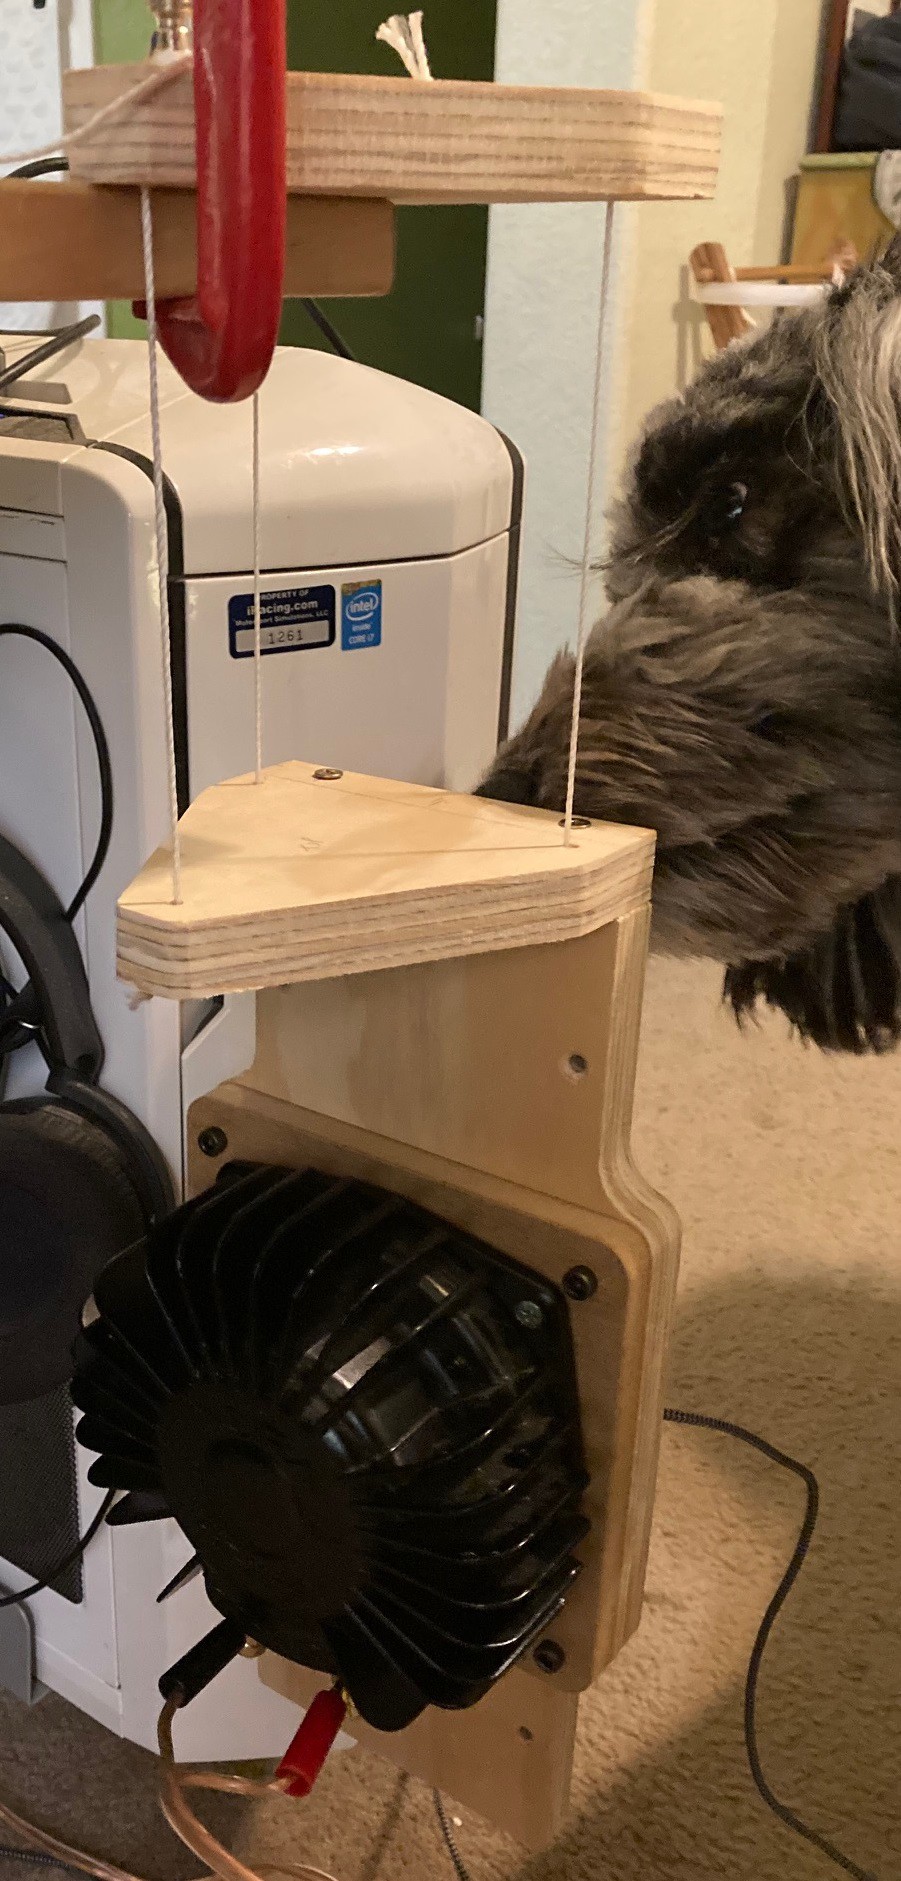
Going back to my previous post, I had to rework my test stand. Fortunately it is easy to rework the design once you have an initial mockup. This new hanging version reduces unwanted harmonics in the rig.
![]()
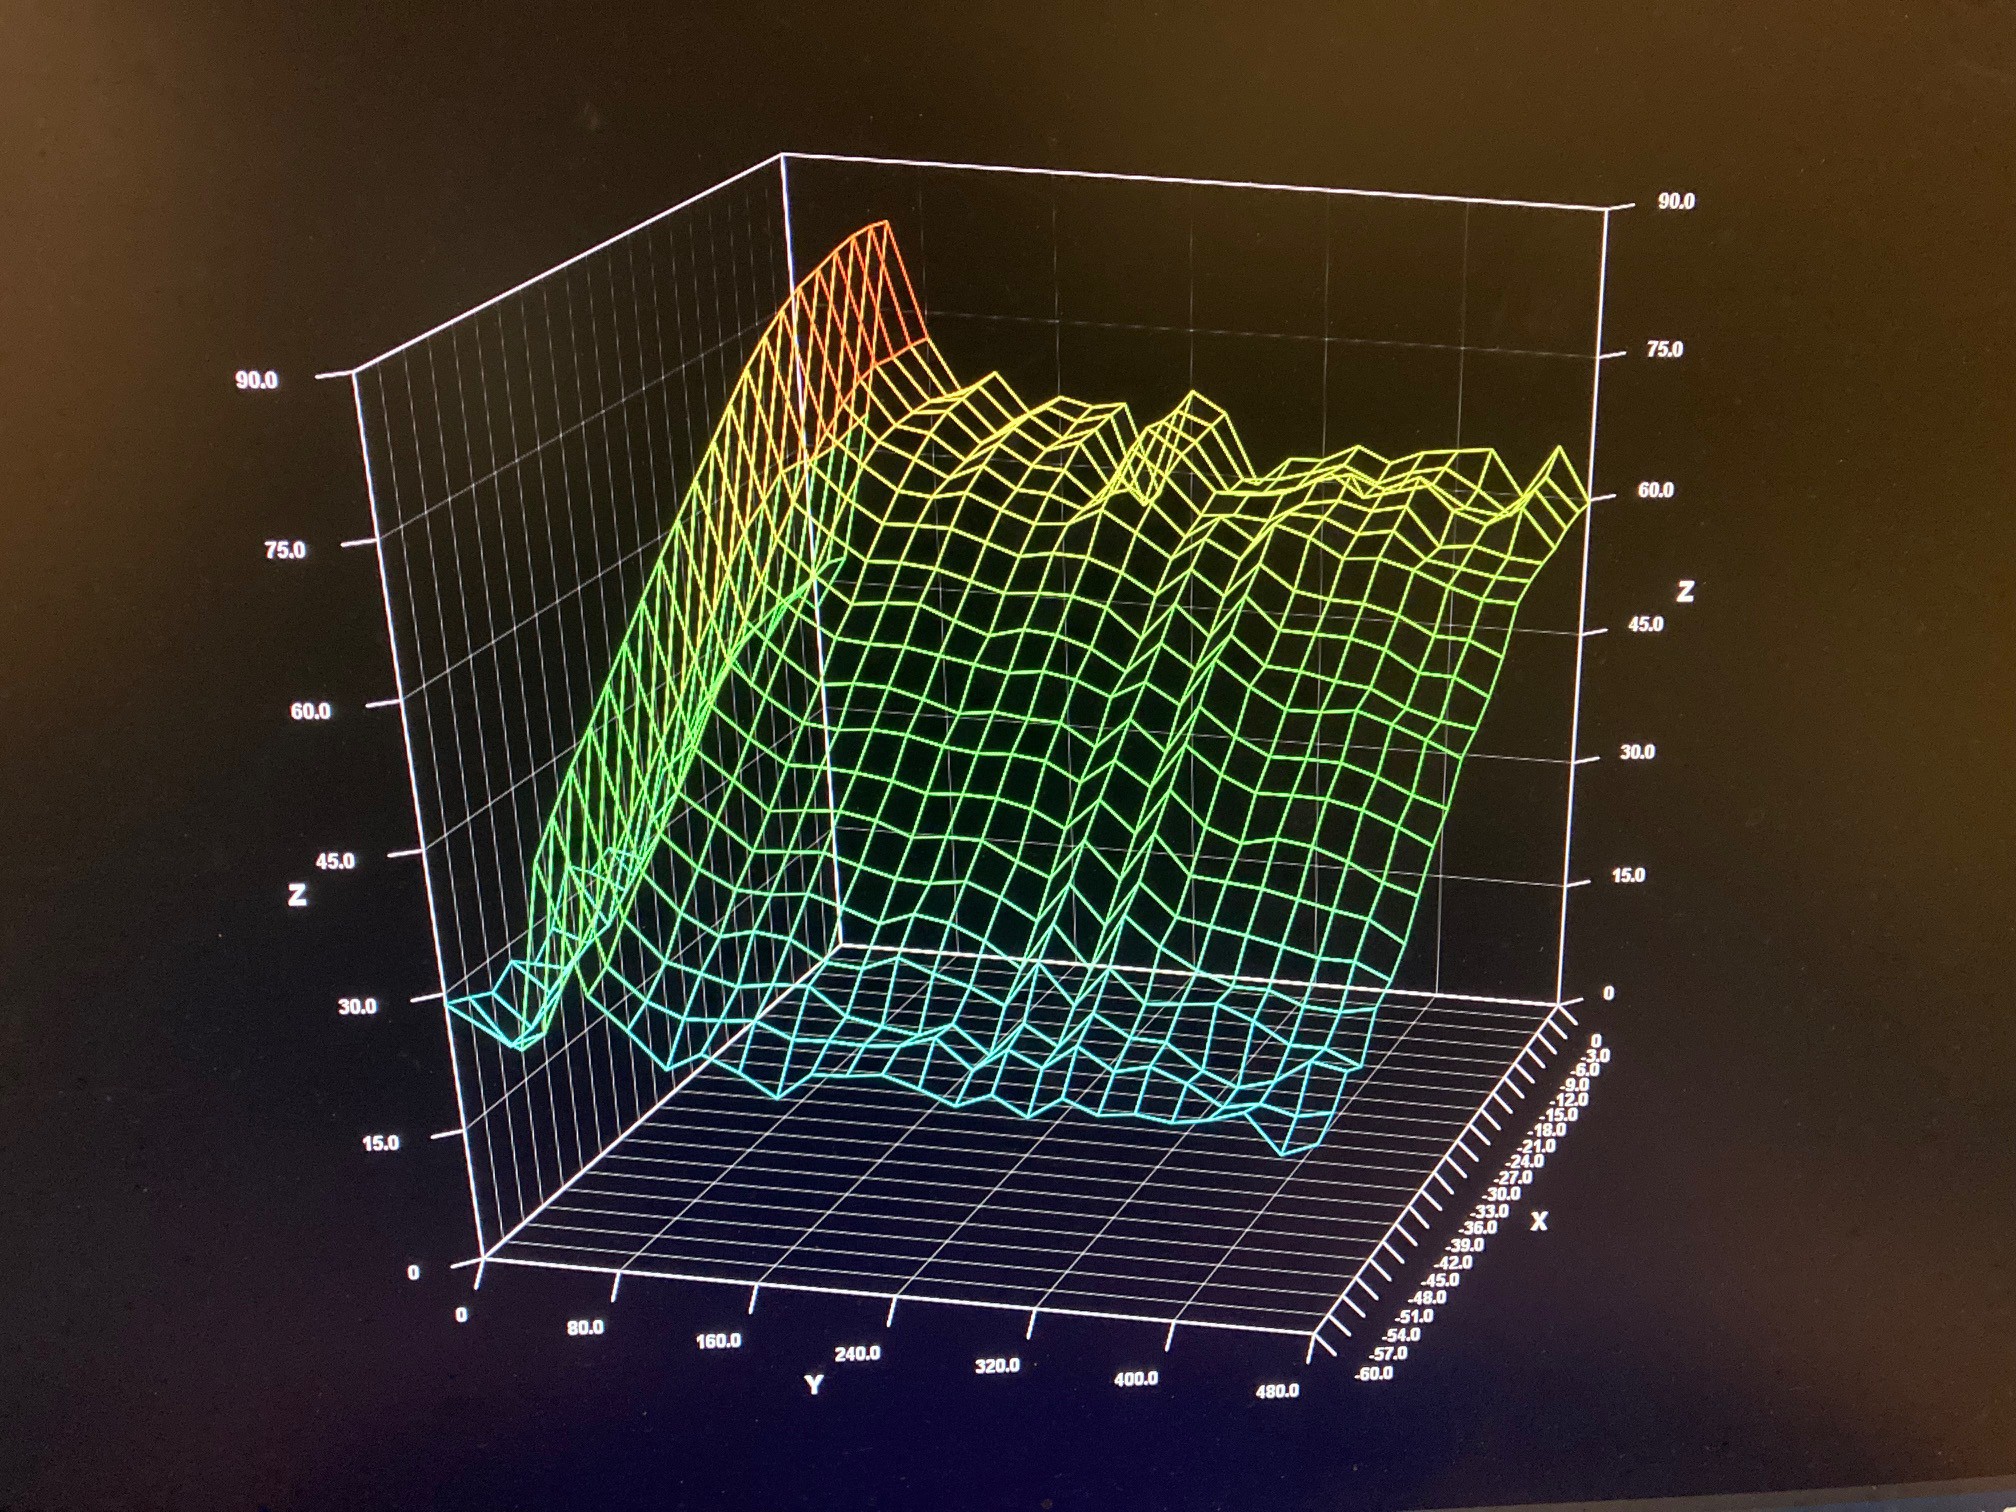
And if your curious what the output looks like, here is a plot of the frequency response of a shaker (possibly the one pictured above). X is input power, Y is output frequency, Z is output power.
![]()
-
Shaker Test Stand
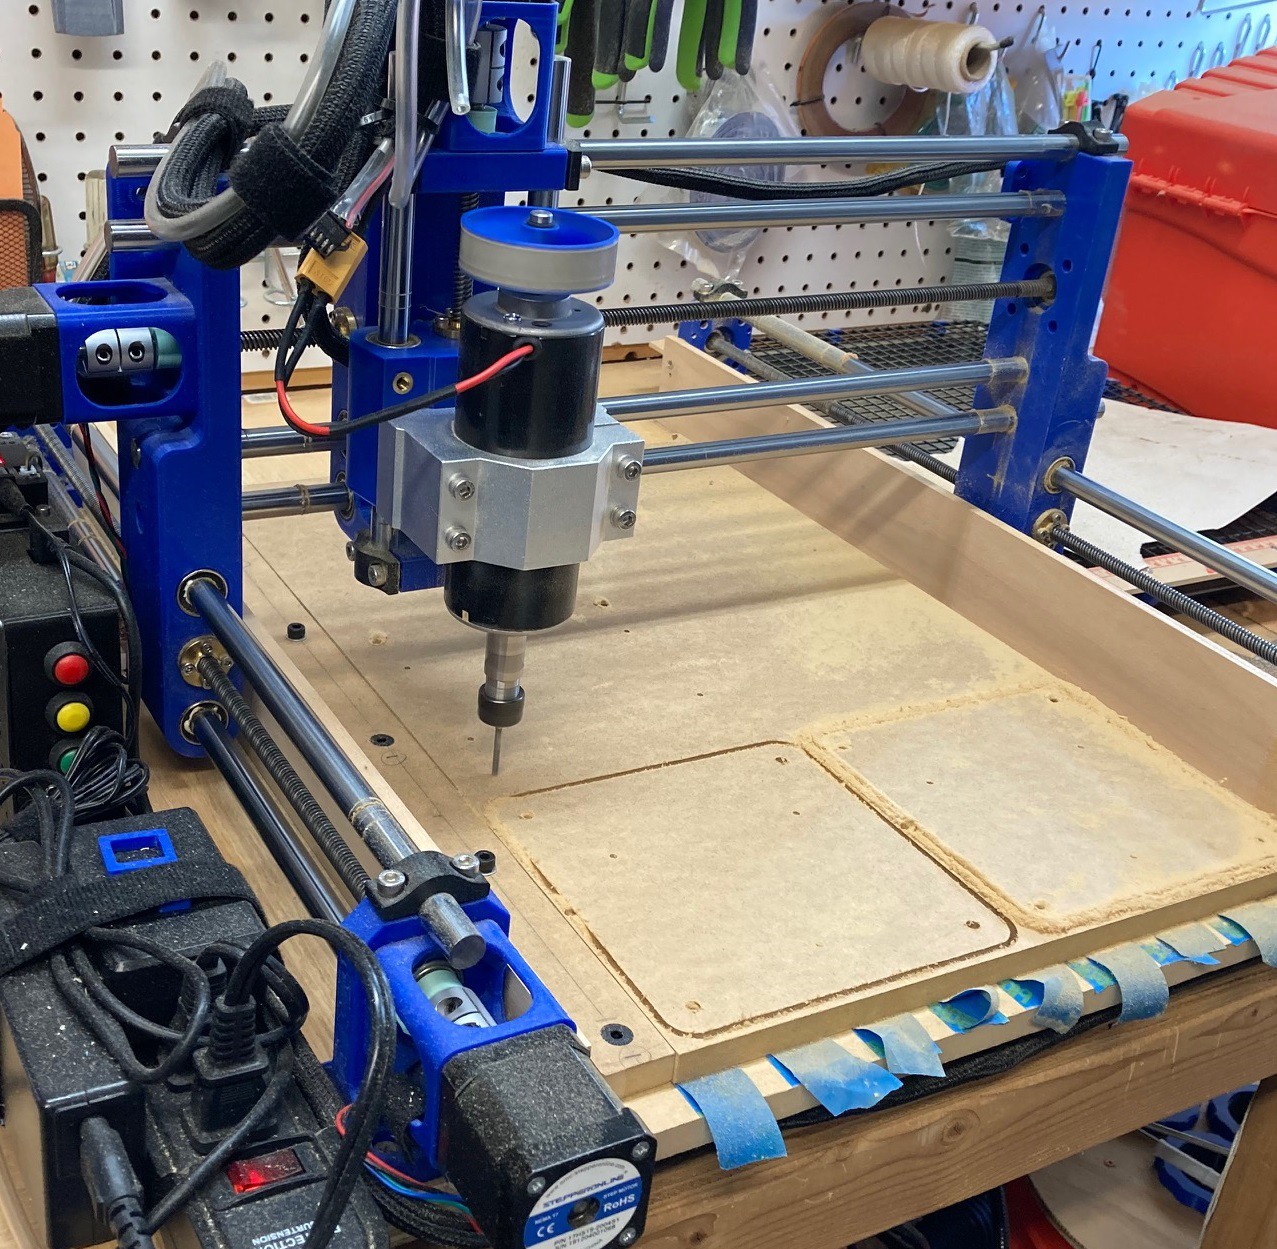
10/19/2022 at 03:39 • 0 commentsFor work I have a need to test out several different bass shaker transducers. I prototyped up a few different test stands from rough parts to get a general idea of what I wanted. Then this weekend I decided to spend some time designing up a proper test stand and cutting it out on my CNC.
![]()
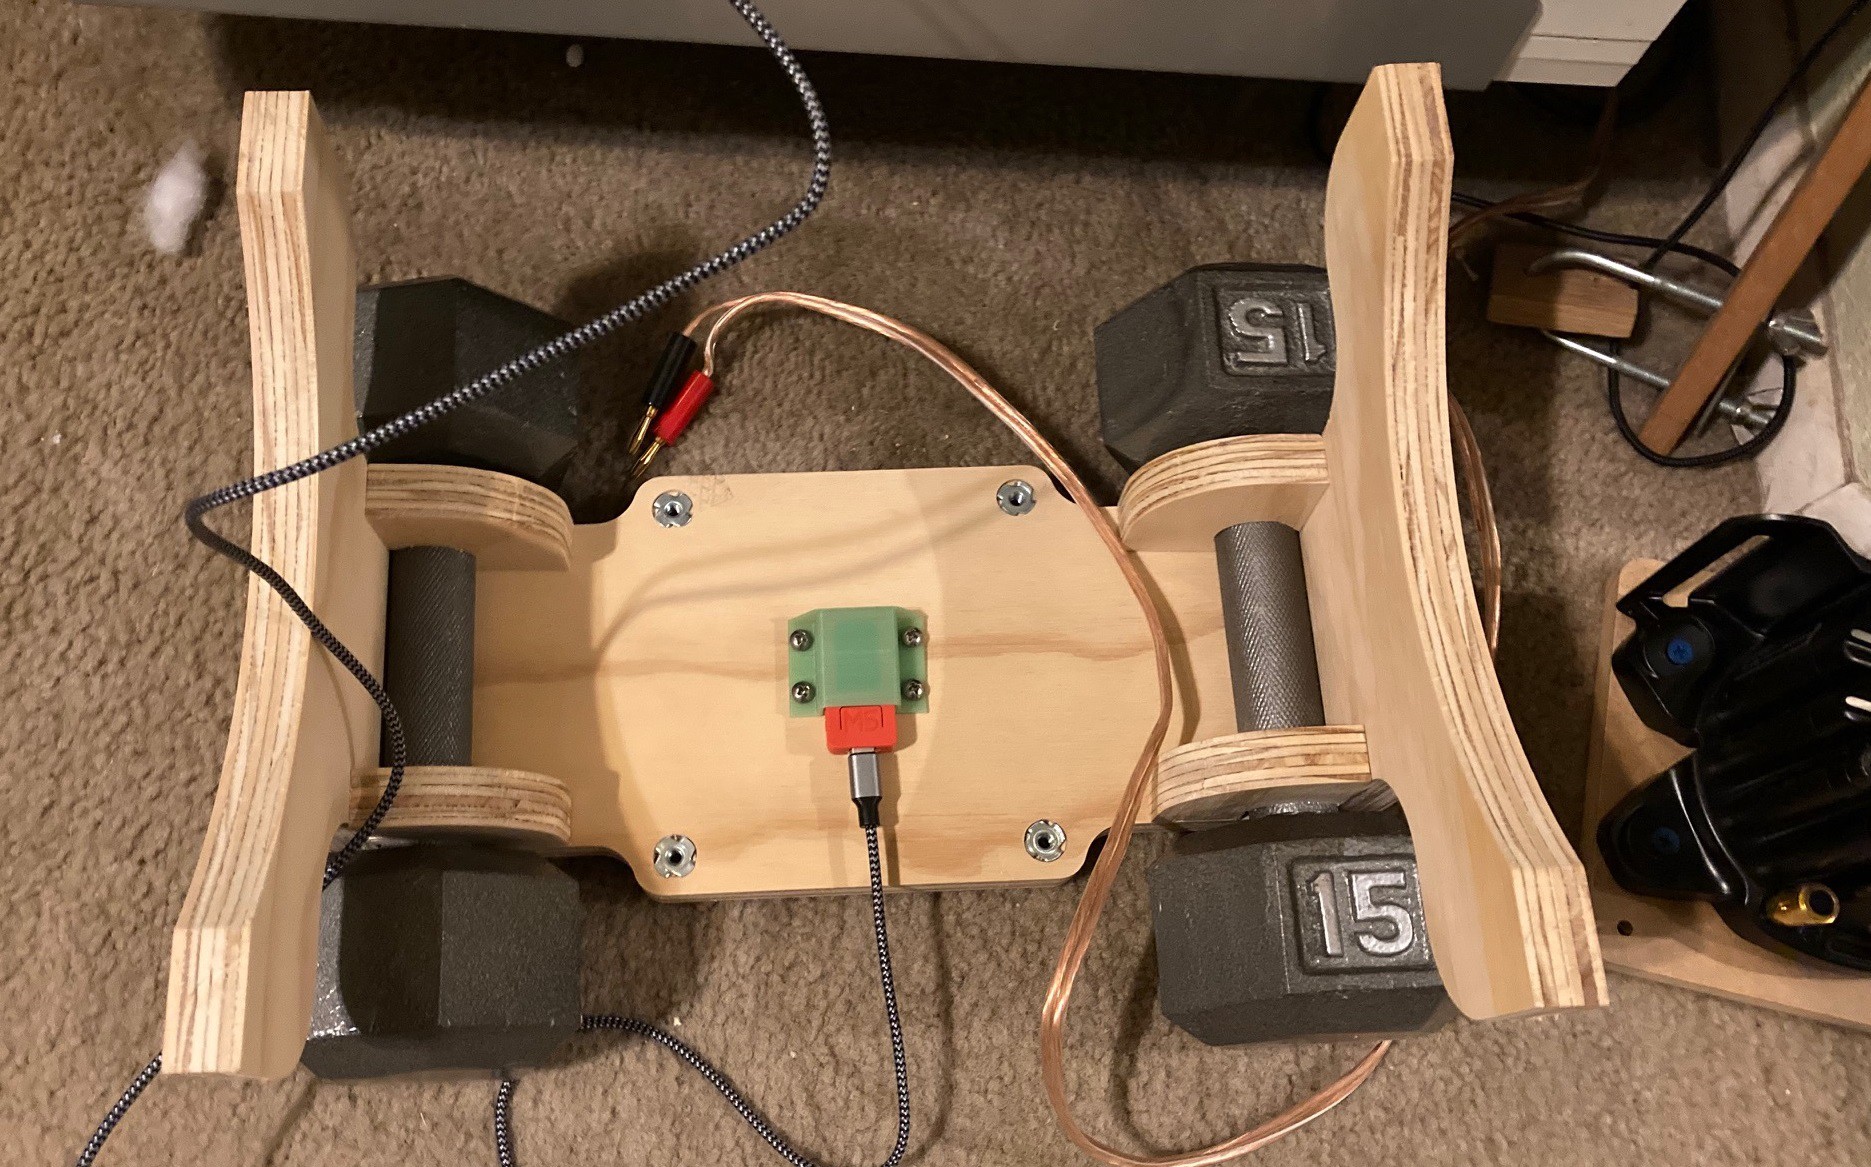
The stand has 30 pounds of weights on it to keep from rattling around. On the bottom I have an accelerometer to measure the intensity of the vibration.
![]()
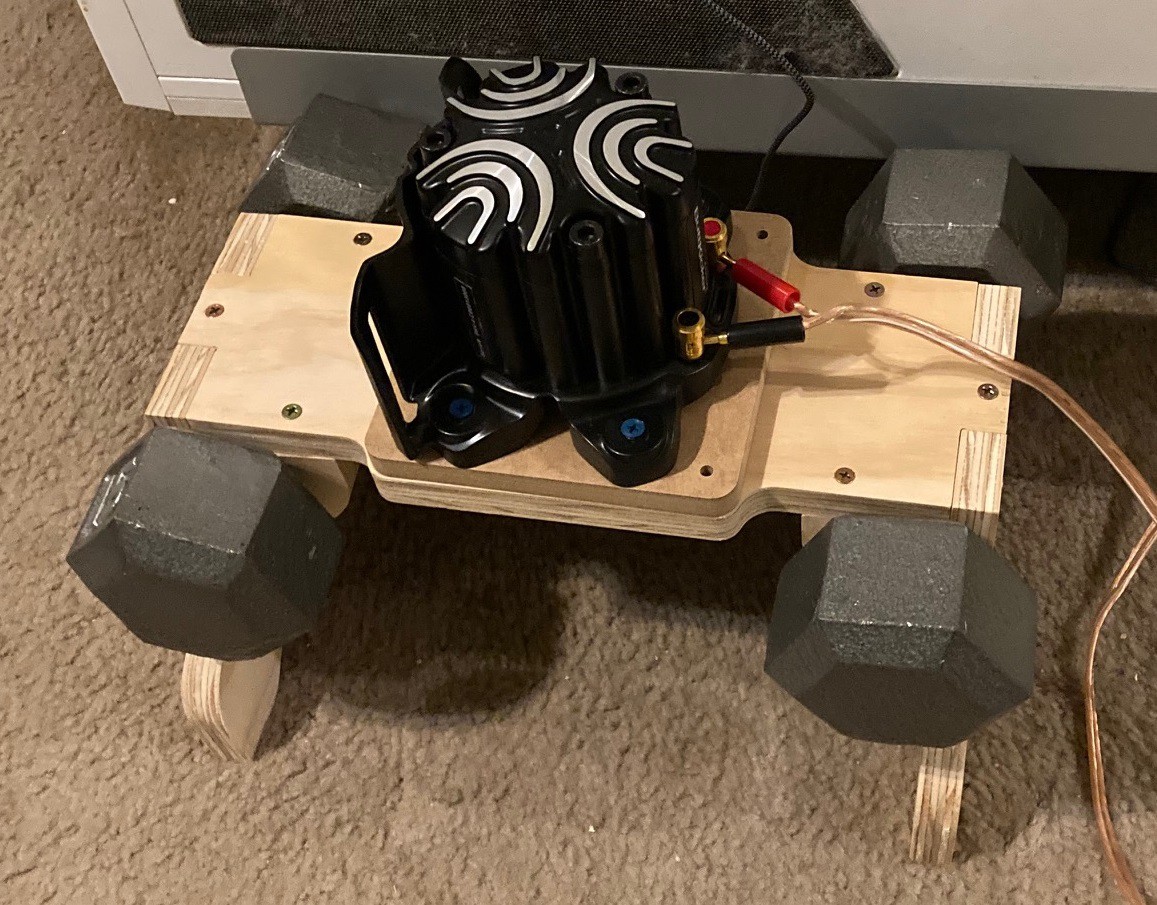
On the top you can attach a shaker to the test stand for testing.
![]()
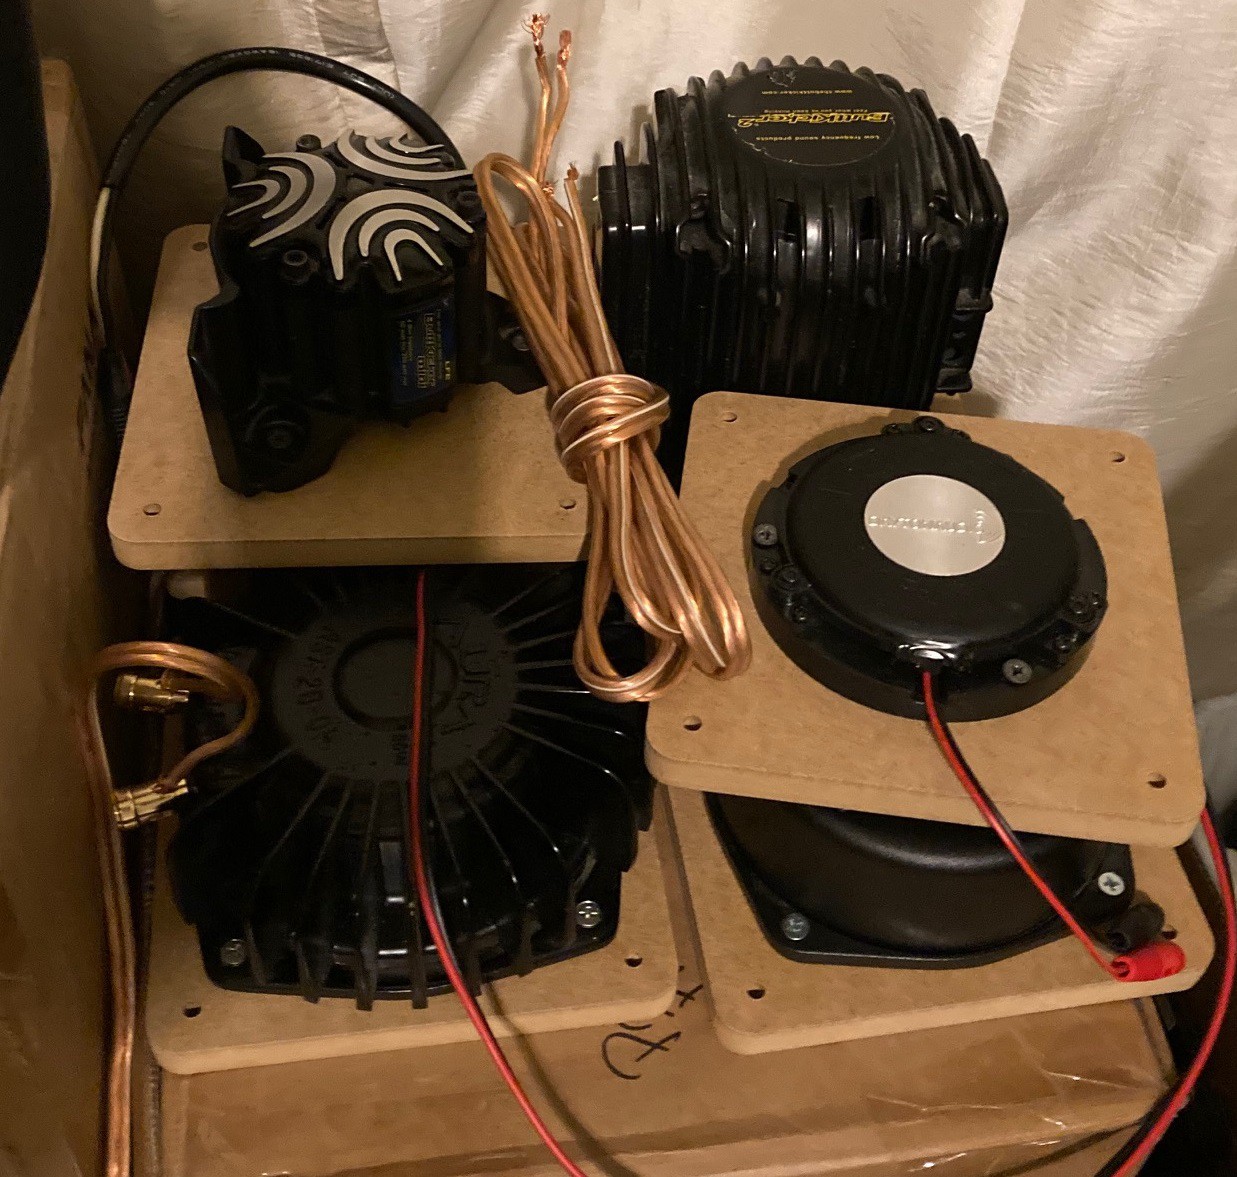
Finally I cut out a series of base plates for the various shakers I have access to so I can quickly switch them on and off the test stand.
![]()
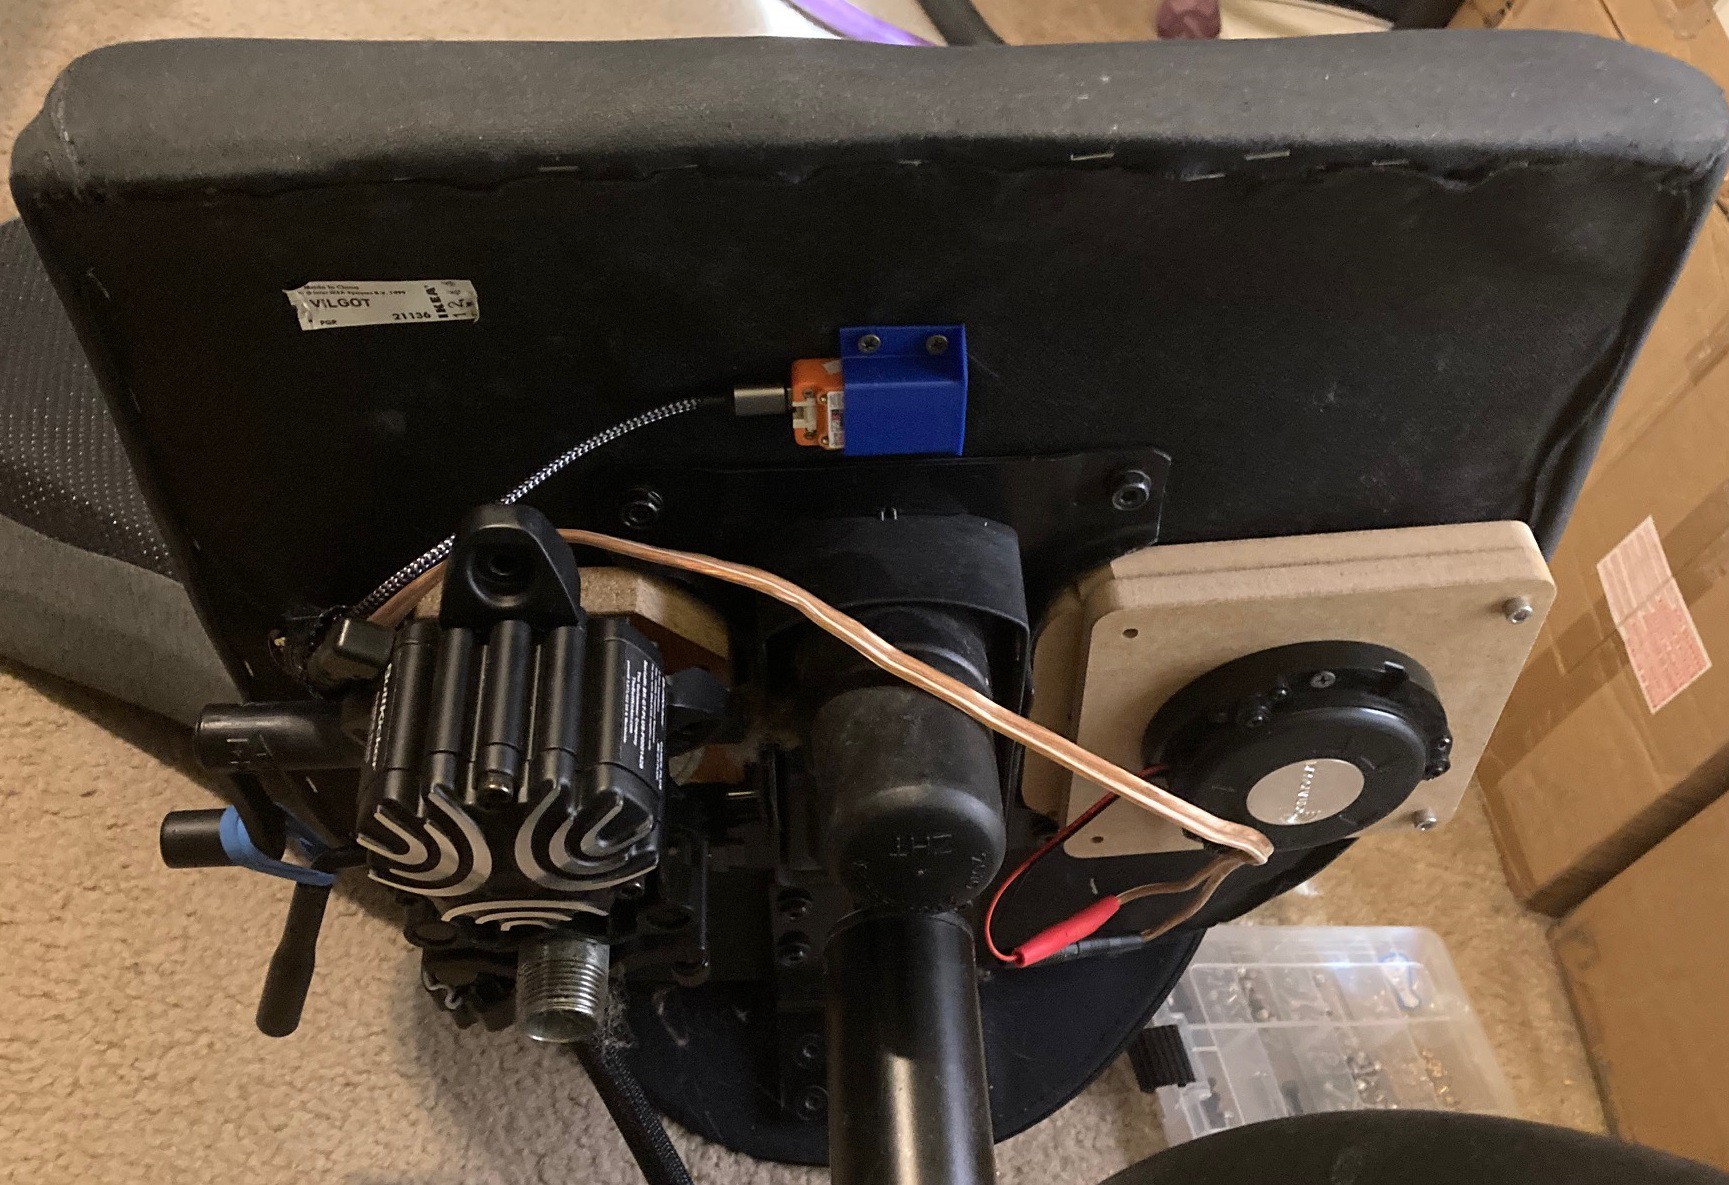
Oh, and I modified my chair to also take the same shakers so I can switch them around when developing new effects as well.
![]()
It was really nice being able to go from a design to a finished product in a couple of days. There were some pluses and minuses to the experience.
On the minus side it took quite a while to put together the drawings and verify things. It also took a while to cut the parts out. If I did not care about the details I could have banged out something about 4x faster myself with simple hand tools. Even just cutting out a part is much faster with a skill saw or band saw than the CNC, however those are mostly only good at making straight cuts.
On the plus side, with less than 2 days of effort I was able to make something that approached a professional quality build without needing the woodworking skills to actually pull it off. I was also able to add a lot of precise features with little effort. Not only can I add precisely aligned holes, but I can add curves and intricate cutouts without any thought to how hard it will be to cut out. I ended up with a level of precision that I would never be able to get on my own (I know from experience on this!). Finally for repeat cuts it was possible to churn out parts very quickly. This is where the CNC really shines, it is capable of churning out the same part over and over with exacting precision.
-
CardsUI
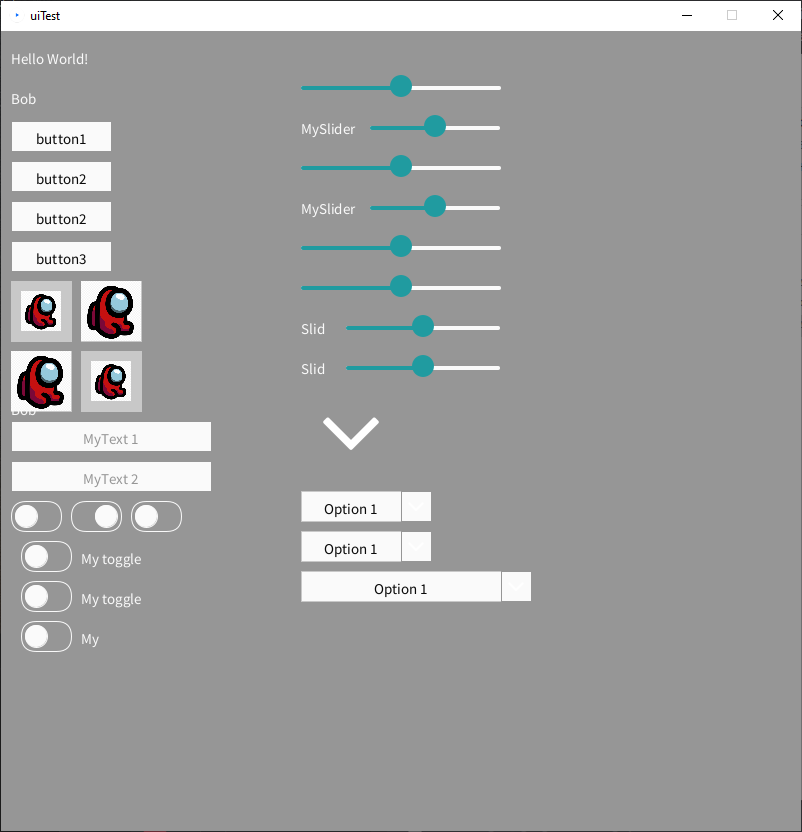
10/19/2022 at 03:18 • 0 commentsI have not been posting here much, but I have been busy working. I have been developing a small test utility for work on the side using processing. I needed a UI for this utility and processing does not provide one, so I turned to Cards_UI a slick simple little inline UI.
Unfortunately Cards_UI has not really been updated in several years and it had some bugs. So I spent some time cleaning it up and writing a simple test script to try out all the various UI elements. Here is the result of that. Feel free to use it if your interested, I maintain no rights to it, although the original author retains there rights I'm sure.
![]()
-
UGS Take 2
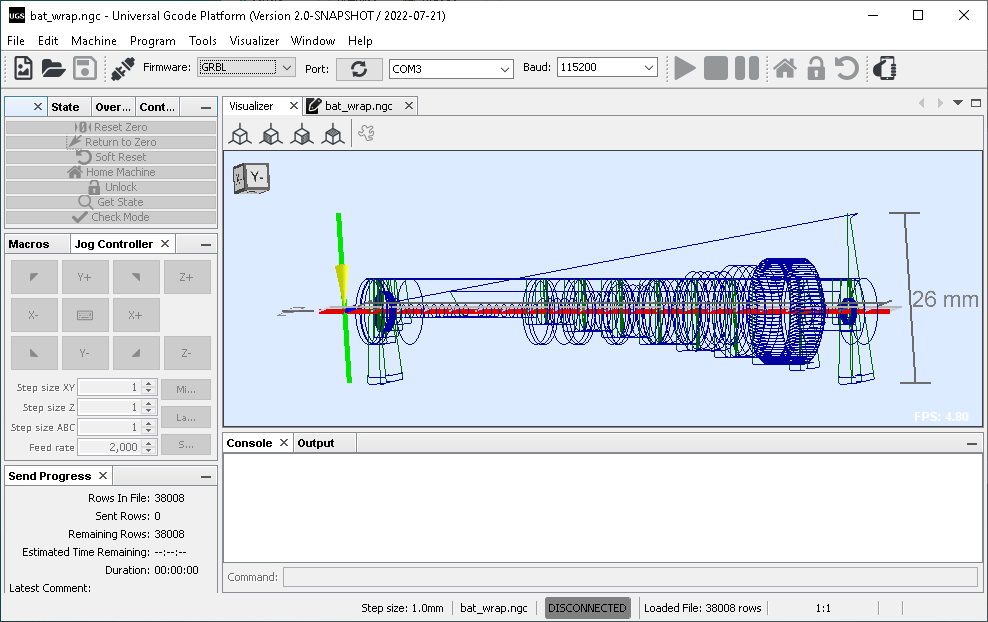
08/10/2022 at 01:15 • 0 commentsSo UGS came through again and fixed my spiral bug. Things are looking even better when showing my bat project. They are looking good enough in fact that it is becoming clear I have an issue with my zero position and need to circle back around on my own code to work out some issues.
I'm sure there are still little bugs hiding in here, that is how things go. But from my initial inspection it now appears to be rendering everything correctly.
You can grab the fix from the latest UGS nightly build here.
-
UGS
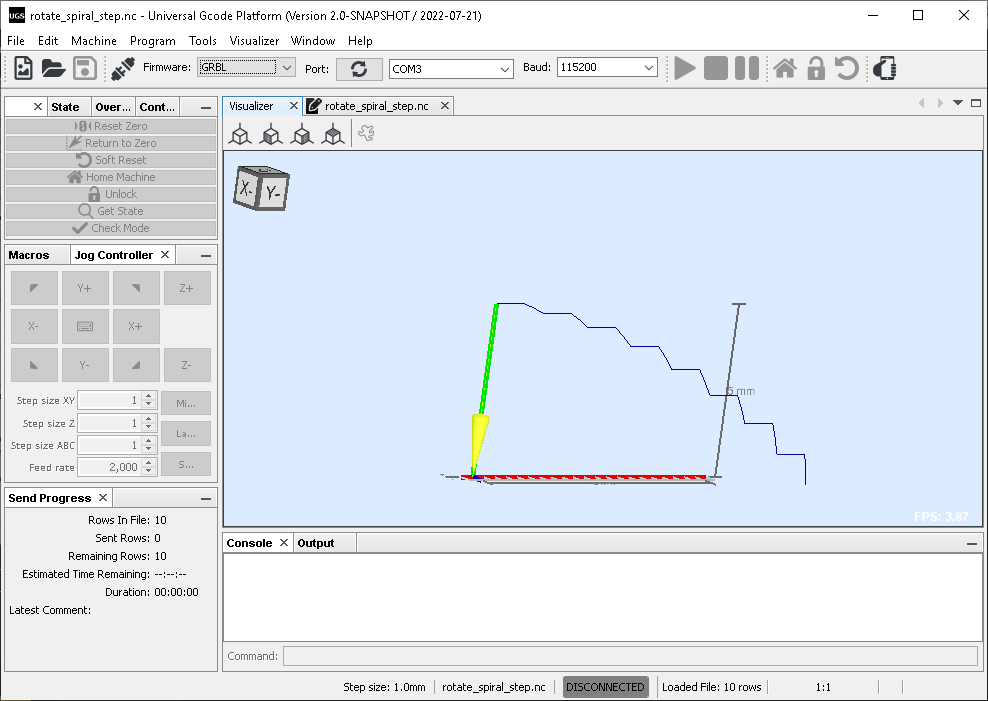
07/22/2022 at 04:41 • 0 commentsI put in a bug log a while back reporting that UGS was improperly rendering rotary gcode. Well they really came through and put in a fix a few weeks ago, and you can now download the fix from the nightly build.
Here it is rendering my bat project, you can see it is doing a lot better than previously.
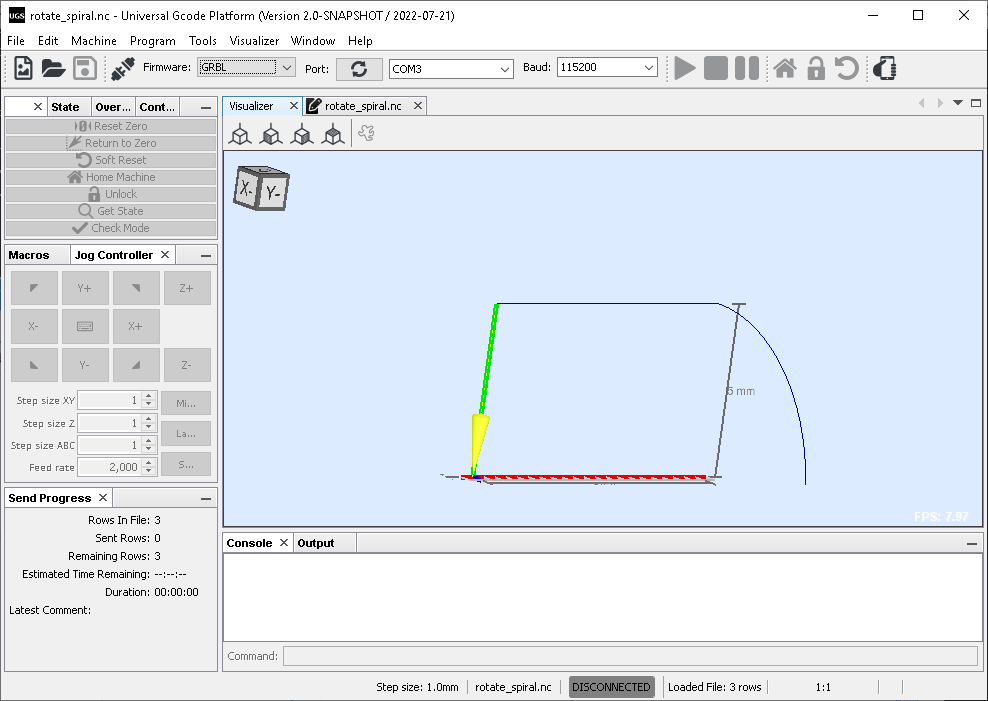
It is much better, but it is still not perfect. Here I'm trying to make a 80 degree spiral but instead the x and a axis are moving one after the other.
And here I have sub divided the spiral into smaller segments. You can see the intended shape better, but it is still just stair stepping rather than spiraling.
You can download the above example code here.
-
Ding Ding goes the Trolley
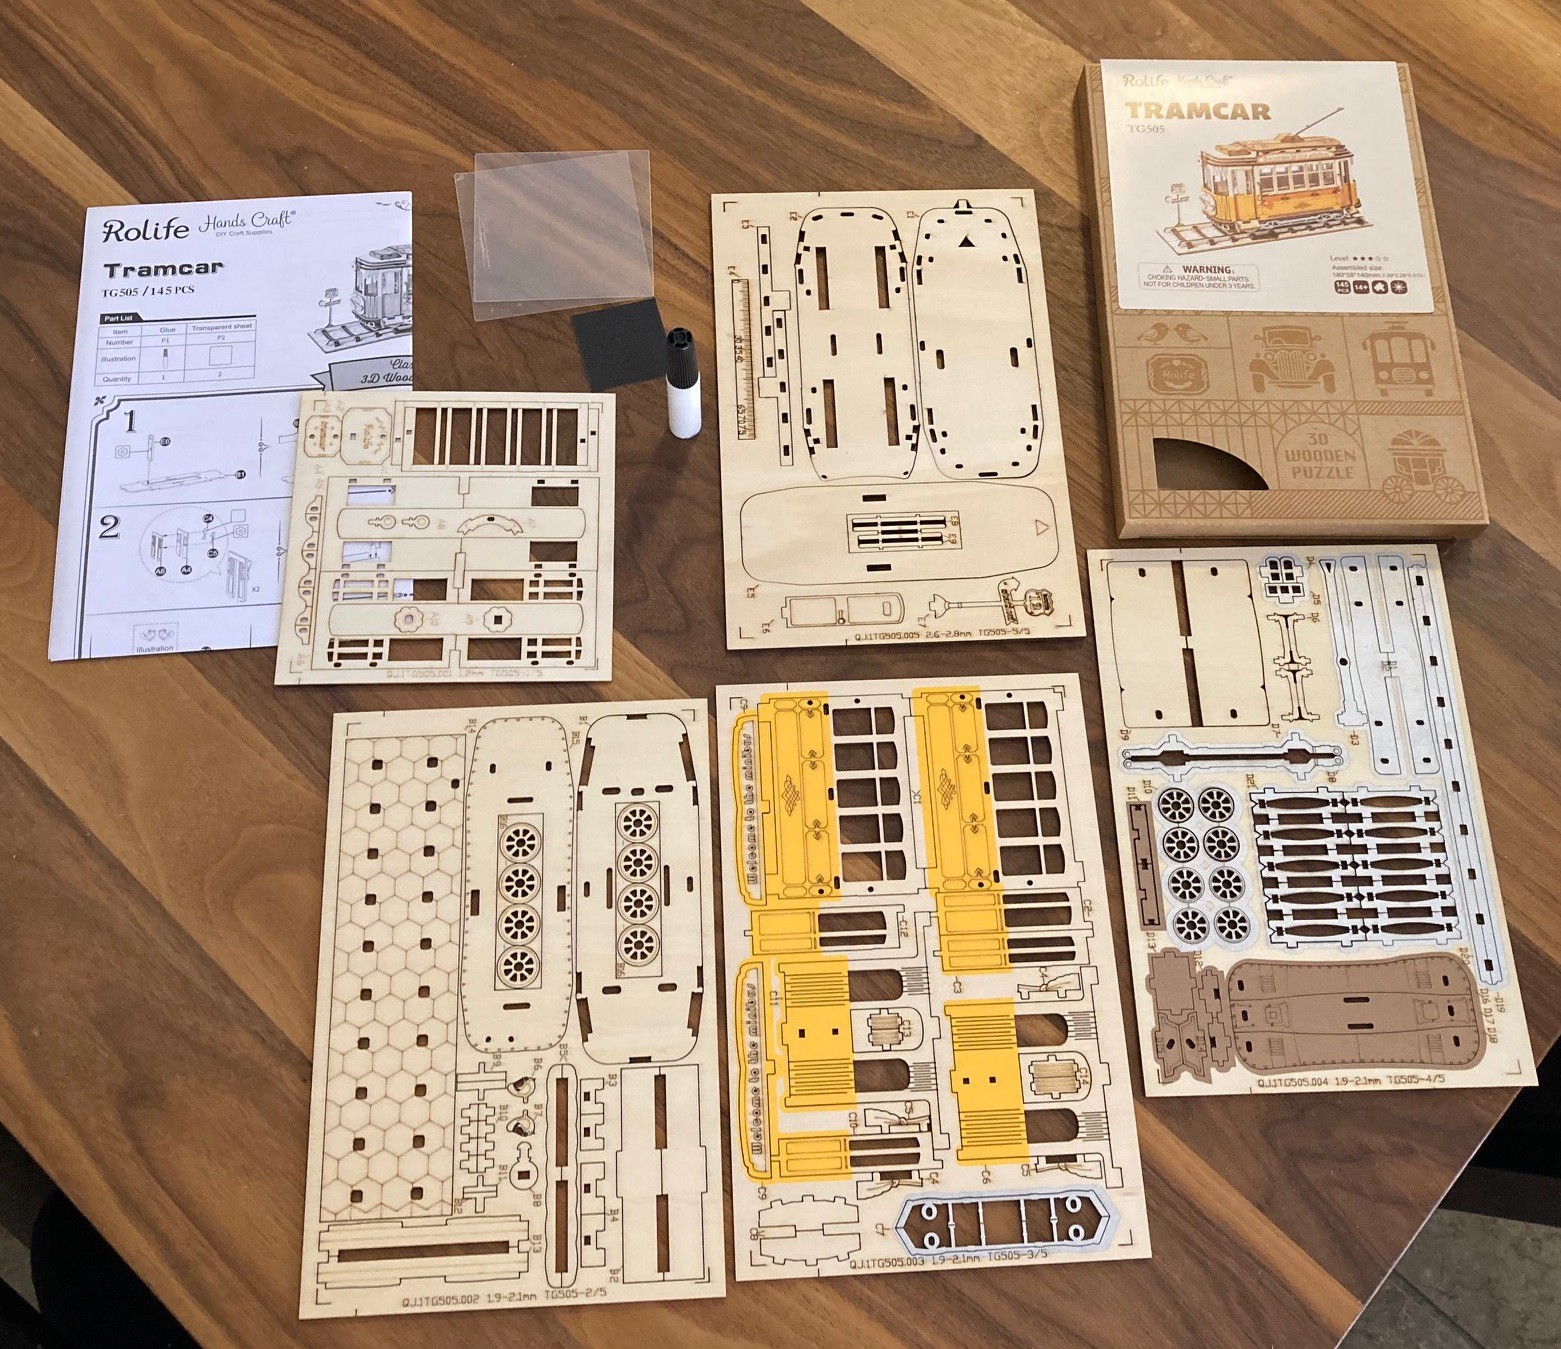
07/06/2022 at 03:24 • 0 commentsI took a vacation with my family's (yay!) and picked up a Rolife Tramcar TG505 laser cut wooden model as a small souvenir.
![]()
For the $15 I spent on it, it came with a lot of stuff. There were 5 sheets of laser cut wood and two pieces of Lexan along with the glue and sandpaper needed to assemble the model. It took the better part of a day to put together with me fiddling on and off with it as parts dried. It was a fun experience and it turned out nicely.
![]()
One of the sheets is 1 mm thick, 3 were 2 mm thick and one was 2.5 mm thick. They used a neat trick on the holes. When a part needed to pass through a sheet the hole was cut square, but when it needed to connect to a sheet the hole would be slightly rounded to create an interference fit. On parts where only 3 sides were available a small dimple was added instead. This allowed the model to hold together quite firmly without glue. I used glue anyway but I think it would have completely held together without any glue.
Anyway it is a fun little kit and they seem to have a lot of even bigger models. If your interested in laser cutters you can look to them for inspiration, or for a fun afternoon distraction.
-
Small Notes
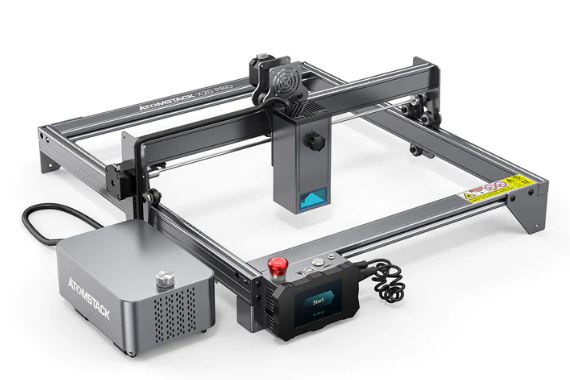
06/19/2022 at 00:46 • 0 commentsSo Atomstack has finally released there 40 watt quad diode laser as part of the X20 Pro kit. This has a 400x400 mm working volume, built in air assist that can hit 15 psi, an offline controller with LCD screen, and of course full support for LightBurn, all for $1,100 shipped. Combining the 20 watt output with the much smaller spot size over a CO2 laser, I think it is safe to say this is more powerful than a K40 laser. In fact the K40 is a poor comparison. For starters most K40 machines are really 30 watt machines, next they have only a 300x200 mm working area, finally they lack support for LightBurn, any safety, and basically any support.
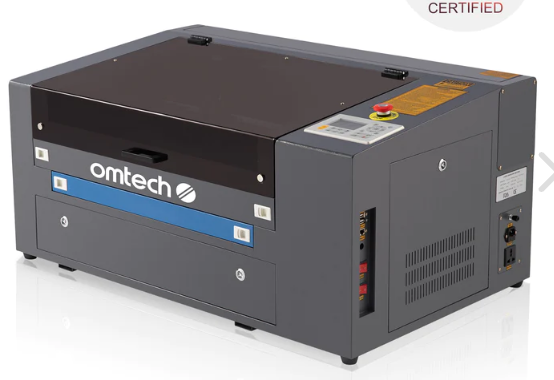
A better target for comparison is the $2,100 Omtech MF1220-50R - 50W laser. This has a similar working volume, built in air assist, and proper light burn support. The Atomstack lacks an enclosure, and work bed, but you can add both of those for $500, bringing the price up to $1,600. Ignoring shipping, that brings the Atomstack to within $500 of the Omtech, but at around 1/2 the optical power.
The big benefit for the Atomstack is ease of use, no more need for water cooling, simpler optical path. The down side of course is lower optical power, and no support for cutting clear plastics.
Anyway the point is not that they are equivalent, but that they are getting close. The Atomstack is the premium laser from the company and very new, we can hope that in a few years this laser power will find its way in lower cost machines. It is conceivable that we could see a fully enclosed 20 watt diode laser for under $800 in a few years, making it a much lower cost way to get into lasers.
Atomstack also has a new $180 air filter coming out. This is basically a large room filter with a special cartridge that has better support for smoke than an off the shelf unit. This is a good idea, hopefully we see more systems coming with air filters, hopefully that can lower the cost.
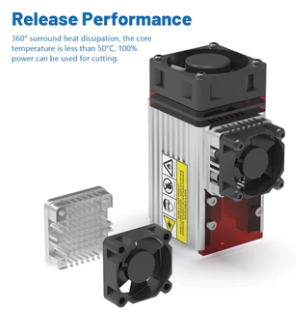
Neje has released a new heatsink for there A40640 module that helps cool the laser module more. This sounds like a good idea to me, the face of the diode gets quite warm. At $20 it is a bit pricy, but it includes a soldering iron, proof that this is a bit of an afterthought.
MultiBot CNC v2
A low cost 3D printed CNC that can be built with minimal tools yet is capable of great things.