David Tucker
-
YouTube
02/19/2021 at 04:04 • 0 commentsSam Parlatore put up a great series of videos showing how to build the MultiBot. He has also been a great beta tester and helped sort out several issues. You can view the first video below.
-
Behold the Junk-inator
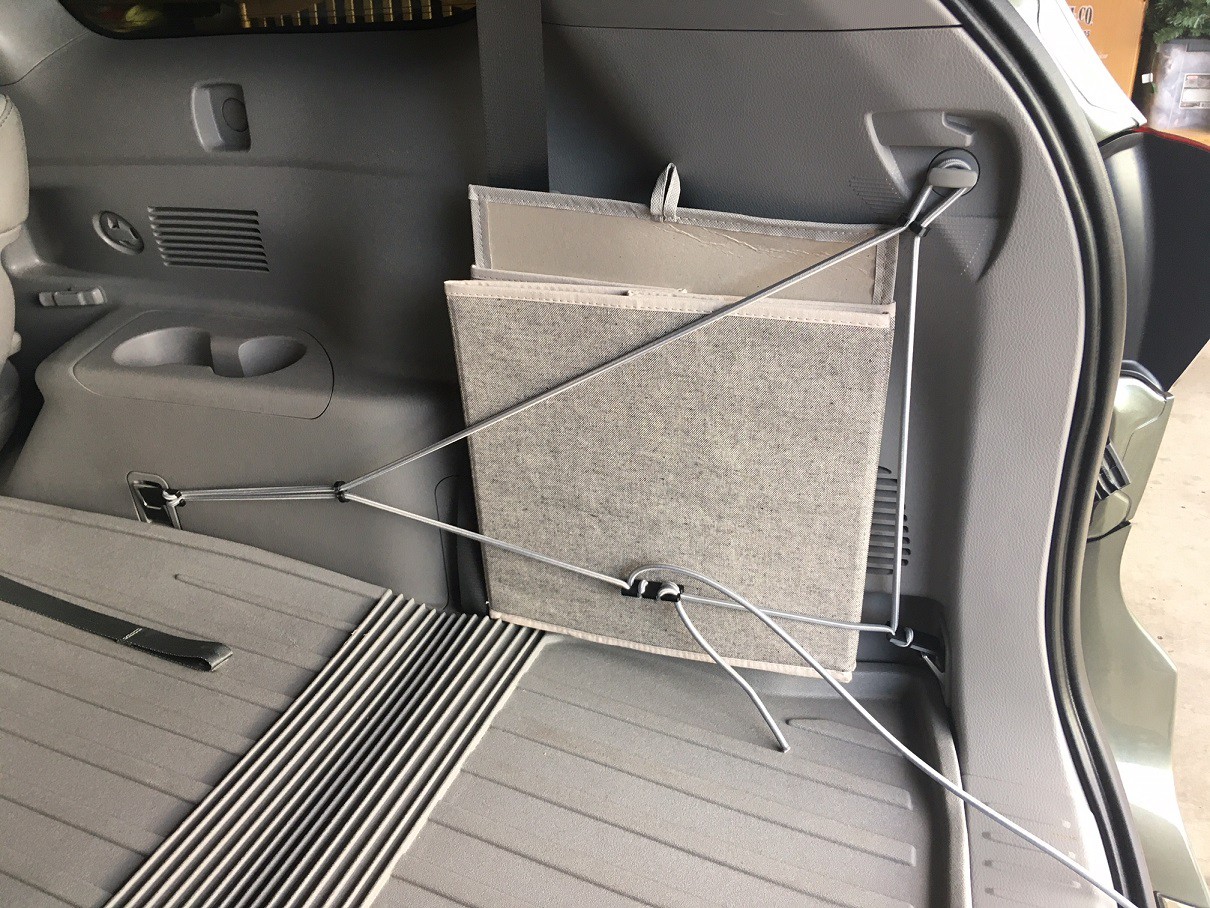
02/02/2021 at 05:30 • 0 commentsAfter 20+ years and 350,000 miles my venerable Toyota 4-runner finally gave up so we picked up a 2017 Toyota Highlander to replace it. I wanted a simple way to secure small items to the side of the cargo bay. After looking around for a while and finding nothing I came up with my own design using 3D printed clips and some 1/4" bungee cord. I'm still trying to finalize the final layout, but I'm happy with the results so far. It was important to me that this would be easy to take down, and that the rear seats would be serviceable with this installed.
You can grab the files from Thingiverse if your interested in them. https://www.thingiverse.com/thing:4745781
![]()
![]()
-
Drum sander
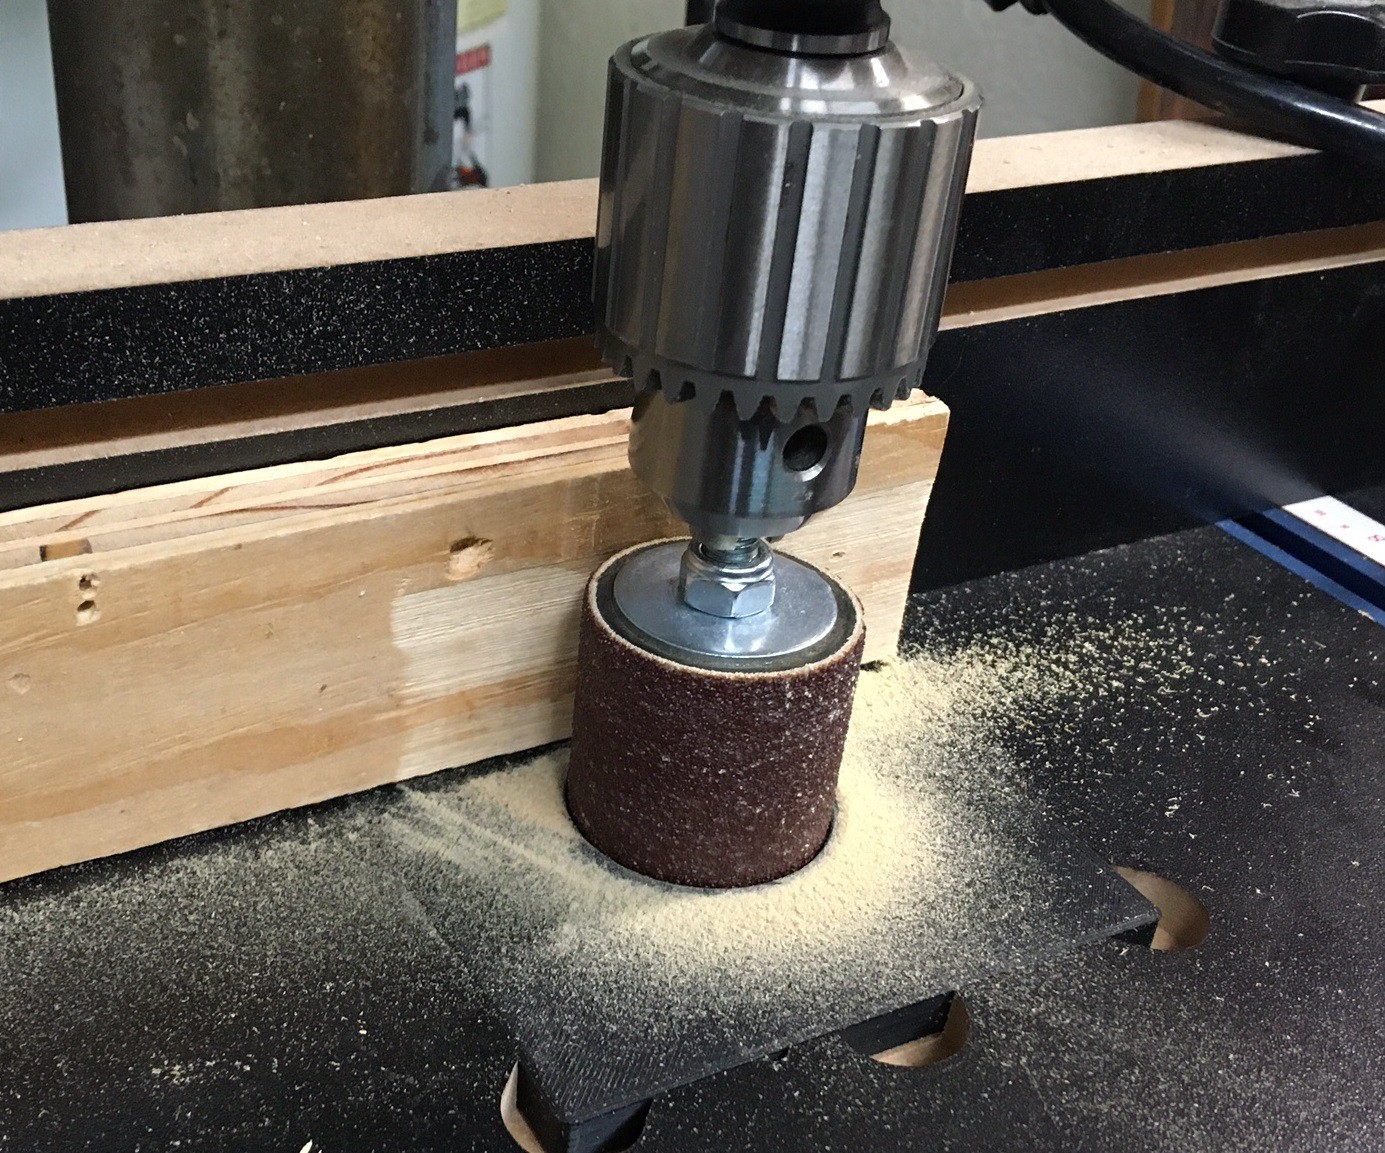
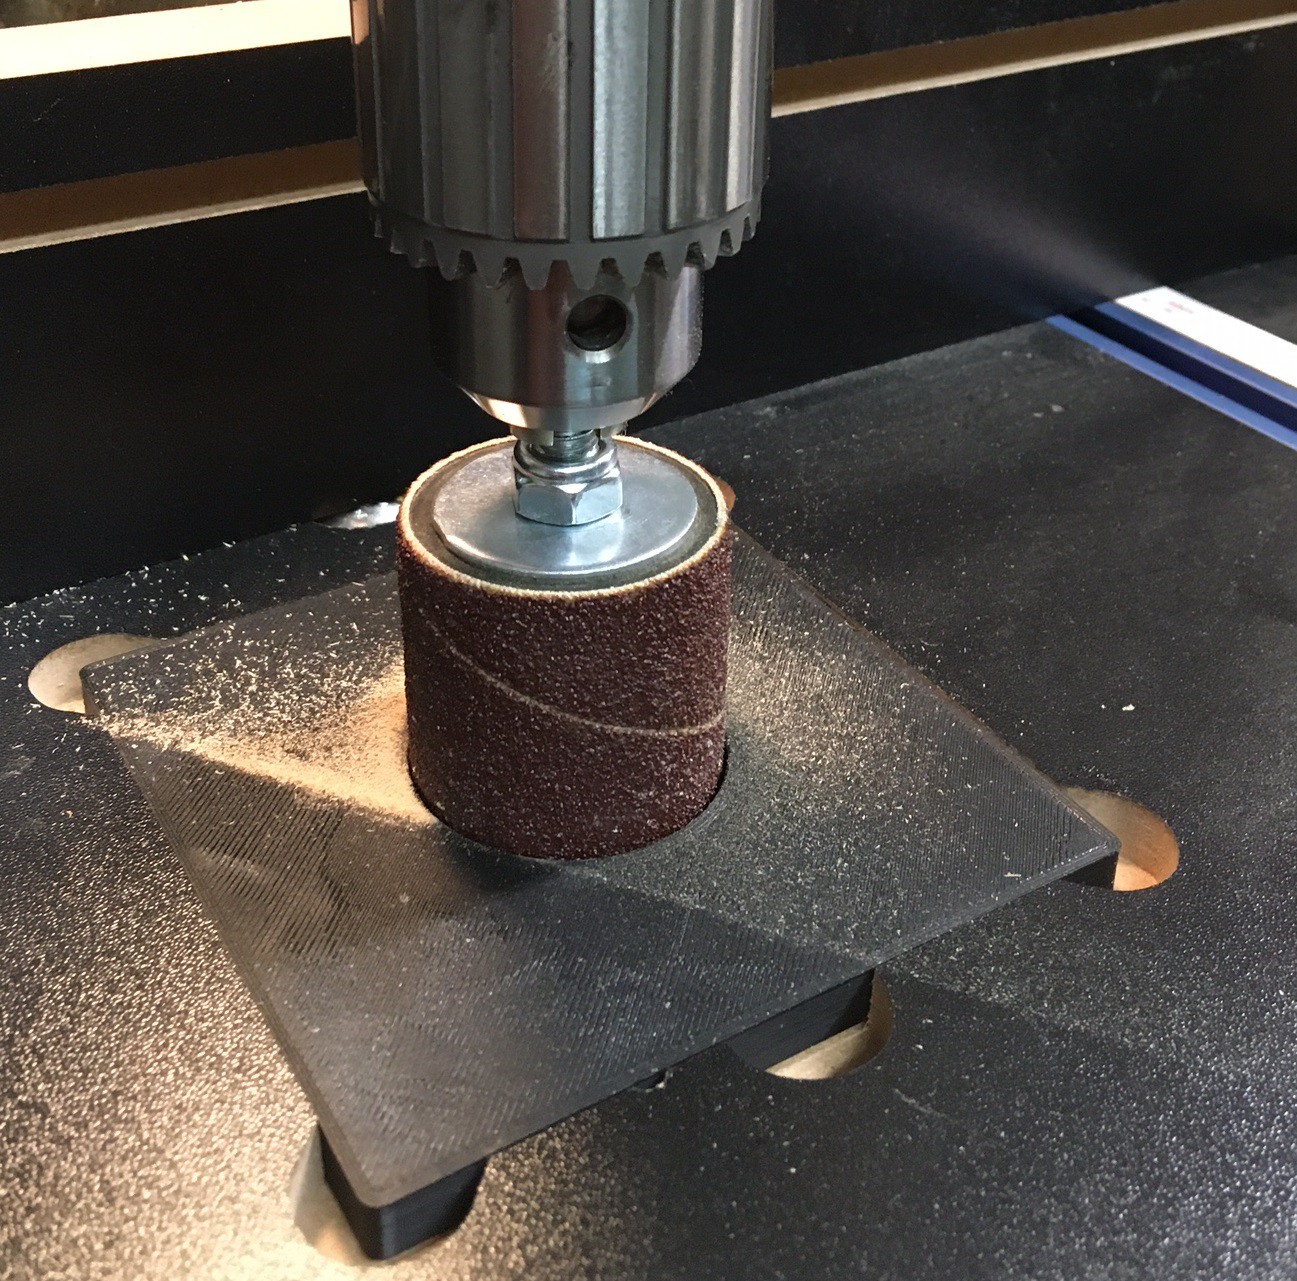
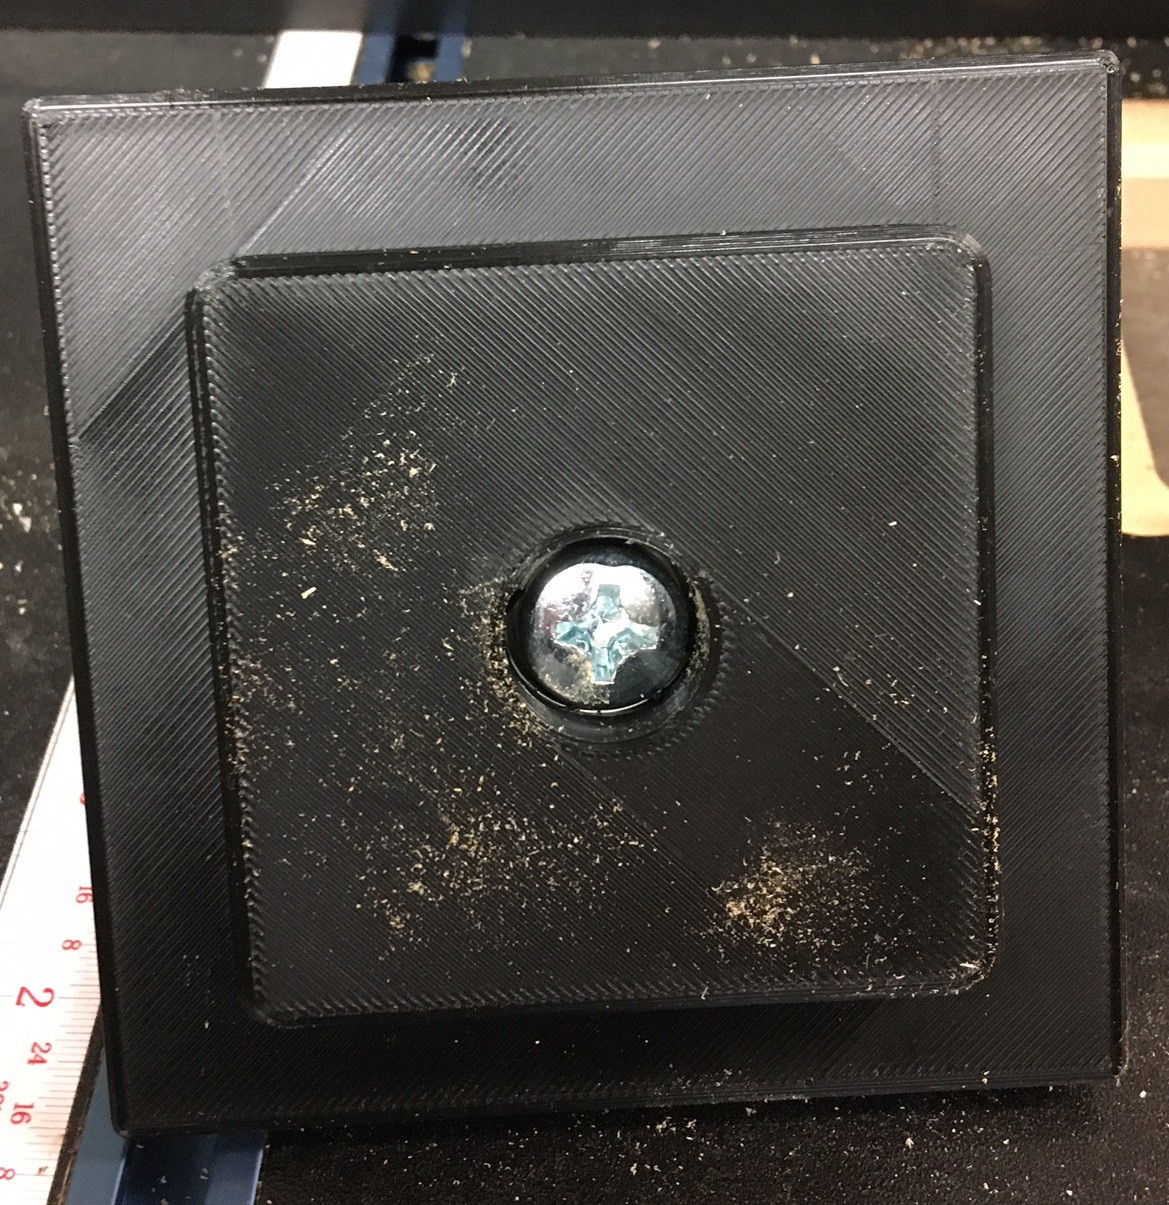
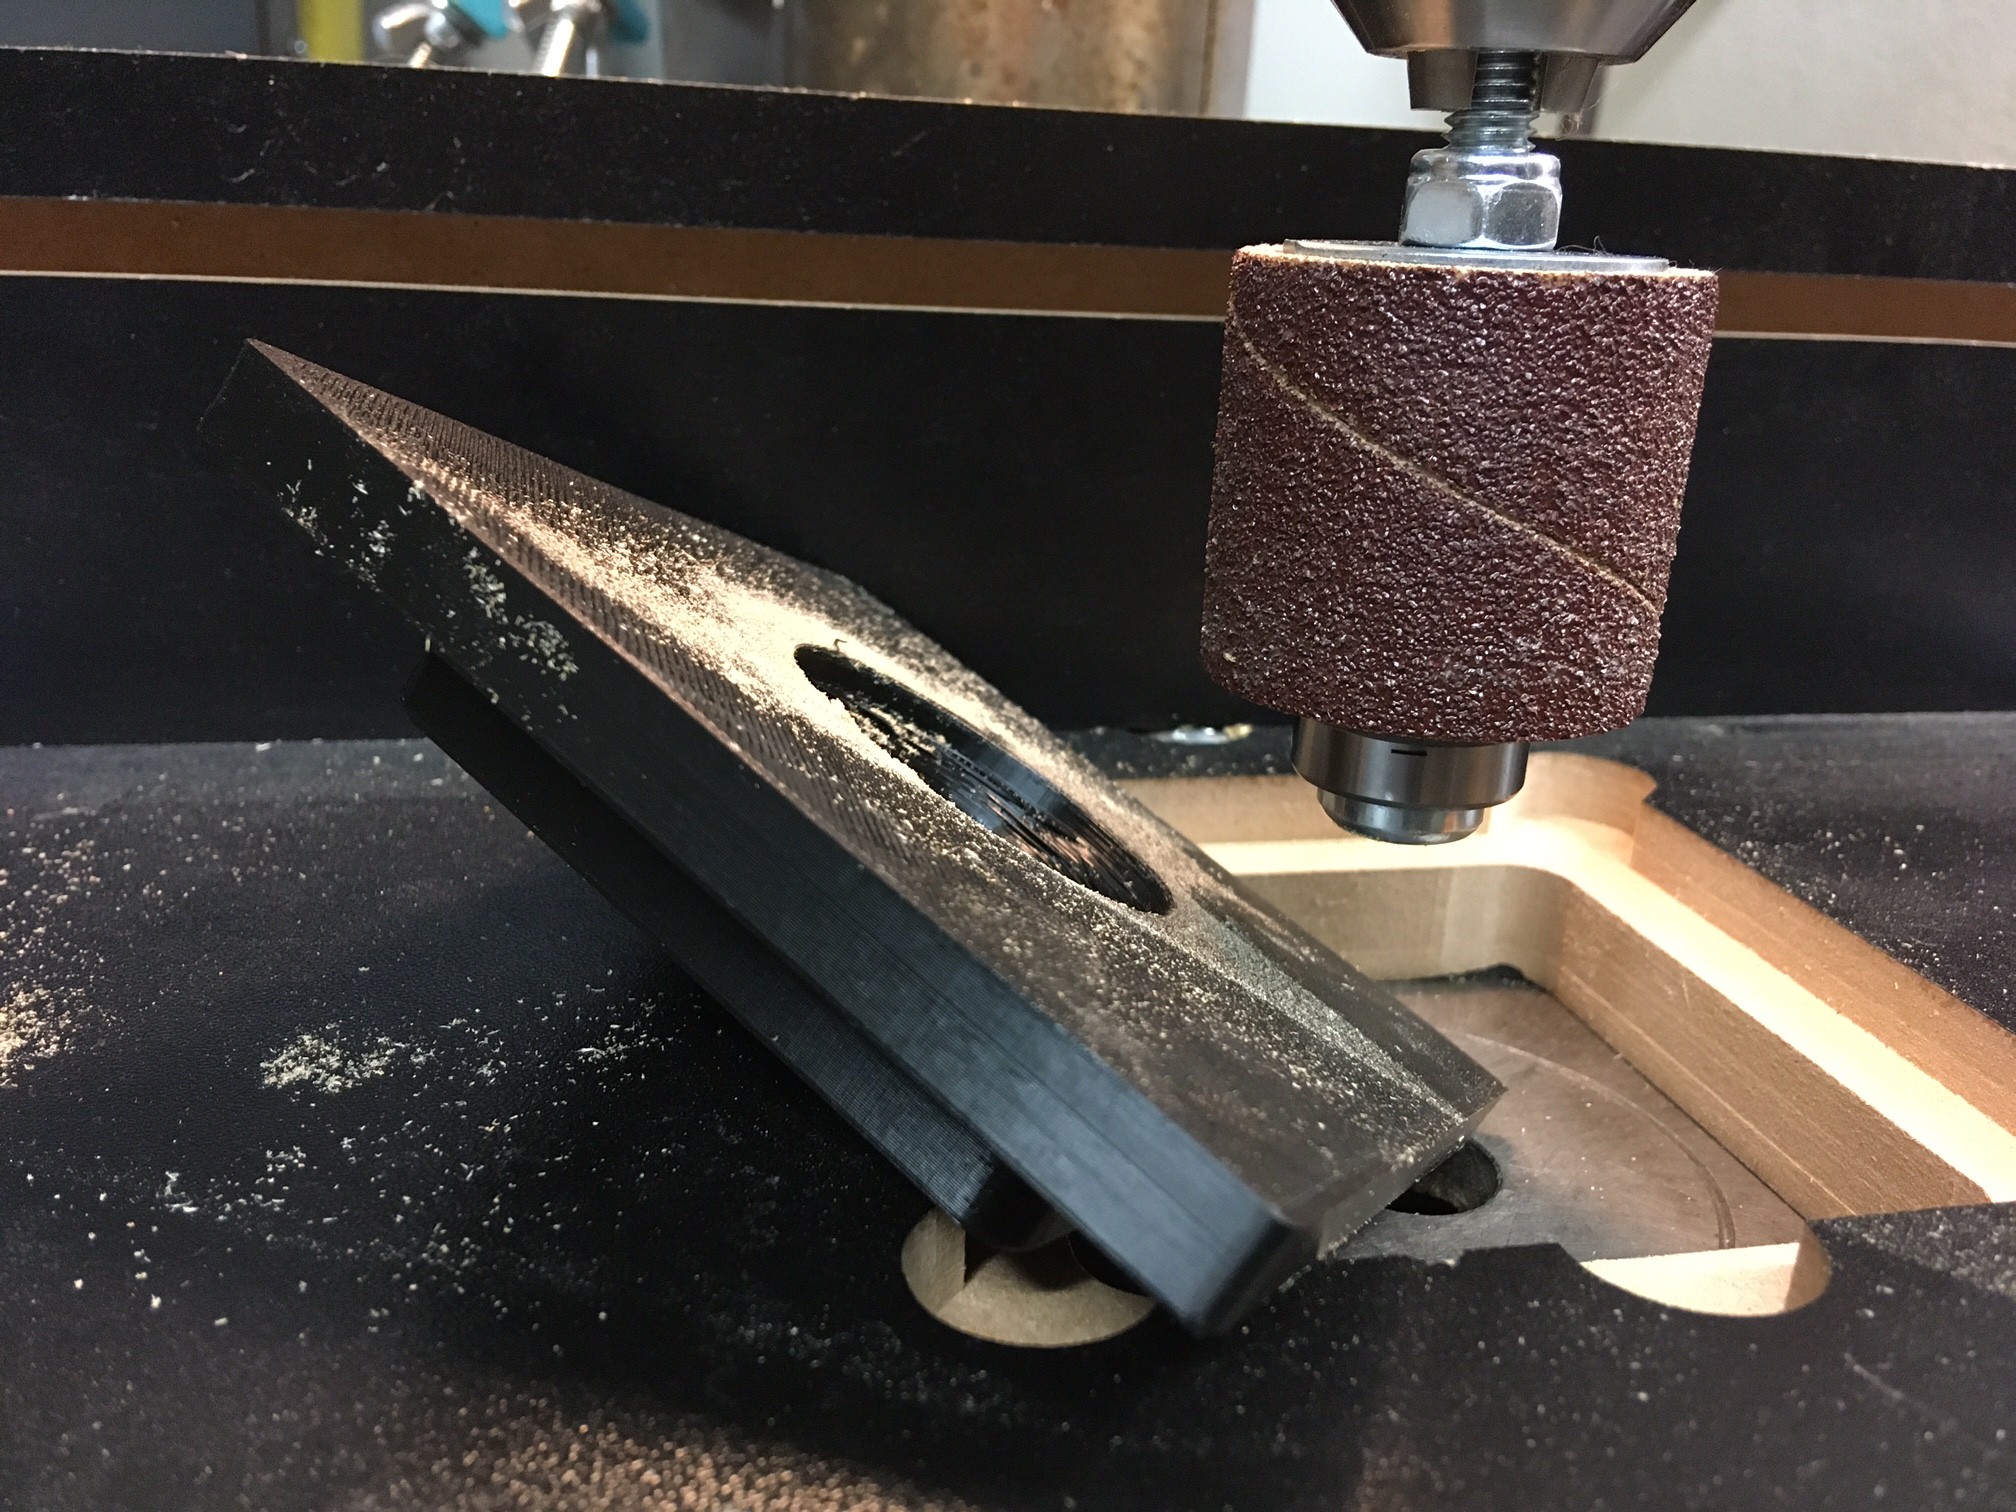
01/08/2021 at 01:09 • 0 commentsVacation is over and life is getting busy again but I found the time to make a small project. I made an insert for my drill press table that allows a drum sander with a bearing to be recessed in it. My drill press has a press fit chuck and I don't trust it to handle a lot of side torque, so this little insert takes the load.
It is working really good and I was even able to use it with the fence to sand a board to a uniform thickness. I'm not going to publish the plans because both the table and sander have been discontinued from Harbor Freight so it would be difficult to replicate this build. But there are similar tables and drum sanders out there and it would not be hard to replicate this on your own if your interested.
Note that this does not compare to a $200 oscillating drum sander, but then again I think I put $6 into the build. It will leave some lines on your parts, but it is a great way to quickly rough in a shape.
![]()
![]()
![]()
![]()
![]()
![]()
-
Wrap it up
01/04/2021 at 06:21 • 0 commentsOk I cut a 22 cm diameter disk and used it in place of the Thien baffle and that seems to work just as well. At least with only 2" of dust in the bottom of my separator. I will need to wait on more dust before I can evaluate if the lip is really needed or not. For now I'm going to leave the disk in place and leave the dust bag off my shop vac so I can better evaluate this over the long term.
So for now the final design is 3 rings of 1/4" plywood at 33 cm, 28.5 cm and 22 cm. Glue the top two together and use 10 cm standoffs for the baffle. It seems to be working well, with only a bit of dust making it through to the shop vac. I'm also dropping the diffuser for now, it does not seem to help much and it is easy to plug up.
The wood lid and Thien baffle are not needed but they do make things nicer to deal with and have some benefits to the strength and dust collection. I think the vacuum release valve is the big win, it saves the shop-vac motor when you get a plug and stops the system from getting stressed. I'm surprised there is not one built into the vacuum.
On a side note my 1-1/4" shop-vac hose is really not up to the job. It clogs on the smallest pieces and overall is just a real pain. On the other hand most of my tools don't need a 2" hose, and it was free with the vacuum. Eventually I should break down and pick up a 1-7/8" hose, it would probably be a better compromise between suction, flexibility and clogging.
![]()
![]()
![]()
![]()
-
Validating Thien
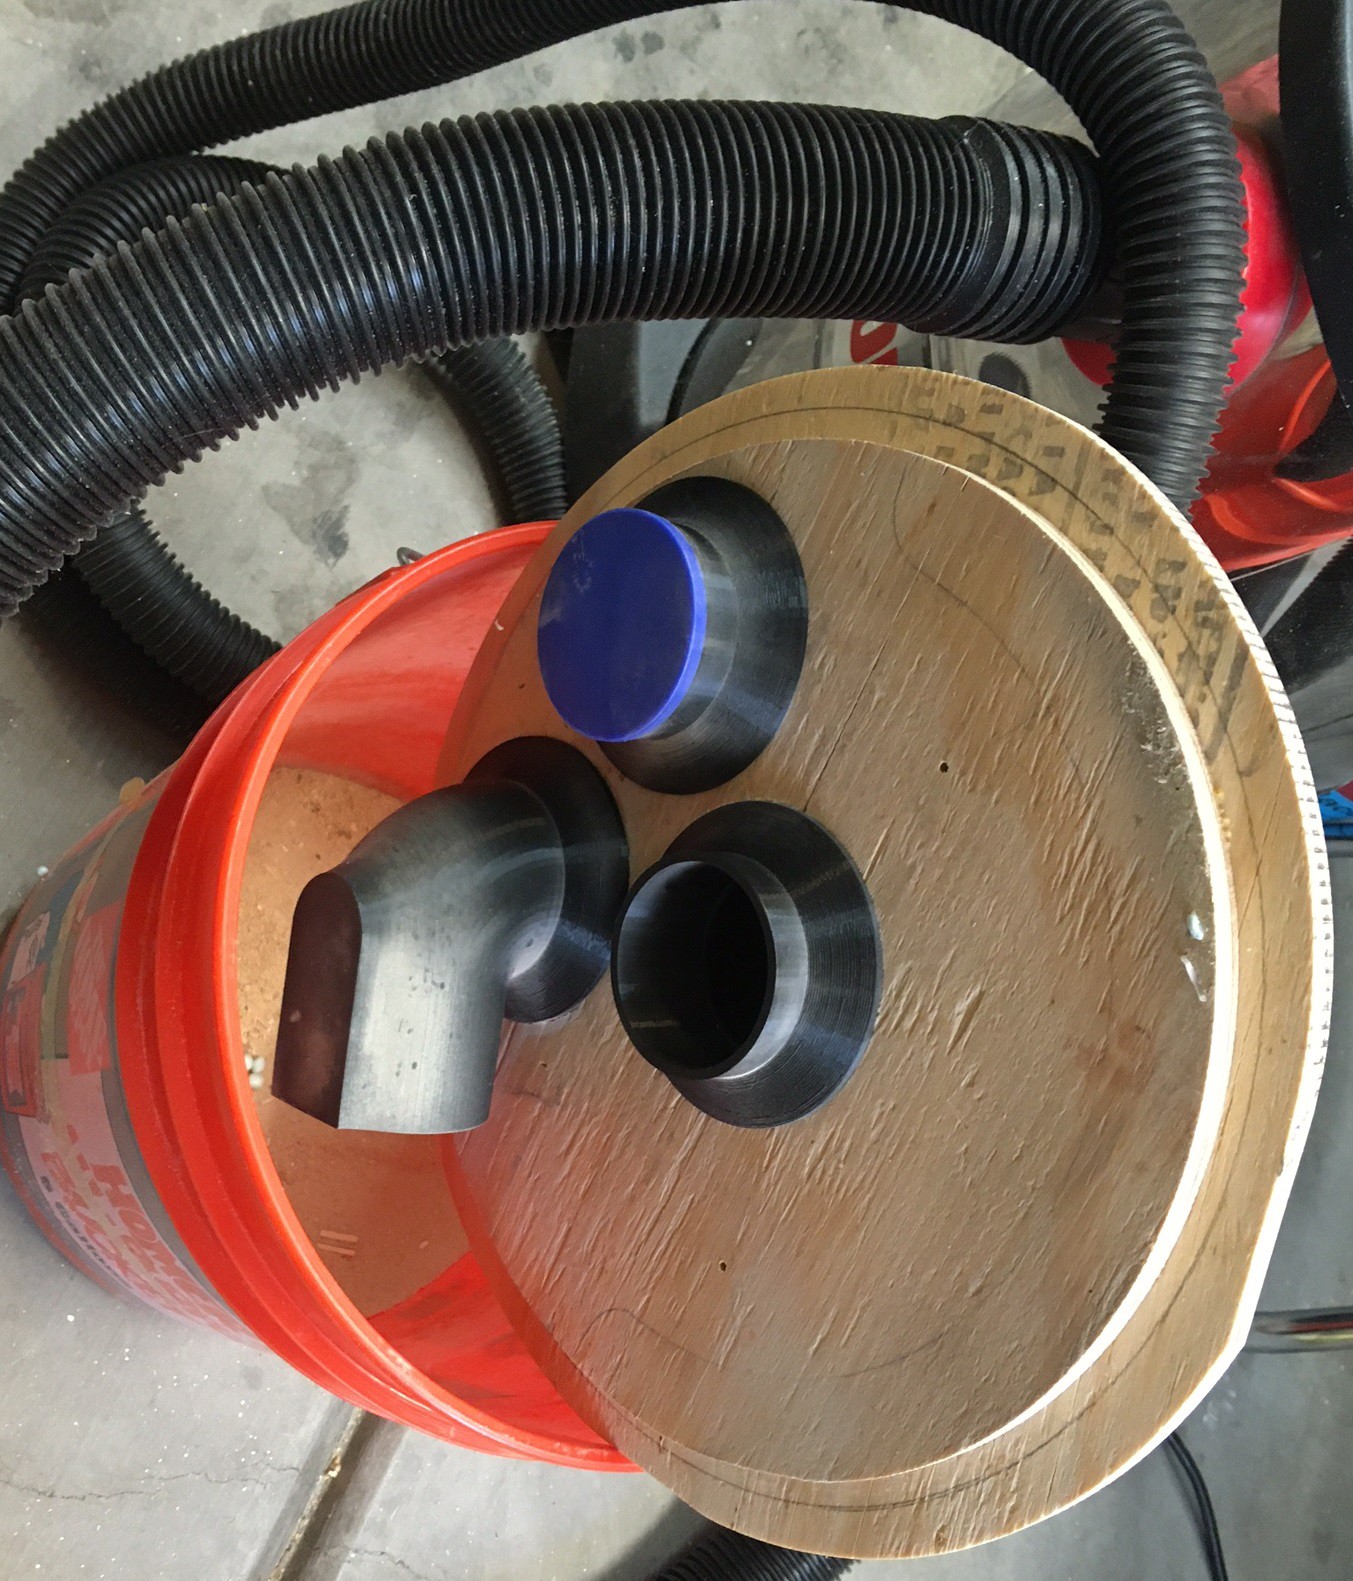
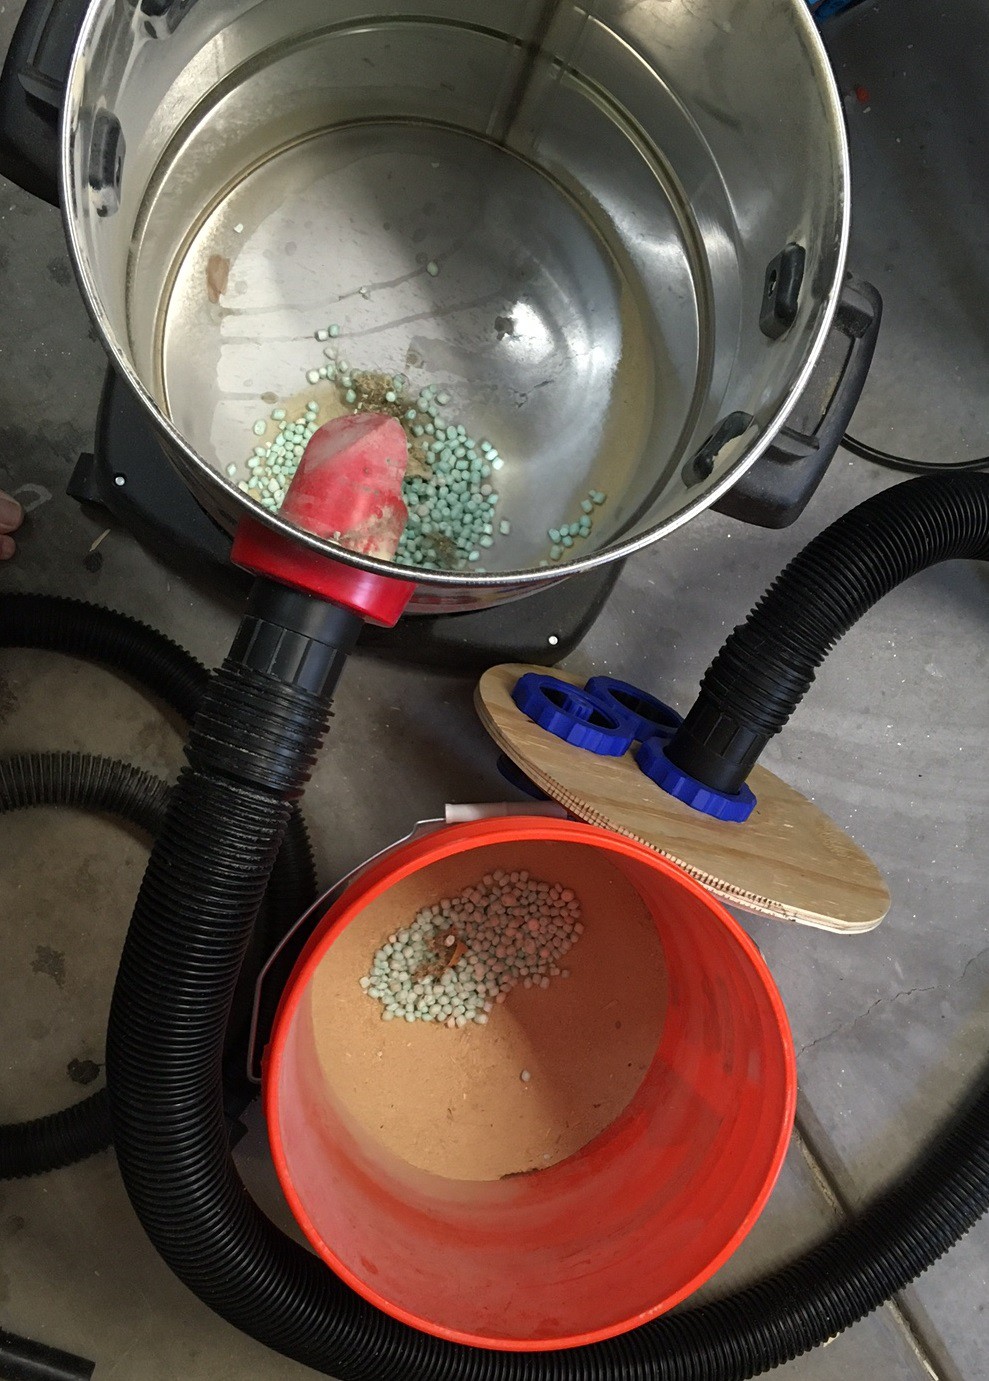
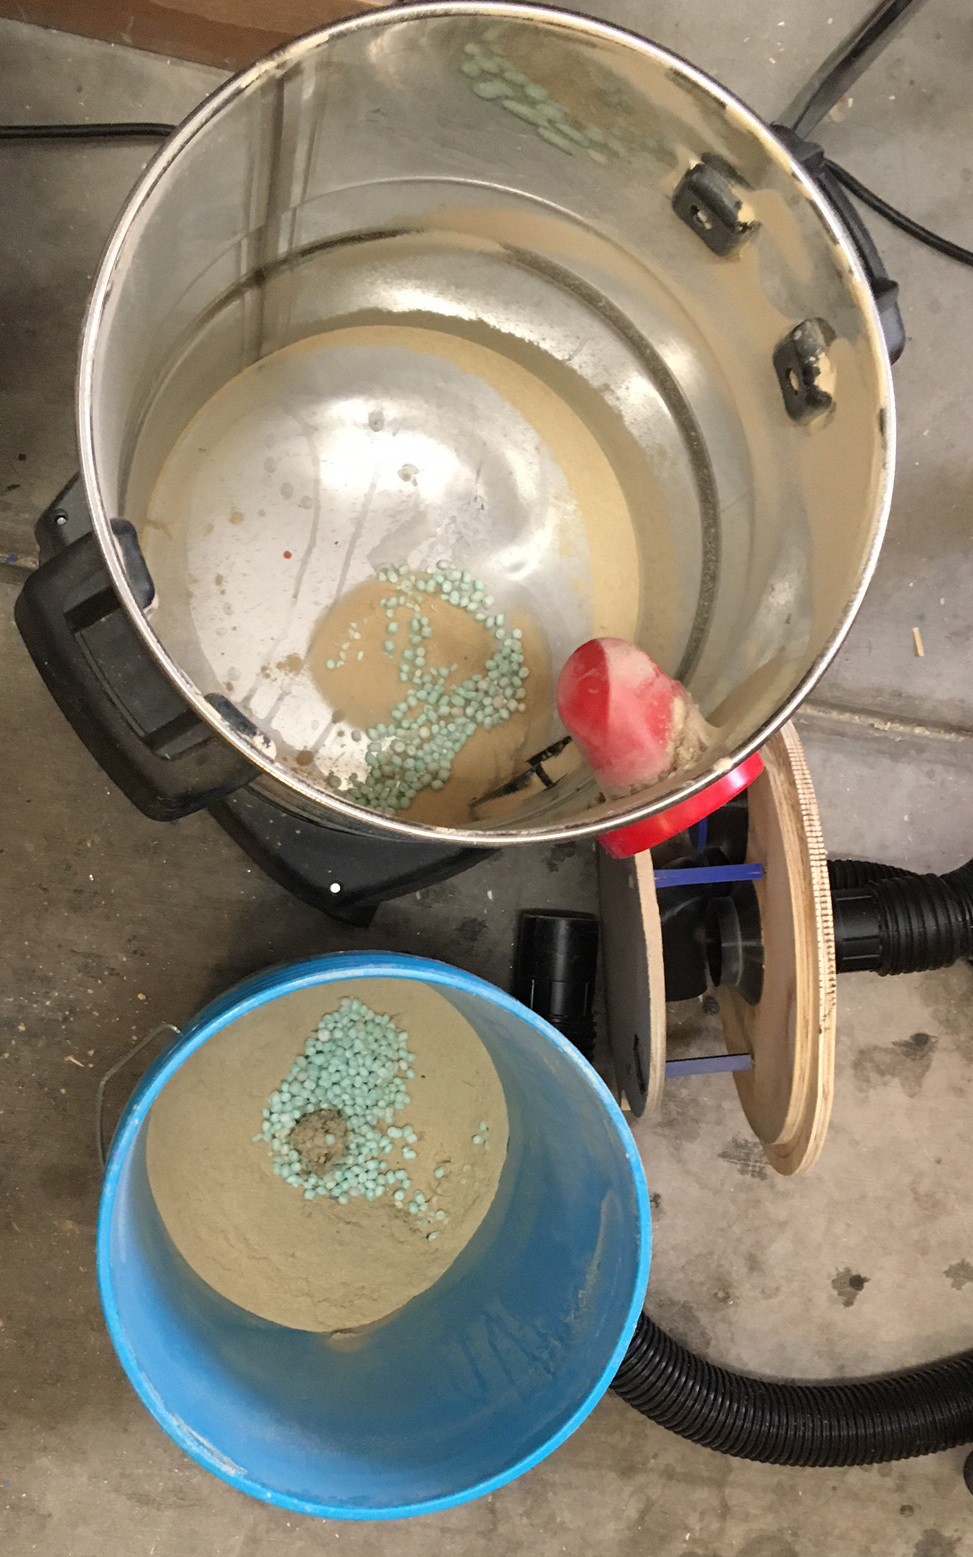
01/02/2021 at 19:47 • 0 commentsI have been trying to come up with a way to peek inside Dusty to see how well it is working. I had been thinking of ways to hide a camera in there, but this seemed like a doomed idea, either the camera will get hurt, or it will not capture the image, or just cause a disturbance in the air flow. Finally I stumbled on this great video on reddit. They had the bright idea to put a strong light behind the bucket to cause a shadow to be cast by the dust.
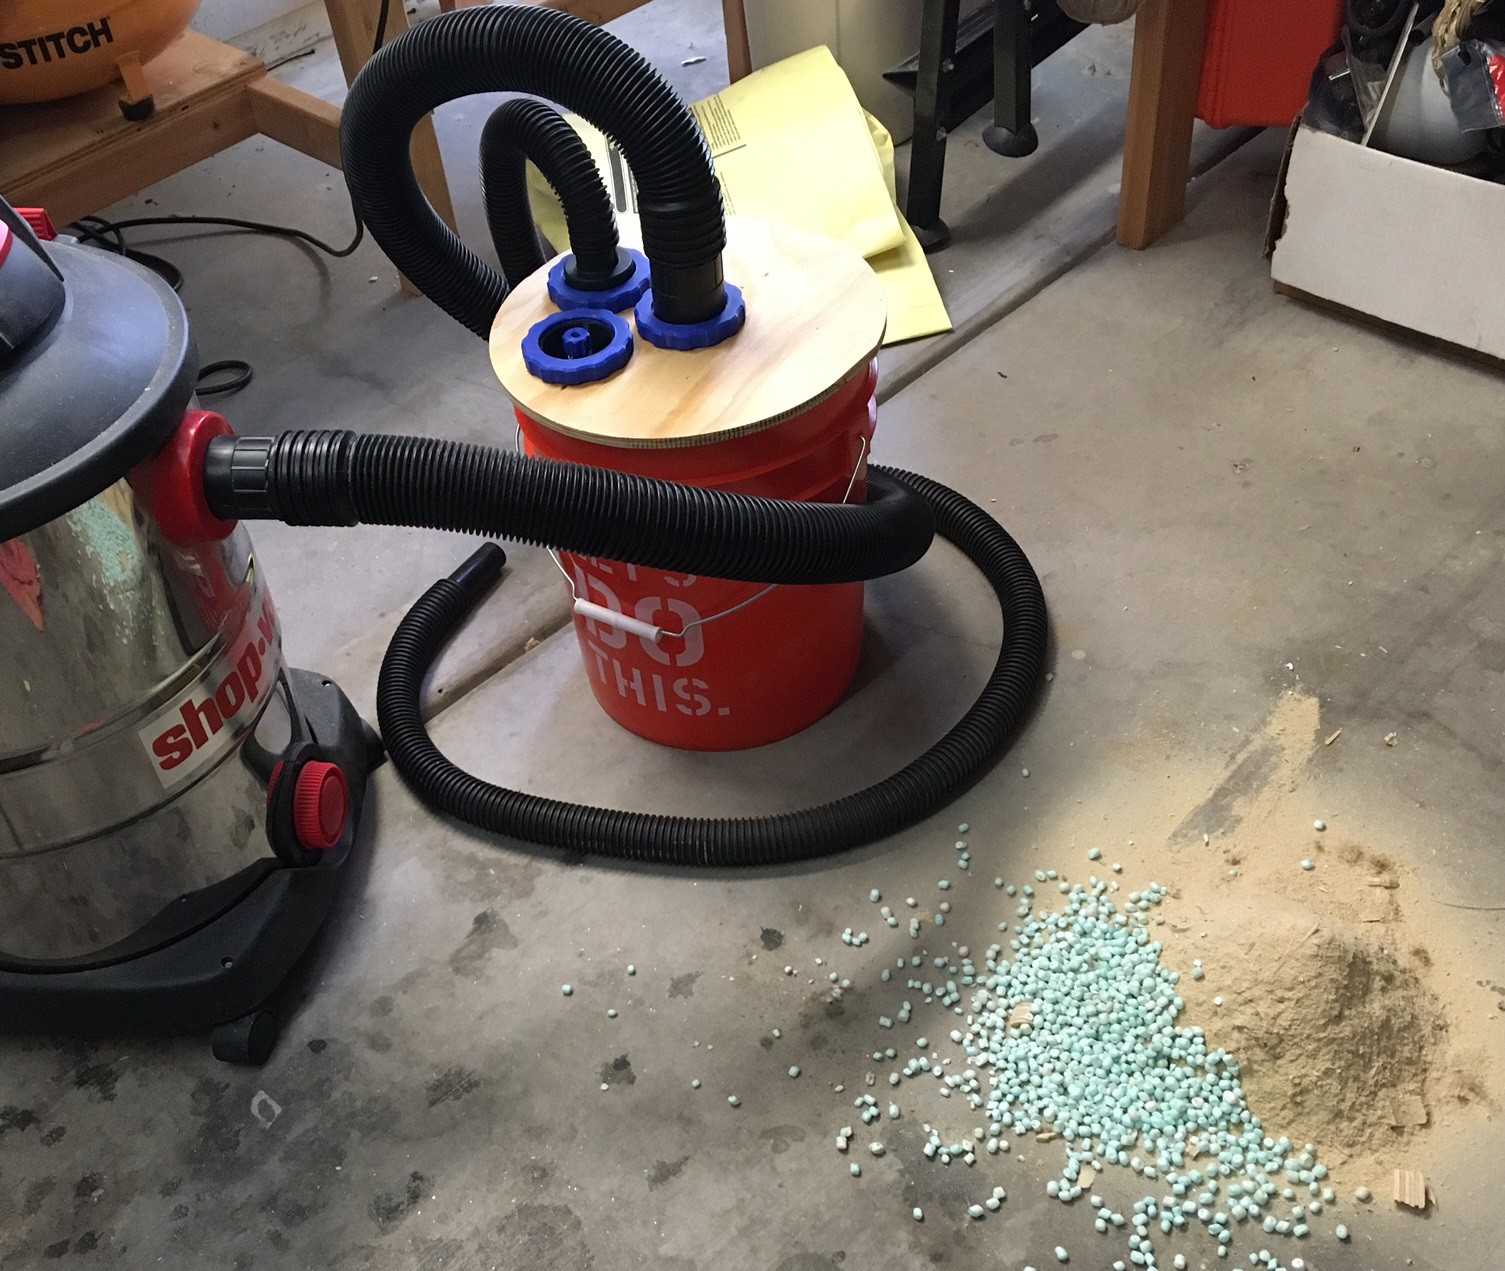
I only have an orange bucket, and nothing close to a strong light, but it finally hit me that I have a car and the headlights are really bright. A quick setup in a dark garage and a box to line it all up and it worked great!
I was able to see the dust swirling in with and without my Thien baffle, and also using my diffuser. The results with the straight outlet and diffuser were about the same. The dust flowed in a nice swirl but if I plugged up the inlet I could see dust cavitating back up from the bottom and upon inspection I could see a hole was drilled in the center of the dust.
Adding in the Thien baffle seems to have eliminated this cavitation, when blocking the inlet there is no evidence that the dirt in the bottom is being disturbed. And there is no hole in the center of the dirt either. I'm changing my view of the Thien baffle, it is not just that it reduces the air speed at the edge of the baffle, I think it also provides a more direct route between the inlet and outlet when the vacuum is increased by restricting the inlet and that in turn keeps the air below the baffle smoother and reduces cavitation of the dust.
Next is to cut a new baffle that lacks the lip, and probably one more that is 1/2 the diameter to see if the lip is important and if the diameter is a big deal. I also need to compare the straight and diffused outlet with the Thien baffle. I tested with only the diffuser and noticed that there was a pile of dirt under the diffuser. If the diffuser is not effective then it would be better to remove it, it adds complication and material on printing and can be a pinch point where material can clog up the vacuum.
-
Baffled
01/01/2021 at 03:08 • 0 commentsIt occurred to me that while I can't properly test the Thien baffle without enough sawdust to fill up the bucket I can test my own baffle simply by lowering it into my bucket. I did just that, lowering the old outlet port and the new baffle into a bucket of sawdust and other junk while measuring the distance from the bottom of each and the surface of the dirt.
The regular open outlet port started to suck up light particles of Styrofoam at around 10 cm and started sucking up sawdust at 3 cm. My new baffle did not suck up the Styrofoam till 2 cm above the surface and even when pushing it into the sawdust it did not suck up any dust. Now my new outlet is 5 cm deeper than the old outlet, so that is only a 5 cm gain on the Styrofoam.
There is almost no air movement at the bottom of my baffle, I suspect I could drop the bottom two layers of holes to shrink it up without greatly reducing its effectiveness. I did notice that it appeared to be disturbing the air around it much less than without the baffle, I got movement on my Styrofoam balls almost immediately when using no baffle.
Anyway I may publish the baffle, it appears to be working well, well enough to give it a proper try at least.
-
Diffusing the situation
01/01/2021 at 02:06 • 0 commentsI have been thinking a lot about my dust separator and trying to visualize how it all works. I decided to do a writeup on my belief, and hopefully someone smarter than me can point out the flaws in my thinking.
![]()
For starters the Thien separator, why does it work (or does it work at all). There are two ways to look at this one. The first is that somehow the particles enter the chamber, spin around the wall and slowly drop, that much is true. Then the Thien baffle would act as a knife blade, separating the dropped particles from the return air flow. However I don't think this is a valid way to look at it, in fact I suspect the small tab on the separator is not essential for this to work (whether or not it has a small benefit). Rather my thought is that the separator is reducing the speed of the return air by spreading the flow over a very broad area before allowing it to drop into the bucket. The idea in my head is that there is a concentrated flow of suction near the return nozzle and if the sawdust piled up high enough in the bucket then this stronger suction would be able to pick up particles and send them on to the shop-vac. The separator forces the air to spread out and that in turn causes a reduction in suction near the edge of the baffle that allows the sawdust to rise much higher in the bucket before getting sucked into the shop-vac. I suspect that a much smaller diameter baffle that was perfectly circular would work just as well.
![]()
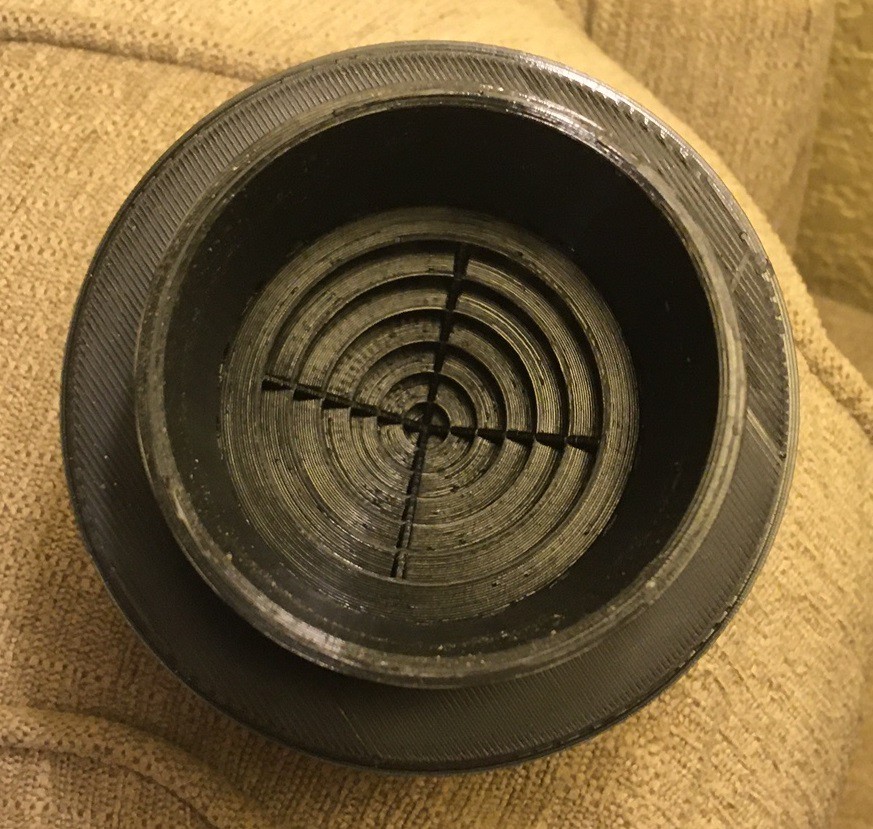
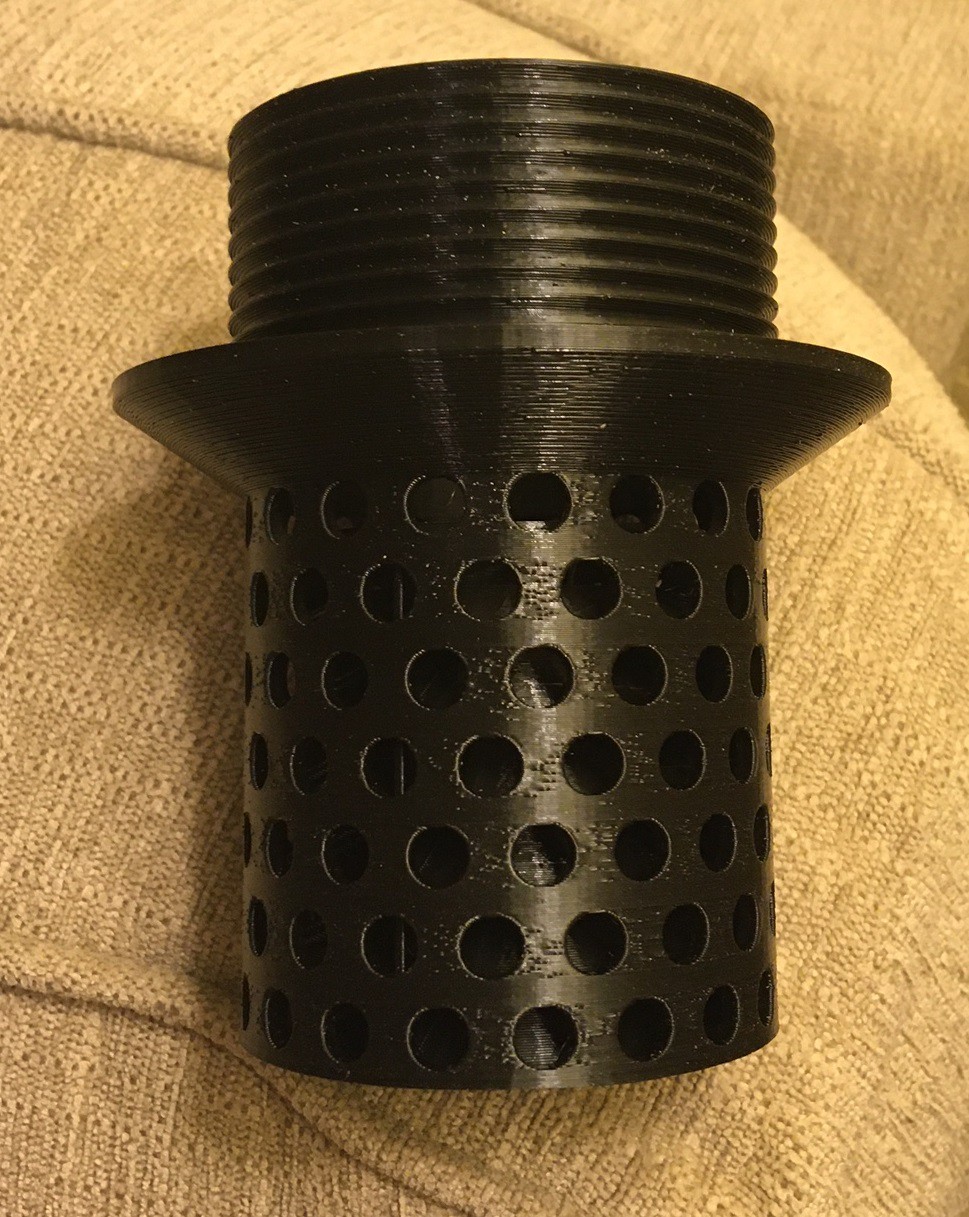
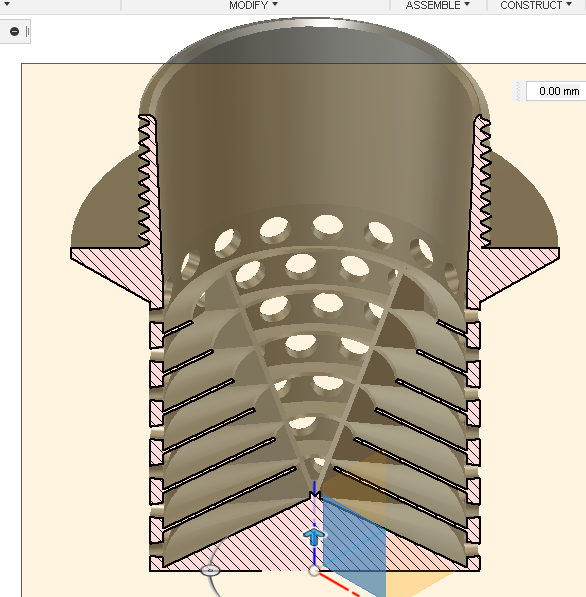
My idea was if we are just trying to slow down the air, ie divert the suction so it is oriented horizontally rather than vertically, then why not just use a baffle (diffuser?). I created the baffle below with a series of holes that are more and more restricted as you go down in depth. That causes a strong suction at the top of the baffle and a slow suctions at the bottom edge with no suction on the bottom itself (it is fully blocked). That in turn causes a series of air currents that steer the air out sideways from the baffle rather than downward and hopefully that has the same impact as the Thien separator without the added complexity and space of the extra baffle disk.
![]()
![]()
![]()
All of this is independent of what is going on with the inlet side of the separator. On that side particles are thrown into the bucket wall at a high speed and hopefully they loose momentum quickly as they are asked to rapidly change direction and drop out of the air flow. In theory the goal is to keep these two systems separated, hopefully the outlet suction is diffuse enough that it has little to no influence on the inlet vortex.
Anyway I have a lack of sawdust at the moment so I can't effectively test these right now. I may try to test them anyway just to make sure they don't make things worse, but we won't know how good they work till I have 3/4 of a barrel of sawdust to play with. I guess I need to come up with some new ideas on what to make and stop trying to improve my tools.
-
The rise of Thienos
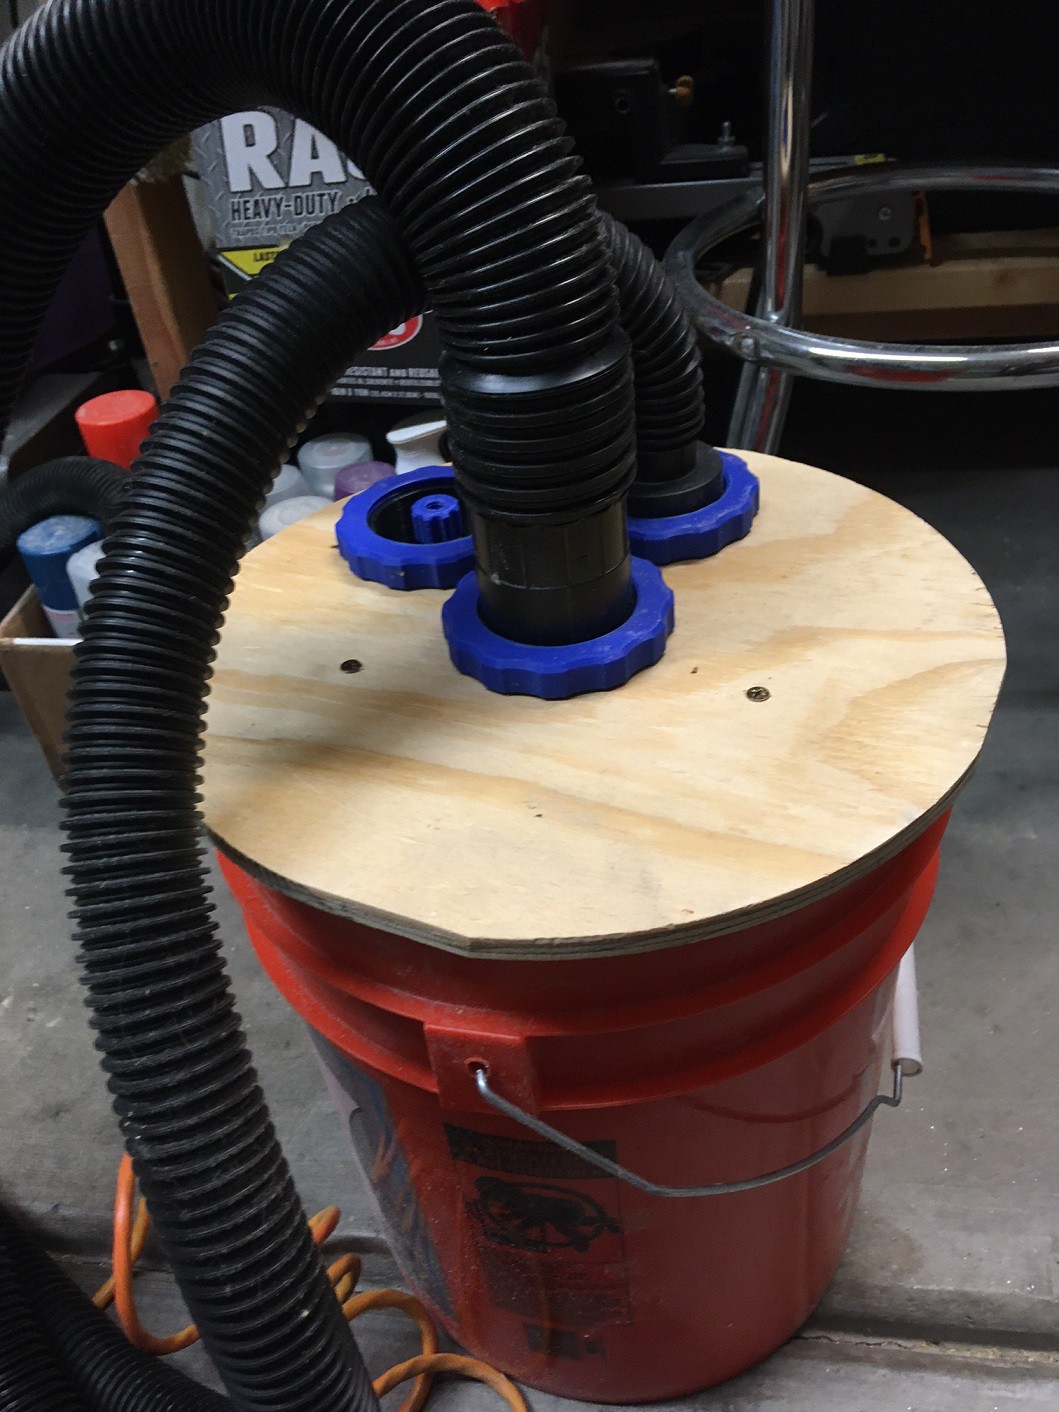
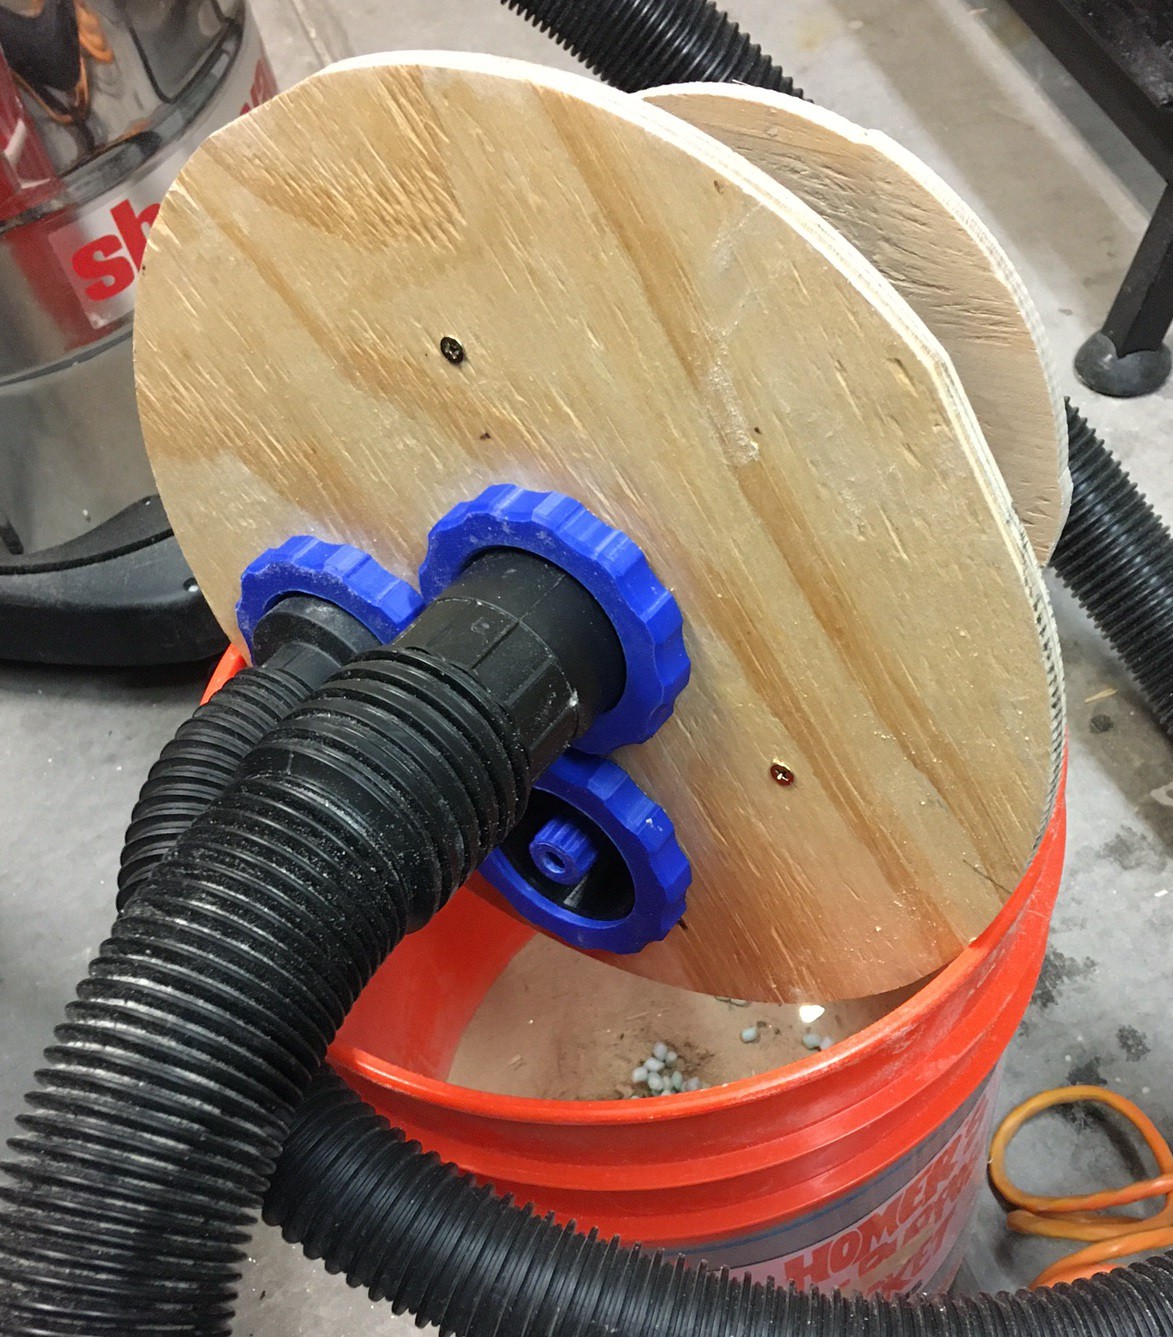
12/31/2020 at 01:30 • 0 commentsI have wanted to make a wooden lid for Dusty from the beginning but I lacked the skills to fabricate it. Now that I have a bandsaw that can cut circles I decided to make one out of two layers of 1/4" plywood glued together.
![]()
This is working great, it no longer warps under a vacuum and it is trivial to remove (maybe too easy in fact). The only issue in making this is that I used a jig saw to make the inner holes. The problem is my normal blade would not turn tight enough to make the cut, while my thin blade warped all over the place. In hindsight I should have broken down and got a circle cutter.
I did have to extend the threads so they could fit through the thicker top. I have updated my models on thingiverse to match.
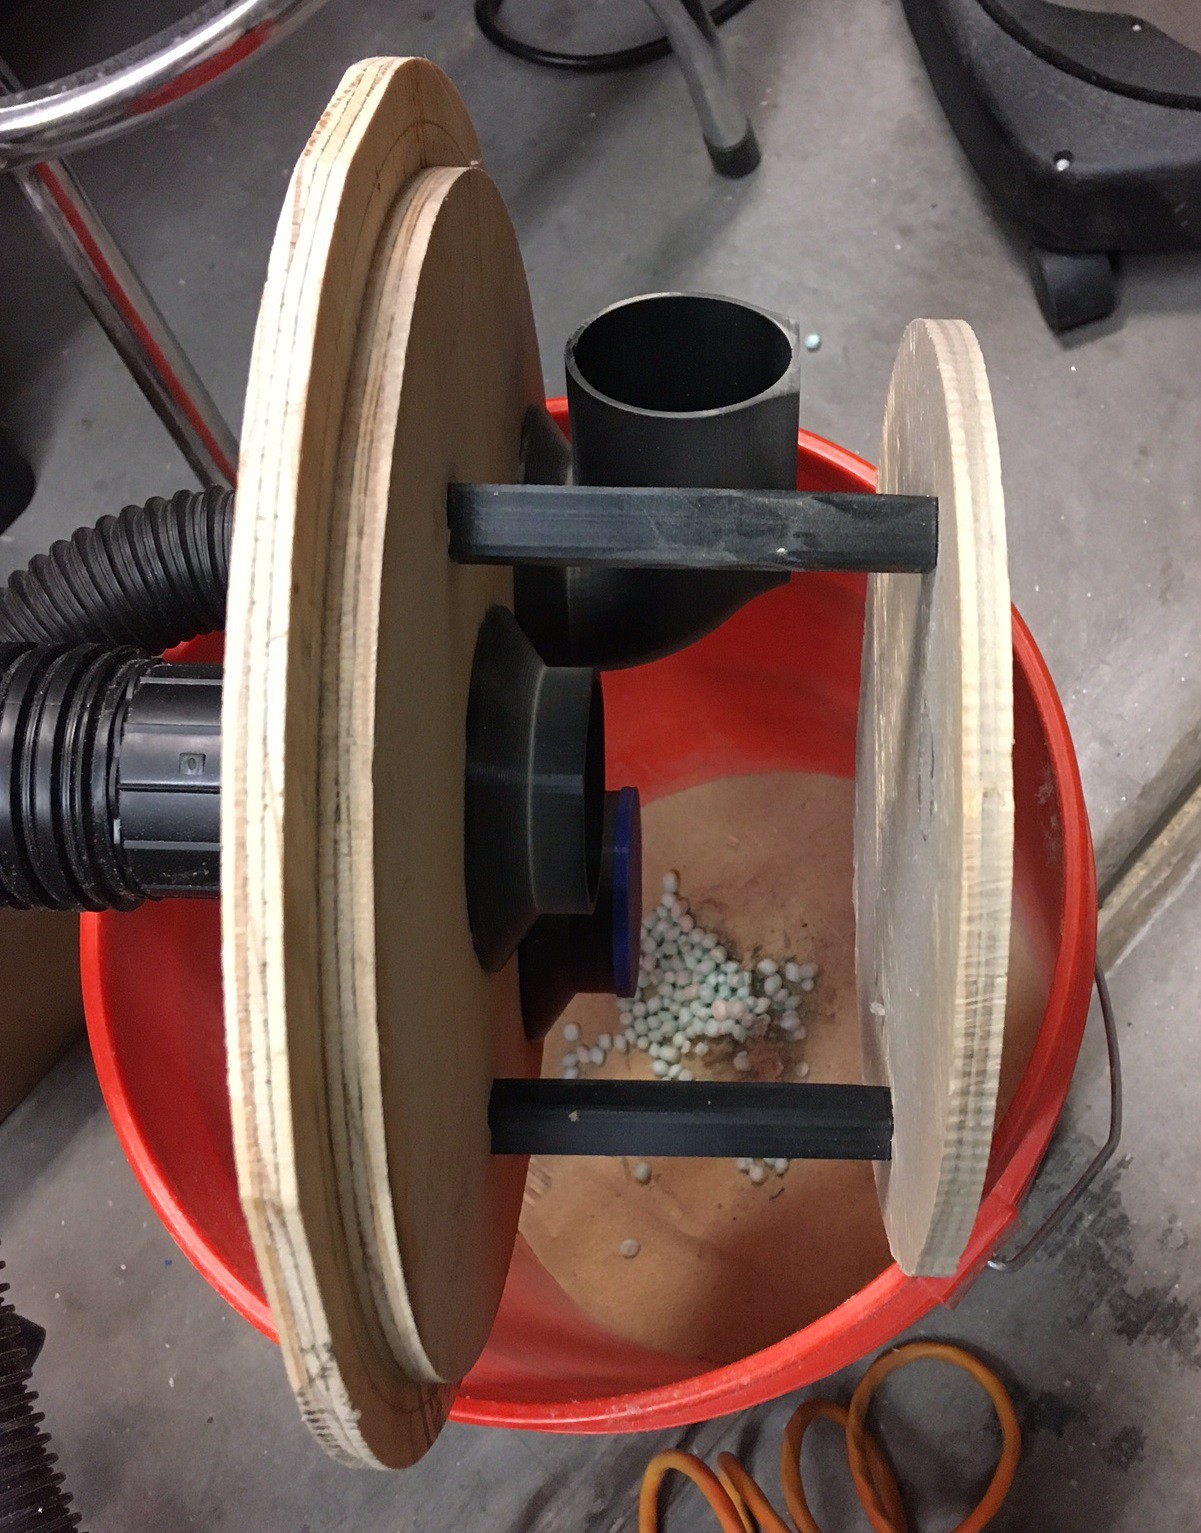
I went ahead and tried making a Thien baffle for this while I was at it. My first attempt turned out to be a bit of a dud. When I did back to back tests with and without the baffle the baffle made things worse. The big problem appears to be that the baffle was to close to my lid, allowing the dust to get trapped under the inlet nozzle. That in turn keeps the dust circulating at the top and eventually getting sucked back out the outlet.
![]()
![]()
I did not get a great shot of this all together but you can see it from the side in the shot below. These are not perfect shots but in the one above there is no new dust in the shop-vac, the inlet is blocking you from seeing that. in the second there is quite a bit of dust and when I took the lid off Dusty a lot of dirt came out of the top.
![]()
![]()
I'm printing new standoffs that will extend the baffle down to see if I can make it work better. I will make a new post once I have a chance to test it. I also had an idea for making a diffuser on the outlet to try and broaden the return air path without using a baffle. I'm printing it out now and will let you know how it compares.
![]()
Anyway overall this worked great. I would probably use a higher quality and thinner board for the lid next time, this is really course stuff, but it is all I had laying around. Also I have a vague idea of using the bucket handle as a latch to hold the lid on. If I added small tabs to the lid that the handle would lock into I think it would hold together well even if this all tipped over.
-
Band Saw
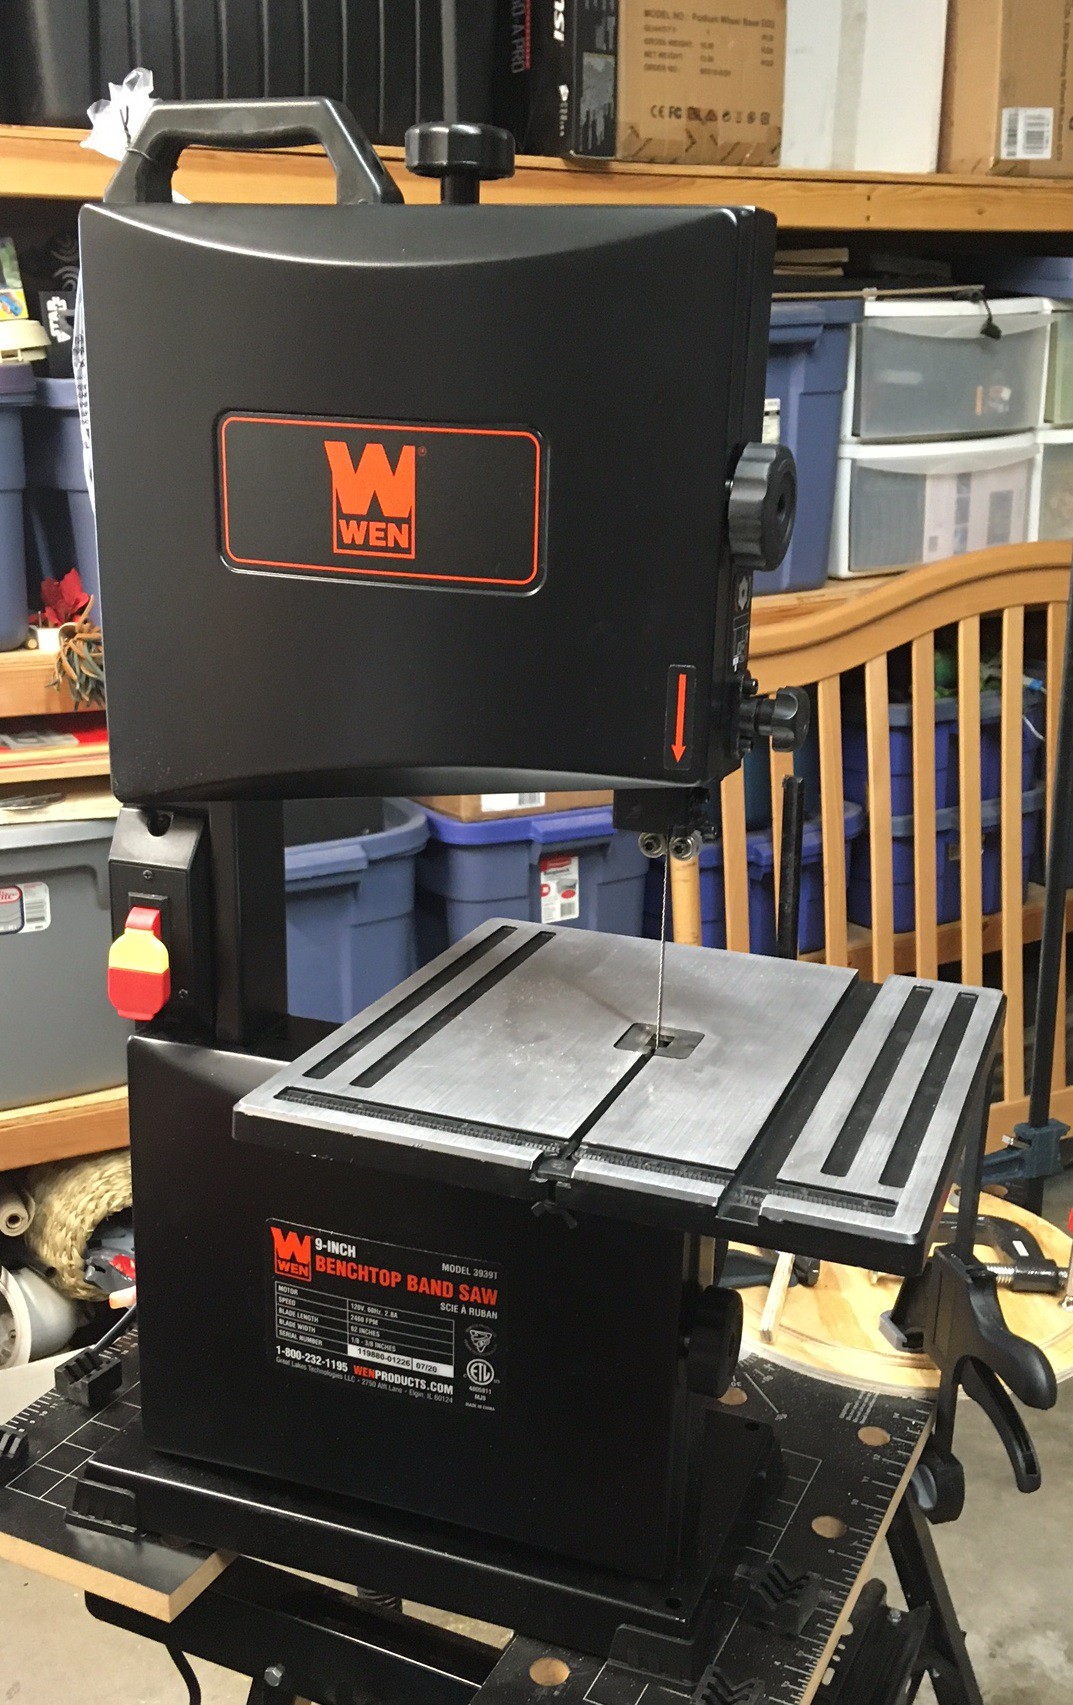
12/29/2020 at 03:00 • 0 commentsMy lovely wife got me a bandsaw for Christmas. It has been high on my wish list for years but I was nervous about getting a small one that could fit in my limited shop space. I got a WEN 3939T 2.8 amp 9" bandsaw from Amazon. It seemed like a reasonable compromise between size and performance. It is just light enough that I can move it around without much of a struggle and yet just powerful enough (barely) to actually be useful.
![]()
So far I'm really liking it. It cuts well and just has enough power to resaw a 2x4 the long way. I'm not sure how well it will hold up to 4" thick hardwoods but still it is nice to have a saw that can make quick and reliable cuts that does not make me nervous when using it. I have a skill saw, a chop saw, and a jig saw and all either scare me or cut rather rough.
![]()
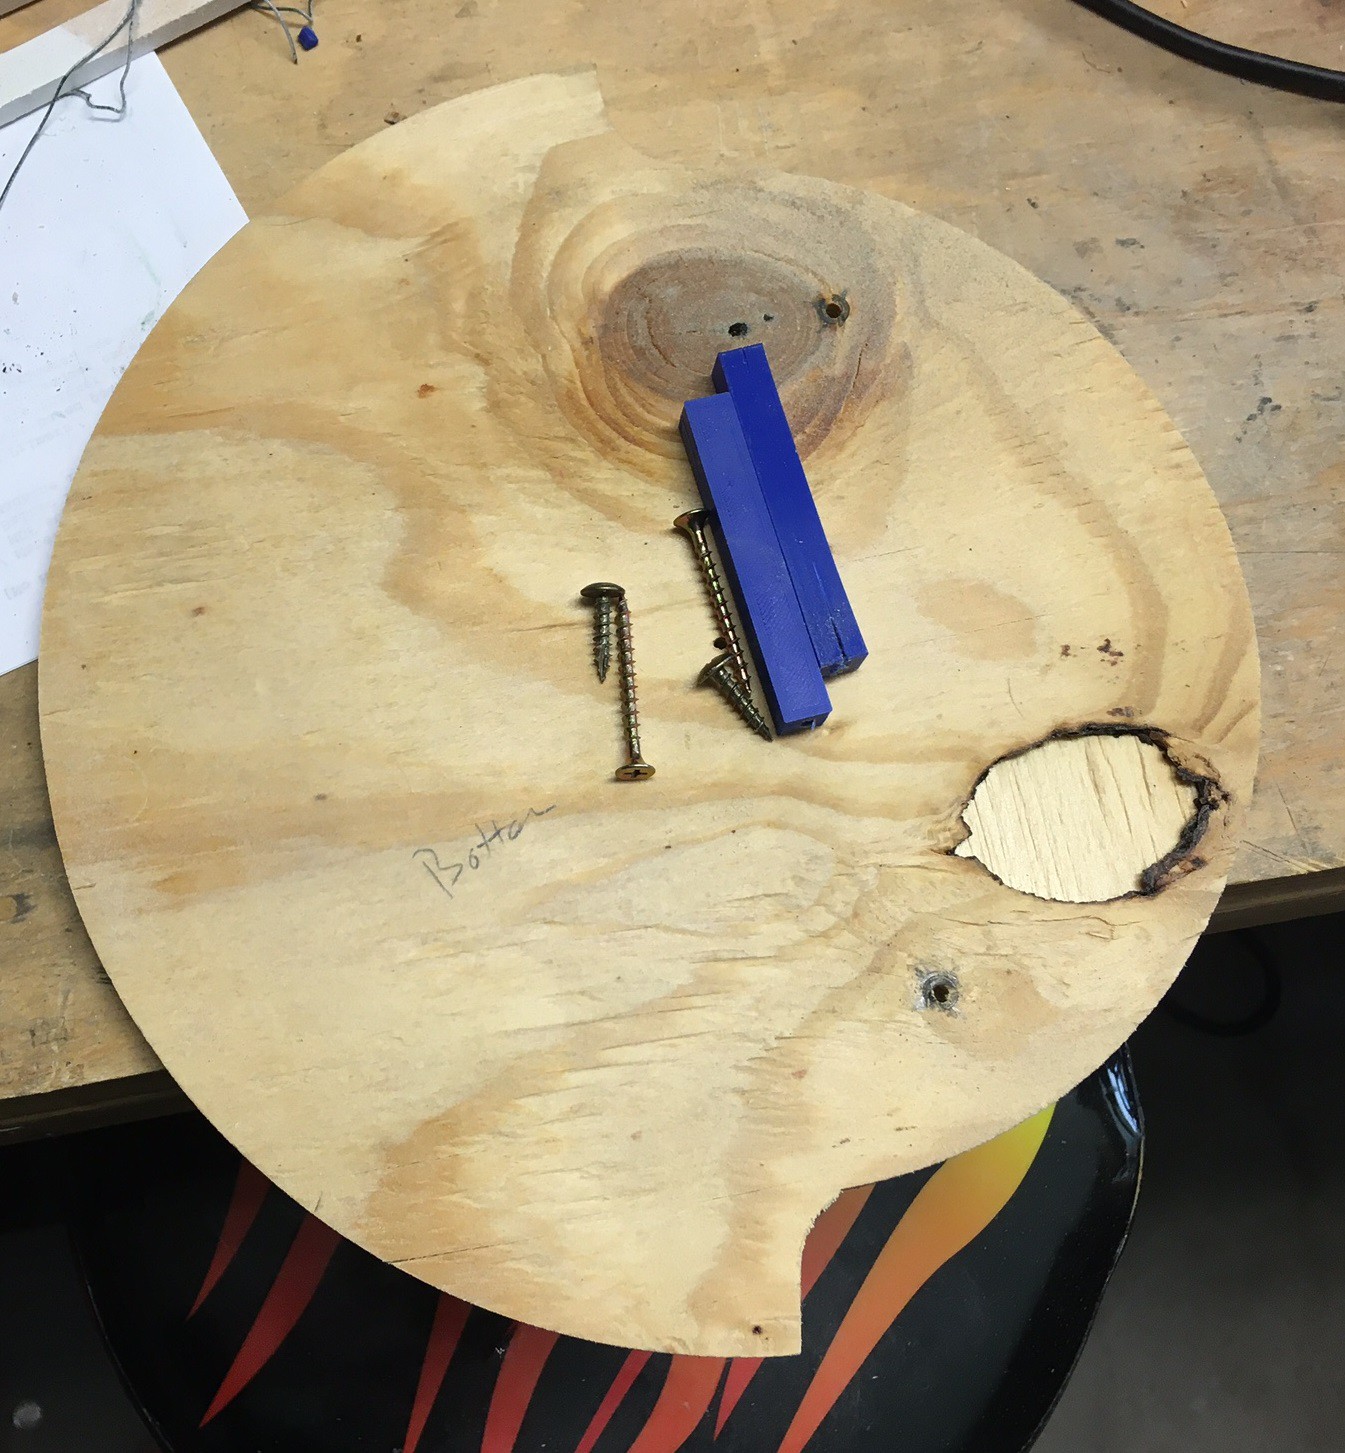
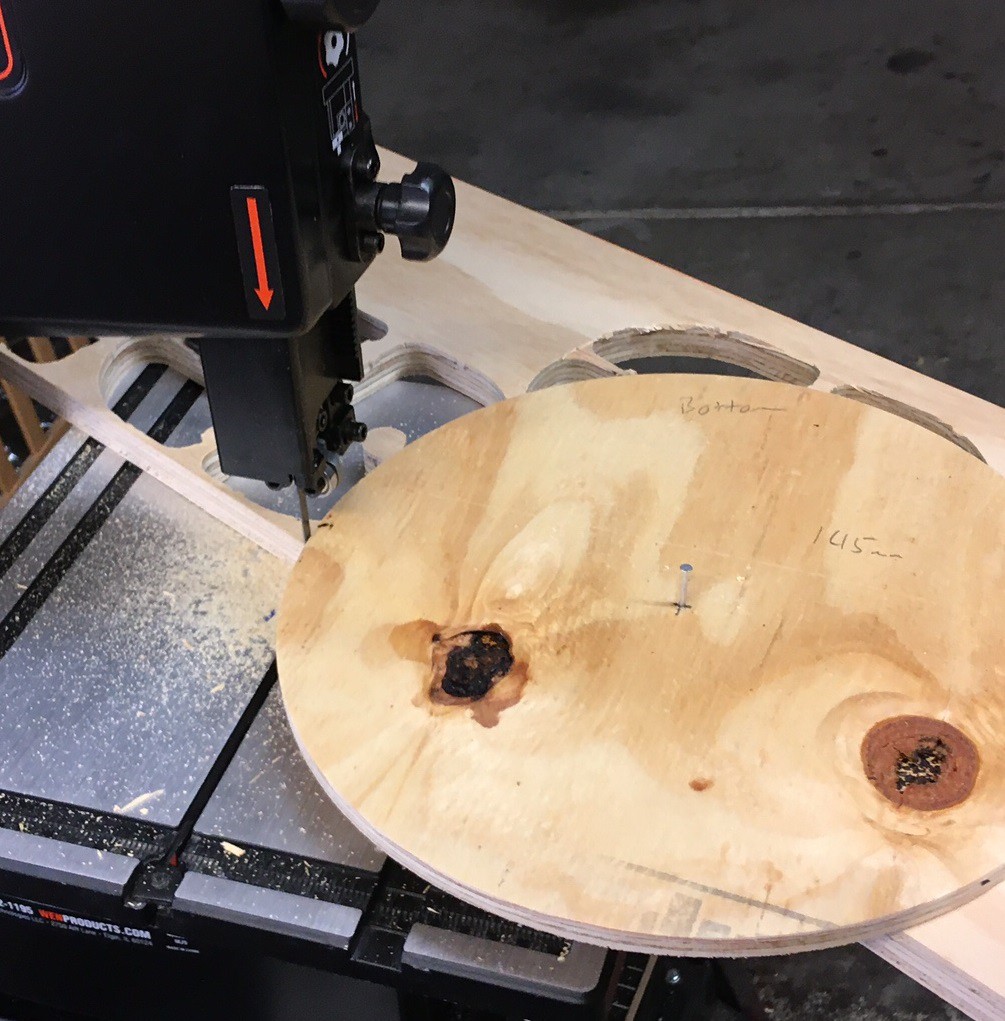
One of my first projects was to cut out some circles from some scrap plywood I had laying about. At first I started to research circle cutting jigs, but I finally hit on the trick of just nailing my target to a piece of scrap wood and clamping that to the table to create a pivot. I found that you need to move the pivot point an inch or so in front of the blade to allow it to bite in and keep it from wandering too much. Anyway works a treat and costs nothing! A proper jig is probably a great idea if you do this all the time but for a one off I can't complain.
![]()
I noticed the table insert was a mm to shallow for the bed, causing small material to catch on the lip so I made a zero clearance insert. However I noticed there was a lot more dust on top of the table after adding in this insert. The dust collection works ok but it produces almost no vacuum at the base of the blade and I think it needs that large opening in the insert to allow the chips to fall into the collector. I'm thinking of redesigning the whole thing at some point, but for now the built in dust collector work ok, and better when left stock (so far).
![]()
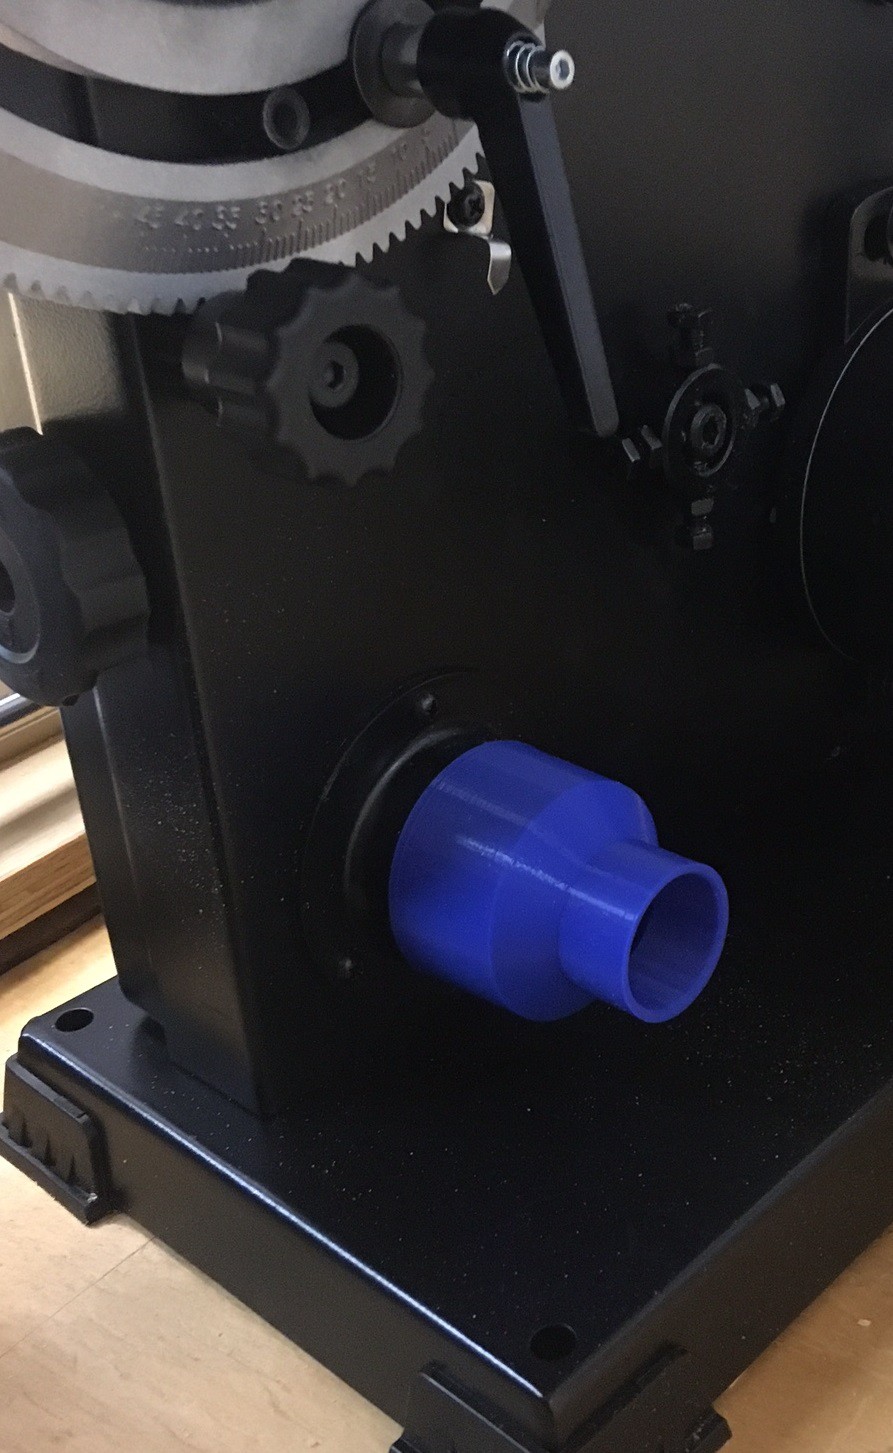
I also made a dust boot adapter for my smaller shop vac hose.
Anyway over all I'm really pleased with this little machine. It is certainly not something you would want if you had a proper sized shop, in that case spend the money on a decent sized 14" bandsaw with a built in base, but it is great for my small space and needs. In summary if you don't expect this to be a full size bandsaw you will be very happy with it.
-
State of the Union
12/24/2020 at 02:05 • 0 commentsI have been working on my CNC journey for a while now and thought it would be a good time to take stock of where I have been and how it is going. I have wanted a CNC machine basically for ever, but 4-5 years ago I started down the road.
First I build a hacked up machine from old CD rom drives just to see if I could do it. That was a great learning experience but it did not result in a very functional device. I did wire it up to a 3D pen and managed to print out some small objects along with making a few drawings on post-it notes.
Next came a XYZ da Vinci miniMaker from my wife for Christmas. I worked with that for about a year, getting comfortable with simple cad work and learning the basics. This is a great machine if you have no interest in electronics. There is basically nothing you can change on the machine, it works great for what it does but you can't make it better (or worse) by tinkering. I actually reversed engineered the protocol for communicating with the printer, but was never able to get things to a point where my code was simpler to use than XYZ's software. Again this is a great printer if you want to make miniatures but don't know anything about computers, it does what it does well, but can't go any farther than that.
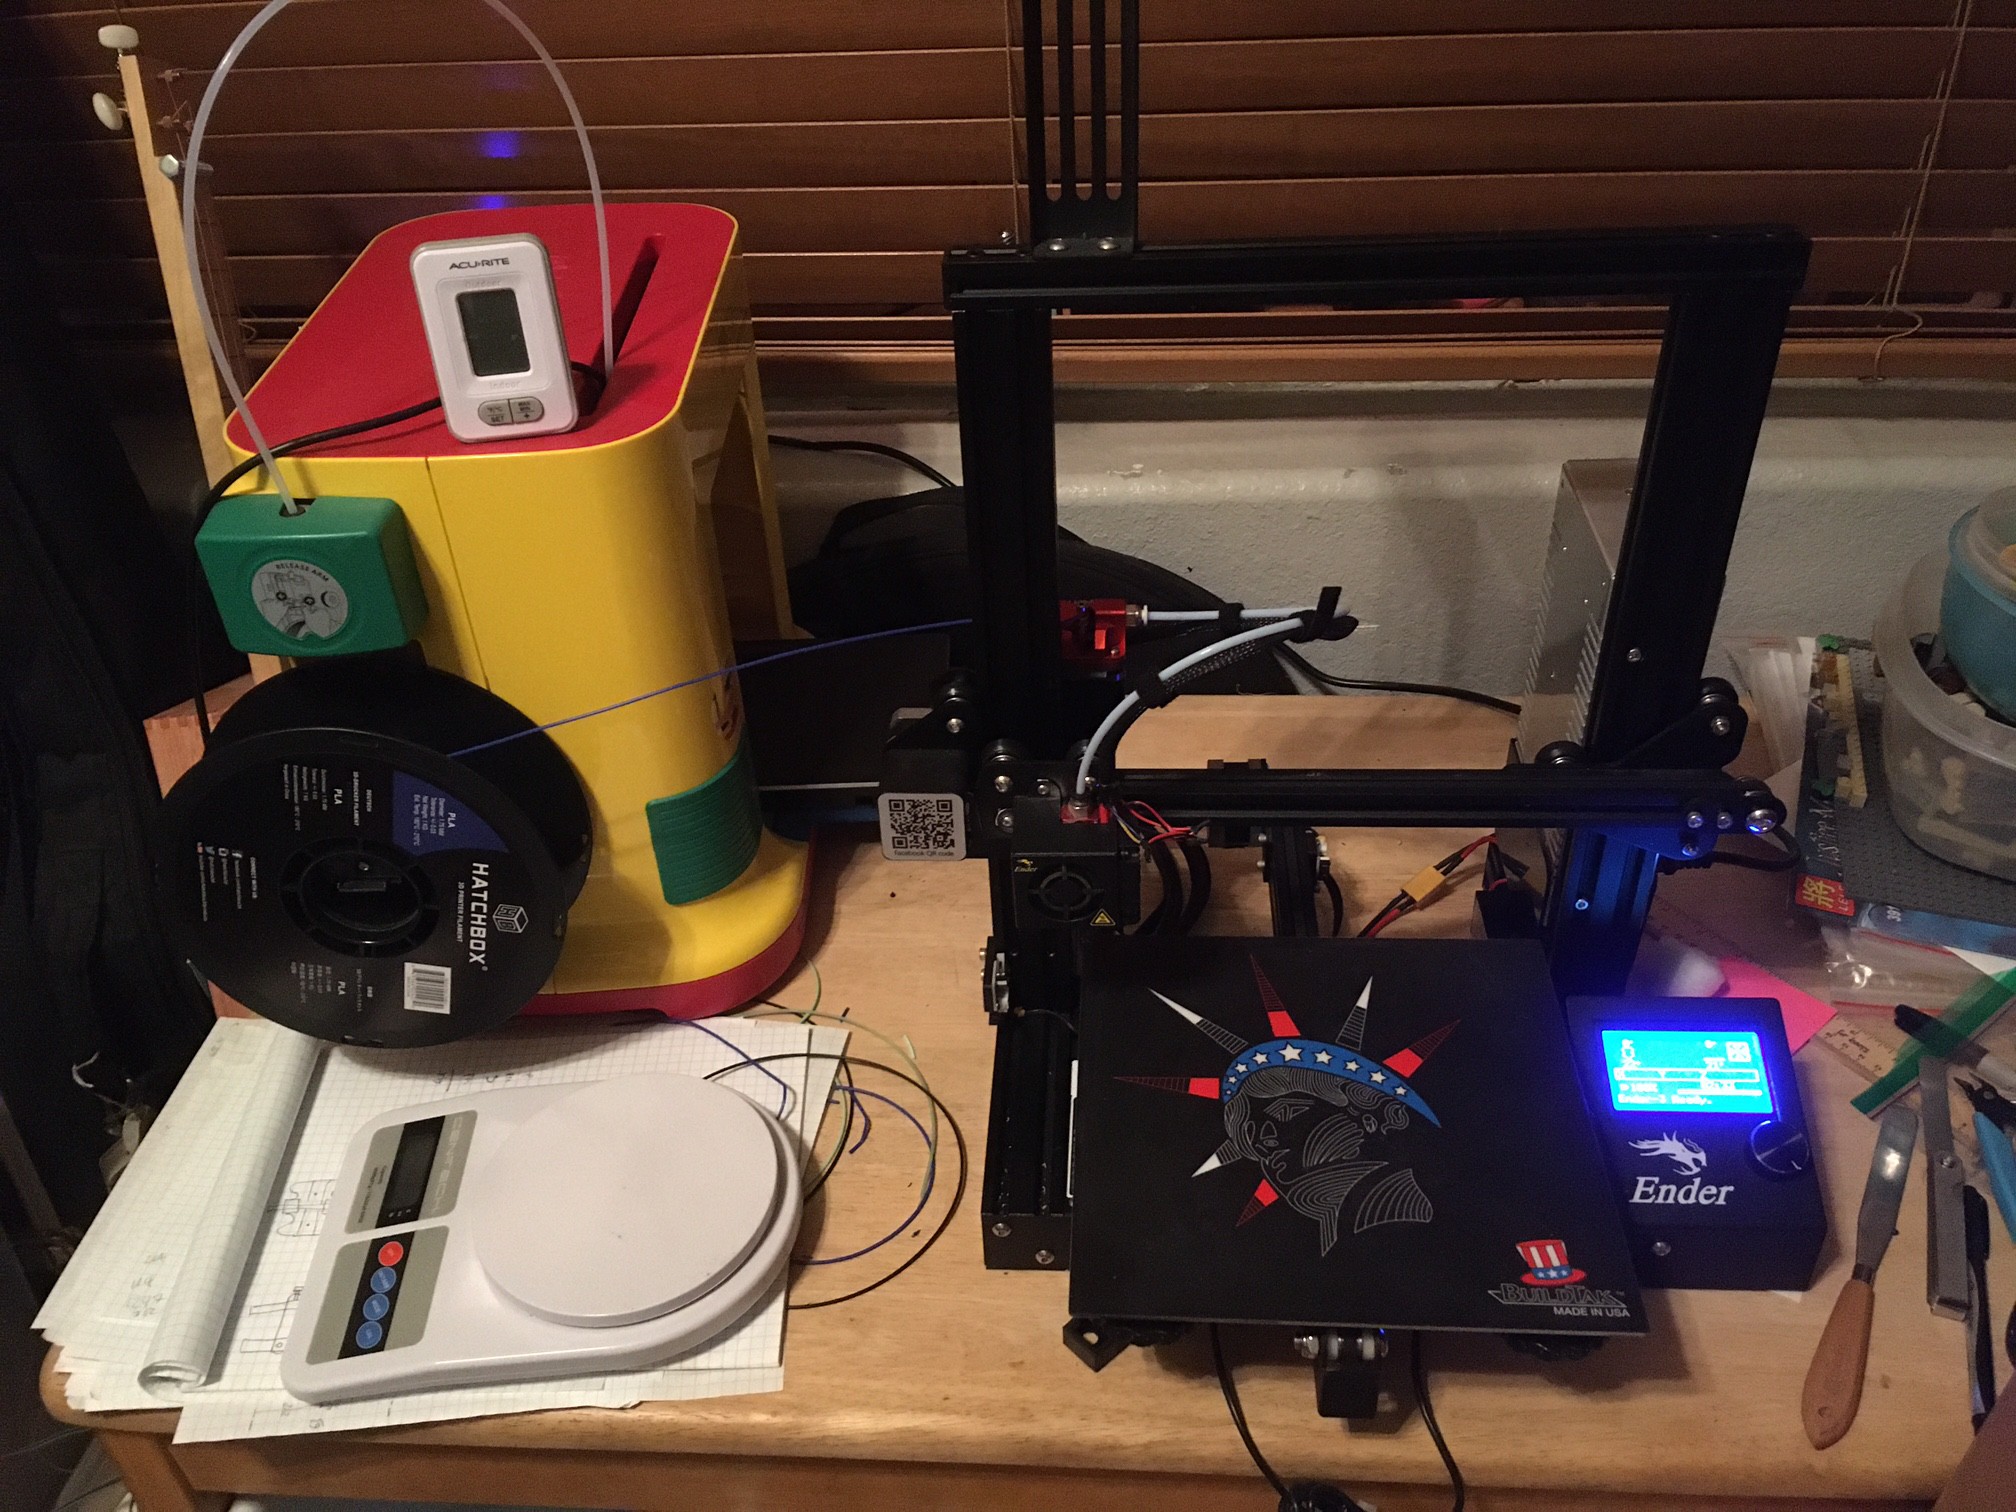
After a year with the miniMaker I picked up a Creality Ender 3 printer for a great price. This has proven to be an excellent, and yet frustrating, little workhorse. When it works great it is very reliable and dependable and produces parts with good finish and accuracy. When it goes bad you feel like your in an alternate universe because nothing seems to make it better.
I have made only a few modifications to my ender 3:
- Latest Marline, with manual mesh bed leveling enabled. This is the number one upgrade everyone should make. If you don't know about arduinos just buy a dongle from someone with the latest firmware on it. I believe TH3D sells a kit but I could be wrong on that. Anyway this is free and you will get much better quality out of your printer over the crusty old stock firmware.
- BuildTack print sheet. I can't stress this enough, a quality print bed surface makes a big difference. I experimented with a lot but settled on the BuildTack shetes. Partly because they worked so good with my XYZ miniMaker and partly because they just hold up really well. Get a thin paint spatula to go with it and throw out the scarry paint scraper, your build surface and fingers will last longer.
- Dual gear extruder, extrusion has always been my big nemesis with the ender 3, I tried several extruders but have been really happy with there dual gear extruder. The price is right and it is quite functional and easy to install. Use your old extruder tension spring rather than the yellow one that came with it, it is too strong.
- Octoprint, I am very happy with this piece of tech. With a tiny bit of effort you can monitor and print from anywhere, allowing your machine to live in a closet rather than needing to be out.
I wish we could get an ender 3 style machine with a few simple upgrades, for something close to the same cost:
- Up to date firmware, come on everyone this is a no brainer.
- Simple bed leveling built in. The miniMaker has a push button you can manually extend when leveling. It probably cost $0.10 to add to the printer and is 90% as good as a fancy BLTouch.
- Quieter stepper drivers and fans that shut off when not in use. This is not critical but it can make the rest of your house happier about your hobbies.
- A hot end with a captive heat break liner like on the E3D V6. Probably the biggest failing of all Creality printers is that they run the bowden tube all the way down the hot end. This sounds great on paper but in practice you end up having to jam everything together really tightly to keep it from leaking.
The newer machines from Creality try to solve some of these problems but they spend too much time on bling (touch screens) and not enough on reliability.
![]()
Enough nonsense, the big question is how does all that relate to a CNC. Well I'm supper happy with my home made CNC. So far I have been able to cut out anything I can think of with only a minimal amount of effort learning any new skills I may need. It is really a dream come true!
However as awesome as the CNC is it is still many times more difficult to learn how to use than a 3D printer for one simple reason. With the 3D printer I can think up an idea and start it printing from the comfort of my couch. And in 3-10 hours I have a finished part I can inspect that cost $0.30 to print all without any oversite from me. That allows me to rapidly iterate on ideas without worry and makes the CAD/CAM learning curve much easier to handle.
On the other hand the CNC produces parts that I'm much more eager to show off, but at a cost in both materials and time. Quality wood can cost $30 or more for each cut, 100x more than the 3D printer, and I'm just not comfortable leaving my CNC unattended. You don't have to watch it every moment but if something goes wrong you want to be there to turn it all off quickly before serious damage is done. Not to mention the CNC is loud, dusty and takes up a lot of prime real-estate in your workshop.
I guess what I'm getting at is that the 3D printer is a great first step to the CNC. It has its limitations but it is very forgiving as well. There is a huge learning curve on all of this and taking things piecewise is the best approach. I'm looking forward to continue pushing my CNC to see what else it can do, but if your just starting out then consider spending a few months mastering your 3D printer before going on to bigger and better things.
MultiBot CNC v2
A low cost 3D printed CNC that can be built with minimal tools yet is capable of great things.