David Tucker
-
No inserts
12/10/2020 at 05:07 • 0 commentsI just uploaded some STL's in a 'no insert.zip' file on thingiverse that remove the need for the heat set inserts. This should help if you are having issues finding inserts or the ones you find don't fit well. Keep in mind that this is a weaker setup, however it is how my original version worked and that held up for the most part.
I originally got my inserts from Initeq, if that helps anyone having issues finding them locally in the US.
-
Baby Saw (doo, doo, doo, doo, doo, doo)
12/10/2020 at 04:12 • 0 commentsA true side note here, I got tired of using an old hacksaw blade to cut the tabs on my projects so I whipped out a small handle to turn a jig saw blade into a miniature hand saw. This works with t-handle blades and they just snap in and out with a small bit of force. Should also work nice for pumpkin carving as well...
![]()
You can grab the file from thingiverse if you are interested in it.
-
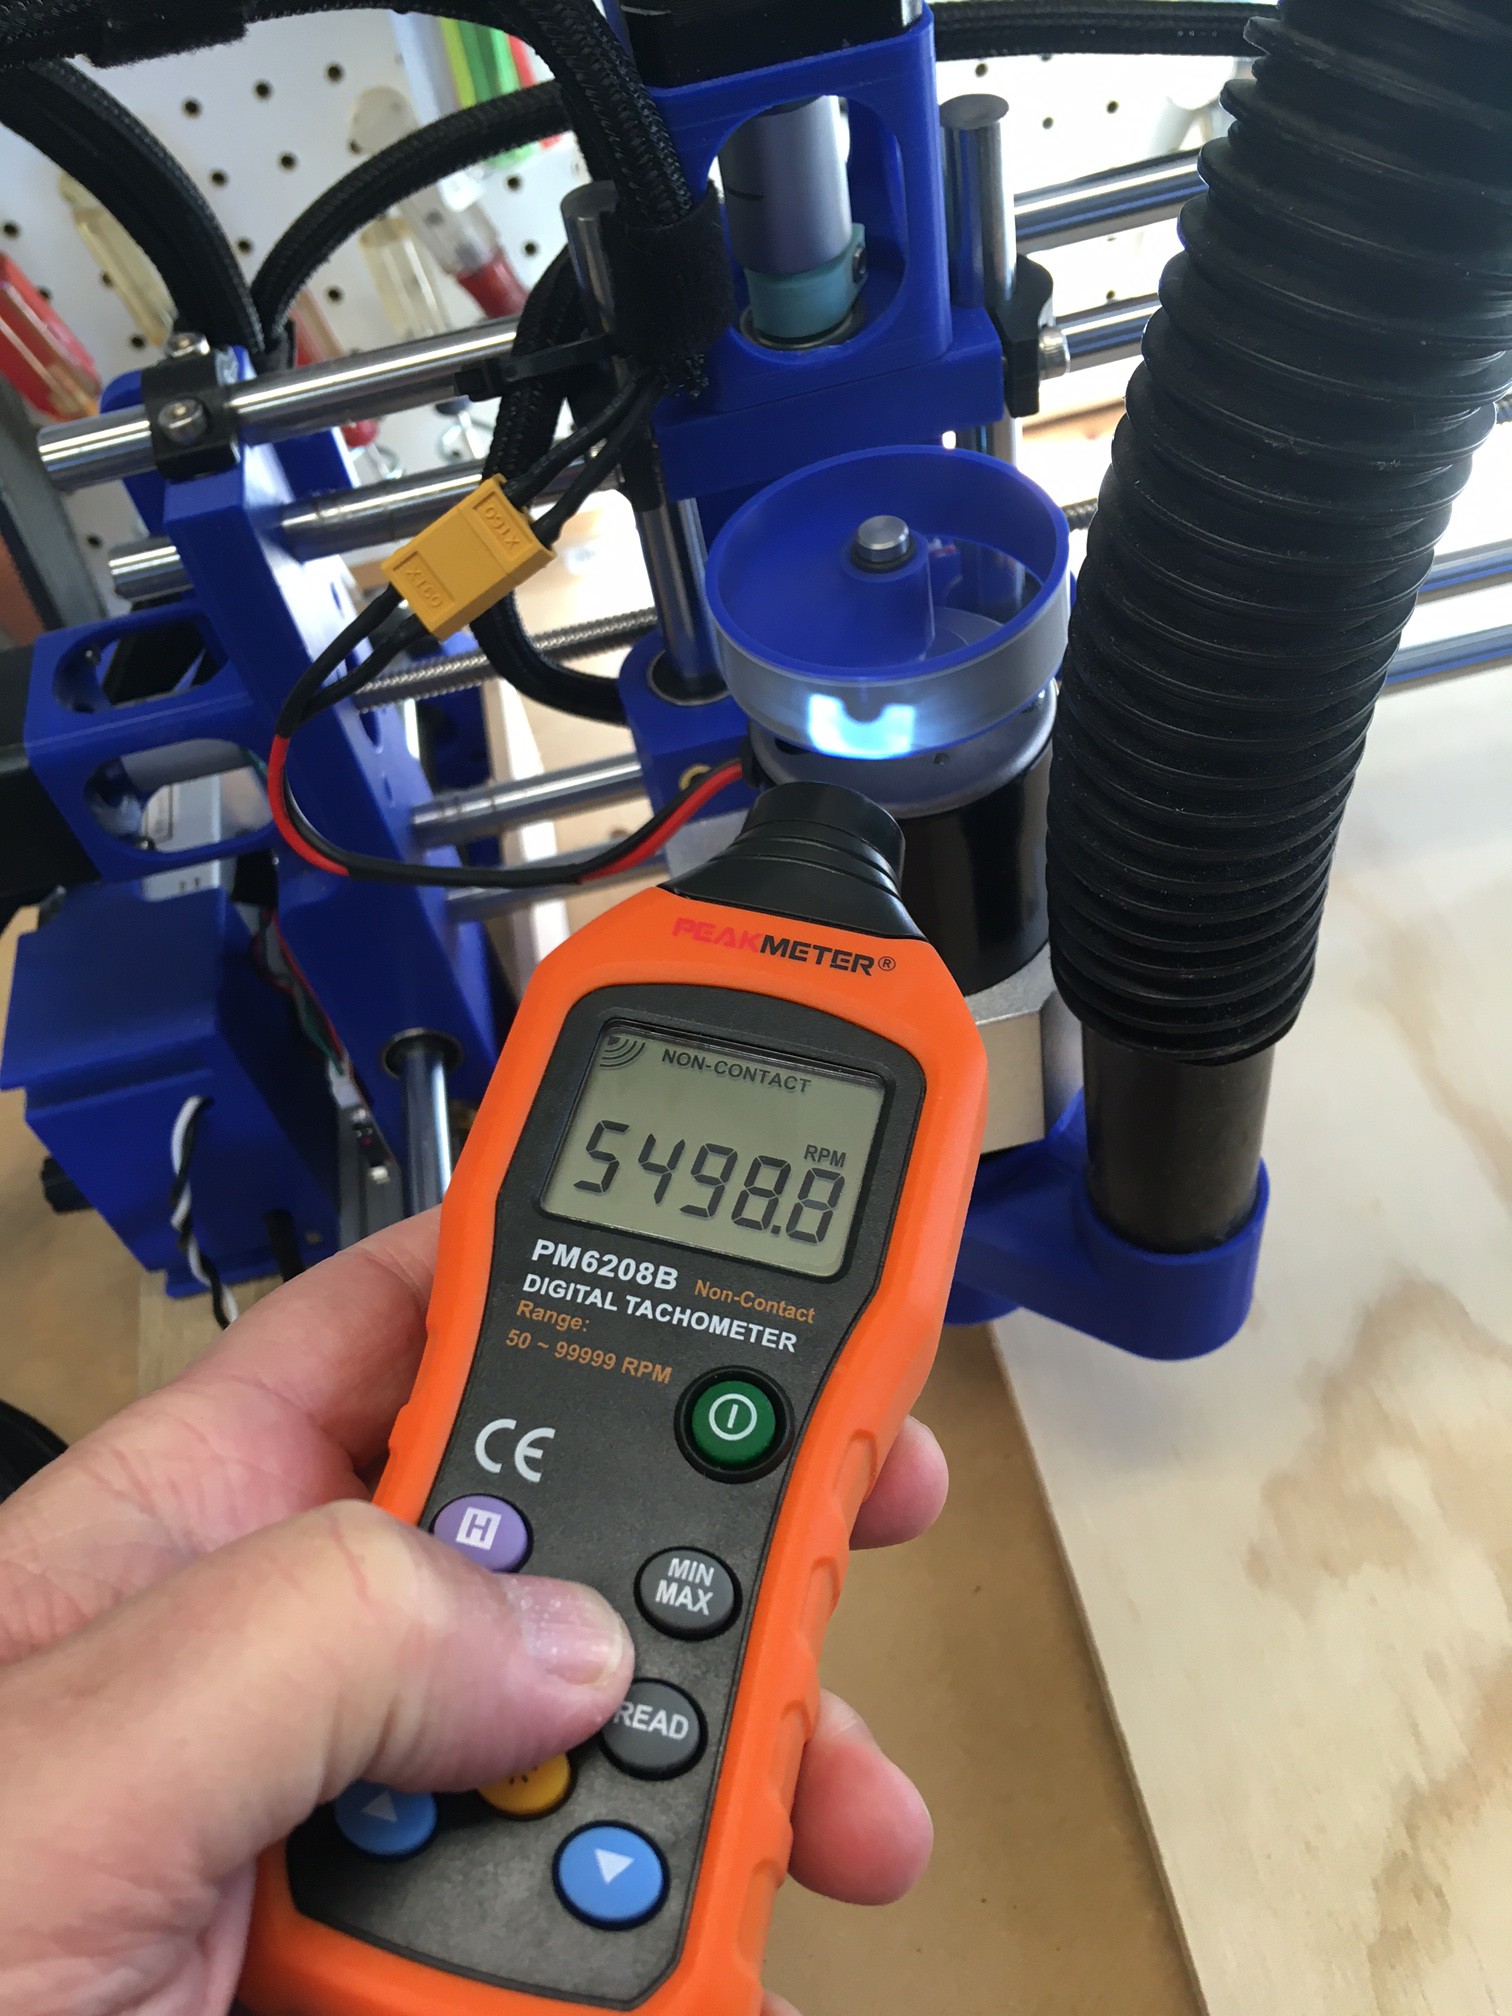
RPM Gauge
12/06/2020 at 03:17 • 0 commentsA while back I picked up a PeakMeter PM6208B non contact digital tachometer to measure the rpm of my spindle. I happened to get it on a great sale, but it turns out to be just an ok meter. This one uses a LED to shine a light on a shaft that has been marked with a bright or dark stripe and then reads the reflected light to detect a pulse when the shaft rotates. The problem is that it is not very sensitive, using the included foil tape I could not get it to reliably read my spindle at all, I had to paint half my fan black and the other half white to get a reliable signal. I suspect the tachometers that use a low power laser for a light source probably work better since the light is more directed and hopefully more will bounce back to the detector.
![]()
Anyway paint seems to have helped a lot, I can get a reliable signal now, but I have to hold the meter very close to the source, about half an inch. Now that I have it working I can begin to investigate the capacity of my spindle. I have a Machifit ER11 Chuck CNC 500W Spindle from Bangood that is rated for 3,000 to 12,000 rpm. For starters the spindle won't start turning before about 2,000 rpm, but once started I can then turn it down to 500 rpm however I doubt I could mill even these speeds without stalling out the motor. The motor is peaking out at around 11,800 rpm, so not to far off from the rated speed.
I tried milling some plywood at full RPM and saw no perceivable dip in speed while milling. I need to rerun that same test at 3,000 rpm to see if the motor torque drops with speed (I'm sure it does) and to determine what the minimal RPM I could mill at would be.
![]()
On a side note I think at $70 this is a very good deal for a spindle. You can get a stronger spindle with a more advanced controller but you probably can't beat the price and it seems well built and runs quiet compared to my Dremel tool. The brushless spindles run even quieter and may last longer, but they cost twice as much for the same relative performance. If your going to go down that road you probably want to invest in a larger machine and a larger spindle that can handle higher speeds and torques as well.
A word of caution, before painting my spindle I tried wrapping it in tape to create a contrast in color. That worked great at low speeds but once I got up to around 9,000 rpm the tape exploded off the spindle making for a very exiting moment. These spindles move fast, so don't mess around too much!
-
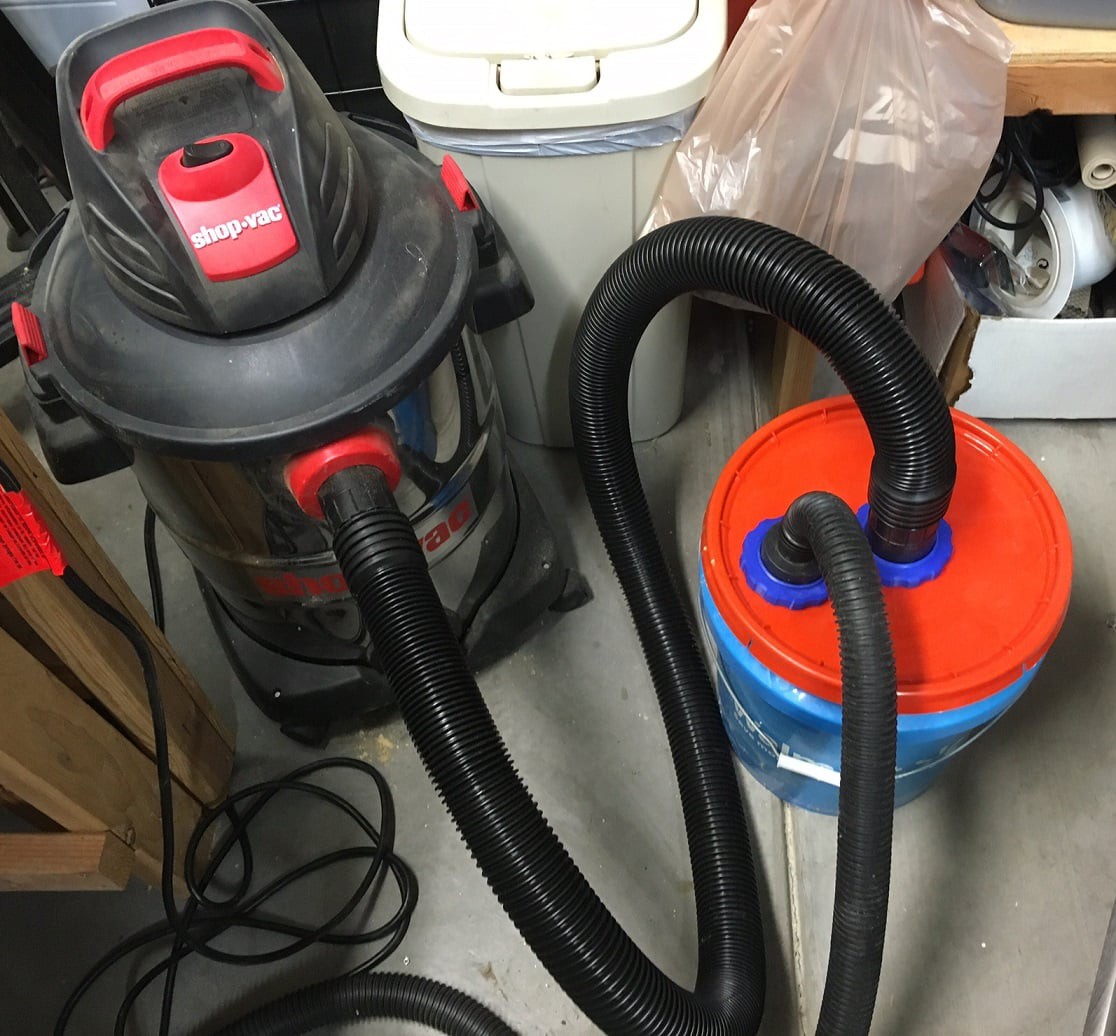
Dust seperator
12/03/2020 at 02:59 • 0 commentsI took a peek in my shop vac and found it clogged up with MDF gunk, so I decided to design a dust separator I could 3D print. This is based around a 5 gallon pail and lid and takes 2-1/2" press fit hoses.
I dumped out the content of my shop vac and cleaned it all back up and 99% of the material ended up in the dust separator, it seems to be doing a great job. Now I can add a dust bag to the vacuum without worrying about going through bags too fast, that should help further reduce dust in the air.
You can grab the stl files from my Thingiverse page, along with the fusion 360 f3d files in case you want to remix it for your own tools.
https://www.thingiverse.com/thing:4668759
This cost around $5 for the bucket and lid, much cheaper than a dust deputy or dustopper and it seems to work quite well.![]()
![]()
![]()
-
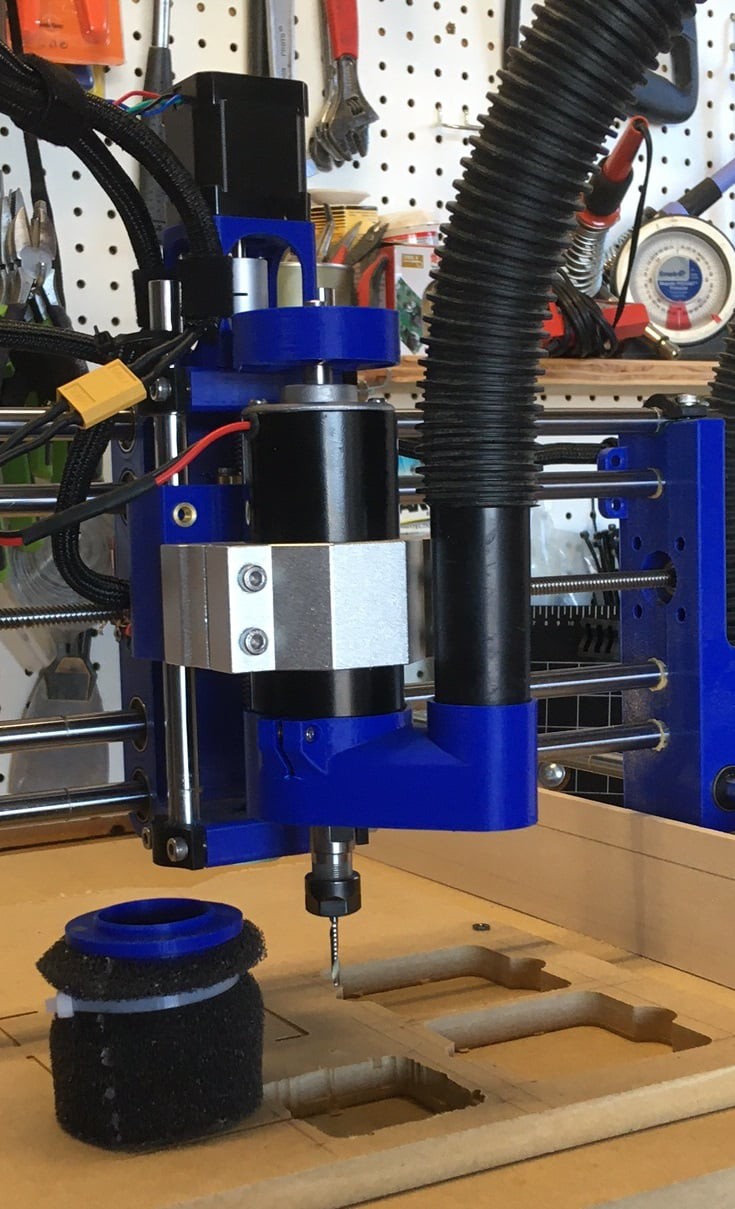
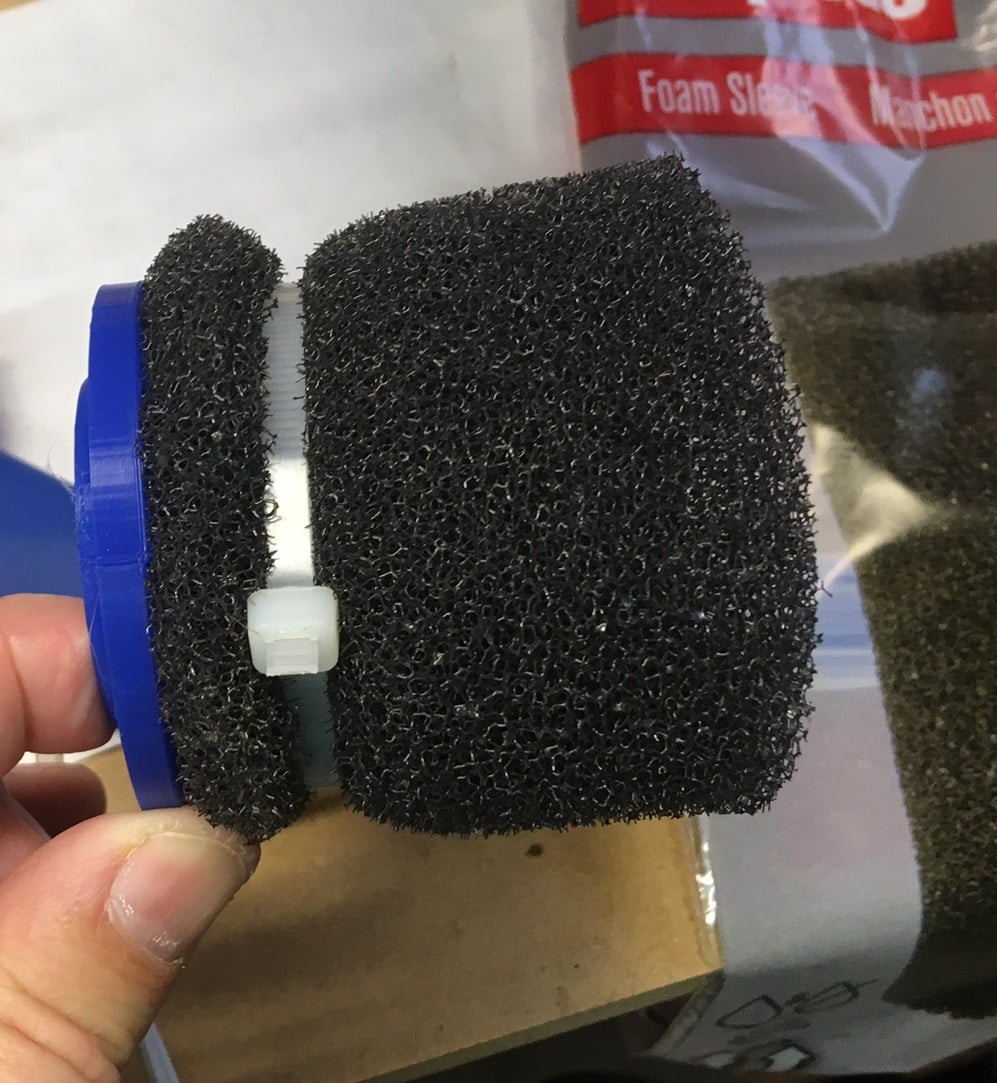
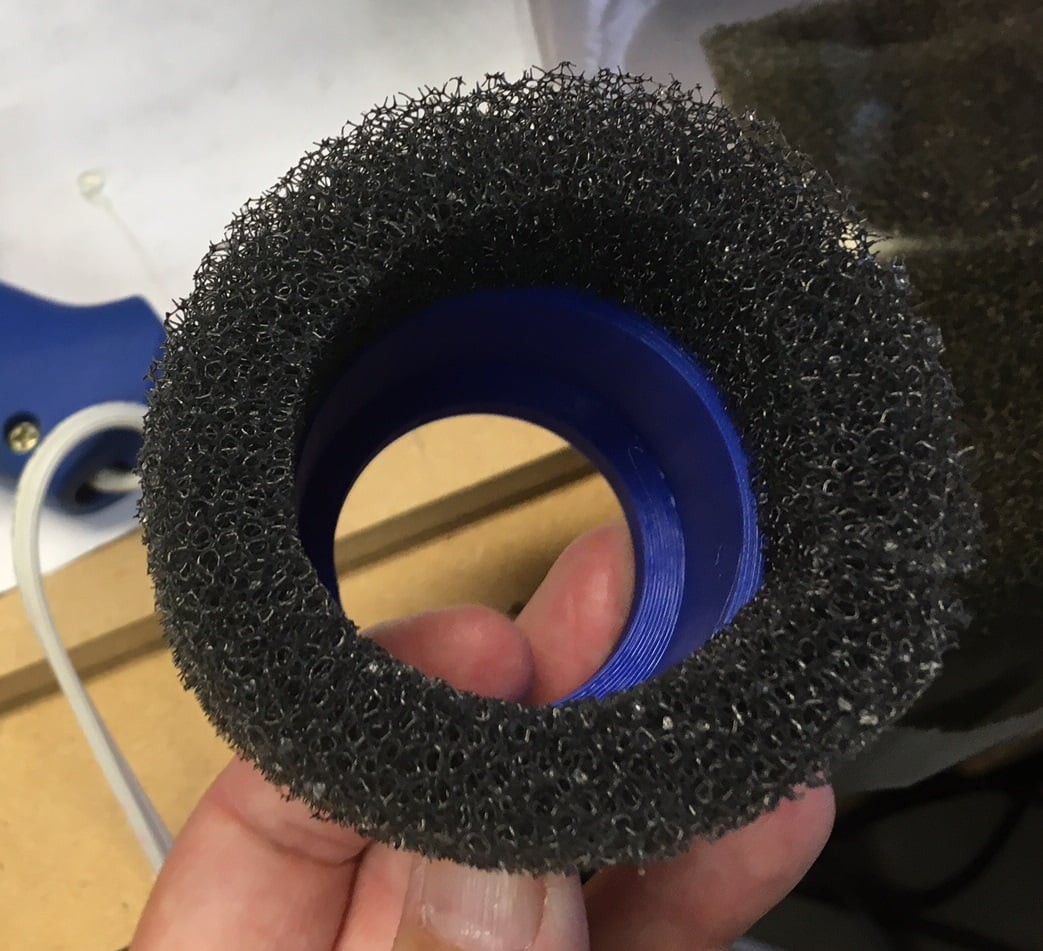
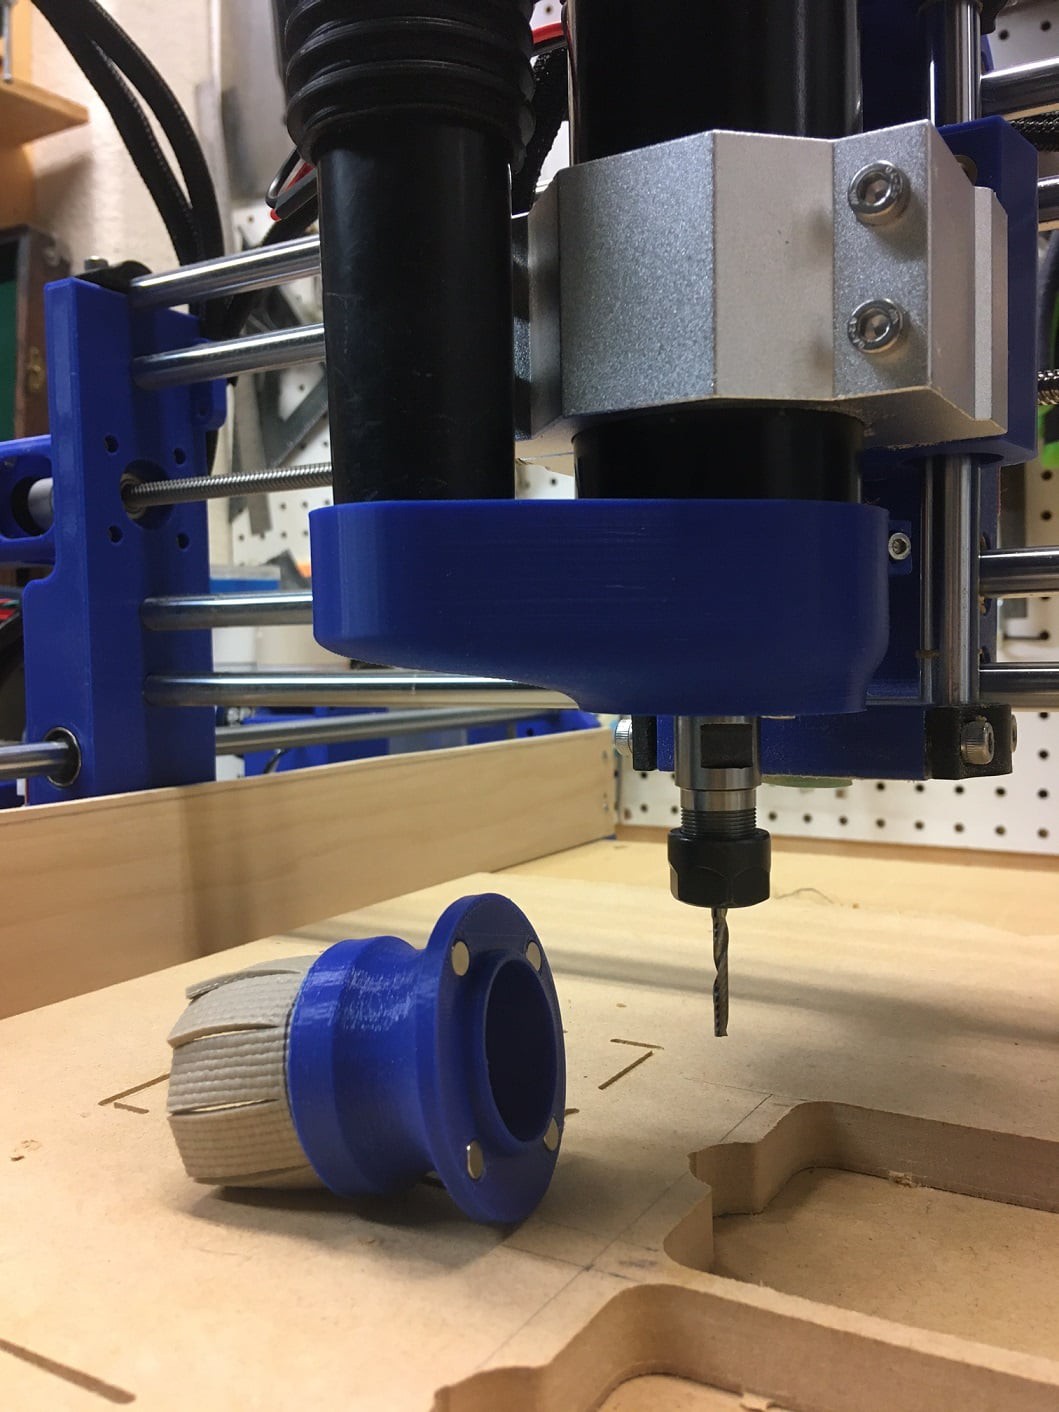
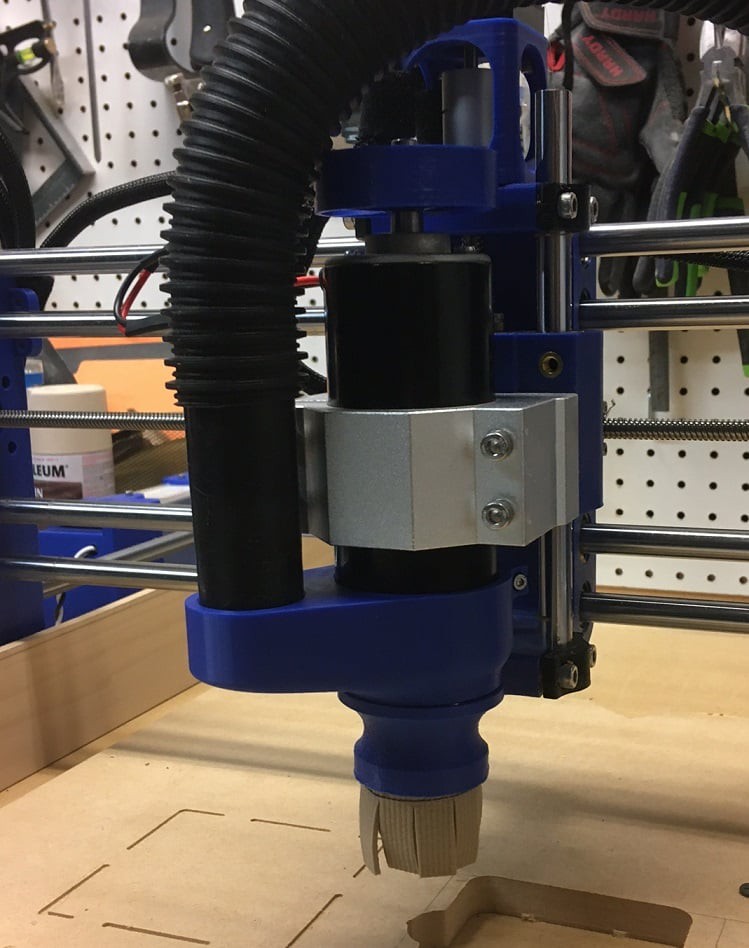
Dust boot take two
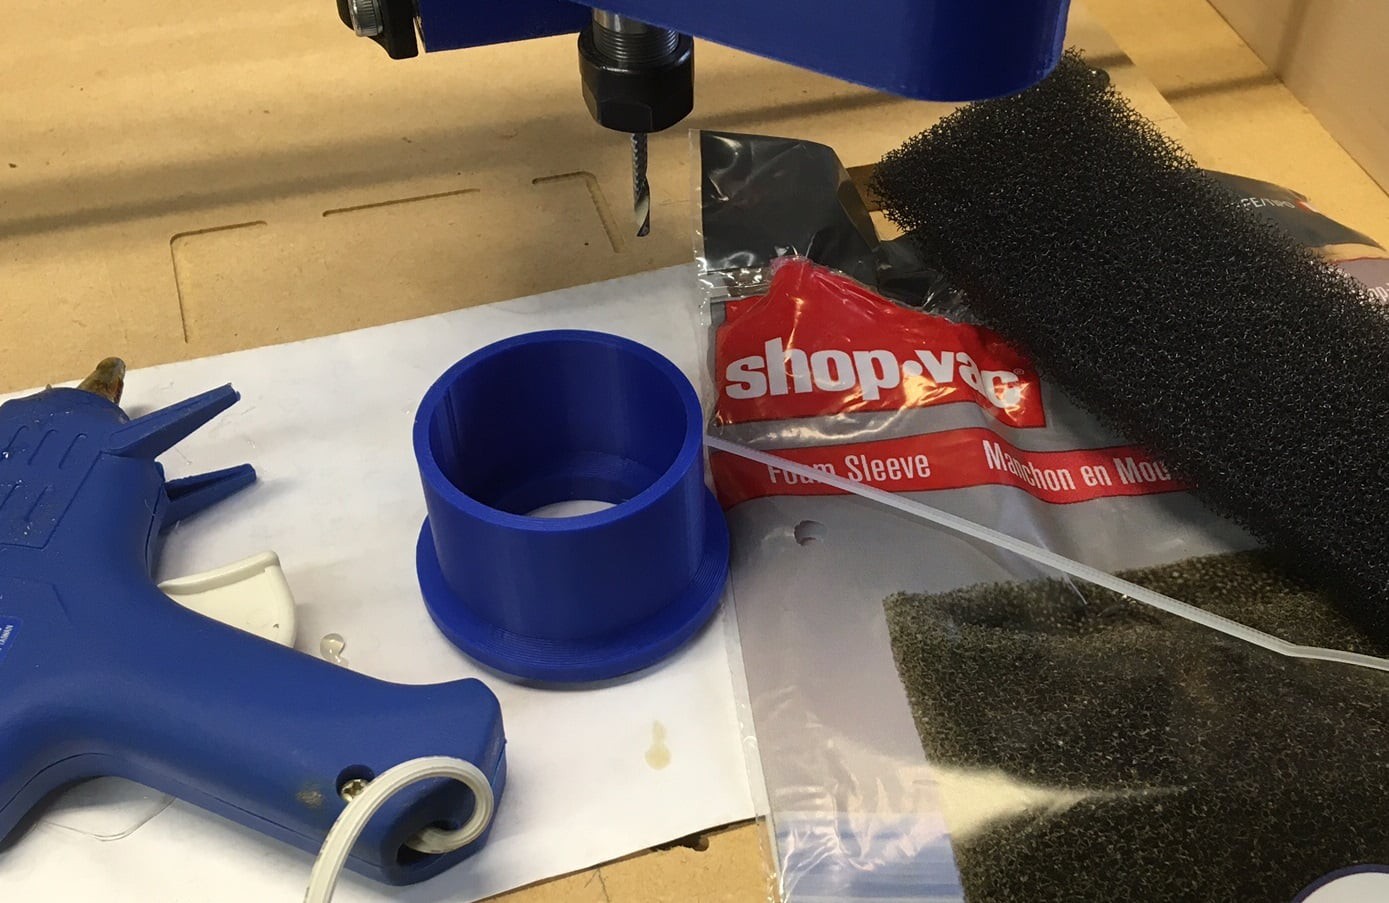
12/03/2020 at 02:58 • 0 commentsHere is take two on my dust boot. I made it easier to print, and opened it up more for better suction. Finally I redesigned the brush holder to be both more flexible and hopefully prevent the brushes from being sucked into the vacuum. The idea is to support the bristles (or whatever you use) as much as possible without restricting the ability of the brush to bend.
I'm experimenting with low cost alternatives to bristles. I can't find brush material for less than $10, that is about 1/3 the cost of buying a dust boot on amazon, so a bit pricy. Anyway right now I'm using a section of a ShopVac foam filter sleeve I found at Walmart for $4. I'm using 1/4 of the filter, so it could be used to make 4 brushes. I have not tested it out but I think it will work well, it is solid, and yet can easily be compressed and should prevent chips from flying out.
If that is a dud, then I designed this to take 70mm bristles. I will try that out next. Fingers crossed for a good test tomorrow.---
Well it works a treat! I don’t see any down side to using a piece of shopvac filter for a dust boot brush. You could probably use most any porous foam material like a scotch brute pad or chair foam.
I don’t see any dust outside of the cutting area and 90% of the dust in the hole was sucked up.![]()
![]()
![]()
![]()
-
Dust boot take one
12/03/2020 at 02:55 • 0 commentsHere is my take on a low cost dust boot. I have not had a chance to give it a go yet, we will see how well it works tomorrow. I tried to design it so it could use brush bristles, but I'm just using some shelf lining pads for now because they were laying about.
My goal was to get as much suction as possible right at the cutter, while still being able to access the chuck without completely removing the whole setup. For that I split the boot in two and attached it with magnets for a quick disconnect.
![]()
![]()
-
Second project
12/03/2020 at 02:53 • 0 commentsMy latest project, a holder for all the collets that came with my spindle. I’m using 6mm magnets to hold the lid on. It works great!
On the collet side, for US customers there not needed, a 1/4 and 1/8 collet is all you need. I got the full pack because it was only $11 more with the spindle and because I was not sure where I would buy bits from. But in hindsight I would skip it and spend the money on bits.
![]()
![]()
-
Software
12/03/2020 at 02:52 • 0 commentsI have been trying to find the perfect cam slicer for this machine. A big goal was to make it a free slicer since a $350 machine with a $500 software package to drive it seemed counter intuitive (may as well bought a Shapeoko). After making a long list of every CAM package I could try and experimenting with all the free and low cost versions I have settled on two. I'm using carbide create for simple goofing around, and the cam module in Fusion360 when I have something serious to cut.
https://docs.google.com/spreadsheets/d/18VVDNzIbiPsPa4I6_KfHdcdMfg1gpYXKEfeGCnfBoI4/edit?usp=sharing
Carbide Create is quite functional for what it is but trying to use it to create a design is a very frustrating experience. It feels like I went back in time to windows 3. Honestly I think MS Paint is more capable as a drawing program. However when importing a SVG it does a good job of slicing and has rudimentary v-carve support so it has its value. Plus it is the simplest cam tool that is functional. Because 2020 has been so fun they decided to give away Carbide Create Pro free for a year. I tried it out but it does not add much and certainly does not make it easier to edit drawings.
https://community.carbide3d.com/t/carbide-create-pro-free-for-a-year/20918Fusion 360 on the other hand was very intimidating to get going on, however once I made a cut it all became a lot clearer. The trick is to ignore what you don't know! The nice thing here is you can model your design fully in 3D just like you would for making a 3D printed part, and you have very exacting control over every part of the CAM process. Anyway here are a few nice tutorials on how to get started.
http://evanandkatelyn.com/2018/01/fusion-360-cam-tutorial-for-cnc-beginners/
https://reprage.com/post/fusion360-to-gcode-to-grbl-CNC-millOne trick that is not mentioned in there (or that I missed) is that Fusion360 will add a G28 command to the start of your cut. That is an obscure command that sends the tool to a known safe position. However that safe position must be set at some point in time, and you need to have homed the machine (this is an absolute position). Without this the Z axis will just randomly move up or down at the start of your job. There is a nice writeup on it at the link below, but basically you just home the machine, move off the limit switches a bit and send a G28.1 command to GRBL and that will set the safe position for you. After that you only need to home the machine then zero the tool at the top of your workpiece and the G28 position will be recalled from GRBLS internal settings. Basically you only need to do this once.
https://discuss.inventables.com/t/learning-about-g28/12205I'm still on the hunt for the perfect CAM package. I feel that there is a gap in the industry between low end hobby code and high end production shops for a simple to use cad/cam package that can handle 2D 2.5D and 3D milling without needing a mechanical engineering degree to use or costing more than the rest of my workshop. I had hoped VCarve could be that tool, but not only is it expensive, but I did not find it very intuitive to work with either. Maybe time will change my mind.
-
First cut
12/03/2020 at 02:51 • 0 commentsFirst real cut on my machine! It turned out nice.
However every time I tried to vacuum up the chips I got a communications error between my pc and grbl. I suspect poor ground but I need to run some more experiments.
---
Note, getting a quality usb cable with Ferrite filters seems to have helped
![]()
-
Auto Squaring
12/03/2020 at 02:45 • 0 commentsI went ahead and did a writeup on how to get auto squaring working on the Dremel CNC. Just a note, if your using a clone CNC shield from eBay then you will loose the ability to control the spindle, but with a proper CNC shield, or a ramps board you can have it all.
https://docs.google.com/document/d/1KOMStGTb-w_KqlAyxvKoIVSi_9OebBm97TLjsE9GJBE/edit?usp=sharing
Let me know how this works out for you if you try it.
MultiBot CNC v2
A low cost 3D printed CNC that can be built with minimal tools yet is capable of great things.