Instead of programming a web and mobile application from scratch to send commands to my thermal printer, I wanted to use Telegram, a cross-platform cloud-based messaging service compatible with iOS and Android. In Telegram, it is effortless to create bots with a command list unalike any other messaging applications, which are special accounts that do not require an additional phone number to set up. IoT Thermal Printer, Telegram bot I created for this project, let me print records in six different categories I need frequently:
- Notes (Appointments)
- Shopping Lists
- URLs
- Payments
- Product Barcodes (Manufacturer Product Numbers)
- Series (New Episode Release Dates)
To fetch commands transferred by IoT Thermal Printer, I developed an outgoing webhook for the Telegram bot, which interprets and replies commands or texts when updated by the Telegram Bot API.
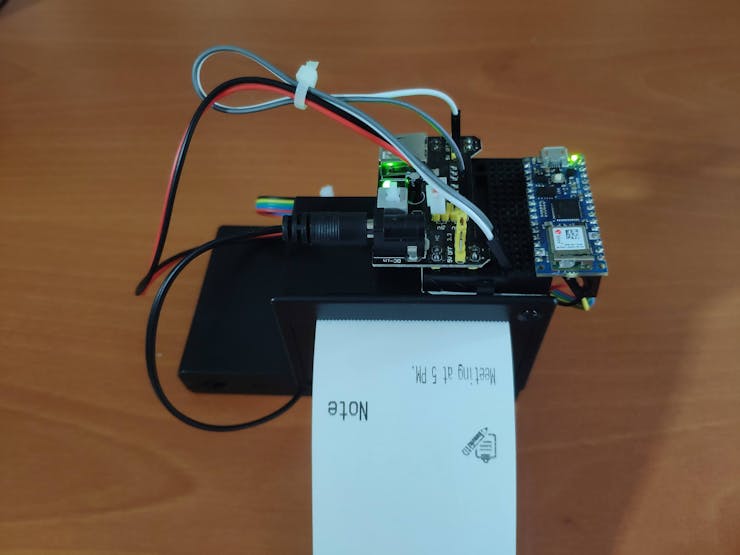
Then, to receive commands from the webhook and print out records with graphics (bitmaps) for each category mentioned above, I used an Arduino Nano 33 IoT and a tiny (embedded) thermal printer.
Huge thanks to DFRobot for sponsoring this project.
Sponsored products by DFRobot:
⭐ Embedded Thermal Printer - USB - TTL Serial | Inspect


Step 1: Building a bot for Telegram with BotFather
BotFather is a Telegram bot that lets us create and manage bots on Telegram without any coding required.
⭐ First of all, open BotFather on Telegram and enter /start to view the available command list and manuals.

⭐ Use the /newbot command to create a new bot. Enter the name of your bot when BotFather asks you for a name. It is displayed in contact details and elsewhere.
thermal printer
⭐ Then, enter the username of your bot. Usernames are 5-32 characters long and are case insensitive, but may only include Latin characters, numbers, and underscores. They must end in 'bot', e.g. 'tetris_bot' or 'TetrisBot'.
thermal_printer_bot
⭐ After these steps, BotFather generates an authorization token for your new bot. The authorization token is a string along the lines of 123456:ABC-DEF1234ghIkl-zyx57W2v1u123ew11 that is required to authorize the bot and send requests to the Telegram Bot API. Keep your token secure and store it safely.

⭐ If you want, you can change your bot's name afterward by using the /setname command, as did I.
IoT Thermal Printer

⭐ Also, you can change your bot's profile picture by using the /setuserpic command.

⭐ Finally, enter the /setcommands command to create the list of commands supported by your bot. Users will see these commands as suggestions when they type / in the chat with your bot.
⭐ The command list I created for my Telegram bot (IoT Thermal Printer):
- /print_home - print all available functions
- /print_notes - send and print a note
- /print_shopping_list - create and print a shopping list
- /print_url - send and print URLs
- /print_payments - define and print payments
- /print_product_barcode - define and print product barcodes
- /print_series - enter and print a new episode date
- /cover - display the given cover picture
- /arduino - display Nano 33 IoT schematics
- /help - functions and instructions

Step 2: Developing a webhook to get updates from the Telegram Bot API in PHP
I developed this webhook, named Telegram_Thermal_Printer_Bot, in PHP to get updates from my bot (IoT Thermal Printer) via the Telegram Bot API. You can download it below - Telegram_Thermal_Printer_Bot.zip.
The webhook has two parts:
- index.php - gets updates from the bot and send replies
- results.php - prints the data from the bot saved in the database
I will talk about the results.php in the following steps.
First of all, I created a class named thermal_printer to define the database settings and functions to send texts and pictures...
Read more » Kutluhan Aktar


 Toby Jackson
 Mo Badr
 ElectroScope Archive
 paul.spriet
is any anti flood security module?