Pavel Semenov
-
Progress Update 2022-01-12
01/12/2022 at 11:00 • 0 commentsHere is some info about the current status of the project.
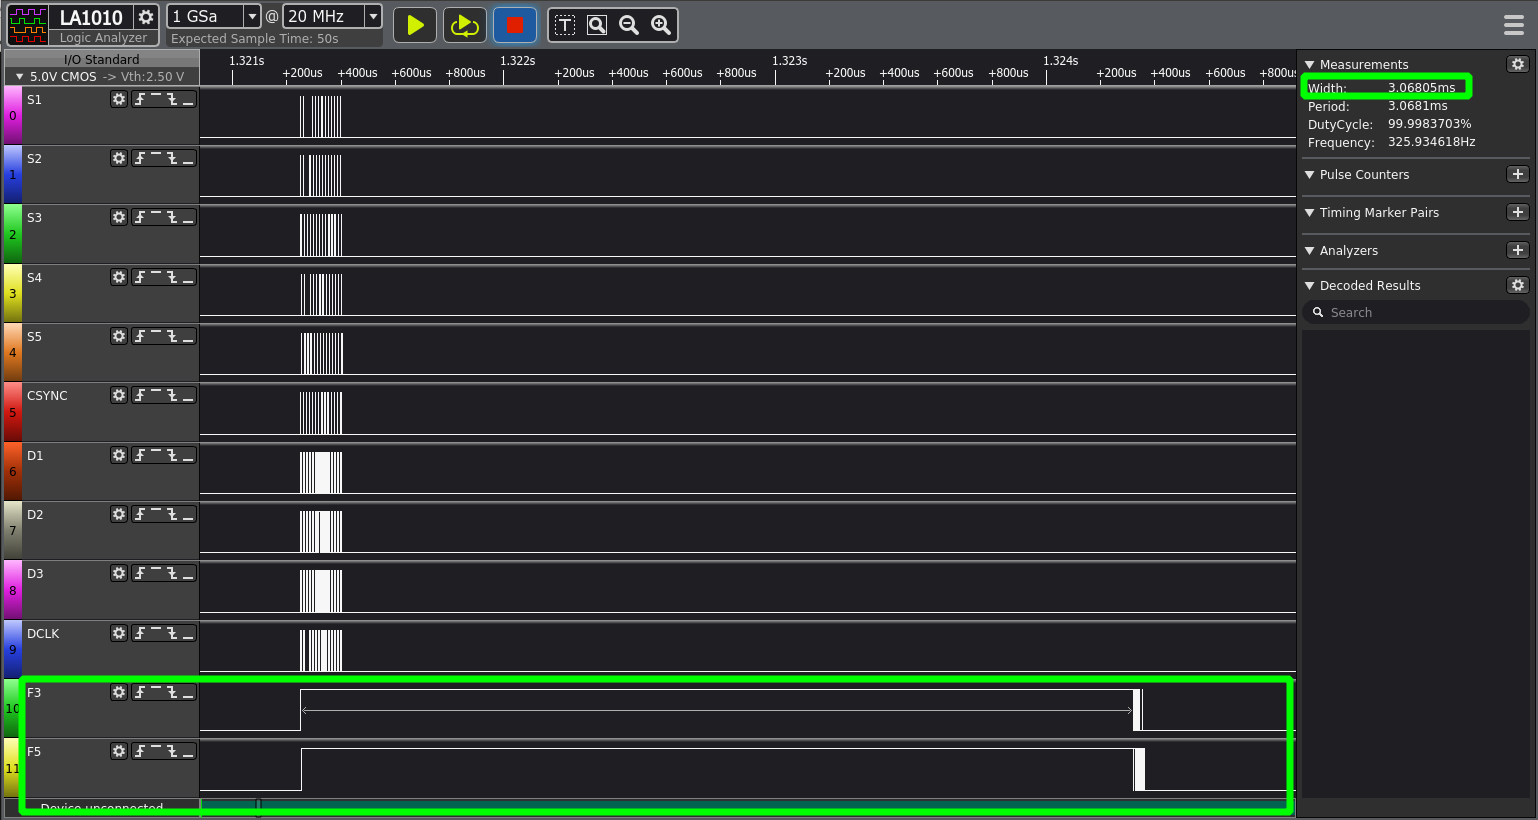
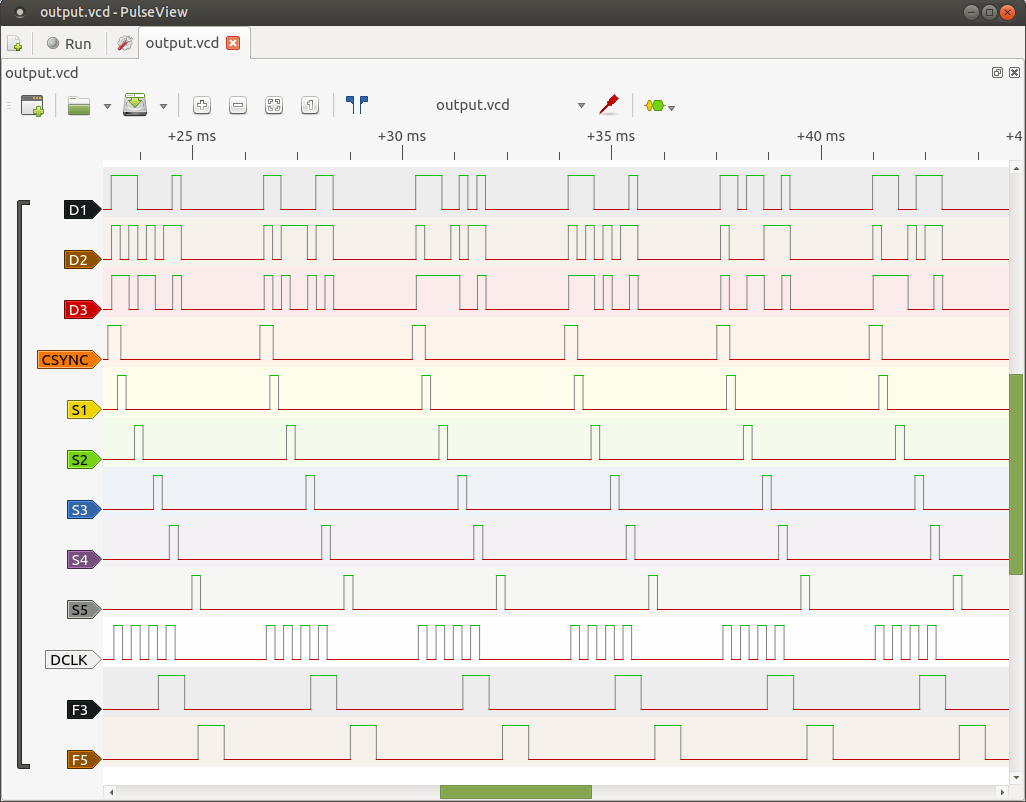
I've made a raw signal dump from a real HP DeskJet 2130 printer.
It does not contain F3 and F5 signals and has some noise, but it's pretty readable.
Printed image: test-page-fill.png
Data: test-page-fill-data.srzip - can be opened with PulseViewPCB debugging is in progress with the following results:
First: the DC-DC step-up converter changed from FP6292IR-G1 to HX3608 since the first one did not provide enough current to initiate ink firing.
Second: some issues were found while testing the module with ESP32 MCU using this firmware
- Protection circuit on F3 and F5 signals did not function properly, its width is more than 10us
As a result, I think that the magenta color of my cartridge has been burned out since the cartridge is no more printing with magenta after my experiments on the real printer.
- Some software issues exist around every third DCLK group.
Next steps to do:
1. Temporary remove protection circuit that limits F3 and F5 width and drives all signals directly with the software.2. Debug firmware with an in-circuit debugger.
-
Debugging completely assembled solution
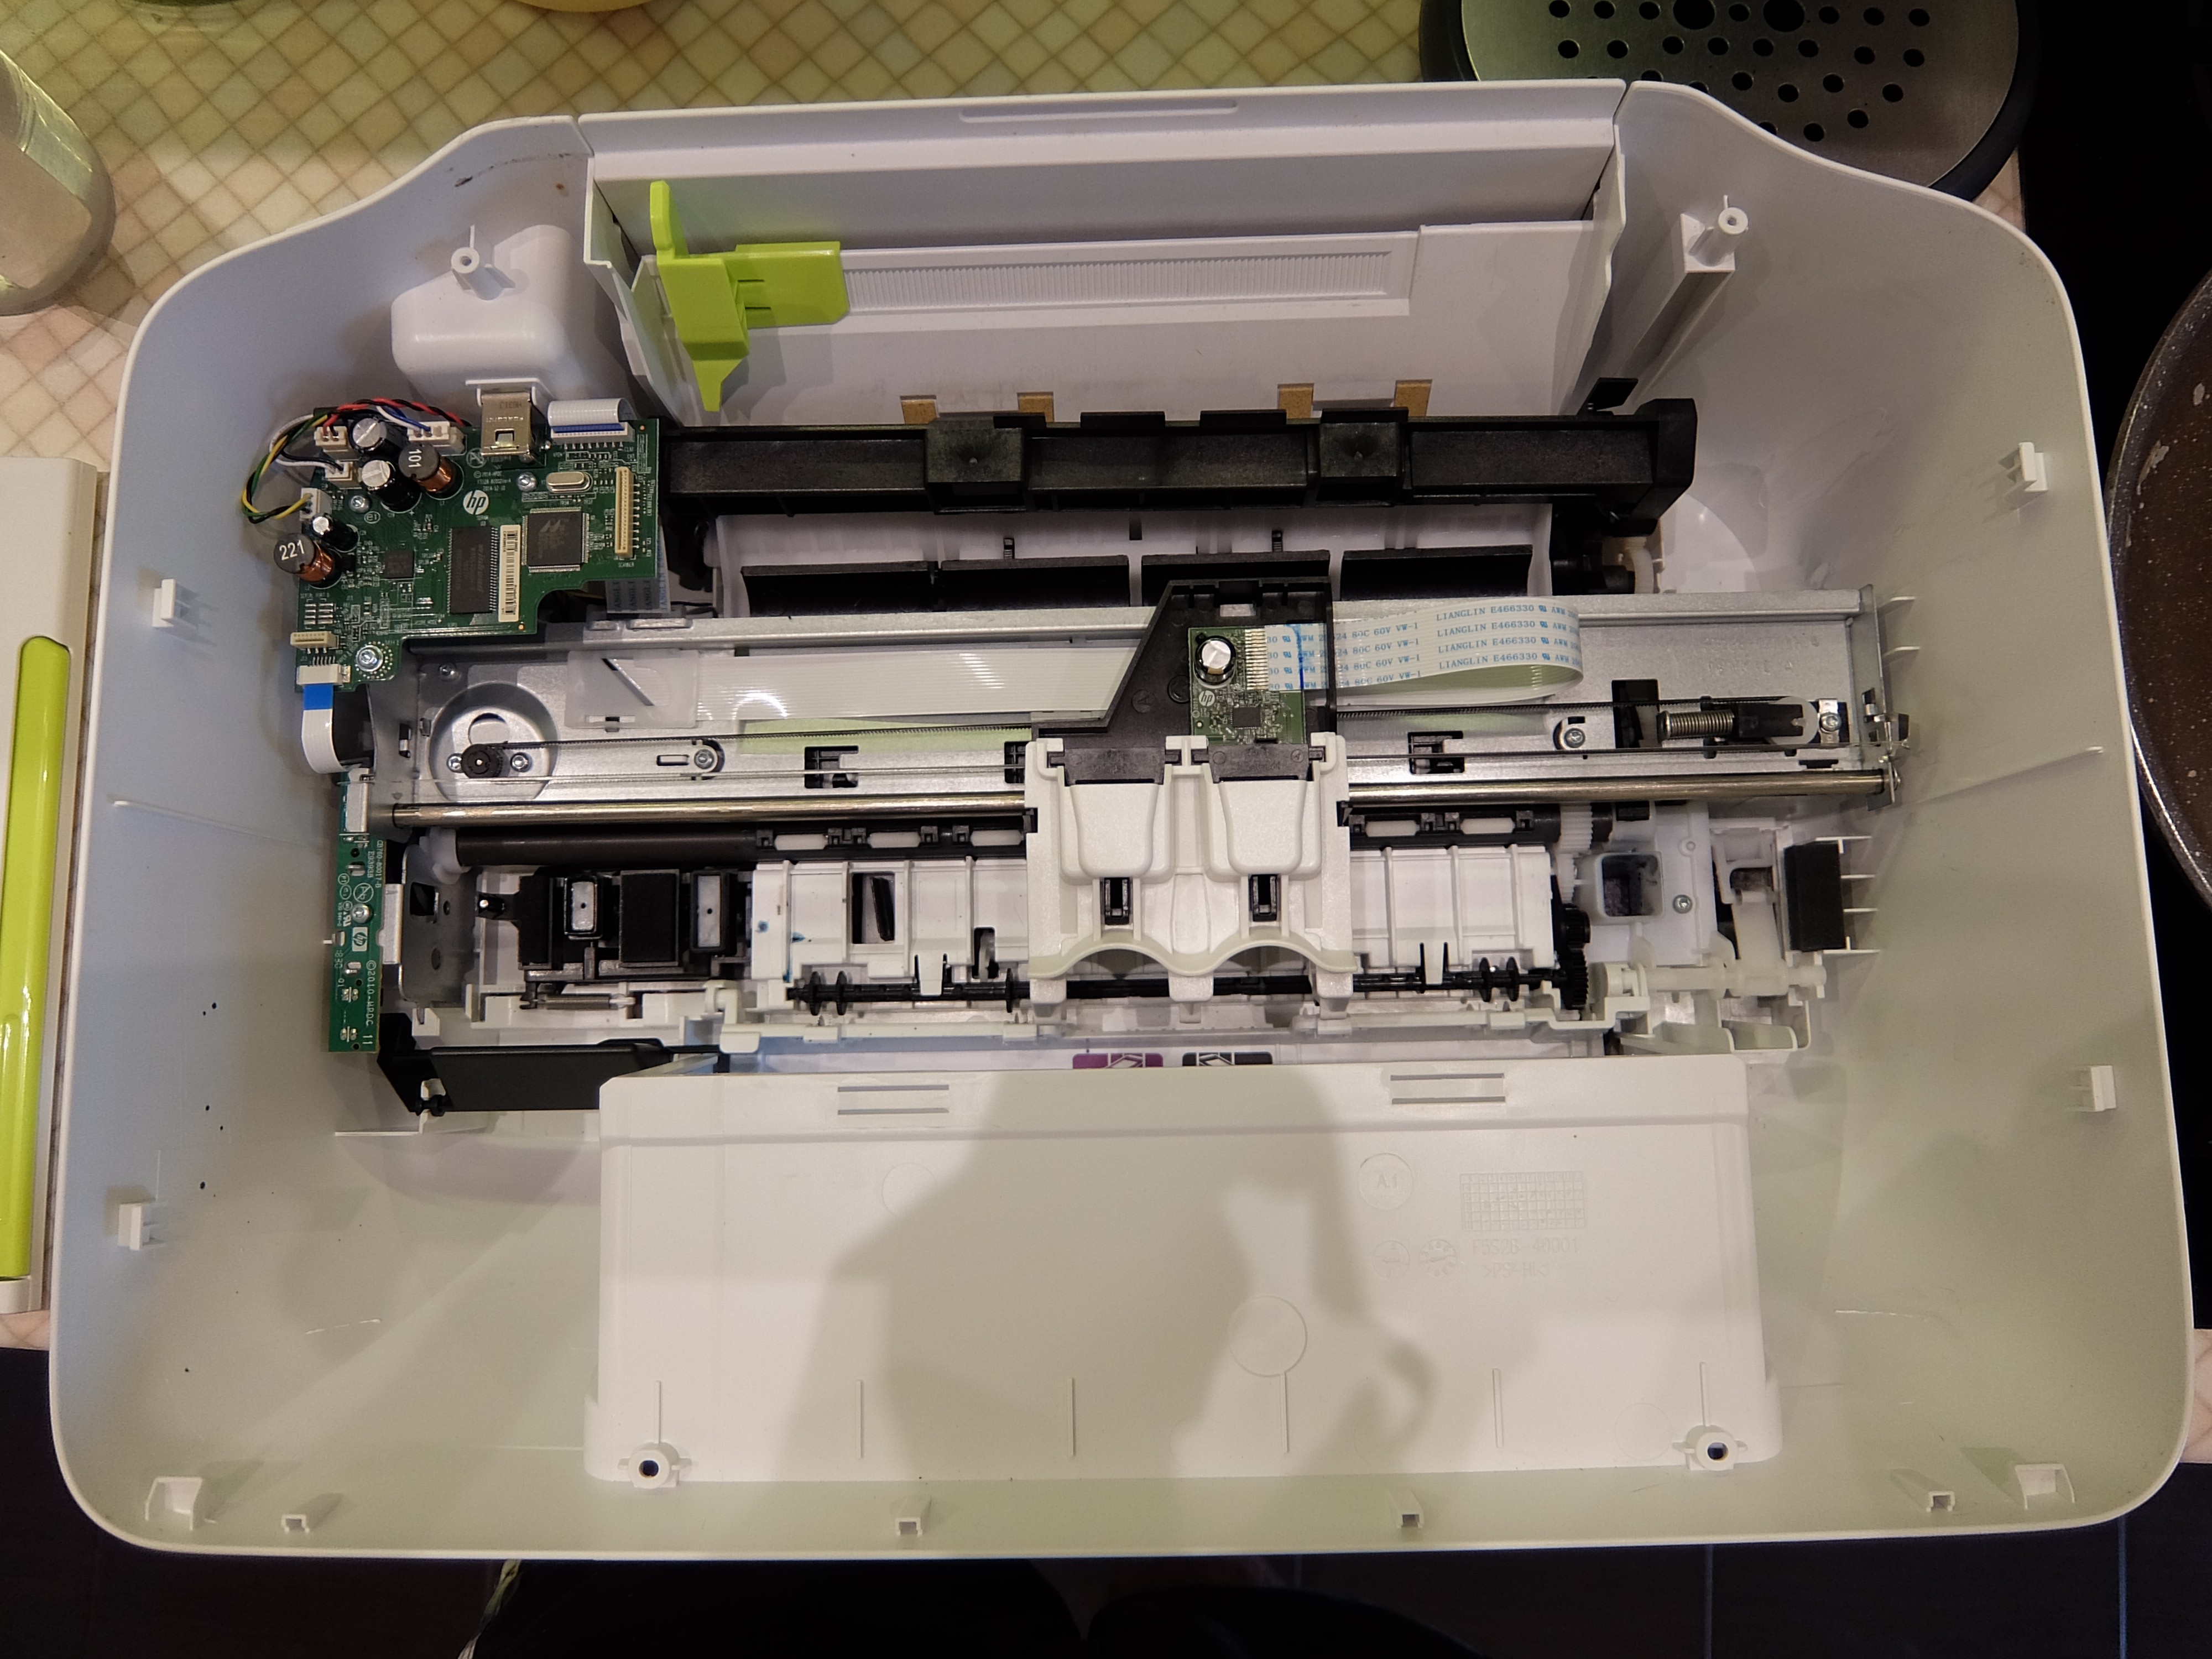
06/02/2021 at 15:08 • 0 commentsI have not been written for a while but debugging of the assembled solution is in progress. Slowly but it's moving forward.
![]() ---------- more ----------
---------- more ----------After tests of each component independently, it seems that all parts work correctly:
- The software produces correct signal sequences.
- The PCB converts levels correctly.
![]()
But when I put it all together and tested it with a real cartridge, nothing happened. The cartridge does not print... unfortunately...
I have switched the environment from Arduino to ESP32, have been implementing some debug code for it, have been written a monkey generator tool that adds some adjustments to the base signal sequences... Minor sequence adjustments have not yielded any results... unfortunately...
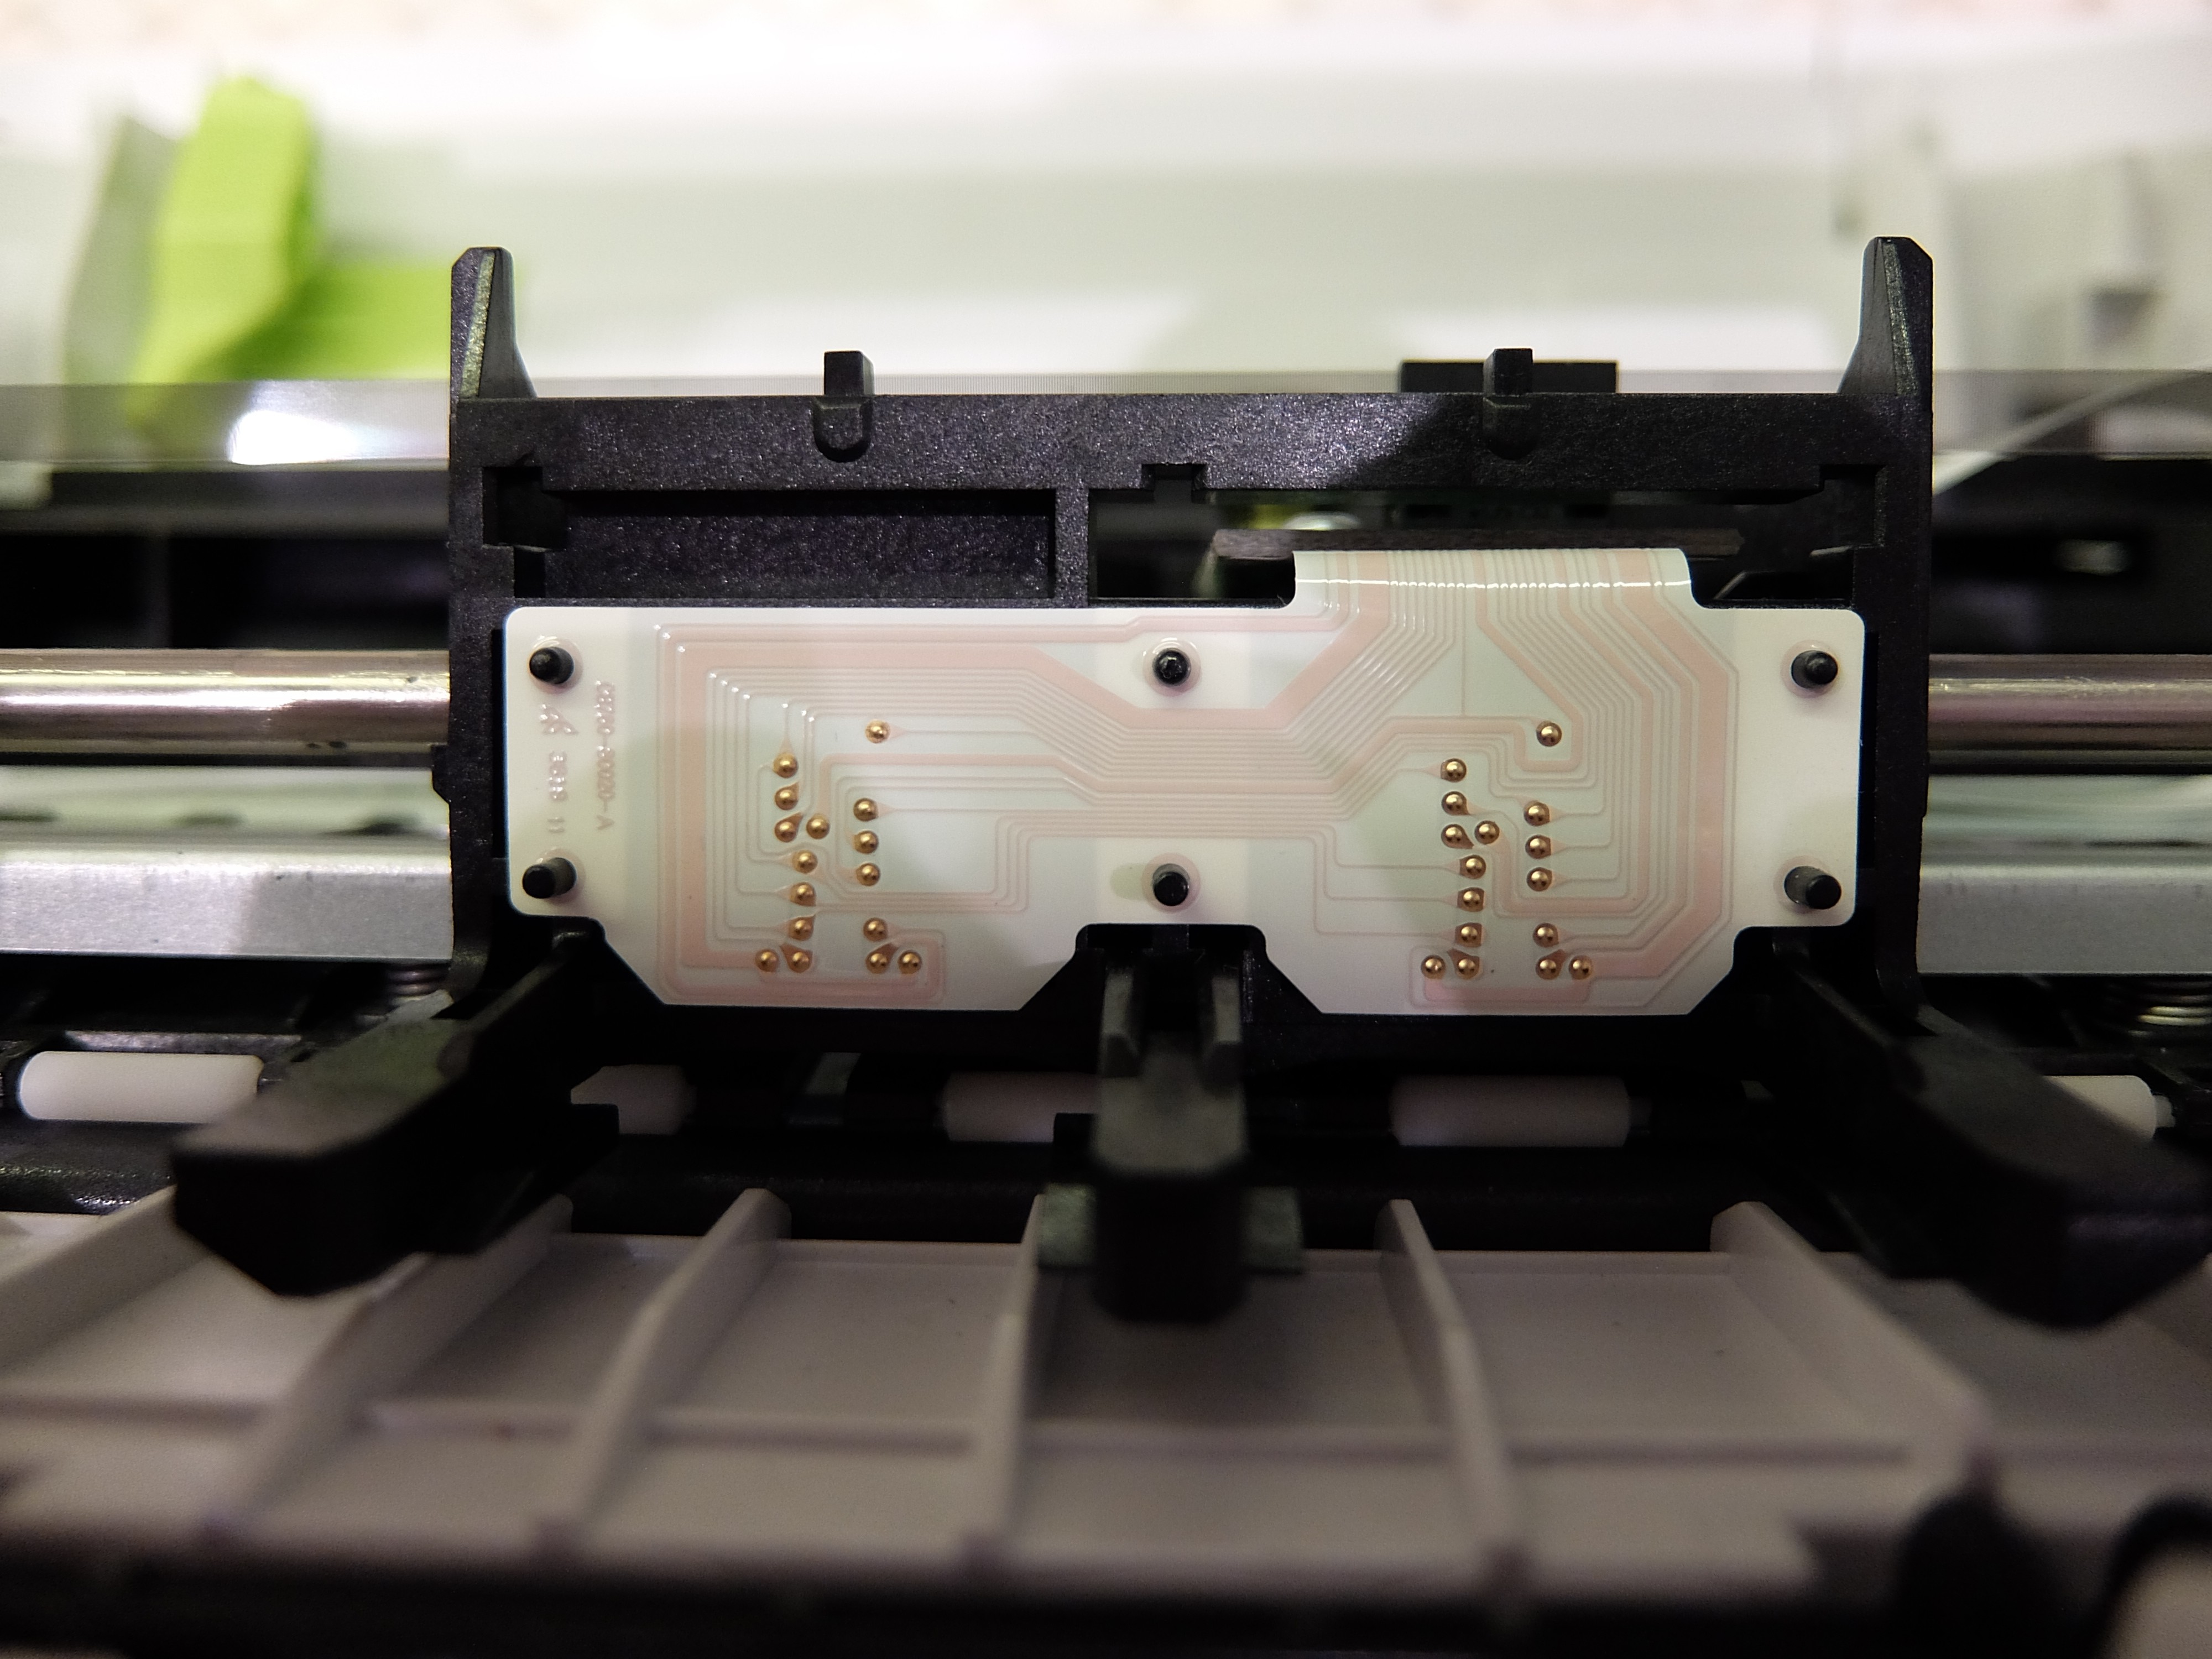
I suggested that this might be so. So I decided to buy a whole printer, disassemble it and reverse engineer target signals to compare what is the difference between my implementation of sequences and the original one.
![]()
The contacts which are going to the color and black print cartridge would be brought out as two IDC ports.
![]()
Then all data will be logged with the oscilloscope and will be analyzed. All dumps will be presented here.
The journey continues.
-
Module control software for Arduino.
04/23/2021 at 10:36 • 0 commentsHere is it, the software part of the project for Arduino board is ready and can be downloaded from github.
---------- more ----------I've implement simple Arduino application to control cartridge ink jetting through module. It was not so hard as I expected, since all cumbersome bit logic is implemented and well documented by Sprite_tm in his repository of simple printcart.
This code has not been tested with real hardware yet, but output pins diagram looks promising.
![]()
-
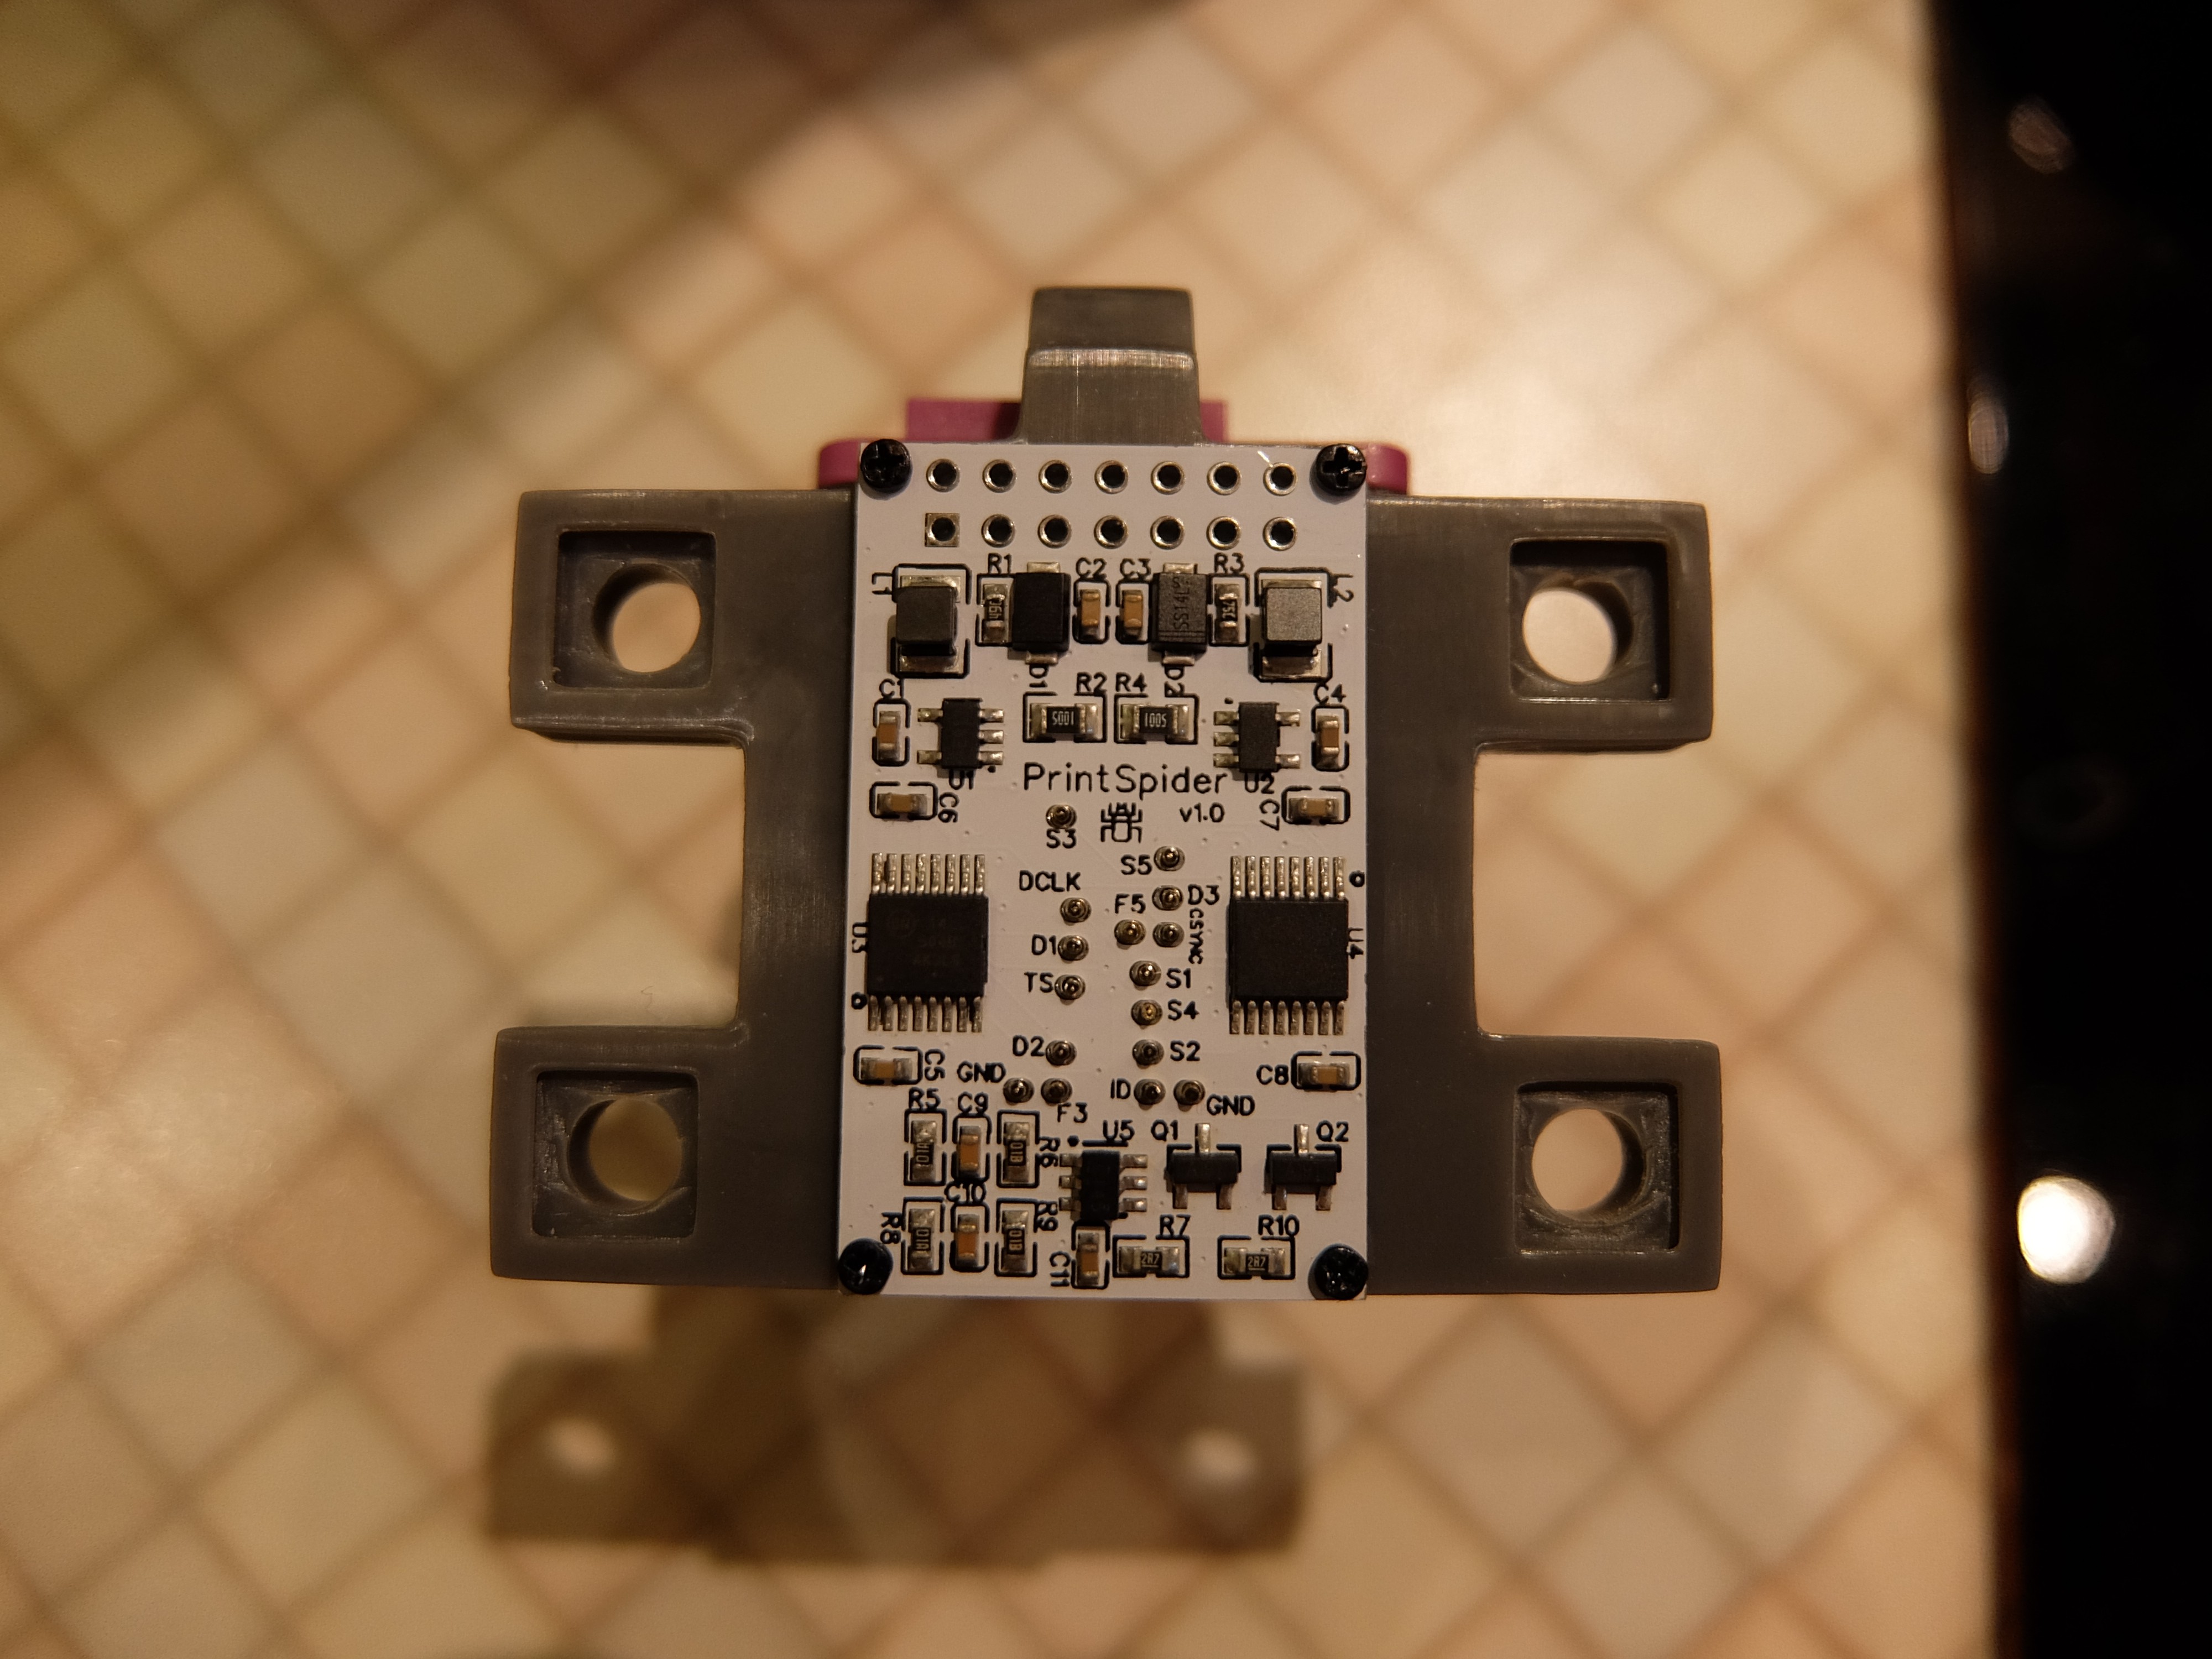
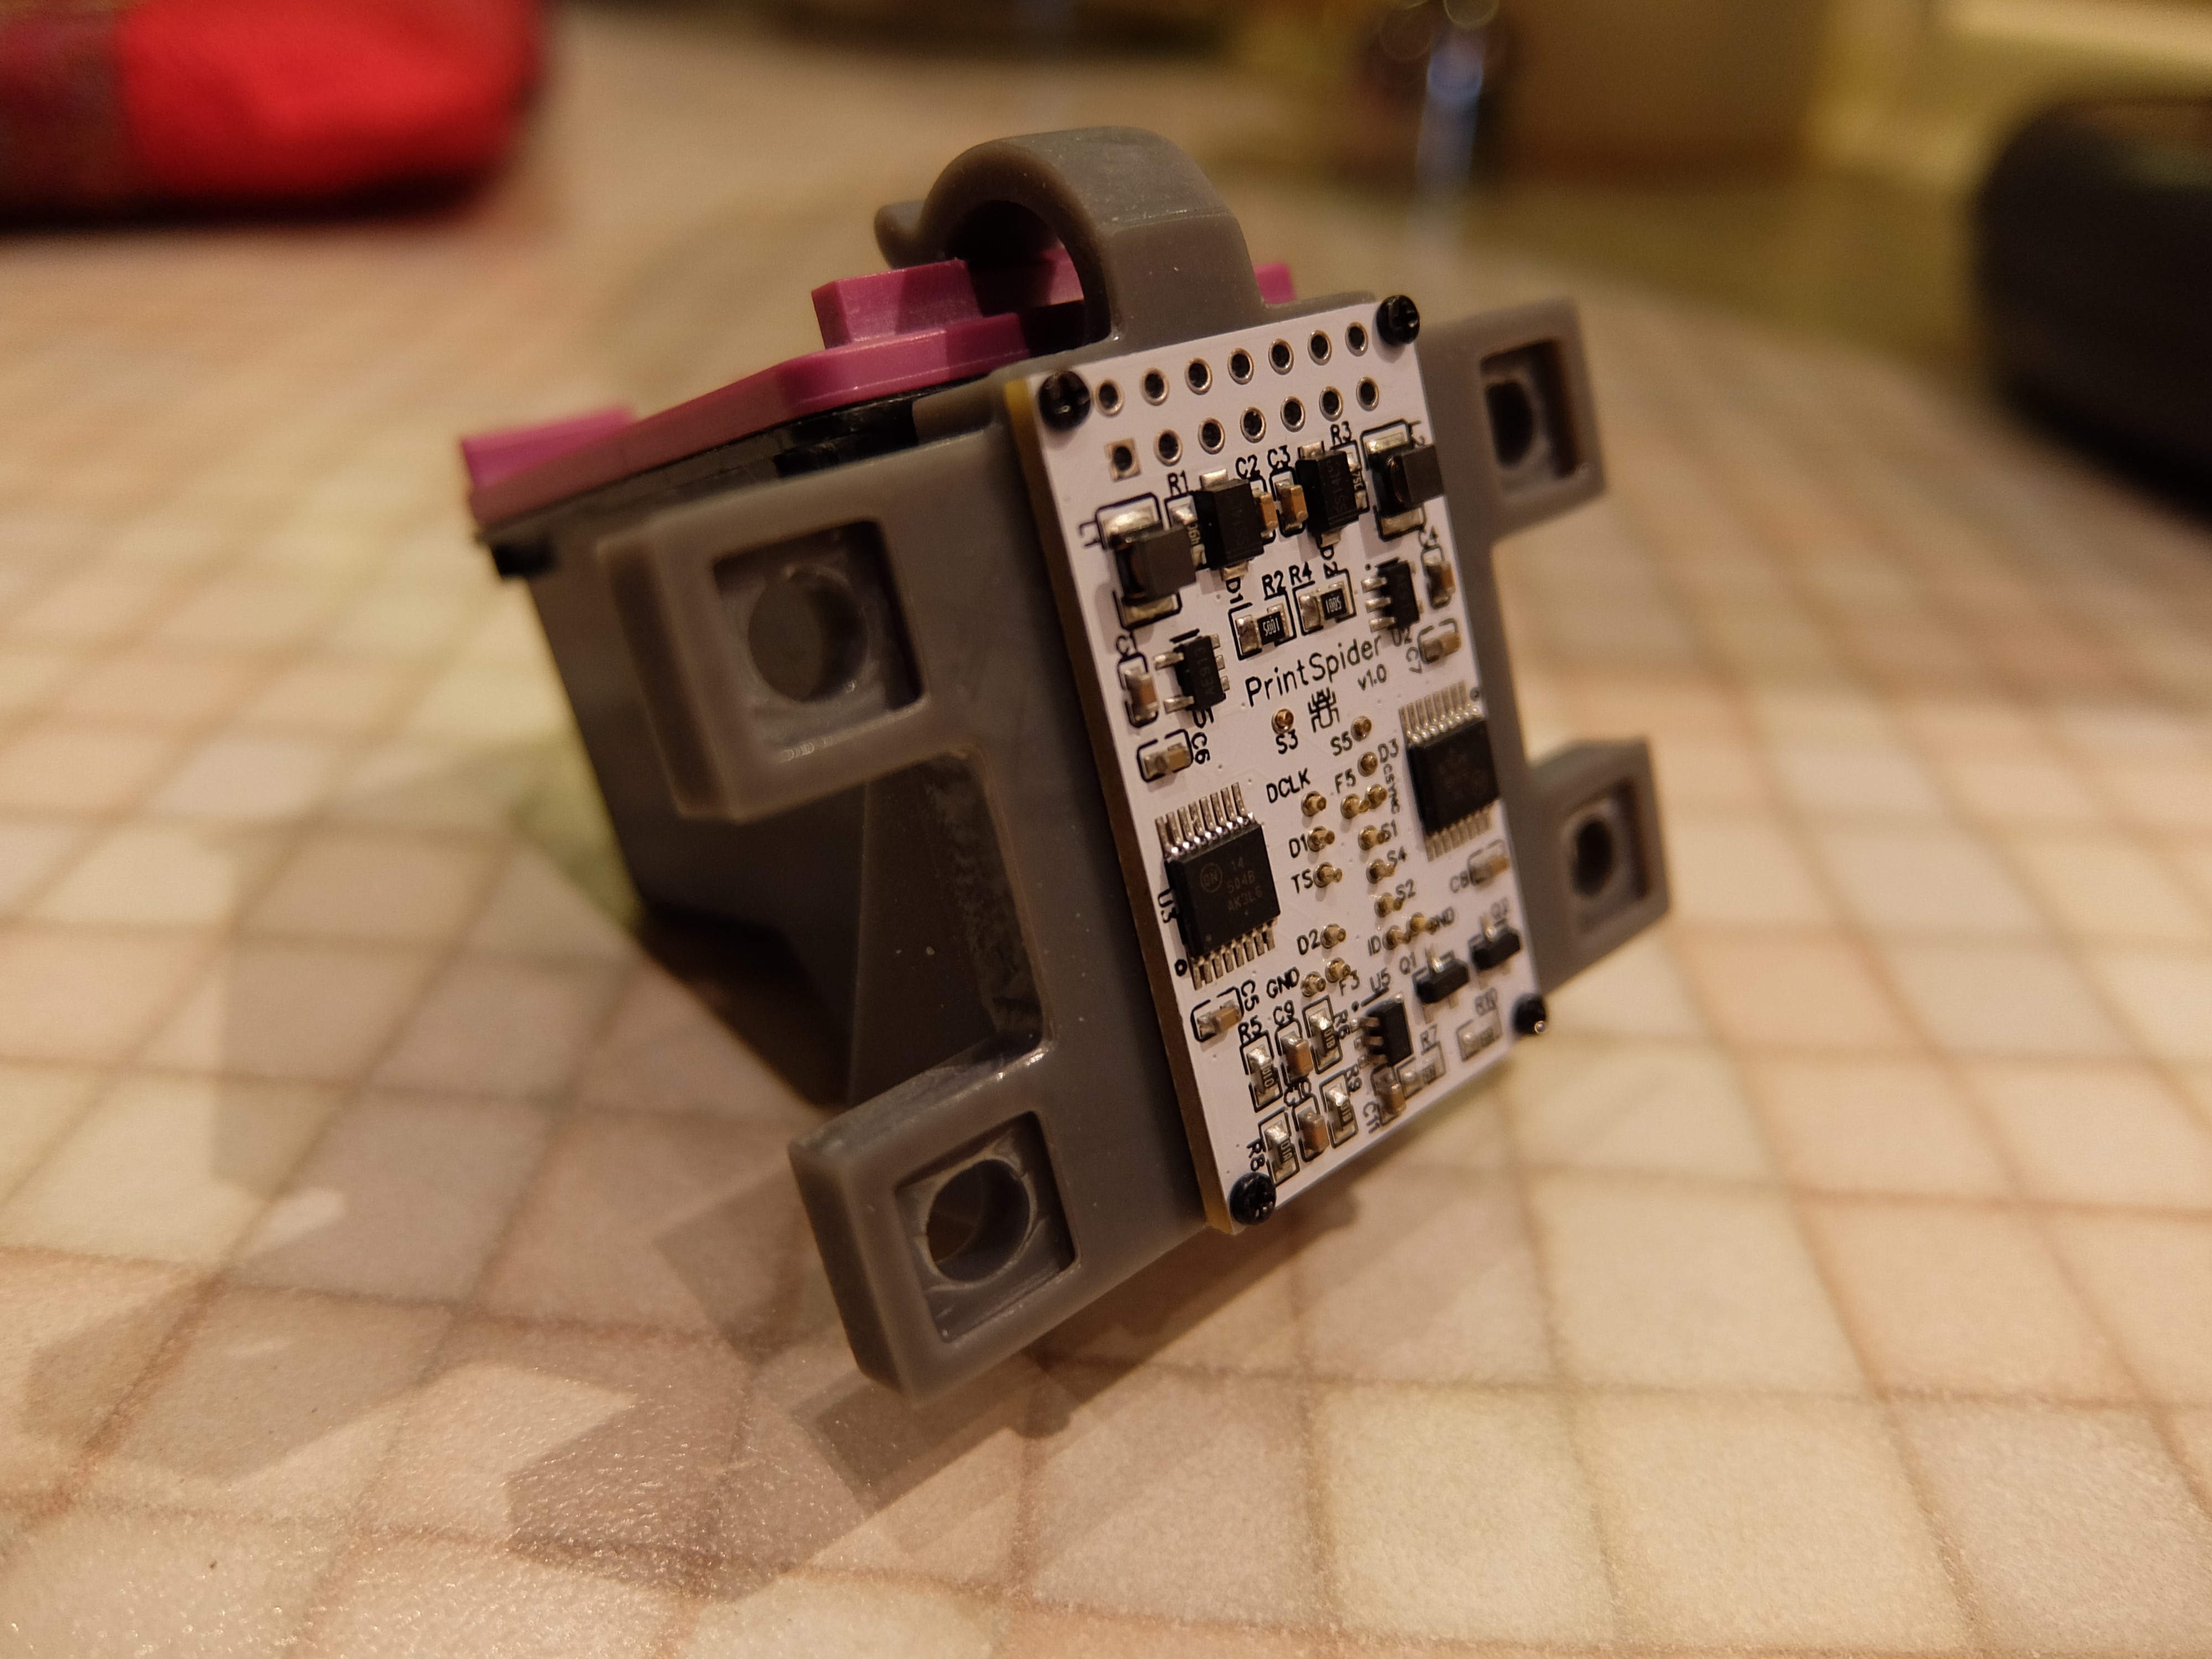
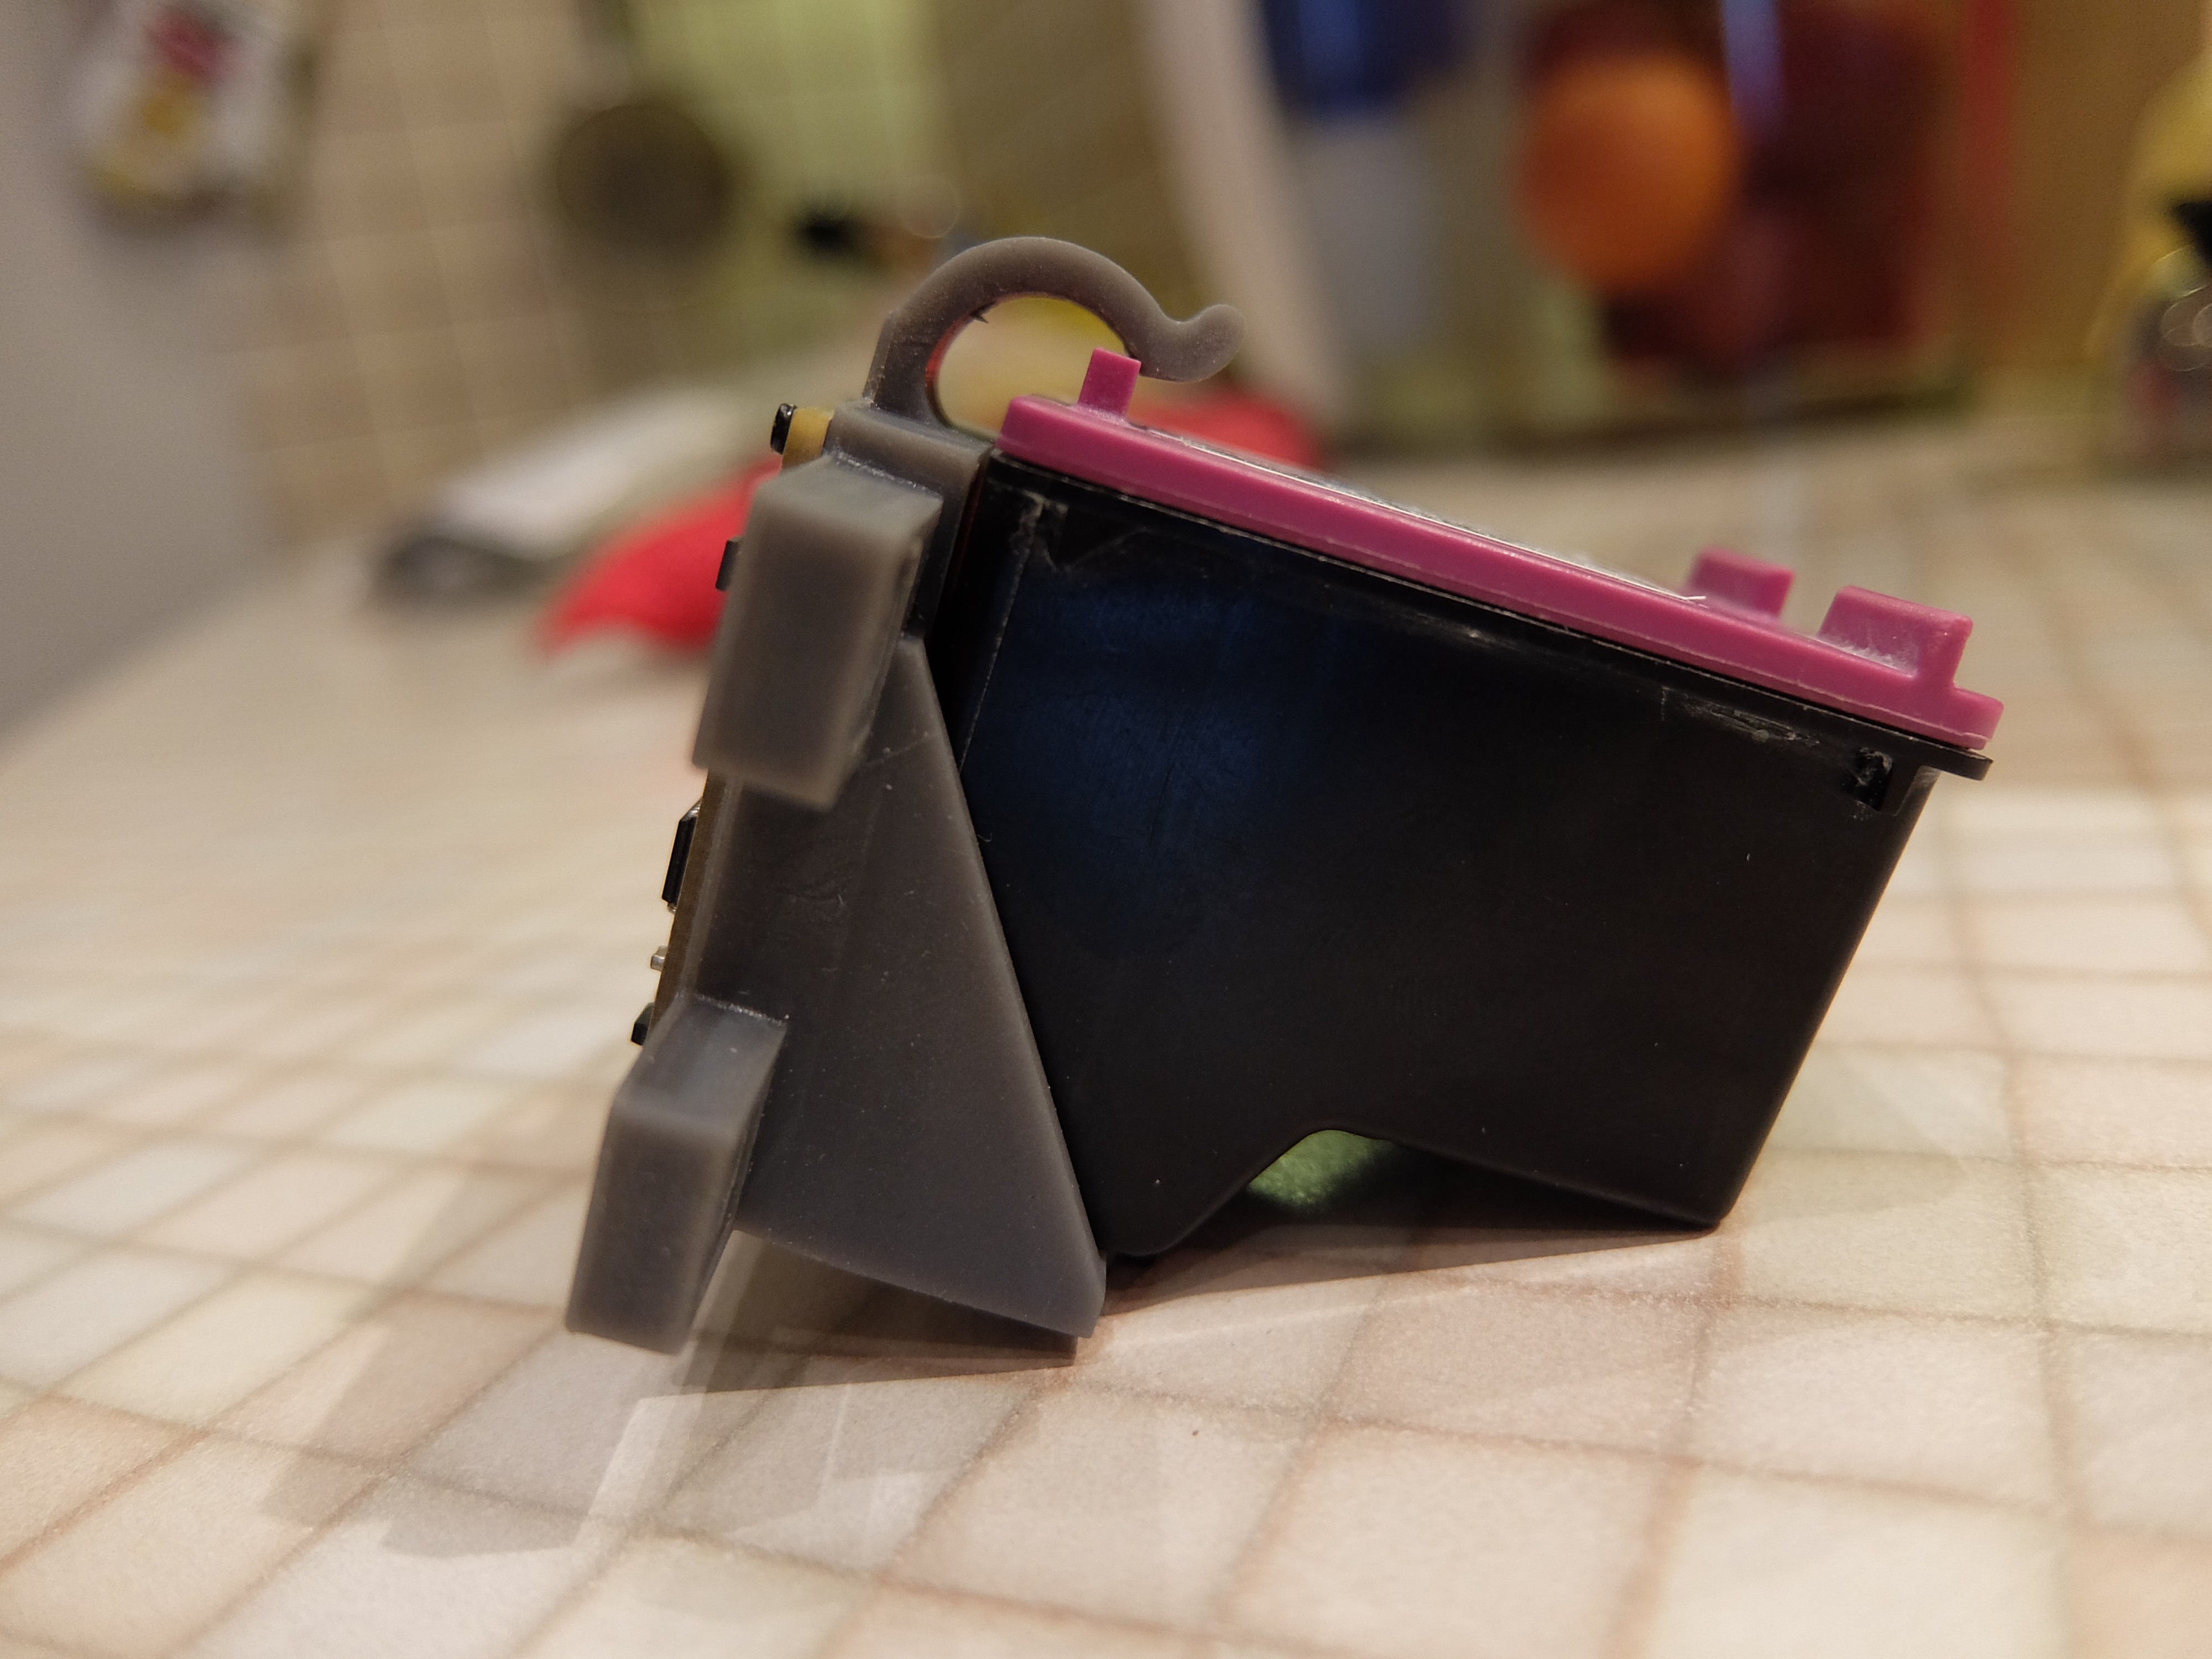
Mount with PCB
04/10/2021 at 13:28 • 0 commentsThe second prototype of the fully assembled mount .
![]() ---------- more ----------
---------- more ----------![]()
![]()
As it can be seen mount fits pretty well with cartridge and PCB connected through pogo pins.
I've started to implement code to control cartridge with ESP32-WROVER here on github, but unfortunately it can not be tested with real cartridge since my first PCB prototype has an stupid issues. So I should fix it... again.
Stay tuned...
-
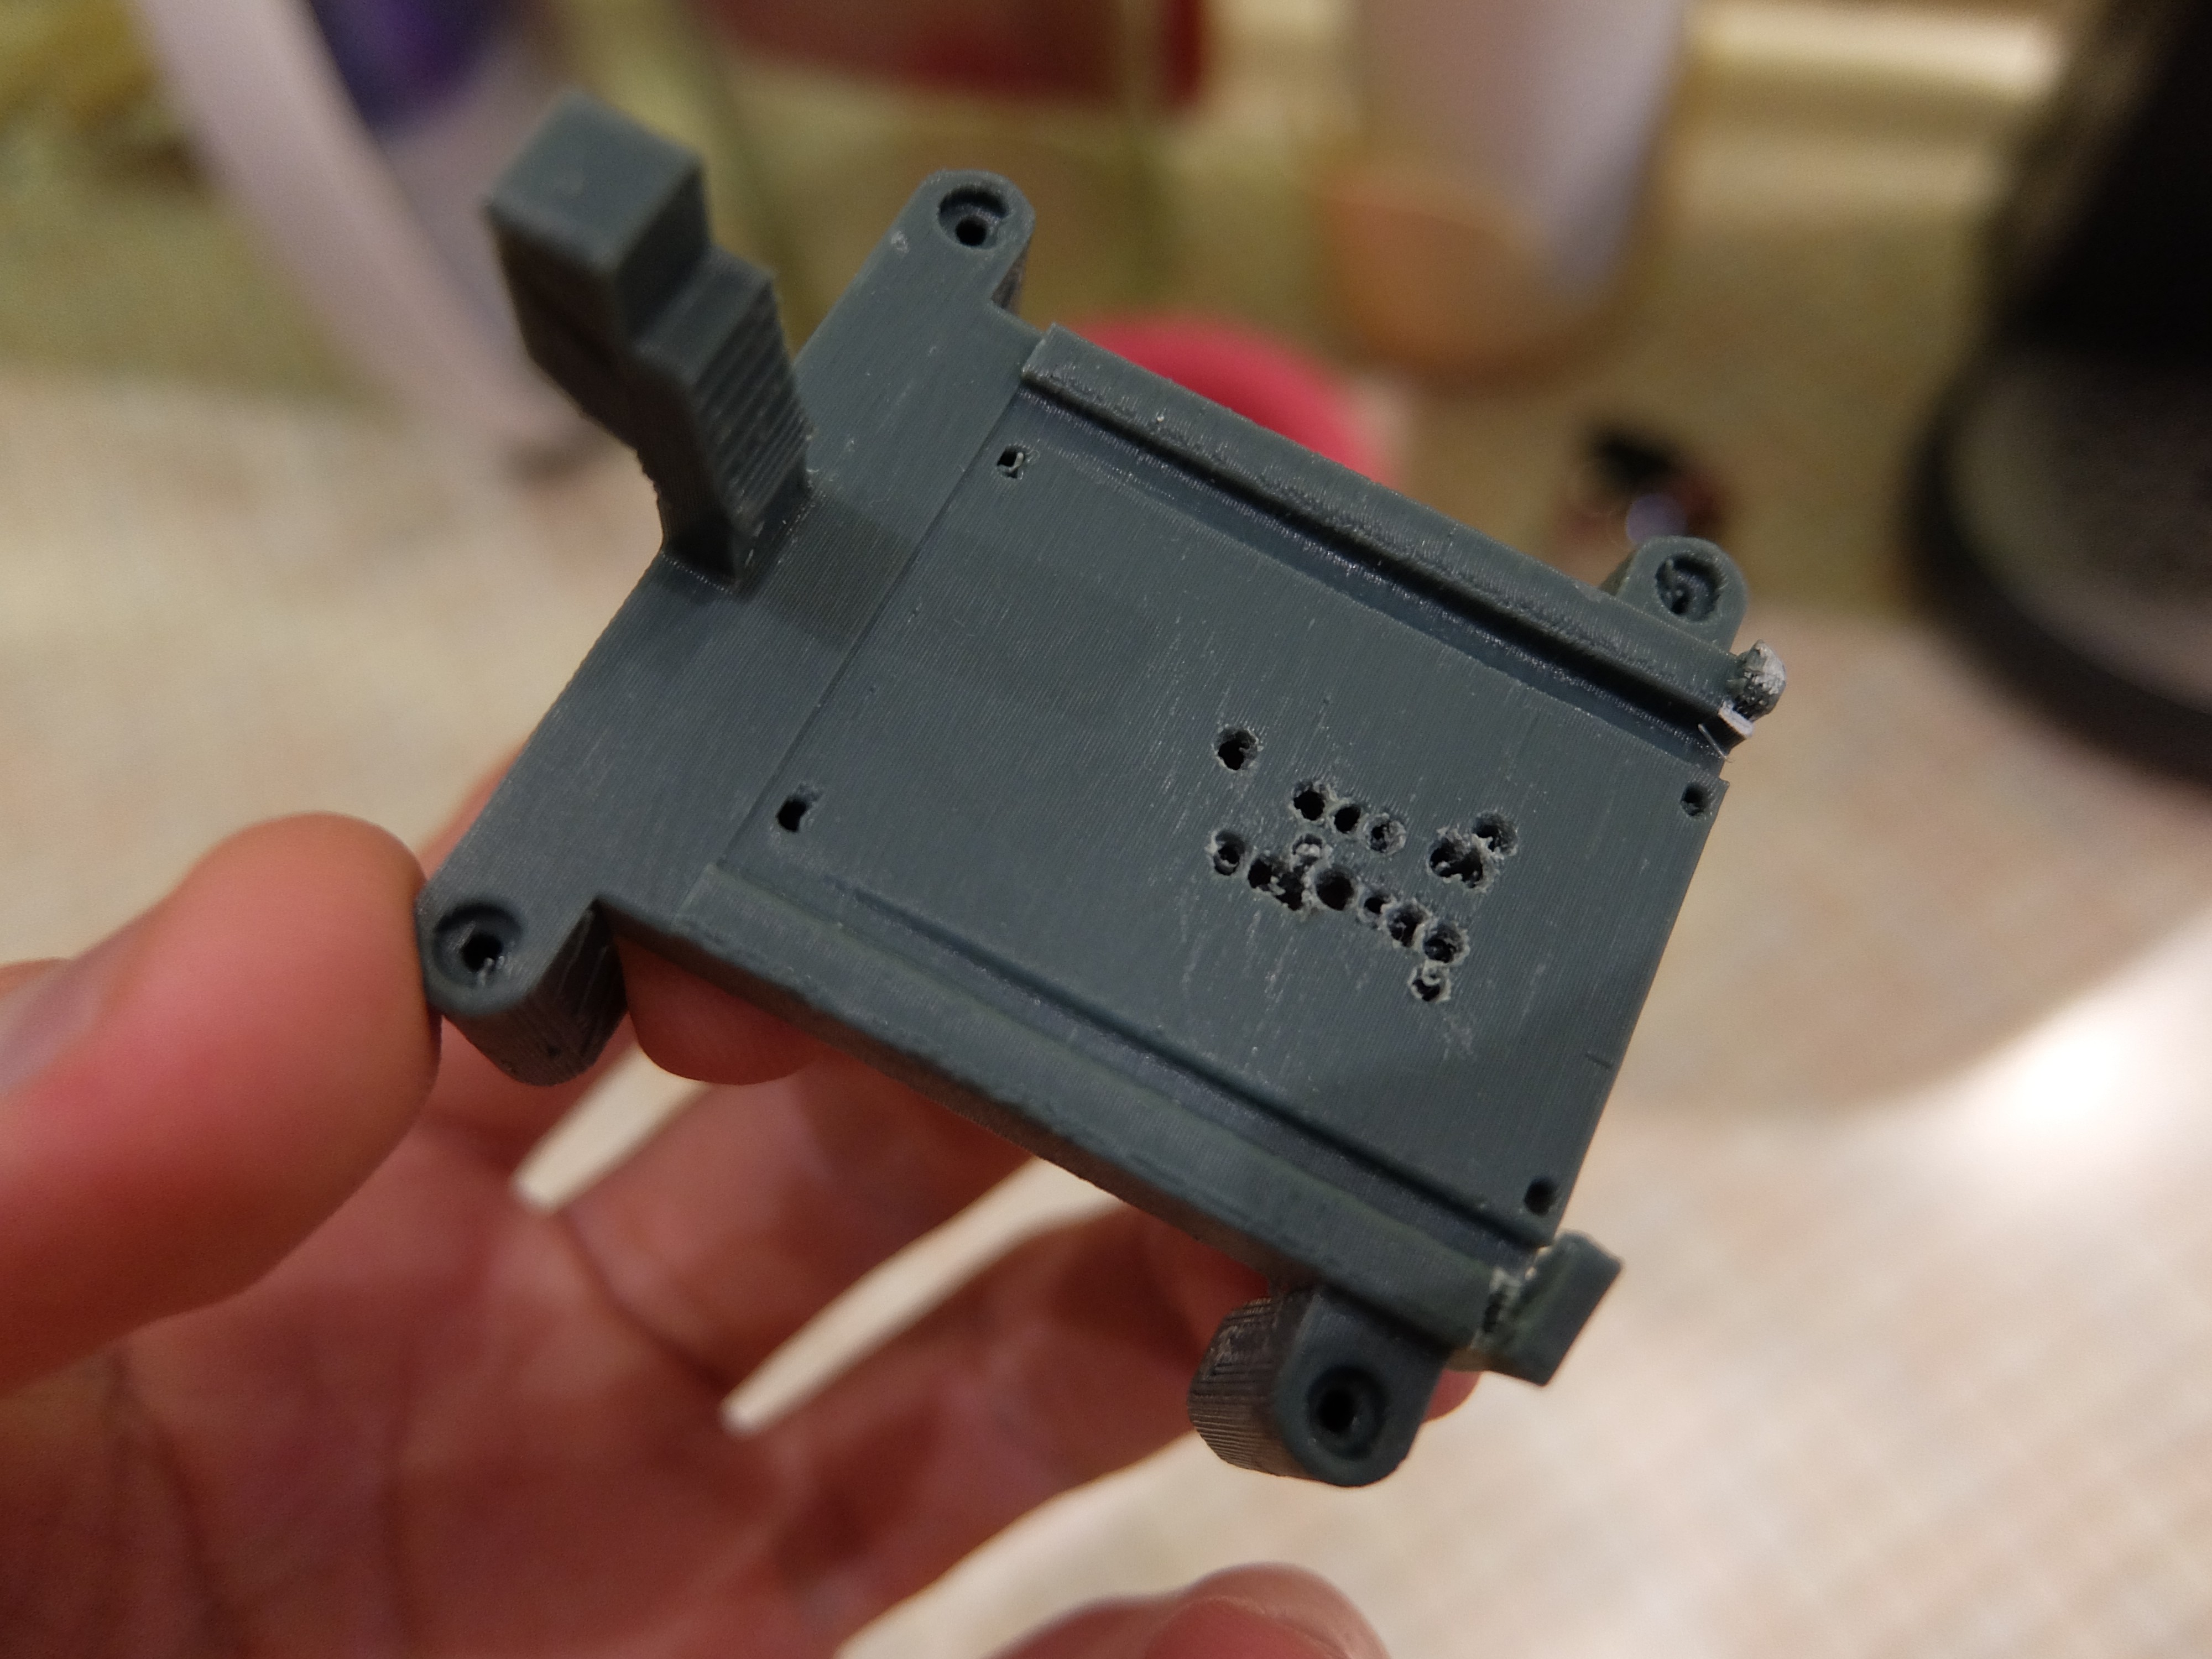
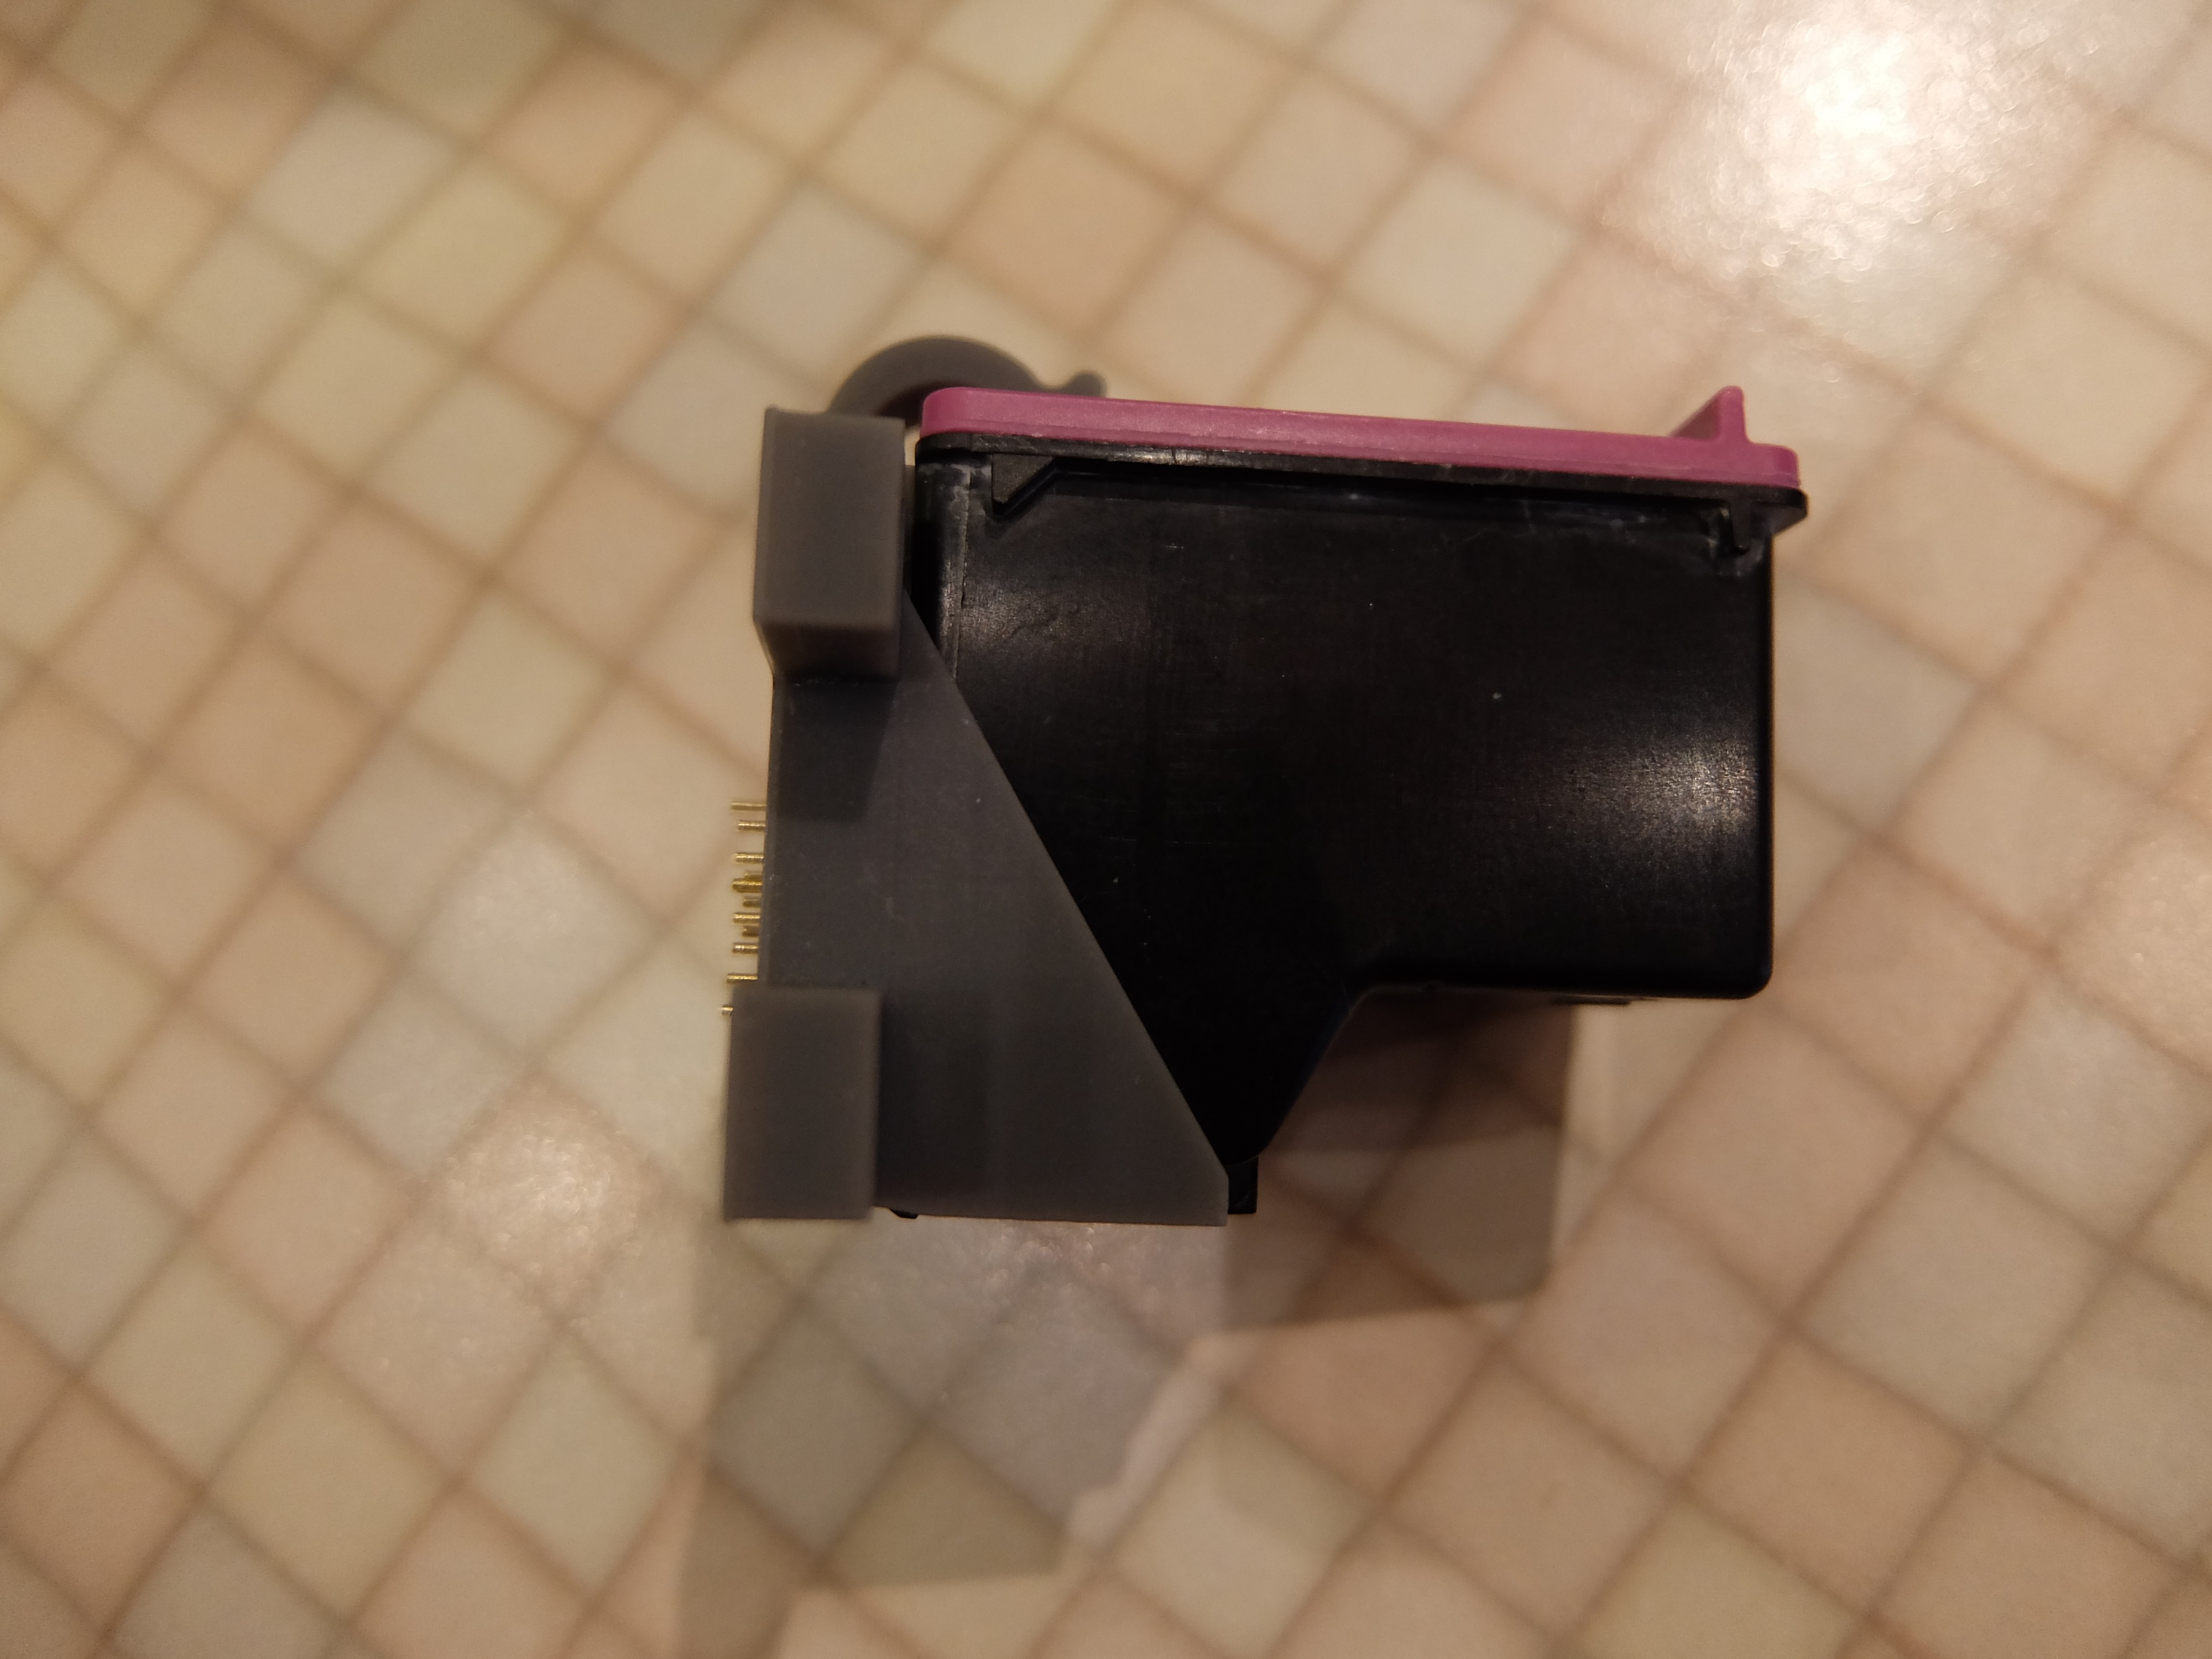
Cartridge mount prototype
02/26/2021 at 12:43 • 0 commentsThe first almost successful prototype of the mount:
![]() ---------- more ----------
---------- more ----------It's the first time i deal with 3D printing and the second design I have tried to print. First design was really not so good as I expected:
![]()
It's printed with FDM printer and precision is not enough for this project, so the second time I have printed on SLA printer with ABS-like resin.
Second design fits pretty well with cartridge:
![]()
![]()
![]()
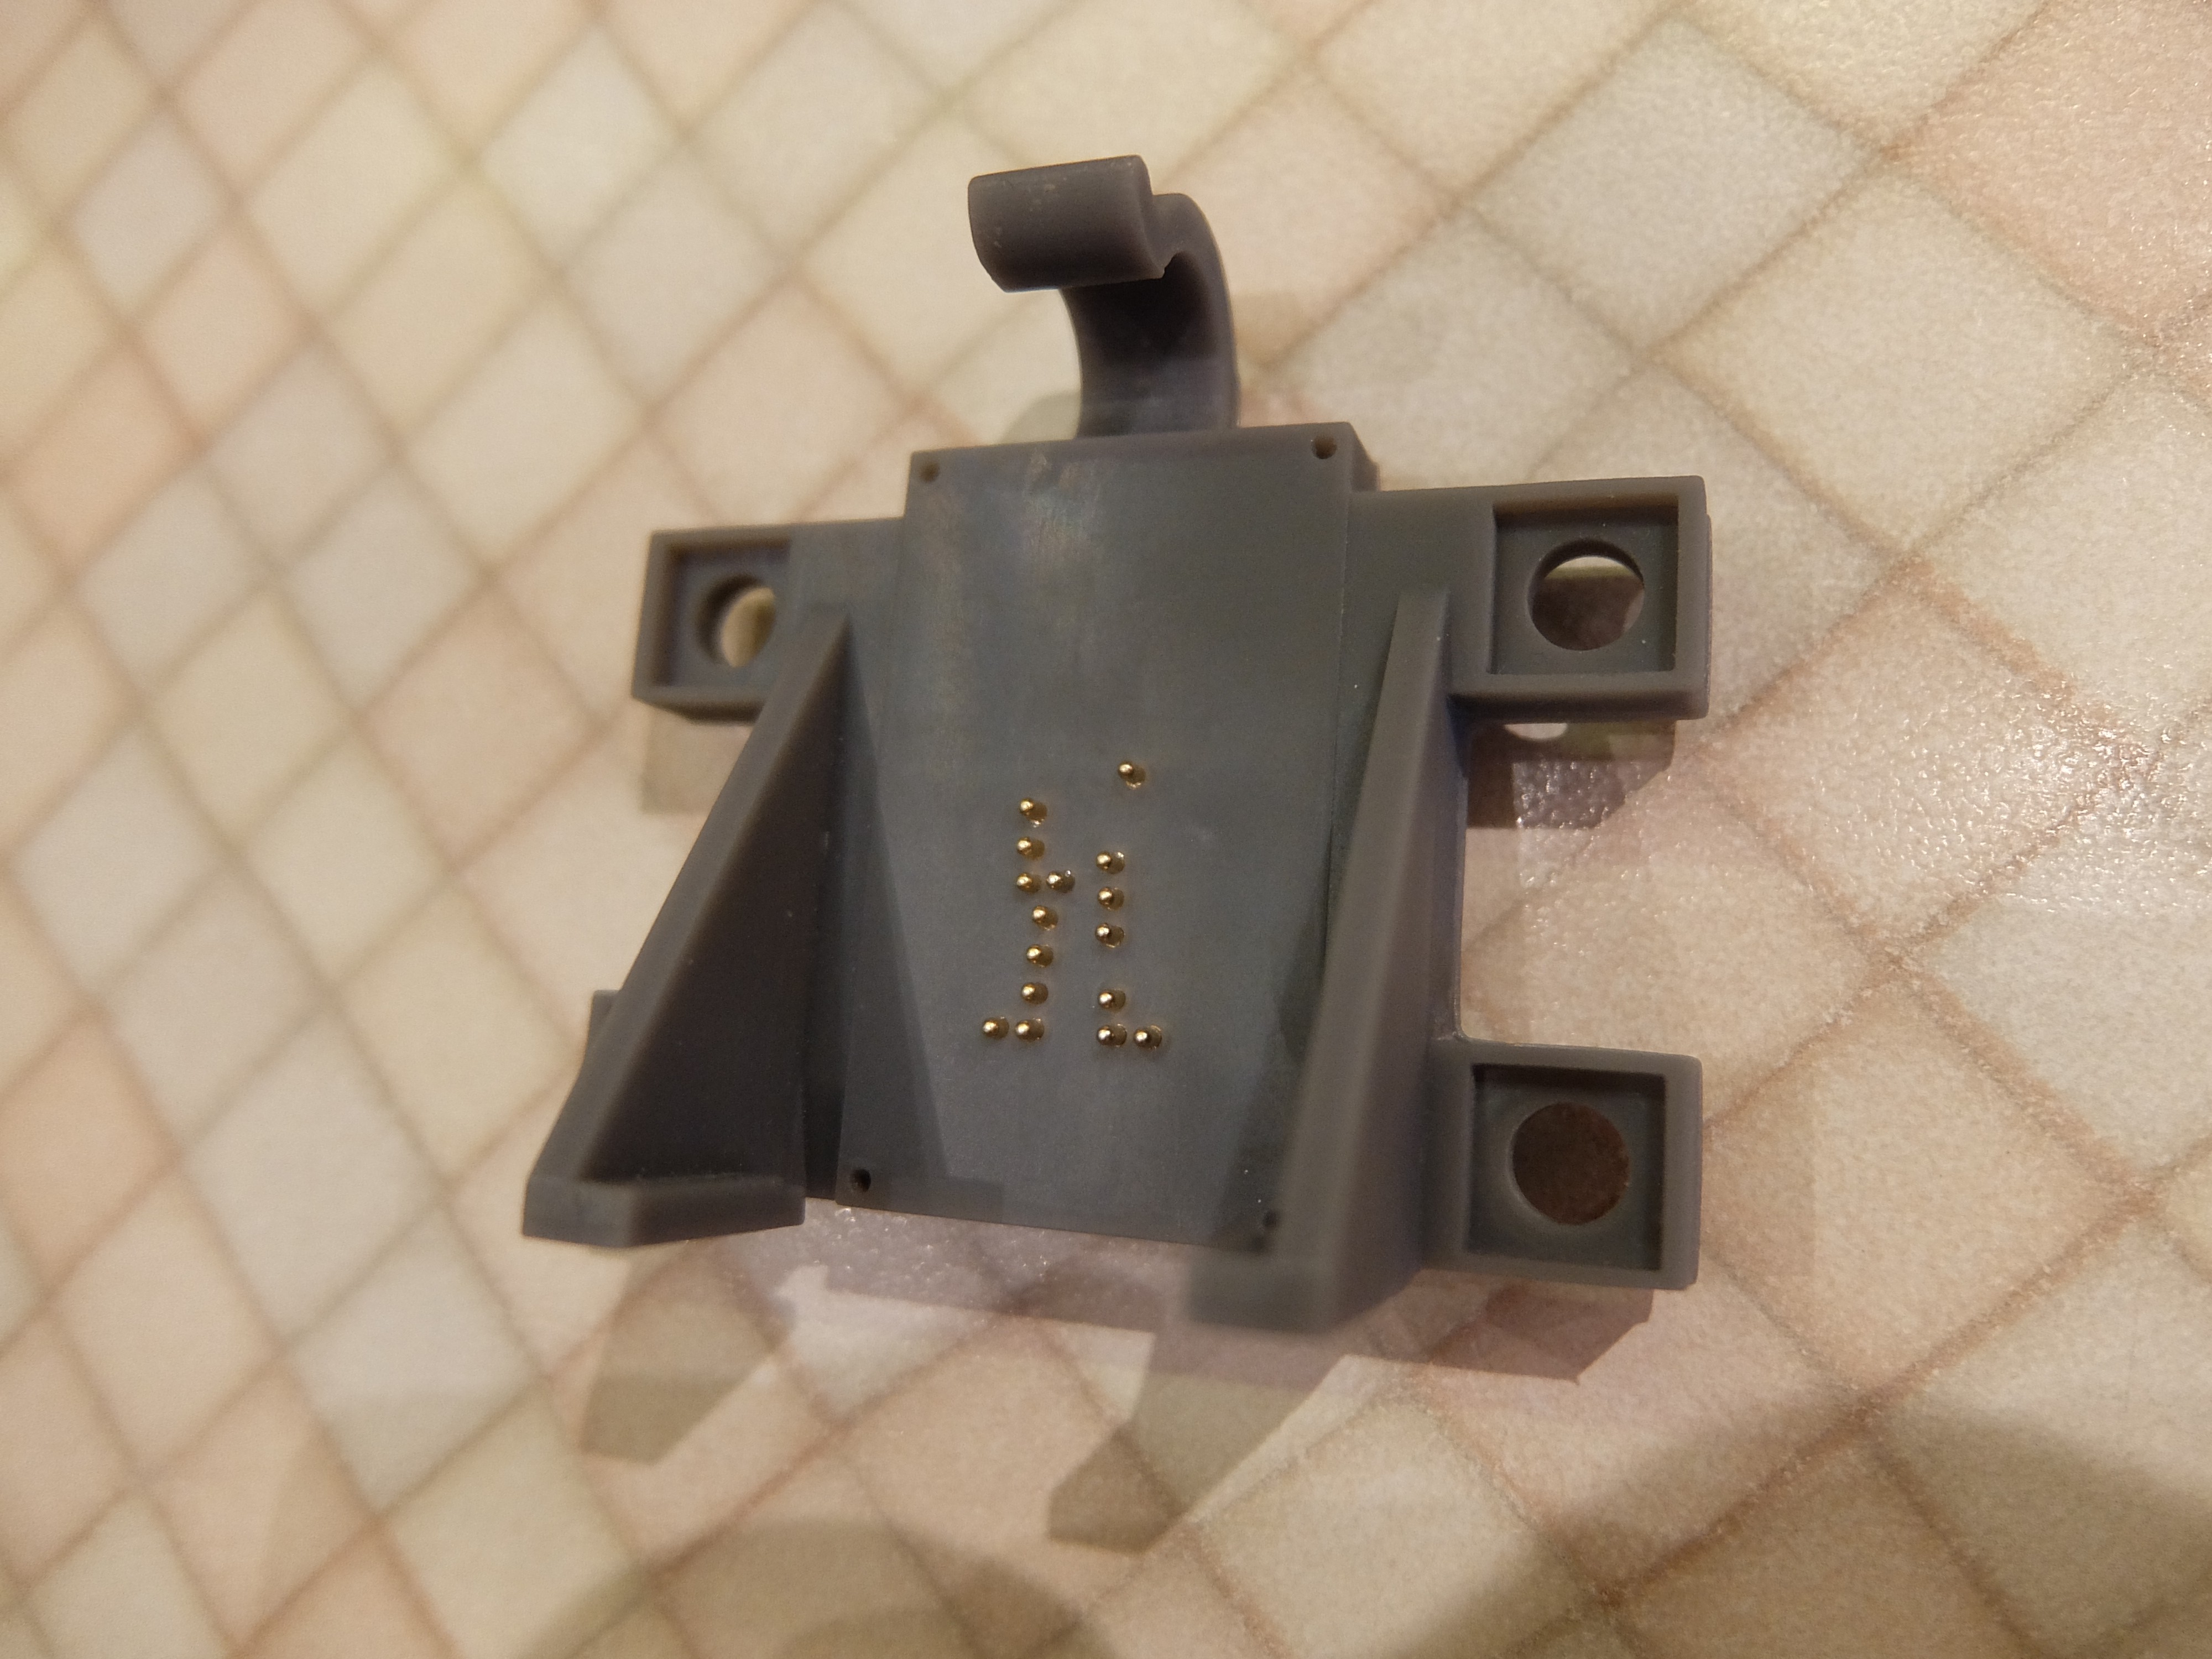
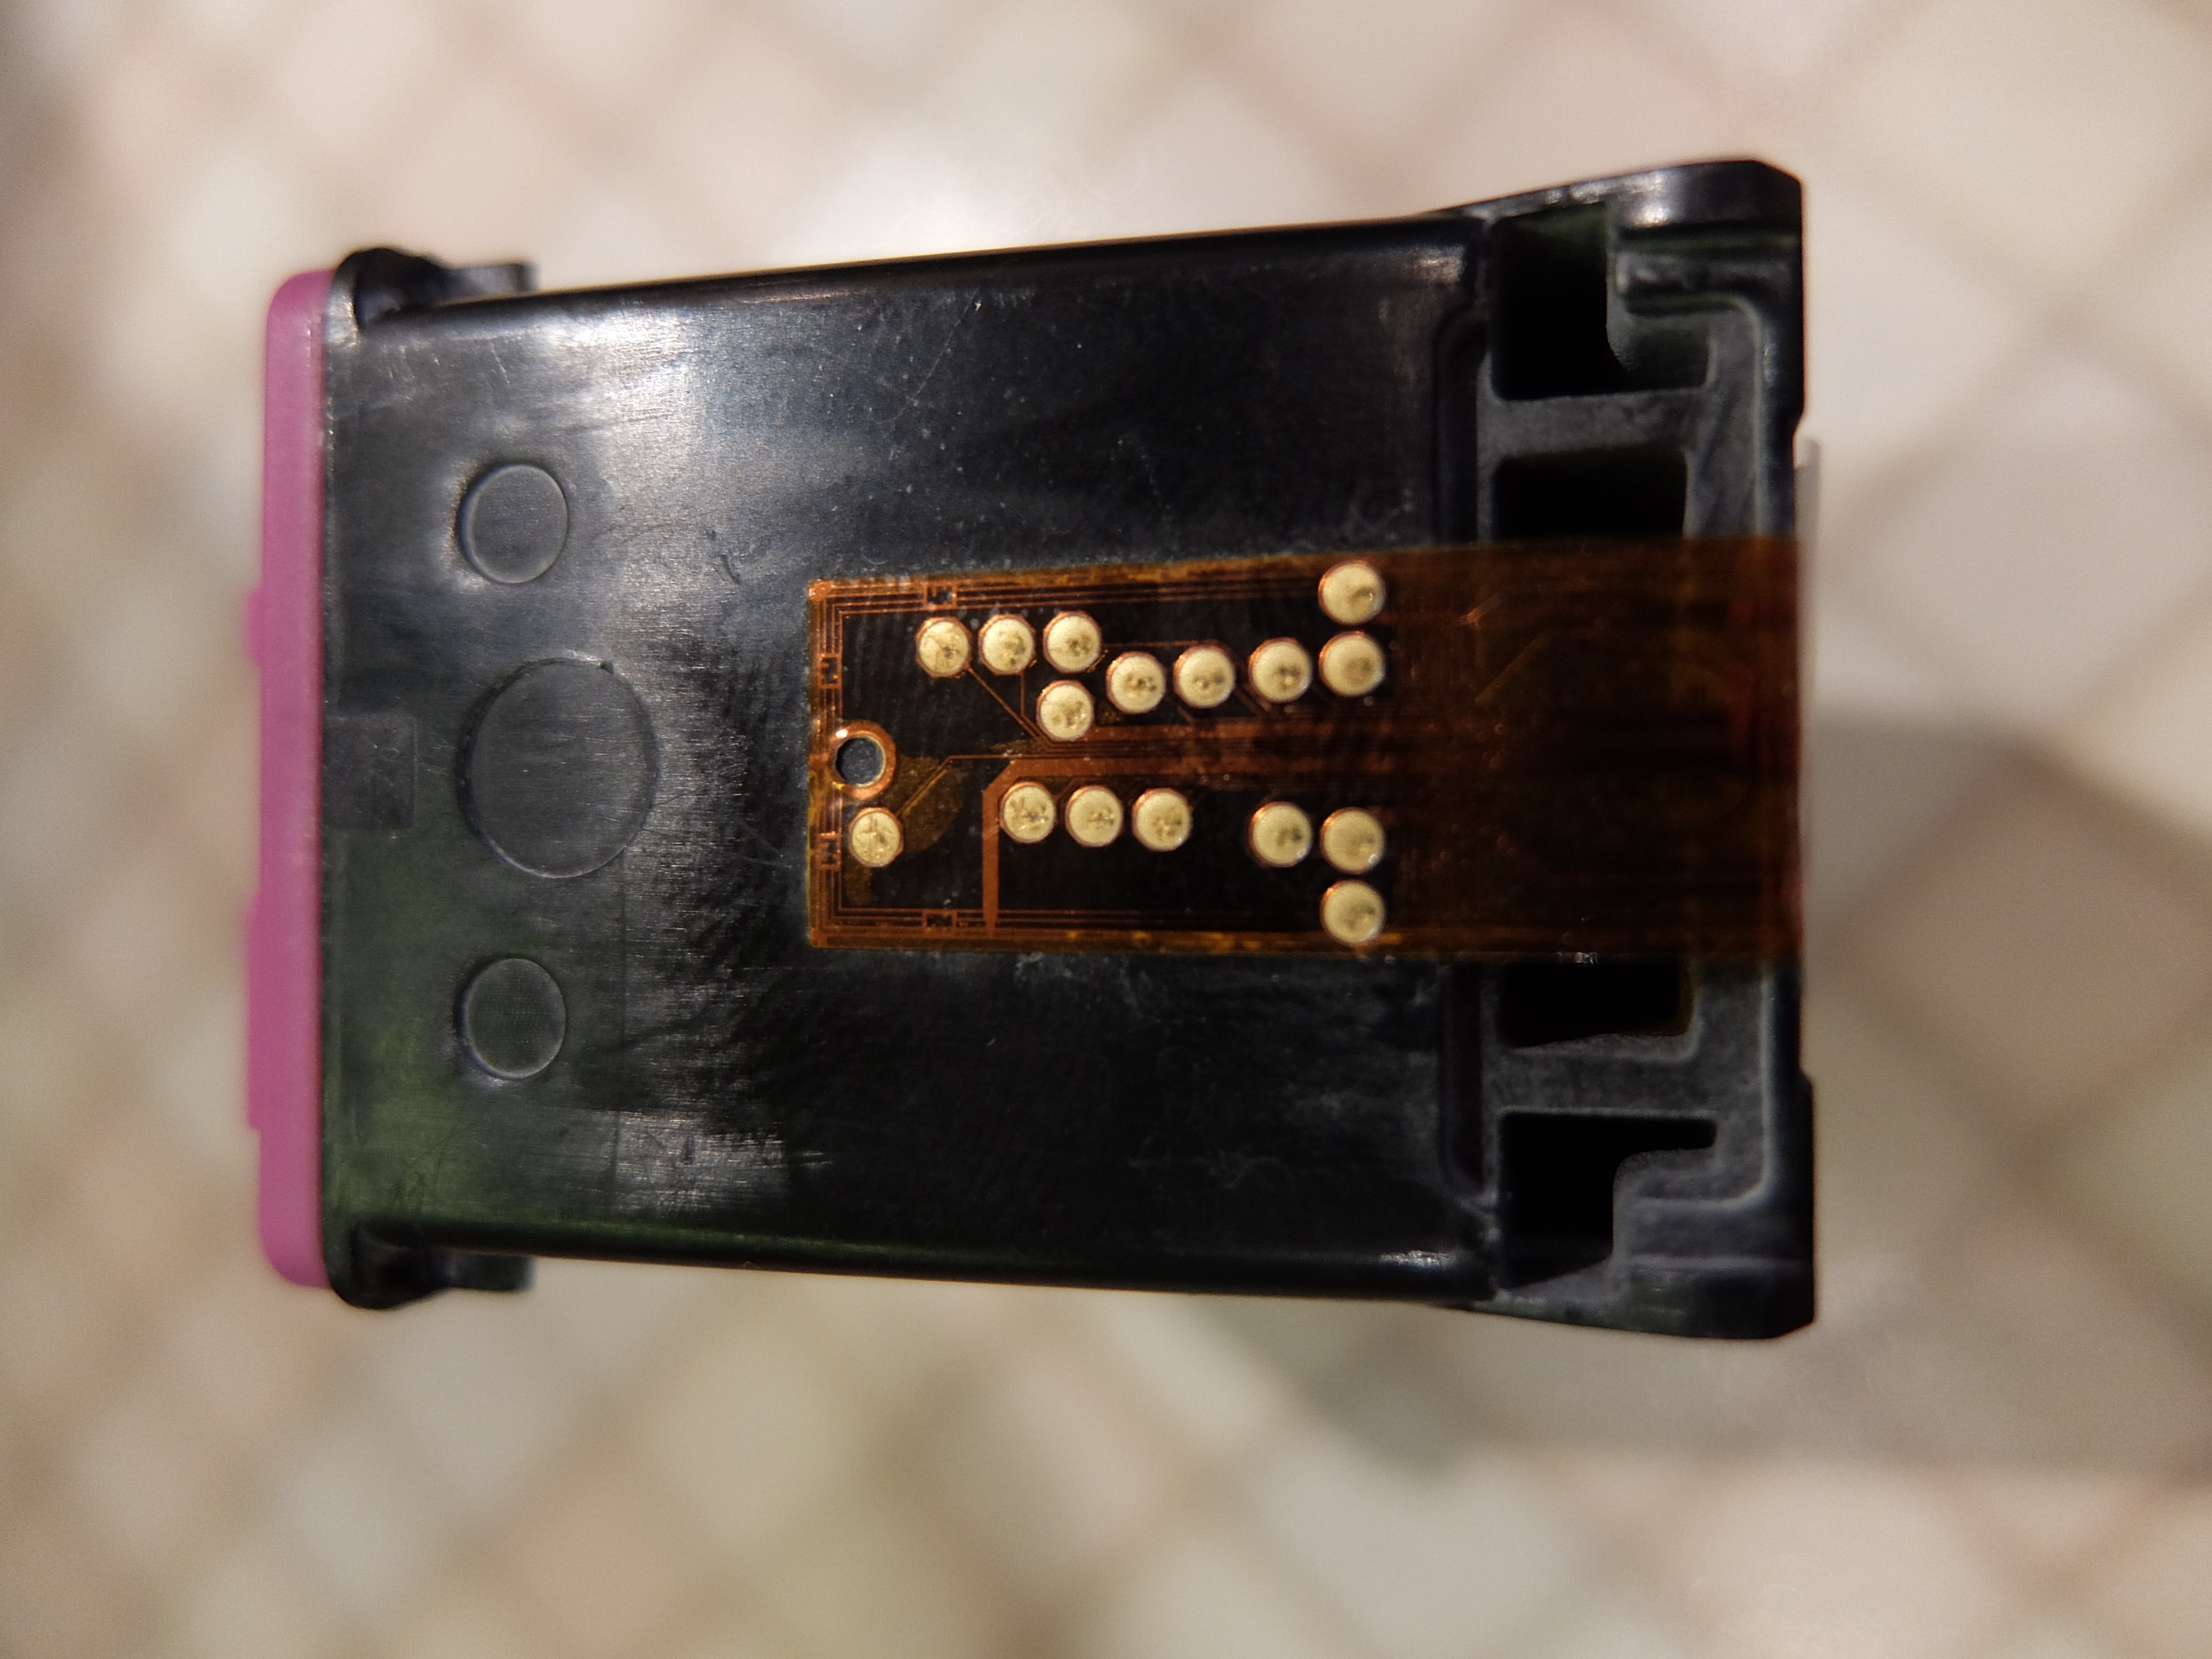
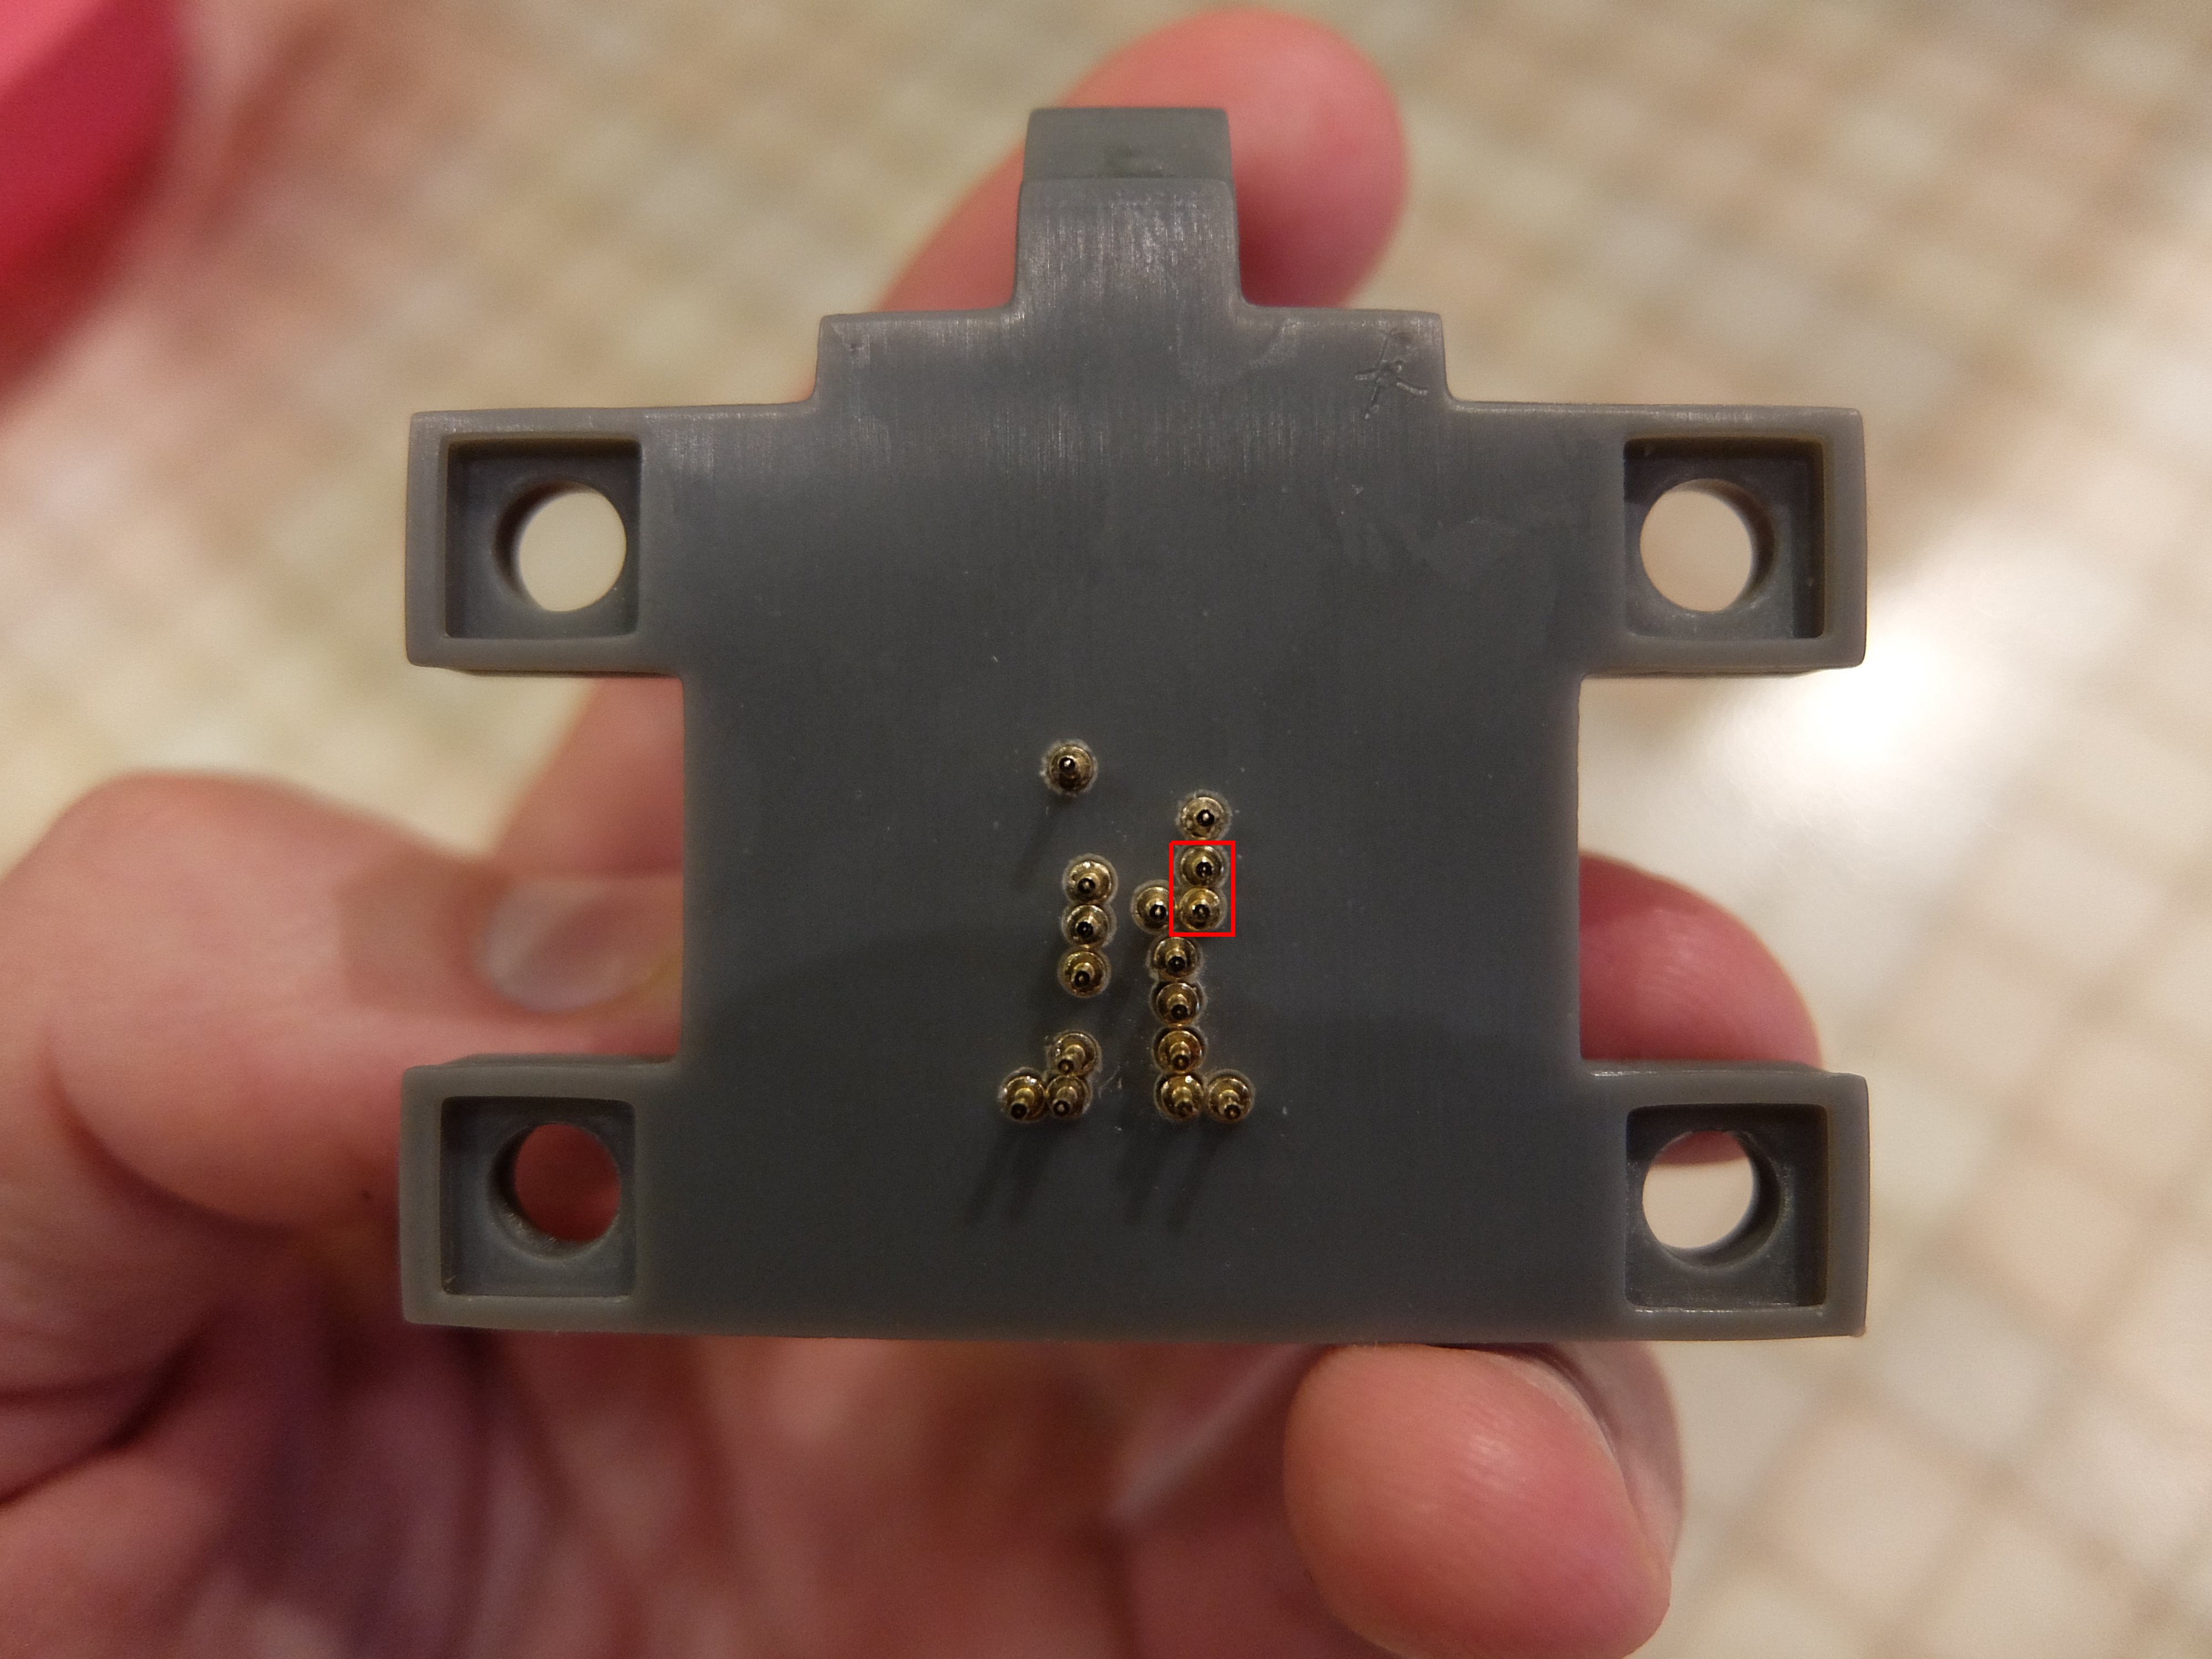
The pins are positioned fairly accurately, it can be seen by the scratches on on contact pads of the cartridge:
![]()
First time I have seen printed mount, I thought that many of the contacts will touch each other, but only CSYNC and D3 touches.
![]()
Next try I'll fix it and will try to connect to PCB which will be ready soon.
HP printer cartridge control module
HP 63/302/123/803 cartridge control module with 3D printable mount.