Matthew Begg
-
Project update
02/09/2021 at 14:03 • 0 commentsPrototype coming soon
So I'm pretty close to having a rough prototype working. This will use an Arduino Nano, PowerBoost 500 Basic, CardKB keyboard, SPI OLED screen, piezo buzzer and 2xAAA batteries. Hoping to get that all soldered together and working in the tin this week. My idea of using mini breadboards isn't feasible due to the size constraints of the Altoids tin.
That then begs the question: do I encourage people to build the same thing from all those modules? Or do I create a custom PCB using an ATMega 328P chip and make a single-board version to replace the Nano and PowerBoost?
3D printed bezel
My cousin has very kindly offered to design and build a 3D printed bezel to mount the OLED screen nicely in the top of the tin. Once finalised, we will make the files for that available here.
Comments
Thanks to everyone who has commented so far in the discussion section below. Lots of nice comments and suggestions. Some people seem to want this computer to do more. For that, I'd recommend searching hackaday.io for 'pocket computer' as there are lots of much more capable computers with SD card support, networking, better screens etc. But that's not what I'm going for here. I want a text-based 8 bit system that runs BASIC for a minimal cost. No frills. Maybe the frills will come with the eMBee TWO ;-)
Another commenter suggested I build my own keyboard. That's a possibility in the future (especially to make it feel nicer than the hard feel of the CardKB keyboard)
-
Games to play on your eMBee ONE
02/04/2021 at 16:02 • 0 commentsOnce the eMBee ONE is released, you'll want to have some games to play on it. Despite only having a text-based display and 1KB of program memory, I think you'll be able to code quite sophisticated action games thanks to the 'POS' and 'INKEY$' commands. They allow you to position a character anywhere on the screen and take quick keyboard inputs.
Alternatively, lots of the printed listings in old Usborne 1980s computer books should work with minimal adjustments. And the listings in the seminal 1978 book 'BASIC Computer Games: Microcomputer Edition' should also work.
-
Benchmarking the eMBee ONE
02/02/2021 at 15:30 • 1 commentI'm interested to see how the eMBee ONE compares performance-wise with the classic 8-bit computers from the 80s. I did a quick bit of Googling to find out the best way to benchmark old 8-bit computers, and found two interesting methods:
The 'N-queen' chess problem - website
  10  CLEAR
  20  R=8: X=0: S=0
  30  DIM A(R)
  40  IF X=R THEN GOTO 180
  50  X=X+1
  60  A(X)=R
  70  S=S+1
  80  Y=X
  90  Y=Y-1
 100  IF Y=0 THEN GOTO 40
 110  T=A(X)-A(Y)
 120  IF T=0 THEN GOTO 140
 130  IF X-Y<>ABS(T) THEN GOTO 90
 140  A(X)=A(X)-1
 150  IF A(X)<>0 THEN GOTO 70
 160  X=X-1
 170  IF X<>0 THEN GOTO 140
 180  PRINT S
This doesn't seem to use up too much memory as it was originally used to compare programmable calculators. Even my old CASIO FX-730P (an inspiration for this project) is listed with a completion time of 7 mins 0 secs. However it uses the 'ABS' command which isn't supported in ArduinoBASIC. So first things first, I had to implement ABS in eMBee BASIC. This is my first attempt at adding to the list of commands.
Once that was done, I just typed in the code above, and typed RUN with a stopwatch ready. Would it beat 7 minutes for the FX-730P calculator?
Er....yes. Result: 7 seconds! To be fair, the processor runs at 16MHz though, and this is a very efficient BASIC interpreter. But I wish I could tell my 13-year-old self that I've built a pocket computer that's 60 times faster than his!
Prime Sieve benchmark - website
10 W=500: DIM F(W): P=1: A=3
20 F(P)=A: P=P+1: IF P>W THEN STOP
30 A=A+2: X=1
40 S=A/F(X):IF S=INT(S) THEN GOTO 30
50 X=X+1:IF X<P AND F(X)*F(X)<=A THEN GOTO 40
60 GOTO 20
Simpler code that in theory would run on ArduinoBASIC, but results in a '10-Out of memory' error due to trying to create an array of 500 numbers in the first line! Time to beat here would have been 6 mins 28 seconds for the ZX Spectrum.
-
OLED screen swap and adding external EEPROM
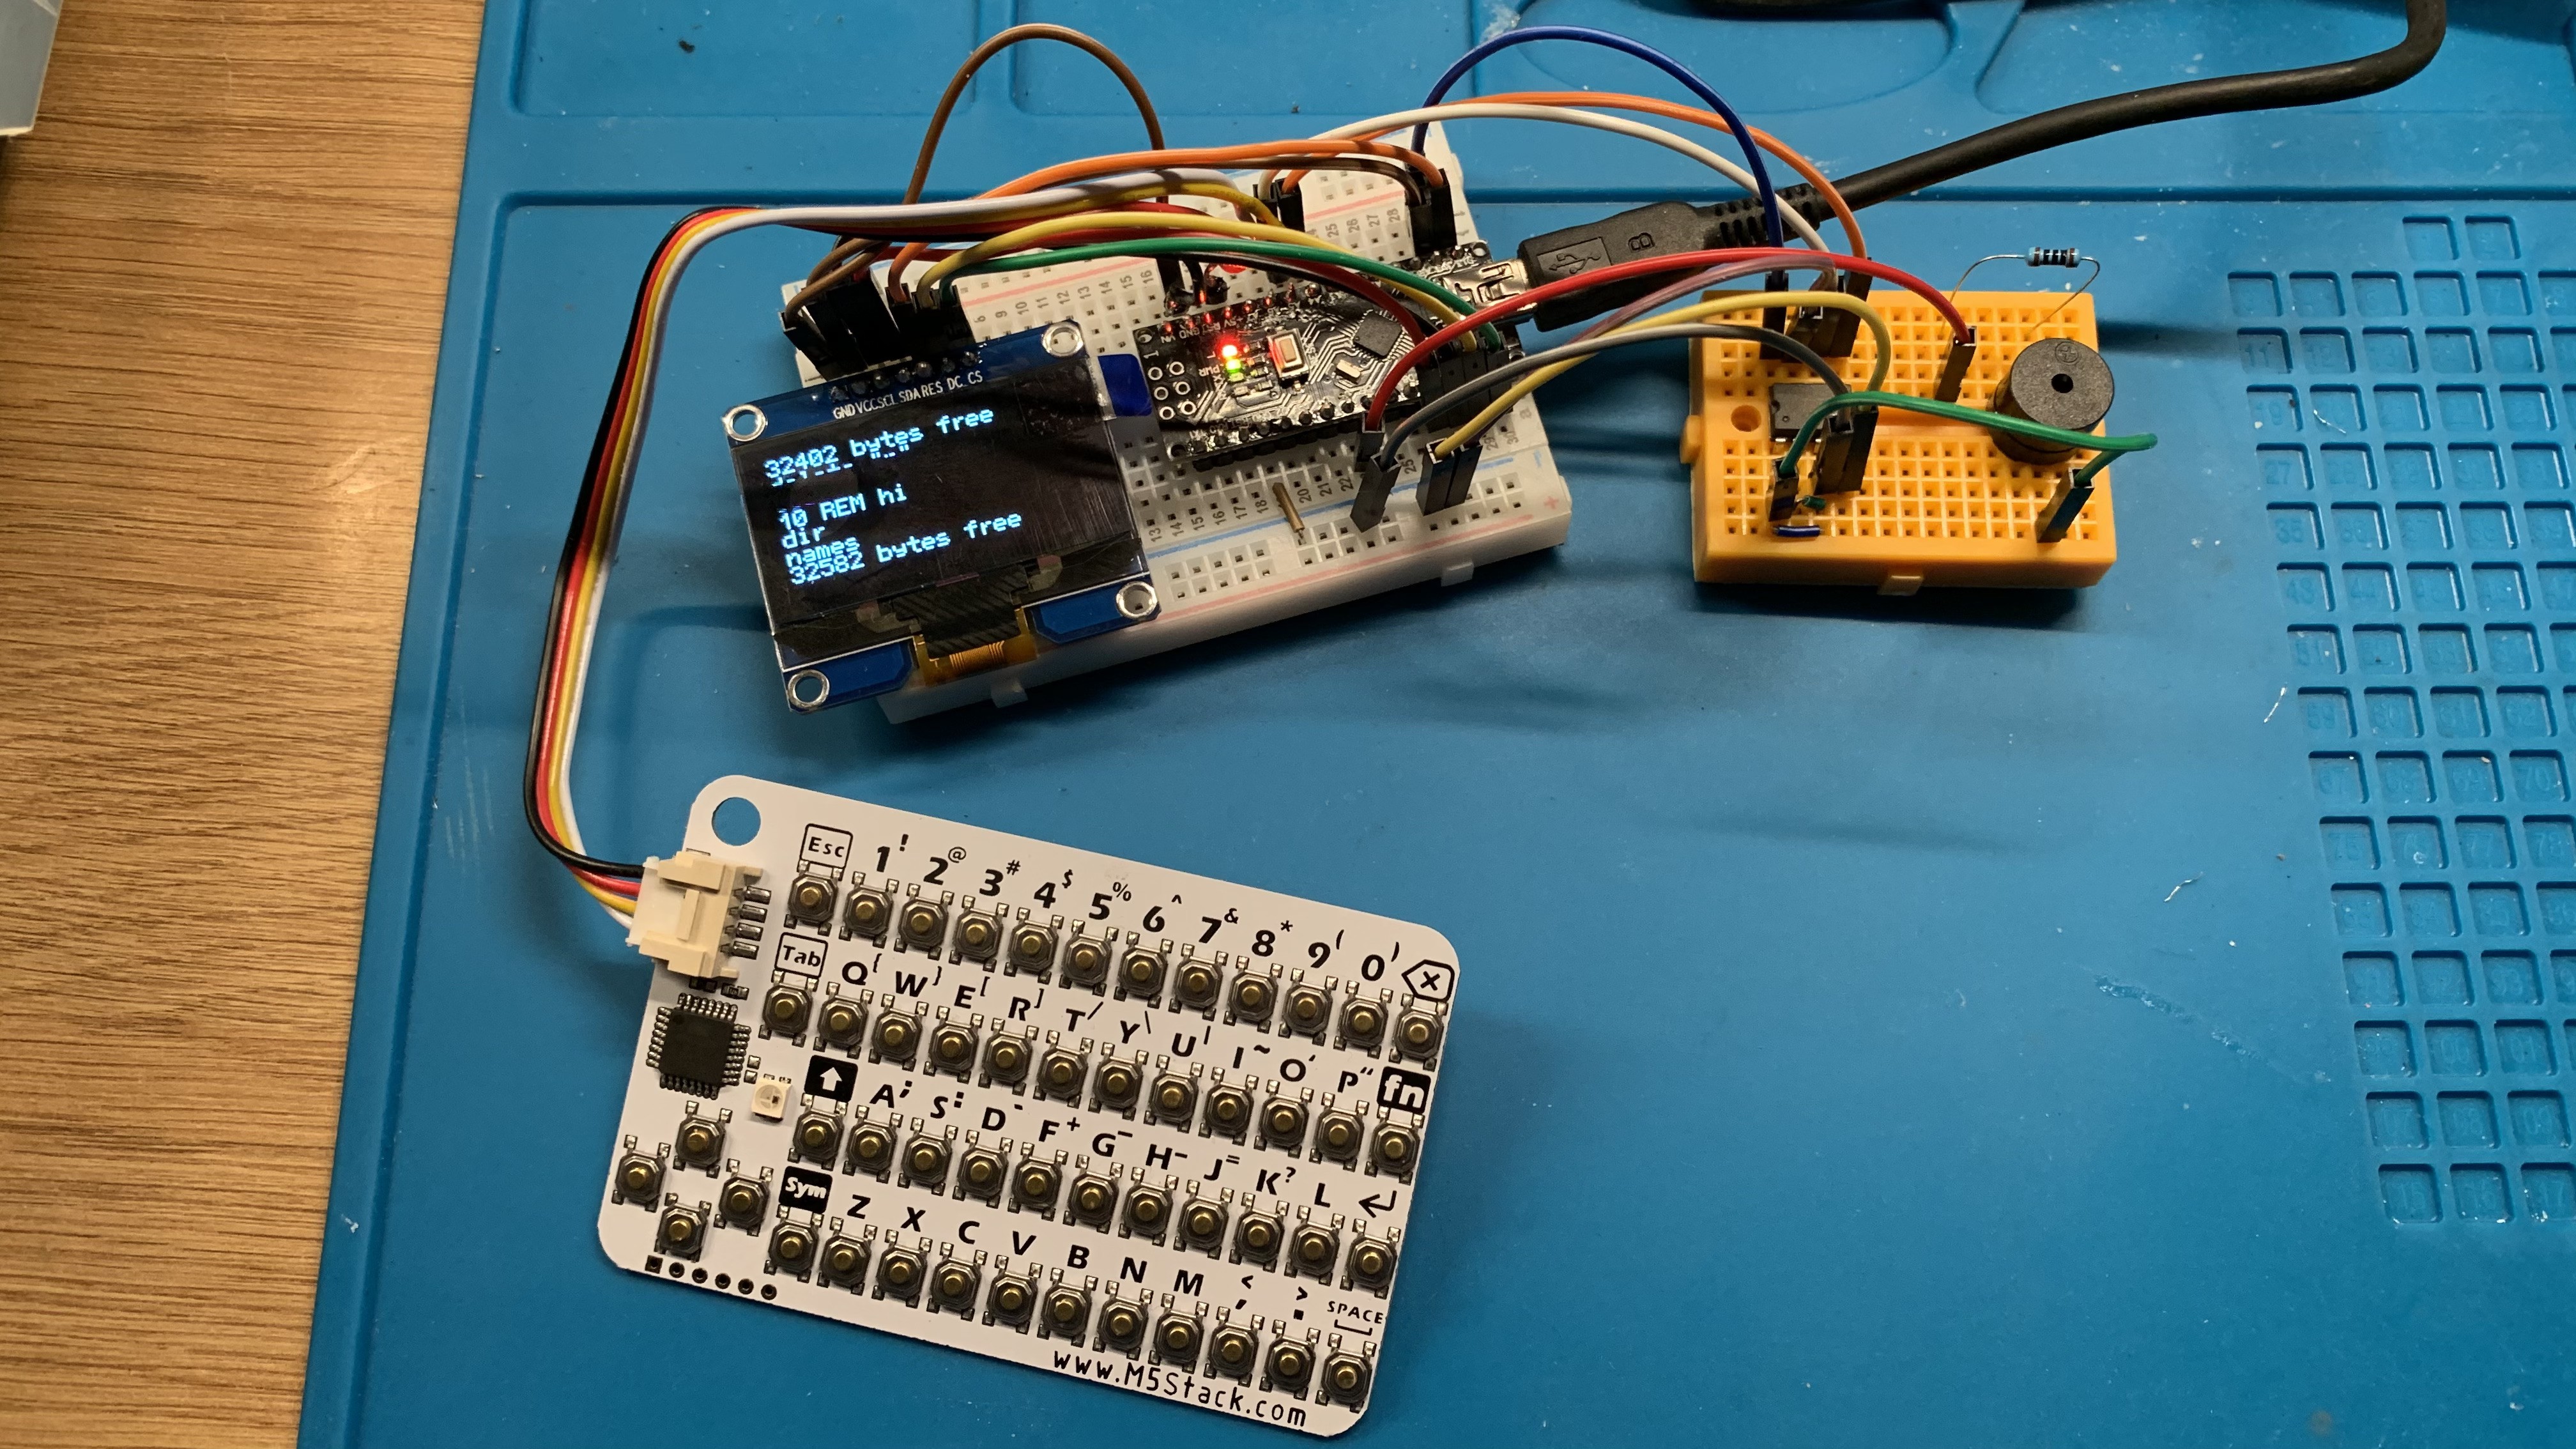
02/02/2021 at 10:20 • 1 commentI've now got a fully working prototype of the eMBee ONE! It is running on breadboards with the following components:
- Arduino Nano clone
- 1.54 inch OLED display connected via SPI
- CardKB keyboard connected via I2C
- 24LC256 external EEPROM connected via I2C (32KB storage)
- Piezo buzzer (with 100 ohm resistor) to pin 5
![]()
The new display doesn't have the dimming bug that the previous one did, and everything seems to working well. I came across a weird bug when loading programs from the external EEPROM though. I get a 'Bad parameter' error even though it successfully loads the program. Looking at the original ArduinoBASIC code, there's a missing 'return true;' statement at the end of the routine for loading so next time I'll try adding that and see if the error disappears.
Next steps
Now that I've discovered that the mini breadboards are thicker than I remembered, I think I'm going back to hard soldering everything together to keep things thin. Still might be able to get one mini breadboard in the bottom part of the tin, which gives some possibility for future expansion though...
Currently I'm powering the whole thing via Mini USB, but hopefully I'll have the Adafruit PowerBoost 500 Basic arriving in the next few days so will be able to get it running from 2 x AAA batteries and make it a true pocket computer.
Keyboard
Love the form factor of the CardKB, but the reality of typing on it for more than ten seconds is pretty rough. Very hard tactile switches that leave imprints in your fingertips! So need to explore the possibilities of either adding some kind of membrane or set of keycaps? Or even build a keyboard from scratch using mouse buttons (thanks to Oscarv for that tip!)?
'Pocket computer' or 'palmtop'?
What should I refer to this as? I first came across the term 'palmtop' when the legendary Atari Portfolio was released. That was much bigger than this though. I want to go with whichever term suggests the smallest form factor, 'pocket' or 'palm'? Let's hear your thoughts in the comments below.
-
The inspiration for this project
02/01/2021 at 15:46 • 0 commentsHere is my original CASIO FX-730P pocket computer from back in the day!
Still works!
![]()
I can see there are 5 programs already on there with 5,247 bytes of storage free. Program 9 is the classic Horse Race game which I must’ve typed in from the original Casio manual. Place your bets!
![]()
-
Fritzing diagram
02/01/2021 at 15:31 • 0 commentsHere's the current setup that's working
![]()
-
Future plans
02/01/2021 at 14:21 • 0 commentsDon't want to get ahead of myself considering the eMBee ONE isn't even working yet, but thought I'd keep a log of ideas for future plans:
Hardware- Adafruit RFM69 radio transceivers so that eMBee ONEs can communicate with each other
Software
- BEEP command (so you can easily do stuff with the buzzer on pin 5)
- CHR$ support
- User defined graphics? Change character sets to make text-based games more interesting
-
Getting the hang of GitHub
02/01/2021 at 07:54 • 0 commentsRather than keeping the altered Arduino BASIC code to myself, I’ve officially forked the original code and will now maintain my version on GitHub. This is my first proper foray into using the service and I’m impressed so far.
-
Photos so far
01/29/2021 at 15:51 • 0 commentsHere are some photos showing the project at various stages...
![]()
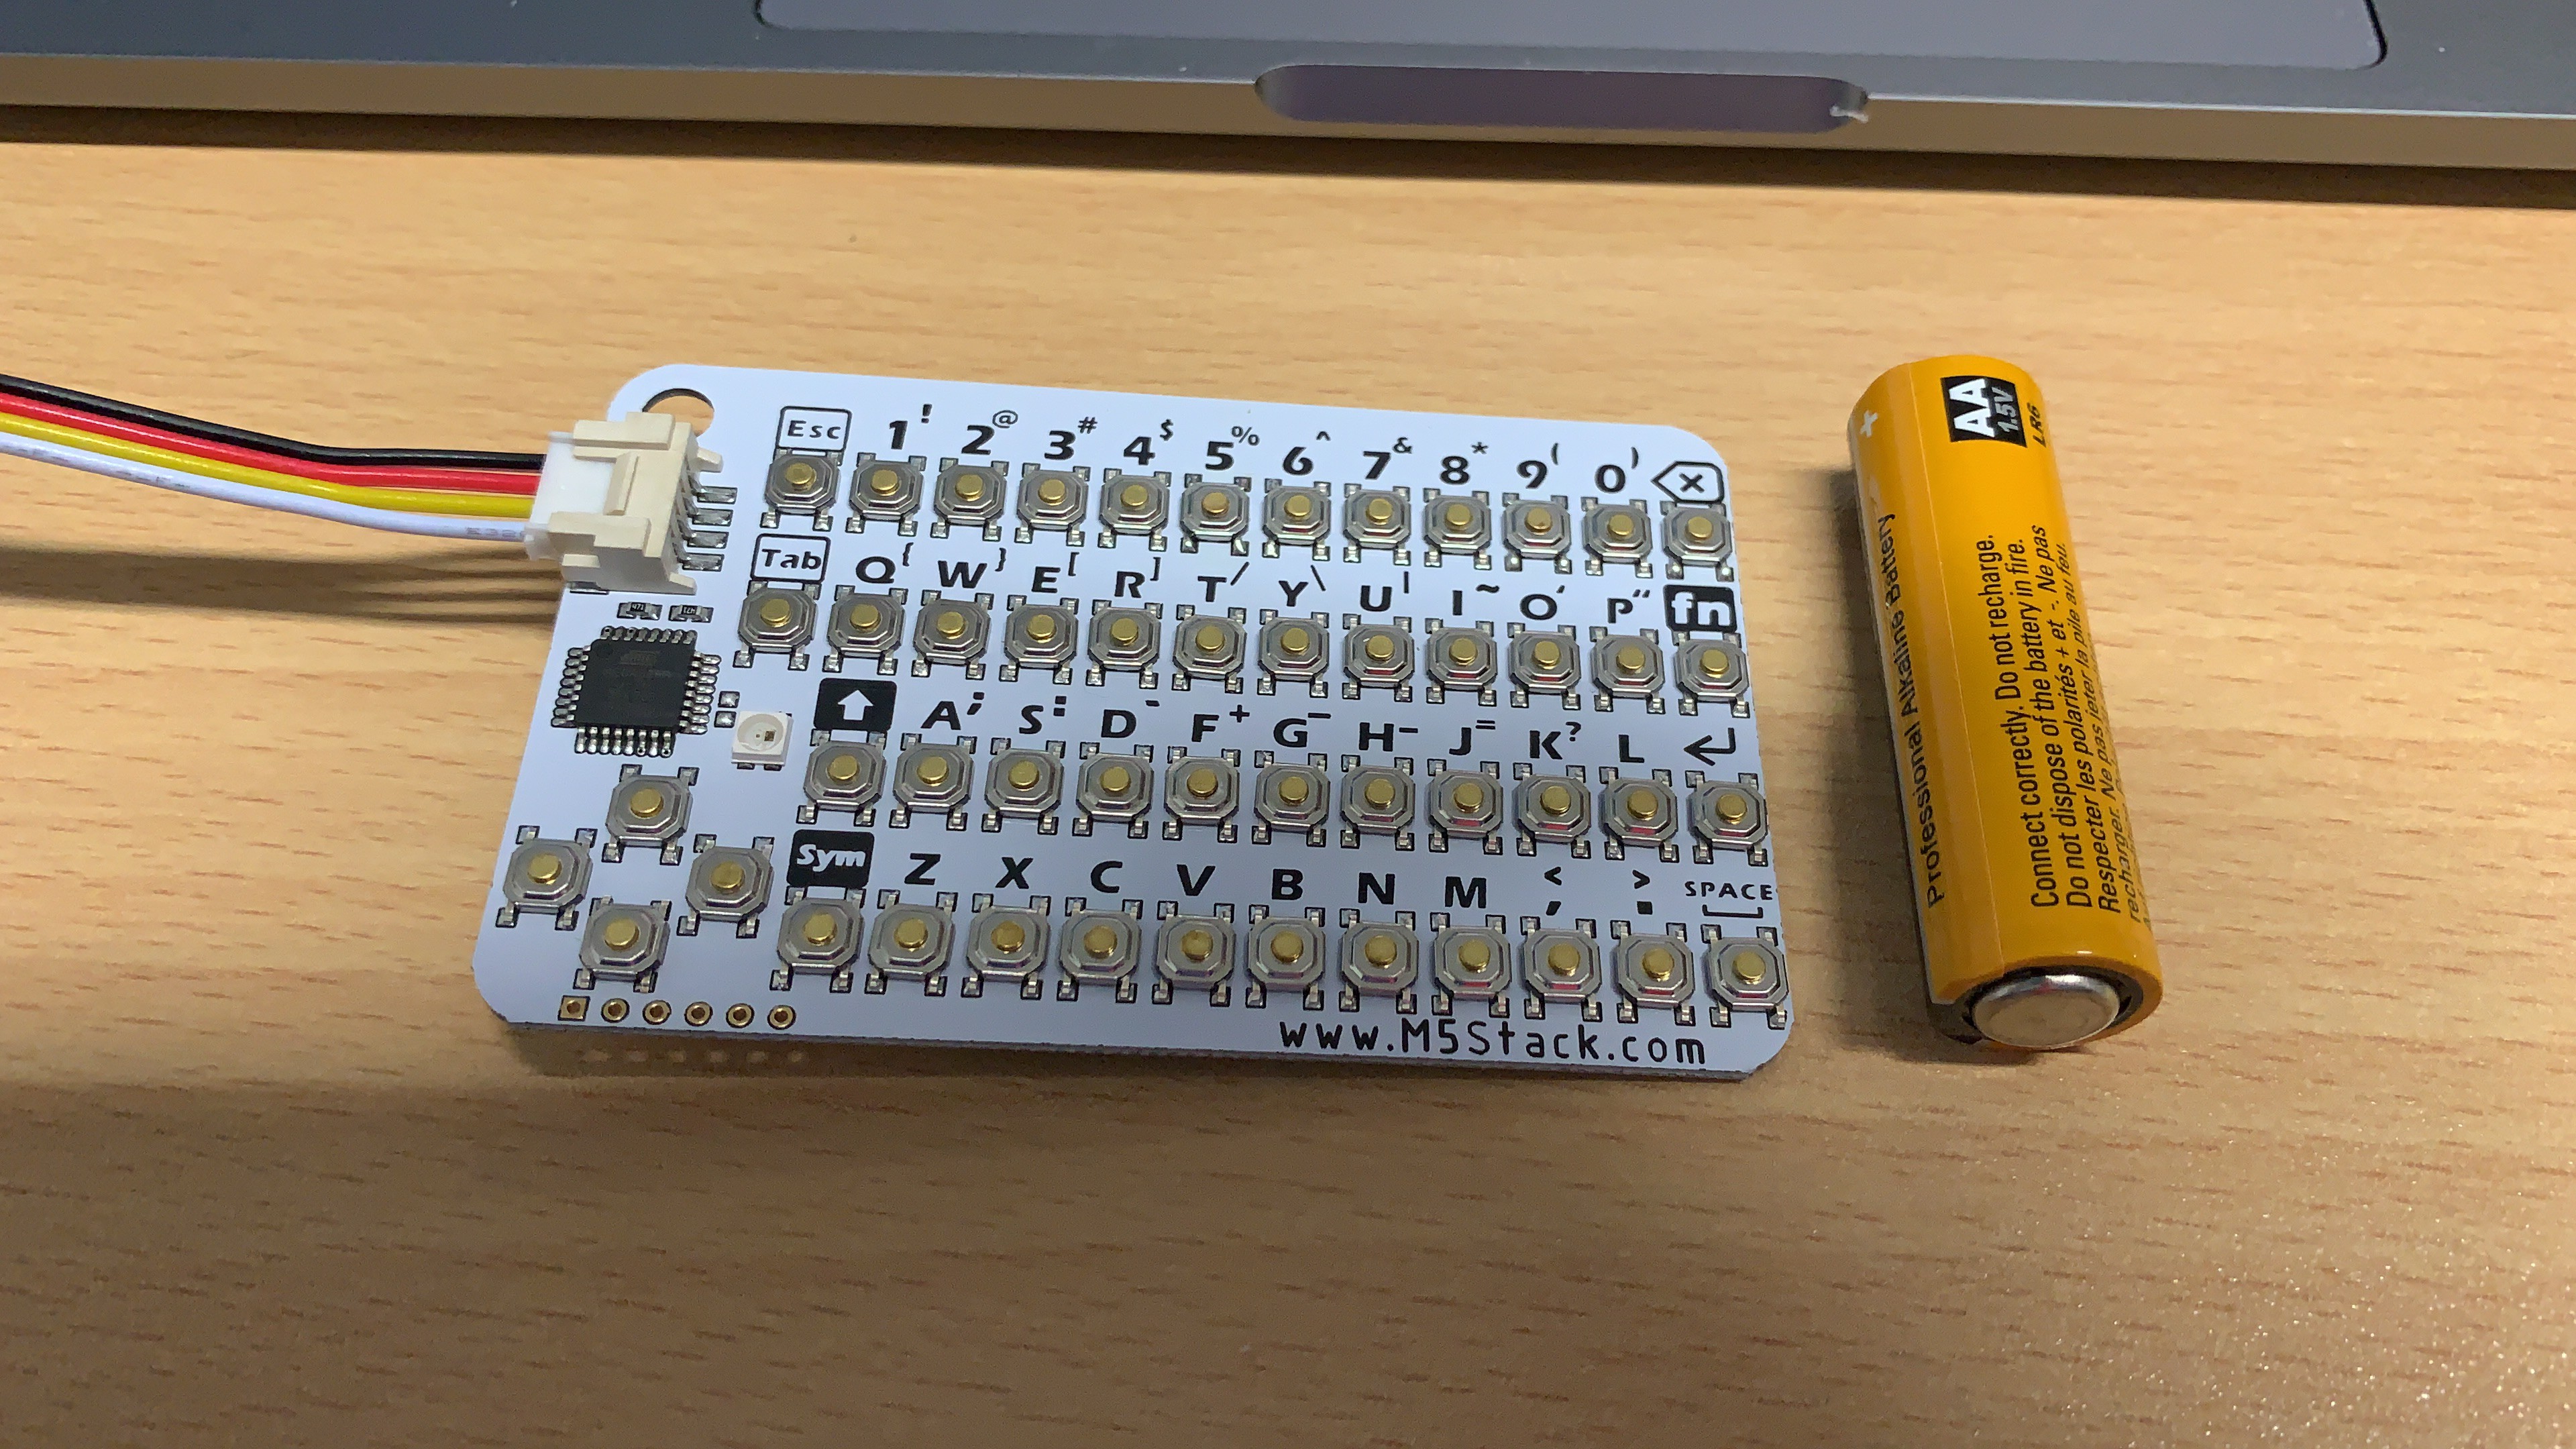
This is the CardKB keyboard next to an AA battery for scale. Basically it is the same size as a standard credit card, and fits perfectly edge-to-edge in the Altoids tin.
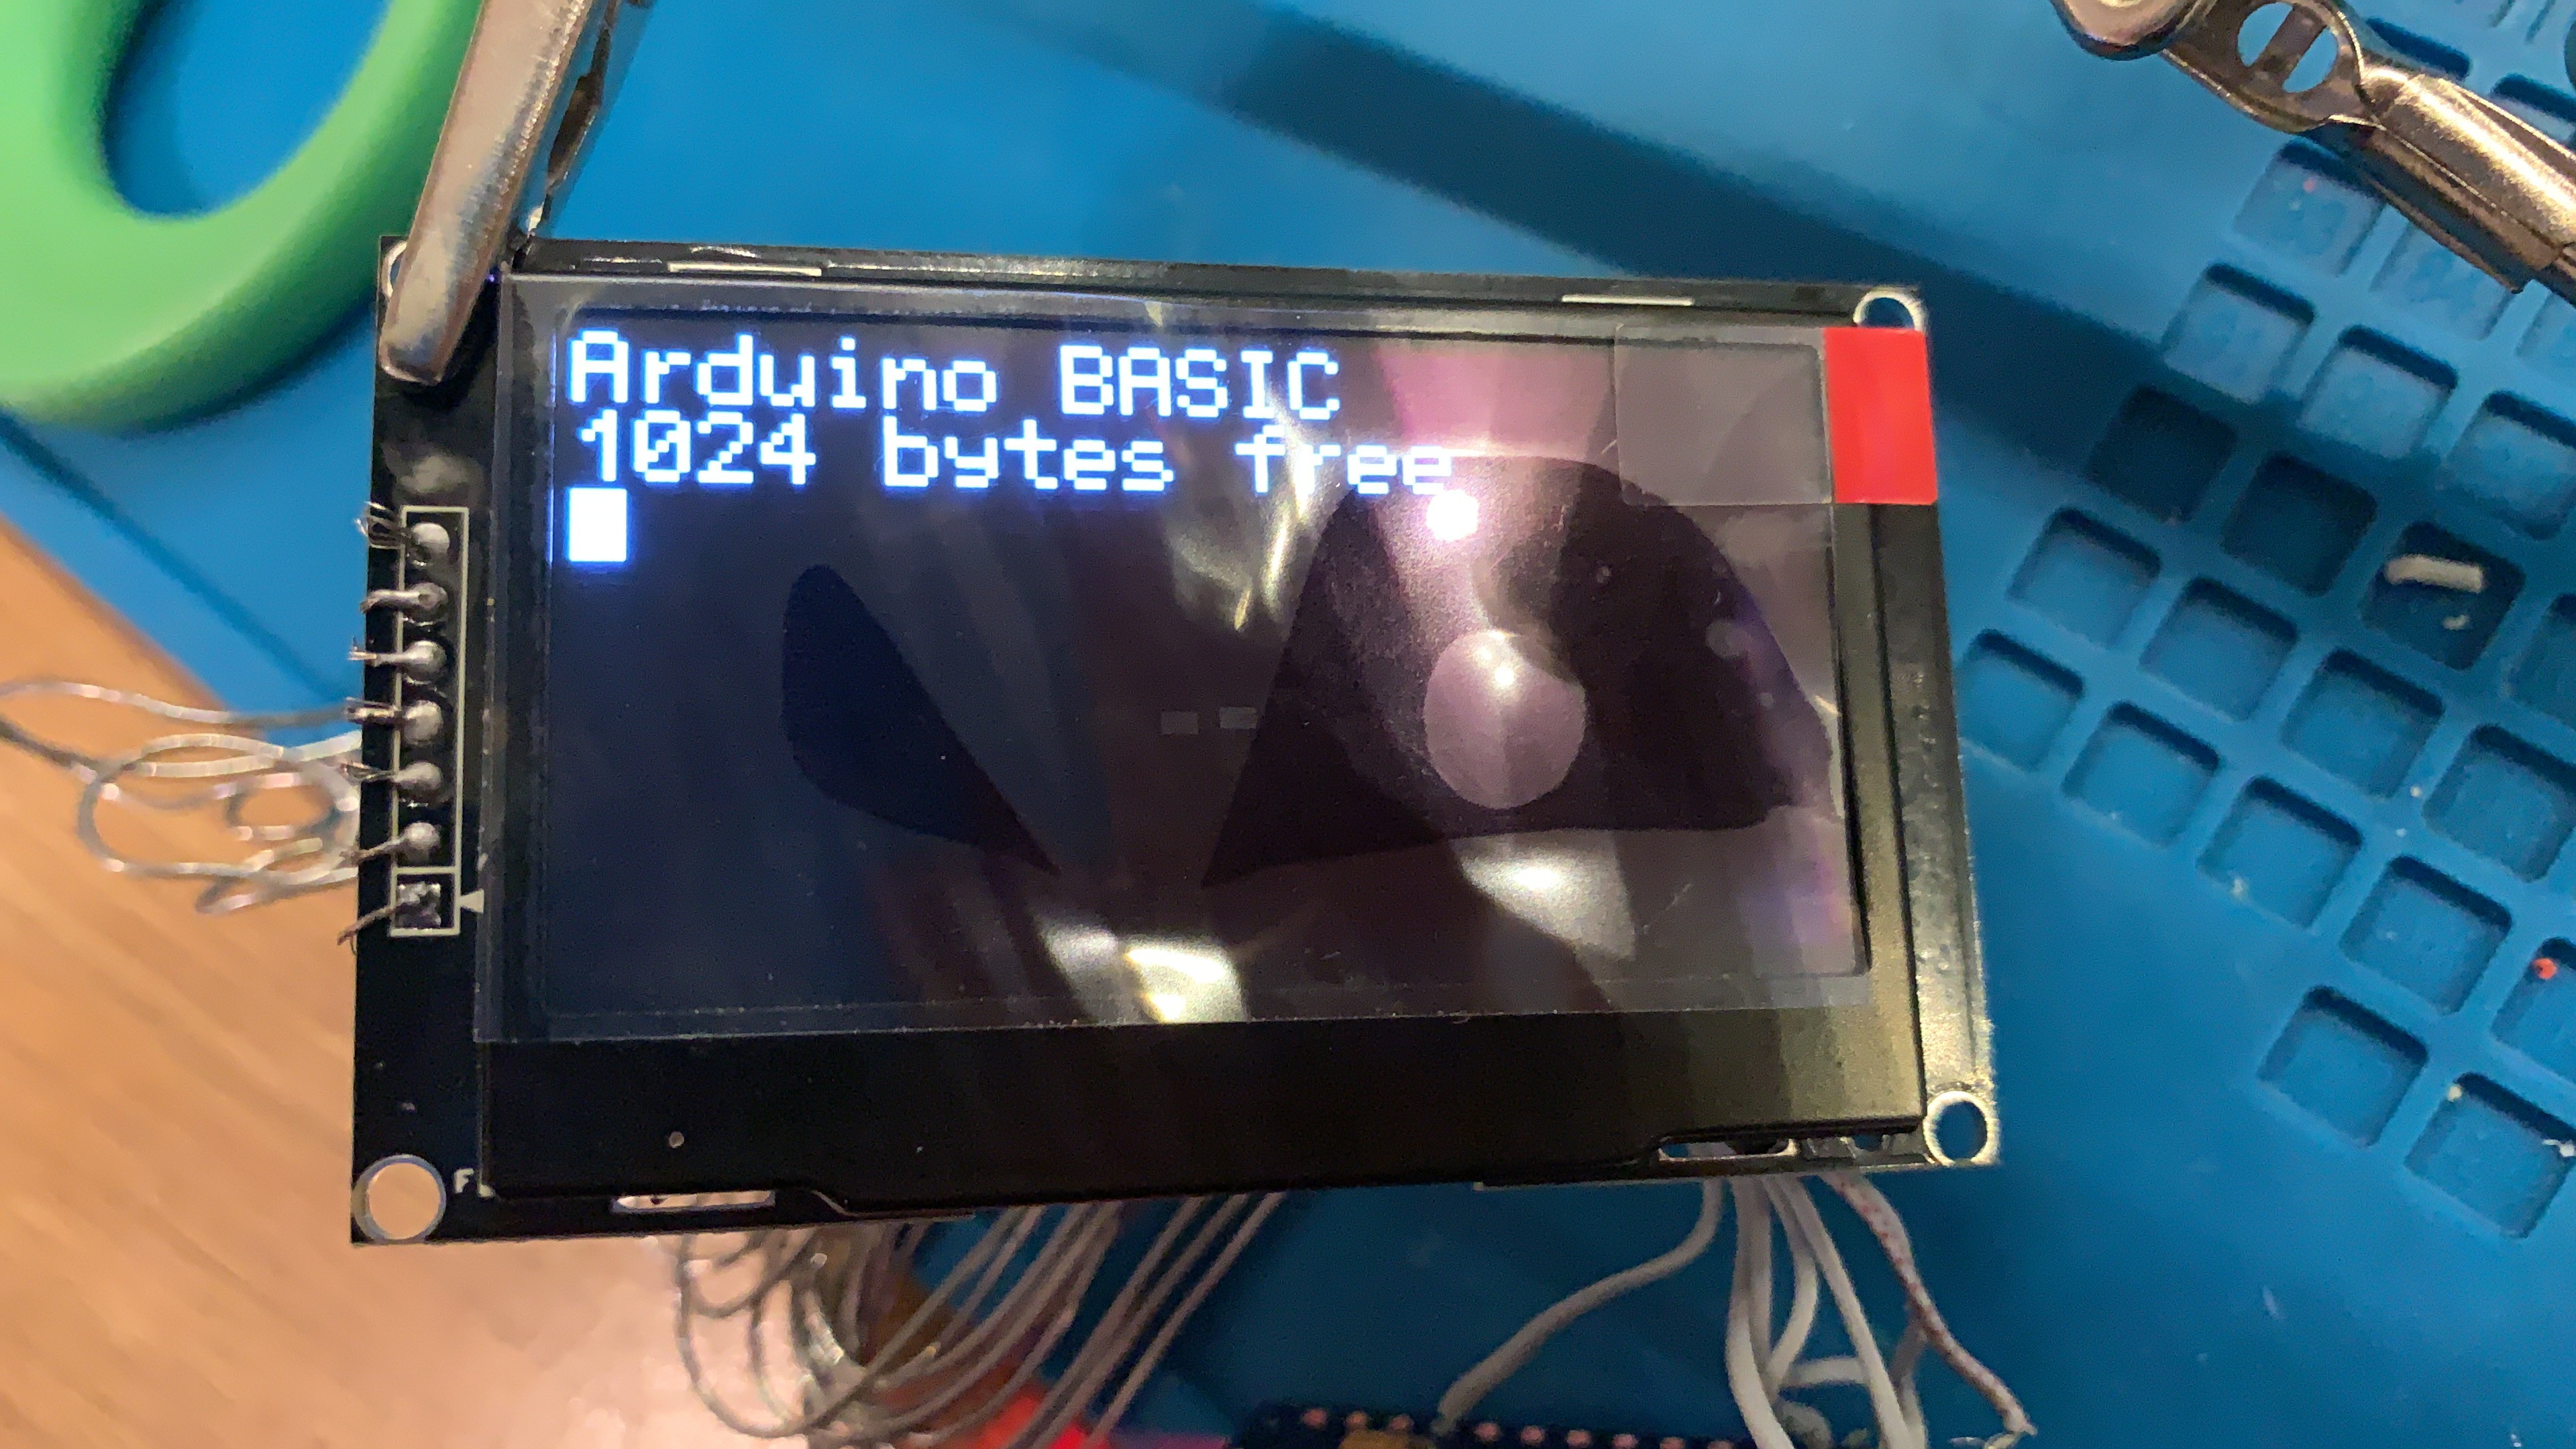
![]() The first time I actually got Arduino BASIC to run. This was with the original 2.42 inch OLED that ended up having a dimming fault. Notice everything is hard soldered.
The first time I actually got Arduino BASIC to run. This was with the original 2.42 inch OLED that ended up having a dimming fault. Notice everything is hard soldered. ![]()
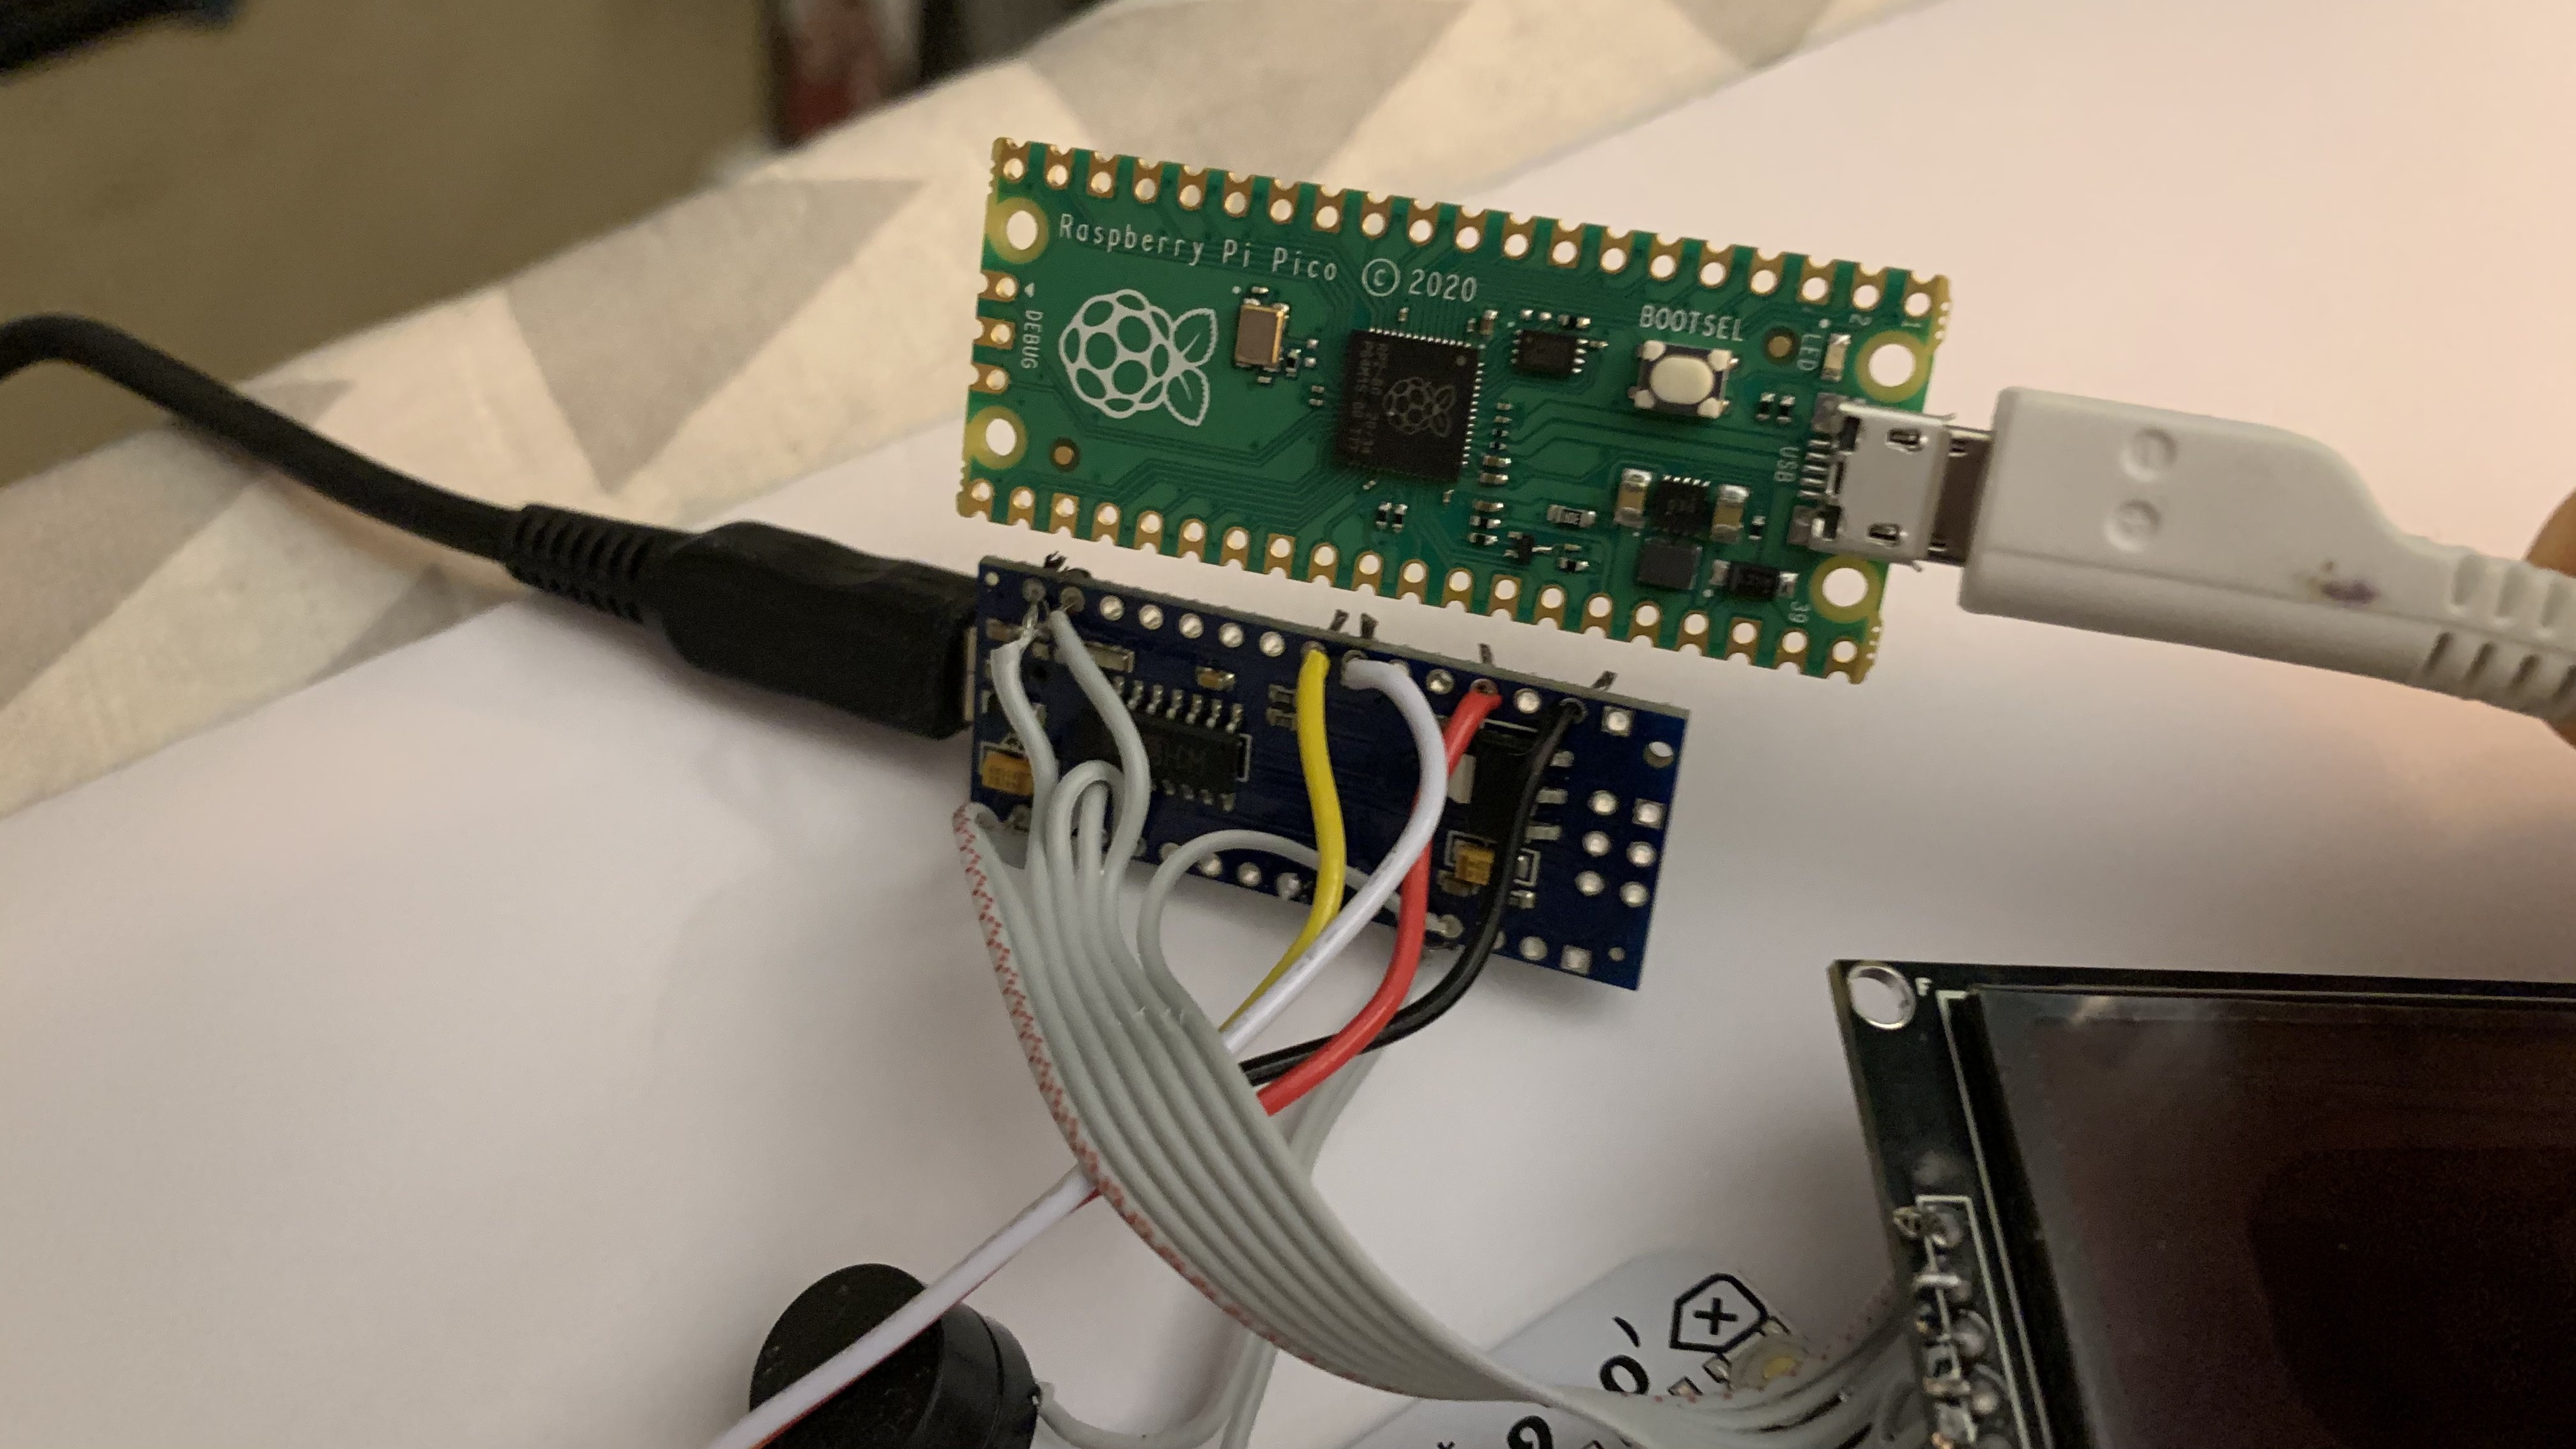
Here’s the Arduino Nano clone (bottom) next to its potential successor the Raspberry Pi Pico (top). A lot more powerful but perhaps not as much fun trying to get it to work!
![]()
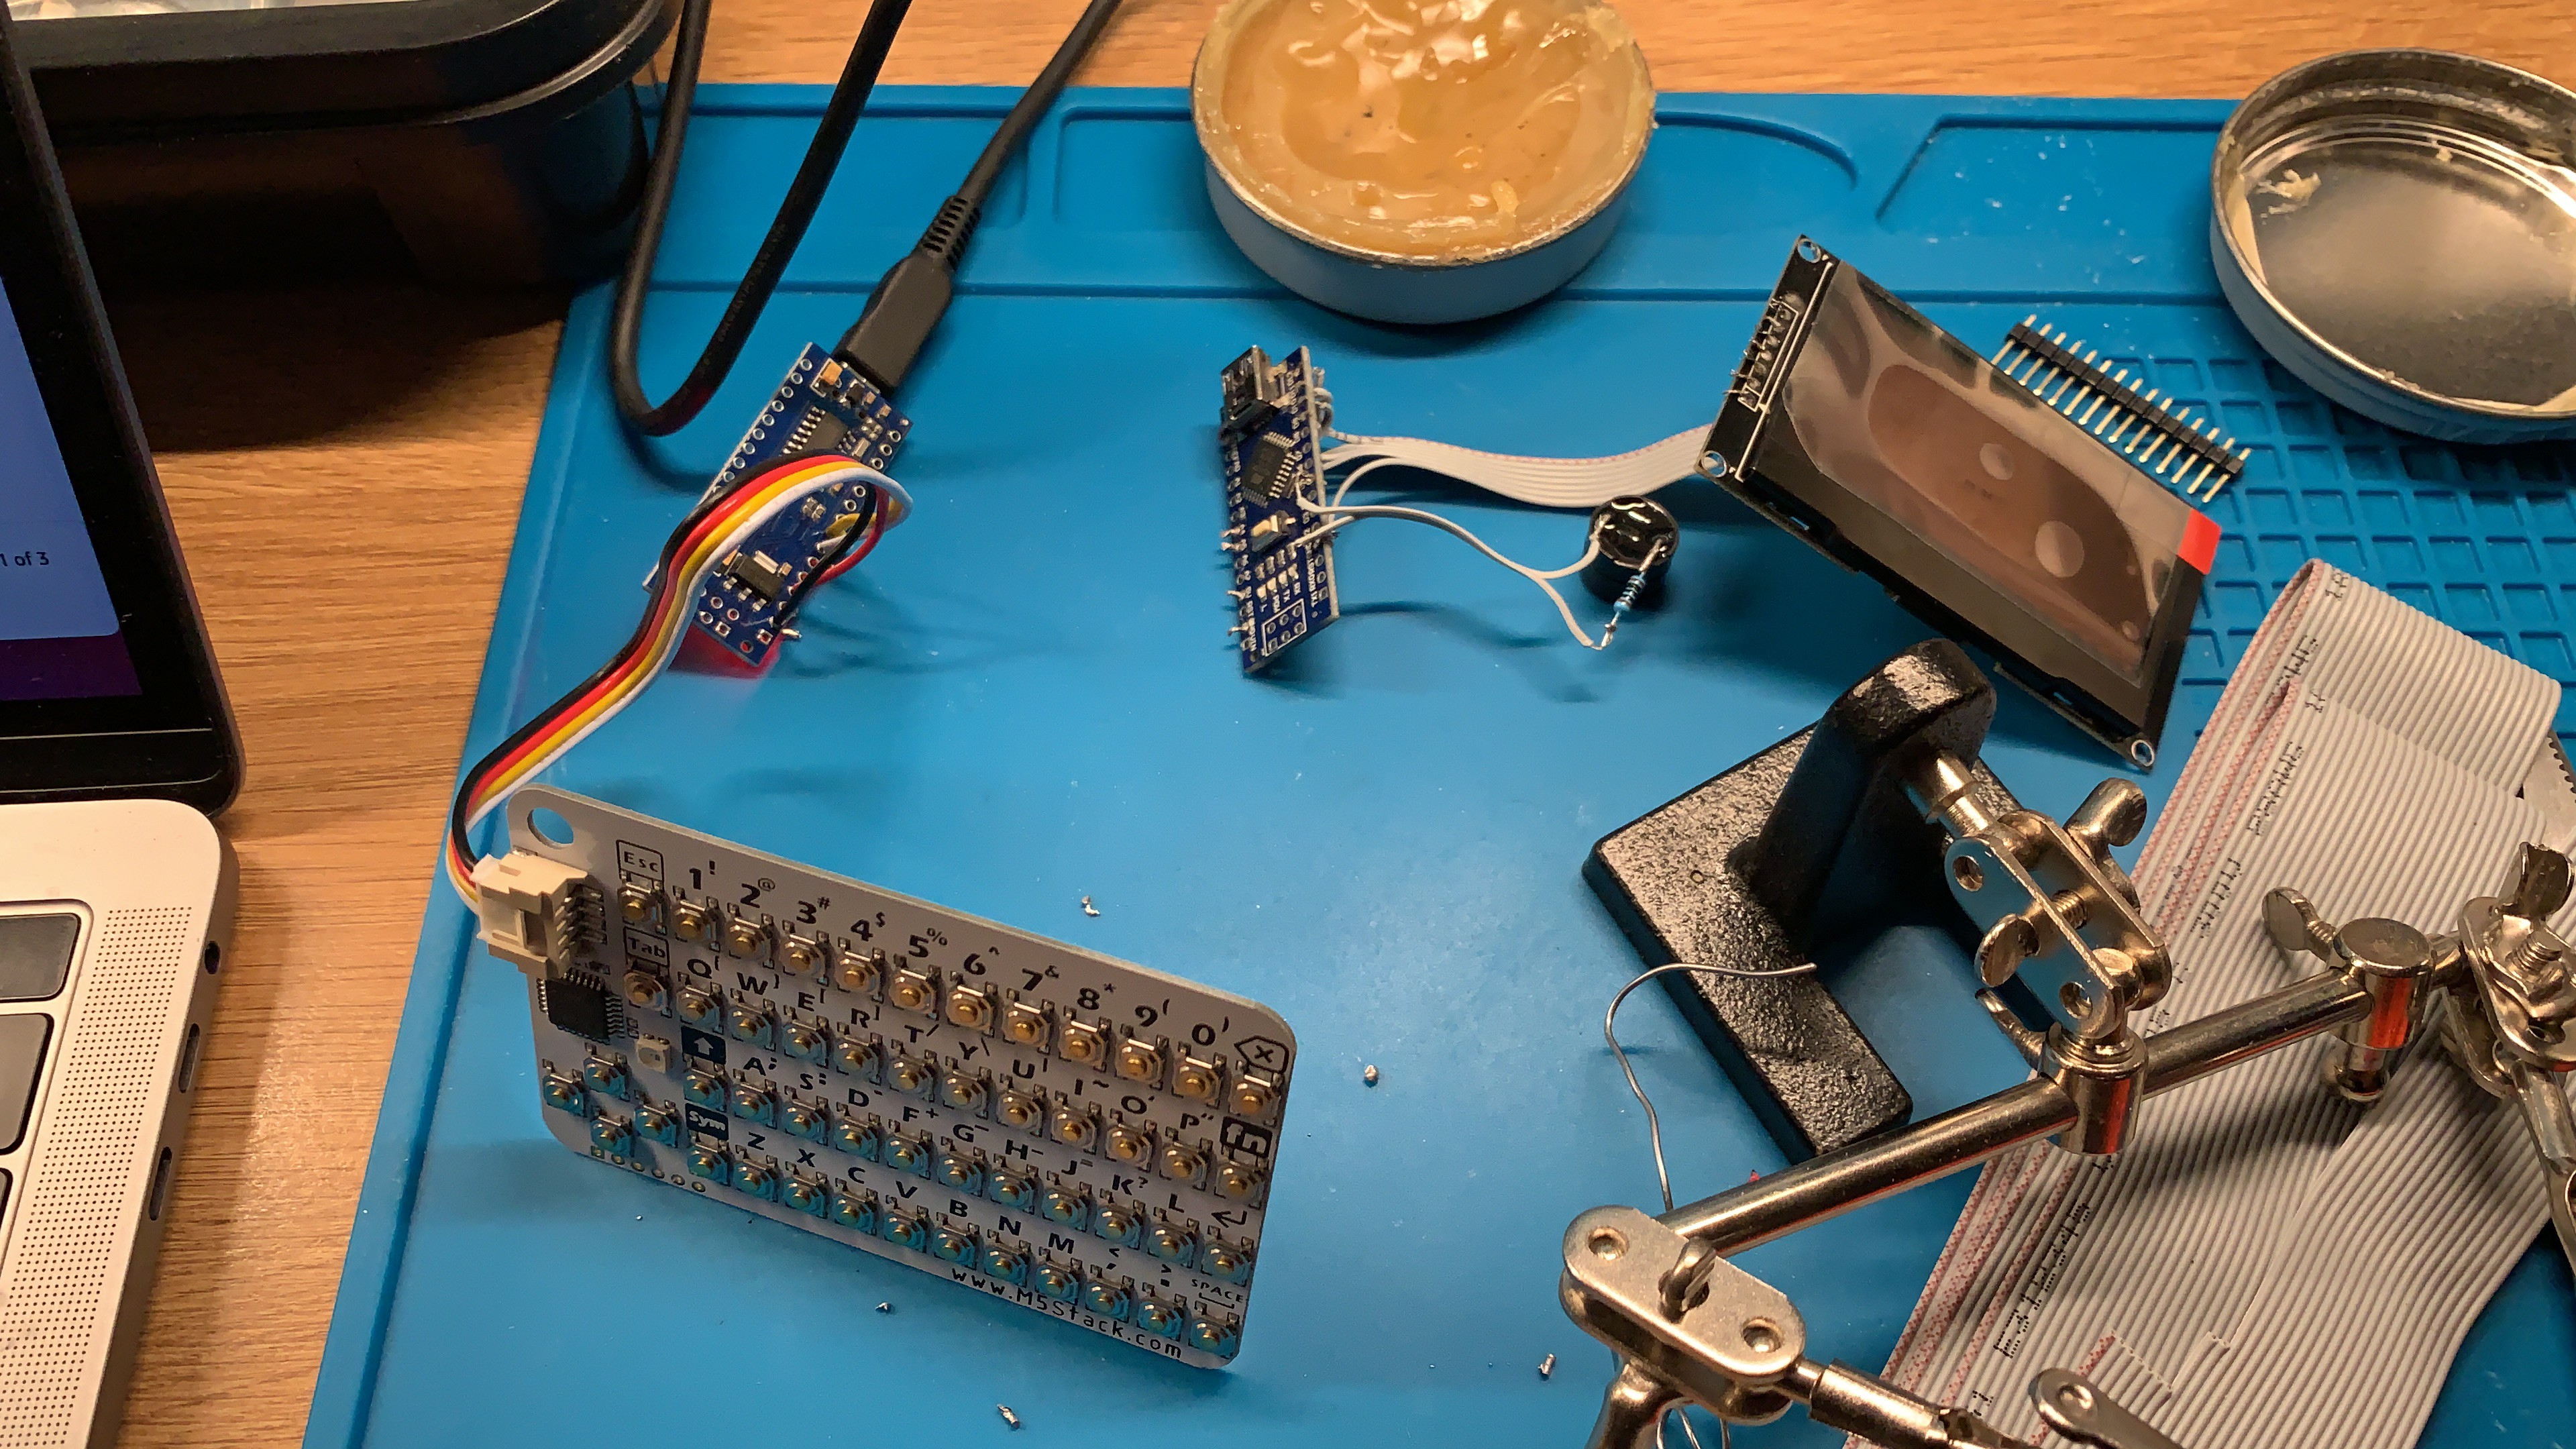
An early attempt that actually used TWO Nanos - one for the display and one for the keyboard. They were then connected via serial. A bit overkill really just to get around the limited SRAM problem. Abandoned that idea and went back to one Nano.
![]()
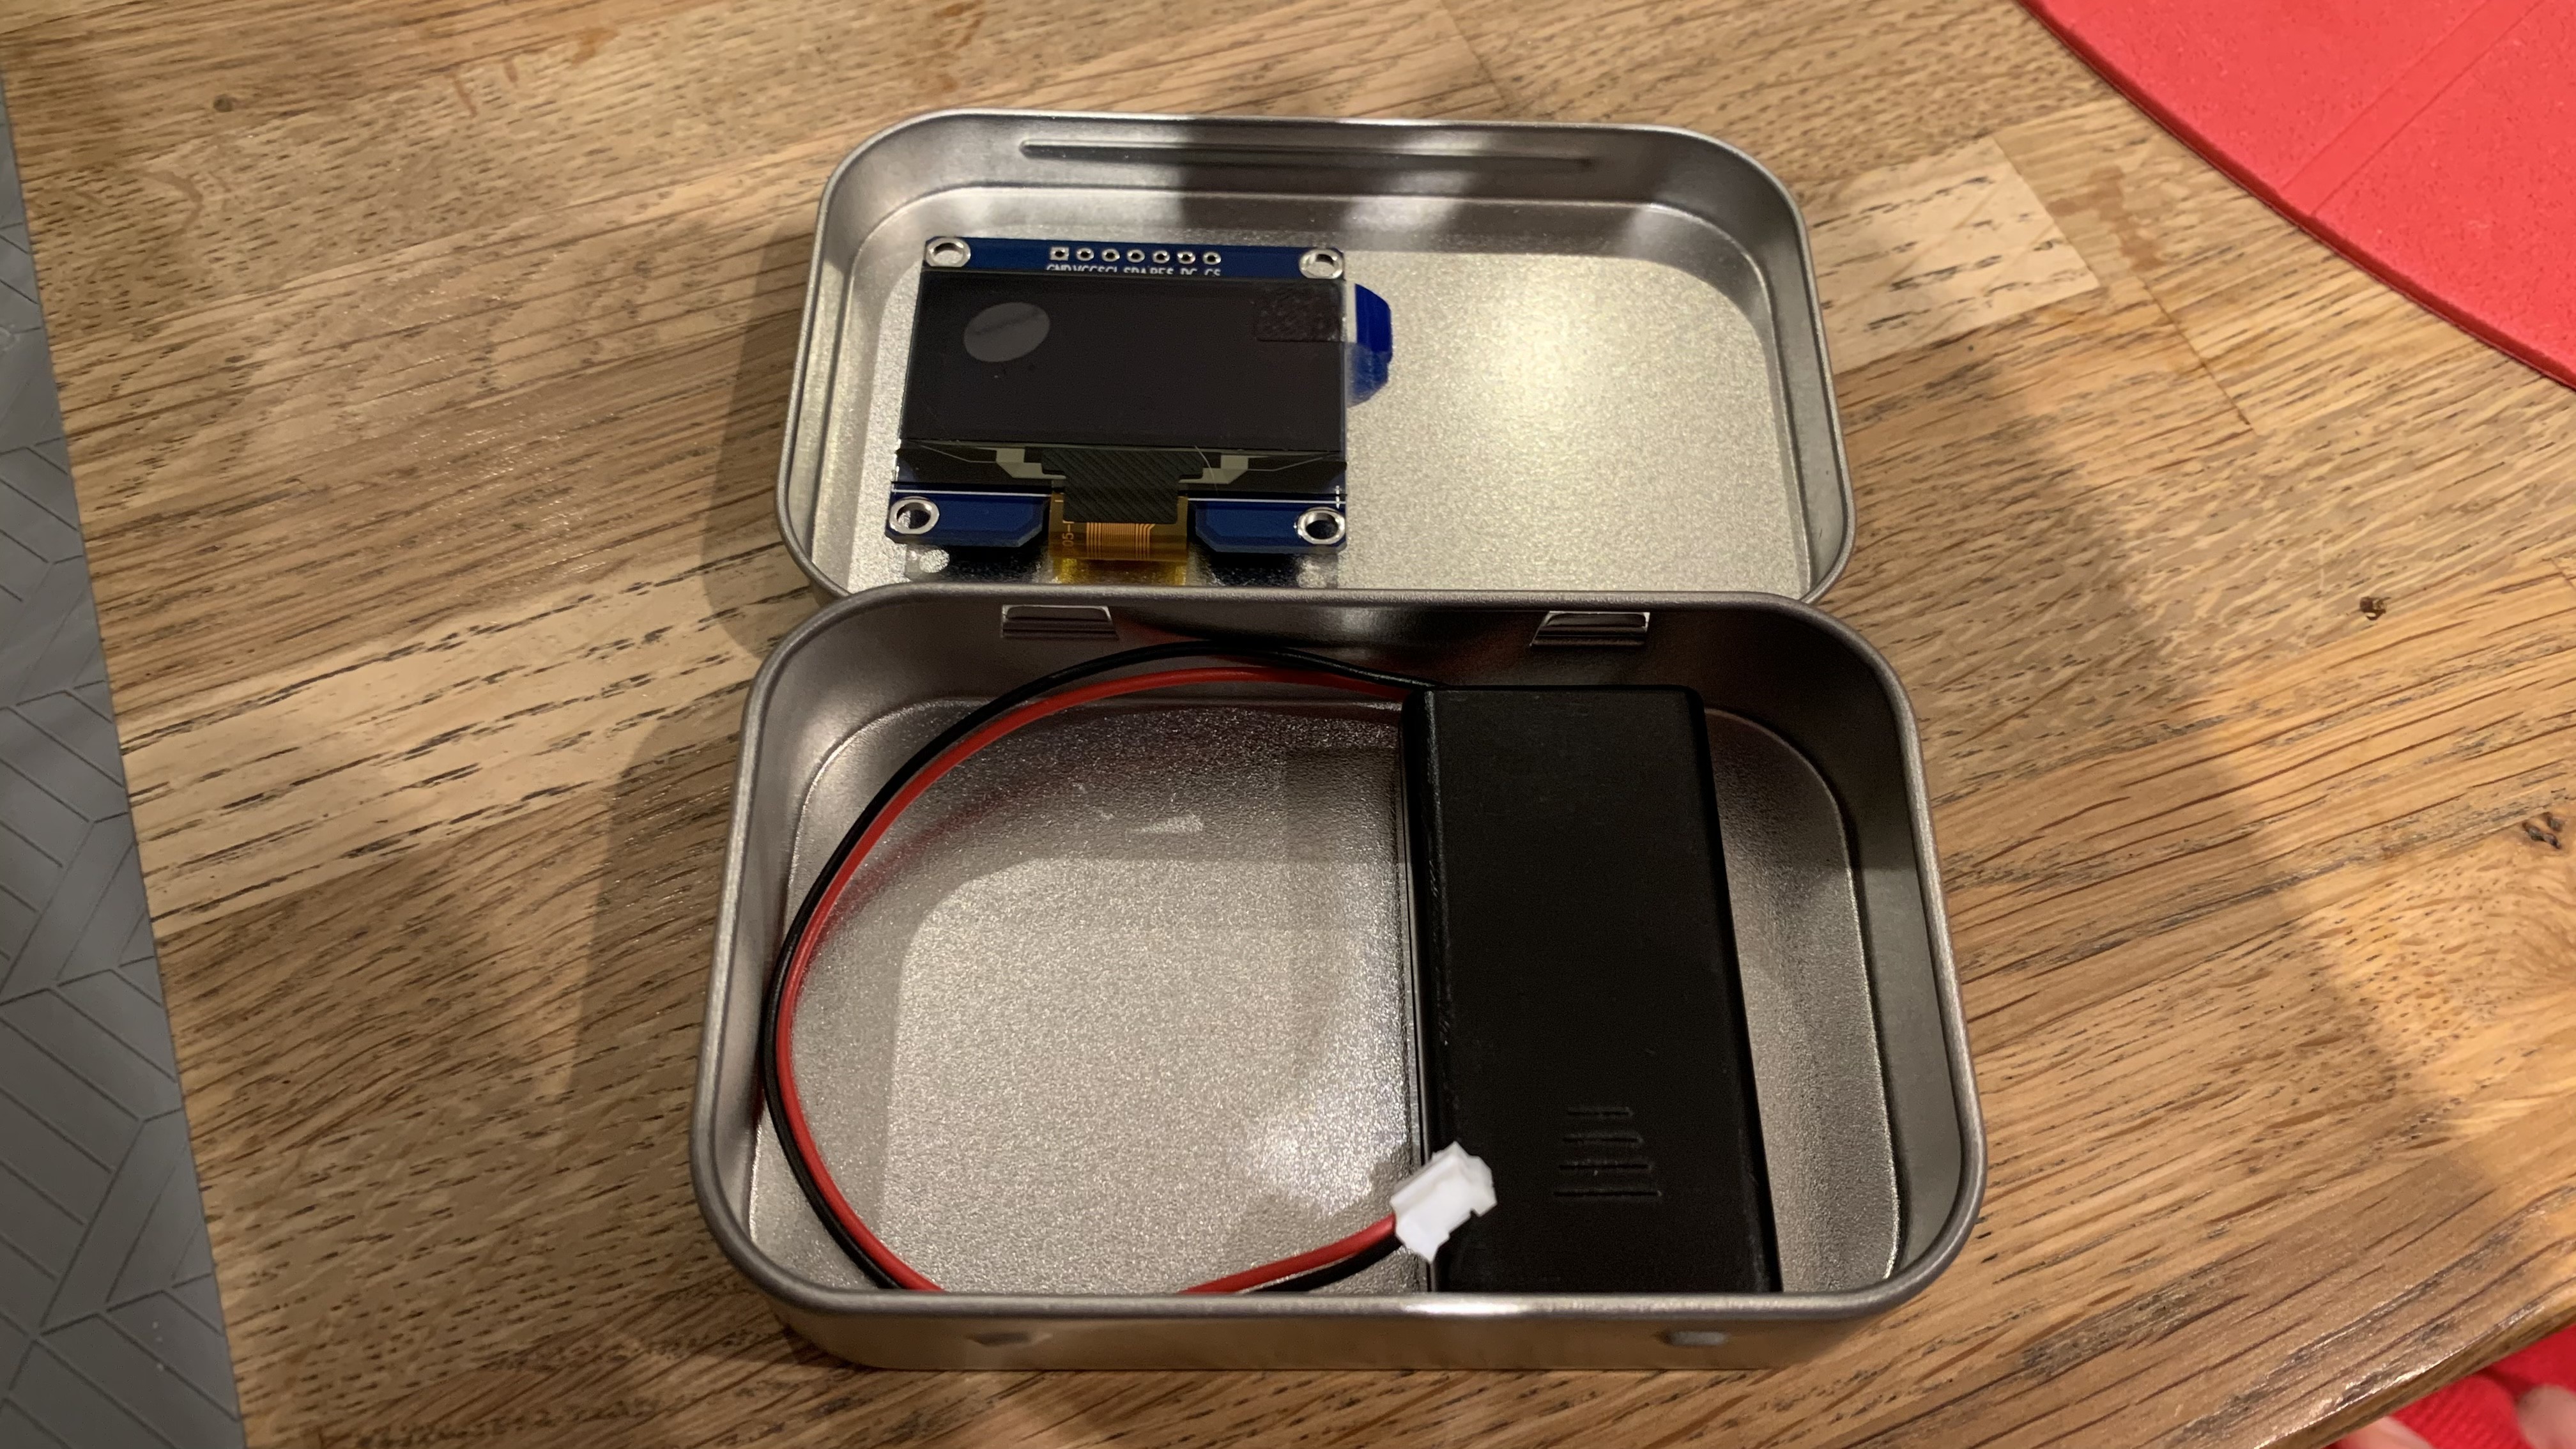
A first look at the new smaller OLED display and the 2xAAA battery box in their potential final positions within the tin. You can see this opens up possibilities for a mini breadboard to the right of the display, and lots of space for the Nano, PowerBoost board and spare components in the bottom of the tin. The CardKB keyboard goes on top of the battery box and can be removed for access to everything.
-
Getting the basics right
01/29/2021 at 15:46 • 0 commentsSo far, I've managed to get Arduino BASIC running with a 2.42 inch OLED SPI display and the CardKB keyboard. But for some reason, the display keeps dimming after a random period of time. Not sure if its a fault with the display but rather than get stuck on this point, I've decided to swap it for a 1.54 inch display I have instead. I should be able to try this out next week. Moving to the smaller display actually gives me more scope to fit more into the tin, specifically one of those mini breadboards next to the display so that the user can do some physical computing. There should even be space under the keyboard to store spare components and jumper wires. I also realised the benefits of building the Arduino and display onto breadboards too. So there will be 3 mini breadboards all inside one tin. My previous attempts of soldering components directly looked so messy - this will be much neater and can give me more flexibility as the project progresses.
eMBee ONE pocket computer
A 1980s style 8-bit computer running BASIC. Includes OLED screen and a QWERTY keyboard. Oh, and the whole thing fits in an Altoids tin.


 The first time I actually got Arduino BASIC to run. This was with the original 2.42 inch OLED that ended up having a dimming fault. Notice everything is hard soldered.