Just4Fun
-
* * SPP (STANDARD PARALLEL PORT) ADAPTER BOARD * *
10/10/2021 at 09:03 • 2 comments* * SPP (STANDARD PARALLEL PORT) ADAPTER BOARD * *
The Standard Parallel Port (SPP) Adapter board allows to use the GPIO port of the 68k-MBC as a standard printer parallel port.
In this way you can use a legacy parallel (Centronics) printer.
To connect the SPP Adapter board to the GPIO connector of the 68k-MBC board you need a 10cm long 20 wires flat cable terminated with an IDC connector at both sides (pay attention to connect the cable in the right way on both sides, so the pin 1 on the 68k-MBC GPIO connector corresponds to the pin 1 on the SPP Adapter board GPIO connector).
Please note that you have to power off the 68k-MBC board before connecting or disconnecting the SPP Adapter board to it.
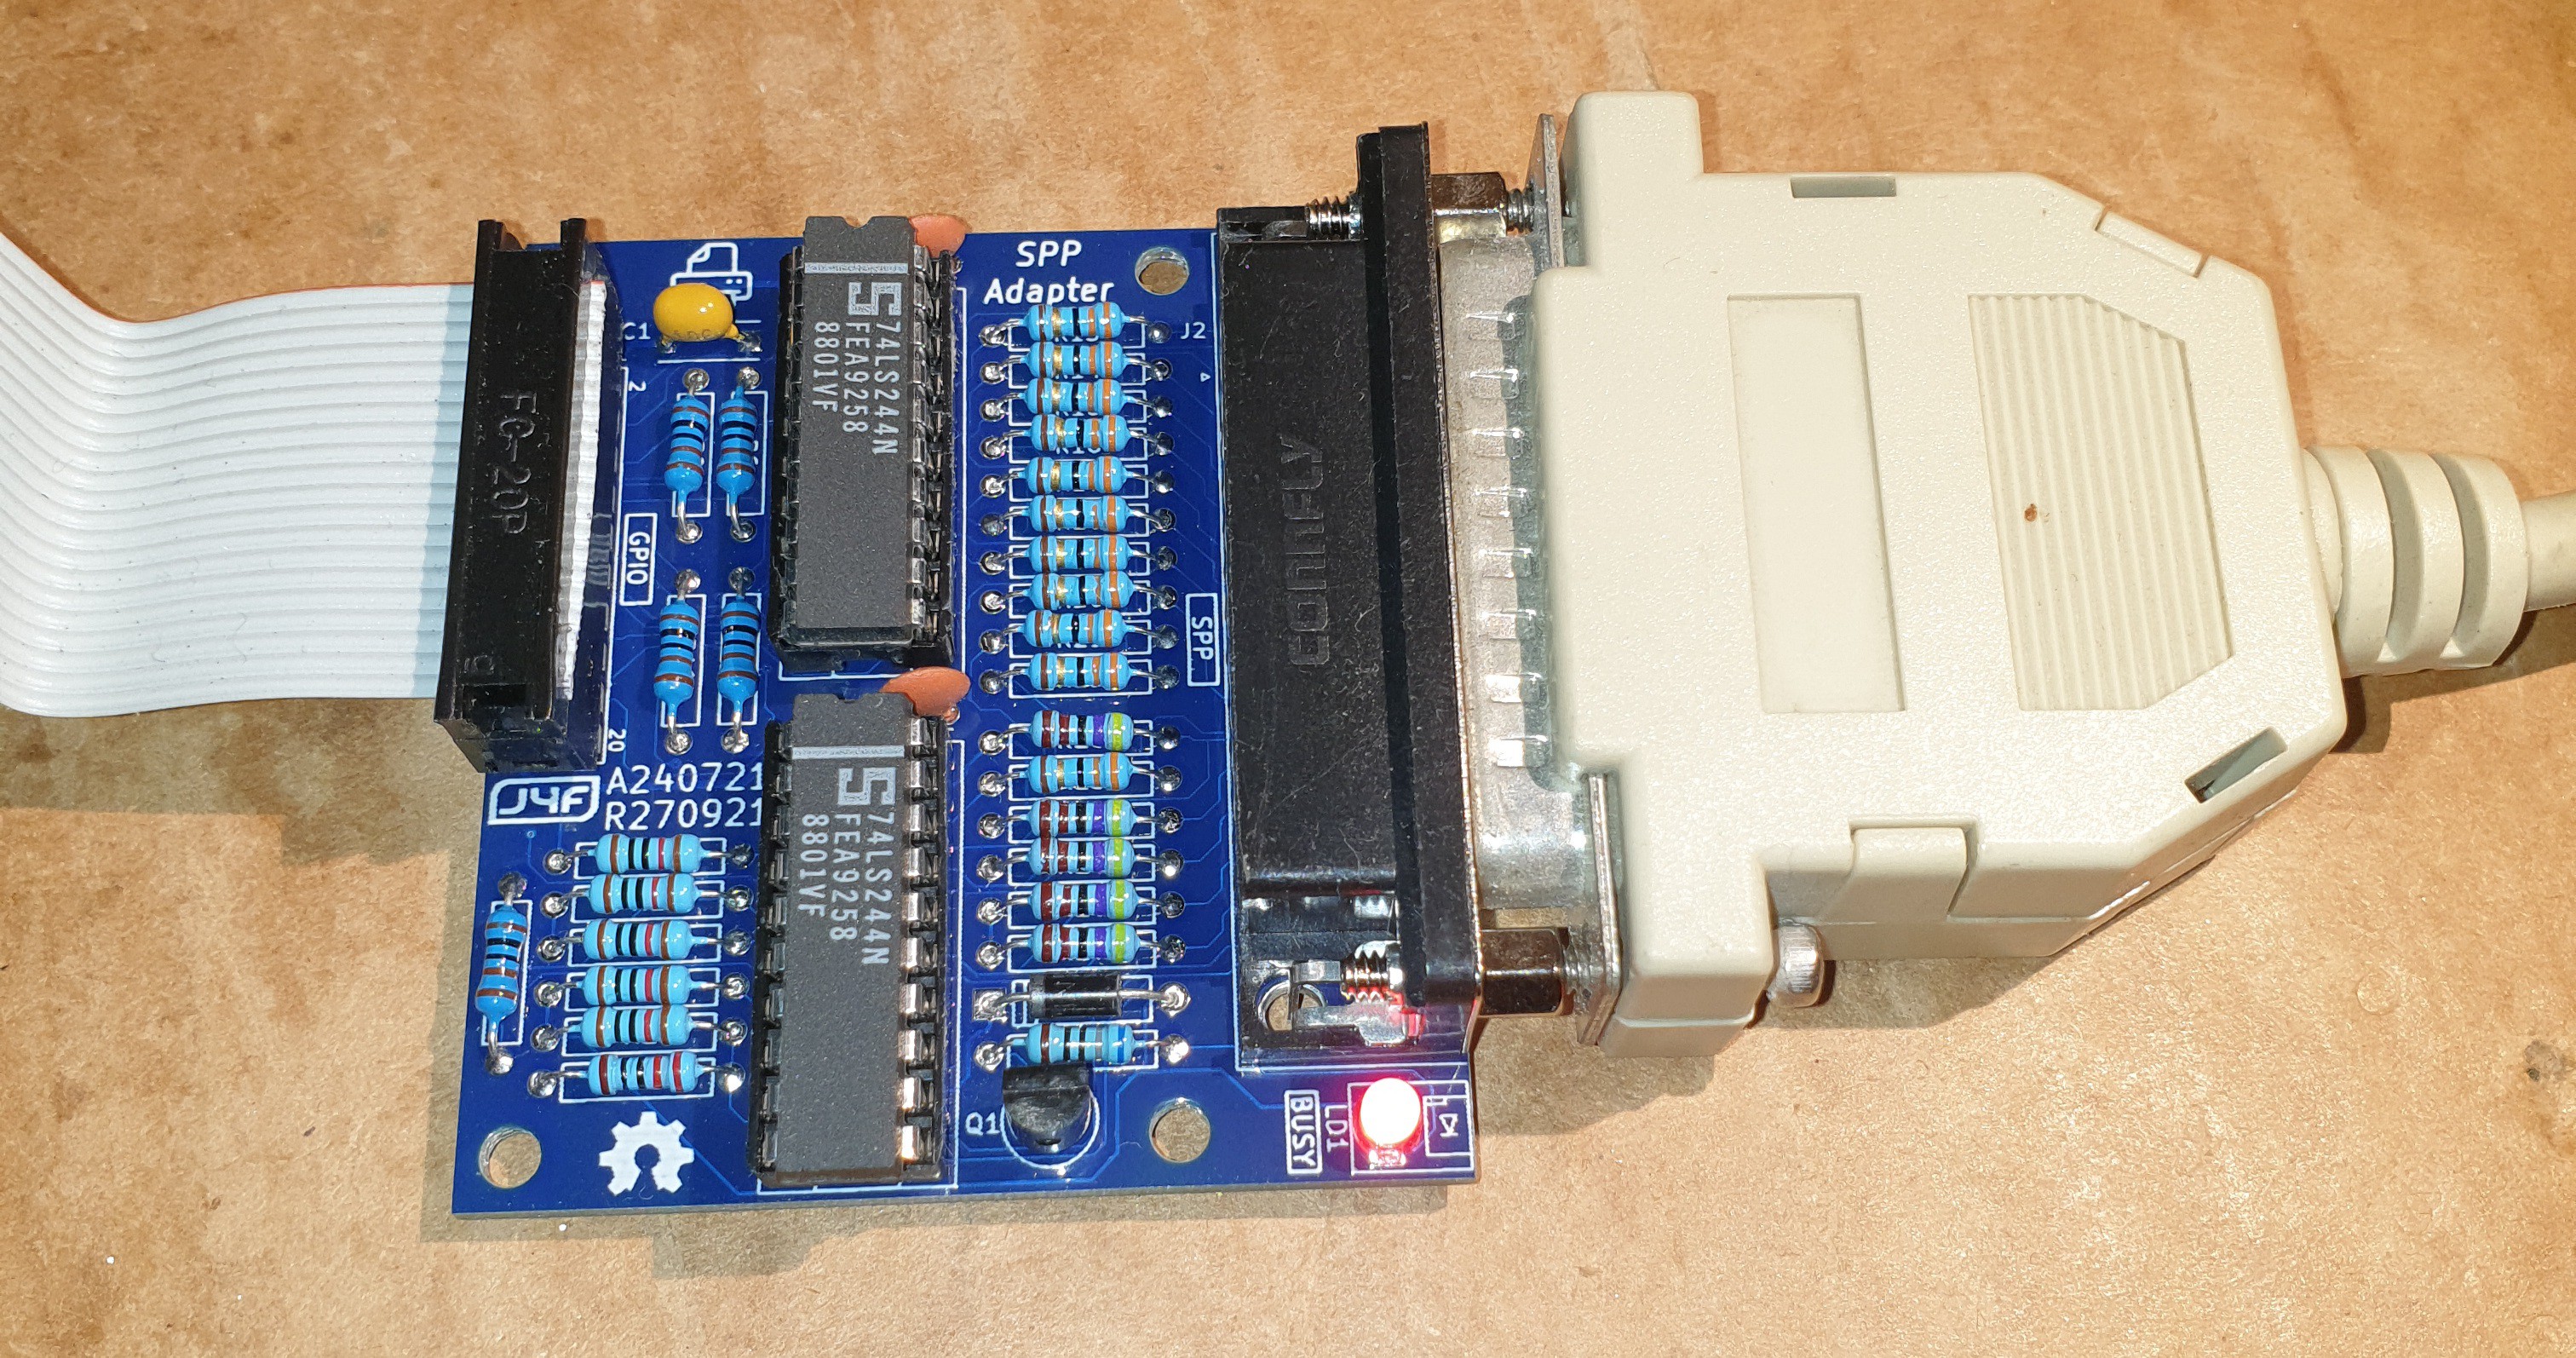
NOTE: before using the SPP Adapter board (A240721-R270921) you have to update both the IOS firmware and the SD image to the latest available version (see the FILES section).In the following image the SPP Adapter board with the flat cable (connected to the GPIO connector of the 68k-MBC) and with the printer cable:
![]()
The cable to use for the printer is the common parallel printer cable, with a DB-25 connector at one side and a Centronics connector at the other:
![]()
HOW TO BUILD ITIn the FILES section you can find a zip file with all the documentation needed to build the SPP Adapter board, including the Gerber files for the PCB production.
HOW TO USE IT: THE SPP CP/M-68K UTILITYTo enable the SPP Adapter board under CP/M-68K I've added on the drive B: the custom utility SPP.68K (and the source SPP.BAS).
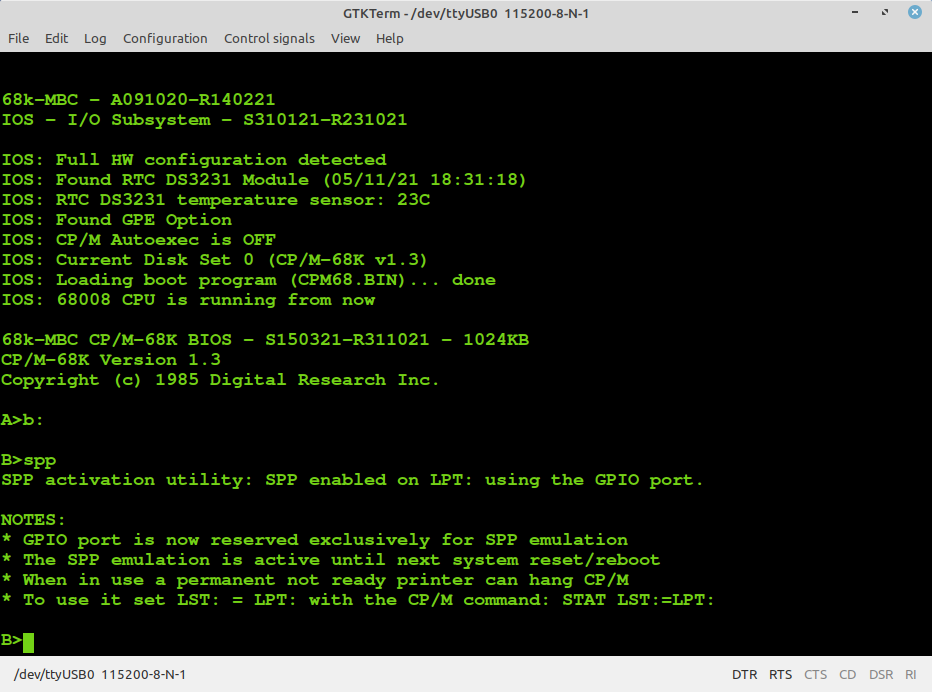
You have to execute the SPP utility to enable the SPP Adapter board and "link" to it the LPT: CP/M device inside CP/M-68K. After the execution of the SPP utility the GPIO port will be linked and reserved (the "normal" GPIO opcodes/functions inside IOS will be disabled) to the SPP parallel port emulation until a system reset or reboot:
![]()
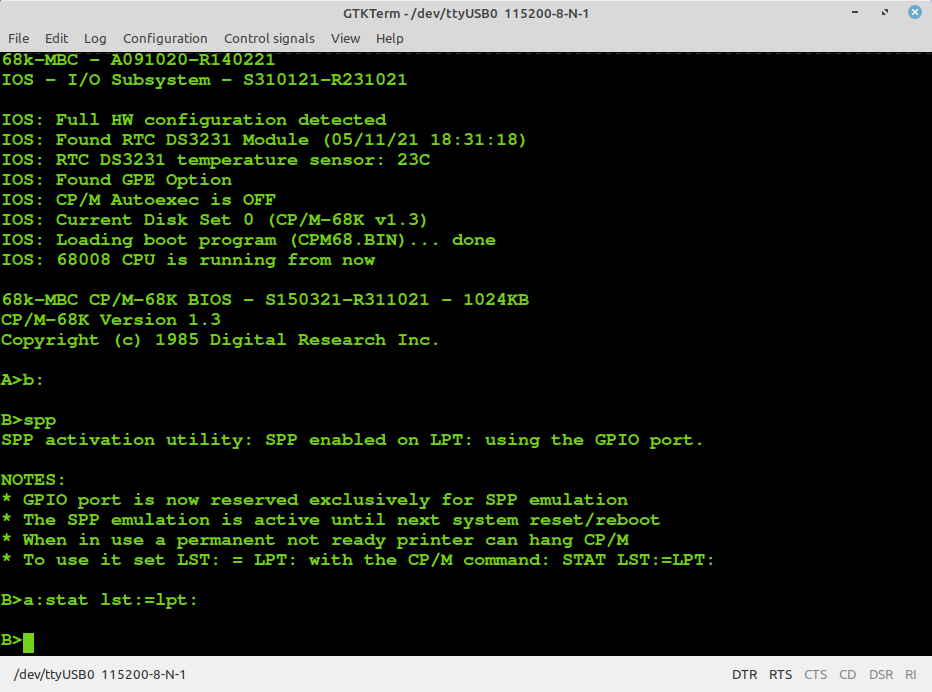
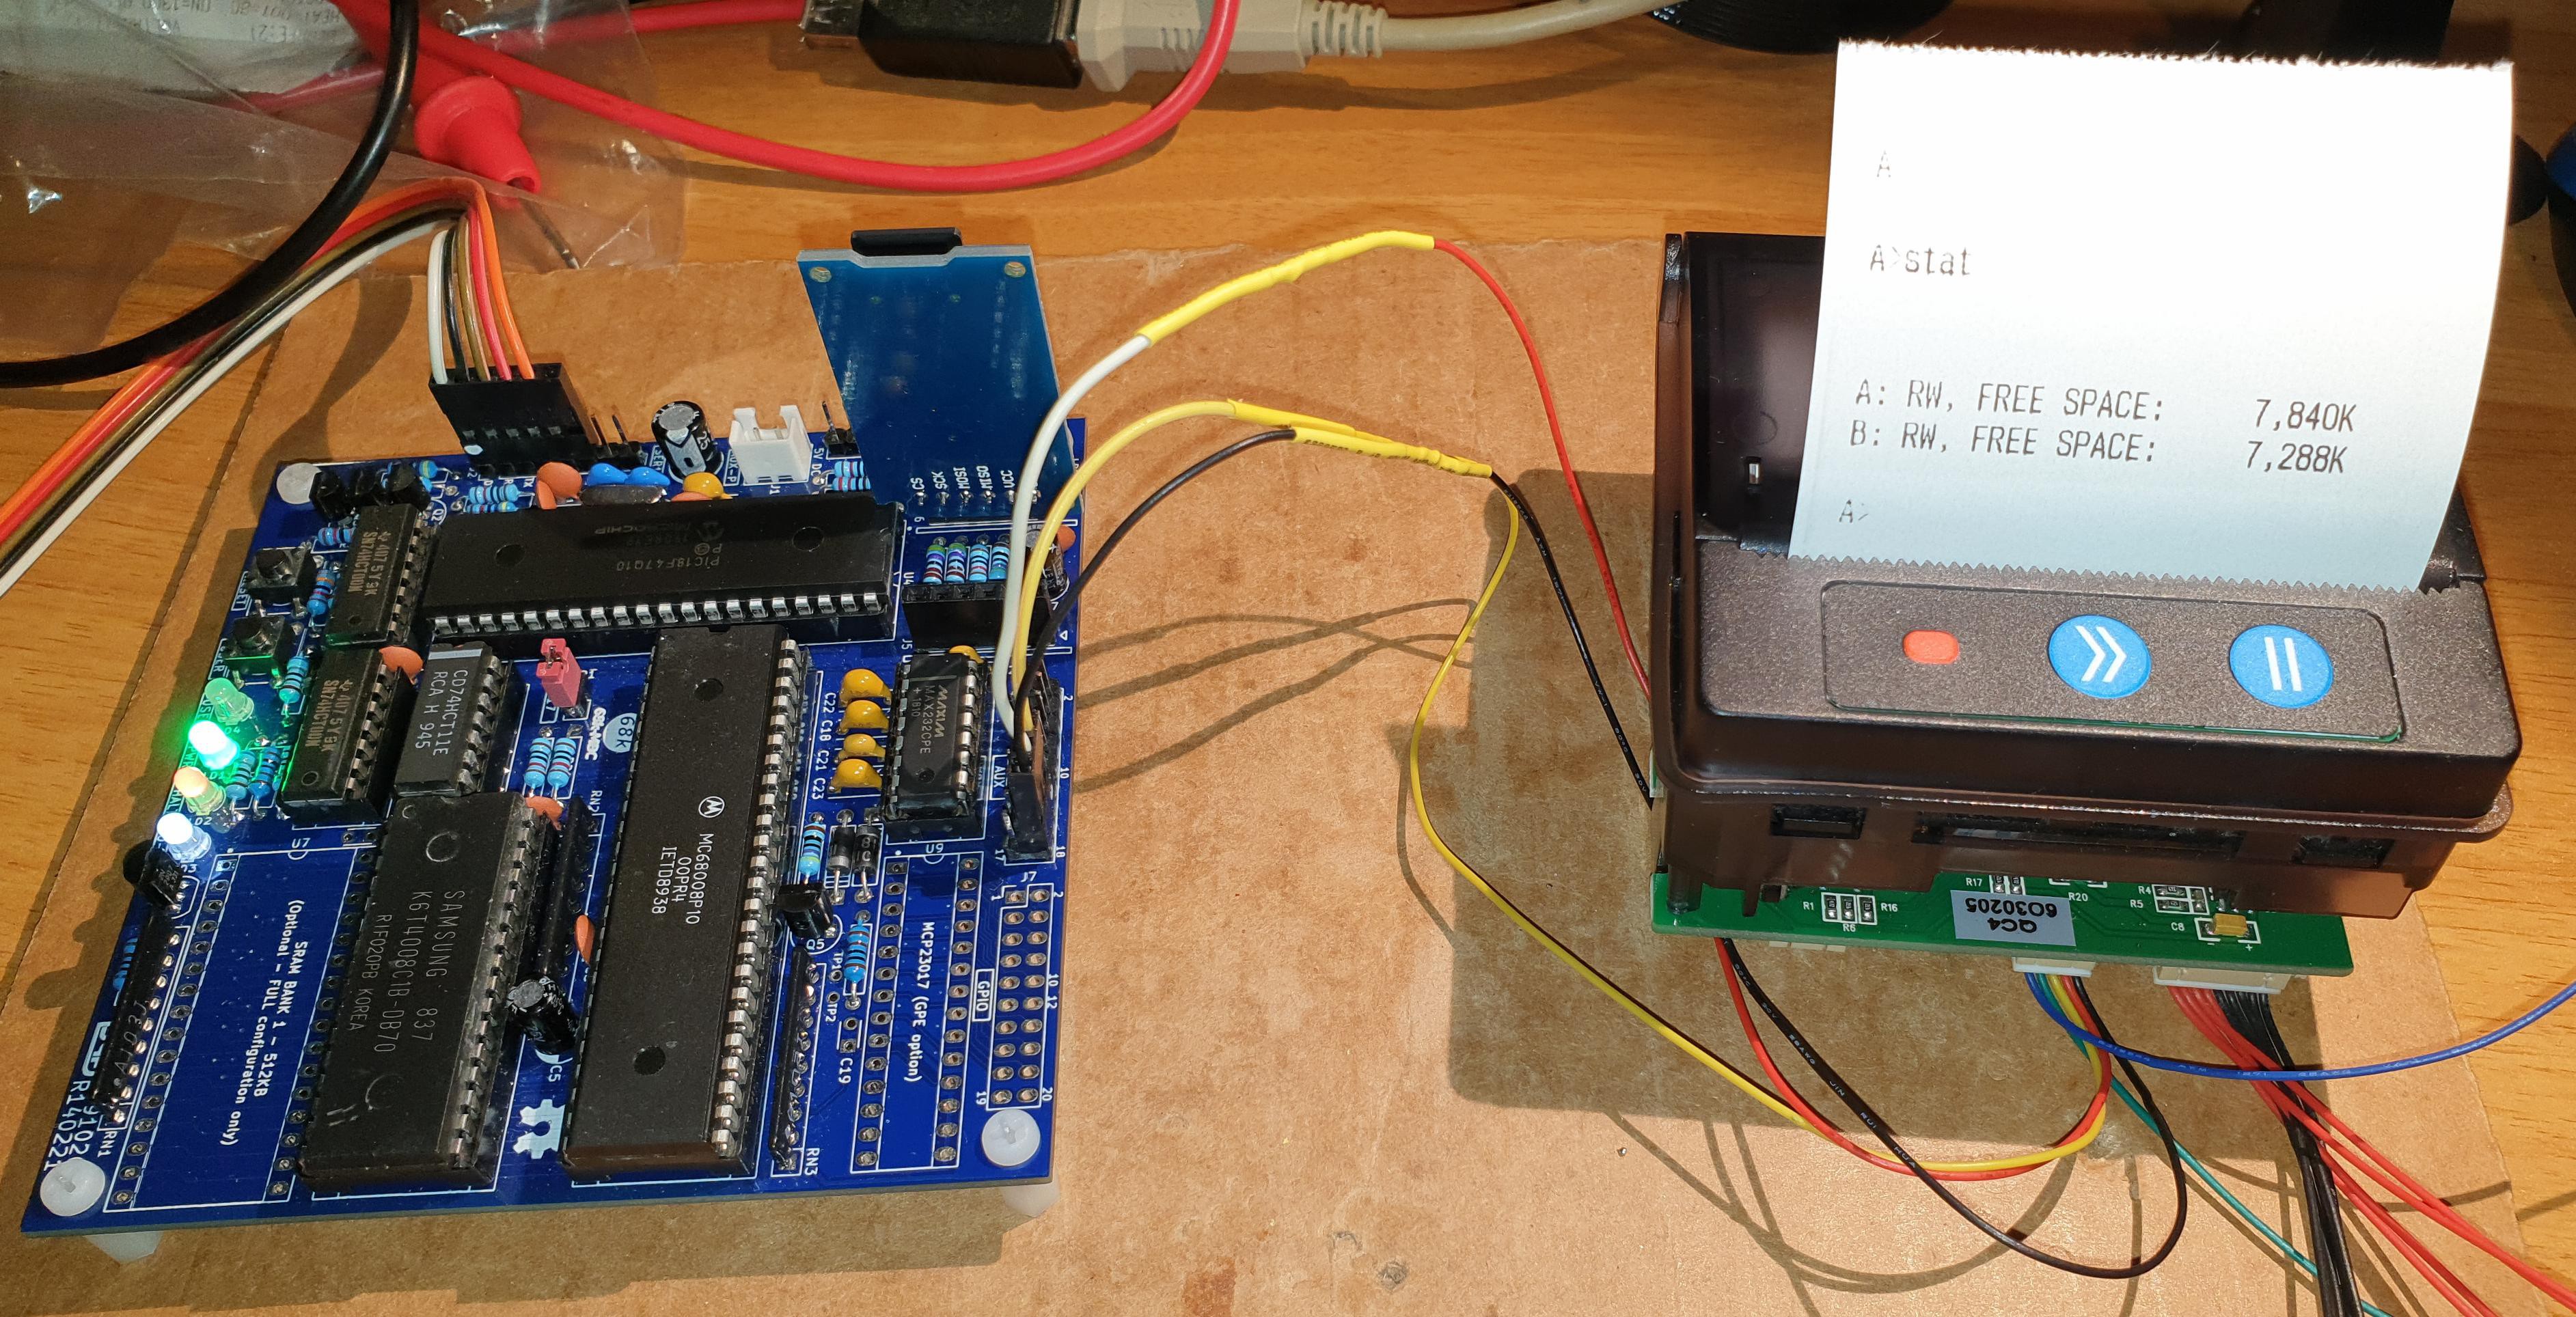
After the execution of the SPP utility you need to link the LST: logical device to the LPT: device with the CP/M command STAT LST:=LPT:
![]()
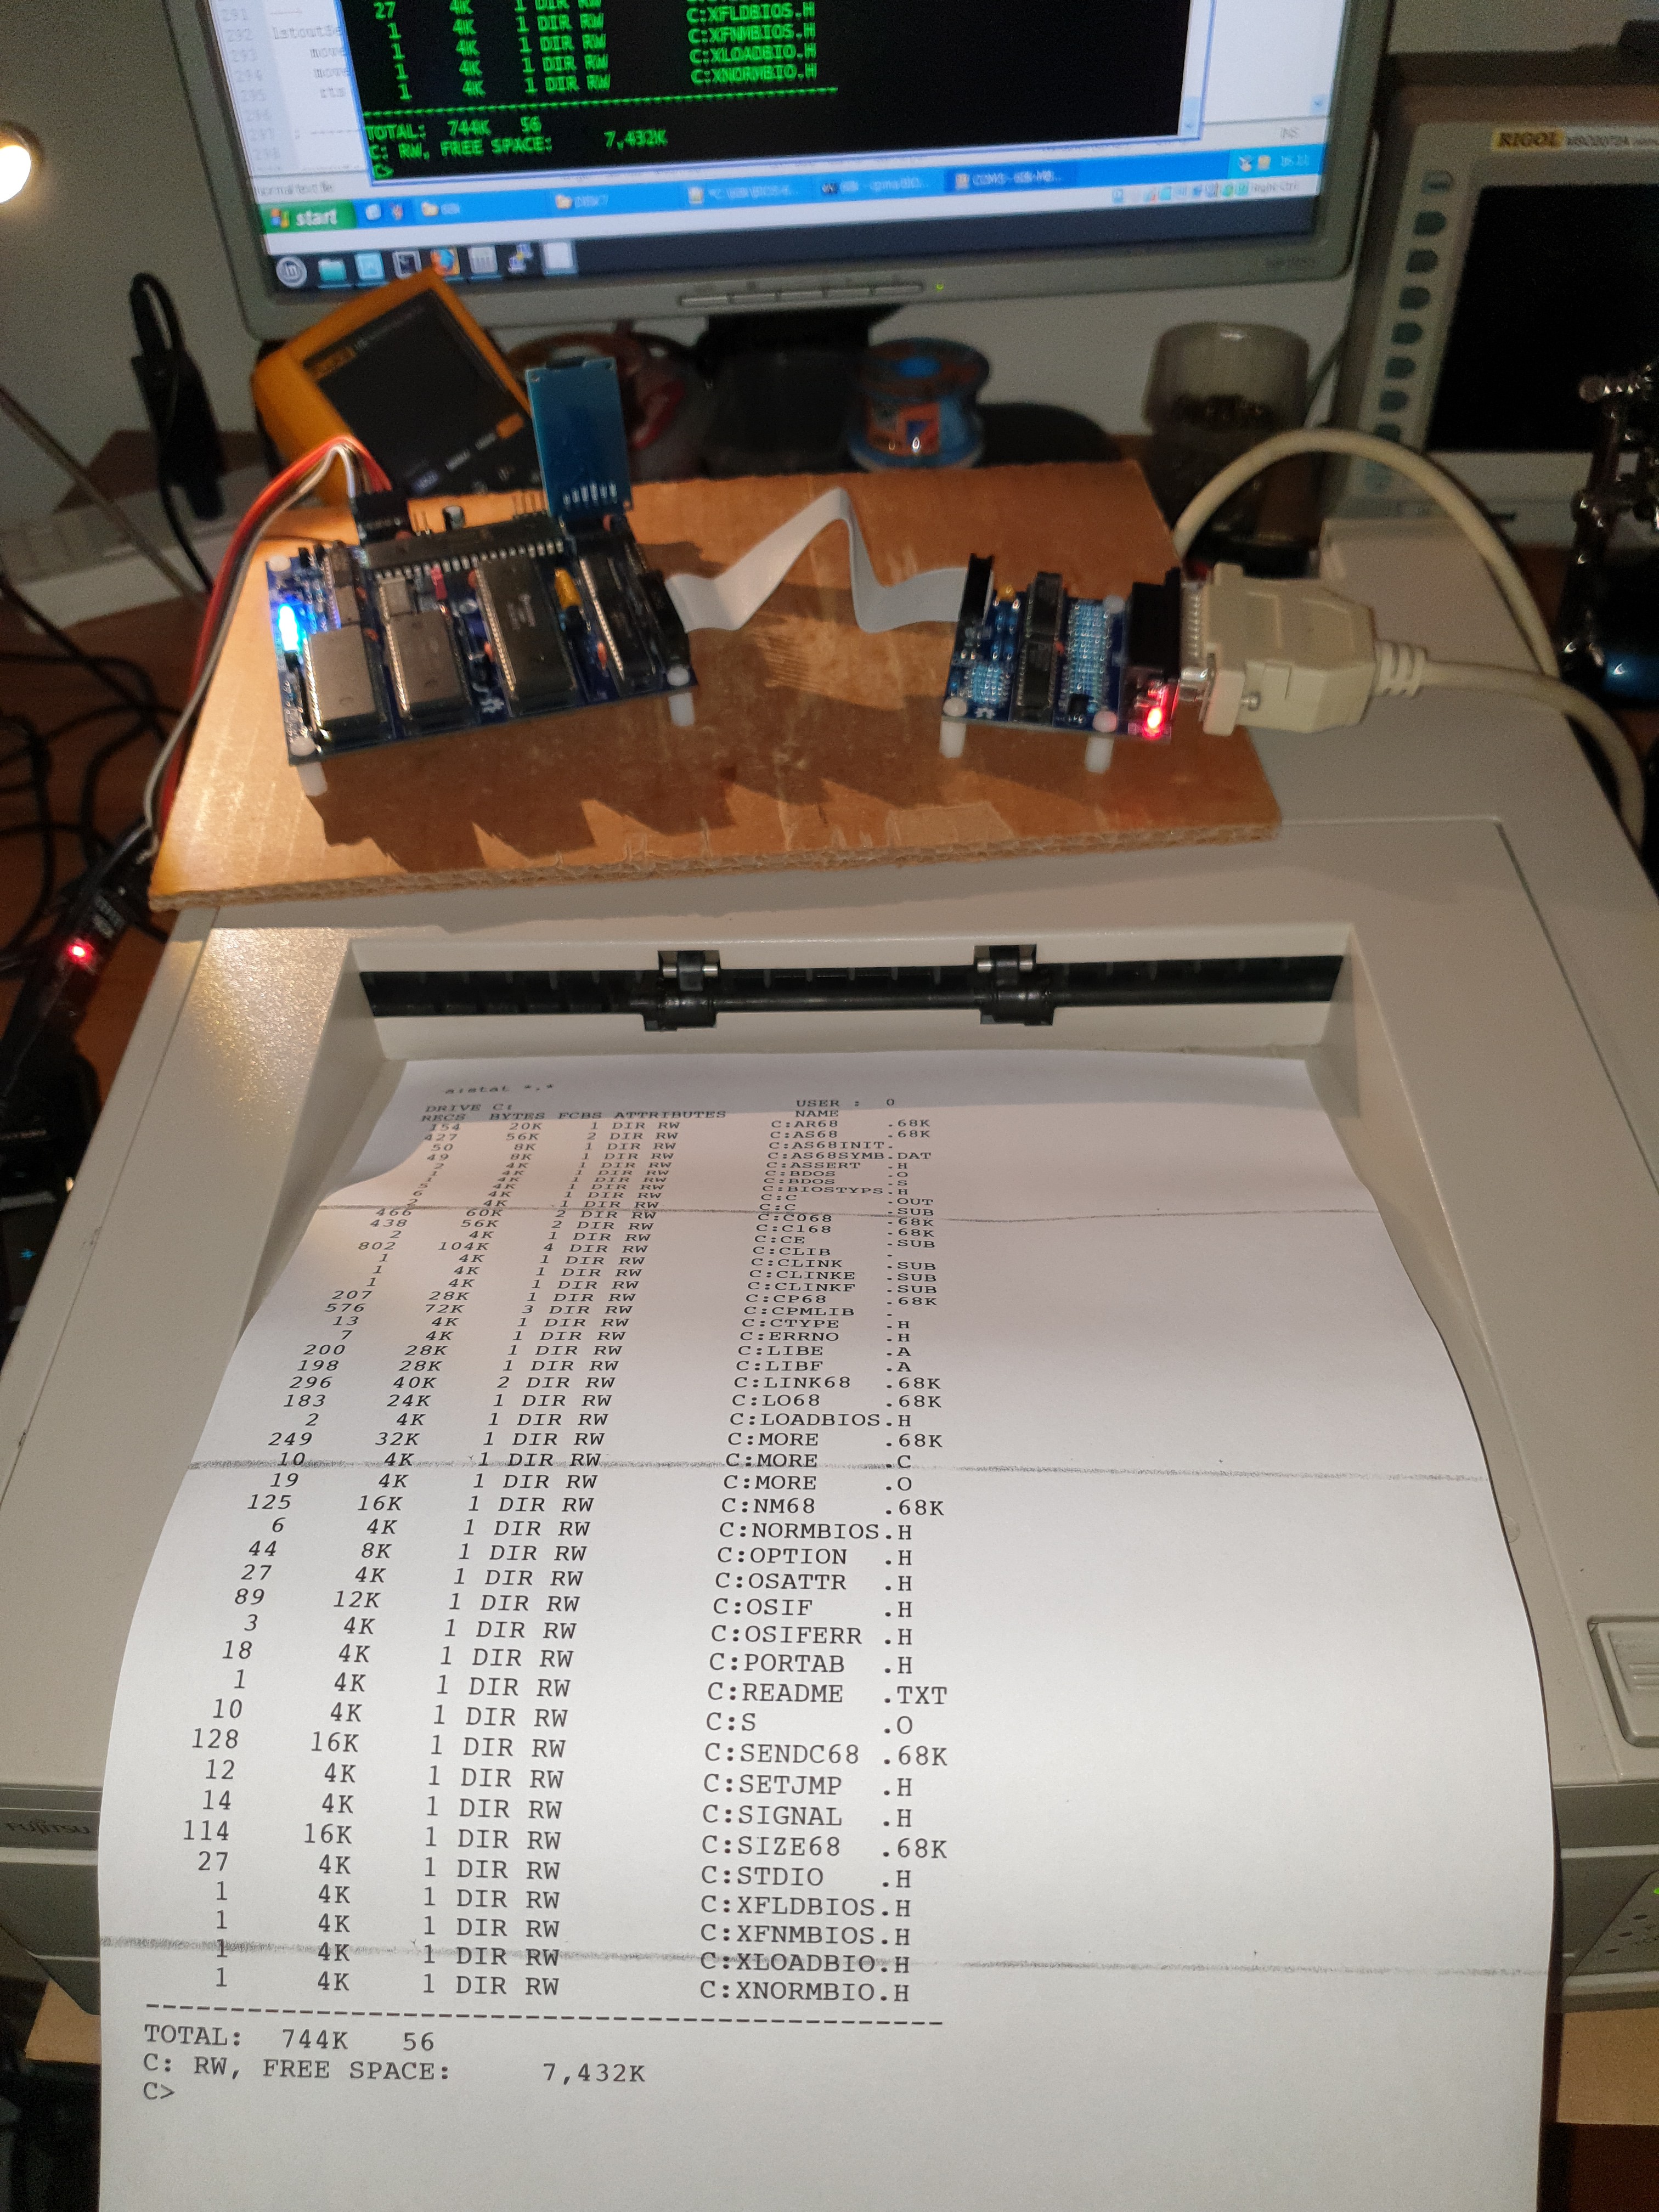
At this point you have a working printer parallel port on LST:, so if you give the Ctrl-P command all the console output will be echoed to the printer:
![]()
NOTE: The SPP utility will output an error message if the GPE (GPIO Expansion) option is not installed.
HOW TO USE IT: GCC EXAMPLESI've added a couple of source examples in the SD image (/gcc-68k/workdir directory) to show how to use the SPP Adapter with the gcc cross compiler.
The two source examples are getStatusSPP.c and writeTestSPP.c, and they are the ones I used for the first test of the SSP Adapter board:
![]()
WHERE TO GET A PCBI've prepared an "easy" link to get a small lot (5 pcs minimum) of PCB of the SPP Adapter. The link is this one.
HOW TO GET A KIT OR AN ASSEMBLED UNITIf you are looking for a kit with all the needed parts or an assembled unit ready to use now there is a professional seller that can sell both and ship worldwide.
The link to the seller is this one.
-
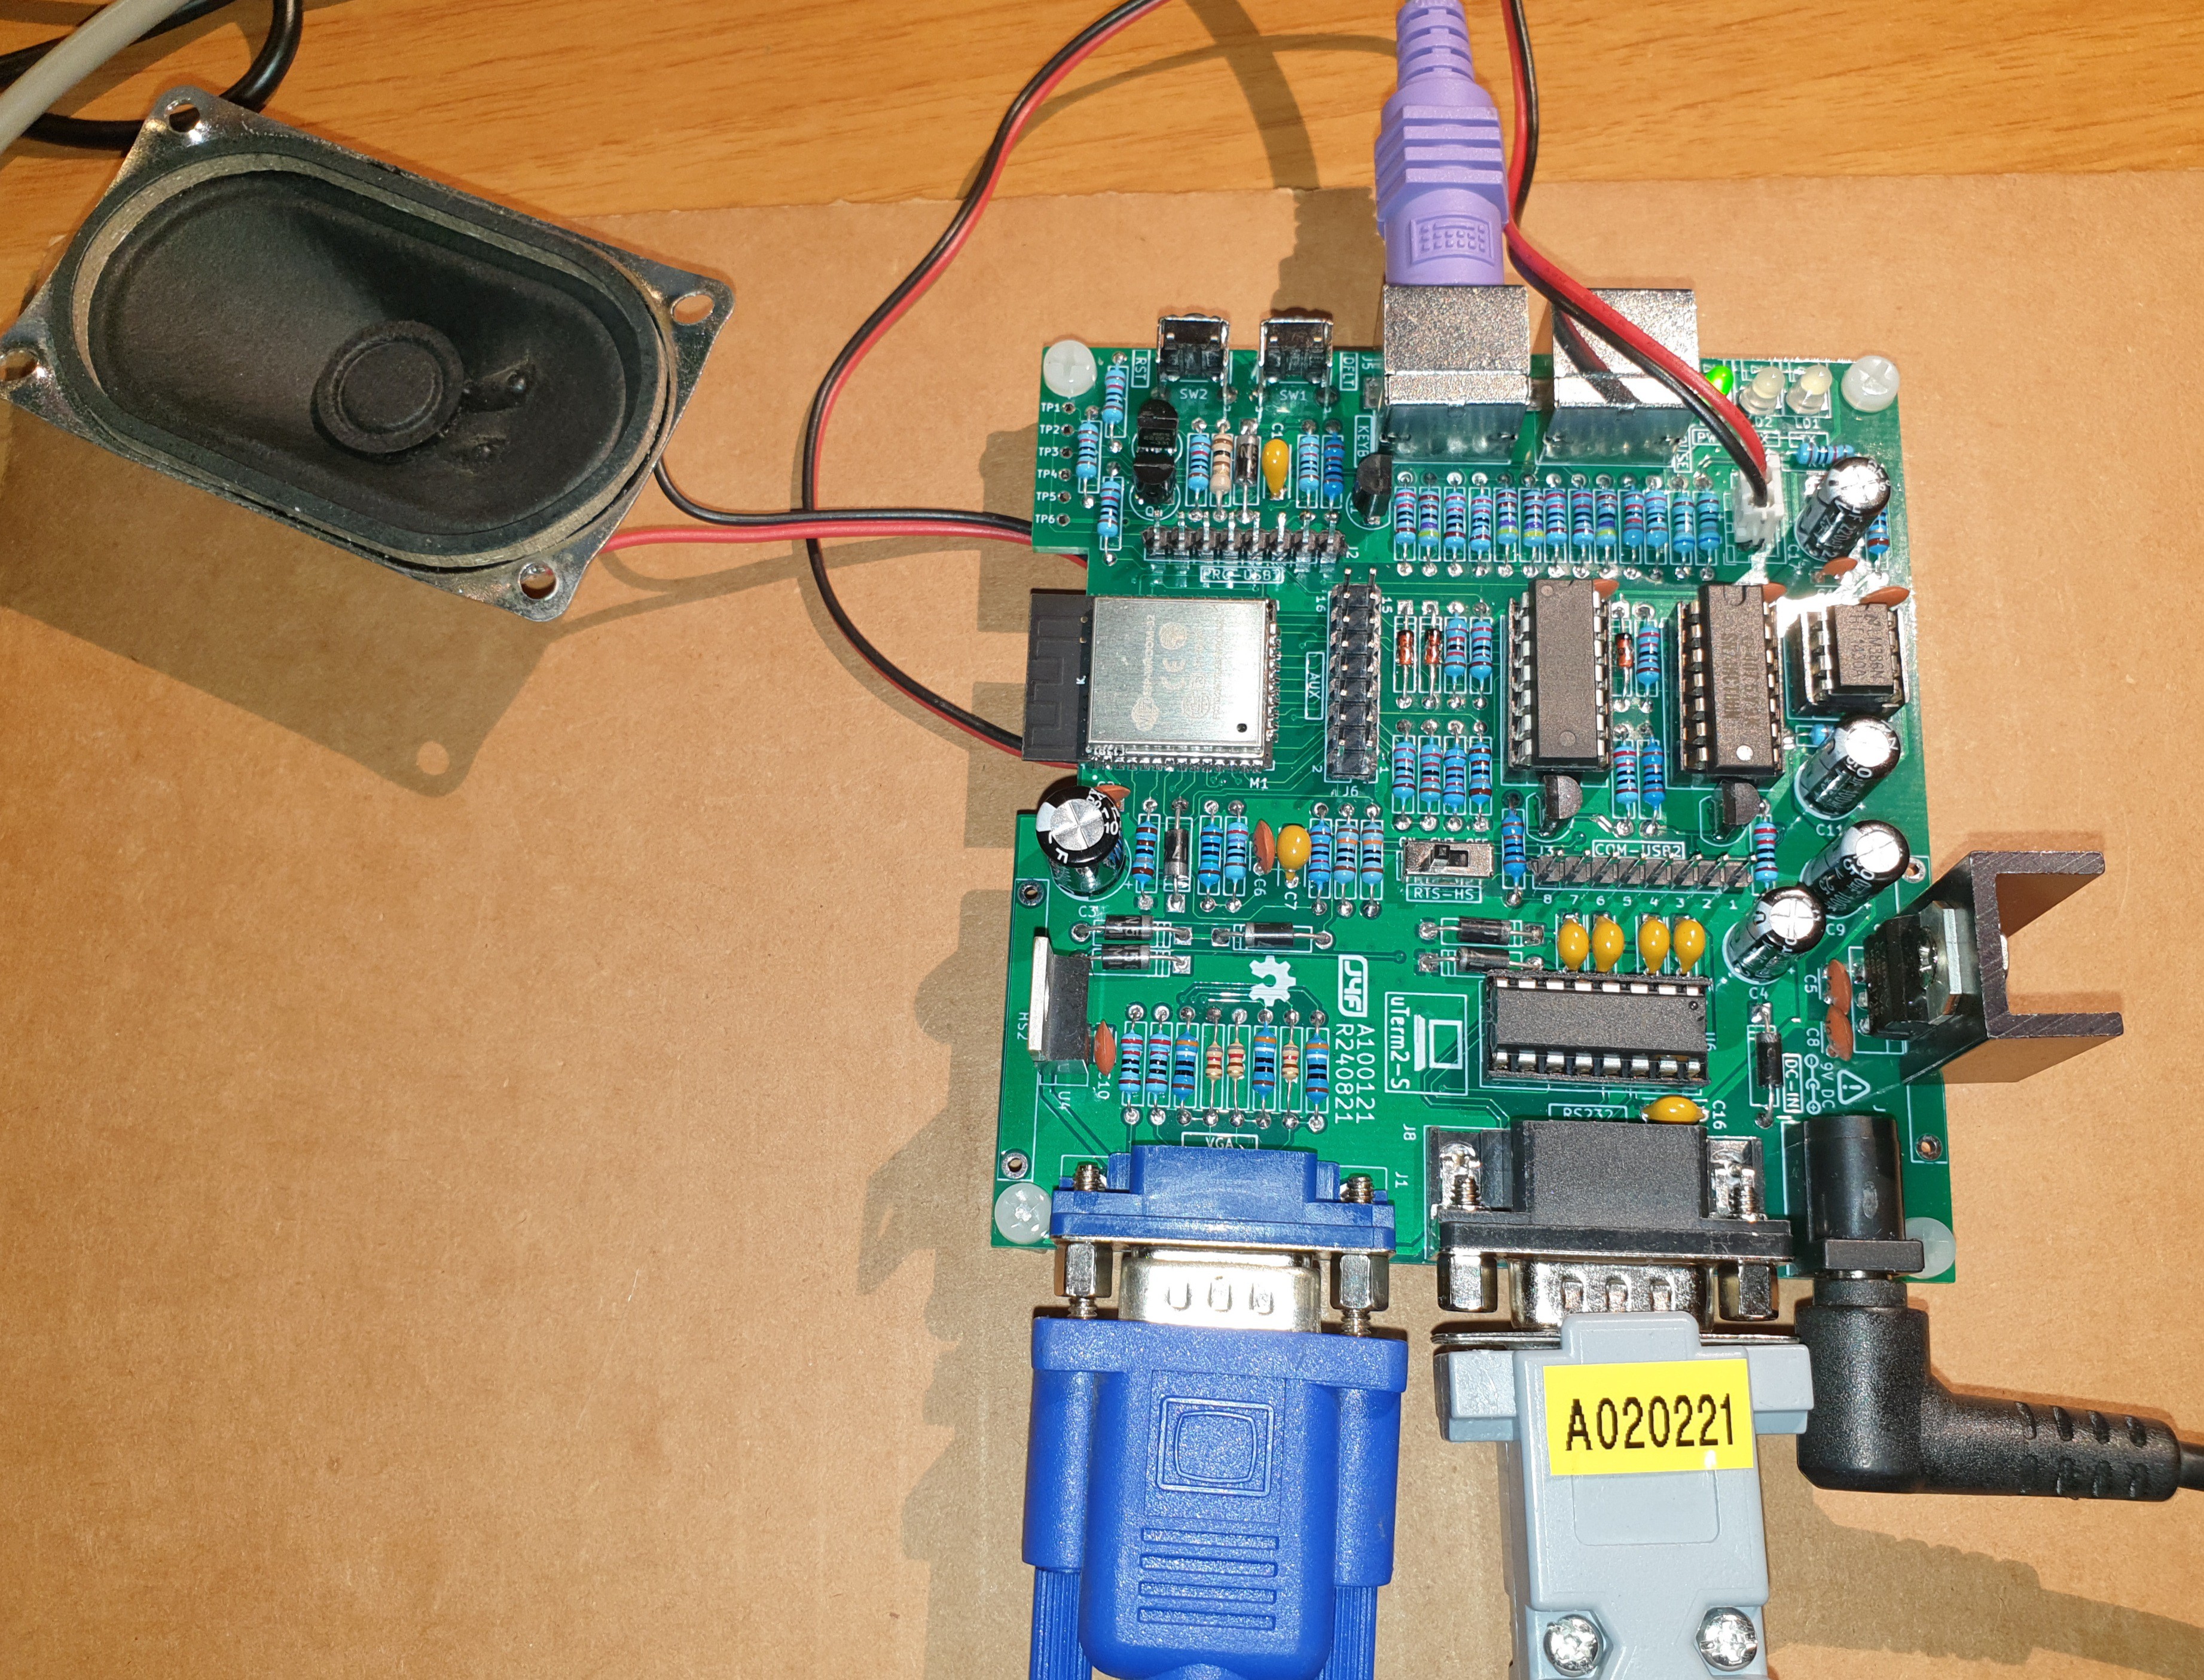
* * USING A uTERM2-S TERMINAL * *
09/10/2021 at 15:30 • 0 comments* * USING A uTERM2-S TERMINAL * *
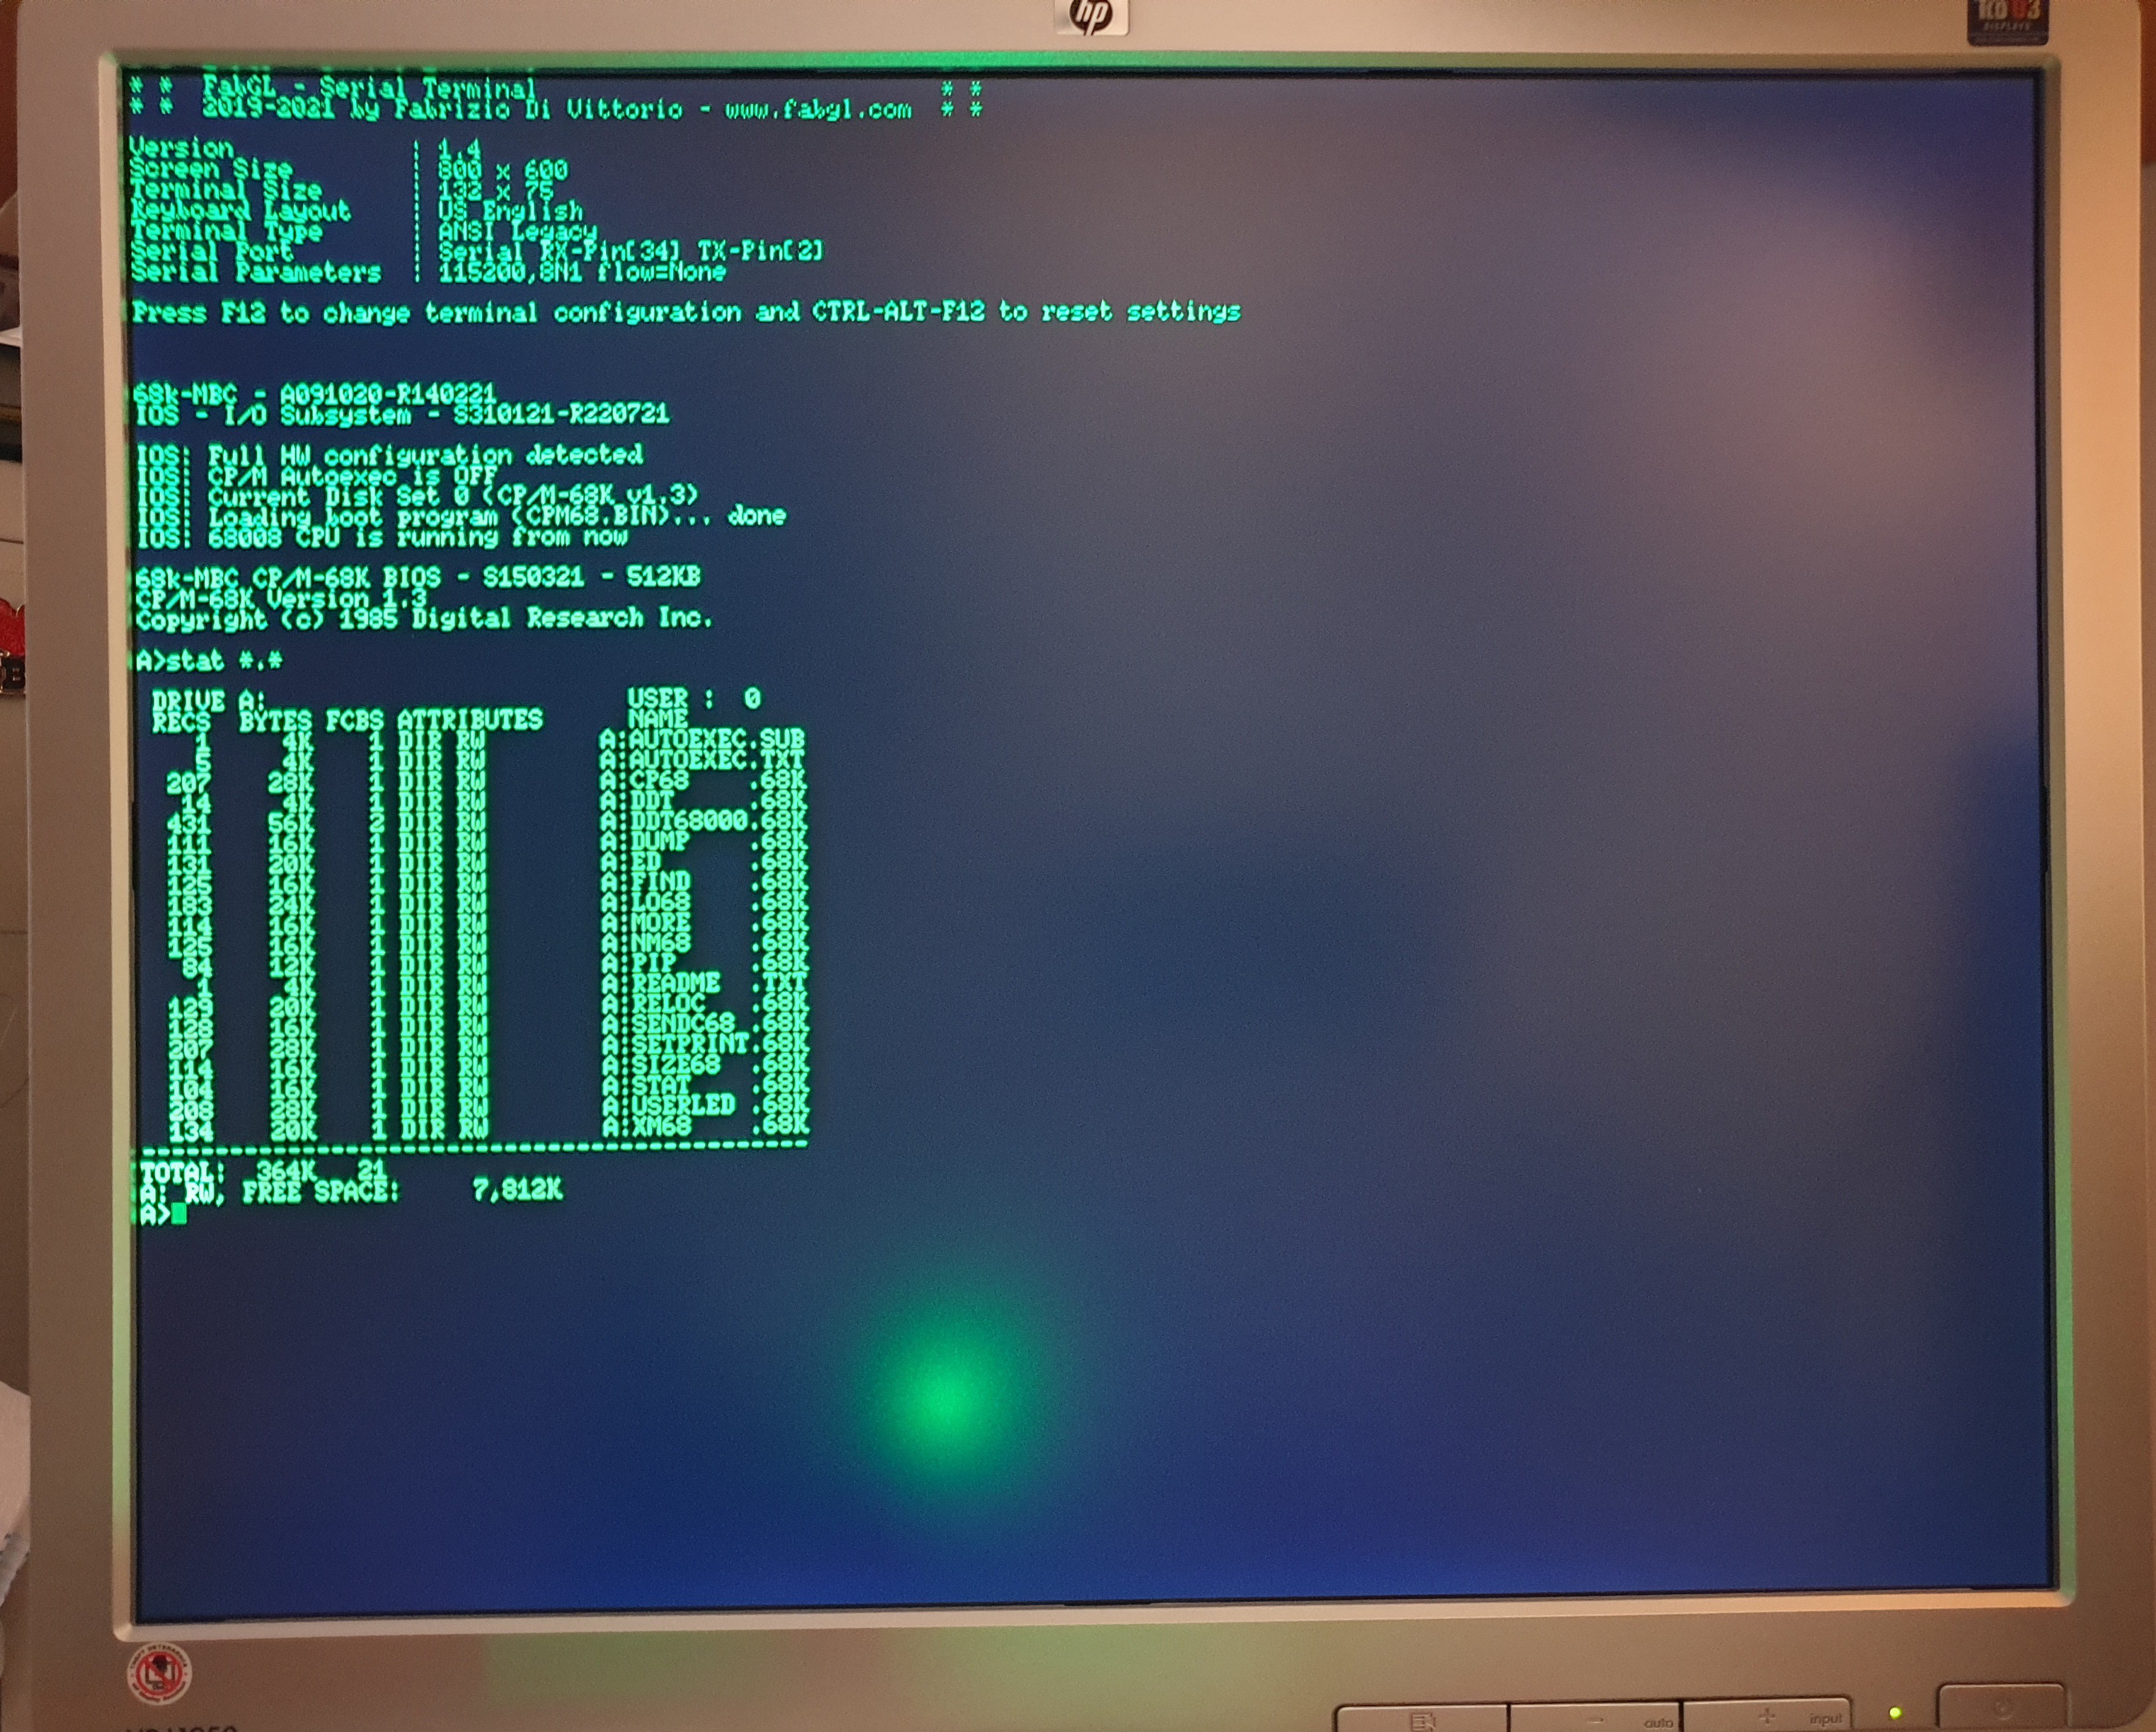
I've just relesed the uTerm2-S, a new multi-emulation color RS232 terminal for the 68k-MBC (but not only...). It is based on a ESP32 cheap module and is designed to use the FabGL library.
More info on the uTerm2-S can be found here.
The following image shows the uTerm2-S (previous PCB revision) connected to a 68k-MBC using the custom RS232 cable (A020221) previously described:
![]()
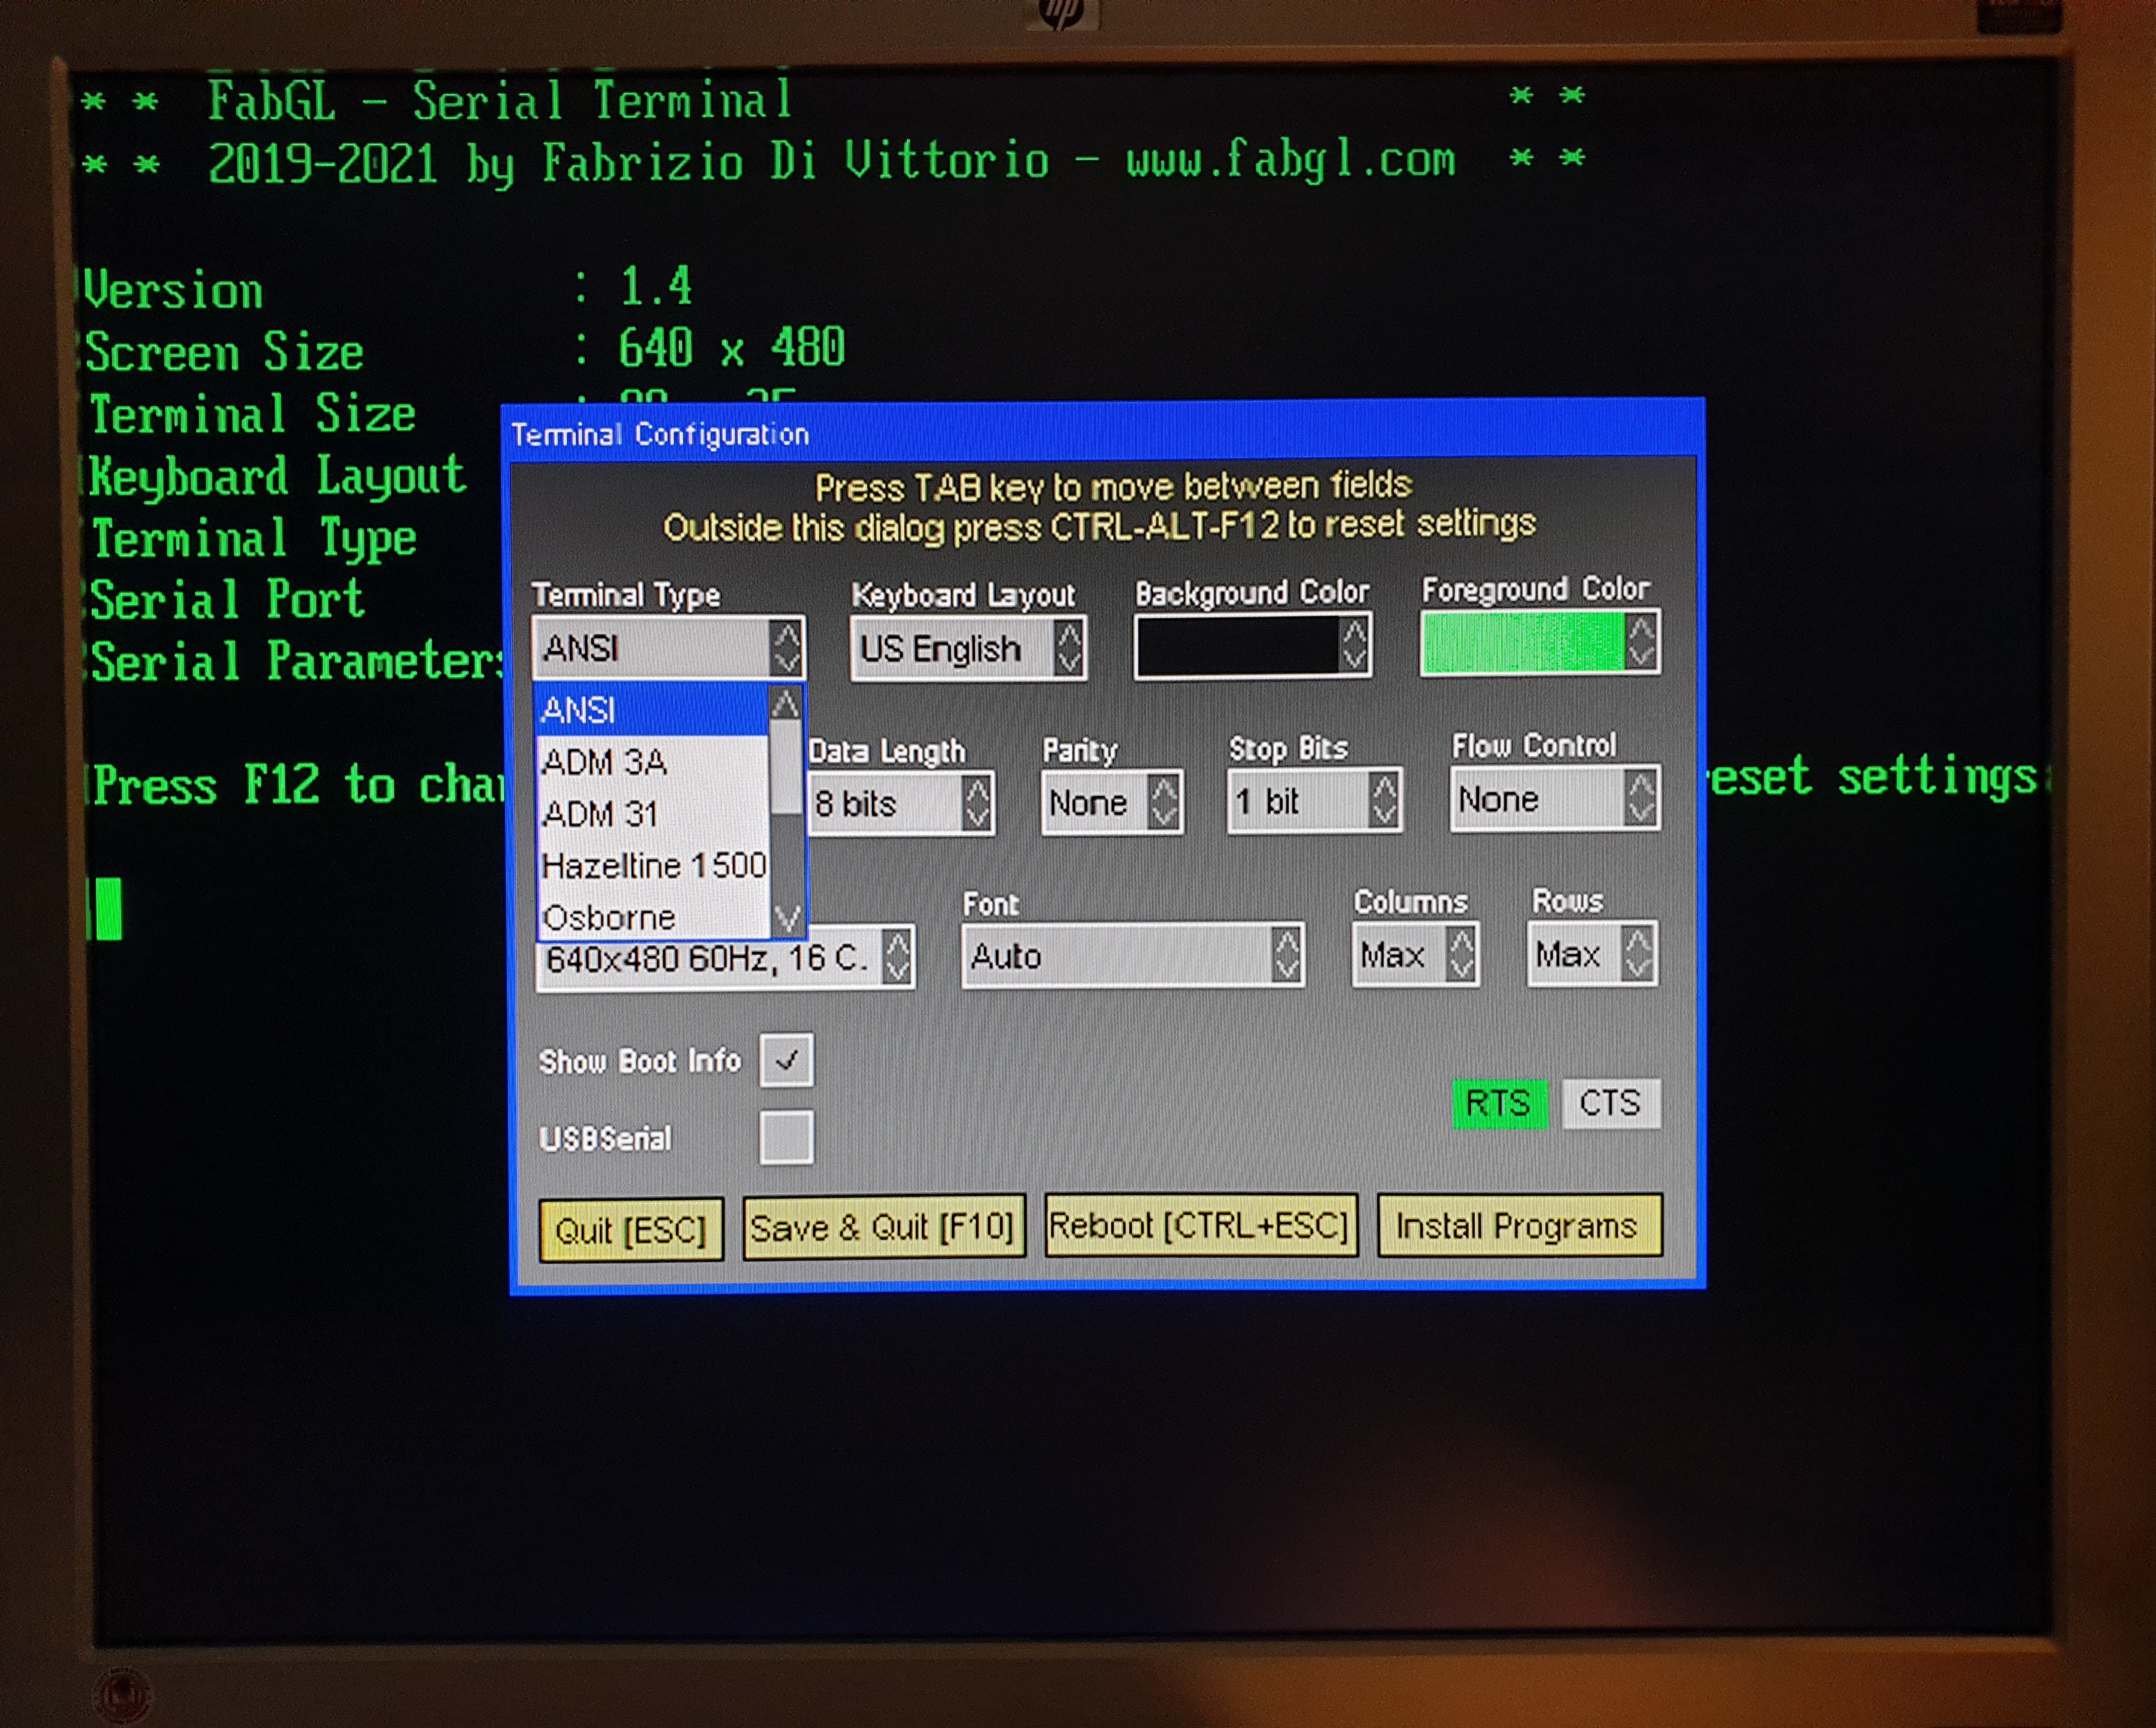
Here I've set the screen of the uTerm2-S to 132 columns x 75 rows to have a large display area:
![]()
In the following images a 68k-MBC powered with a uCom add-on board and connected to a uTerm2-S terminal (here the terminal was set to 128 columns x 40 rows):
![]()
![]()
![]()
![]()
-
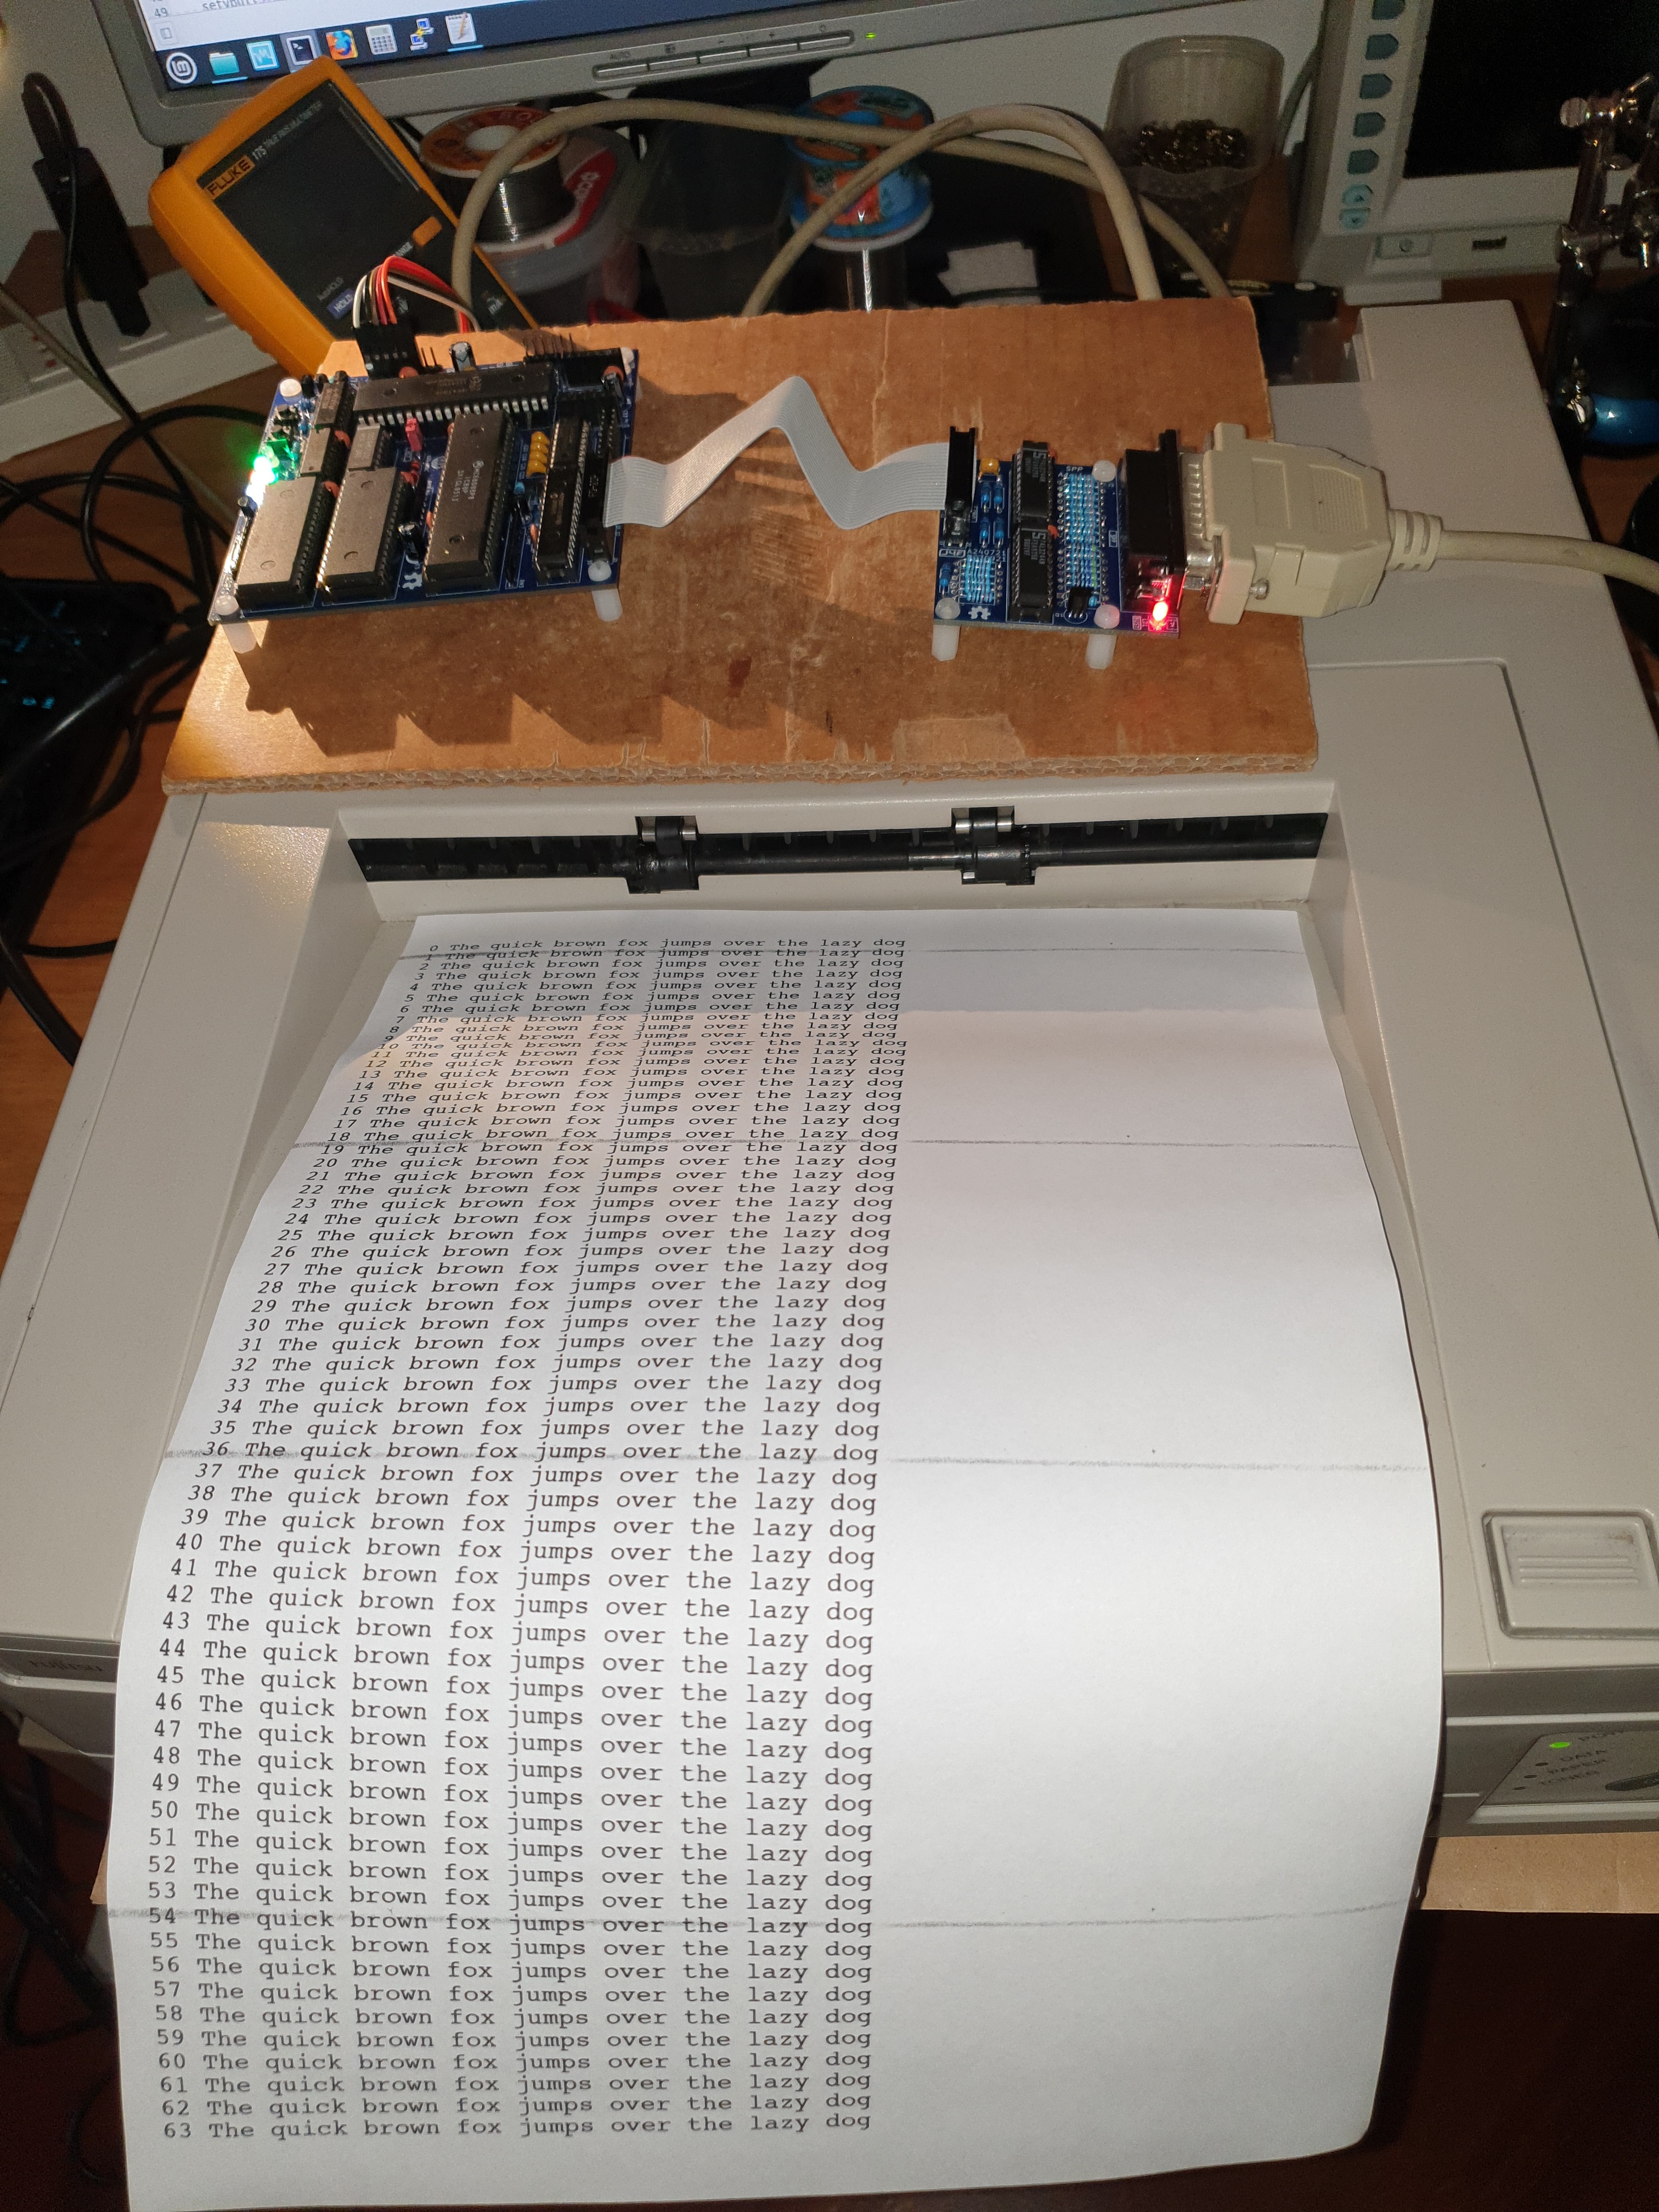
* * USING A SMALL THERMAL PRINTER * *
07/20/2021 at 17:25 • 0 comments* * USING A SMALL THERMAL PRINTER * *
It is possible to find "around" cheap little thermal printers like those used to make receipts. The model name of the one I've used here should be QR203.
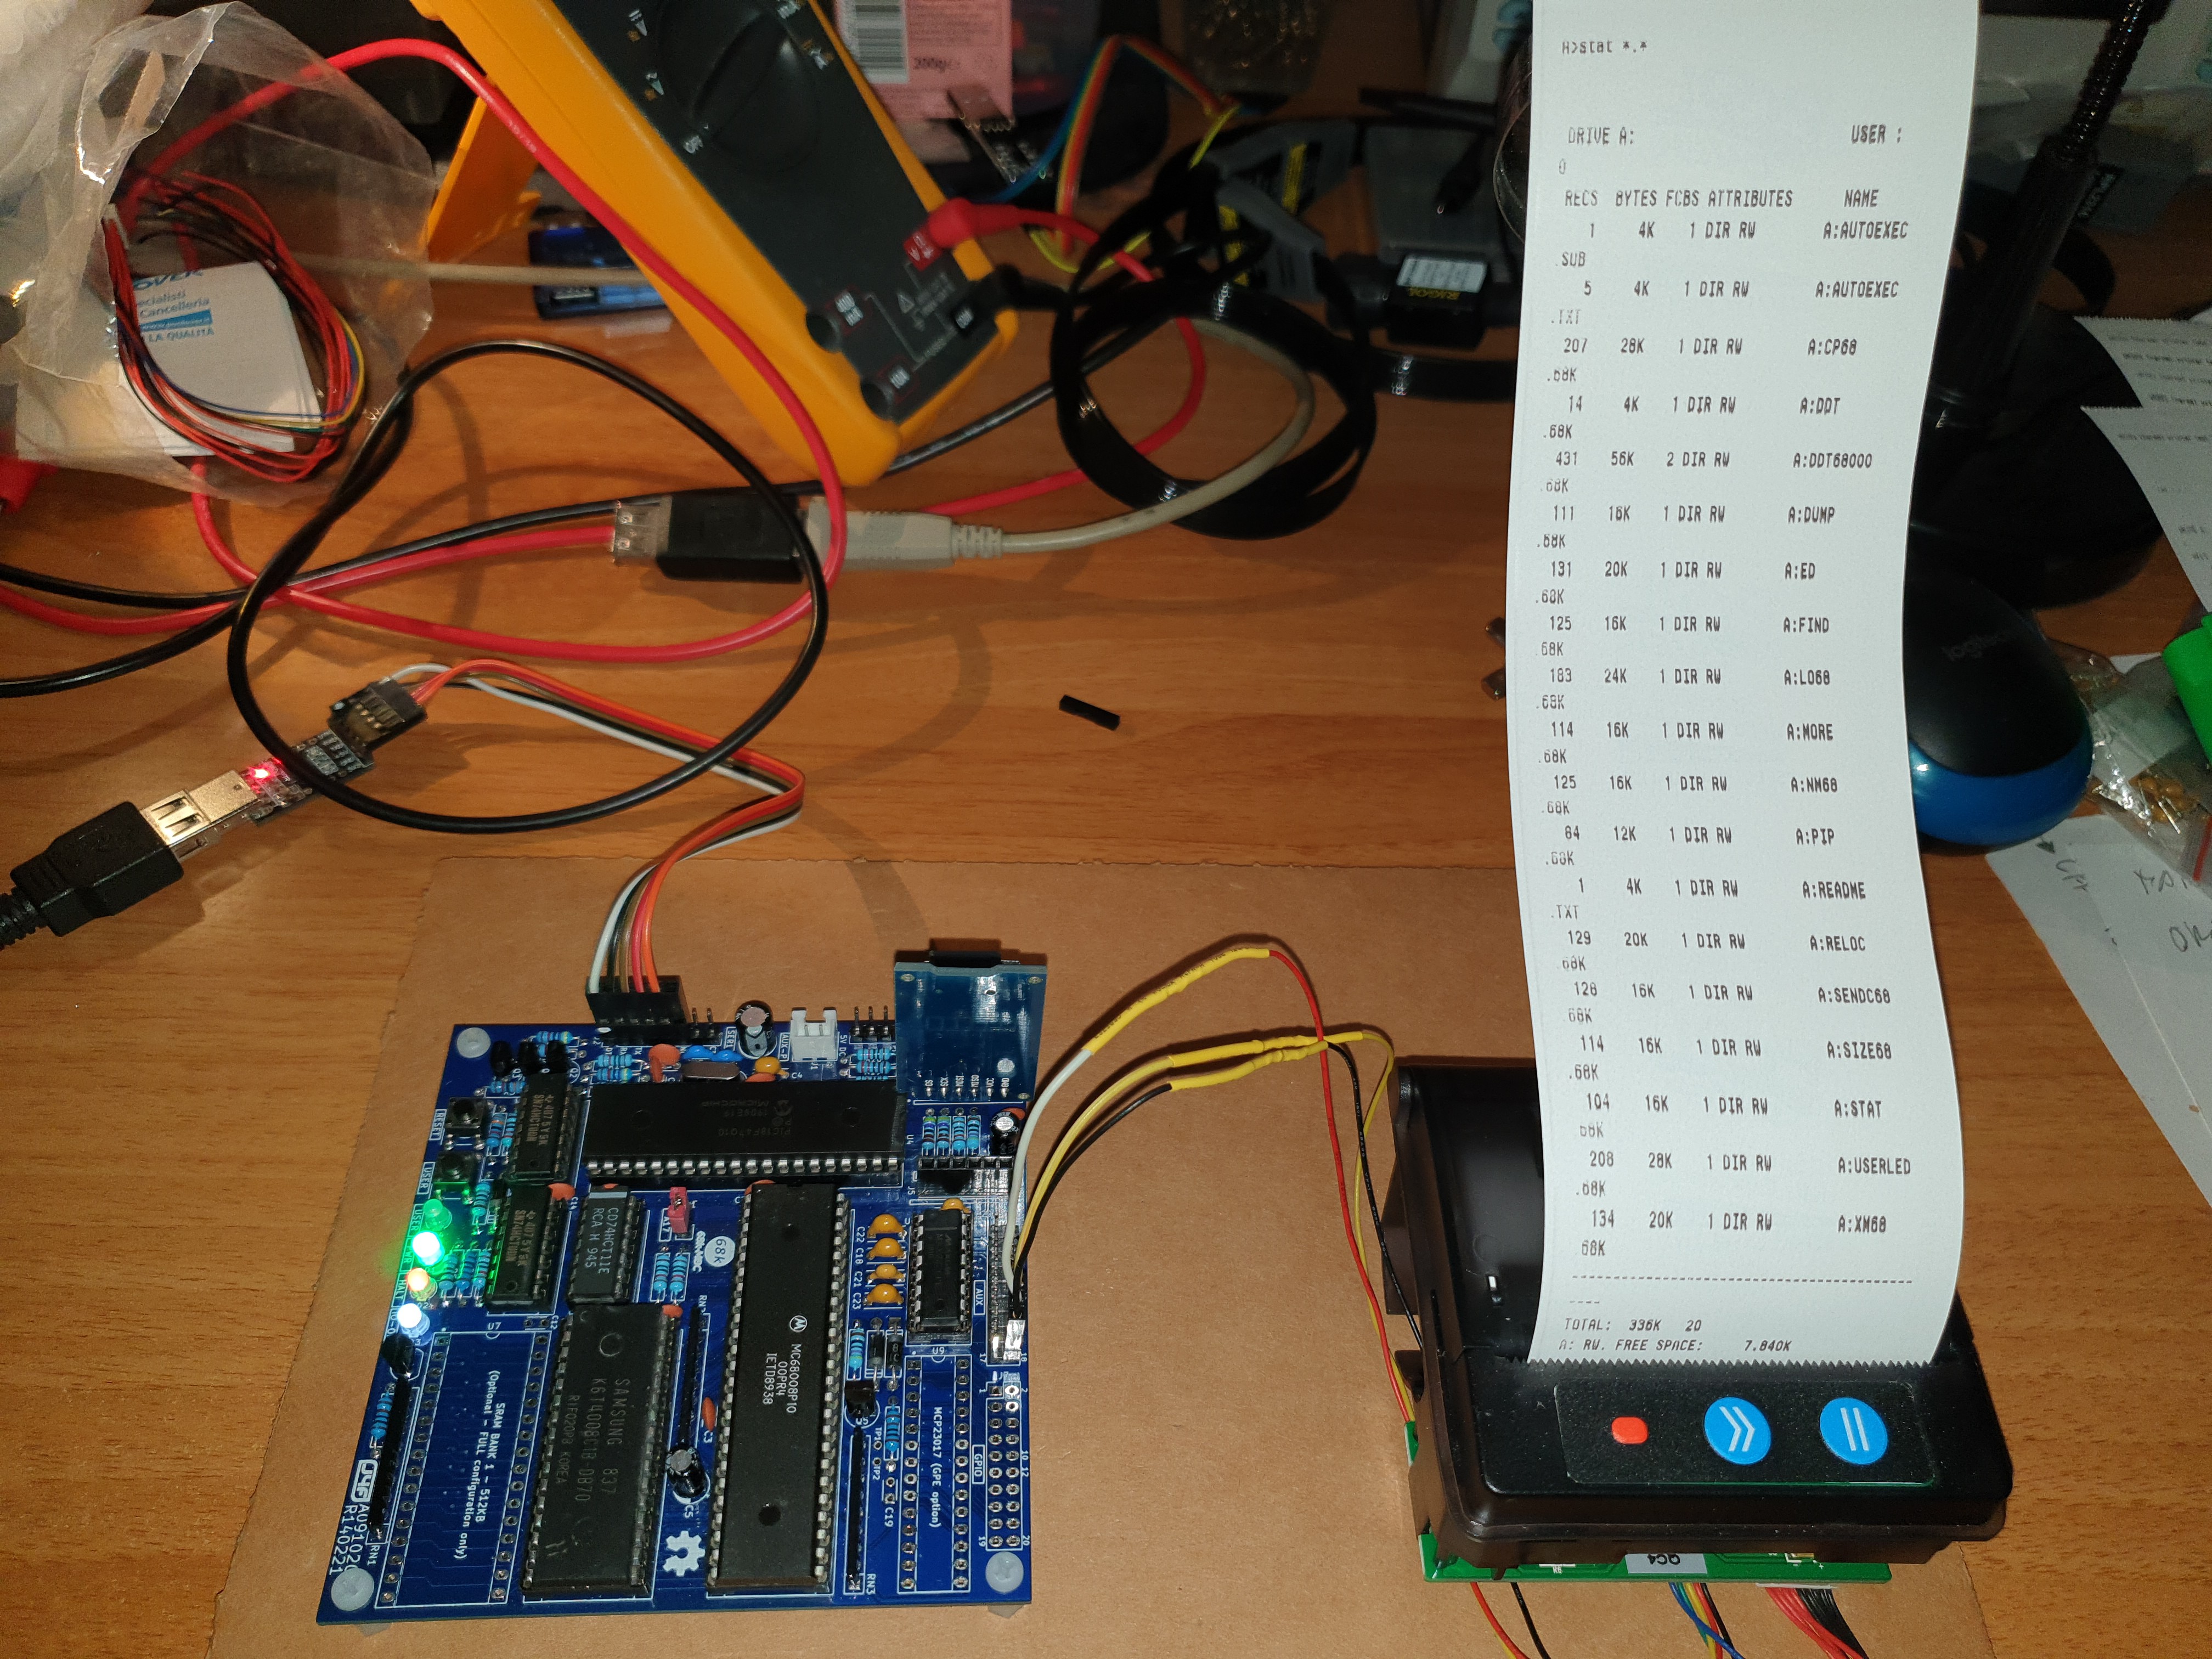
These printers typically have an RS232 serial interface, so you can connect it to the 68k-MBC thru the second RS232 port and use it as a little system printer (i.e. activating the "hard copy" with the CP/M command Ctrl-P):
![]()
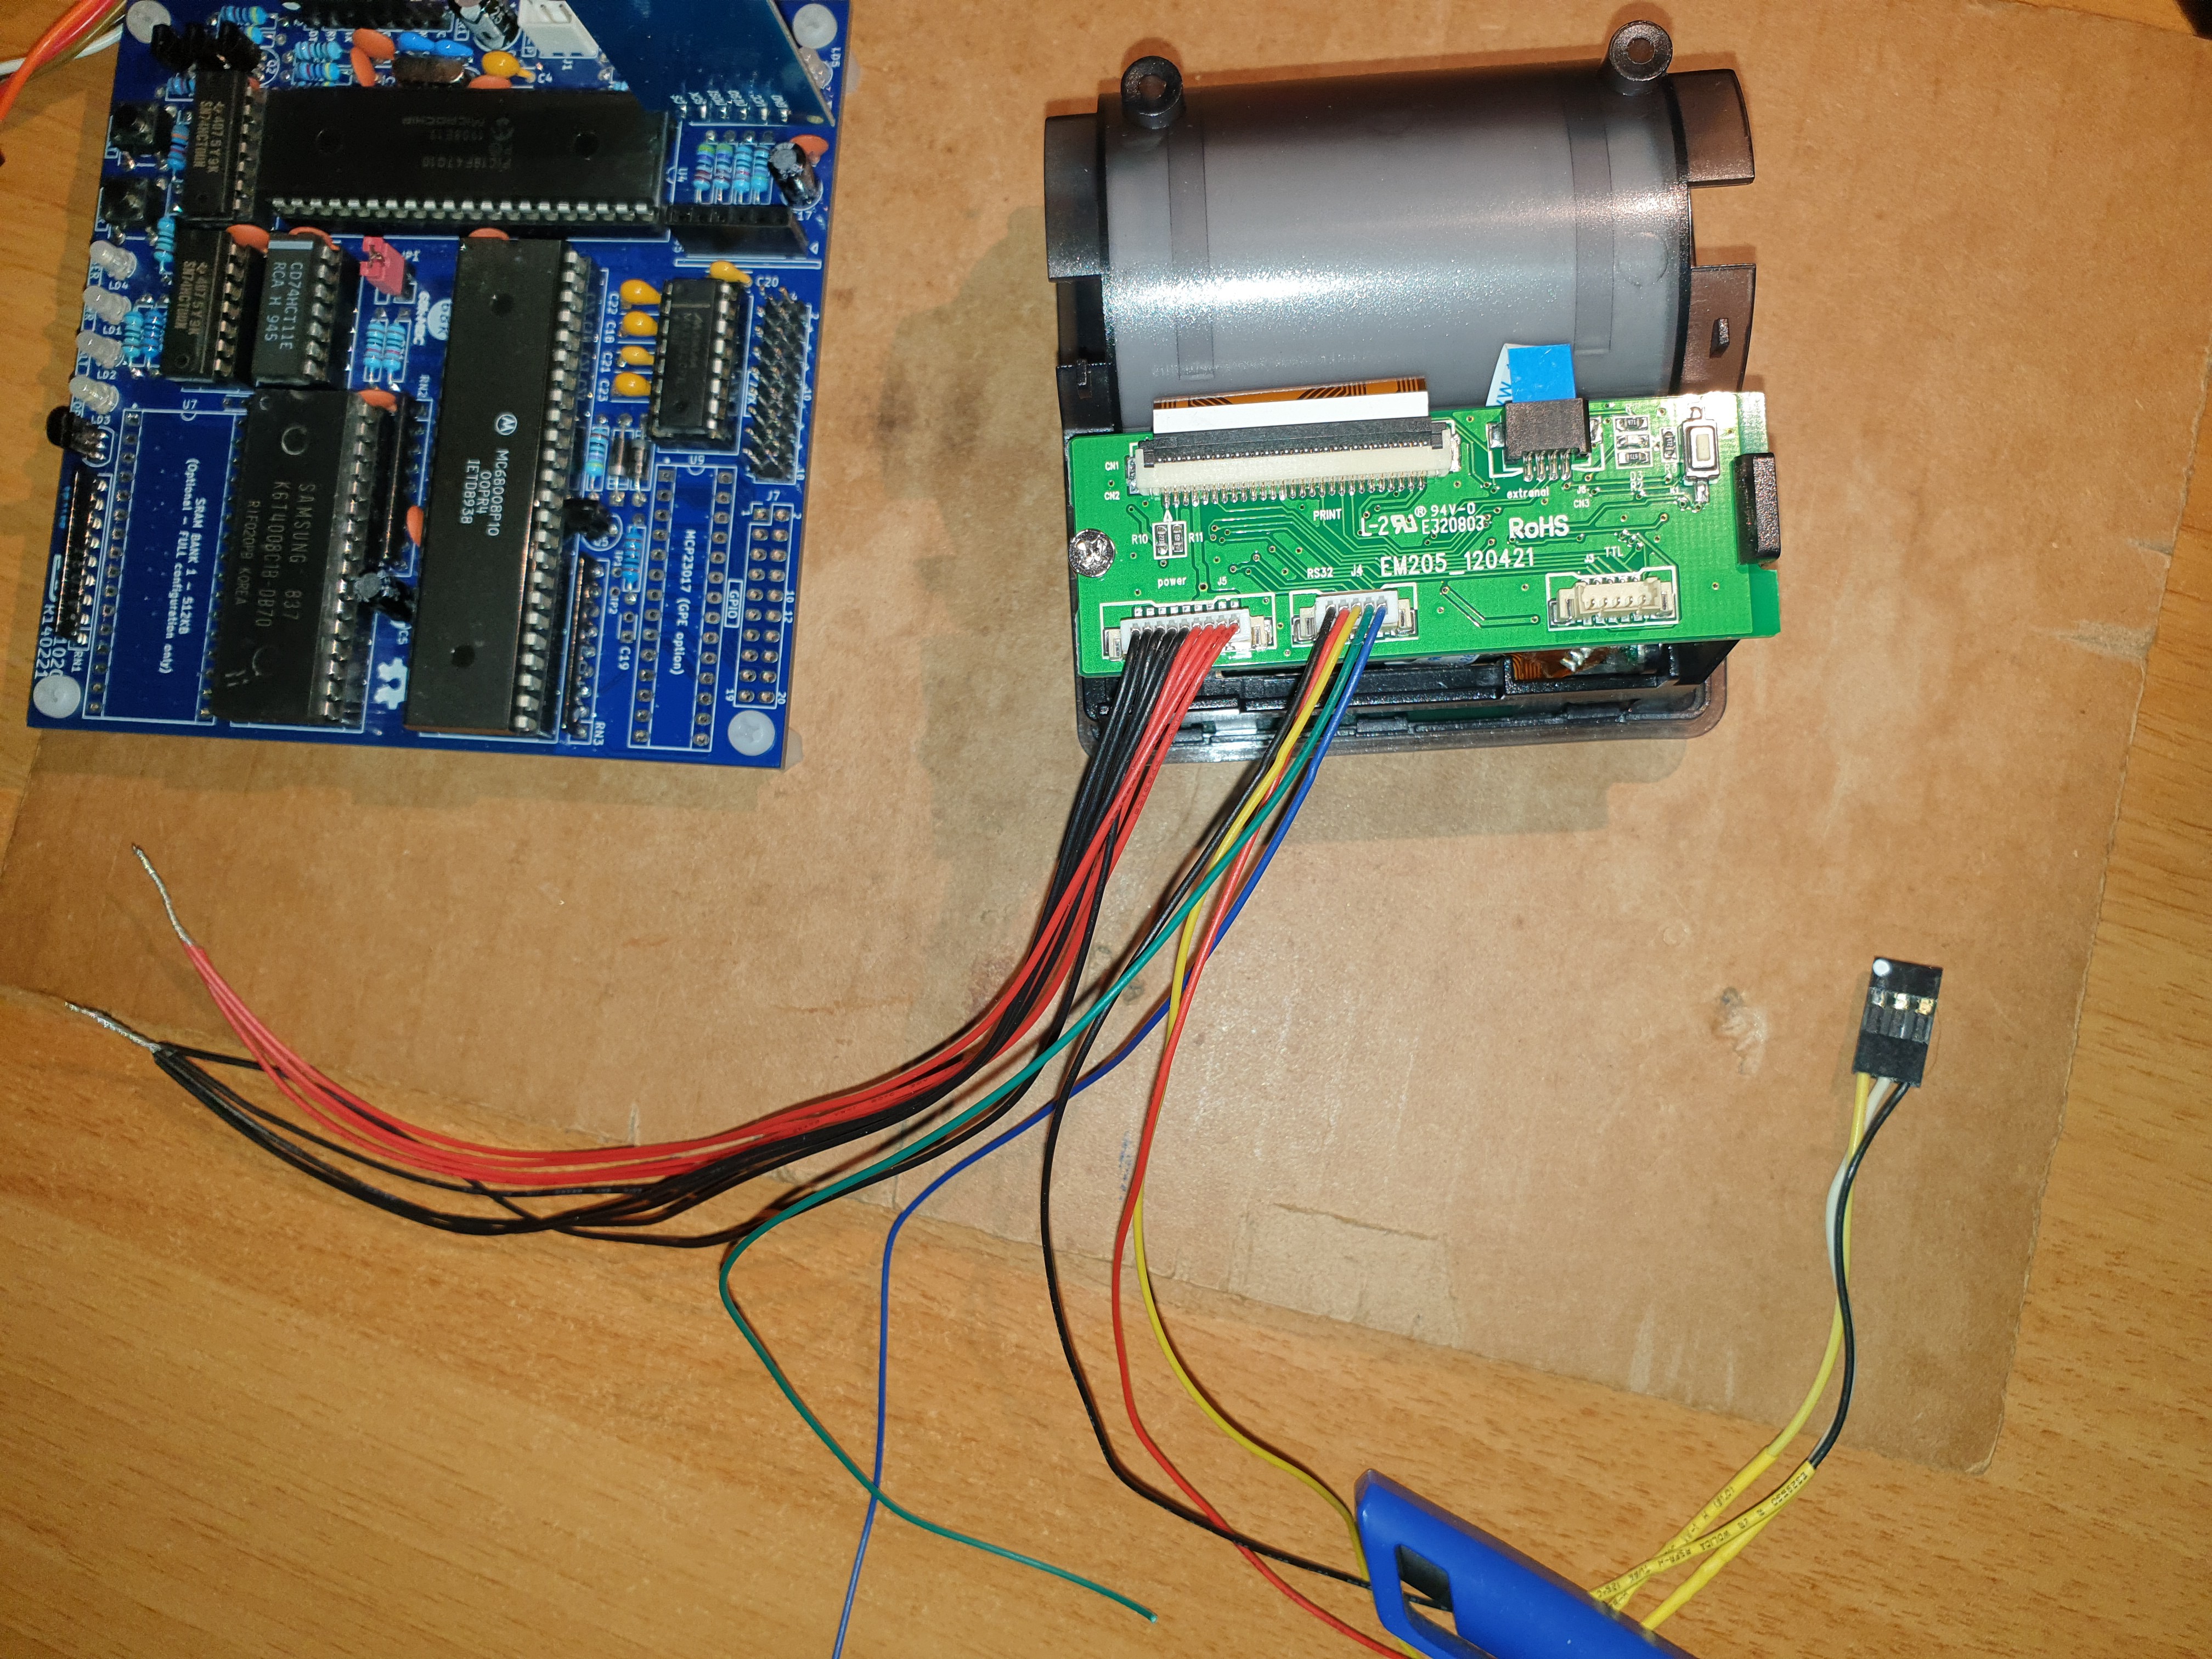
These printers are normally sold with two cables, one for the power and one for the data (RS232 or TTL). I suggest to cut both cables in the middle so you'll get two pieces (with one side already connectorized on the printer side) for each type.
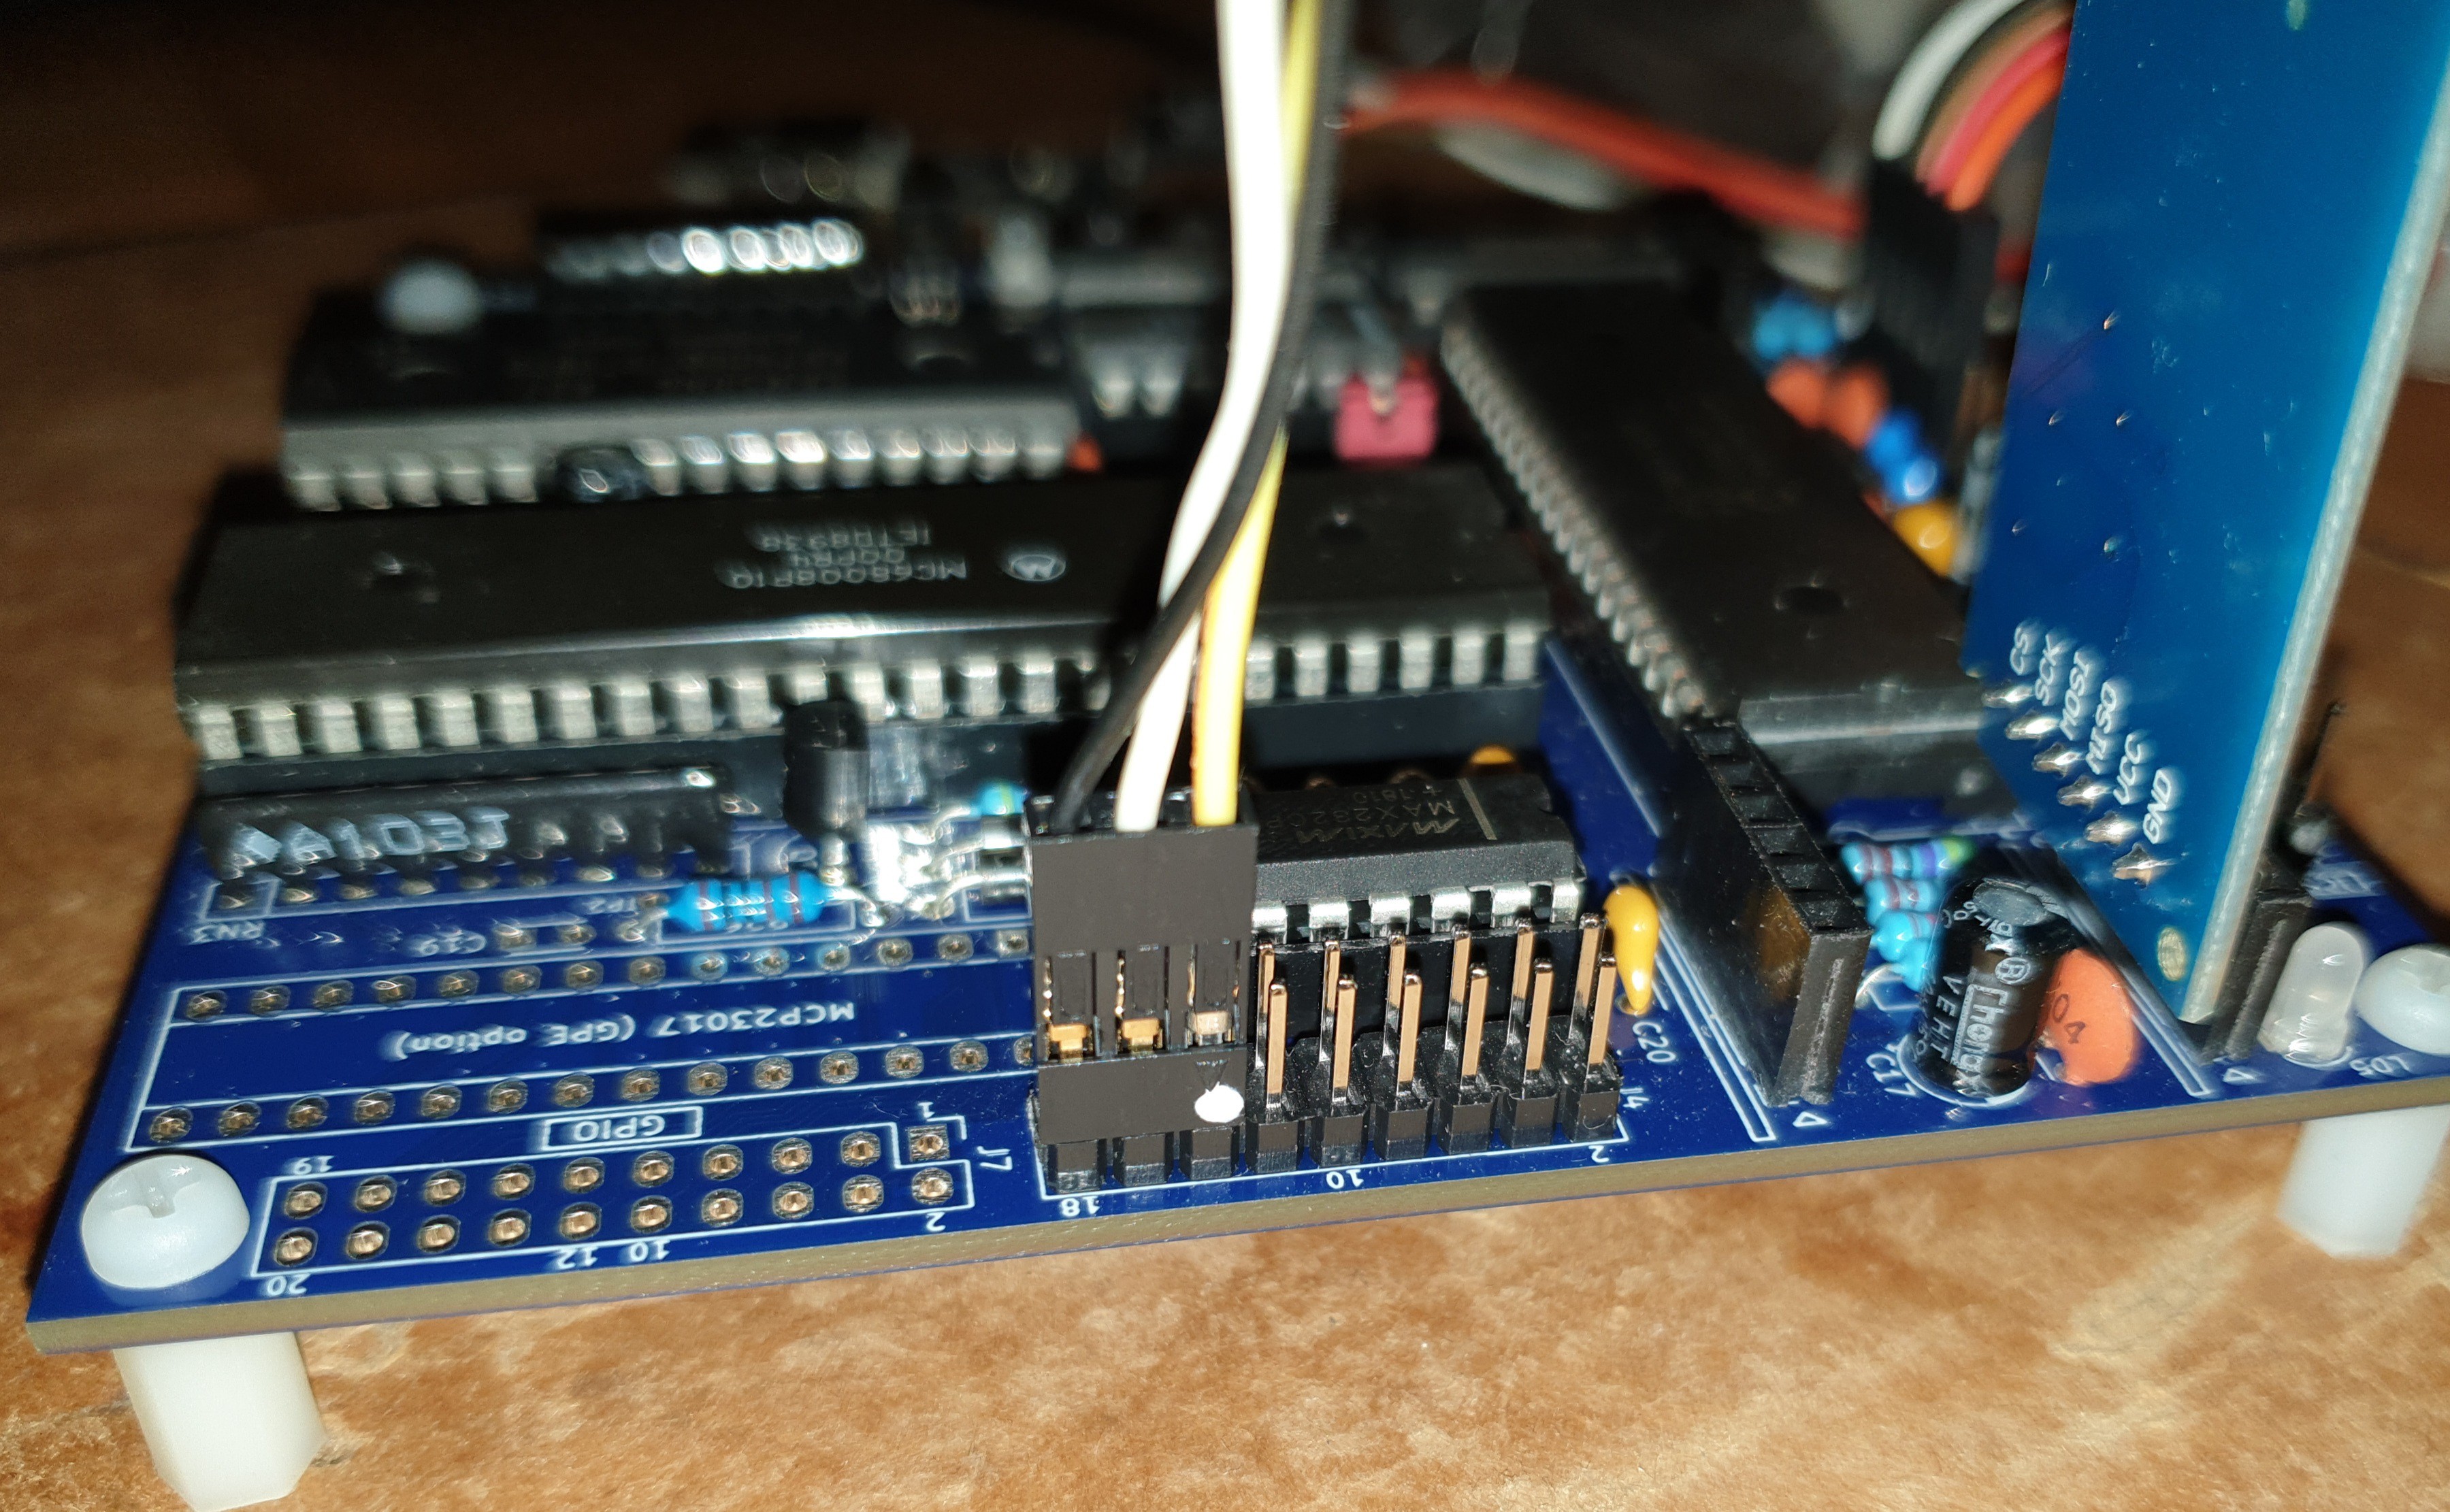
To connect the printer to the RS232 port 2 (J4/AUX) of the 68k-MBC you have to make a custom cable using an half data cable connected to a 3 pin Dupont connector as in the following photo (I've just soldered three wires with one side already connectorized with a Dupont terminal, then isolated with a heat-shrink tube):
![]()
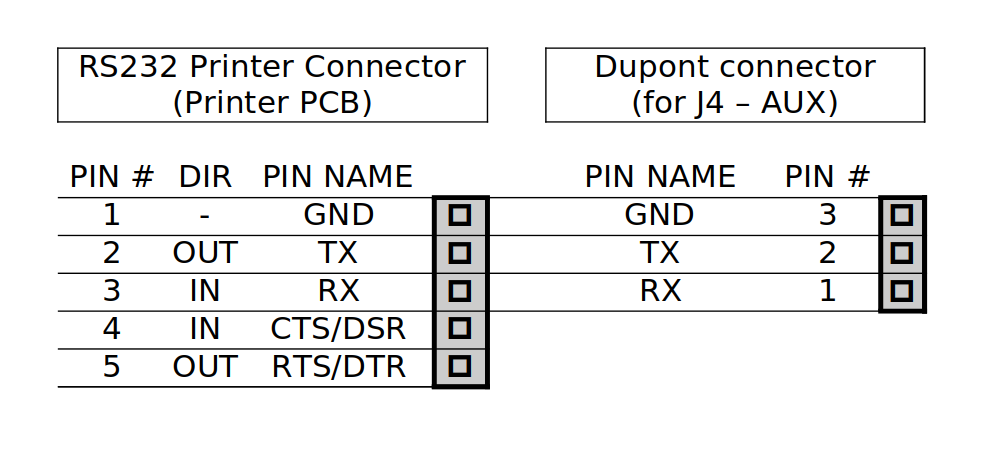
Here the table with the connections between the RS232 connector on the PCB printer side (5 pin) and the Dupont 3 pin connector (for J4/AUX):
![]()
Only GND and RX are really needed, anyway I've connected also TX.
The pin 1 of the Dupont connector (RX) is the one marked with a white dot on the photo.
The pin 1 of the 5 pin RS232 connector on the printer PCB side is the one on the left (black wire) on the previous photo.
This way it is ready to be connected to the RSR232 port 2 pins of J4/AUX as the RS232 custom cable (A020221):
![]()
To power the printer I suggest to use a 9V 3A power supply adding a silicon diode (at least 3A rated) in series to protect against polarity inversions and to lower a little the voltage (9V is the maximum voltage for this printer).
Remember to set the speed of the serial port 2 at 9600 bps, as this one is the standard operating speed for this model.
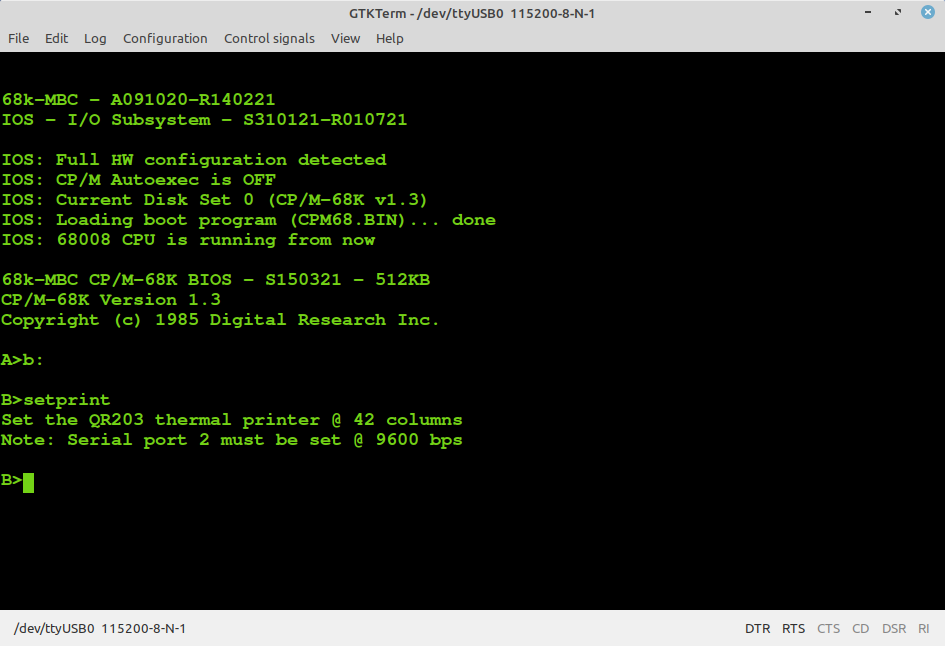
I've done a little utility (SETPRINT.68K) to set the printer to 42 columns using a smaller font and to set bold characters for a better readability (it is in the drive B: together with the source SETPRINT.BAS for the CB68 Basic compiler):
![]()
![]()
In the Files section I've uploaded a manual with all the commands for this printer (it is referred to another model, but the commands seem to be the same of this one).
68k-MBC: a 3 ICs 68008 homebrew computer
An easy to build homebrew SBC with a 68008 CPU. Two HW options: Lite and Full. Lite allows to build a 3 ICs 68008 system running CP/M-68K.