-
1Flashing the Bootloader
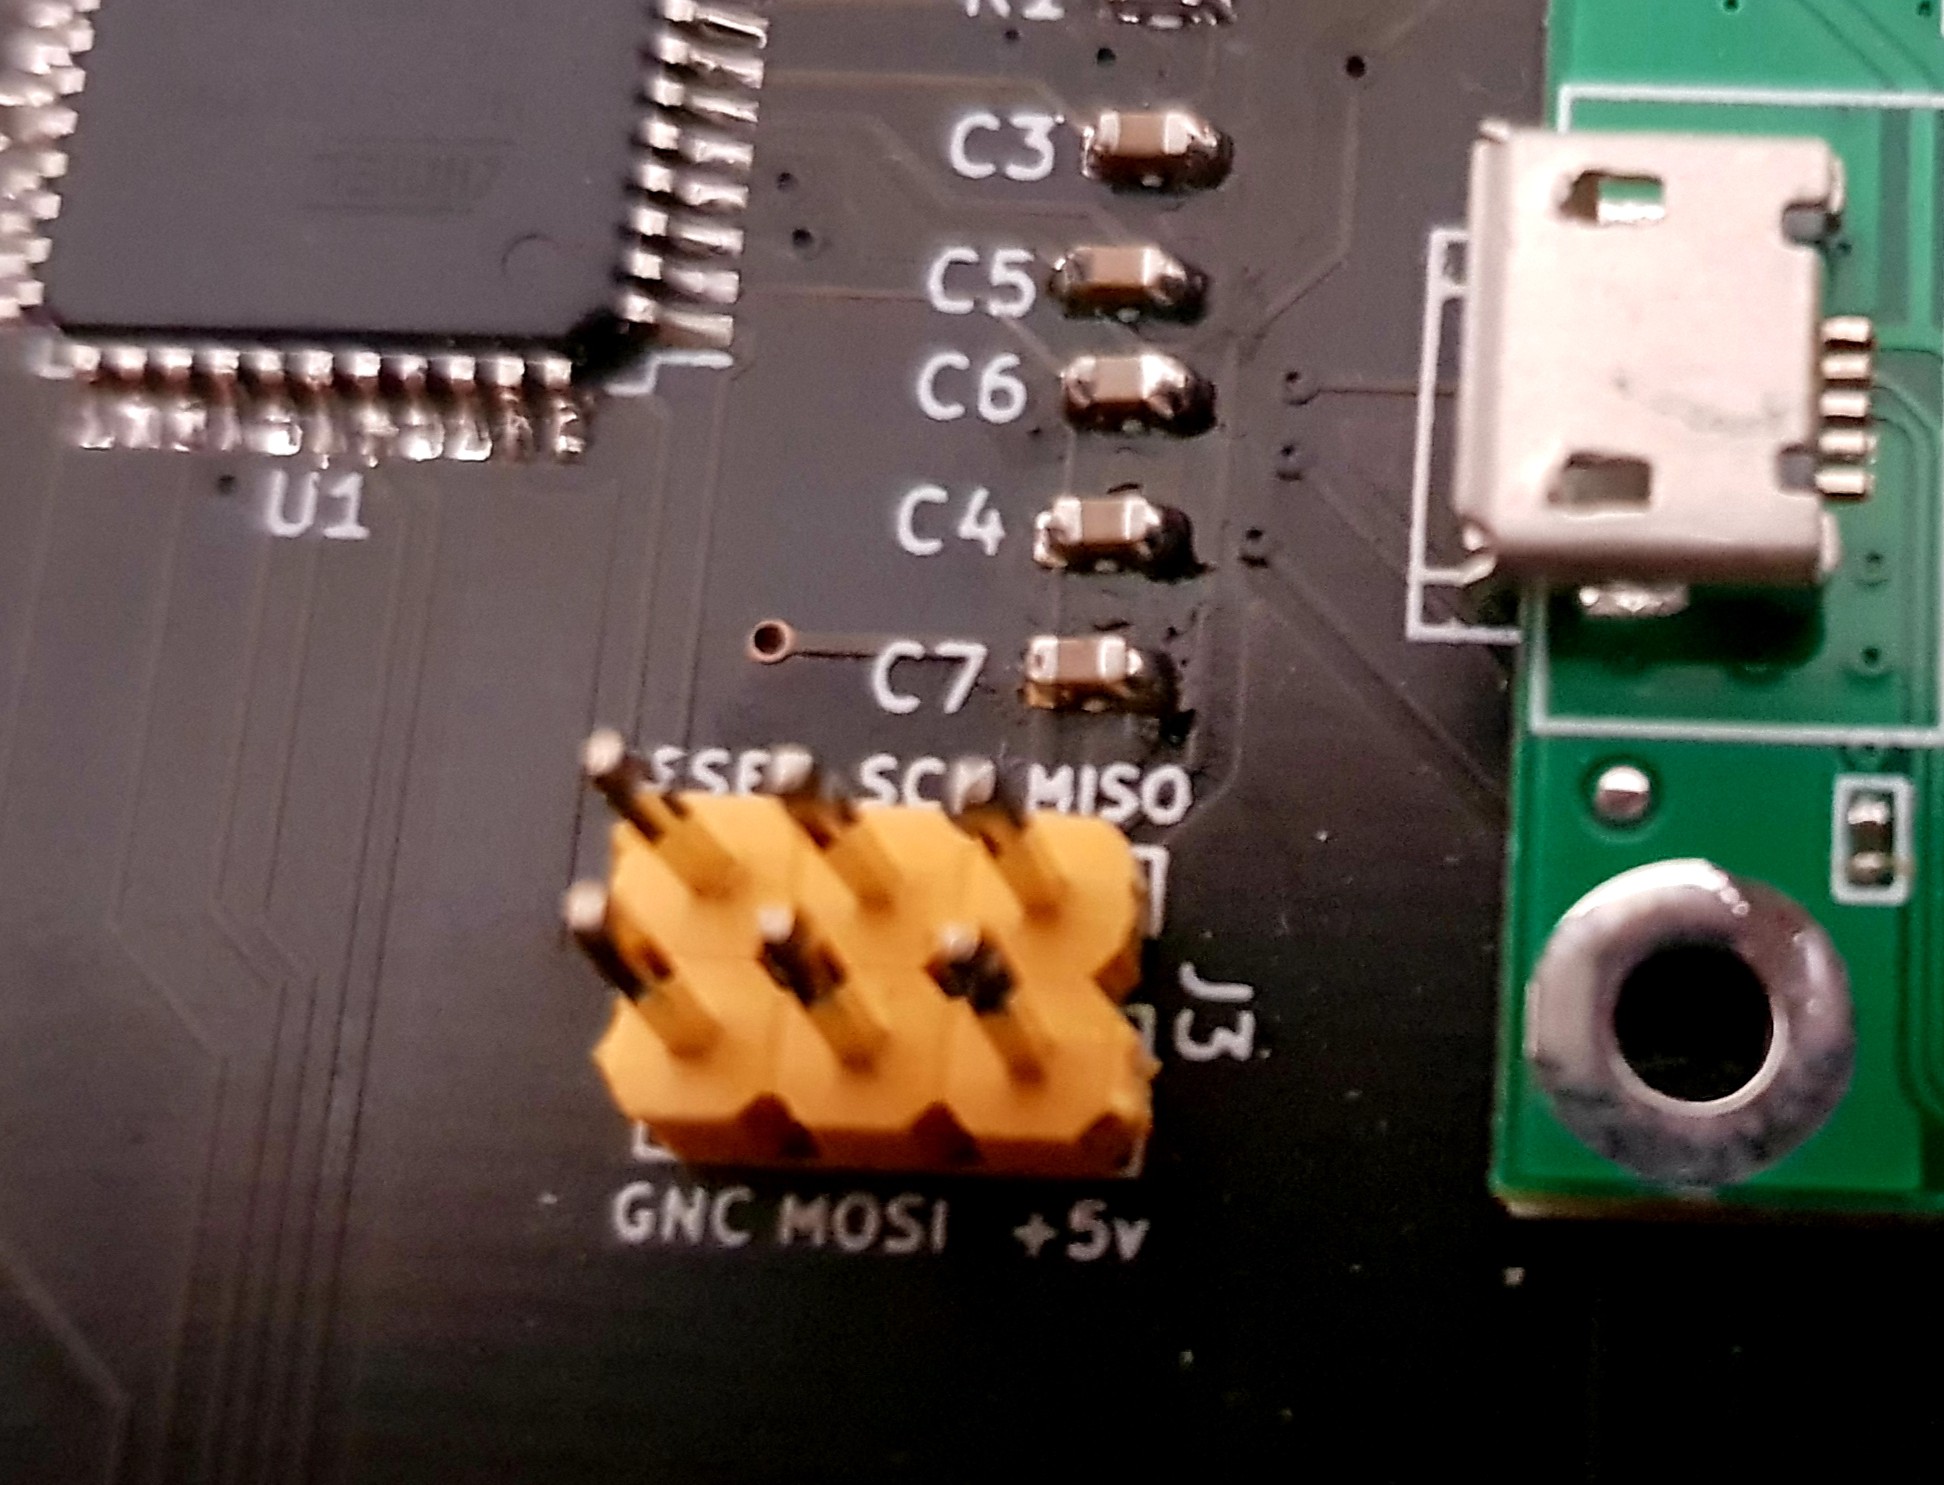
The keyboard module is based on the ATMEGA32U4. You can flash thebootloader using the ISP 6 pins connector on the back side of the PCB
![]()
You will need to use a bootloader .HEX file which is compatible with the ATMEGA32U4 16 MHZ crystal version. (5v arduino pro micro equivalent). I used the Caterina-Promicro16.HEX for this.
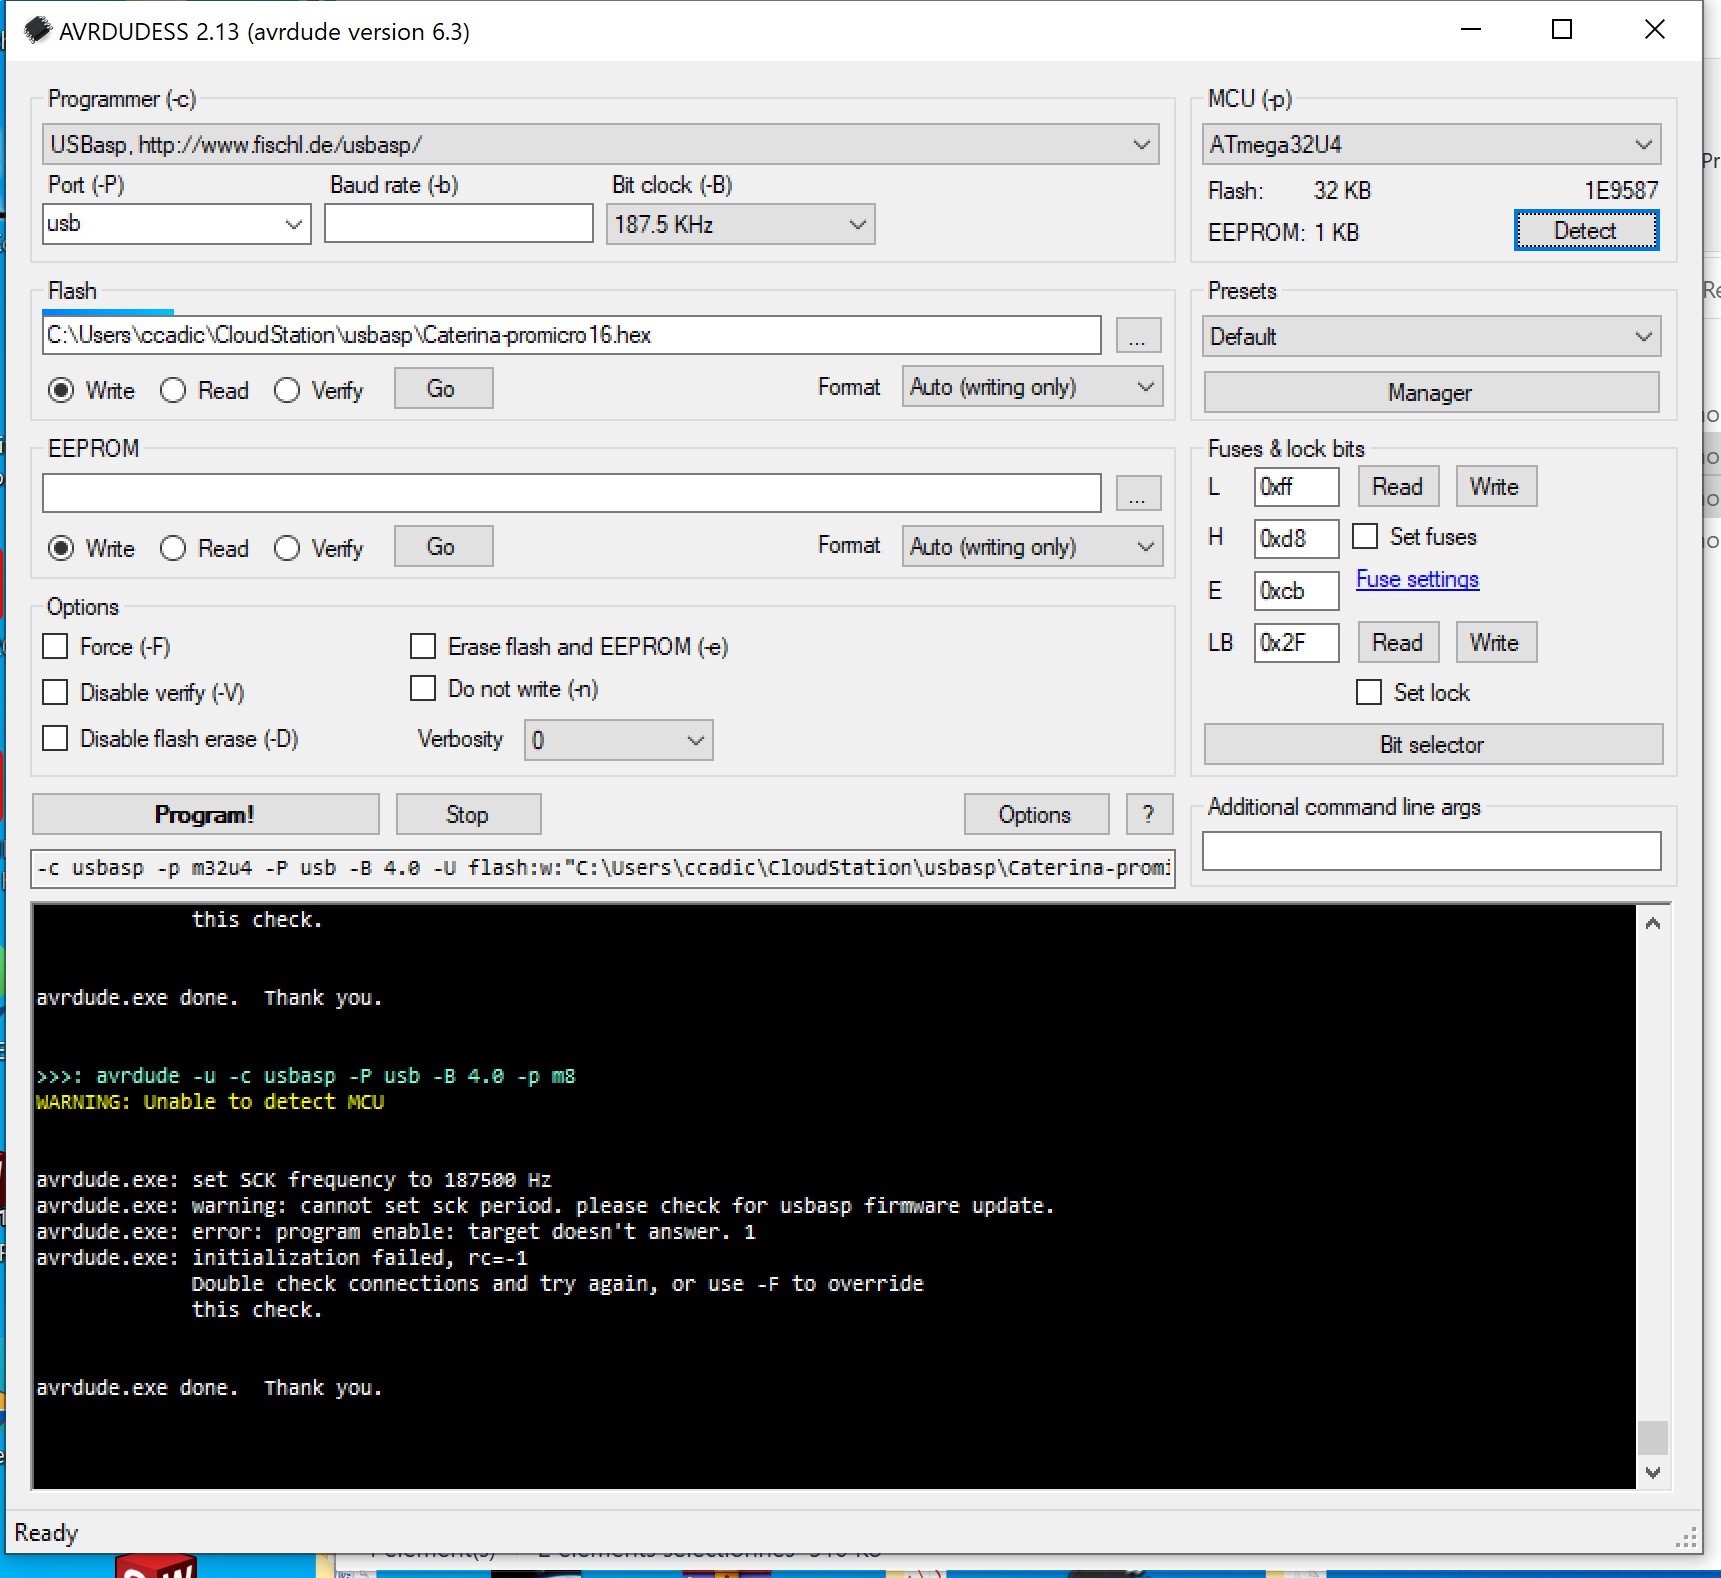
To flash the ATMEGA32U4, I used AVRDUDE with its GUI interface AVRDUDESS .
Take care when you flash the bootloader. You will need to define FUSES and BITLOCK with care. Here is the screencapture of avrdudess which will let you burn the blank ATMEGA32U4
![]()
Before you burn the HEX, you will have to click "Detect". It should display ATMEGA32U4. Then you have to press both "WRITE" buttons to write FUSES and LOCKBITS. Once done, select the Caterina-Promicro16.HEX to fill the FLASH textbox, then click PROGRAM! This should upload the ardiuno bootloader like a charm.
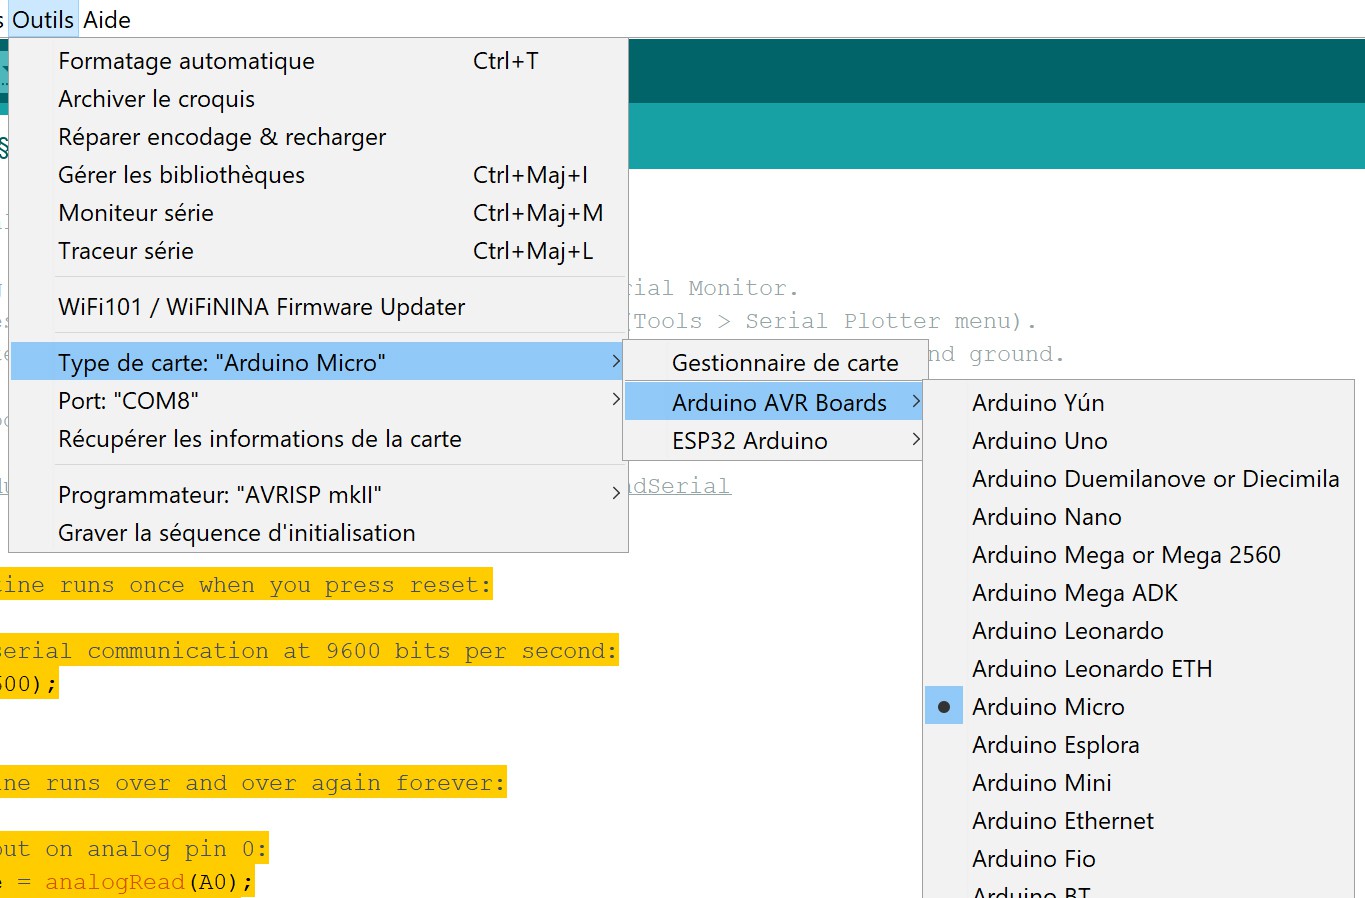
You can test using ARDUINO IDE via USB-C cable. Select AVR PRO MICRO board and the appropriate port (COM8 in the example).
![]()
Then upload this sketch
// the setup routine runs once when you press reset:
void setup() {
  // initialize serial communication at 9600 bits per second:
  Serial.begin(9600);
}

// the loop routine runs over and over again forever:
void loop() {
  // read the input on analog pin 0:
  int sensorValue = analogRead(A0);
  // print out the value you read:
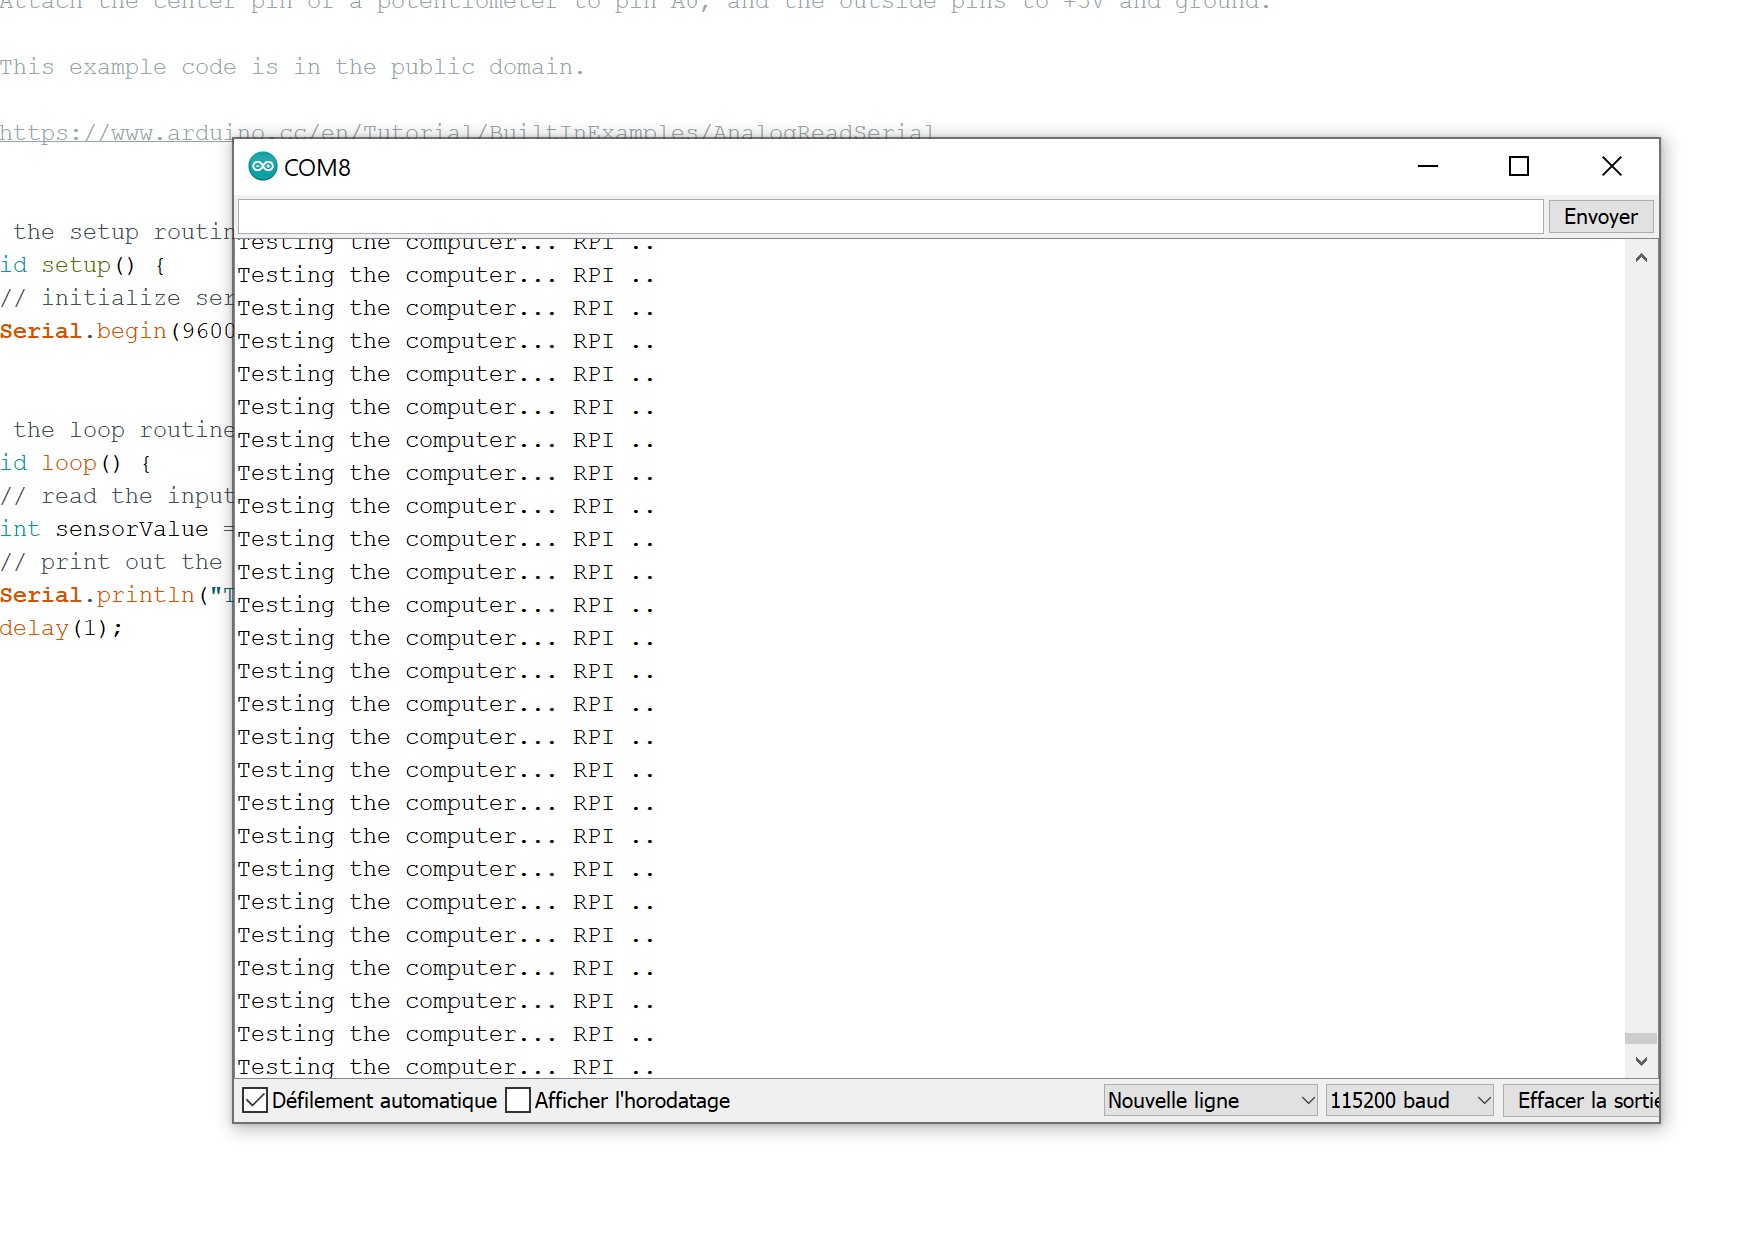
  Serial.println("Testing the computer... RPI ..");
  delay(1);        // delay in between reads for stability
}
It should display the echo.
![]()
 pcadic


Discussions
Become a Hackaday.io Member
Create an account to leave a comment. Already have an account? Log In.