-
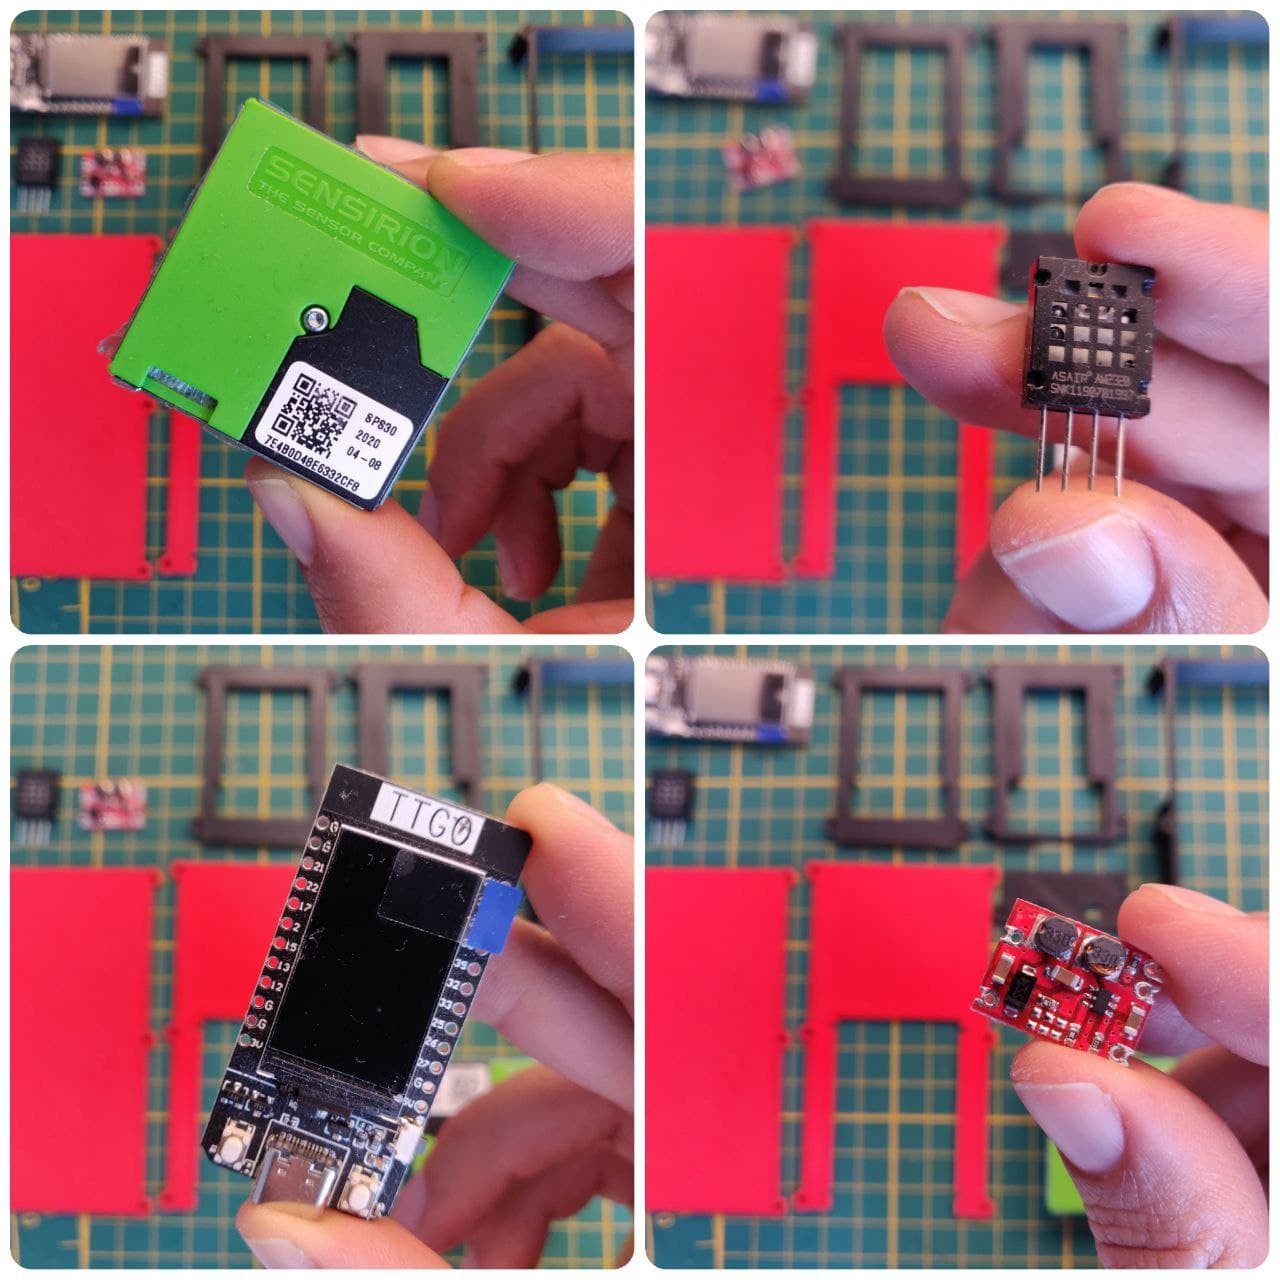
1Components and materials
Please first review the last updated list of components and 3D Printer files here
![]()
-
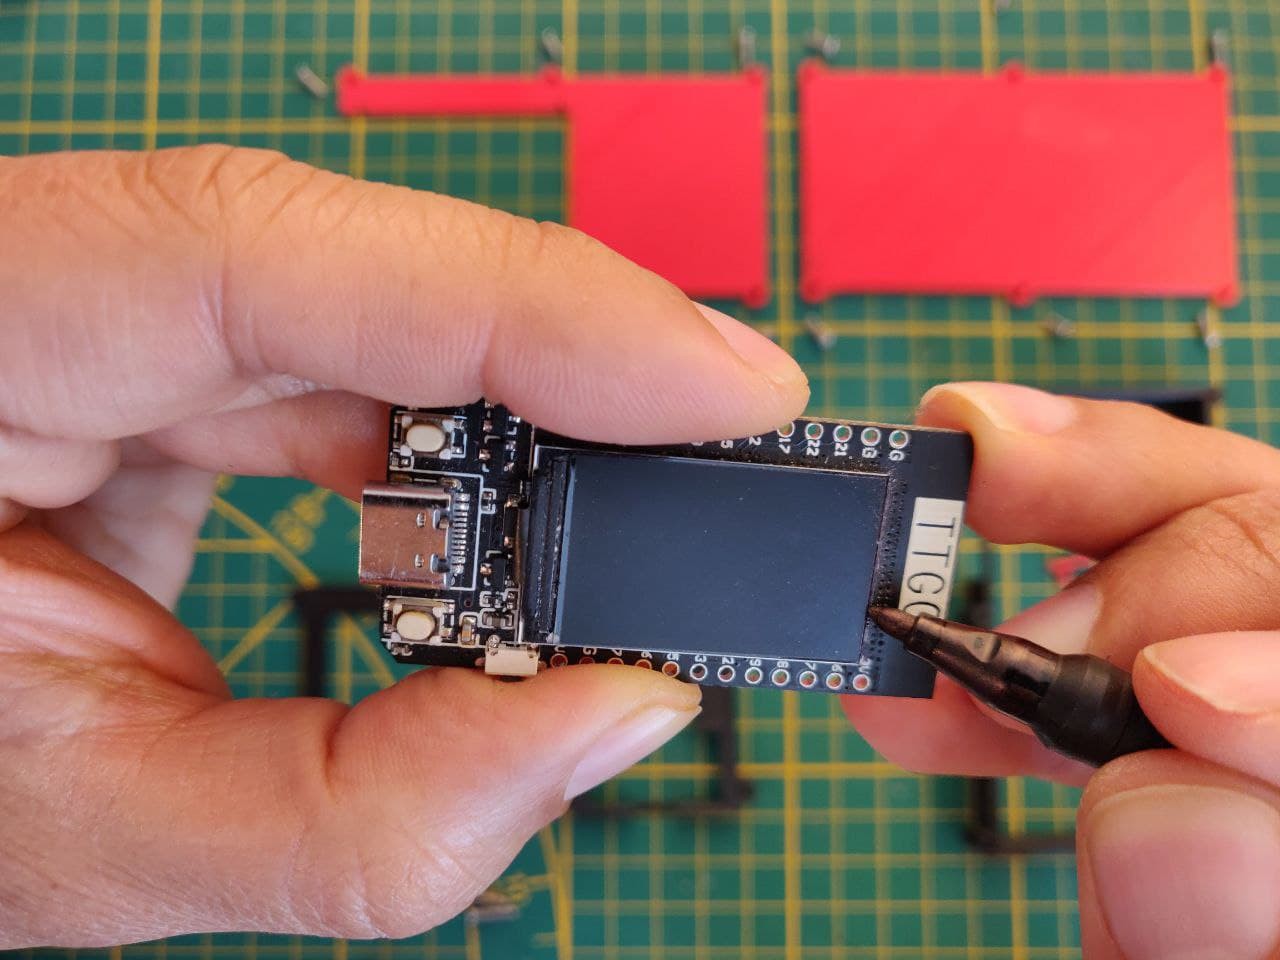
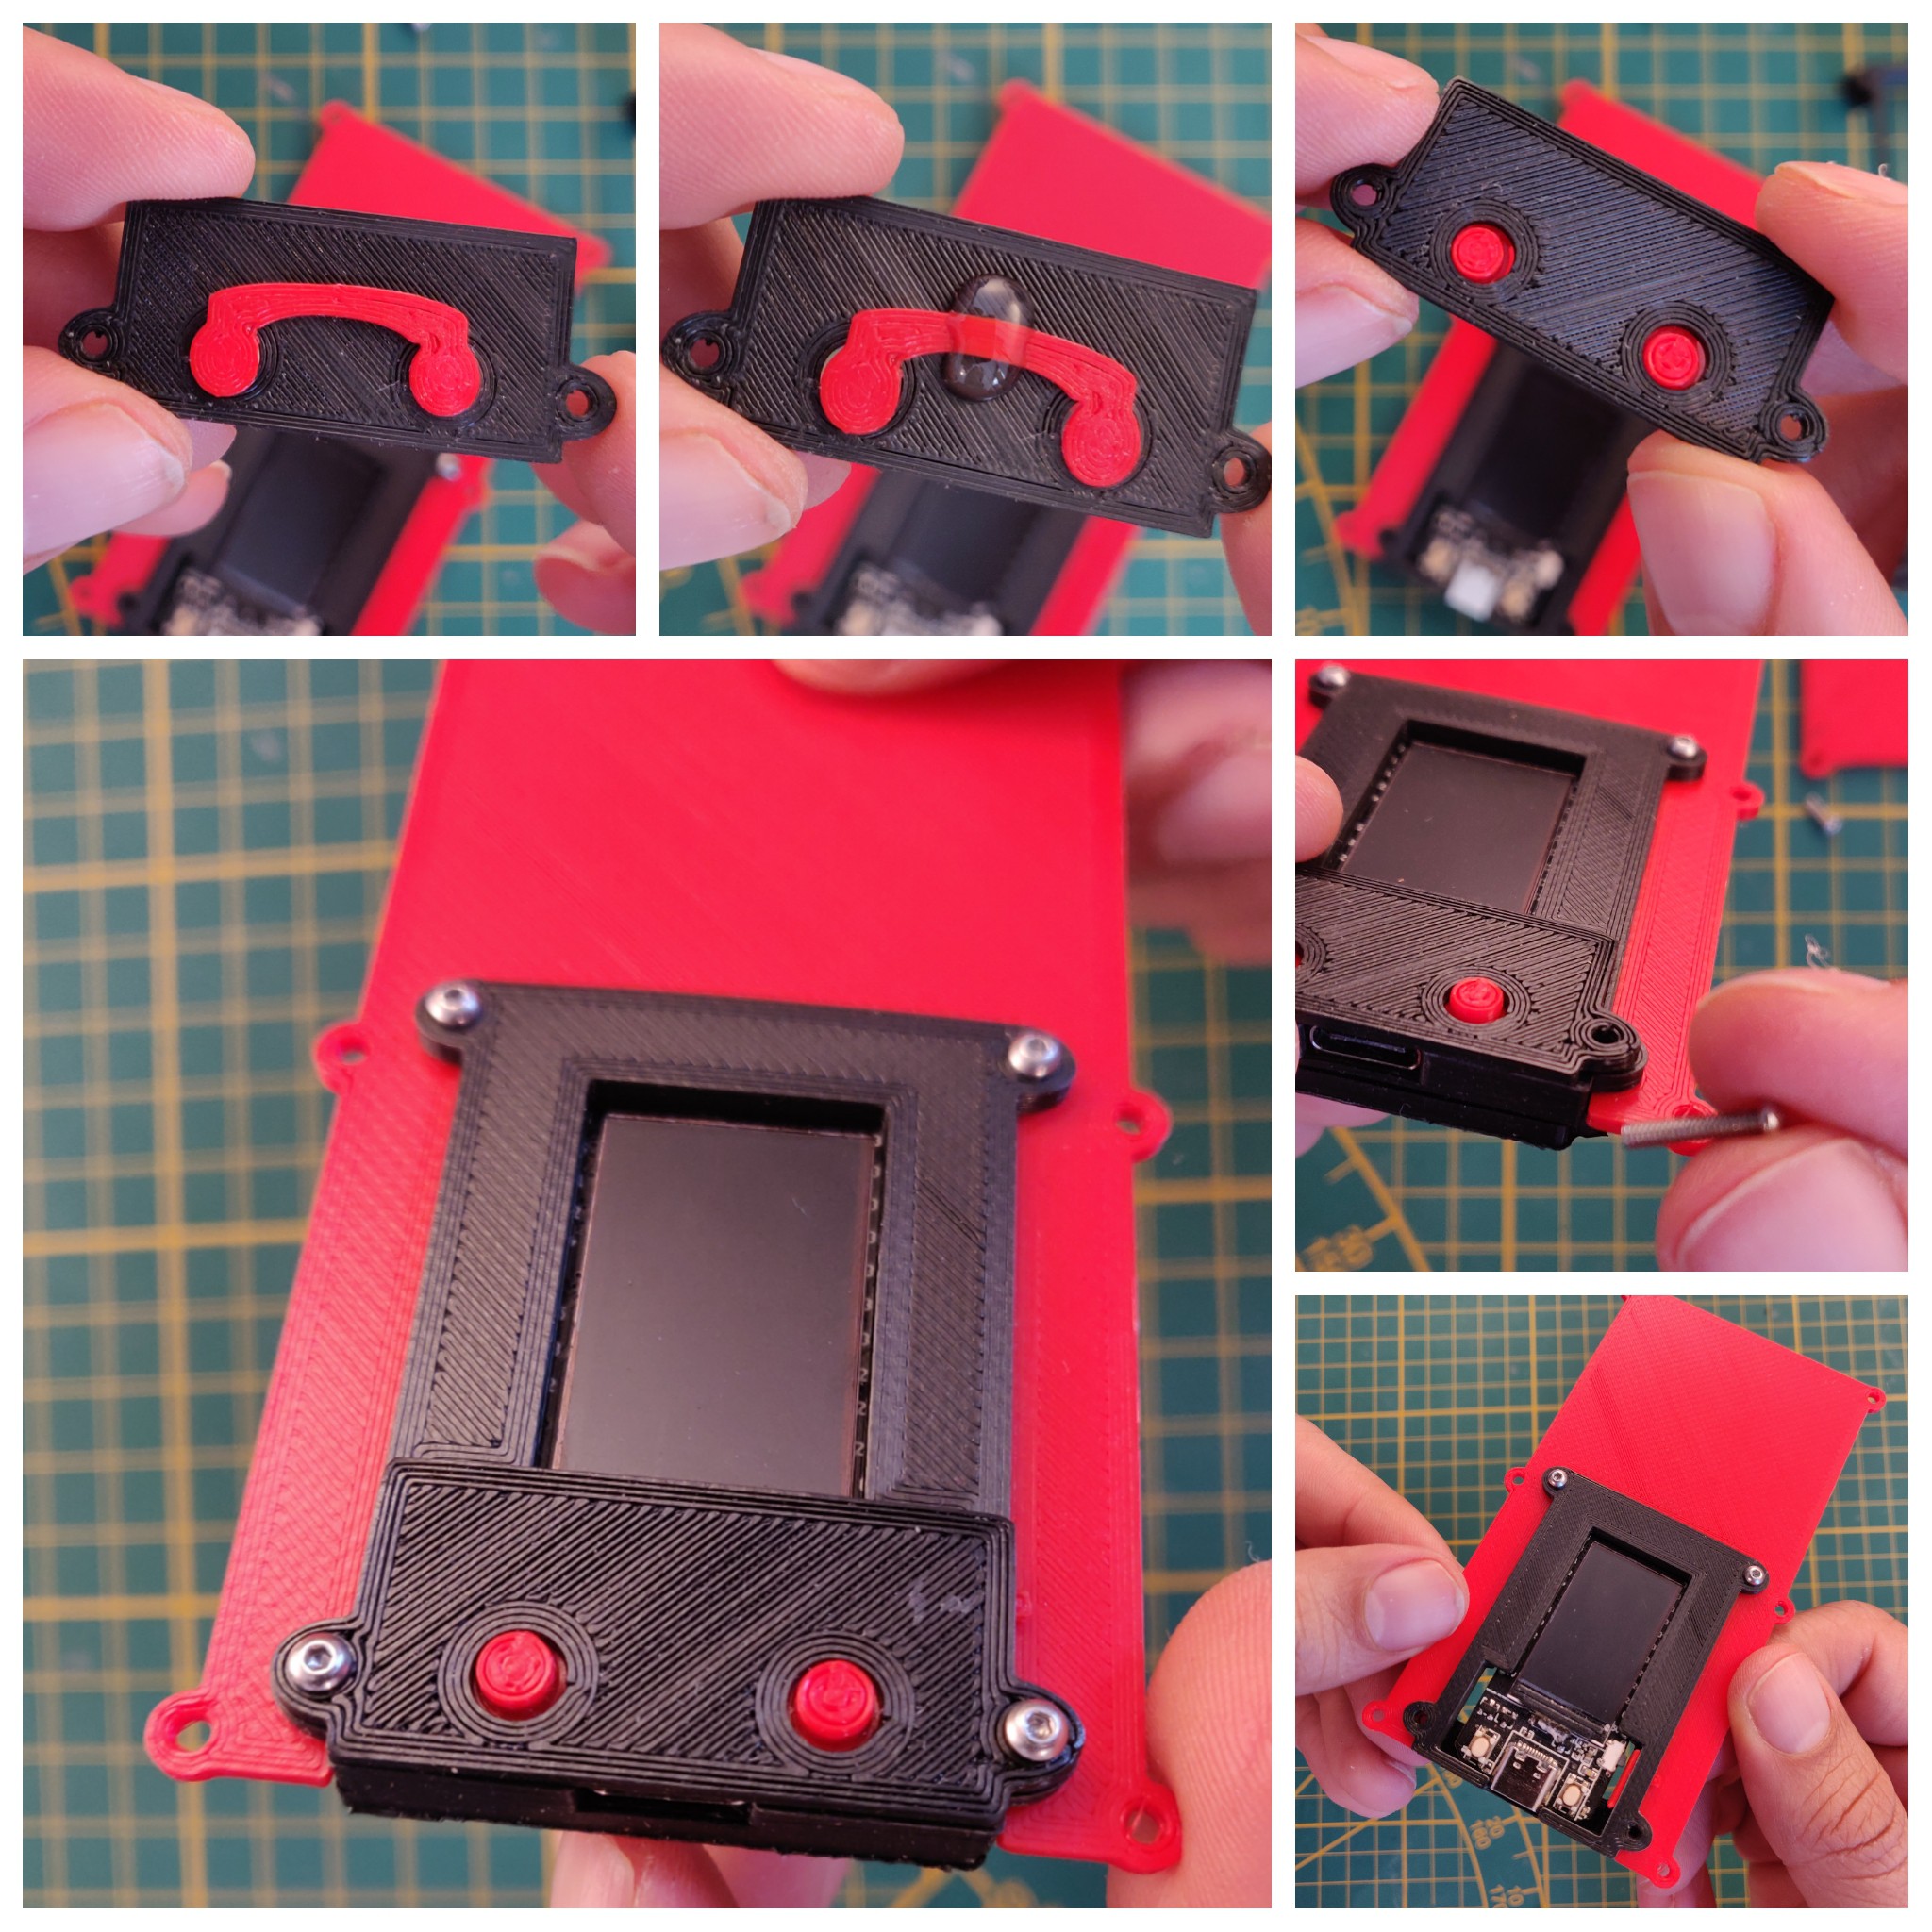
2Paint the display white border to black
![]()
-
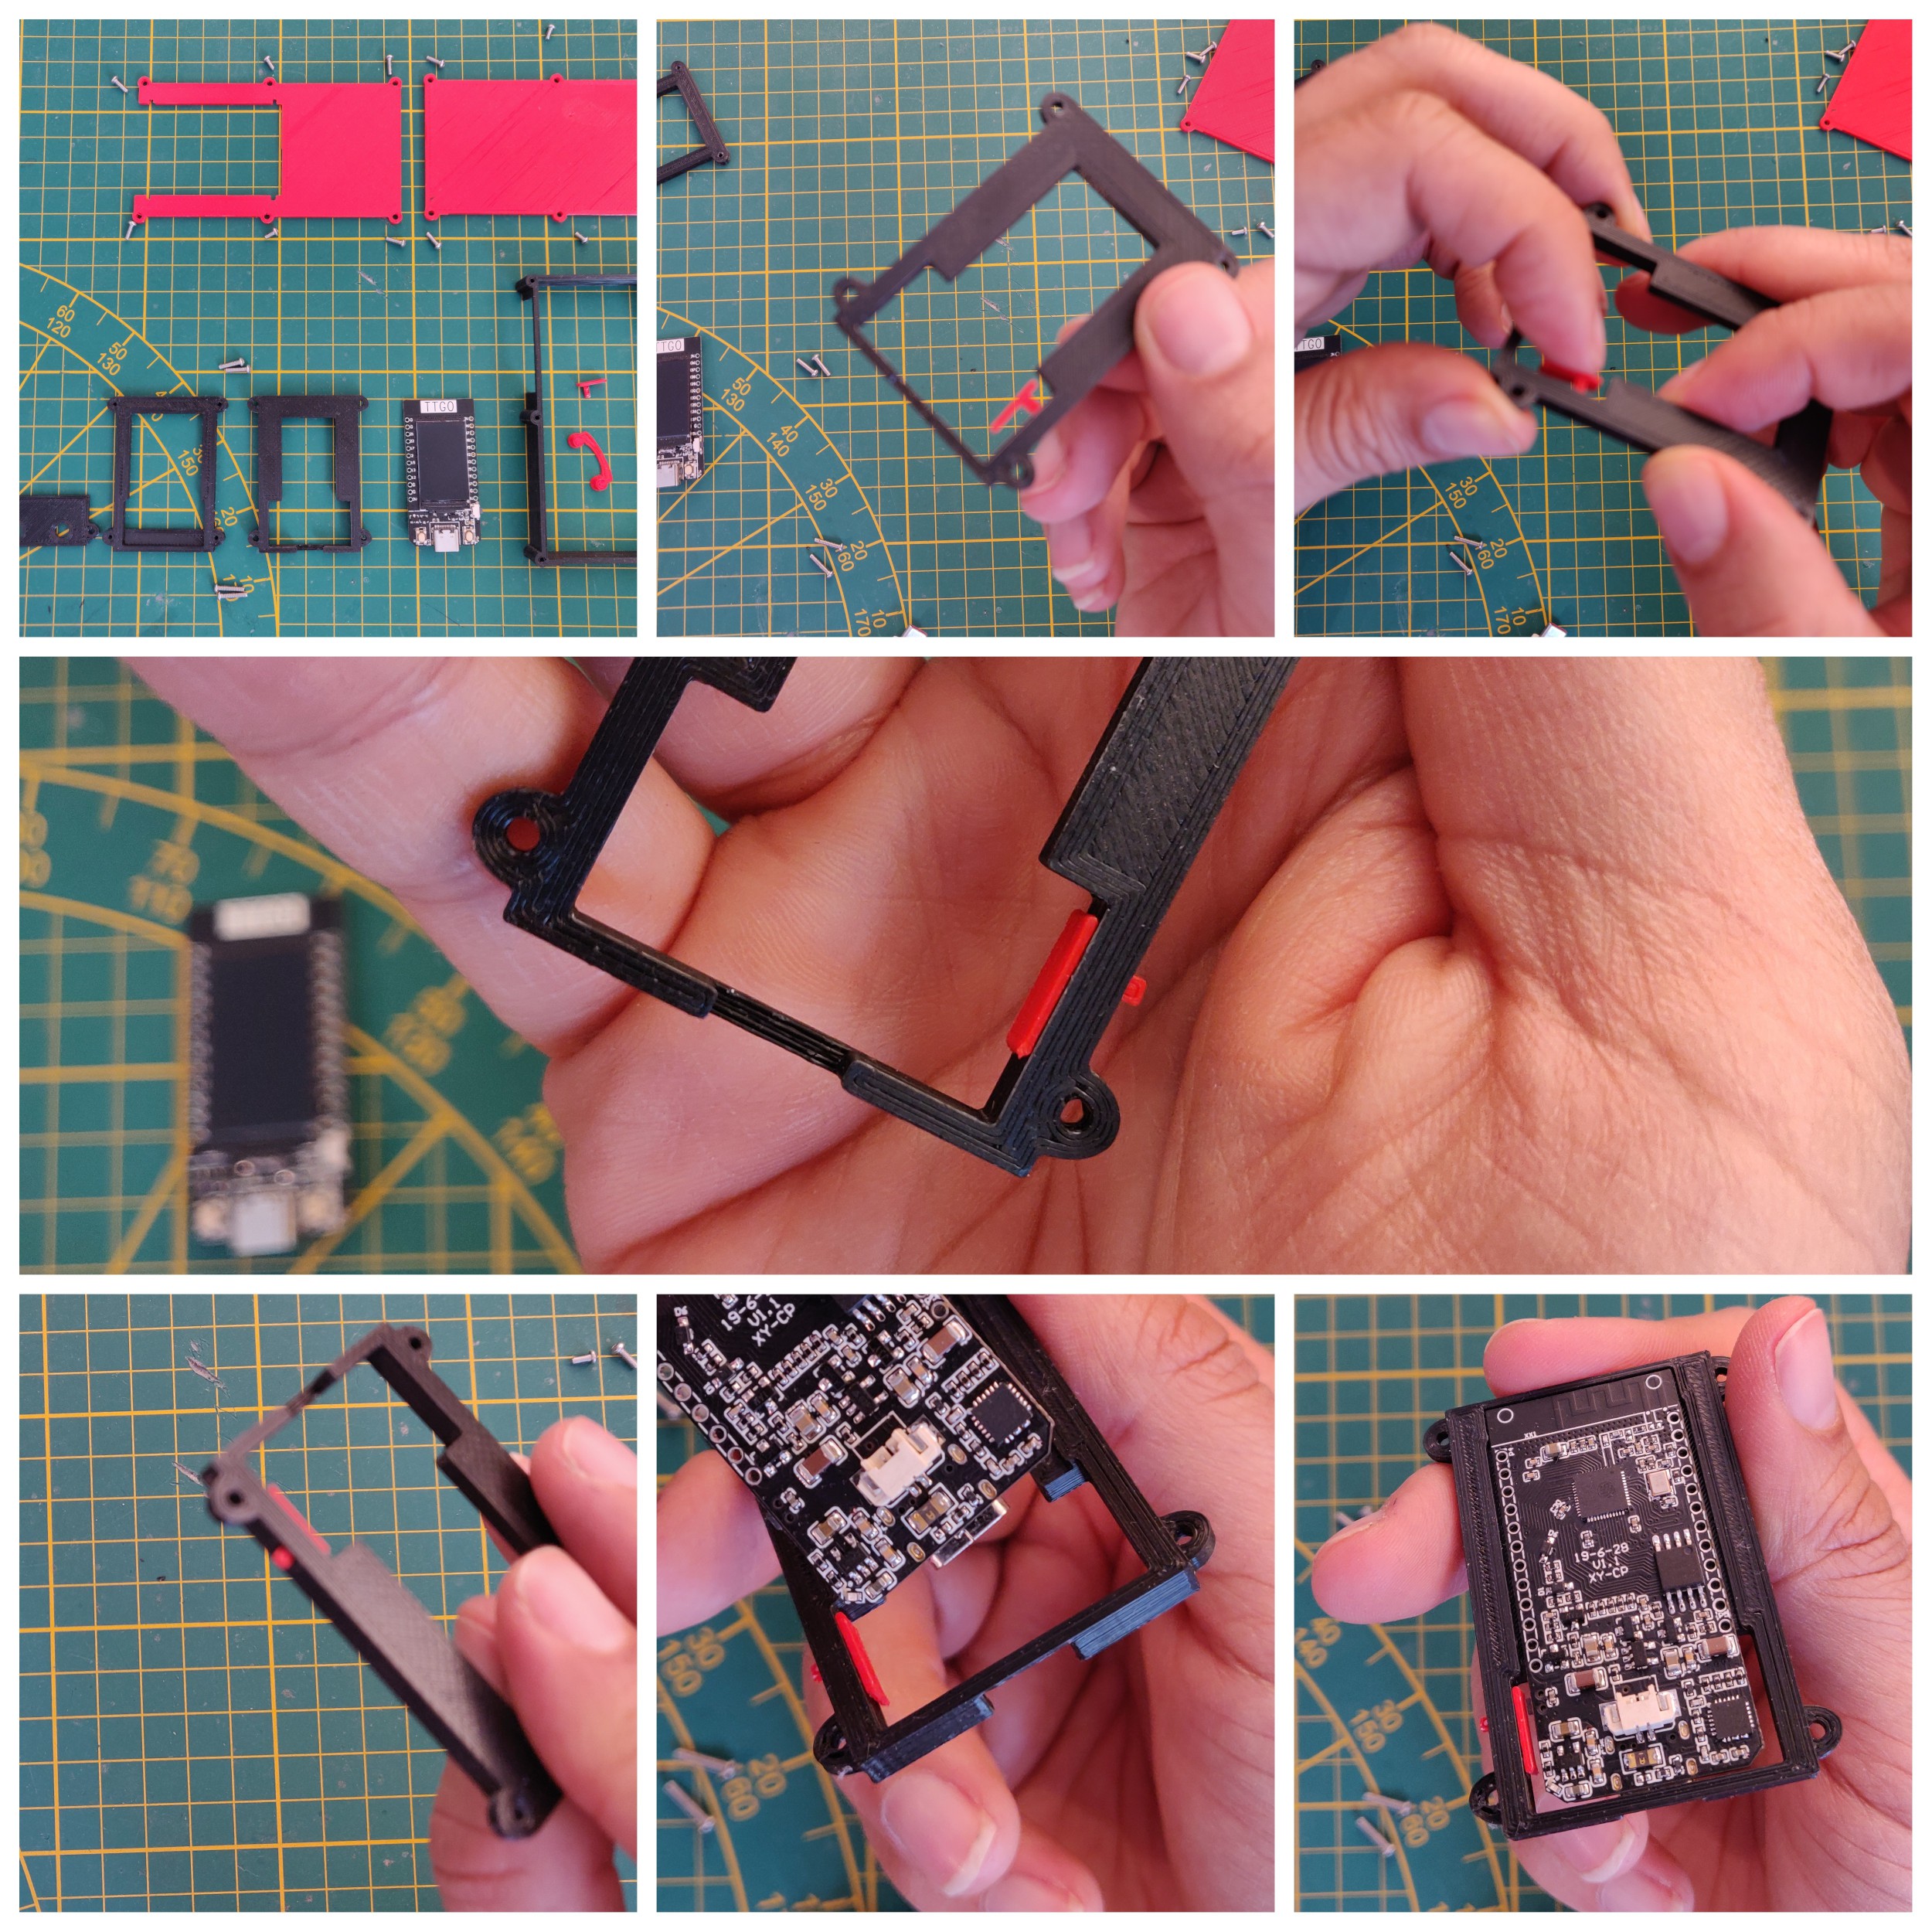
3Start with reset button (power button)
![]()
-
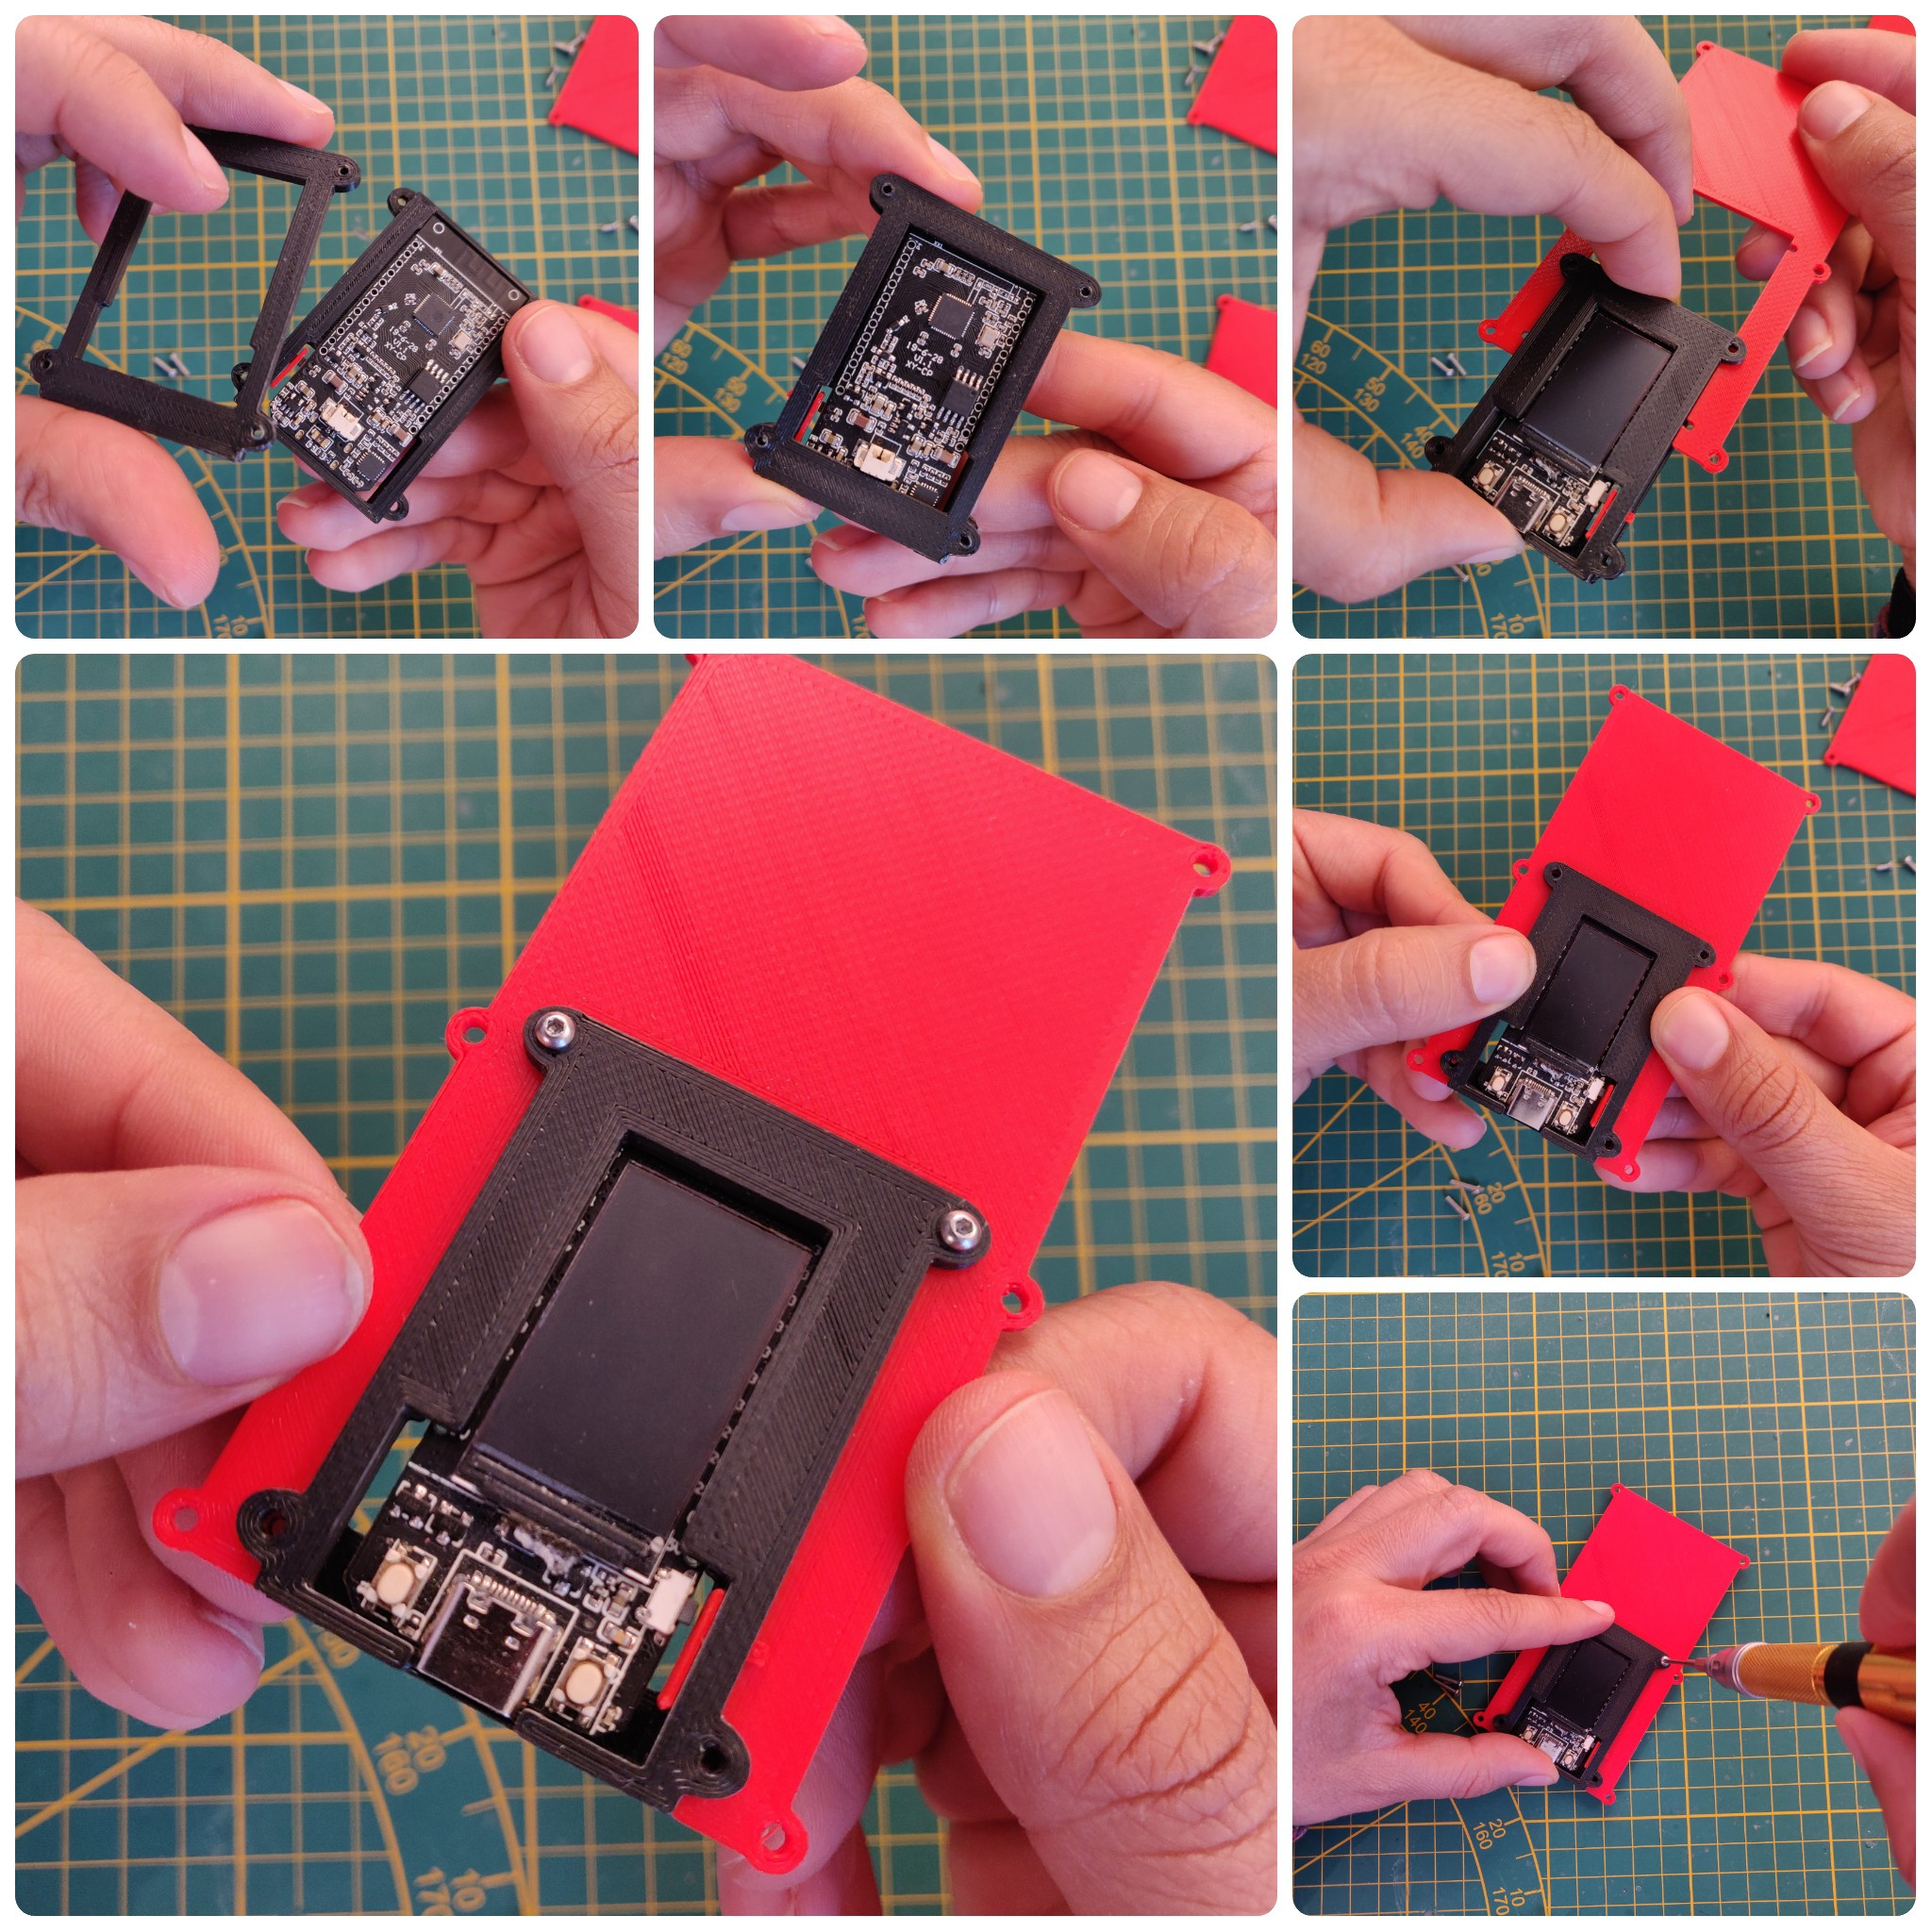
4Put the display holder with two screws (M2x6)
![]()
-
5Stick the buttons with instant glue and hold the lid with two screws (M2x7)
![]()
-
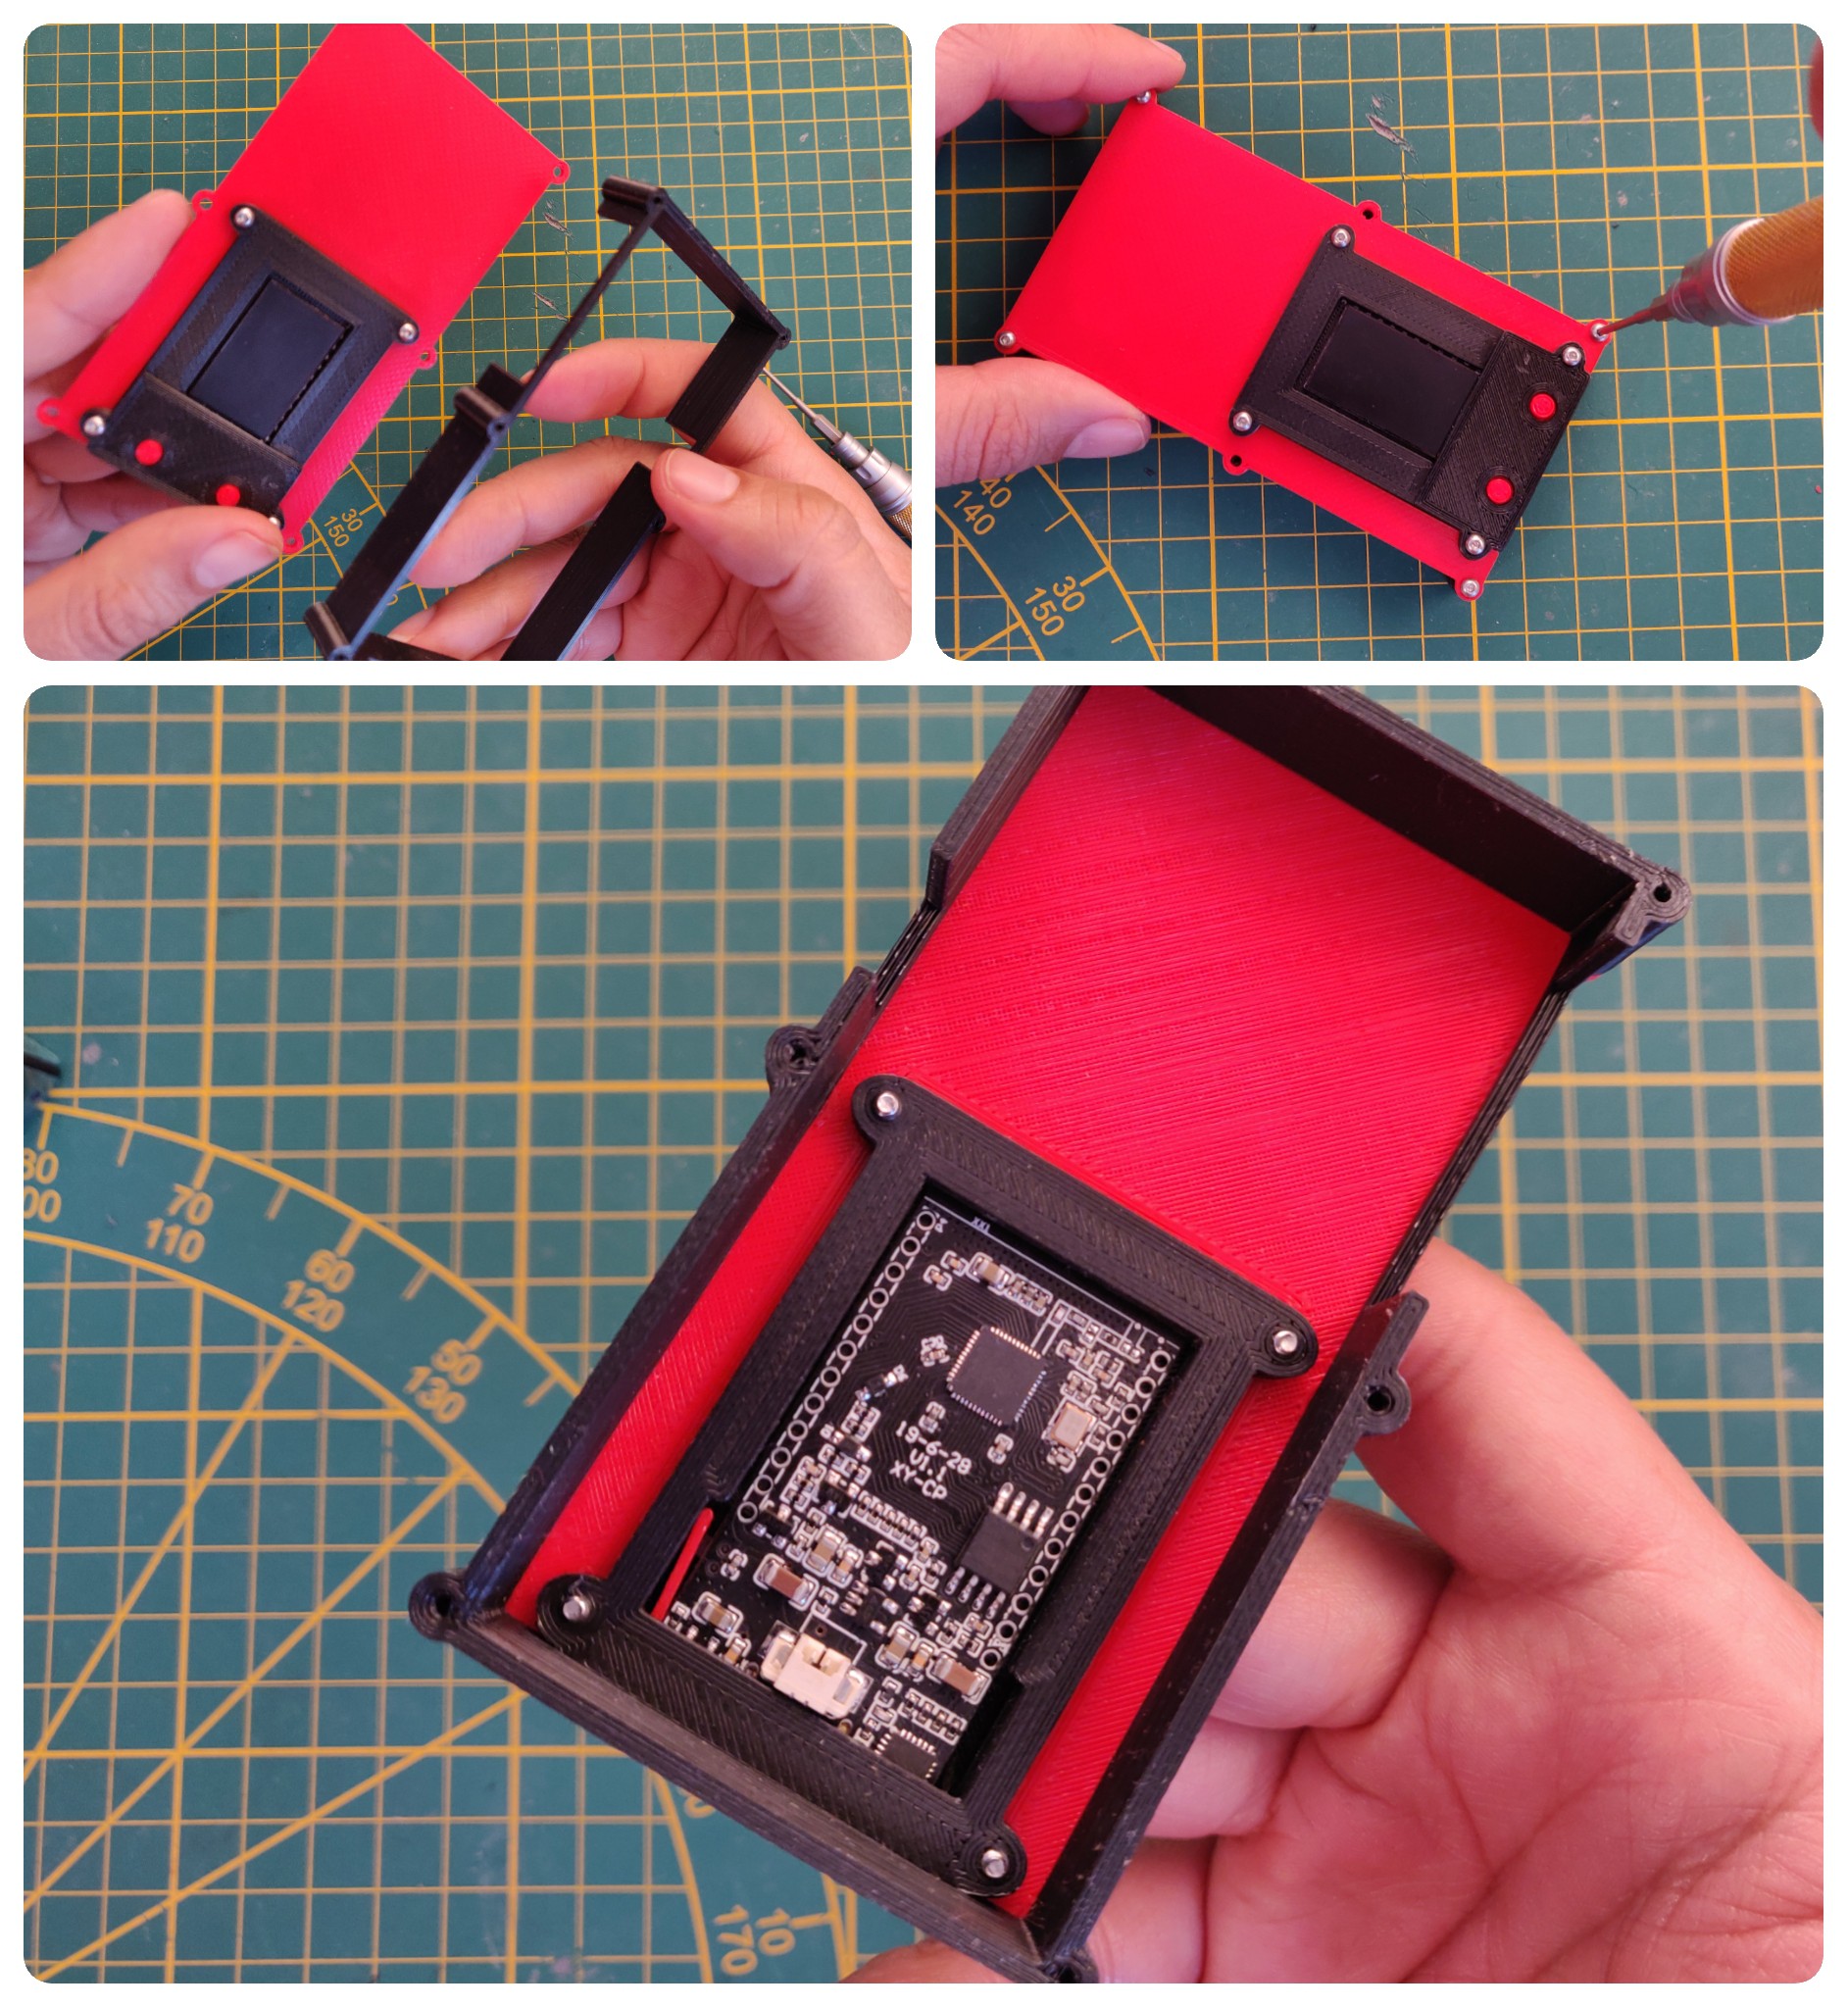
6With 4 M2x5 (corners) and 2 M2x4 join the top side with the box body
![]()
-
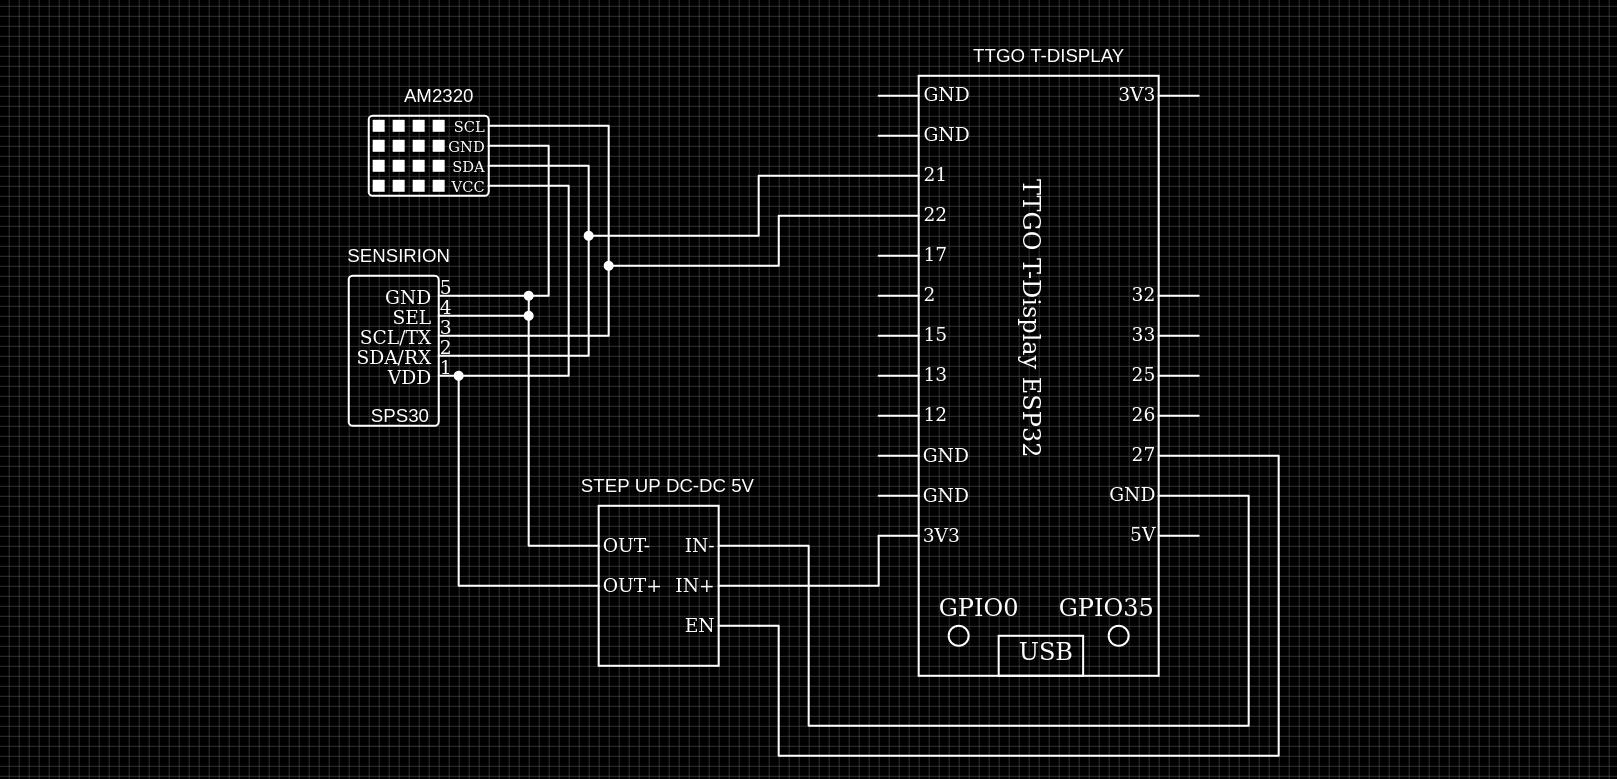
7Check the connection diagram
![CanAirIO Bike Schematics]()
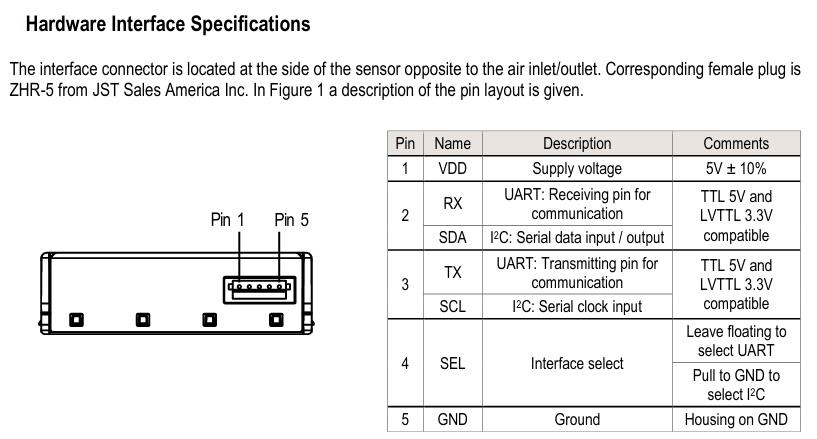
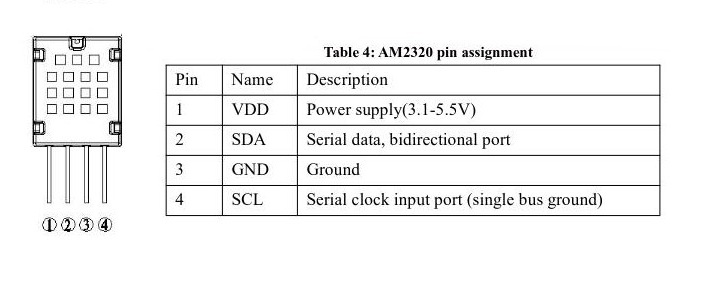
Please note that it is a general diagram, for details of pin connections please review the datasheet of each component. For example the next diagrams:
SPS30 pinout diagram
![CanAirIO Bike Schematics]()
AM2320 pinout diagram
![CanAirIO Bike Schematics]()
-
8Follow the video instructions
Wiring alternative:
-
9Uploaded the firmware
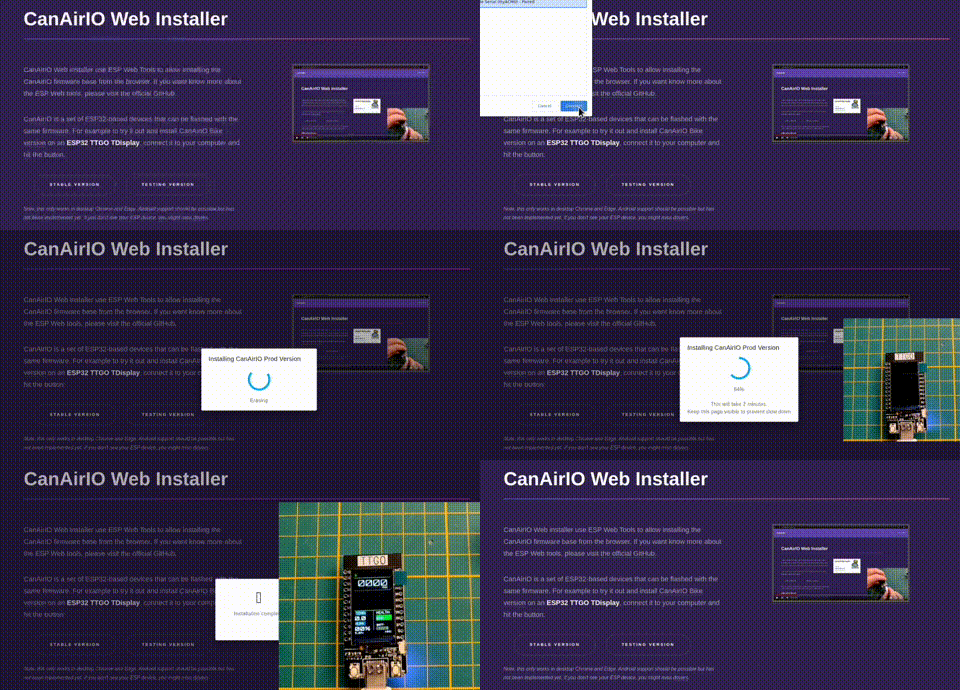
CanAirIO device supports ESP32 boards with Bluetooth and Wifi features, all boards with it should be able to receive the current firmware. We have six alternatives for uploading it:
Alternative Difficulty Software Requeriments CanAirIO Web Installer Super Easy PC Browser with Chrome or Edge CanAirIO Loader Easy Arduino Droid App Android and OTG cable CanAirIO Loader Basic Arduino IDE USB drivers on Windows and MacOSX Espressif Uploader Basic Espressif tool Only works on Windows CanAirIO Installer Basic Python3 USB drivers on Windows and MacOSX Source code Advanced PlatformIO No needs drivers on Linux For more details please here
CanAirIO Bike
CanAirIO mobile version that also is a bike computer for share Air quality conditions on your tracks
 Hpsaturn

Discussions
Become a Hackaday.io Member
Create an account to leave a comment. Already have an account? Log In.