Brandon
-
devLog[10]
08/13/2021 at 17:25 • 0 commentsWell guys, I finally did it! I completed the build! I uploaded the first video about my project, which you can watch here:
I'll also be adding a lot of updates to this page and pictures and tutorials and stuff, so be on the look out for that!
-
devLog[9]
07/28/2021 at 00:06 • 0 commentsGuys, I'm SO CLOSE! Since the last update, i've glued the speakers and audio jack to the case and wired up the Teensy++ 2.0 to the Raspberry Pi. Another major change I made was to switch from my previous 64bit RetroPIe OS for the supported 32bit OS. I decided to switch to 32bit because I couldn't get the power button for the Raspberry Pi working properly. As soon as I made the switch, however, the power button worked great! And that's another thing i've added since the last update - the power button. I followed this tutorial on youtube to set it up and then wired the screen's power button the the same button as the one for the Pi, which allows me to turn both on and off at the same time. The only thing I'm waiting for is the heatsink for the Pi. I bought one that works great, but it's too tall, so I had to settle for this one from amazon. I'll update you when I get it!
There is one small problem with the power button that I may try and change soon. When I press the power button, the Pi powers down, but the red light and the fan on the heatsink both stay on, which makes it so the RetroPSU is never actually able to fully charge. This may be dangerous for the Pi and the RetroPSU, because I won't be able to tell when the battery is fully charged (because the green battery LED will never turn on while the Pi is still plugged in currently). I am trying to find a soulution to this and will update you when I find one.
-
devLog[8]
07/19/2021 at 05:12 • 0 commentsExciting news! I finally got the speakers and 3.5mm audio jack working! Check out the 'Assembling the Components' section in the instructions to see how I did it. Now all I have to do is drill some holes for the speaker, glue it in place, and get the Raspberry Pi power button working!
-
devLog[7]
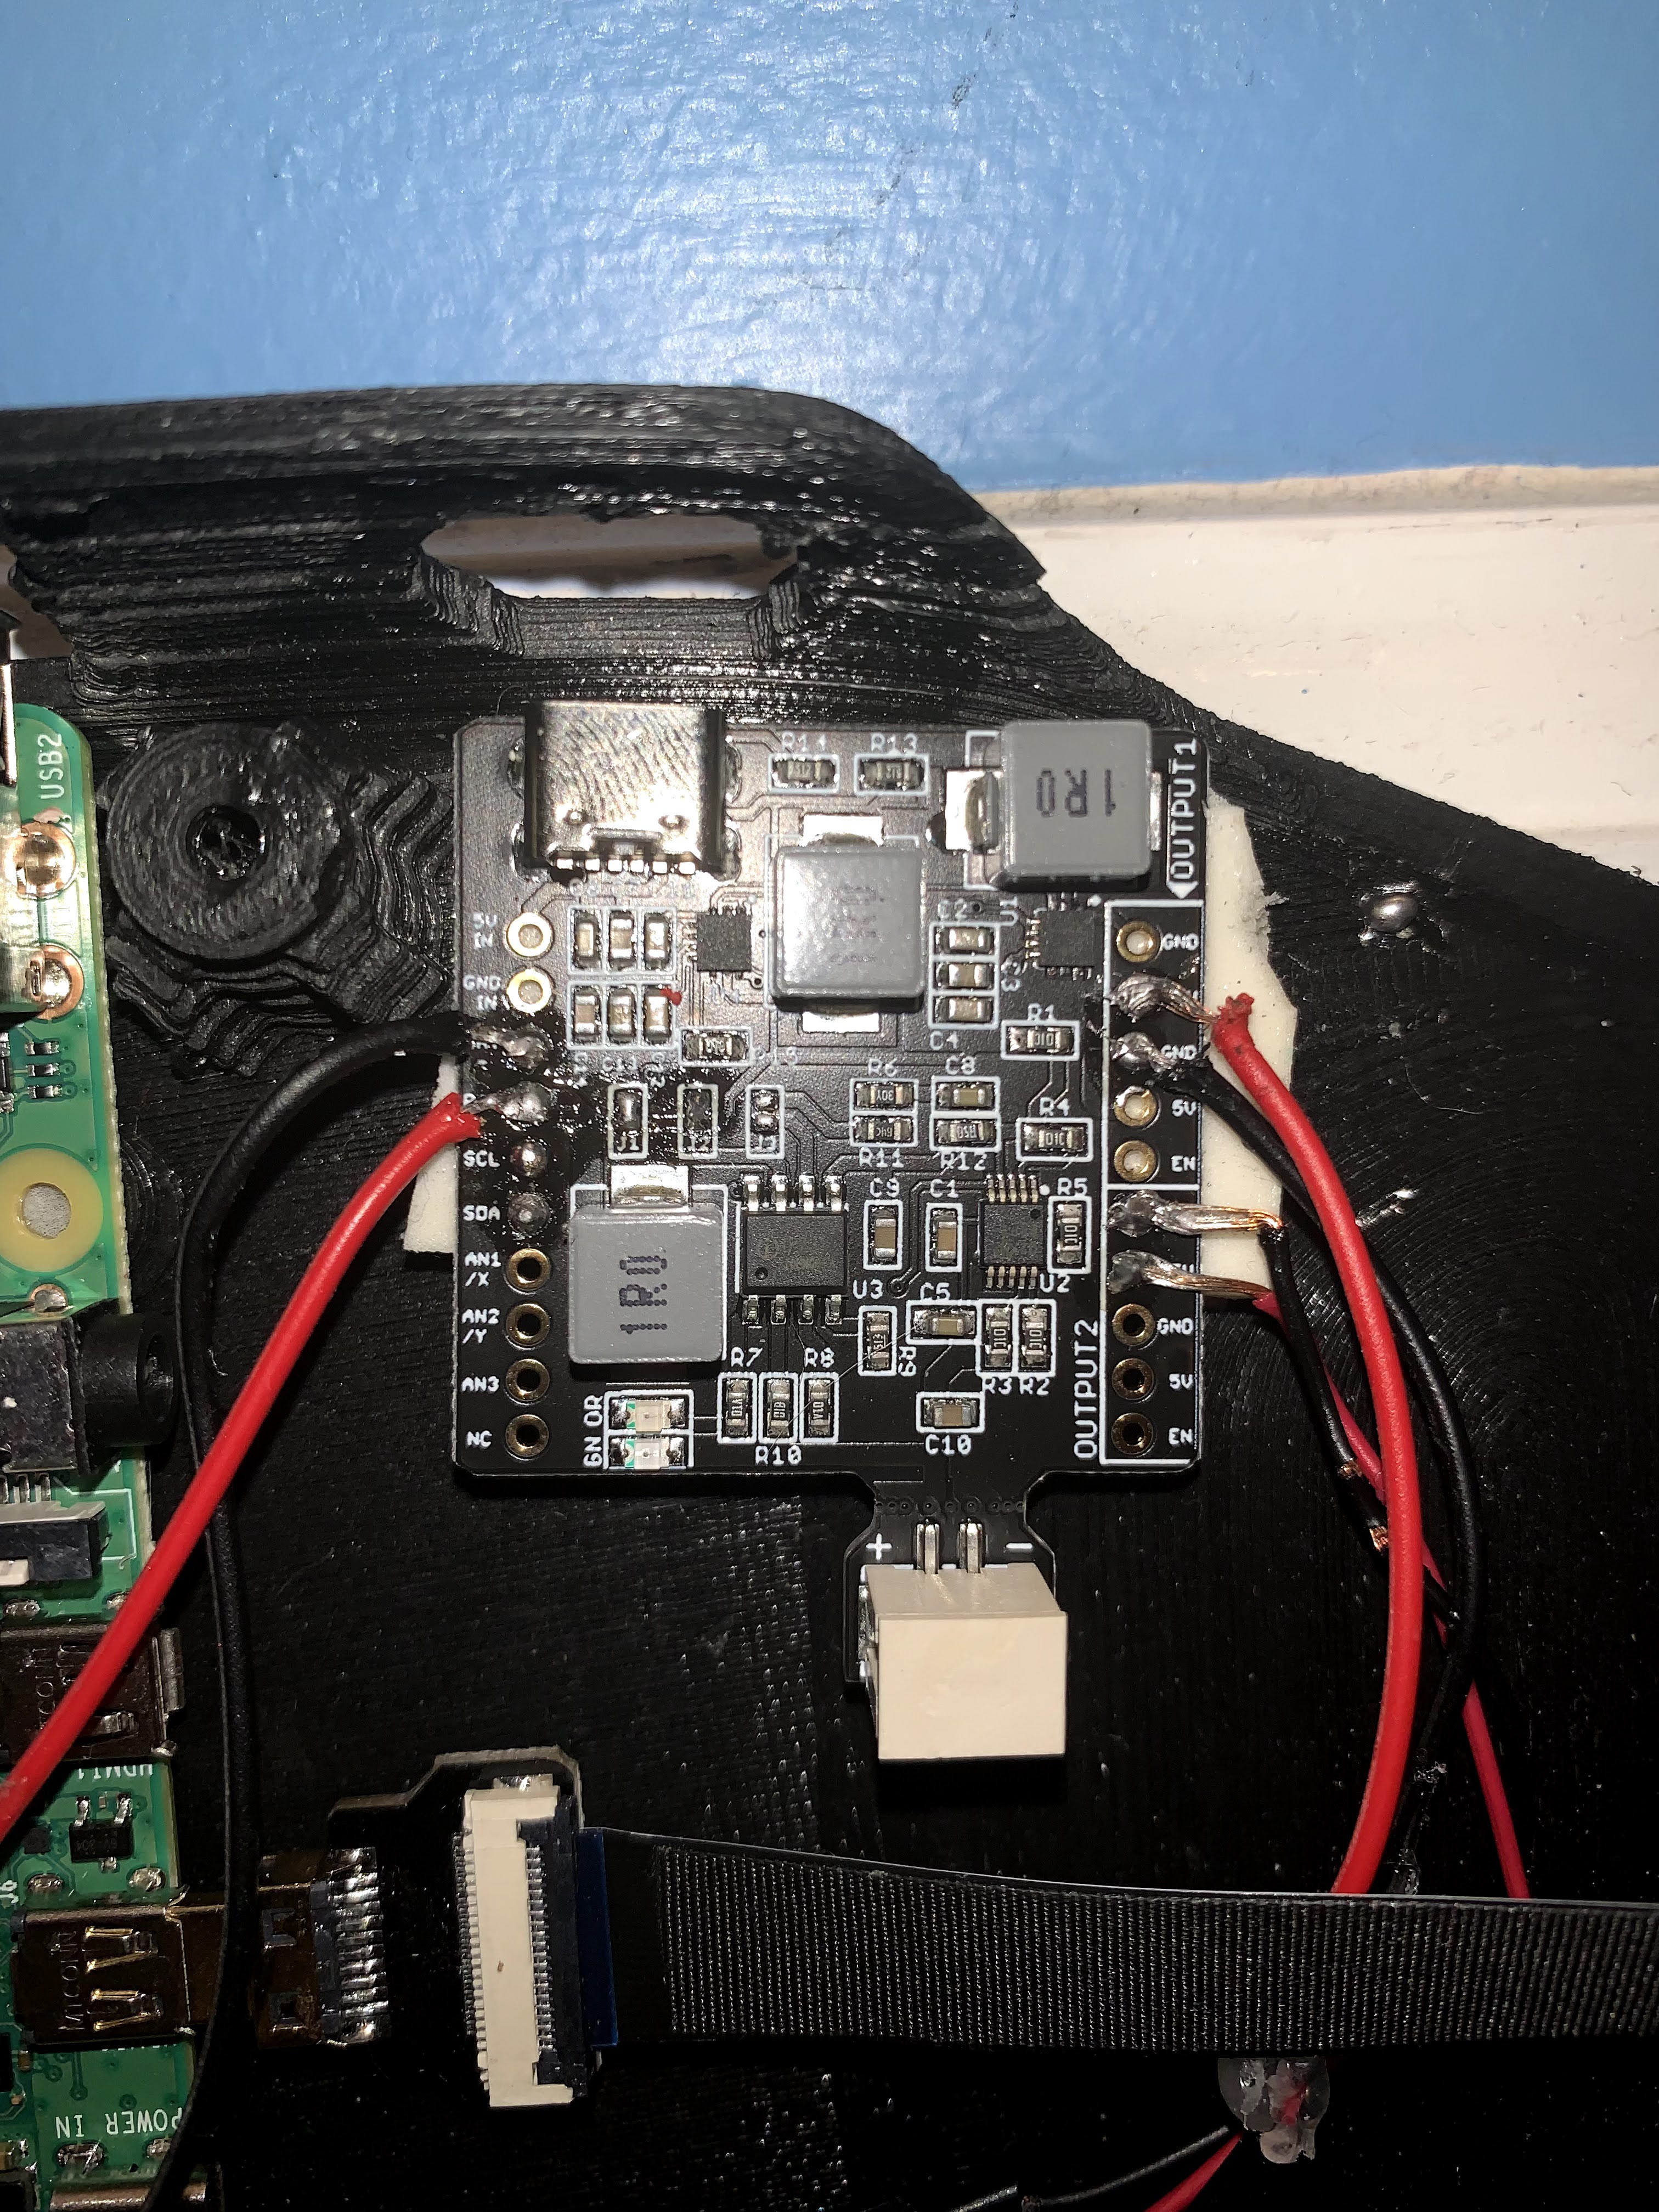
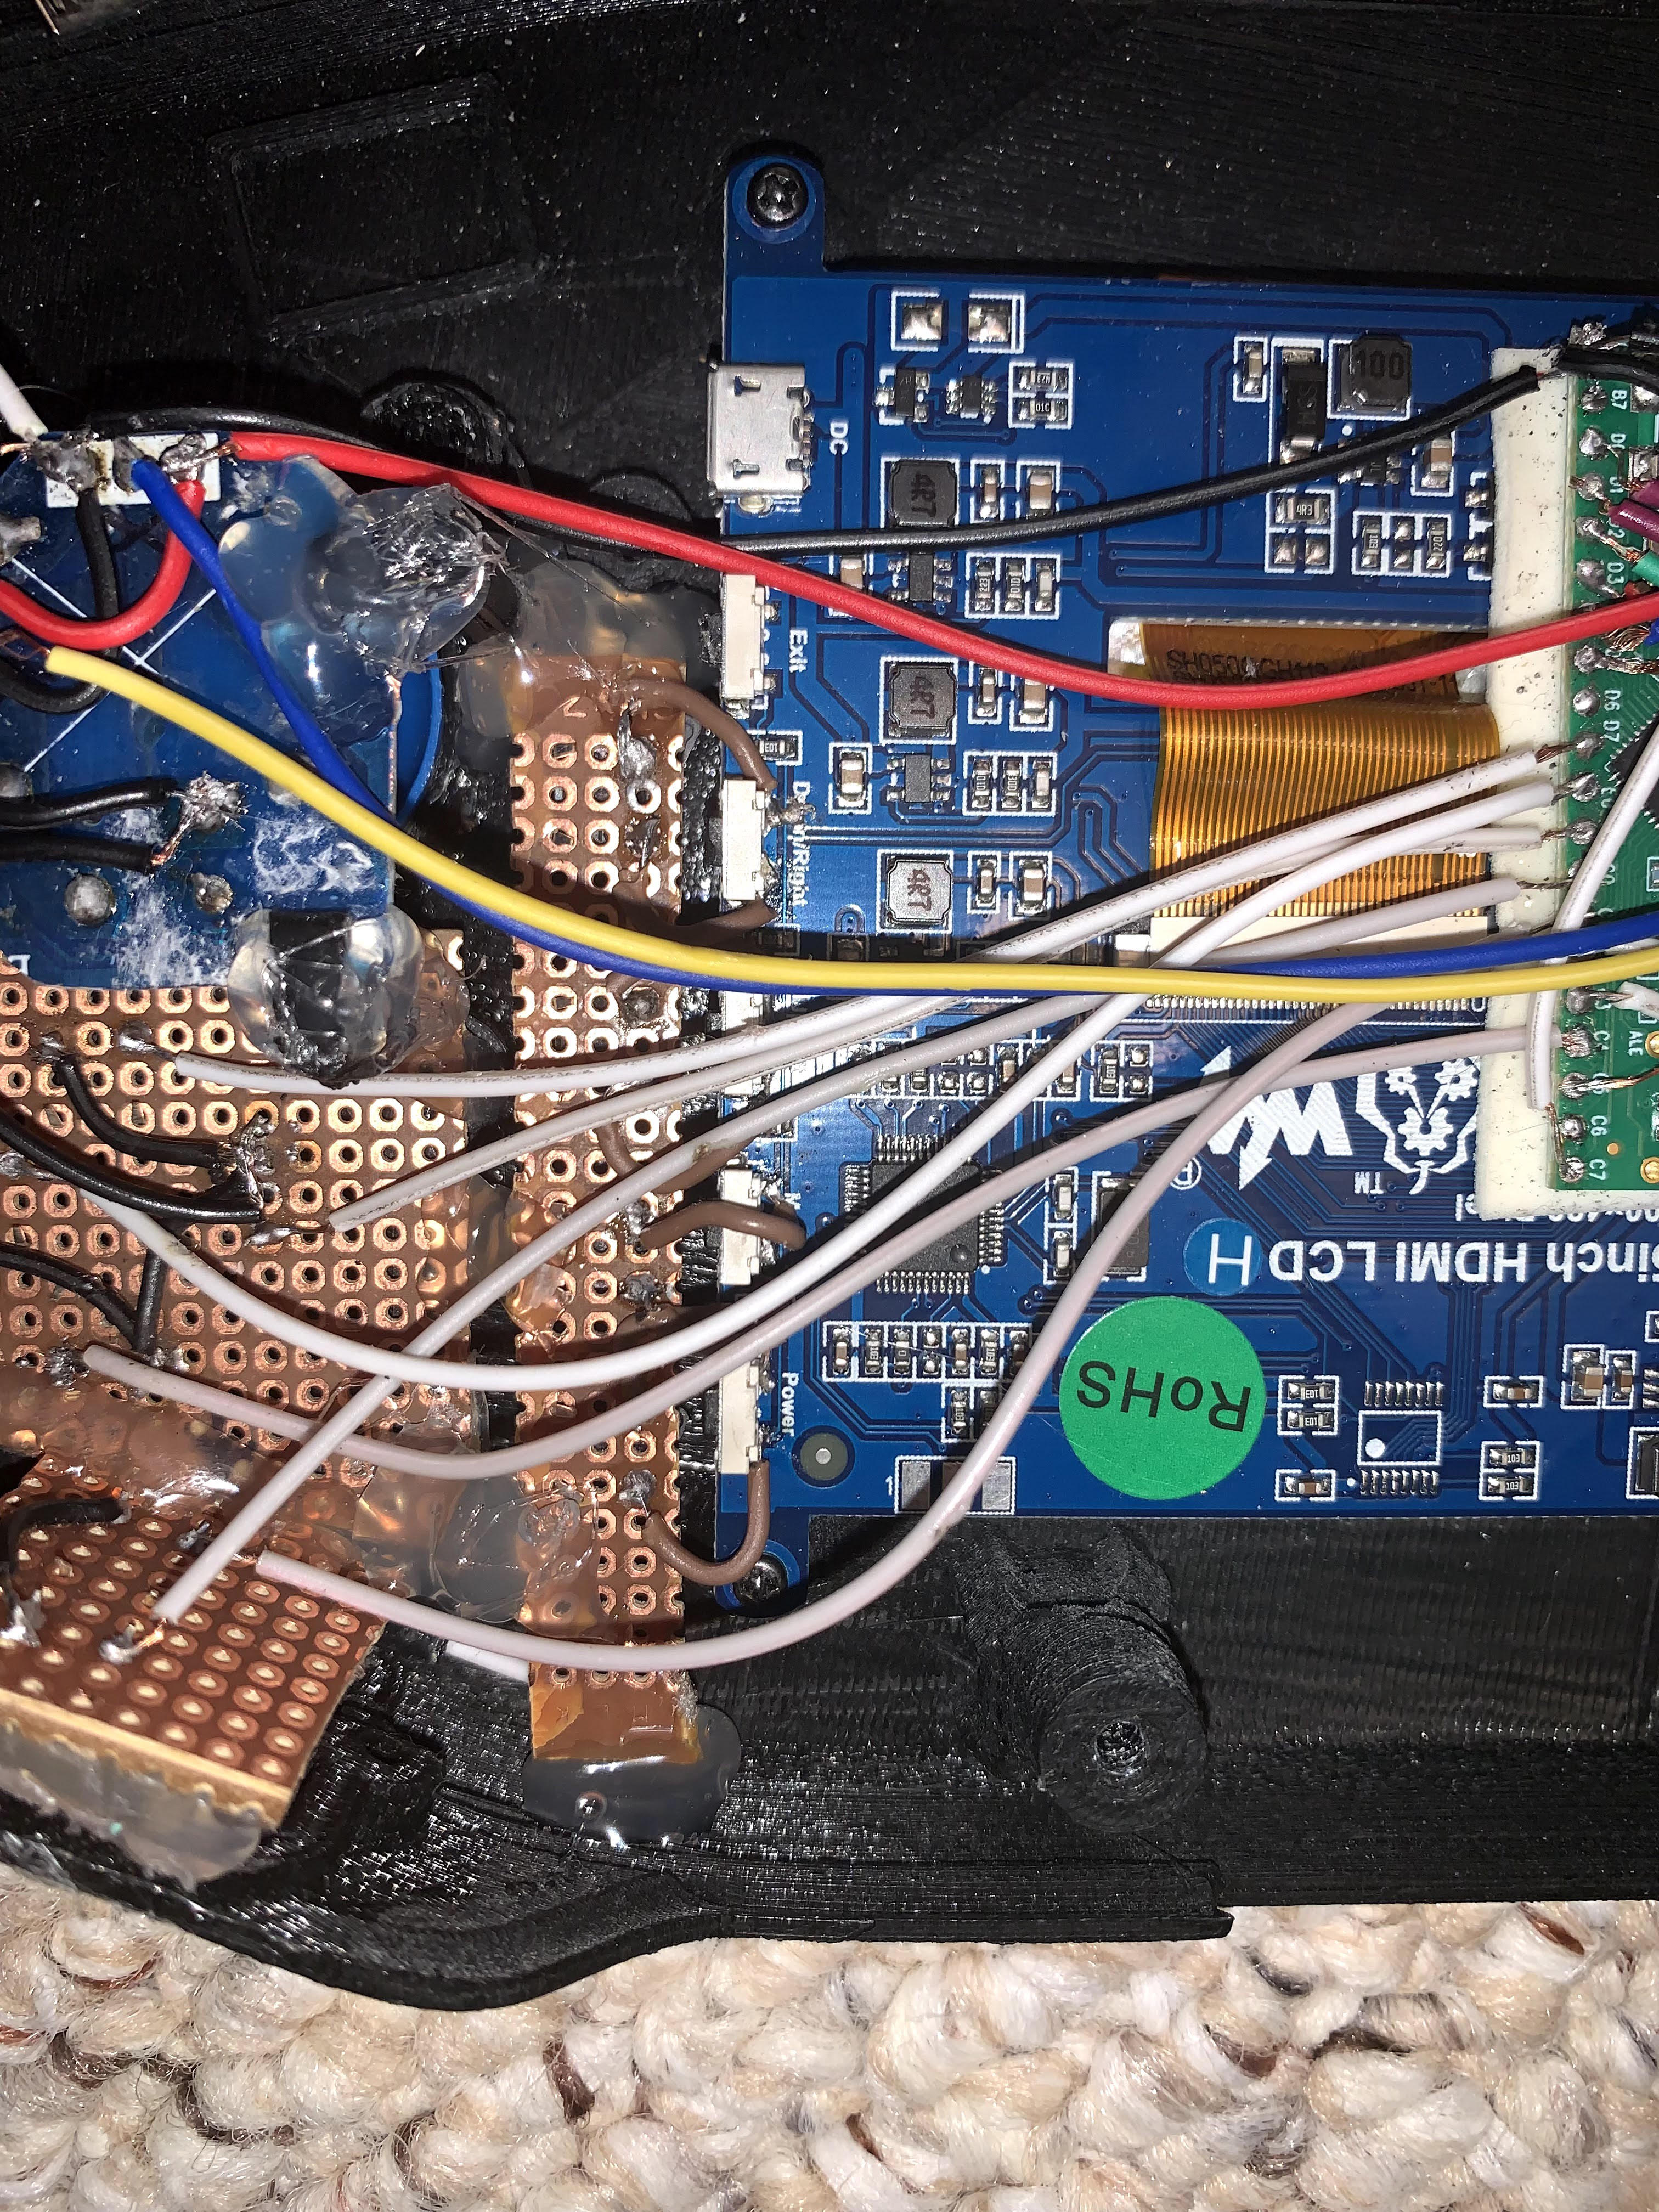
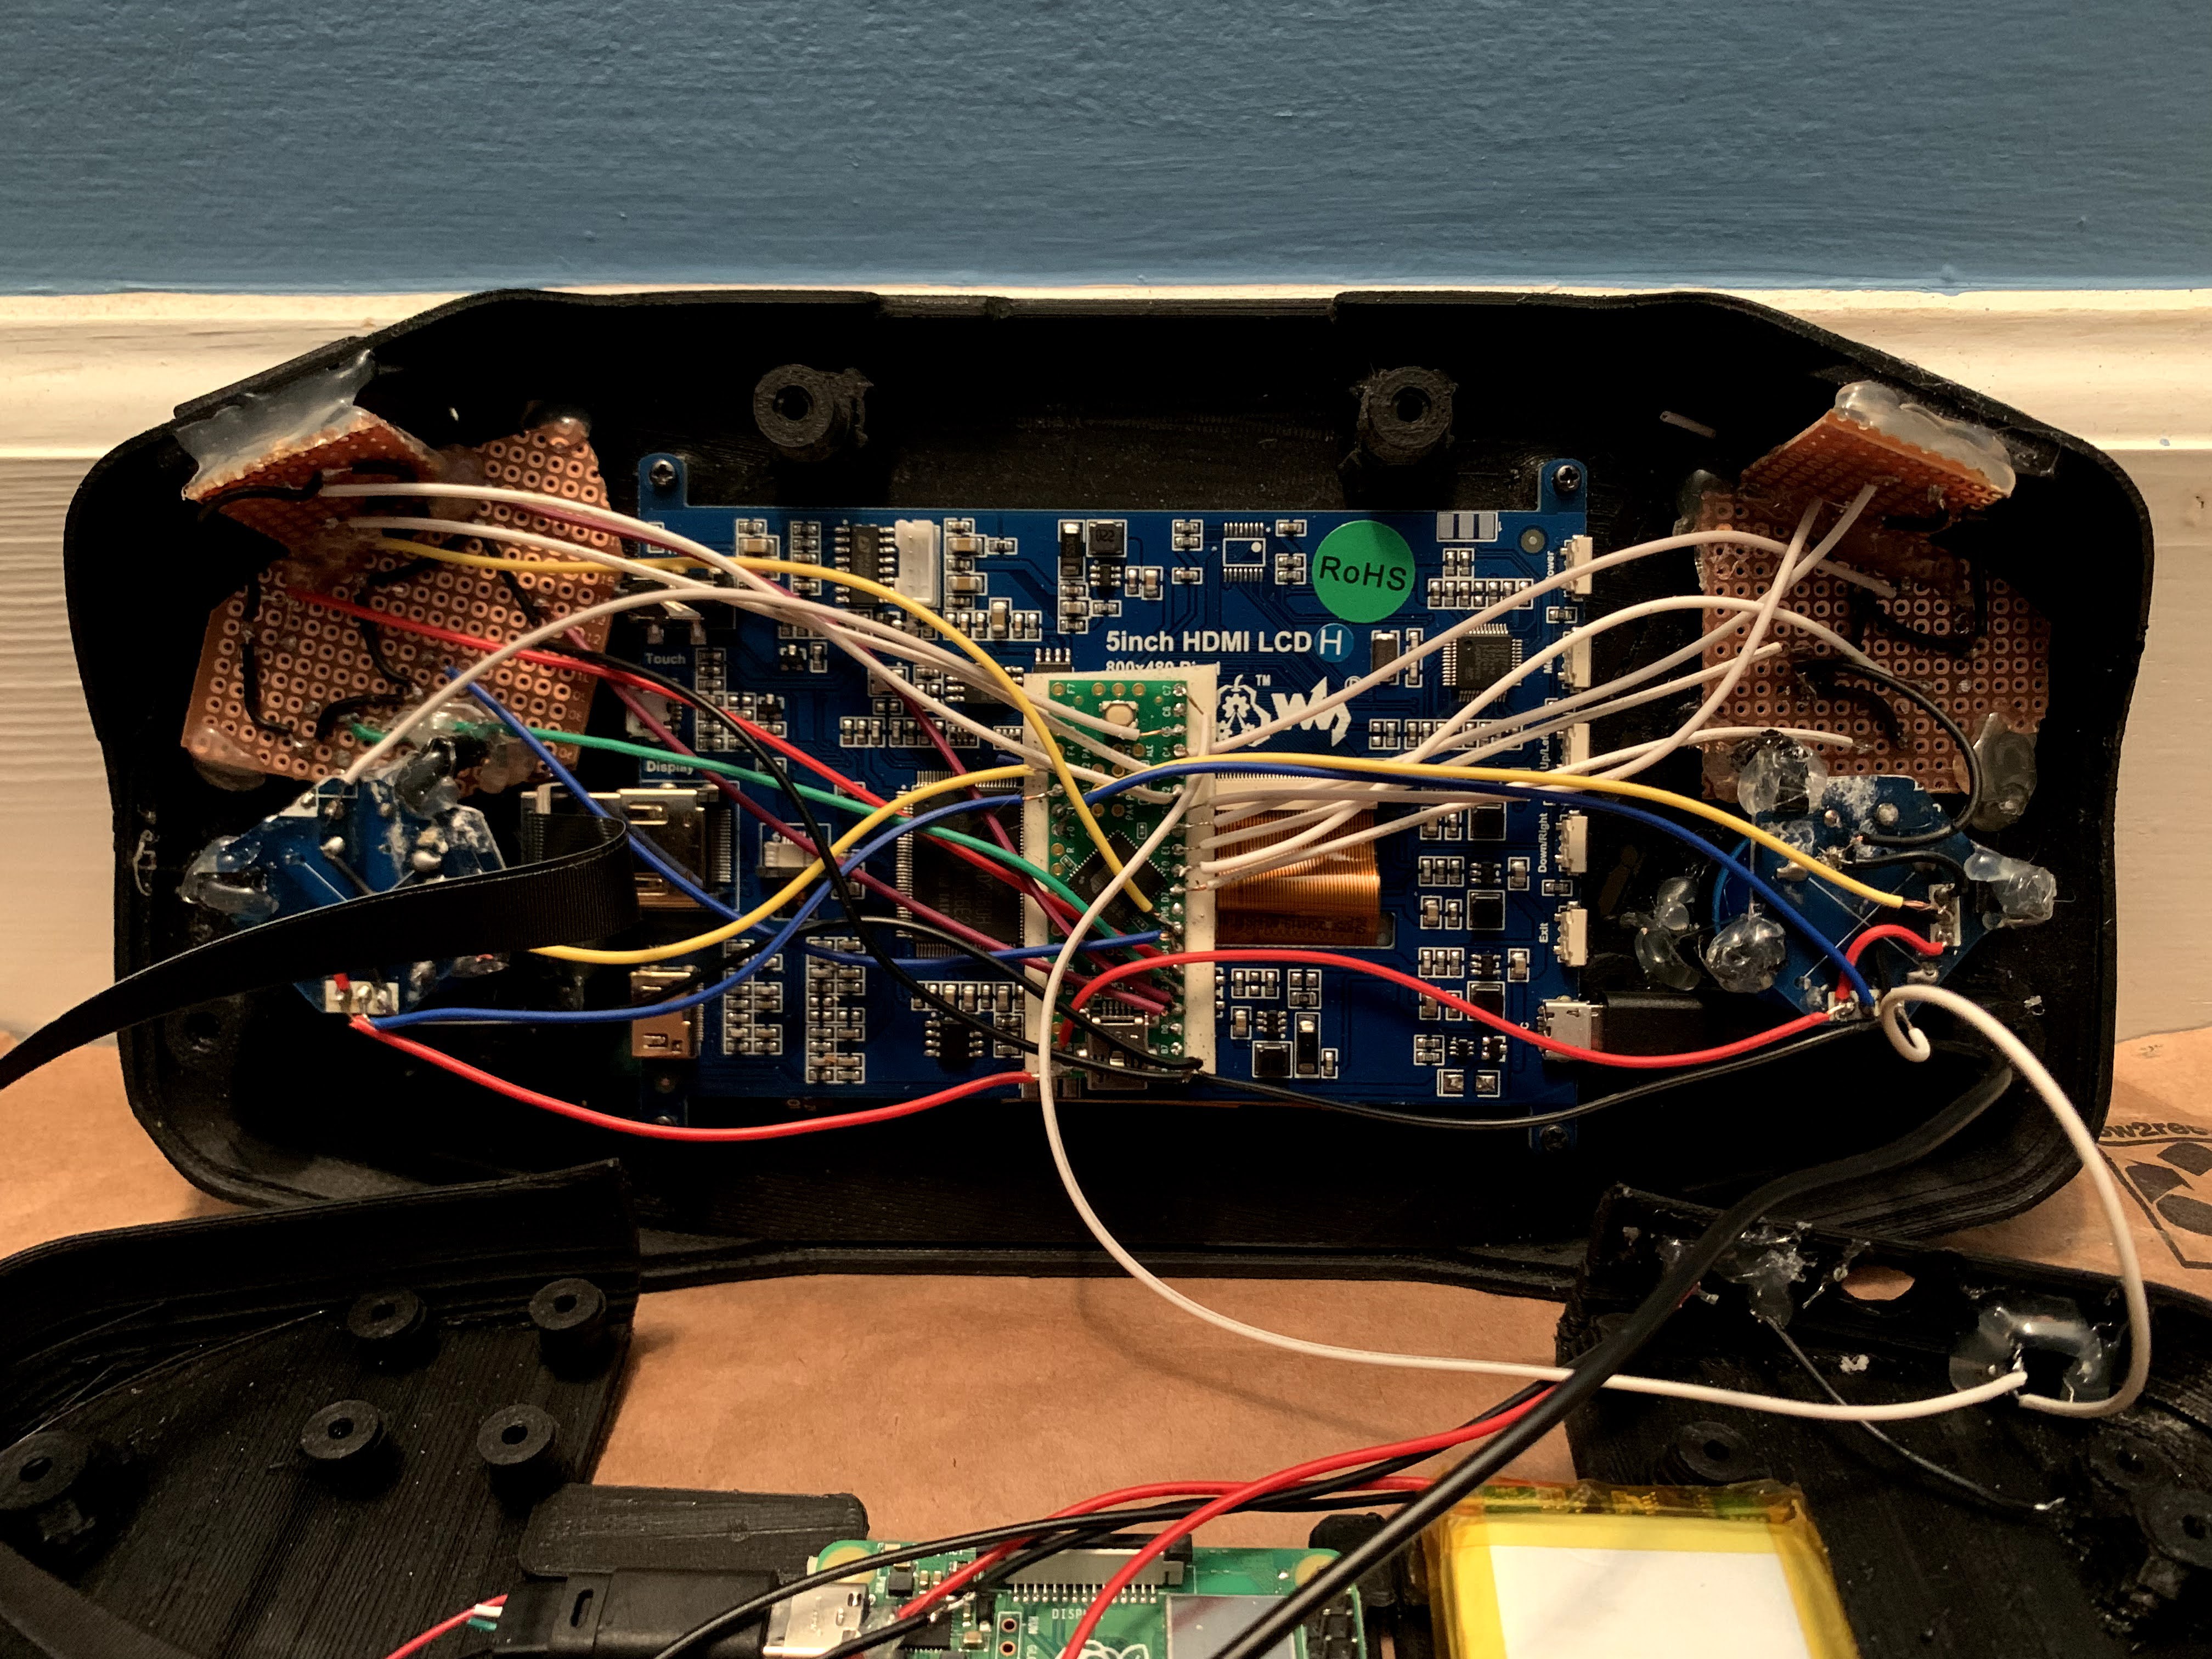
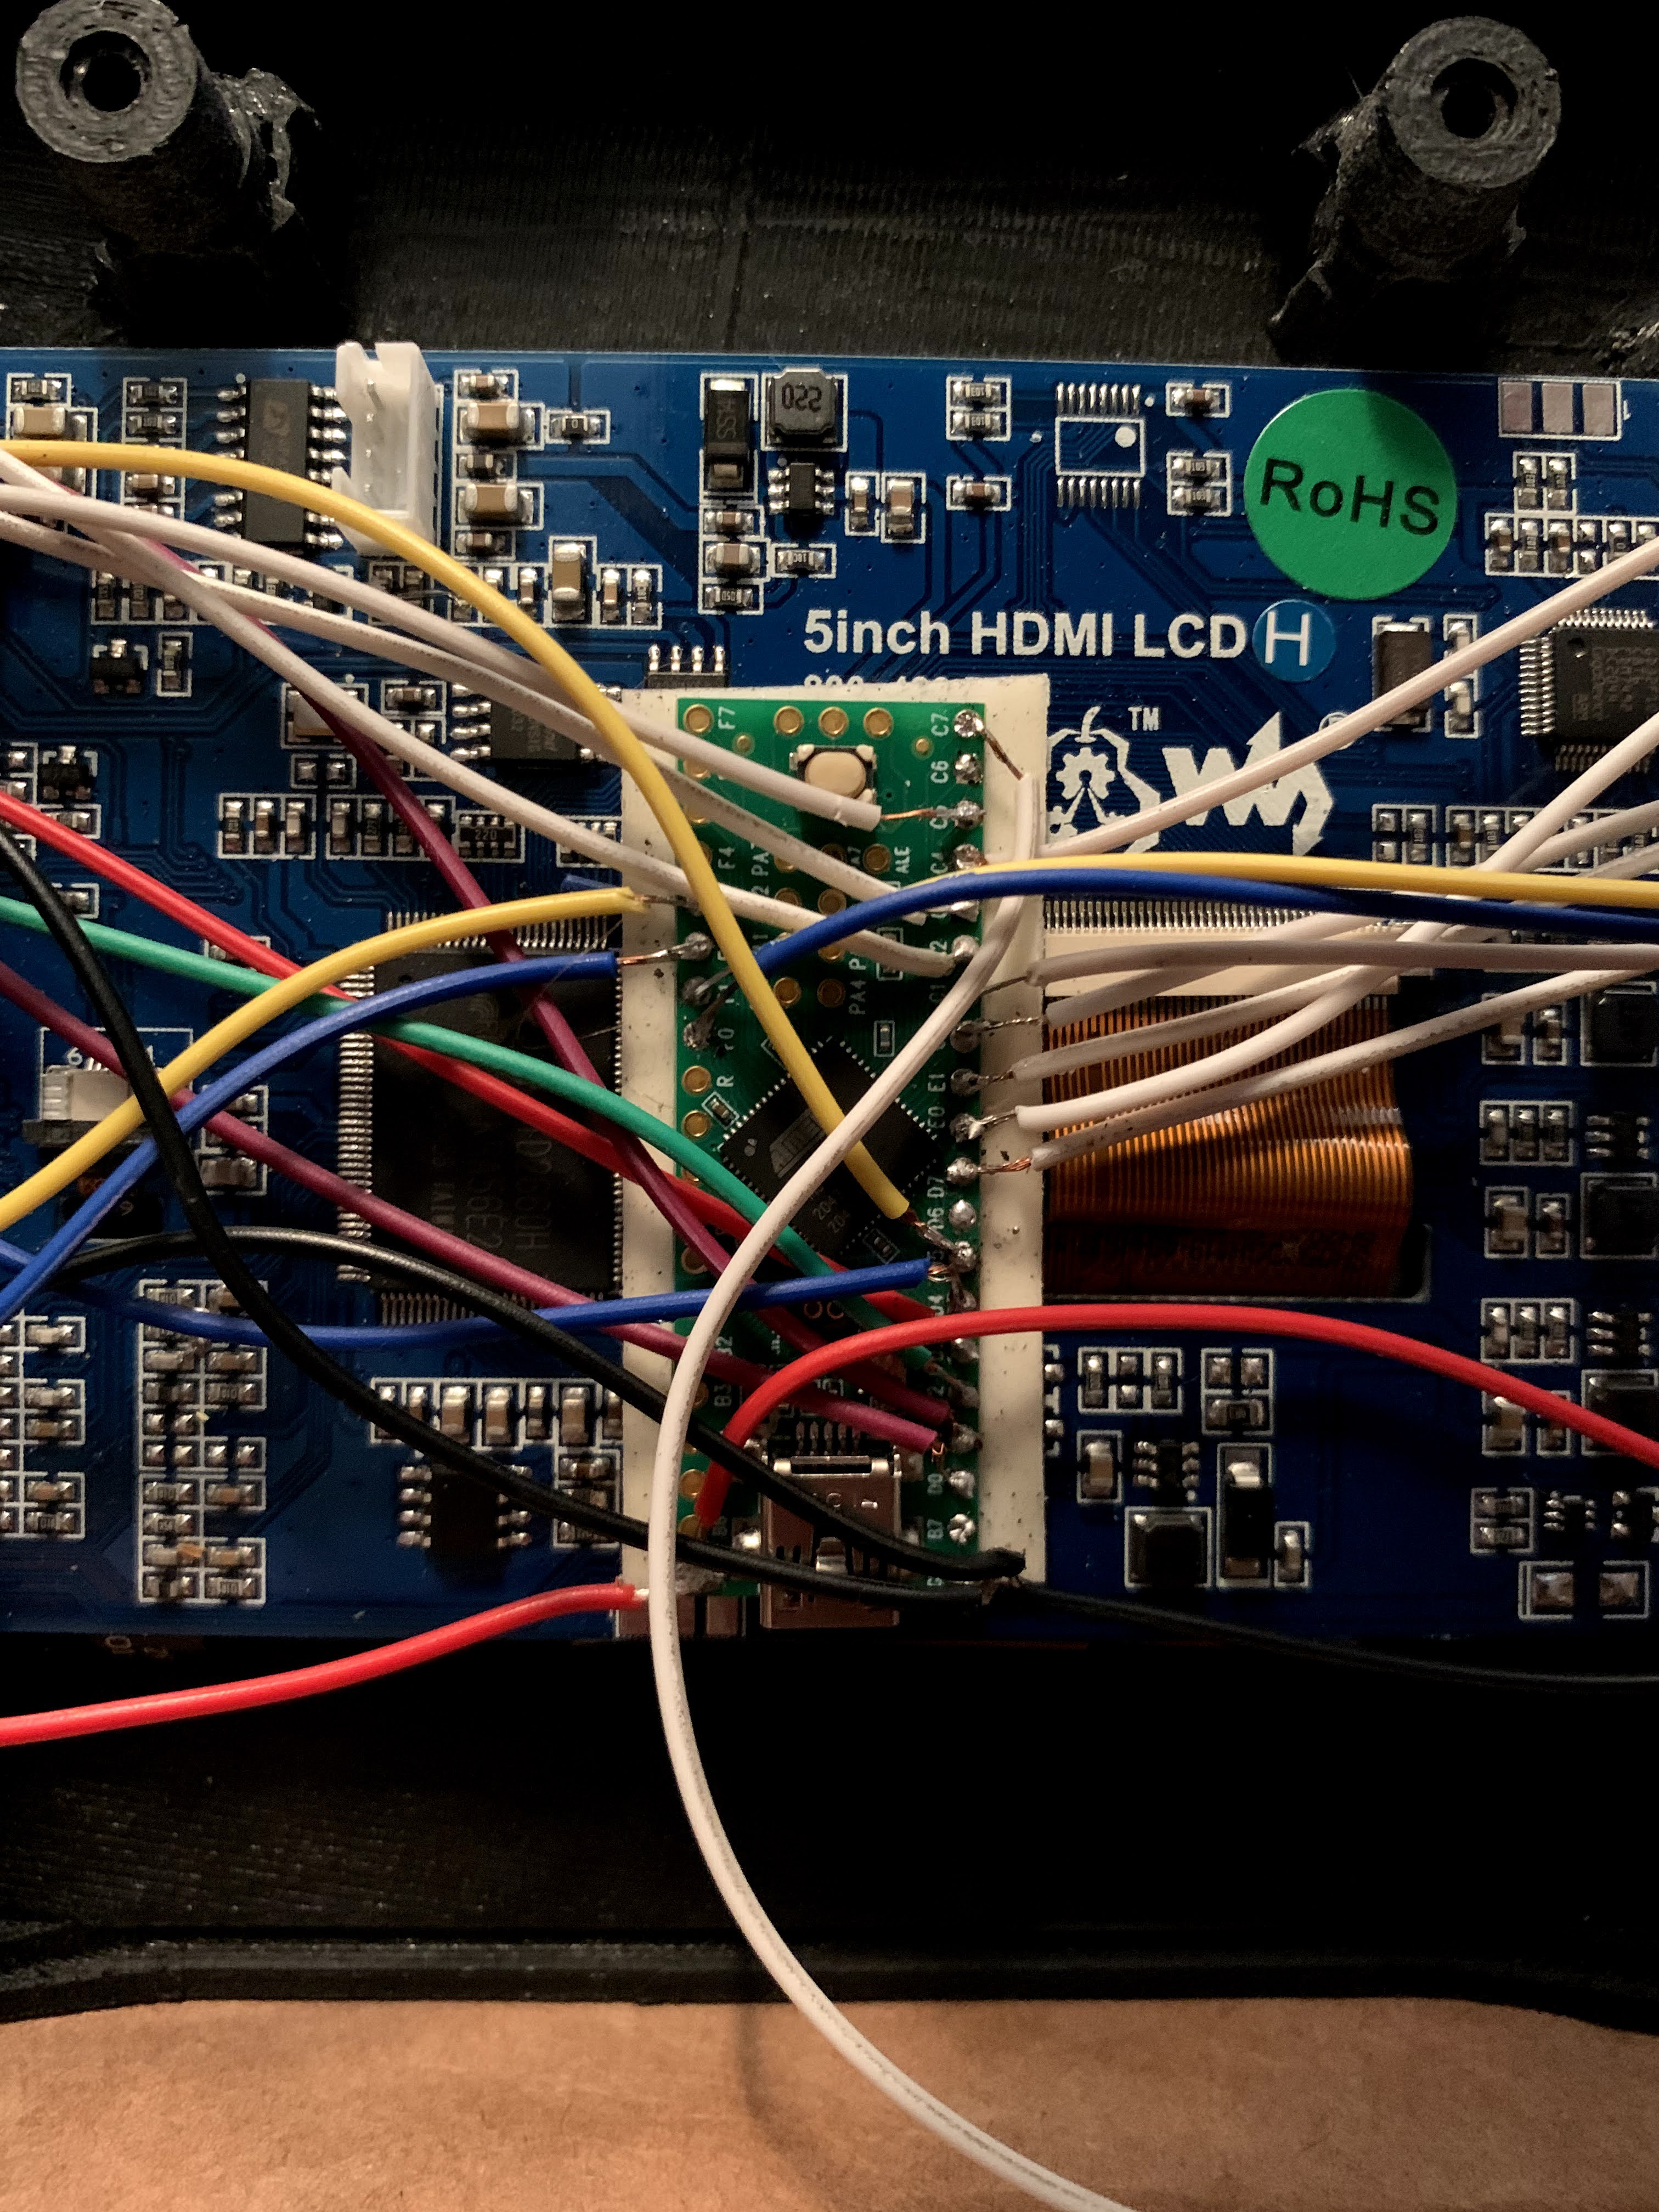
07/15/2021 at 01:50 • 0 commentsHey guys, it's been a while! I promise I've been hard at work, though. Since the last update I have successfully wired up the RetroPSU from HelderTech as well as extended the LCD screen buttons out the the case so they are accessible wihtout having to open up the case. Pictures below.
![]()
![]()
The case only has 4 buttons for the screen on the outside, which is unfortunate because my screen has 5 buttons, so I'll have to figure out something for the last button eventually.
In the meantime, I've also started working on installing speakers. I salvaged a couple from an old laptop and soldered them to the case, but I am still trying to figure out how to get them to work. They aren't recognized by the RetroPie OS right now. After that I'll try and wire up the 3.5mm audio jack so it's accessible while the case is closed. Once that's finished i'll get the Raspberry Pi power button working and then the project will, most likely, come to a close.
-
devLog[6]
06/24/2021 at 15:29 • 0 commentsHey guys, just a quick update today! My Helder RetroPSU shipped and will be arriving on Saturday, which is exciting! Also, I have decided not to use the Supreme Ultimate OS as it is a very large file size, and I have decided to go with a new, lighter build of RetroPie that just came out a few days ago. This build of RetroPie has Wii and Gamecube emulators built in so I won't have to use the pixel desktop and download Dolphin emulator to play them! I know not many GC or Wii games work on the Pi, but I really wanted to have native emulators for those systems, so that's why I am switching. I am editing the video about how to install this OS right now, and It should be out in the next few days.
Be on the lookout for more updates! There will be a bunch coming soon. -
devLog[5]
06/15/2021 at 15:13 • 0 commentsHey guys, today I'm back with a lot of updates for you guys! I meant to post this devlog a while ago, but I just got back from vacation and didn't have time to post it beforehand. Anyways, here's what I've been working on since the last devlog:
First off, I finished mounting and gluing the joysticks and buttons to the case! The case was originally designed to use screws and mounting holes to mount everything, but they didn't quite line up correctly, so I just used a ton of hot glue. I would definitely recommend using a better method of securing the buttons and joysticks in place if you are considering making something like this.
![]()
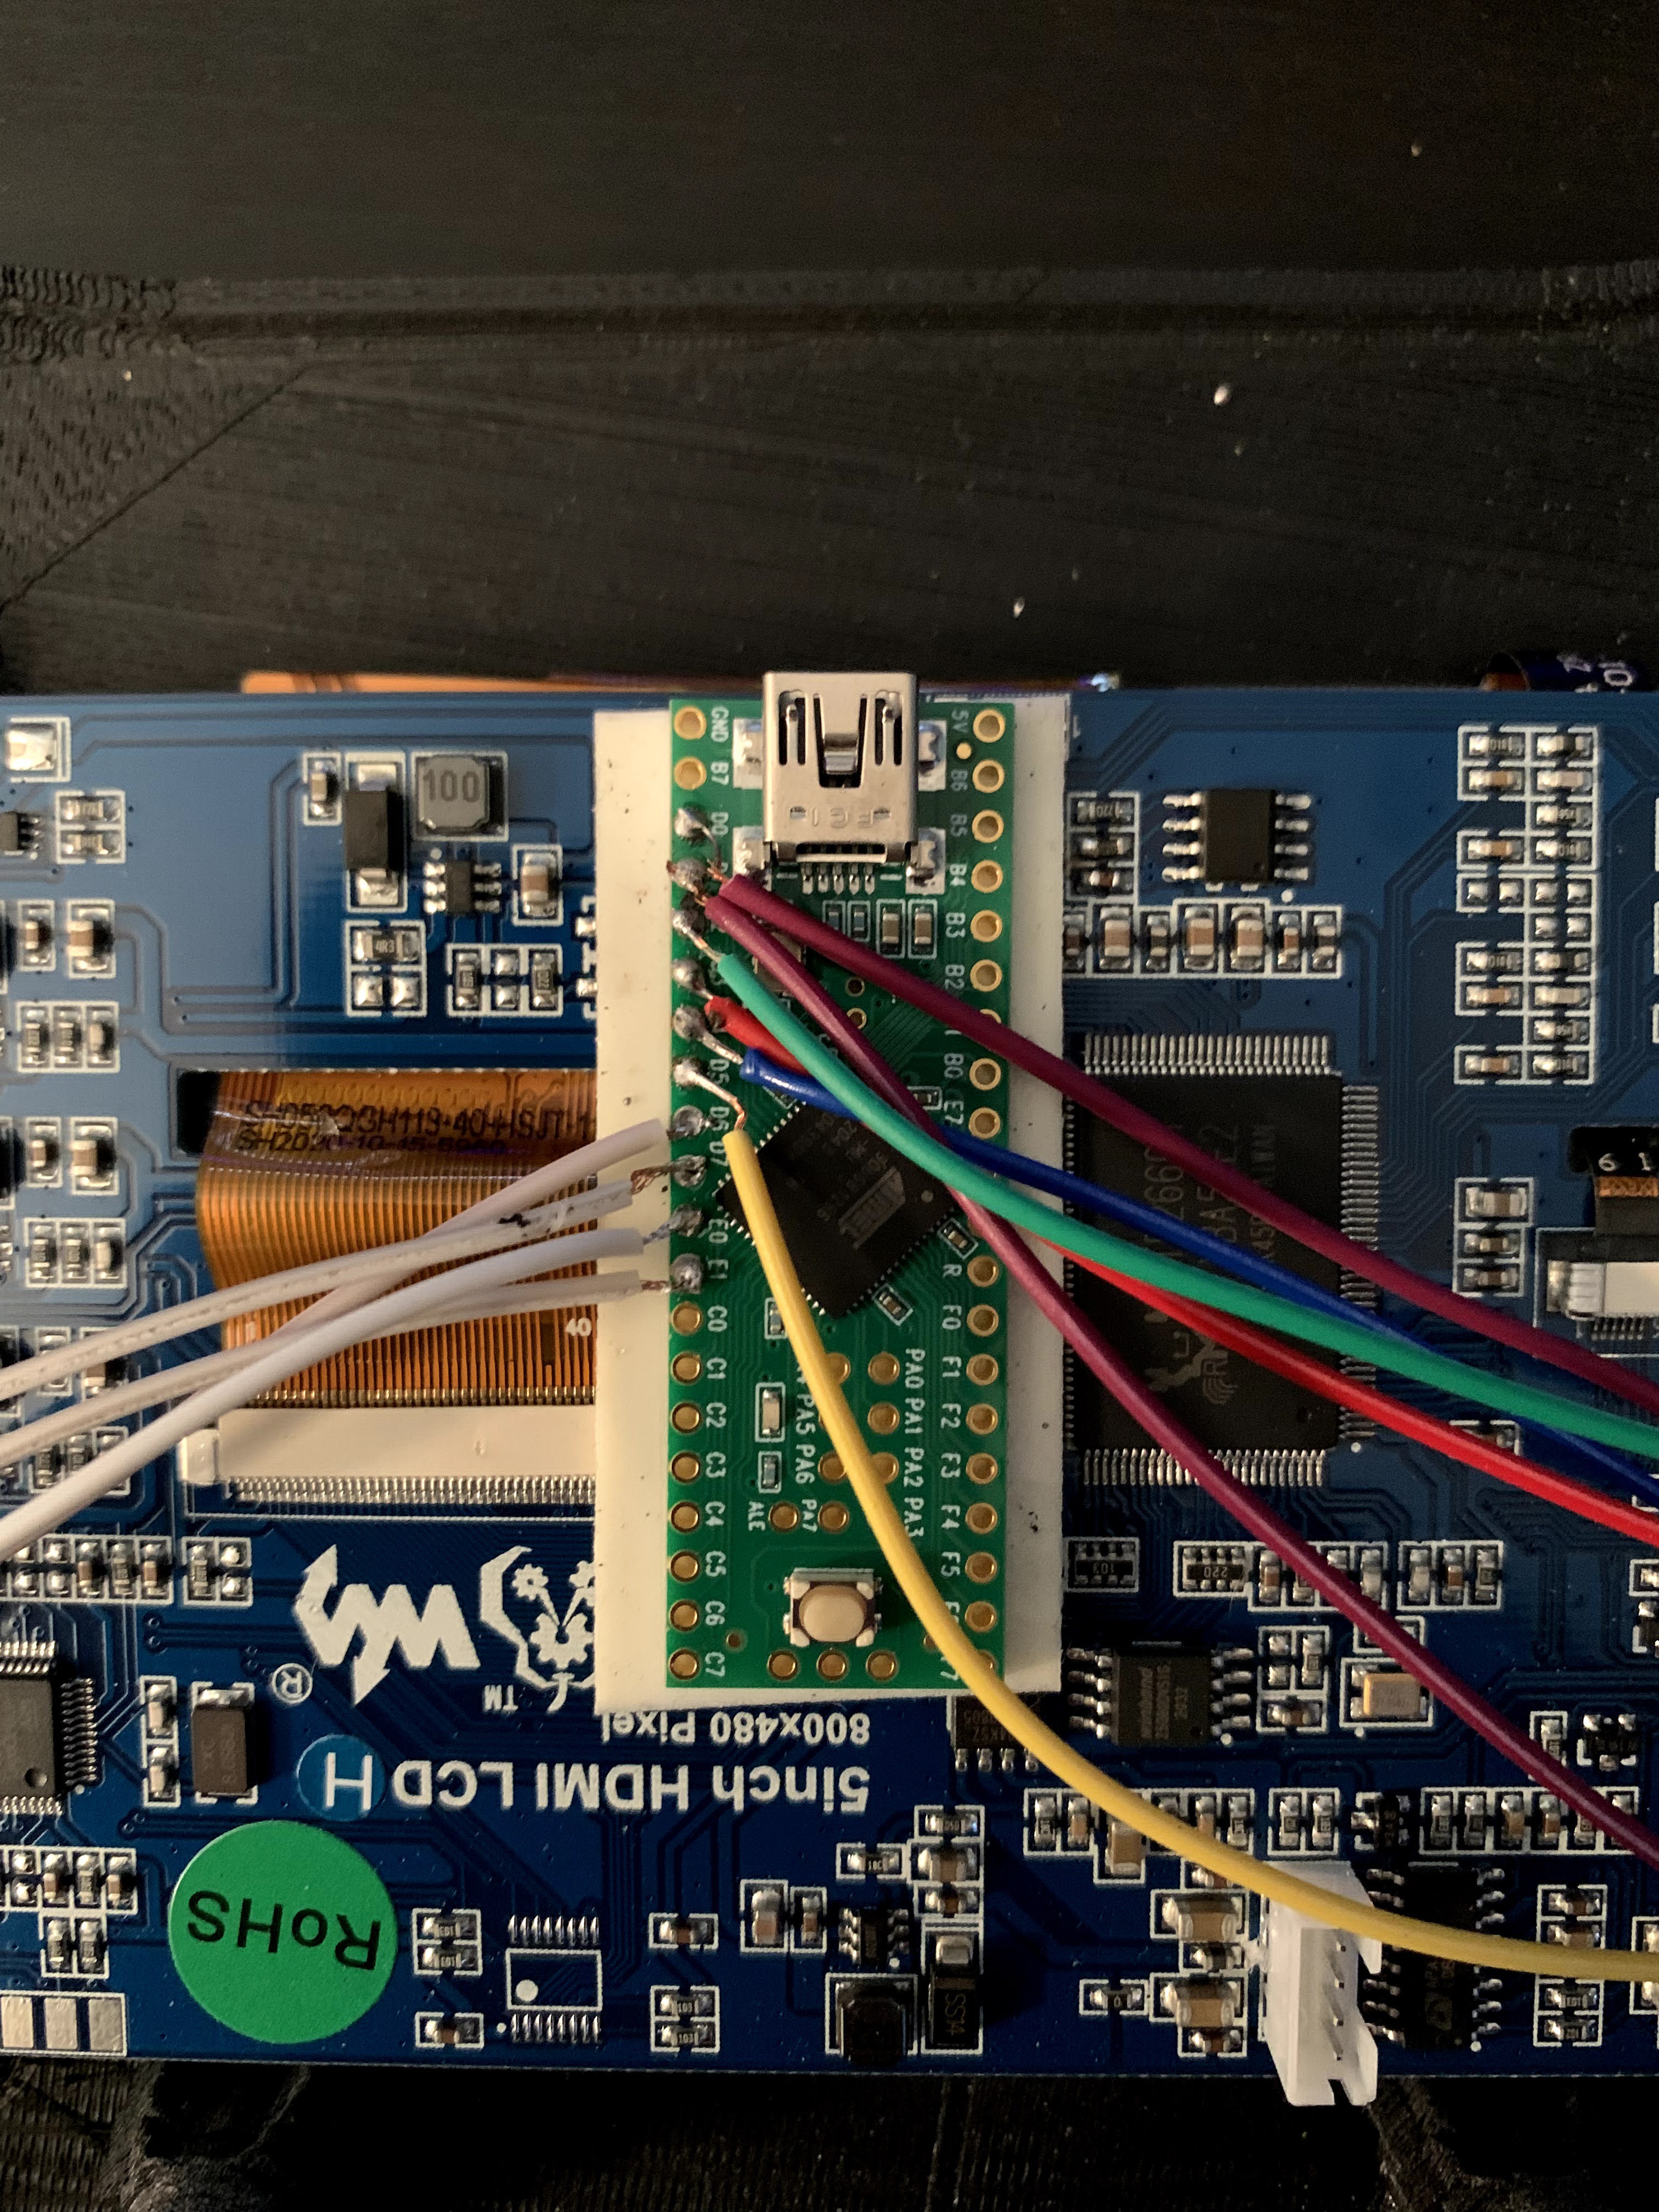
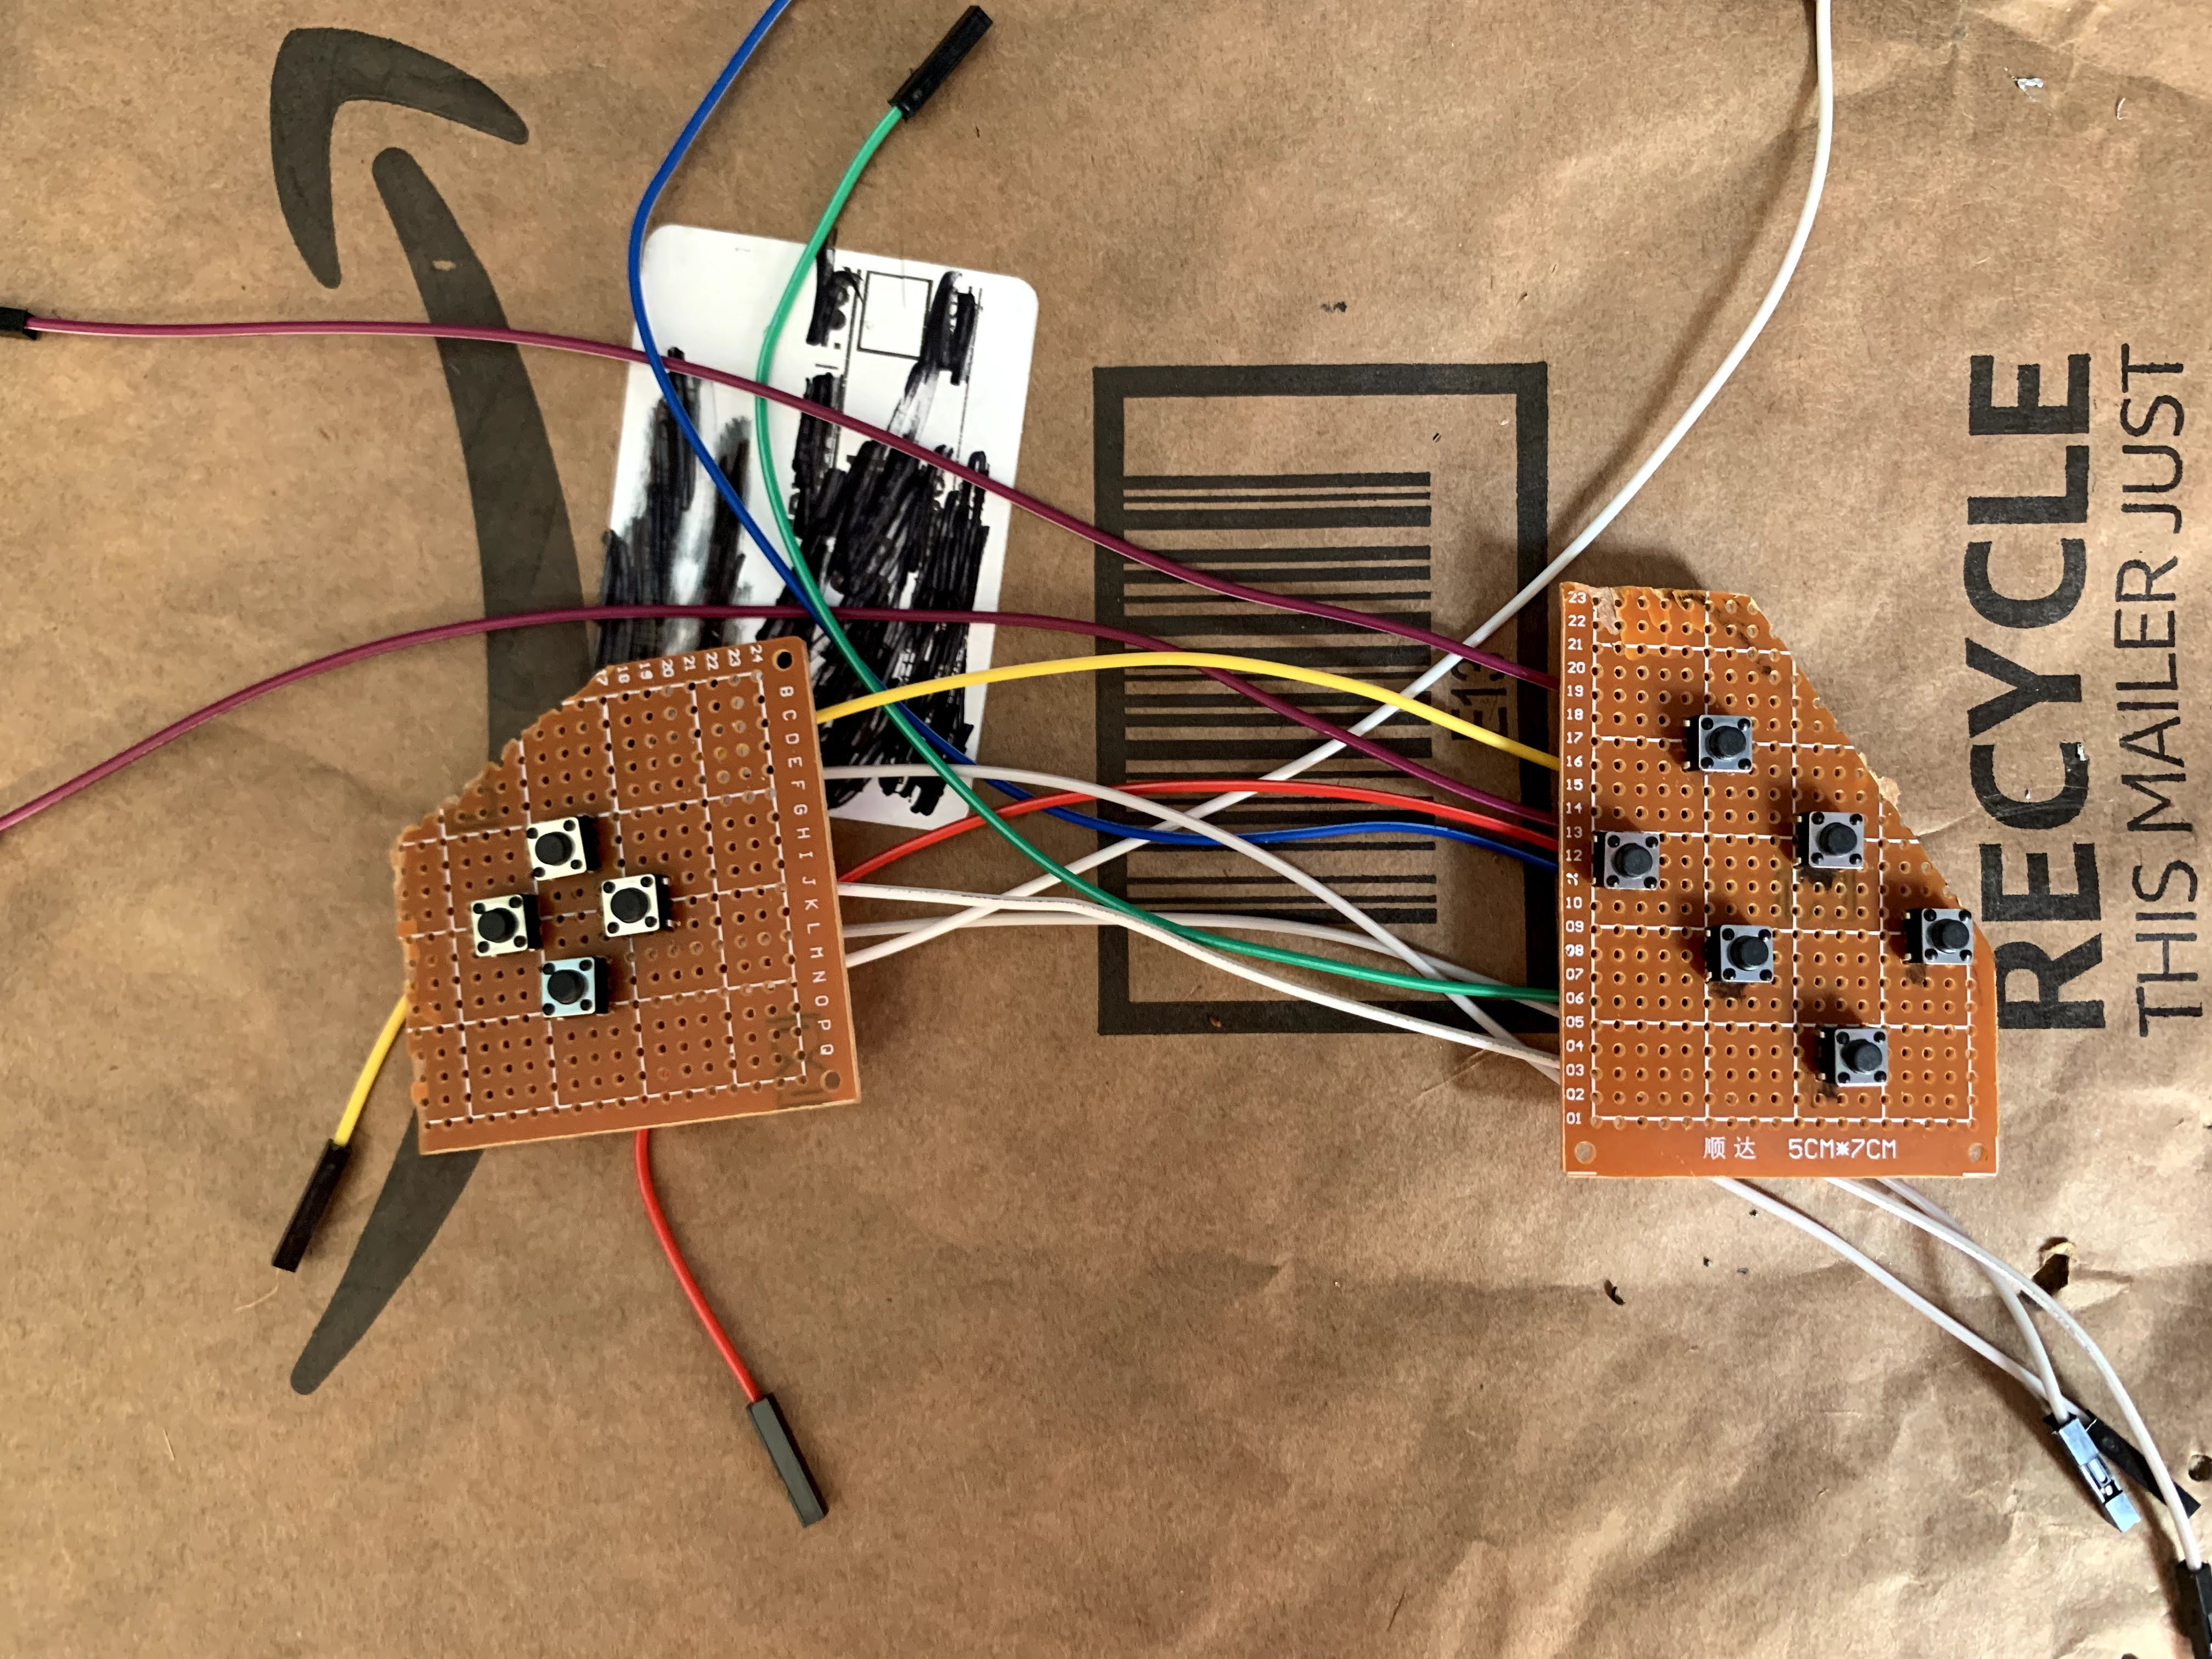
Next, I finished soldering all the buttons to the Teensy, which is pictured below. I also added a button to function as a mode button to toggle between controller mode and keyboard mode. This is super handy because it will allow me to use the controller as a regular gamepad as well as a keyboard and mouse for when I want to navigate around on the desktop. I also wrote the code needed to get the buttons as well as the toggle switch to work, which can be found in the downloads section of this project.
![]()
I also realized that the step-up voltage boost converter I bought in the last devlog is actually a step-down converter, so I ordered a step-up converter so I can finish this project. You can find the converter on amazon here. To be honest, i'm a little worried that this converter won't be powerful enough to power both the screen and the raspberry pi, since the comments say that you shouldn't use more than 2amps or the board will fail, but we'll see. My backup plan is to buy the RetroPSU from heldergametech.com which I know will work. The only downside with that is that it takes forever to ship here.
Those are all the updates I have for now! I can't believe I am so close to finishing this project! It's been a ton of fun to make. All I need to finish it is the voltage booster and then I just have to download games and start playing!
-
devLog[4]
05/29/2021 at 00:26 • 0 commentsHey guys, I'm back with another dev log! I've been working a lot on this project the last few days, and it is so close to being finished! Here's what i've been doing since the last update:
I soldered the D-pad, A, B, X, Y, Start, and Select buttons to the teensy, and I also put the teensy into the case.![]()
I contacted the original developer of the case I'm using, and he added the missing front place file to his thingiverse here.
I realized that the power supply setup I'm using currently can only supply about 3.7 volts to the Raspberry Pi and Display, which is not enough to power the devices. Because of this, i'm going to need a voltage step-up converter, which can boost the voltage from 3.7v to 5v. That component should arrive soon, and you can find it here. I'll also add it to the bill of materials list.
I've also been working on getting my joysticks mounted to the case, which has proven more difficult than I first imagined, because the mounts in the case don't work with the joysticks I'm using. Because of that, i've been having to design my own mounts and glue them to the case.![]()
That's all the updates for now! I can't believe I'm actually almost finished making this thing. All I have to do is mount the joysticks and shoulder buttons, program the teensy, and solder the new boost converter and then this thing will be done! -
devLog[3]
05/24/2021 at 03:03 • 0 commentsJust a quick update, the case that I am using for this project, which can be found here, was missing one of the parts needed to complete it (the front plate). Because of this, I decided to attempt to design my own front plate, which can be found here. I am going to print it out tonight and test it and then update you guys tomorrow on whether it works or not.
-
devLog[2]
05/24/2021 at 01:47 • 0 commentsHello again everyone! It's been a minute. I've been doing a lot of work since my last update, so let my get you up to speed.
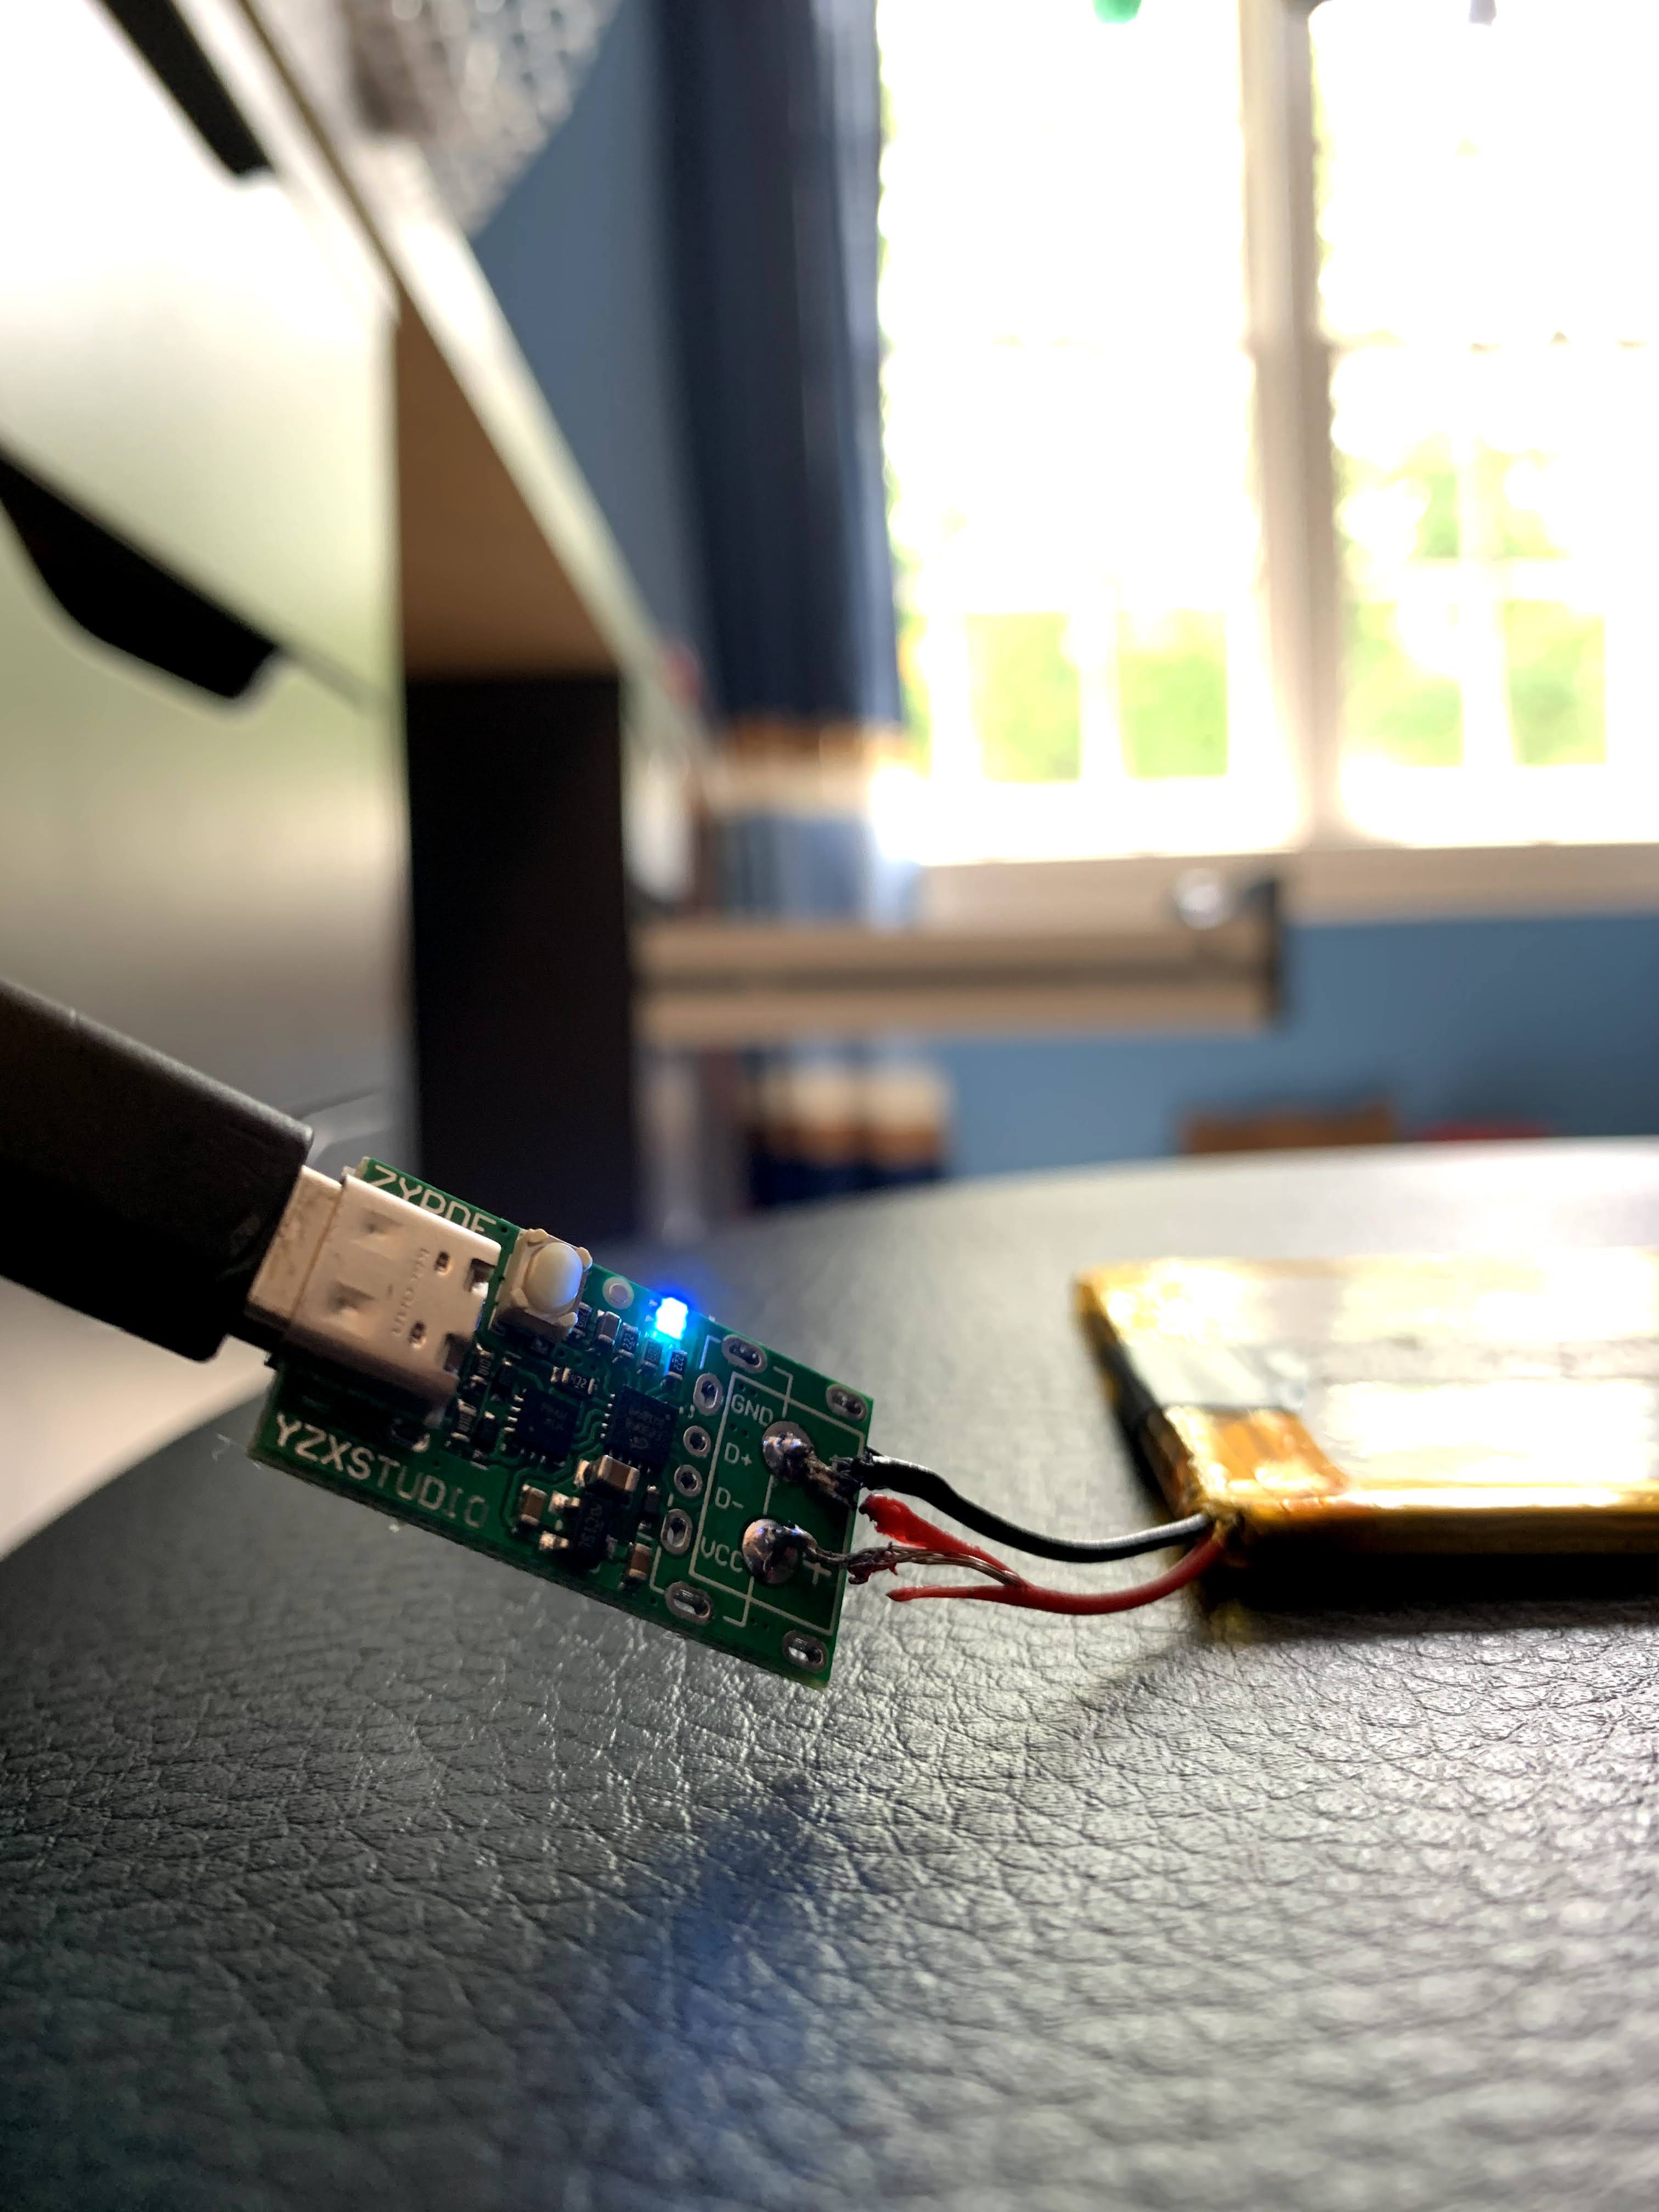
First, I tested my lipo battery charger, and it works great! It doesn't have any protection, so I'll have to be careful about that, but for now it will do fine. I may upgrade to a better battery circuit in the future.![]()
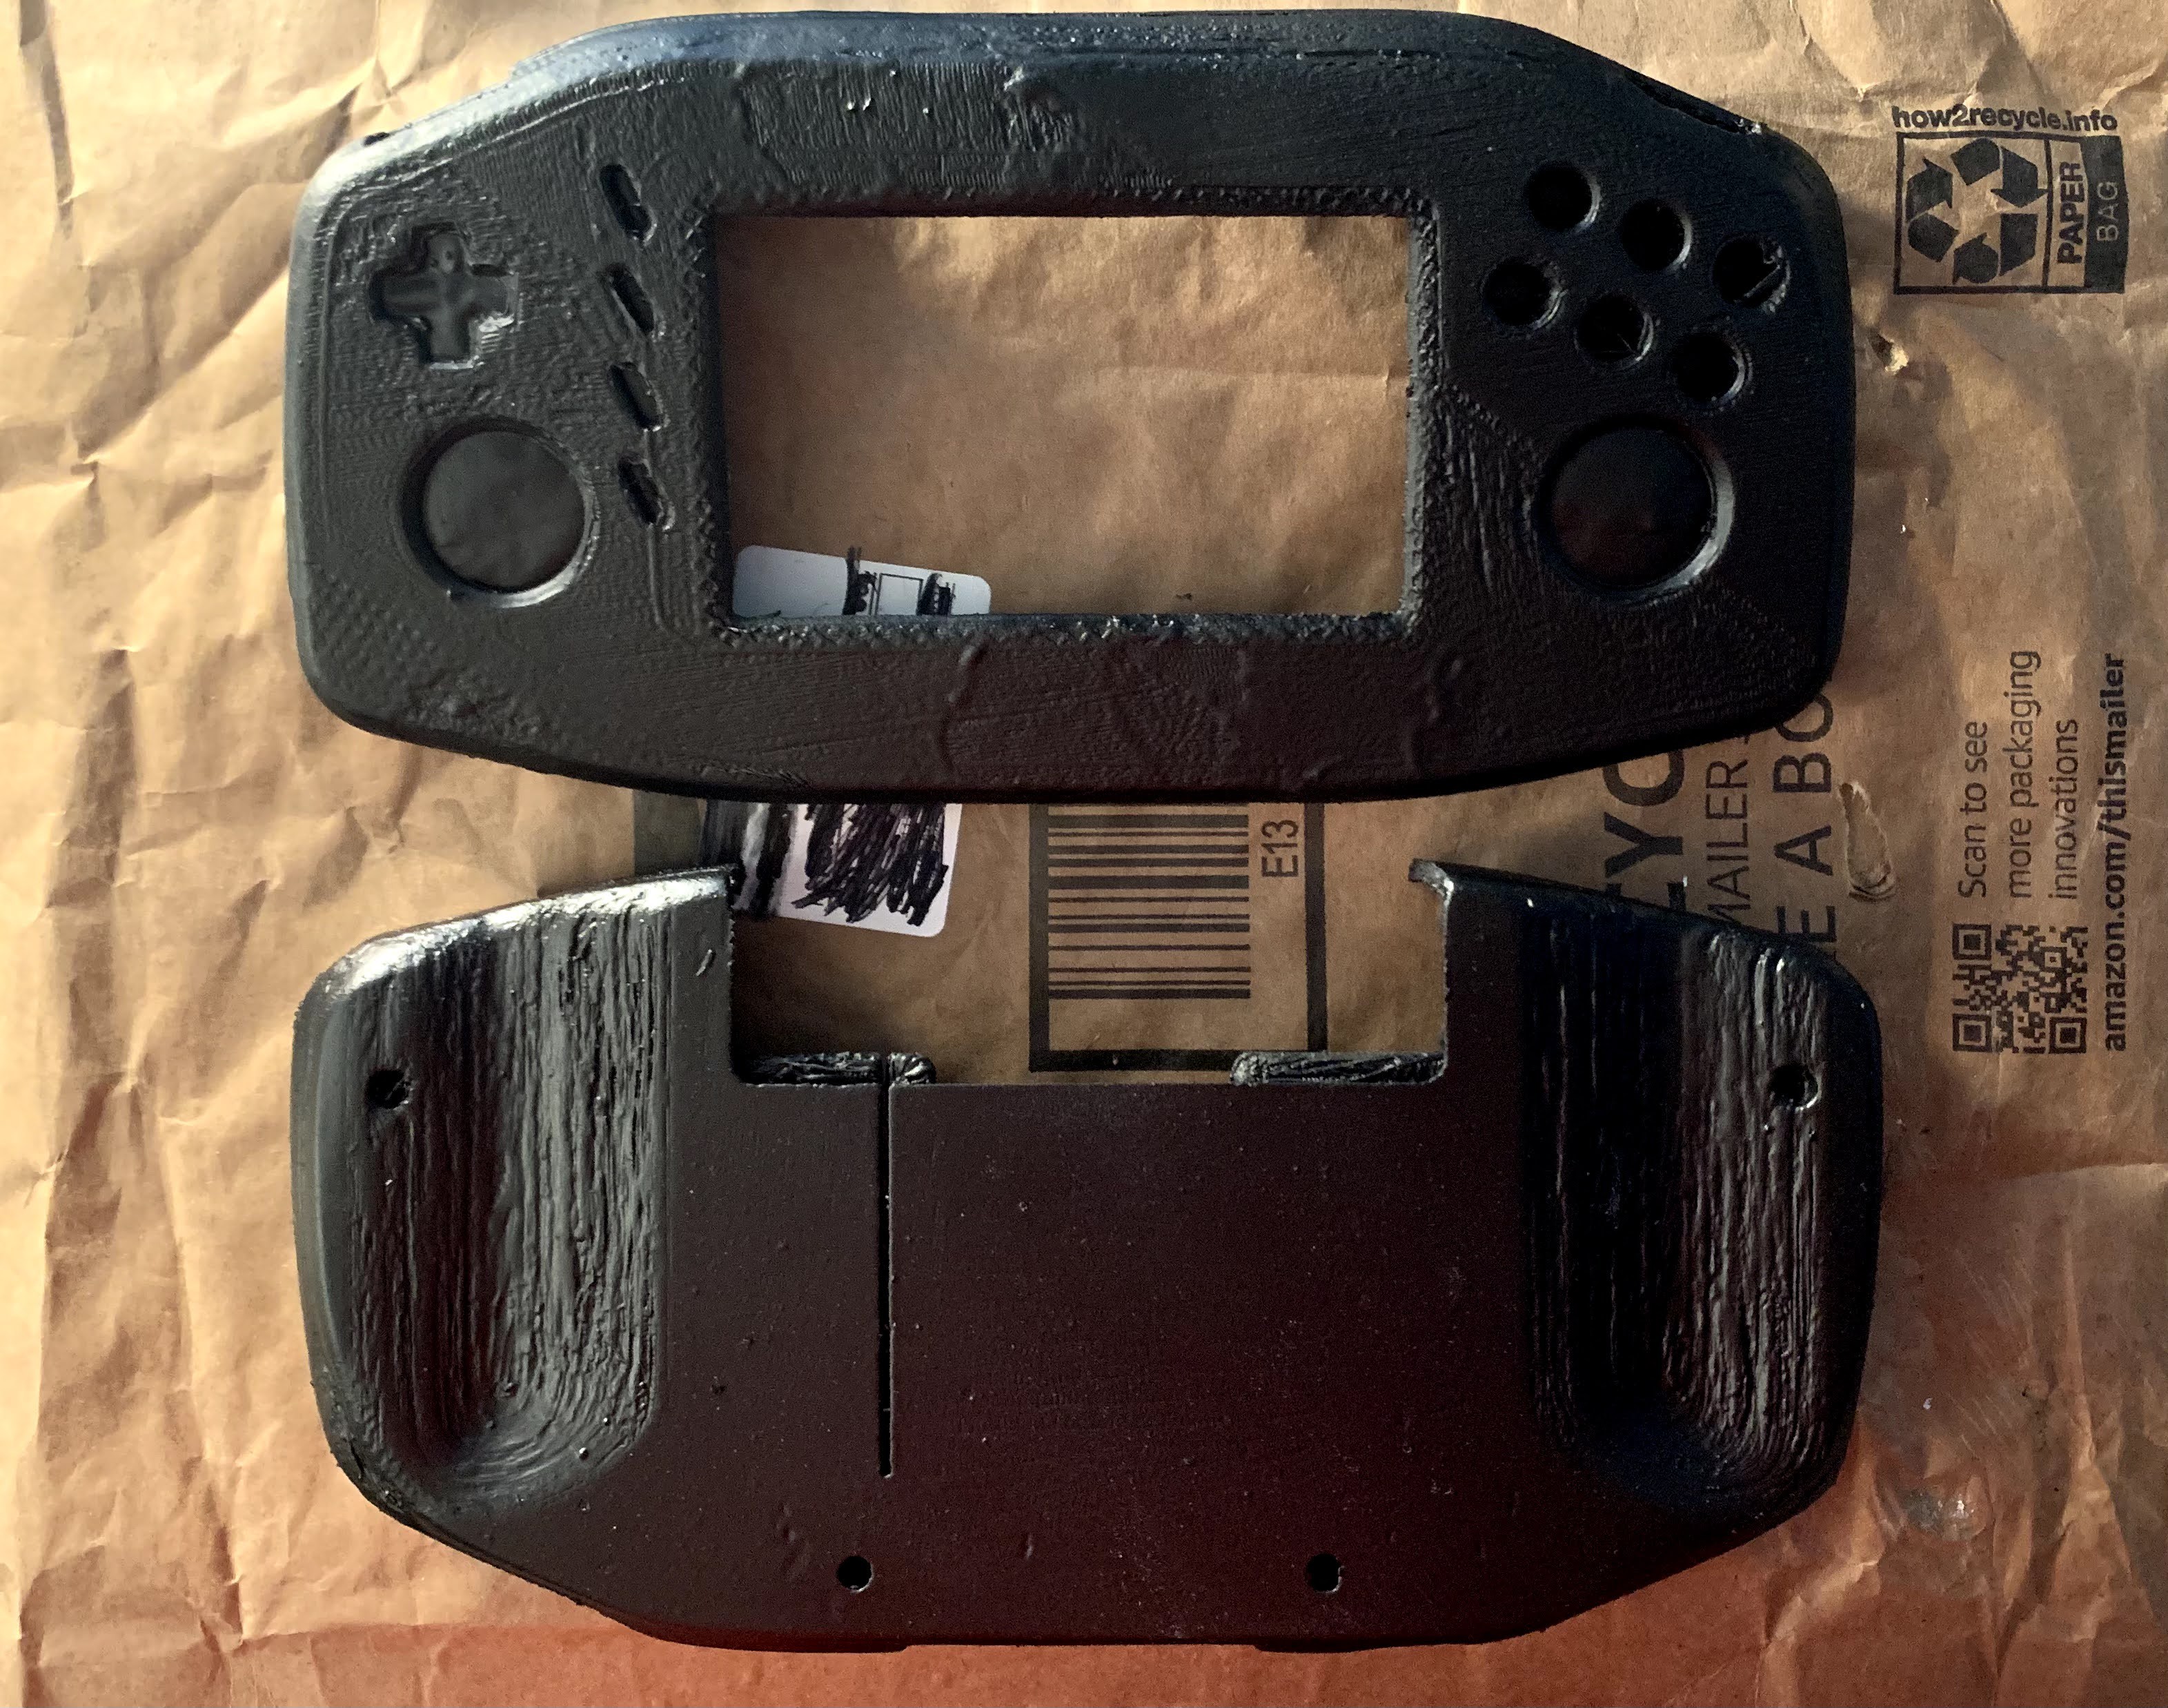
Next, I spray painted my case, and it turned out pretty good! I messed up the top, but that's not a big deal.![]()
I also downloaded and installed the operating system I will be using onto my raspberry pi. I'm using a modded version of retropie from Arcade Punks.
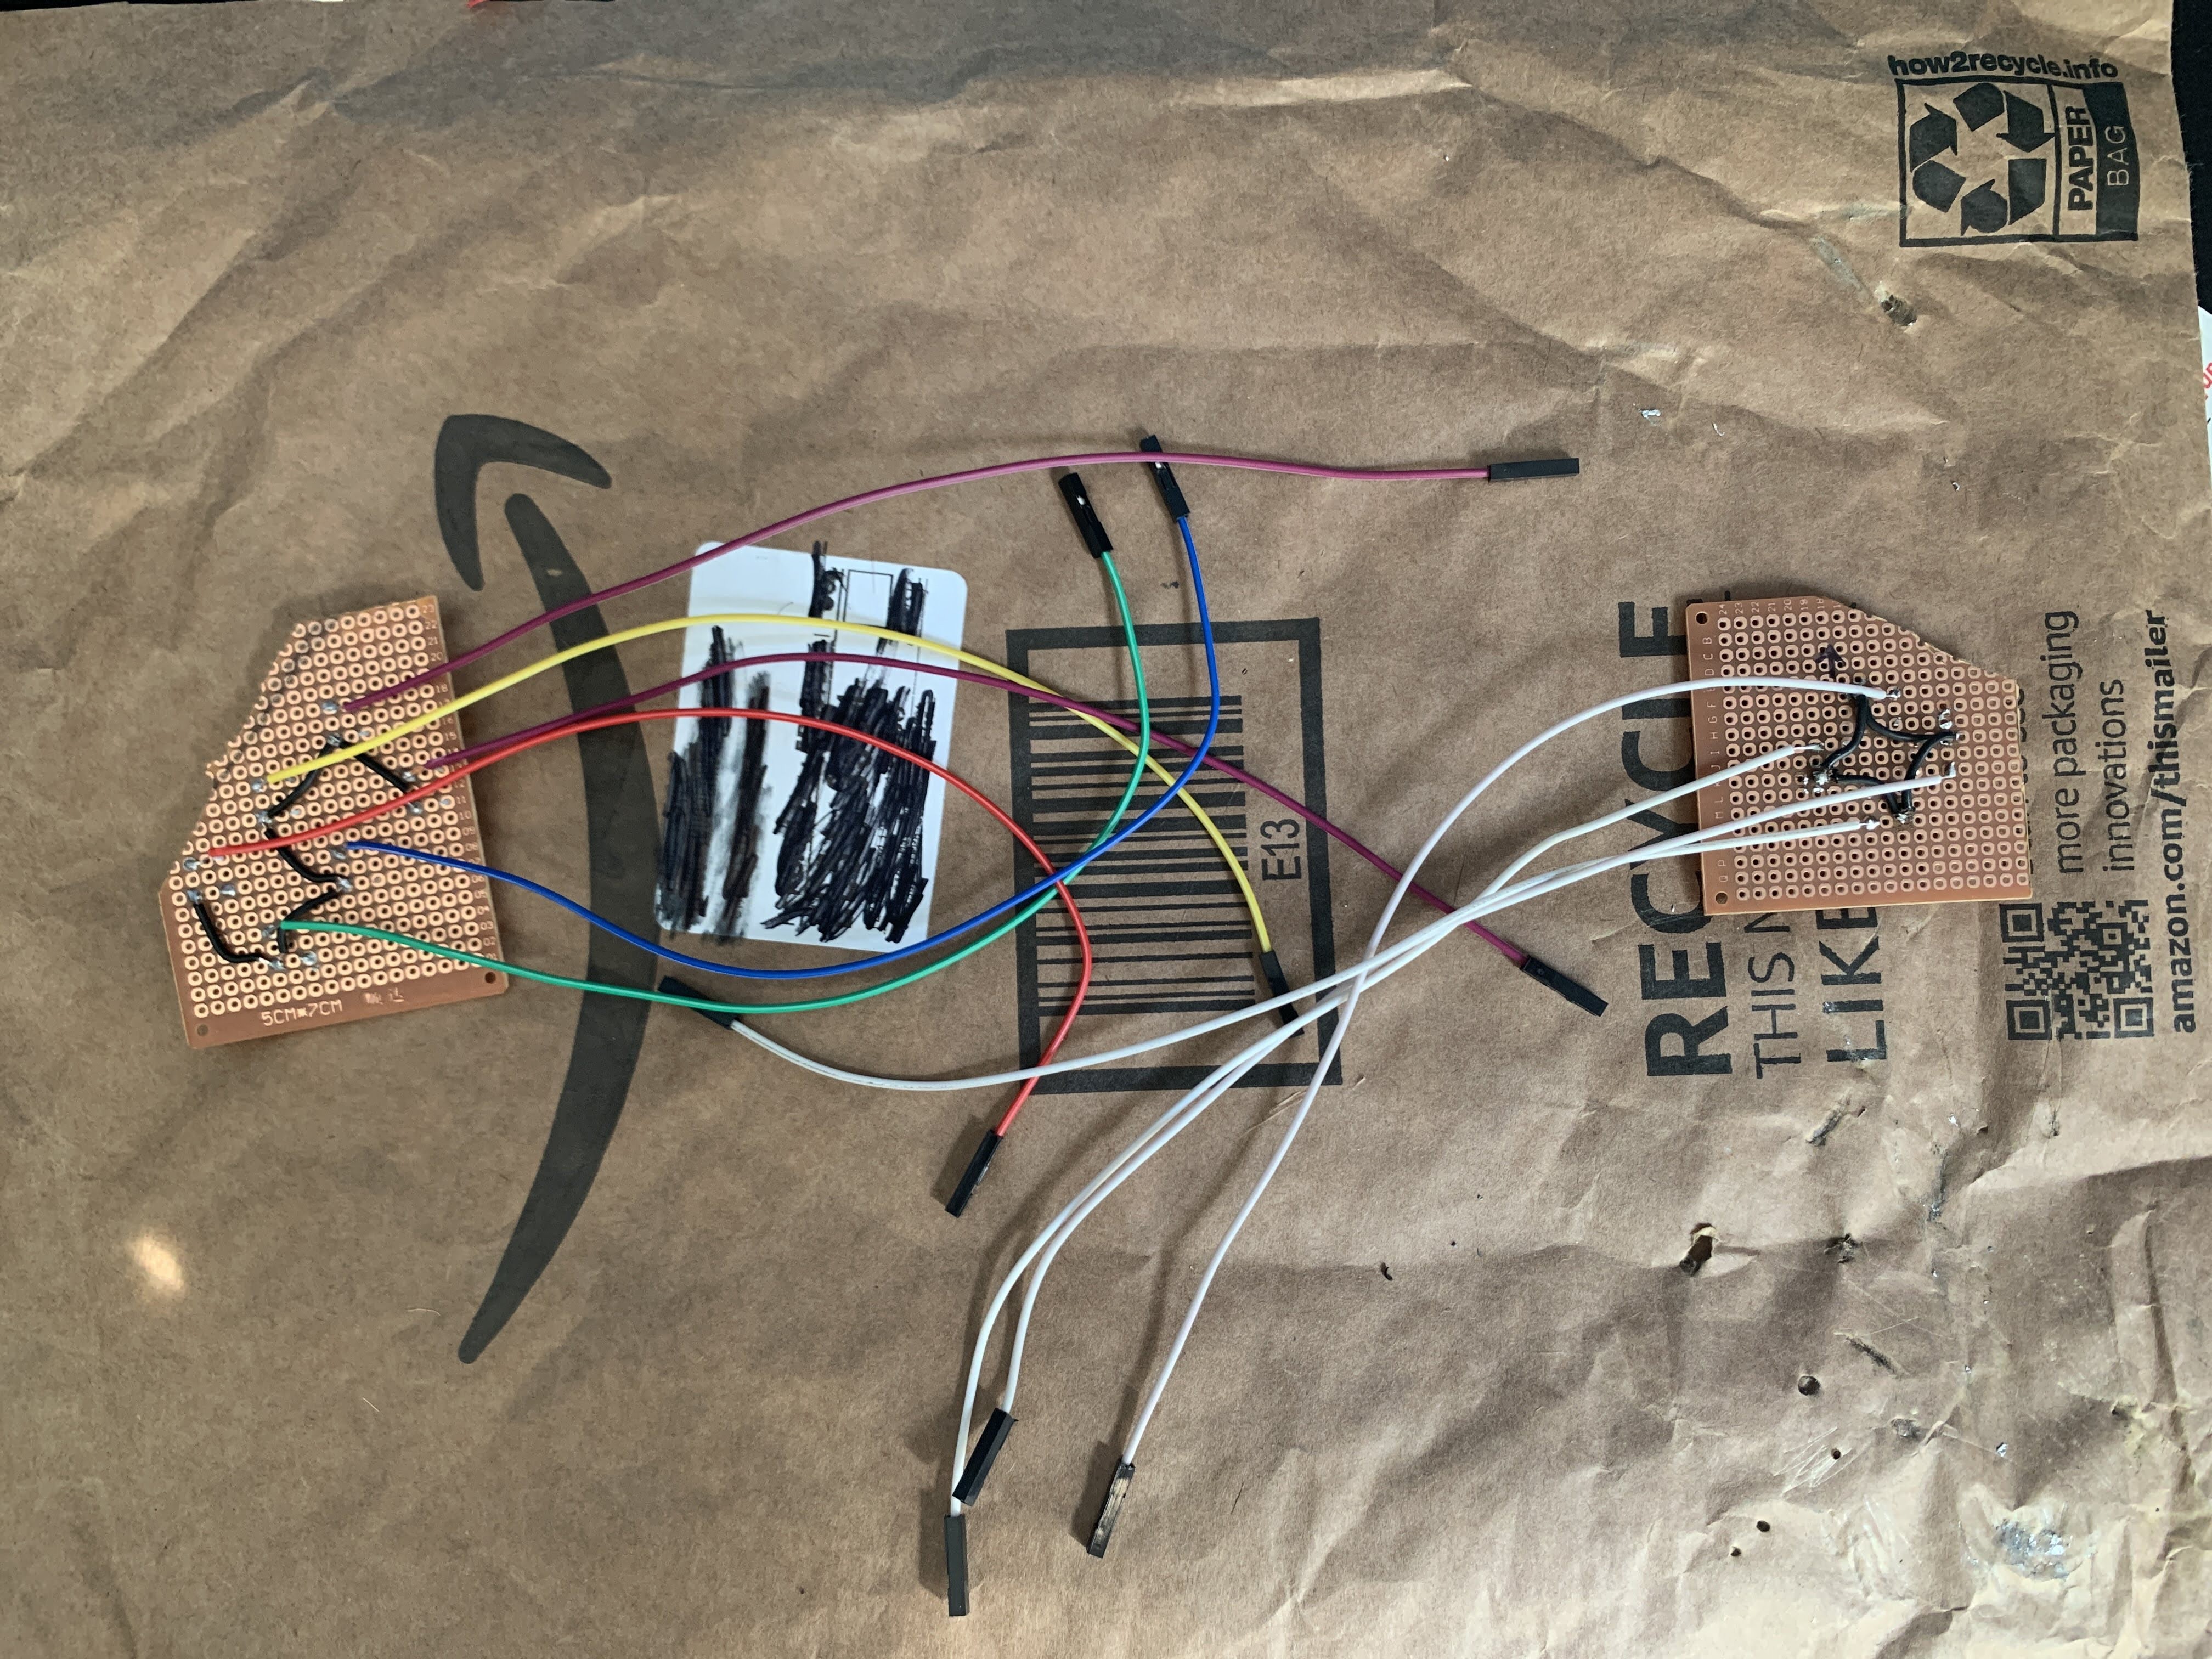
And finally, I started wiring up all my buttons! I haven't wired them to the teensy yet, as I need to figure out the placement of all the components first, but I have a good start.![]()
![]()
I will be coming out with videos documenting my process very soon as well, so stay tuned! -
devLog[1]
05/14/2021 at 21:08 • 0 commentsGreat news! A bunch of parts I need for the project came in today! So far I have received the SD card, Blower fans, HDMI cable, heatsinks, tactile buttons, and jumper wire. I have also been working on the case for this project, and, luckily, I found a design on Thingiverse that might work. I would make one myself, but I am absolutely horrible at 3D design. Hopefully I'll get some more parts in before I leave for the beach on the 18th, but if not, I'll have an update for you guys probably on the 22nd or 23rd.
Handheld Raspberry PI Retro Game Console
In this project I will be making a Nintendo Switch style retro game console