Dan Julio
-
Virtual Hosts and BSD banner
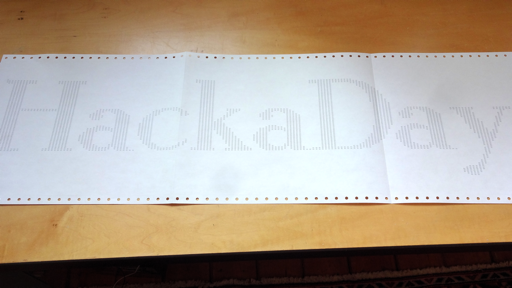
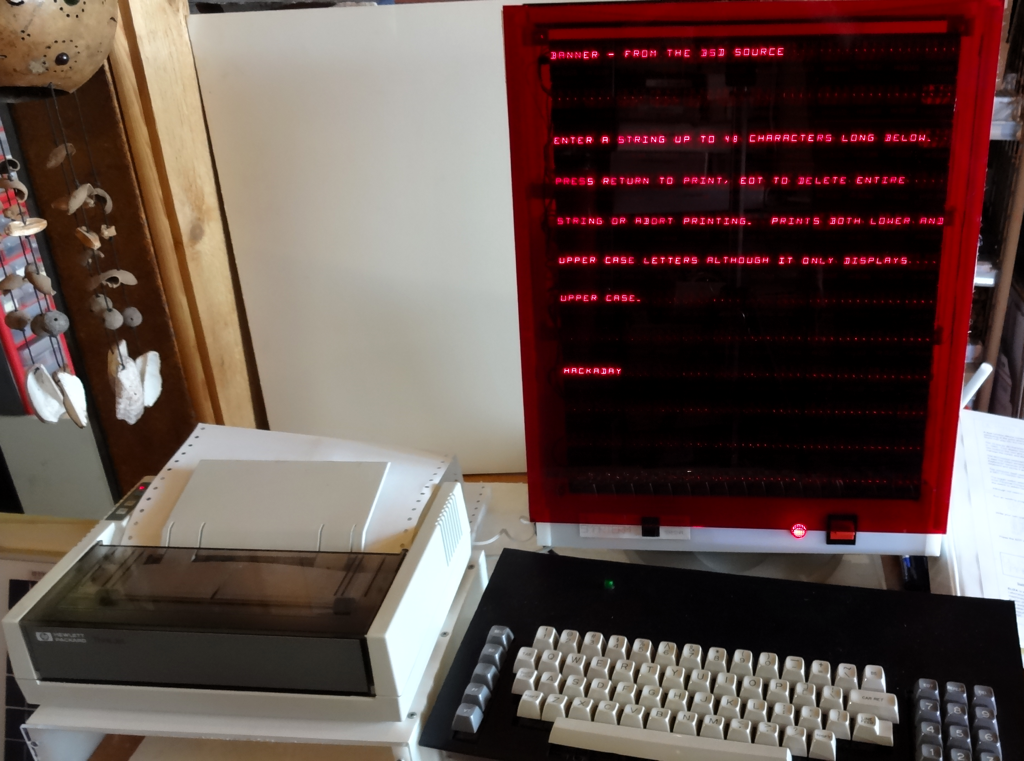
10/29/2018 at 00:18 • 0 commentsEver since including a printer with this project, I've been interested in somehow having the system able to print out old-school banners on the printer. My BSD-derived Mac still has the program (type "banner" in a terminal). Over the last couple of years I have been showing the computer at various shows and exhibits and have created a demo version of the firmware that does stuff like reset itself to a known state and display inviting information after a period of inactivity. Recently I also introduced the idea of "virtual host" programs into the firmware. The feature is intended to make it possible to have programs run locally and interface to the built-in terminal emulator as though it was connected to some external system (without having to have an external system). I moved the Eliza module over to the new system and then went out search for the source to banner which I found in an online repository of an ancient version of BSD unix (which I can't seem to find again as I write this).
![]()
Porting it was fairly straightforward. As discussed in the wiki article about the program, the original program (included in the downloads section) is a pretty big hack with two hand-crafted tables of font and index information. It expects to run as a command line program outputting directly to stdout. I had to change it into cooperative multitasking process interfacing with the printer buffer in the main firmware (and relearning - yet again - about buffer management and flow-control...). I ended up having it load all the lines for one character at a time and waiting for a token passed through all the buffers to be returned by the printer (via my serial_to_parallel sketch that interfaces the parallel-port printer to the computer's serial output).
![]()
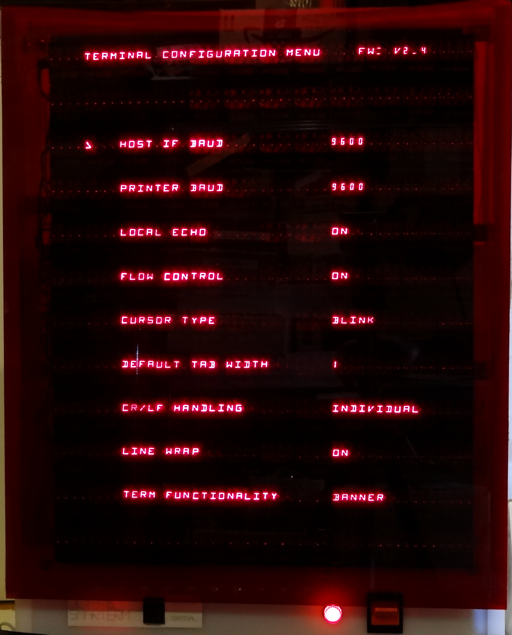
The virtual hosts are now selected via the terminal's configuration menu. Code for anyone who is interested is in github (dl1416SmartTerm_demo).
![]()
-
Sound, ELIZA and bug-fixes
02/10/2018 at 21:35 • 0 commentsAn opportunity to show the computer in a local maker show provided incentive to make some changes. All code and documentation changes are in the github repository. I finally finished adding sound capability by using the Teensy Audio library to provide three new Tiny Basic commands: DRUM, NOTE and WAV. DRUM and NOTE use the 'drum' and 'waveform' library functions and WAV allows playback of a 44.1 kHz .wav file loaded from the SD-Card. WAV playback occurs in the background allowing the program to continue. The PLAYING? command allows a program to see if a wav file is currently being played. In addition a few bugs were fixed, UPDIR and DNDIR were made to be operable inside a program (to make it possible to store sounds in a different directory than the Tiny Basic program was run from) and Autorun functionality was enabled (Tiny Basic will execute a file called "AUTORUN.BAS" if it exists when it boots).
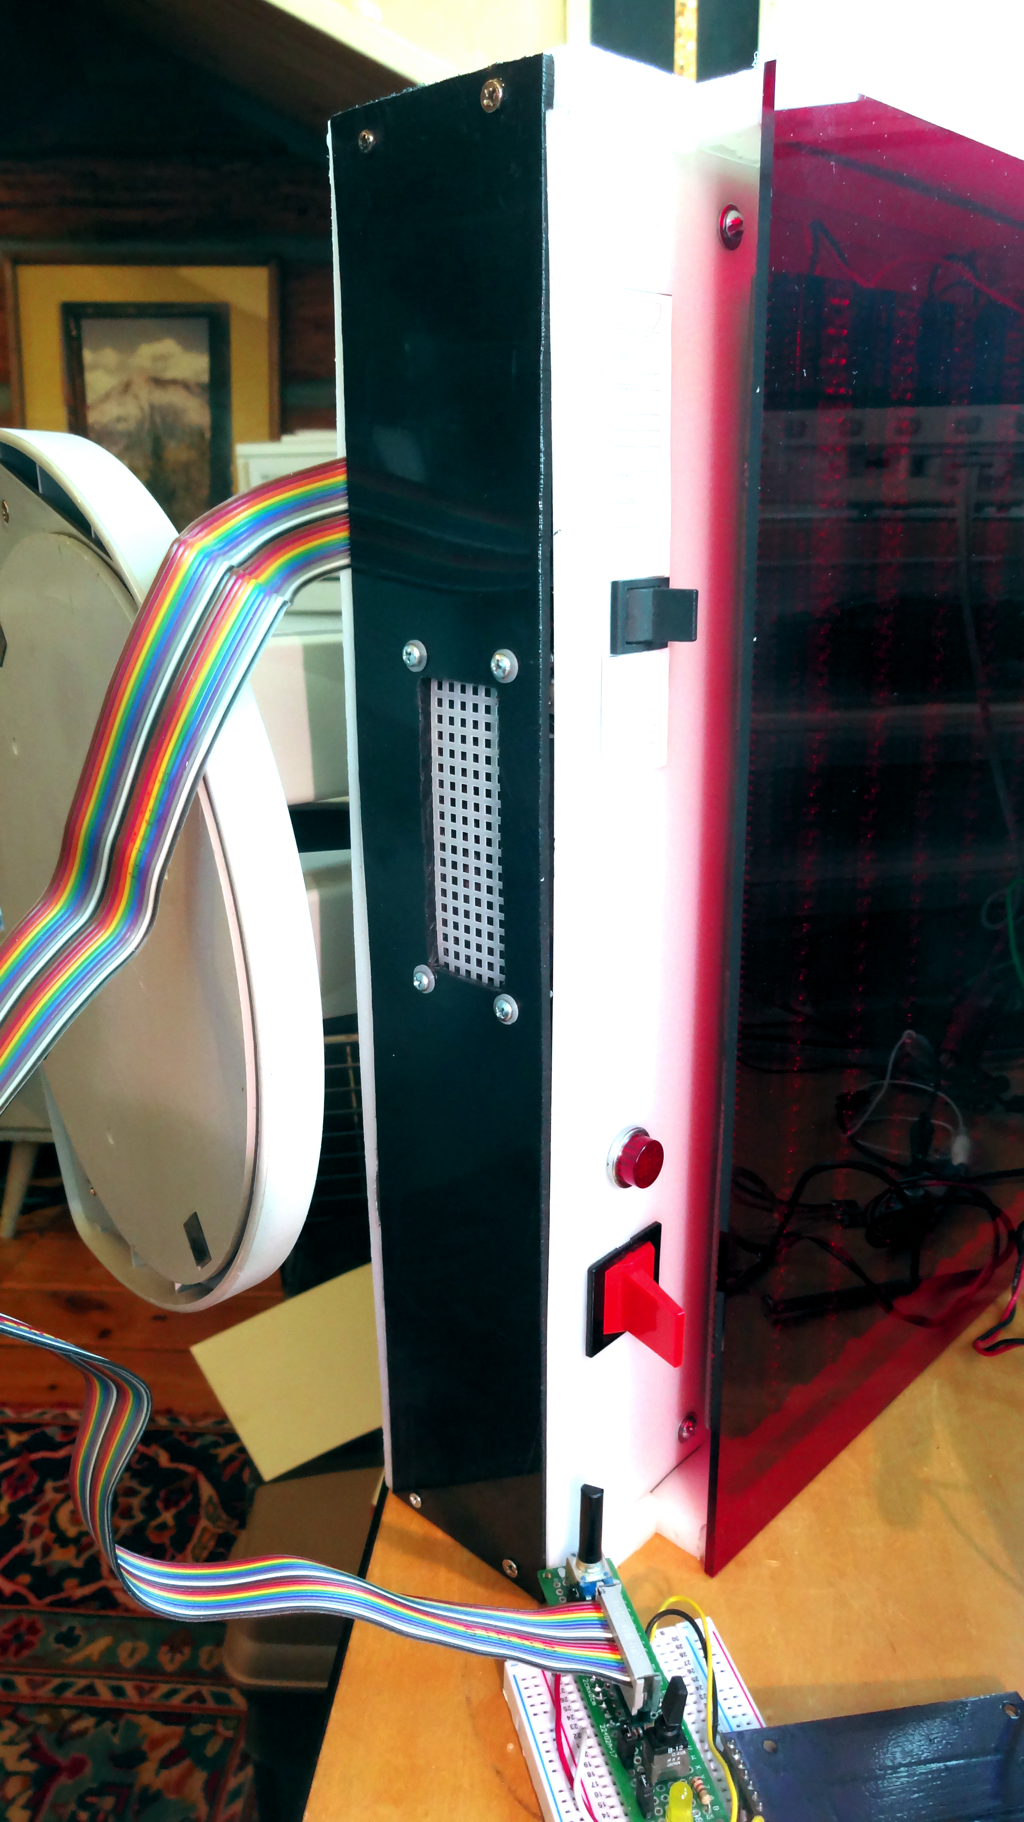
I also added a bottom panel with speaker connected to the internal LM380-based amplifier connected to the Teensy DAC output.![]()
I toyed with the idea of leaving a Raspberry Pi connected to the terminal input but figured that was asking for trouble in a public installation. Since the exhibit was stressing the "retro" nature of this computer I had the idea of running ELIZA and after exploring a bunch of ways of getting it running settled on porting the Creative Computing BASIC version (listed included here in files section) of it to C running directly on the Teensy replacing the Terminal's serial communication. In effect, the terminal is connected to a process running Eliza.
The code can now be compiled with the "DEMO_MODE" compiler directive to include Eliza.
Perhaps the C port of Eliza might be amusing to include in your own project. It should be fairly easy to adapt by providing your own versions of the TB_TX_AVAIL, POP_TB_TX, TX_RX_FULL and PUSH_TB_RX macros. -
Tiny Basic V1.0
11/06/2016 at 05:06 • 0 commentsThe idea of writing a BASIC interpreter seemed overwhelming so I immediately hit search. There are a lot of BASIC interpreters/compilers out there but the one that was an initial perfect fit was Scott Lawrence's version of Mike Field's port of Tiny Basic. It ran on an Arduino (albiet, barely) and it looked easily modifiable (which turned out to be true). I started by just getting it to run on the Teensy 3 instead of an Arduino. Then I made a simple port for it to communicate with my terminal code via a pair of FIFOs. Eventually I started adding commands and a more sophisticated interface.
As of this post it runs the commands documented below. Based on feedback from fellow hackerspace members, I will change the PCHR command to a set of CHR and ASC functions to more closely match early BASIC environments. Beyond this device, I think both the terminal code and the Tiny Basic interpreter could be combined with a new library, perhaps using DMA, on the Teensy to drive NTSC/PAL or VGA displays with commonly available PS2 or even USB keyboards.
Input can come from keyboard or any of the serial interfaces (e.g. USB host IF) to load programs from a host computer using a terminal emulator. Output may be directed to any serial interface as well as the display (e.g. to save programs via a terminal emulator). Tiny Basic communicates to the outside world through a set of virtual (or physical) serial ports. The local keyboard and display appear to it logically as a terminal (and can be interacted with using escape sequences if desired).
Each line must have a numeric line number (e.g. 10, 20, 30…). Commands may be separated by the colon character (‘:’) on a single line. Commands which immediately goto another line (GOTO, RETURN) cannot have subsequent commands on the same line. Each command is stored as an ASCII representation in memory (no tokenization).
There are 26 variables, A-Z. Each variable is a 16-bit signed number (-32768 to 32767). Variables or literal numbers may be used in expressions.
Tiny Basic provides 32 Kbytes of program memory. Variables and the stack live at the high end of program memory and the program starts from location zero. The MEM command returns how many bytes are available for program code. DATA@, PEEK and POKE can access the entire range but not outside of the program memory (e.g. other DL1416SmartTerm memory in the Teensy address space). There is room for 8 nested FOR loops on the stack or more GOSUBs in this version of Tiny Basic.
The EOT key is used as BREAK to stop execution of a Tiny Basic program.
File names follow the 8.3 rule (a maximum of 8 filename characters and 3 file type characters which should be .BAS for Tiny Basic programs). This version of Tiny Basic is limited to 16 levels of directories on the SD card.
System
- BYE - exits Basic, soft reboot of Tiny Basic
- END - stops execution from the program, also "STOP"
- MEM - displays memory usage statistics
- NEW - clears the current program
- RUN - executes the current program
- LIST [start line number [, end line number]] - list to end with one line number argument or range between two line numbers to current OUTDST mask
- HLIST [start line number [, end line number]] - list only to host ports
- PLIST [start line number [, end line number]] - list only to printer port
- CLS - clear screen
- INSRC mask expression - sets input (keyboard: bit 0, usb host: bit 1, serial host: bit 2, printer port: bit 3) defaults to keyboard + usb host (1 + 2 = 3). Be careful to not lock yourself out.
- OUTDST mask expression - sets output (screen: bit 0, usb host: bit 1, serial host: bit 2, printer port: bit 3) defaults to screen + usb host (1 + 2 = 3)
- REBOOT - reset computer (deletes current program)
- HELP - list commands and functions
File IO/SD Card
- FILES - lists the files on the SD card
- LOAD filename.bas - loads a file from the SD card
- CHAIN filename.bas - equivalent of: new, load filename.bas, run
- SAVE filename.bas - saves the current program to the SD card, overwriting
- ERASE filename.bas - delete the file on the SD card
- MKDIR dirname - Make a directory
- RMDIR dirname - Remove a directory
- DNDIR dirname - Enter a directory
- UPDIR - Exit the current directory
IO, Documentation
- DATA@ address expression, val [,val…] - loads data into memory at the specified address for access by PEEK or POKE. val are 8-bit numbers (0-255). Address must be non-zero and located above the last line of code (PEND) but below the stack
- PEEK( address expression) - get a value in memory
- POKE address expression, data expression - set a value in memory
- PRINT expression - print out the expression, also "?"
- INPUT variable - read a number into the variable
- REM stuff - remark/comment, also "'"
- PCHR expression - print a specified character
- INCHR variable [, delay expression] - returns the ASCII value of a key from the incoming buffer to a variable. By default it will wait until a key is pressed. An optional expression can set a timeout in mSec to wait before returning. If no key was pressed before returning it will return 0 in the variable.
- CURSOR row expression, col expression - set the cursor to a specific screen location (0-based)
Expressions, Math
- A=V, LET A=V - assign value to a variable
- +, -, *, / - Math
- &, |, ^ - Logic (AND, OR, XOR)
- <,<=,=,<>,!=,>=,> - Comparisons
- ABS( expression ) - returns the absolute value of the expression
- RSEED( v ) - sets the random seed to v
- RND( m ) - returns a random number from 0 to m
- PEND - returns the address of the first byte past the last line of the program
Control
- DELAY timems expression - wait (in milliseconds)
- IF expression statement - perform statement if expression is true
- FOR variable = start TO end - start for block
- FOR variable = start TO end STEP value - start for block with step
- NEXT variable - end of for block
- GOTO linenumber - continue execution at this line number
- GOSUB linenumber - call a subroutine at this line number
- RETURN - return from a subroutine
Pin IO
- DWRITE pin,value - set pin with a value (HIGH,HI,LOW,LO)
- AWRITE pin,value - set pin with analog value (pwm) 0..255
- DREAD( pin ) - get the value of the pin
- AREAD( analogPin ) - get the value of the analog pin 0..1023 for 0-3.3Vin
DWRITE, AREAD IO pin is [0:8]. AWRITE pin is [0:2] that are on IO pins [6:8]. Do not drive any pin with more than 3.3 volts.
-
V1.0 Terminal Functionality
11/06/2016 at 04:38 • 0 commentsI started the project without any clearly defined goals for the terminal functionality other than it had to scroll. I wanted a terminal to connect to a nebulously defined future computer project but was stuck with testing with modern computer...which still speak to command line environments with ANSI escape sequences. Why not emulate the classic computer terminal progenitors then? I started with the VT100 but soon found I liked the additional features that DEC added with the VT102 such as the ability to support printers and more efficient editing capabilities. This meant a lot of escape sequence decoding. I ended up wading through a lot of websites describing various ANSI escape sequences but finally found http://vt100.net as the best source. Obviously I couldn't deal with commands to change the font or font-size so I ignored those but I tried to deal with everything else and I added a couple of escape sequences from more advanced terminals that supported some function (like cursor blink) that my display could also support. I tested my code using both a Raspberry Pi running Raspian and my Mac OS X laptop. Interestingly the OS X system wanted a much more modern set of ANSI escape sequences even when I thought I told it to limit to the old VT102 set. I ended up adding code to ignore entire classes of escape sequences such as "Operating System" types. My main test was bash shell interactivity and the vi text editor. I used a diagnostic mode in my code to dump the incoming stream to the USB serial port so I could see what the terminal had seen when the display didn't match what I expected (which, at least at first, was a lot). It was entertaining if nothing else. A lot of modern code thinks nothing of sending the same escape sequence multiple times in a row.
Ultimately for my first go-around I ended up with the following control character and escape sequence "command set" for the terminal. I made the conscious decision not to support all the control characters in the same way DEC terminals did to match some more "stupid" terminals that I had run across over the years.Control Characters Implemented CTRL-C EOT - Break command for Tiny Basic (ignored in Terminal mode) CTRL-G BELL - sends BELL to keyboard (rings keyboard bell) CTRL-H BS - backspace cursor CTRL-I TAB - forwardspace cursor to next tab position (default values: 1, 2, 4 or 8 positions, configurable) CTRL-J LF - Linefeed character (moves cursor down one row; may also be configured to include a CR) CTRL-K VT - Vertical tab (moves cursor up one position) (**) CTRL-L FF - Formfeed (clear screen) (**) CTRL-M CR - Carriage return (moves cursor to start of line; may also be configured to include a LF) ESC (*) Escape - starts escape sequence DEL Delete - backspace cursor, deleting character first (**) Notes: * The EOT key on the keyboard is treated as an Escape in terminal mode and a CTRL-C (break) in Tiny Basic mode. ** These control characters are not VT100/ANSI compliant. They exist for compatibility with other, more primitive, terminals. ANSI Sequences Implemented (numeric arguments in decimal ASCII notation are contained with <>) ESC[;H Cursor Position ESC[;f Horizontal and Vertical Position (same as Cursor Position) ESC[A Cursor Up ESC[B Cursor Down ESC[C Cursor Forward ESC[D Cursor Backward ESC[s Save Cursor Position ESC[u Restore Cursor Position ESC7 Save Cursor Position, origin mode and cursor attributes (*) ESC8 Restore Cursor Position, origin mode and cursor attributes (*) ESC[J Erase Down ESC[1J Erase Up ESC[2J Erase Display ESC[K Erase End of Line ESC[1K Erase Start of Line ESC[2K Erase Line ESC[L Insert Line ESC[M Delete Line ESC[P Delete Character ESC[c / ESC[0c / ESCZ Query Device Attributes (responds with VT102 ESC[?6c) ESC[5n Query Device Status (responds with Report Read, no malfunctions ESC[0n) ESC[6n Query Cursor Position (responds with Report Cursor Position ESC[;R) ESC[?15n Query Printer Status (responds with ESC[?13n if printer is offline ESC[?11n if printer is out of paper ESC[?10n if printer is ready to print ESCc Reset Device ESCD Scroll Down One Line ESCE Next Line ESCM Scroll Up One Line ESCH Set Tab ESC[0g / ESC[g Clear Tab at position ESC[3g Clear all tabs ESC[;r Set scrolling region ESC[r Reset scrolling region ESC[4h Enable Character Insertion ESC[4l Disable Character Insertion ESC[7h Enable Line Wrap ESC[7l Disable Line Wrap ESC[12h Disable Local Echo ESC[12l Enable Local Echo ESC[20h Set New Line Mode (new line also includes CR, CR sends CR+LF) ESC[20l Reset New Line Mode ESC[?6h Set Origin Mode ESC[?6l Reset Origin Mode ESC[?25h Make Cursor visible ESC[?25l Make Cursor invisible ESC[0q / ESC[1q Cursor Blink (**) ESC[2q Cursor Solid (**) ESC[i / ESC[0i Print Screen or scrolling region (based on Printer Extend Mode) ESC[?1i Print Line with cursor (followed by CR/LF) ESC[4i Disable Print log ESC[5i Start Print log (send incoming data to printer instead of screen) ESC[?4i Turn off Auto Print ESC[?5i Turn on Auto Print (print line after cursor moved off line w/ LF, FF, VT) ESC[?18h Set FF as print screen terminator ESC[?18l Set nothing as print screen terminator ESC[?19h Set full screen to print during print screen ESC[?19l Set scrolling region to print during print screen ESC# Line Attributes (IGNORED) ESC( Select Character Set (IGNORED) ESC) Select Character Set (IGNORED) ESC];BEL Operating System Command (IGNORED) Notes: * This isn't ANSI compliant, instead of storing character attribute, we are storing cursor attributes ** These are VT520 commands -
DL1416B Display Module (PCB) Command Set
11/06/2016 at 04:08 • 0 commentsThe DL1416 display firmware running on the PIC16F1459 takes input data from either the USB Interface or a TTL-level Serial input. The USB Interface appears as a CDC Class communications device to the host PC. The TTL-level Serial input runs at 57,600 baud. The DL1416 echoes all incoming serial data from either the USB or Serial input to a TTL-level serial output for connection to subsequent display boards.
ASCII characters are displayed directly. Lower case letters are converted to upper case letters by the display.
Some control characters and sequences have special meaning and can be used to control the display or the cursor position on the display.
   ^H - Backspace : backspace cursor on same line (no change at position 0)

   ^I - Tab : forward space cursor

   ^J - Line Feed : move cursor to next line (no change on last line)

   ^L - Form Feed : clear display

   ^M - Carriage Return : move cursor to position 0 on the current line

   ^N - Shift Out : set destination to shadow memory

   ^O - Shift In : set destination to display

   ^Q - DC1 : enable cursor (applies only when destination is display)

   ^R - DC2 : disable cursor (applies only when destination is display)

   ^S - DC3 : enable cursor blink (applies only when destination is display)

   ^T - DC4 : disable cursor blink (applies only when destination is display)

   ^V - SIDLE : Display firmware version

   ^Z - Substitute : Load shadow memory

   DEL - Delete : Change previous character to a blank and backspace

   ^[ - Escape : Set Cursor Position

      COL;ROW'H'  (special case: 'H' set to home (0,0)
The display has two memories. ^N and ^O control access to the two memories. The default memory is immediate display mode. Any received character data is immediately displayed. The second memory is called shadow memory and writing to it does not immediately change the display. ^N sets the destination to shadow memory. ^O sets the destination to immediate display mode. ^Z copies the shadow memory to immediate memory and updates the display. Two sets of cursor positions are maintained, one for each memory.
DL1416SmarTerm LED Computer/Terminal
Old and new come together for an old school intelligent terminal.