Malte Schrader
-
First redesign of the printhead - magnetic bowden tube coupler
09/20/2023 at 21:01 • 6 comments
I added a mains powered heated bed because the prints weren't sticking well to the print plate, so this step couldn't wait.
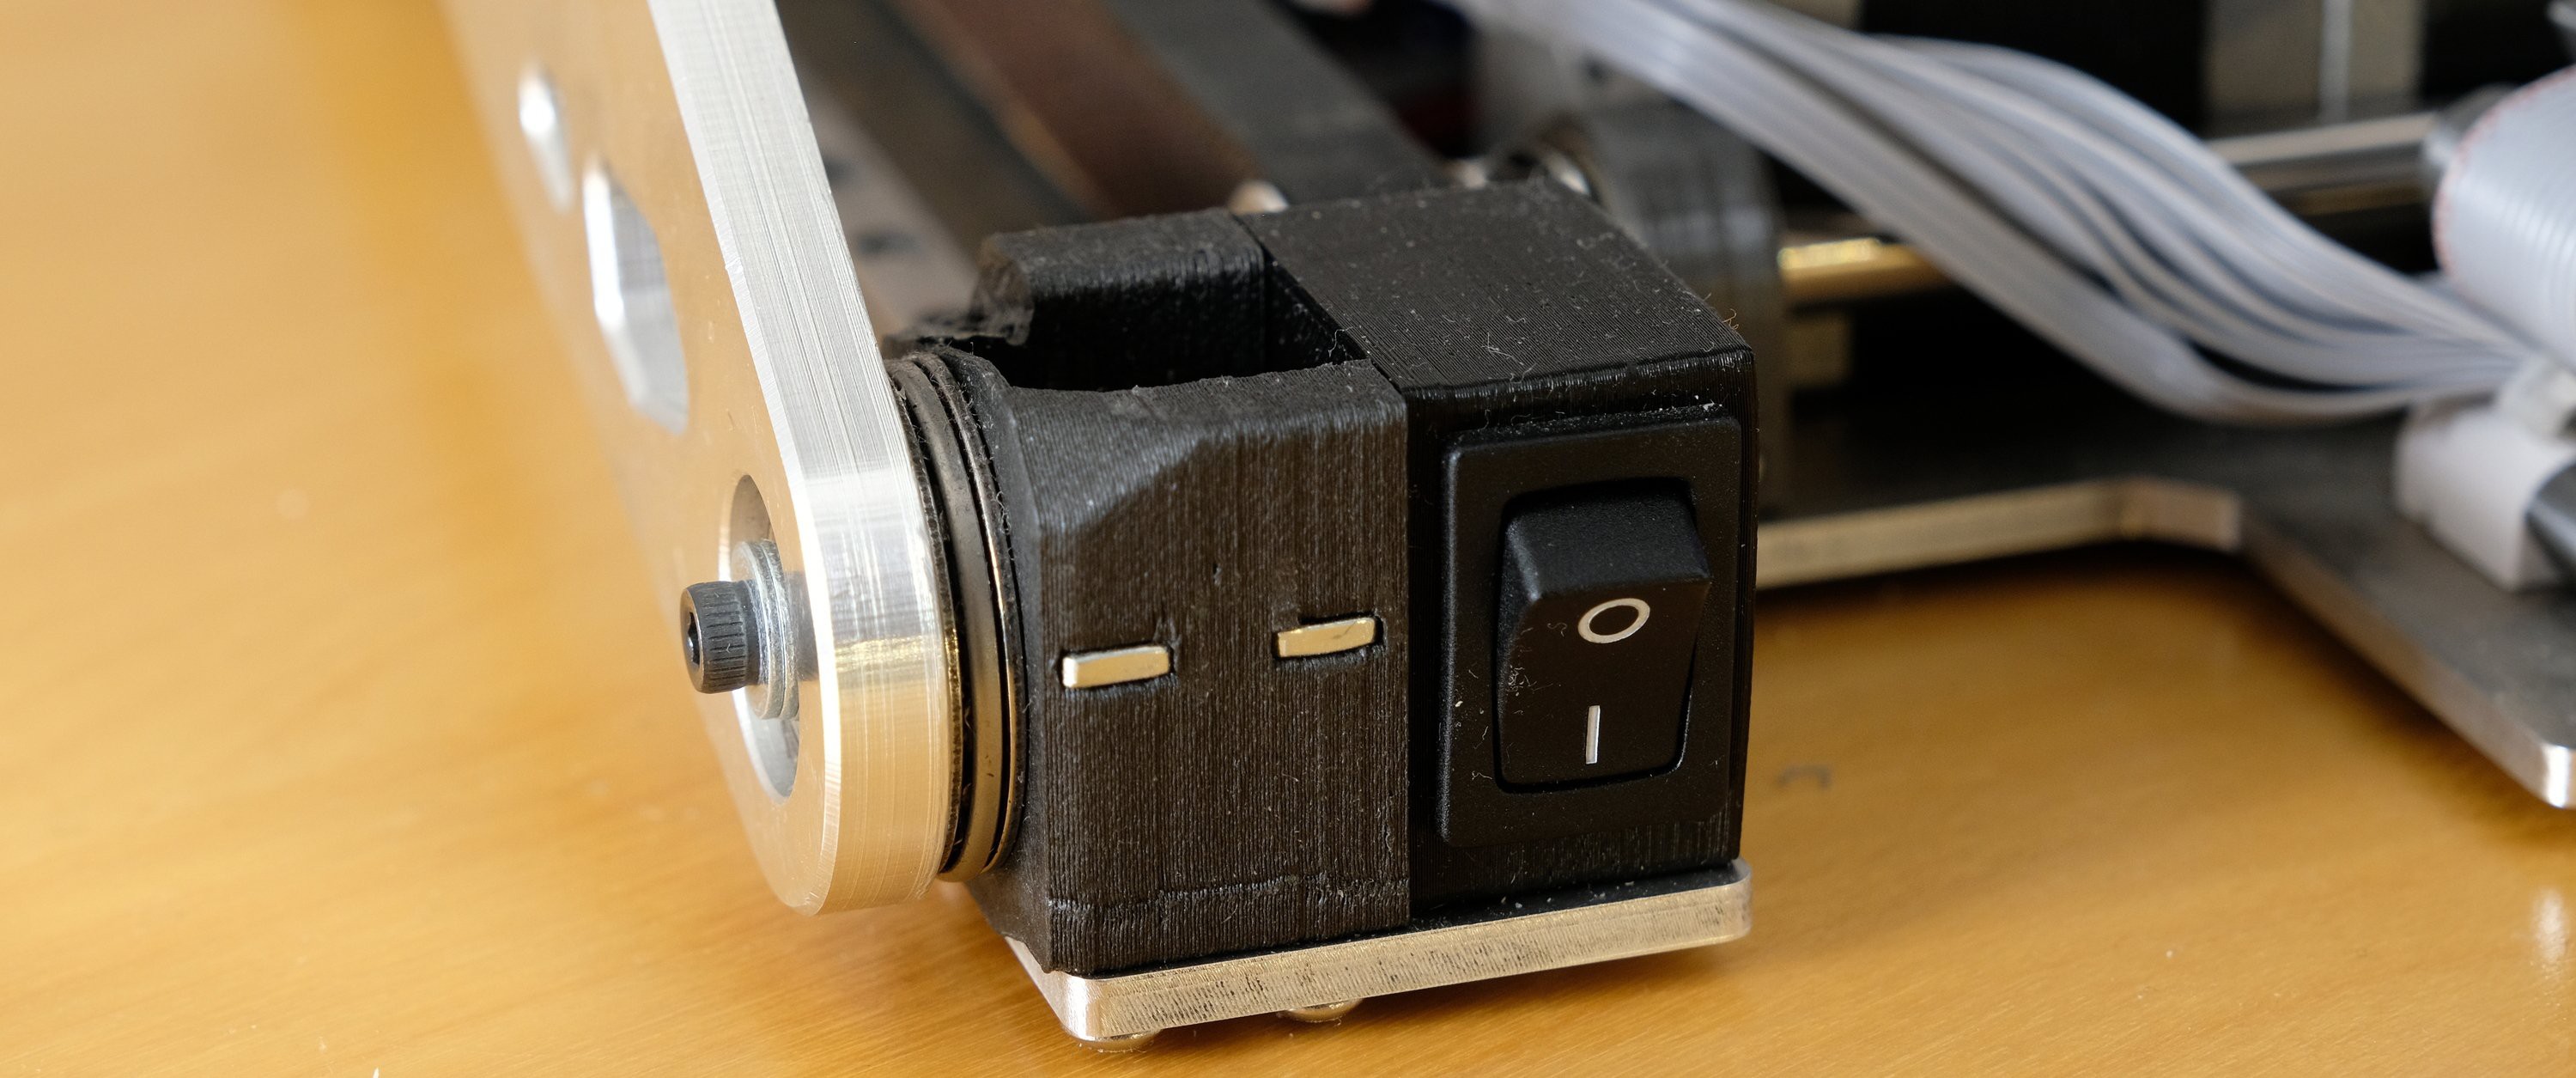
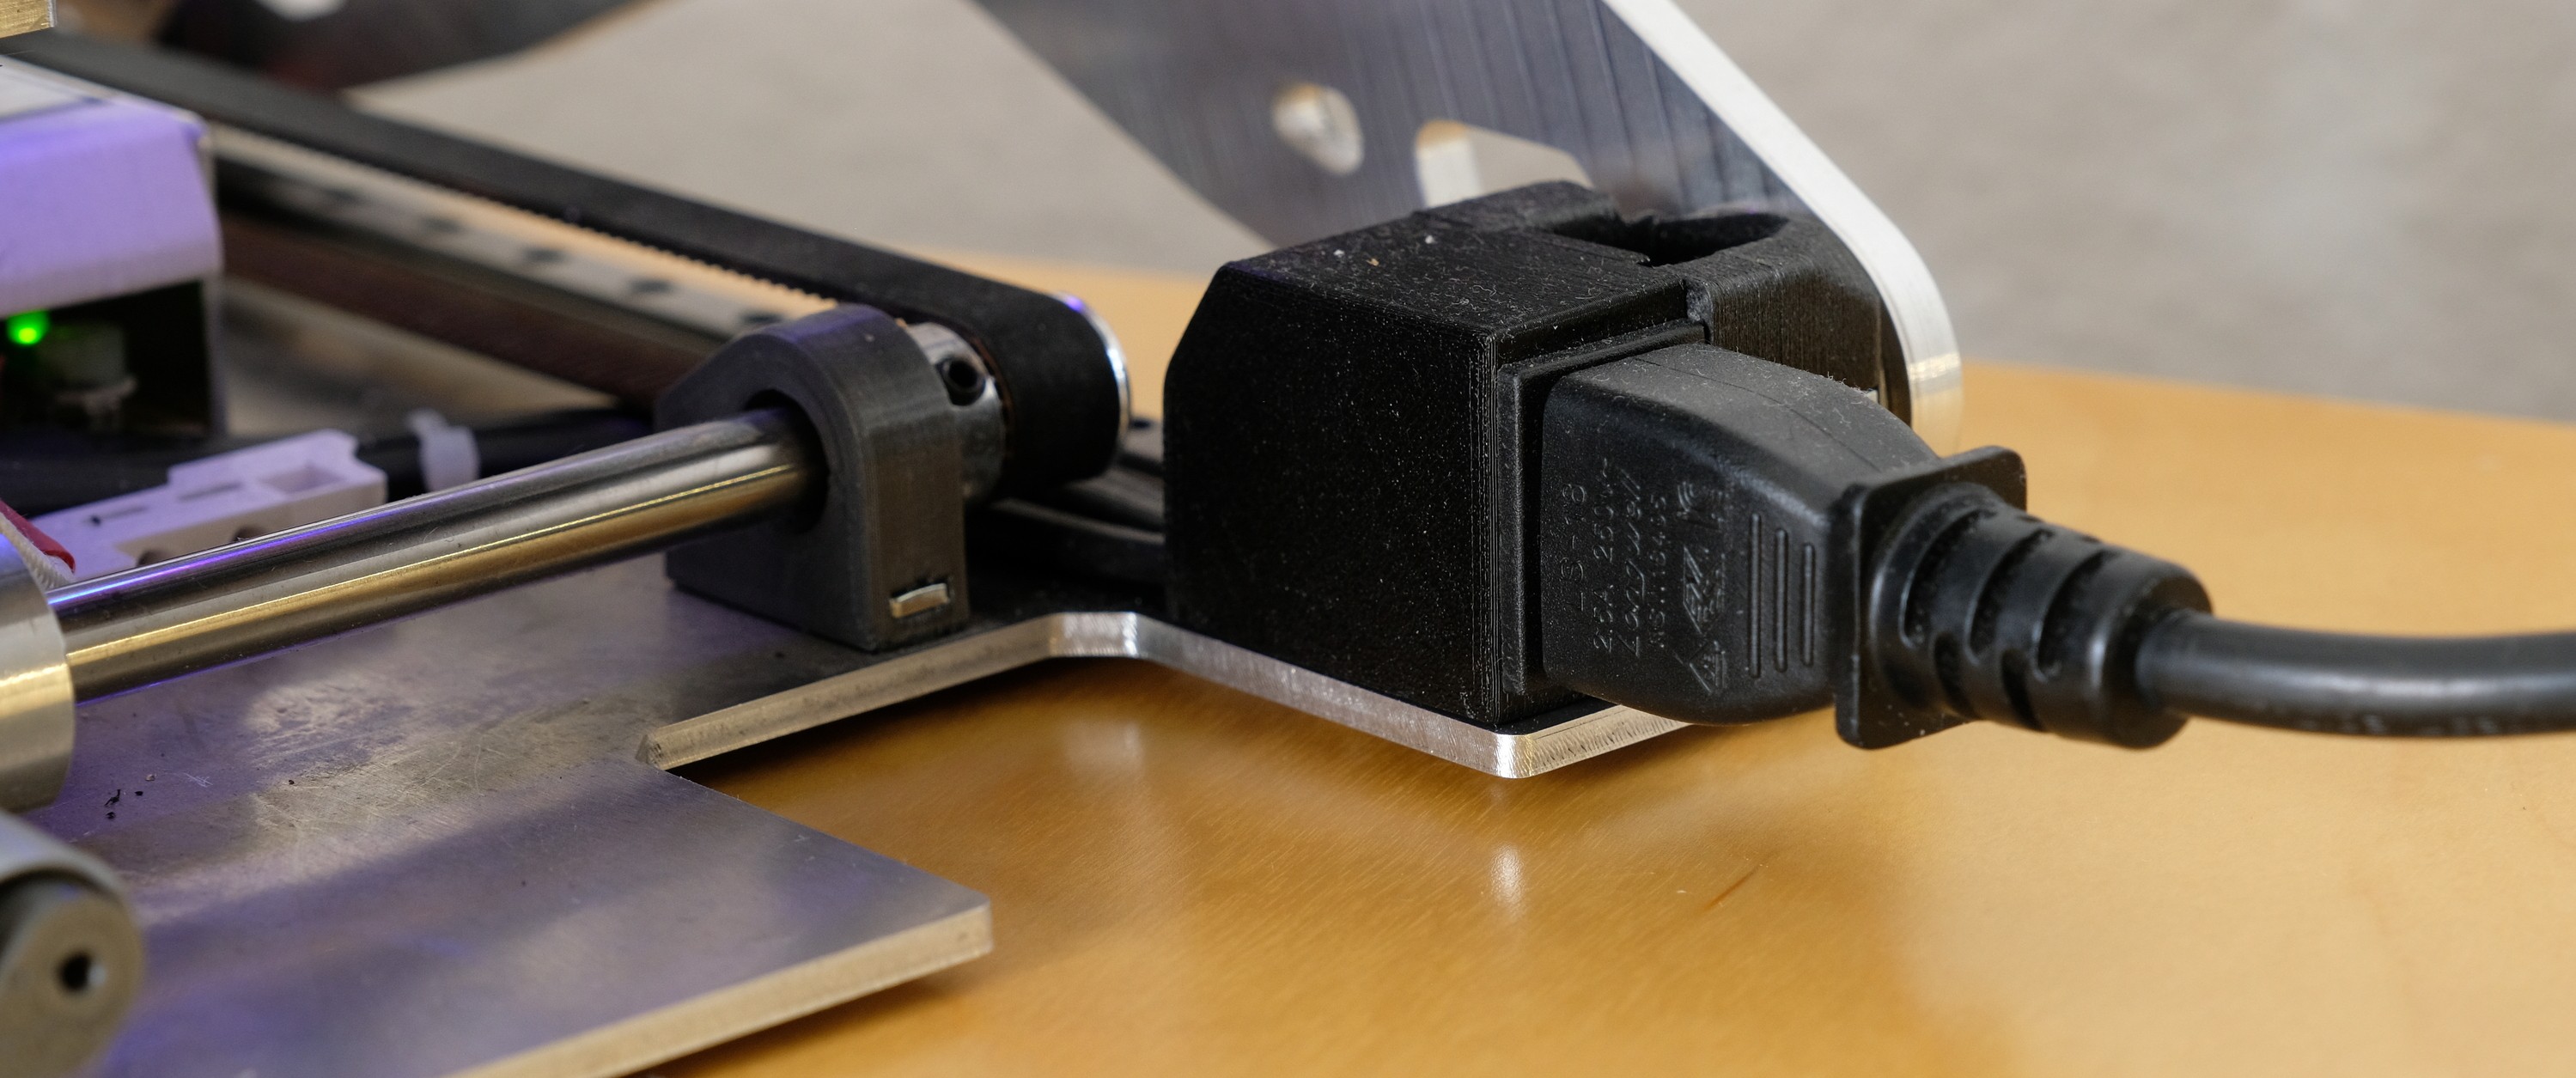
Then the printer got an on/off switch and a cold-appliance(power) connector on the back. The connector replaces the red power cord that was attached directly to the printer, as seen in the time-lapse video of the last log.Idea: magnetic bowden coupler
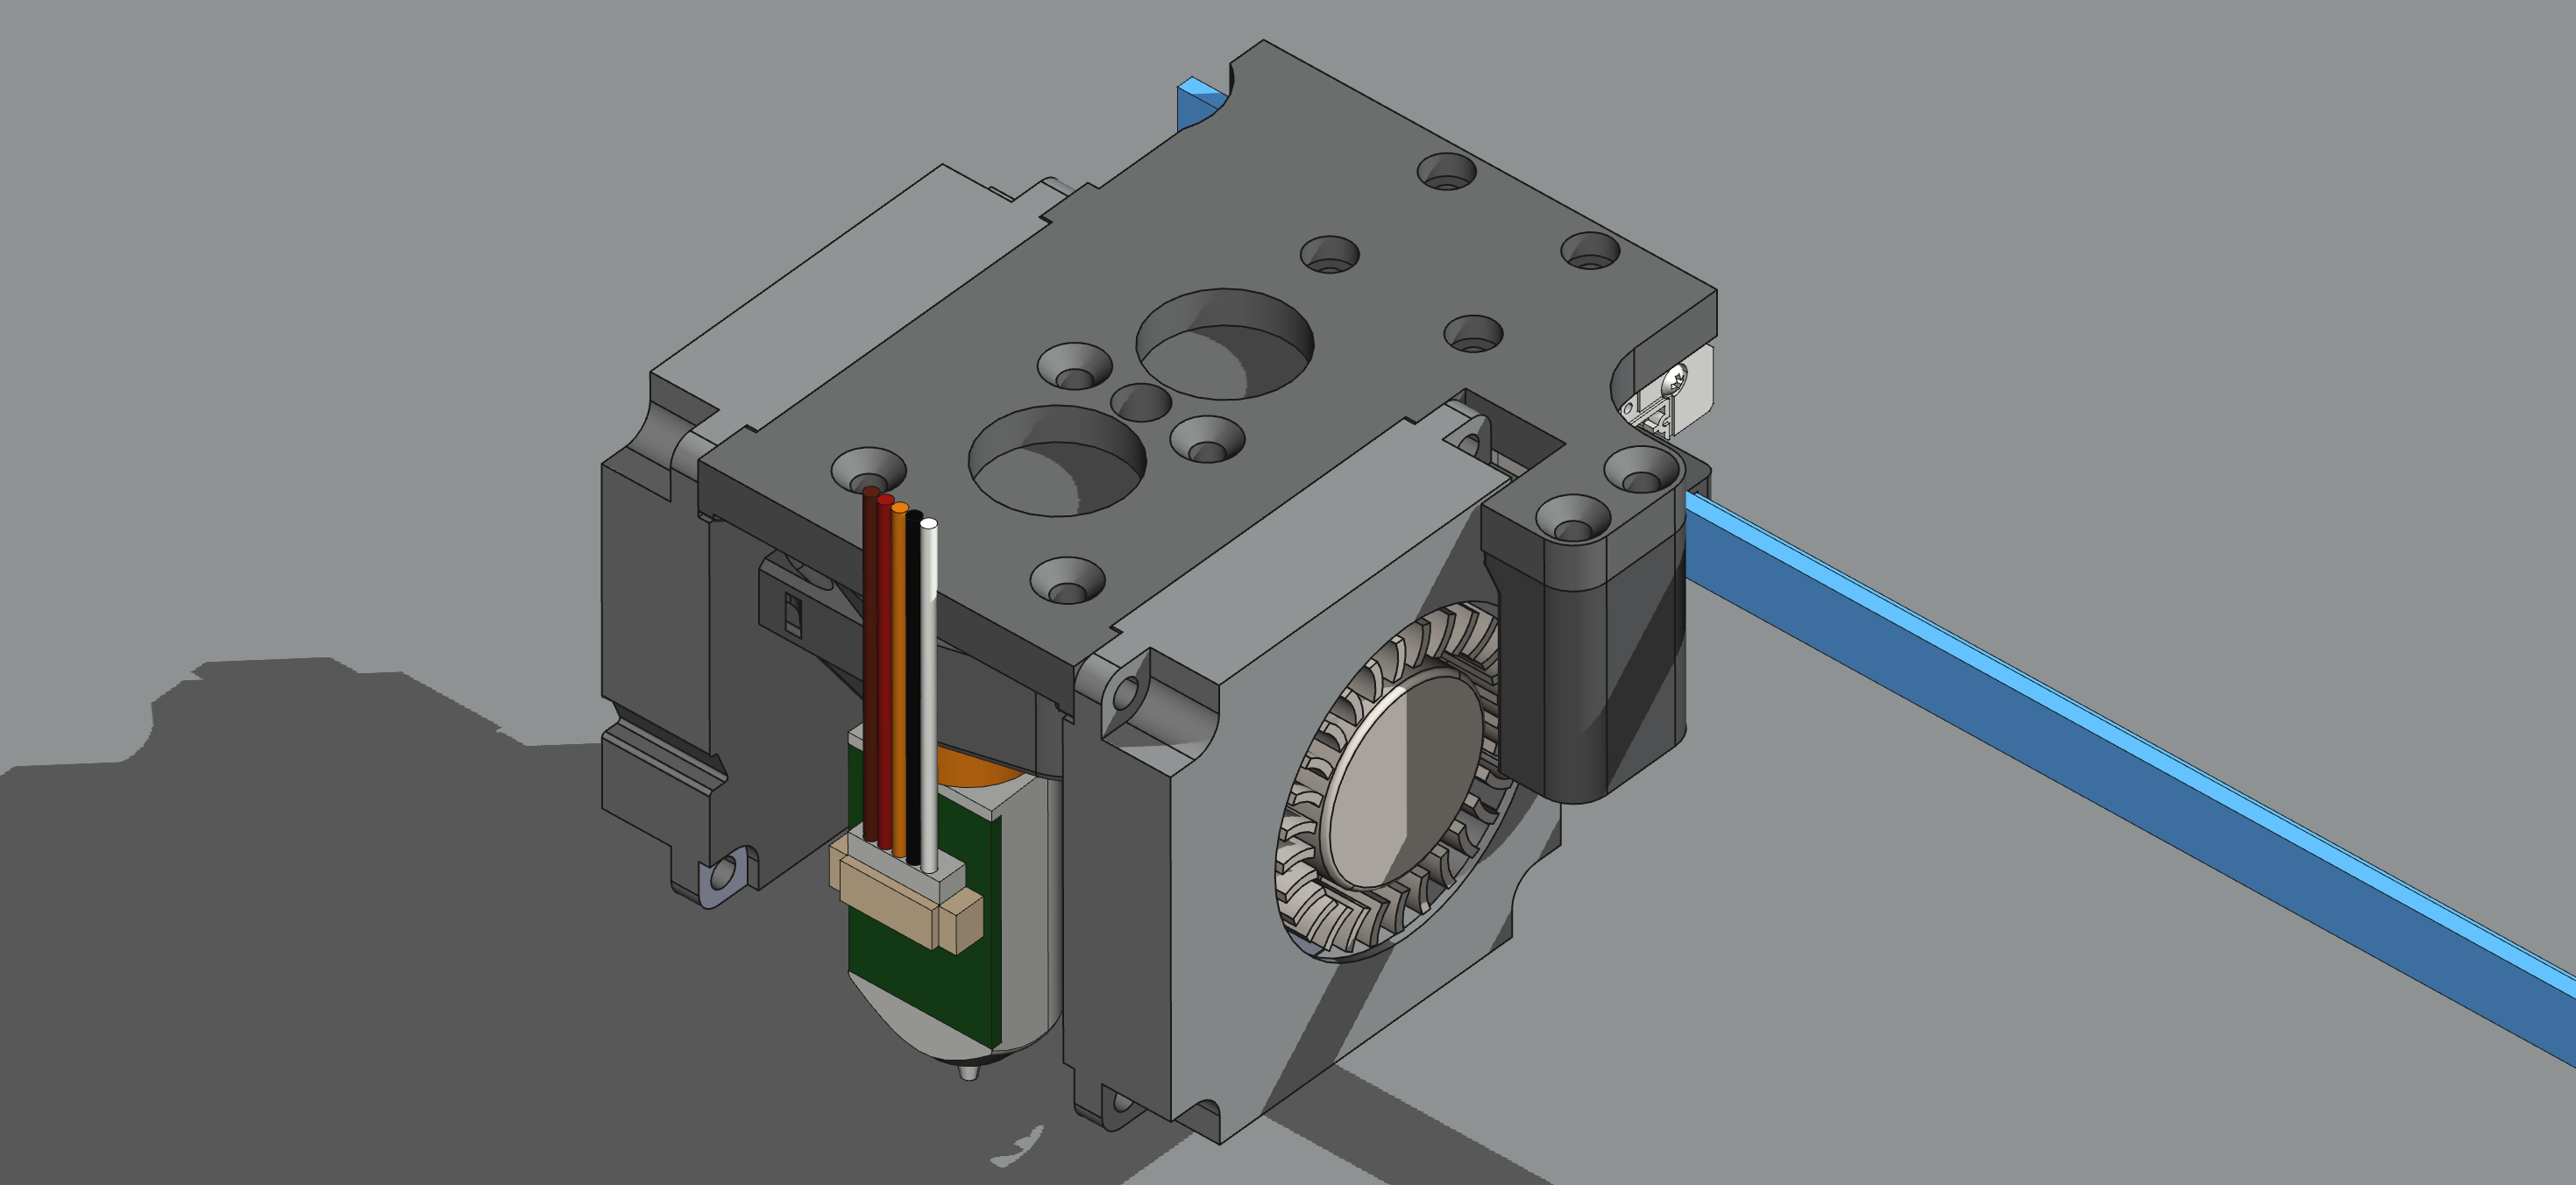
The redesign should incorporate two 40mmx10mm fans, a Bltouch sensor and a new folding mechanism for the bowden tube.
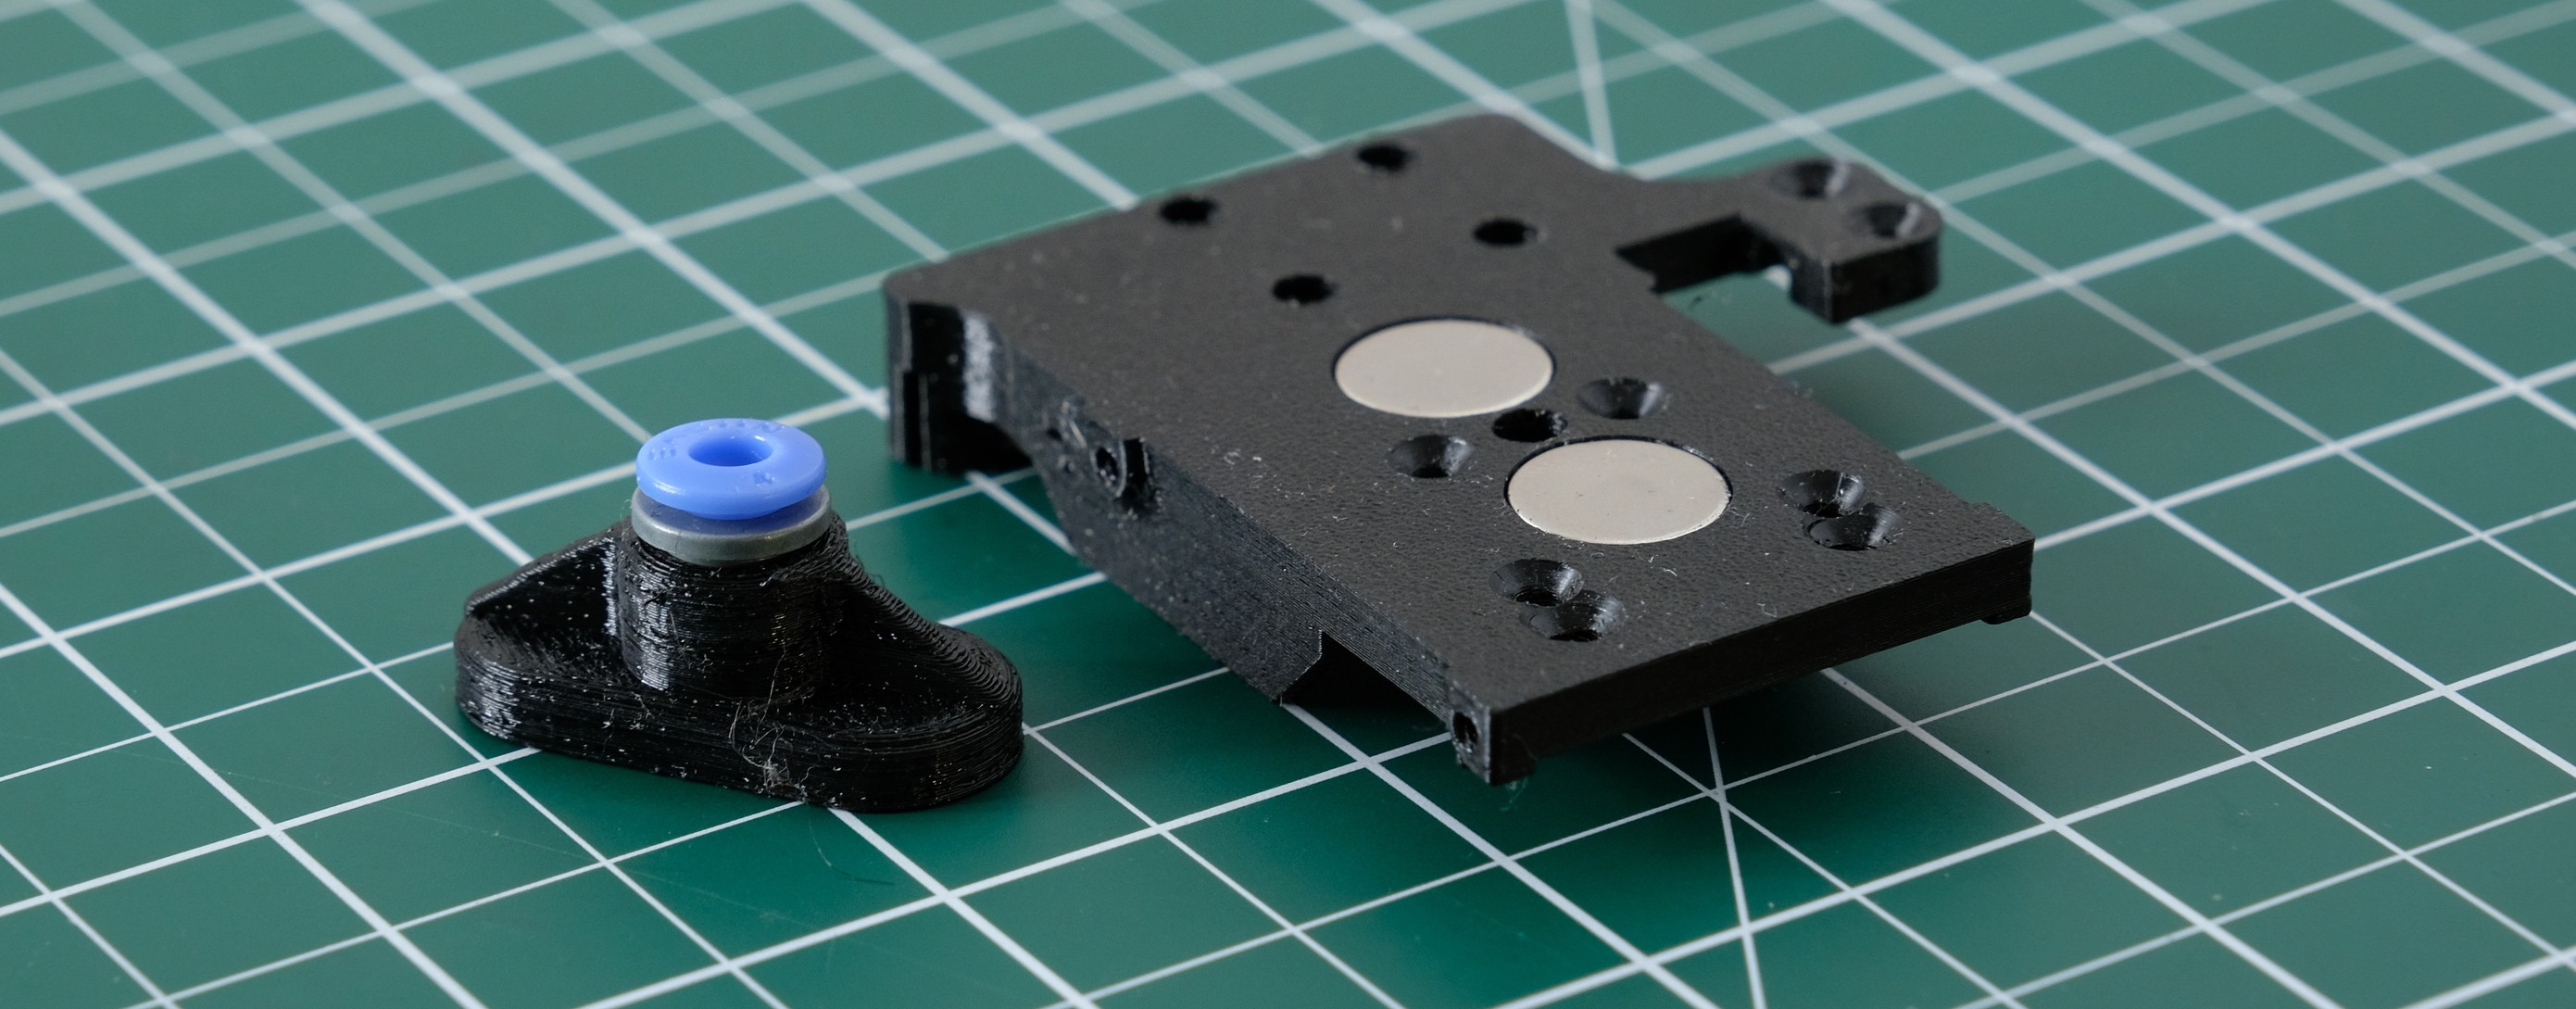
I came across this magnetic bowden connector and thought that if somebody sold this, it might be a feasible way to get the bowden tube detachable. With the use of CNC Kitchen's data from his extruder comparison video I knew how much force an extruder would generate, usually no more than 100N. With this information I started looking for suitable magnets that can hold more than 10kg of weight. I settled on N52 12mmx3mm cylindrical neodymium magnets, each capable of holding up to 3,1kg. I planned to use four of them, for a total holding power of 12.4kg.I only have this picture where you can see the one part of the printhead and the bowden tube holder that can be attached to the printhead through the magnets.
The concept with the magnets had several problems:
The magnetic bowden coupler held together during normal printing in the centre of the print bed, but when the printer moved to the corners of the print area, the coupling broke due to drag on the bowden tube.
In addition, the magnets, or rather their strong magnetic fields had severe effects on other components of the printhead. The Bltouch sensor couldn't be placed near the magnets because it wouldn't work properly. The magnetic fields of the magnets inhibit the lifting motion of its tip.Secondly, the magnets slowed down all of the fans. The part cooling fans sometimes stopped spinning or didn't start to spin. Which surprised me quiet a bit because I thought the fans were far enough away from the magnets. Anyway, for these reasons I had to abandon the magnetic bowden tube coupler concept as it was too weak and caused other components to malfunction.
I think it might work if the magnets are stronger and further away from the other components. But the Xprinter's printhead needs to be very small, so the relatively close placement of the printhead's components is inevitable.
-
It prints!
09/19/2023 at 21:12 • 3 commentsAbove you can see a timelapse of a vase-mode print.
The build of the printer is a bit ahead of the logs. I'll try to reconstruct the process of the last few months in the future logs.
Problems with the current printhead
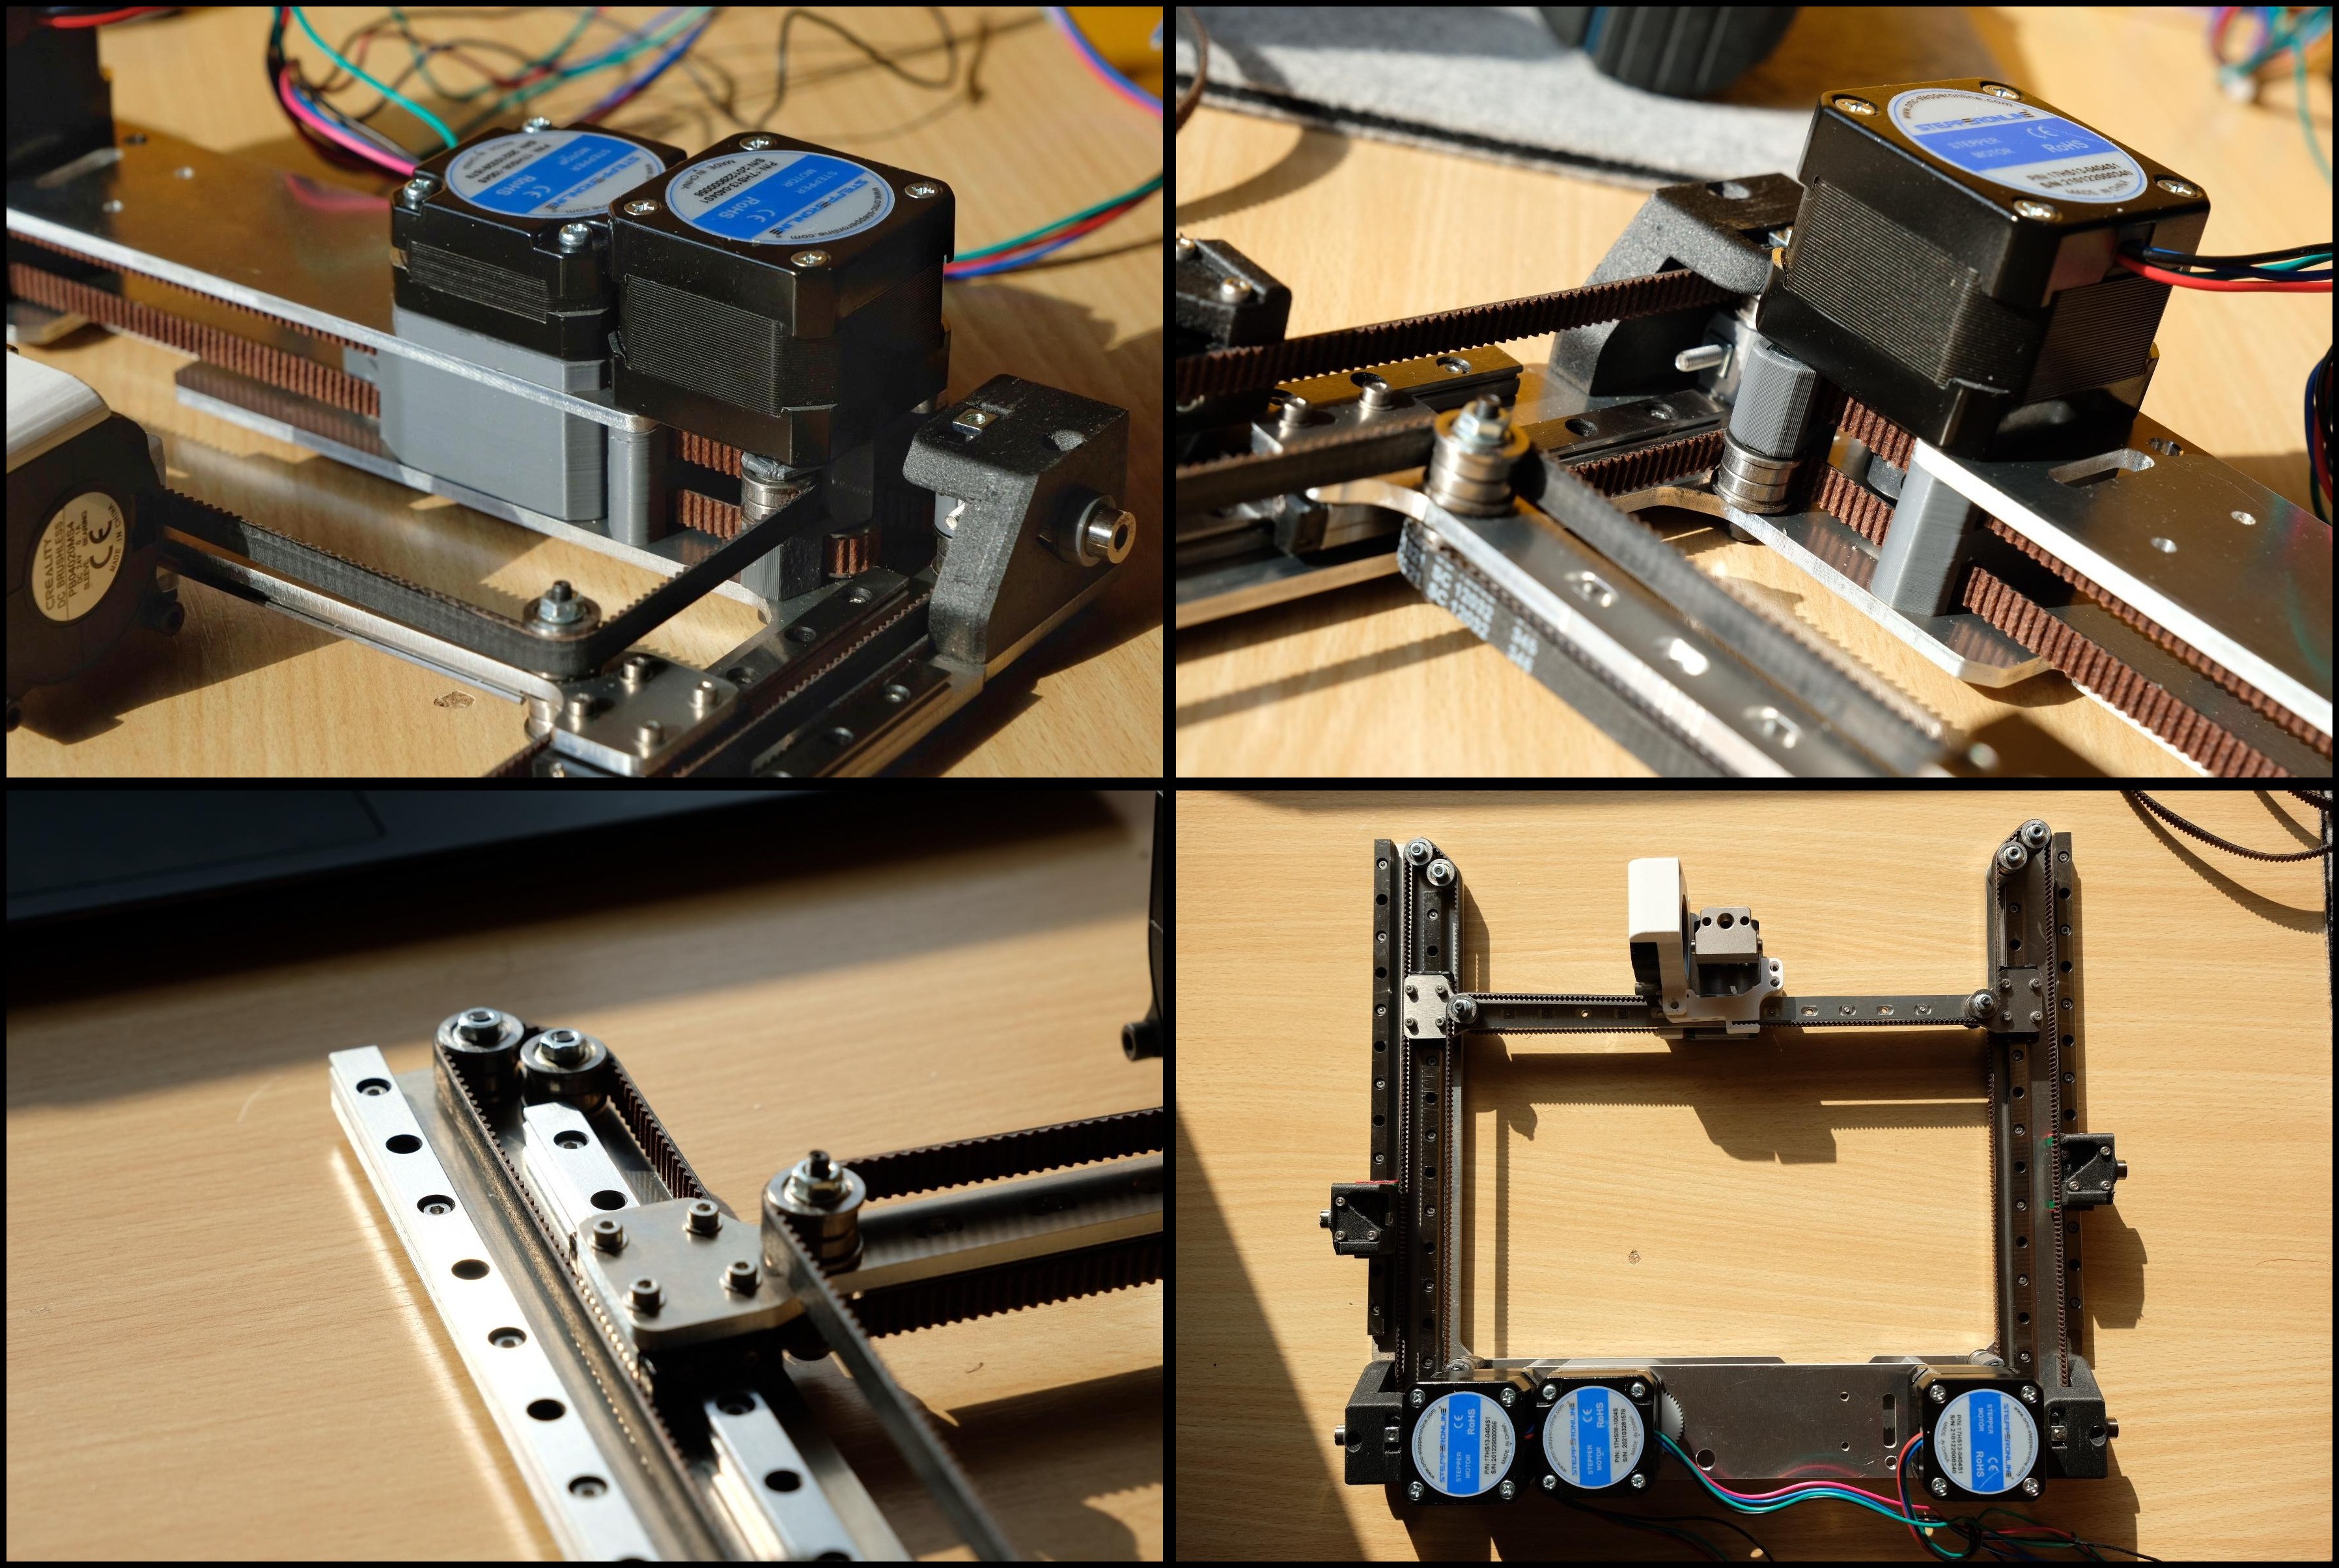
I found out that the chosen IR-sensor for the automatic-bed-leveling does not work reliably on a textured, black PEI print bed. Because of that I want to switch to a bltouch sensor which should work better.Secondly the printhead in general has some shortcomings, it has only one large 40mmx20mm radial-fan for part cooling, which is not ideal for achieving an even part cooling effect. After seeing the video by DIY PERSPECTIVE and his data showing that two narrow 10mm fans are quieter than one 20mm wide fan at the same airspeed, I decided to replace the current one with two 10mm wide fans on either side of the hotend.
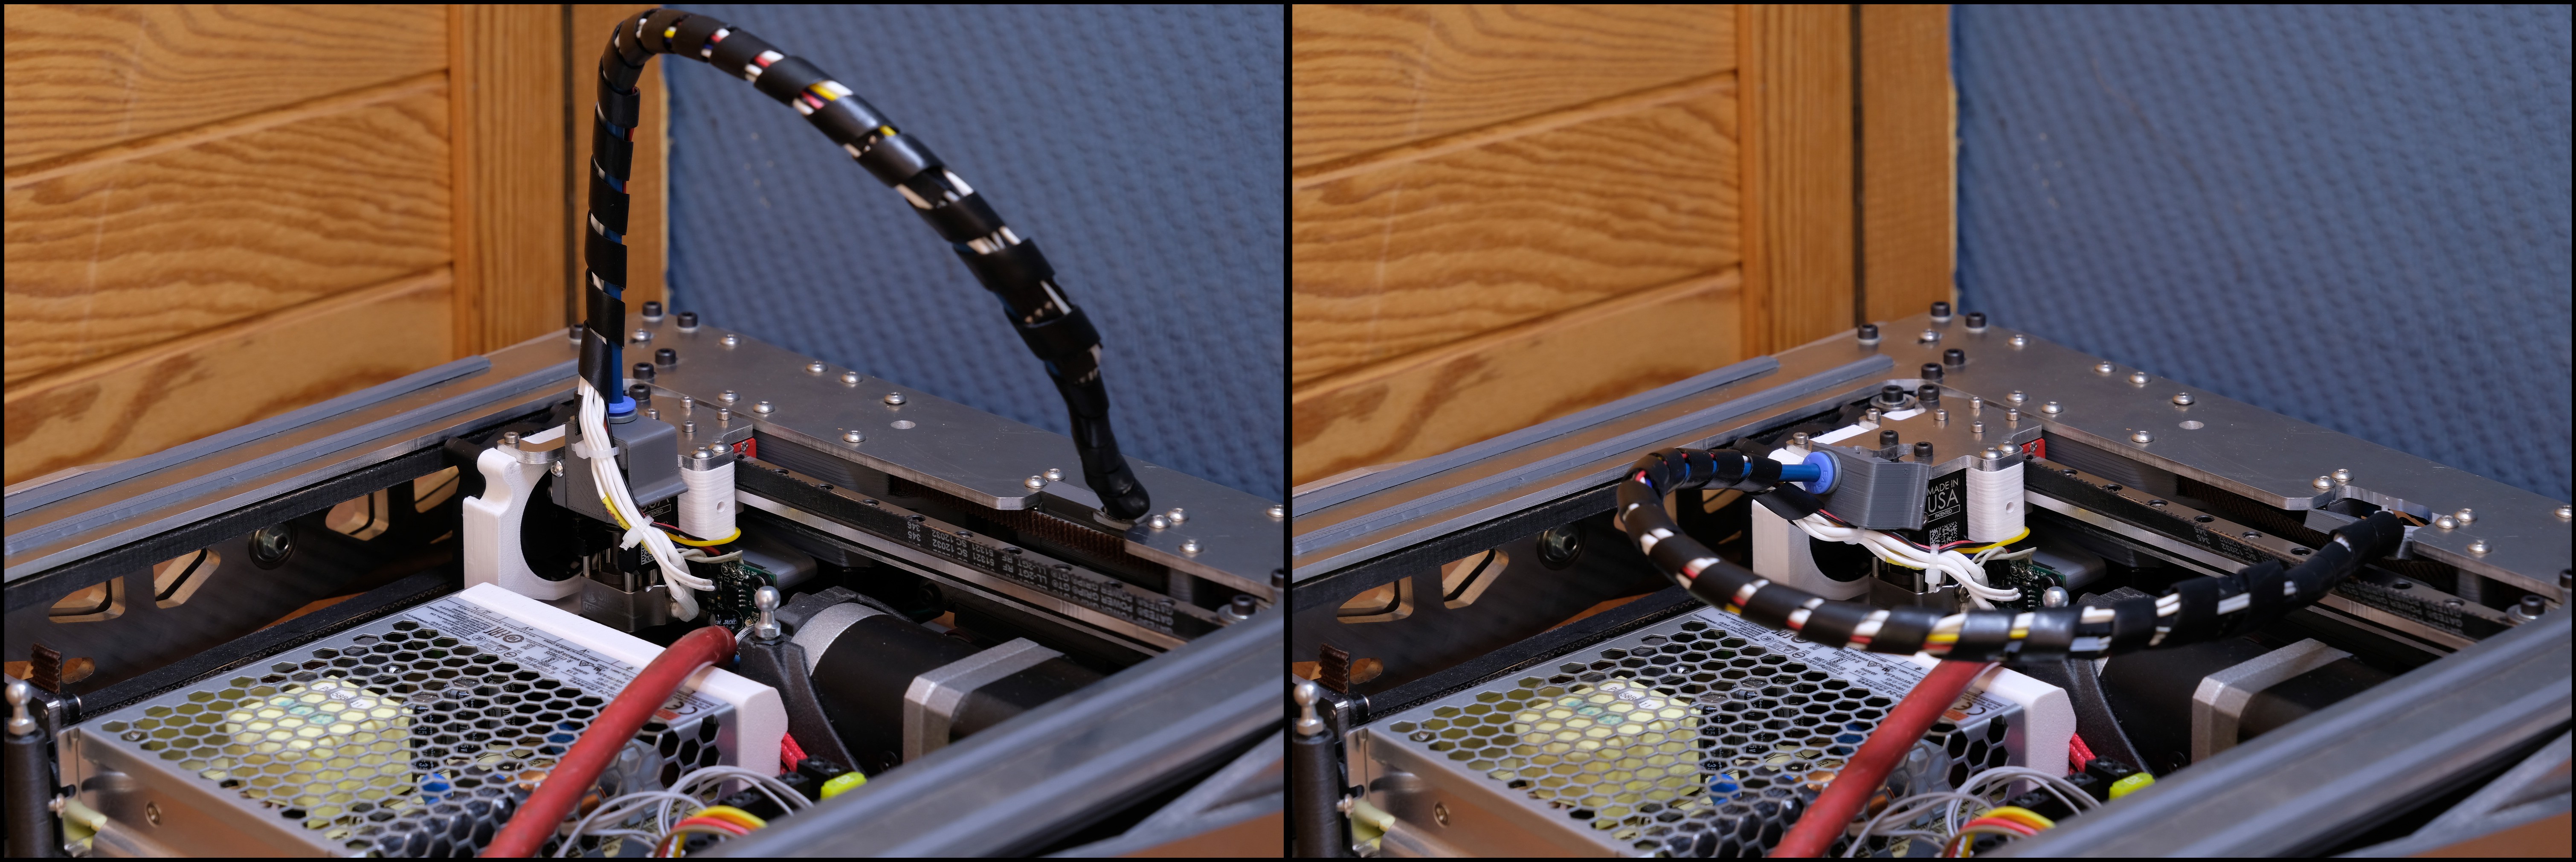
Lastly the collapsible mount for the bowden tube is not working very well. Thus I have to think about a new mechanism to fold the bowden tube away from the printhead.
-
Build
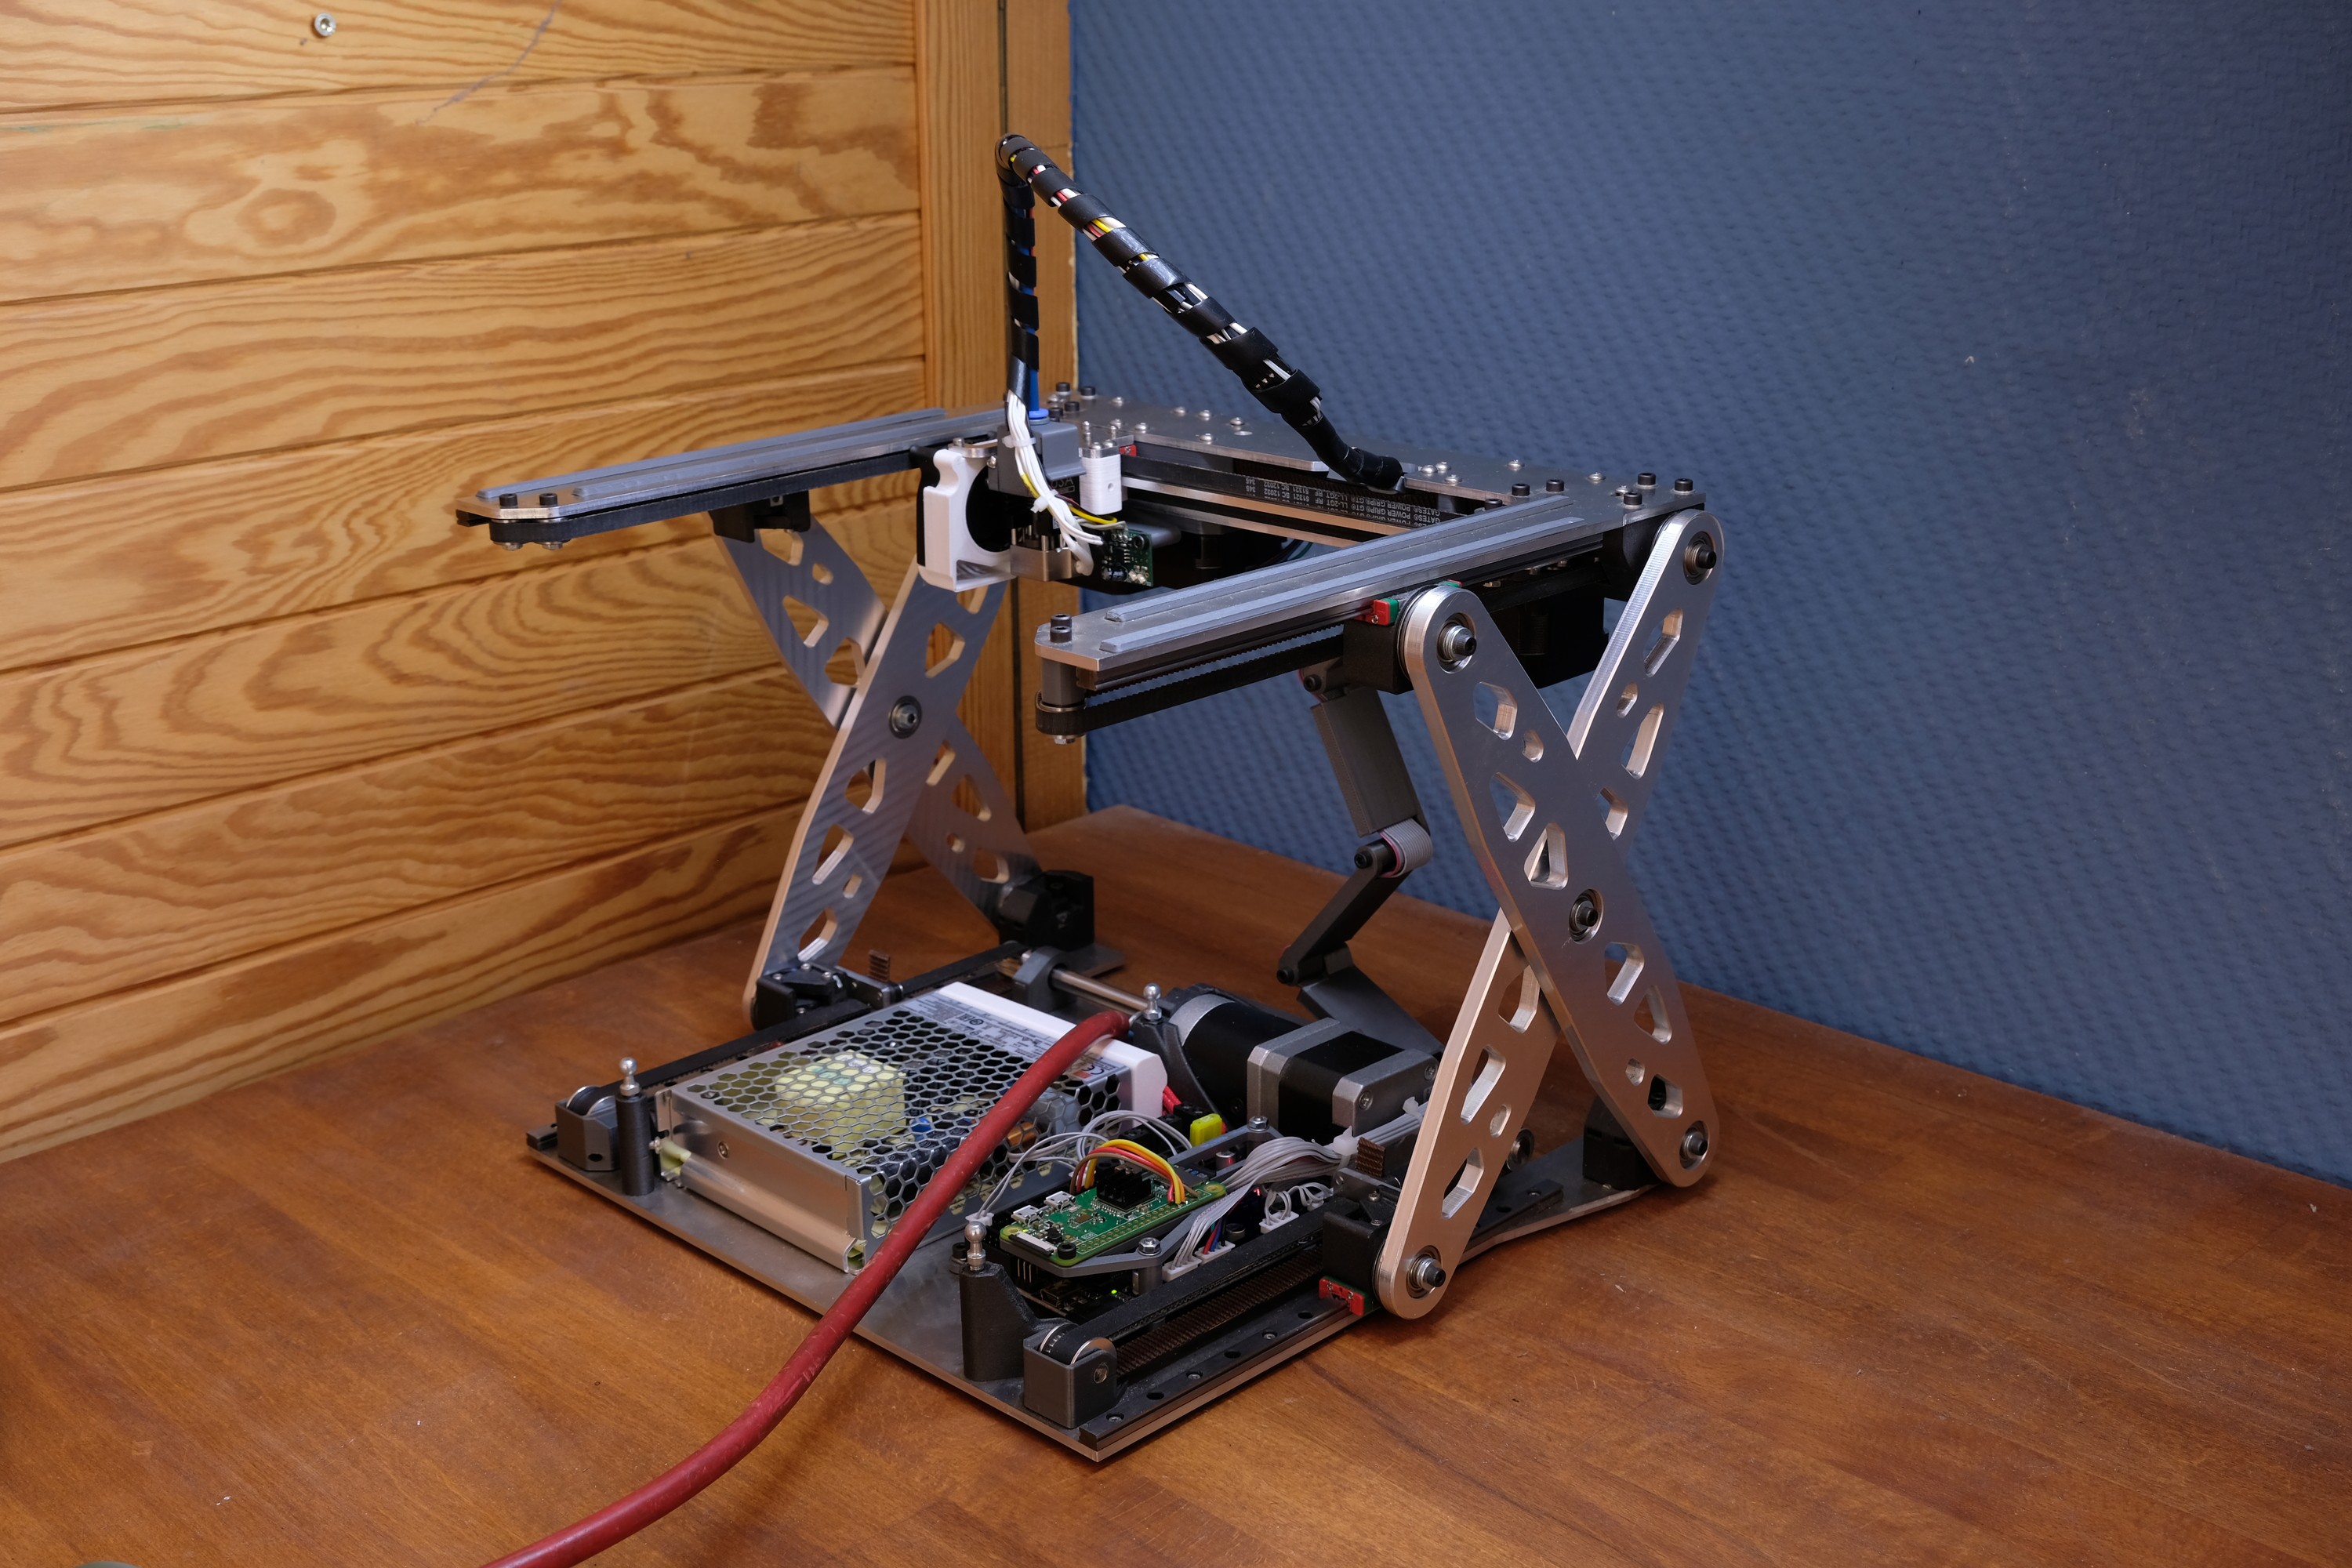
10/08/2022 at 21:28 • 1 commentThe build of the printer is almost finished, only the print plate is missing.
Some problems occurred during the build:
The ball bearings for the joints of the scissor-lift were chosen much too fragile, so they had to be replaced. As a result the entire arms of the scissor-lift had to be remodelled and instead of being made out of two 3mm Aluminium plates, they were now milled from 6mm aluminium.Learnings / mistakes
cheap mgn7 rails are pretty loose, they have a lot of play when applying torque to them. Half of the scissor-lift joints are mounted on these mgn7-carriages, so the whole scissor-lift looses stiffness due to that, which is very unfortunate.
Maybe the mgw7-Rails (wide version) have less play because the are two times wider.
To make the printer as thin as possible I made two cut-outs for the X/Y motors in the base-plate, so the printer could fold together even smaller. However, this weakens the attachment points of two joints, therefore reduces stiffness of the scissor-lift.
Due to a dimensioning mistake in the design, the printer can't collapse as thin as I planned it. The collapsed height of the printer is now 3-4mm taller.
things that worked well
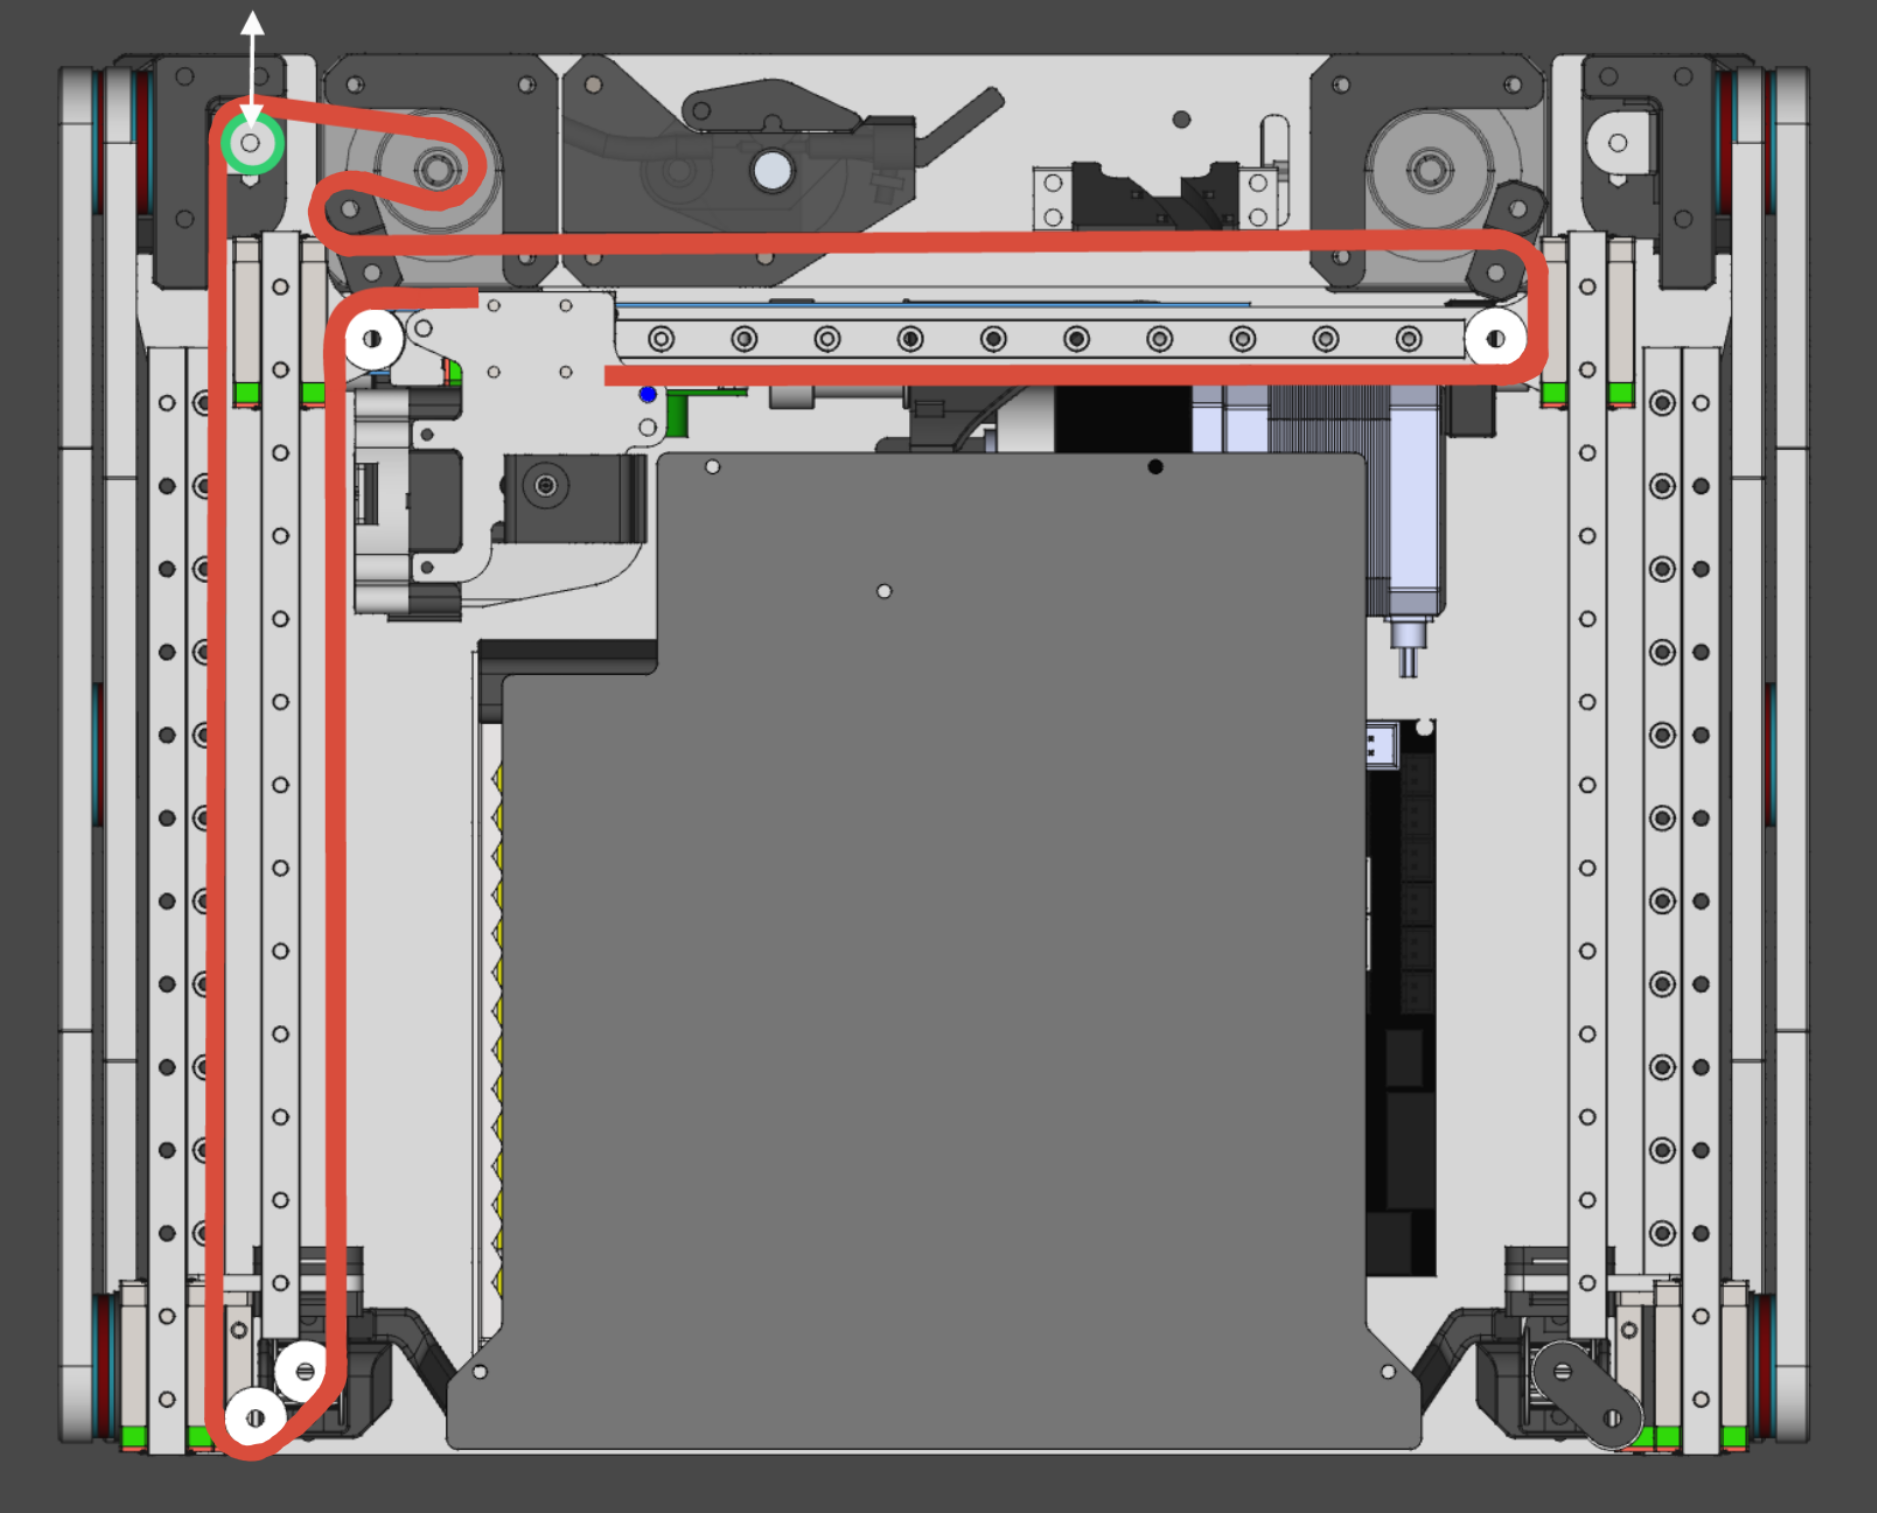
- The pathways of the CoreXY belts are running through the mountings of the X/Y motors and the extruder.
- The tensioning mechanism for the CoreXY belts consists of the rear idler pulley, which can be pulled further backwards by a screw. Which works very well.
Stiffness
When the printer is fully unfolded (print height approx. 115mm) and a force acts orthogonally to the scissor-lift, it is not very stiff. I think printing that high will only be possible with low printing speeds. I am curious how the printer will print in general and if it is stiff enough for reasonable print speeds.Printhead
the printhead uses a Mosquitto hotend which sliceengineering kindly provided. In the picture you can the the folding mechanism of the bowden tube, when the printer gets stored away.
All in all, I am not very happy with how the printer turned out, because it is not stiff enough. It is difficult to minimize something with moving parts without loosing stiffness.
I really like the concept of a 3d printer with a scissor-lift and already thought about how I can use steel wire to stiffen the scissor-lift and printer. I have to give this idea a try in the next redesign
-
Scissor-lift prototyping
07/03/2021 at 12:30 • 0 commentsThe design of the printer is not done yet but I built one of the scissor-lift joints which connects the arms with the printer. The arm in this prototype is just an old 3mm thick aluminium part. So it doesn't have the shape / thickness of the real one.
In the video you can see the joint-construction. It looks reasonably stiff.
This is a lasercut protoype of the scissor lift (arms) out of 3mm MDF. Each arm consists of two layers 3mm MDF in the real 3D printer these will be out of 3mm 7075 Aluminium. The two layers are screwed together with 10x m3 screws. Now I'm realising how small the whole printer will be. Hope that everything works as planned because every part of the printer shrank a lot compared to the old one.
X printer V2
Portable CoreXY 3D printer - lighter, more compact than V1