 Kutluhan Aktar
-
1Connections
// Connections
// Raspberry Pi 4 :
//                                L298N Motor Driver Module
// GPIO 17 ----------------------- IN_1
// GPIO 27 ----------------------- IN_2
// GPIO 22 ----------------------- EN_A
// GPIO 10 ----------------------- IN_3
// GPIO  9 ----------------------- IN_4
// GPIO 11 ----------------------- EN_B
//
//
// Arduino Nano :
//                                DFRobot Serial 6-Axis Accelerometer
// D11 --------------------------- TX
// D12 --------------------------- RX
//                                SSD1306 OLED 128x32
// A4  --------------------------- SDA
// A5  --------------------------- SCL
//                                Buzzer
// D10 --------------------------- S
-
2Assembling the Tracked Robot Chassis
First of all, I assembled the DFRobot Black Gladiator (Tracked Robot Chassis) and connected an L298N motor driver module to the robot chassis to control its DC motors easily with Raspberry Pi GPIO pins.
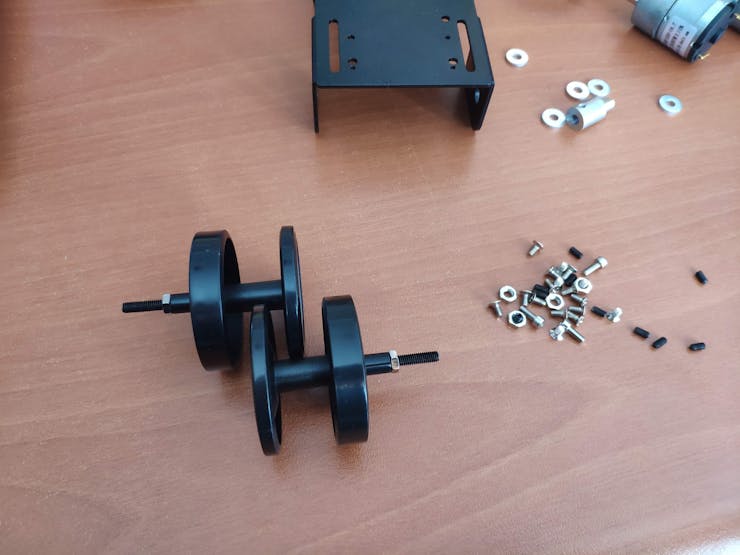
⭐ Install the load-bearing wheel (first install the M4*50 long screw into the load-bearing wheel) and lock the other side with the M4 screw.
![]()
-
3Assembling the Tracked Robot Chassis
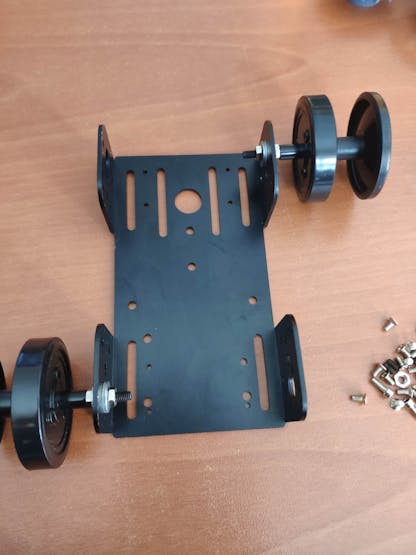
⭐ Place the gasket on the bracket and insert the load-bearing wheel into the hole of the bracket. Then, seal it with the other gasket and the M4 nut.
![]()
-
4Assembling the Tracked Robot Chassis
⭐ Insert the motor into the bracket and tighten it with 3 M3*6 flat head screws.
![]()
-
5Assembling the Tracked Robot Chassis
⭐ Join the two sides of the drive wheel and lock it with the M3*8 hex socket screw.
![]()
-
6Assembling the Tracked Robot Chassis
⭐ Attach the drive wheel to the motor and tighten the connection with the black screw sent with the kit.
![]()
-
7Assembling the Tracked Robot Chassis
⭐ Disconnect the track to measure the required track length and discard the redundant part.
![]()
-
8Assembling the Tracked Robot Chassis
⭐ Wrap and reconnect the track after attaching it to the wheels.
![]()
-
9Assembling the Tracked Robot Chassis
⭐ Solder male jumper wires to motors and connect them to the L298N Motor Driver Module. Then, fasten the L298N module to the bottom of the bracket with a hot glue gun.
![]()
![]()
-
10Building the Litter Detection Robot
Then, I connected the RPLIDAR A1M8 360 Degree Laser Scanner (Lidar) and the USB webcam to the Raspberry Pi 4.
![]()
Autonomous Litter Detection Robot w/ Edge Impulse
Recognize and monitor litter with object detection via this self-driving robot. It also deploys a video stream and a fall detection system.


Discussions
Become a Hackaday.io Member
Create an account to leave a comment. Already have an account? Log In.