-
1Teensy on breadboard
First of all, this isn't a proper building guide at all, sorry, it is just a confused documentation of how it all was done.
The Teensy was on a messy breadboard for a long time, with a couple of control box prototypes connected that had different shapes and forms.
Installation instructions for Teensy: https://www.pjrc.com/teensy/td_download.html
We figured out how buttons and knobs works, found the libraries needed:
Bounce.h
ResponsiveAnalogRead.h
Adafruit_NeoPixel.h
MIDI.hNote: Should check what exact versions of libraries we're using
The serial USB setup is very basic, check the code and Max patch.
-
2LED
![]()
We started with normal leds, and also did some test with just one RGB LED per controller and both kind of did the job, but since these are connected in serial and just use one pin it just made more sense to use the fancy Neopixel ones.
So from Max there's three bytes sent: ID, Mode and Position:
unit_ID (1,2,3,4) or special commands (Brightness and stuff)
LED mode
1 - all off
2 - play, filled leds
3 - rec, filled leds flashing once per step
4 - resync effect, four steps loop
5 - cue, single LED position
6 - flash (yellow version of play)LED position
0 - 31. It's just 8 leds but we send the position in 32 steps to be able to flash leds on each step
-
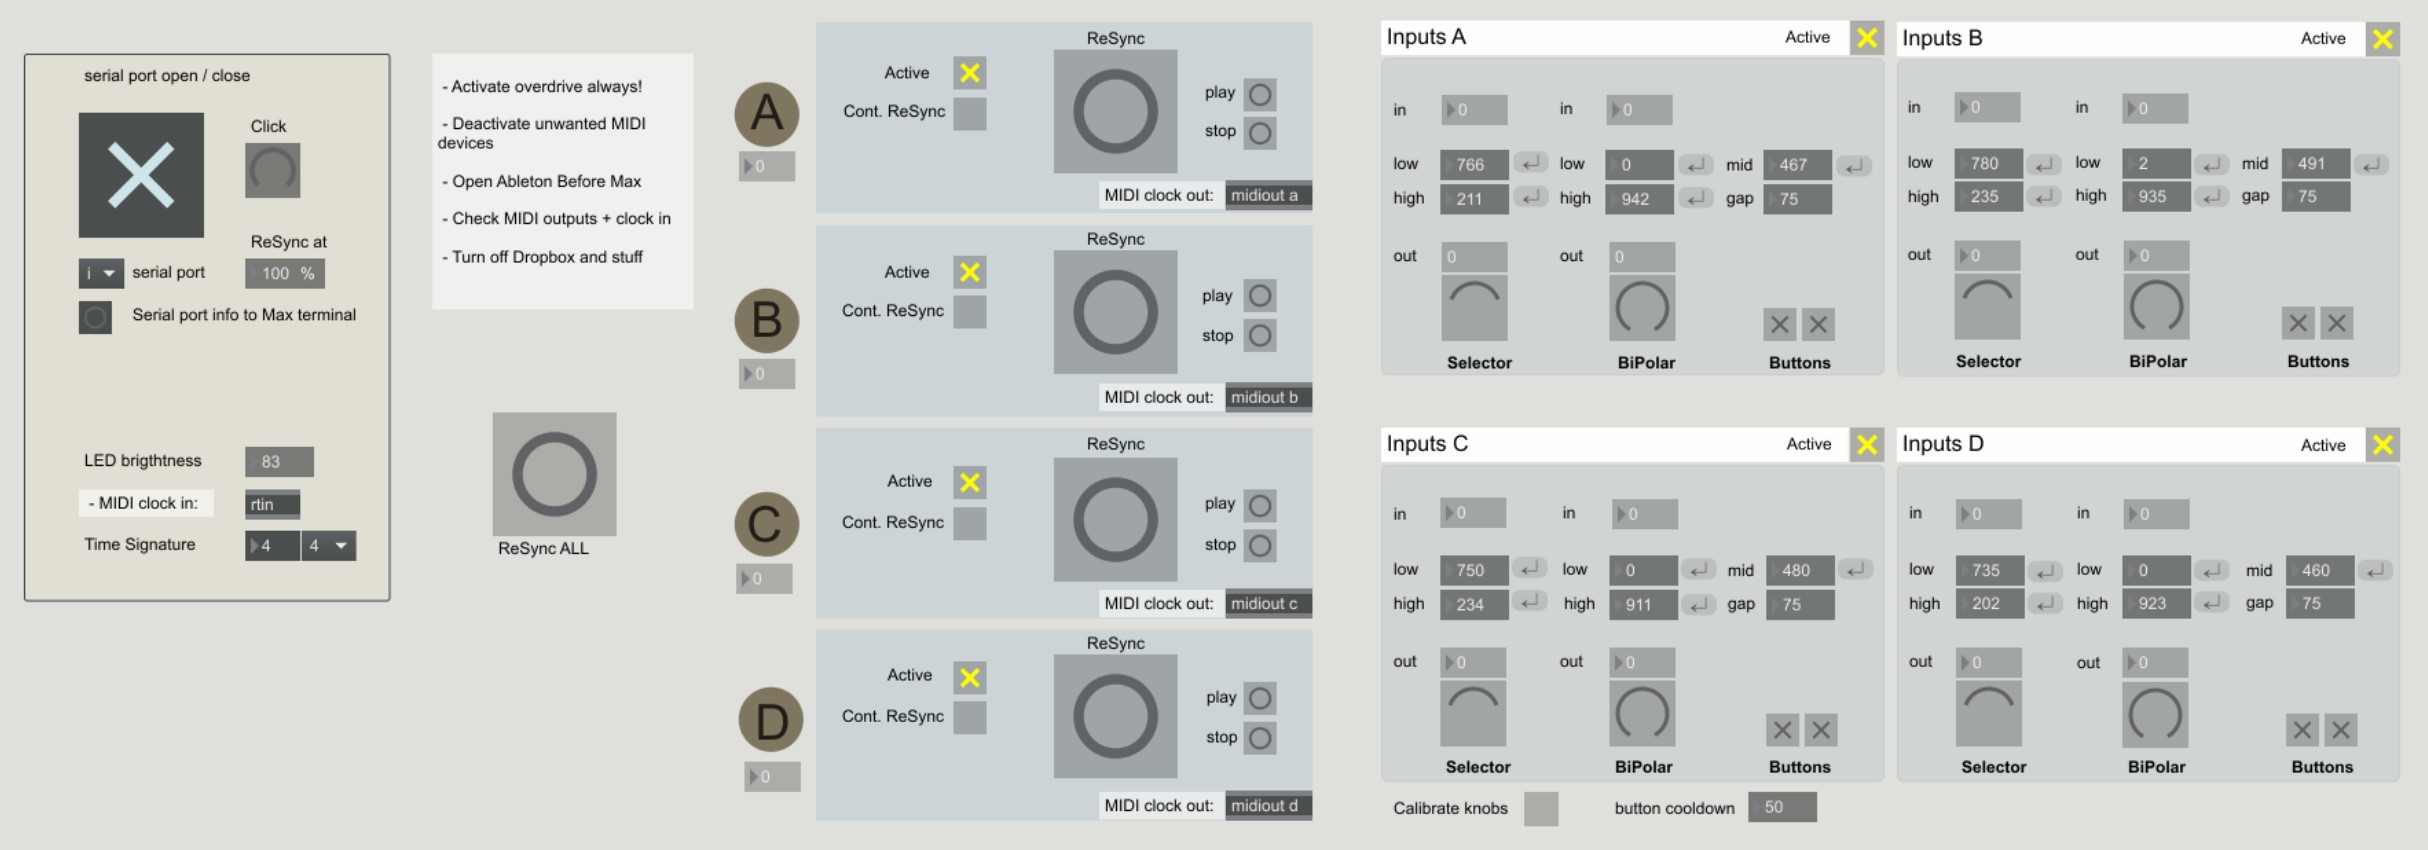
3Max and Ableton setup
From the Teensy we get the button and knobs send to Max, and the messages gets scaled and routed into each m4l-patch.
![]()
Ableton's sync out goes to a virtual MIDI device, we found Loopbe1 to be perfect. https://www.nerds.de/en/loopbe1.html Latency compensation is done in the Ableton MIDI out setting using negative delay on the clock out until the monitor inputs matches with the built in sound.
Max receives the clock ("MIDI clock in" )and distributes it to the Teensy's MIDI ports with the added resync (Stop/Play) messages.
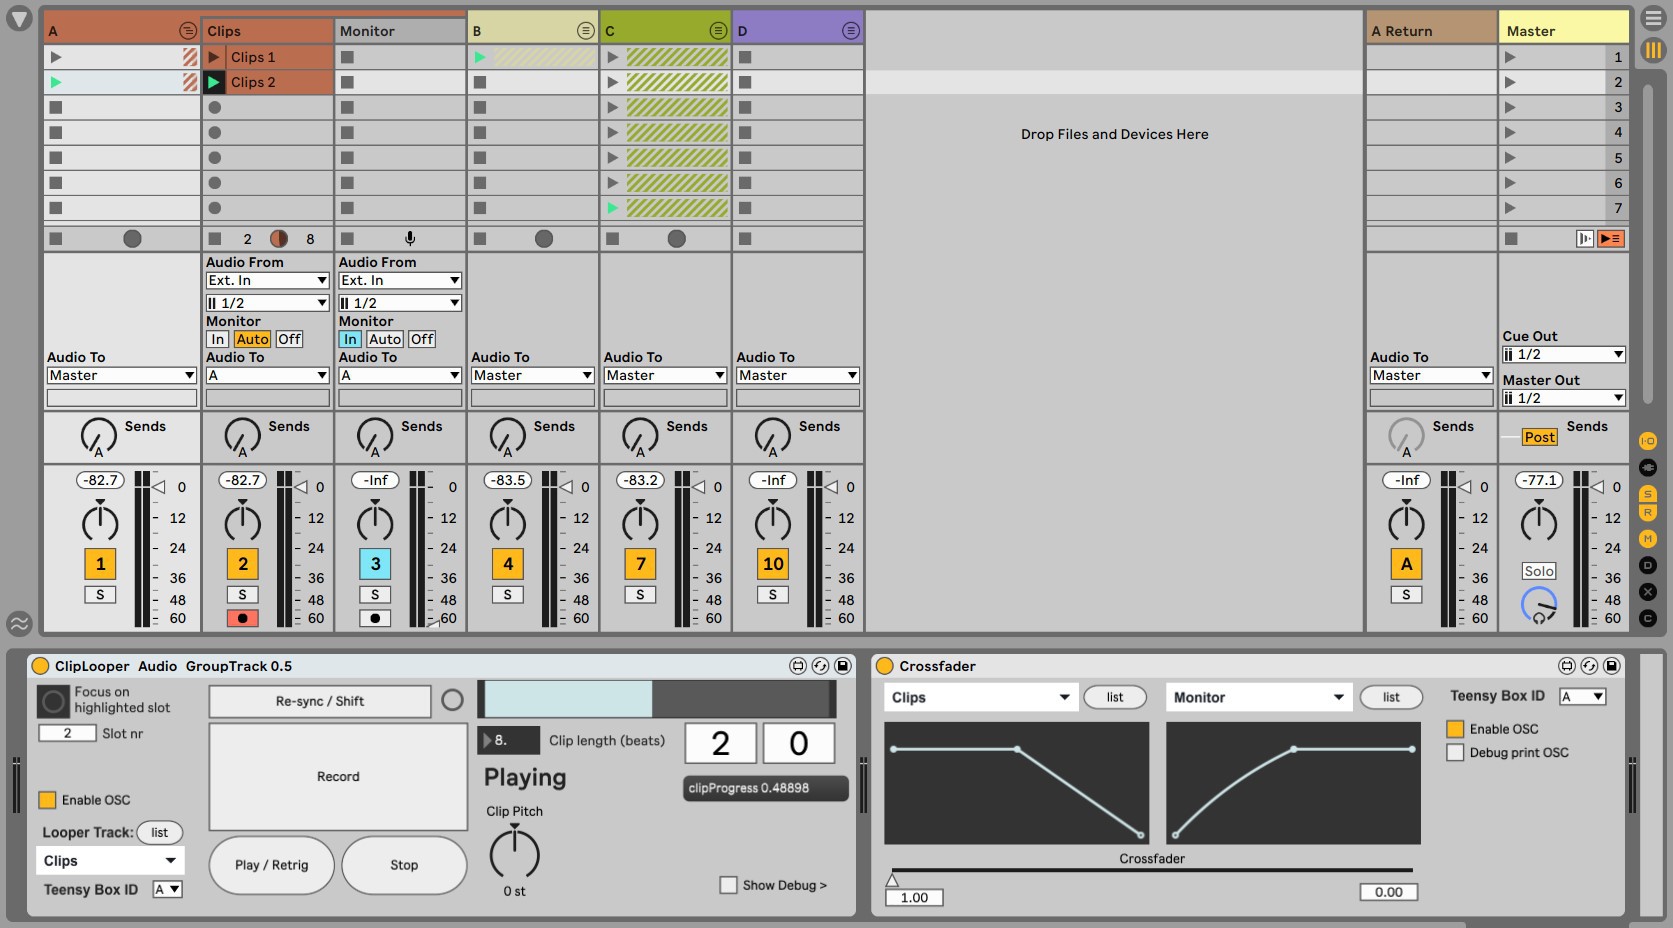
For each instrument, the setup in Ableton consists of two channels grouped together. One for monitoring (live mode) and on for the clips. The ClipLooper patch sits on the group channel and has to point to the clip track. (lower left corner). It also needs to know which controller (A/B/C/D) it belongs to.
The crossfader patch is controlled from the big knob and simply sets the volume of the two channels ion the group.
![]()
Loop based live/jam solution
Ableton Live based setup for live music collaboration using custom hardware controllers.

Discussions
Become a Hackaday.io Member
Create an account to leave a comment. Already have an account? Log In.