 Lewis (DIY Machines)
-
21WLED - Using the Controls
![]()
There are absolutely loads of good quality guides on the internet for using WLED so I will not go into great detail here. But I won't leave you without a quick crash course in the basics.
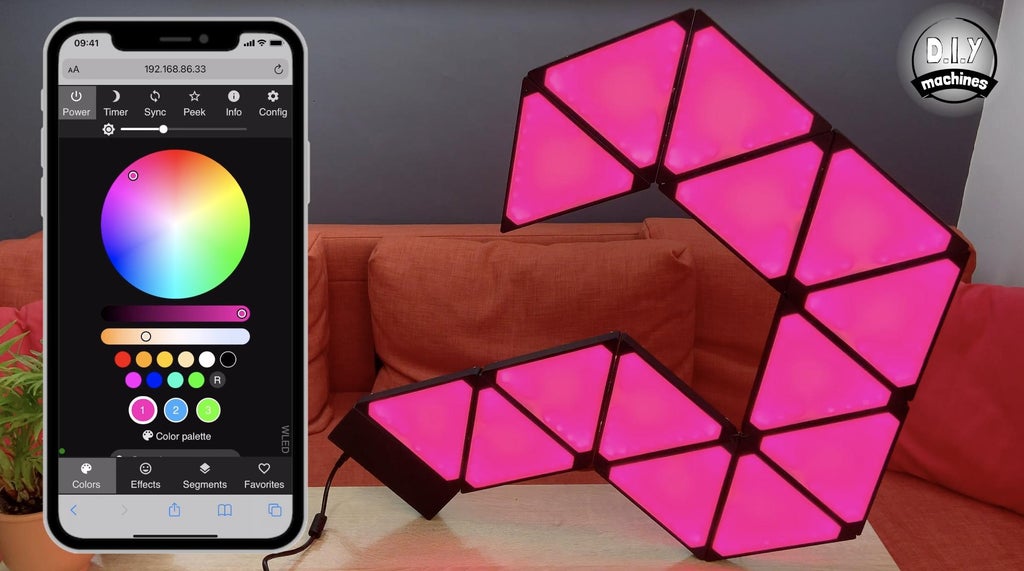
On the main screen is a brightness slider found at the top of the screen. This is the master brightness control and can be accessed from any screen.
There are four main pages which can be accessed from the four main tabs at the bottom of the screen; Colours, Effects, Segments, Favourites. The first tab you find yourself on is the Colours tab.
Colours Tab
![]()
WLED has a pallet of three main colours, accessed by the numbers 1,2,3 just below the colour pickers. Pressing one of these and then selecting a new colour from above will update it. At the moment the effect we have is known as 'Solid' and only uses the third colour. So for now the other colours chosen for colour one and two will not effect what your project will show, however, other effects can use more than one colour and will therefore allow you finer control.
If you scroll further down the colour tab there are pallets of pre-prepared colour schemes you can select from.
Effects Tab
![]() The Effects page allows you change between various dynamic and static animation for the LED panels.
The Effects page allows you change between various dynamic and static animation for the LED panels.This tab introduces an additional slider at the top of the page which controls the speed/tempo of the dynamic effects.
![]() In a similar fashion to the colours tab, this page has a long list of predesigned lighting effects. There are plenty here to choose from and it may take you a few minutes to find some of your favourites.
In a similar fashion to the colours tab, this page has a long list of predesigned lighting effects. There are plenty here to choose from and it may take you a few minutes to find some of your favourites.Power Control
![]() At the very top left of the screen is the 'Power' button. This allows you to turn the LED's off and on easily from any screen. If you won't be using your panels for awhile I still recommend that you turn of the power supply at the wall connection.
At the very top left of the screen is the 'Power' button. This allows you to turn the LED's off and on easily from any screen. If you won't be using your panels for awhile I still recommend that you turn of the power supply at the wall connection. -
22WLED - Alexa and Phillips Hue
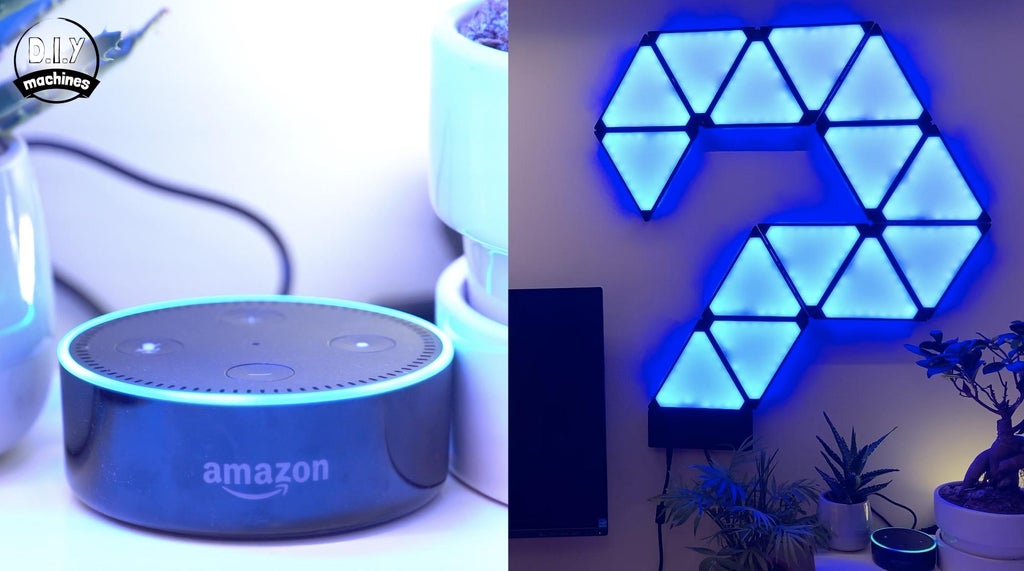
The fantastic WLED software allows us to connect this project with Alexa and Philips Hue. If this is something that you're not interested in doing you can just skip past this step.
![]()
![]()
Integrating with Amazon Alexa
The Nanoleaf project can be integrated with Amazon's Alexa voice assistant service to allow you to control the colour, brightness and toggle the panels on and off with your voice. This option also allows you to further integrate it into other services such as IFTT's routines. It is very easy to add:
- On the main screen of WLED open the 'Config' screen (top right button) followed by the 'Sync Interfaces' menu.
- Scroll down until you reach the 'Alexa Voice Assistant' section. Check the box to enable 'Emulate Alexa Device' and then choose an easily spoken and heard 'Alexa invocation name:' You can then scroll to the bottom and save your changes.
- Now open the Alexa app on your phone and click the '+' in the top right to begin adding a device.
- Choose to add a light and then scroll to the bottom of the list of brands and choose 'Other'.
- Proceed to 'Discover Devices'. Alexa will start to search for new devices, keep your Geoleaf project powered on during this search.
- Once you have received confirmation that the project has been found Alexa will guide yo through setting it up and how to control it.
Integrating with Philips Hue
Integration with Philips Hue's smart lighting system is a little more involved than the Alexa integration shown above and in the photos. To integrate with Hue we will have the project poll the Hue Bridge regularly and ask it about the status of one of your existing lights. The Geoleaf project will then try to replicate the settings of this build as closely as it can. For example, my Geoleaf panels are in my office and I have it follow the brightness and colour of my ceiling light bulb. This way it switches on and off when I enter and leave my home office space.
Here is some documentation provided on the official Wiki for WLED: https://github.com/Aircoookie/WLED/wiki/Philips-hue-sync and here is some documentation from Philips Hue on interacting with your Hue bridge to find bulb IDs which you need to enter int the WLED app: https://developers.meethue.com/develop/get-started-2/ . Both of these resources might help you with this integration but here is a super concise run through of what is required:
- Find the IP address of your Hue bridge by either clicking here (if you're on the same network at the moment) or by opening the Hue app, go to the settings menu, go to Hue Bridges, select your bridge and note its IP address.
- In a web browser navigate to: https://<bridge ip address>/debug/clip.html (ensuring you substitute your IP address). This will open the 'CLIP API Debugger' of your Hue Bridge.
- To be able to ask for more sensitive information about your Hue system you need to ask for a username to prove who we are. Do this by entering the following into the fields of the API Debugger: URL =/apiMessage Body ={"devicetype":"my_hue_app#geoleaf"}
- And then press the 'POST' button. This should return an error saying 'link button not pressed'. This is a security step to ensure you should be allowed access to your Hue data. Press the physical button on top of your Hue Bridge and then press 'POST' again.
- This time it will generate unique username for you. Note this down - it will be a long string of letters and numbers.
- This time enter the following information into the fields: URL =/api/YOUR-UNIQUE-USERNAME
- And press the 'GET' button. This will return all the information about your Hue system.
- This information can then be copied from the results and pasted into a JSON viewer such as http://jsonviewer.stack.hu. From here you can find the bulb you would like to mimic, take note of its ID and enter this into WLED.
-
23Wall Hanging
There are two different methods you can use to hang your Geoleaf project on the wall. You can either use the less destructive 3M command strips or the more permanent method with a screw and the mounting points provided in the project.
3M Command Strips
![]() These are self adhesive pads. One side sticks to the wall and the other the project. A velcro like finish allows you to then join the two halves together. (Full instructions should be followed on the packet).
These are self adhesive pads. One side sticks to the wall and the other the project. A velcro like finish allows you to then join the two halves together. (Full instructions should be followed on the packet).![]() It's ideal if you don't want to (or can't) make holes in the wall for a screw. They are also designed to be easily removed later whist leaving no marks or residue. The medium and large sizes are more then strong enough to mount this project.
It's ideal if you don't want to (or can't) make holes in the wall for a screw. They are also designed to be easily removed later whist leaving no marks or residue. The medium and large sizes are more then strong enough to mount this project.![]()
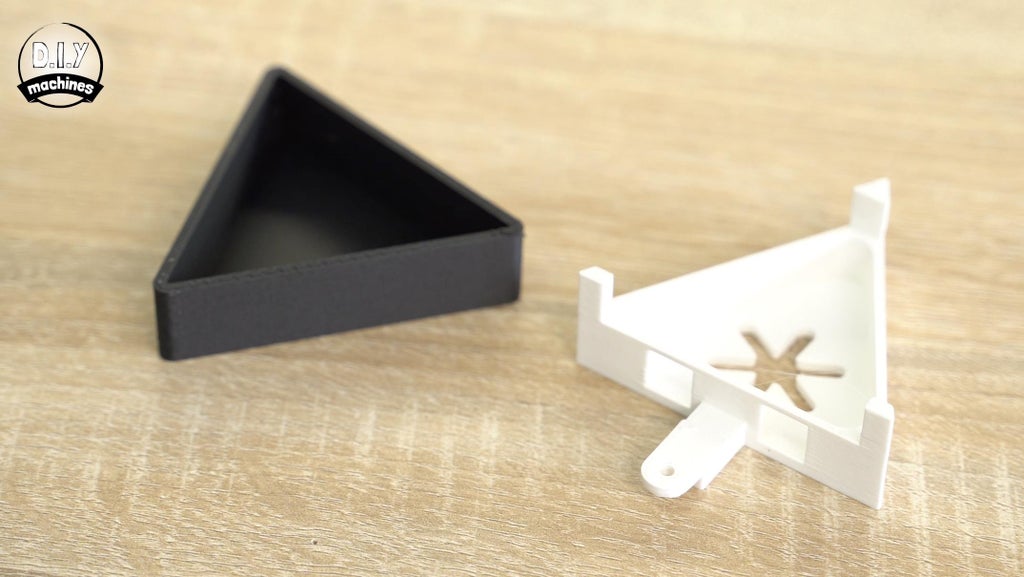
Mount with screws
![]()
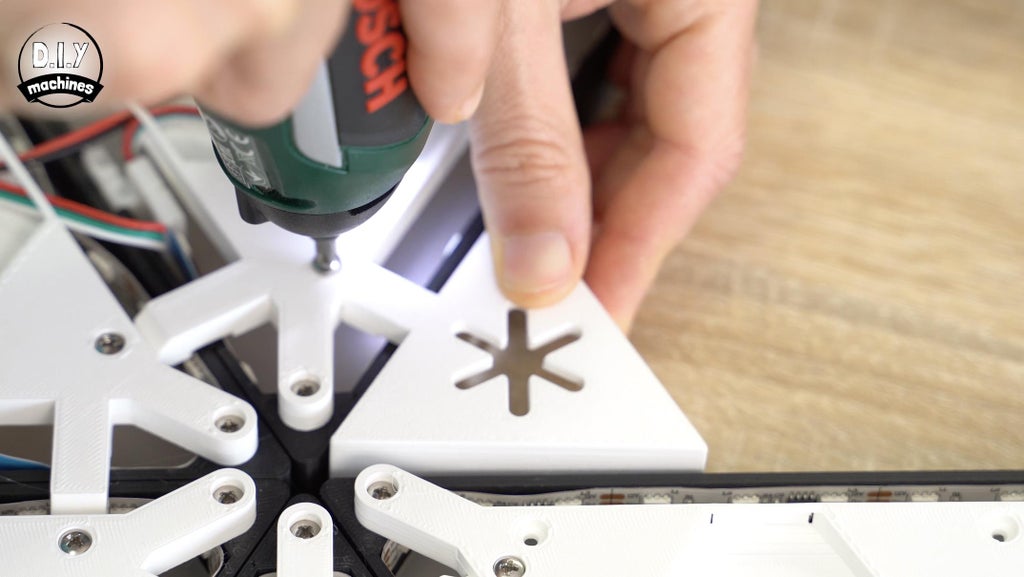
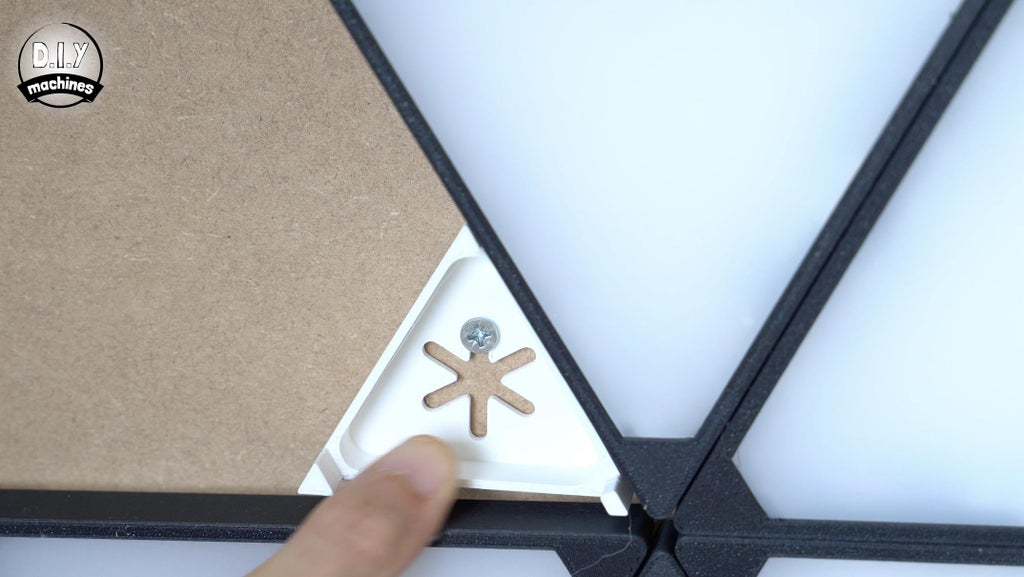
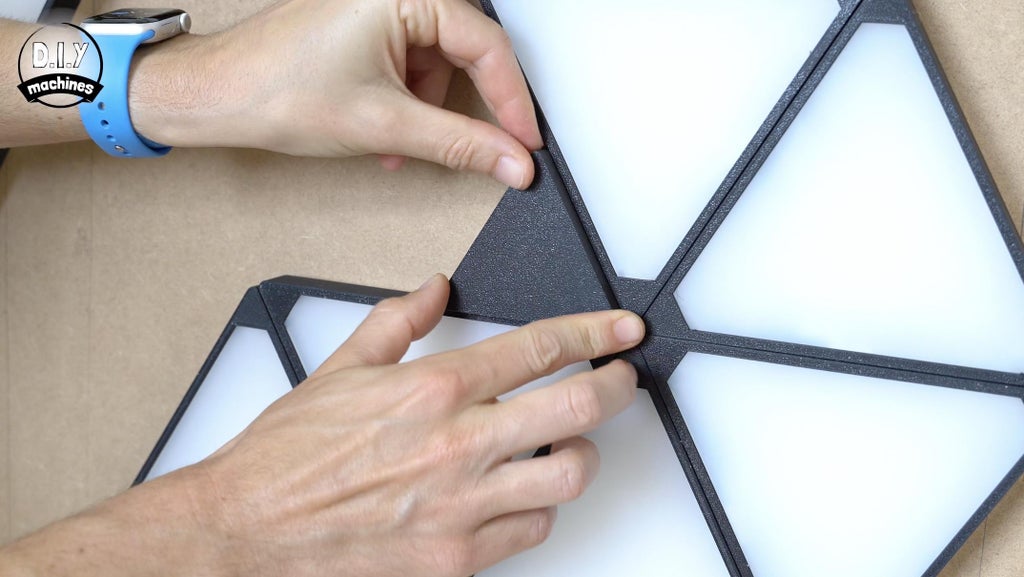
I also designed some 3D printable mini triangles (with matching lids) which provide mounting points for screws and nails. The mini triangles match the aesthetics of the larger illuminated panels whilst utilising the same interlocking system and an M3x8 bolt.
![]()
![]()
![]()
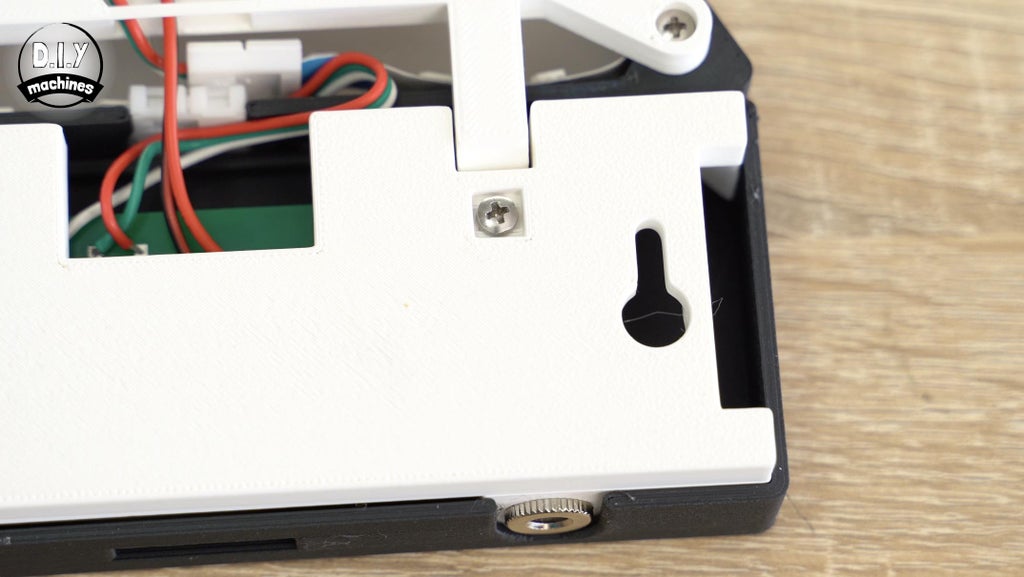
Mine were printed in matching PLA colours. You can add as many of these as you deem necessary. There is also an additional mounting point provided in the back panel of the rectangular control housing which you have already printed. :)
![]()
![]()
-
24Some Words of Warning...
I do need to provide a few warnings for this project, just to ensure that you don't cause any harm to yourself or property:
- Don't draw too much current: LEDs, particular when you are using a lot of them at bright settings, can draw a large amount of current. Because of this you must use the software limiter in WLED to cap the peak theoretical current draw.This will help to ensure that the wires do not get too hot or we damage the power supply.
- Add more panels responsibly: If you decide to add additional panels to your project, leave the software current limiter in place at its current value. This will only limit the brightness of the panels when required based on their calculated current draw based on how many LEDs are lit at any point and their respective colours.
- If you increase the power supply or demand, ensure you understand what you're doing: If you don't, please ask someone who will. An inappropriately specced power supply or wire thickness (including the PCB) may result in component failure and damage to you, your project or even other property.
-
25Project Completed!
Congratulations, that's the project completed! Time to sit back and enjoy the fruits of your labour. :)
I would love it if you wanted to support my projects, please consider subscribing to me on here and Youtube (https://www.youtube.com/diymachines). I also have a Patreon page where some very kind people are helping me to cover the cost of designing, documenting and sharing these projects. Please consider joining them in any way if you can.
Thanks for reading to the end, have a wonderful day and until next time. Ciao for now.
![]()
GeoLeaf
Customisable 3D printable geometric light panels which connect to Hue and Alexa to brighten and personalise your space.

 The Effects page allows you change between various dynamic and static animation for the LED panels.
 In a similar fashion to the colours tab, this page has a long list of predesigned lighting effects. There are plenty here to choose from and it may take you a few minutes to find some of your favourites.
 At the very top left of the screen is the 'Power' button. This allows you to turn the LED's off and on easily from any screen. If you won't be using your panels for awhile I still recommend that you turn of the power supply at the wall connection.
 These are self adhesive pads. One side sticks to the wall and the other the project. A velcro like finish allows you to then join the two halves together. (Full instructions should be followed on the packet).
 It's ideal if you don't want to (or can't) make holes in the wall for a screw. They are also designed to be easily removed later whist leaving no marks or residue. The medium and large sizes are more then strong enough to mount this project.
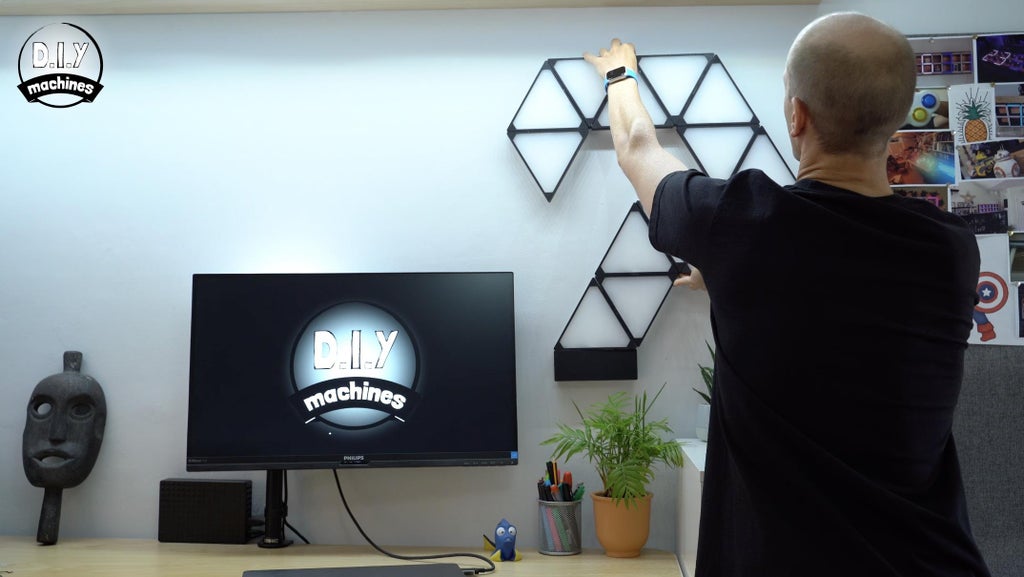

Discussions
Become a Hackaday.io Member
Create an account to leave a comment. Already have an account? Log In.