Before we get too far into the build be sure to review the BoM (bill of materials) and make sure you have the required hardware. Apart from the physical hardware components you will need an AWS account, this is required for the cloud services provisioned during the build. If you don't have an account and this is your first time you can follow the AWS official documentation guide.
Everything you need to build this project (excluding physical assets) is available open source on the talkncloud github repo. I have tried to develop the project to automate as much as possible to make it easier to recreate. You will find additional information inside the repo readme files and source code comments that will help to understand the build.
The project folder structure consists of three folders:
aws-cdk
aws-iot
aws-sagemaker
AWS-CDK
AWS Cloud Development Kit (CDK) folder has everything you need to deploy the services required in the cloud. If you refer to the high level design diagram earlier, everything pictured will automatically be provisioned for you. This is Infrastructure as Code (IaC), by developing everything as code I can provide a consistent repeatable environment to make sure it works as designed. The alternative is you'll need to create everything manually (boring).
Note: CDK is a great project, if you've seen IaC before you might be familiar with developing in definition style languages such as JSON or YAML. CDK allows you to bring programming languages to the party such as typescript, python, which if you're browsing hackster I'm sure you'll appreciate.
AWS-IOT
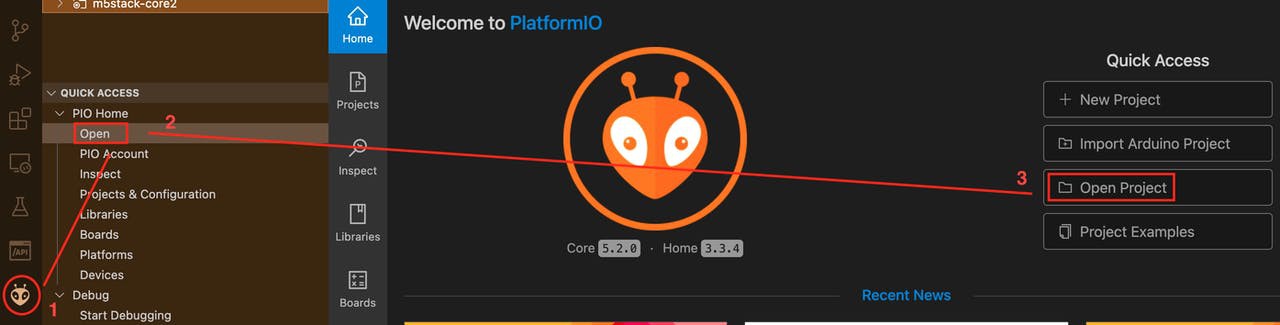
The arduino code to build and upload the firmware to the M5 Core2 AWS EduKit device. This is required to run the tyhac firmware on your device and we'll be using platformio (IDE) to make things a bit easier.
AWS-SAGEMAKER (OPTIONAL)
If you're into deep learning this folder contains everything you need to perform data preparation, model training and model hosting. The trained models used in the high-level design are included as part of the project. You don't need to use sagemaker at all for this build. Sagemaker is not included in the aws-cdk deployment.
If you want to build on the model or you were just curious, this folder is for you.
2
Cloning the repo
We are going to work our way through preparing the local environment, we'll start with cdk and then move onto the device.
Let's start by cloning all that tyhac goodness...
git clone https://github.com/talkncloud/tyhac-aws-hackster
cd tyhac-aws-hackster
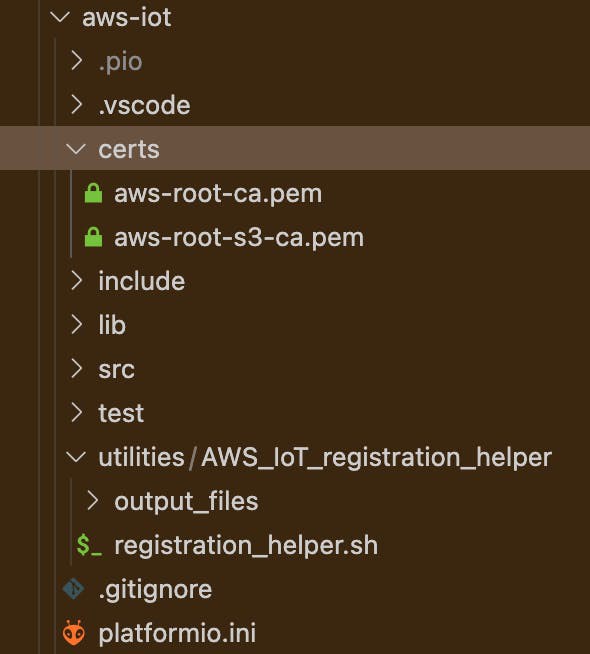
Once cloned you should see the folder structure described in the previous section.
3
Provisioning the cloud
Tyhac requires the use of docker containers, these containers will be built and stored in your AWS account using AWS Elastic Container Registry. The containers are used for the lambda functions to perform staging and inference. You can build these containers locally if you have docker installed and running and then CDK will take care of everything. If you don't already have docker or your internet is slow, I can recommend AWS Cloud9 which will use the AWS network instead and comes pre-configured with the tools discussed. The containers will upload approx 3-4GB
You don't need to know anything about containers, everything is provided and will be handled during provisioning automagically.
You will need to download and install the AWS cli, this will allow you to authenticate to AWS and perform cloud related actions, which is what we need for CDK to deploy into your account.
Once the AWS cli is installed, you will need to configure the client to add your access keys. This gives the AWS cli privileges to access your account. Refer to the AWS doco for configuration.
Pro tip: The keys AWS refer to are passwords, treat them like that. Don't share them and limit their access. If this is your fist time getting into AWS, remove your credential file at the end of this build and any keys you've generated in your AWS account. You can always create more later if you need. It's best not leave keys hanging around.
Now that you have everything installed and you have configured your AWS cli with access you are ready to provision the backend AWS resources, permissions, policies and configuration for tyhac.
yarn install
projen
projen deploy
The following video shows the tyhac deployment using Cloud9, same applies for visual studio code:
Let's verify a few things, I won't go into too much detail but understand CDK uses AWS Cloudformation, the IaC 'OG' if you will. Using the console head over to cloudformation and find the deployment:
Congratulations, you've just built containers, functions, buckets, databases, IoT and more. Pretty cool!!
4
Building and uploading the tyhac firmware to the device
Now, the part you're probably most interested in, the tyhac device. Now that our AWS backend is waiting and ready for your device we can go ahead and build the firmware.
I can highly recommend the examples and guides over at the AWS EduKit, this is a wealth of information that ranges from getting your env setup to running sample projects. It's a good idea to run through one or two of these to get a feel for the process.
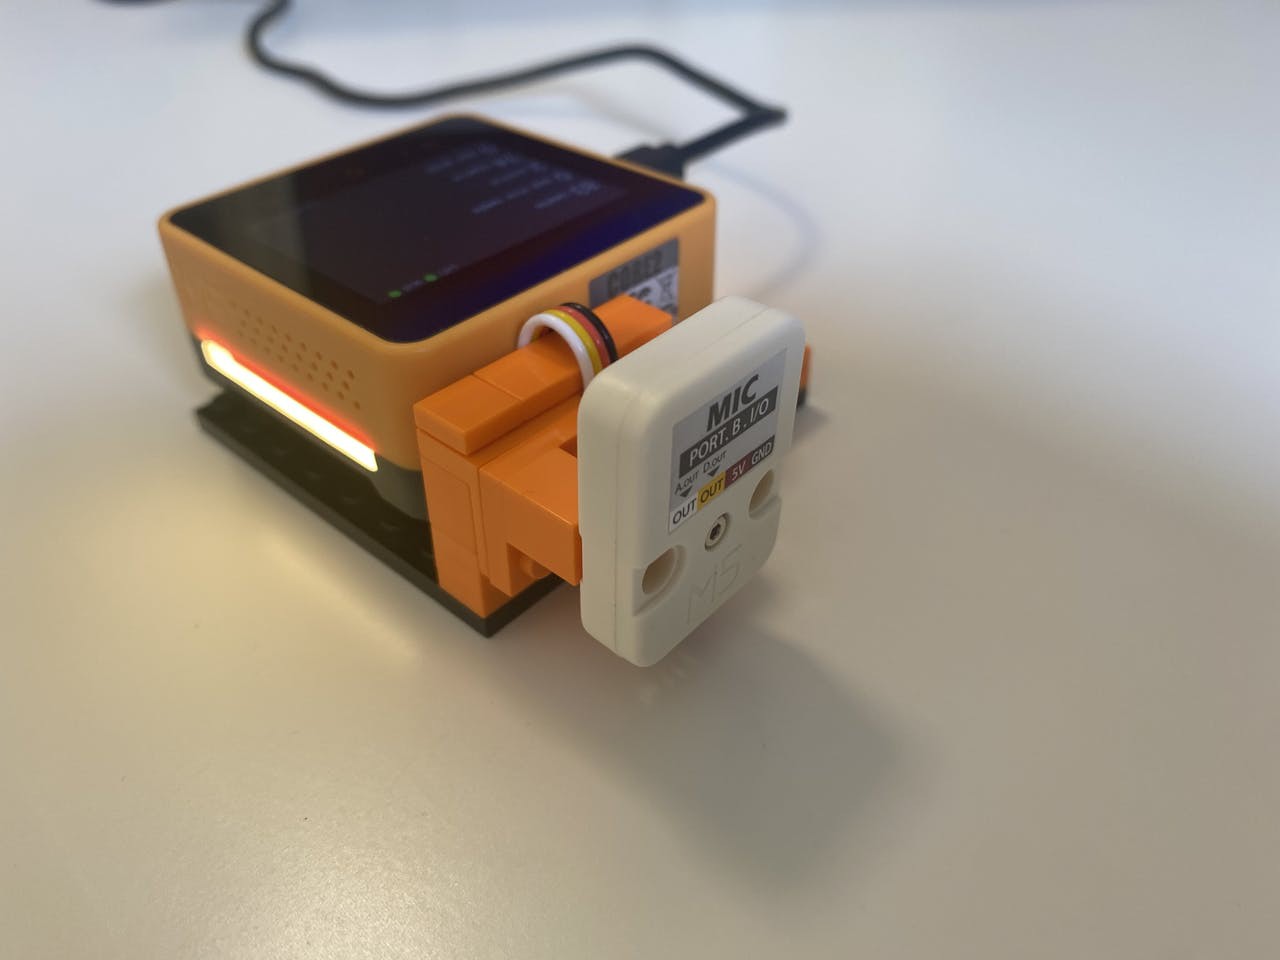
LM393 Mic Unit and SD Card
This part is simple, if you are using the LM393 unit simply connect the sensor to port B on the device. This is indicated on the casing of the LM393.
Insert a micro SD card into the SD Card slot of the device.
As you can imagine, we don't want just anyone using our AWS tyhac stack. To use AWS IoT with our configuration you'll need to register the device with AWS IoT. This requires generating certificates and associating the device with relevant policies so that the thing can do what it needs to do e.g. MQTT.
I've provided a script to handle this for you. If you follow the AWS EduKit guides you'll notice this is a similar approach. The script will register the thing in AWS IoT, generate certificates and associate the certificate with the policy we created earlier in the CDK stack.
cd utilities/AWS_IoT_registration_helper
./registration_helper.sh
The certificates that are generated are stored in the output_files folder, these are your certificates and are private. These certificates will be loaded into the SPIFFS on the device during build time and used for secure communication with AWS.
Device build and upload
With the M5 Core2 AWS EduKit device connected, AWS backend completed, device provisioned and configured for your environment you are ready to build the firmware and upload to your device.
I like to use the platformio toolbar located at the bottom of the IDE:
Icon
Description
tick
build
arrow
upload firmware to device
bin/trash
clean build
plug
monitor serial out, useful for logging information
terminal
new platformio terminal (loads env)
Using the tick, build the project and then use the arrow to upload to the device, the terminal output will show you the current status. Once the upload is completed it should automatically switch to the monitor output but if not hit the plug button to switch to monitor.
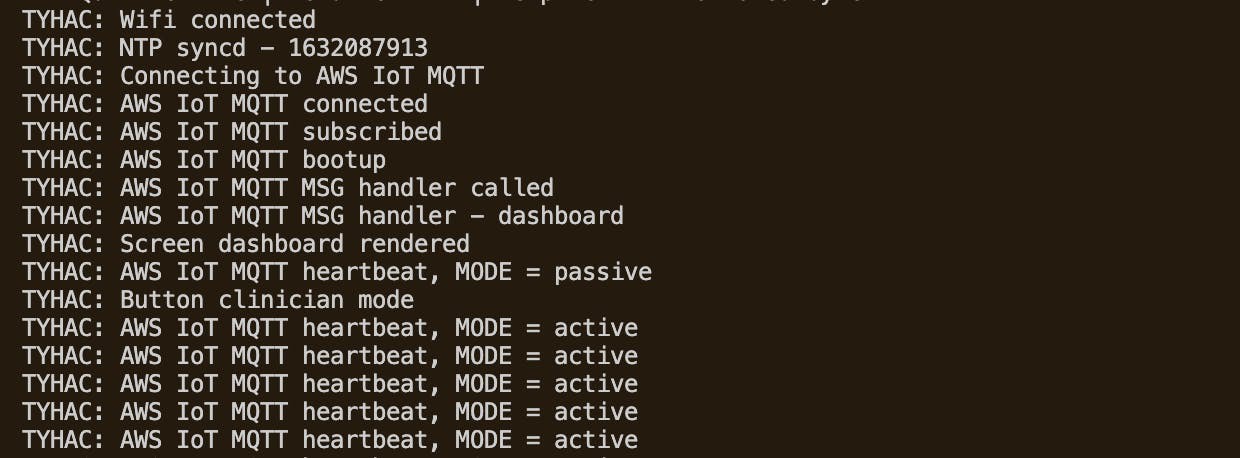
Congrats! Now the device should be running the tyhac firmware and communitcating with the AWS backend. Here is a video showing the device running, viewing the logging output:
You can see under normal operation the serial output will provide some useful details on how the tyhac thing is operating. In the next section I'll provide some detail into what each of the different indicators and messages mean.
Pro tip: If you're clicking the platformio monitor button in the toolbar watch out for the button location moving as it does in the video. argh.
Device status indicators and serial output
The M5 Stack Core2 AWS EduKit comes with two RGB strips either side of the device so I figure we may as well use them. Now that your device is running the tyhac firmware and communicating with AWS you might notice different indicators happening.
Color
Description
orange
connecting or processing, this can be for Wifi or AWS MQTT
green
the action was OK e.g. wifi connected
red
critical error, most likely unable to connect to wifi
white
normal operating mode / sleeping
Note: The same colors are used for the prediction display .e.g positive and negative green and red.
The status messages both on the display and in the serial output are mostly self explanatory:
Message
Description
MQTT
Subscribing, receving, connecting
Heartbeat
A simple message is sent via MQTT every minute and stored as an event
NTP
Sync with remote time server
Screen
LCD screen event e.g. render screen
Button
UI button switch mode event e.g. button press
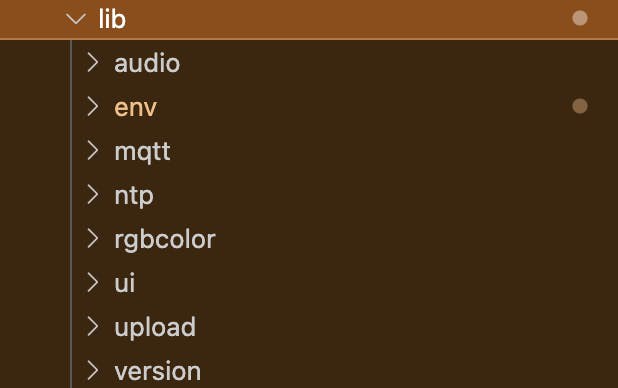
Tyhac device libraries
I've tried to split the code up into libraries to more easily manage the code base and to allow others to use the bits they need for other projects:
Folder
Description
audio
recording audio from the mic to the sd card
env
your environment specific configuration
mqtt
pub/sub MQTT with AWS, message handling
ntp
setting the clock with ntp
rgbcolor
managing the RGB strips on the device
ui
managing the screen elements and changes
upload
uploading files to AWS S3
version
simple file with the current version info
If for example you wanted to change the color of the RGB's you would simply go to the lib/rgbcolor library and update the changeRgbColor function with the RGB values of your choosing or add different colors etc.
5
AWS SageMaker model training (optional)
I won't go into too much detail about sagemaker. As I've said earlier, you won't need to do this part unless you want to for your own understanding or you're looking to maintain the model to improve the accuracy. If you can improve the accuracy please contribute back to the open source repo.
The basic approach that I've taken to sagemaker is that I need CPU, GPU and storage that I simply don't have, AWS provide this for us on-demand at a low cost.
Pro tip: I've taken steps to reduce the costs associated with sagemaker by using the spot market for training, this should result in ~70% cost saving depending on your region and the AWS market. However, this will still be the most costly part of this project, make sure you monitor your costs and setup billing alarms and cleanup resources when you're done.
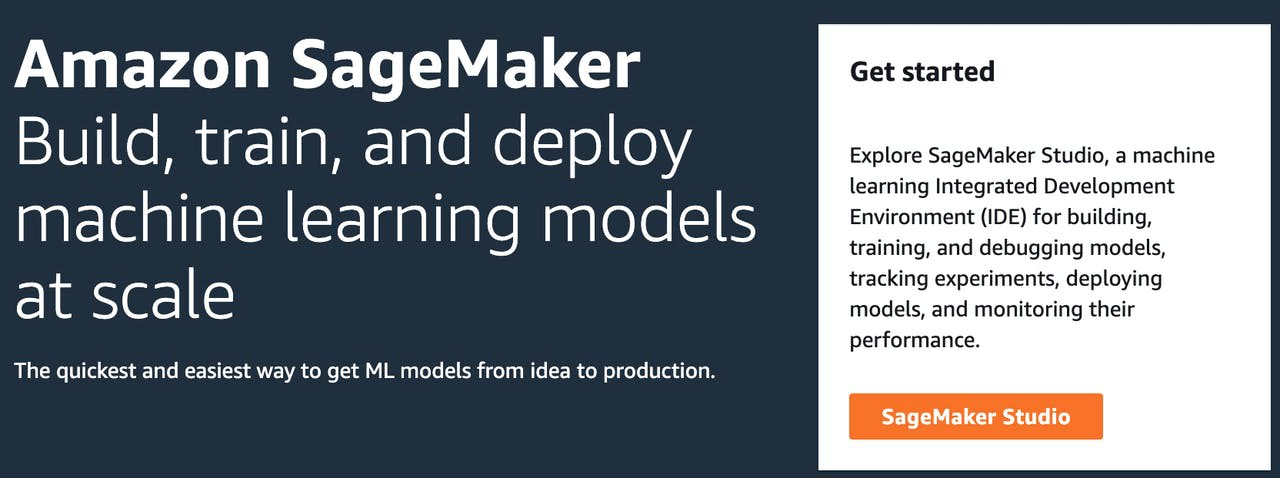
AWS Sagemaker Studio
I ended up using sagemaker studio because it gave me so many features that I could use to build, train and deploy all inside a standard browser using the studio IDE, it just made sense projects with short timeframes. AWS have provided more information on why Studio is preferred. You should be able to do this locally if you have your own setup or standard notebook instances in AWS. This would reduce costs further but will take more of your time.
Creating sagemaker studio
Using the AWS console in your browser head over to sagemaker and using the landing page hit the orange "SageMaker Studio" button.
Using the "Quick Start" option this will setup and environment for you with the required permissions. Once you accept the configuration AWS will start configuring your environment, this will take a few minutes but is a once of.
When your configuration is ready you'll notice a banner message something like this:
You should notice the "Open Studio" click is available, this will launch the AWS SageMaker Studio Web IDE so we can begin.
If this isn't available your env may still be provisioning or you'll need to use the "Assign users and groups" button to associate your user account.
Once you launch SageMaker studio you'll see a sweet SageMaker logo loading screen, the first launch tends to take a little longer, after that it will be much quicker.
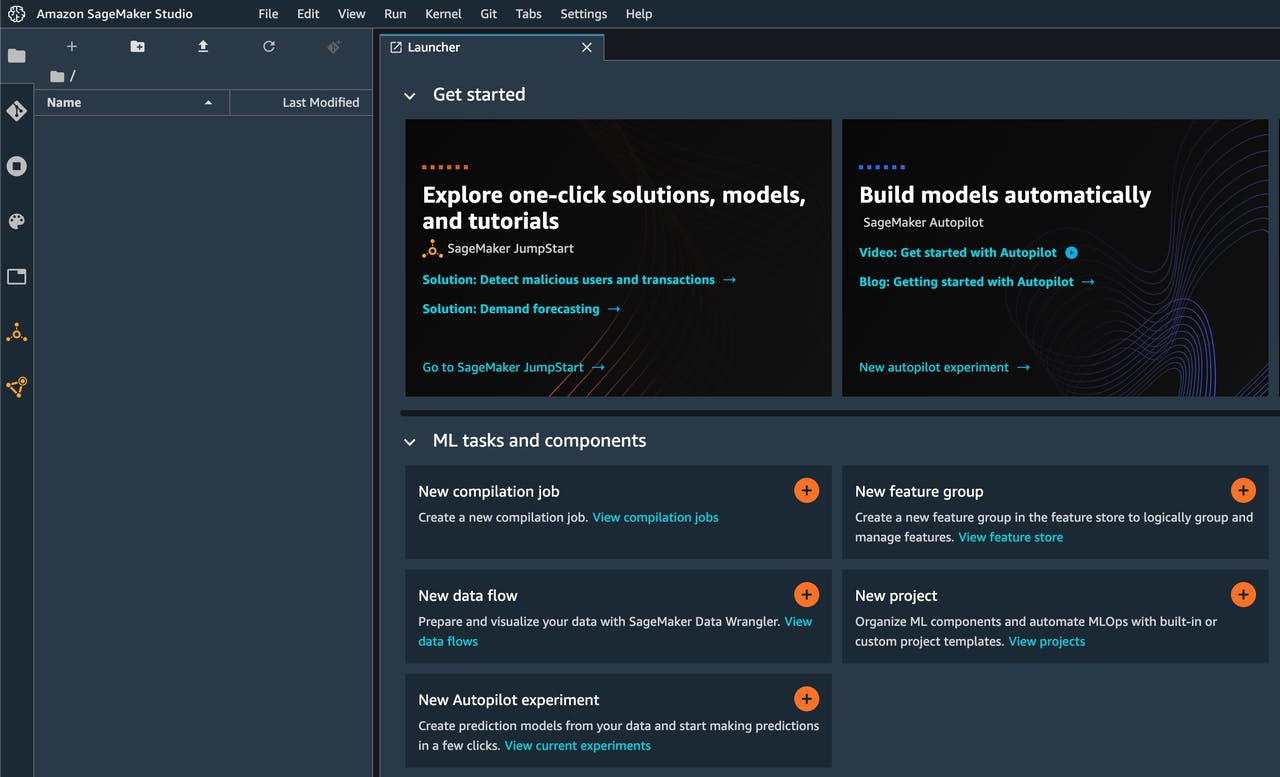
Once Studio has loaded you'll be landed into the Studio IDE:
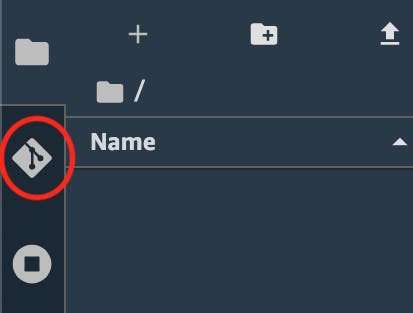
I really like the Studio IDE, for the most part I found it pretty intuitive and visually quite nice to work with. Because we'll be adding a git repository we can use the git icon to load the tyhac repo and hit "clone a repository":
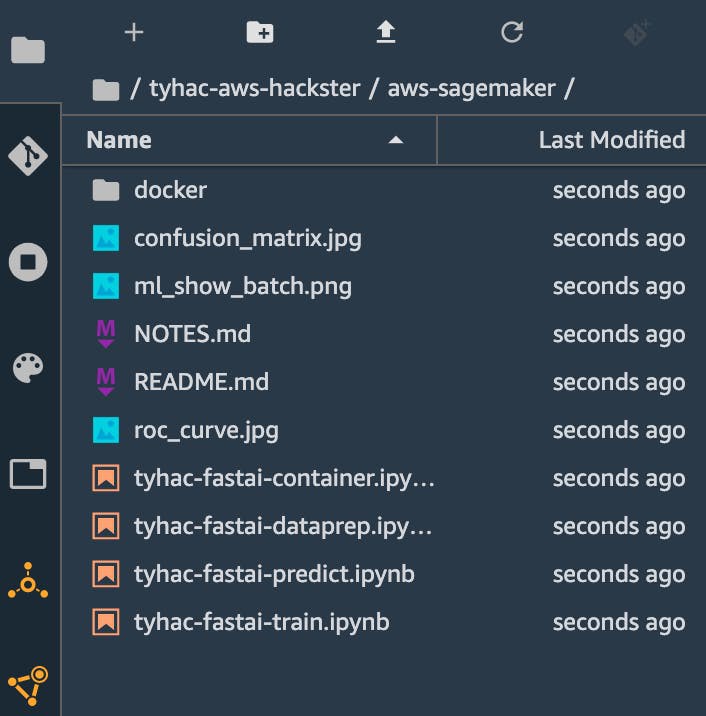
Once cloned you'll notice the familiar tyhac code base structure, navigate over to aws-sagemaker to work with the files we need:
Docker containers for fastai training
When you need to perform training AWS SageMaker will submit a job for training and spin up the compute, GPU, memory instance or instances that you specify for the training. AWS SageMaker provide a bunch of preconfigured containers for various frameworks to get you going such as tensorflow, pytorch etc. When you want to use something different you can build containers with your custom framework. This is what I've done. The docker folder in the repo contains the code needed to build and push the containers into your AWS ECR to be consumed by SageMaker when it needs to.
Protip: As with the previous tips, if you have slower internet or don't want to configure docker etc, AWS Cloud9 is a big help here.
You'll notice two containers, one for training and one for inference. If you want to train the model and replace it in the tyhac backend you do not need to worry about the inference container. If you want to run inference using a dedicated SageMaker endpoint the container code and notebook is included.
To build the containers you will need to be authenticated with your aws cli again, update the Dockerfile to reflect your AWS region and then simply run the shell script:
./build_and_push.sh
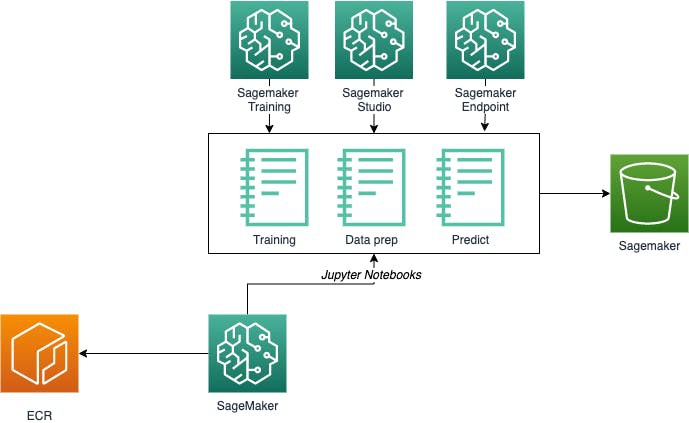
SageMaker diagram
It's a little easier to understand how SageMaker, ECR and notebooks hang together using a diagram. The following diagram shows how the tyhac notebooks and services work together:
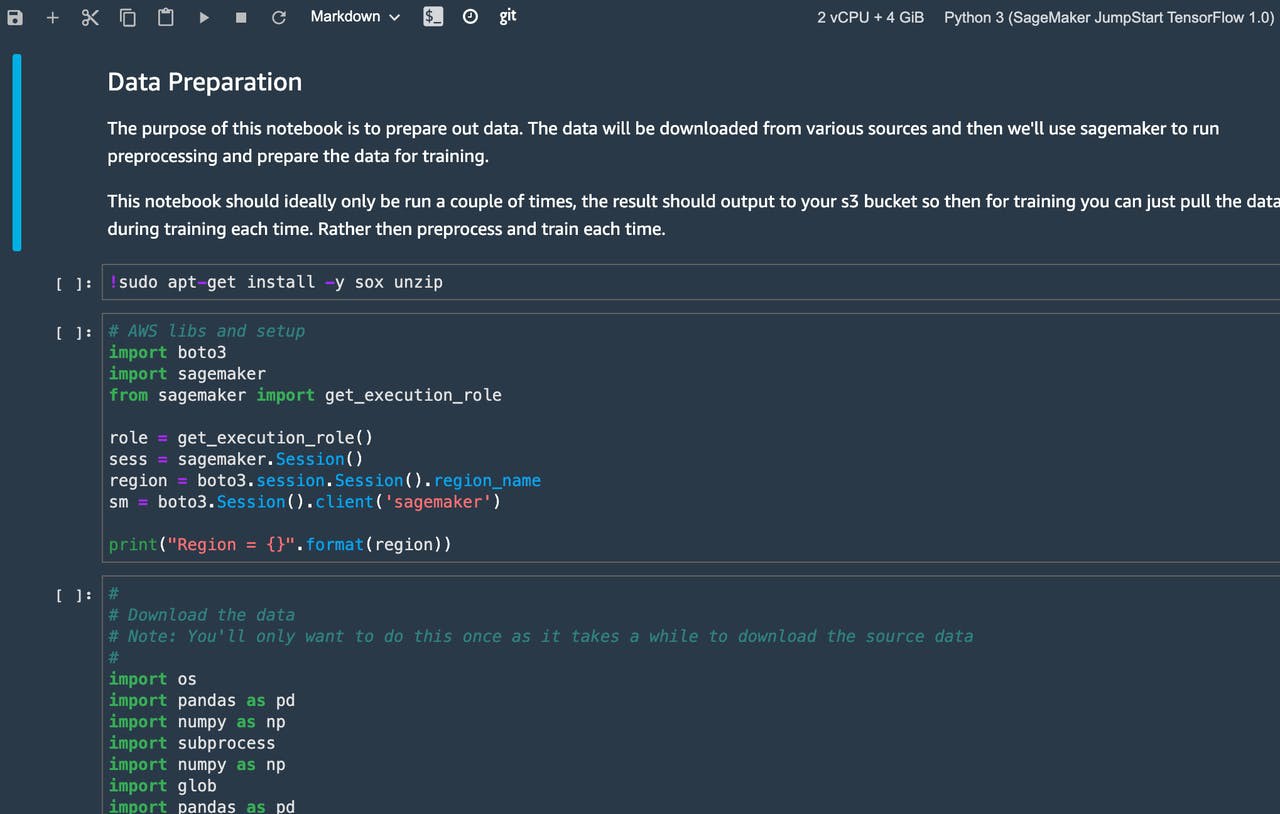
Using the notebooks
The Studio IDE and tyhac notebooks will give you everything you need to run, simply open the notebook and step through the cells:
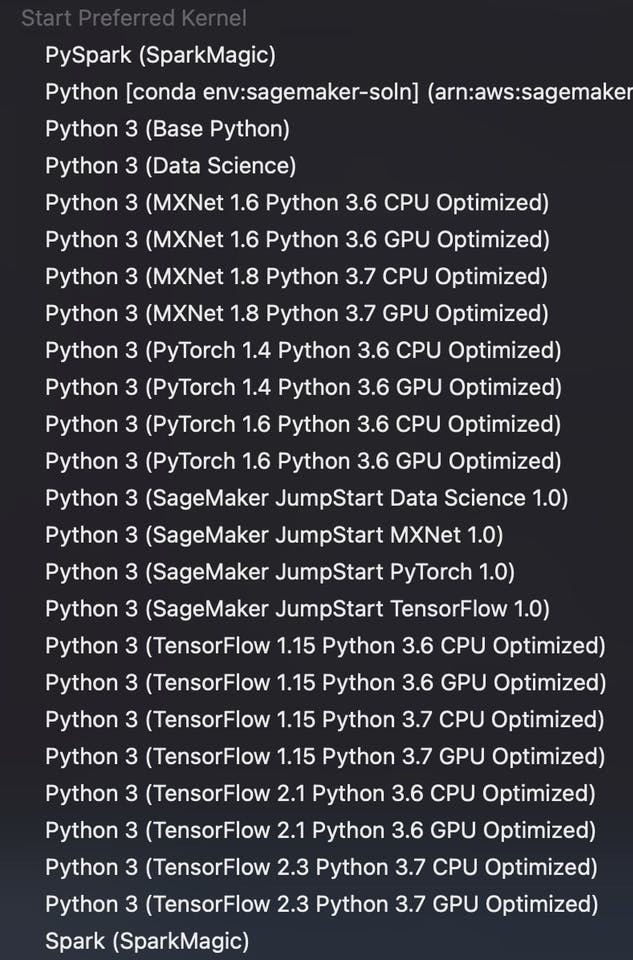
For the most part I used the tensorflow kernel from AWS and just added a couple of packages needed. You can change the kernel at the top of the IDE.
Data visualization
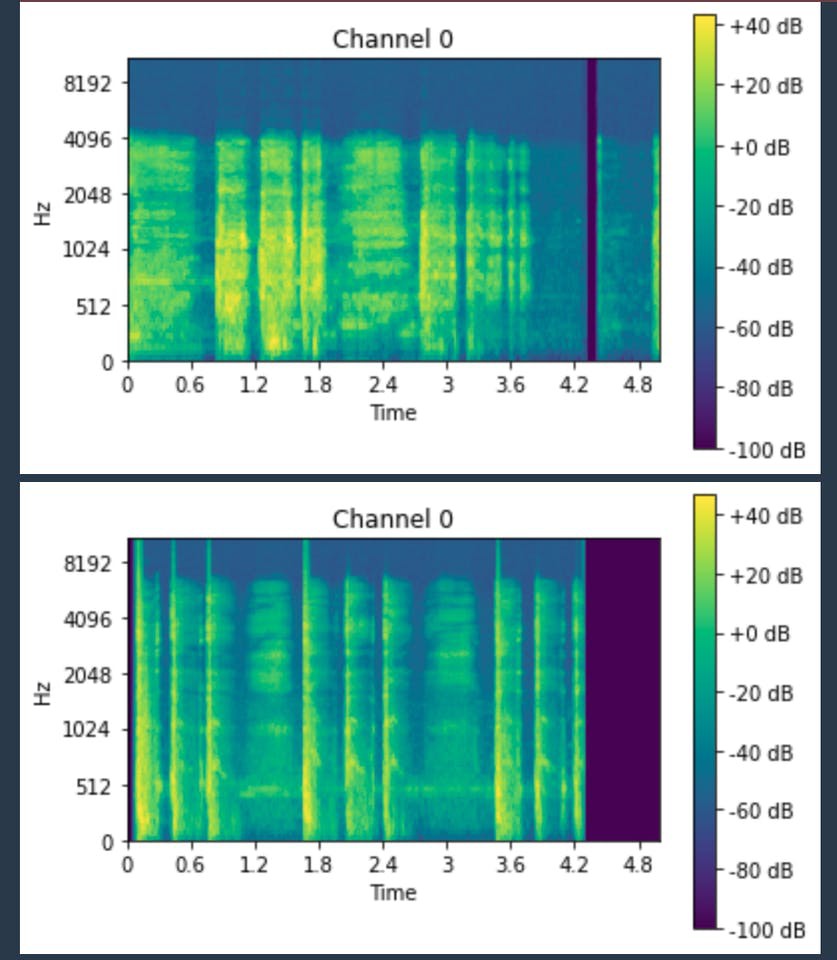
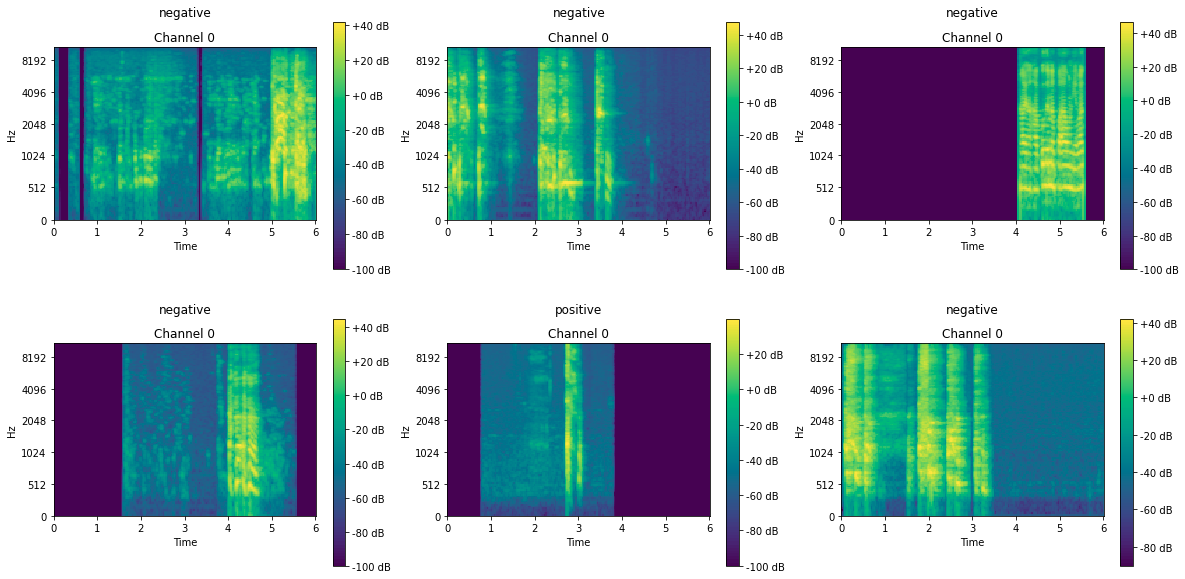
Once you've completed some data prep there are cells that include data visualization before you move onto training, the below shows samples from covid-19 positive and negative patients. The output is the audio mel-spectrogram which we use for training:
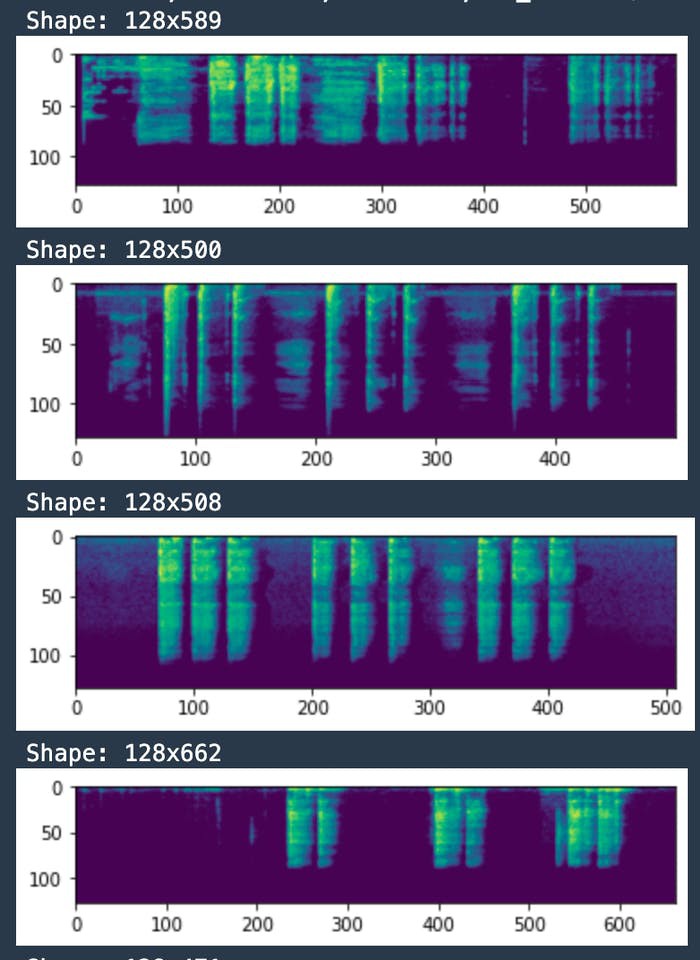
We can dig a little further into the data set to show our current labels and spectrograms:
Training
Once you're happy with the dataprep you can move onto the training notebook, this will run the sagemaker training job and output model files to s3, you can update the hyperparameters and the model architecture in the notebook:
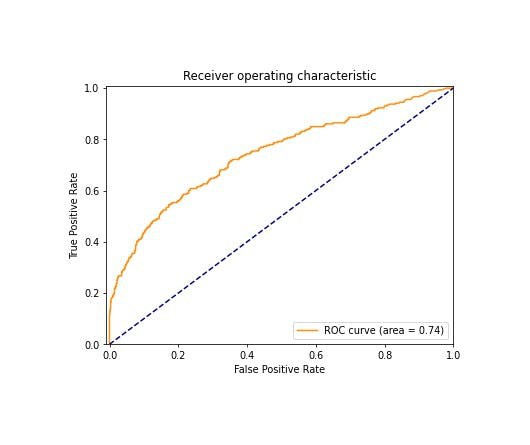
The tyhac notebook I've developed will output a few images that you can use to see model performance:
Updating the model in AWS
If you're happy with the model you can simply download the model.tar.gz from your sagemaker S3 bucket, extract the contents and copy the export.pkl into the aws-cdk/src/lambda/predictor/model folder.
Then update your AWS CDK deployment:
cd aws-cdk
projen deploy
Now when the tyhac M5 Core AWS EduKit device receives a new sample to perform inference on it will be using your newly trained model. Simple!
 mick
mick


Discussions
Become a Hackaday.io Member
Create an account to leave a comment. Already have an account? Log In.