 finallyfunctional
-
11Drilling holes in conduit
In several of the next steps you're going to need to cut metal conduit and drill holes in it. I used a vice and hacksaw to cut the conduit. I used a hand drill to drill the holes.
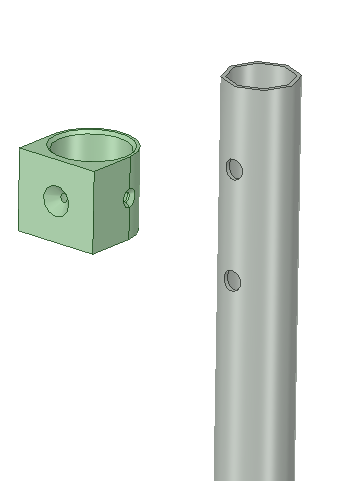
These holes will need to all be aligned. The easiest way I found to do this was to 3D print several guides that slide over the conduit (row 36). One guide is shown below, alongside the conduit.
![]()
These guides have a flat side so you can slide multiple guides onto a piece of conduit and press them flat against a table. Each guide has 4 holes, all 90 degrees from each other. Once you side each guide to the correct position, you can easily mark the holes you need to drill.
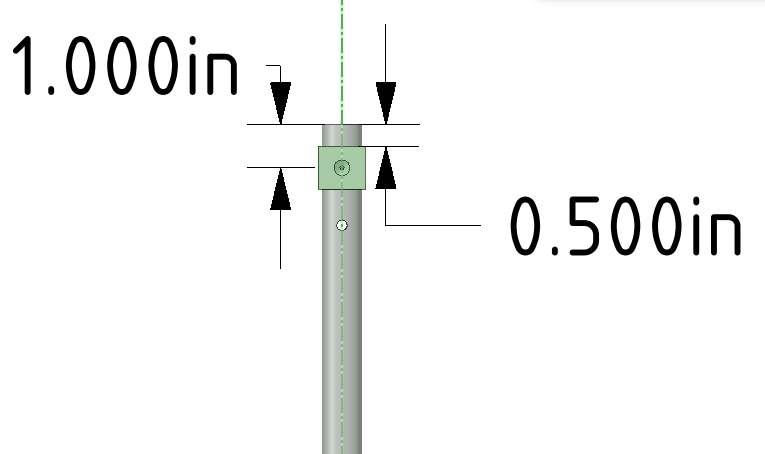
Each guide is 1in long, with the holes being in the middle. So, if you have a piece of conduit and want a hole drilled 1in from the end, then you could make a line 0.5in from the end of the conduit and line up the edge of the guide with it, as shown below.
![]()
Of course, you could also just draw a line 1 in from the edge of the conduit, then try to line the holes of the guide up with your mark, but it can be hard to line them up when the guide is obscuring the mark.
-
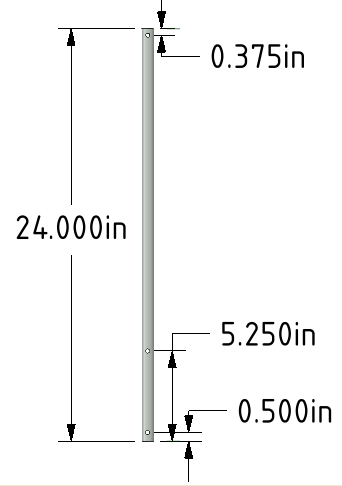
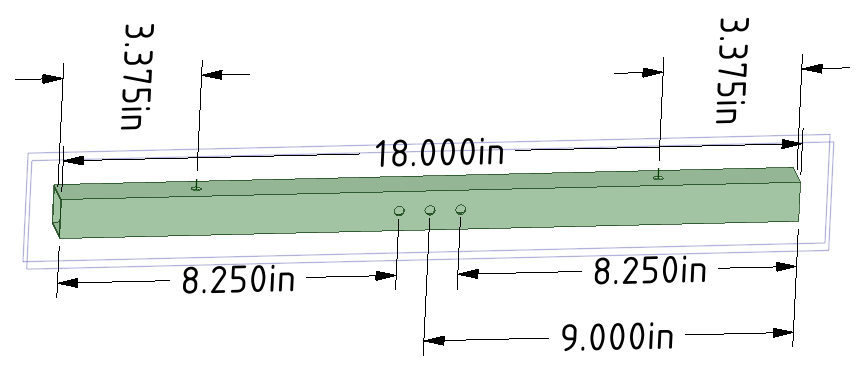
12Cut and drill holes in 0.75in conduit
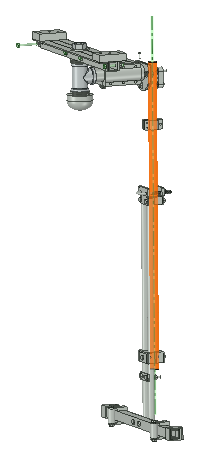
We're going to cut the 0.75in conduit (row 34) and drill holes in it. This will attach to the end of the swivel.
![]()
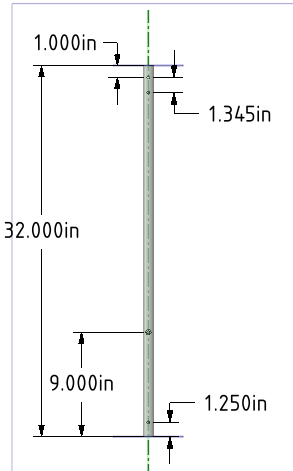
Given the distance between my floor and ceiling is 7ft, and my height (5ft 11in), I cut this conduit to be 32in long. The bottom end of the conduit comes down to about the middle of my back. If your ceiling height is different, or your height is a lot different than mine, you may want to cut this piece of conduit to a different length. Cut it to a length so that it will come down to your mid back. With all that being said, here are the measurements.
![]()
I recommend drilling 5/16in holes since that will make it easier to slide 1/4in bolts through later, but if you're very accurate you can drill 1/4in holes instead.
You may want to wait before you drill the hole 9in from the bottom. This hole is for putting a bolt through that limits the crouching distance. I found 9in from the bottom was a great spot for me, but you may want the crouching distance to be longer or shorter. I recommend not drilling this hole yet. Assemble the rig first, strap into it, and crouch to your preferred height, mark where that is, then drill a hole there. Or, you could also several evenly spaced holes for different crouching distances.
-
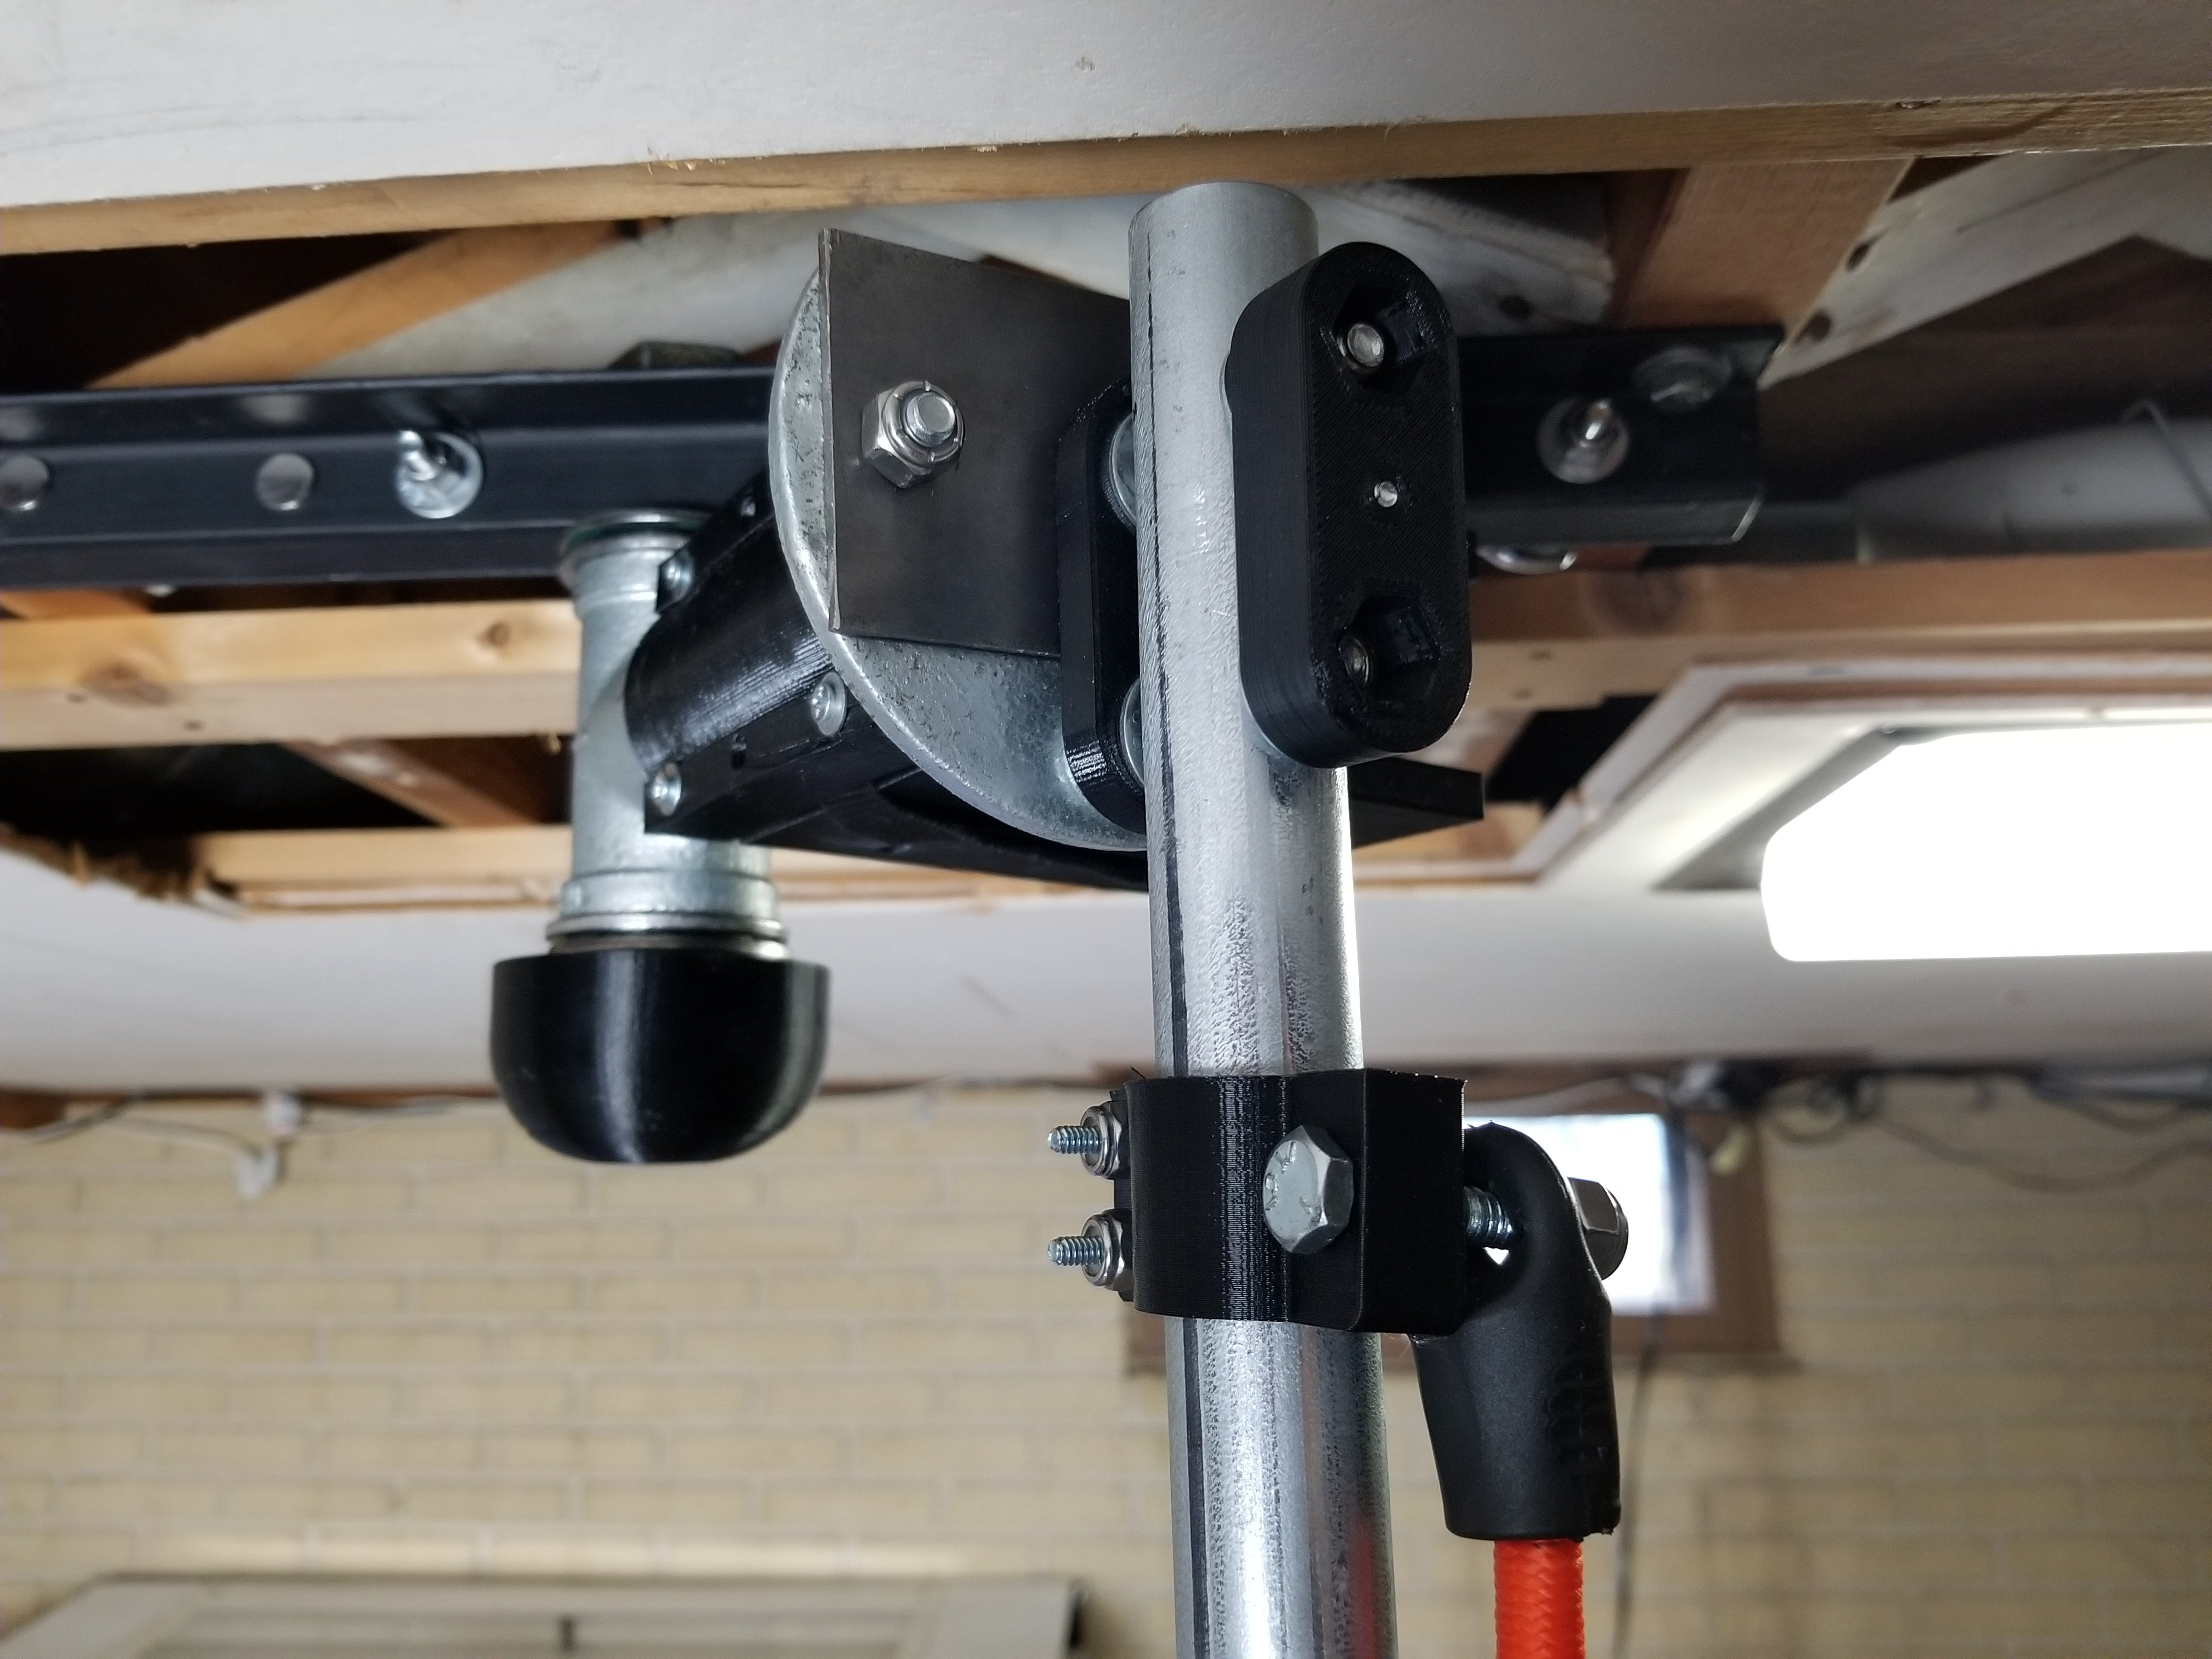
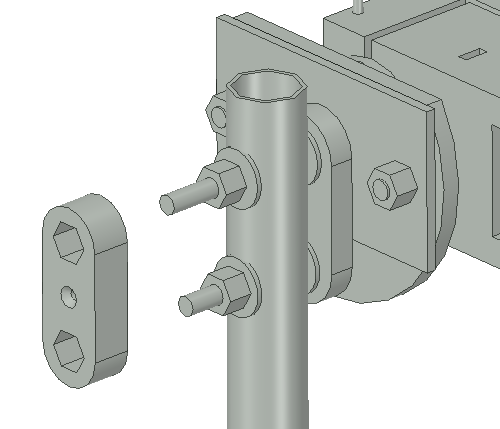
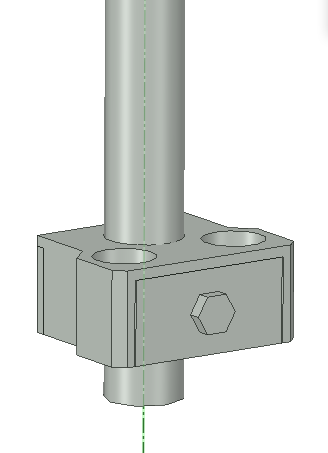
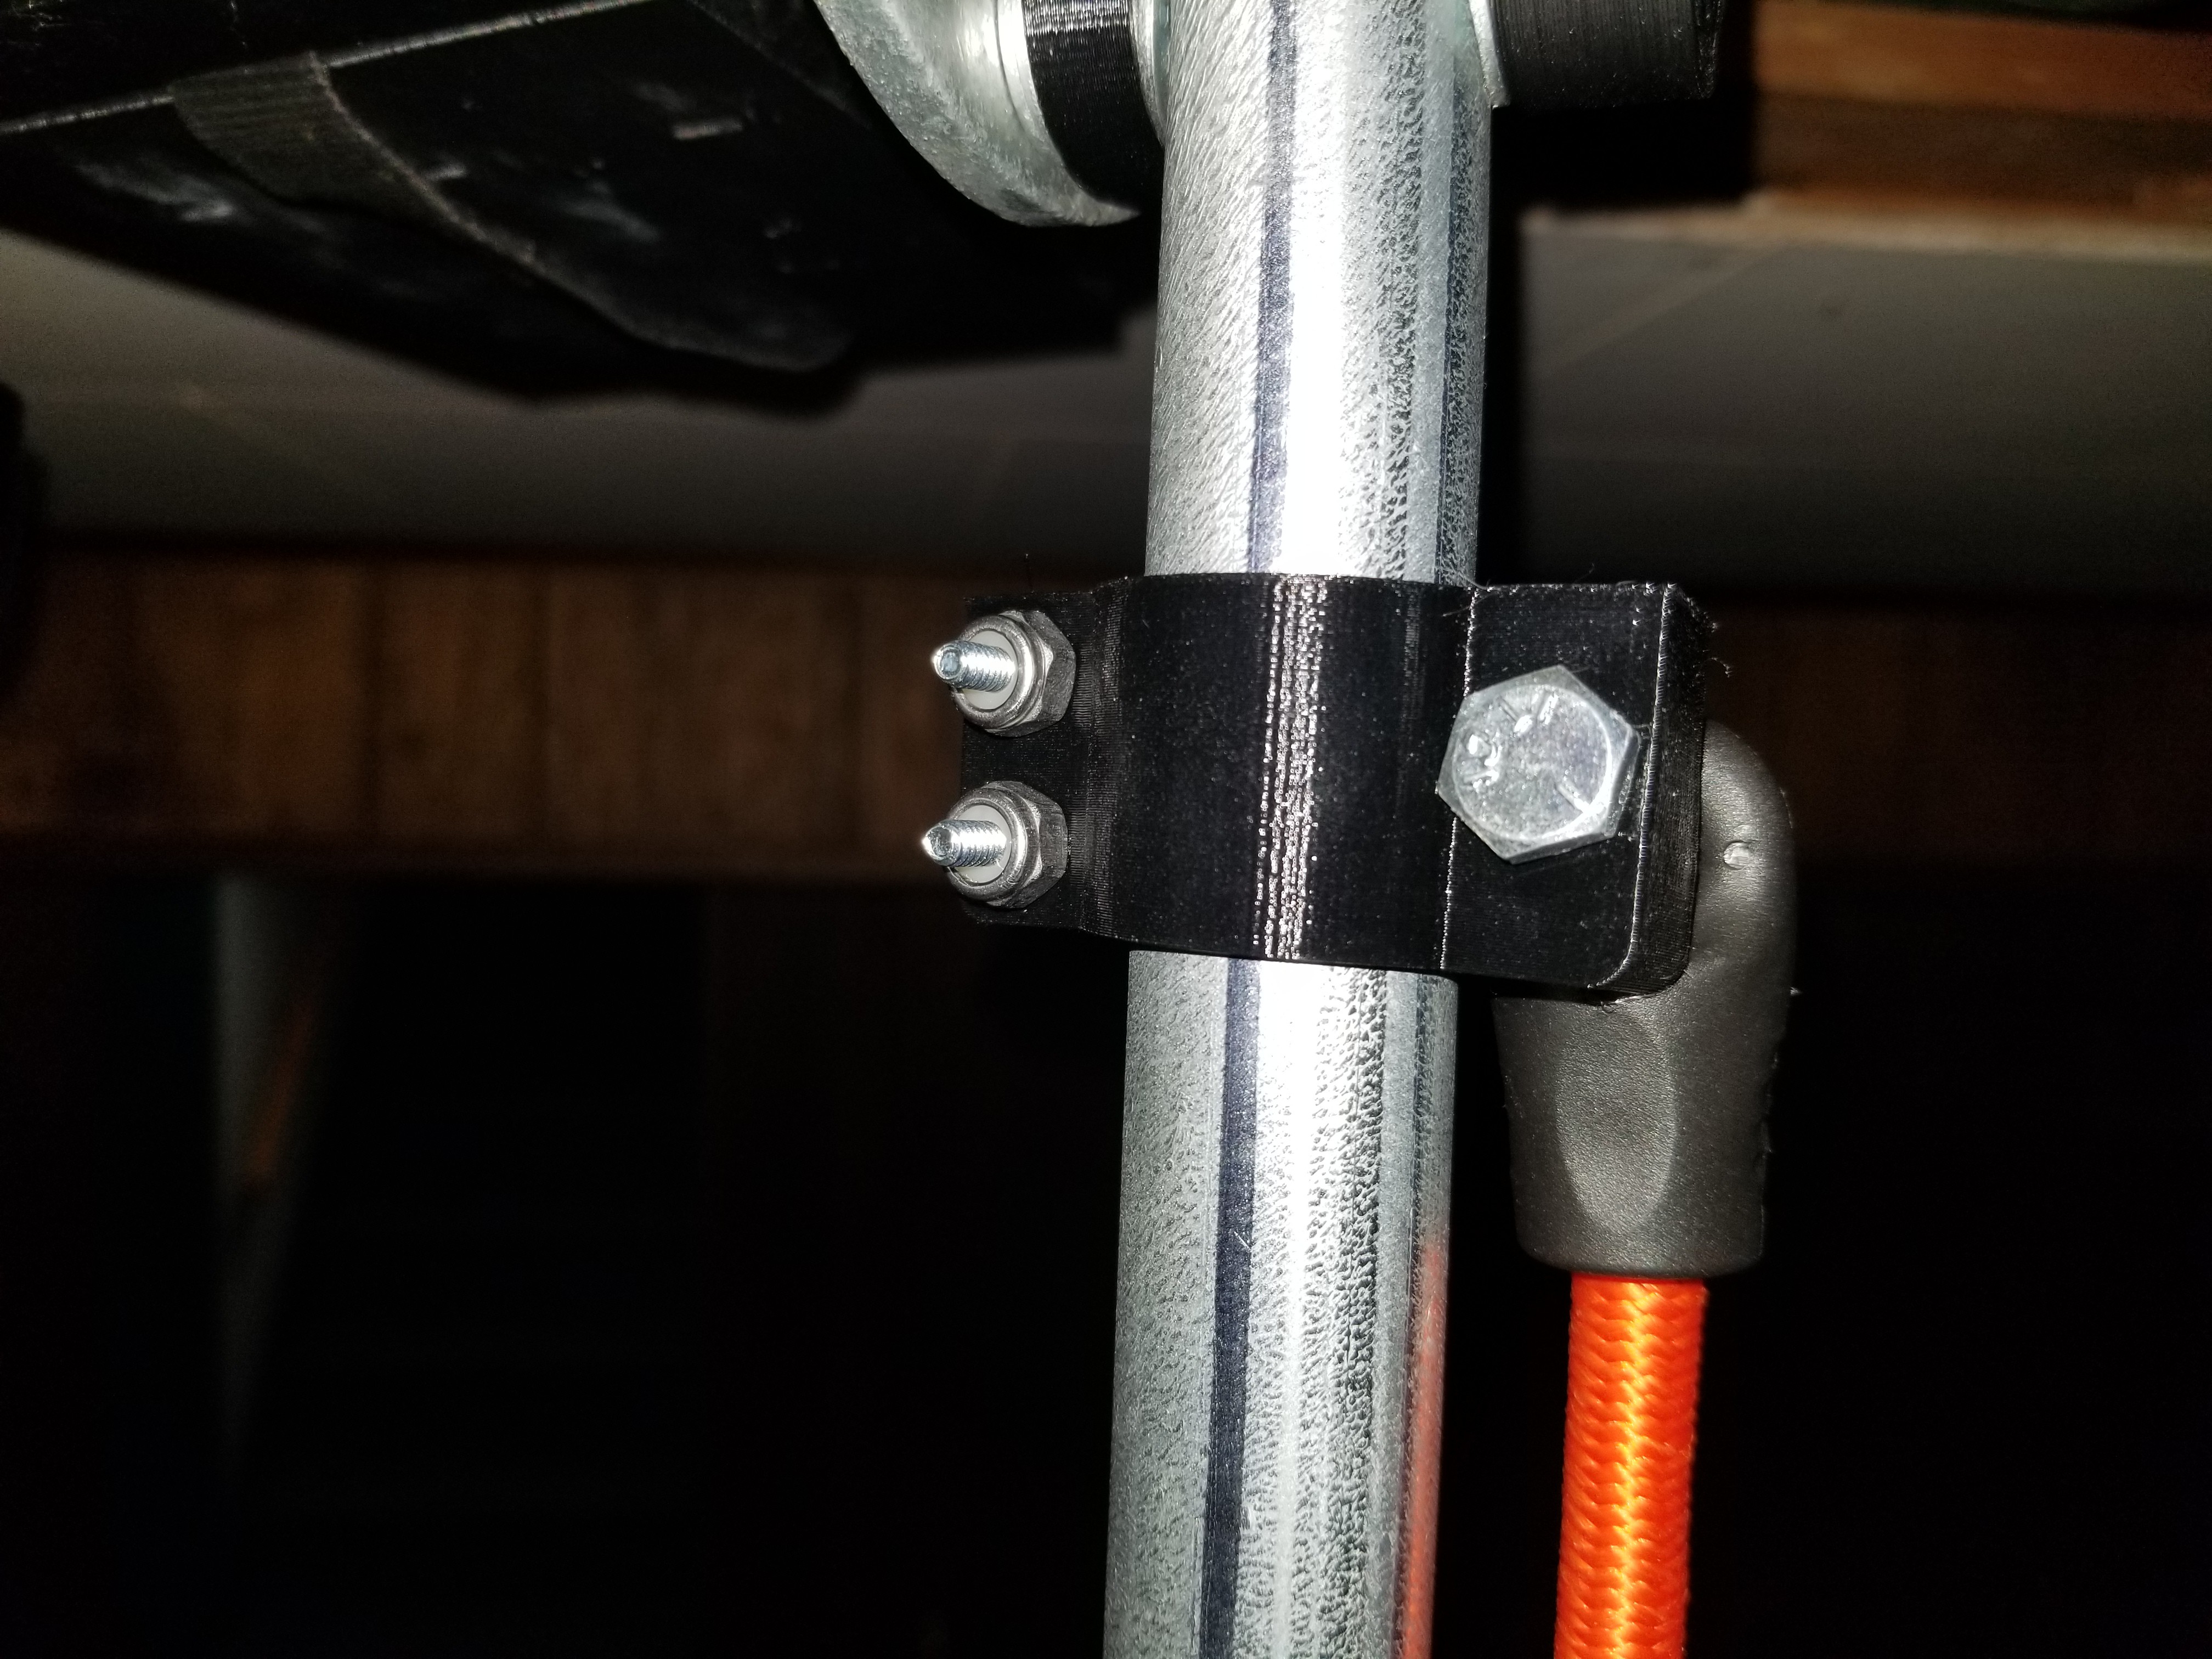
13Screw 0.75in conduit to swivel
After drilling the holes, you can slide the conduit onto the swivel.
![]()
![]()
Once you slide the conduit onto the two bolts, slide a washer and screw a nut onto each one. These can either be lock nuts or regular nuts. Since I screw and unscrew them a lot, I used regular nuts. There is also a 3D printed piece that slides over the two nuts (row 37) as an extra layer of protection from them coming loose while in use.
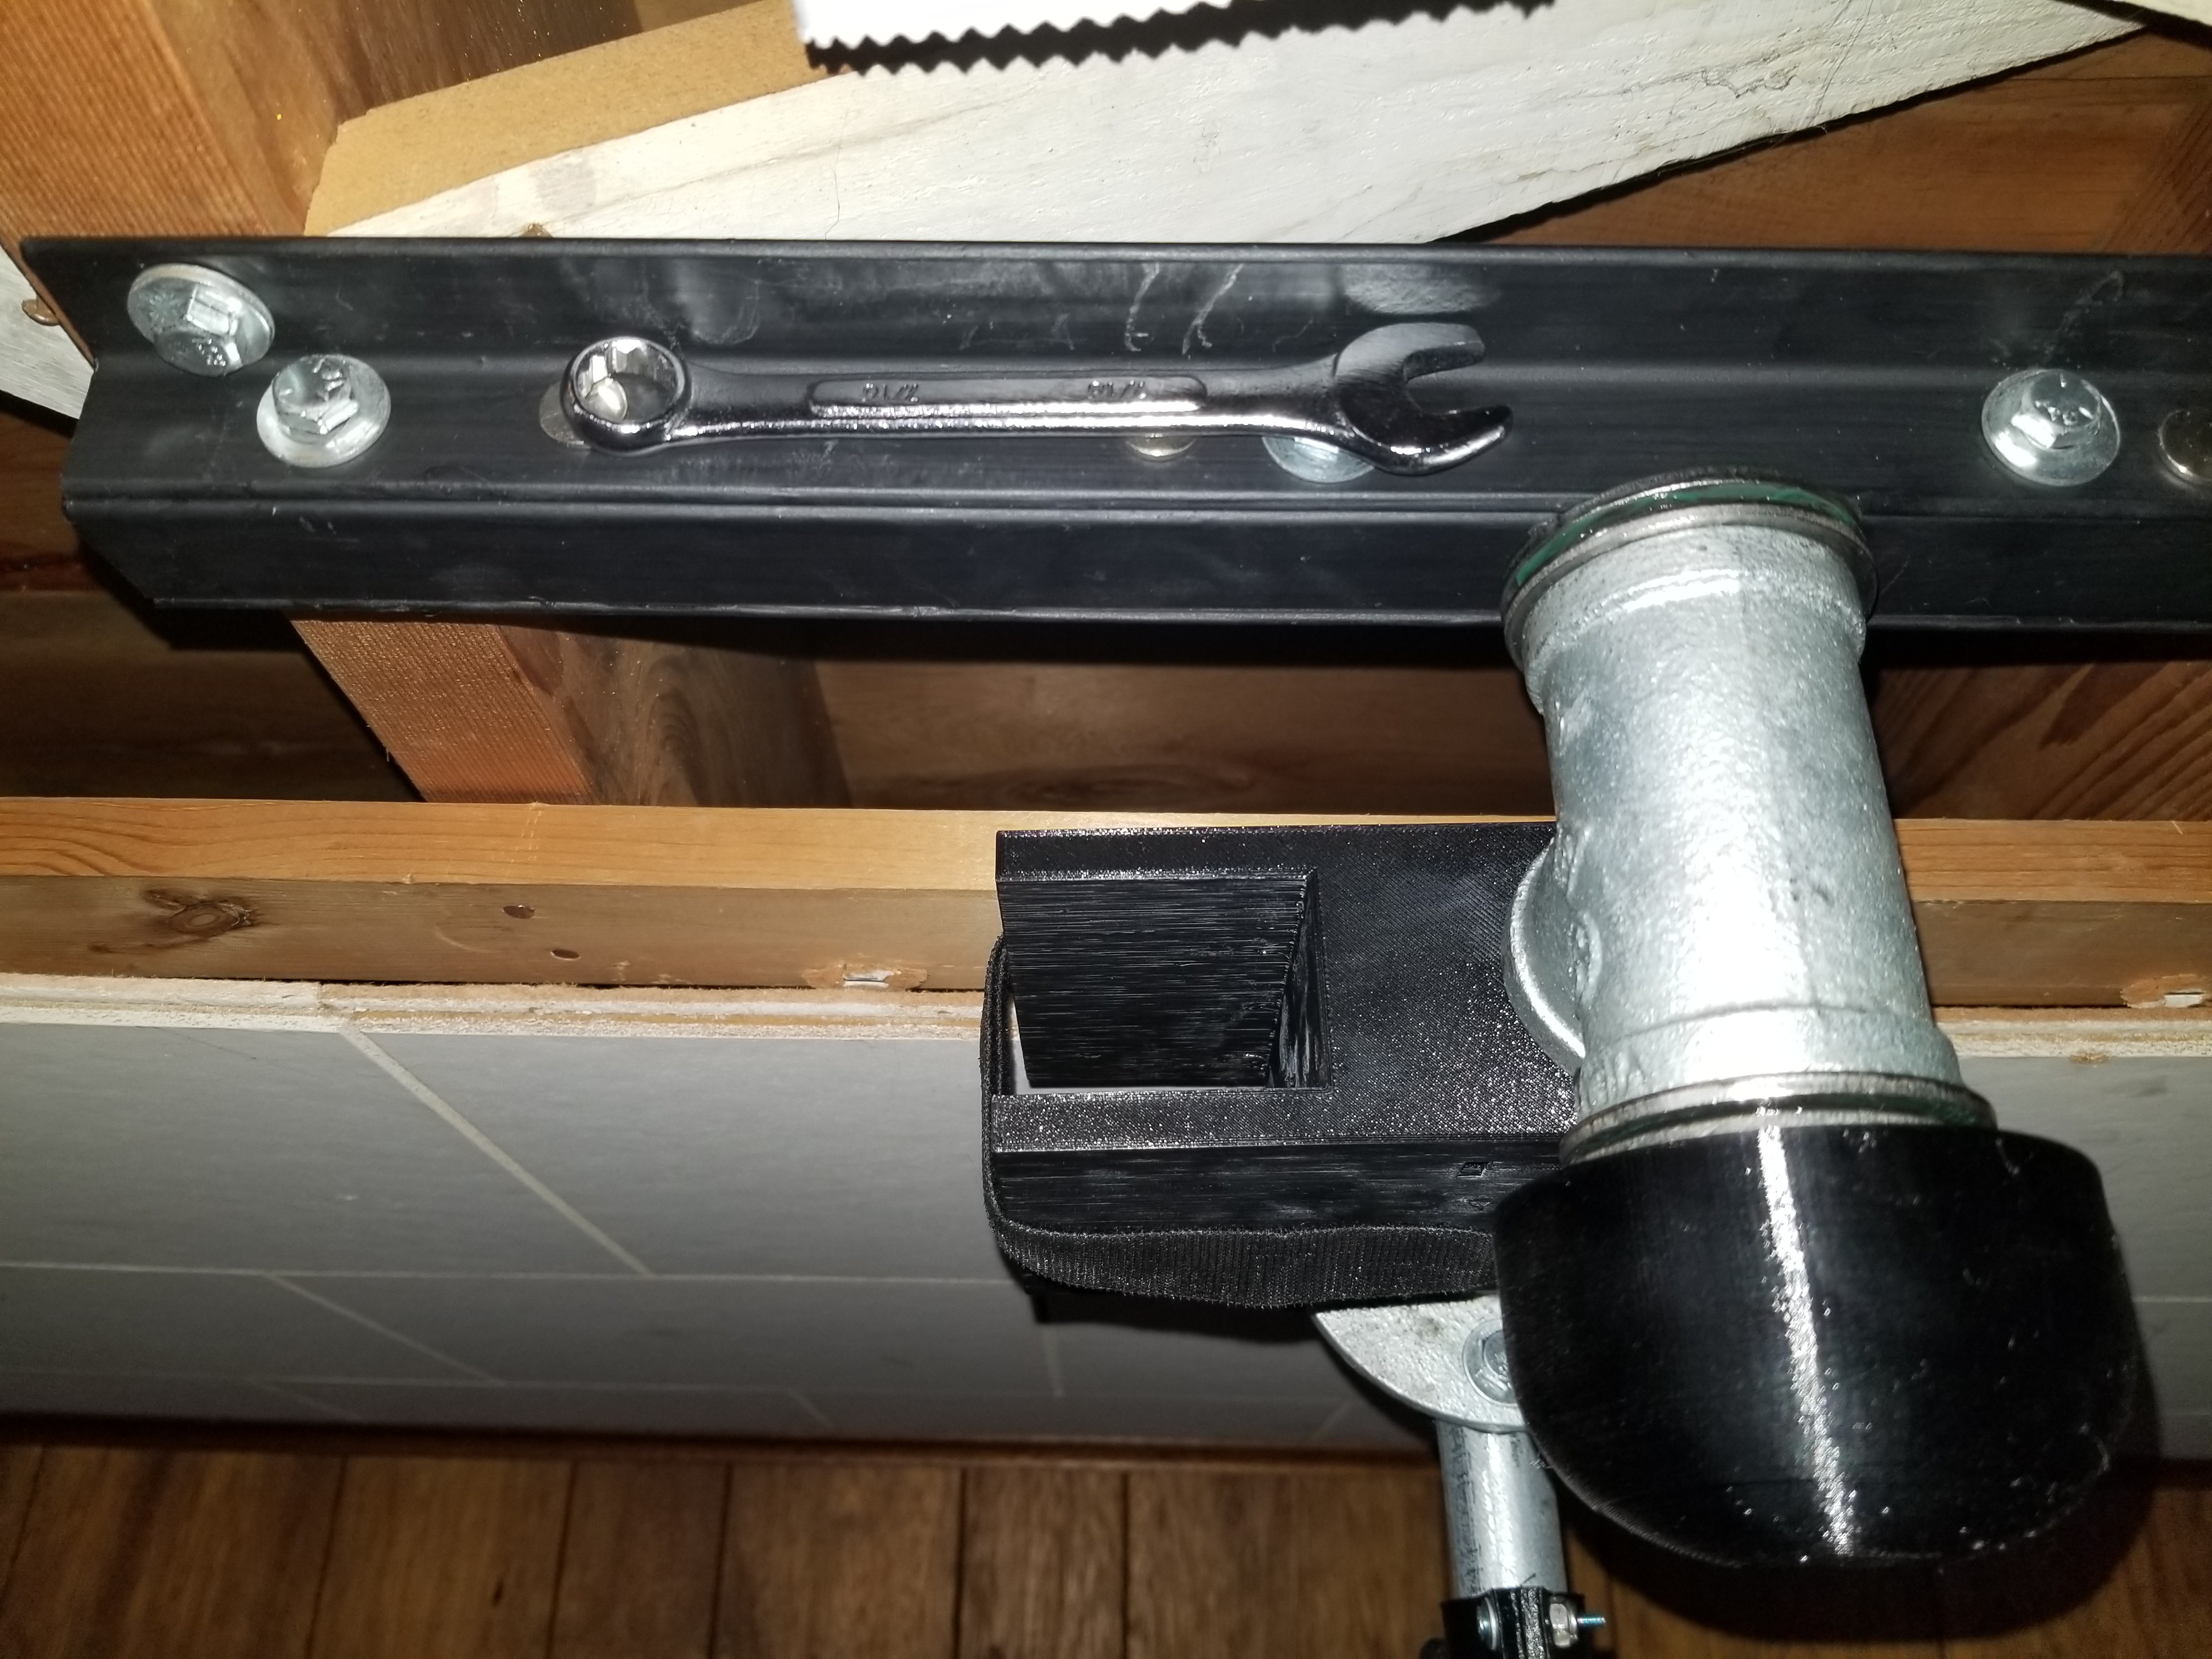
To make it quicker and more convenient to take the conduit off and on the swivel, I have some flat disc magnets on the ceiling brace. These magnets hold a the wrench I use to tighten and loosen the nuts. When I store most of the rig, I also just attach the 2 nuts and 4 washers to these magnets too.
![]()
-
14Cut and drill holes in 0.5in conduit
Take your 0.5in conduit and cut 2 pieces 24in long. Drill the holes, front and back, as shown below. I recommend drilling 5/16in holes since that will make it easier to slide 1/4in bolts through later, but if you're very accurate you can drill 1/4in holes instead.
![]()
-
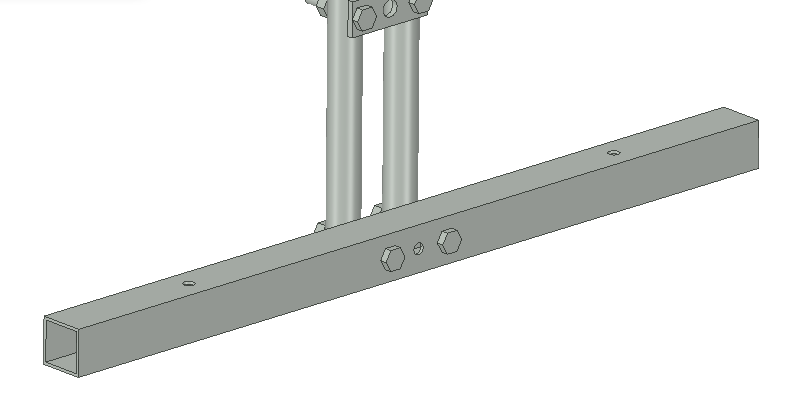
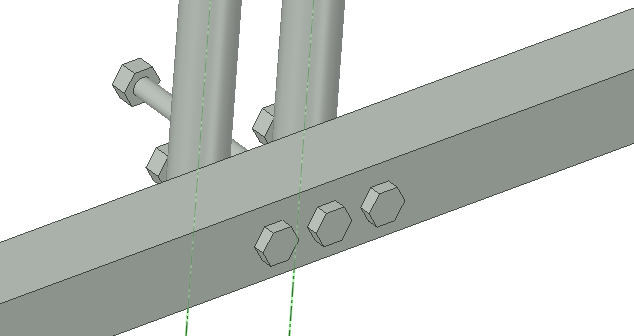
15Cut and drill holes in square tube or 0.75in conduit
You used a 1in square tube for the ceiling brace. If you bought a 36in long square tube, you should have 18in left. Drill the holes in the tube according to the image below. Also, if the tube can rust, be sure to paint it.
Alternatively, you should also have some 0.75in conduit left over. You could instead cut an 18in piece and drill the holes in the same spot. So you can choose between using the square tube or conduit.
I again, recommend 5/16in holes, but 1/4in is fine if you're very accurate.
![]()
-
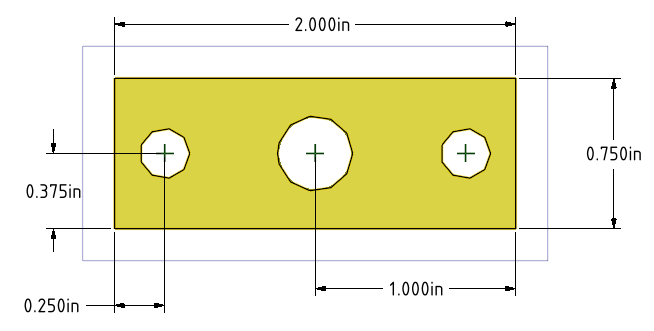
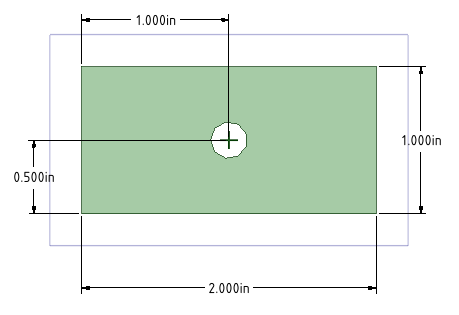
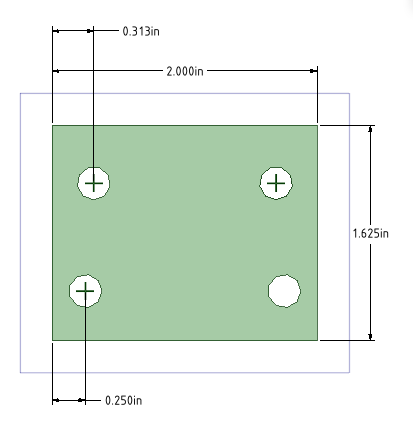
16Cut and drill holes in metal flat
You're now going to need to cut some more pieces from the 2in, 1/8in thick, solid metal flat (row 23). All holes only can be 1/4in or 5/16in in diameter (even though one of them is shown a little bigger).
You'll need one of these -
![]()
You'll need two of these -
![]()
You'll need two of these -
![]()
-
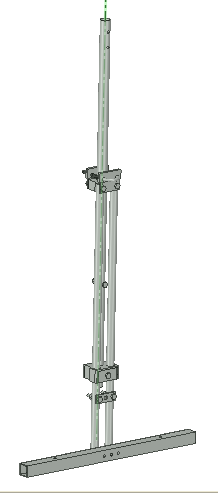
17Assemble vertical arm
In this step, you'll assemble this.
![]()
If the 0.75in conduit piece is screwed to the swivel, unscrew it.
You can assemble this entire arm multiple ways, but we'll start with the bottom slider. This requires another 3D printed part (row 39). Take 2 of the flats you made in step 16, the ones with the one centered hole, a 1/4 by 2.5in long bolt (row 40), and the 3D printed piece and assemble it on the bottom of the 0.75in conduit as shown below. Use a lock nut for tightening the bolt. Don't tighten the bolt much yet.
![]()
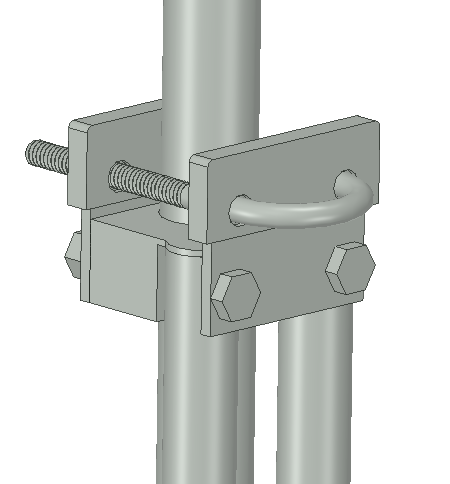
Now we'll assemble the top slider. Slide both 0.5in conduit pieces through the two holes in the bottom slider. Slide the top slider (row 41) onto the 0.75in conduit from the top down so that it touches the tops of the 0.5in conduit pieces. Put the flats you made in step 16, the ones with 4 holes, on the front and back of the top slider as shown below. For the bottom two holes you can slide two 2in long, 1/4in diameter hex bolts (row 43) through. The bolts will go through the front flat, the 0.5in conduit, the top slider, then finally the back flat.
Next, slide the top slider flat covers (row 42 over the tops of the flats. These covers are just to cover the corners of this piece. Finally, slide the U bolt (row 44) through the top two holes. This U bolt is here in case you'd like to attach something to the top slider, like the top of a climbing harness or some other sort of chest harness.
Again, use lock nuts, 4 of them. Don't tighten them down too much yet.
![]()
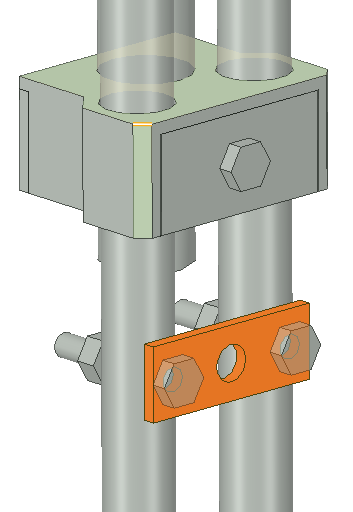
You can now attach the remaining flat piece. However, you may want to wait if you are not using the same climbing harness I am (kisslove half body harness, row 53). This piece is attached at a good point for that harness. If you're using another harness, you may want to wait until you're ready to attach it and see where you should attach this flat piece. If you're ready now, attach it like shown below, with two 1.5in long, 1/4in hex bolts and two lock nuts. You can tighten these bolts and nuts.
![]()
Finally, screw the square tube (or the shorter 0.75in piece) to the bottom of the two 0.5in conduit pieces using two 2in long, 1/4in hex bolts and lock nuts. You can tighten these.
![]()
Now, for the bolts you didn't tighten down, tighten them more but no so much that the 0.5in conduit doesn't slide up and down easily.
-
18Add bungee
This step is optional. You don't need to attach a bungee, but it helps when going from a crouched position to a standing one.
Put a 1/4in hex bolt, 3.5in long (row 46) through the center hole on the horizontal tube as shown below.
![]()
Attach one side of the bungee (row 47) to the bolt as shown below.
![]()
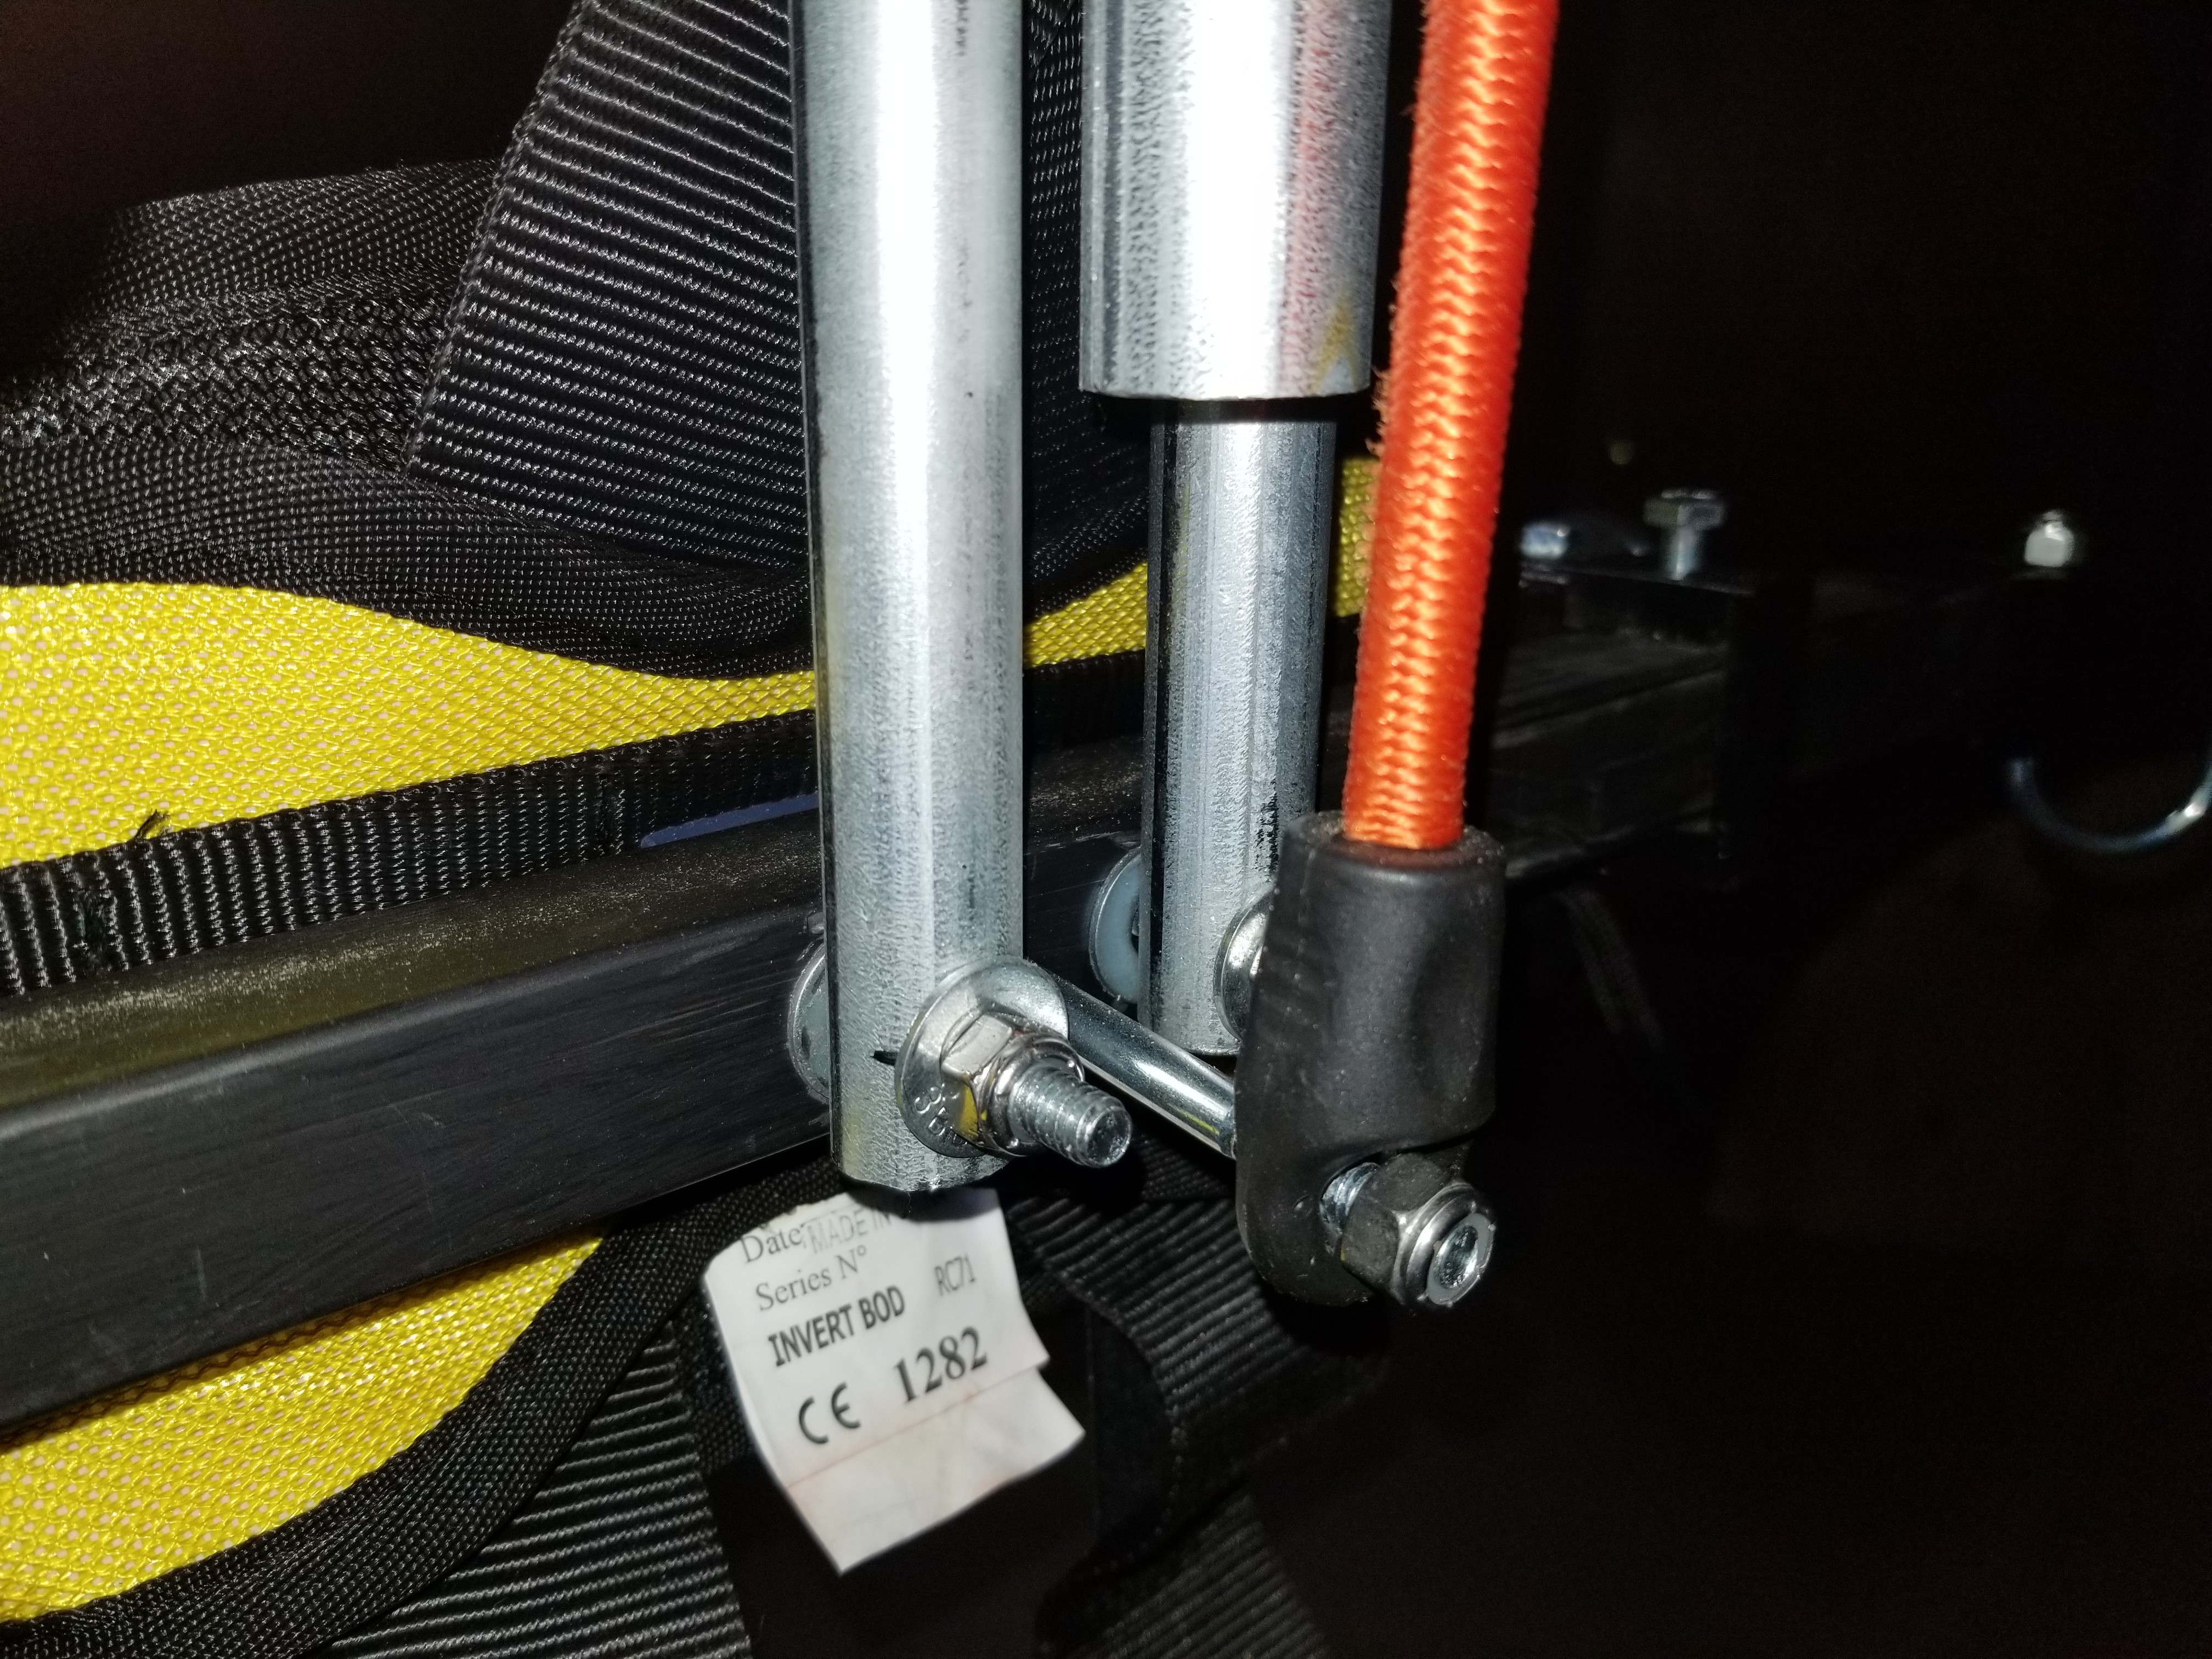
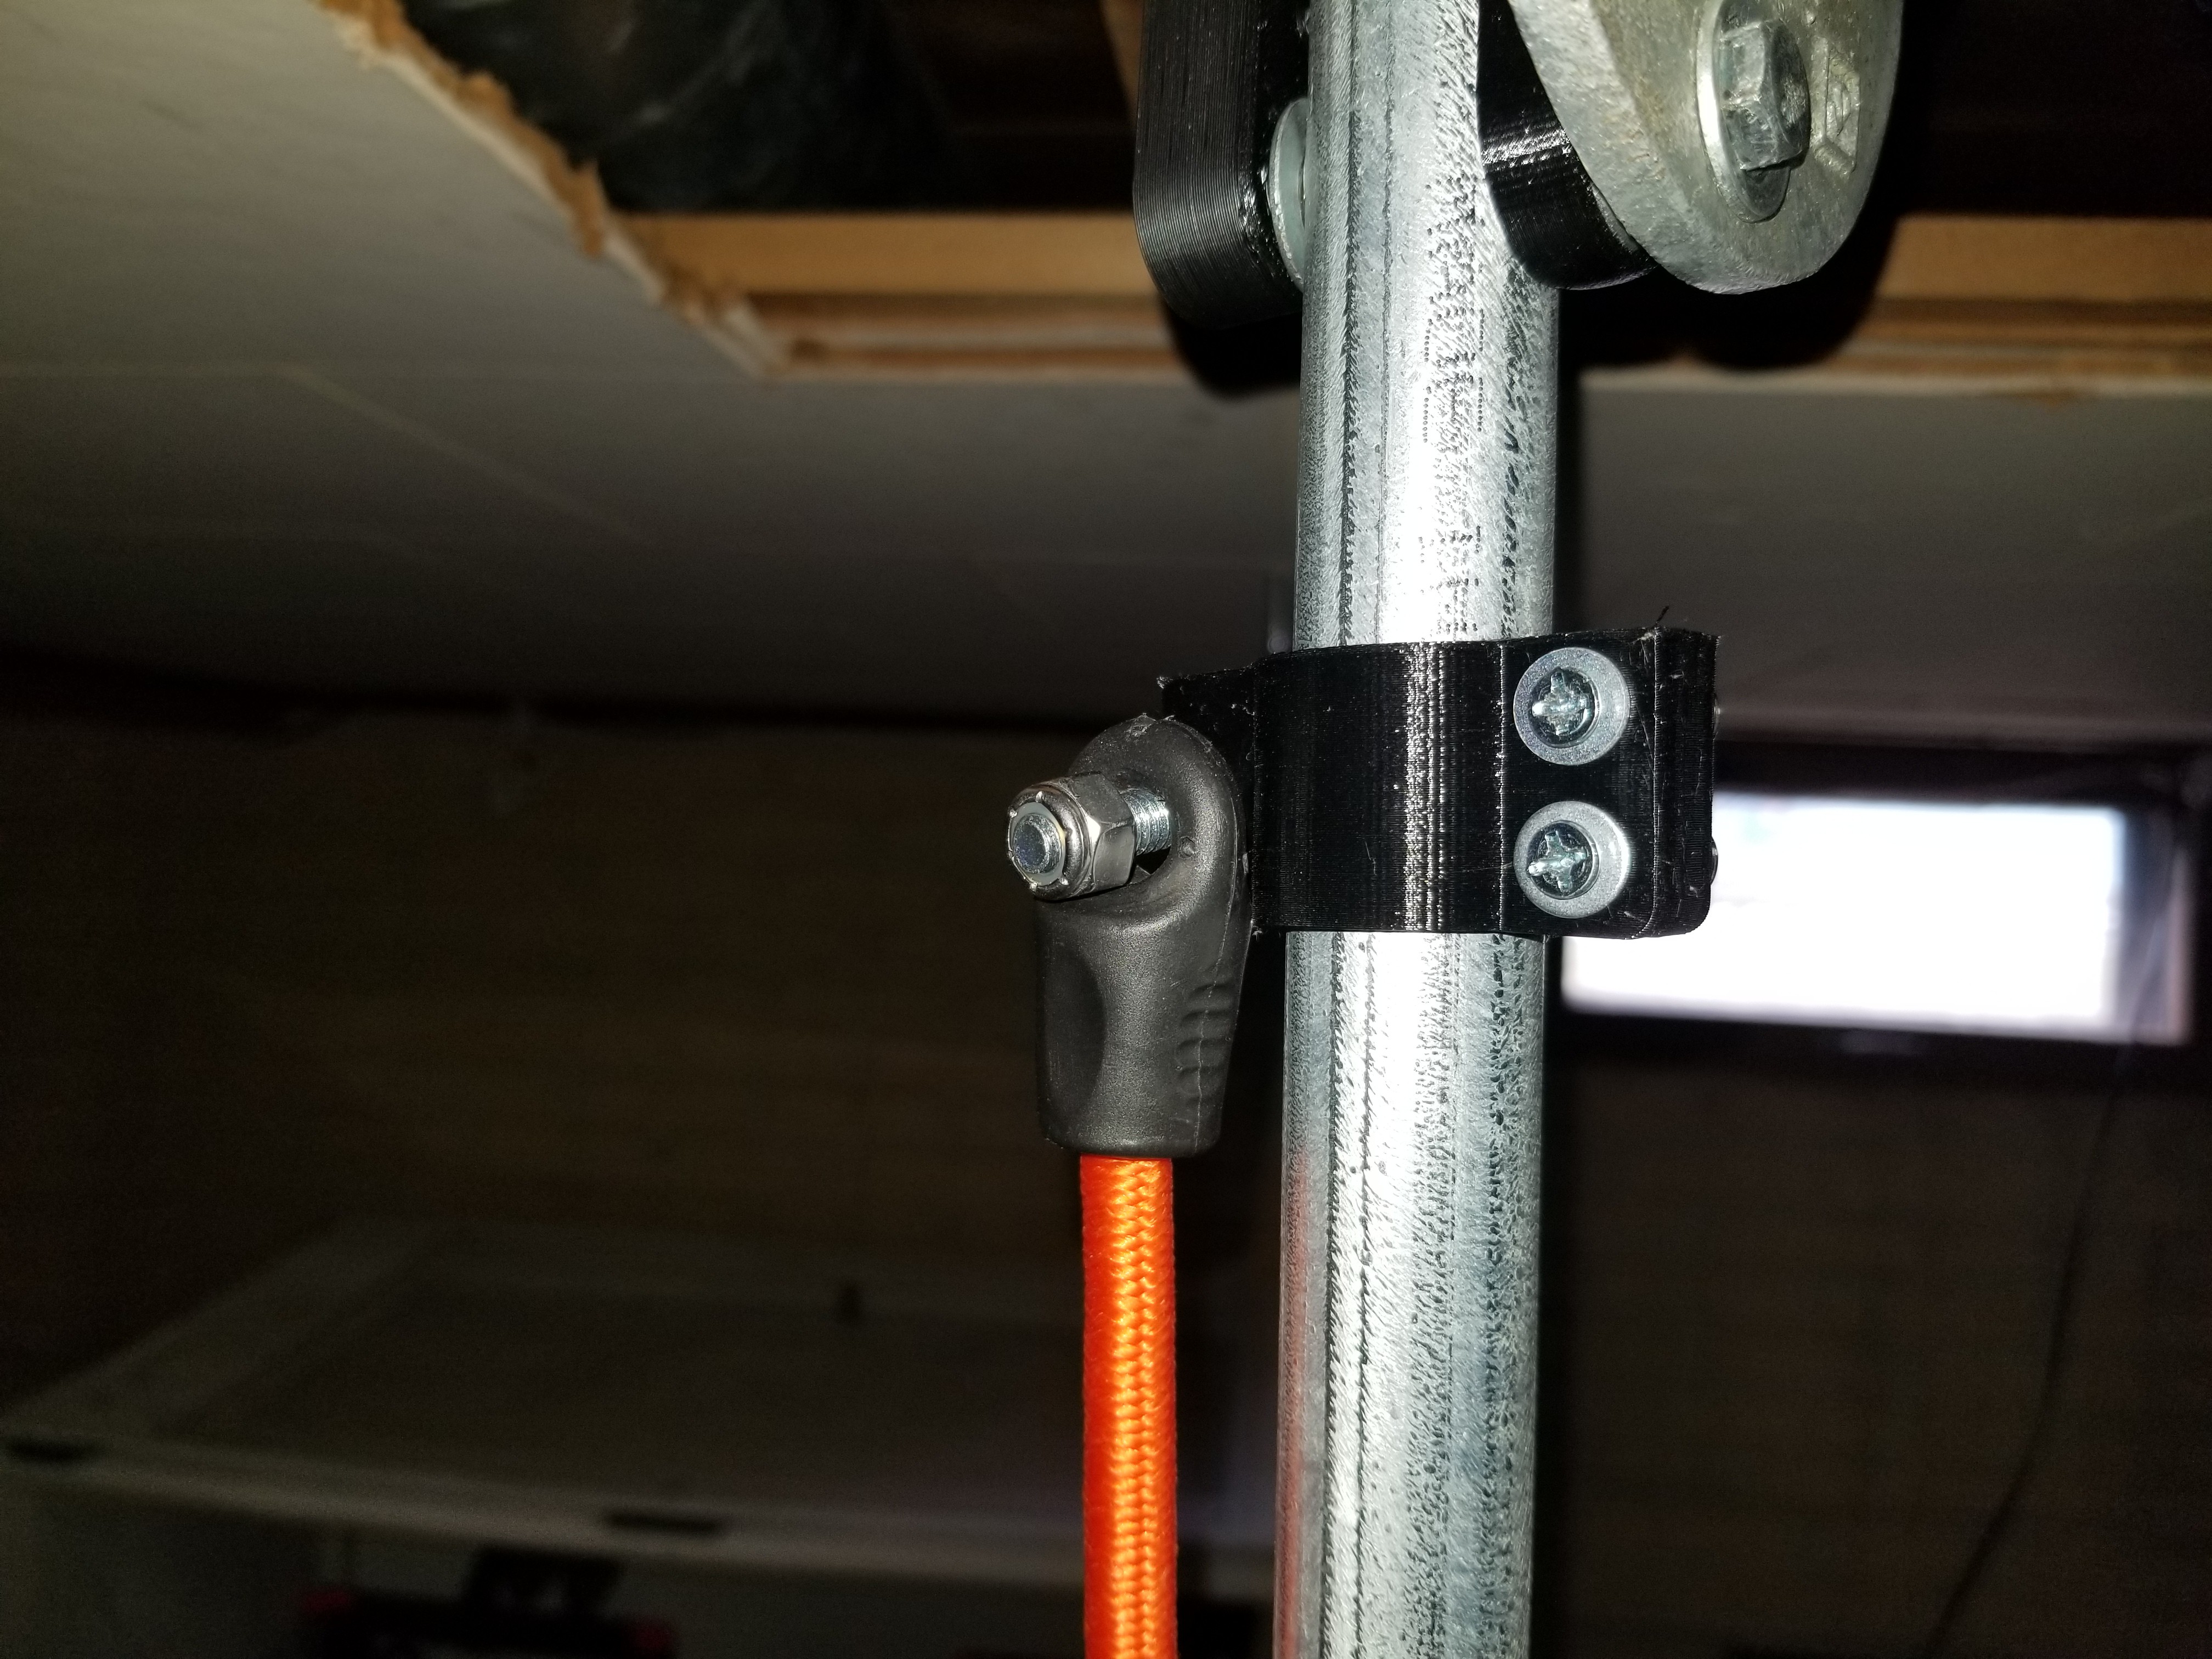
Attach the other side of the bungee to the 3D printed clamp (row 48) as shown below. I used a 1/4in hex bolt, 1 1/2in long (row 45), a lock nut (row 6), two 6-32 machine screws, 1in long (row 49), and two 6-32 nuts (row 29).
![]()
![]()
-
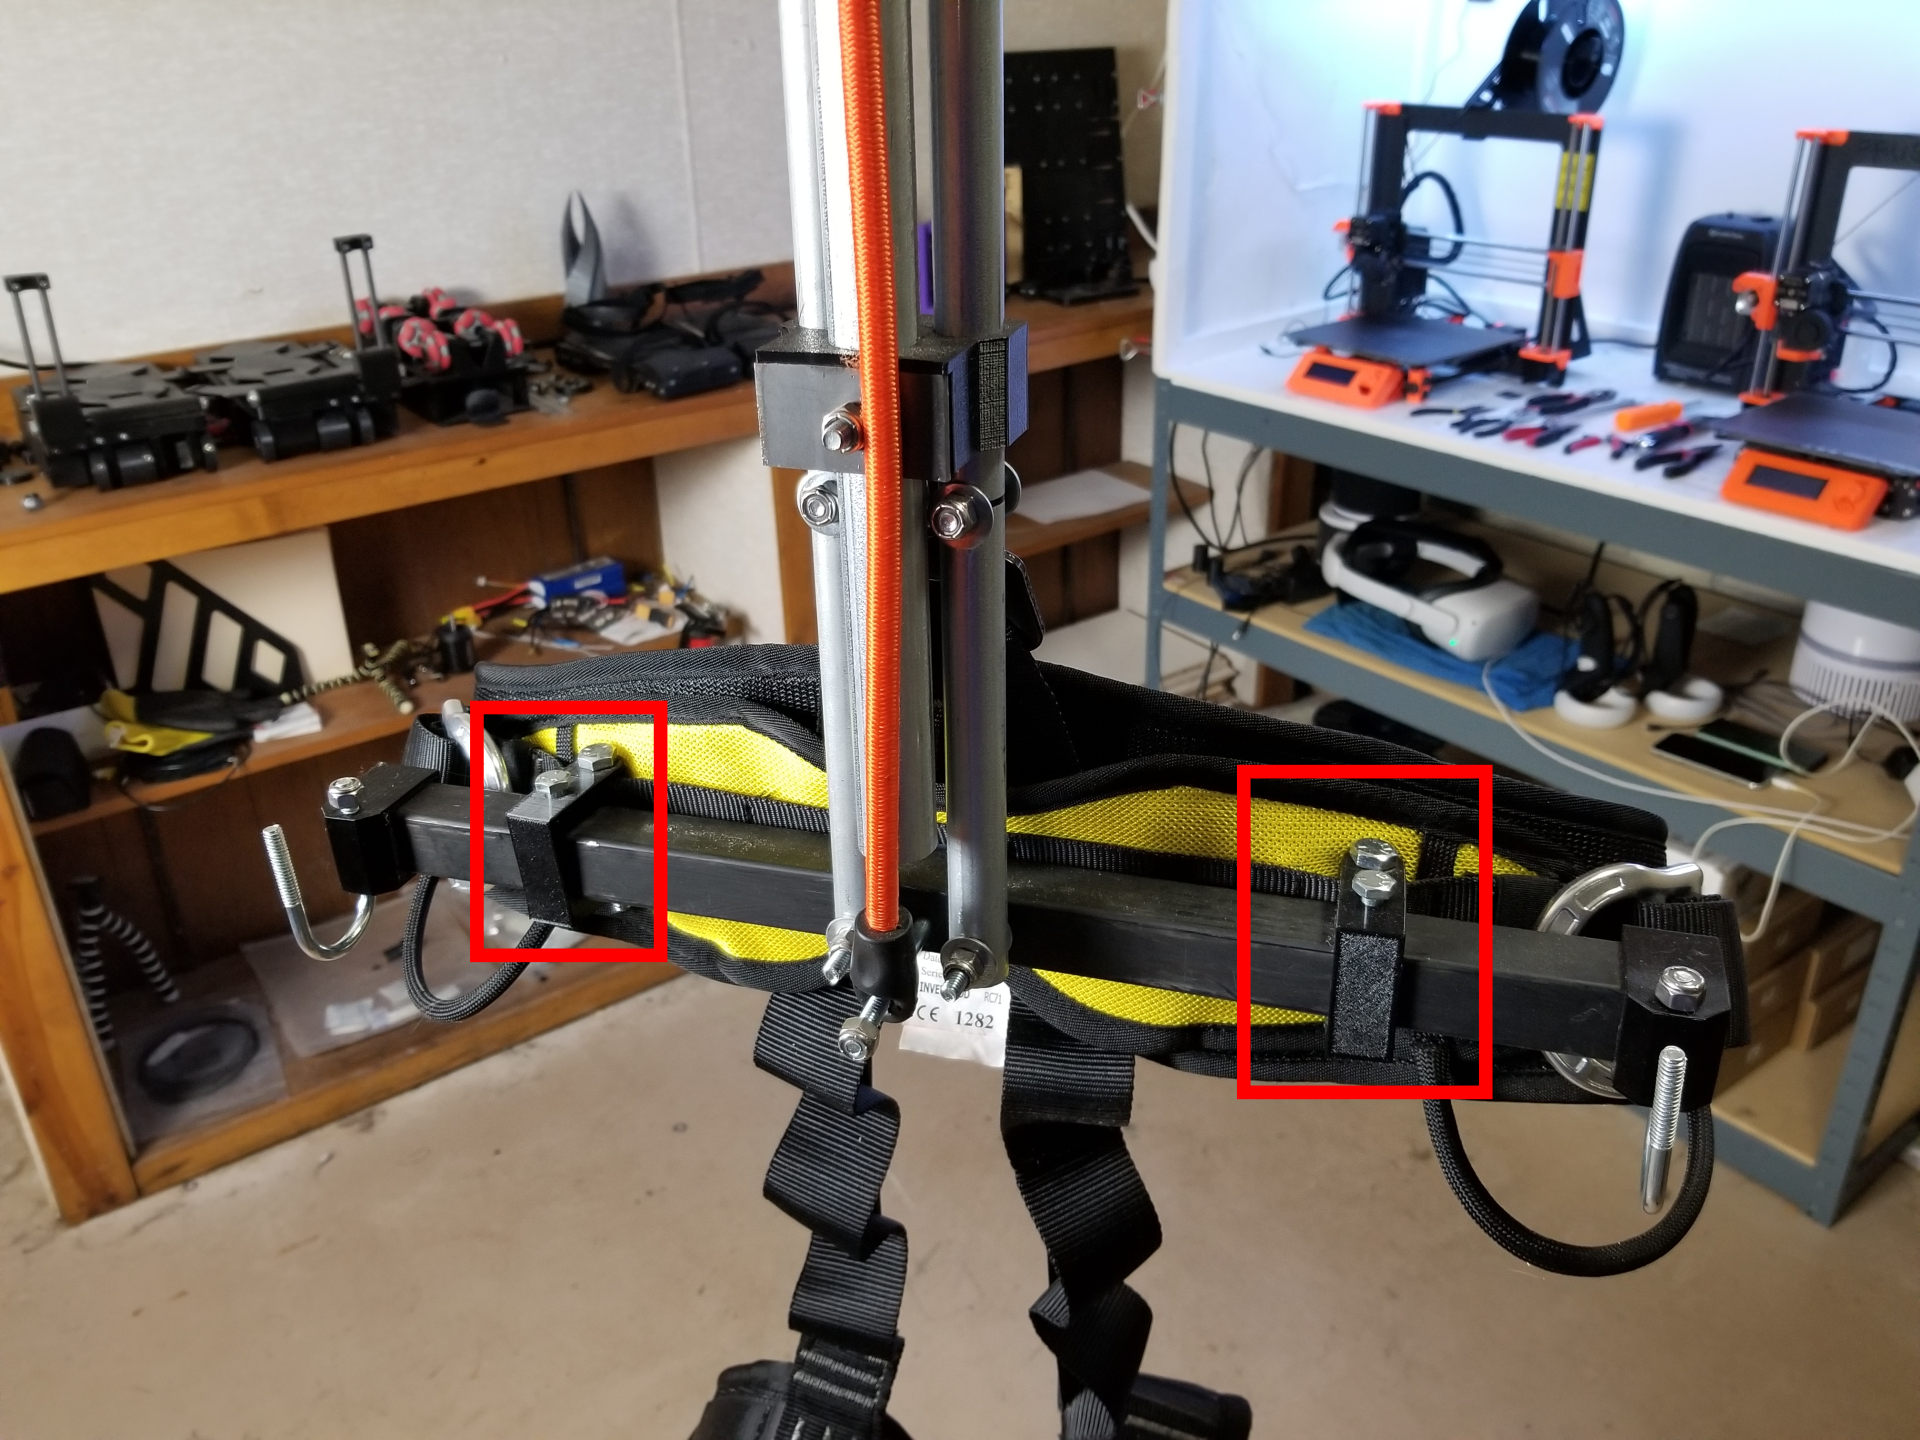
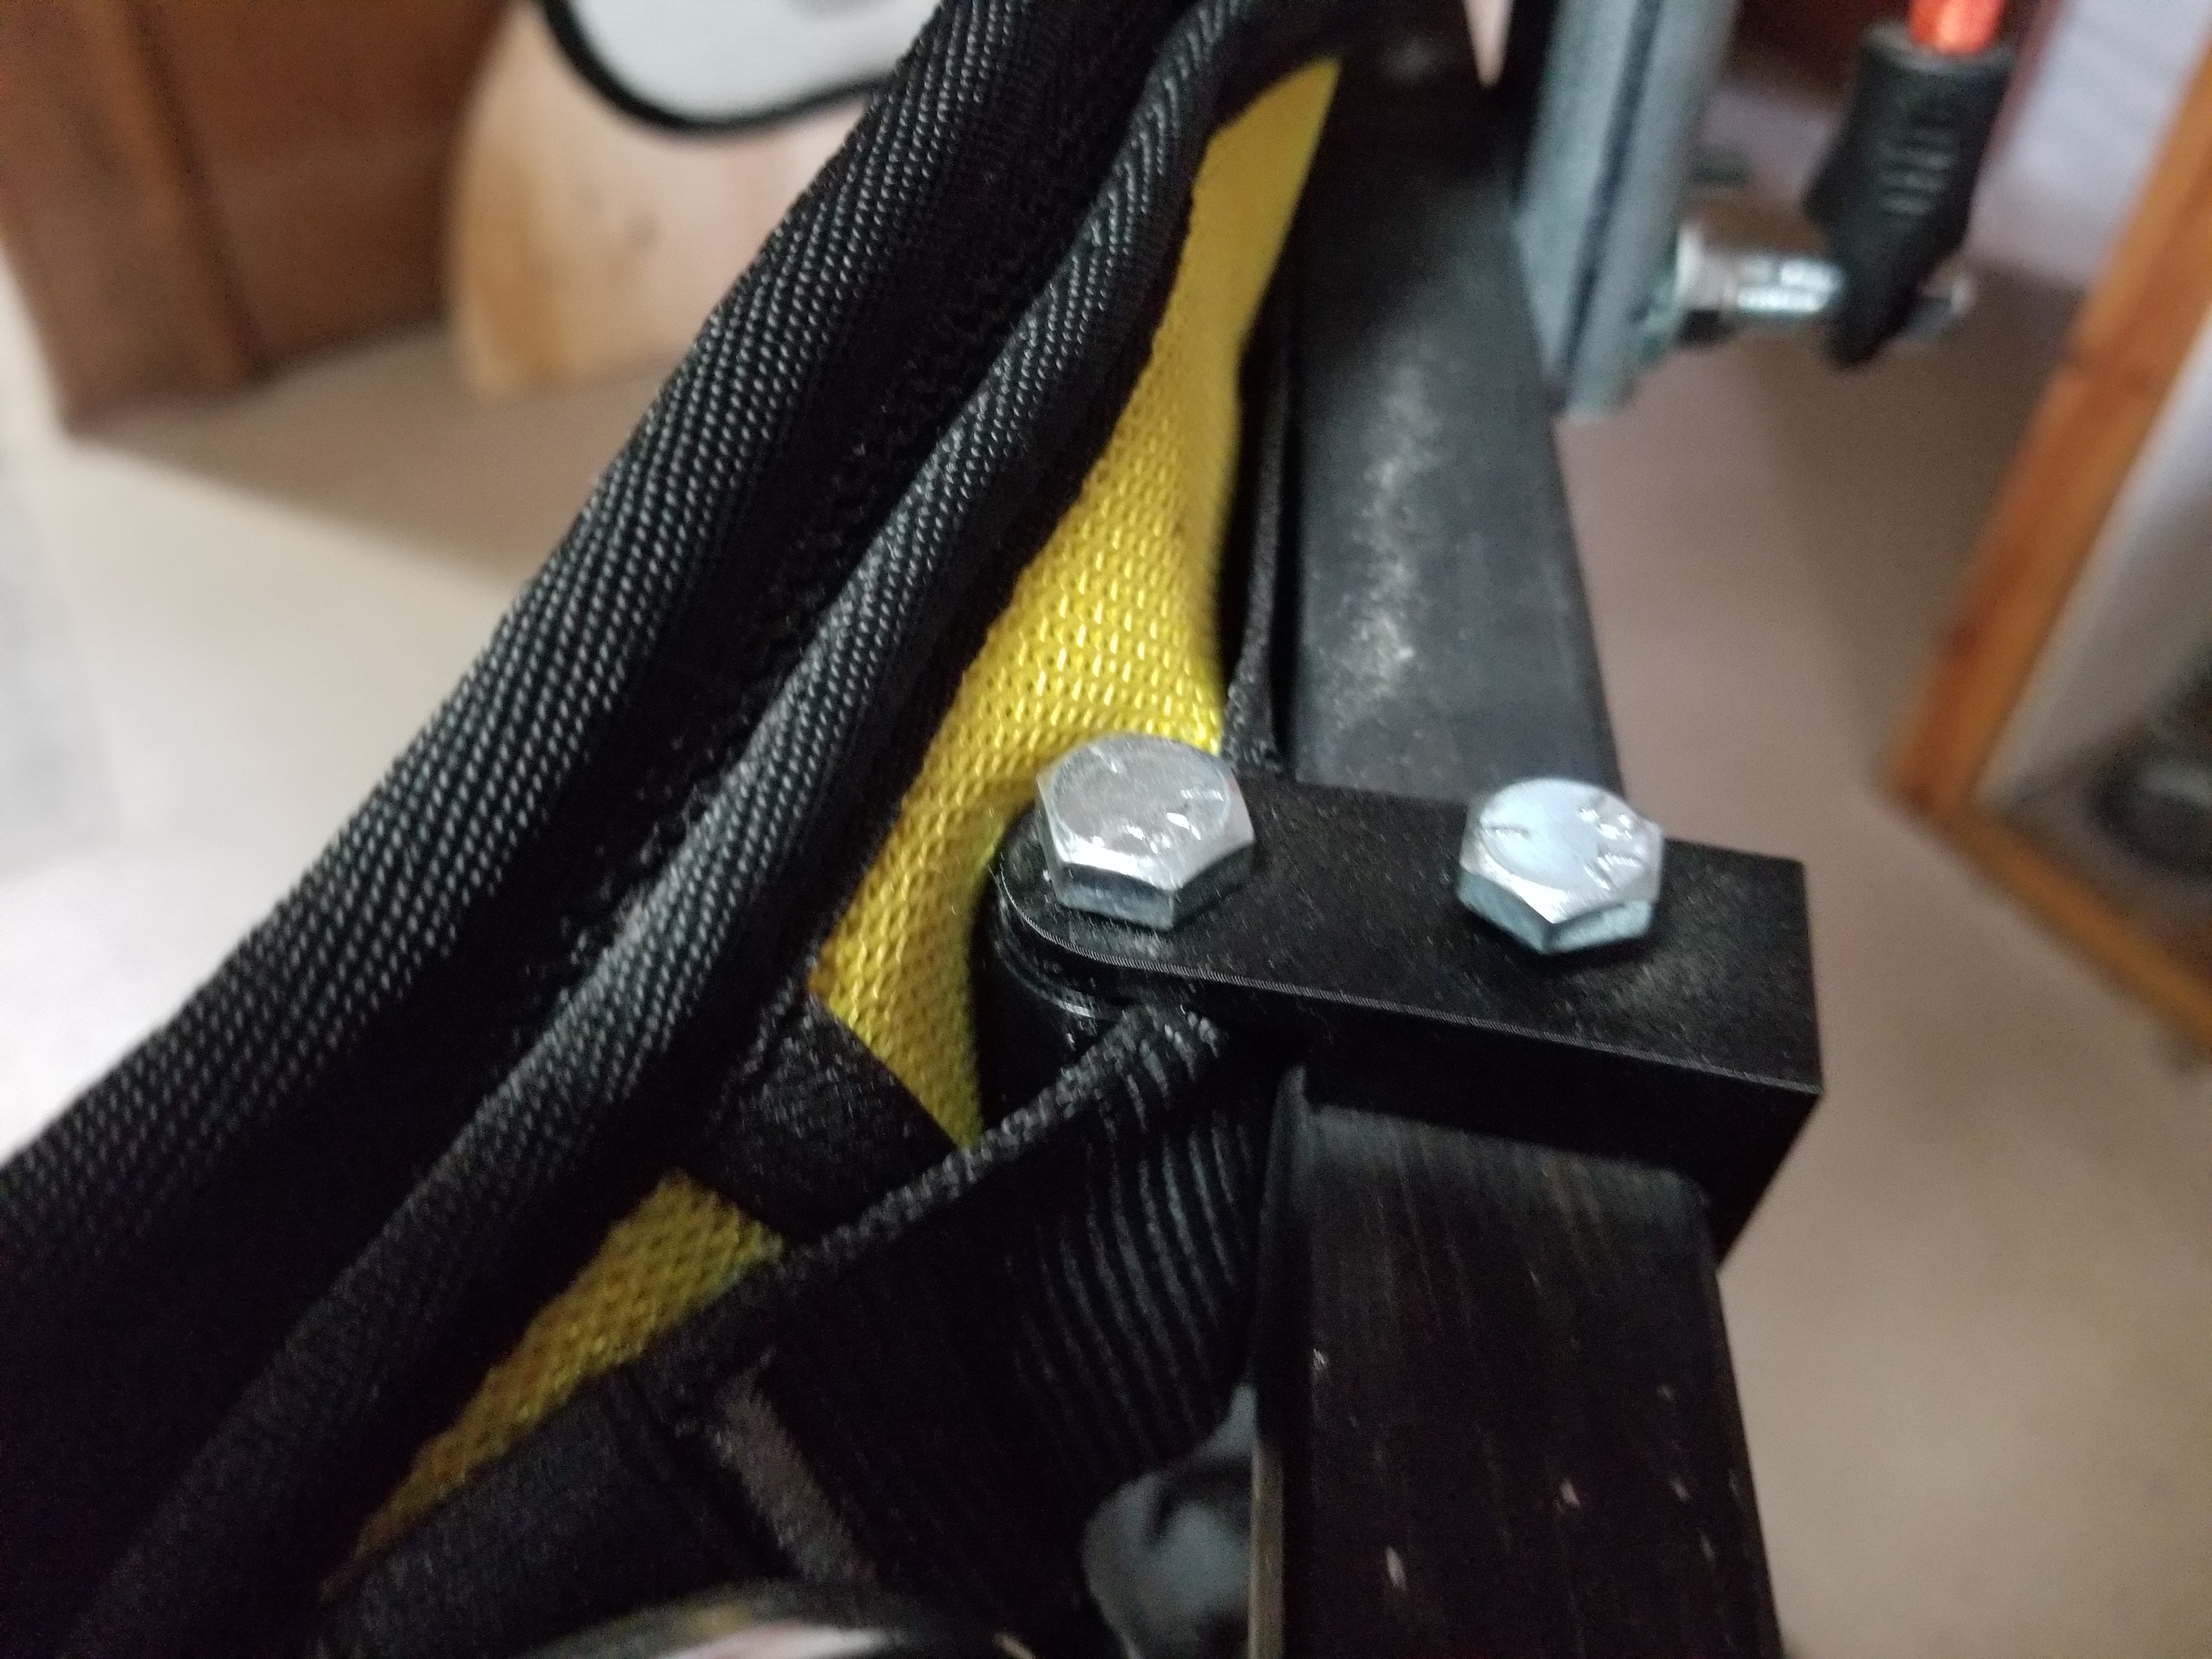
19Attach climbing harness
Take a look at the following photo. Notice the two pieces that slide through two of the loops on the back of the safety harness? You'll want to use the outer most loops, otherwise there will be a lot of play when you turn in the rig. I used the 3D printed parts from rows 51 and 52, four1/4 hex bolts, 2in long, two lock nuts.
![]()
![]()
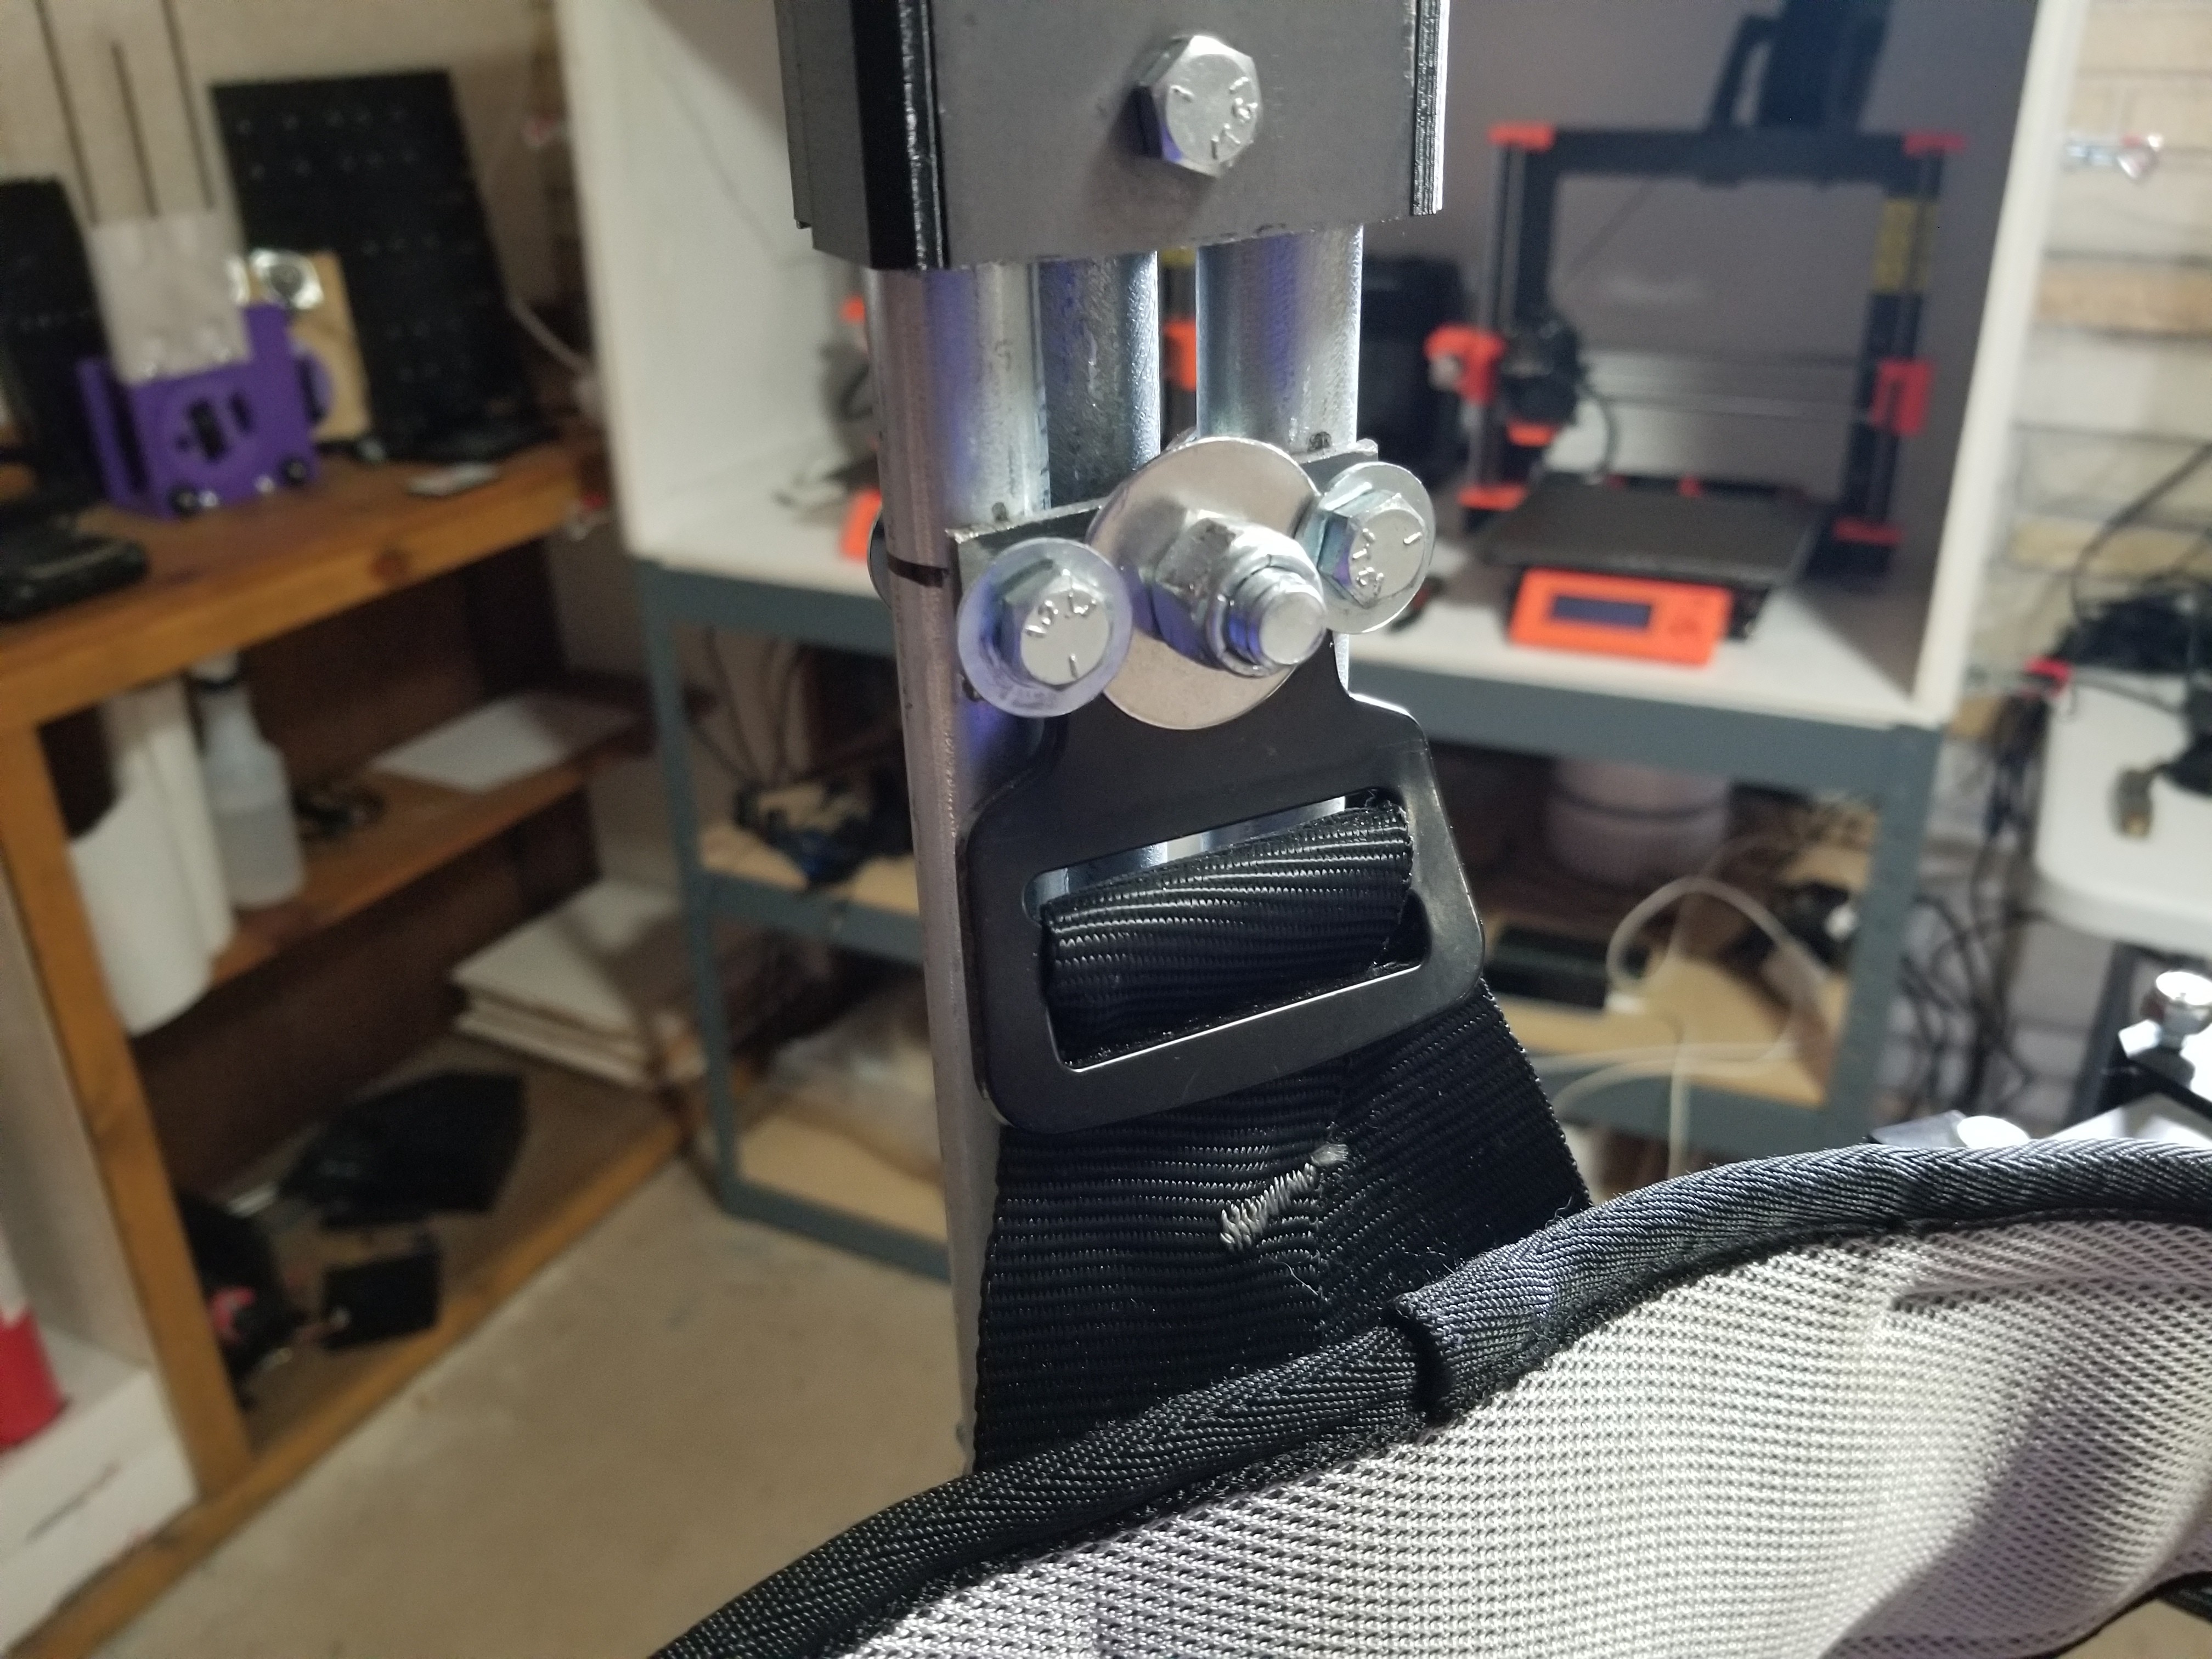
Next, you can secure the harness as shown below. I used a couple 1/4in hex bolts, 1.5in long (row 46), that go through the 0.5in conduit, lock nuts (row 6), washers (row 7). For the middle bolt, I used a 3/8in thick, 1in long bolt, but a 1/4in thick one (row 54) should be fine too. The middle washer (row 55) has an outer diameter of 1in.
![]()
-
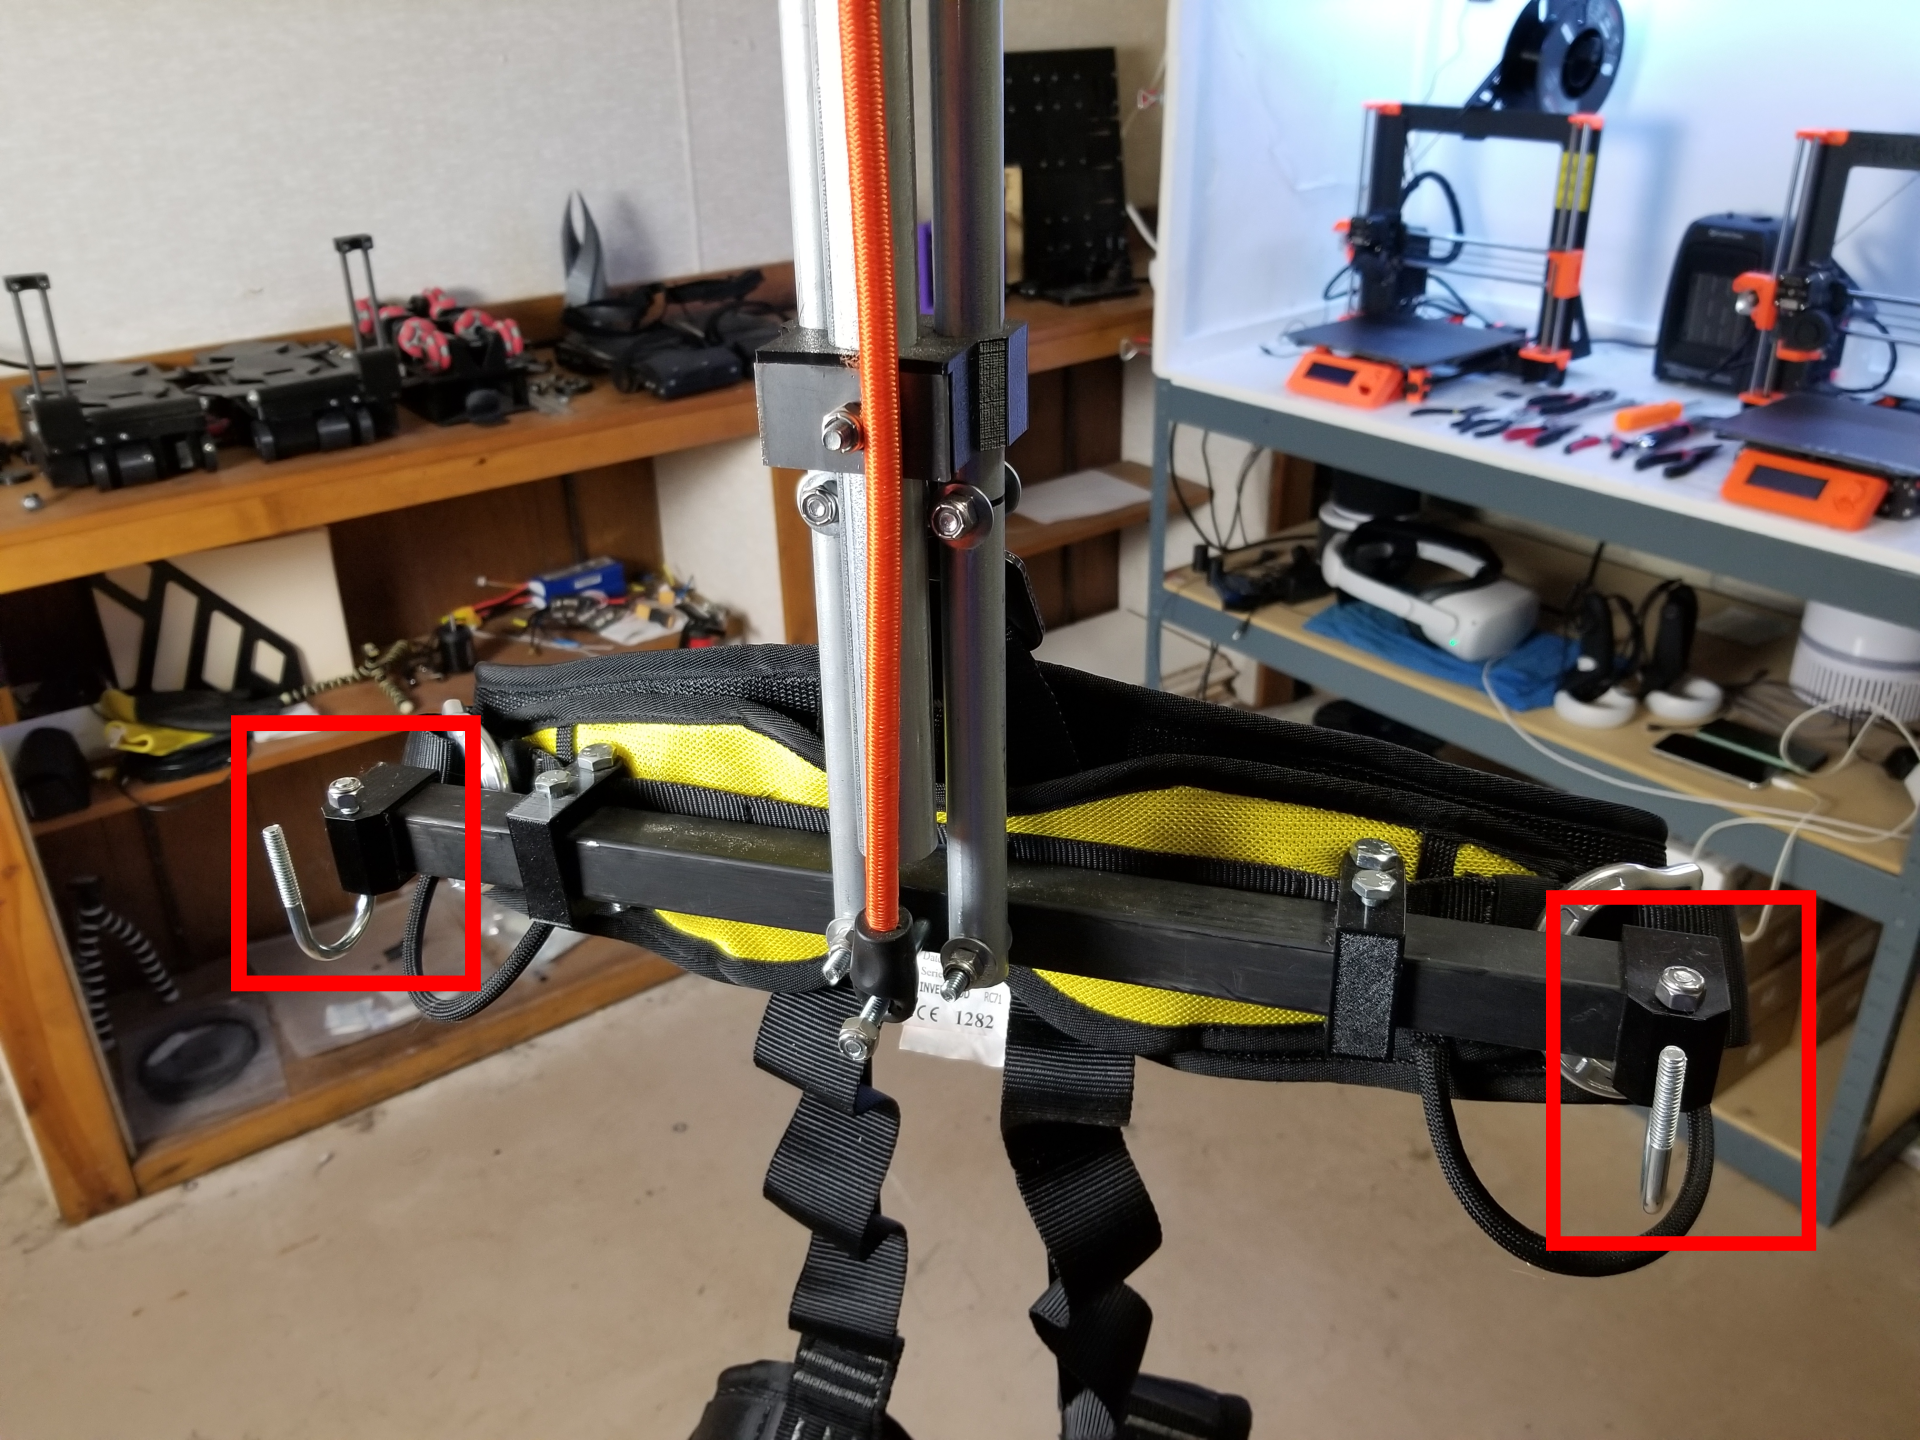
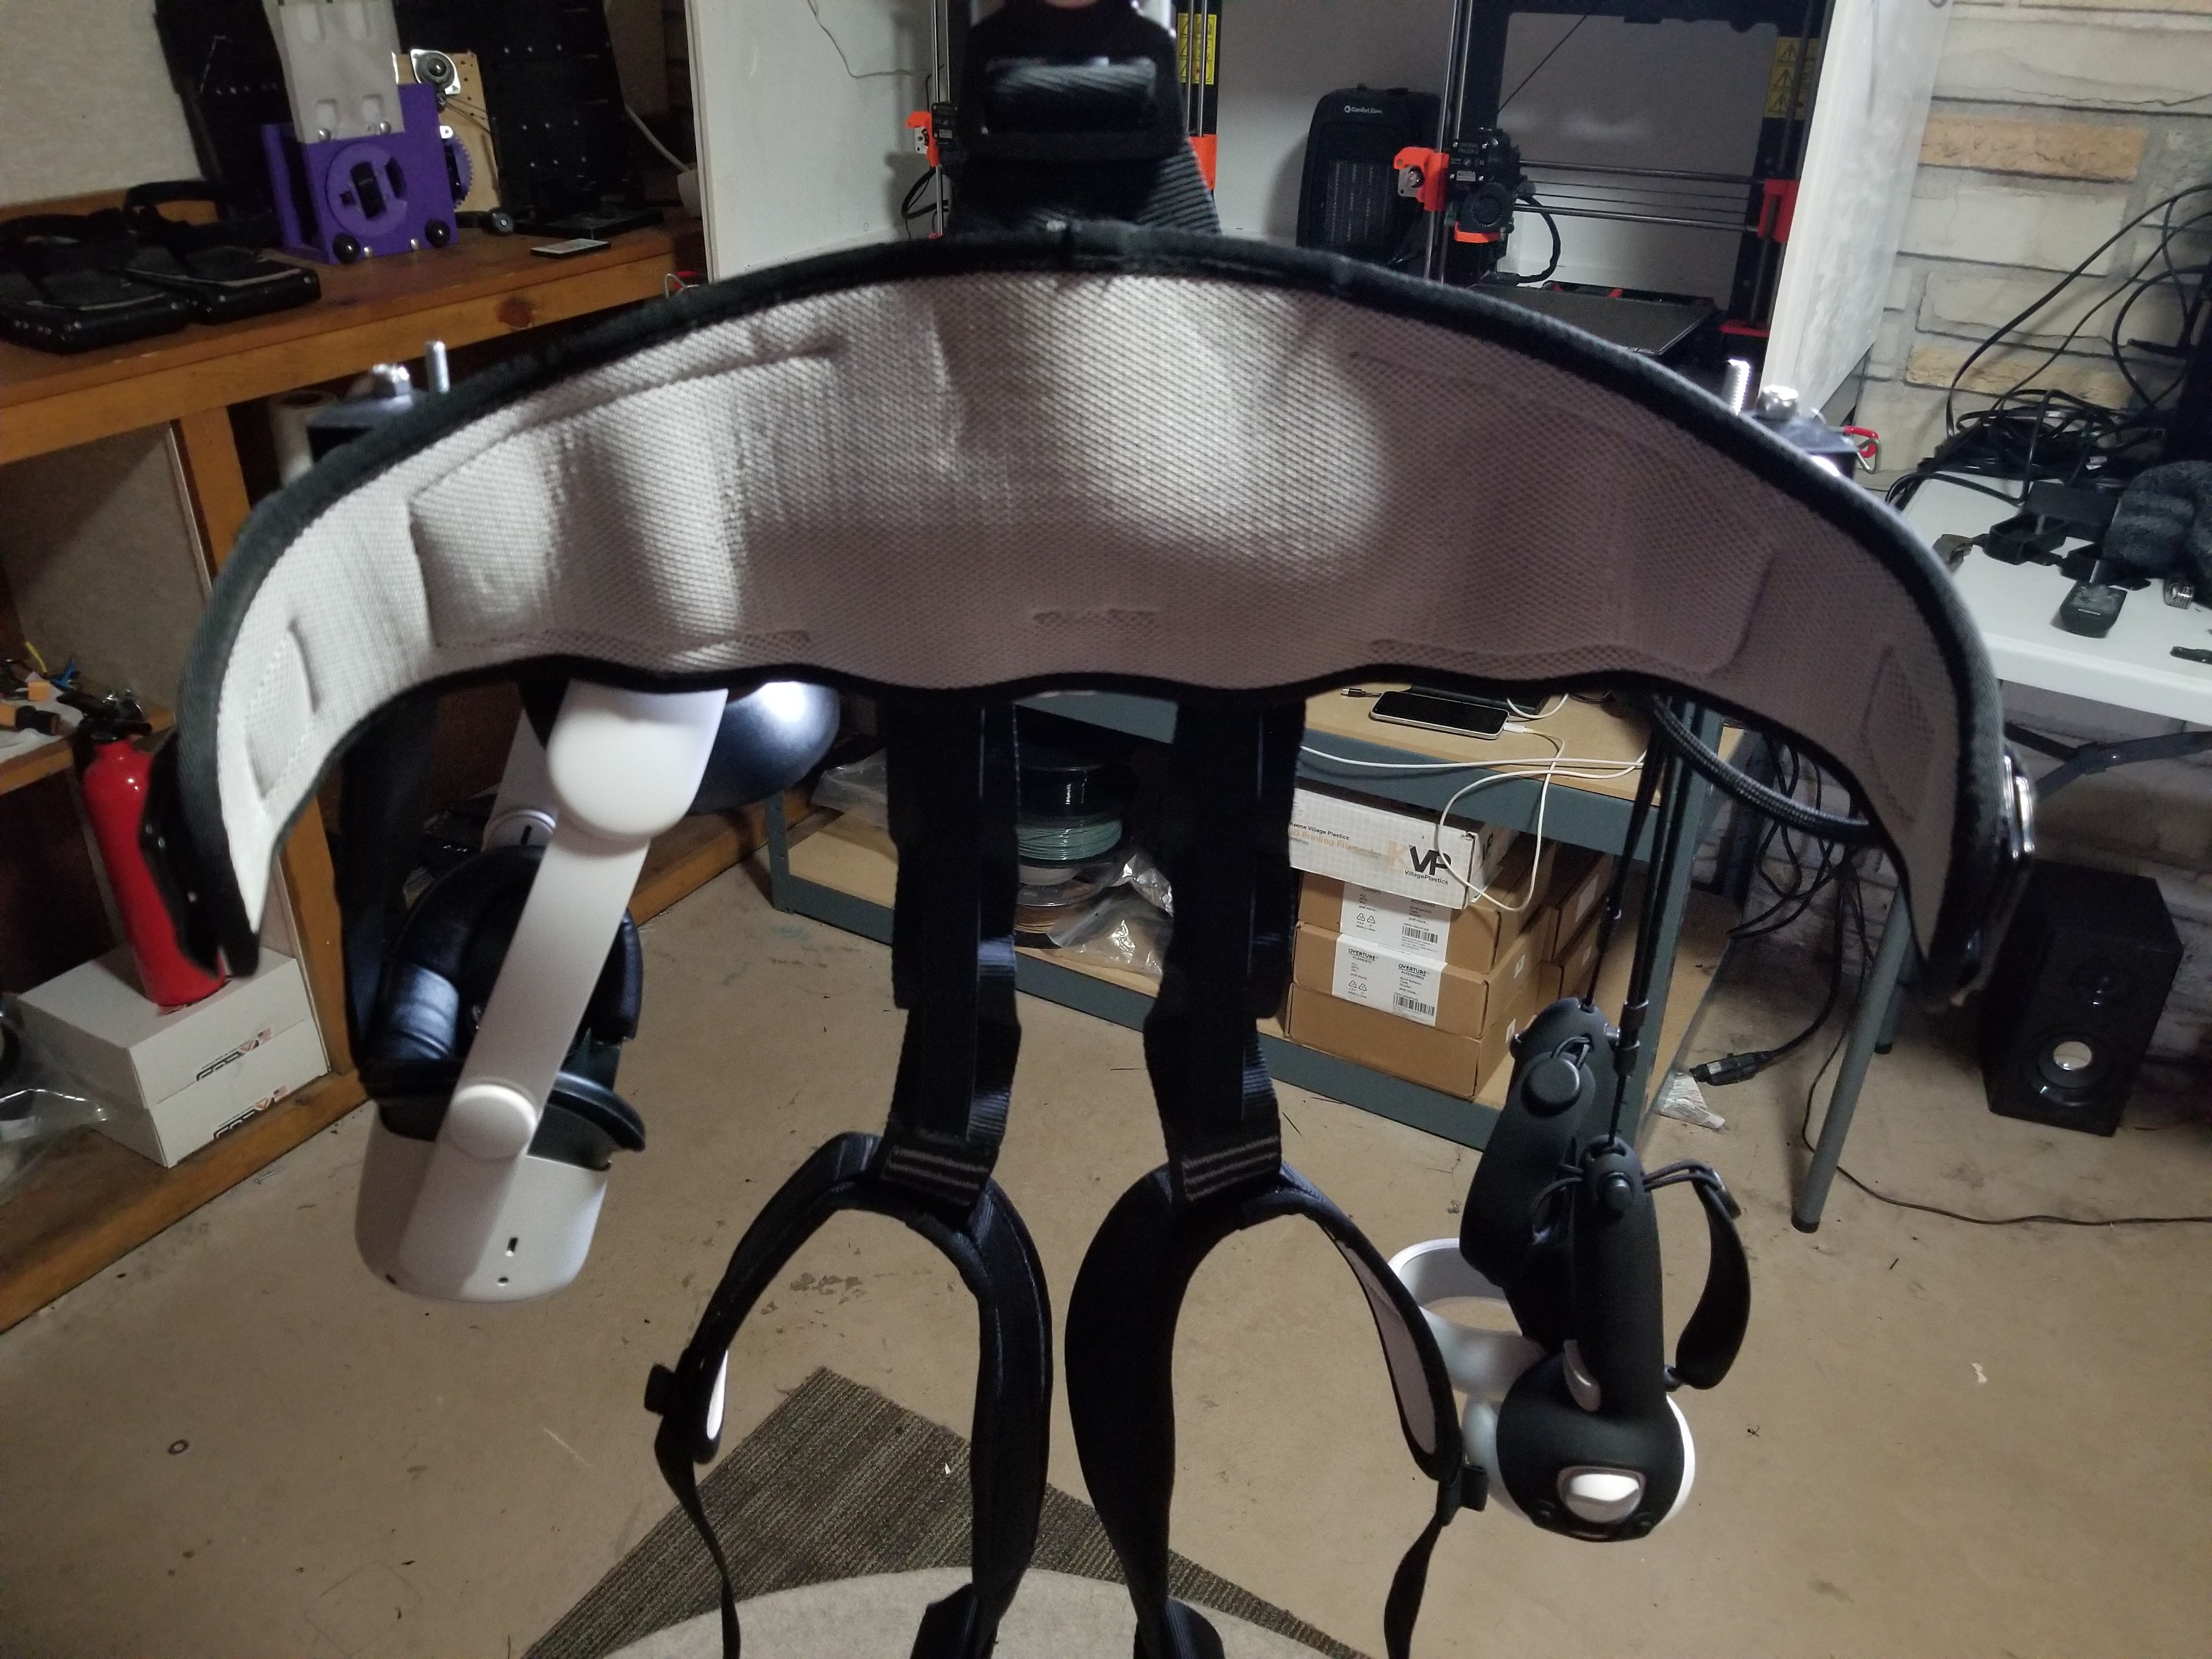
20Add hooks
This step is optional.
You can add hooks onto the end of the horizontal tube so that you can hook your headset and controllers onto the rig while you're strapping in.
![]()
![]()
![]()
This uses two of the 3D printed parts from row 50, two lock nuts (row 6), and two U bolts (row 56).
The rig is done. Now all that's left is to make the platform you'll walk on.
Ceiling Mounted VR Support Rig
A support rig for VR to keep you in the same spot in real life as you walk in VR. Use this with my VR shoes.

Discussions
Become a Hackaday.io Member
Create an account to leave a comment. Already have an account? Log In.