Alexander Dvorkovyy
-
Started selling on Tindie
04/30/2022 at 14:54 • 0 commentsYou can buy the sensor from me on Tindie:
https://www.tindie.com/products/pifactory_nl/water-meter-sensor/
Hand-made, hand-tested by me personally.
Zigbee controller will be available very soon too
-
Arduino example
04/30/2022 at 11:48 • 0 commentsIt was a pleasant surprise for me to know that somebody cared enough to make this sensor for themselves. Well, this is why it is open source hardware - anybody can make it. If you did, please let me know somehow. I want to know everything - which meter you want to read, what kind of connectivity you prefer (Zigbee/WiFi/LoRa), which power source you use (battery, accu, mains power).
Since Arduino is lingua franca for all of IoT community, I've decided to write a small Arduino demo project where I would show in more details how to configure LDC2112 and use it to read the water meter.
You can find it here: https://github.com/pifactory/watermeter/tree/master/firmware/arduino_ldc2112
This is just a demo, but it gives a good starting point for your own firmware. I hope I didn't spoiled your fun discovering how this sensor works yourself :)
With this demo project I share my discovery path so far:
- LDC2112 is a 1.8V sensor and some microcontrollers require a level transformer, otherwise GPIO interrupts do not work
- How to address sensor blindness issue when the wheel mark stops just under the coil for a longer time
- How to improve reliability of the counting algorythm
After 6 months of using this sensor I have found out that:
- 2 x AAA batteries are almost empty. So, my initial thoughts that it will work for years did not come true. 6 month is not that bad too, actually. I will use IKEA rechargable batteries for the next battery round, will see how long they will last.
- Reading error is just under 0.1% - more than acceptable to m
-
Zigbee Microcontroller
11/14/2021 at 14:15 • 0 comments![]()
I've tested my Smart Water Meter Sensor for 2 weeks already and didn't miss any count! It follows perfectly my water meter.
Battery usage is still a problem: I am at 91% of the original capacity or 2,973V for 2 AAA batteries. This is a lot, of course. I've changed the firmware:
- Increase buffer time from 1 to 5min: this means data is sent at most every 5 minutes
- Increase battery/configuration check from 1 to 4 hours
I hope this will be enough to keep battery going for longer time. If not, I still can increase buffer time to 15 or 30 minutes. 1 hour sounds extreme to me, but will see. Data is sent only if water is used, of course.
Other big news: all the design files for ZigBee Microcontroller are now in the GitHub repo:
https://github.com/pifactory/watermeter
PCB, schematic, firmware, device configuration file for Zigbee2MQTT: all of it. Check it out and ask me any questions you might have
-
Going Open Source
11/09/2021 at 07:59 • 0 comments![]()
Here are 2 github repositories used by this project:
https://github.com/pifactory/watermeter
https://github.com/pifactory/kicad-goodies
So far only sensor itself is published, Zigbee microcontroller will be added soon, including firmware and files needed by zigbee2mqtt.
I've got feedback from PCB shop about shorts in the inductor loops. Their answer was that I need to increase the track width and clearance to 125 μm (about 5 mil). This is no surprise, but now I have confirmation from the first hand.
Another problem is that battery of my prototype is down to 92.5%. I will increase counter buffer time to 5min and see if it helps.
For the rest prototype works as expected: counting used water and updating data in Home Assistant. I've created also flows in NodeRed to produce more meaningful "water consumed today" sensor. It is easier to track. Will write about it later
-
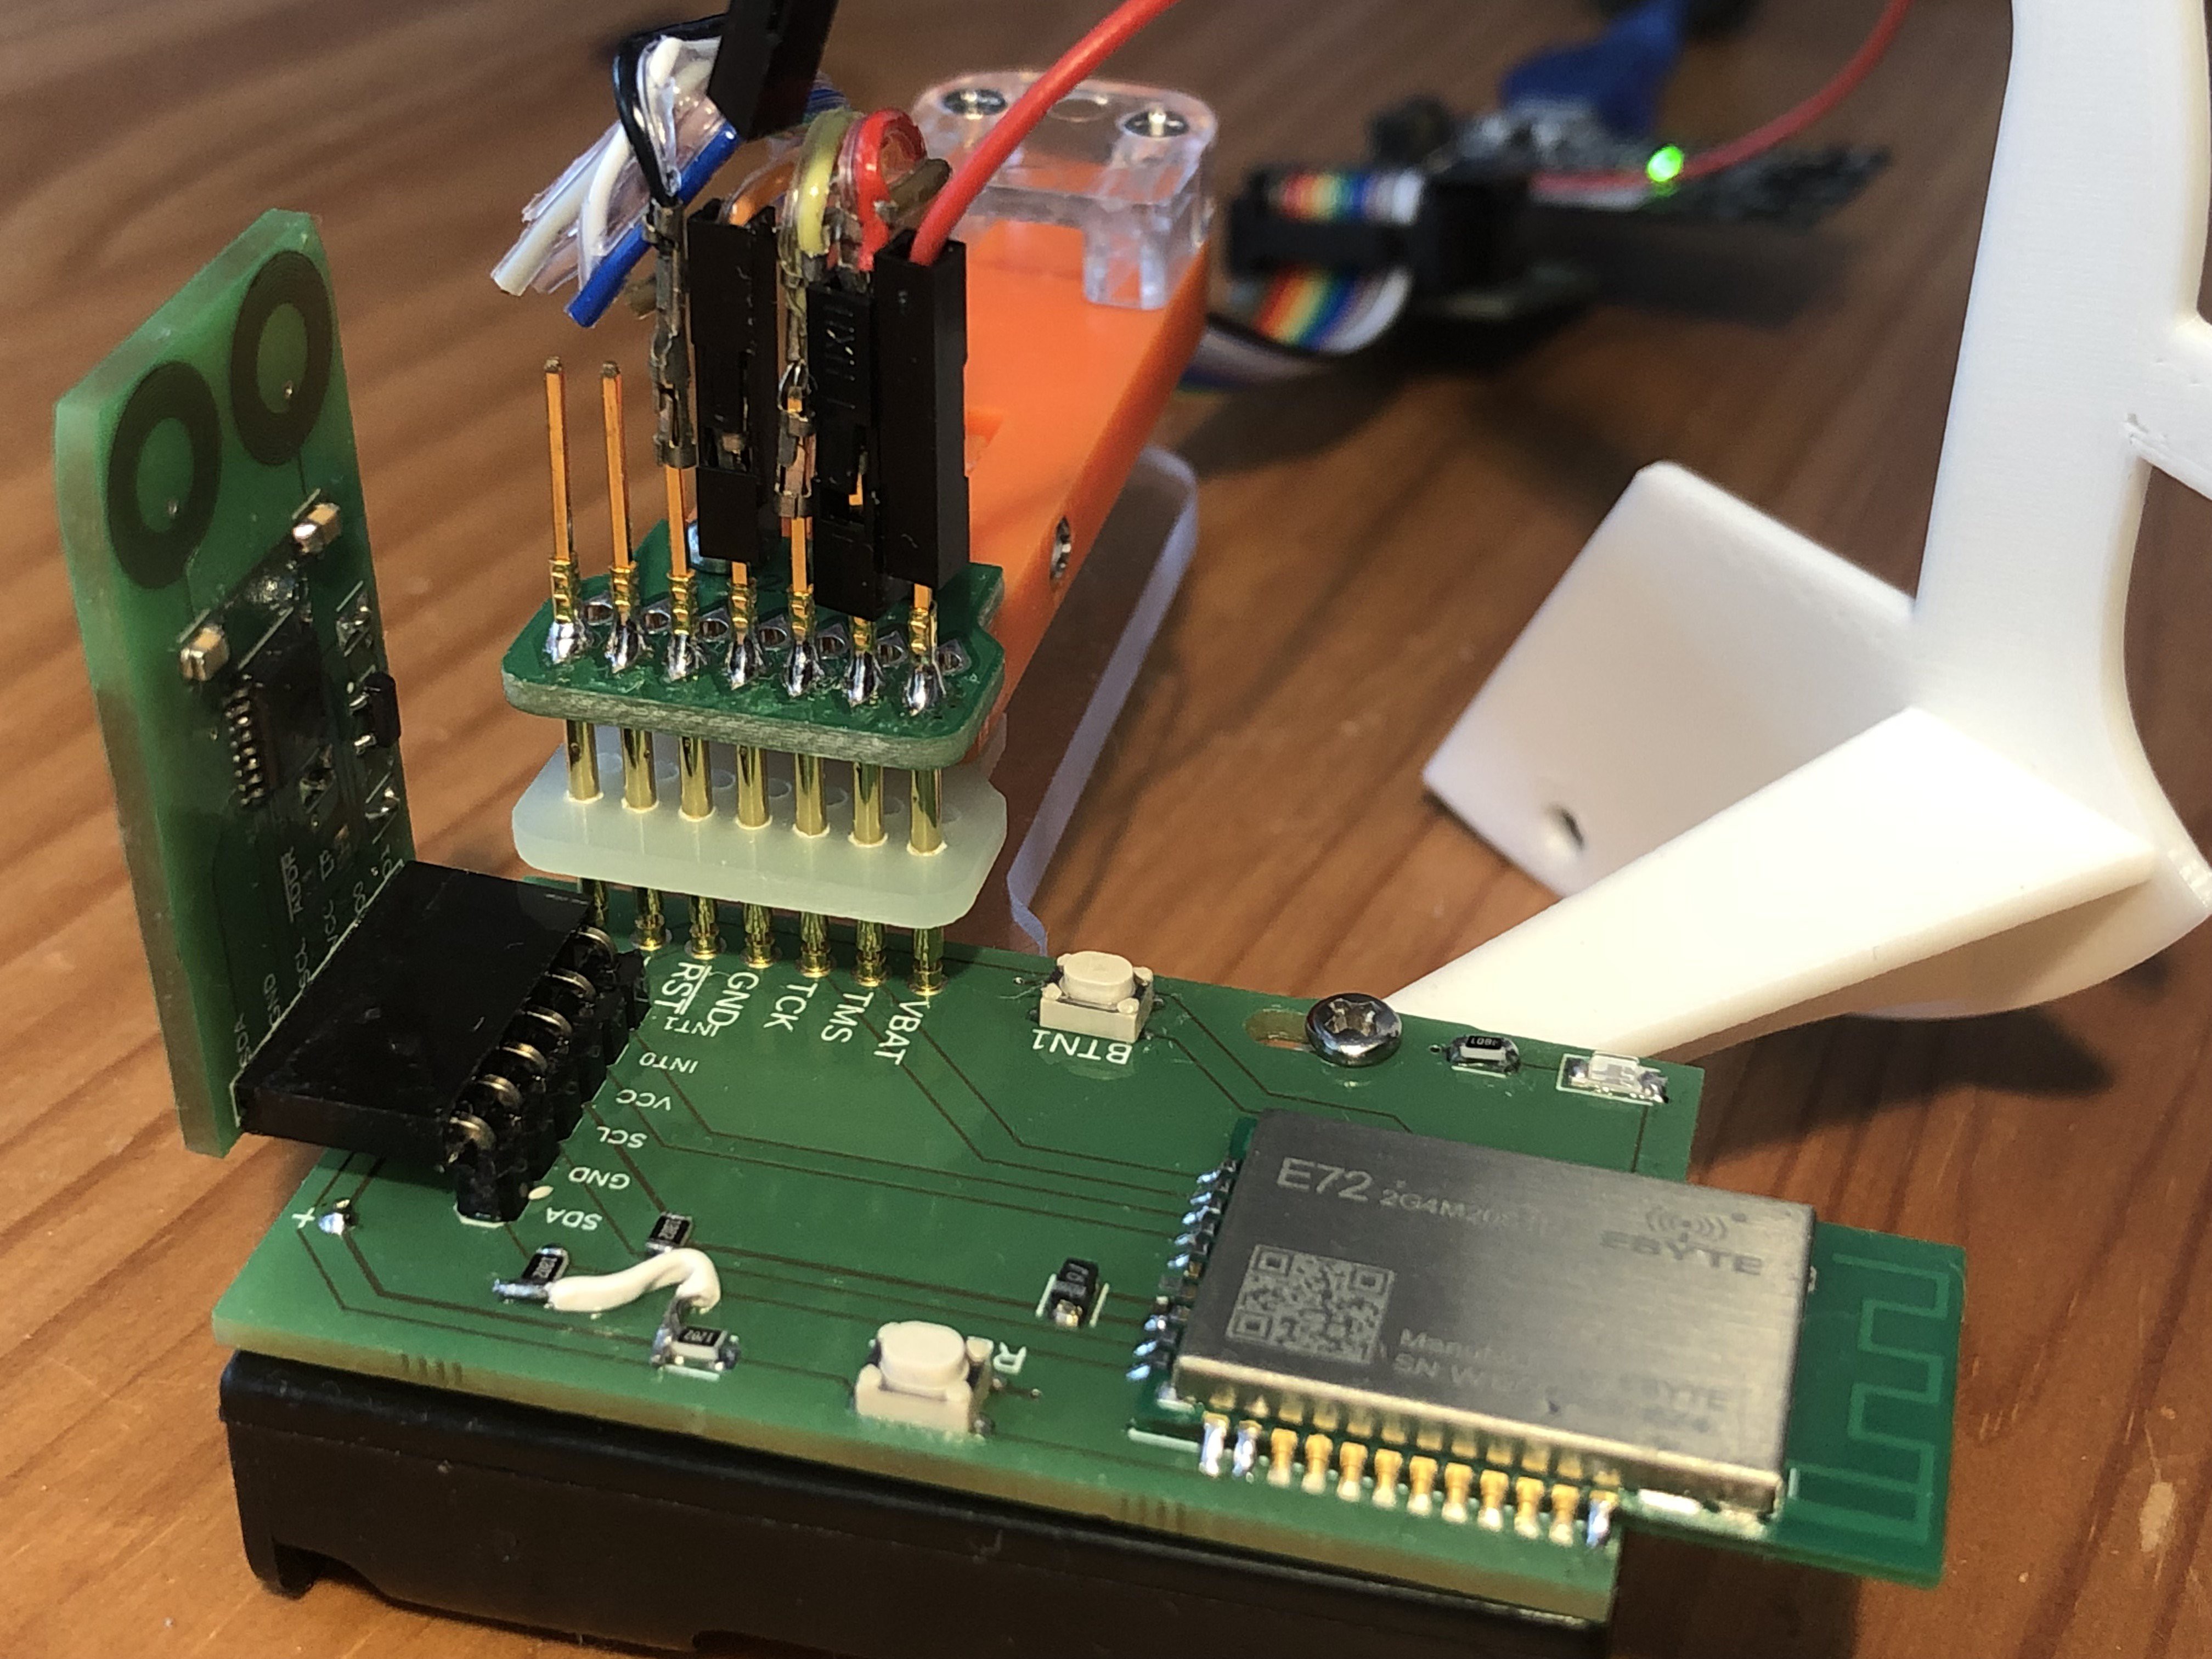
Testing Water Meter Sensor Prototype
10/30/2021 at 12:49 • 0 commentsYou can see my first prototype on the project photos. Good news: it works! I've run it for a day and could see how much water I use almost instantly! It was fun.
Problems discovered so far:
PCB coils have shortcuts
This results in less inductance and they become less sensitive. Contacted the manufacturer about it. Worse case: I have to increase the trace width and spacing. This will also reduce inductance, but keep production more reliable.
I2C lines need pull-up resistors
I knew it, but was hoping to use internal pull-ups of CC2652P chip. No luck. Had to add them to already produced PCB manually. Improvement for the next version.
Battery dropped by 2%
This issue worried me most. I've tested it extensively with my Nordic PPK2 for many hours, but it seems to be working just fine. Average power supply current is circa 20uA - this is actually good. May be it is just cold under the floor? Have to monitor it for a longer time.
Count was 6 liters off
This one is also nasty. Took me a day to redesign the counting algorithm. If you want to know more - ask me in the comments, I can make a separate blog post about it. For now I can say that algorithm has changed significantly and I am also counting "missed triggers". There are 2 sensors and they have to be triggered one after each other. This counter is incremented when it doesn't.
I am testing new firmware for a second day and it follows meter precisely and zero triggers have been missed. Will see what happens in a couple of weeks.
-
How I designed Water Meter Sensor
10/30/2021 at 10:07 • 0 commentsI just want to know how much water I consume. I live in Netherlands and here we have smart meters for electricity and gas. I can see instant consumption and totals per day, month, year. I want same thing for water.
Why? It can be used for automatic leakage detection and also for awareness of how much water I need per day and for what. Building this thing is also a great opportunity to learn new stuff.
First, I had to choose a measurement method. Most people seems to chose one of these approaches:
- Take a photo on regular intervals and then apply OCR
- Use inductive sensor
I wanted this sensor to work on batteries for years. So, I had to choose a low power measurement method. After doing some research, I've found TI's LDC2112, which is an inductive sensor used for keyboards. In low power state it consumes something around 6uA per sensor, which is good enough to start building a device with it.
I never designed an inductive sensor before and at the beginning I was worrying if I will manage to make all the calculations properly. Fortunately, TI provides number of application notes, which made the whole process a lot more straightforward and actually I enjoyed it. If you ever think design one yourself, definitely look at WEBENCH Coil Designer. It includes all the calculations and exports ready to use PCB designs in popular formats. Once the sensor was designed, I had to choose how to communicate the readings. I wanted to make the whole device to work on batteries, so Zigbee was an obvious choice. One challenge: my water meter is under the floor, but my Zigbee controller is in the attic. I considered to give Lora-E5 a try - I used it for a sensor for the mailbox flap and it works well. At the end I just decided to try more powerful CC2652P Zigbee module from EBYTE. It needs more current, but will see if I will manage to save the battery.
Hacking Water Meter
Turn Elster V200 meter into a smart water meter