Close
0%
0%

NES Cart Kitbash - Ready Player One Inspired

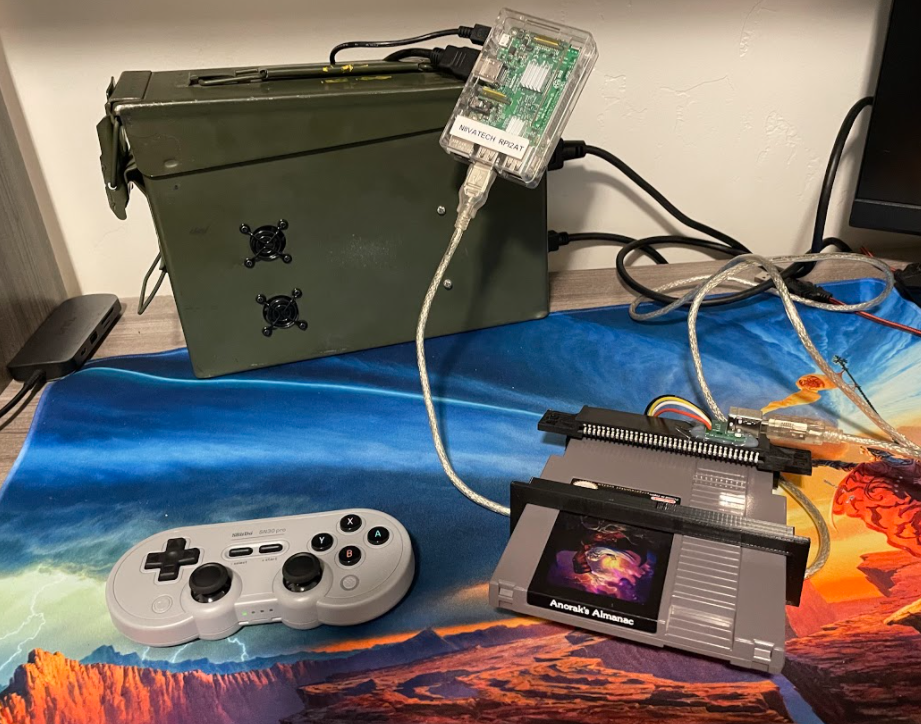
This project hacks the original pins of an NES cart to connect a USB flash drive and bluetooth dongle to a RPi. Emphasis on looks

Public Chat
Similar projects worth following
It took years of recommendations to finally sit down and read Ready Player One. Sure it's not my generation, but even just having parents from that era the was good enough to pick up on some of the nostalgic easter eggs throughout the book. Many of the arcade games, movies and music were part of my upbringing during the late 2000's. Even Rush's *Caress of Steel* was one of my go to albums as I ripped around my midwest suburbs in a beat up 93' Toyota pickup. When I finished the book I started whittling through several community playlists of Anoraks Almanac (a comprehensive pop culture collection used by the characters of the book) but as I consumed the source I felt something was missing. I really just wanted a platform I could experience a sliver of the 80's with the convenience of powerful SBC's and cheap digital storage. Hopefully I end up with the best of both worlds in the end!

The Cart

Electronics
The cart is a donor NES sports game that I picked up from a local game store. Originally I had planned to lay out a PCB with the connections that I needed and might still do that in the future, possibly with a smaller form factor. I know they sell aftermarket PCB's and cases I could have used but I had some gear to trade in and didn't have to fork out any precious moolah for this. Plus my family could use a couple more curses for the next 3 generations for destroying an irreplaceable artifact from the 80's.

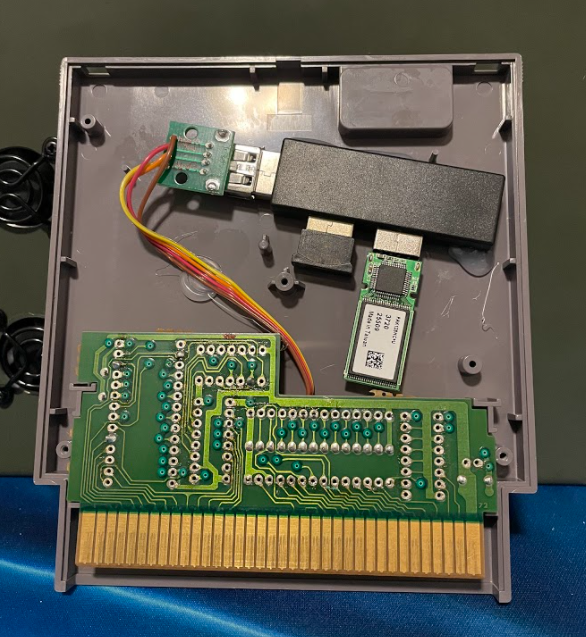
I popped the cart open and used some solder wick to pull the roaches and all the passives off the PCB. While I had the gizmo open, I cleaned everything down with isopropyl alcohol and made sure the contacts were in good condition. Yeah ... nobody played this game. 

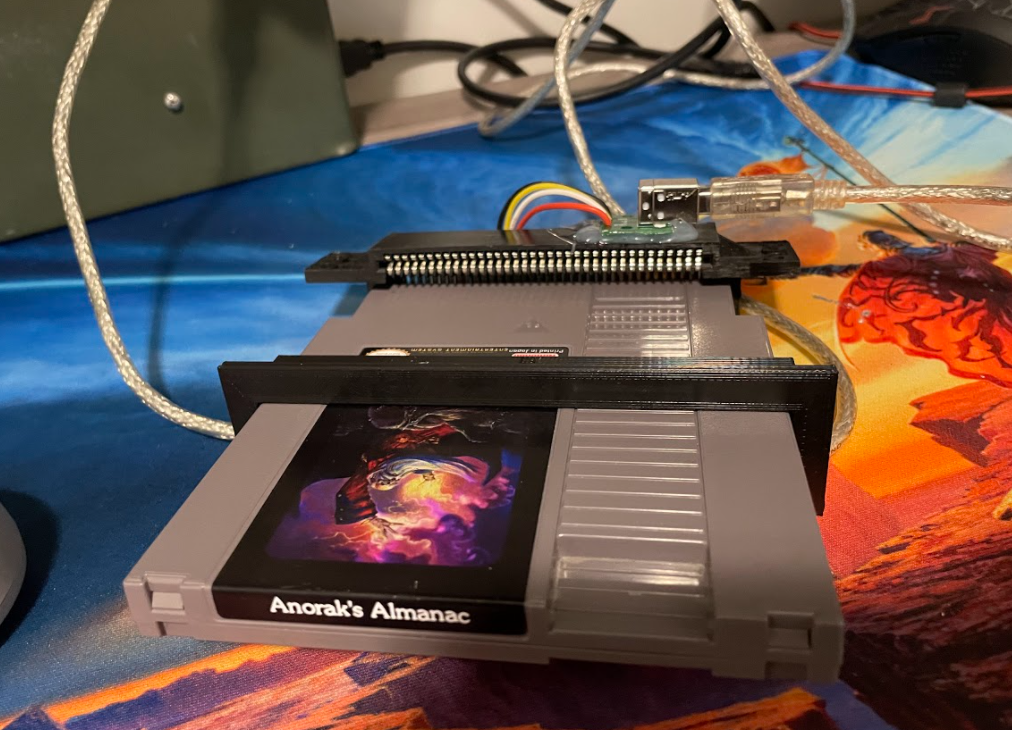
I then soldered some wires to my USB breakout board and hot glued the breakout board to the original PCB. I wasn't sure what contacts I wanted to use on connector so I left that for later, this was a good move because I was still planning out how things were going to layout in the enclosure. 

Graphic
I really liked the work of Jeff Easley in the TSR Advanced DND Publications. I did some web searching and found the art that was used on the cart and felt it looked like how I pictured Anorak. I put together a rough draft of the image, and then sent it over to Kyle Mills at Fire and Clarity. They cleaned up my design and produced a super clean label for my cart. I couldn't be happier with the result. They have other retro related content if you are into this kind of stuff. 

The Chassis

I've always liked how brutal ammo cans are and have always wanted to make project with one as the chassis. All the power connector components I've used in past projects and most of the stuff is relatively plug and play. I've also set up retro pie before and was really impressed with how simple and easy it was to set up and run.

Because the chassis is so over built I can see some issues with any wireless components trying to get coms on the inside.

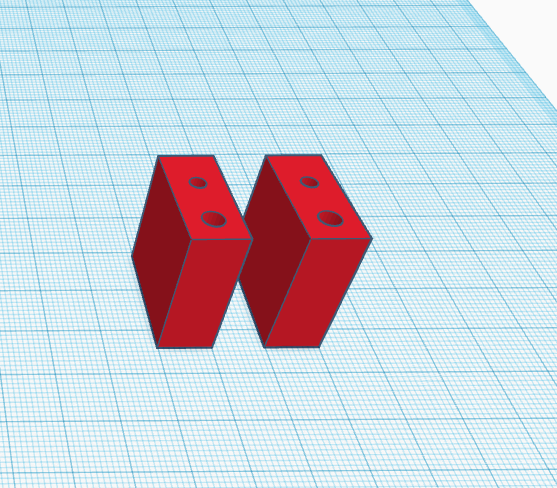
KitBashSpacers.stl

Spacers for bolting to chassis

Standard Tesselated Geometry - 55.65 kB - 11/26/2021 at 20:31

Download

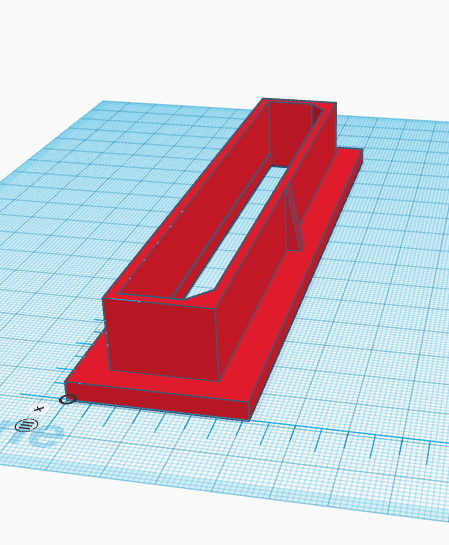
Cart Spacer with Guide.stl

Guide and cover for the cart spacer

Standard Tesselated Geometry - 5.75 kB - 11/26/2021 at 20:29

Download

View all 11 components

  • Completed!

    Nolan McCulloch11/26/2021 at 20:29 0 comments

    I finally got some time over the holiday break to sit down and finish the project. Everything if functioning as a system, though the bluetooth is still wobbly and the Bluetooth controller needs some help after boot to connect up to the system, but everything else works pretty flawlessly! Here is what happened in order to finish up the project.

    3D Printed Spacers and Guides

    I designed a spacer to mount the cartridge connector to the side of the ammo can. There are a couple holes in the side that used as the mounting point. 

    I also designed a guide plate to put on the top of the of the gash I had to cut into the top of the ammo can. The slot helps guide the cart to the connector as you push it in. I did have to widen the hole on the top quite a bit to get it to fit, but the end result works with the design. 

    Exposing USB

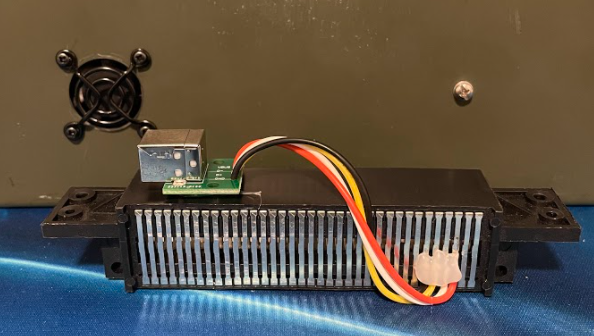
    The small USB hub showed up and I was able to finish placing and gluing down all the USB components in place and soldering the USB breakout wires to the cart pads. I also soldered a USB type B breakout board to the cart connector.  I then connected the the whole system and it totally worked! After bolting the whole cartridge and connector assembly together the system stopped working. I think there is a spacing issue and the cart needs to be pushed in further. After bolting all the parts to the chassis the issue went away so I'll probably just watch for this and see if I can improve reliability later. 


    Whats Next?

    This is at a point where I can pull it out with family and friends, set it up and play some of the games. From here I'd like to figure out how to improve the reliability of the bluetooth connection. I'd also like to play around with some of the Retropie display themes and find something that is a bit more "Ready Player One" themed. 

    USB - I also really hate opening up the case every time I need to connect a keyboard, so I might expose a USB port on one of the faces so I can access the USB lines easier.

    Pi 4 - From the stuff I've seen about the Rasberry Pi 4 I think it would be sweet to try and upgrade the SBC. 

    This is the first project I've finished in a long time. Its at a level of completion that I'm pretty happy with which really is amazing. I'd really like to redo this project and try to make a way that it can either play a given game right from the cart or switch to a "flash drive mode" and just pull data from it that way. I'll have to see if there community projects that have already done something like this and build off them. 

  • IT LIVES!!! - Booting Up Retropie and Testing All The Guts

    Nolan McCulloch11/19/2021 at 07:06 0 comments

    Progress

    Tonight I had some time work on the project so I grabbed a current version of retropie and used the Win32 Disk Imager to put it on the SD Card. The cart formatting process gave me a couple errors and when I loaded it into the pi it still had the old image on the card. After a lather, rinse repeat I purchased a new card and it worked first time. 

    I used the USB connection from the power supply and the HDMI panel mounted cable connection to verify that the Pi was able to boot and transmit the video. I flipped the switch and it booted right up. Even the cooling fans were wired up right and started spinning. Most of the projects I work on professionally appear much simpler and I still feel weird that bringing it together actually worked first time. 

    I also setup and tested the bluetooth dongle to JoyCon controller which worked great too. The instructions posted on retropie's website were accurate and helpful. It was really encouraging to see a large portion of the guts come together and work well. 

    Next Steps

    I'm still waiting on the small USB splitter to arrive to finish the cart, but in the meantime I can drill the holes and mount the spacers and guides for the cart connector. That does reveal one of my current big unknowns which is how to set up the cart guides so it has a clear path as you push the cart into the ammo can chassis. This will probably need a redesign of the the main entrance guide which is pretty flimsy right now.  It is really tempting to just finish it as is and spend more time on the next generation / project. 


    GEN 2 NOTES: 
    • The next version of this project should have some sort of fan control. There are hooks in the raspberry pi OS where the fans can be controlled. I'd like to look into this and make it so the fans aren't on all the time.
    • It would be cool to have one a push pop mechanism for loading and unloading the cartridges, like the push-up push-down  spring and latch system from the original NES. That click is really satisfying and makes things easy to identify if they are ready to go.

  • 2021 November 18 - Assemble Connector in Chassis, Finish and Test USB

    Nolan McCulloch11/18/2021 at 07:05 0 comments

    The next milestone of this project is to get the Cart with the flash drive and Bluetooth dongle connected back up to the Raspberry Pi and successfully run a simple game rom.  

    Ammo Can Chassis Tasks: 

    • The spacers to hold the cartridge connector to the Ammo can chassis was completed and the chassis just needs to be drilled out and the connector installed. 
    • Pins used for the USB bus need to be soldered to the breakout USB A connector that will go from the connector to the Raspberry Pi.


    Cartridge Tasks:

    • Find and add USB splitter to add Bluetooth dongle to flash drive bus. 
    • Select and solder USB breakout to NES cart pins


    System Tasks:

    • Prep the Raspberry Pi 2 B+ with Retropie, verify that power and video still work.
    • See if the Joycons can be added as controllers with the Bluetooth dongle. It looked like there was someone with a working solution here


    Anticipated Challenges

    The big question is even though the USB will be electrically connected, they might not be able to support the file rates needed for the flash drive and bluetooth over some haywire in a box. The backup plan is to just have something that copies over files to a larger medium plugged right into the device bypassing the hack-n-slash. 

View all 3 project logs

Enjoy this project?

Share

Discussions

Similar Projects

Does this project spark your interest?

Become a member to follow this project and never miss any updates