Supplyframe DesignLab
-
Completely normal 3d printer behavior
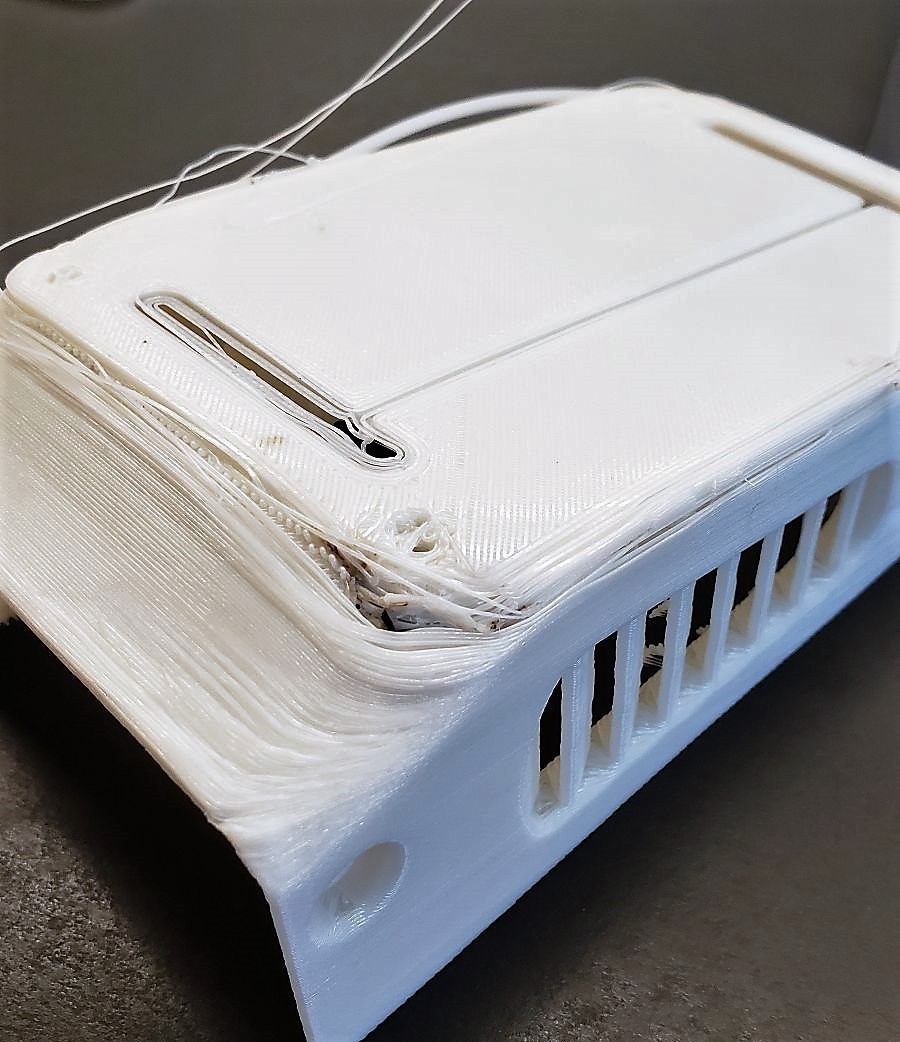
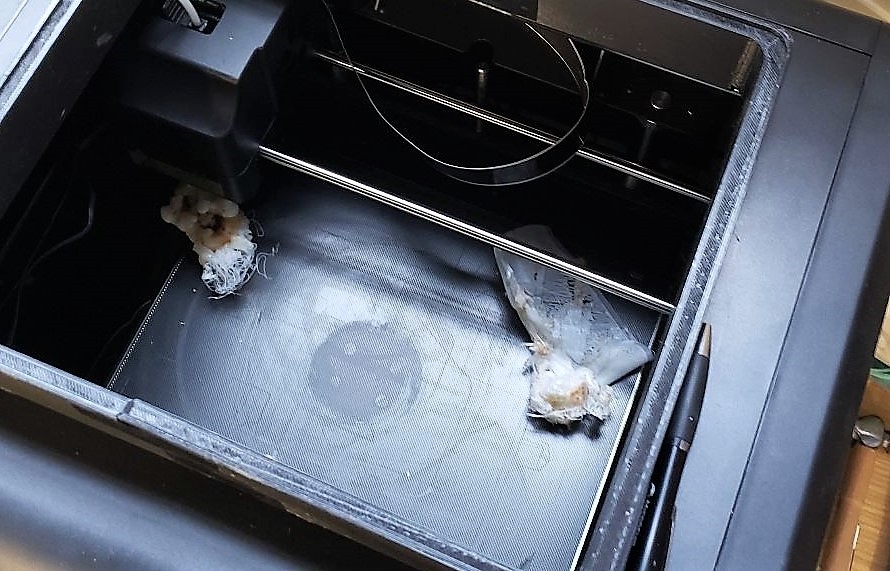
06/22/2022 at 20:25 • 0 commentsIf you think this print went well...
![]()
...I have a 3d-printed bridge to sell you.
![]()
-
Workshop materials
06/22/2022 at 00:27 • 0 commentsUseful tools for a workshop for 30 people:
- Screwdrivers
- Wire strippers (min. 5) - DL
- Heat gun (min. 1) - Angel
- Soldering irons - S & A TBD
- Cyanoacrylate glue (a few bottles) - DL
- Clear adhesive tape (min. 2) - DL
- Wire cutters (min. 5) - DL
- Solder wire
-
Product Development
06/21/2022 at 00:14 • 0 commentsThe project started as an standalone, individual concept, so there were not a lot of restrictions. Things changed when the decision was made to make 35 of these units, and they were going to be assembled by people who were not familiar with the concept. Now that's a challenge!
Now the units had a few new interesting requirements:
- Had to stay aligned with the original goals
- Easy to assemble
- Electronic components easily accessible
- Must have many open-close cycles
- Total investment for 35 (as opposed to 2) has to be calculated more carefully
- 3D printing must be optimized
Some examples of the changes:
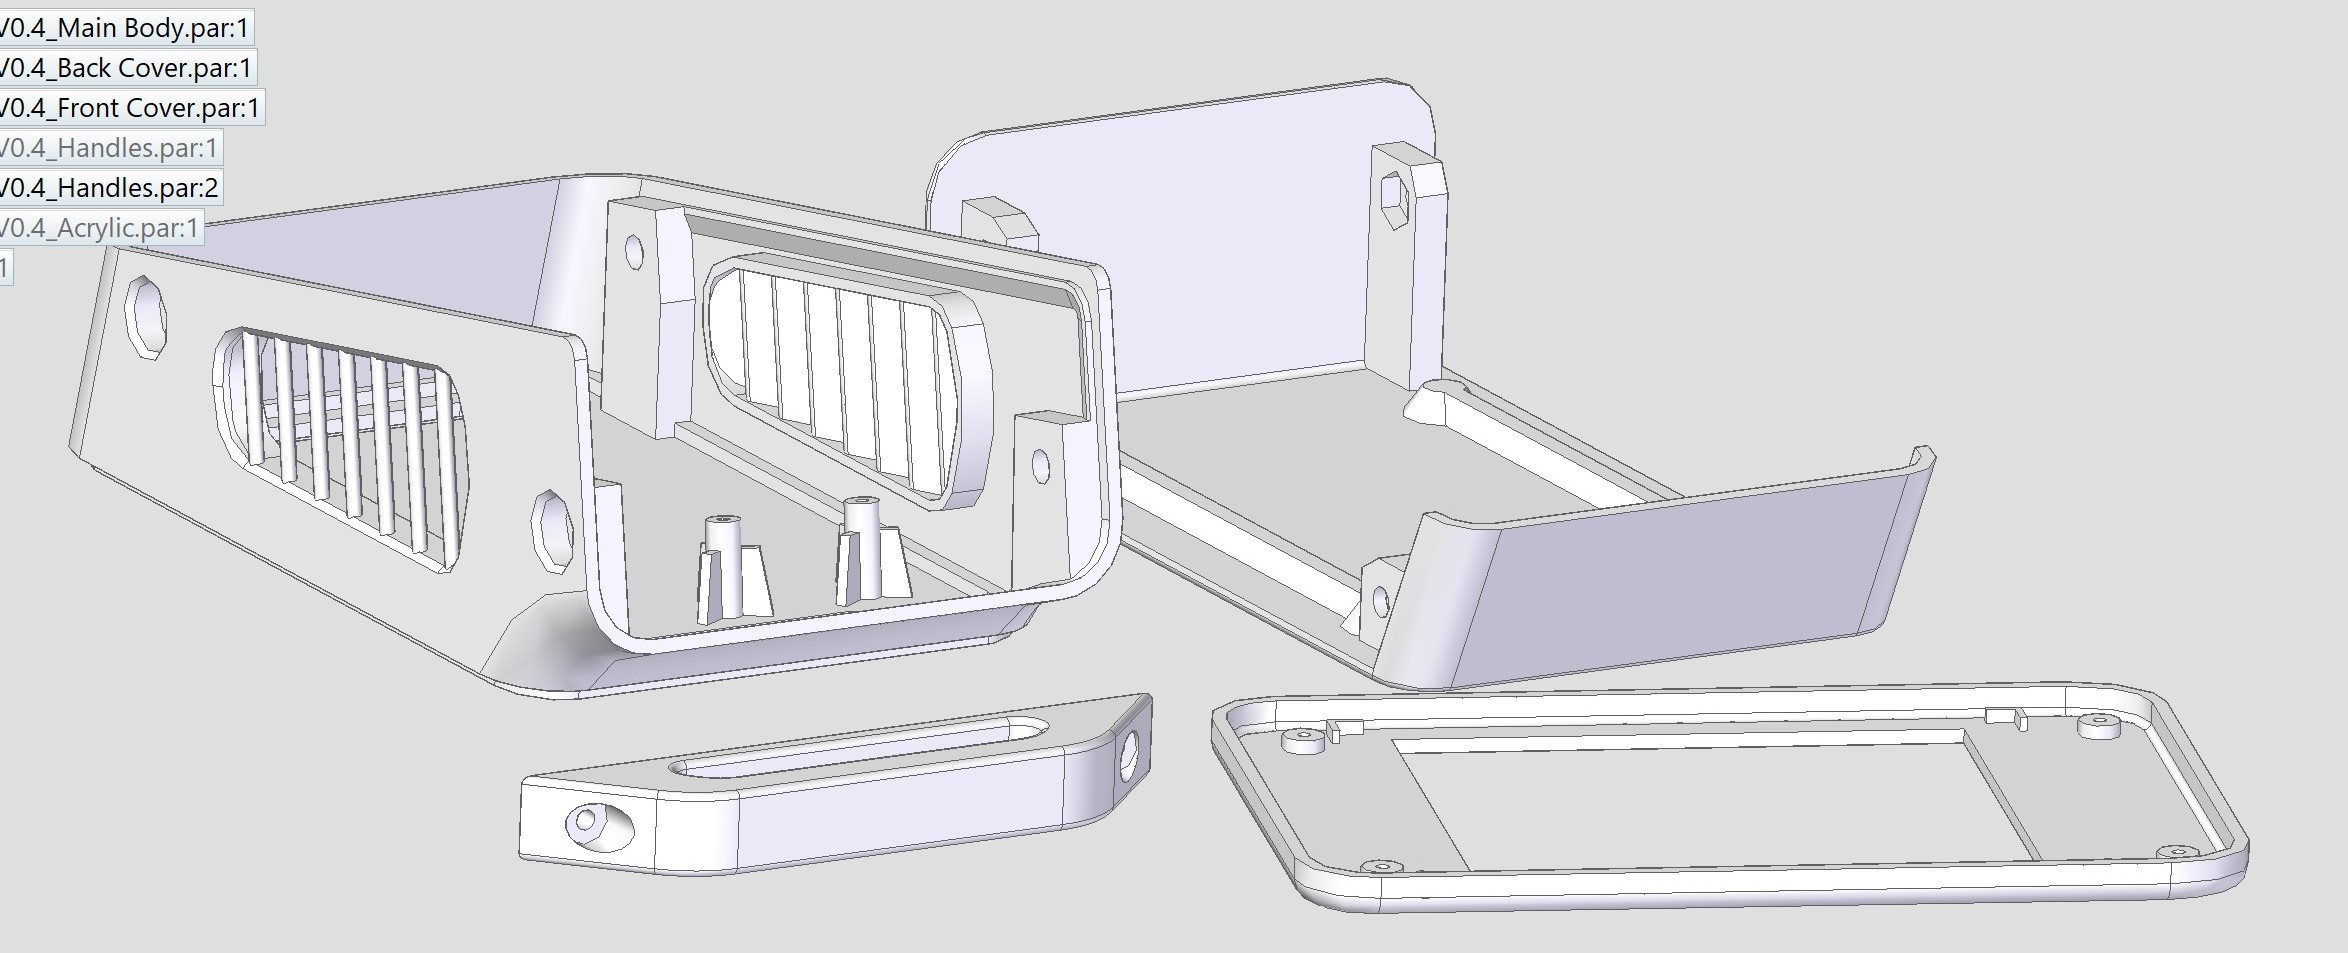
Originally, I had the board attached to the back cover, and when the unit opened, you would have to disconnect the cable. To avoid the potential risk where people remove the cover haphazardly and break the cables, I moved the PCBs to the board, and left the Back Cover clean.
The decision with the most impact would probably be number 6. Initially I just thought of making the enclosure in a way that "worked" and call it a day. Long print times or removing a lot of support structure is not a problem if you are making 3 units. But, we are making 35 :) . So, I had to slice open the enclosure so to speak, in a way that 3D printing would work as efficiently as possible.
![]()
Yes, iterations were printed.
![]()
-
The design process
06/20/2022 at 20:13 • 0 commentsThe design for this device was heavily influenced by function. There are a few critical considerations, among them:
- It will be located outdoors, therefore it should be of a rugged material
- The body should reflect as much sunlight as possible, to prevent it from warming up inside
- It will has a number of antennas, and the farther apart they are from each other, the better
- There has to be air intake for the gas sensors
- The solar cells determine the minimum dimensions of the unit
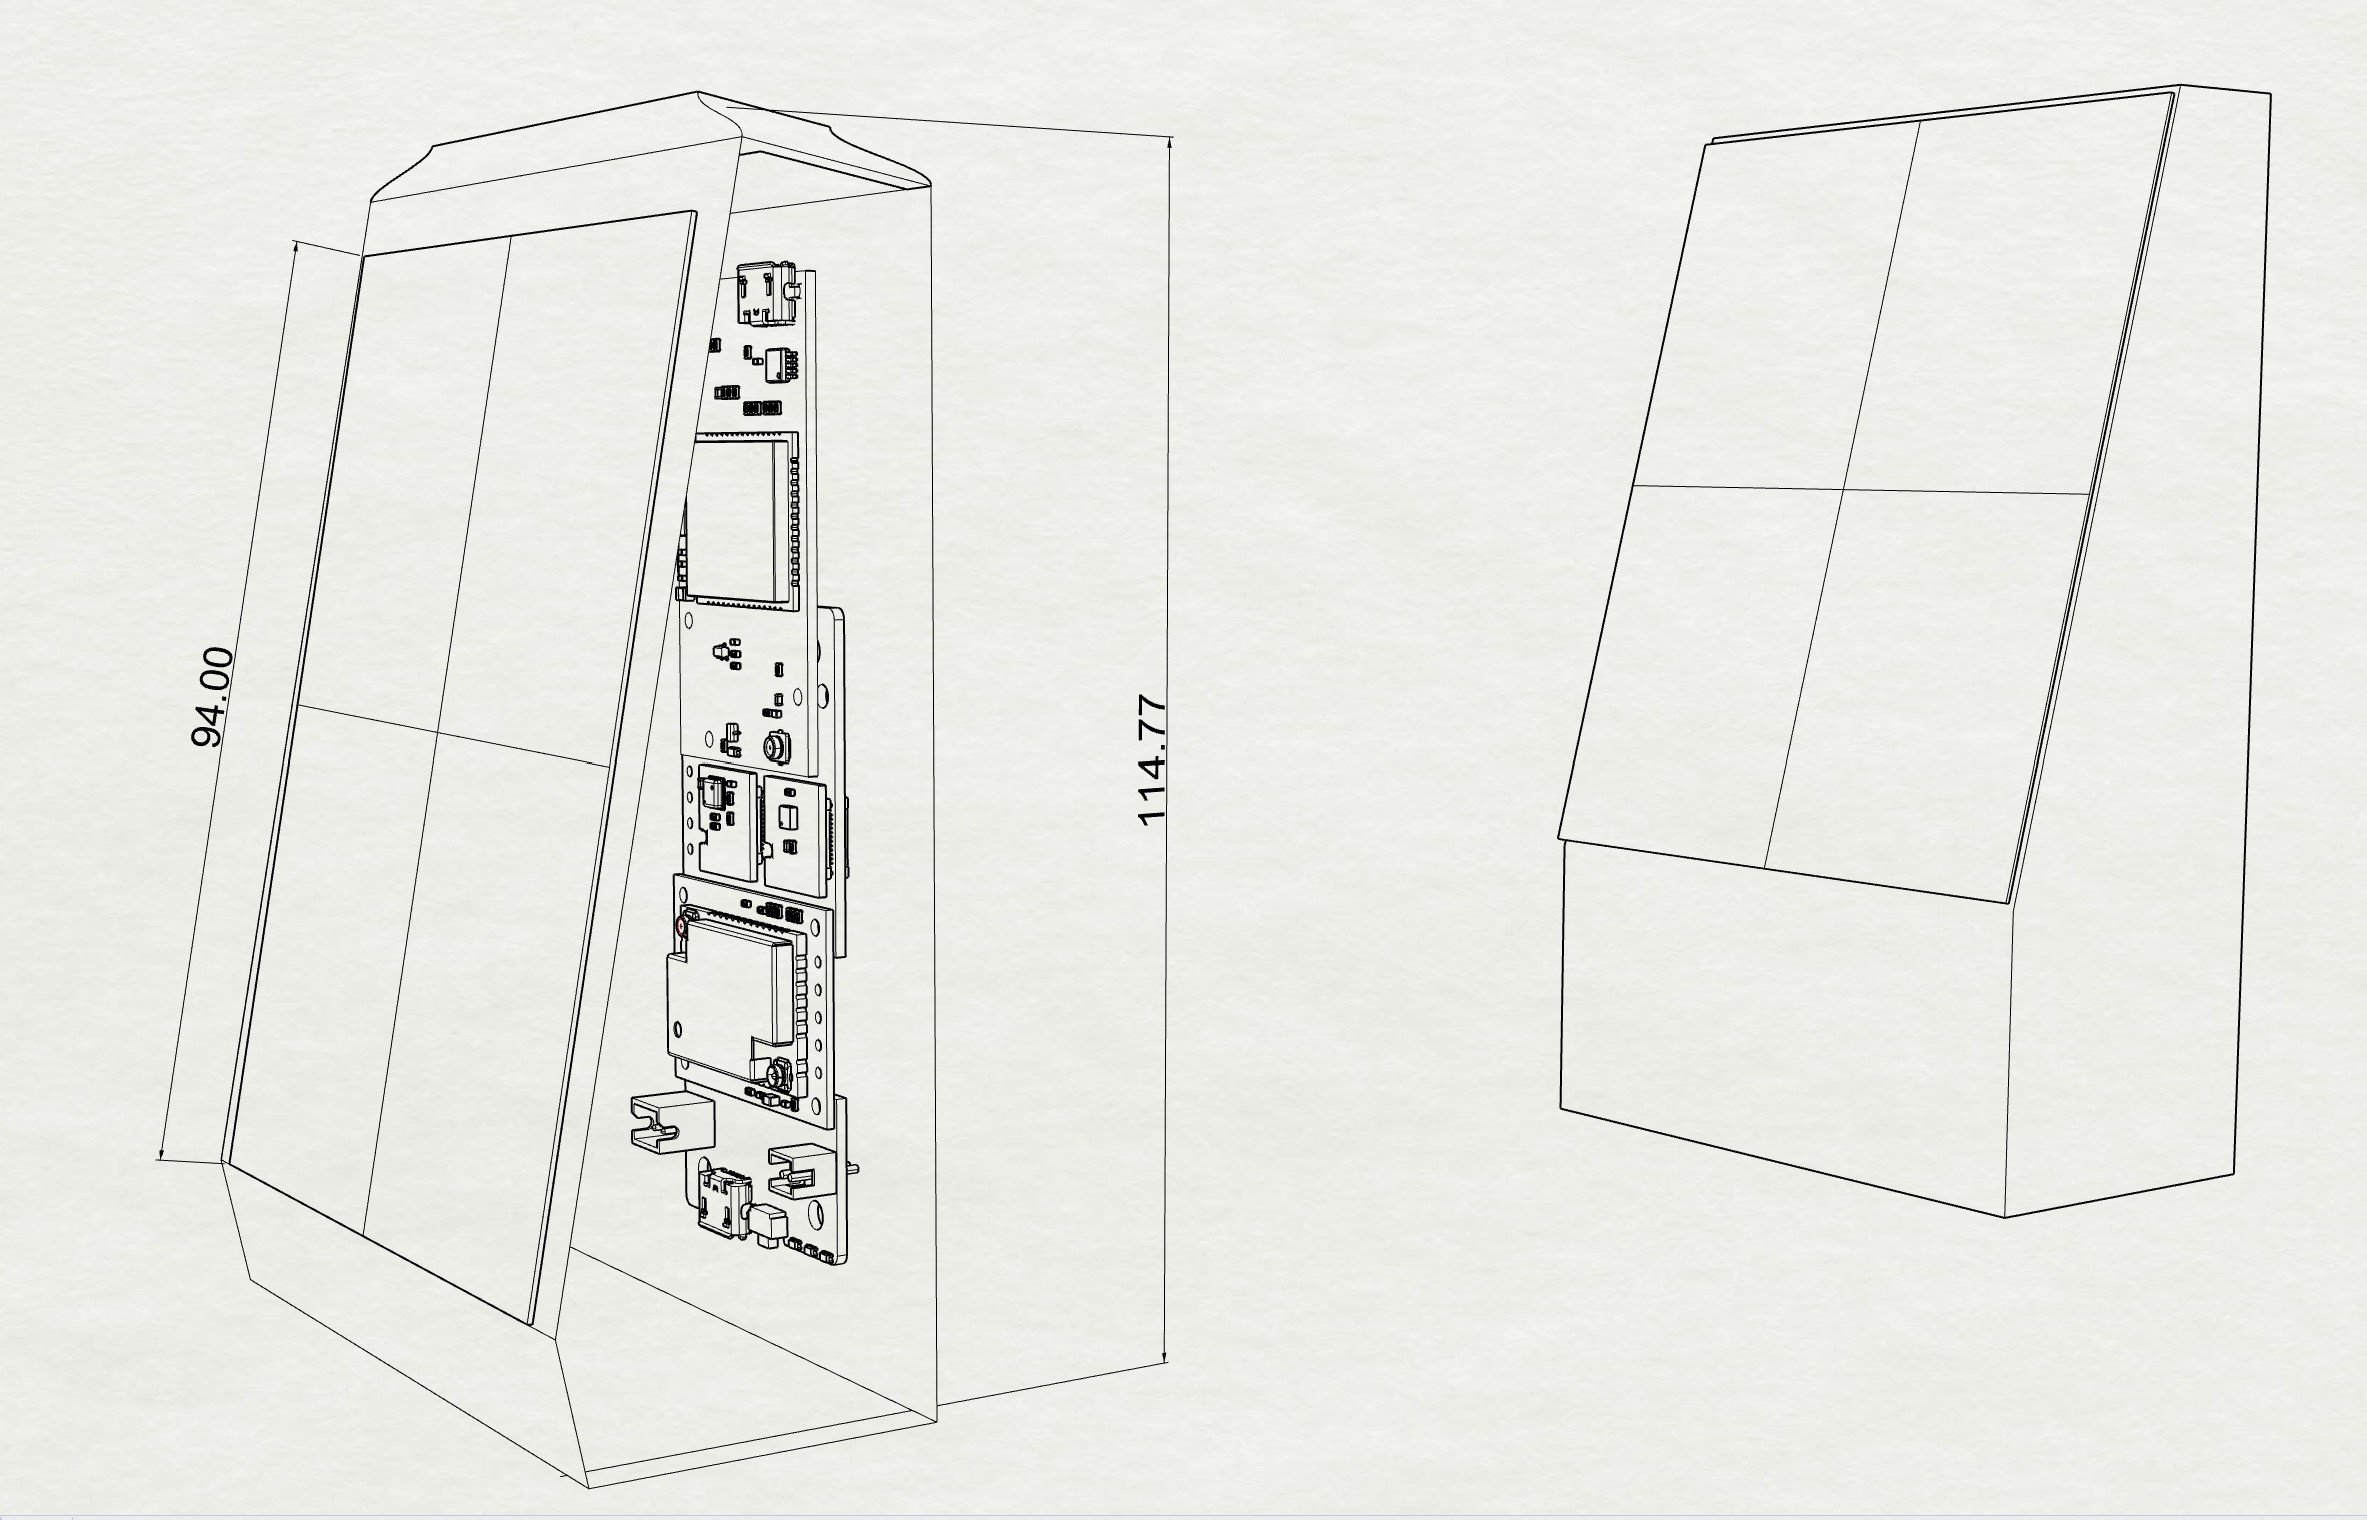
I have seen many units with the solar panels in a separated component. However, I wanted to make this one as portable and sturdy as possible, so I went for the "uni-body". An additional advantage is that the oversized dimensions of the solar panel allow for a roomie interior, which helps air circulation for the sensors.
Before working on any sketches, I wanted to explore a bit the possible array inside. We have a main board with a bunch of sub-boards, a big battery, some cables, and that's it.
![]()
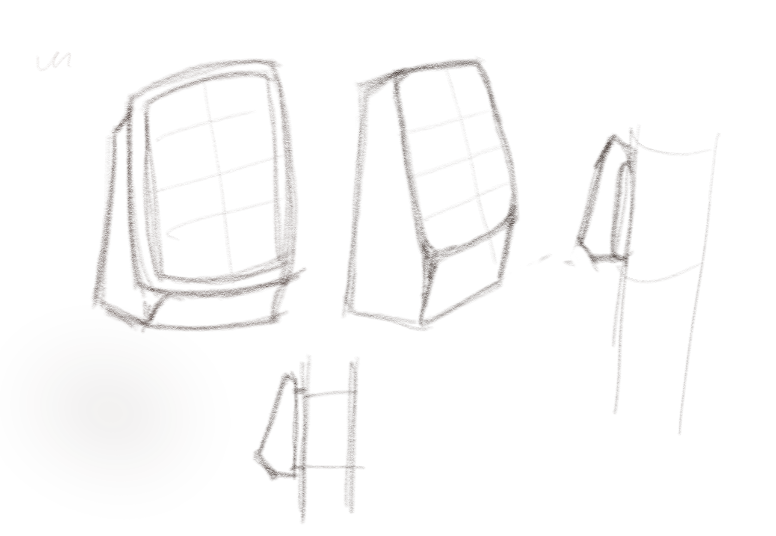
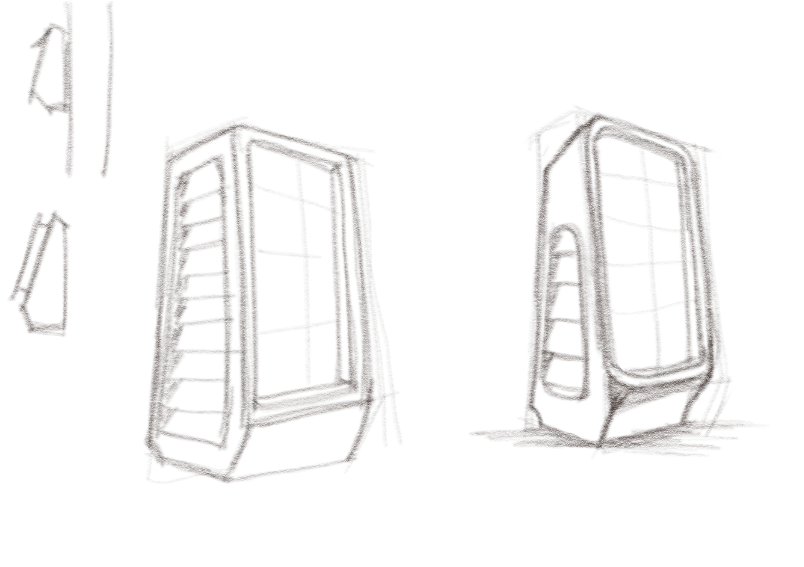
Once I had the ideal array for function and production, time to sketch some possibilities. These were some of the first sketches:
![]()
A very important part is the Stevenson screen, which is a specific "enclosure to meteorological instruments against precipitation and direct heat radiation from outside sources, while still allowing air to circulate freely around them". So, adding the blinds to the enclosure was the next step:
![]()
The design looked pretty doable, so I quickly moved on to the development stage.
2022 HDP 4 - Climate Resilient Communities
Air quality sensor systems for urban bodies of water, so that the population can avoid potentially dangerous exposure