Close
0%
0%

Starship back scratcher

Making back scratching multiplanetary

Similar projects worth following

There is an art to designing a back scratcher.

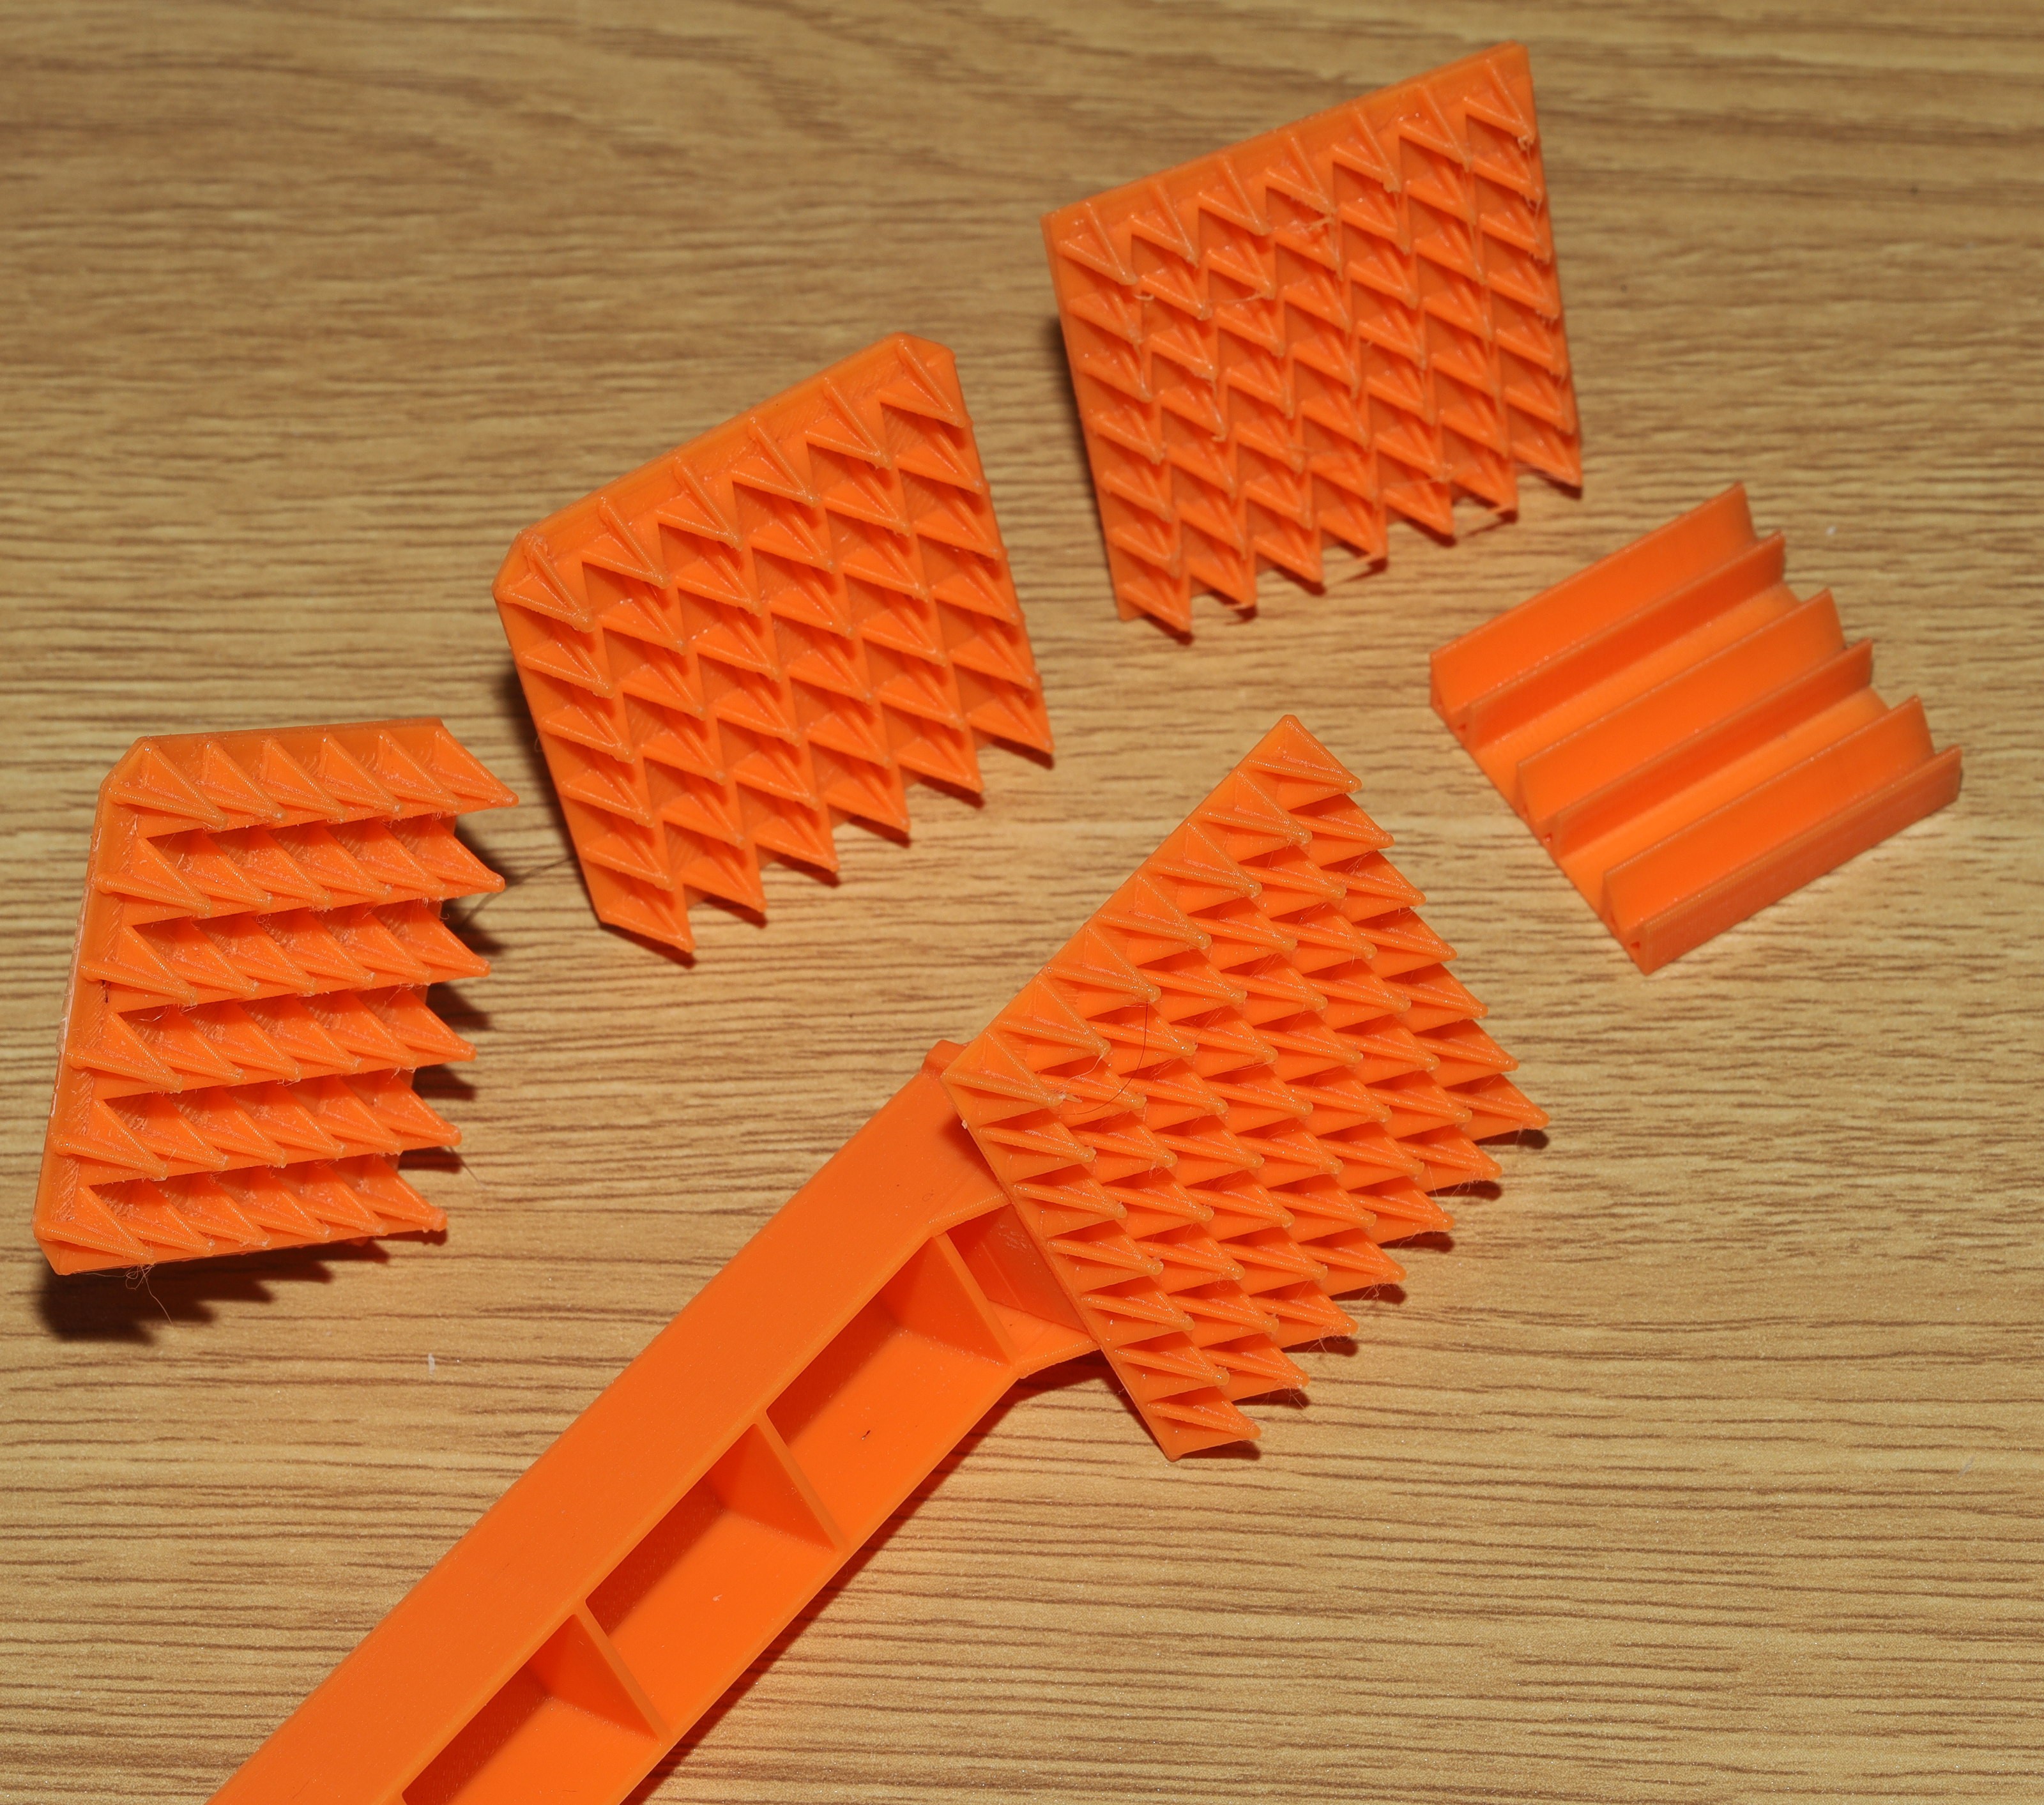
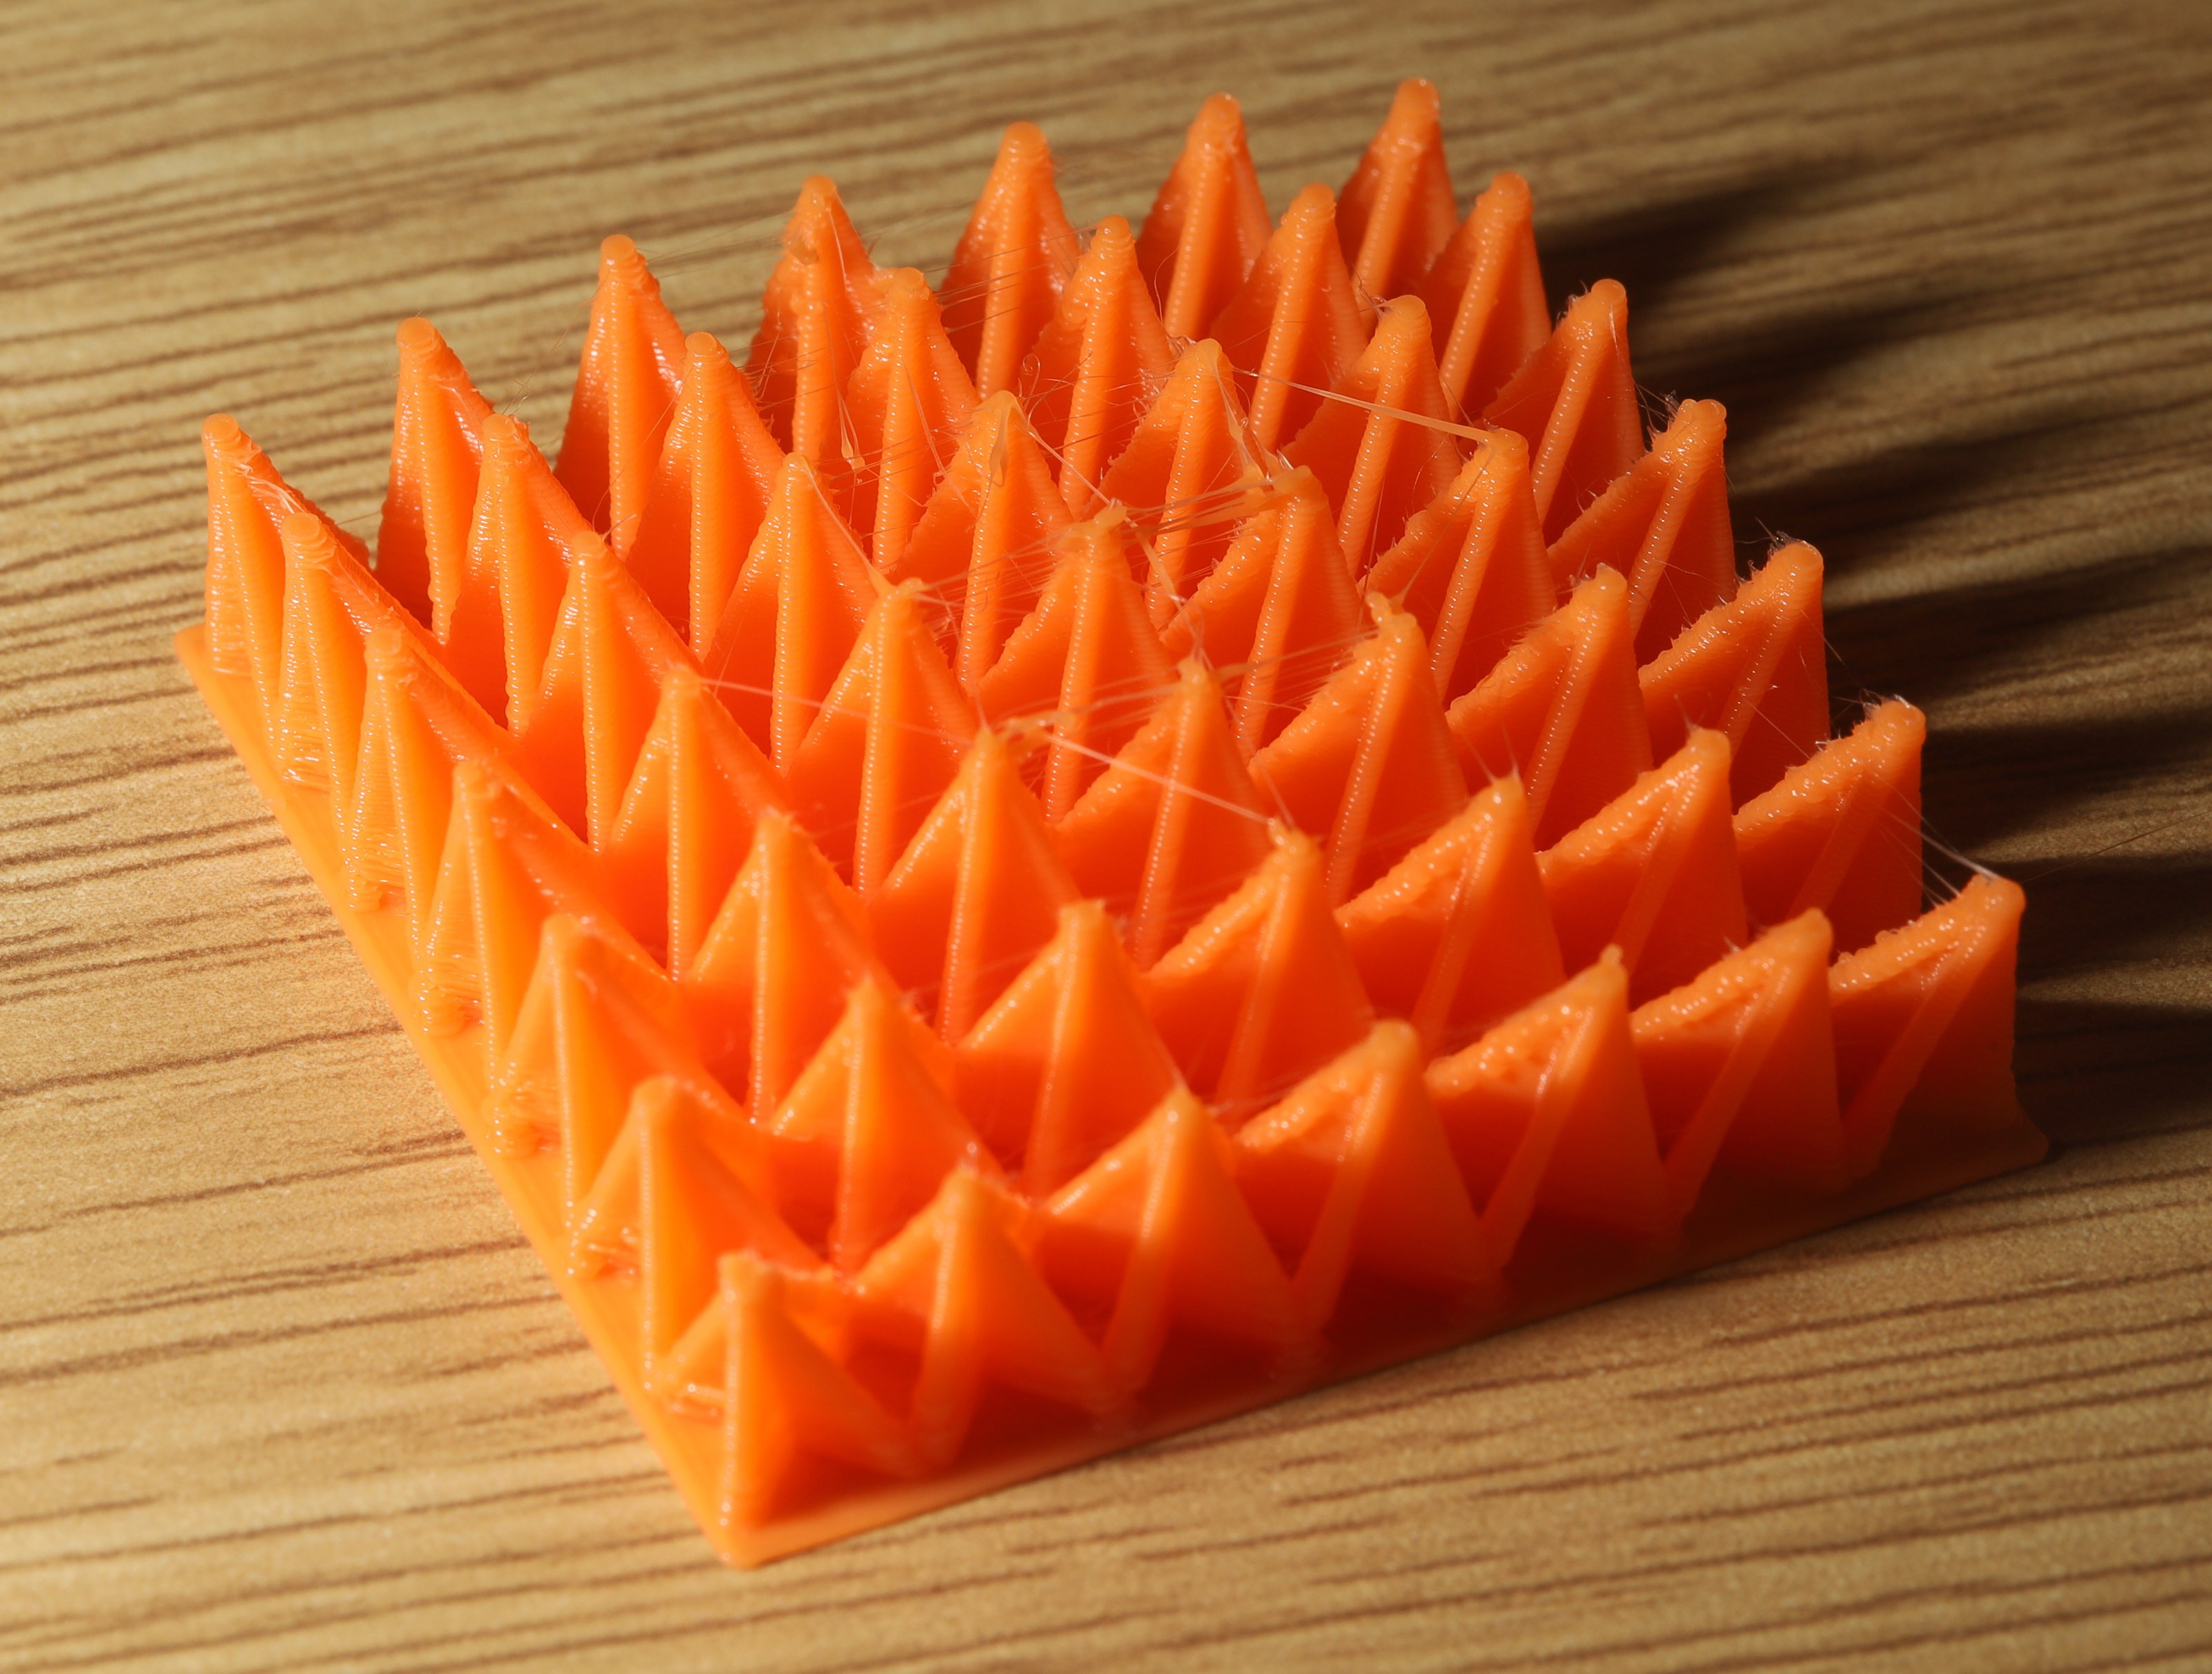
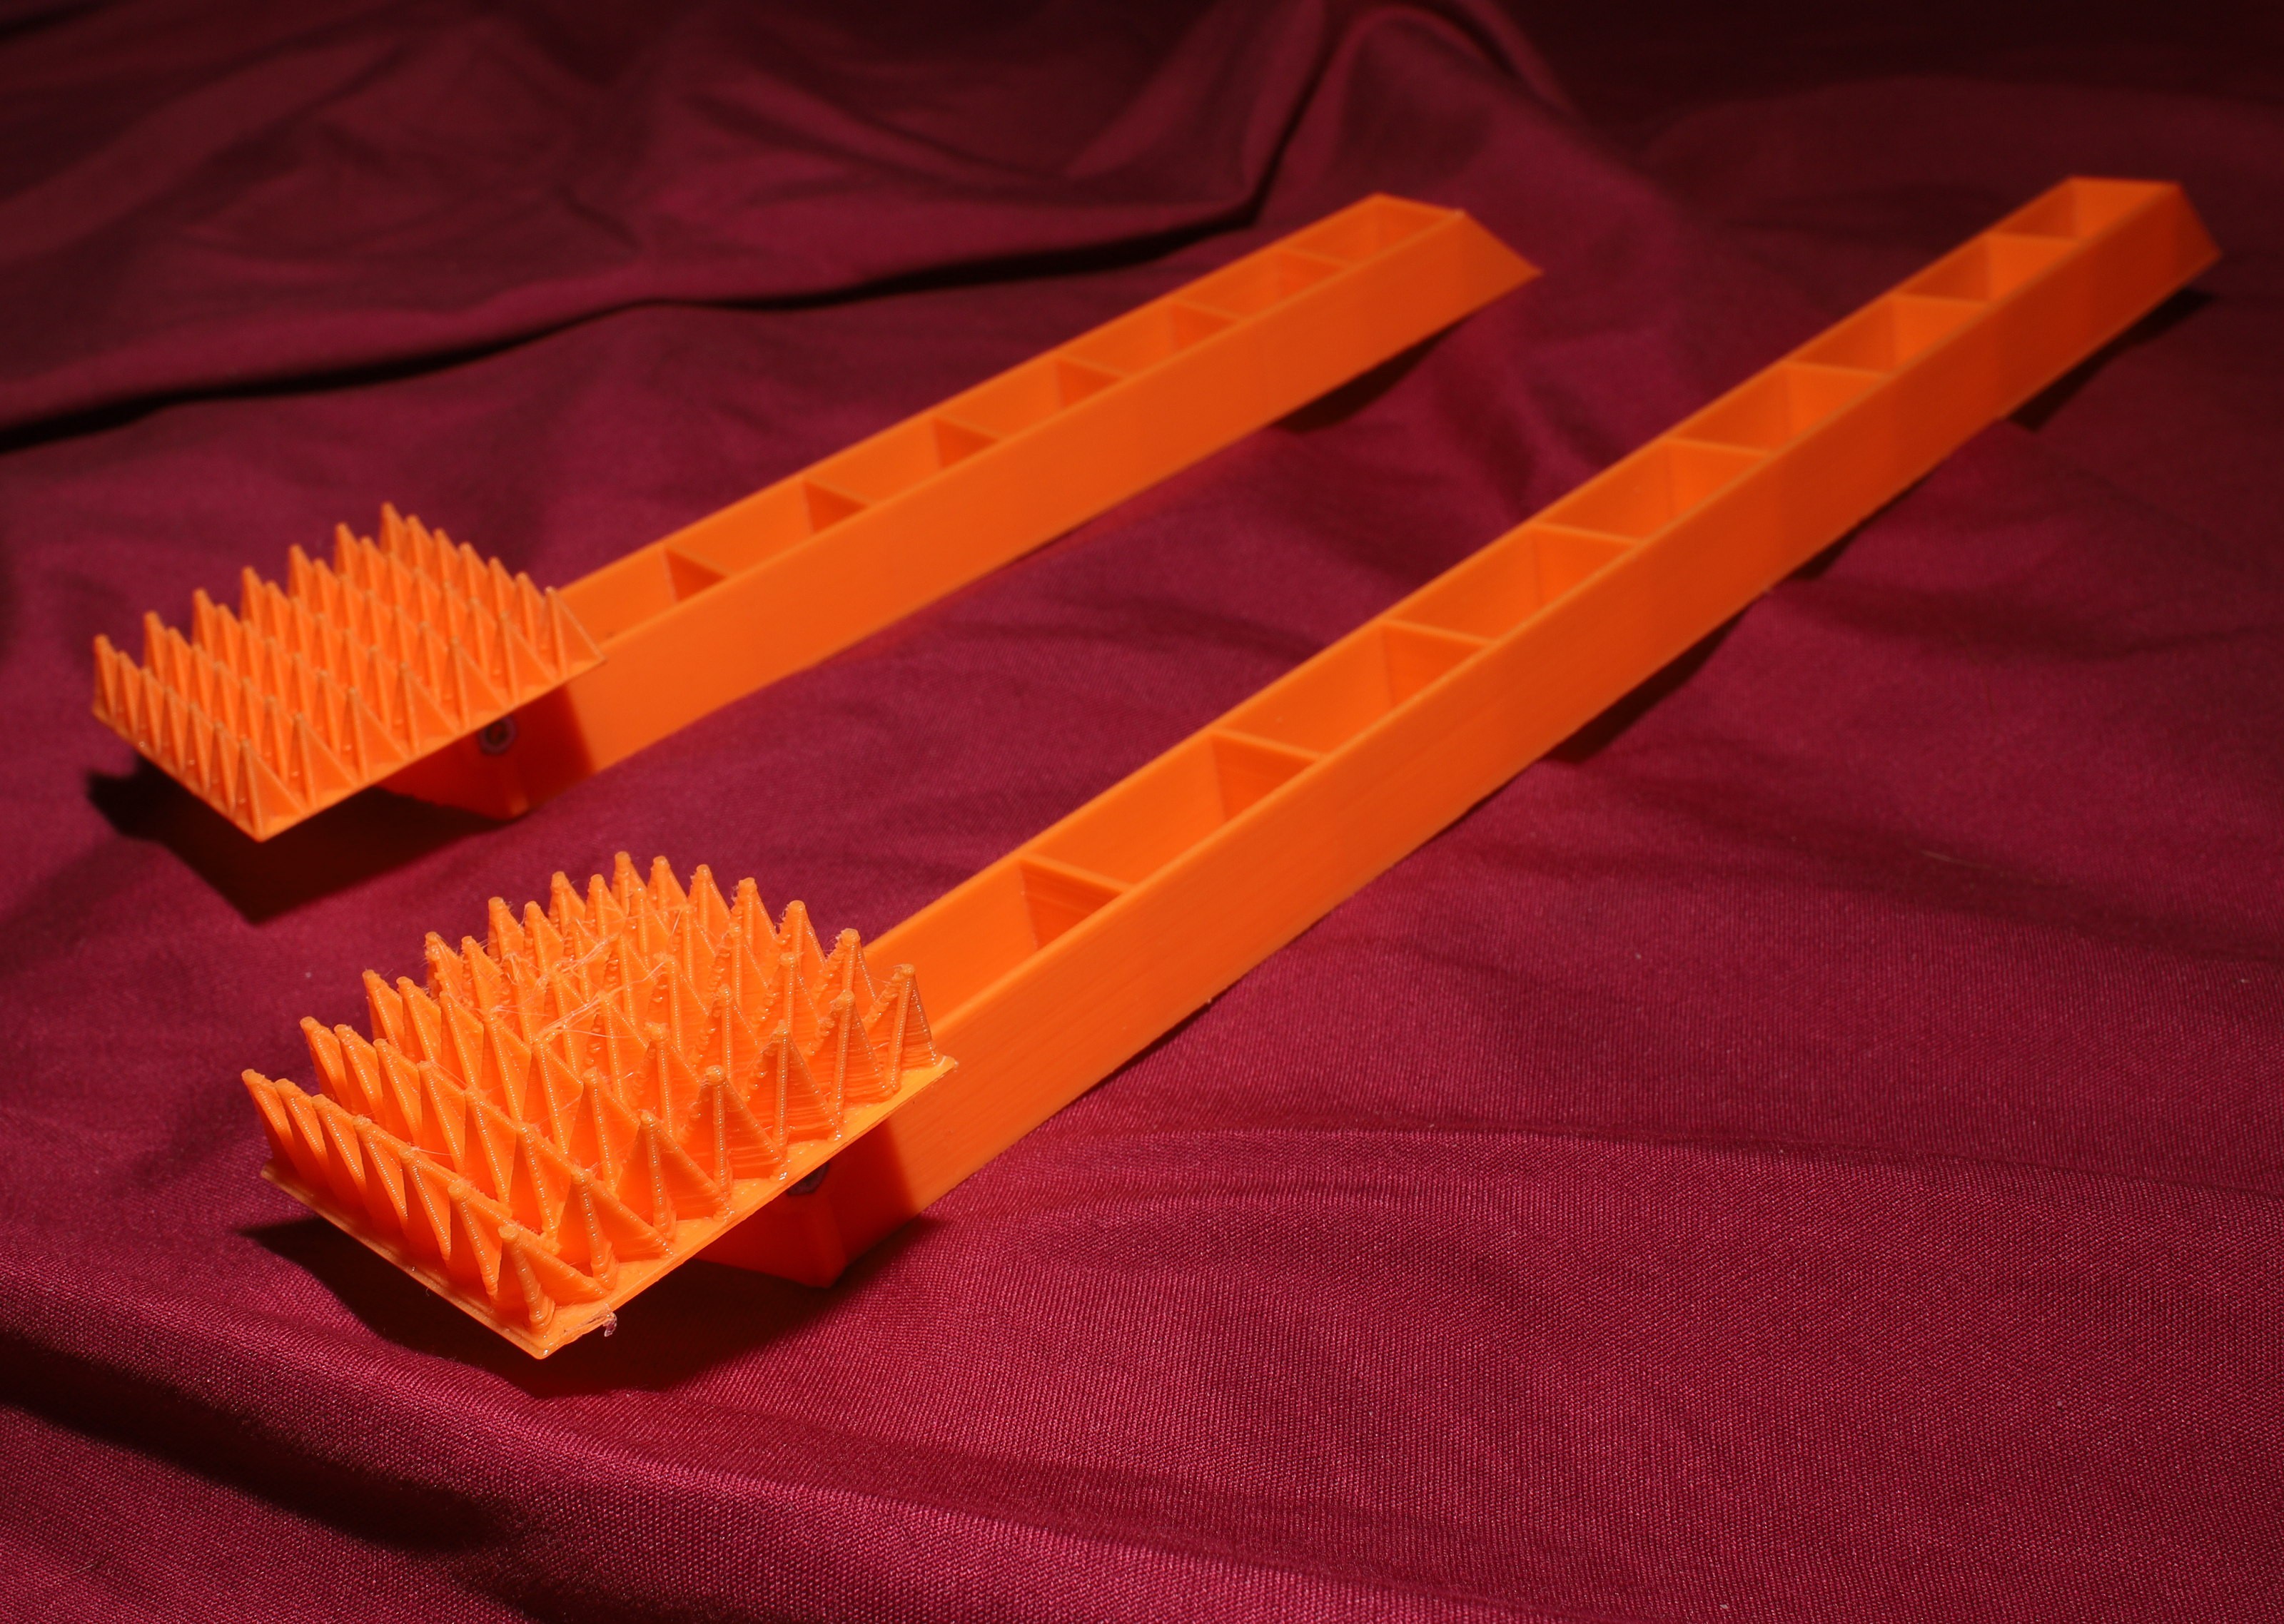
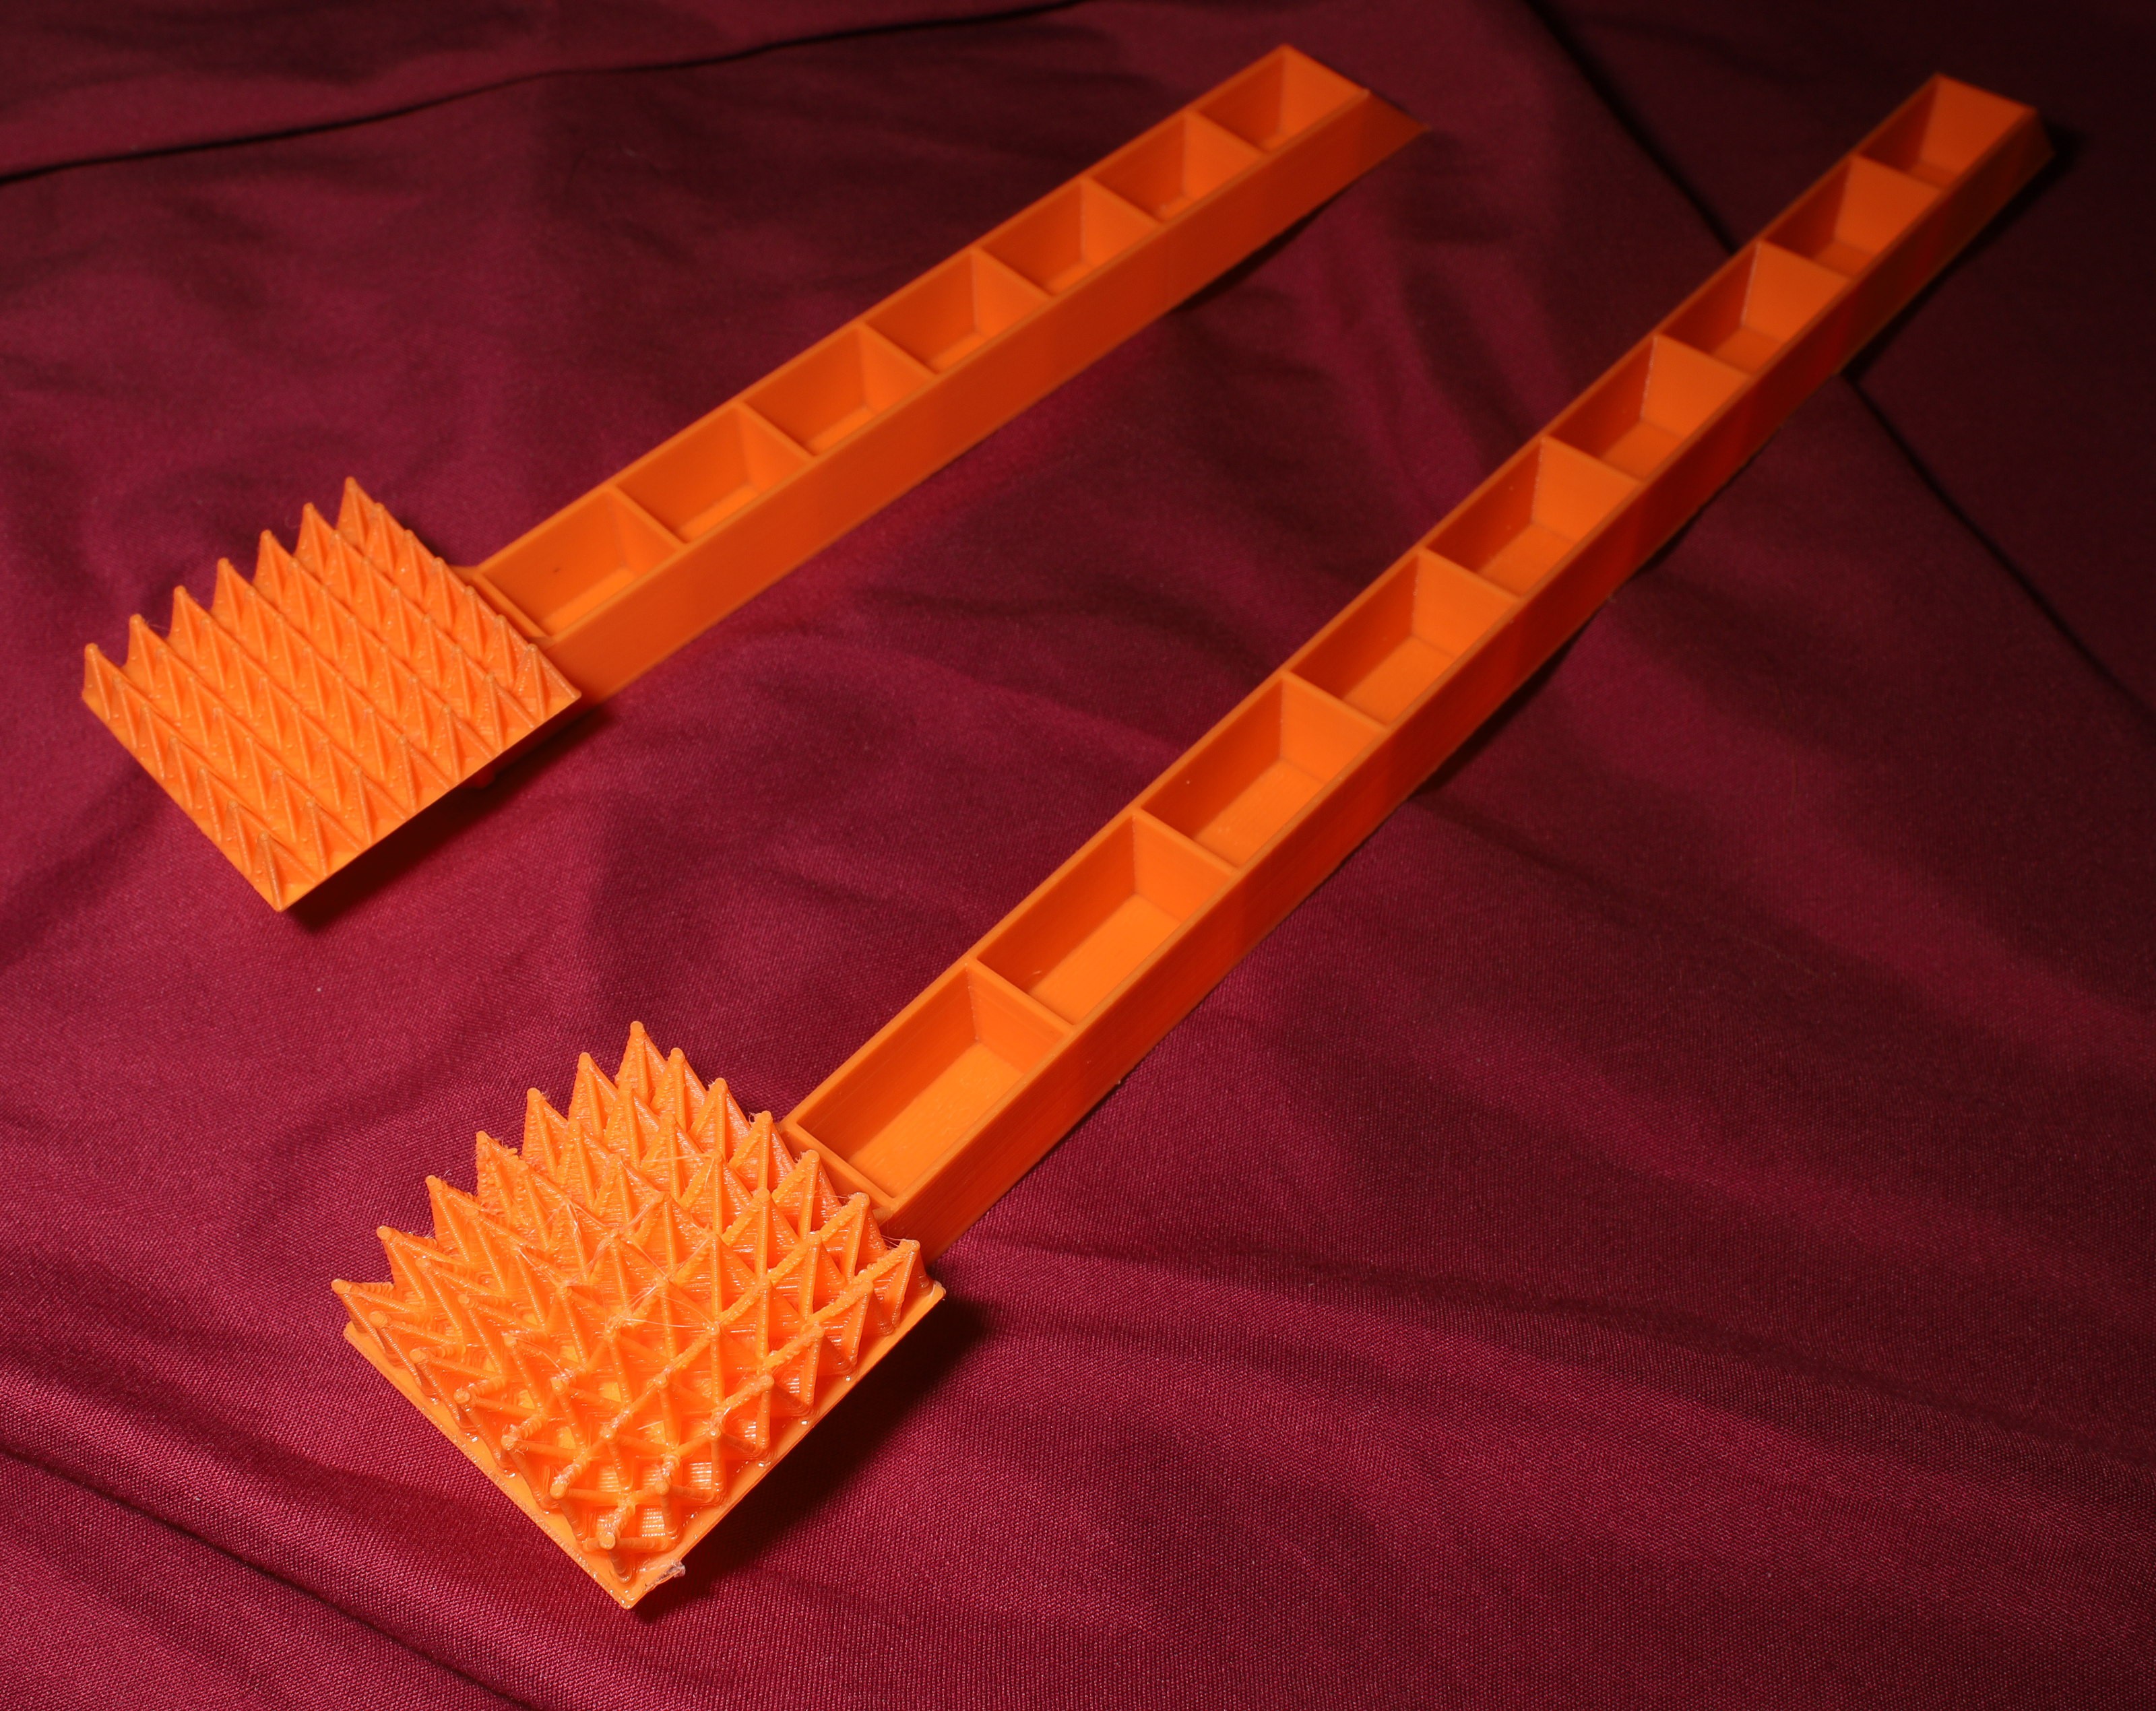
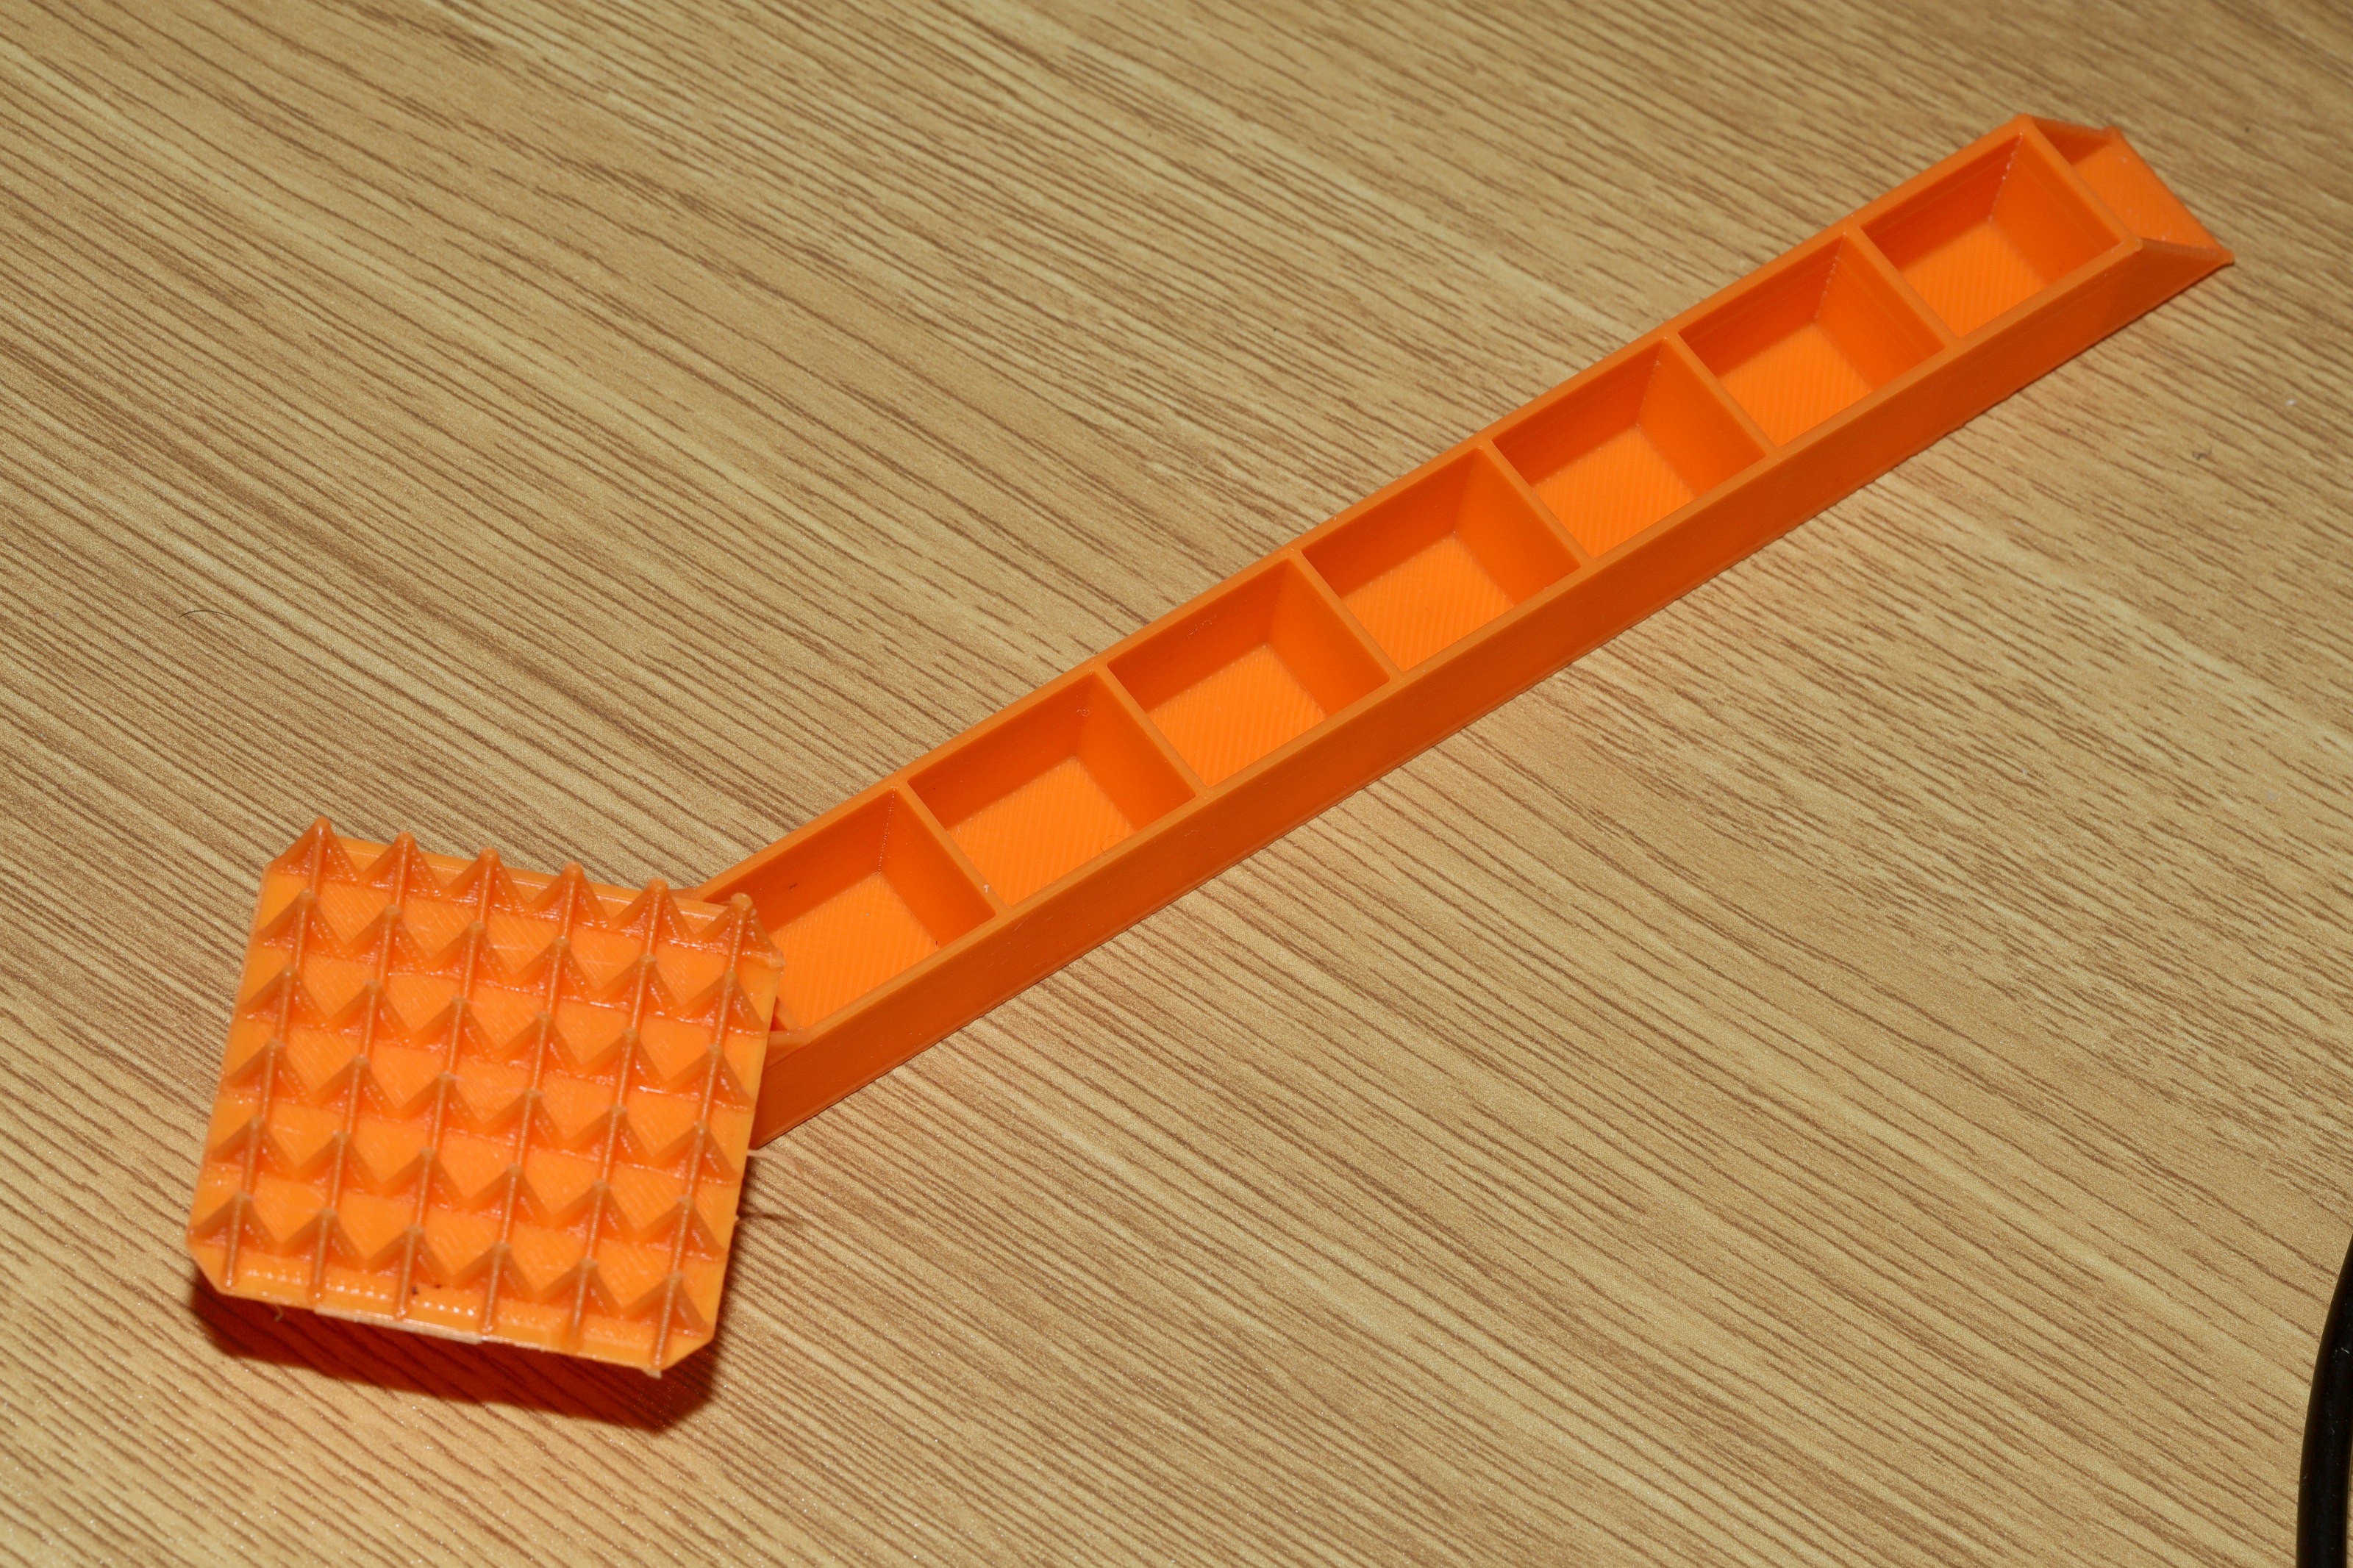
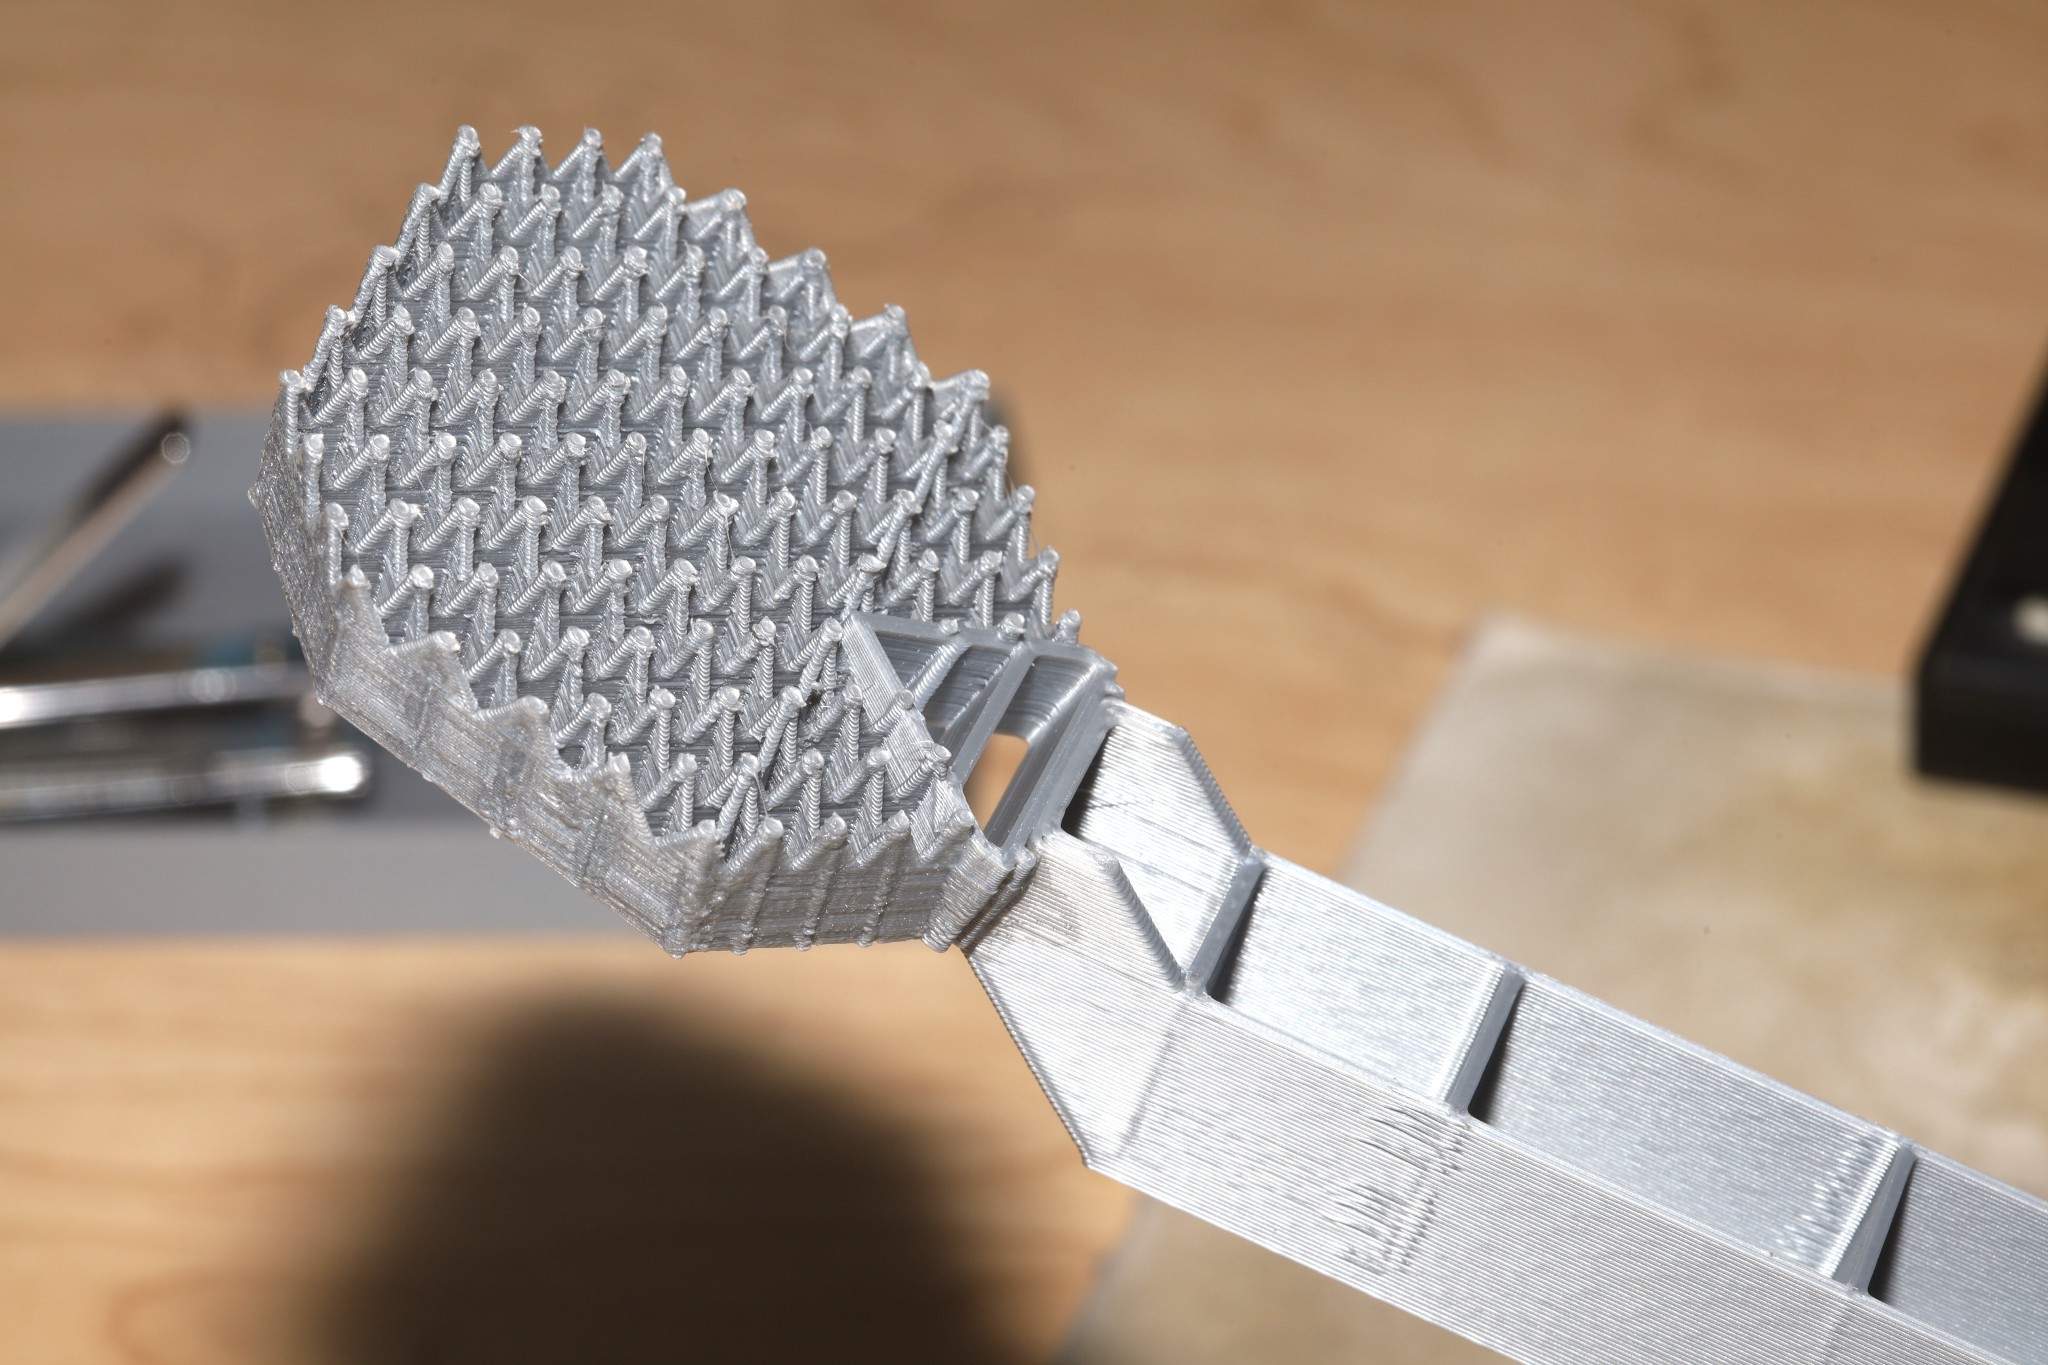
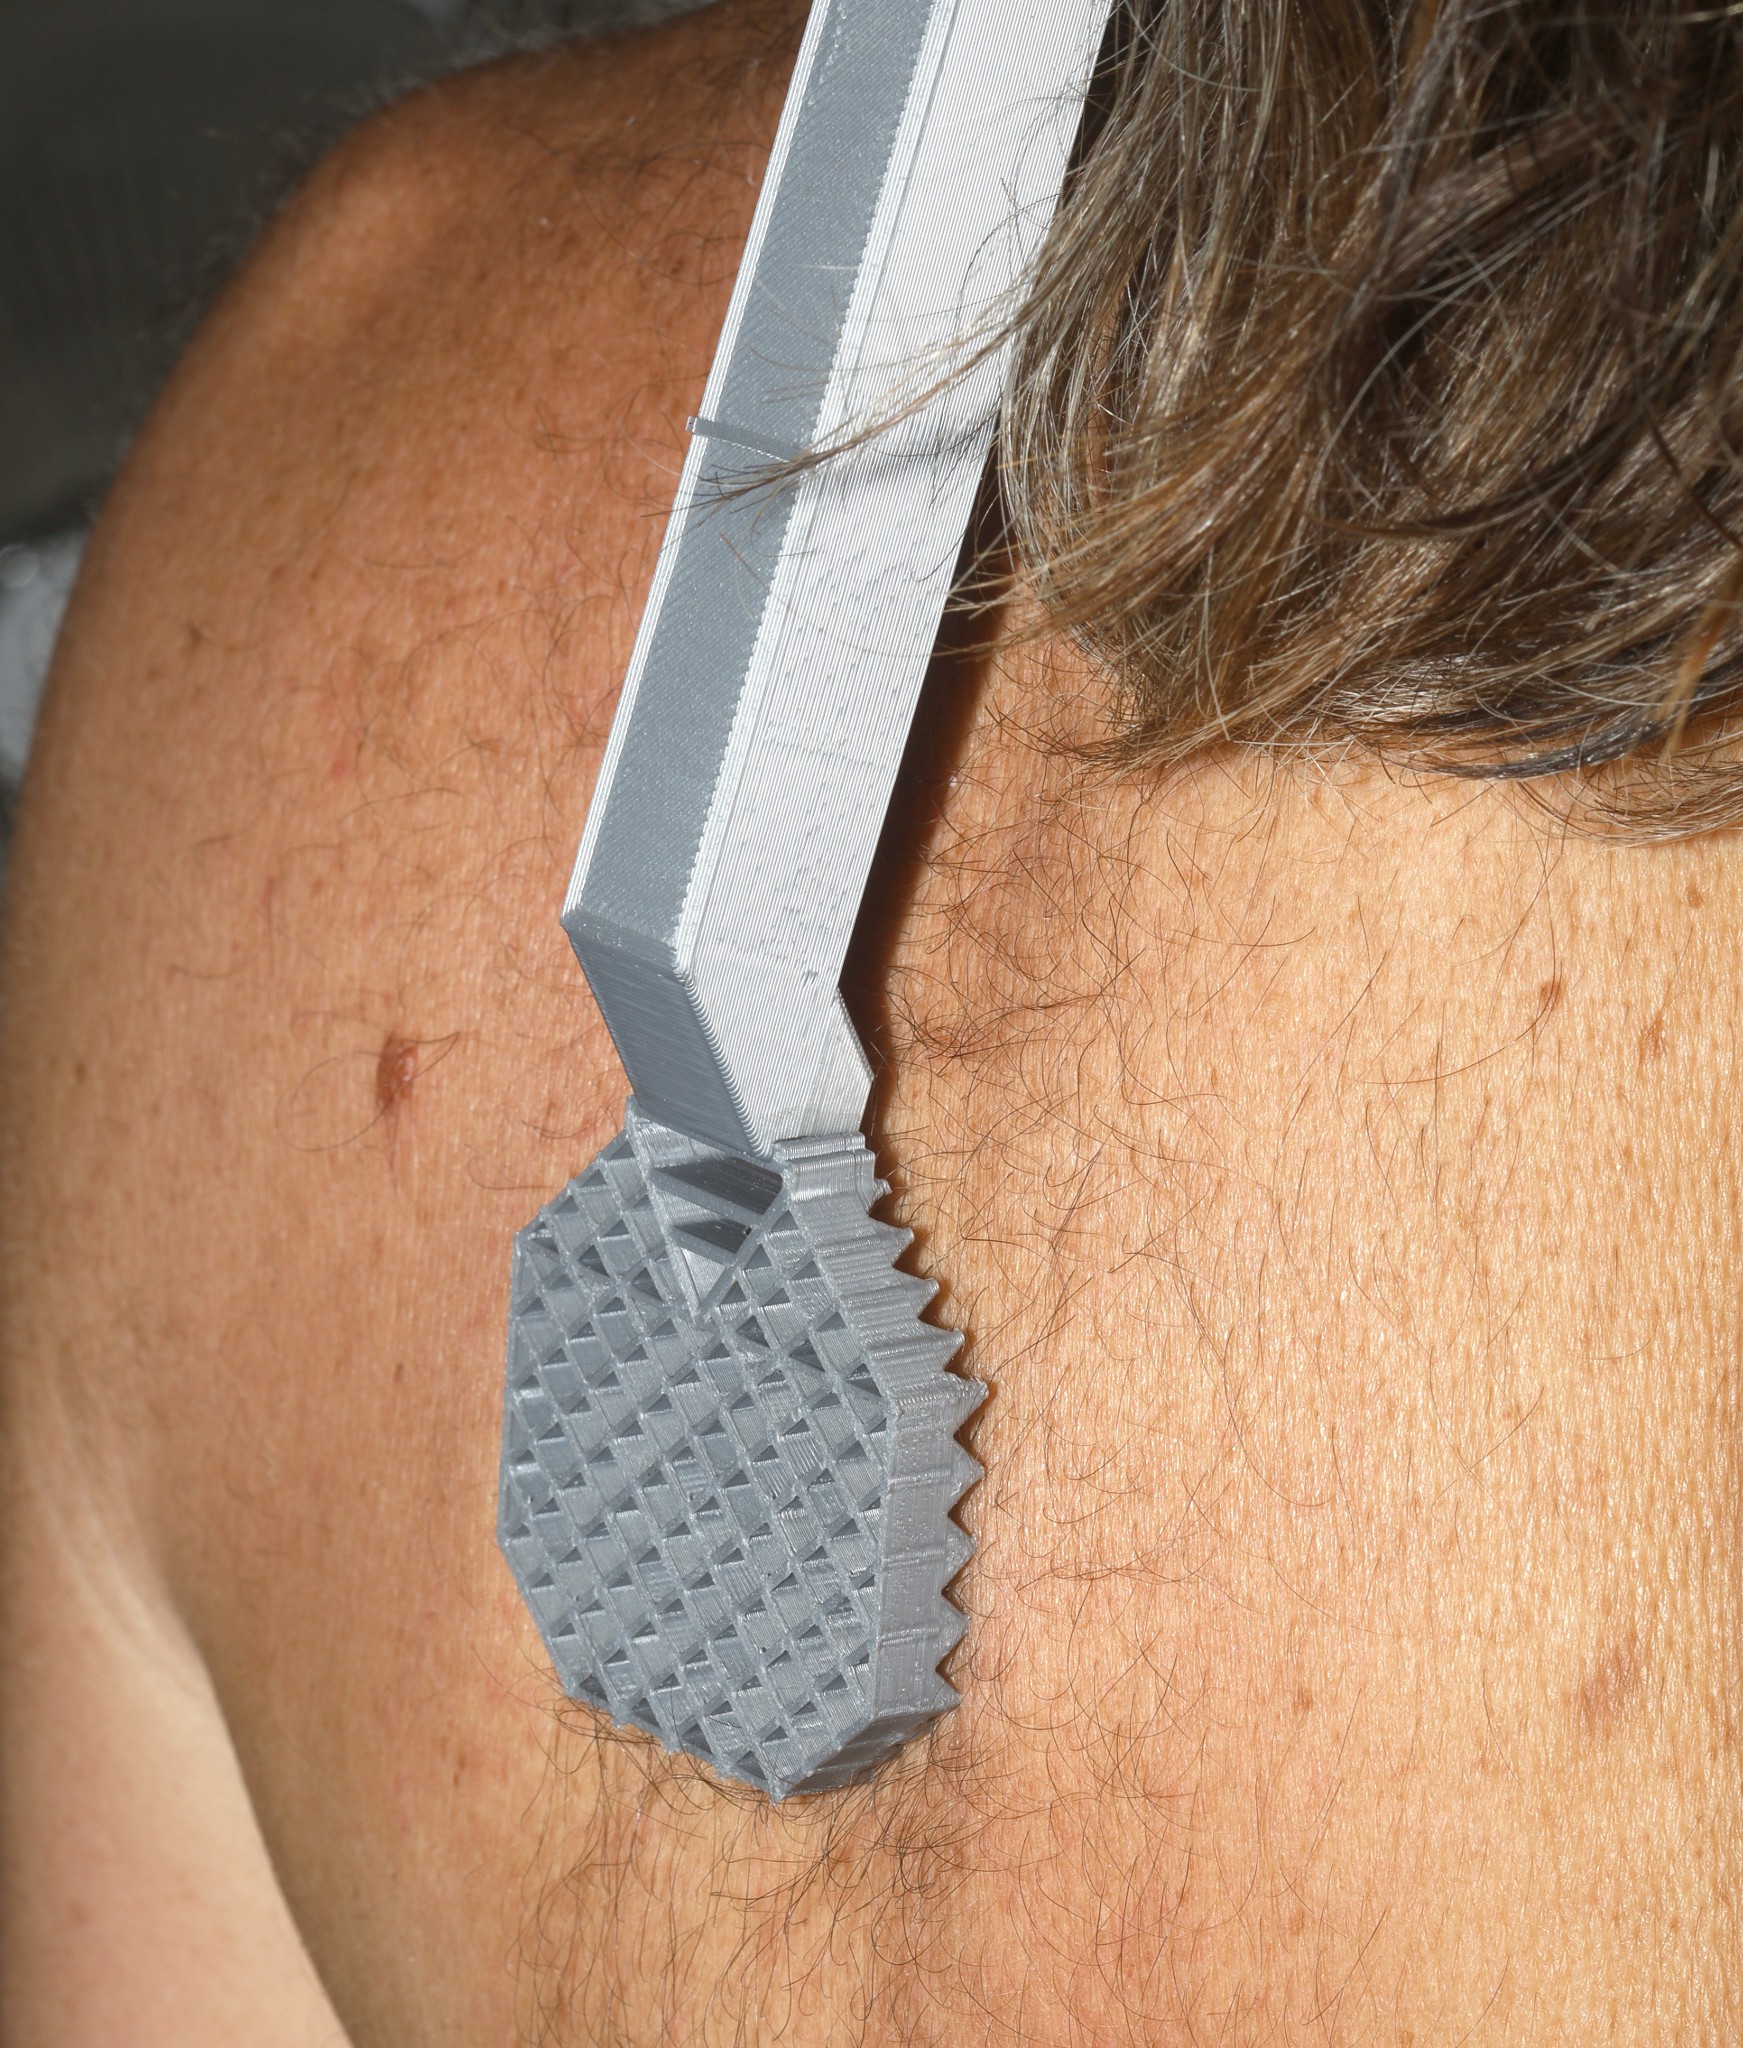
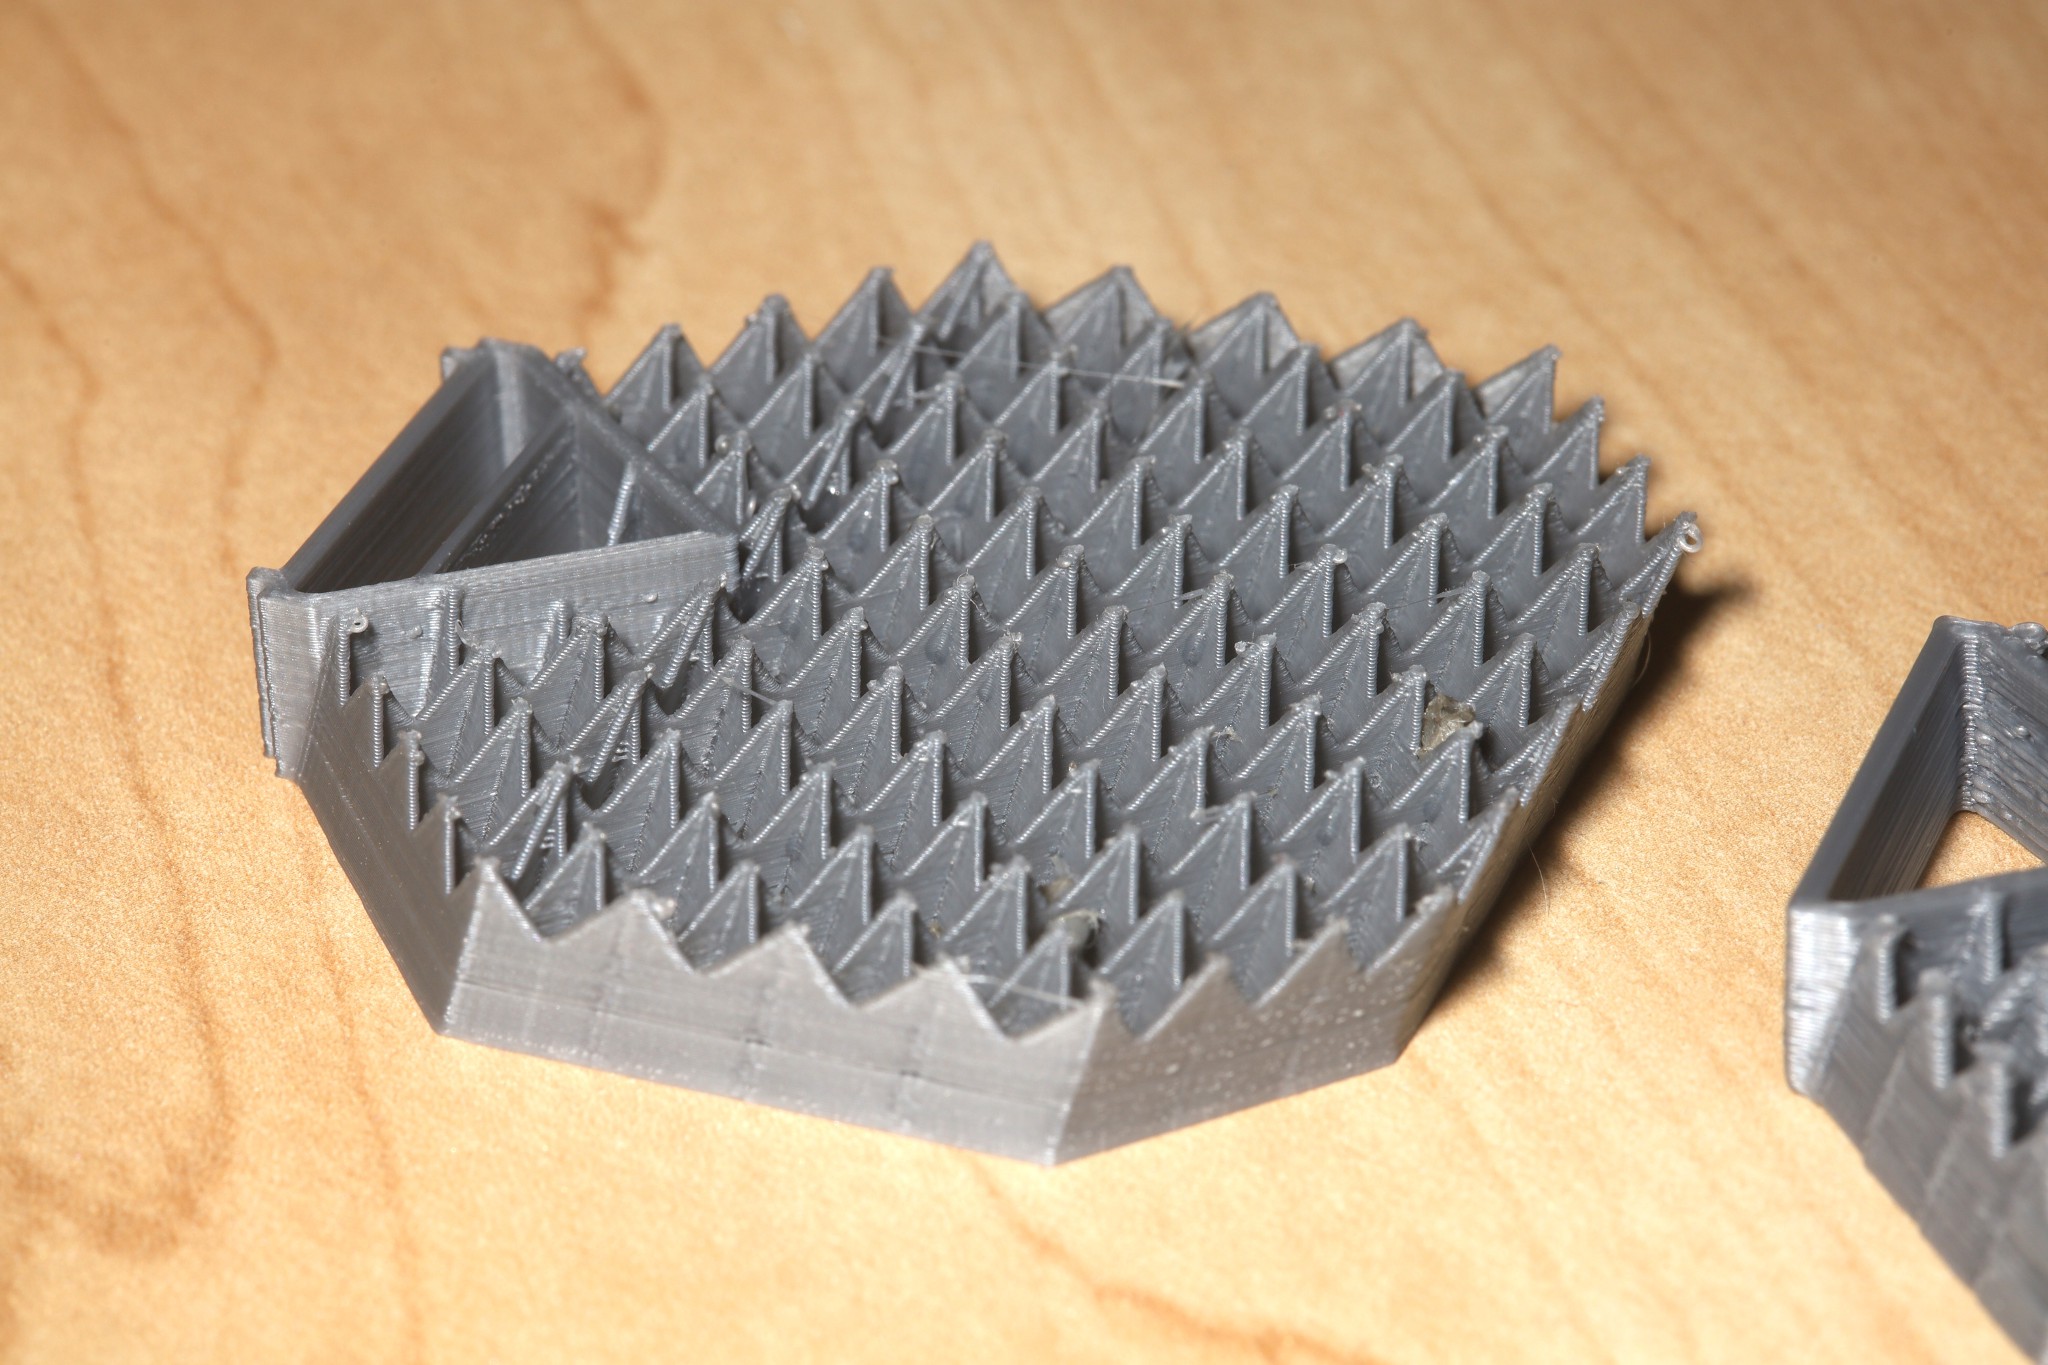
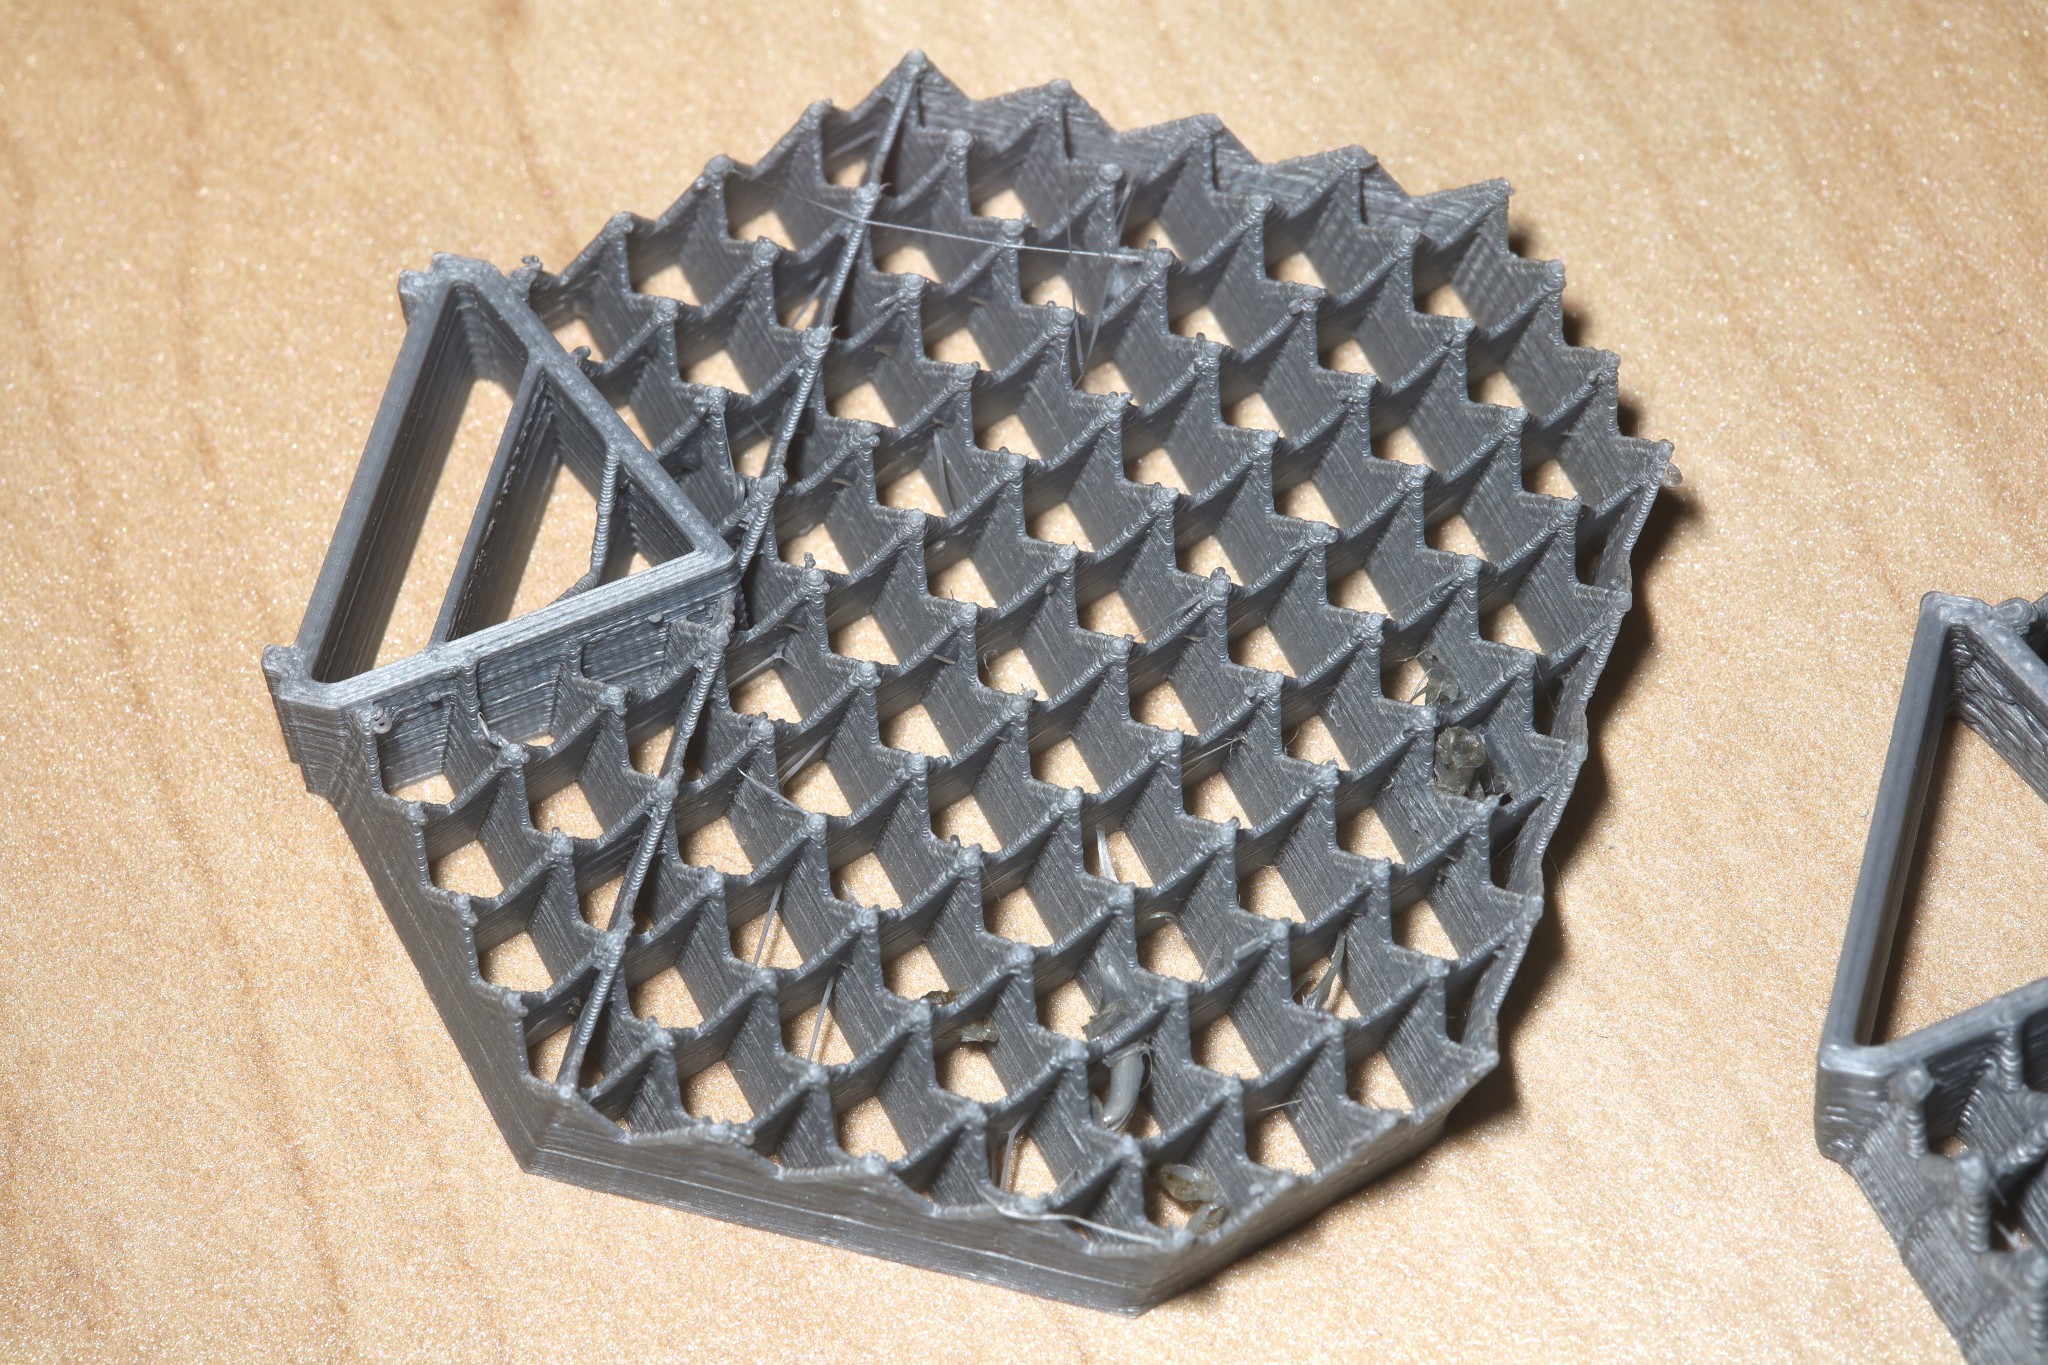
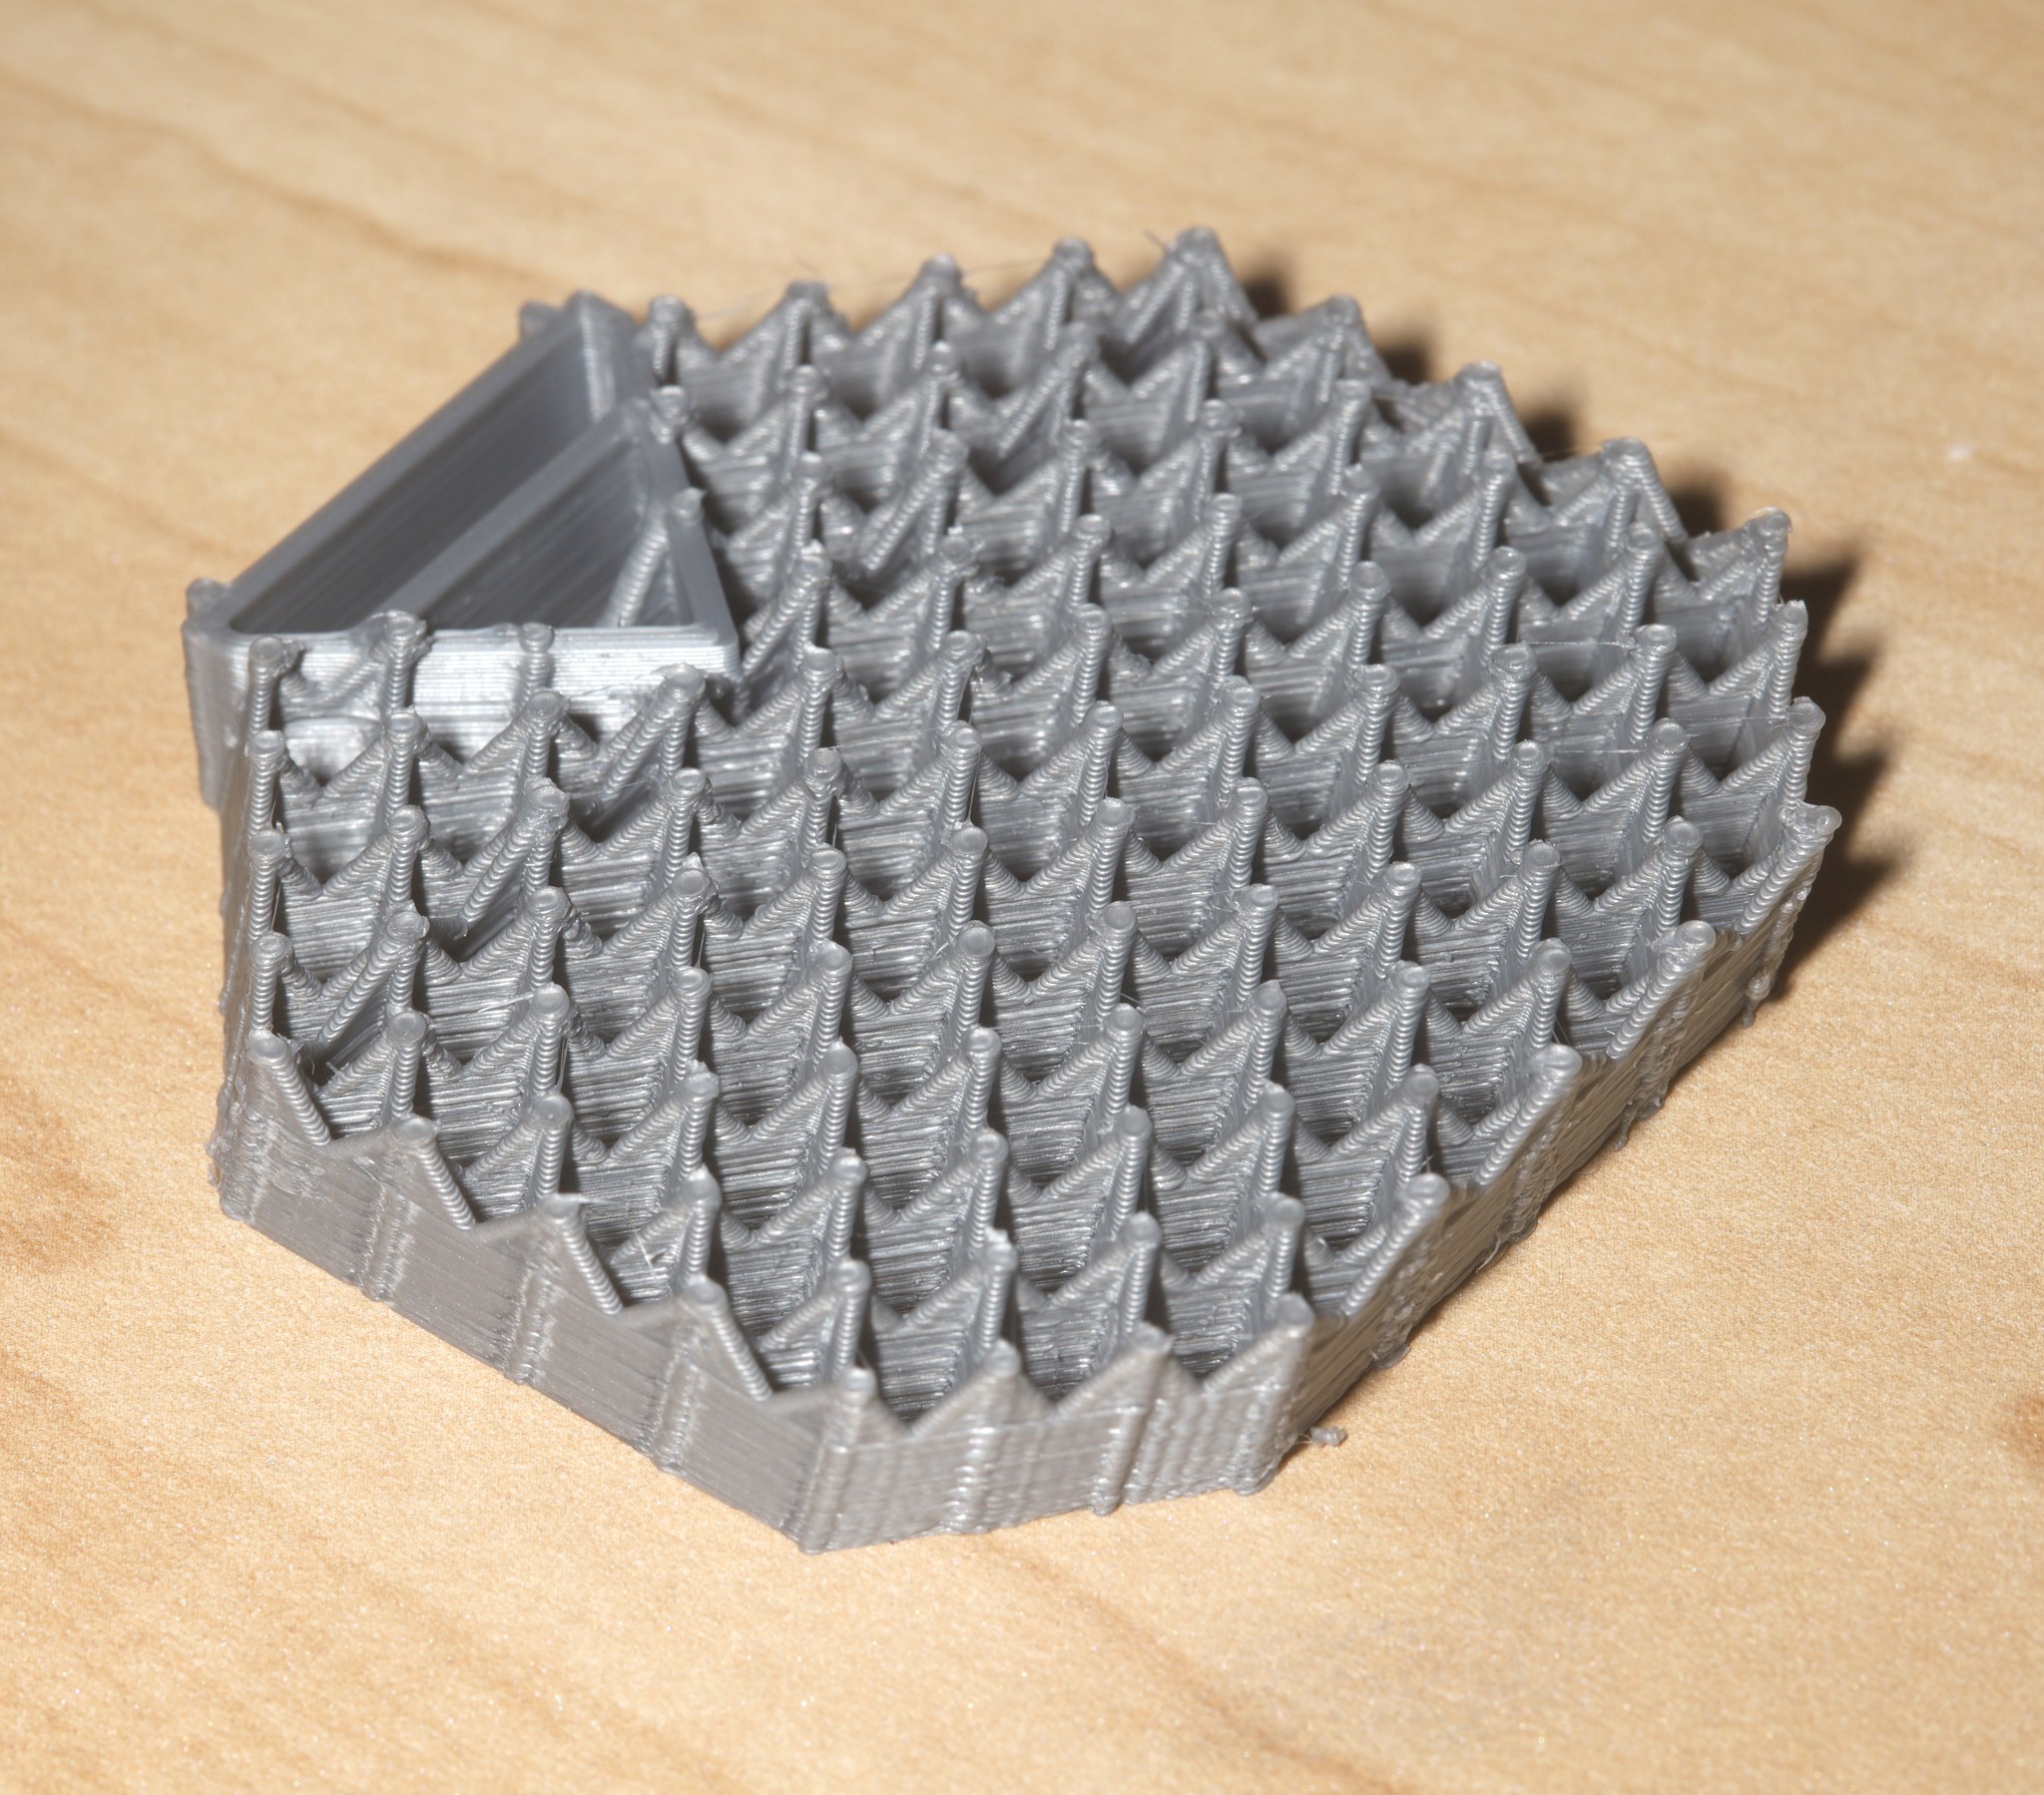
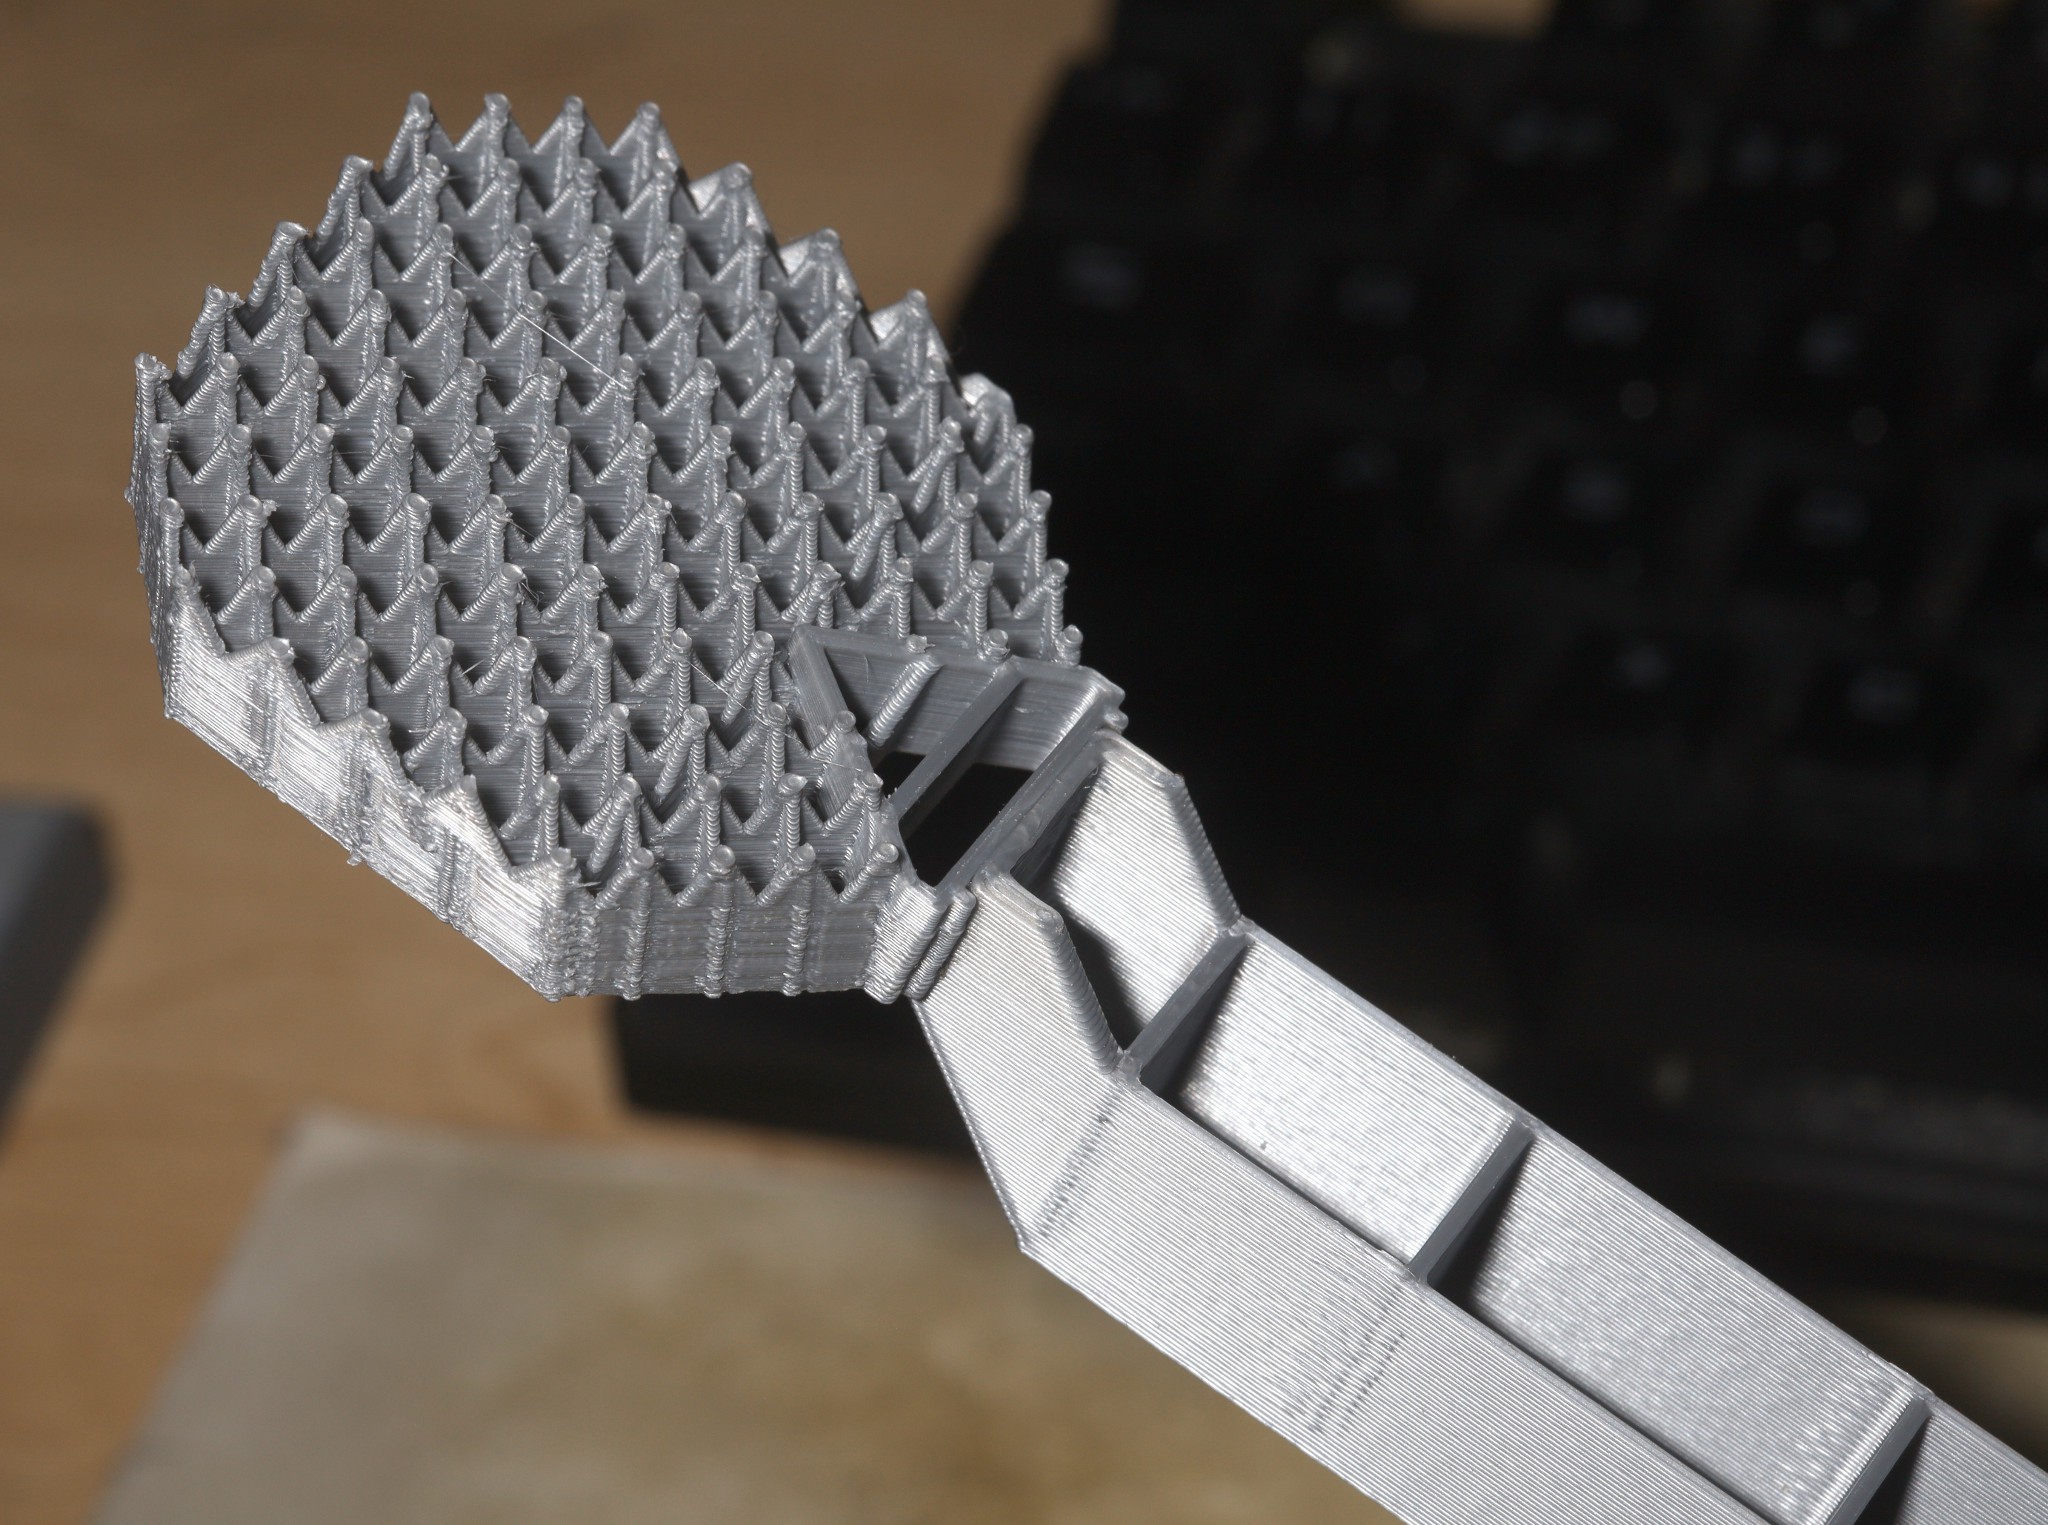
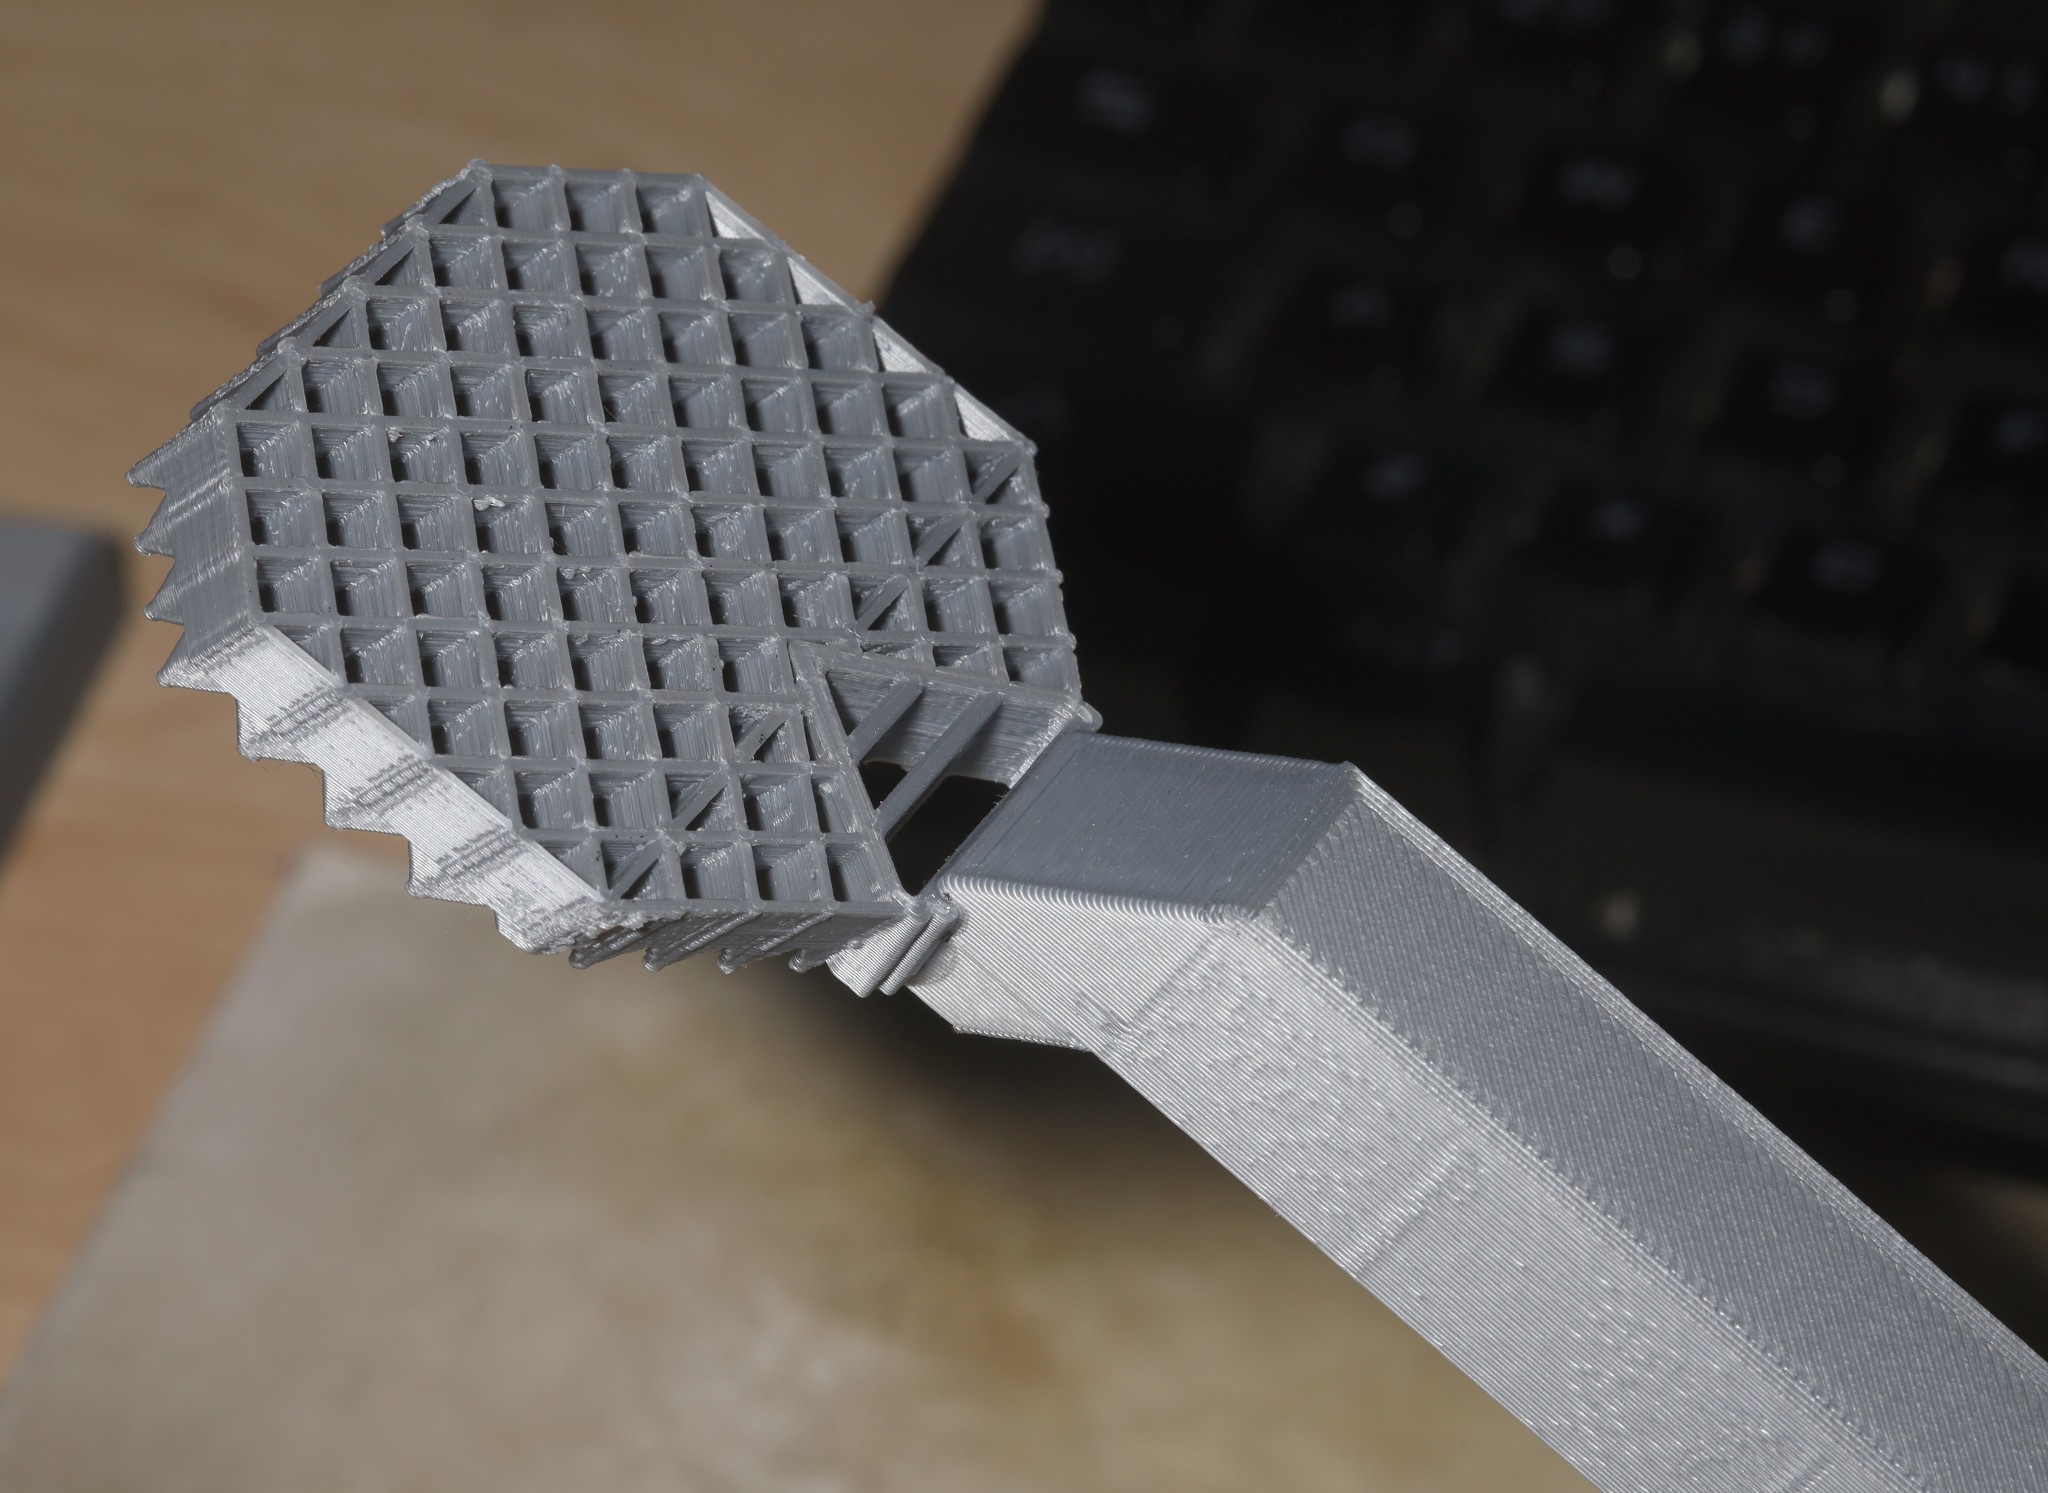
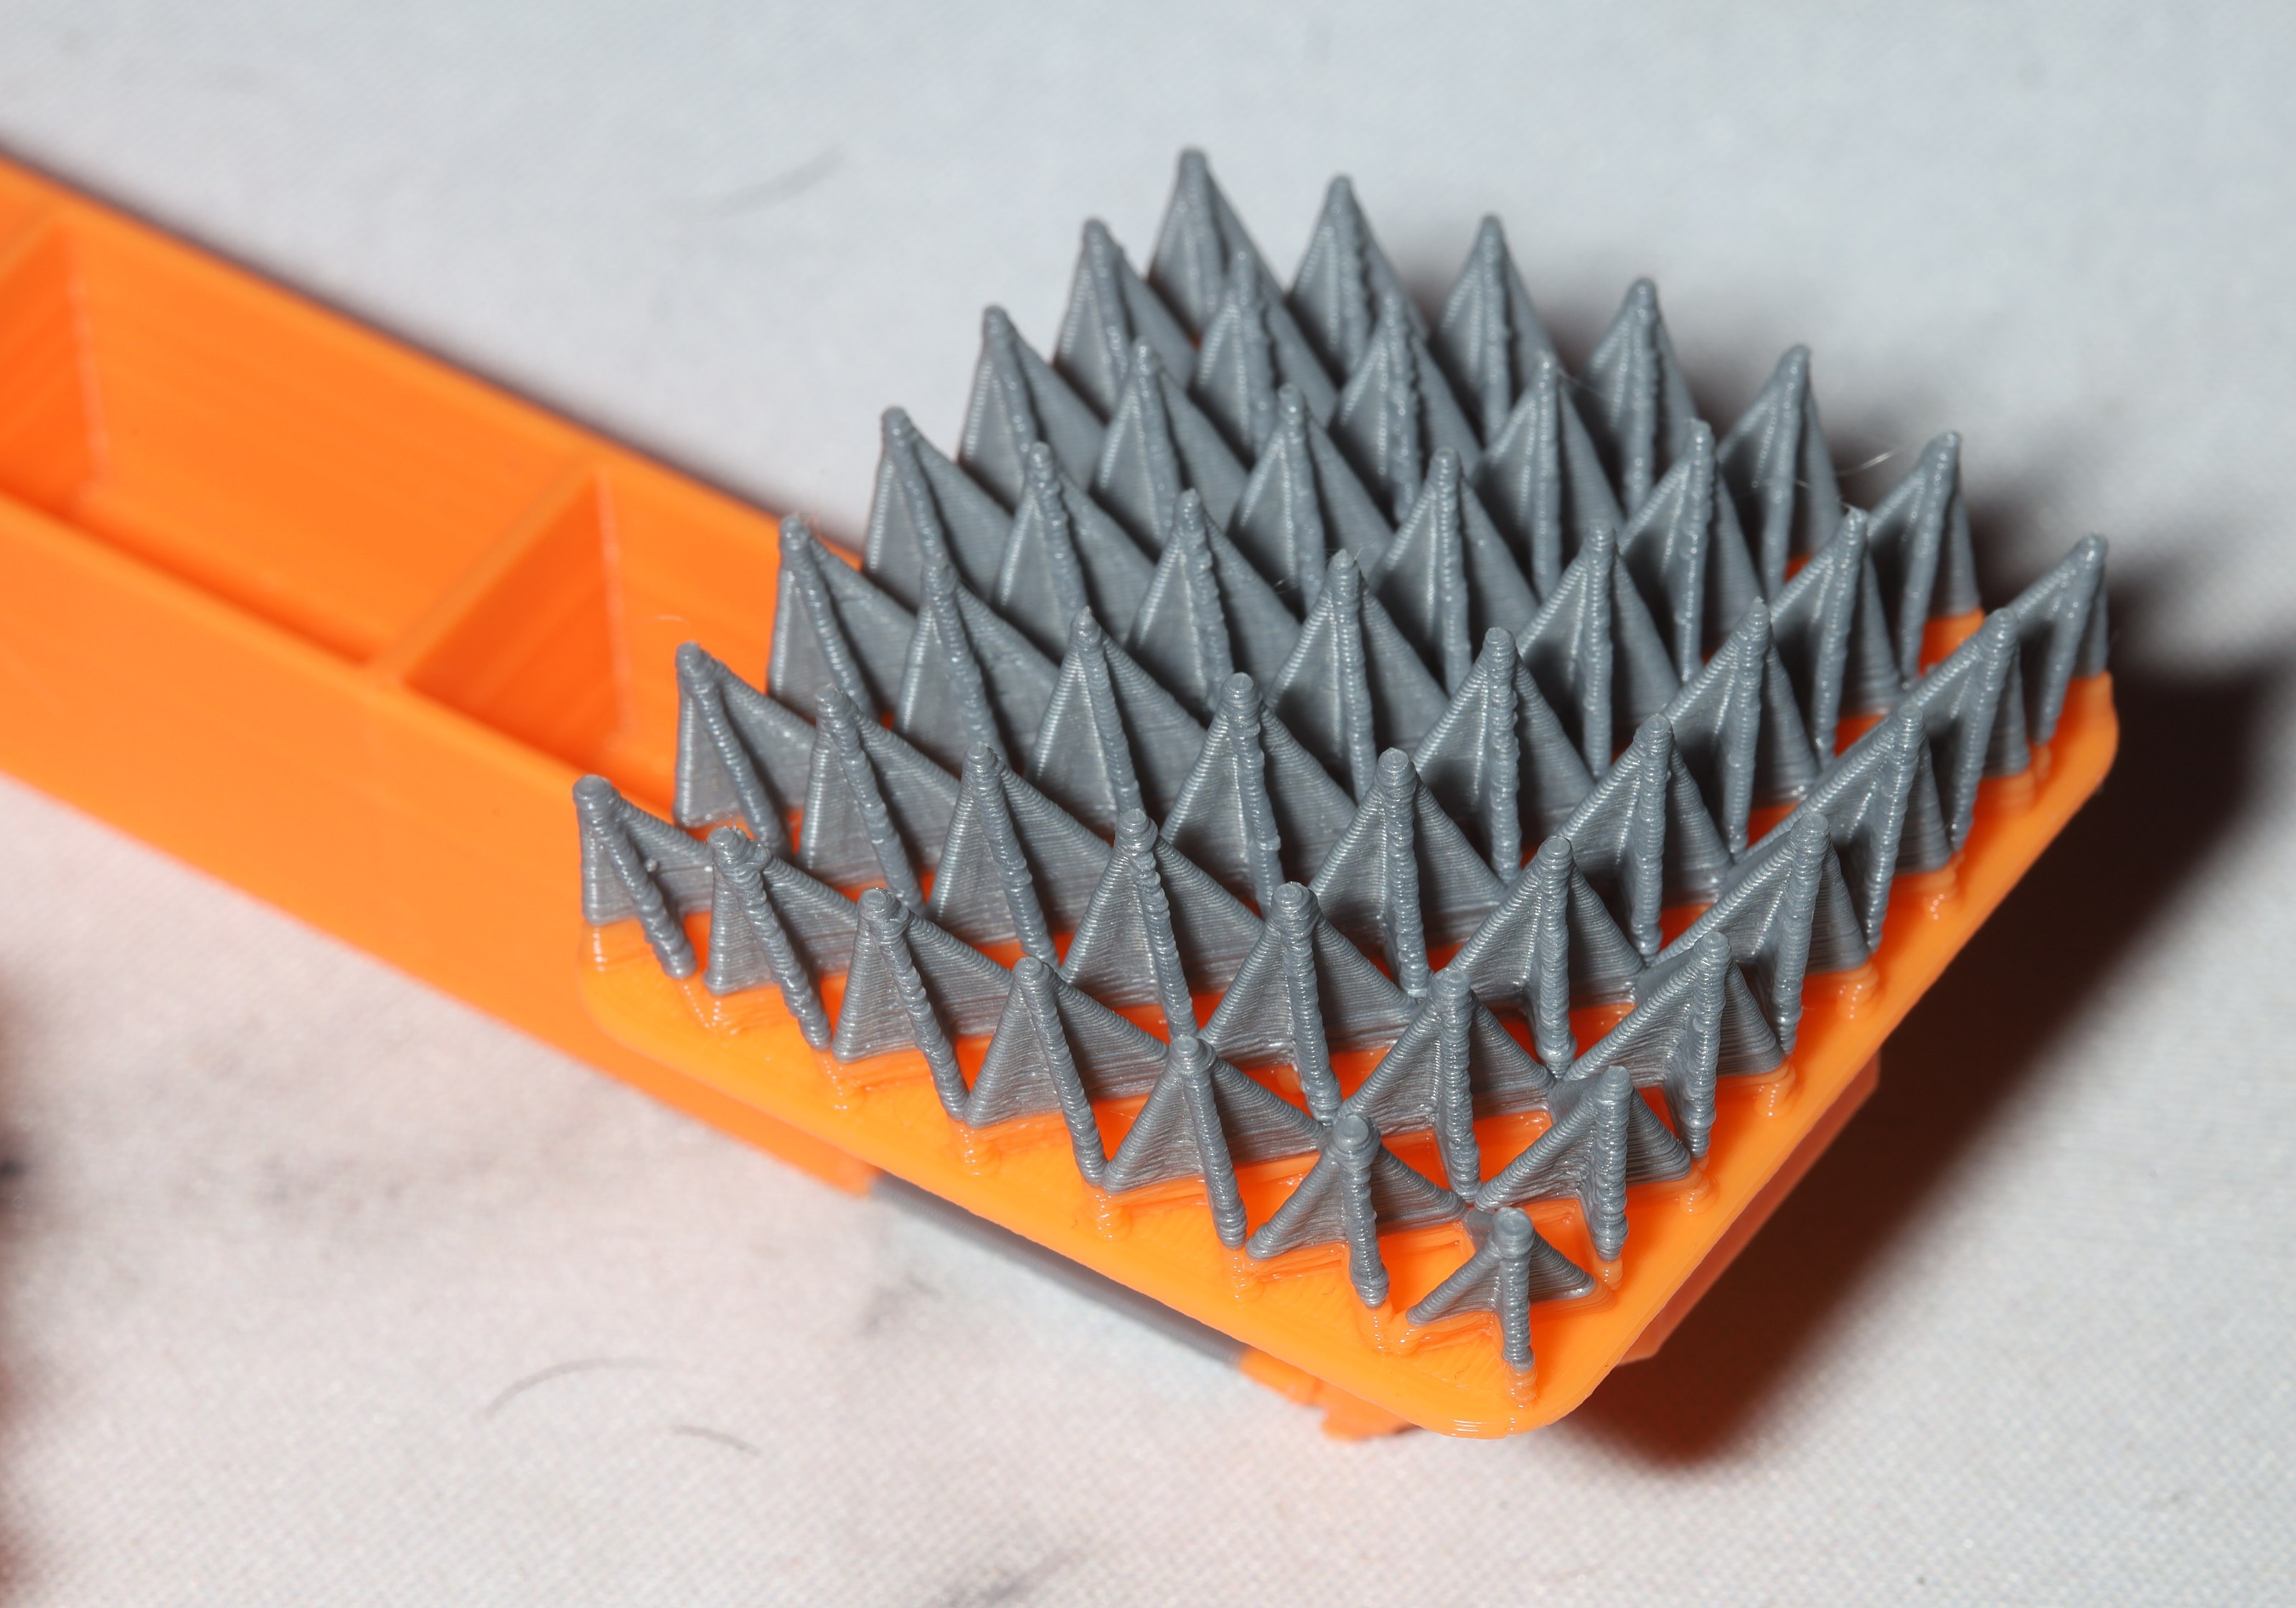
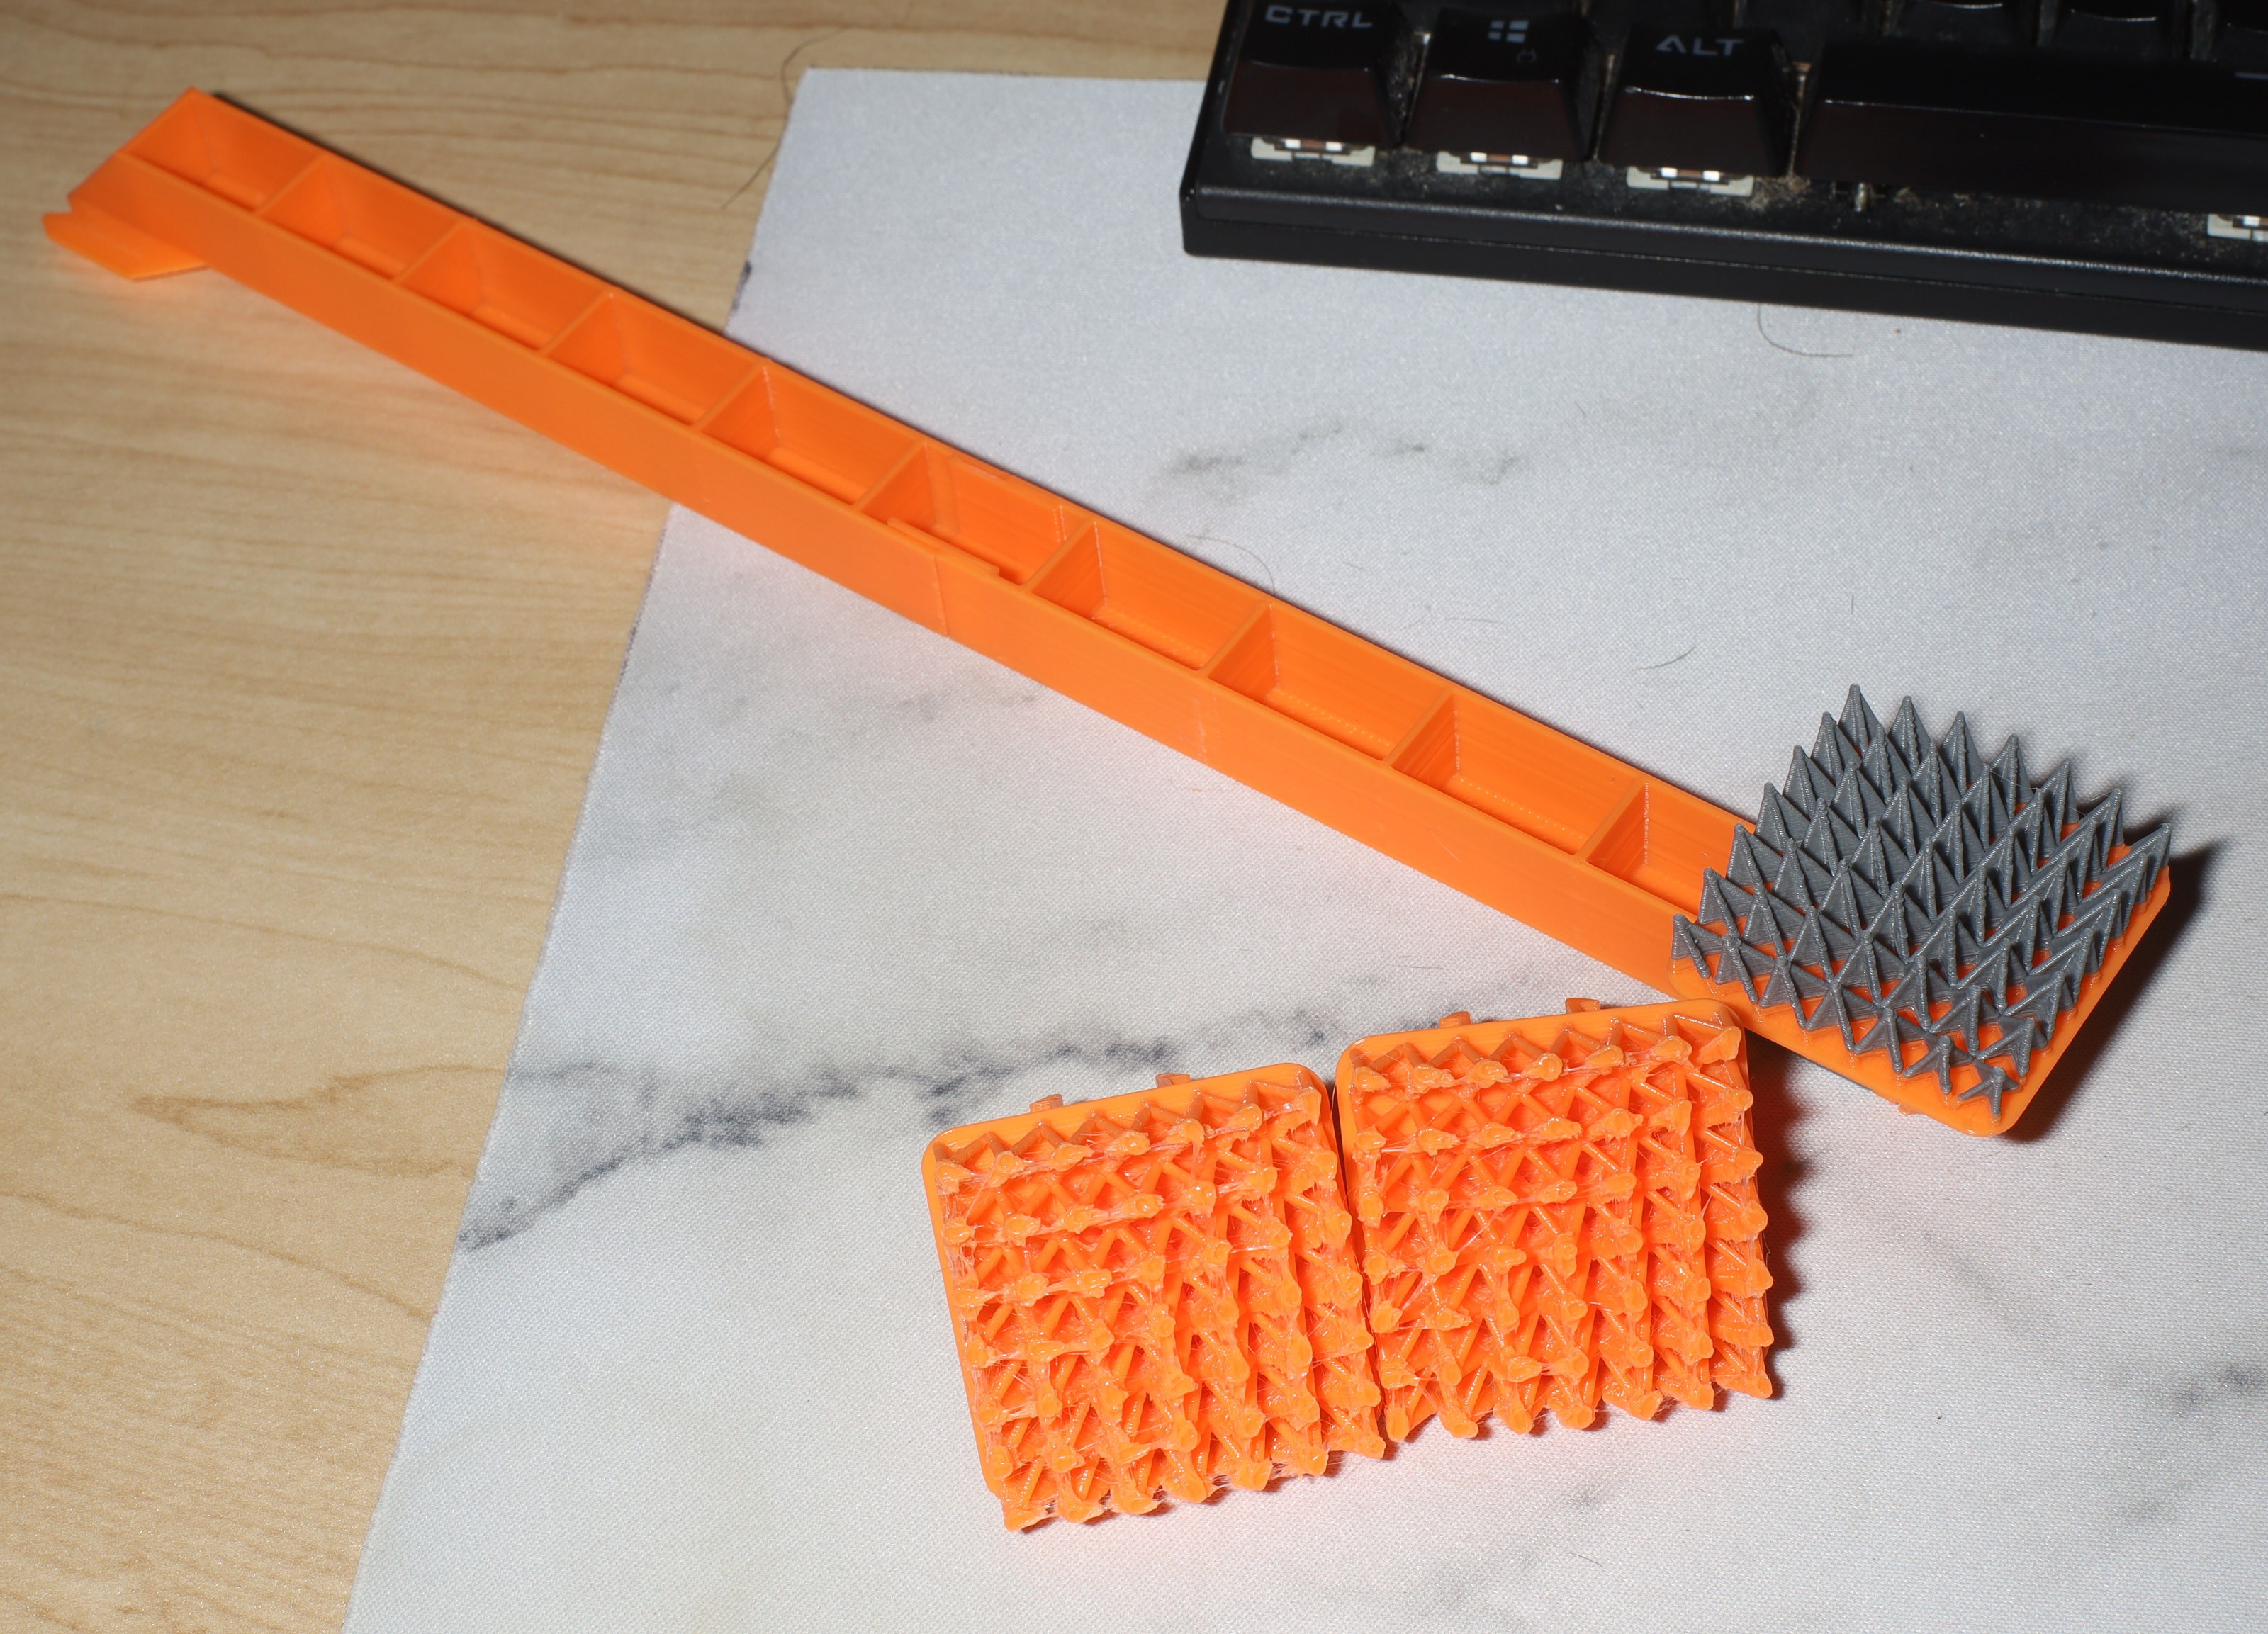
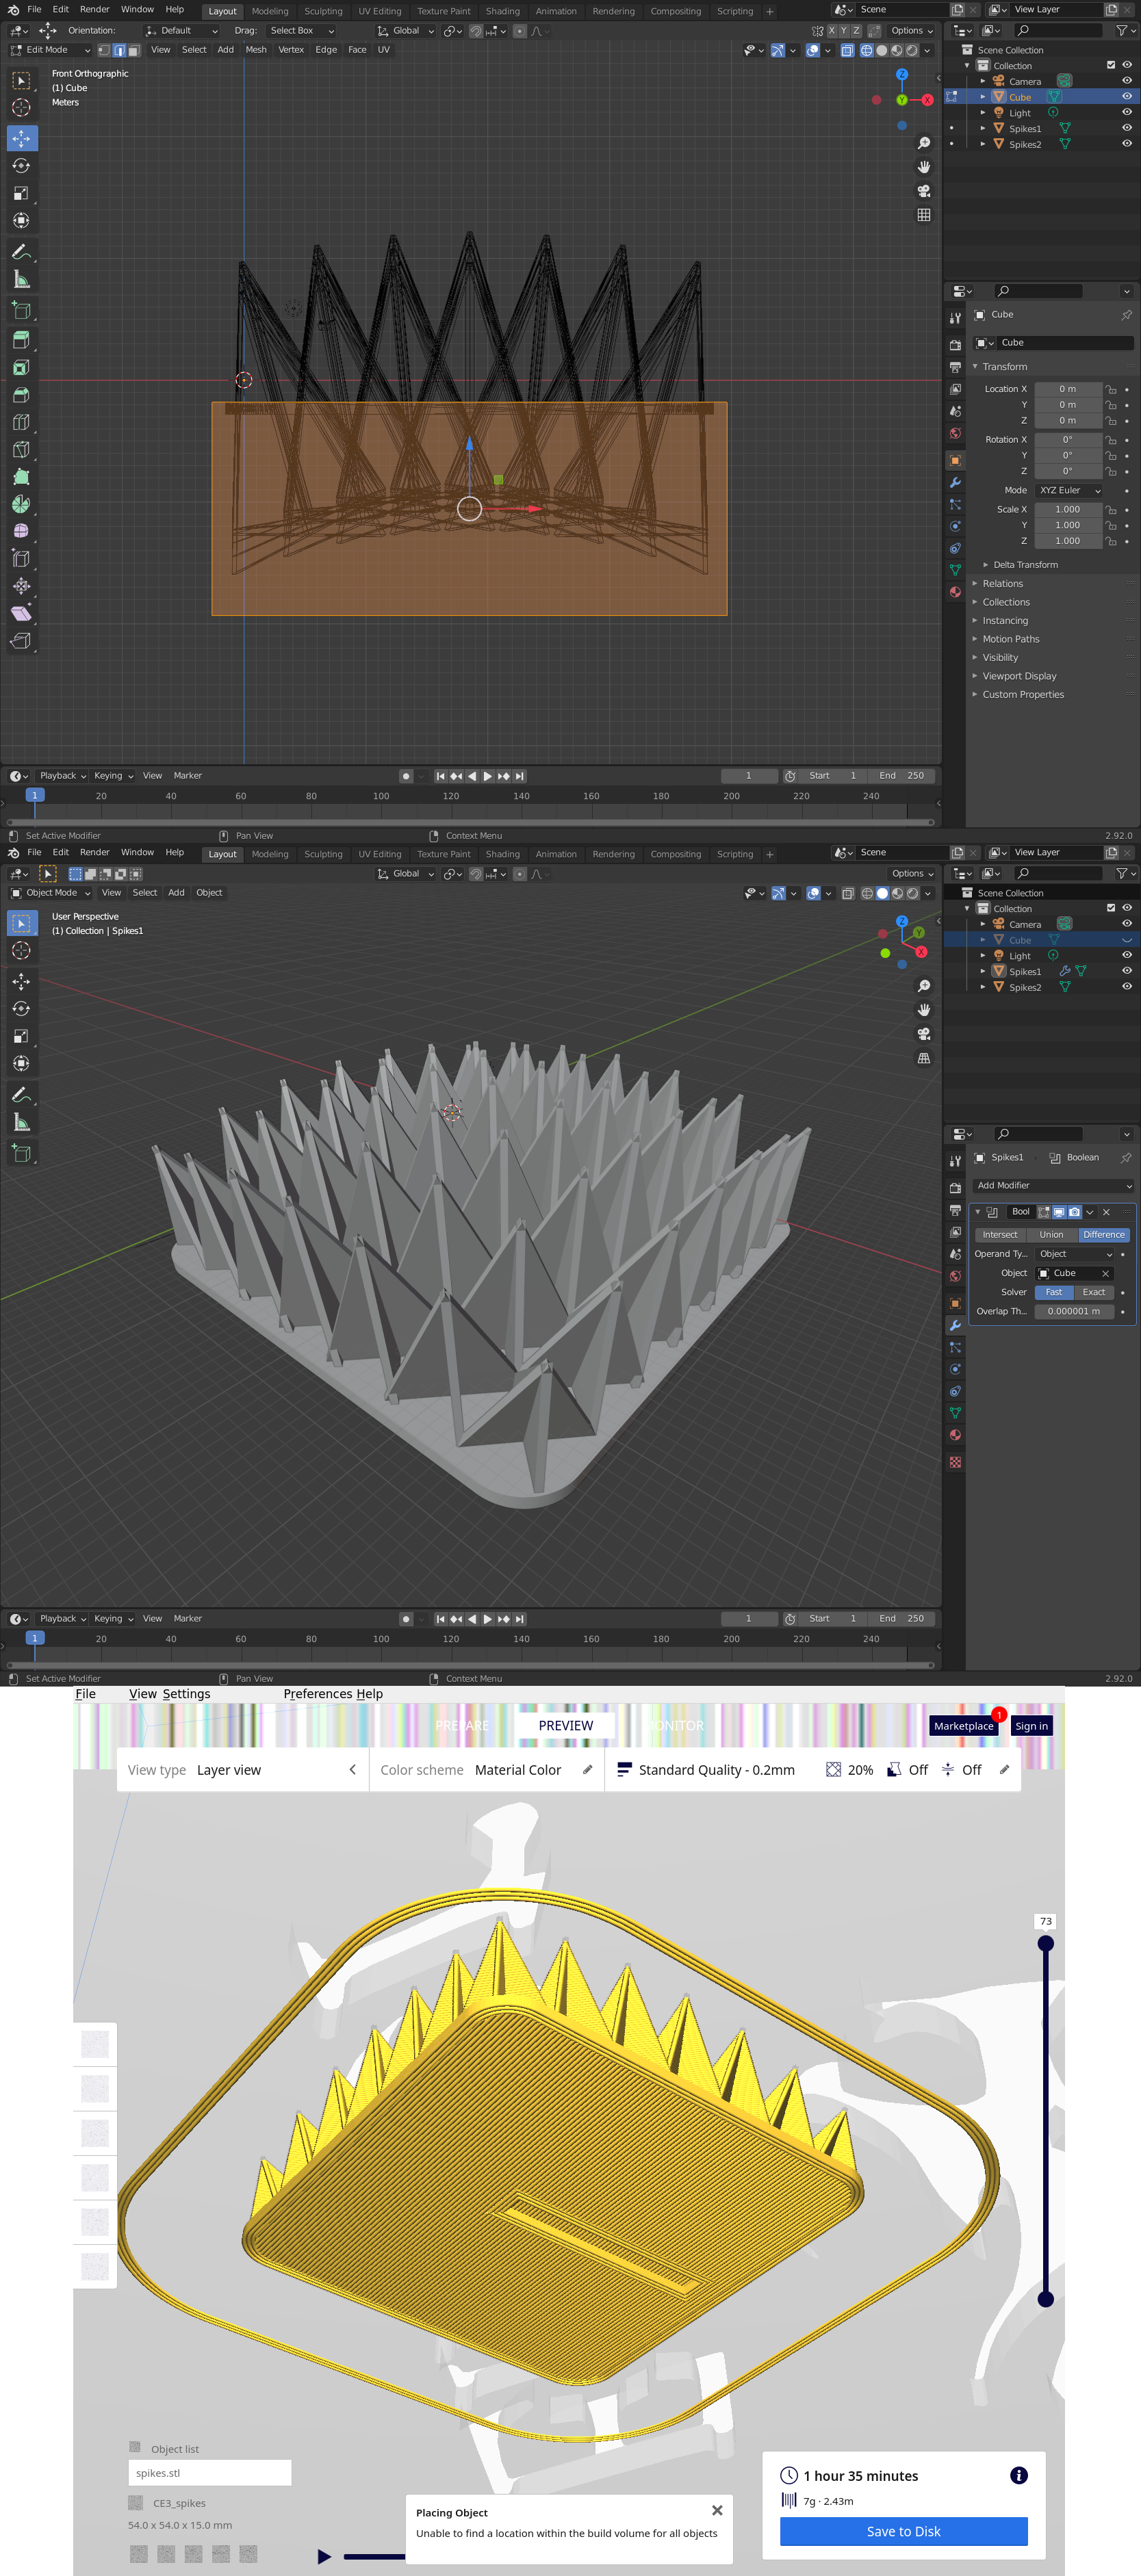
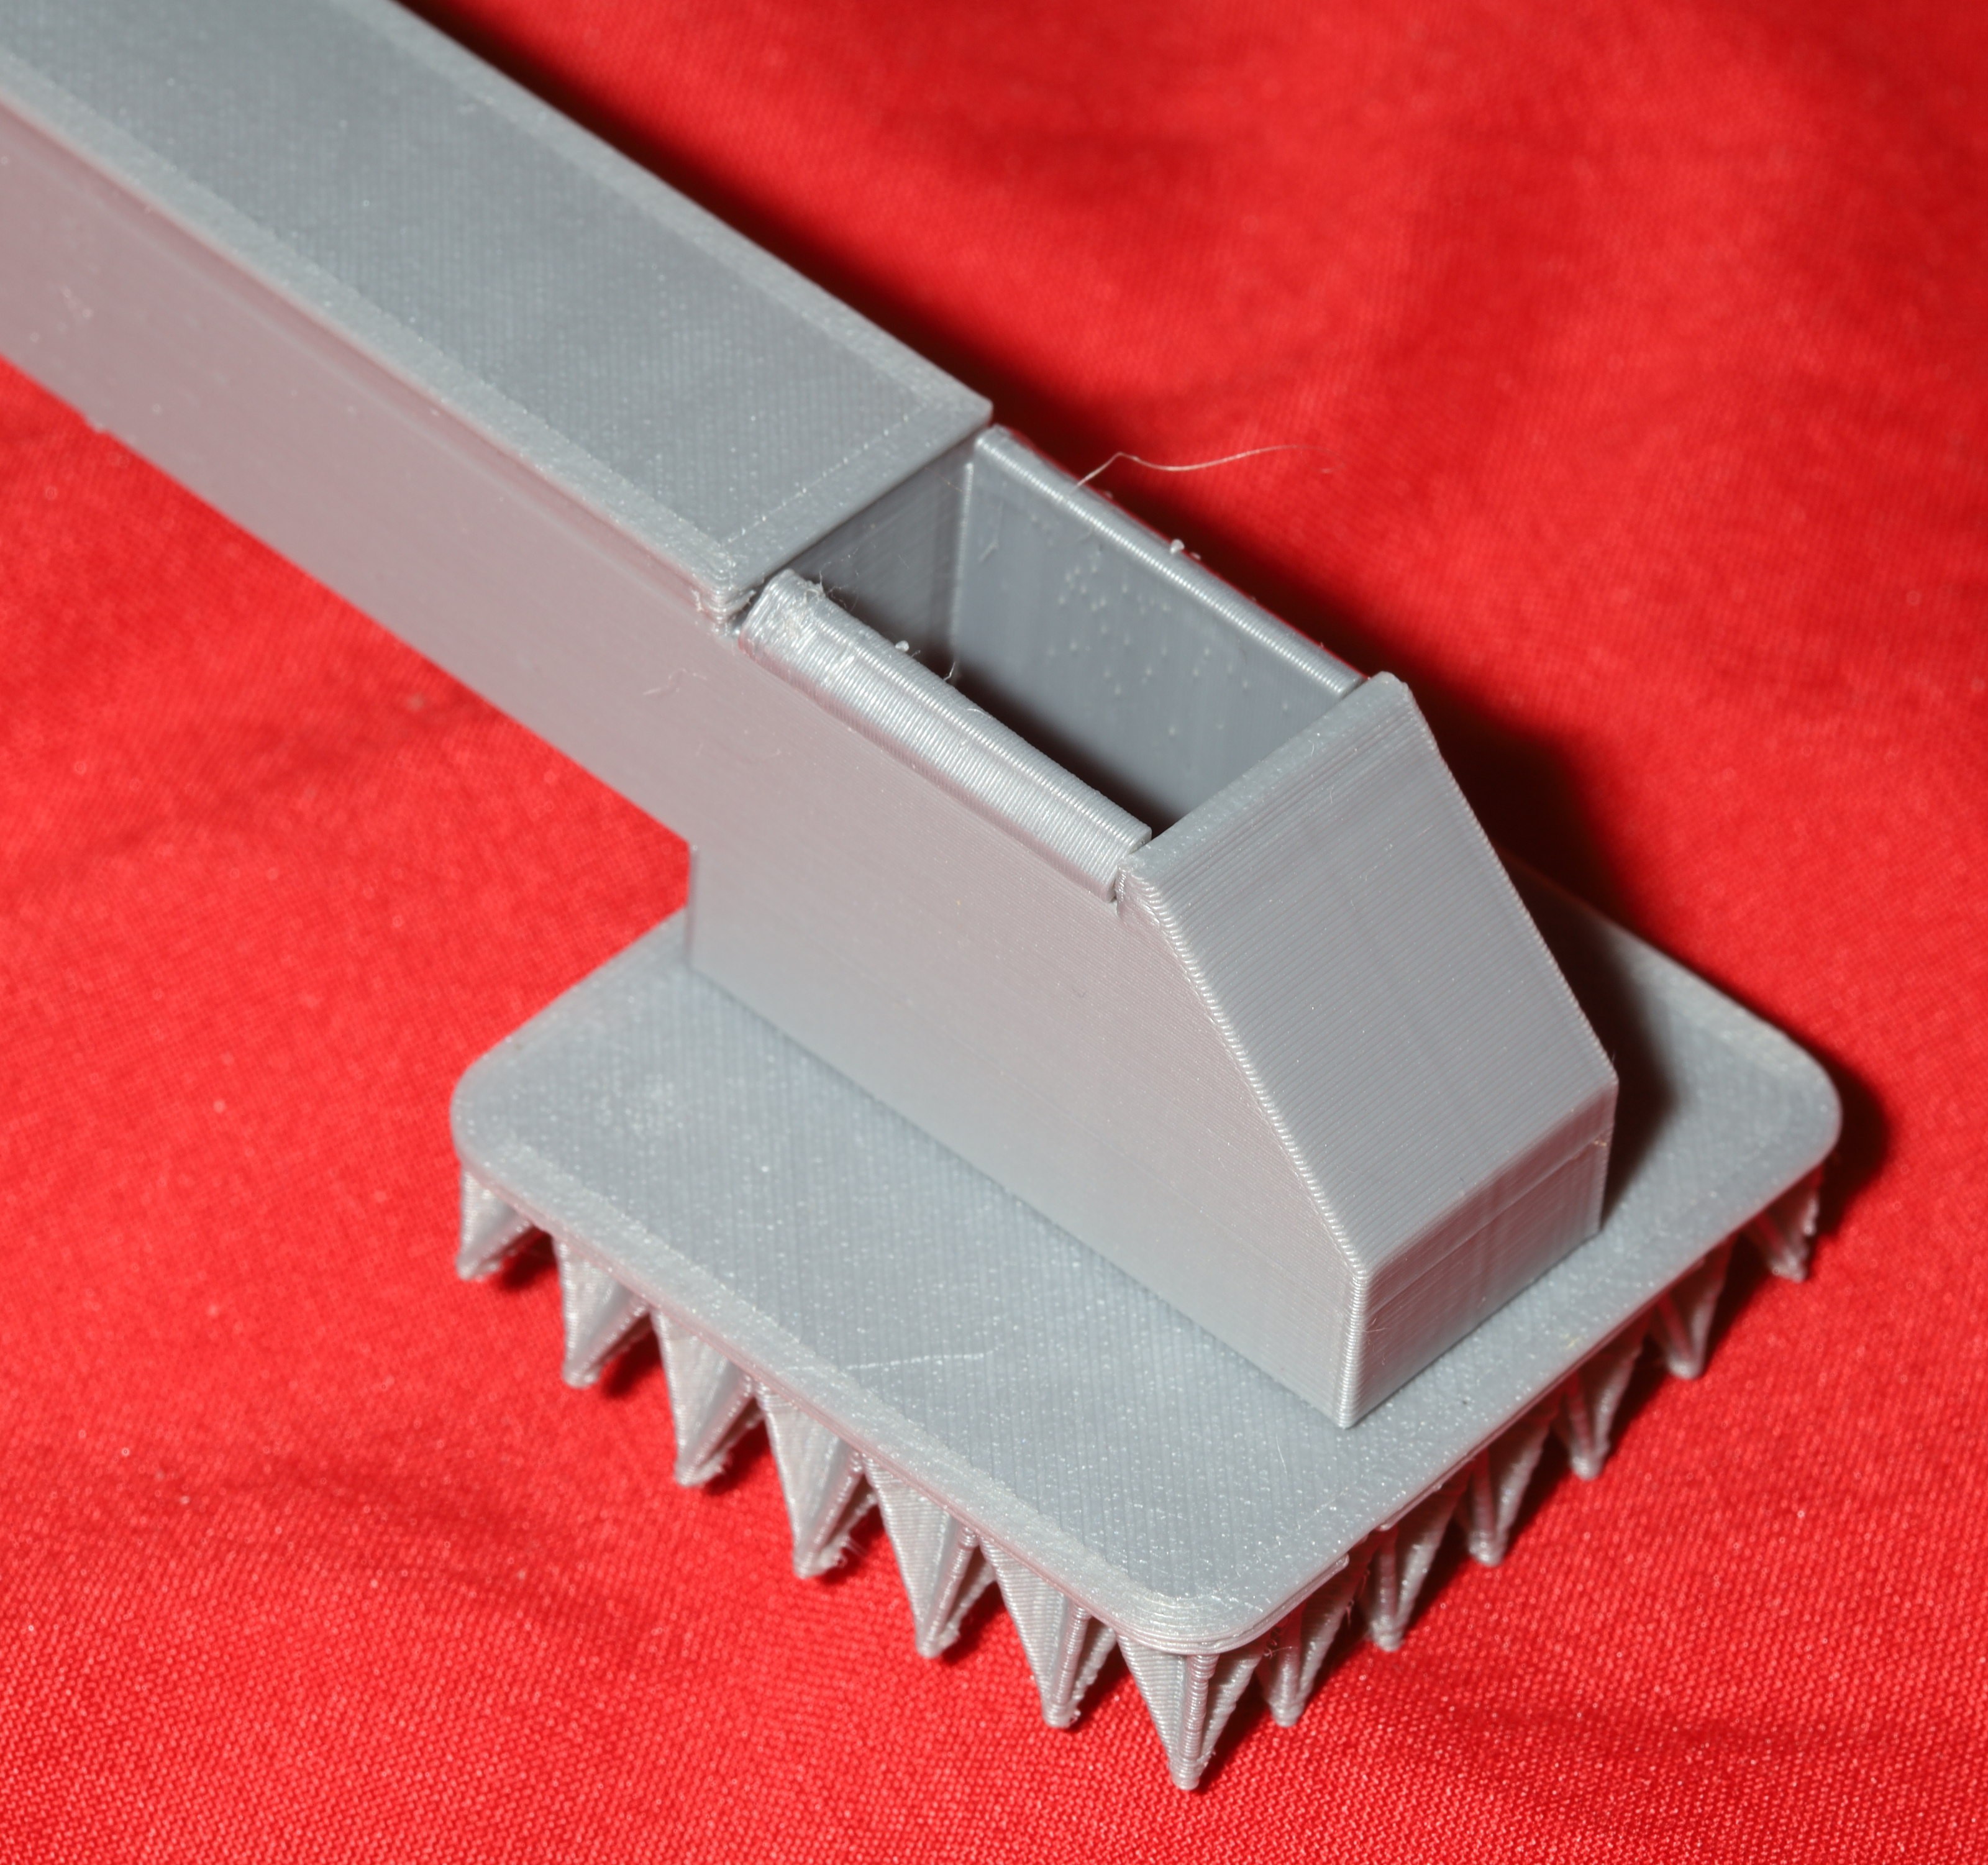
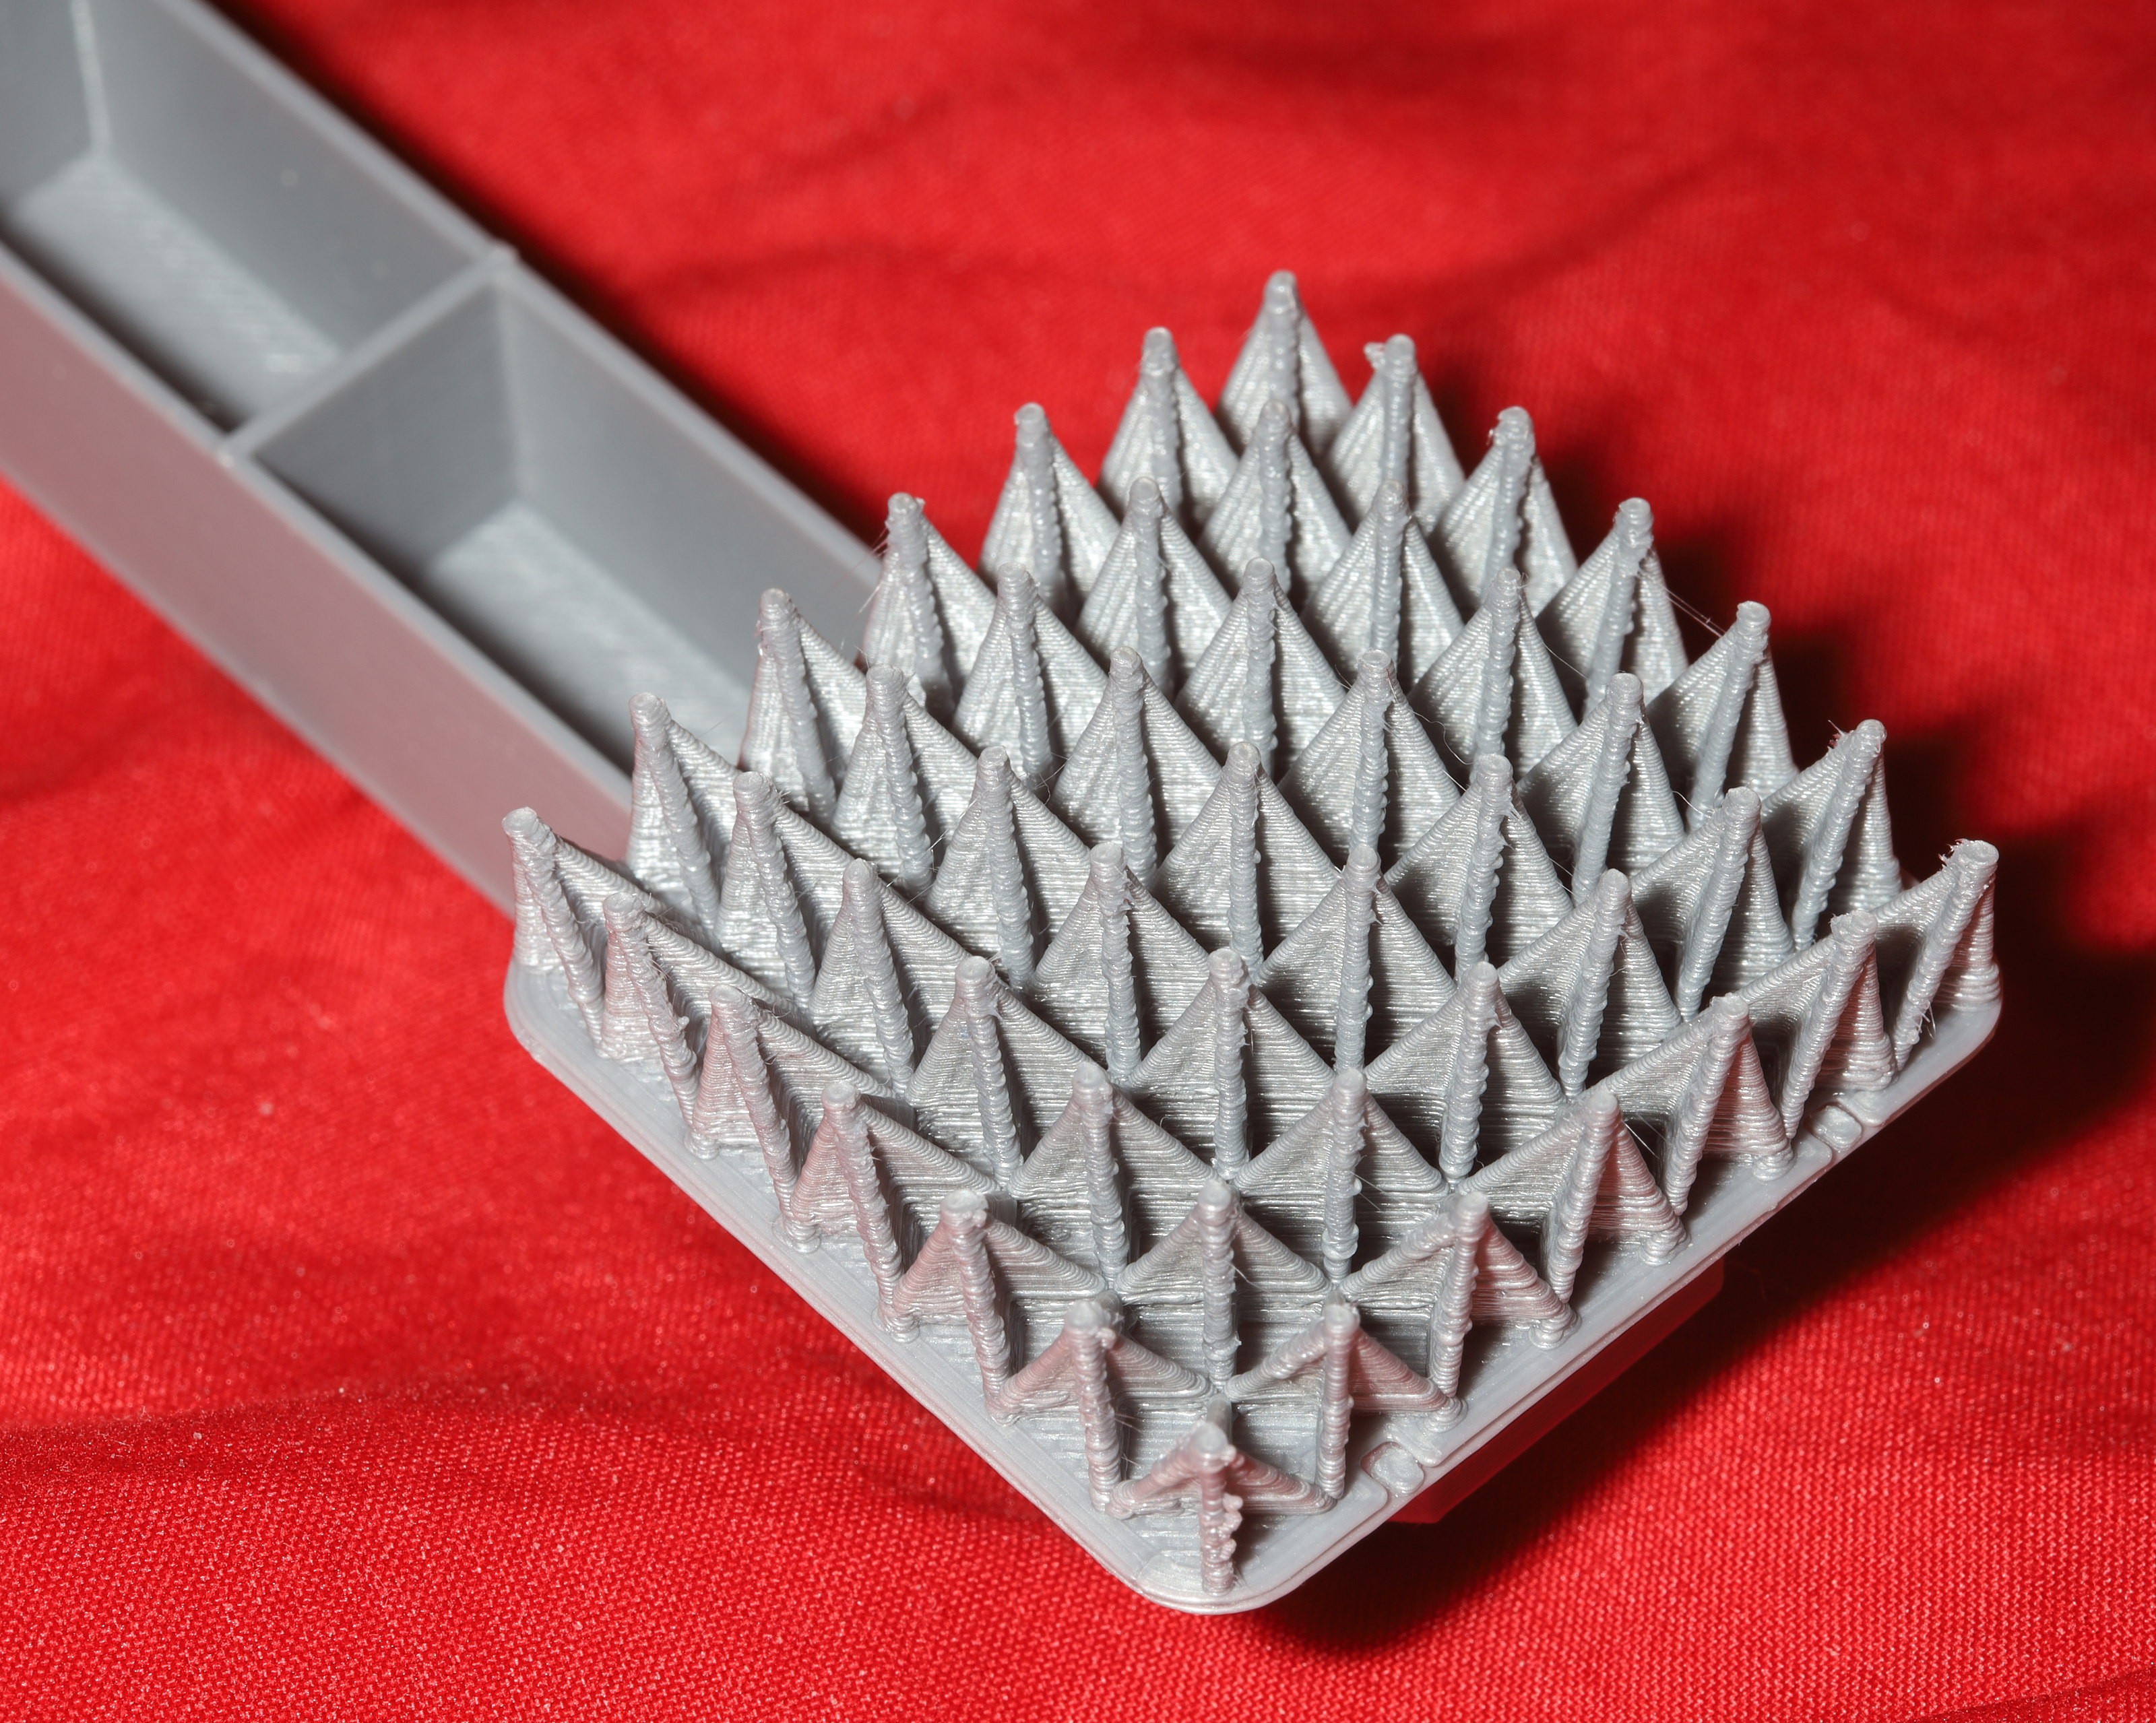
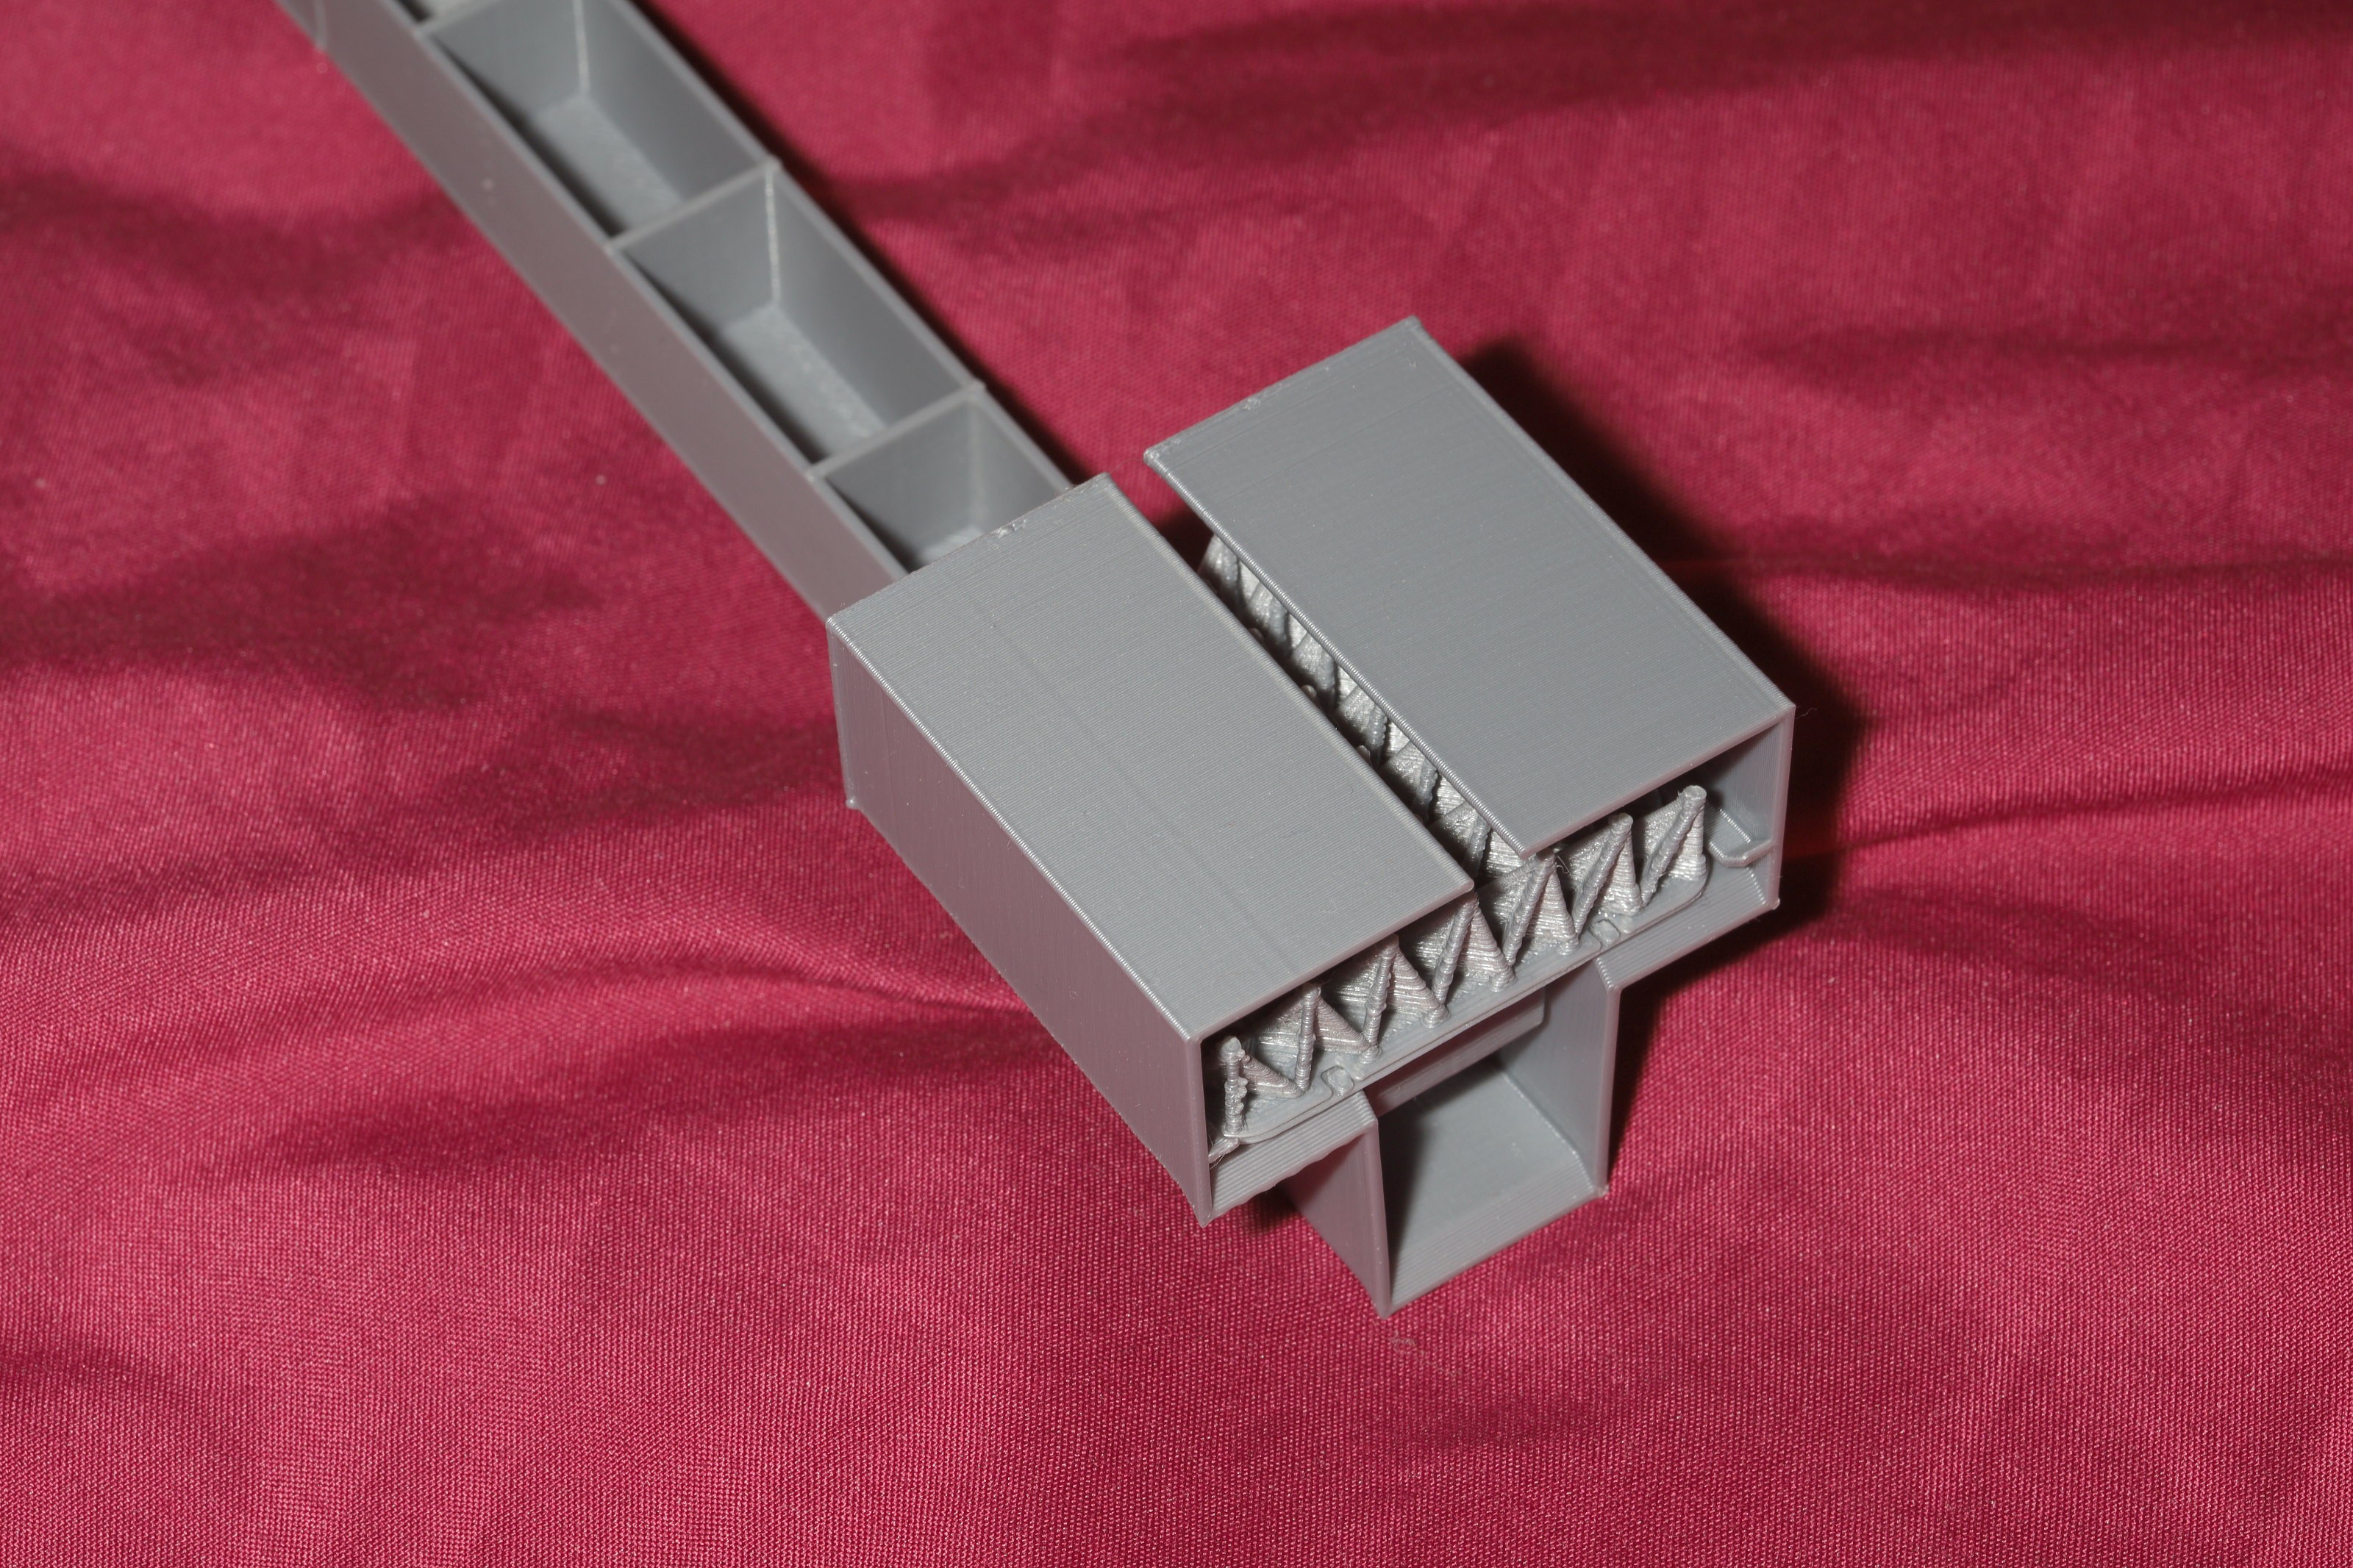
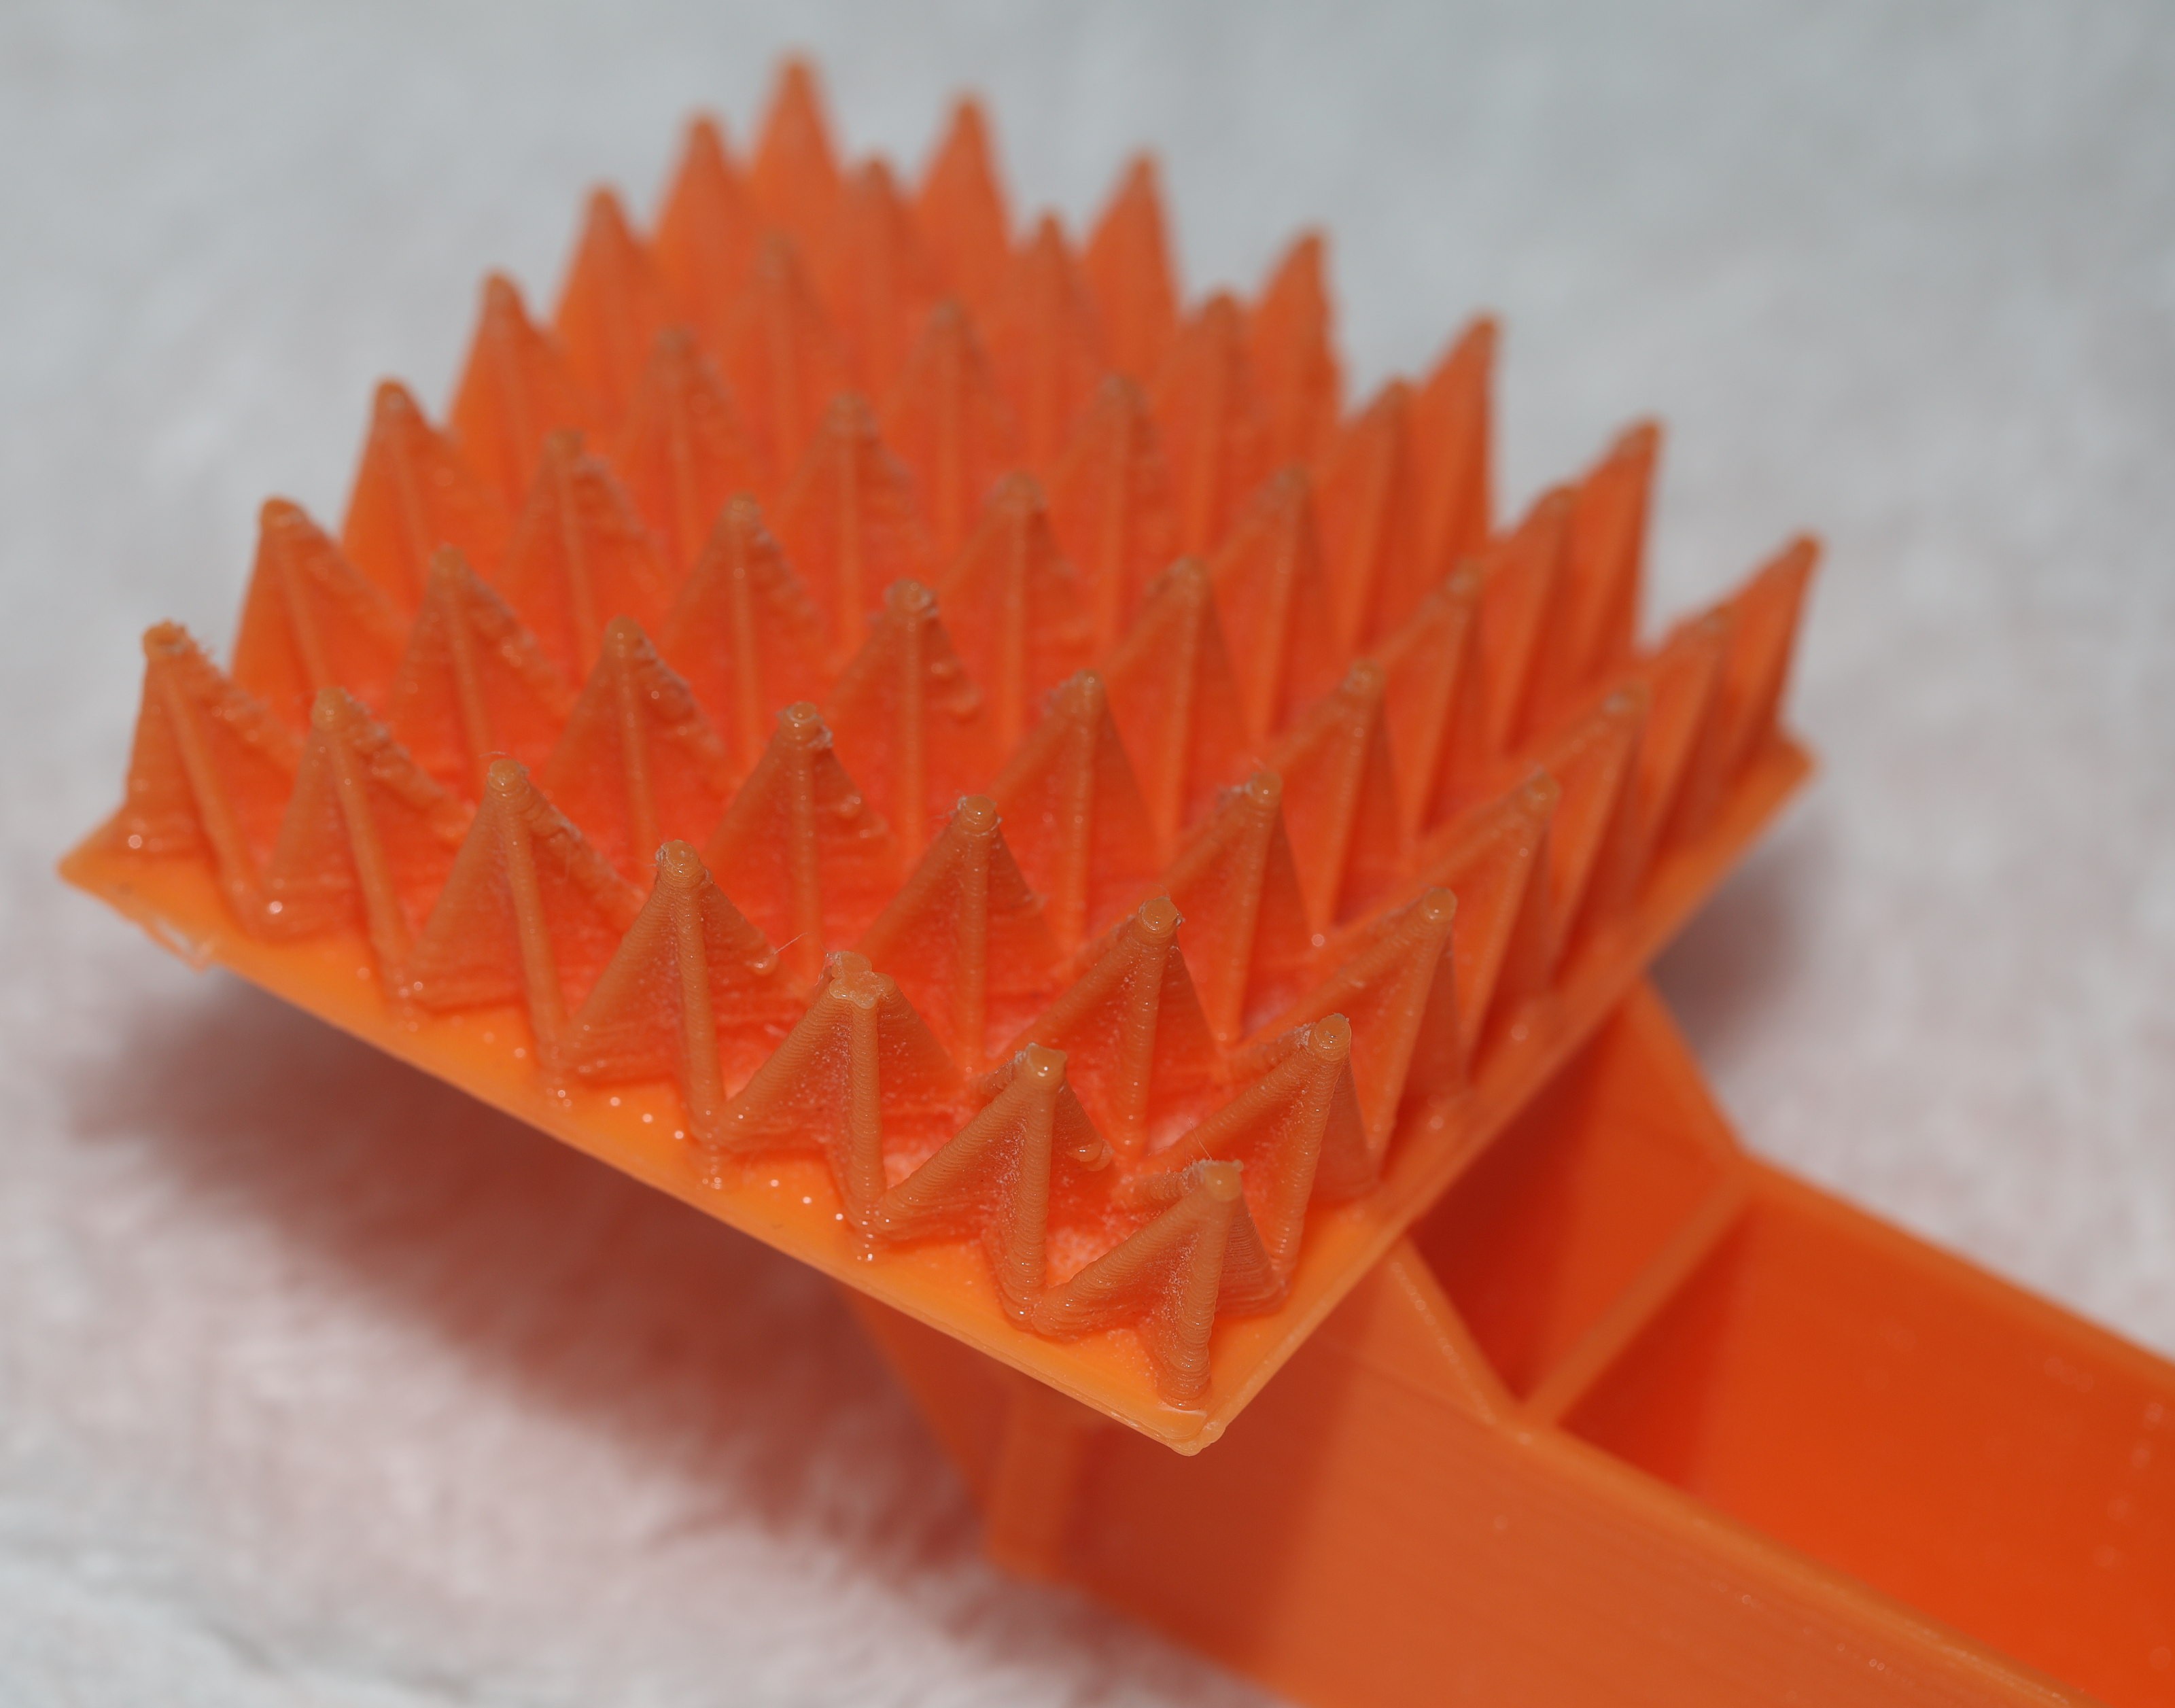
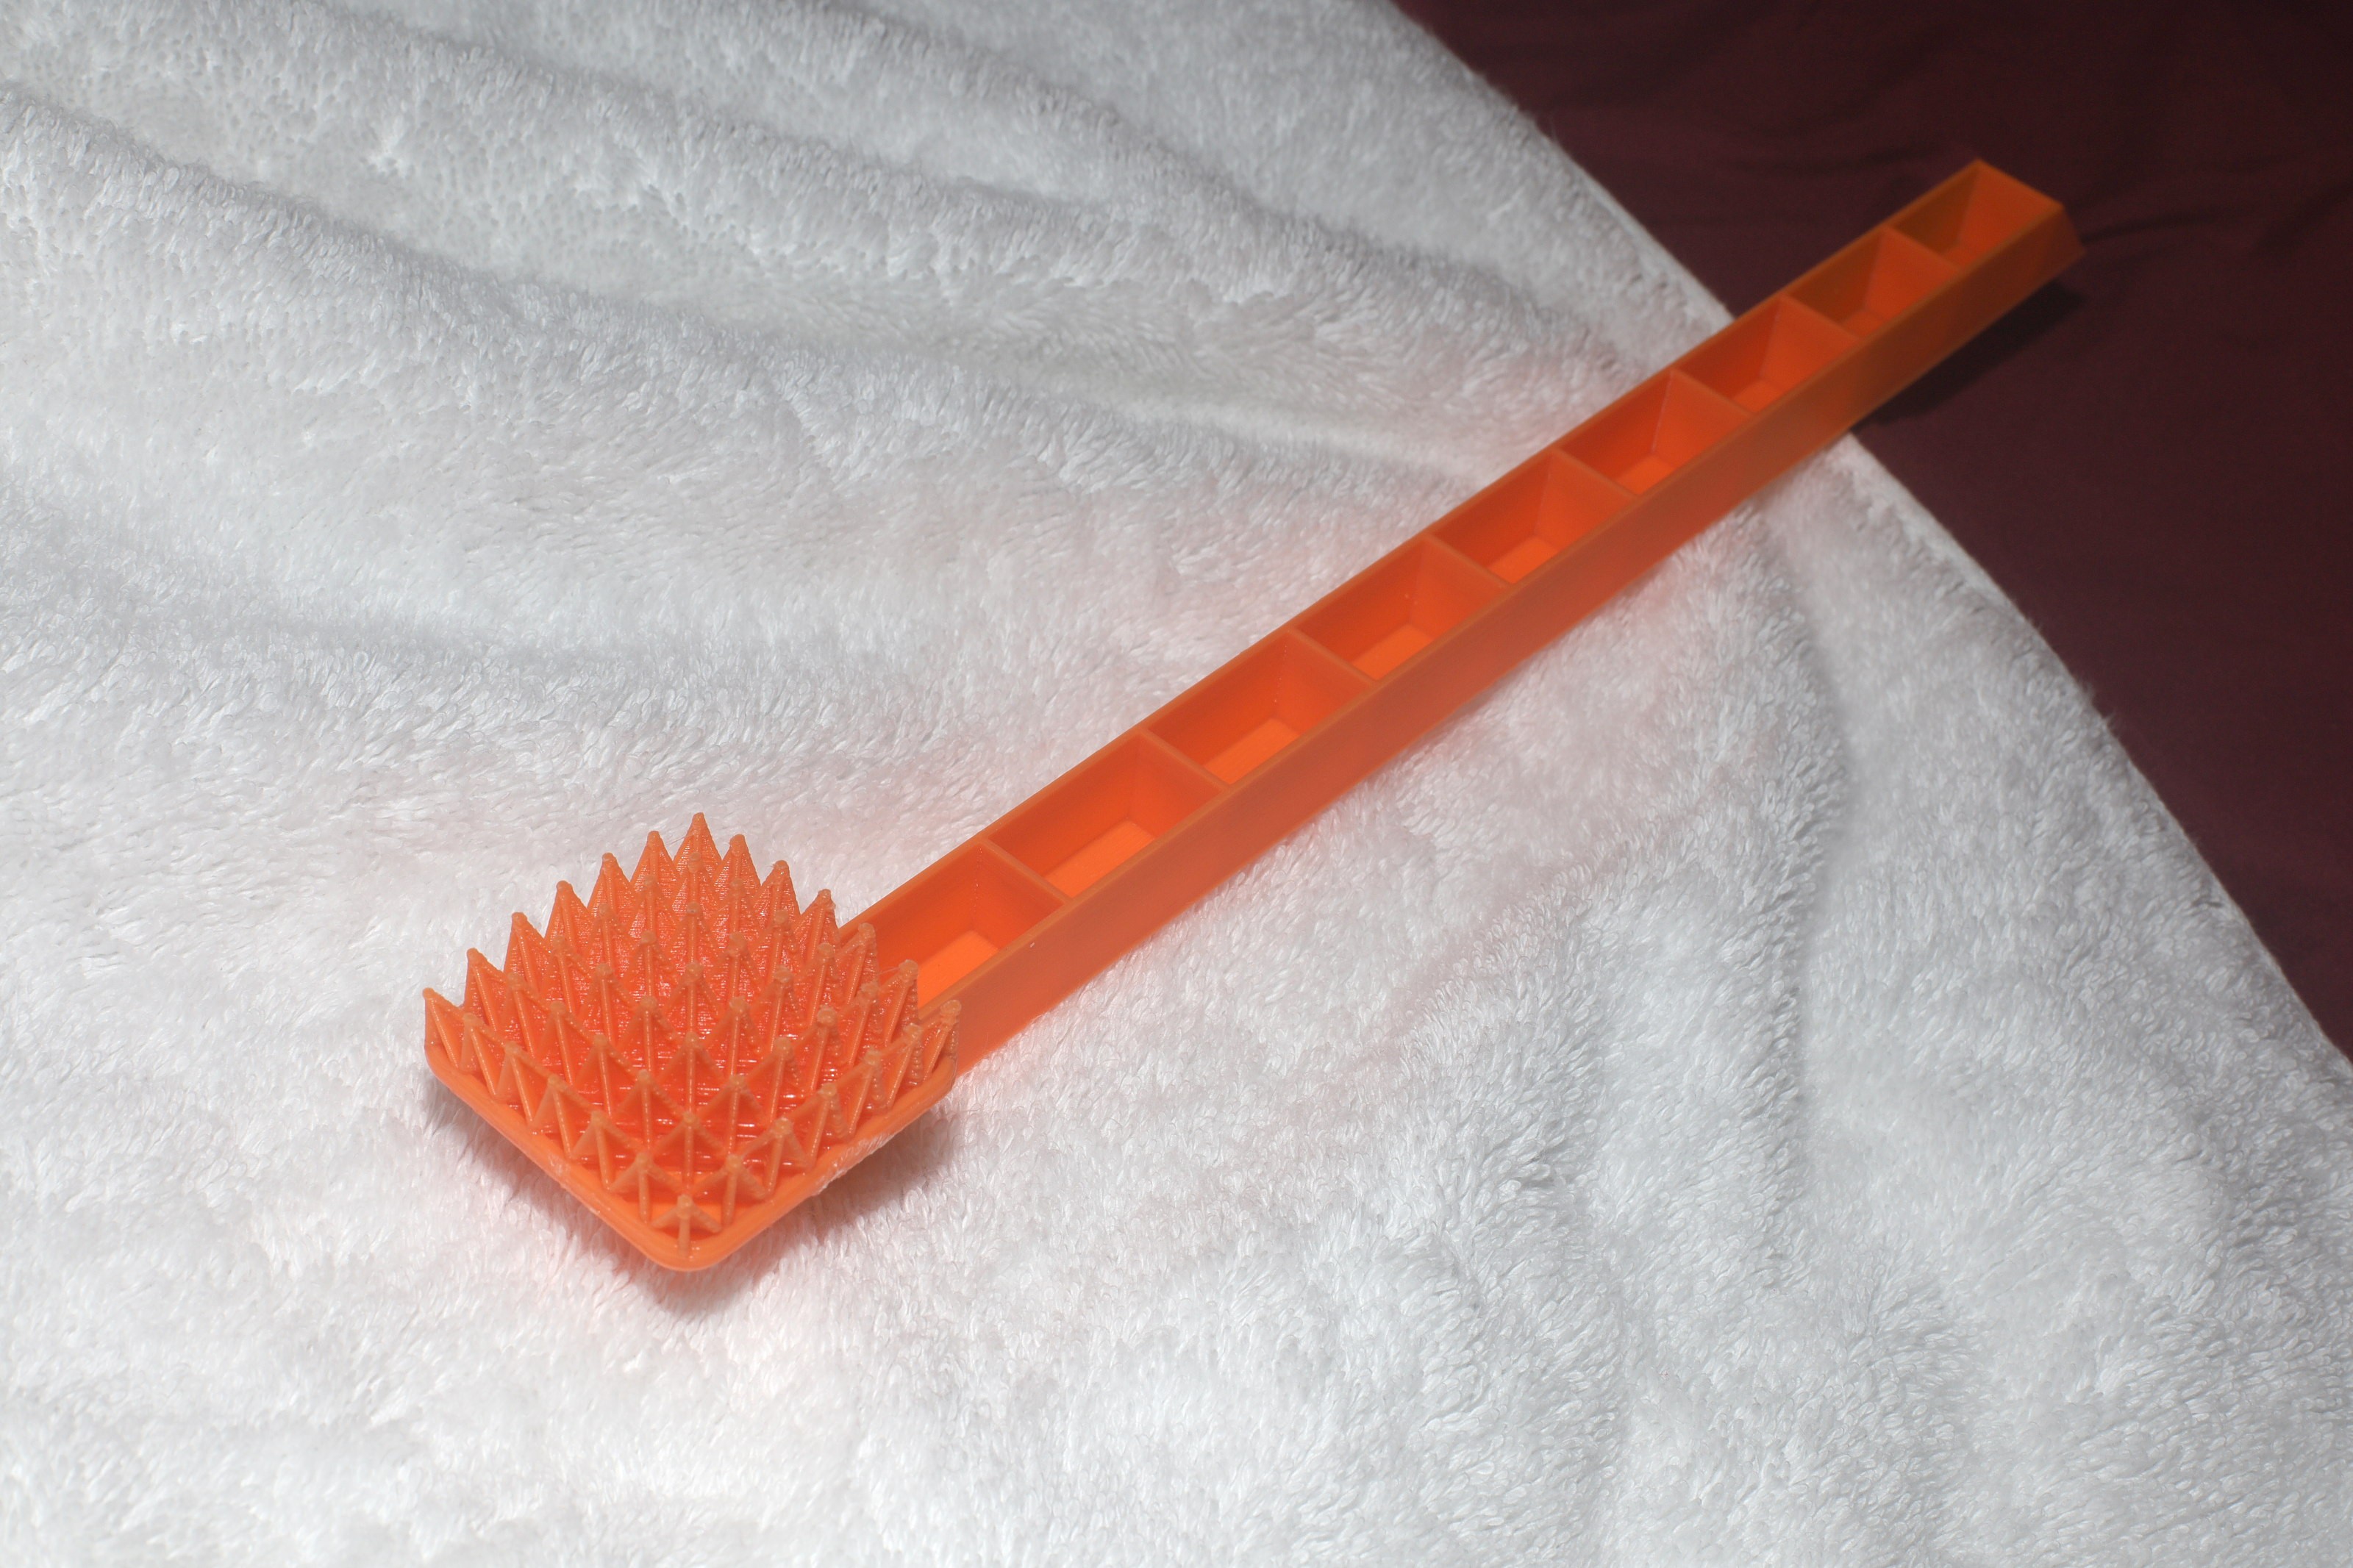
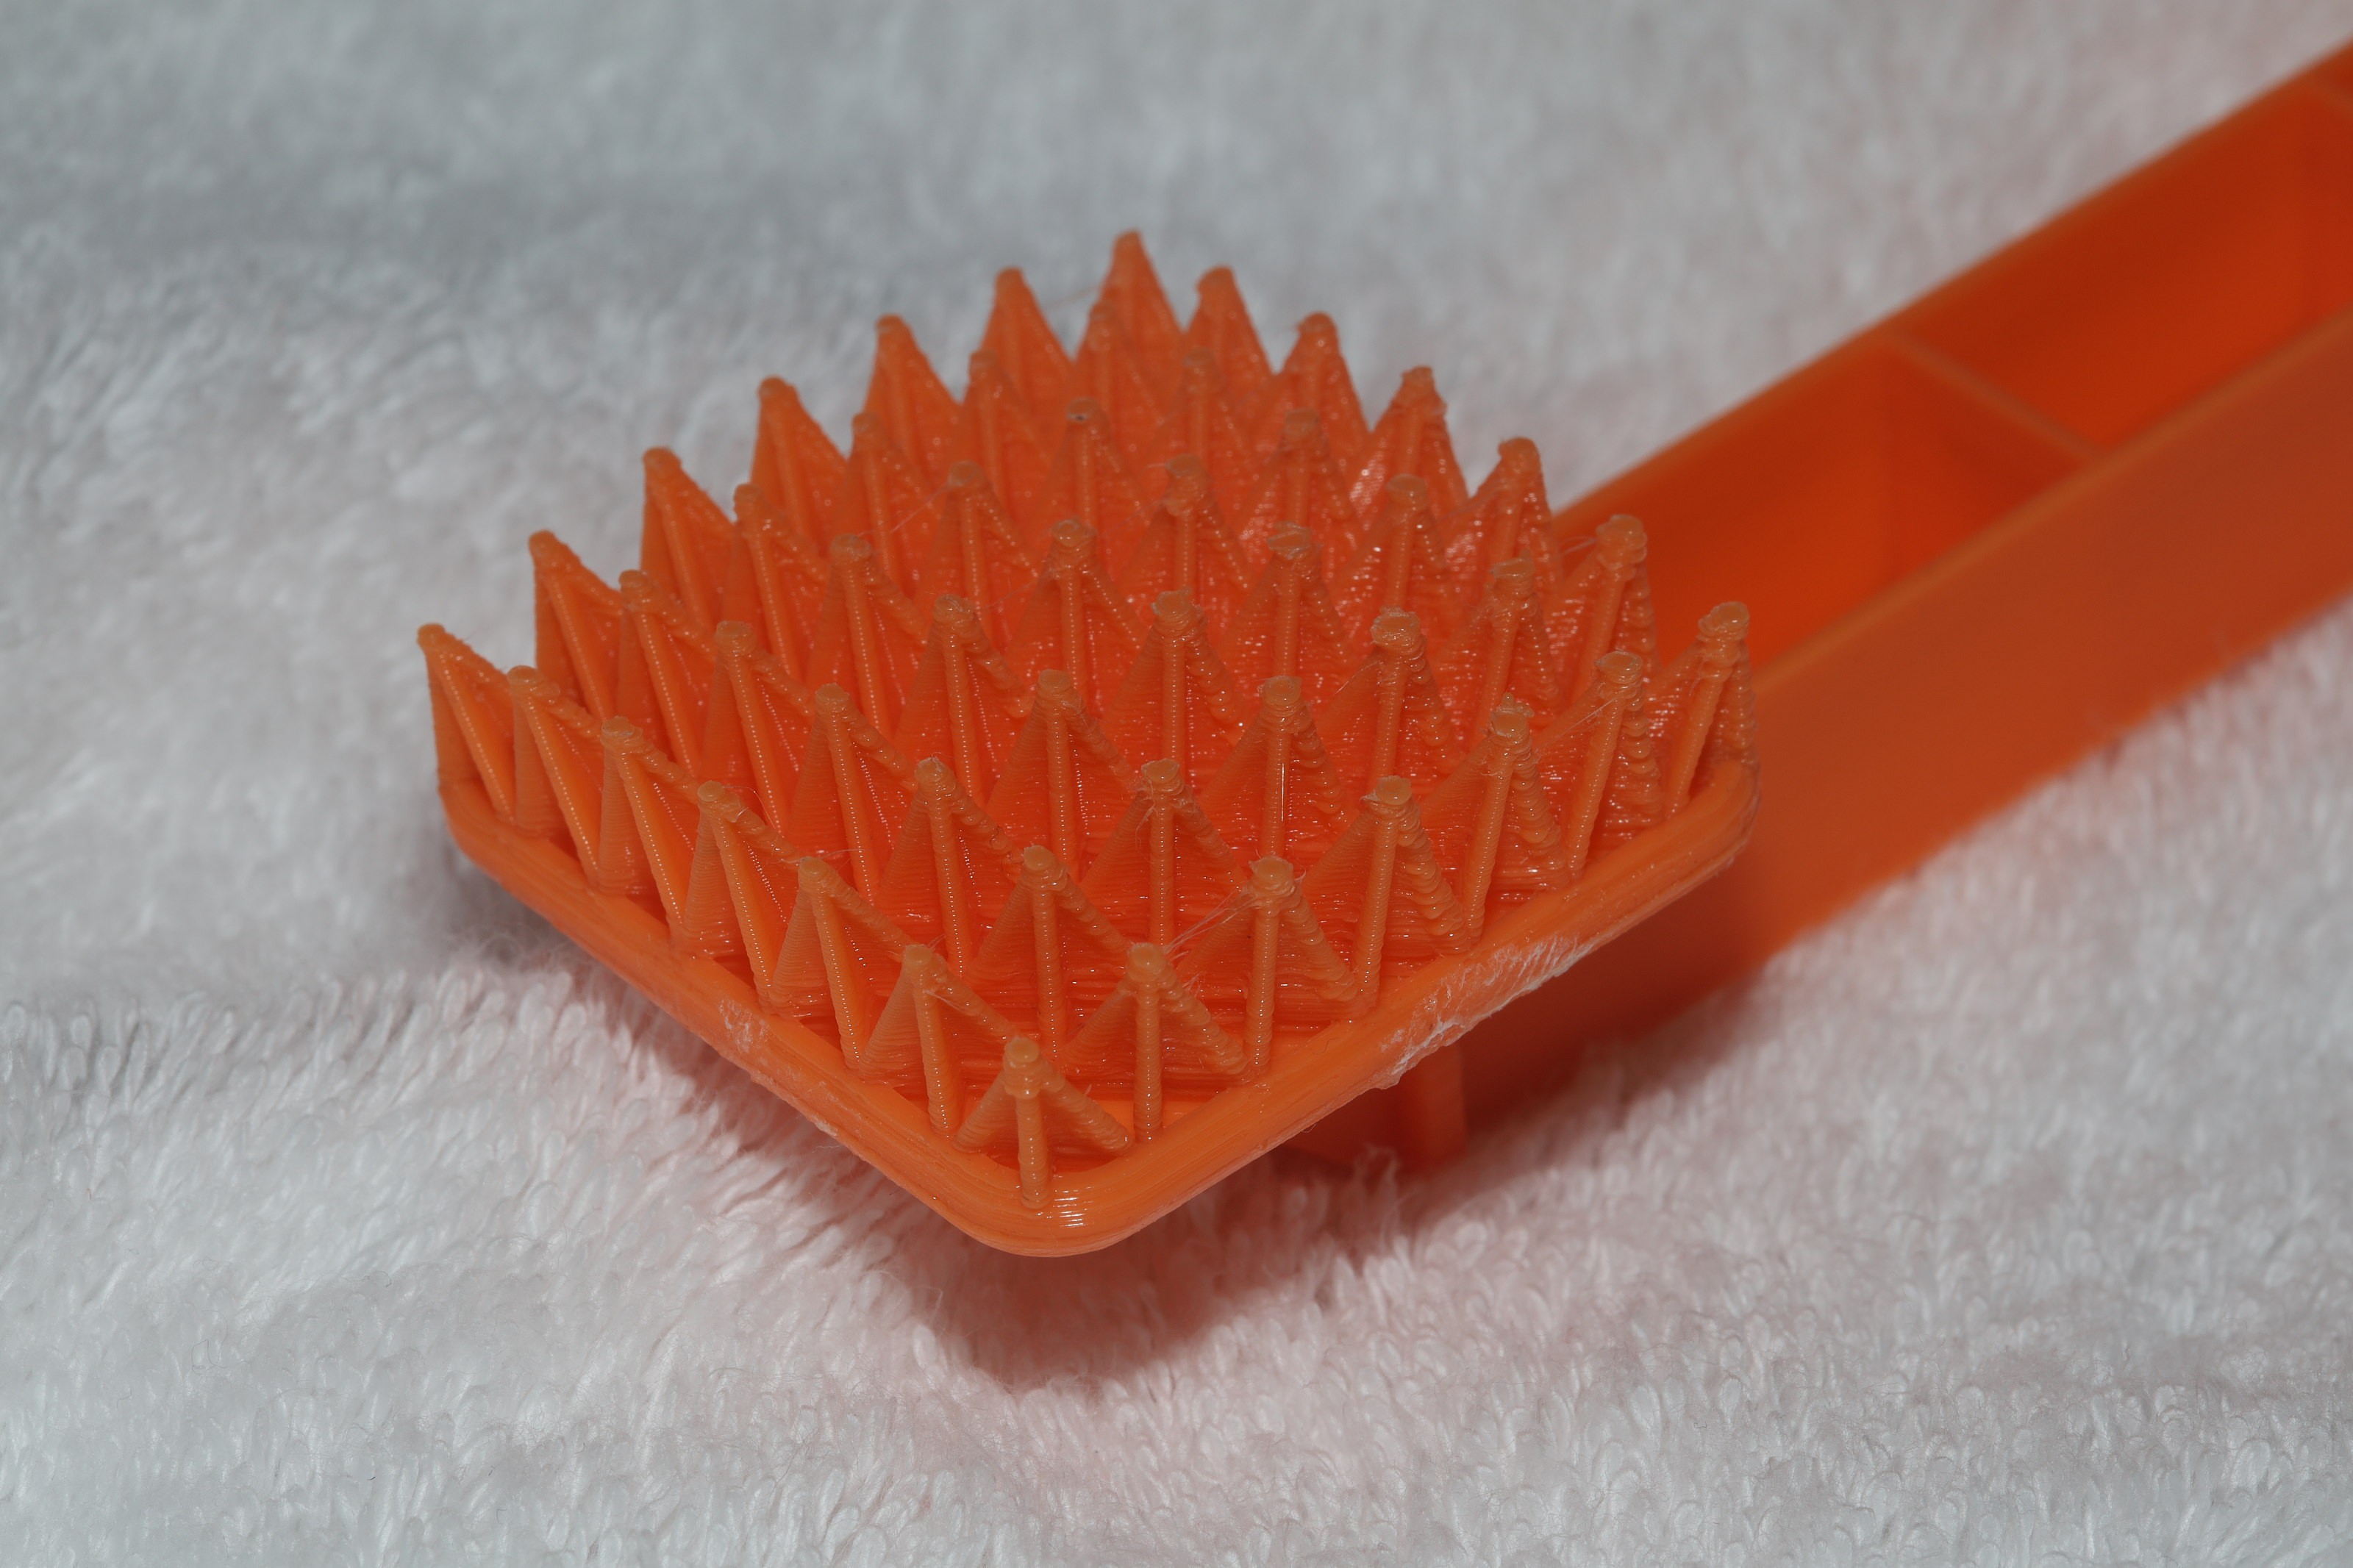
The key feature was interchangeable spikes, since printing a handle is expensive.  The ideal head so far has diagonal crosses on a square panel.

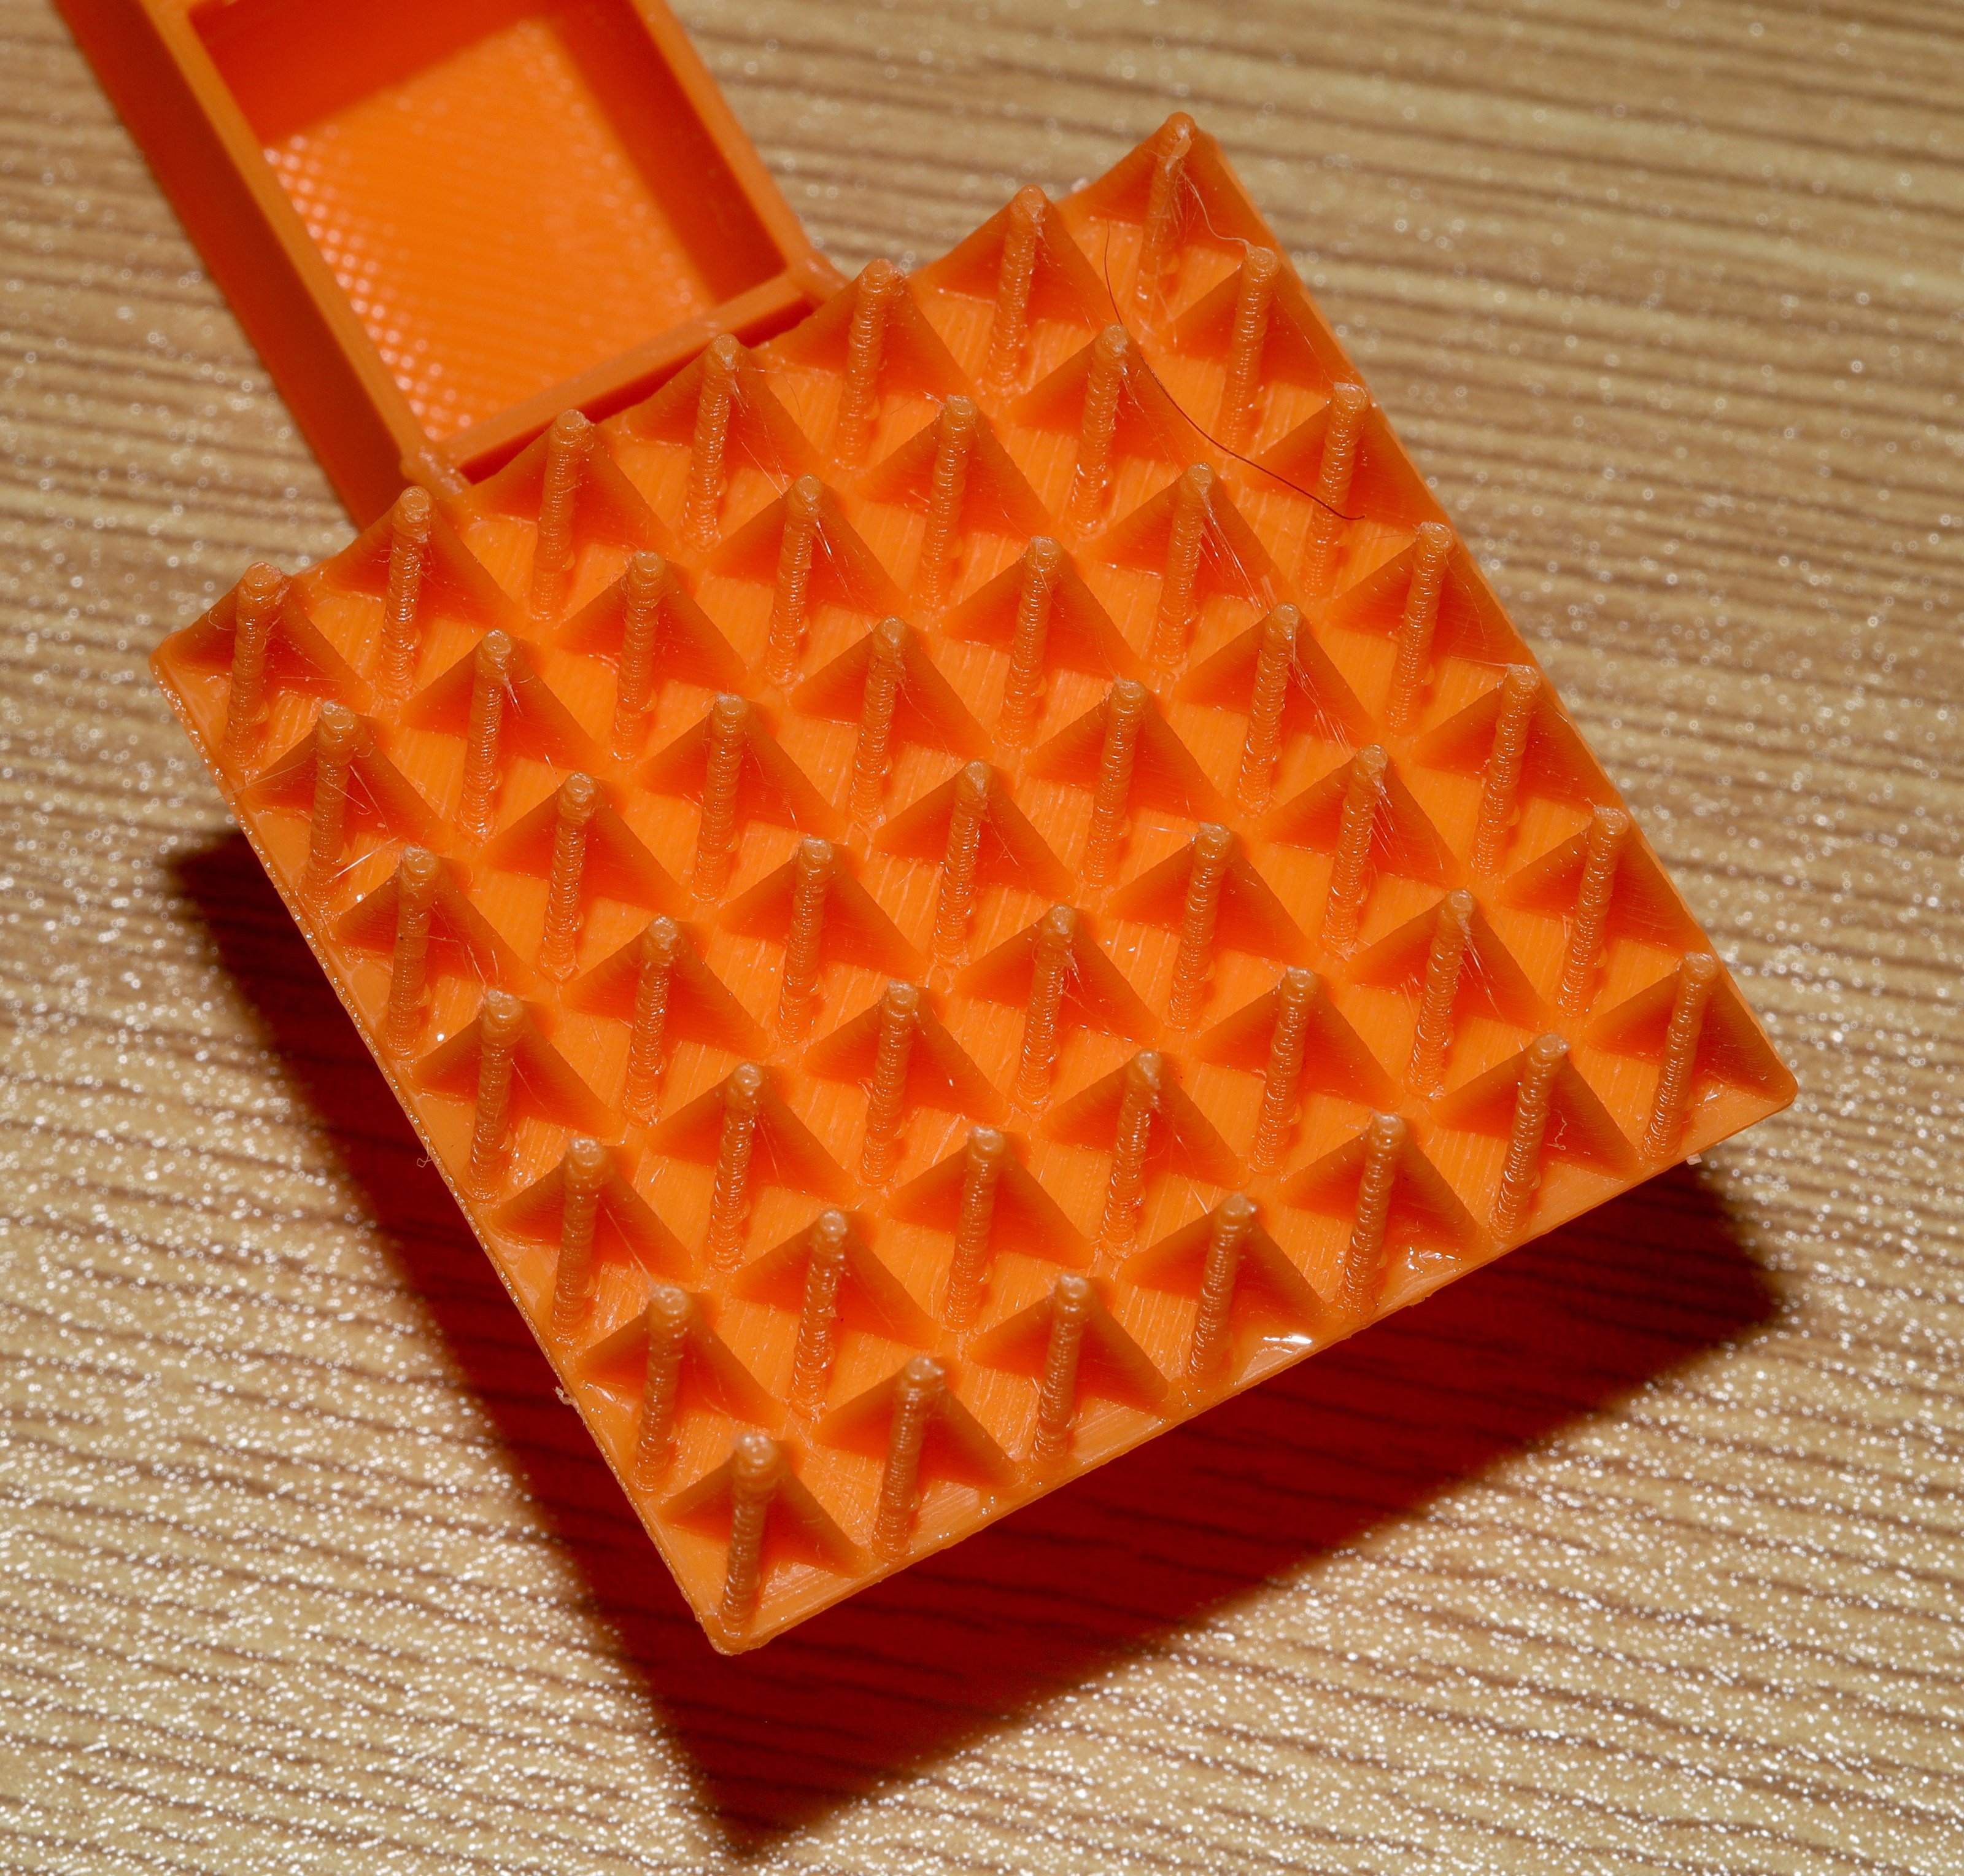
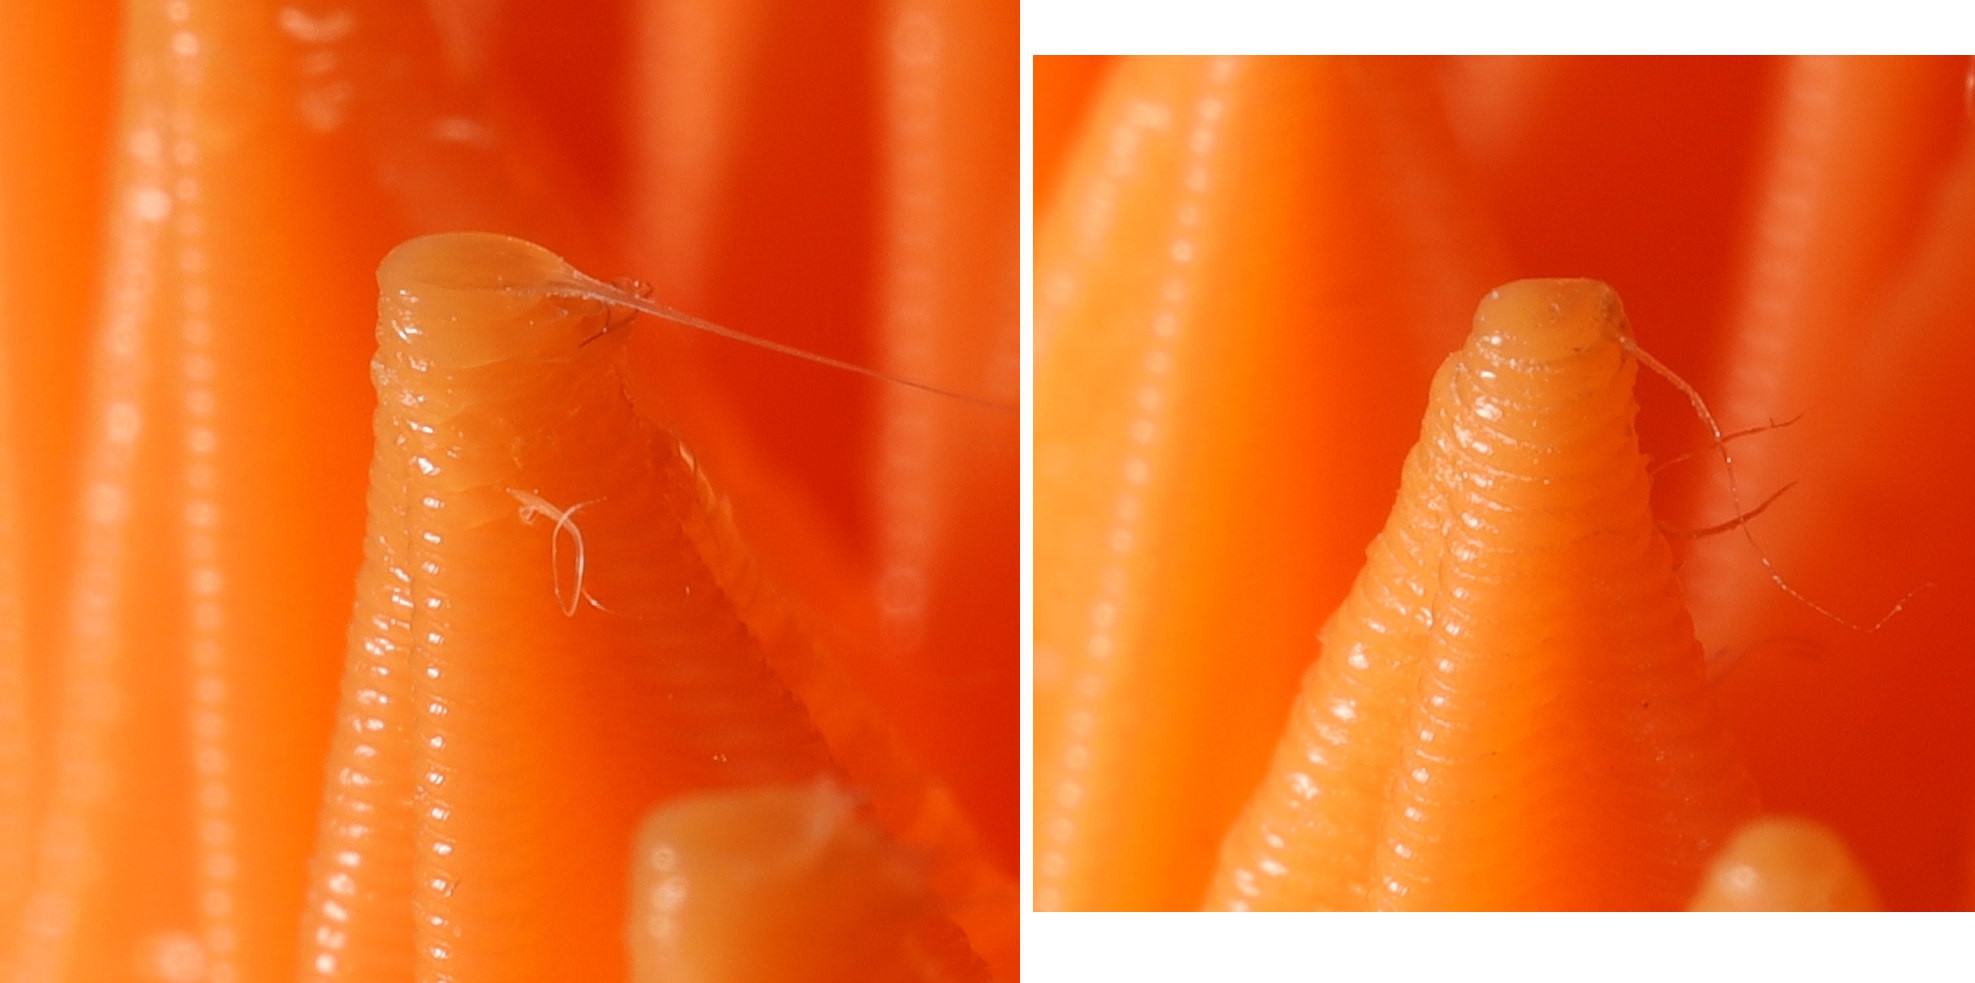
The cross shaped spike, rotated 45 deg, forces skin into a corner before it can pass.  The layers have to be parallel to the plane to get the most abrasive surface.  The spikes have to be tall enough so they do the scratching instead of the edge of the panel.

PLA is much more abrasive than wood, so this can cause injury if abused.  A few light brushes are all it takes to cure all itches.

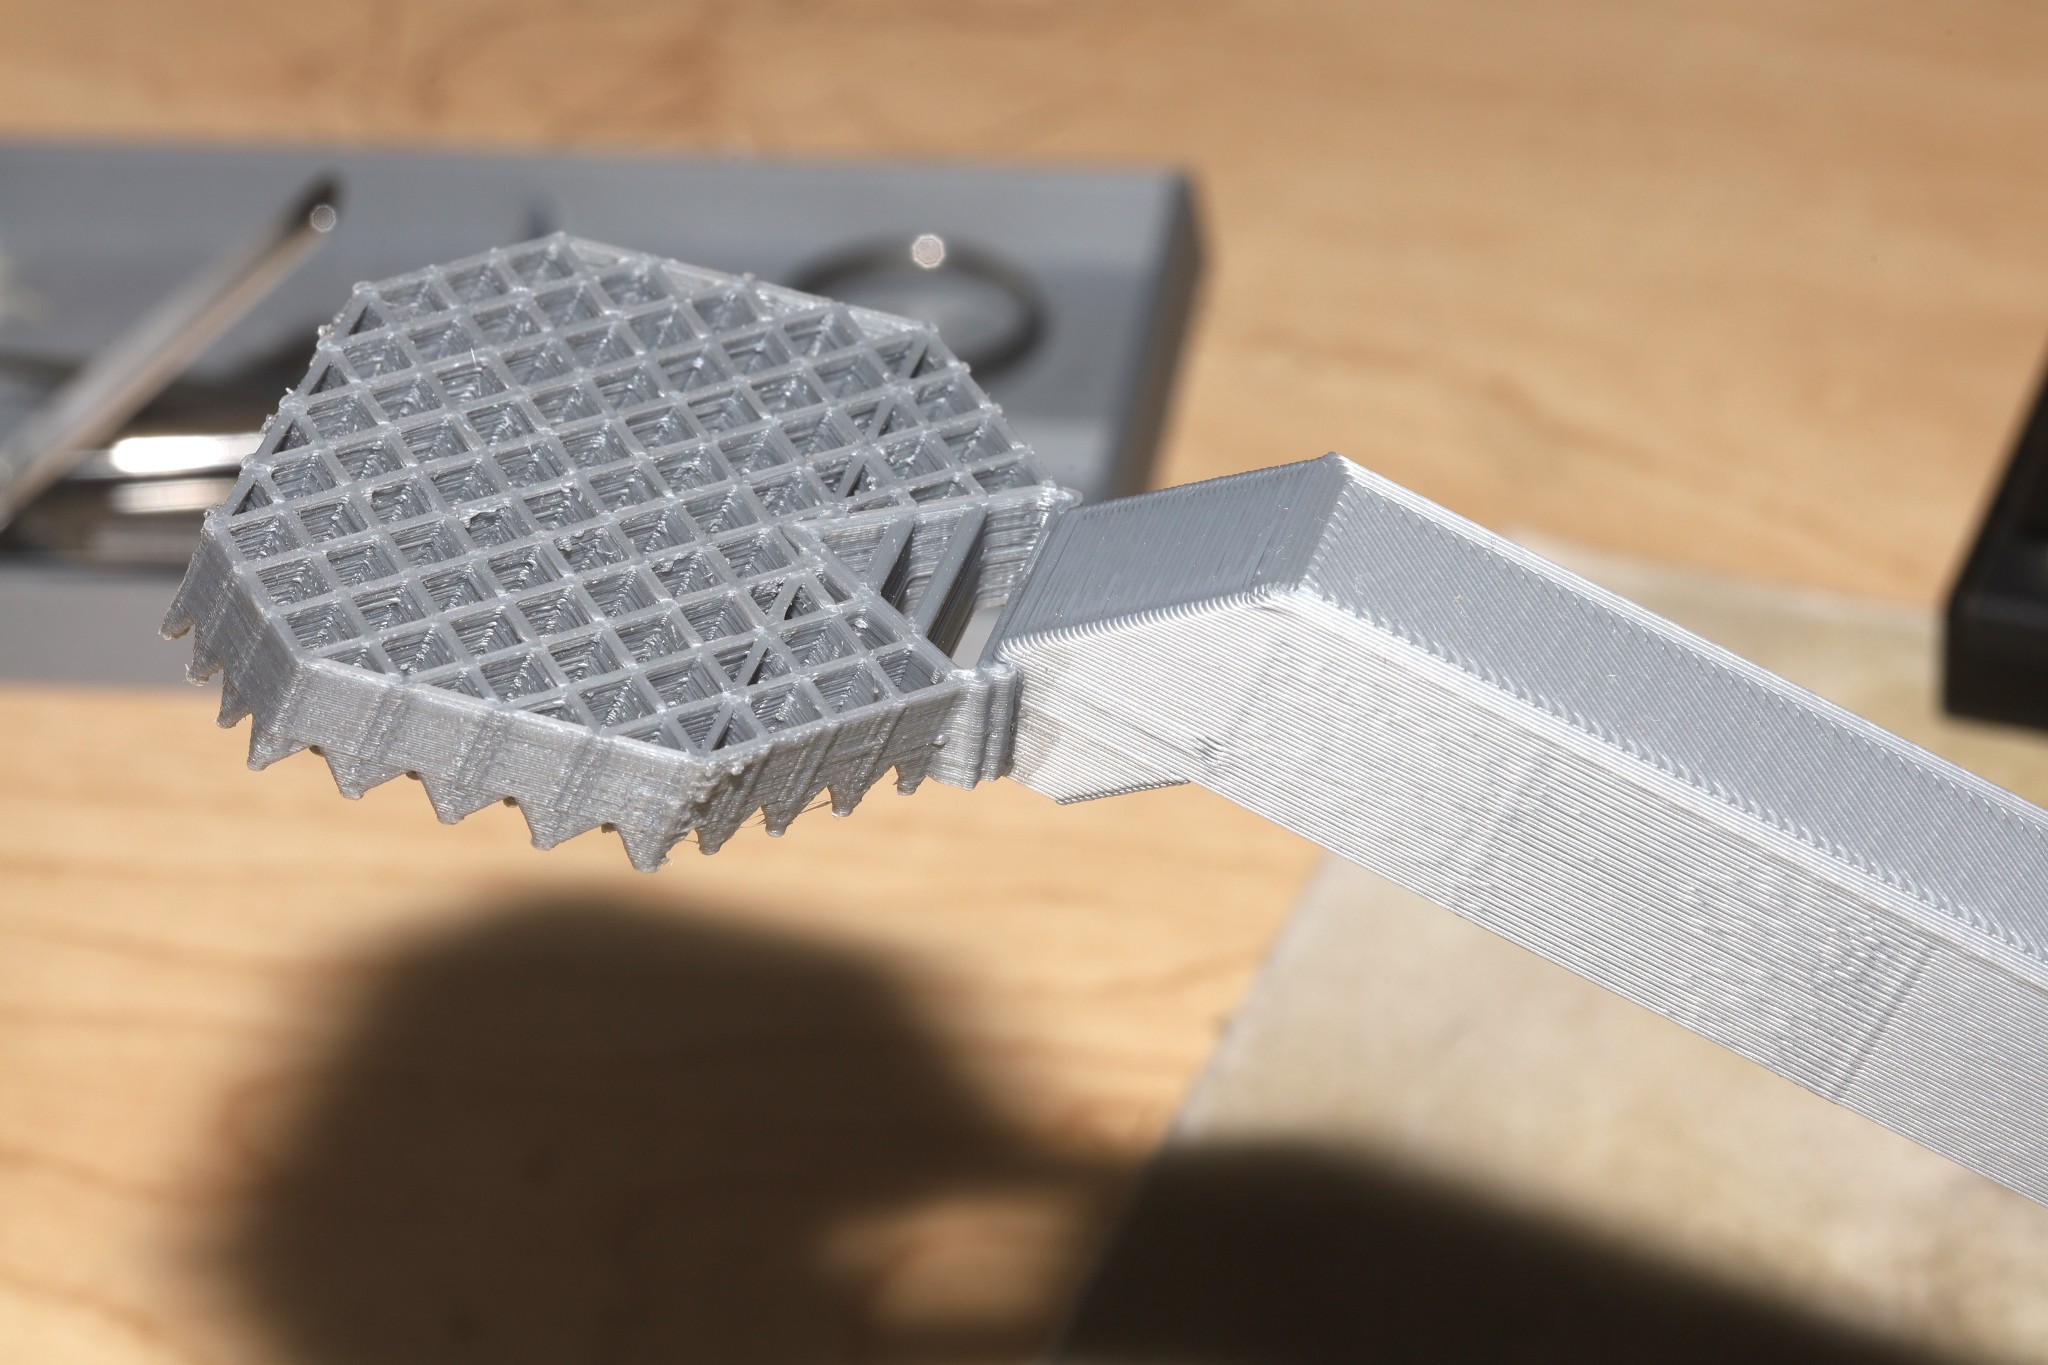
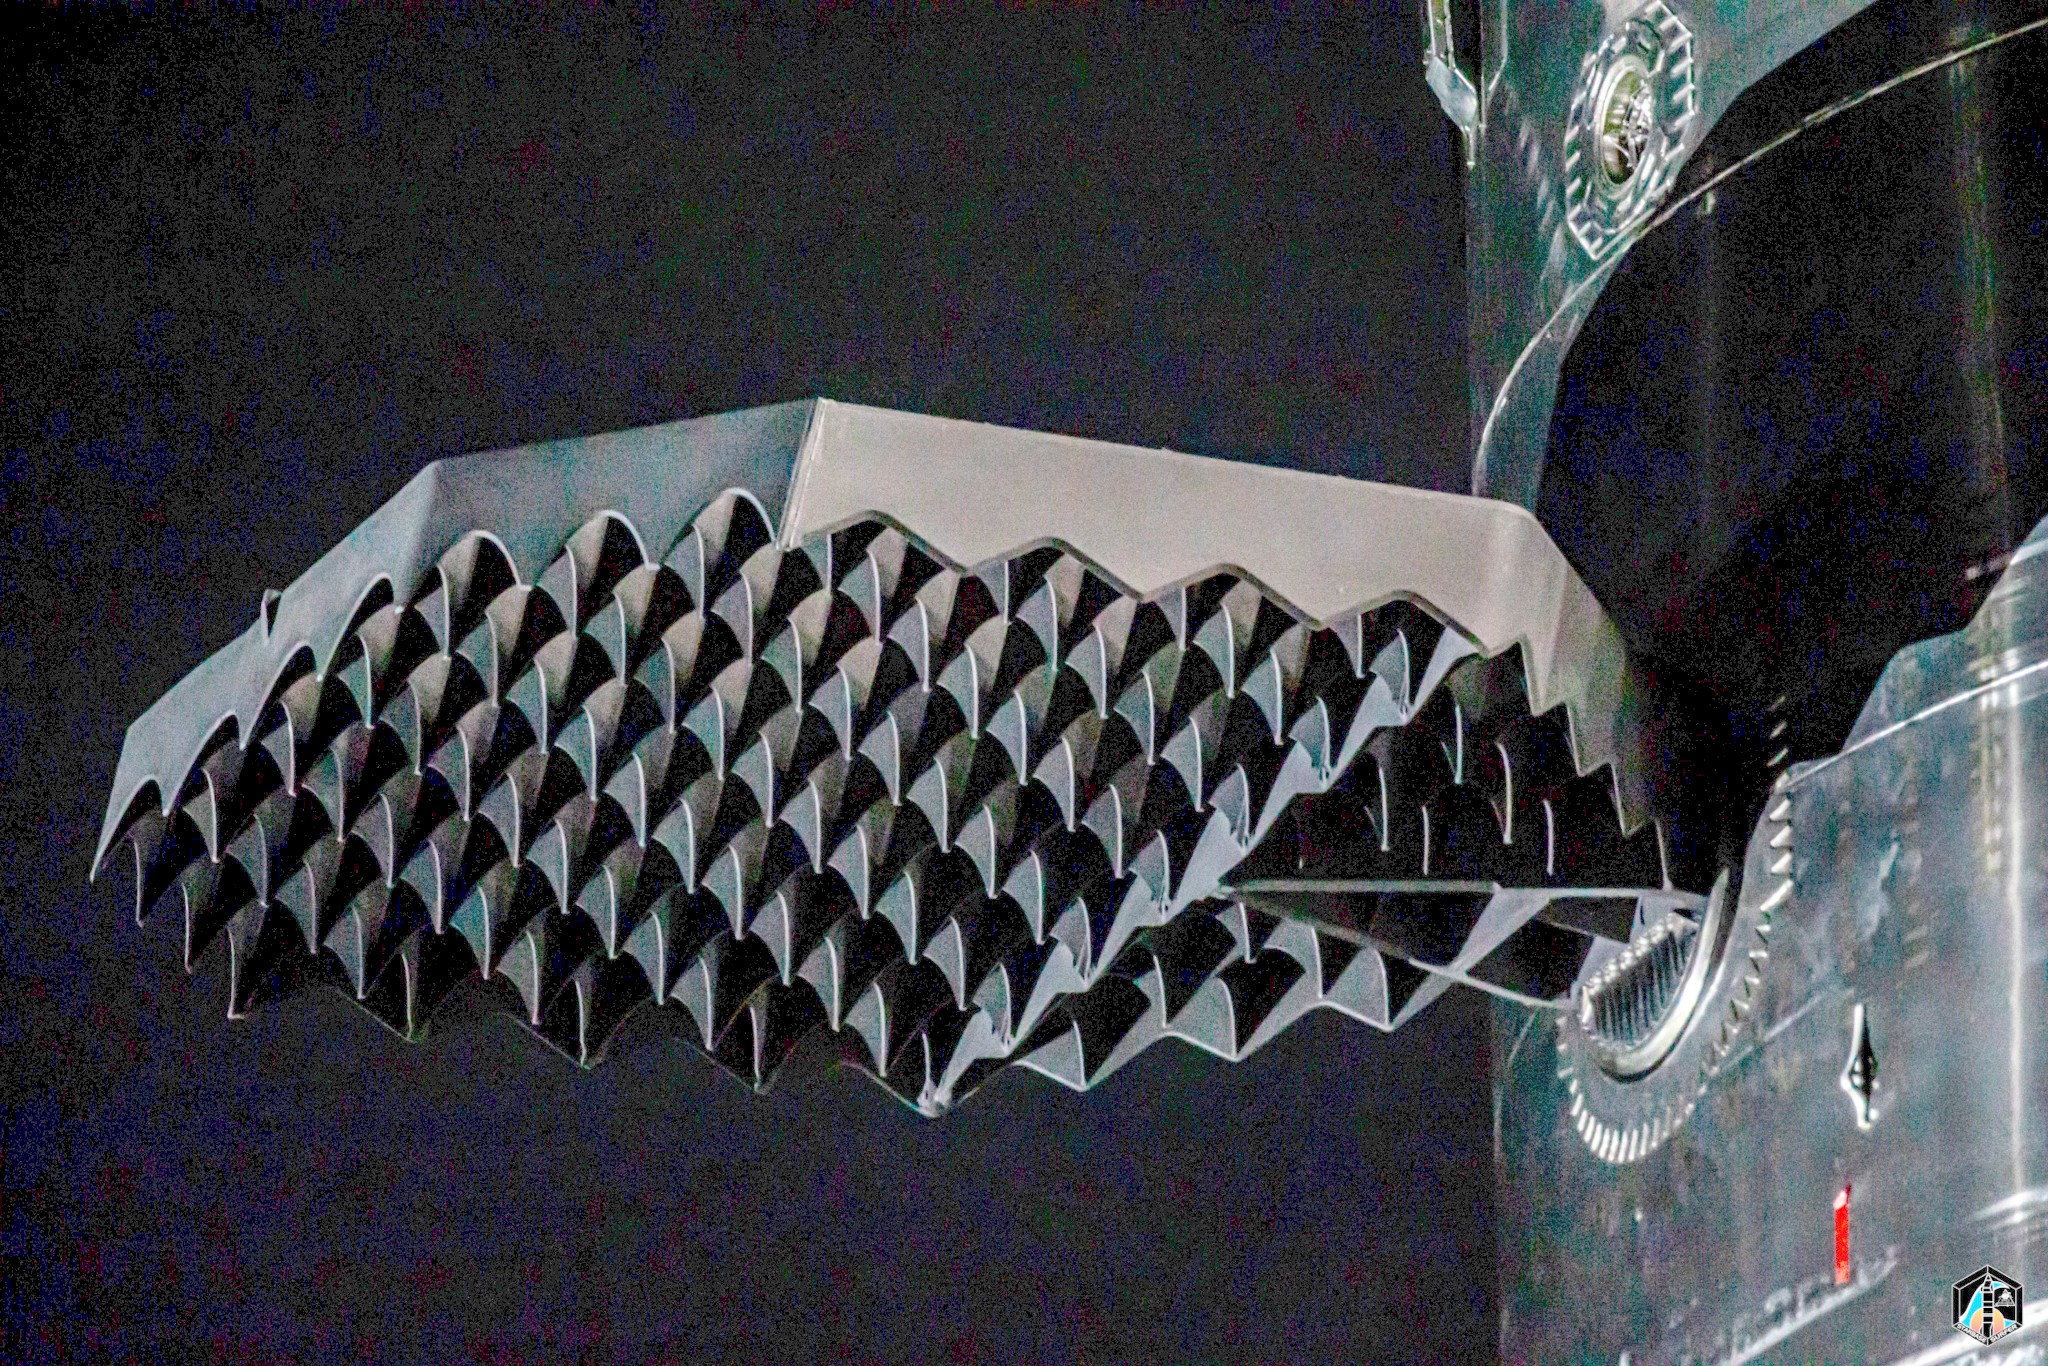
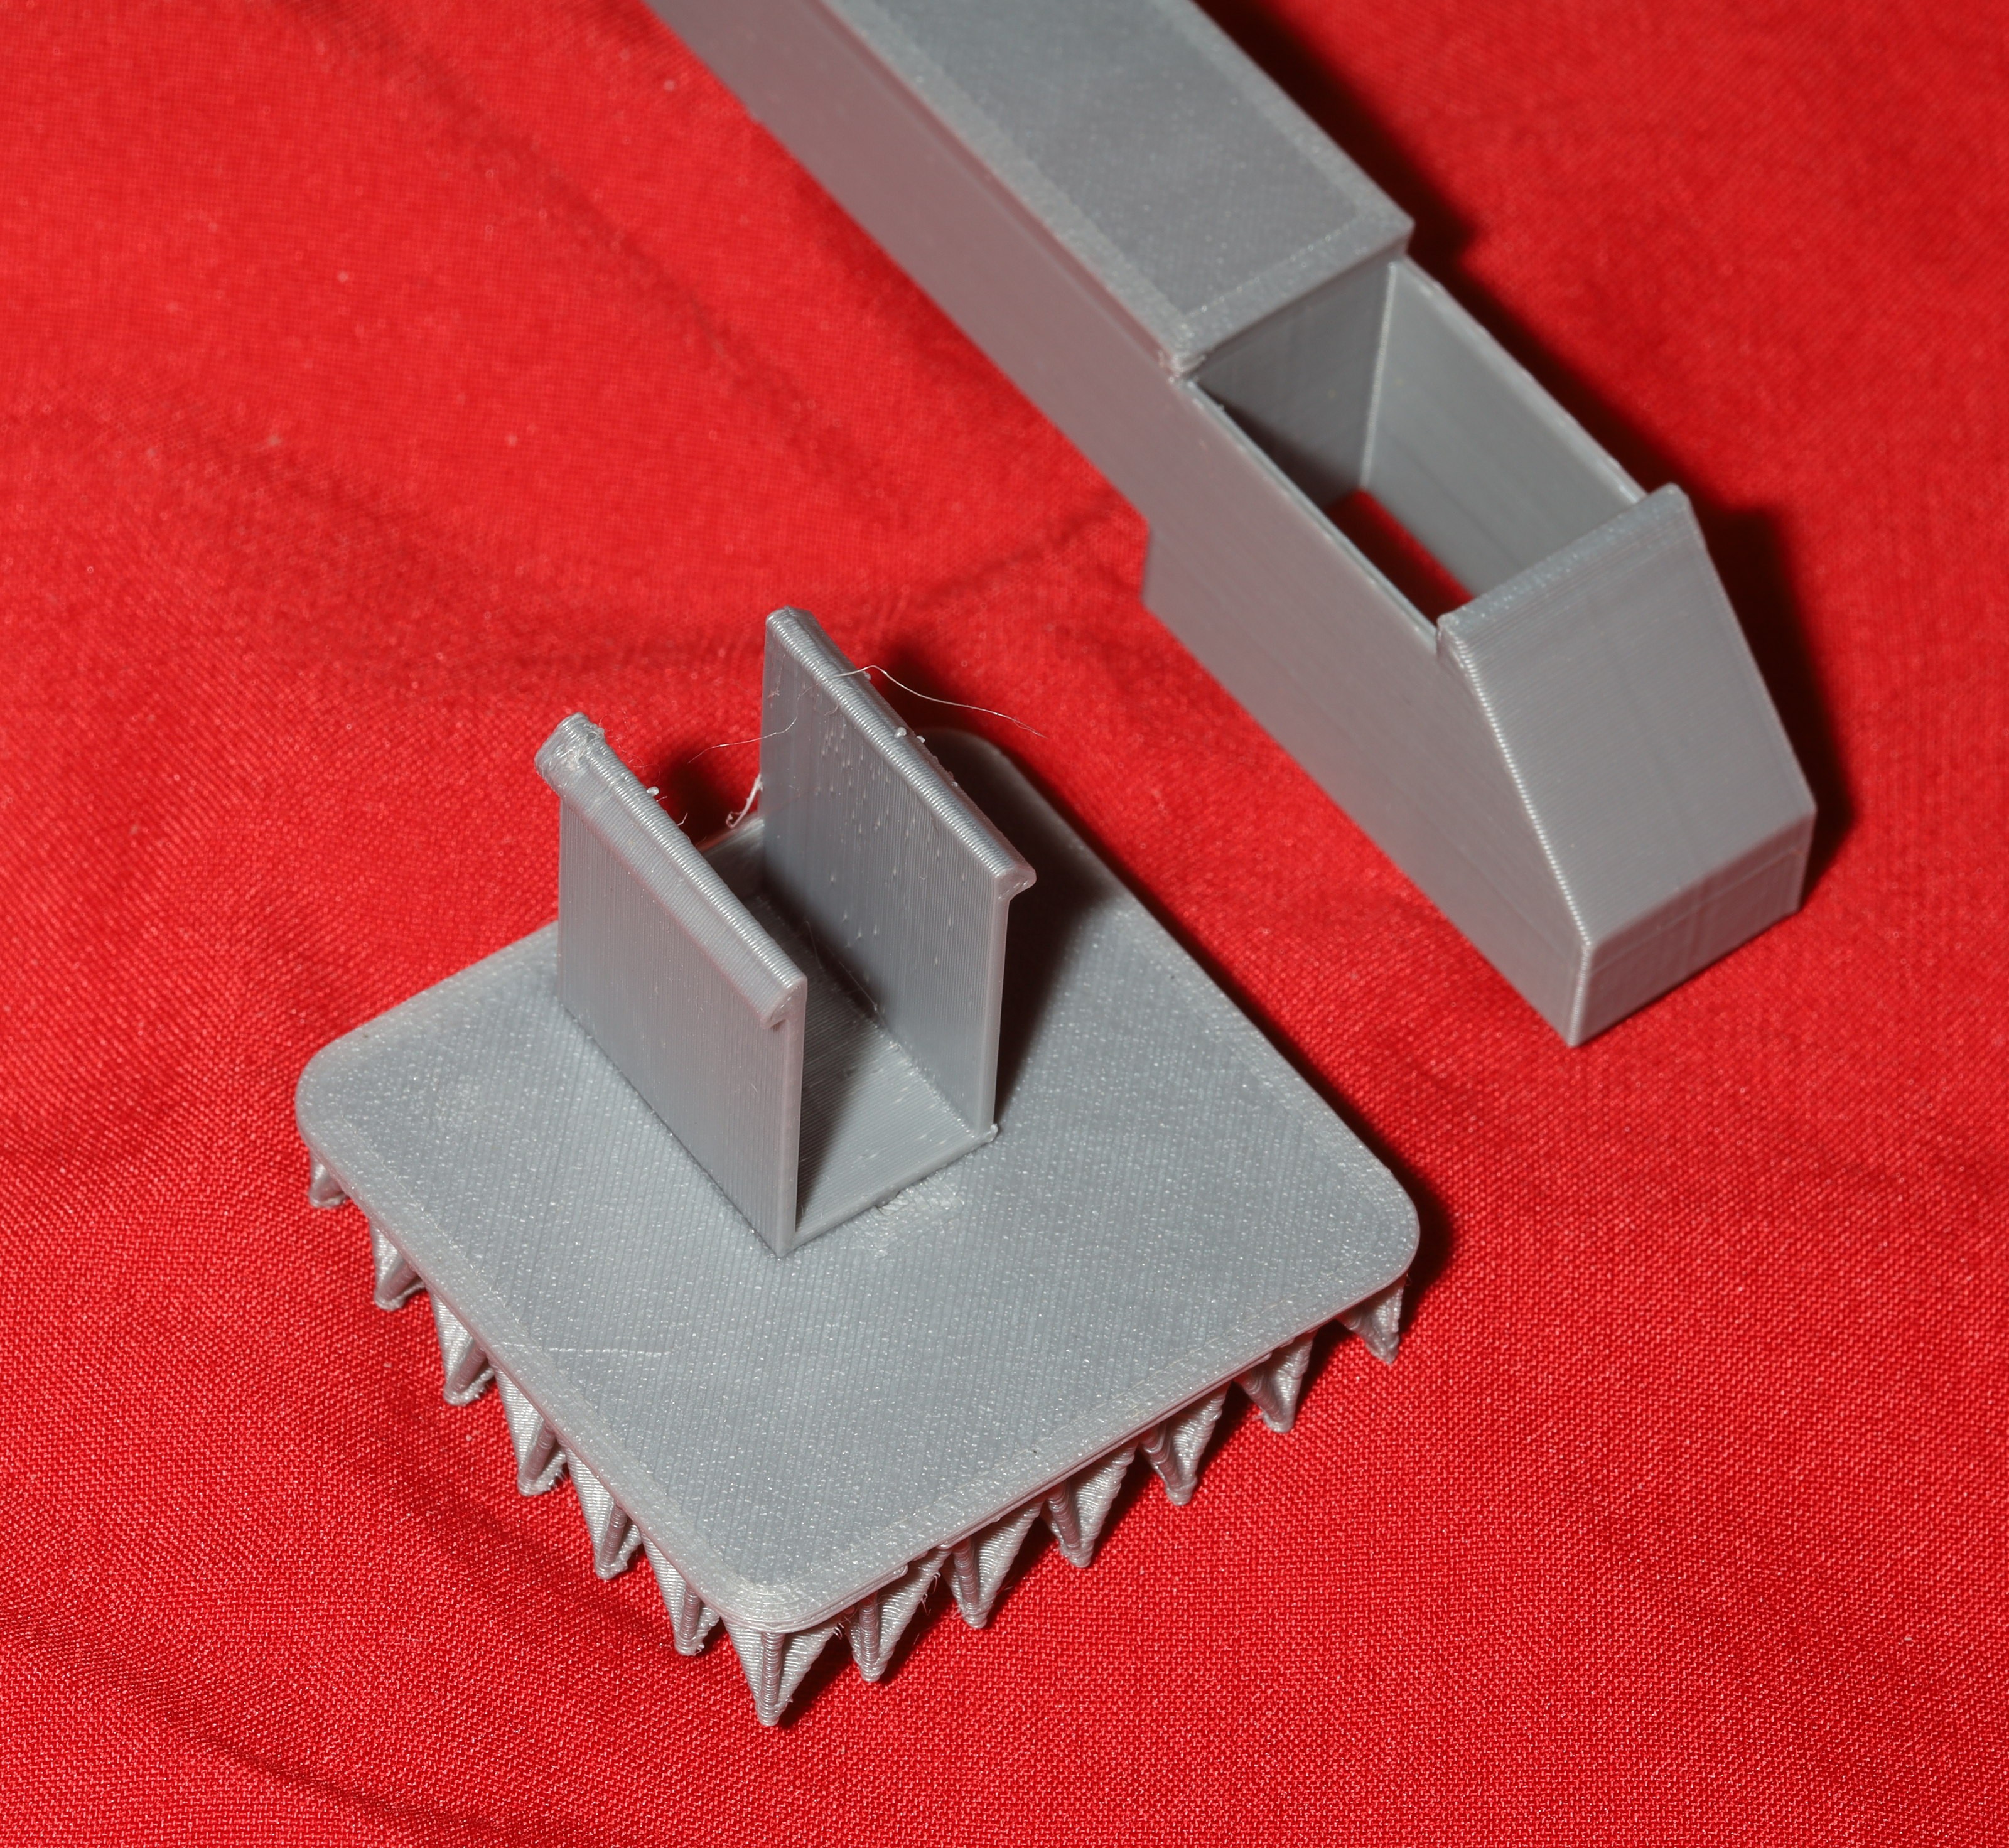
A diamond panel was less effective because it presents a narrower line of spikes in the direction of travel.

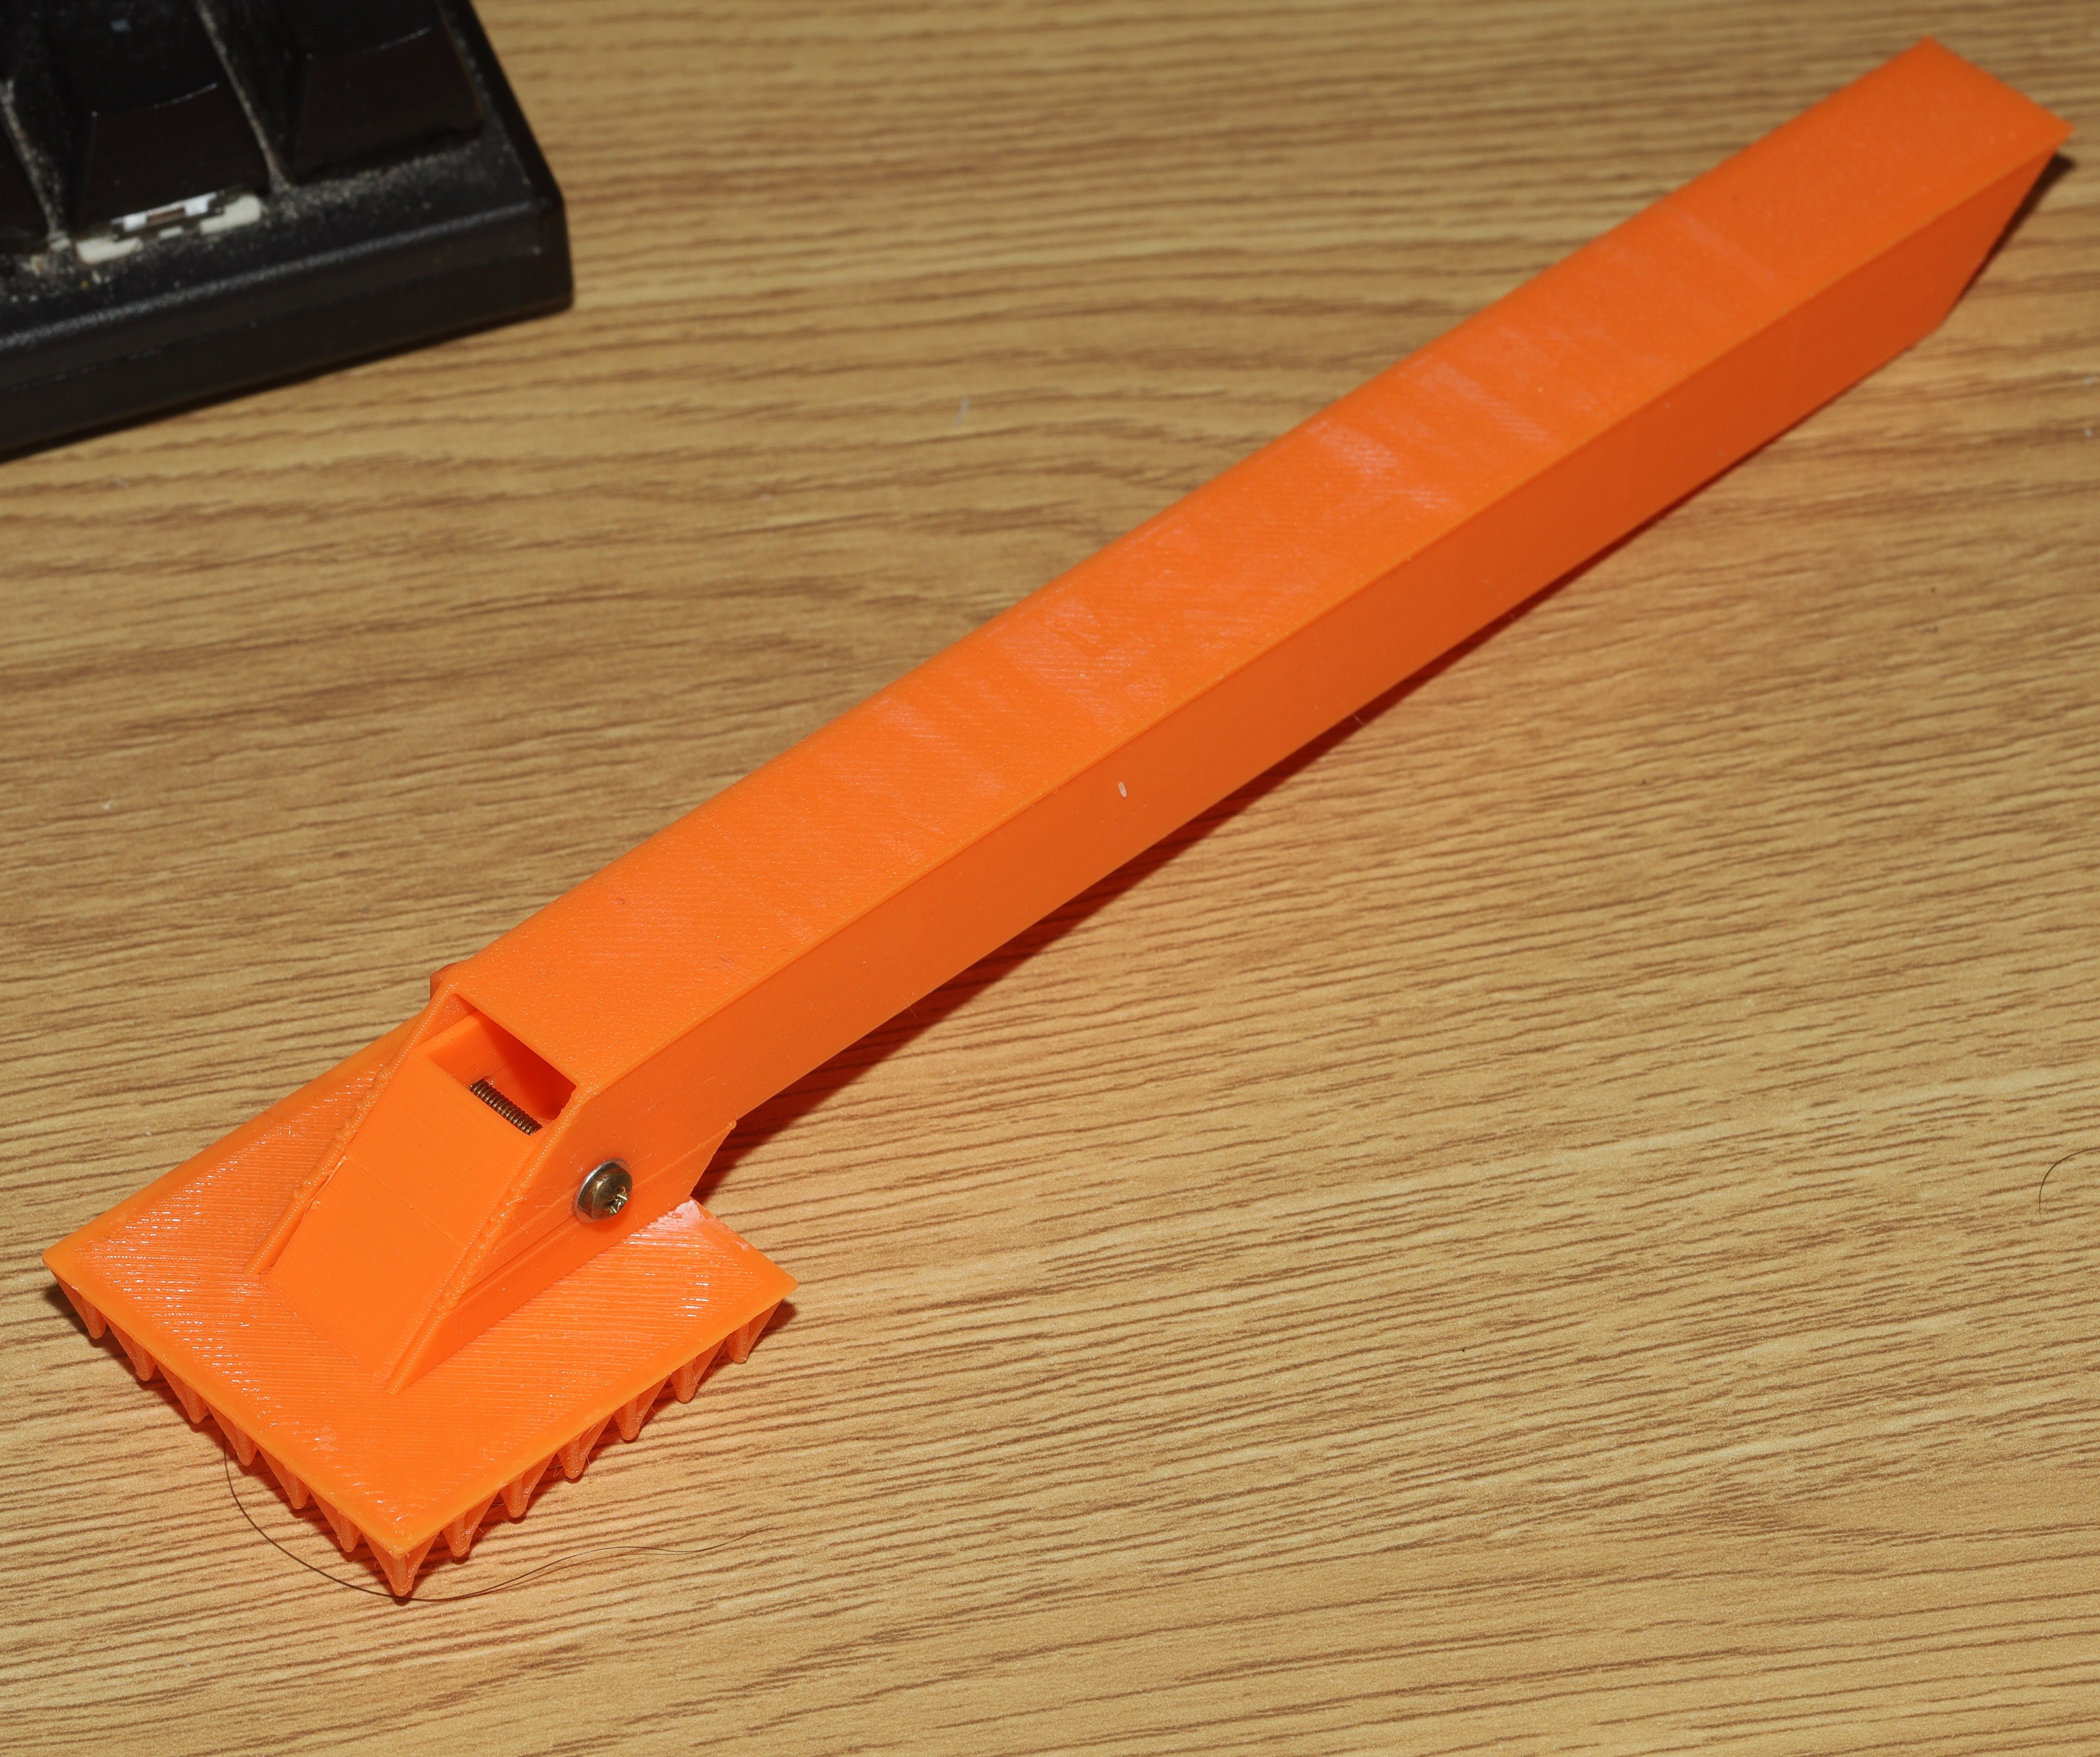
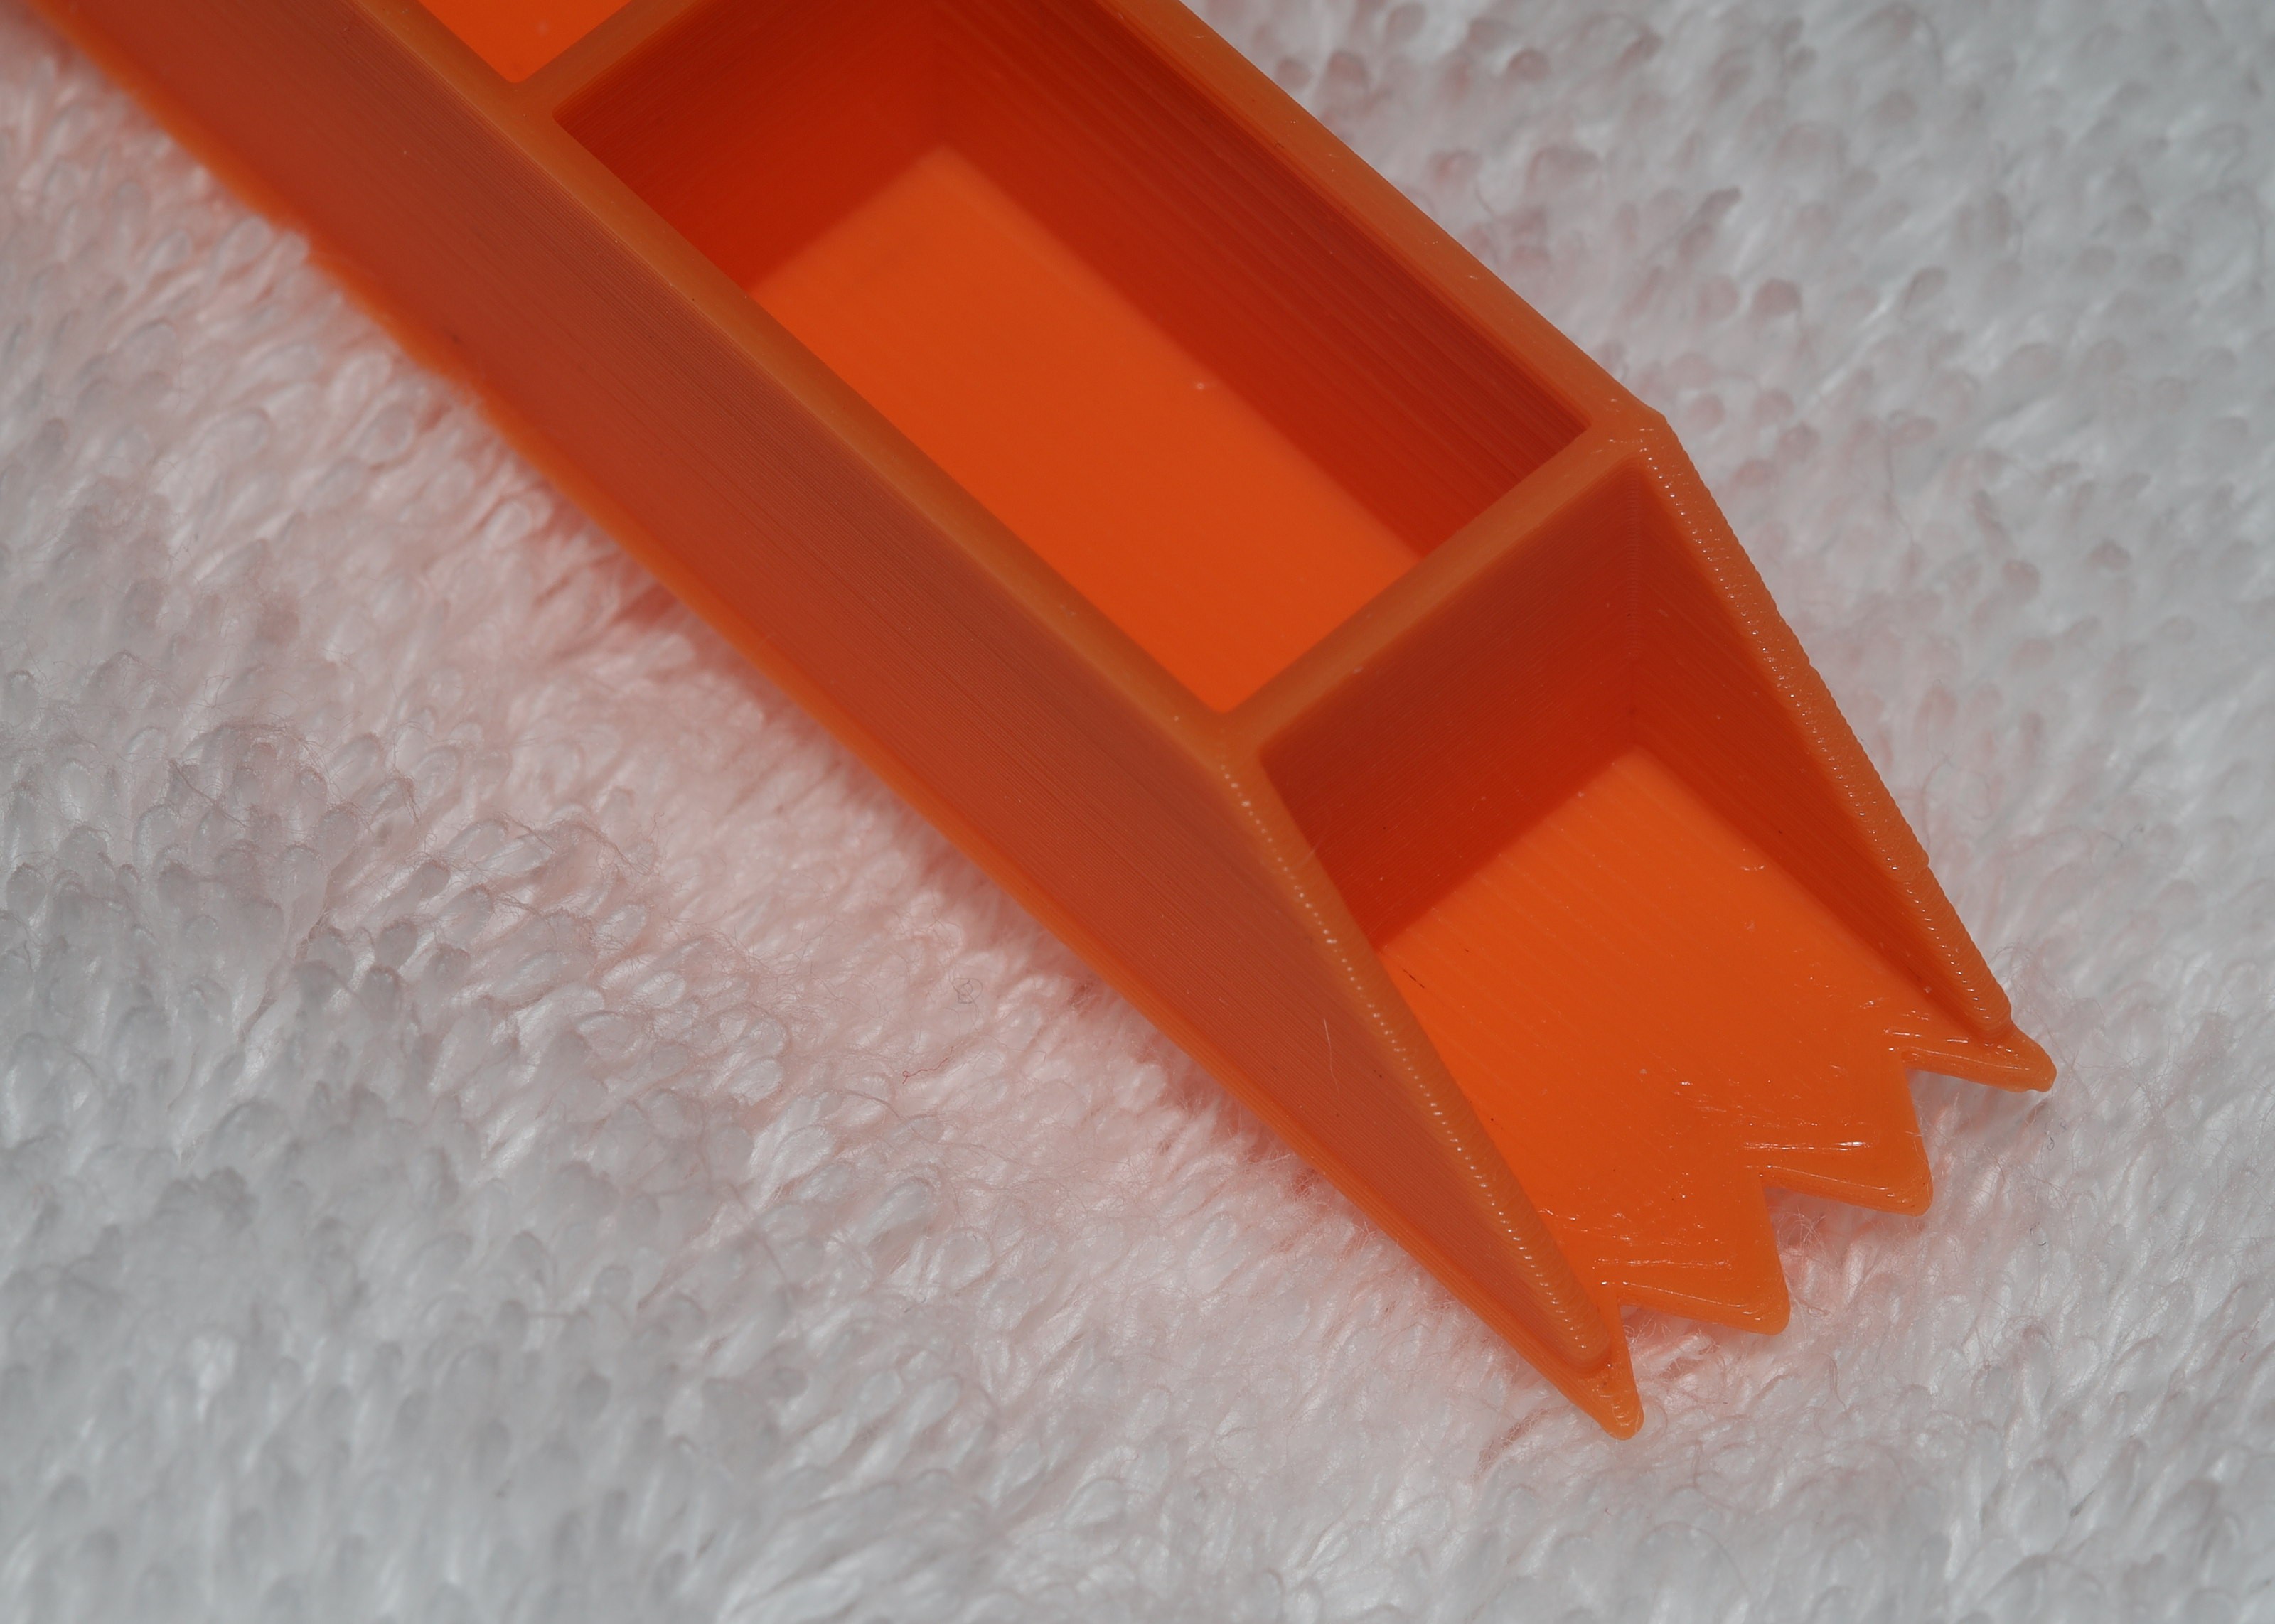
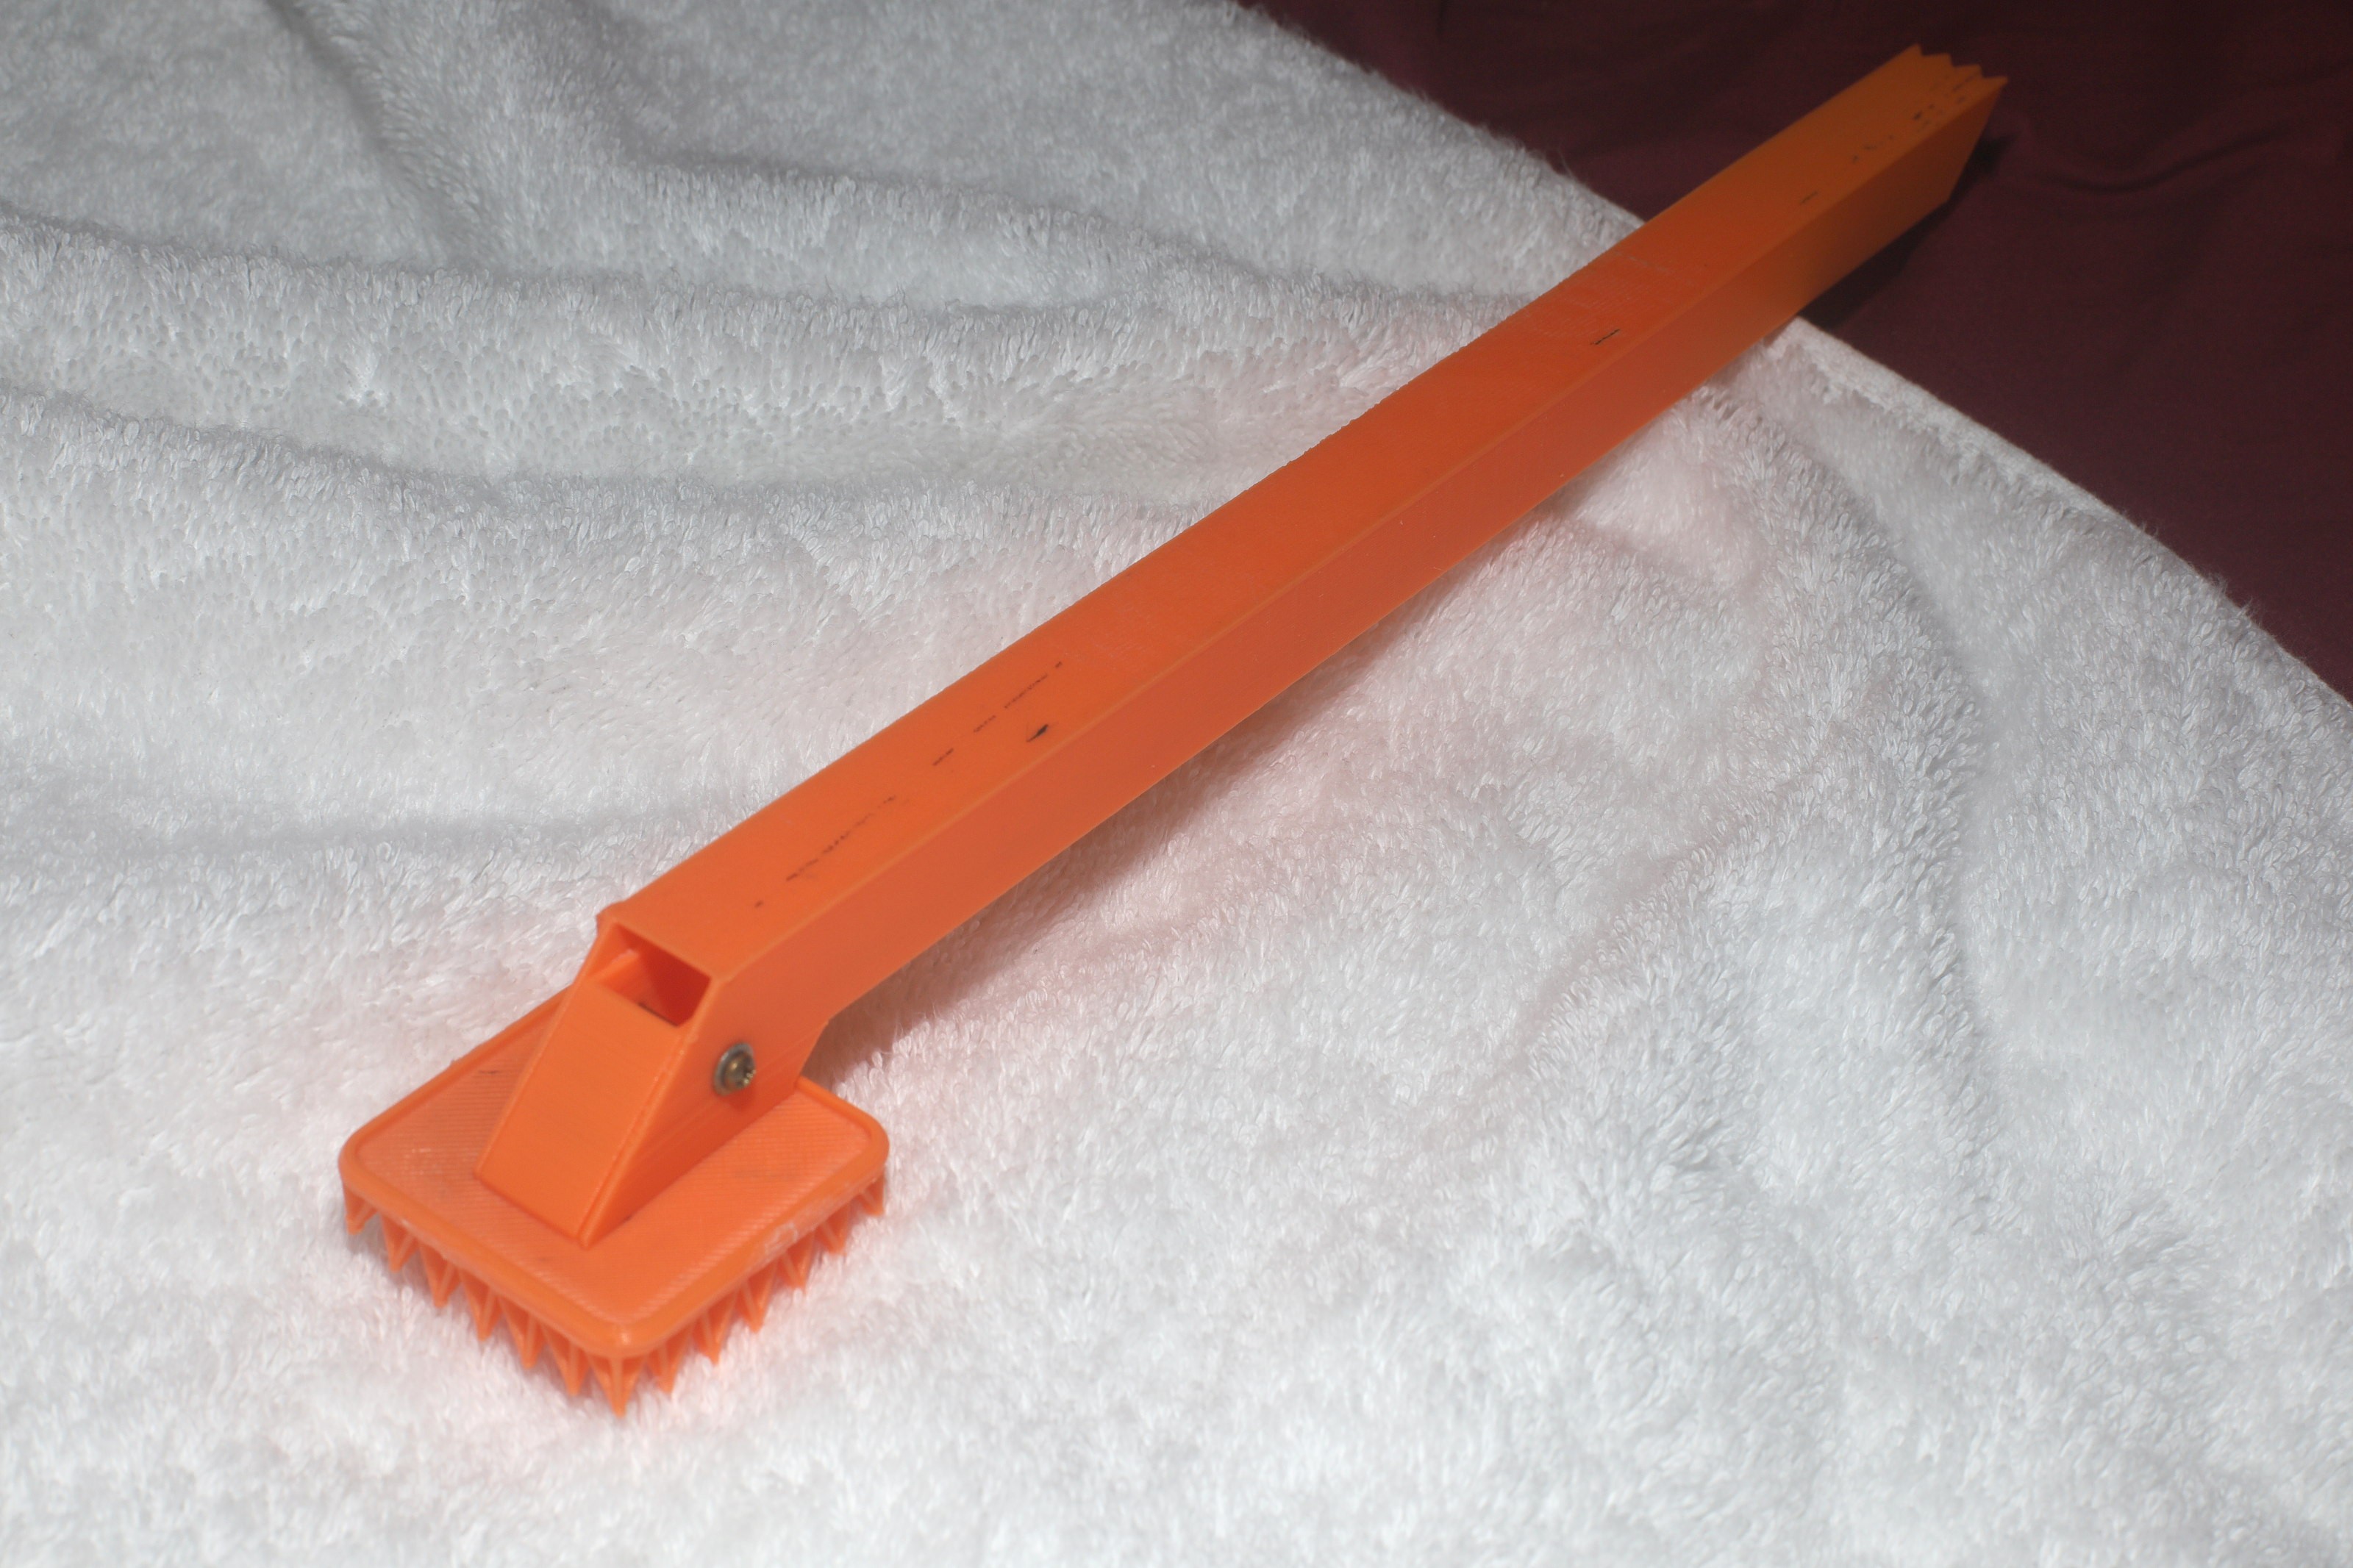
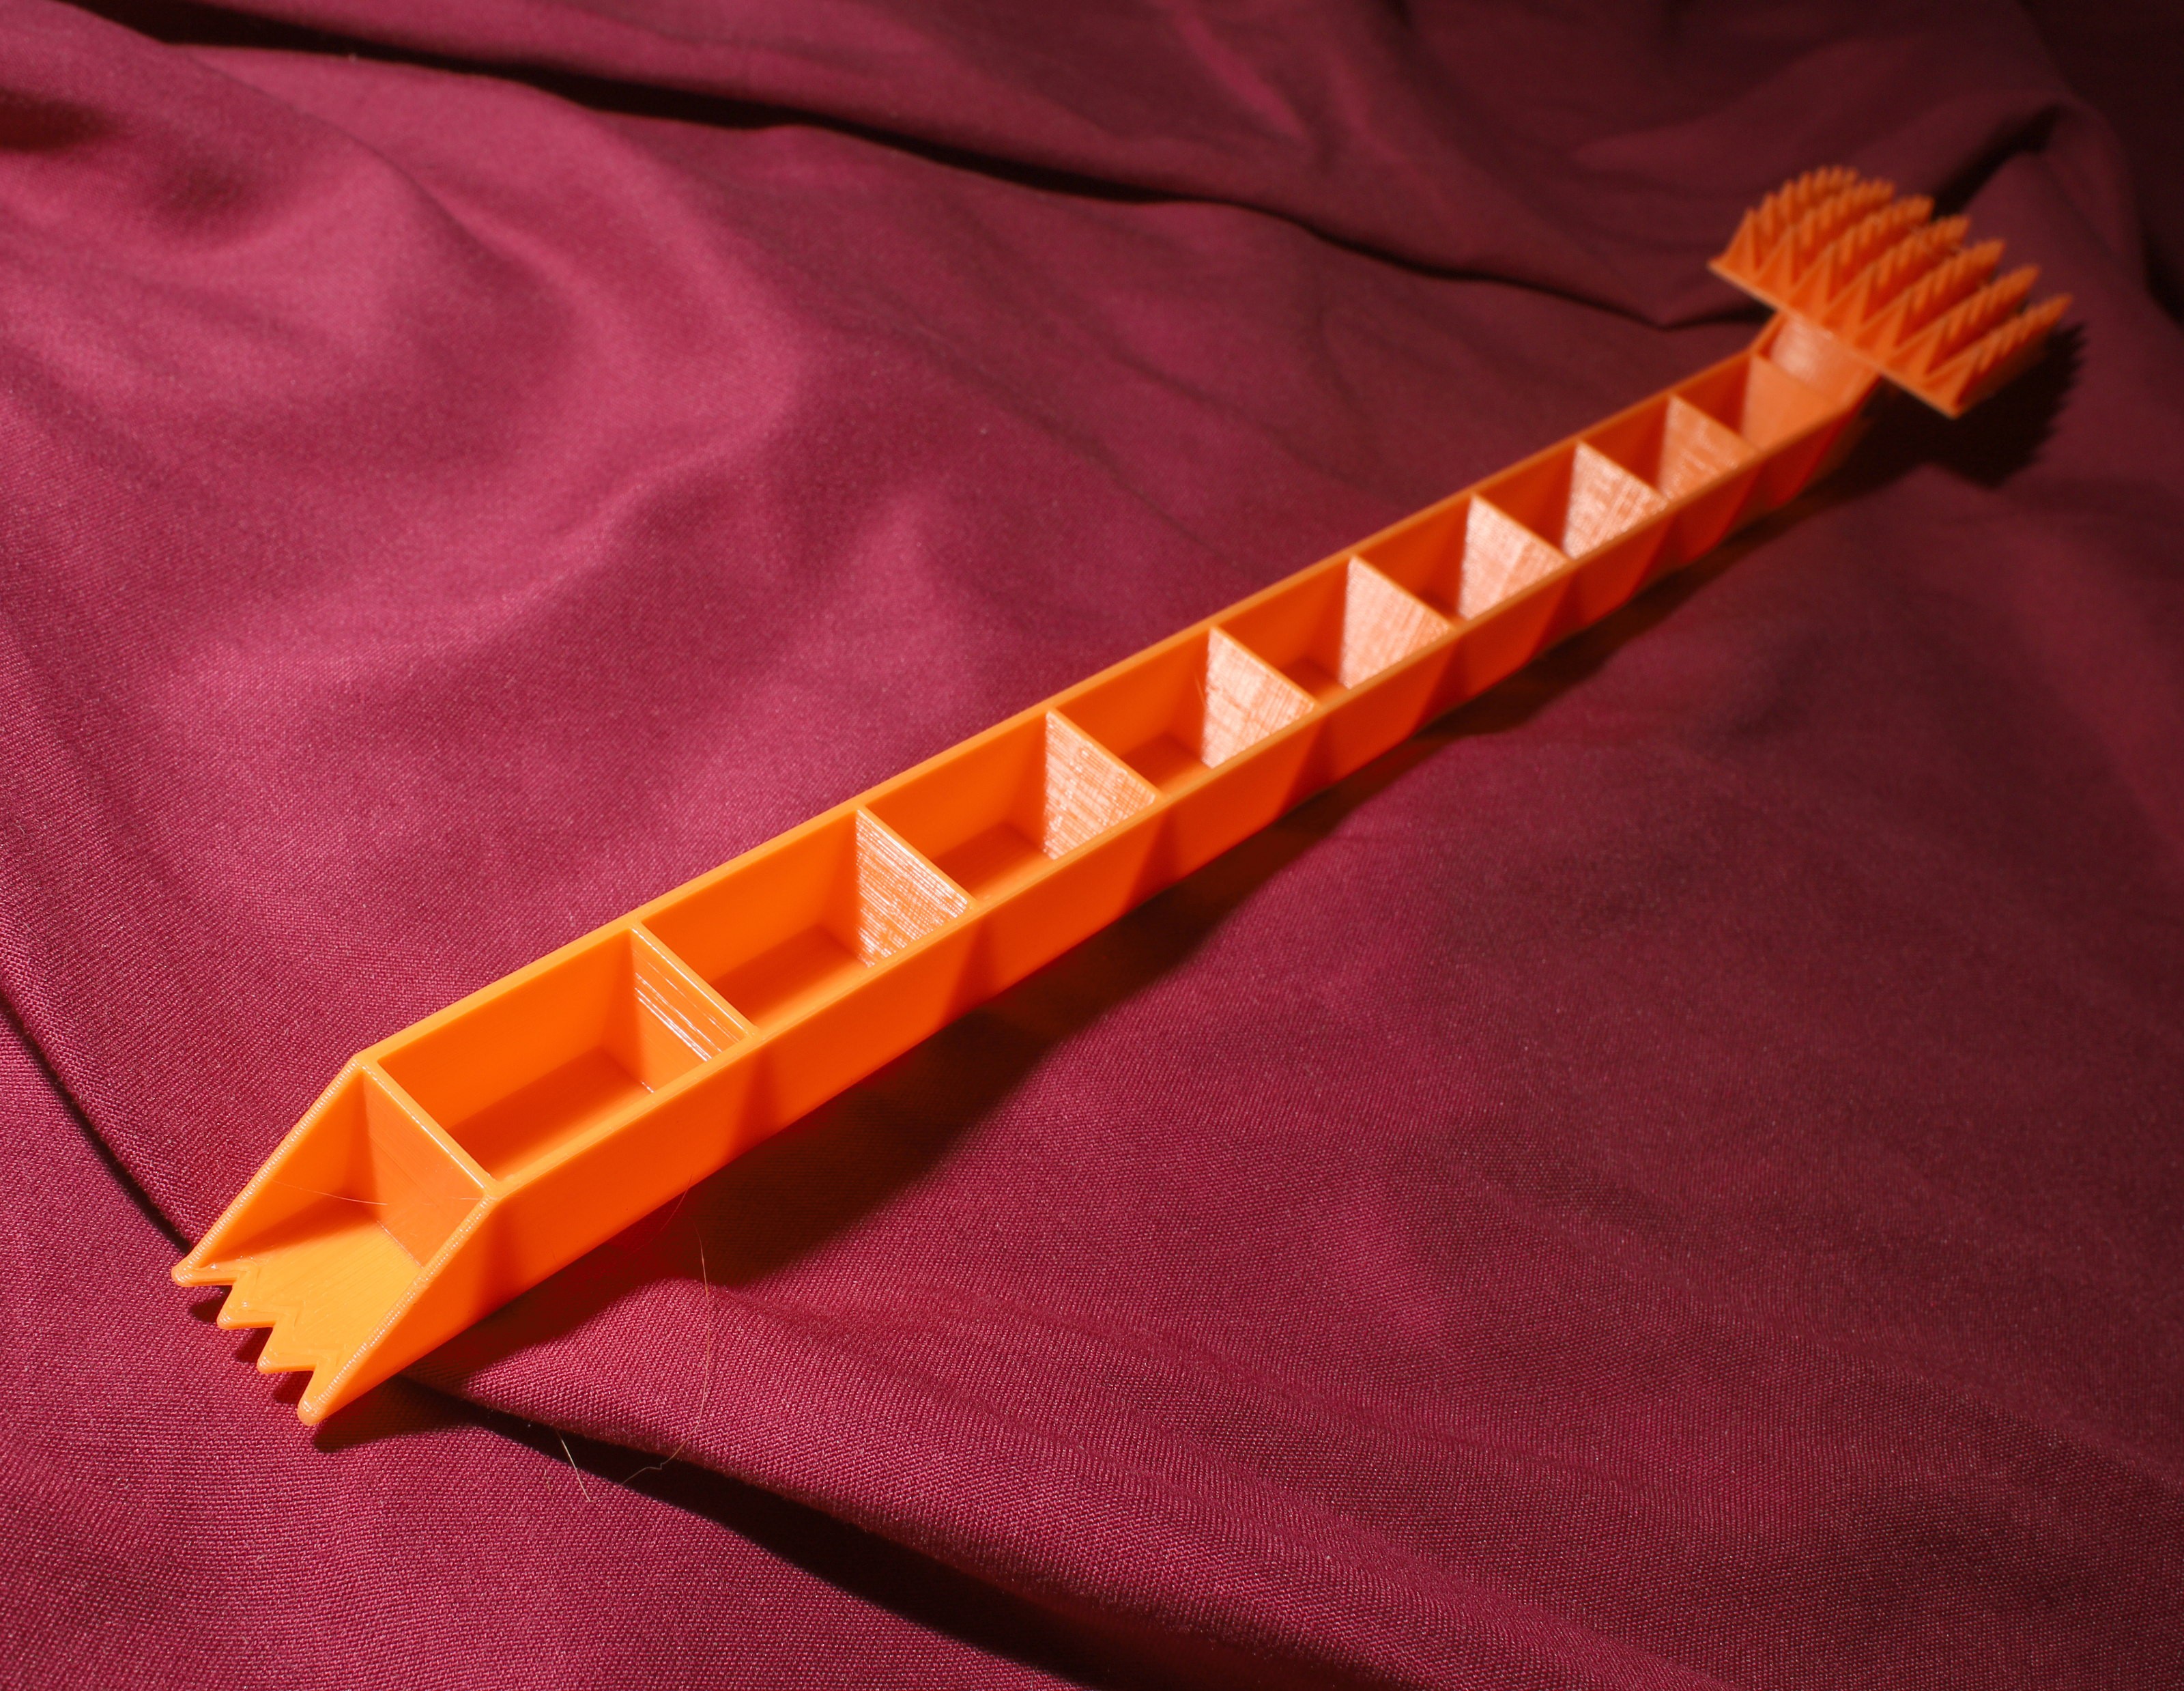
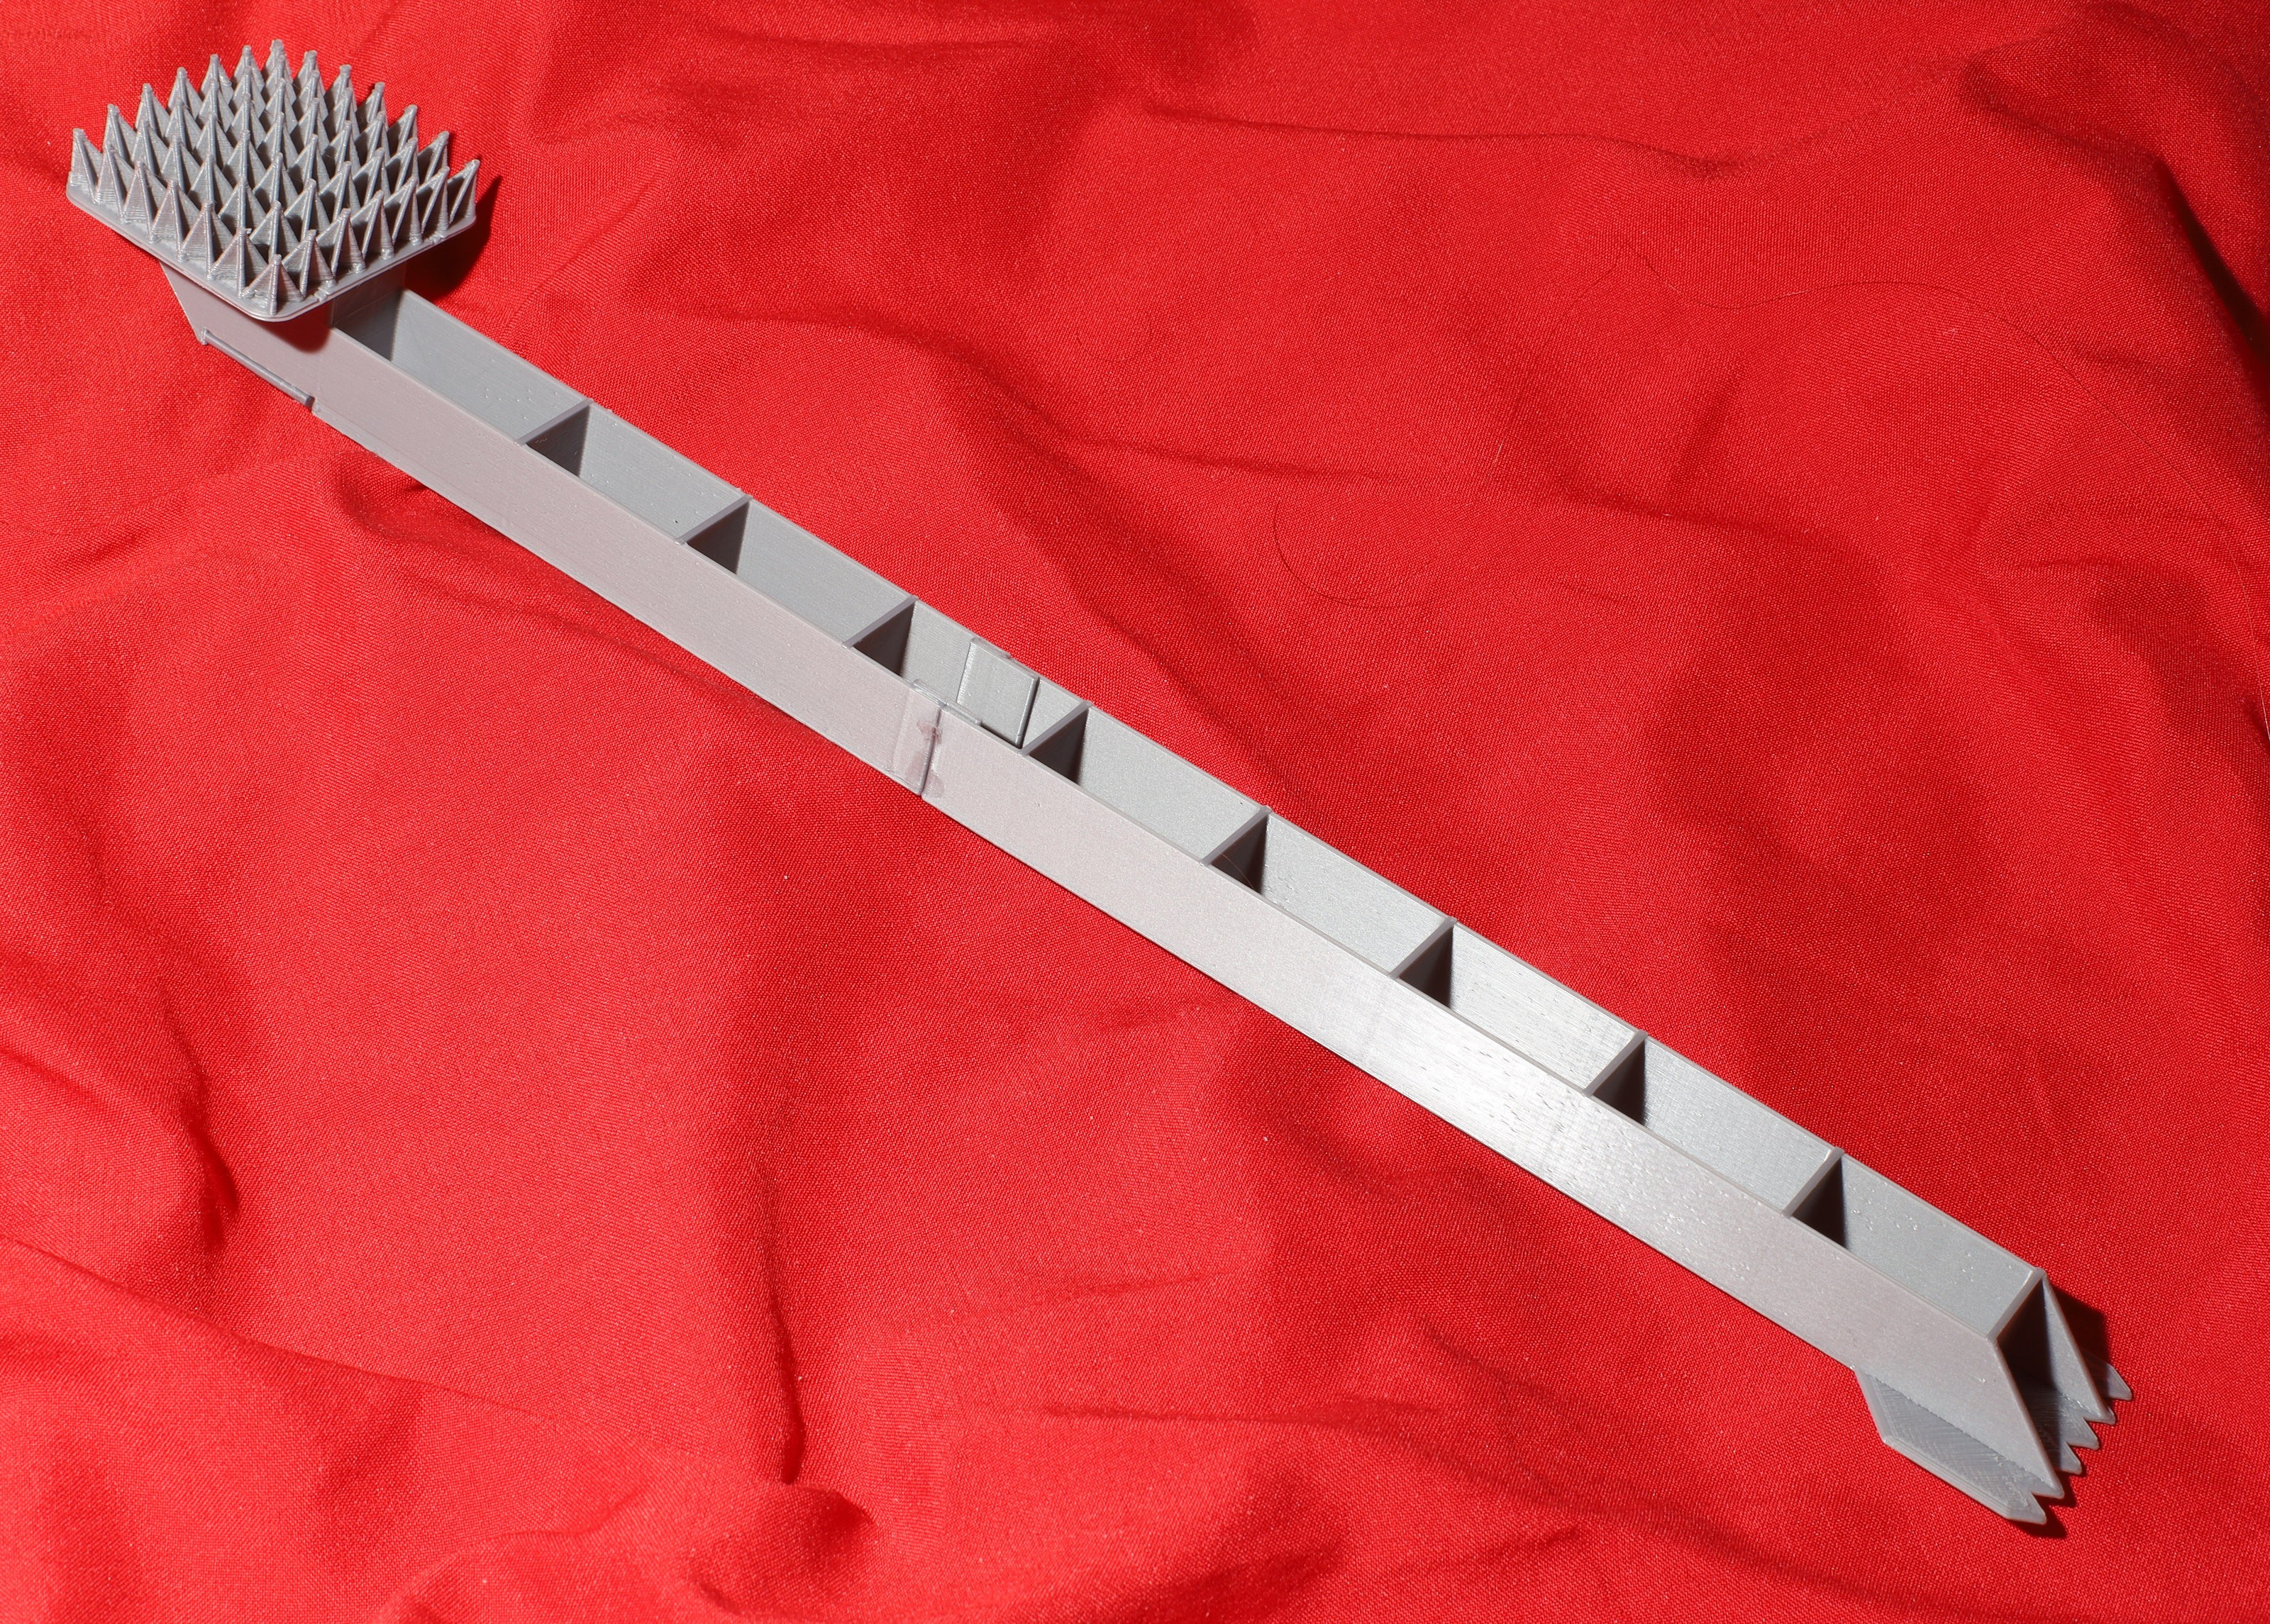
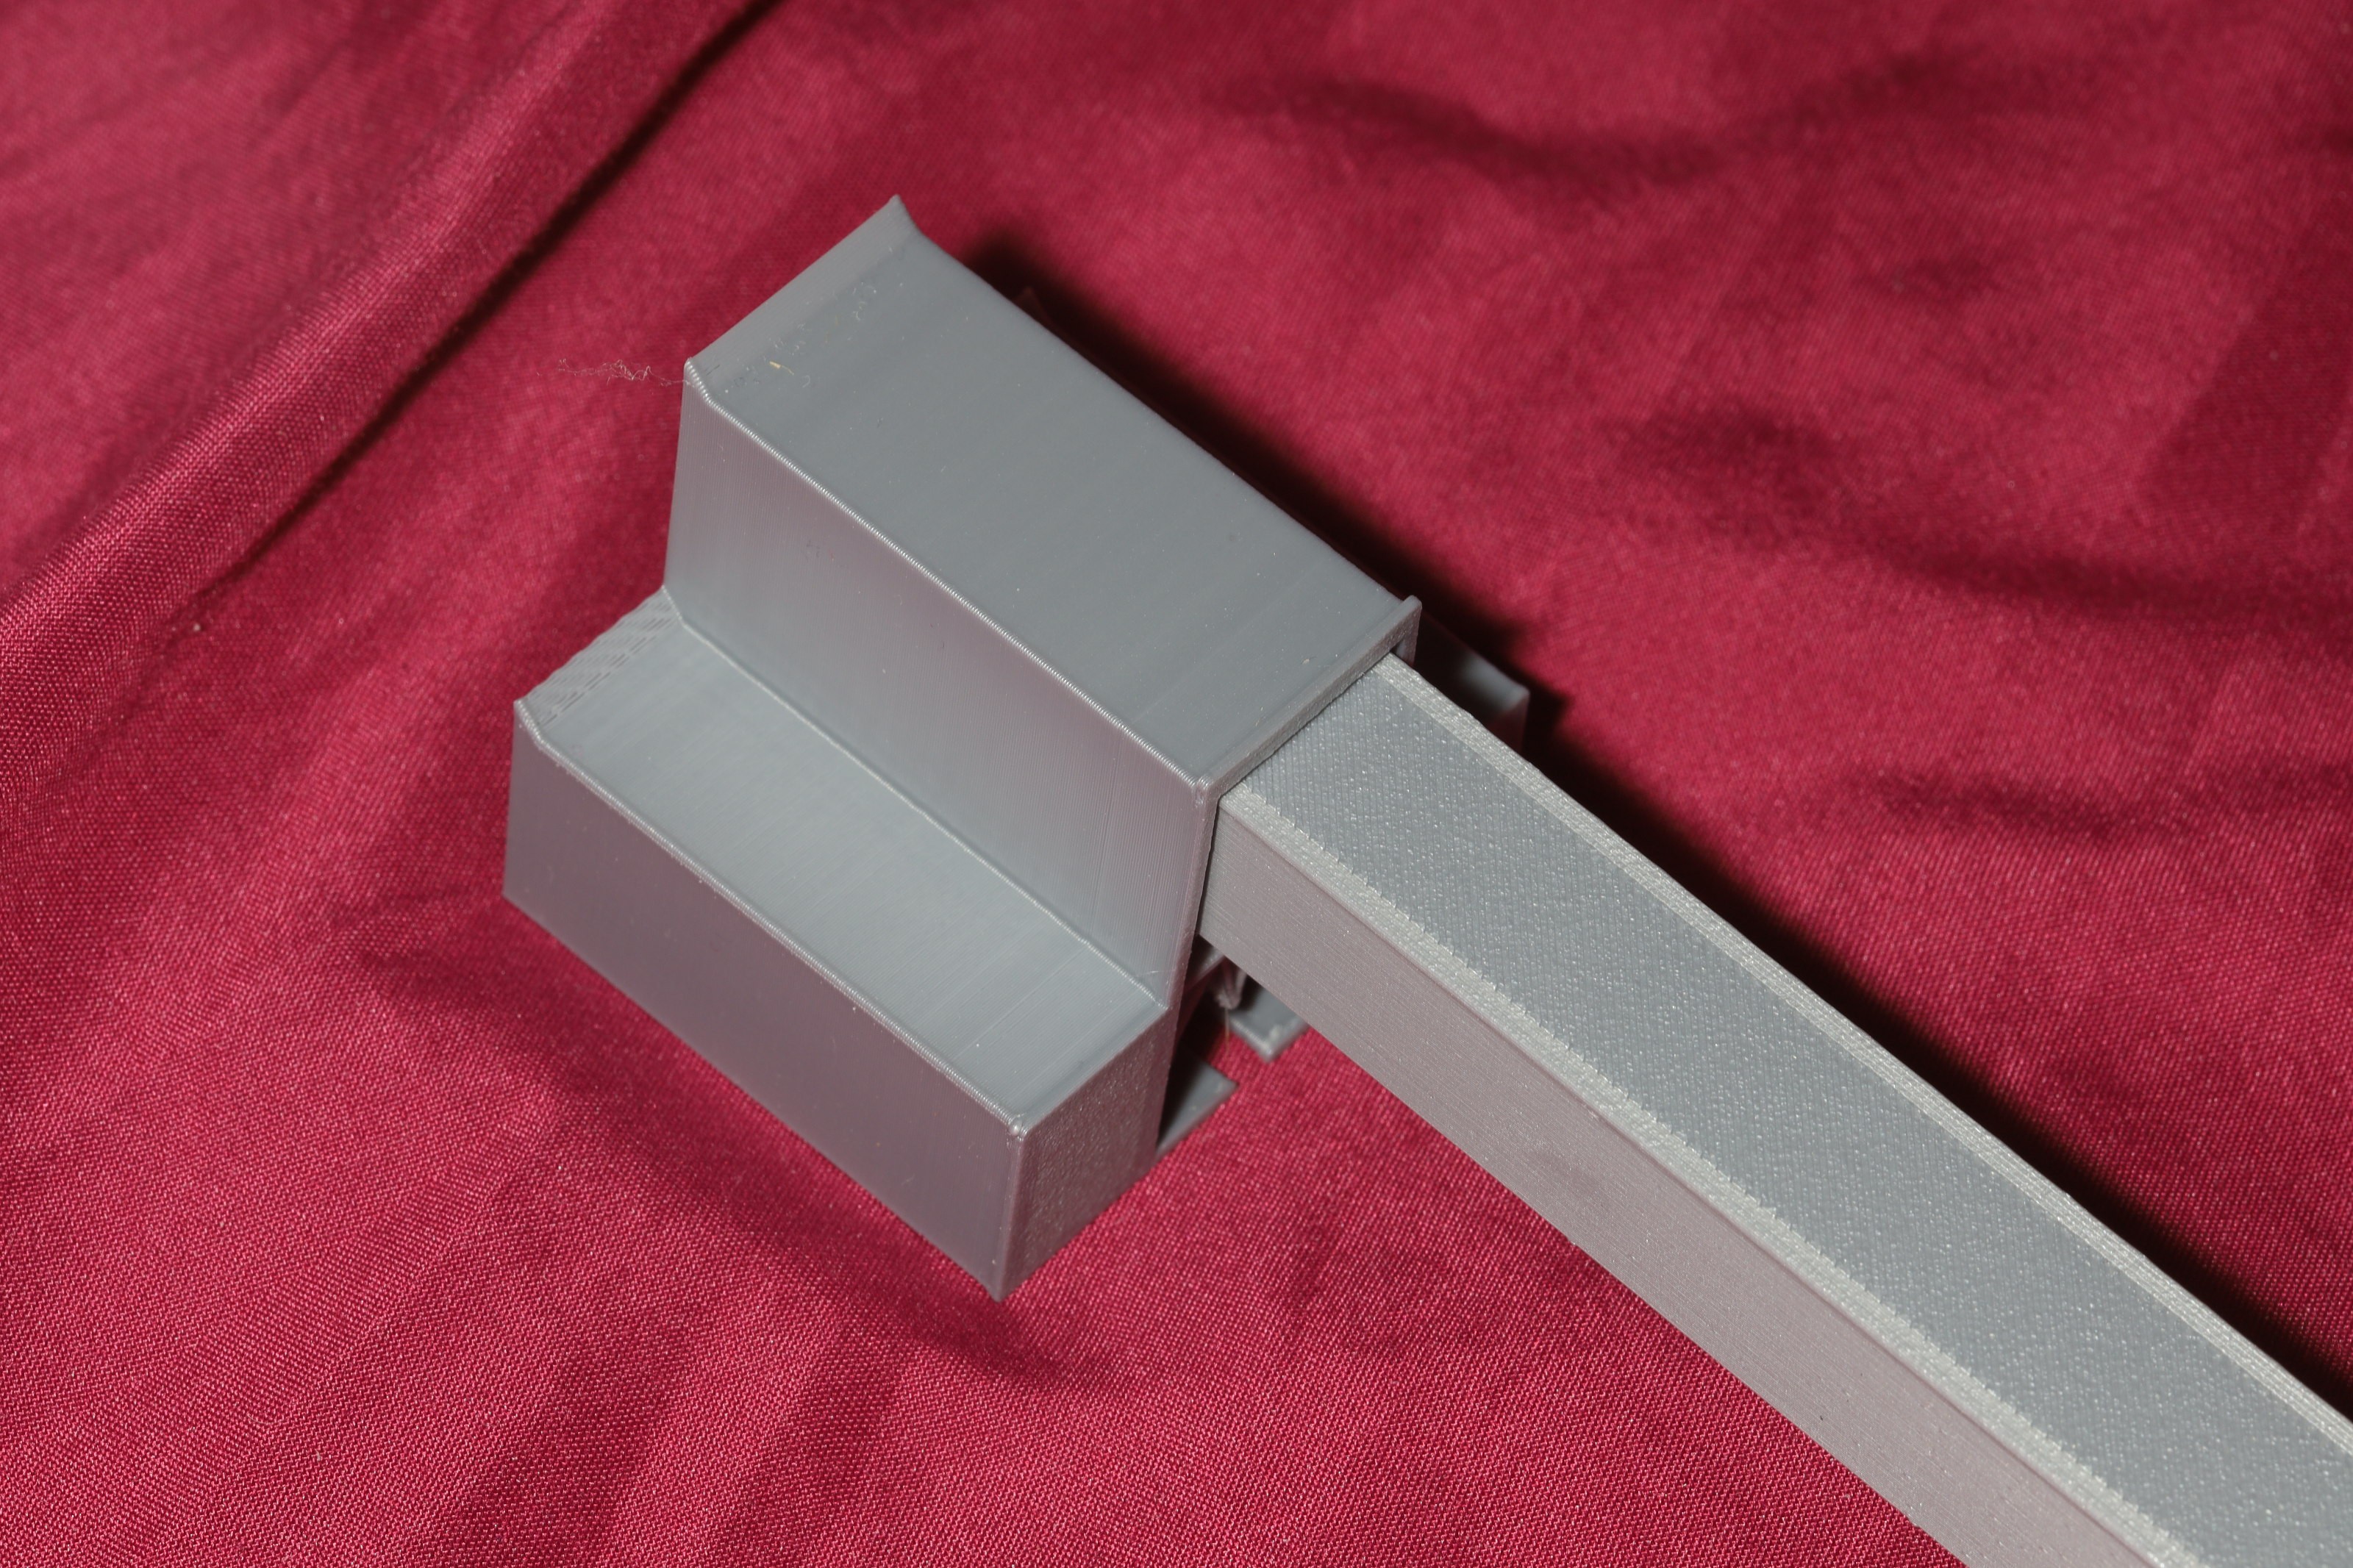
The handle is too short, but it was all lions could afford.  Other back scratchers bolt on to a wood dowel, but the lion kingdom figured bolting onto wood wouldn't be as stiff as a single piece of plastic.  It has a sharp end for scratching other areas not best served by the spikes.

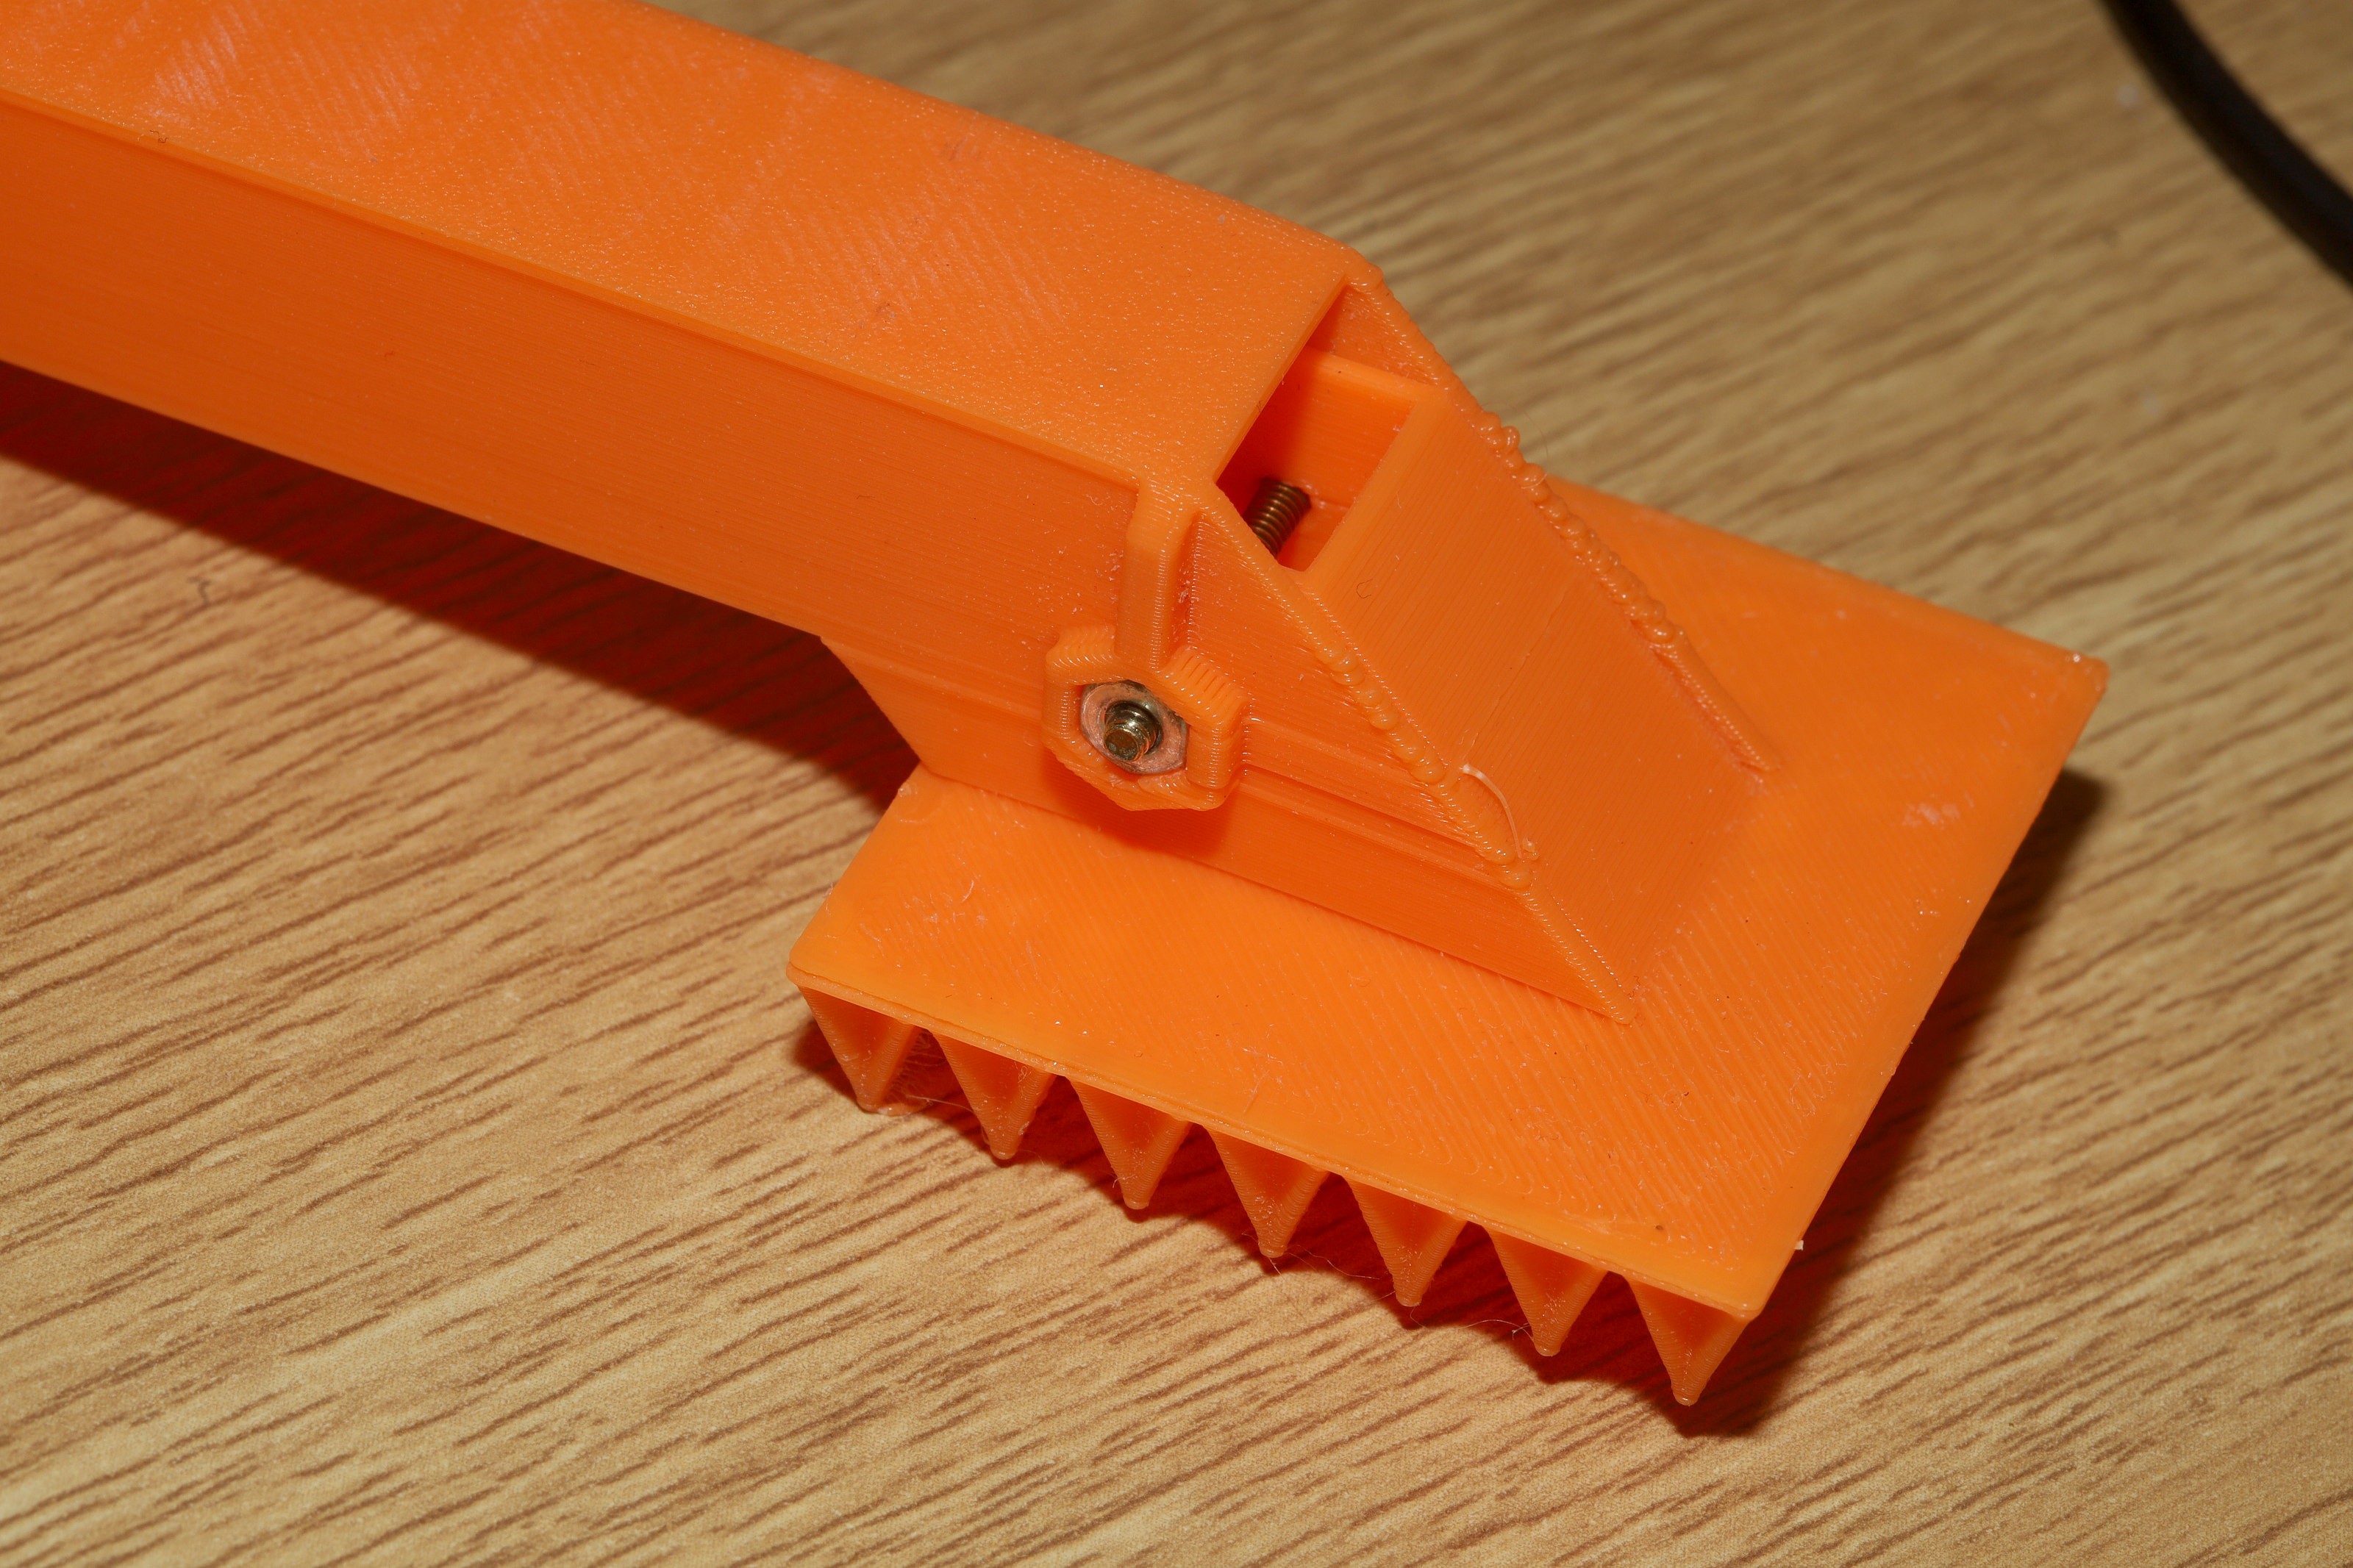
The ever important captive nut farstens the scratcher.

  • Right angle grid fin

    lion mclionhead2 days ago 0 comments

    Tried improving the scratch by increasing the handle angle 10deg.  Also laminated it with CA since the border walls break easily.  It manely scratches with just the last row.  The problem is the slanted grid fin is not the optimum shape for a scratcher.  It's slanted to force the tail down & the engine section up, increasing the angle of attack.  

    The side grid fins would be a better match, would be a lot easier to model, but wouldn't look as neat.  The catching pins would have to be removed to make it scratch.

    The 8mm tall joint joining the handle is very fragile.  No matter what, there's going to be a transition to the 8mm height of the grid fin.

    The grid fin printed by the .2 nozzle with .5 walls was very fragile, breaking when pressed against a table.  The grid fin printed by the .4 nozzle with .3 lines & .5 walls didn't break with the same pressure.

    They had another photo of the slanted grid fin.

    -----------------------------------------------------

    Decided to go with a right angle grid fin to increase the assertiveness. 

    Some photos of the right angle ones showed they're the same dimensions & the catching pin wouldn't be joining us if it was to be a scratcher.  The booleans still required fiddling with the threshold in blender.

    The 10 deg handle angle still seemed right, even if many positions only use the farthest row of spikes.  An adjustable angle would entail a set screw.  

  • Starship back scratcher

    lion mclionhead4 days ago 0 comments

    The great challenge was making the grid fin small enough while detailed enough.  .4 line width with .4 nozzle couldn't make it look enough like a grid fin.  .2 line width with a .2 nozzle was the most realistic.

    It was the 2nd lifetime print with the .2 nozzle.  Helas, the .2 nozzle would require thicker walls to be a structural piece instead of an art piece.  Unsolvable problems with leaking of the .2 nozzle prevented it from printing any more than .5mm walls.

    The best results with the .4 nozzle used .3 line width.  47mm wide seemed to be the largest practical back scratcher.  Either the grid fin would have to be larger or compromises would have to be made.  It would be a good application of resin printing.


    The latest practice has been to glue the scratching head on the handle.  There has never been a need to swap scratching heads.

    A bit of hypersonic entry phase in every scratch.

  • Next concept

    lion mclionhead03/26/2026 at 05:39 0 comments

    3 years after printing the last back scratcher, it became clear it doesn't need any removable parts.  The life of the scratching part is going to be as long as the life of the PLA. All the effort in the clamp mechanism went to waste. There were also some ideas for a novel scratcher shape.

    The trick is the scratcher has to be shaped like an L. It could be offset.  The other trick is the scratcher needs to bulge in the middle.

  • New scratcher

    lion mclionhead11/17/2022 at 20:10 0 comments

    Popped out another one with the scratching head as only 2 pieces instead of 3.  The trick with the scratching head is 5mm retraction & no extra prime.  Everything else continues to work best with 3mm retraction & 1mm extra prime.

    It takes a tricky blender boolean to get the alignment notch to come out.

    It became clear that a radically different design is needed for bed.  It can't have the head scratcher end.  It needs to be a lower profile.  It needs to be less aggressive.  A more traditional design might be needed.  So far, the mark 1 lion paw has been the best solution.

  • Next design

    lion mclionhead11/14/2022 at 05:01 0 comments

    After months of planning, the scratcher finally got updated.  It's now waterproof.  The head doesn't require farsteners. This entailed printing the handle in 2 parts.  

    The most needful part of this is a thumb slideable cover, allowing it to be used in bed without getting up.  The head should be covered up to avoid tearing up sheets.

    The problem is the cover flops around when it's not in use.  It has to be held out of the way.

  • Wishlist

    lion mclionhead05/19/2022 at 02:44 0 comments

    Shower concept

    A back scratcher for the shower & bed were highly desired.  Some ability to wash it was highly desired.  The mane problem with the shower was making it waterproof.  There were ideas for commercial nylon farsteners.  Nylon bolts have to be mail ordered & are expensive.  The smallest nylon farsteners locally are 1/4" so they could be more easily printed.

    There was growing dissatisfaction with the way the bolts always came loose.  The leading idea was a 3D printed farstener & even better, a snap fitting.  In reality, it might be cheap enough just to permanently glue the scratcher on the handle.


    Bed concept

    Using it in bed has proven difficult but desirable.  The mane problem is storing it where it won't get smashed & grabbing it without getting up.  The leading idea is to cover up the scratching head.  The handle could fold up, with the scratching head going into an enclosure.  The scratcher & enclosure could be separate.  That might be easiest.

  • Design changes

    lion mclionhead03/14/2022 at 01:38 0 comments

    The teeth continue to wear out & break off, manely from getting snared in things.  It's a good excuse to print revisions.


    A new design was printed.  Its mane feature is a rounded panel.  Lions are fans of the rectangular PLA panel, but this tends to get stuck in clothing.   It might be overkill to have the edges curve up & down, but the corners definitely need to be round.

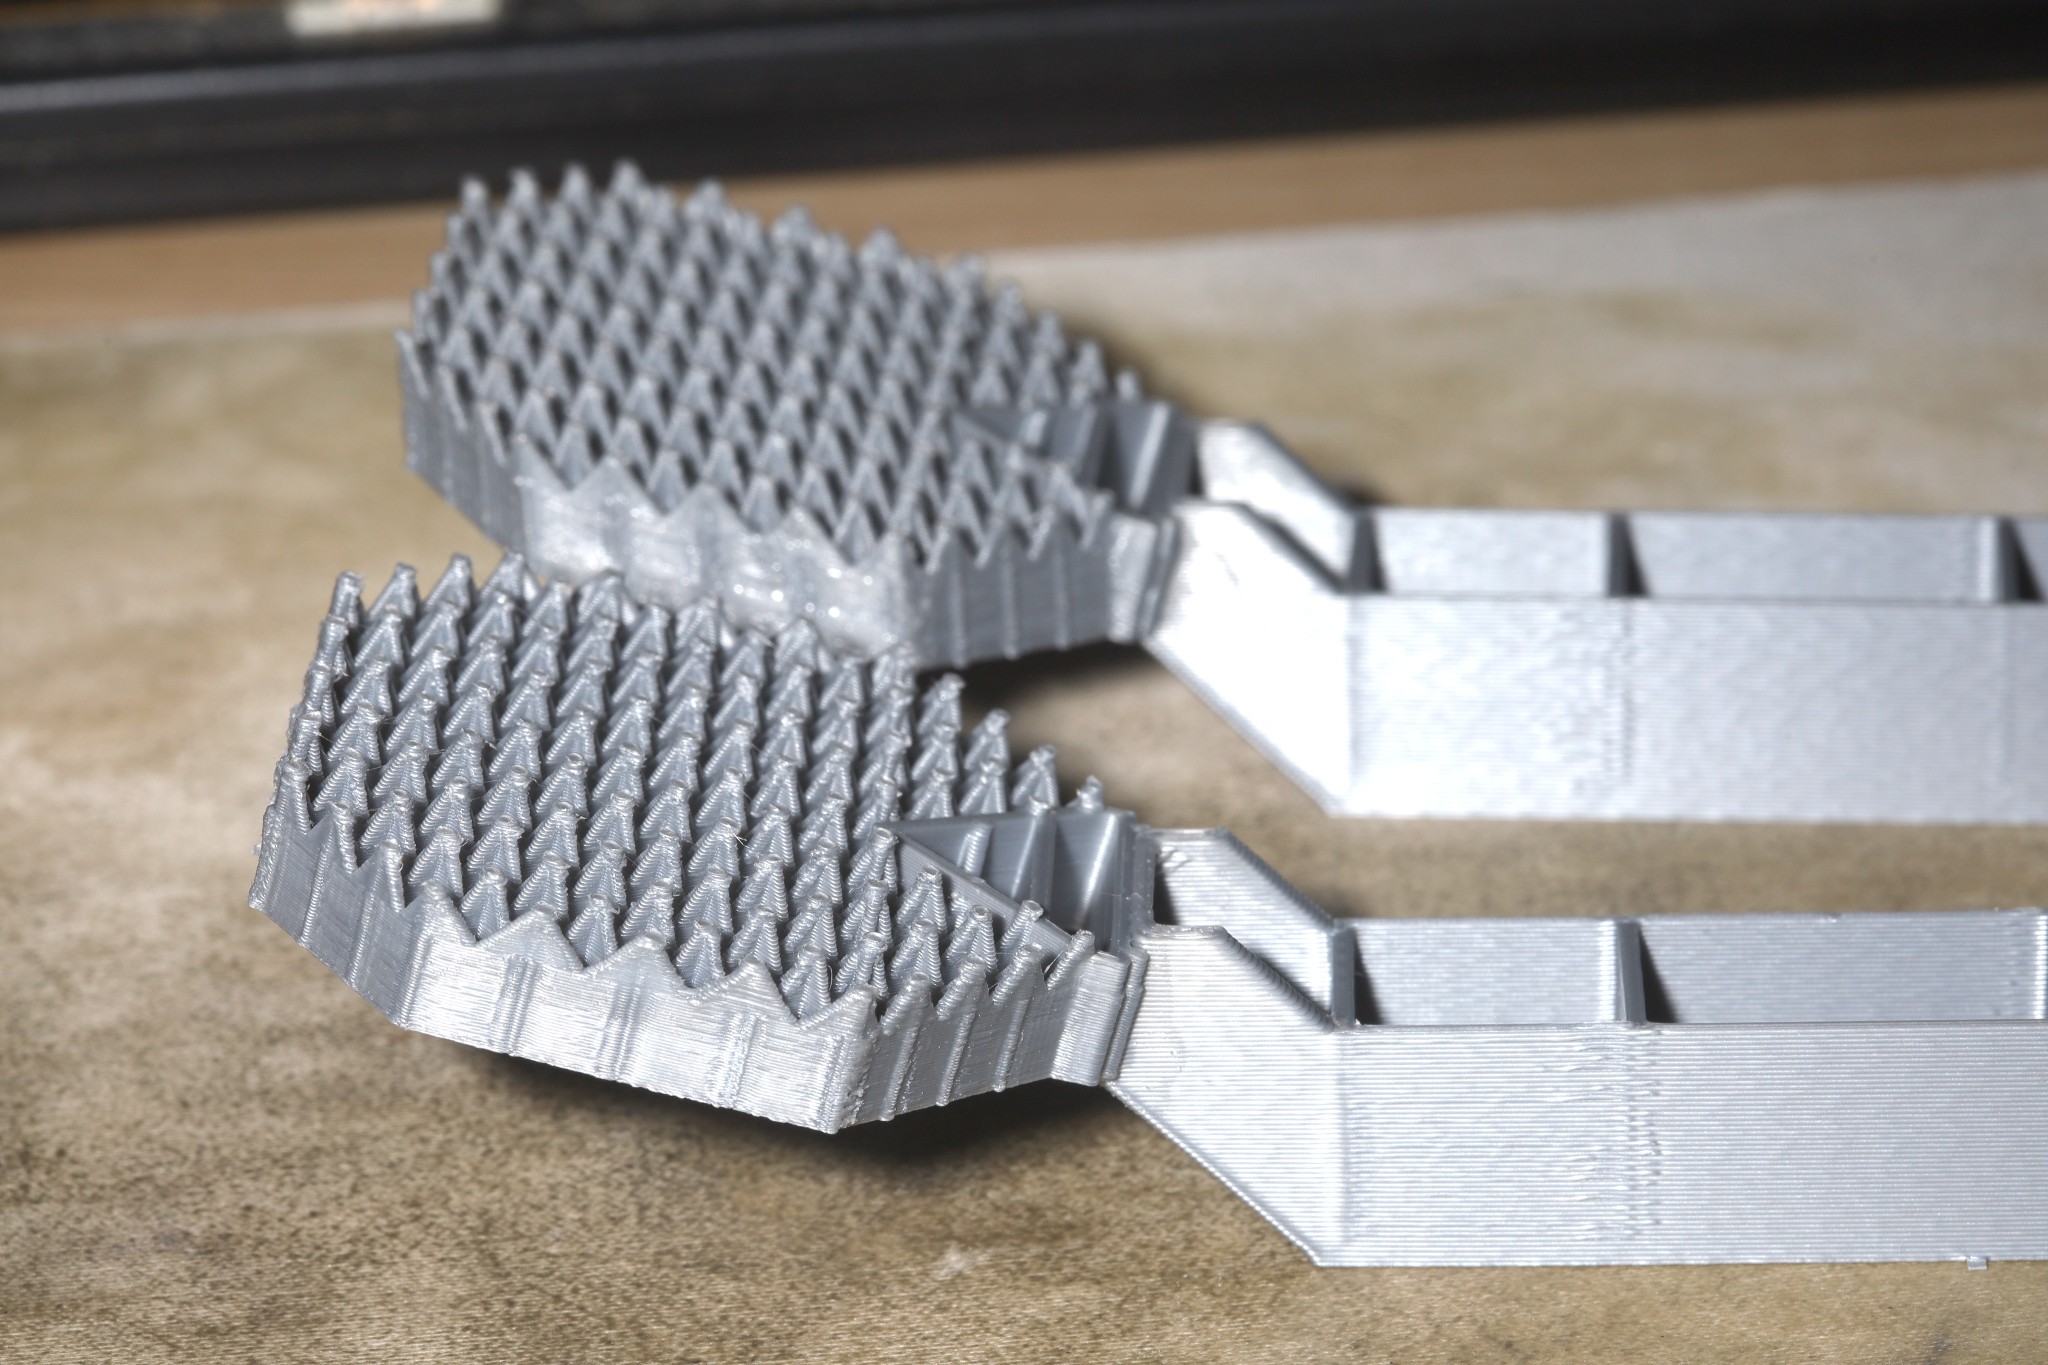
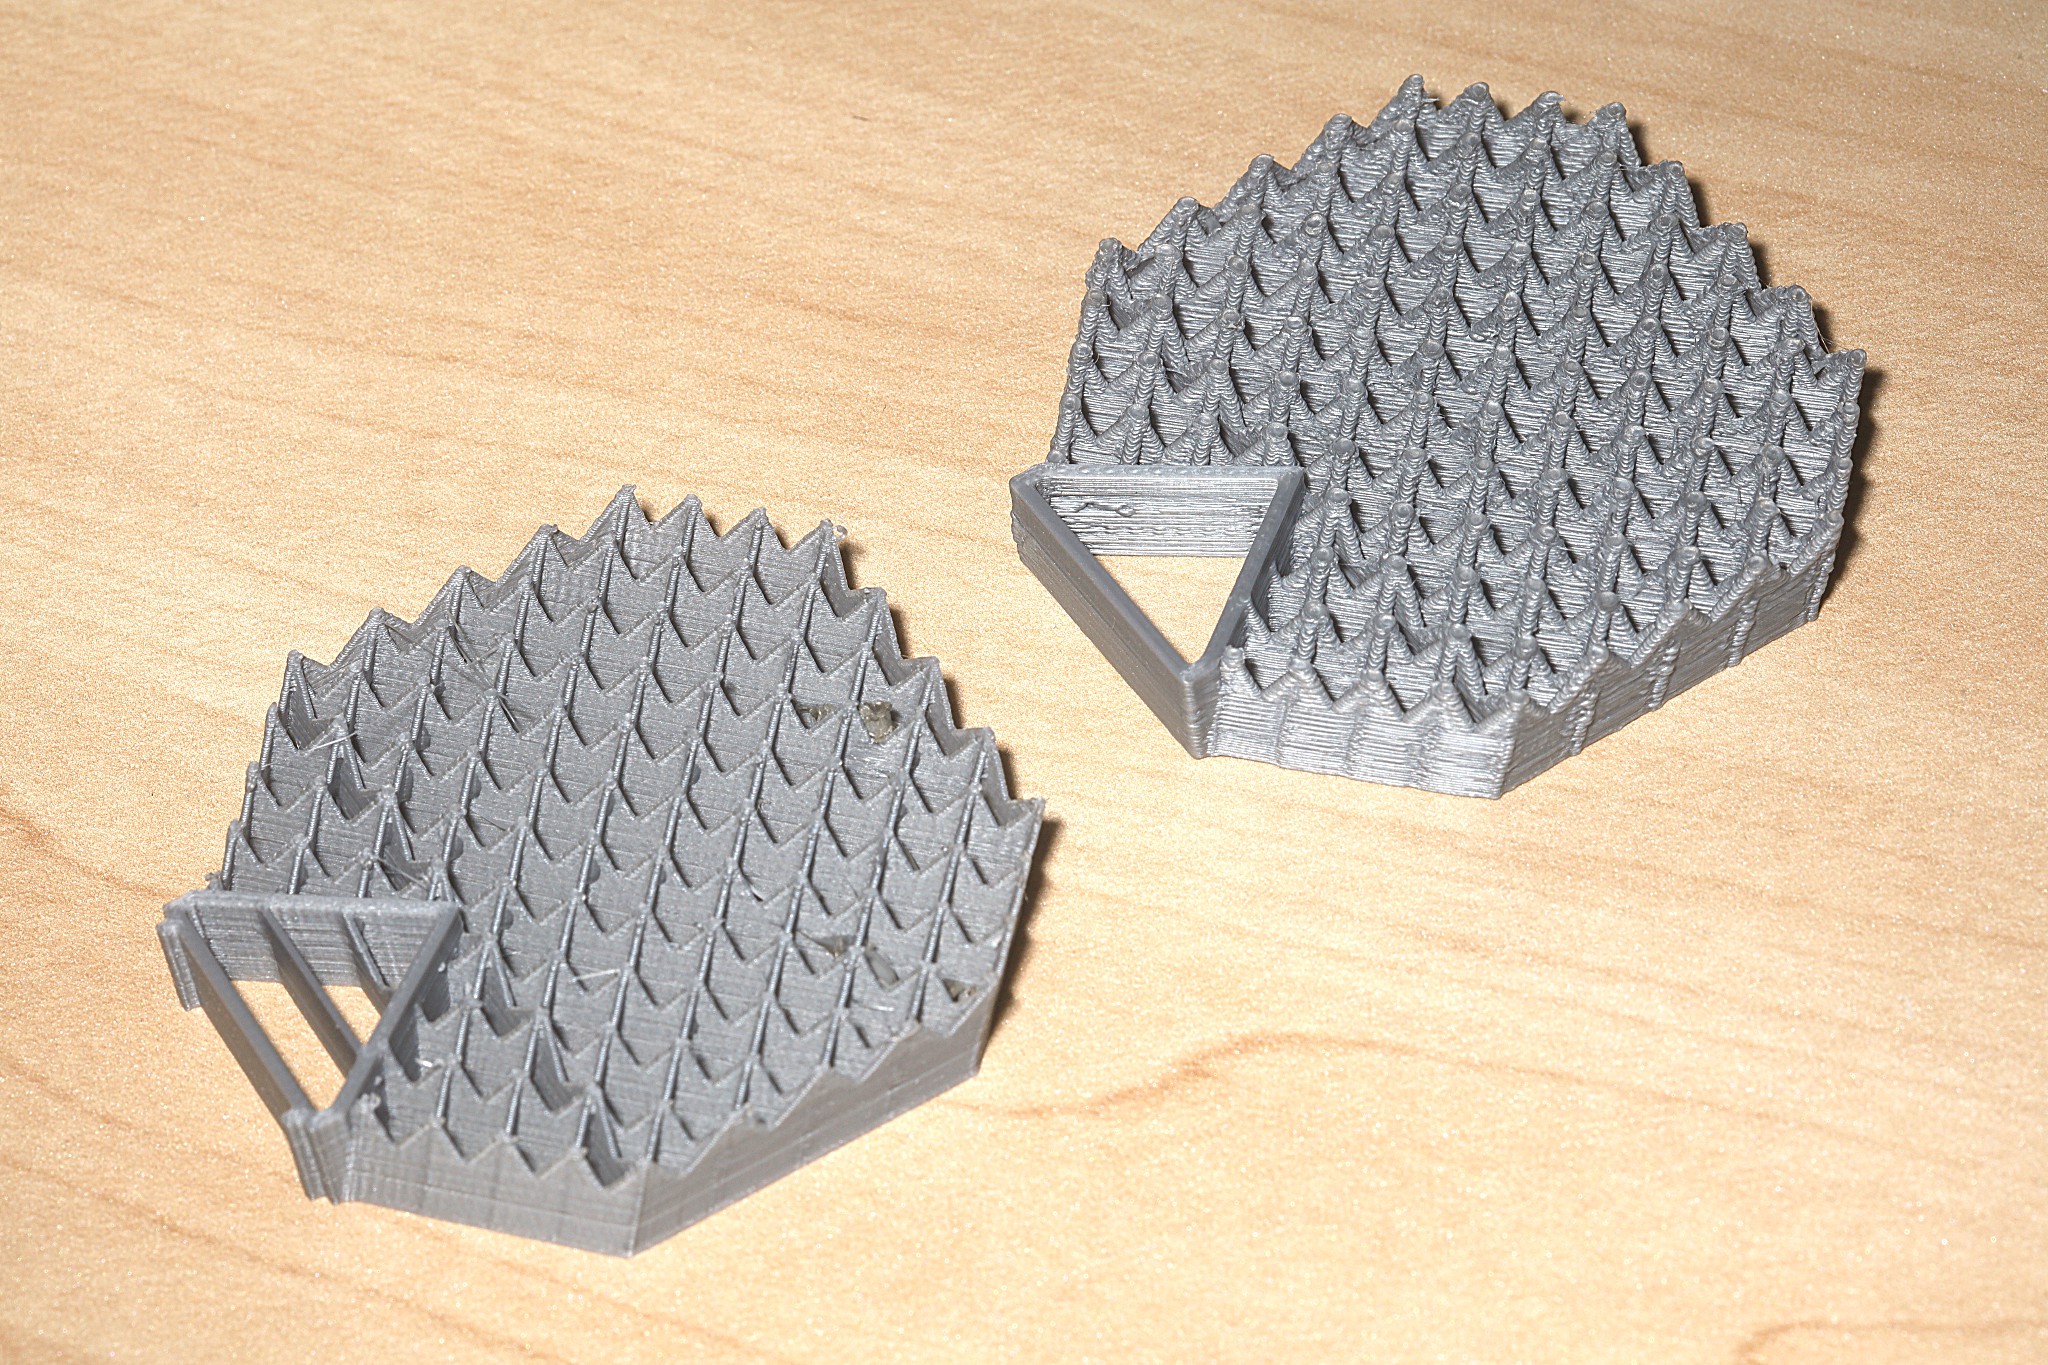
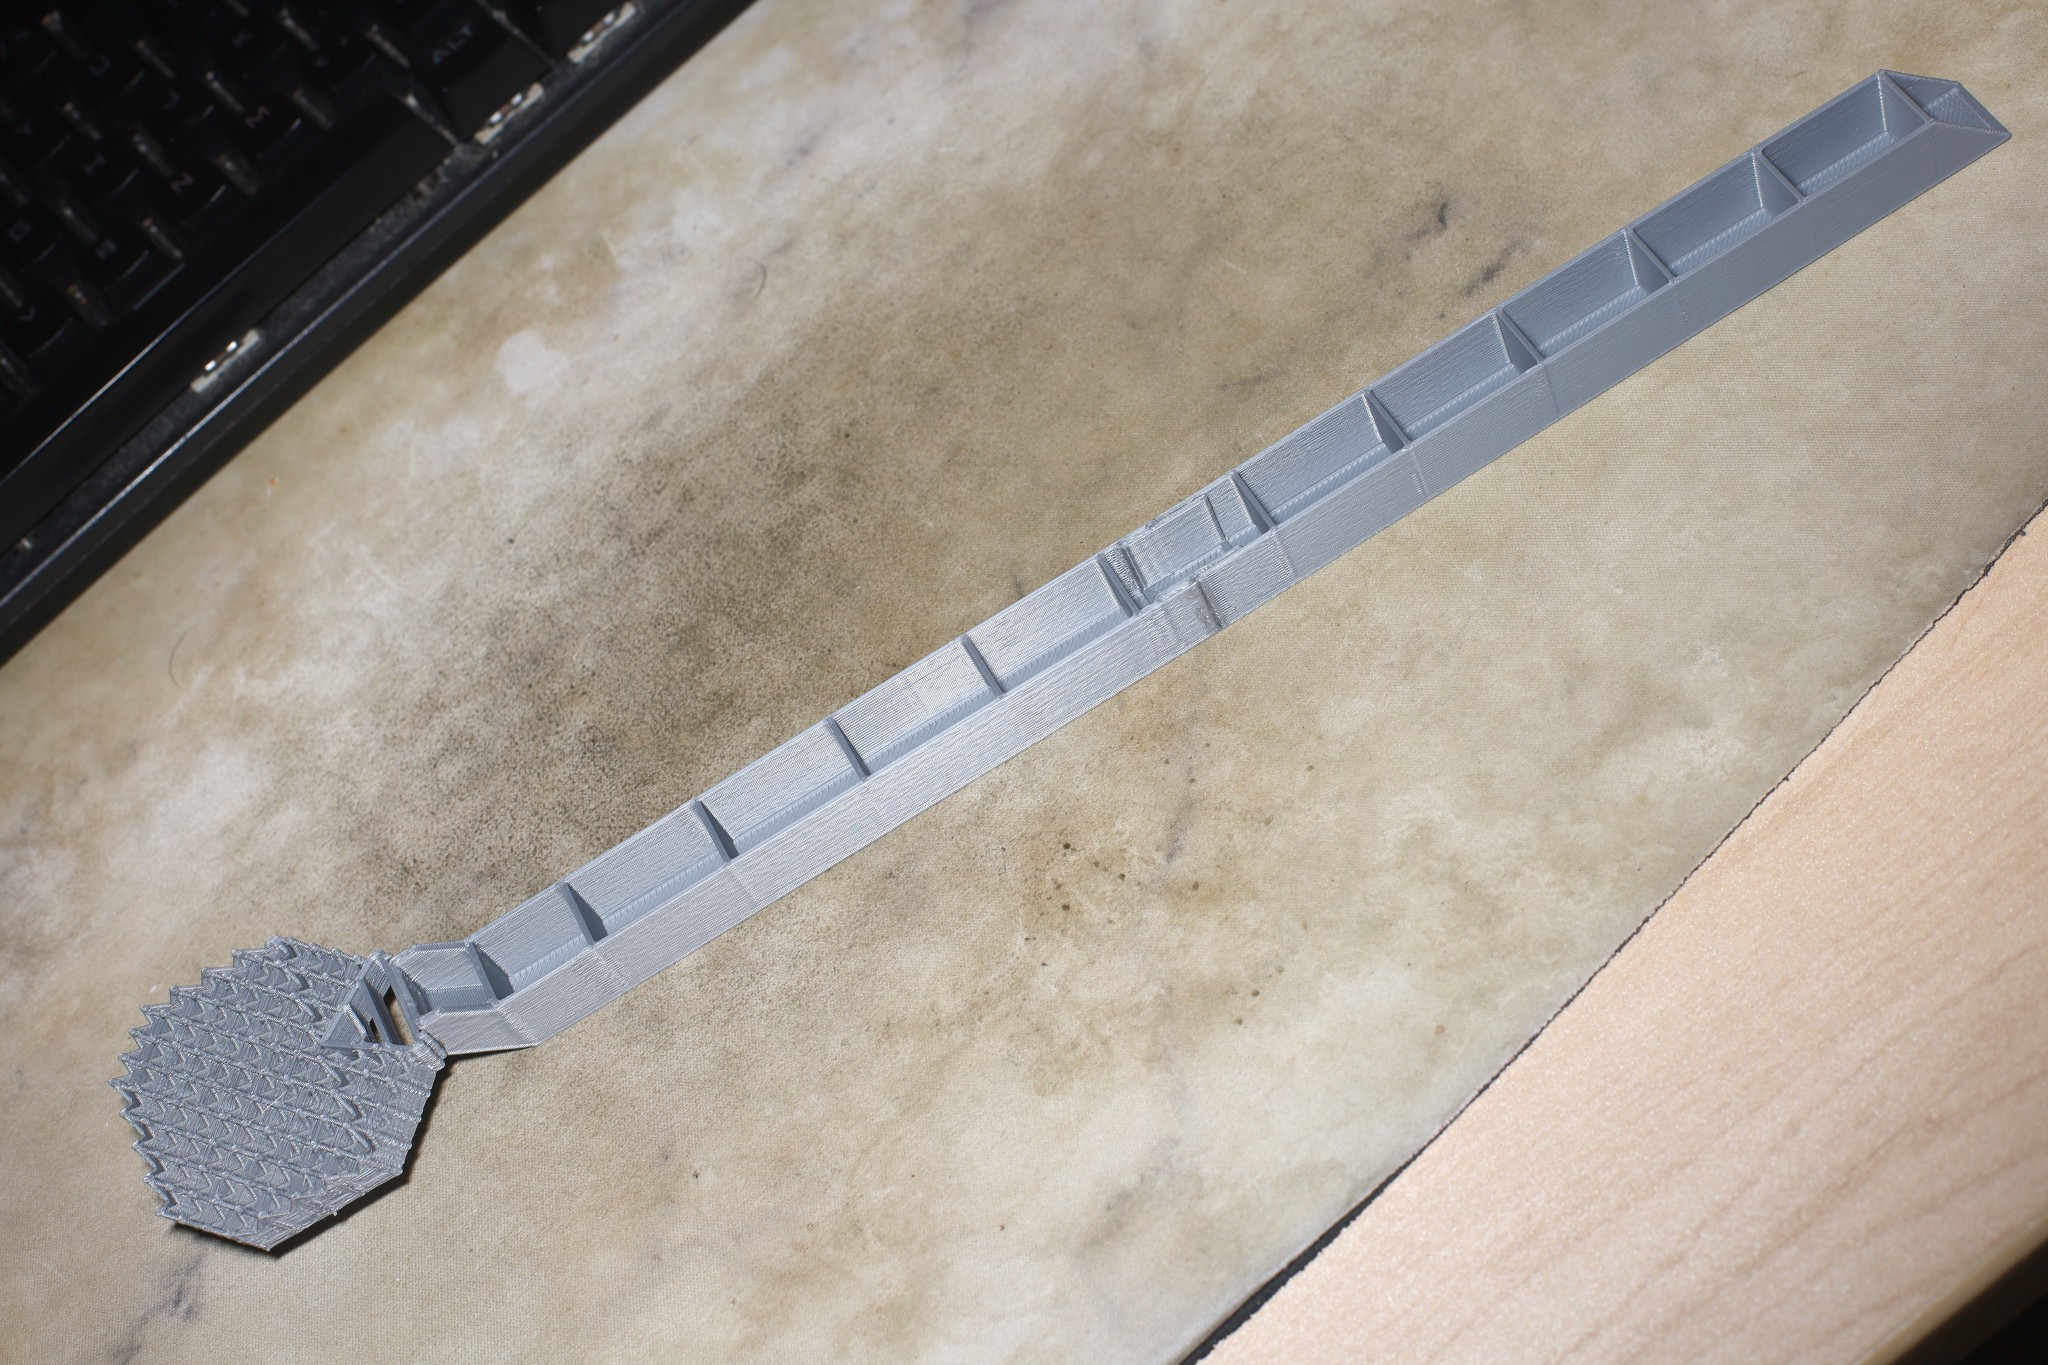
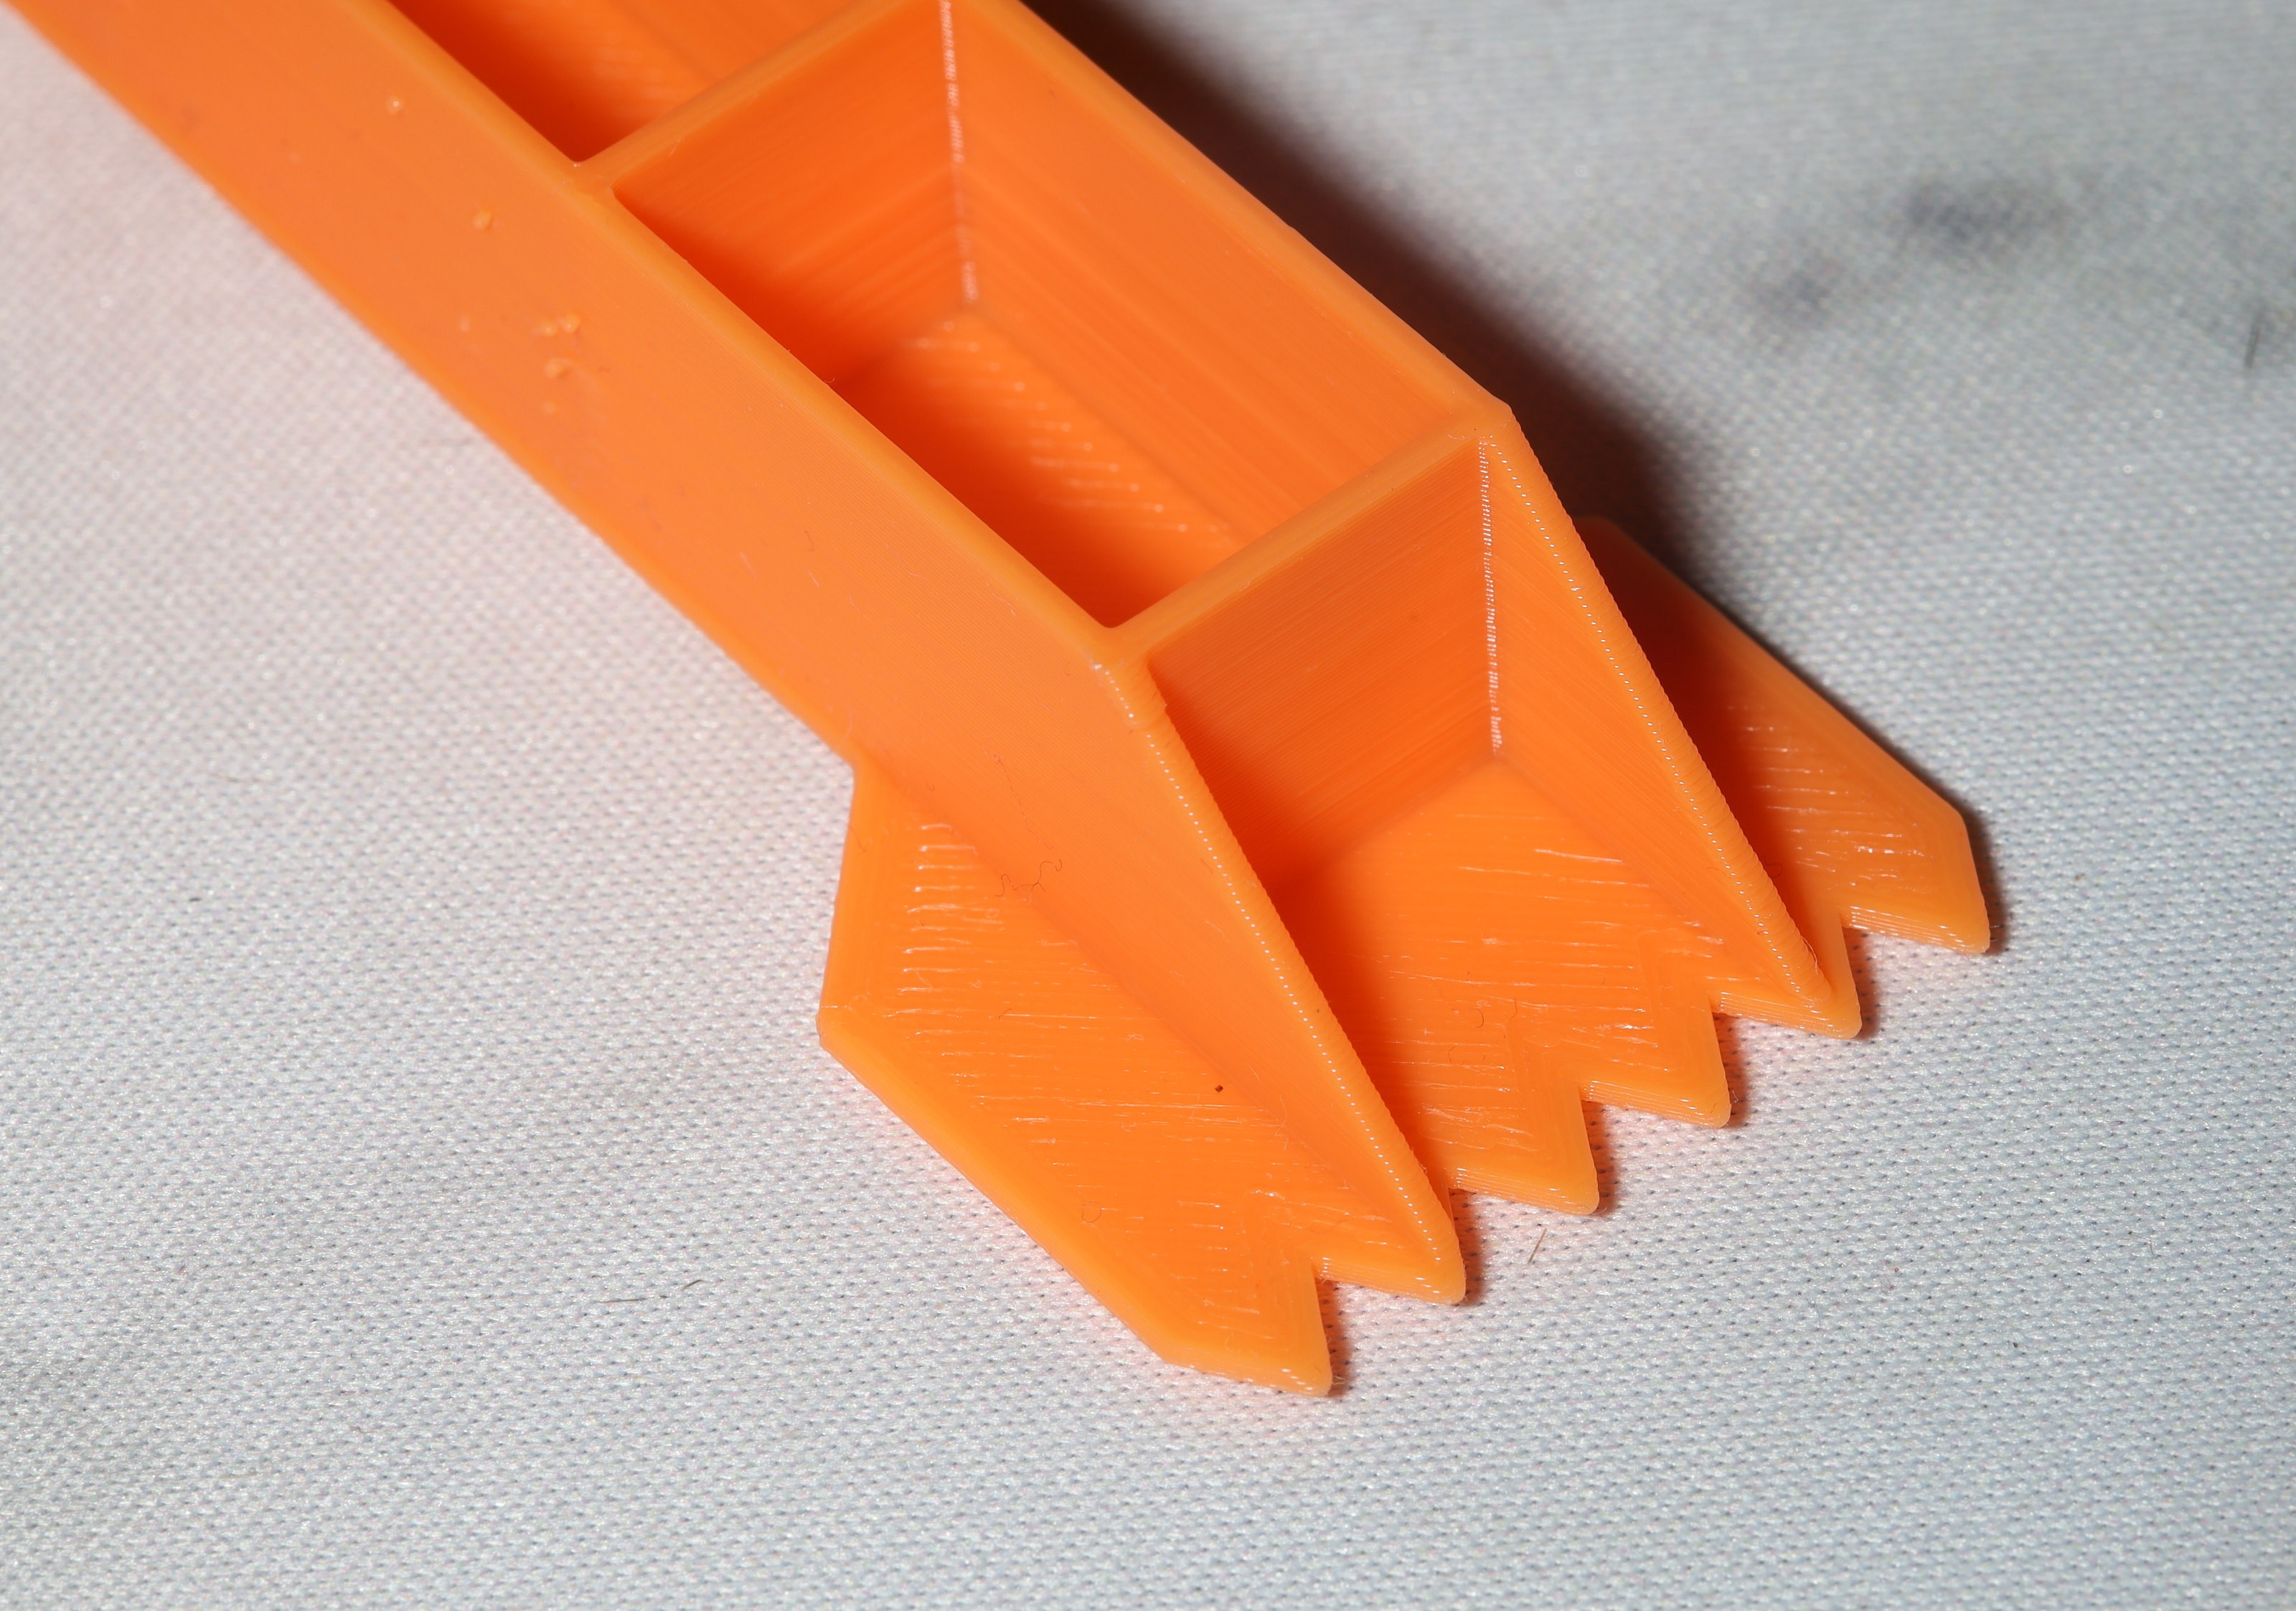
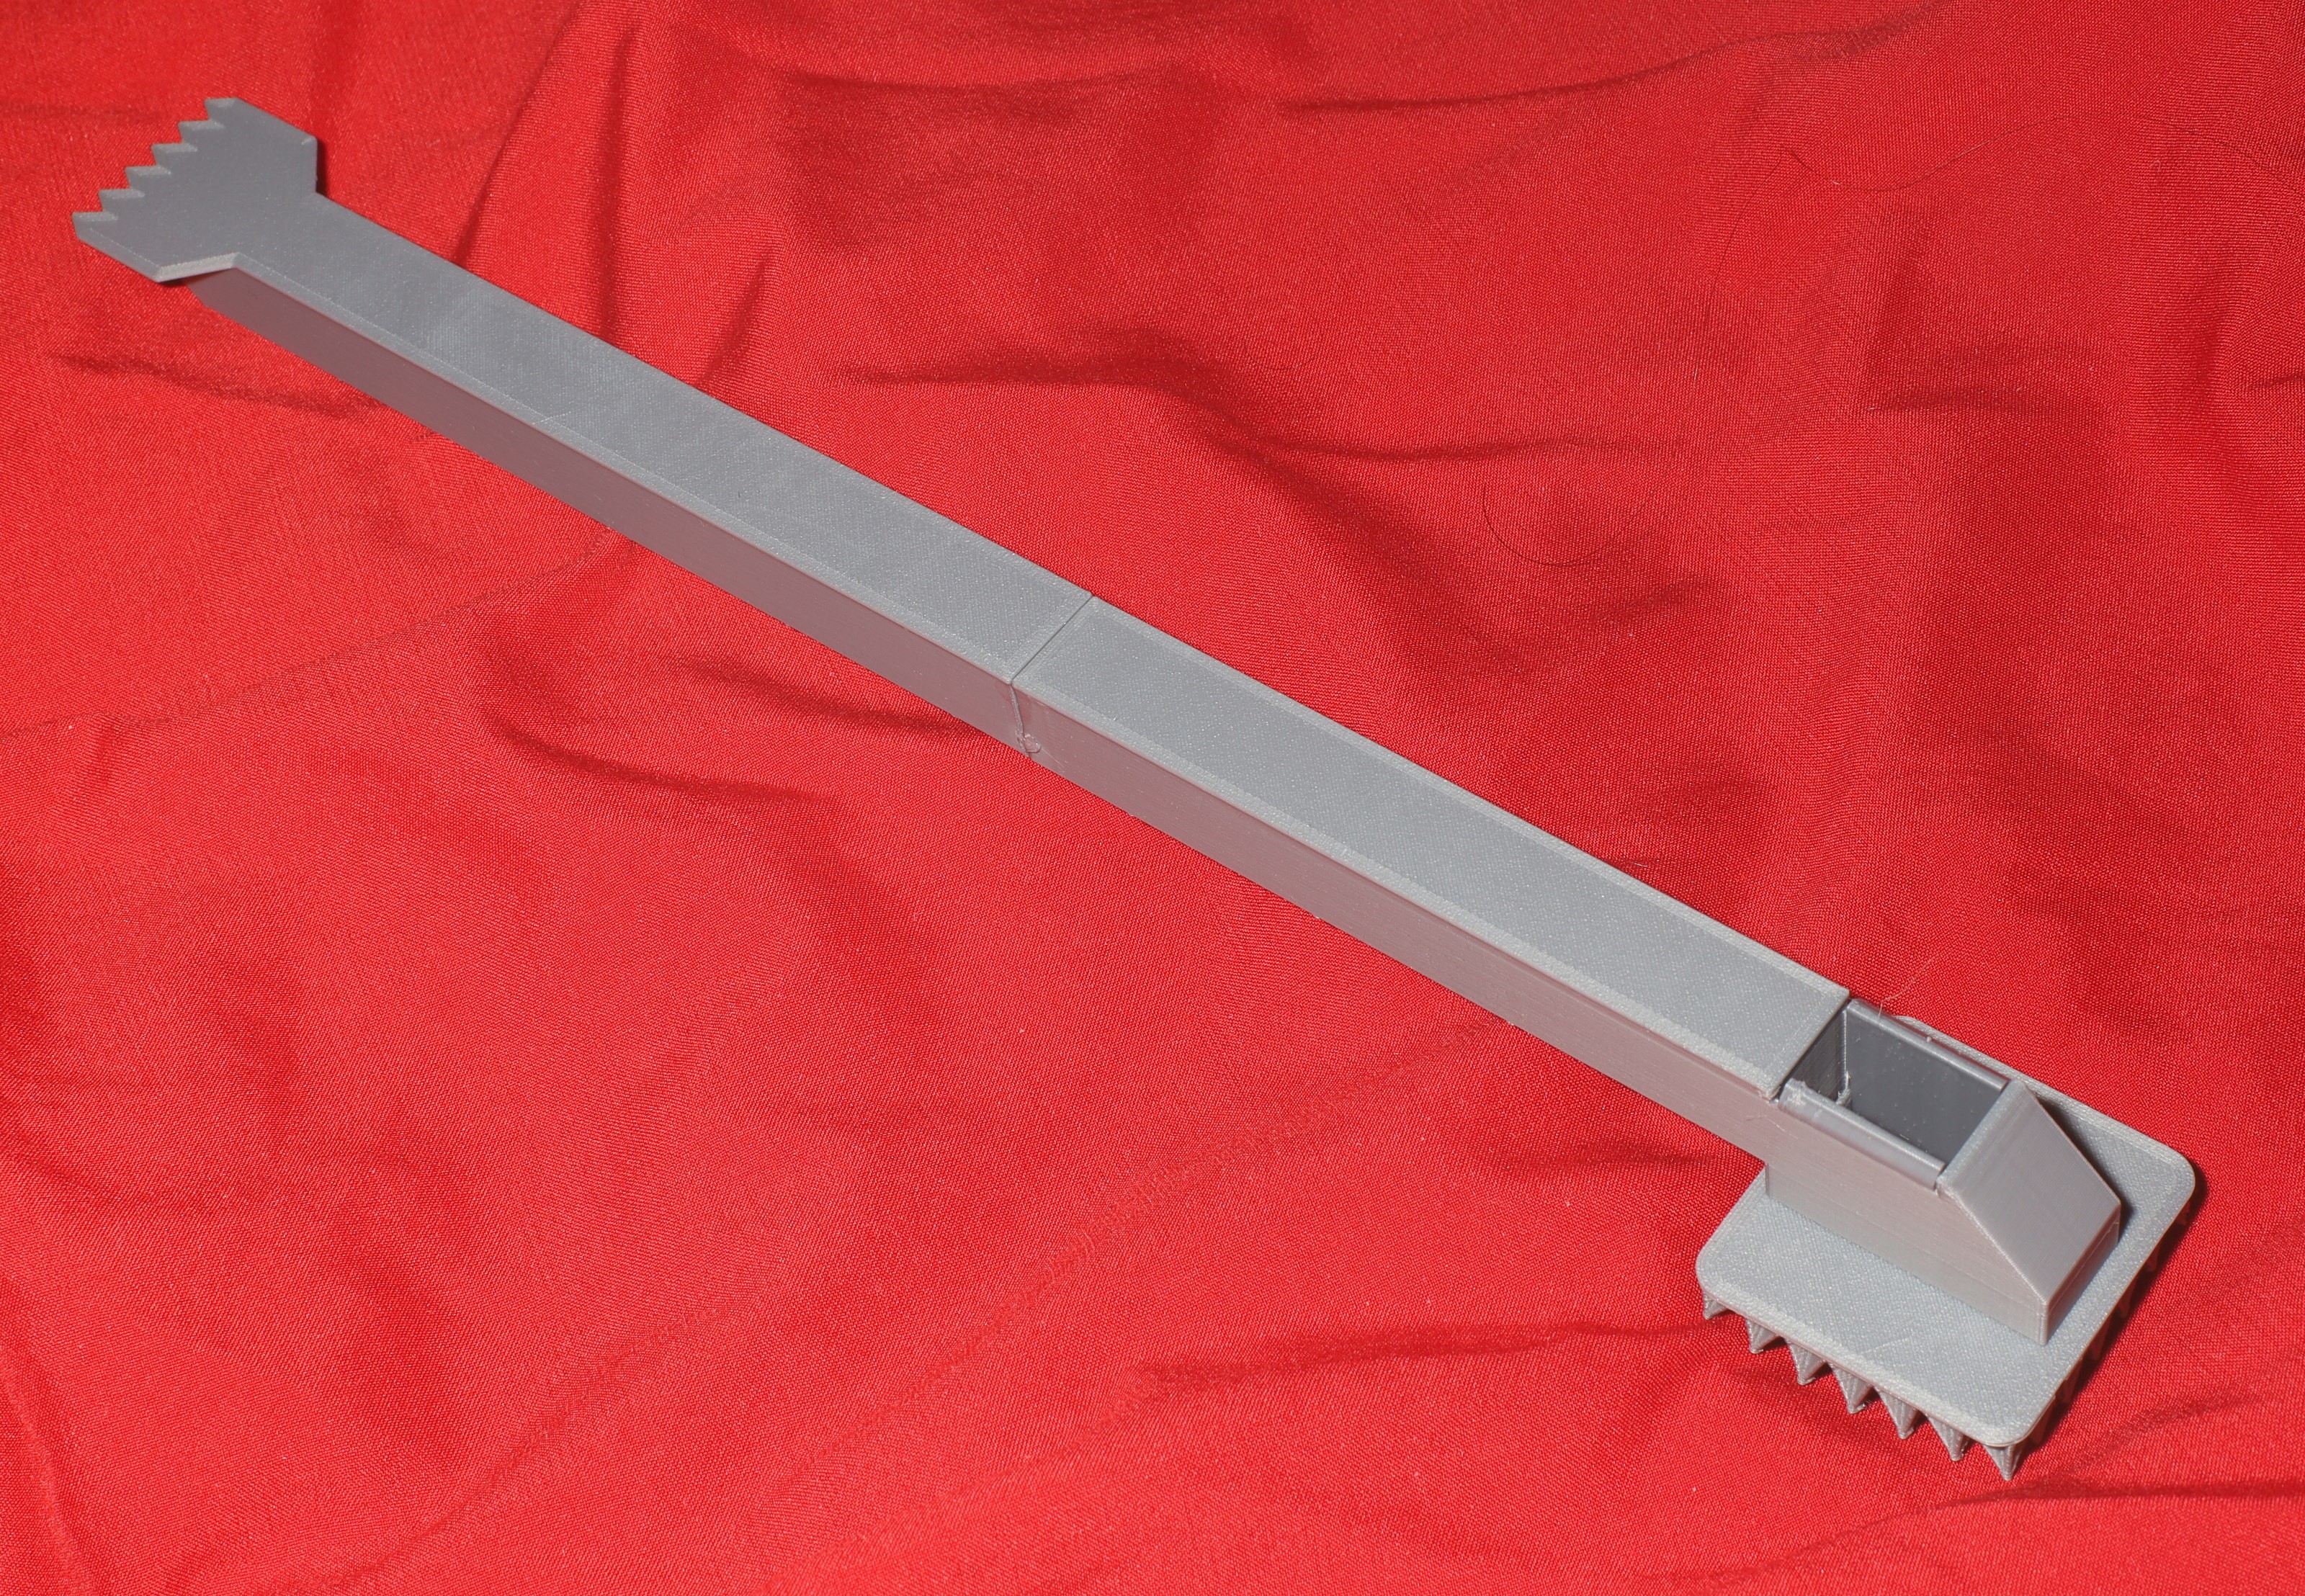
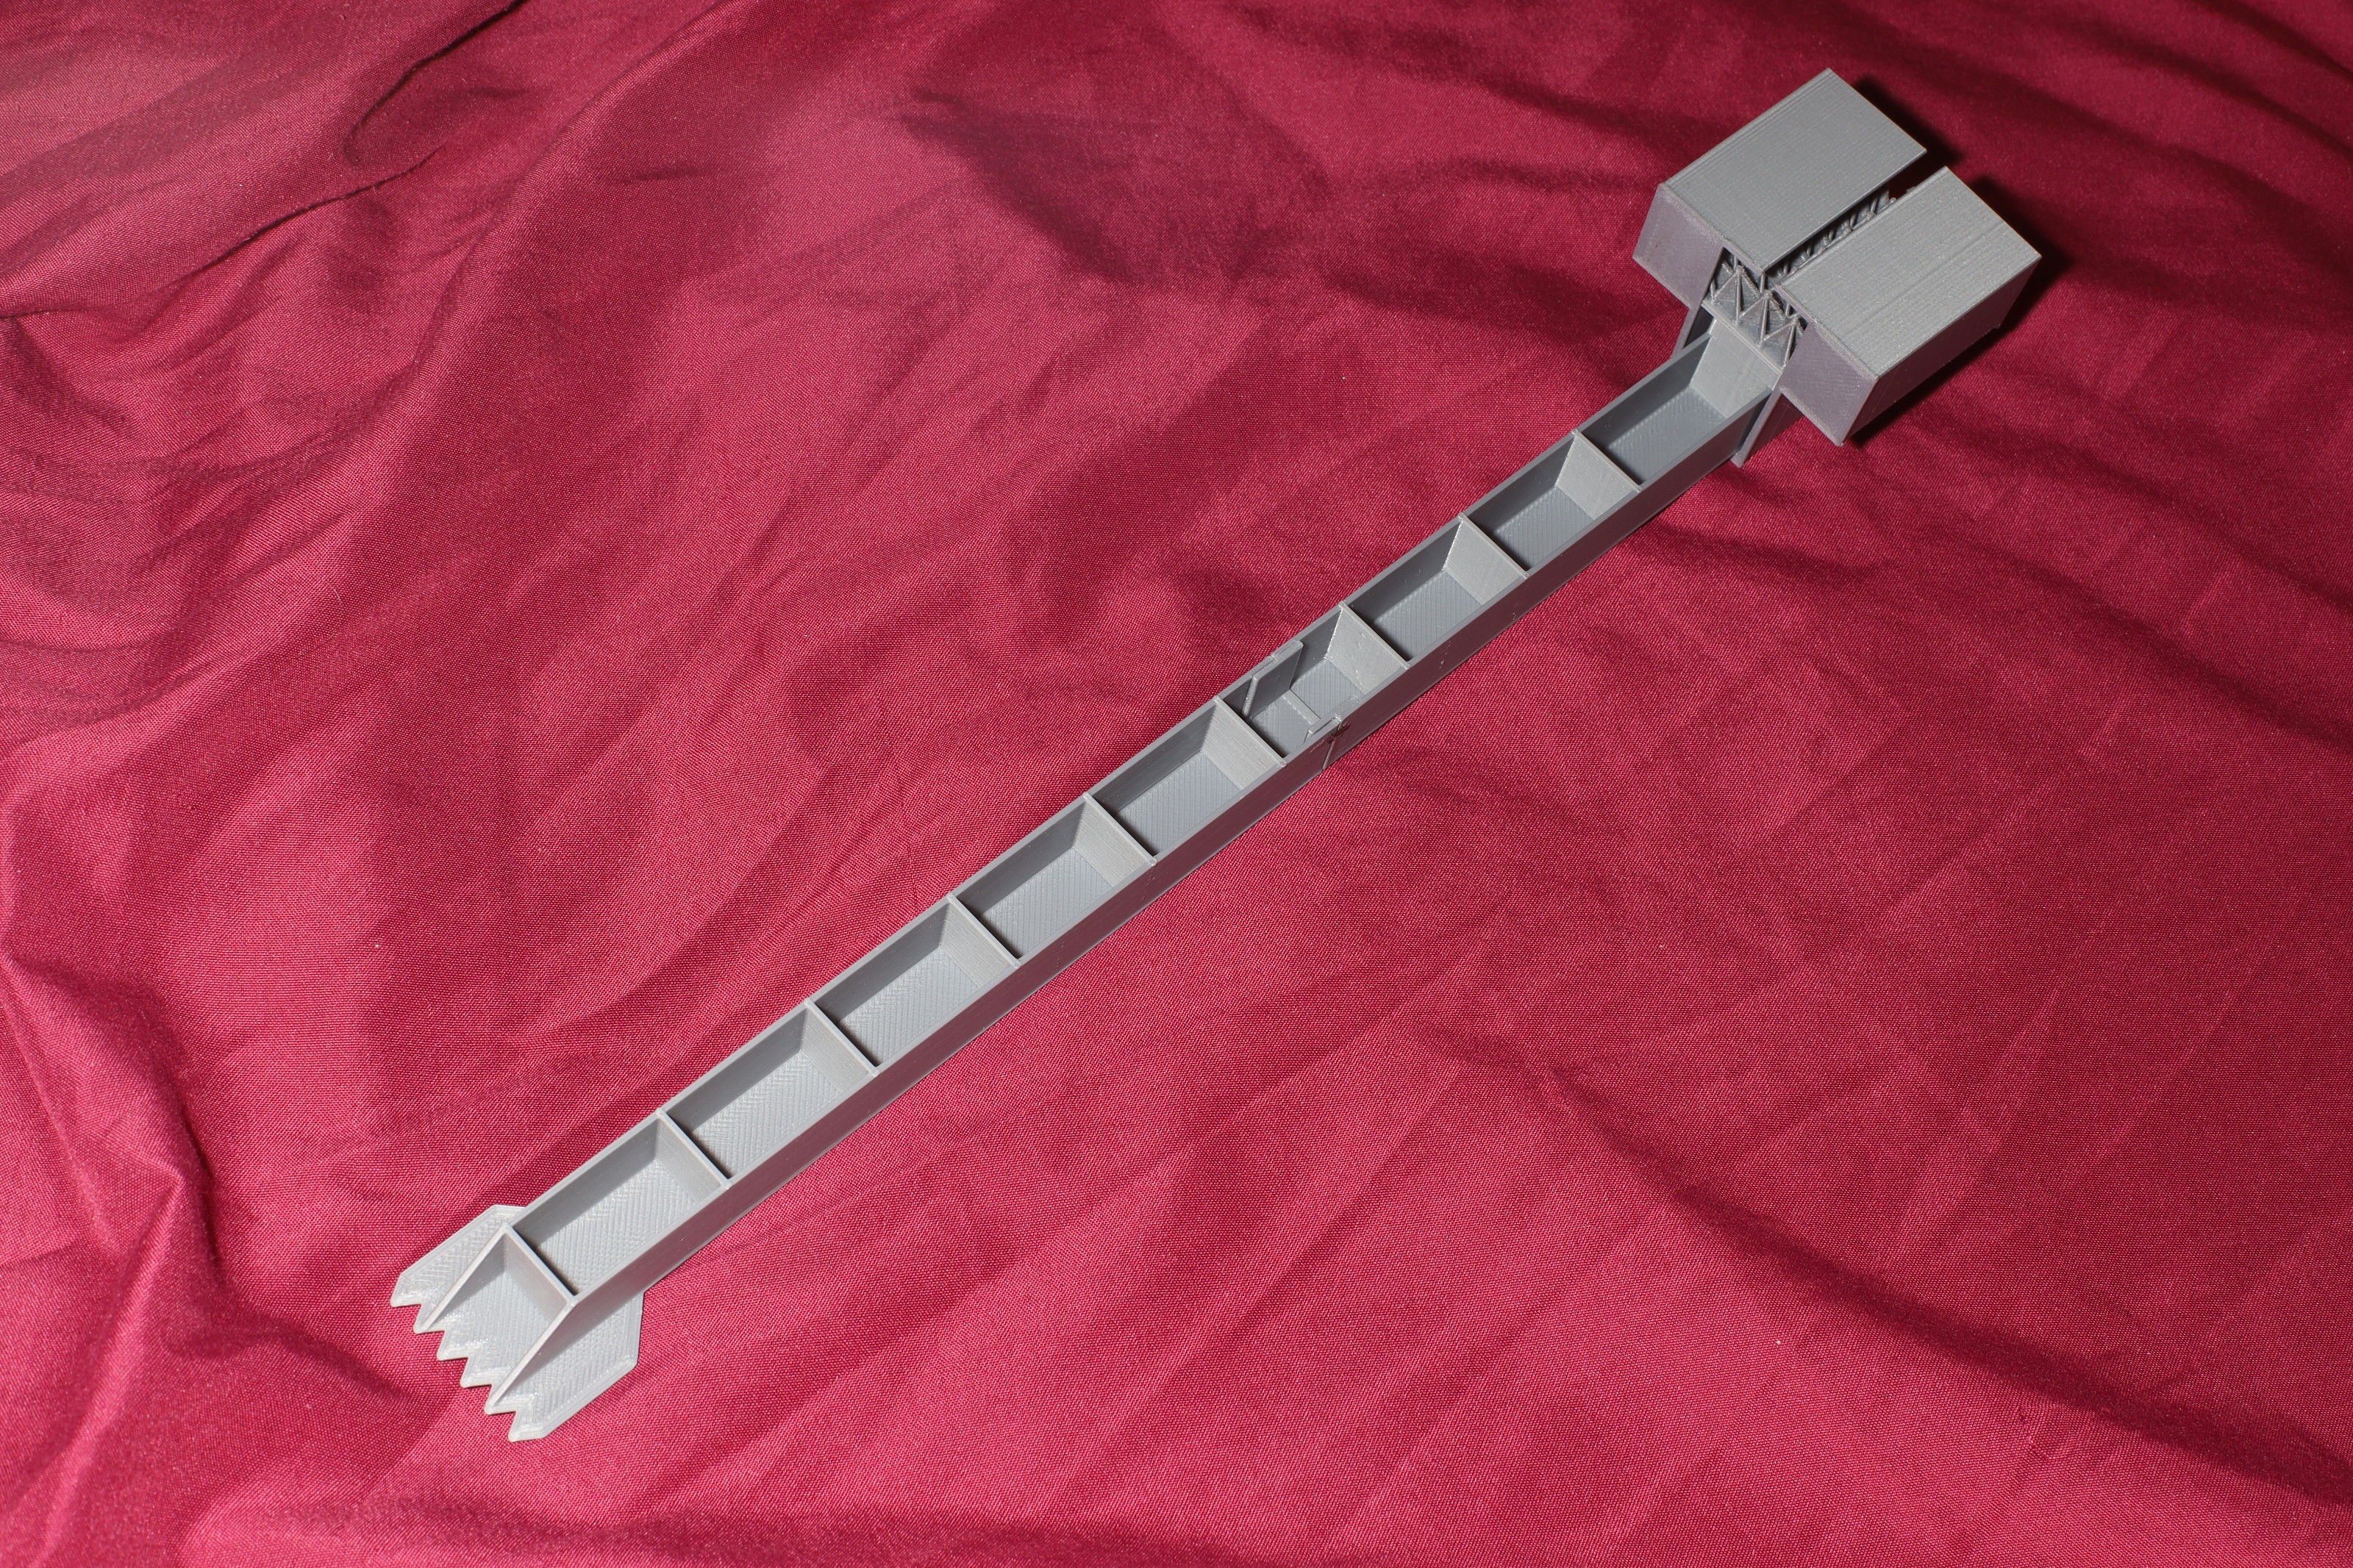
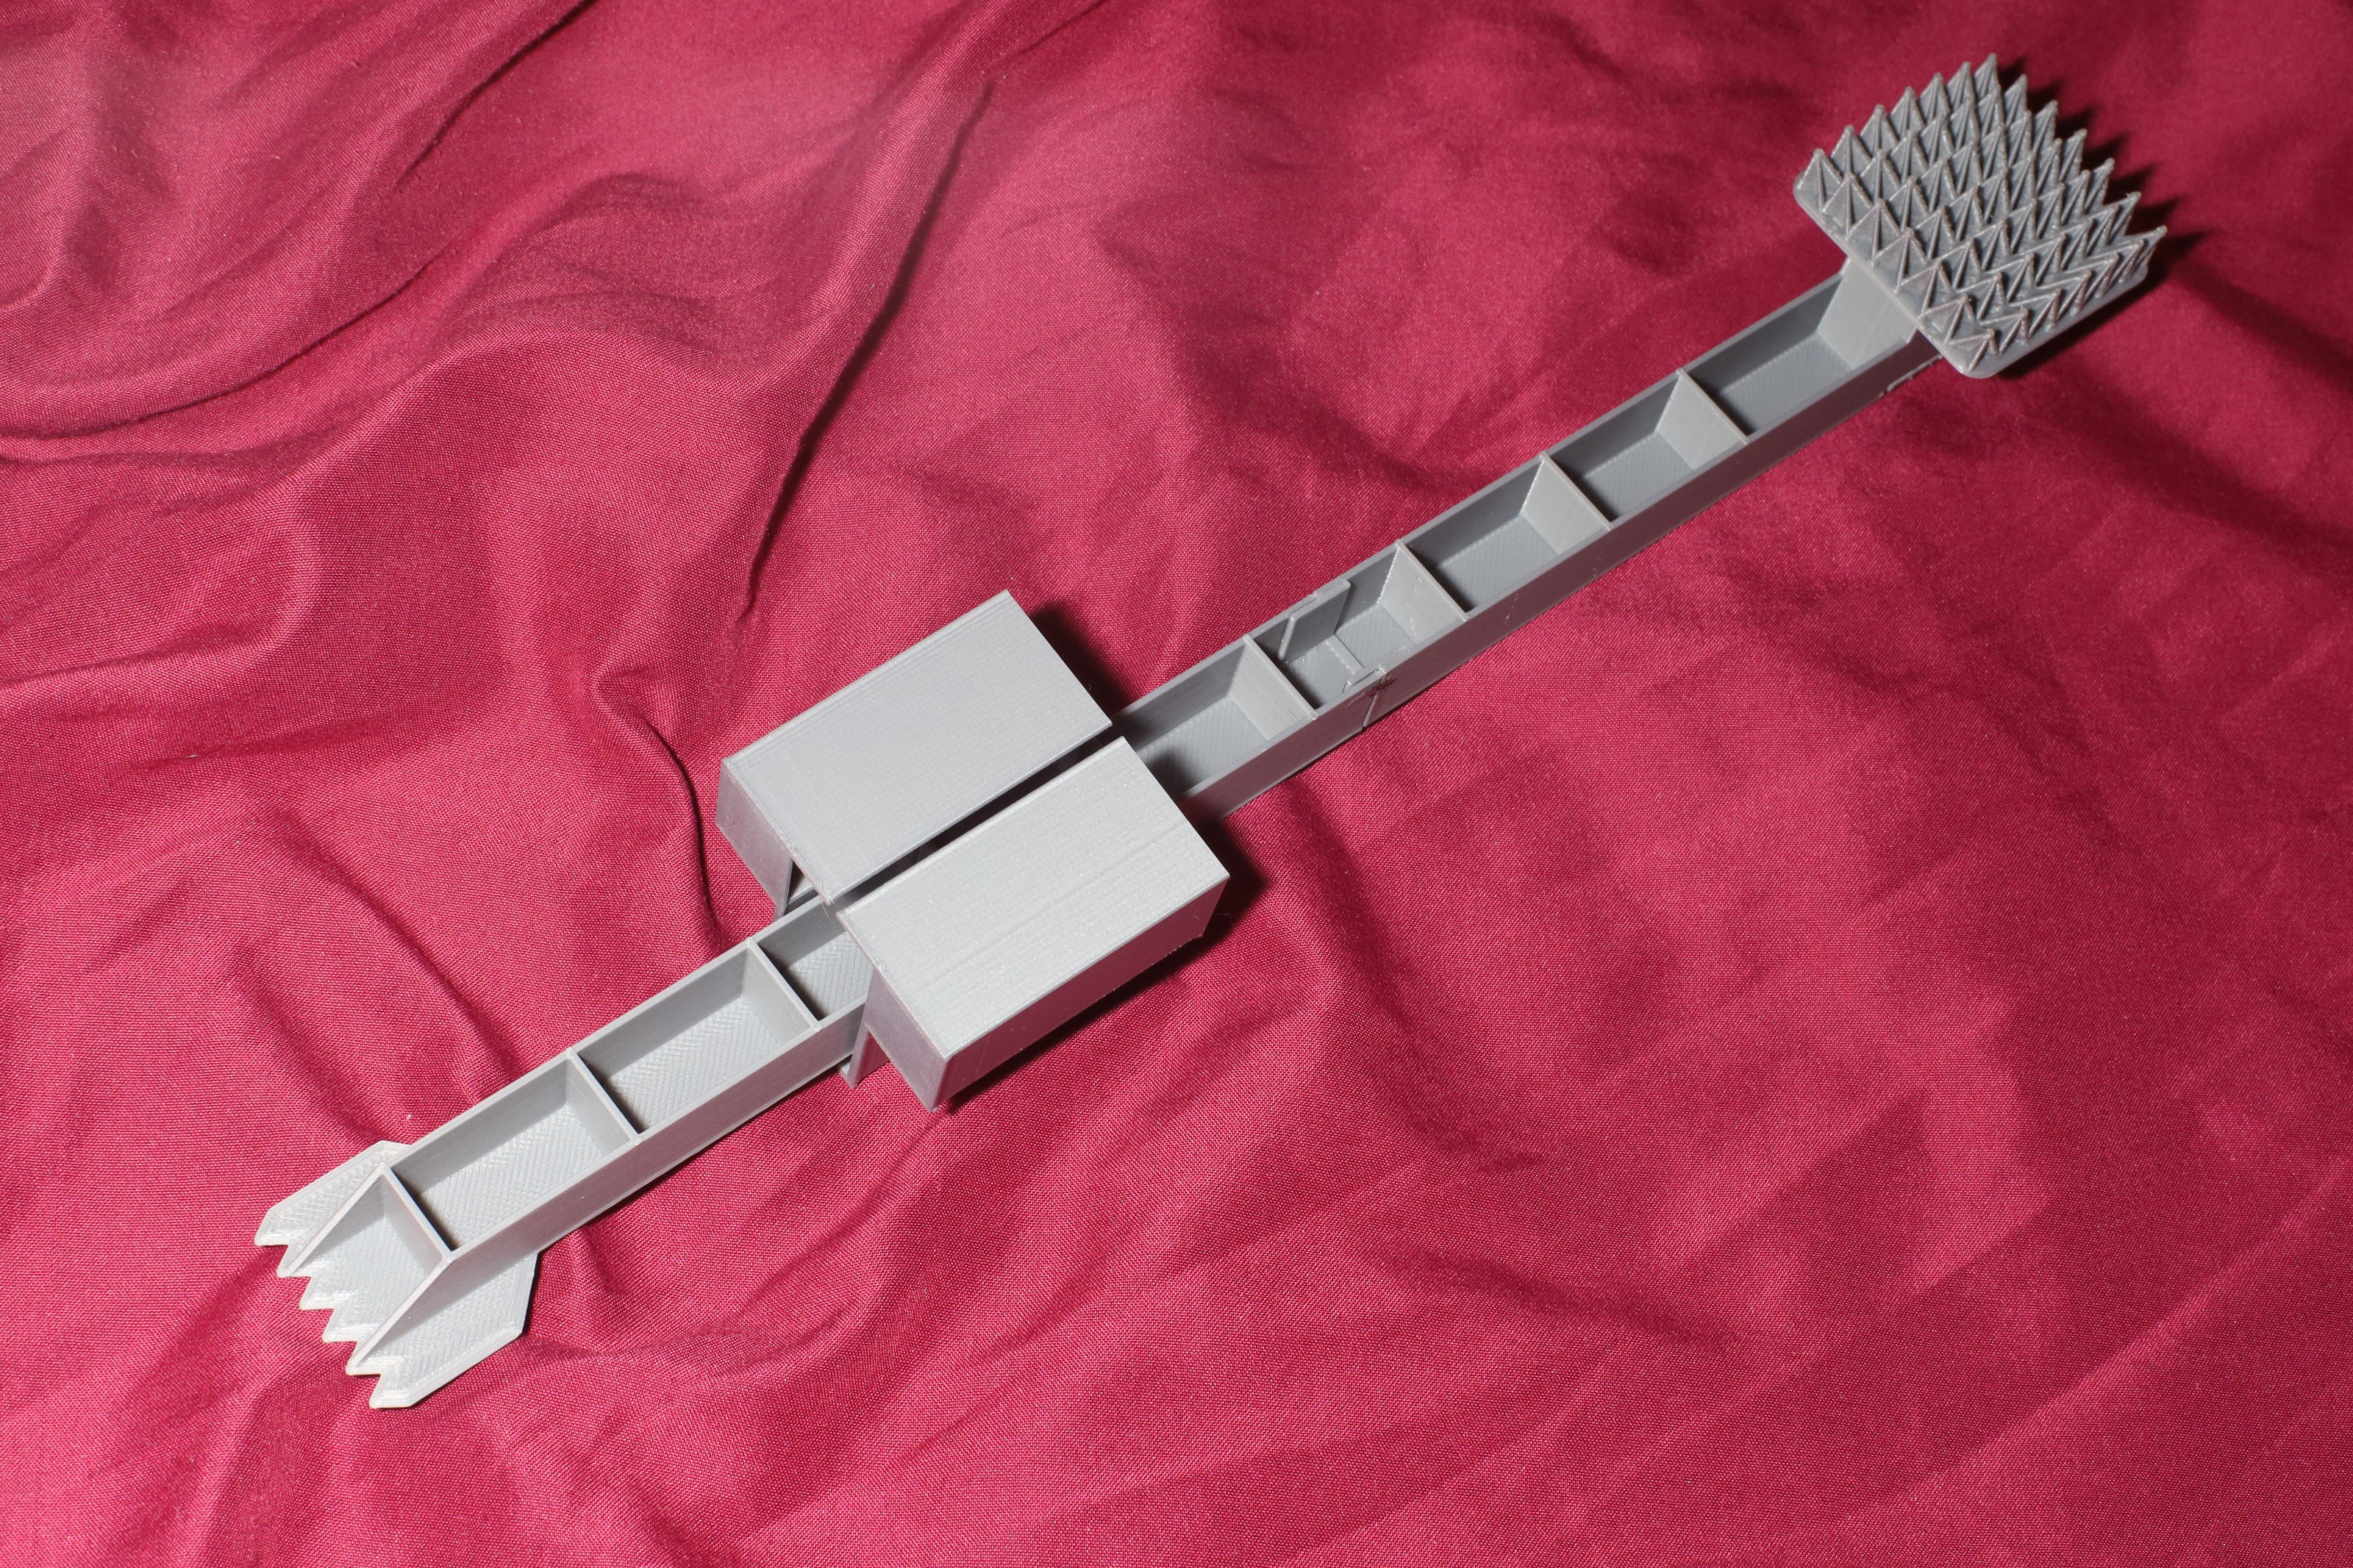
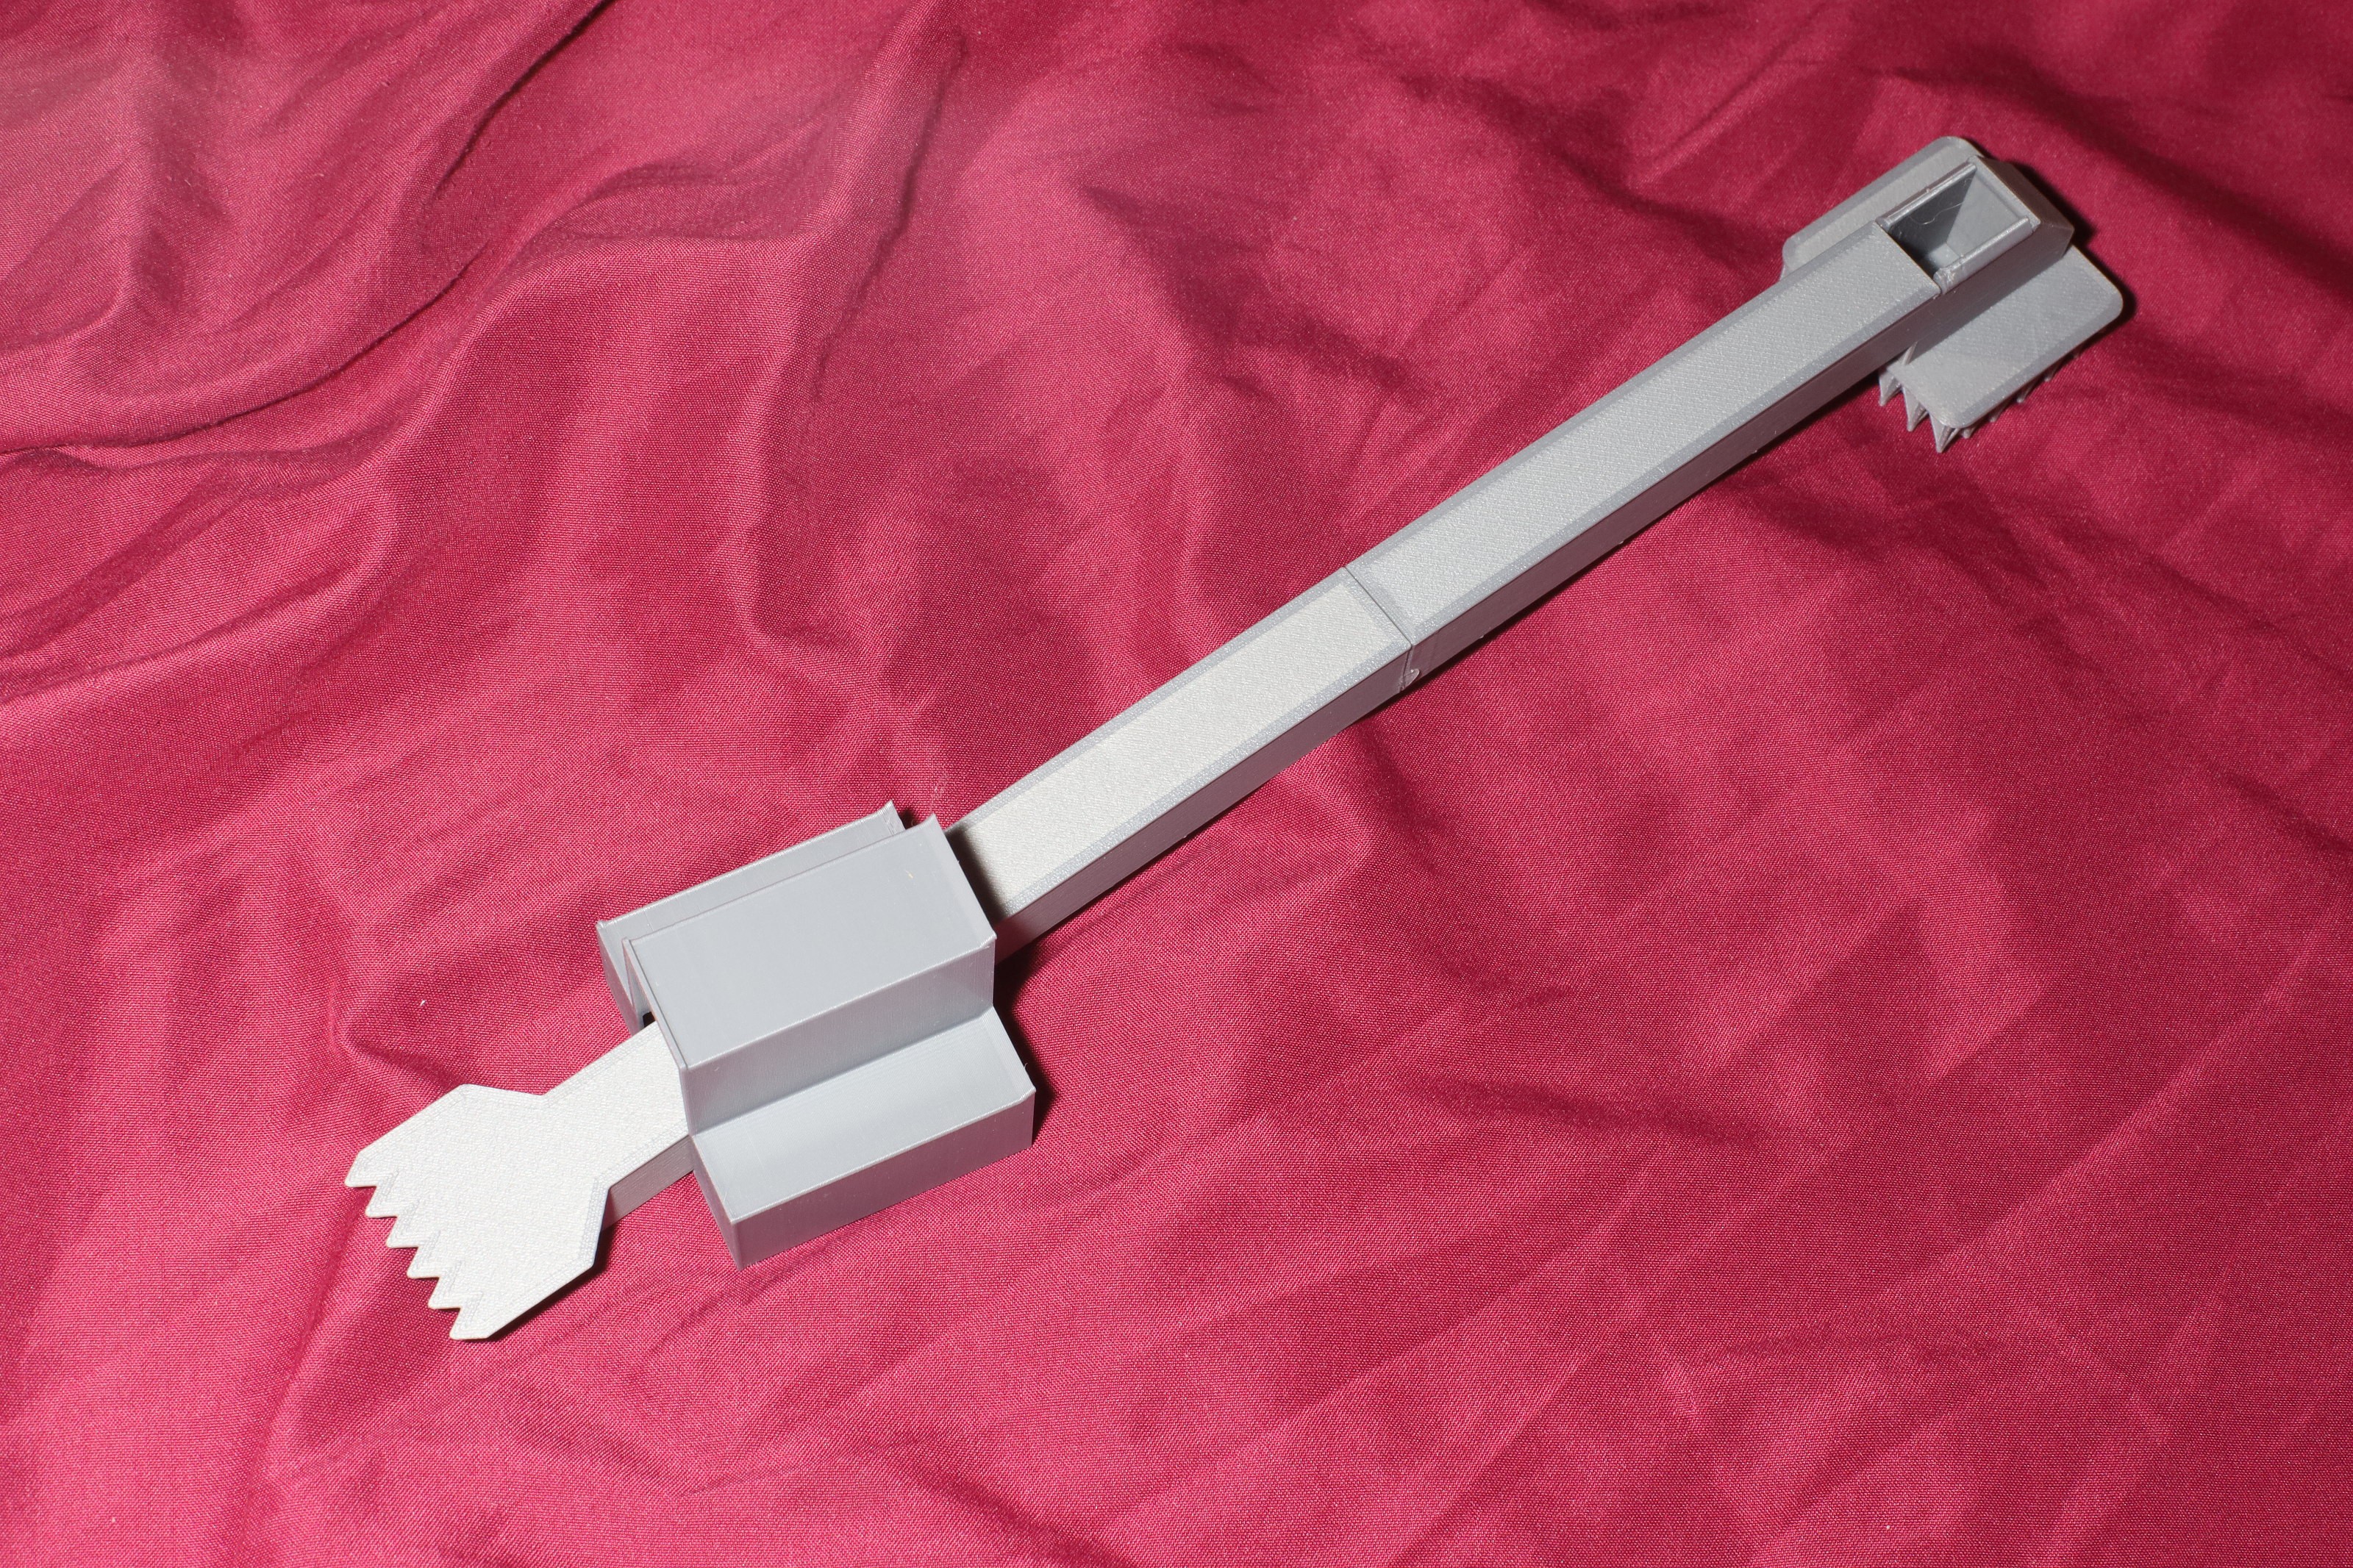
    Then the handle's pointy end got slightly more aggressive.

  • It wears out

    lion mclionhead03/02/2022 at 20:23 0 comments

    It does wear down over time.  It's only on a microscopic level, but noticeable.  The new scratcher has a slight plateau where the nozzle slides off.  The old scratcher has the plateau worn down.

    Some new ideas emerged, like lengthening the handle, making the scratching head convex, either keeping the spikes parallel or making the spikes radial.  The scratcher has proven useful for scratching many other body parts & makes a big impact on the pet hair situation.

    A convex scratcher was designed.  The spikes are farther apart.  

    The rear scratcher is not to be underestimated.  The longest handle the Ender 3 could print ended up being 270mm.

View all 8 project logs

Enjoy this project?

Share

Discussions

Similar Projects

Does this project spark your interest?

Become a member to follow this project and never miss any updates