-
[R] Tube printing
07/03/2022 at 21:58 • 0 comments![]()
Quick introduction
So I'm thinking of any new possible features that the Slime could do and I realised that I could have 1 Slime at 0 degrees and the other at 90 degrees to use the extruder motor of the second on as a 6th axis. That reminded me of the ribbon nozzle I talked about a few logs ago and looked around for internet mentions and other variable nozzles. Quickly, I found the first variable nozzle I ever knew: the SmartNozzle.
![]()
https://contest.techbriefs.com/2016/entries/machinery-automation-robotics/7080 "While I'm here at this site, I might as well look to see what the 2022 entries are." I thought, and there I found the tube printing hotend.
Printing in tubes
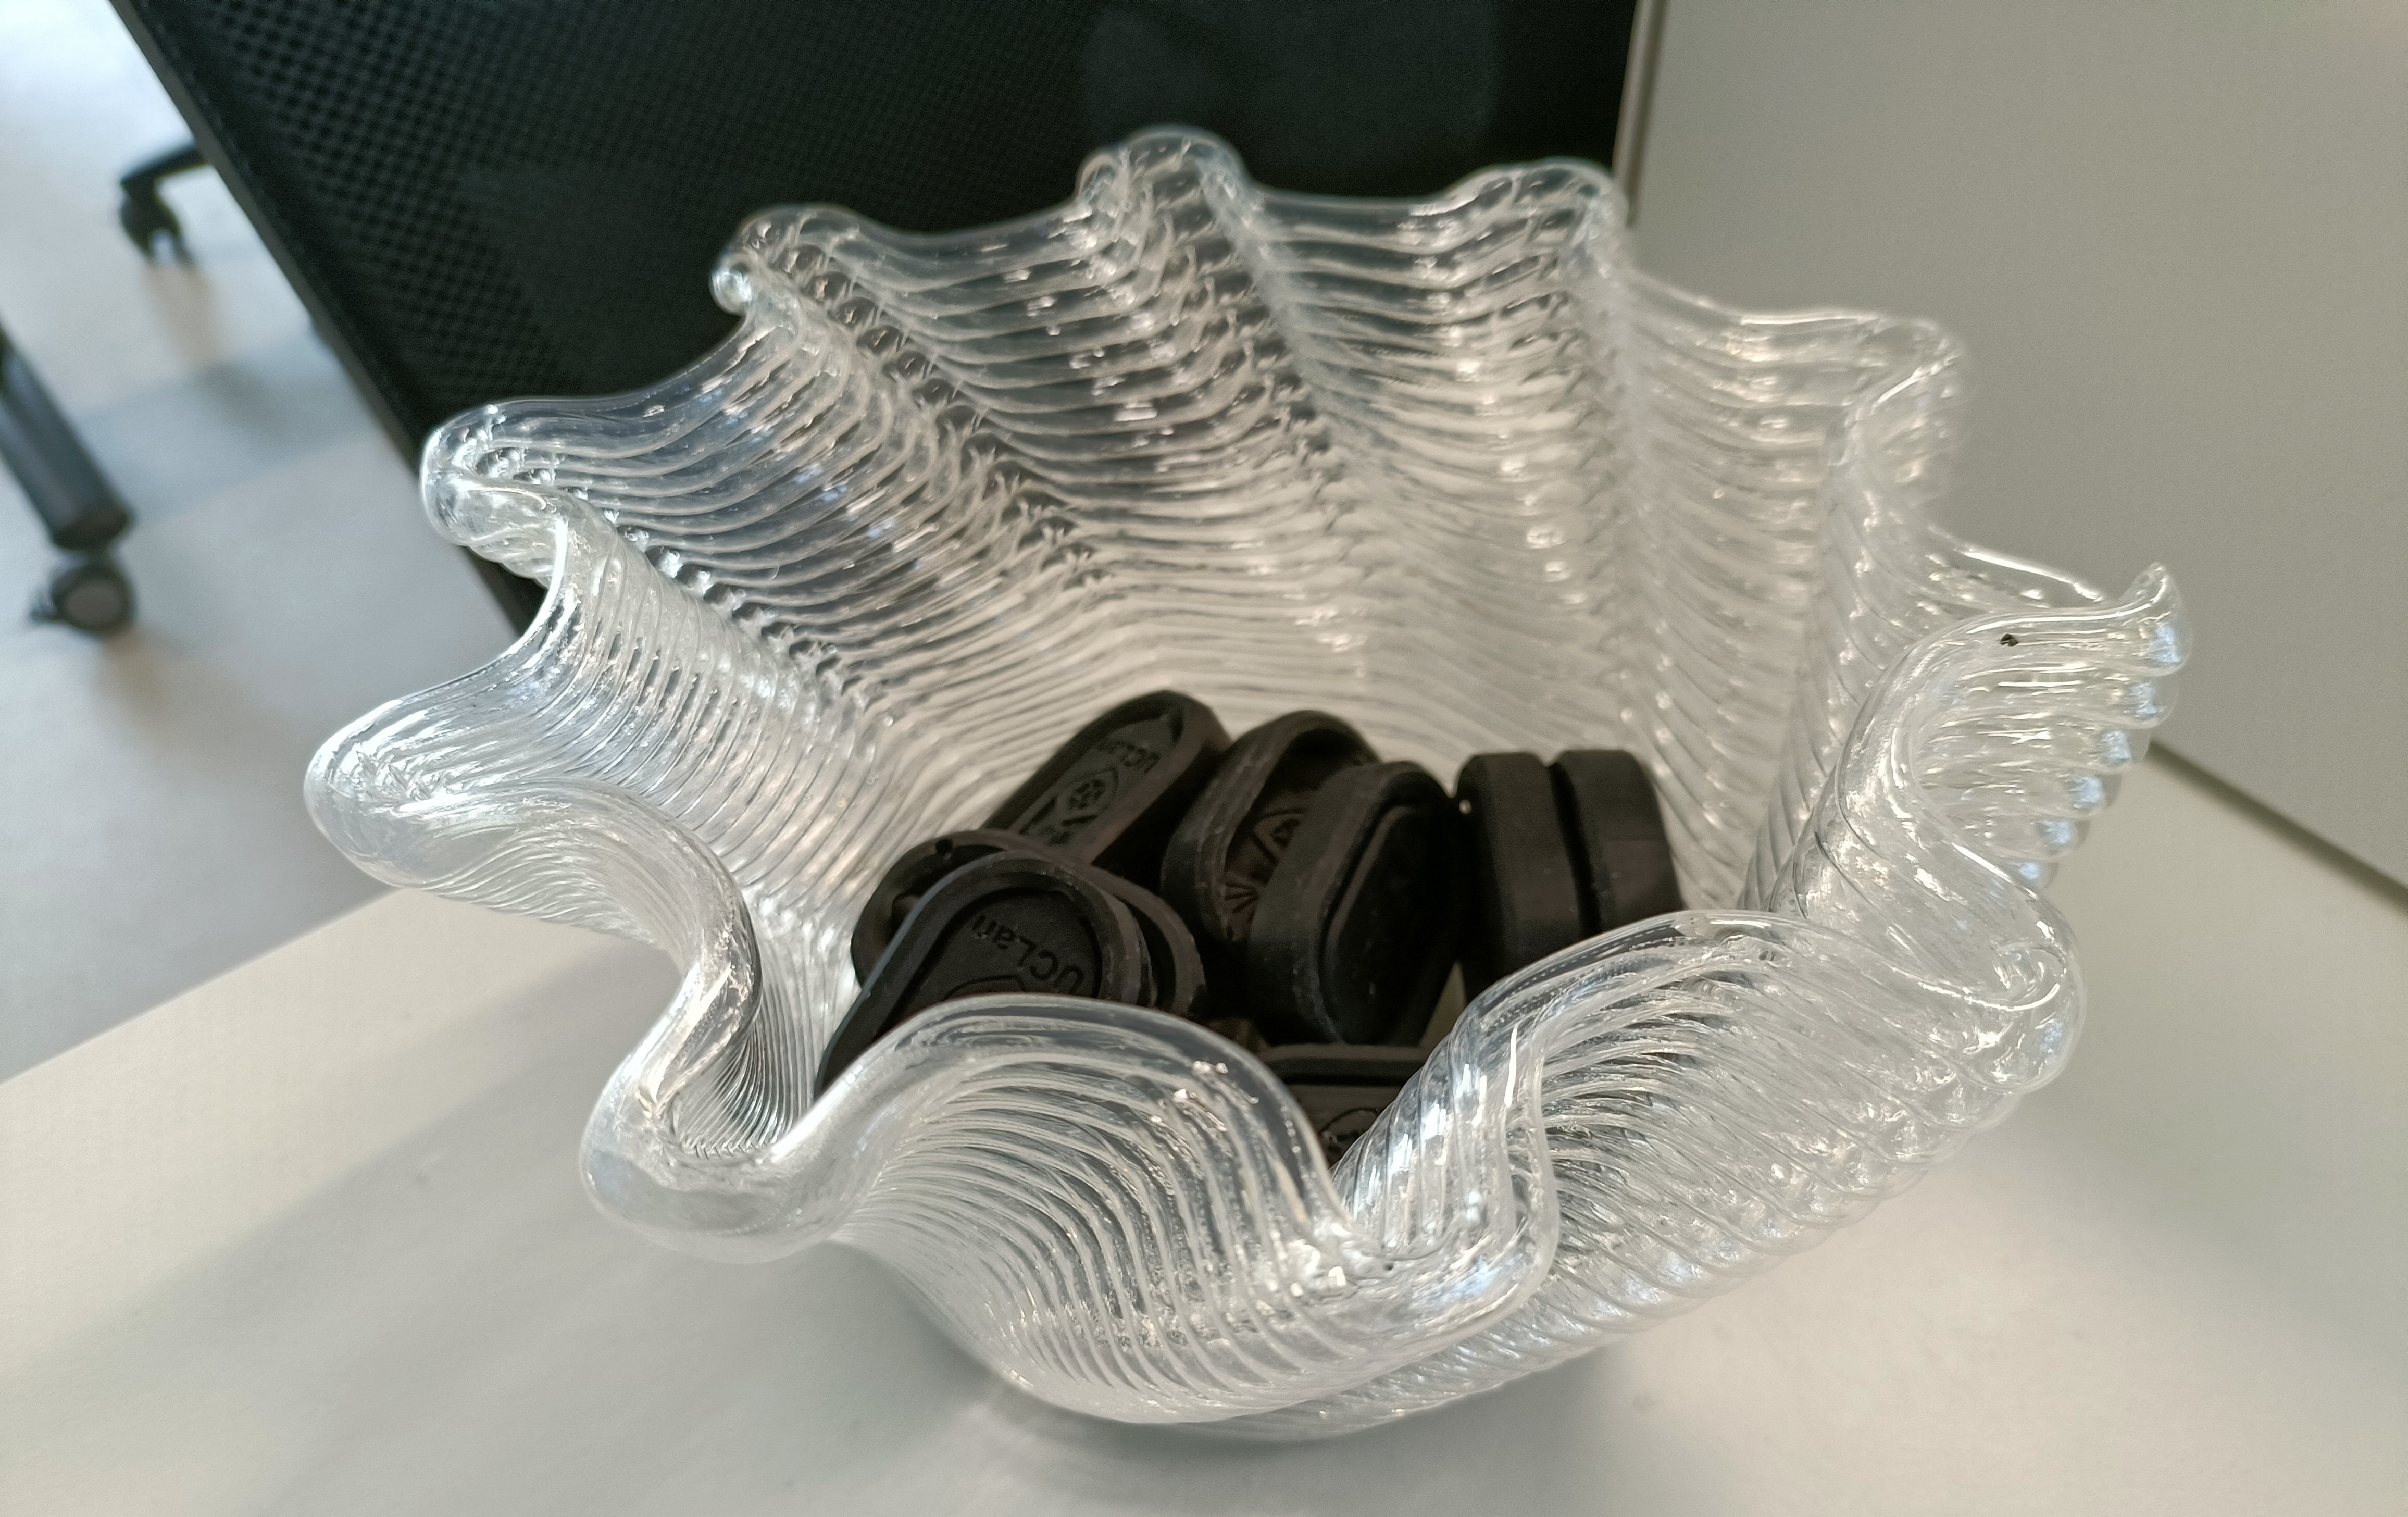
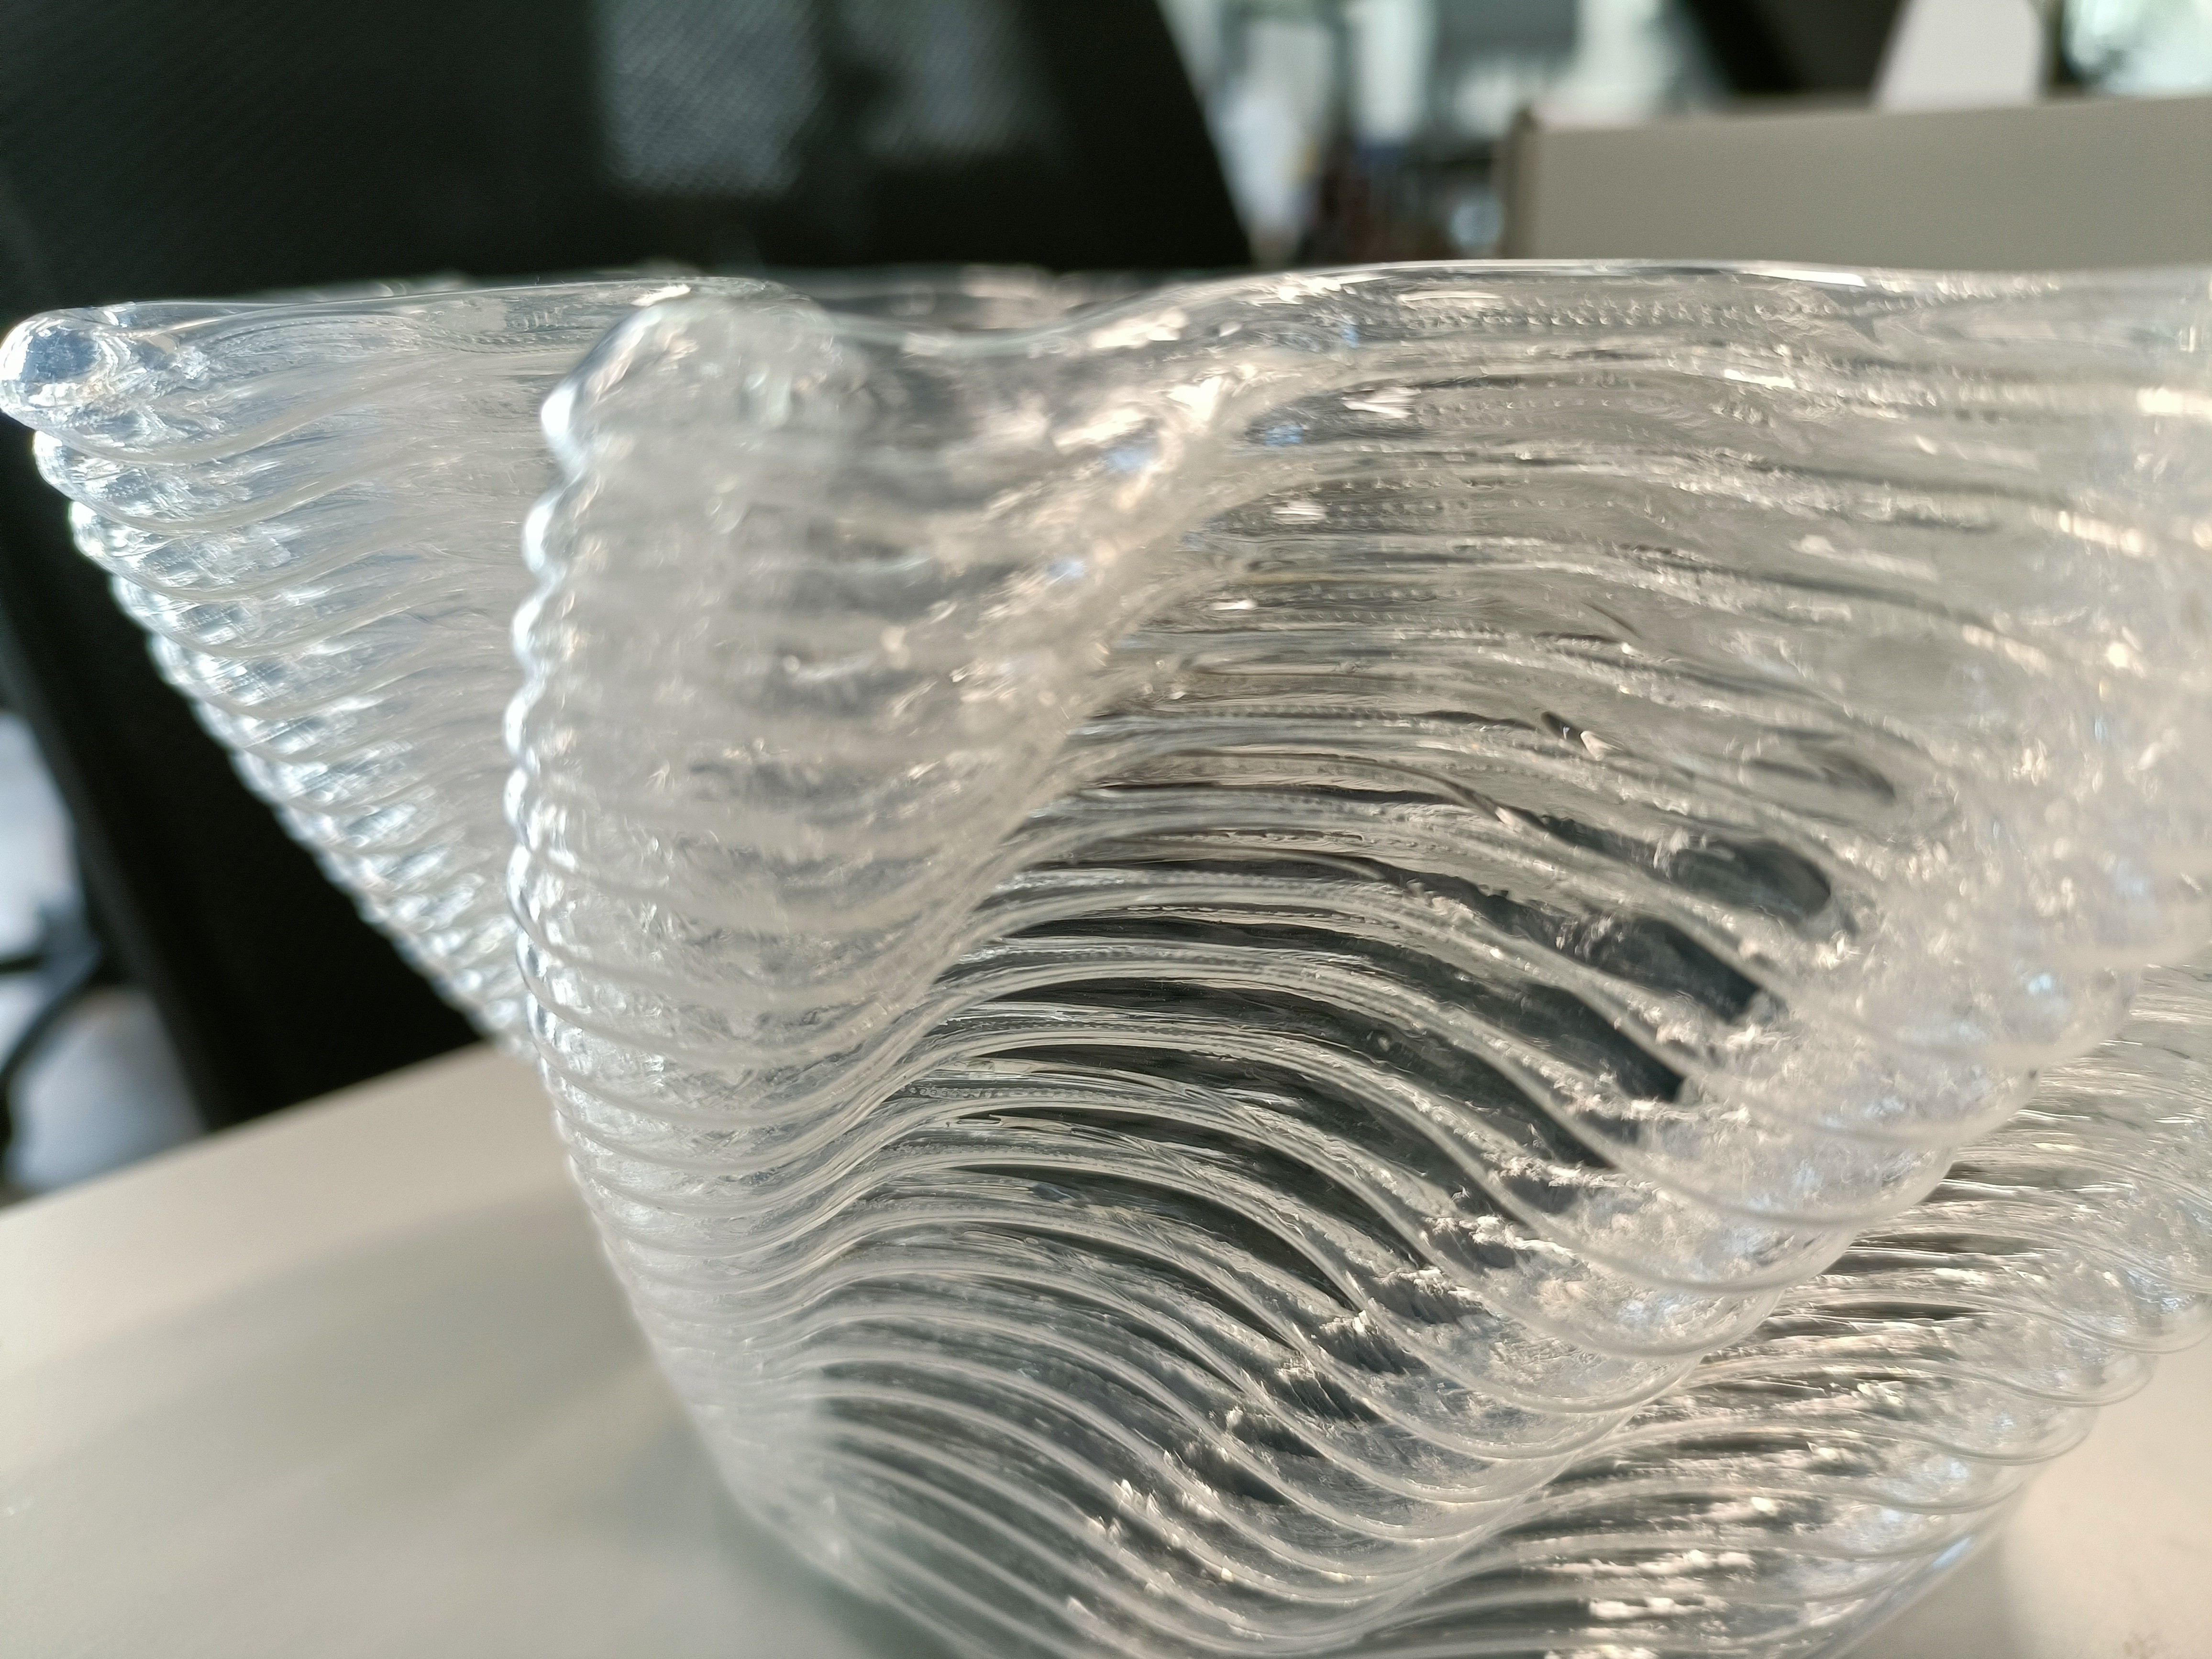
So my university just happens to have a tube 3D printer that I've known about for months but didn't know if it was some secret prototype so never said much about it. I could never quite work out how it worked until now, but I have seen it printing and the prints it's made:
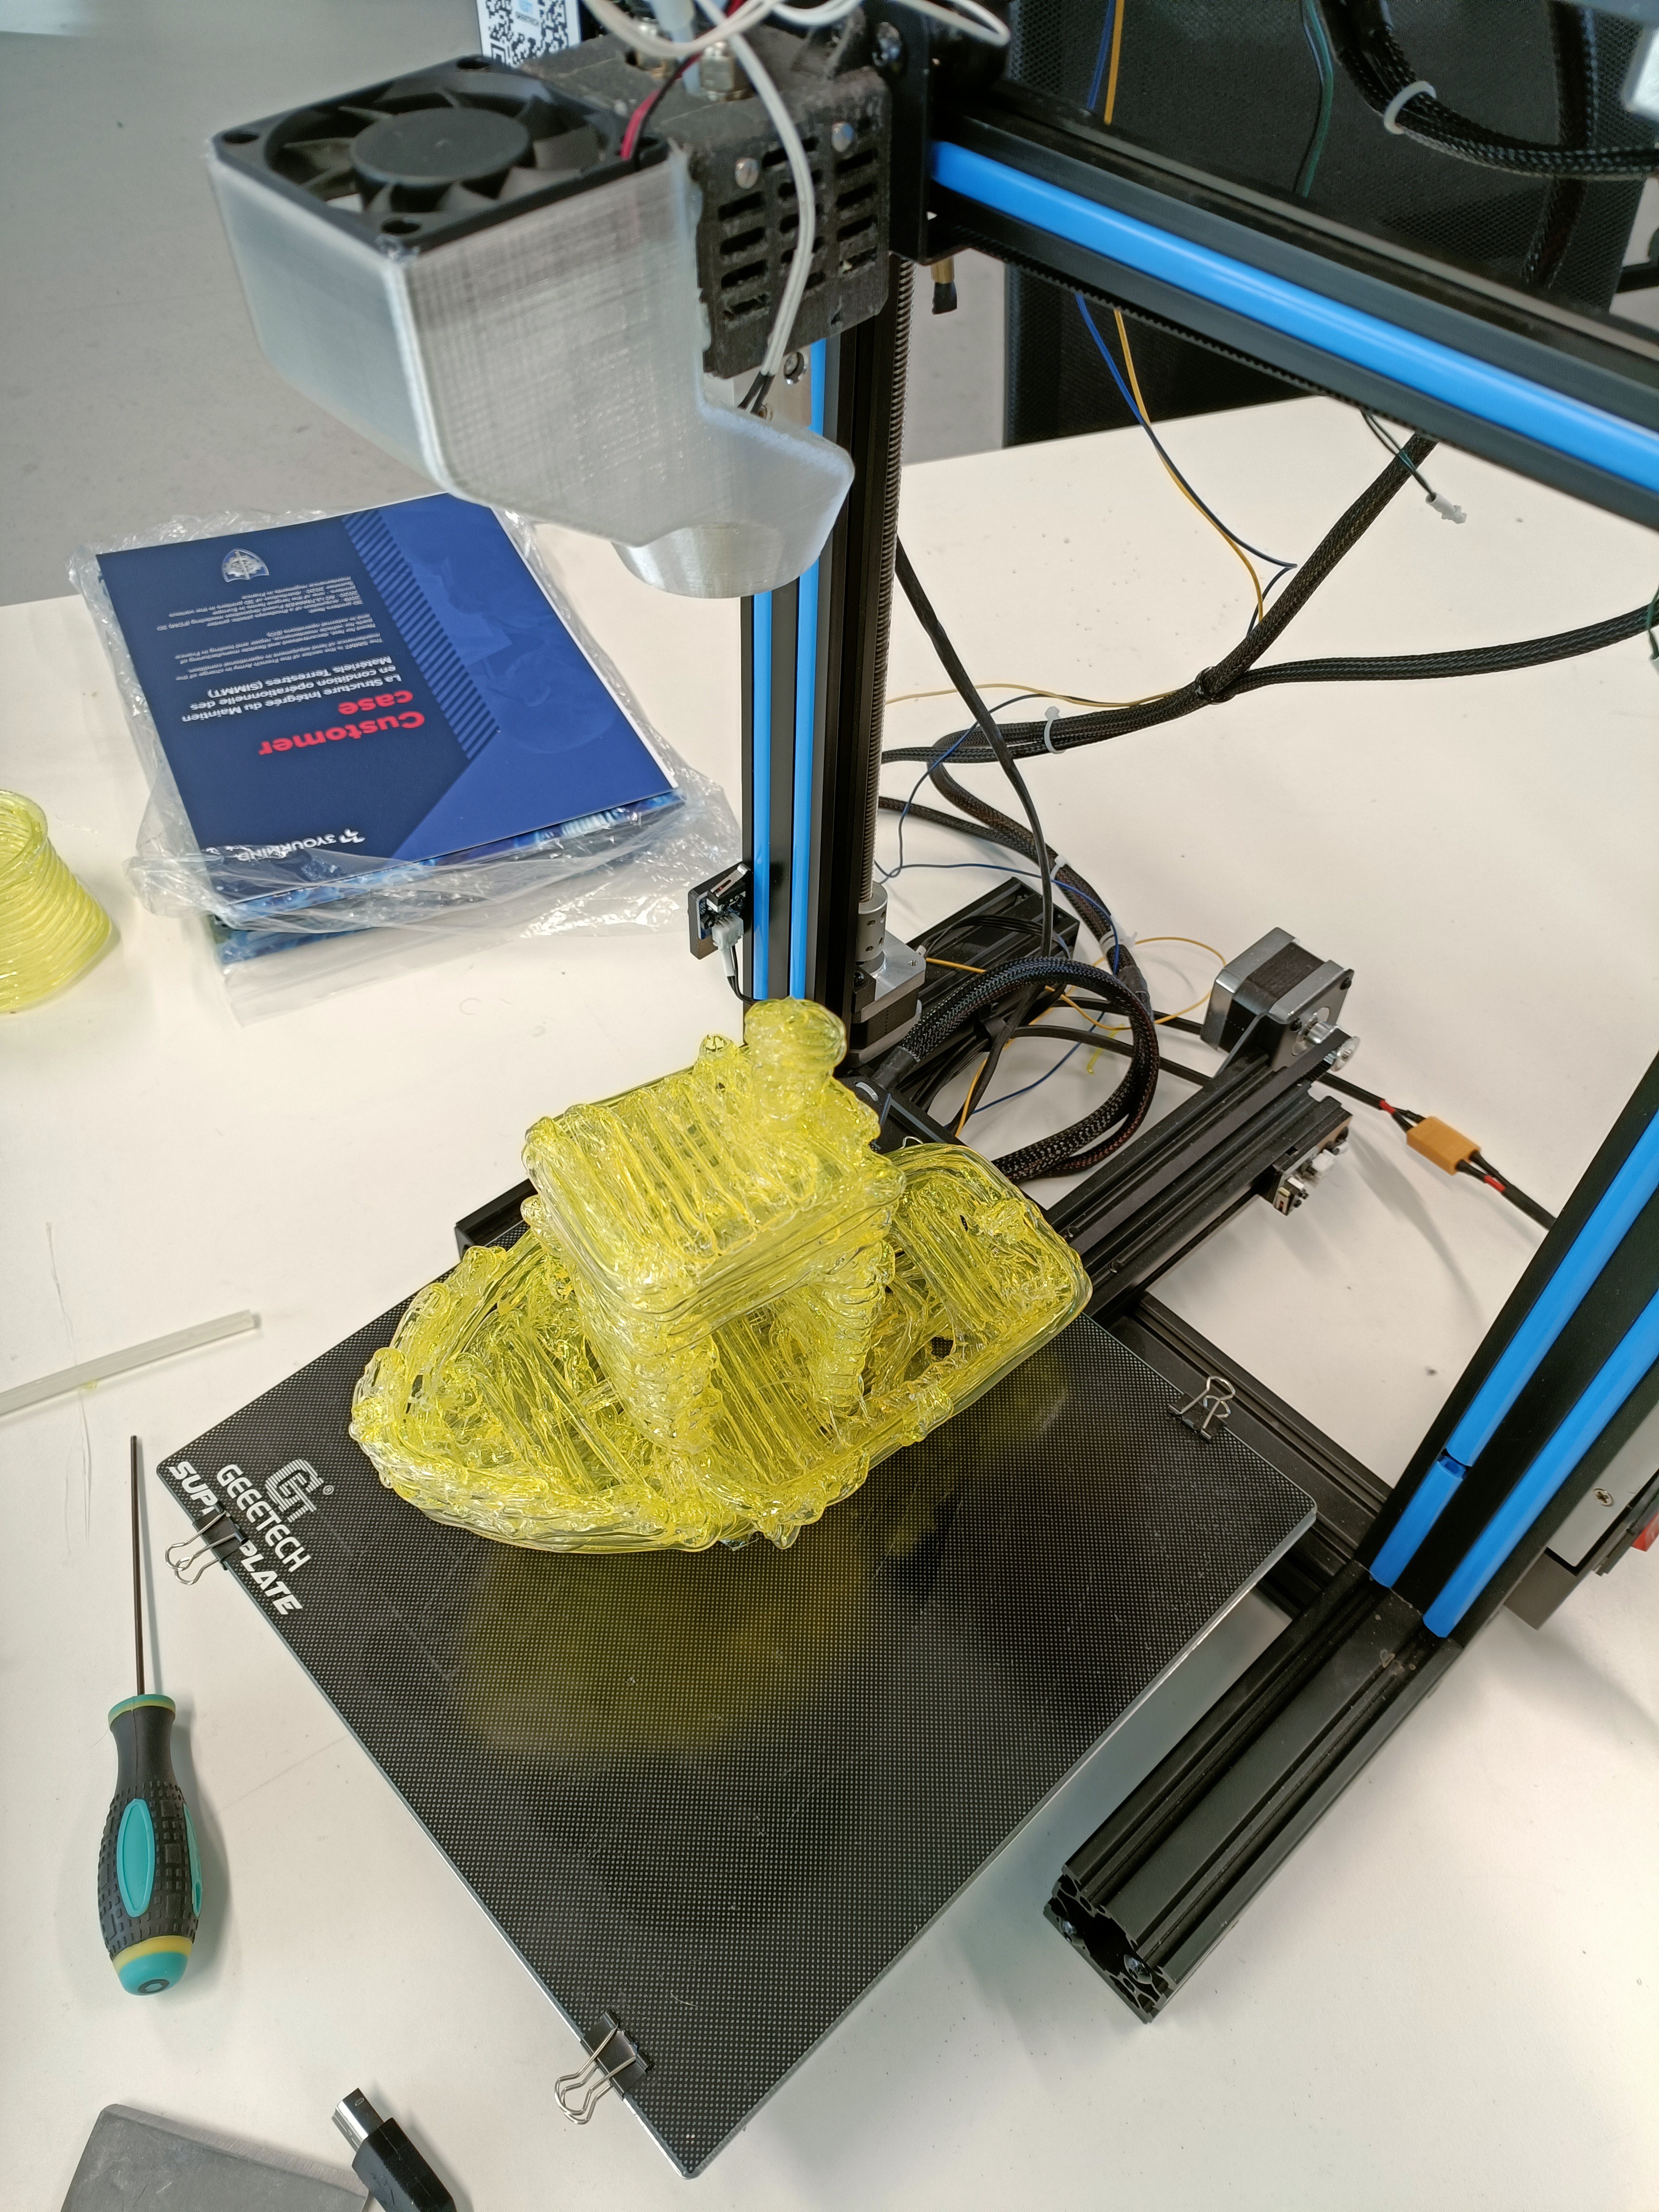
![]() I didn't notice that there was a gap between the inner hole and the edge of the face, and now it makes sense how the walls stay solid and without voids.
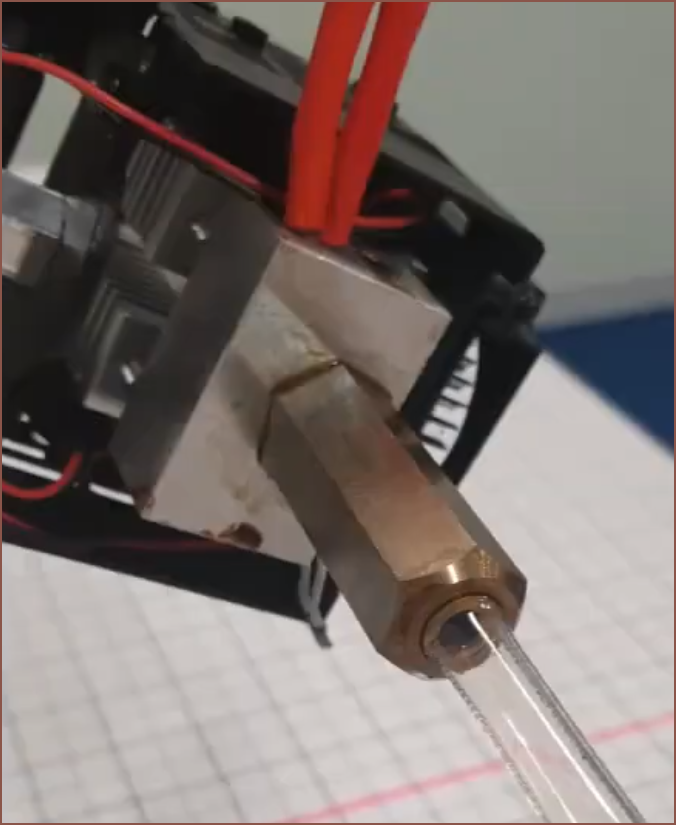
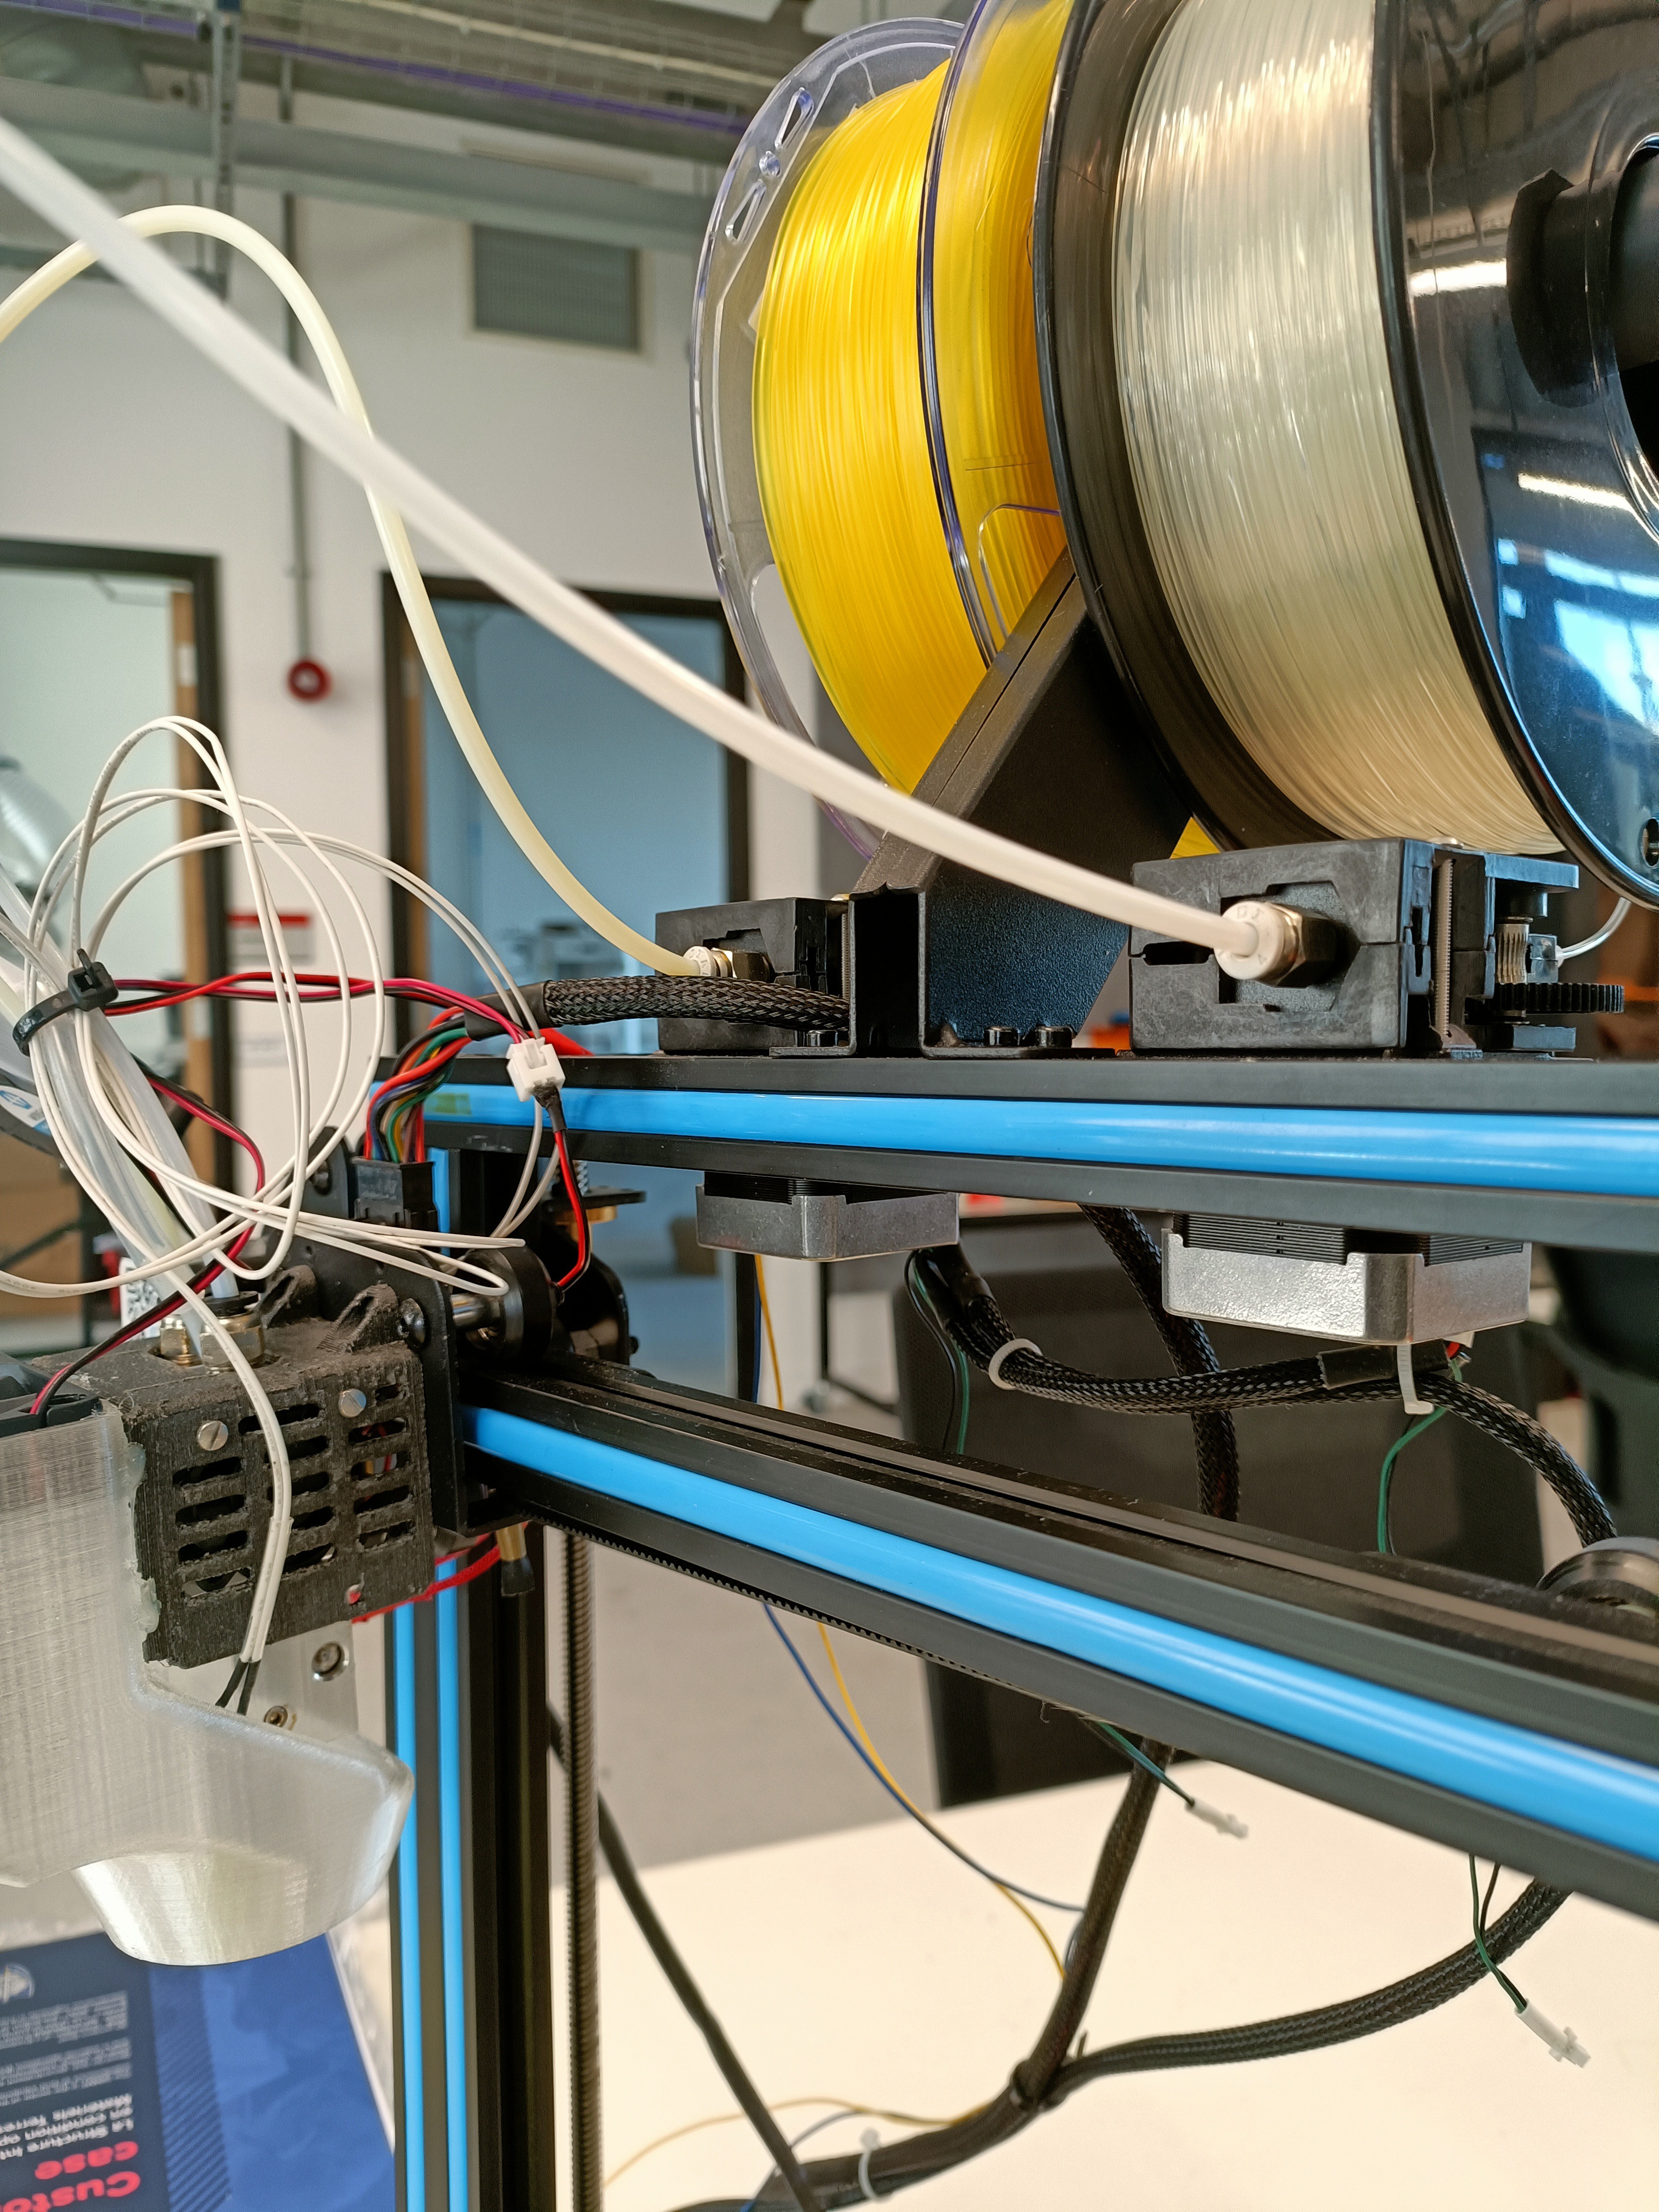
I didn't notice that there was a gap between the inner hole and the edge of the face, and now it makes sense how the walls stay solid and without voids.![]() As you can also see from the image, the hotend takes in 2 spools of filament, so I was happy to realise that I could create a tool that used both Slimes a few logs ago because it meant that the potential of printing tubes was possible. The tubes almost freeze in place so some really extreme overhangs are possible. I wonder if it would be suitable for a 5 axis version of wire printing, or perhaps used as tree supports.
As you can also see from the image, the hotend takes in 2 spools of filament, so I was happy to realise that I could create a tool that used both Slimes a few logs ago because it meant that the potential of printing tubes was possible. The tubes almost freeze in place so some really extreme overhangs are possible. I wonder if it would be suitable for a 5 axis version of wire printing, or perhaps used as tree supports.Most recently, it seems that they're trying different colours instead of 2 sets of clear filament to colour the parts
![]()
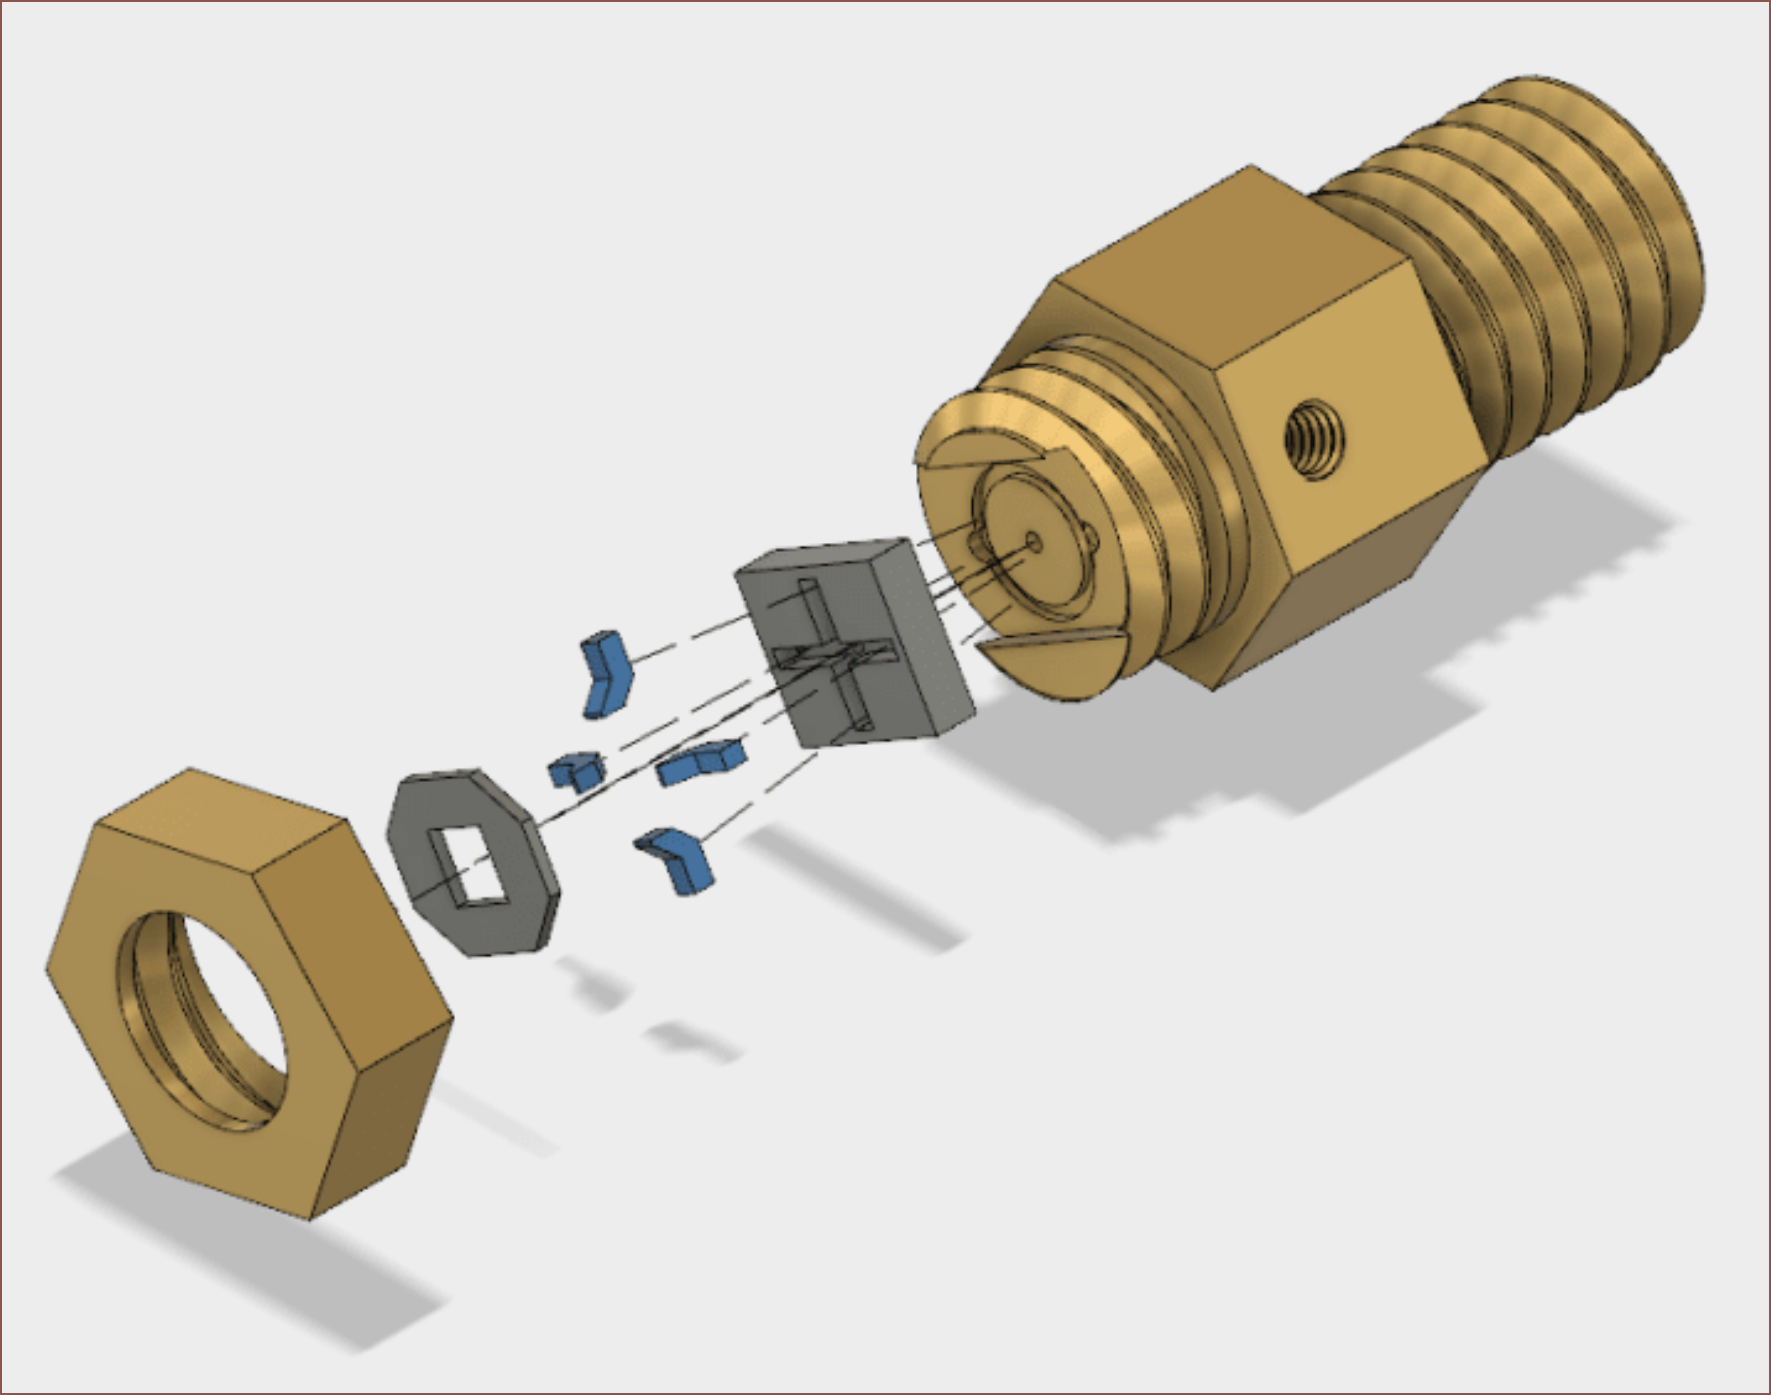
![]() I do wonder what an opaque material would look like, but a more immediate question would be "How would I manufacture it?"
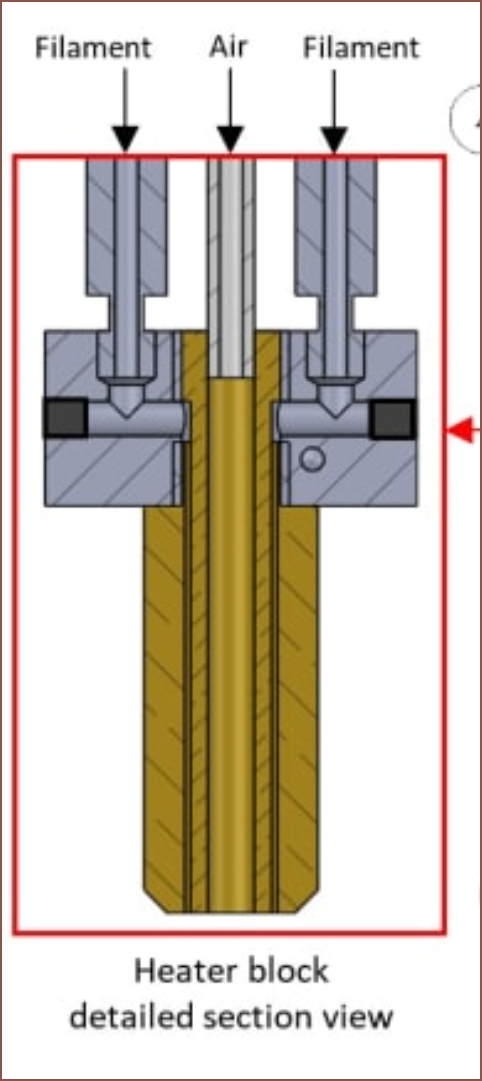
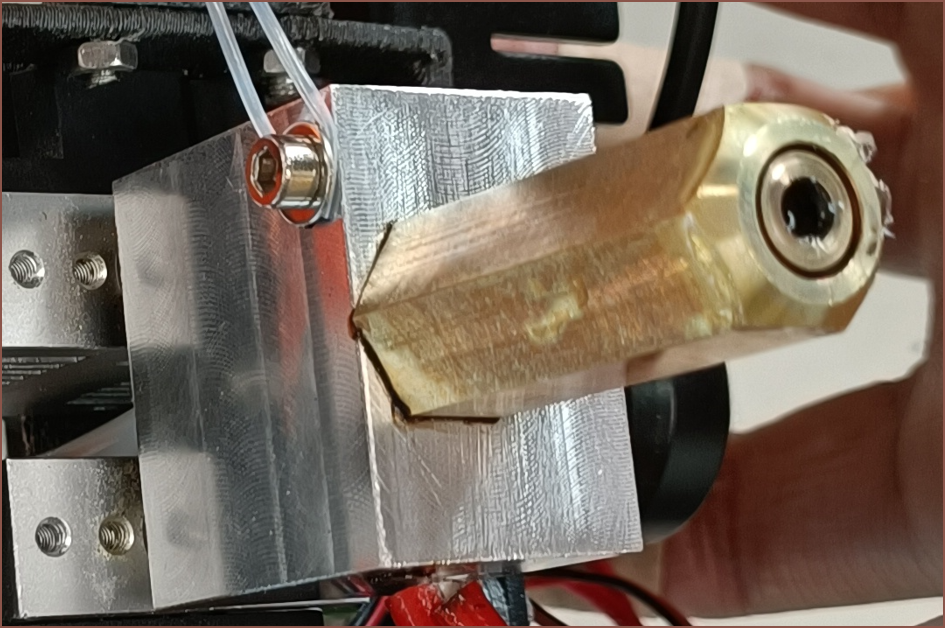
I do wonder what an opaque material would look like, but a more immediate question would be "How would I manufacture it?"![]() This diagram gives some ideas, but I'm not sure how the outer brass looking block attaches to the aluminium looking block.
This diagram gives some ideas, but I'm not sure how the outer brass looking block attaches to the aluminium looking block.![]()
The first time I saw this hotend, months ago. I thought it was some ultra melt nozzle prototype. -
[R][M] Slime Bearing
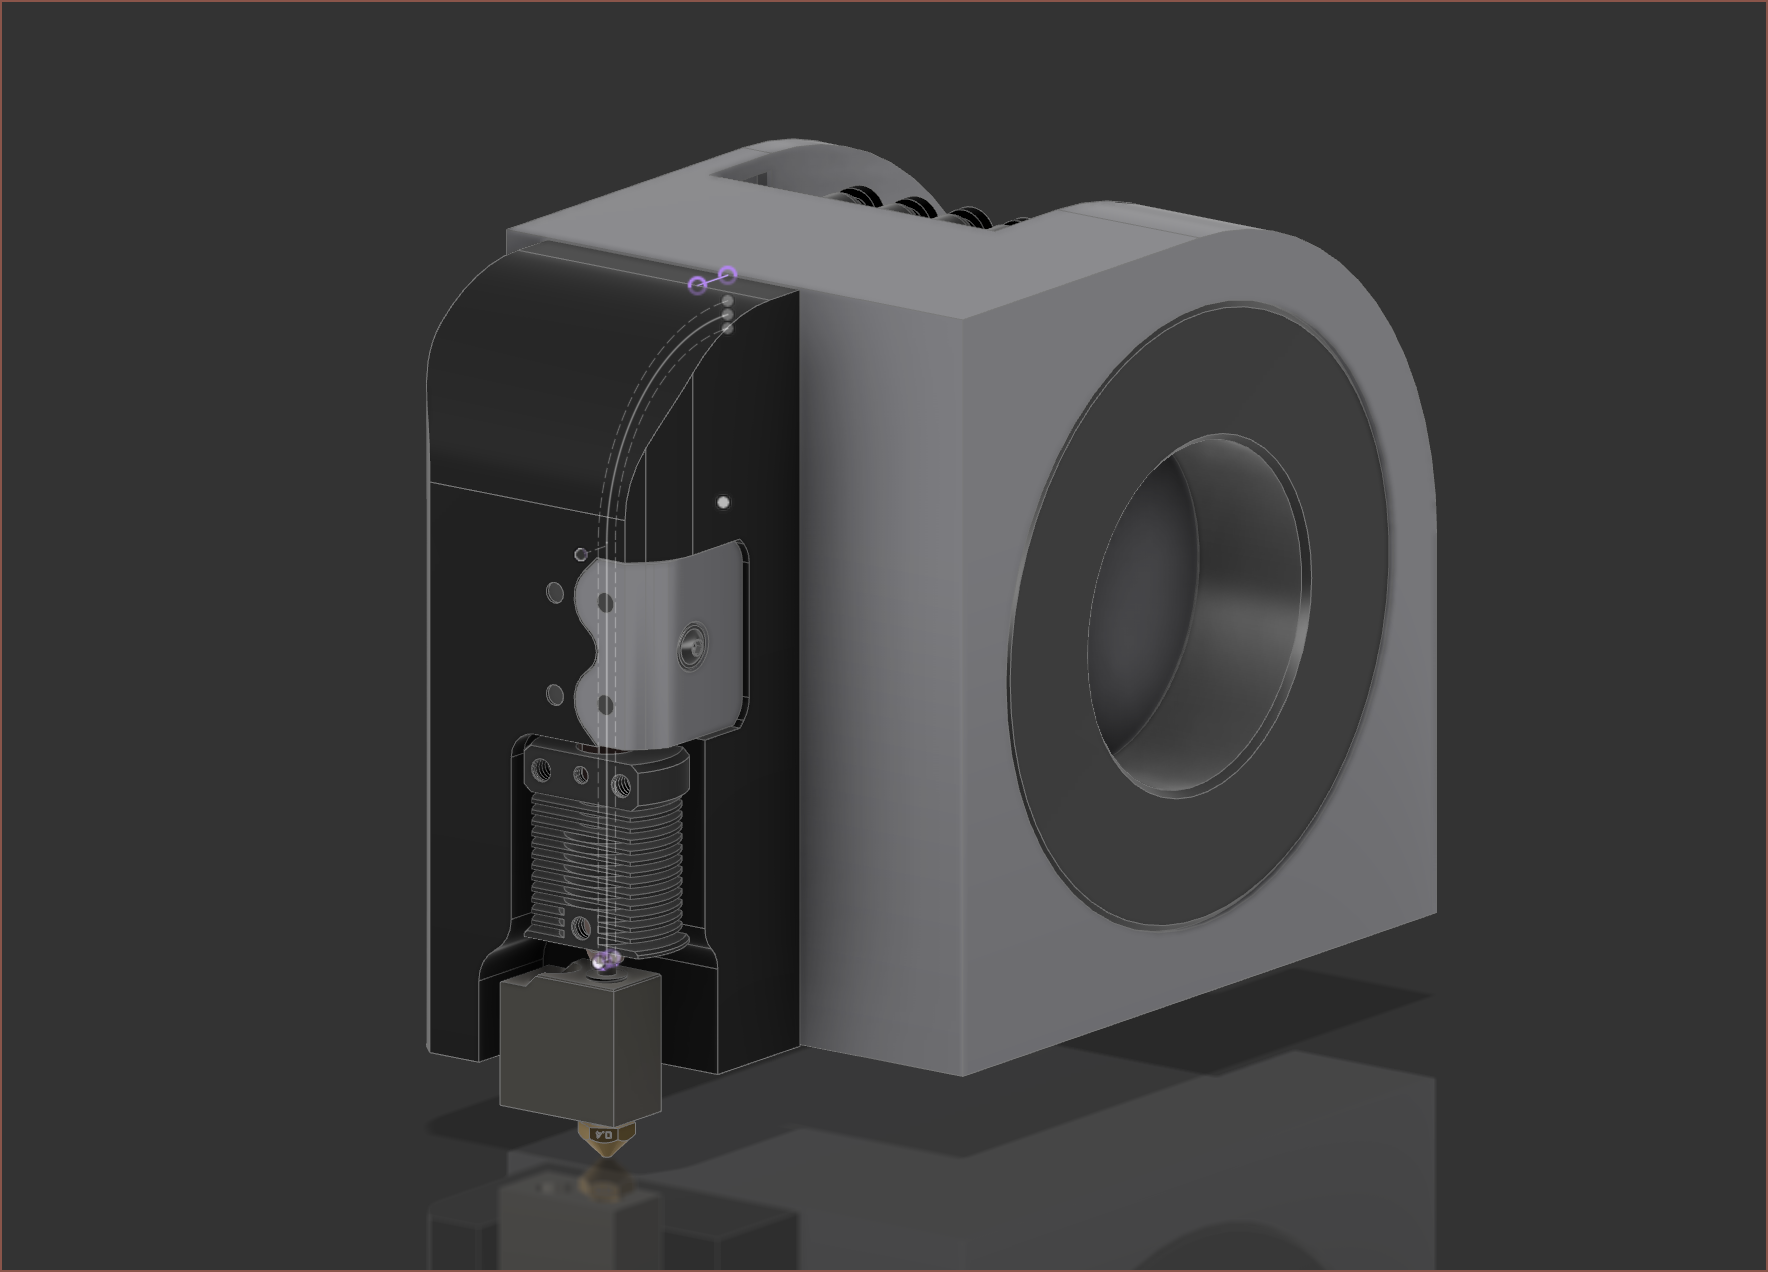
07/03/2022 at 03:13 • 0 comments![]() The more I model, the more it looks like a snail. "Slime" was only supposed to be an internal name, technically speaking.
The more I model, the more it looks like a snail. "Slime" was only supposed to be an internal name, technically speaking. I did some research into bearings to see if there is a bearing I should be using instead of the classic deep groove ball bearing. It seems that "lazy susans" start at 140mm so they won't fit and slewing rings seem expensive compared to that massive 6210 bearing that costs a fraction.
![]() For reasons unknown to me, 6000 series bearings are noticably more expensive than 6200 or 6300 series.
For reasons unknown to me, 6000 series bearings are noticably more expensive than 6200 or 6300 series.I found out that there's all sorts of gadgets that have been created for the installation and removal of bearings:
Considering that 2 Slime's come together for the milling tool, I probably don't have to worry about axial forces as much as I originally thought. The bearing, according to SKF, is 460g but it should mean that:
- 3 axis printing should be unaffected by the V axis (robotic arm 3D printers I'm looking at you)
- The centre of mass should move closer to the pivot
- The large steel outer ring should serve to further stiffen the Slime without having to get (custom) metal plates.
To finish, I'm thinking that room-temp air will be pumped through the bearing and wires will be bundled with the bowden array. Oh and with a tool distance of 70mm, there are no collisions when getting a tool off the Tool Bar.
![]()
-
[M] Tool Plate with the 868 pogo connector
07/02/2022 at 20:15 • 0 commentsSo a while ago, I decided to keep "Tool Plate" and "Tool Plate With Dowels" as two seperate files, thinking of performance. Well I don't think 6 extra cylinders per tool is going to have a noticable effect, so I unlinked "Tool Plate" inside "... With Dowels" and will now just use a single file.
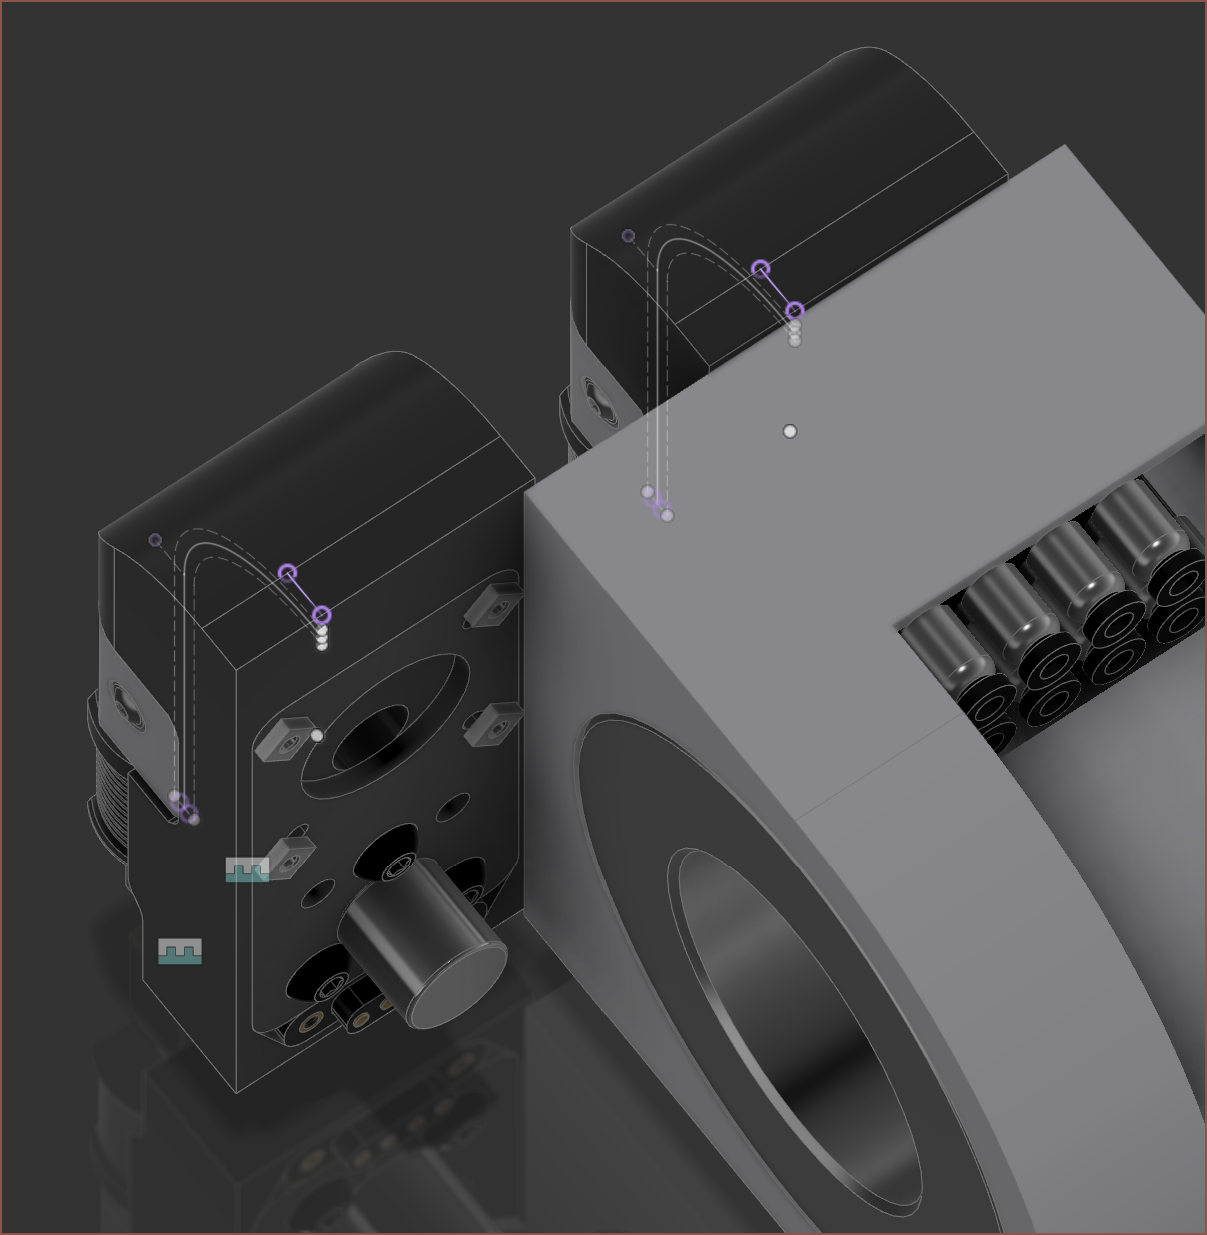
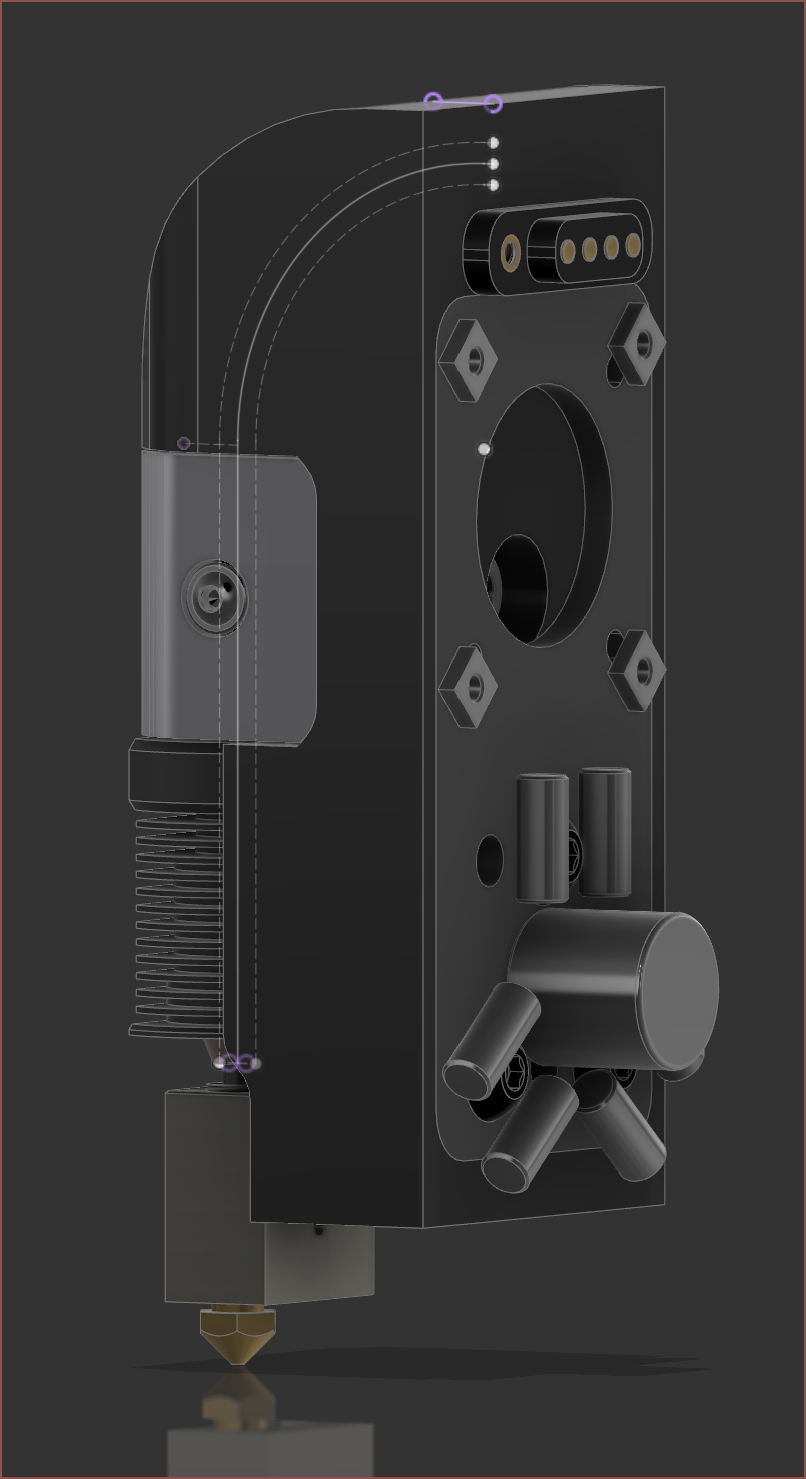
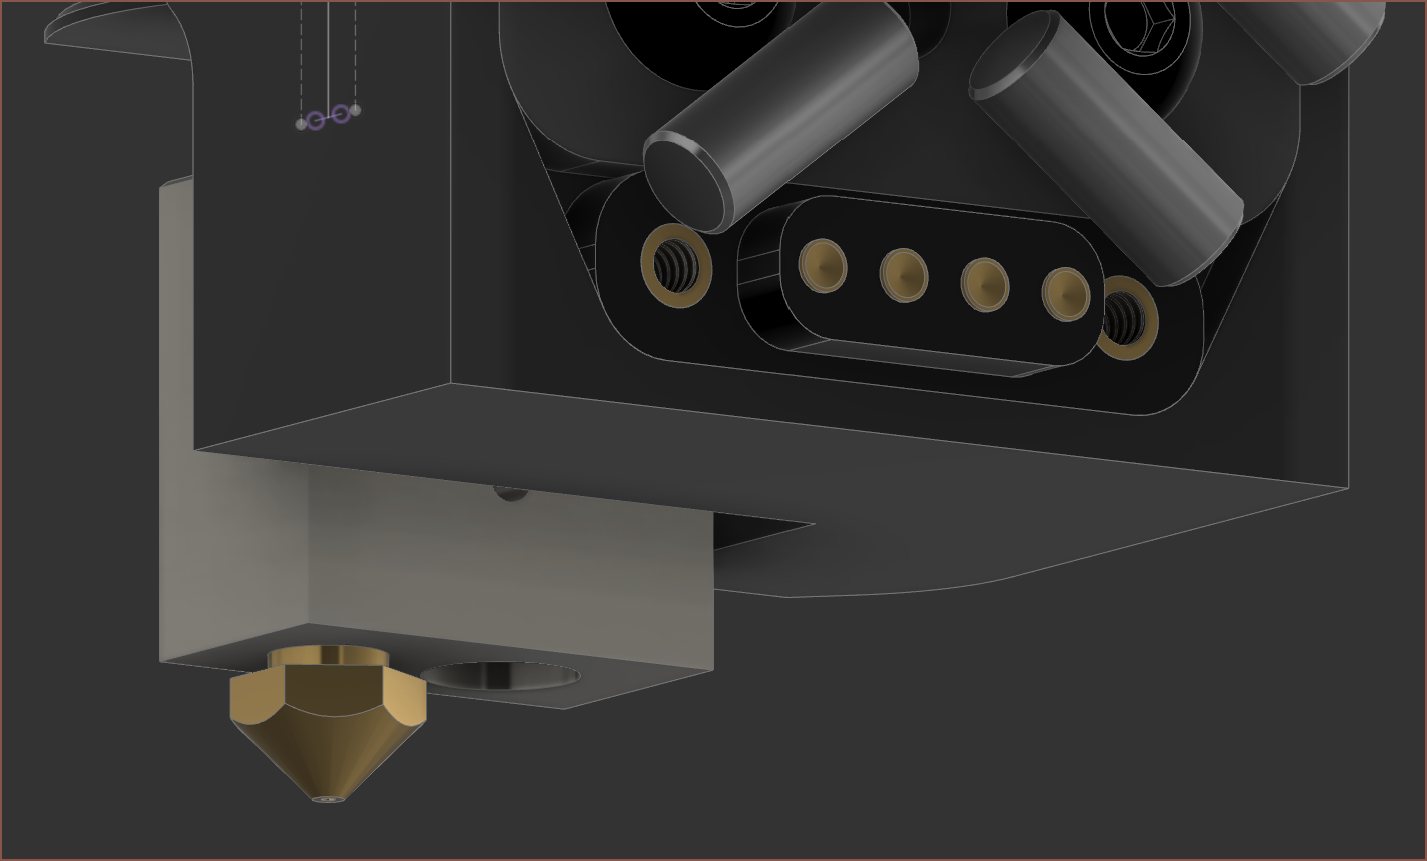
![]() I put the connector inside the Tool Plate file and wow this connector is larger than I expected. I guess I just didn't register how large an 8 x 30mm connector would be in relation to the size of the SecSavr Slight, and wonder if there would be enough space for the 8 to 1 paths in the Slime or the air inlet for component and part cooling. I could extend the size of the Slime from 106 to 108mm and put the pogo's there.
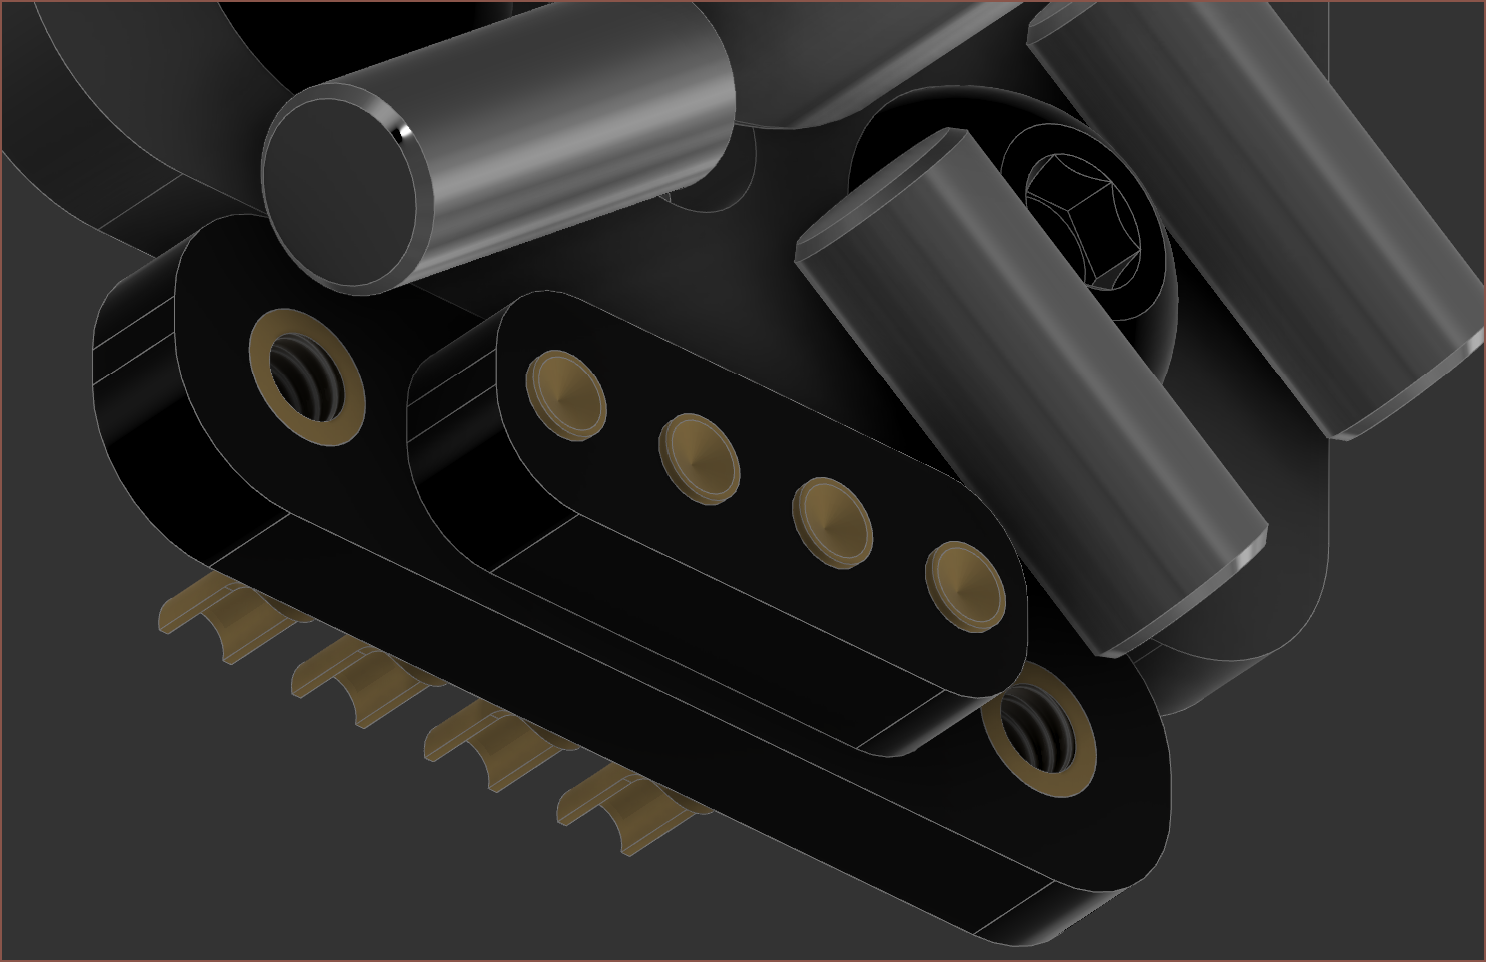
I put the connector inside the Tool Plate file and wow this connector is larger than I expected. I guess I just didn't register how large an 8 x 30mm connector would be in relation to the size of the SecSavr Slight, and wonder if there would be enough space for the 8 to 1 paths in the Slime or the air inlet for component and part cooling. I could extend the size of the Slime from 106 to 108mm and put the pogo's there.![]() Yeah... it's possible. I think having the solder cups facing down would also make it easier to solder/inspect when out in the field, though I need to be able to shield the connection to prevent material dust (from spindle) causing issues or becoming a hazard.
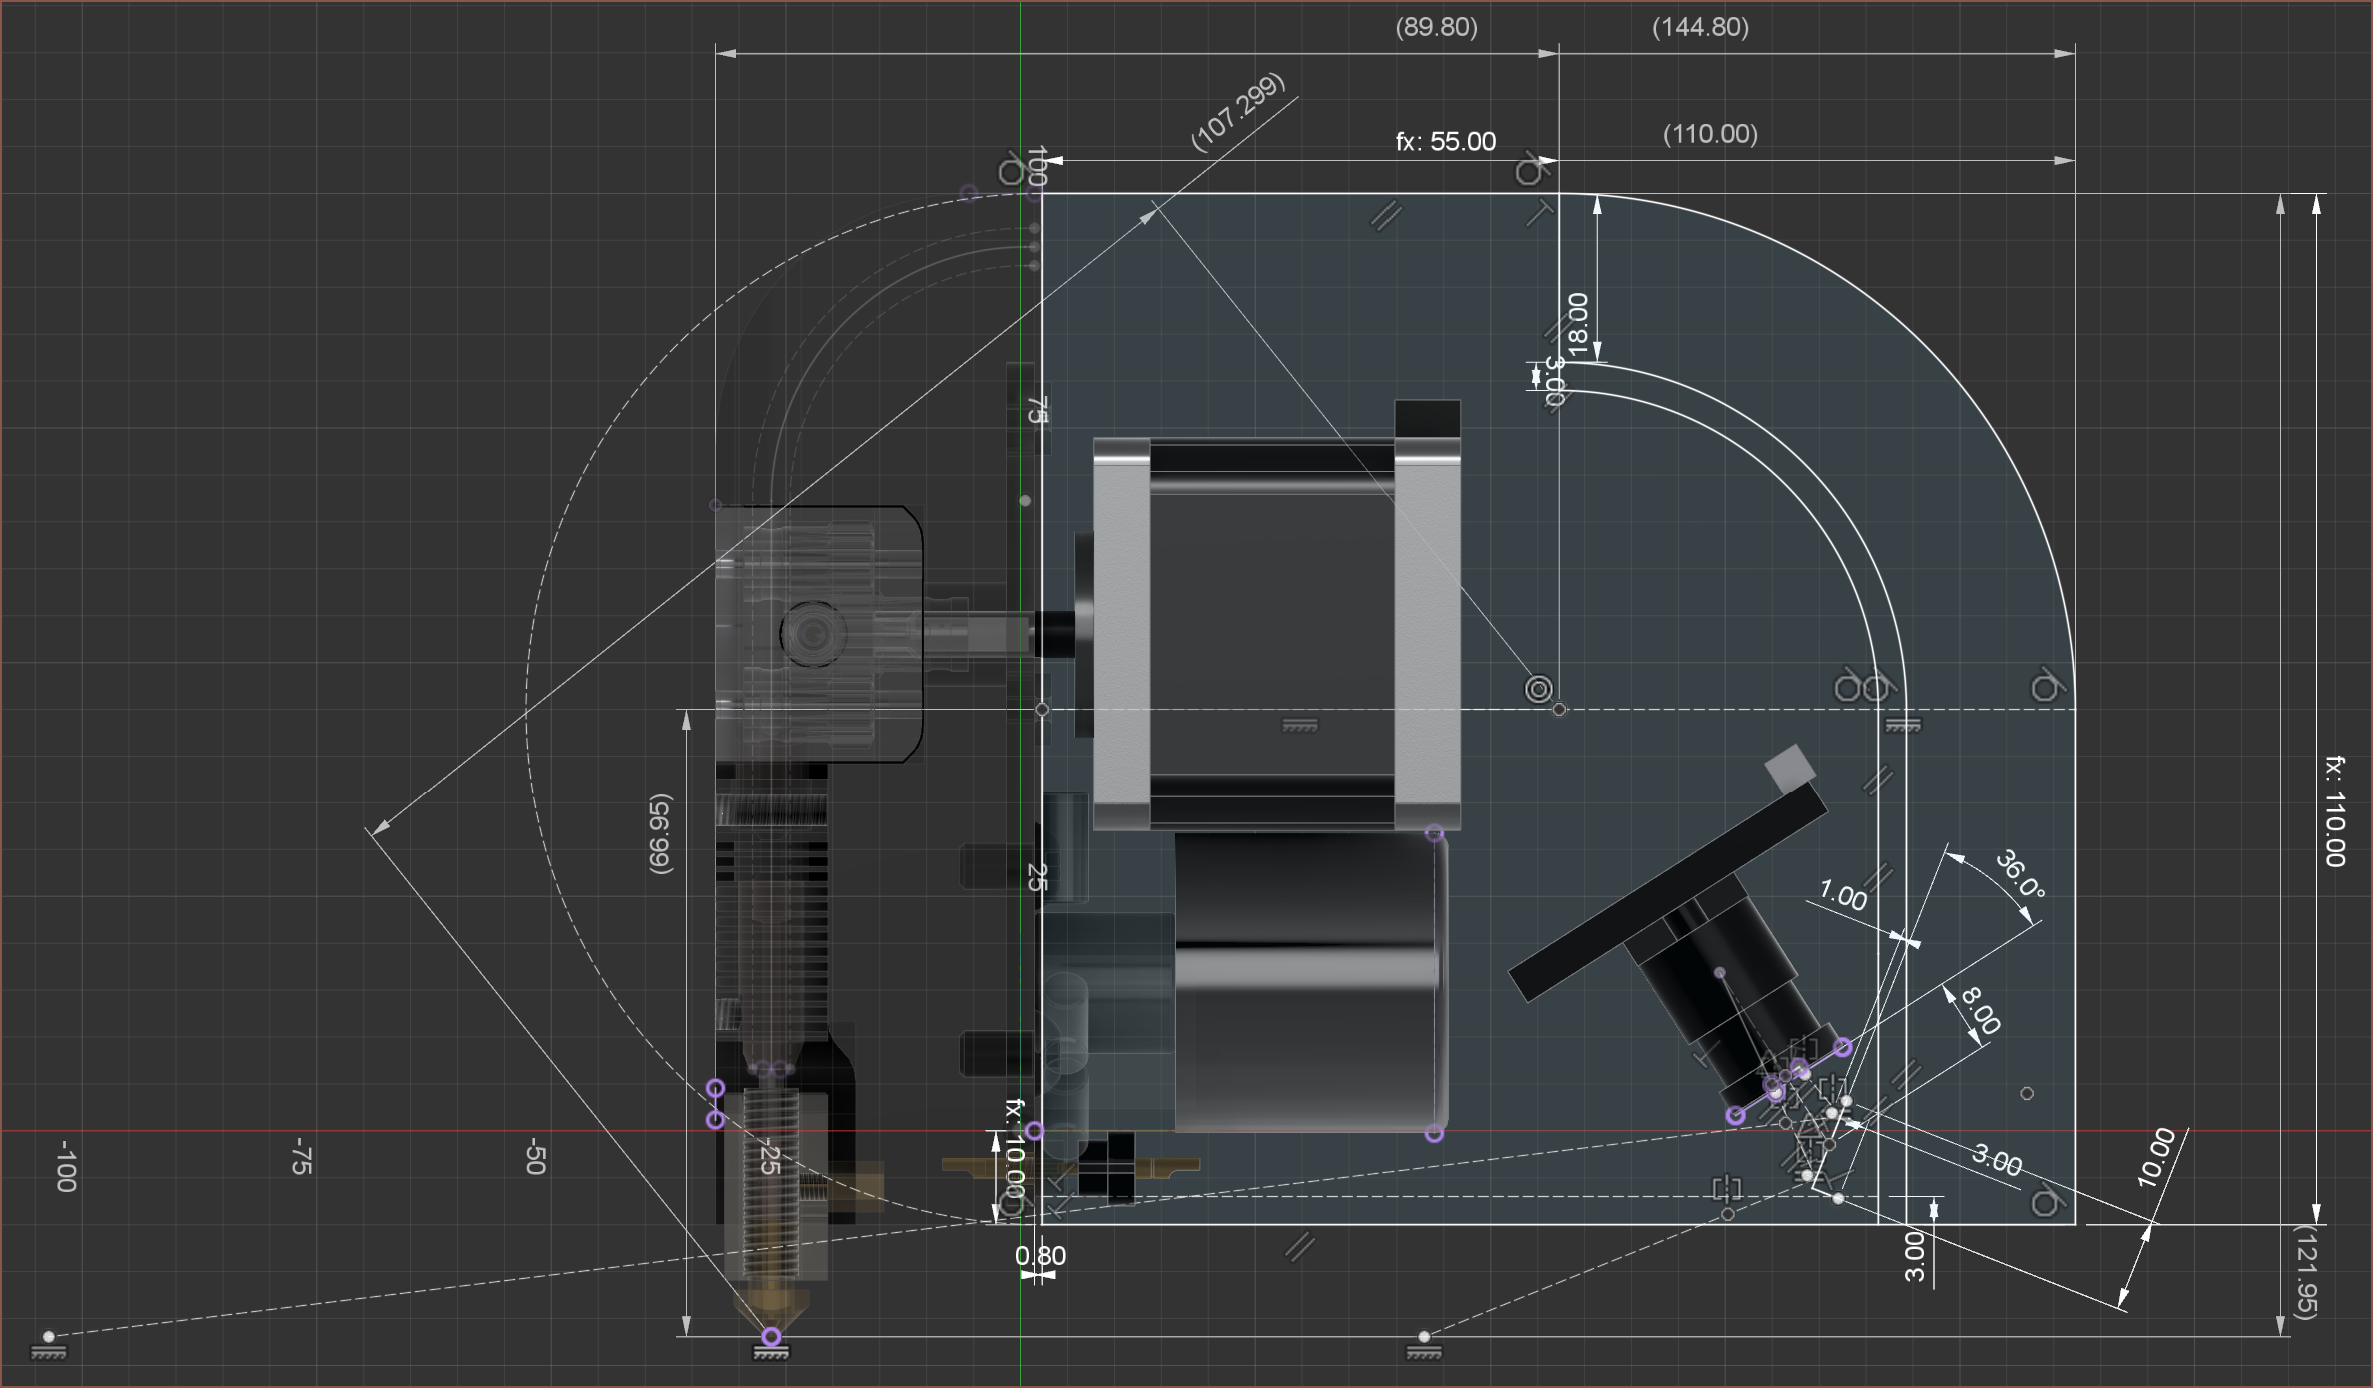
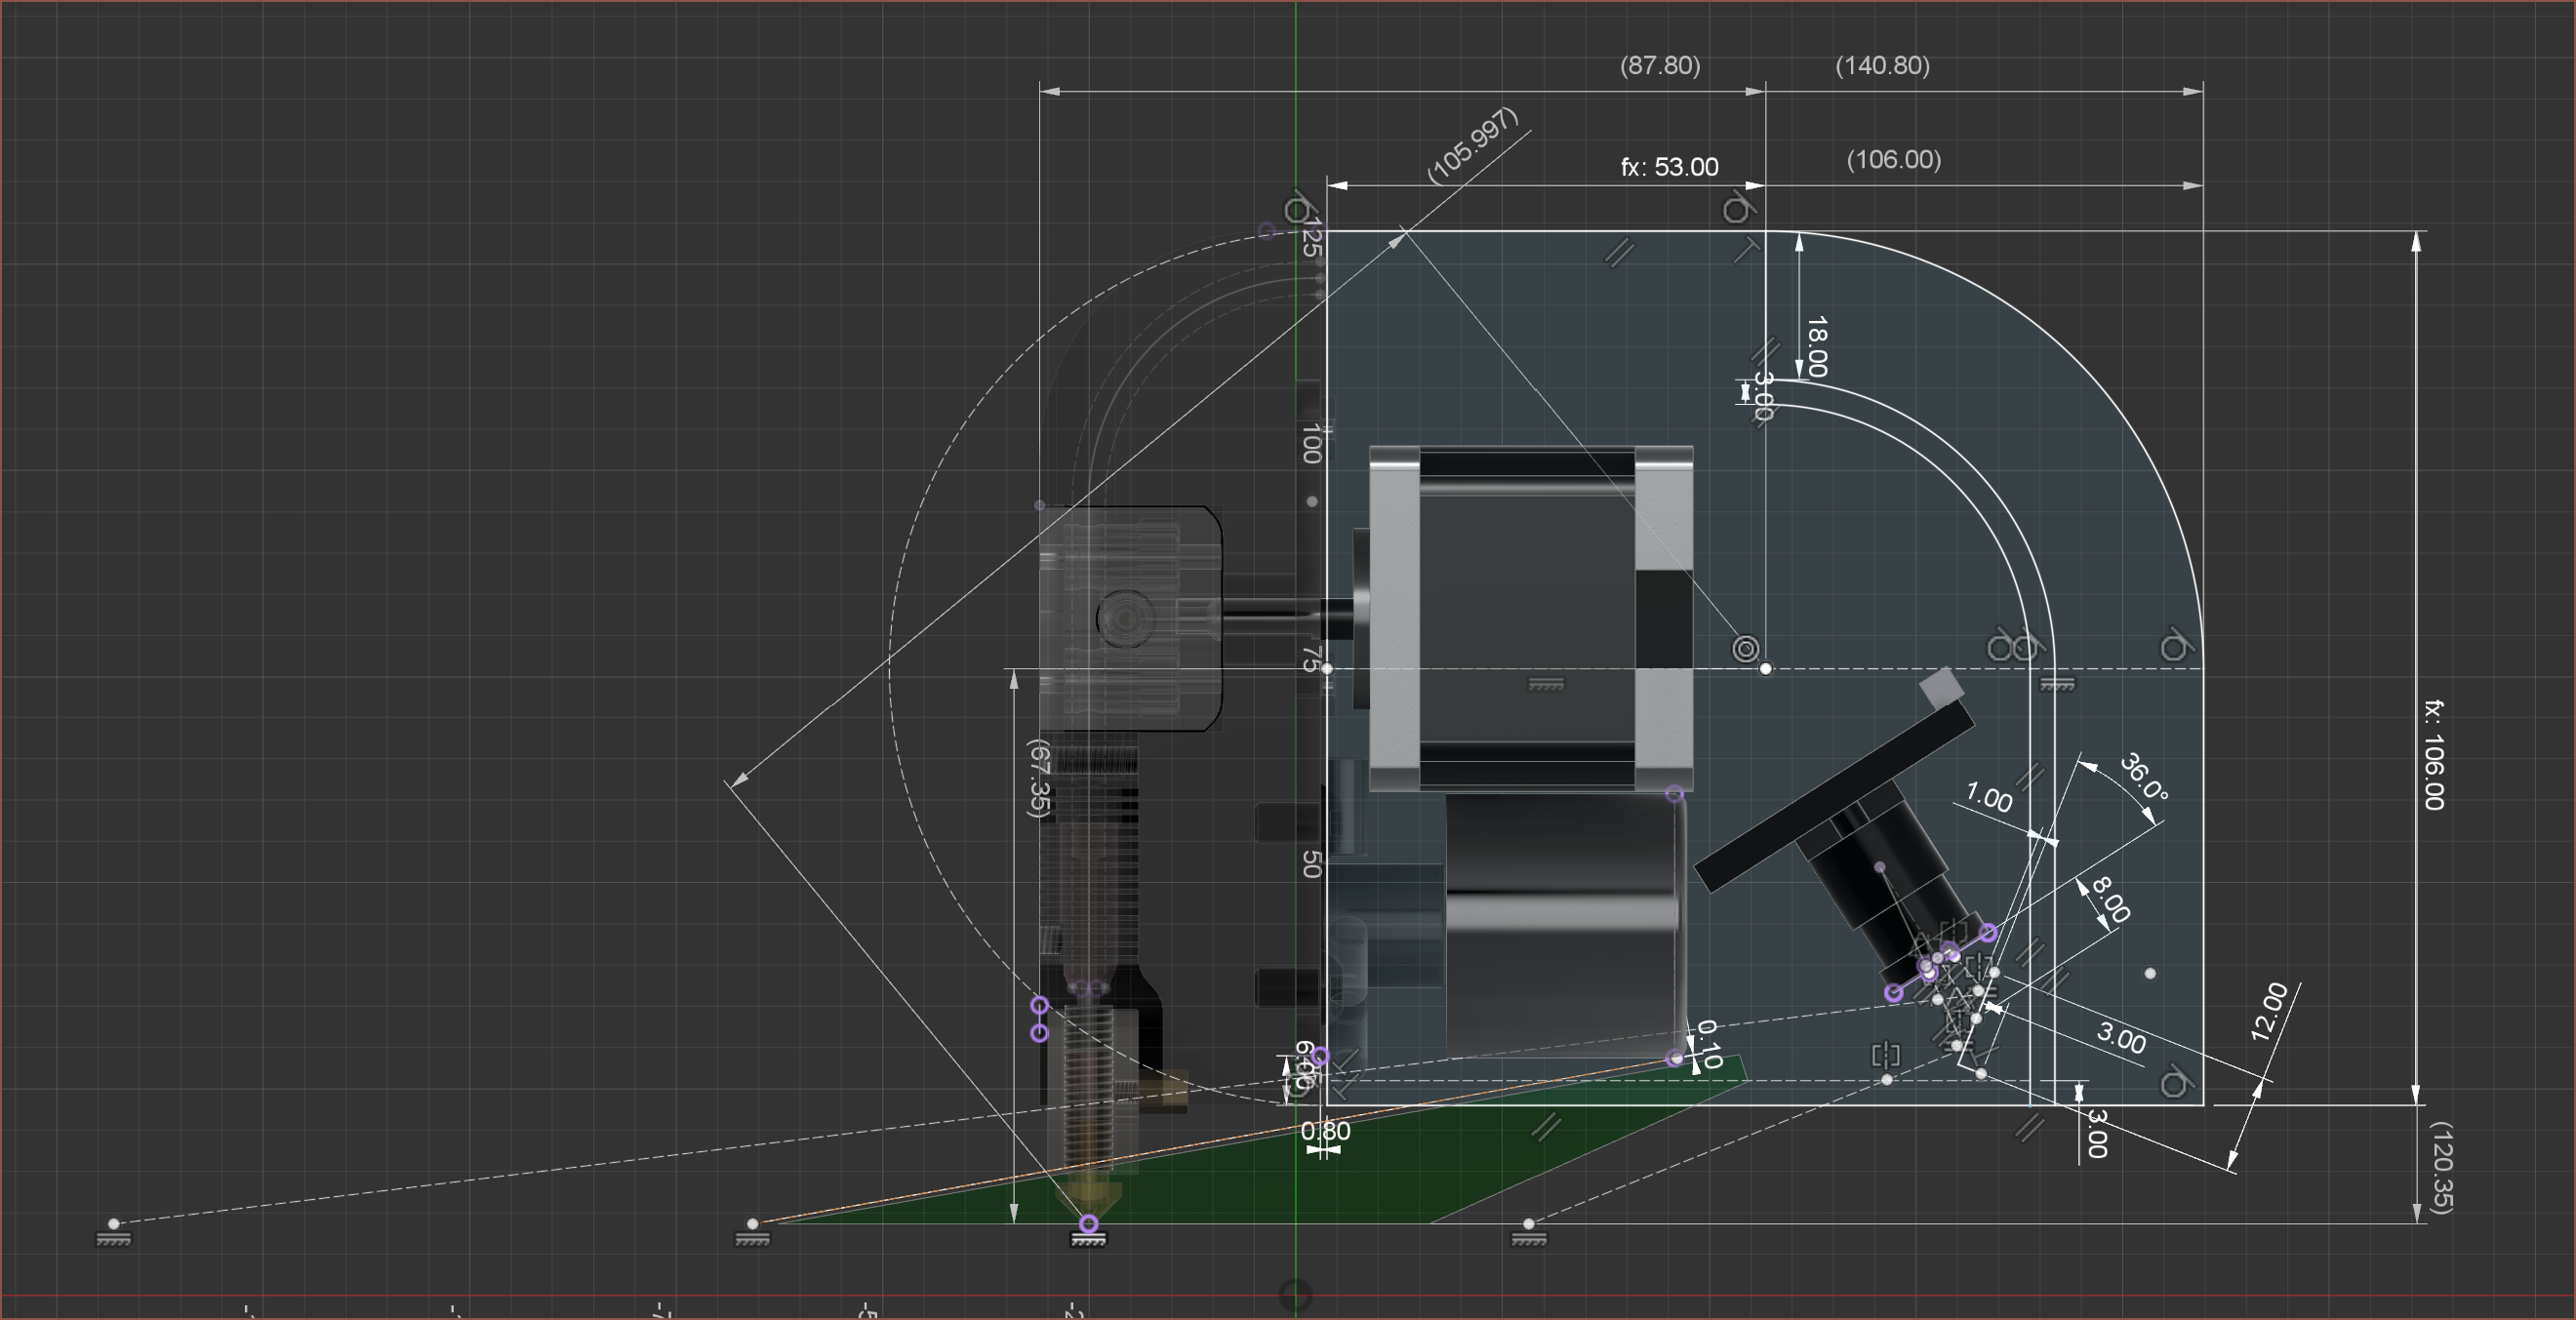
Yeah... it's possible. I think having the solder cups facing down would also make it easier to solder/inspect when out in the field, though I need to be able to shield the connection to prevent material dust (from spindle) causing issues or becoming a hazard.![]() As for the Slime, there seems to be no conflicts, though I may want to opt for a 16mm lens instead of a 12mm.
As for the Slime, there seems to be no conflicts, though I may want to opt for a 16mm lens instead of a 12mm.![]()
-
[M] 868 Pogo Connectors
07/02/2022 at 18:46 • 0 comments![]()
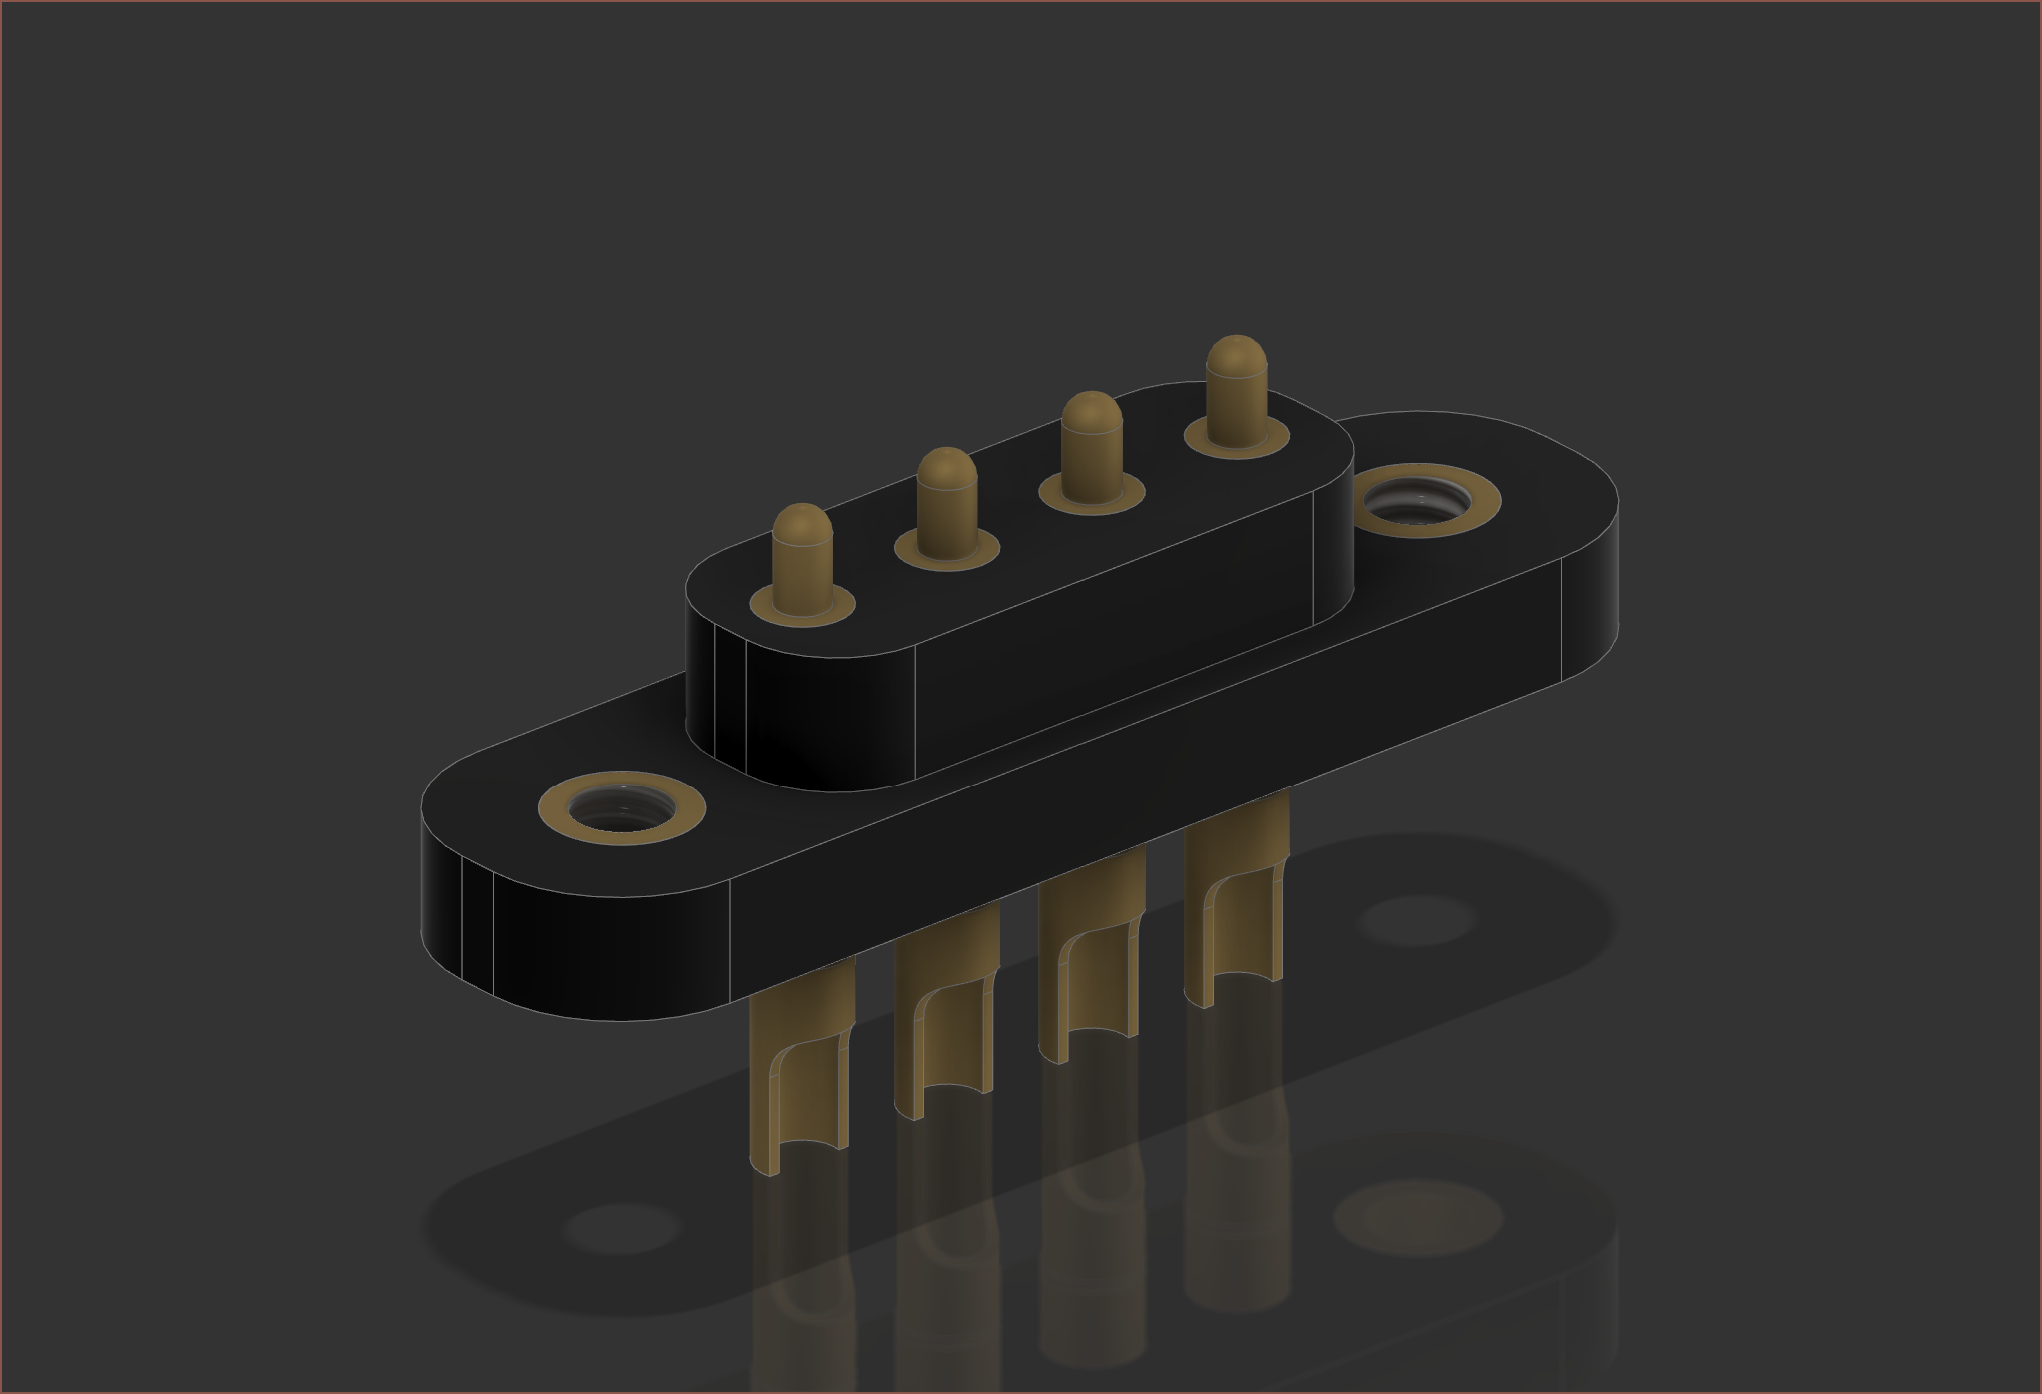
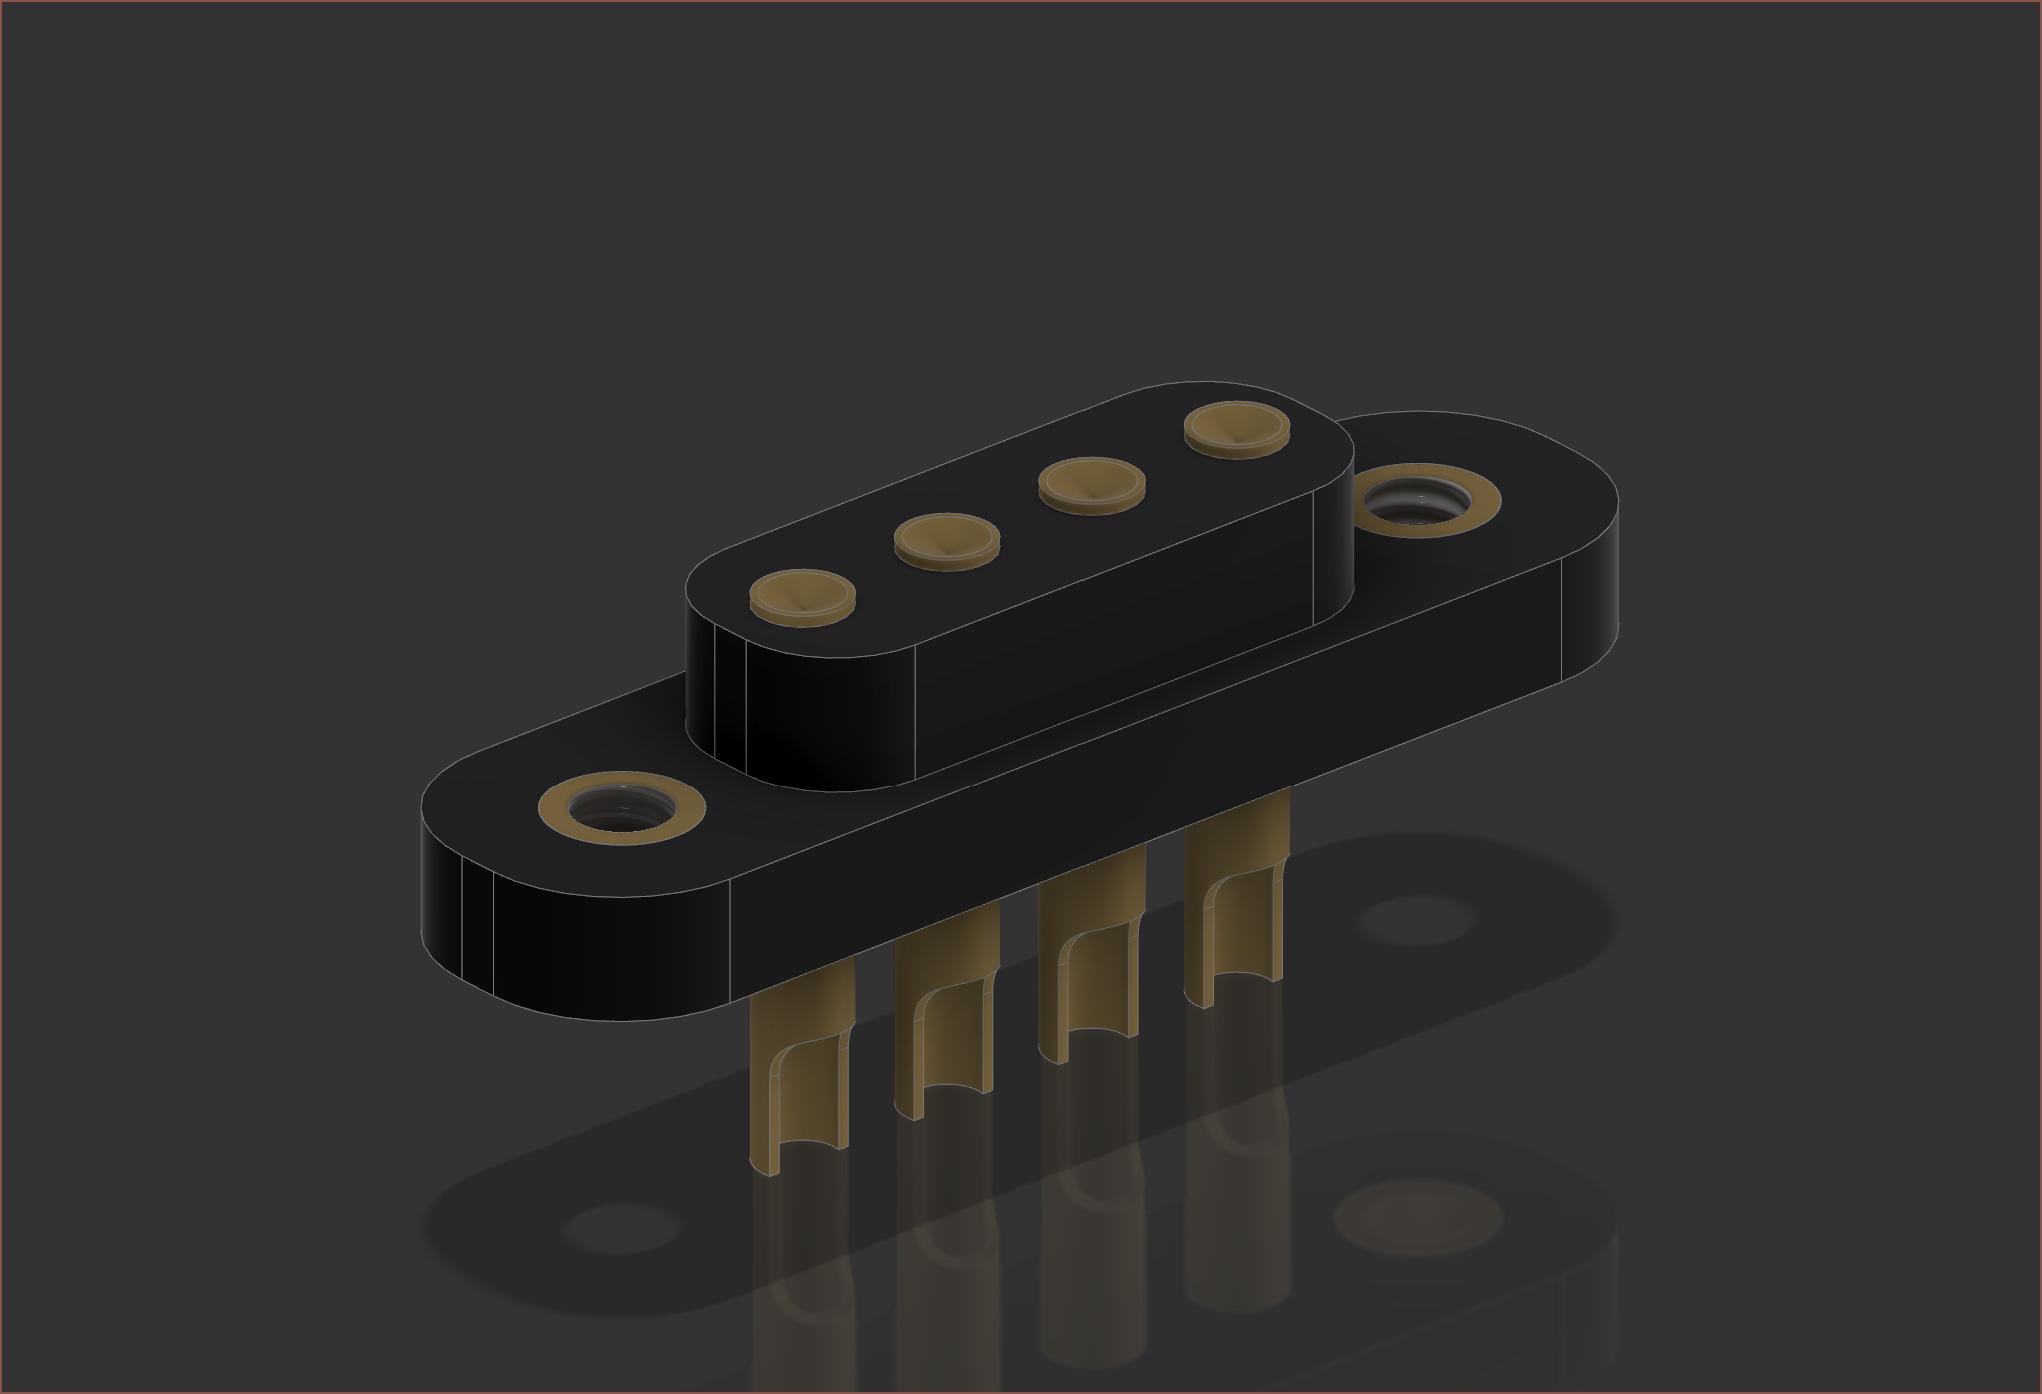
![]() Timed myself and it took 52 minutes to model, another 5ish to make the design parametric and probably another 10 to upload to GrabCAD.
Timed myself and it took 52 minutes to model, another 5ish to make the design parametric and probably another 10 to upload to GrabCAD.I'm planning to use the 868-22-004-00-011101 and 868-10-004-00-012000 connectors.
-
[R] Bigtreetech Manta M8P
07/02/2022 at 13:36 • 0 commentsThe new board is finally out: https://www.aliexpress.com/item/1005004478452192.html
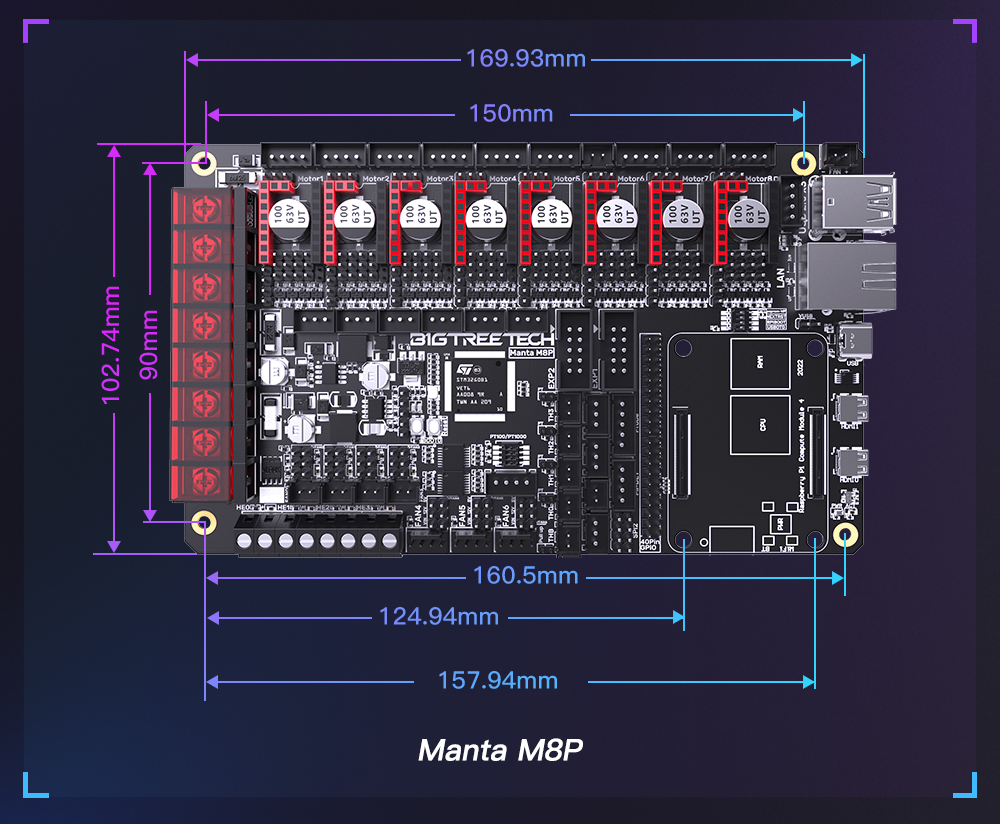
![]() As expected, it's over 170mm in length. Seems that it'll be closer to 180mm.
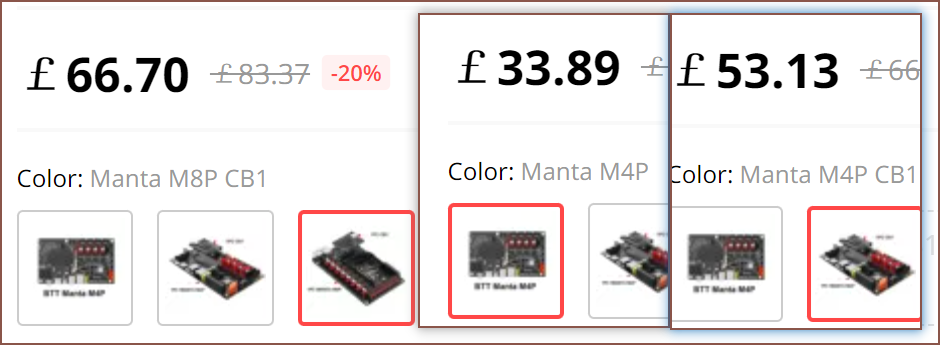
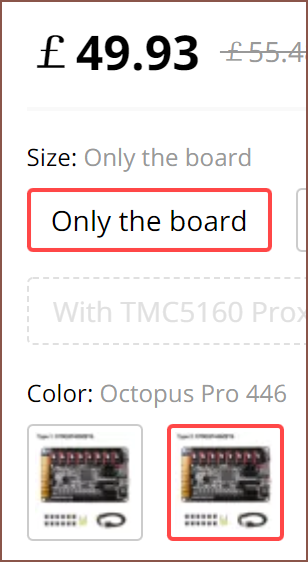
As expected, it's over 170mm in length. Seems that it'll be closer to 180mm.There isn't yet a listing for the Manta M8P by itself, but looking at the M4P, I'd assume that it'll cost £46, which is currently a tad under the Octopus Pro.
![]()
![]()
Now there are some notable features on the OctPro that aren't on the M8P by the looks of things:
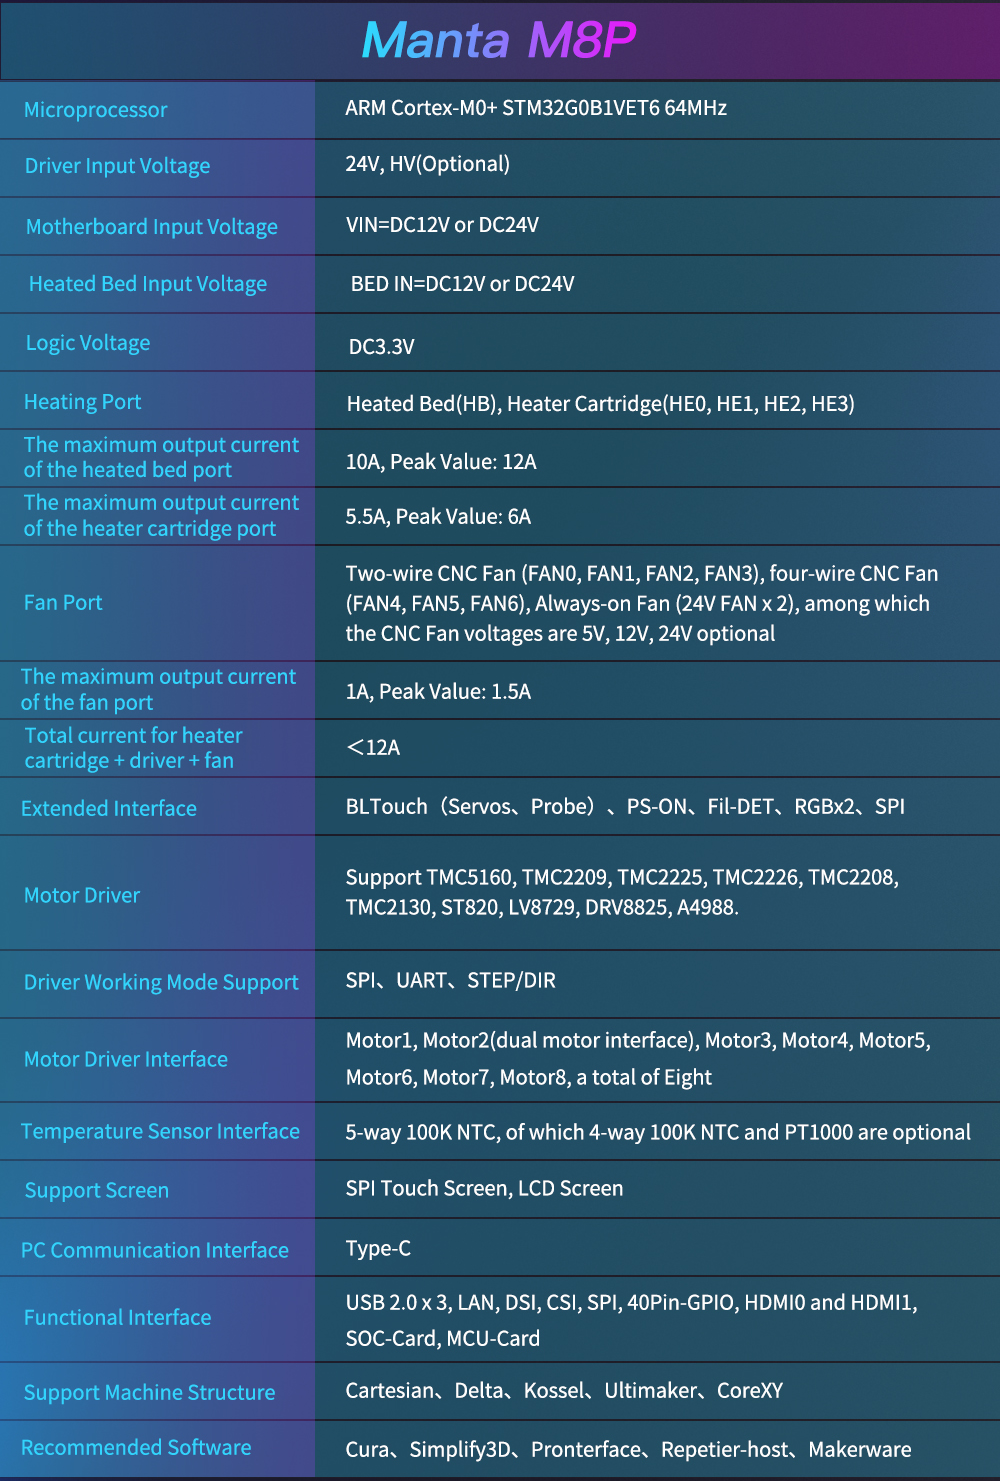
![]() Notably, the CPU is over 100MHz slower and I can't see any CANbus headers or port. The red cover for the input terminals does look more refined than the orange ones on the OctPro though. Hopefully the STM32G0 is still fast enough to send signals for 6 steppers simultaneously.
Notably, the CPU is over 100MHz slower and I can't see any CANbus headers or port. The red cover for the input terminals does look more refined than the orange ones on the OctPro though. Hopefully the STM32G0 is still fast enough to send signals for 6 steppers simultaneously.Knowing this, it seems that there is almost equal justification for M8P+OctPro or dual M8P, though I don't think Klipper supports toolheads using the OctPro CANbus at the moment so dual M8P might be better if I didn't already have an OctPro.
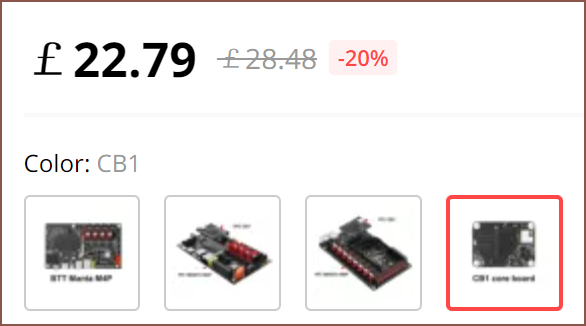
As for the CB1, the standard price is a tad under the price of the Orange Pi Zero 2, which has the same H616 processor and 1GB of RAM. There's also an optional heatsink that covers the whole thing for another £5.
![]()
-
[T] Tool Pogo Pins
07/02/2022 at 01:34 • 4 commentsFor recurring costs and reliability (and probably physical space), the less pins I need to use, the better.
I'm thinking that
- +24V
- Main tool GND toggle
- Always-connected GND
- Thermistor
would cover my use cases, though a 5th one for nozzle/drill bit location sensing, as seen in the video below, would be a cool feature. If there's anything I can do to automate calibration, I'd like to further explore that solution.
I'm thinking that a wireless method such as NFC or IR could be used for controlling non-realtime features, like turning on an LED or fan on the tool that is powered by an on-tool regulator from 24V input. For mechanical actuation, such as the plunger for the chocolate tool, I'm thinking of utilising sensorless homing on the extruder motor to detect end limits. As for something like an inkjet tool, there probably wasn't ever going to be enough pogo pins anyway (the max is 6). Hmmm I wonder if those new CAN bus board things I've been hearing about could present a solution. I feel like that has the potential to drastically increase the per-tool price though. For the spindle, I'm thinking that the motor controller would have to be on the tool.
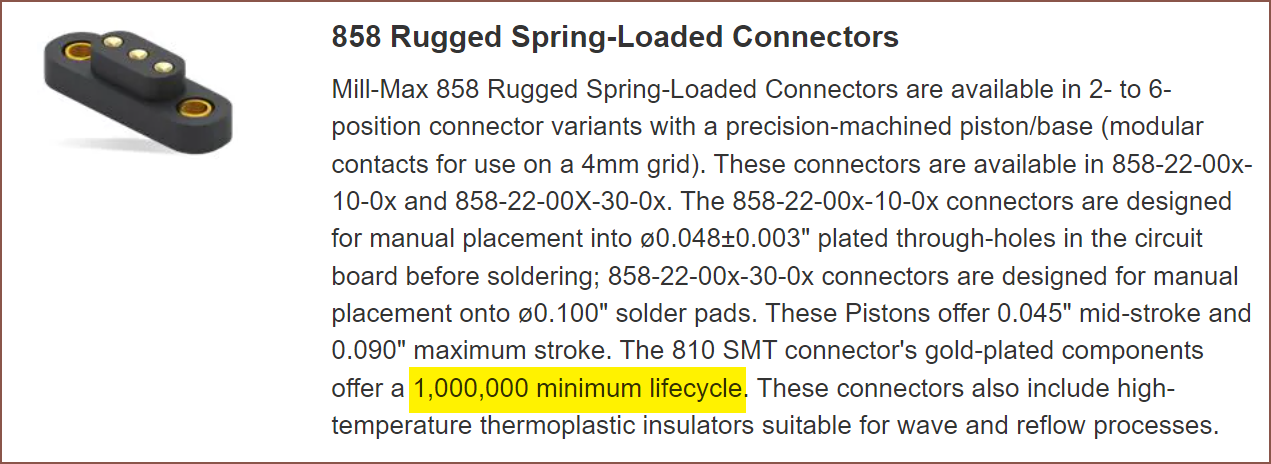
I'm planning to use the same style pogo connector as MihaiDesigns. I haven't yet been able to confirm that they allow up to 9A of current, but can confirm that they're rated over 1 million cycles.
![]() The pogo pin connector is more expensive than the pogo target connector, so the former will be on the Slime. Months (or maybe even over a year ago) I planned to do the opposite so that the "consumable" connector was on the removable component and I could make a PCB circuit that counted how many mating connections the tool had undergone, but swapped now due to the cost difference and high durability.
The pogo pin connector is more expensive than the pogo target connector, so the former will be on the Slime. Months (or maybe even over a year ago) I planned to do the opposite so that the "consumable" connector was on the removable component and I could make a PCB circuit that counted how many mating connections the tool had undergone, but swapped now due to the cost difference and high durability.I'm thinking of using solder cups for connectors on the Slime, but I'm undecided on using solder cups or SMD (essentially just a gold pad) for connectors on the tools; the solder cups are more expensive by about £1.30 and could take up tool space, but be easier to solder, especially when 2 or more wires need to be soldered to a pin. I'm likely to choose solder cups for that reason, as well as consistency.
-
[E1][T] Motherboard on a moving axis?
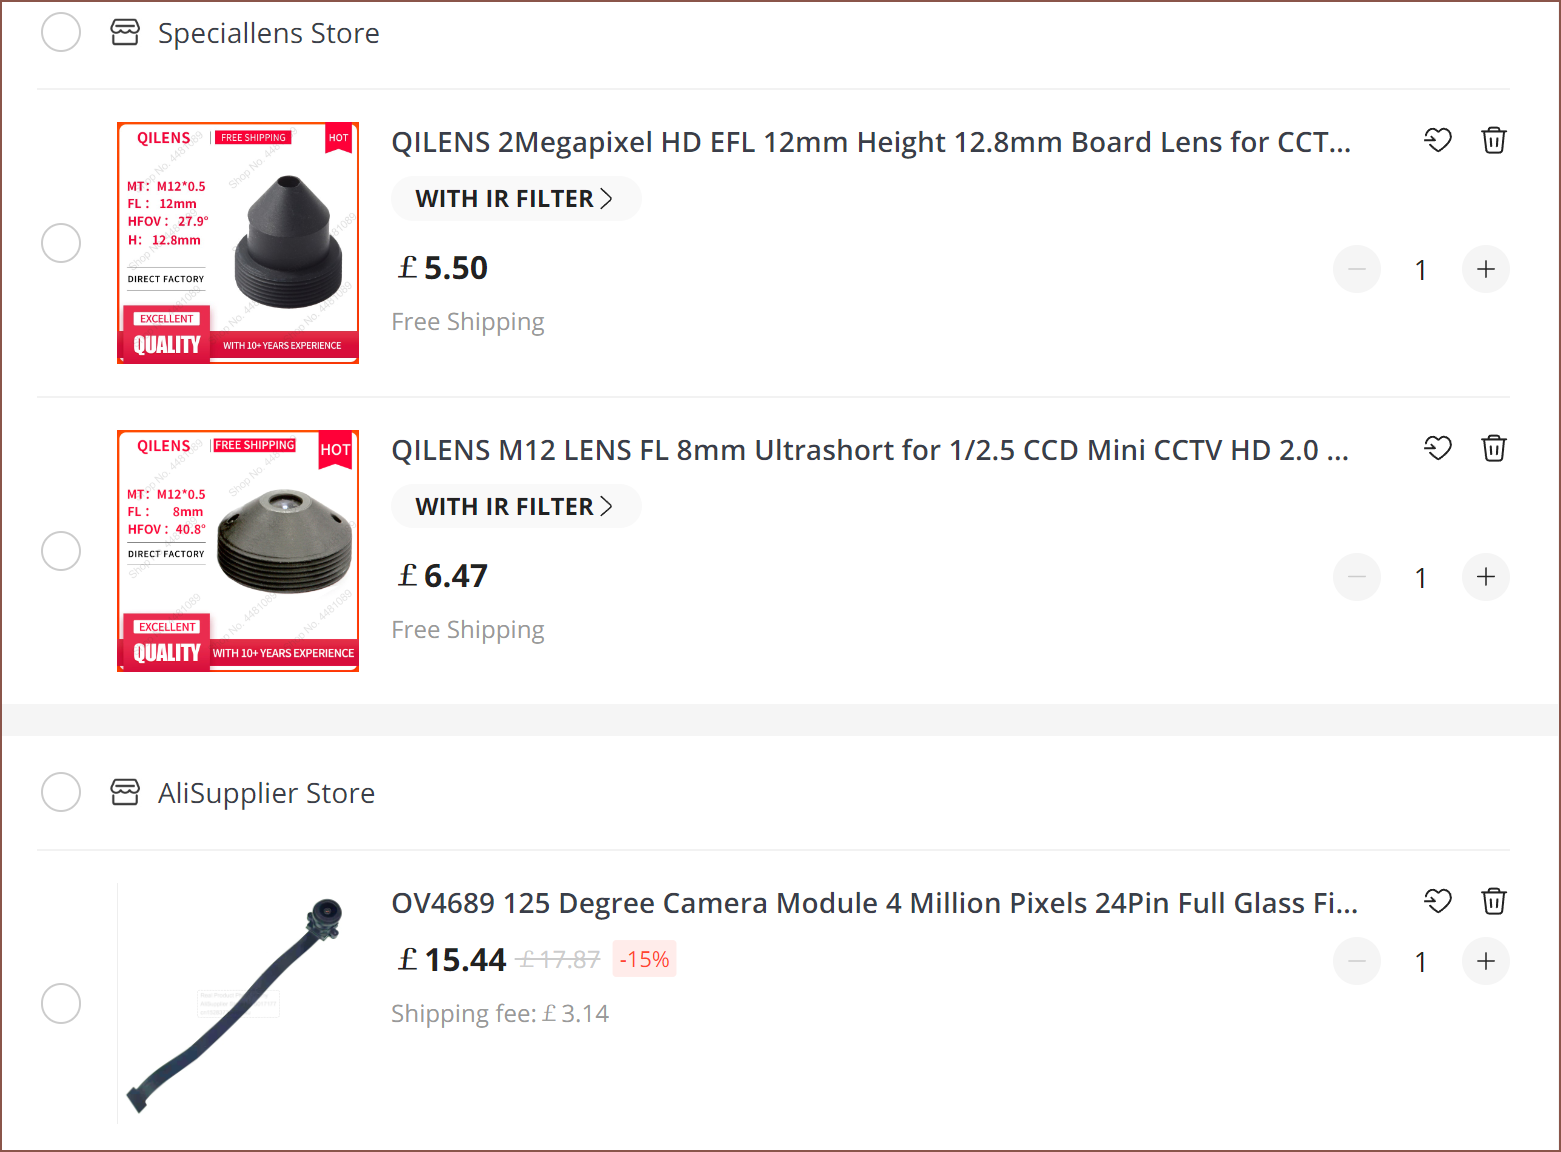
07/01/2022 at 13:03 • 1 commentOk. Let's just assume some things. Let's assume that I can actually use the Manta M8P and OV4689 module without the expensive PCB "middleman", and swap out the 125 degree lens for either a 41 or 28 degree one, as seen below:
![]()
The lens holder on the camera module is short compared to the one on the PCB, but the lens seller also sells longer ones and the one installed looks to be removable. Then from my research, I might be able to use a ribbon cable length up to 1m in length, but the shorter the better. The max distance from the Tool Bar to the Slime is likely to exceed that distance, but from the Y axis slider it could be under 750mm. From the X axis slider, well it's probably short enough of a distance to not even need an extension.
If the M8P is on the X axis slider, the only semilong and long cables would be:
- Motors for Zmain, X, Y, Select, W
- Endstops for Zmain, Y
- 24V and 36V power
- Select servo signal wire
- Select RGB indicator signal wire, though that could be moved to the X axis and probably would be easier to see there instead of at the back on the Tool Bar
- Heated bed signal wires
- Heated bed thermistors
- USB to the other motherboard (M8P or OctPro)
It may also be easier to work on the electronics, as well as reducing the thickness of the Tool Bar, increasing the max tool depth. Additionally, having a nozzle cam permanently installed on both Slimes could be affordable and the camera data won't add traffic to the USB.
[E1] Just found out that the H616 doesn't have any MIPI-CSI at all, which is a shame. Even though a CM4 + OV4689 would've cost around about the same, apparently there's still a large stock backlog from last year. BananaPi's Banana Pi BPI-CM4 apparently wont show up on virtual shelves untill 22Q4 or 23Q1, but the chip it uses apparently can take up to 8MP @ 60fps. I can't tell if 60fps is a hard upper ceiling or it can be extrapolated somewhat based on bandwidth.
-
[M] Camera Mirror
06/30/2022 at 23:43 • 0 comments![]() I'm still annoyed about how much the OV4689 PCB costs (£48) over a OV4689 module (£18) but my research into finding something that could accept a 4 line MIPI and encode it resulted in a solution fail. If I recall correctly, I did some calculations months ago with 2 lane MIPI estimates and would be able to acheive the framerates advertised on the PCB, and the H616 on the Orange Pi Zero 2 was the only SBC I could find that was cheap and had a 1080P@60fps encoder. Conviniently enough, this is the board I plan to run Klipper on anyway (unless the yet-to-be-released Biqu CB1 comes in at like £25 or something because the Zero2 is around that price and the CB1 would be a much nicer solution with the MANTA M8P), so theoretically I could go down that route, but for now I probably should stay in my lane.
I'm still annoyed about how much the OV4689 PCB costs (£48) over a OV4689 module (£18) but my research into finding something that could accept a 4 line MIPI and encode it resulted in a solution fail. If I recall correctly, I did some calculations months ago with 2 lane MIPI estimates and would be able to acheive the framerates advertised on the PCB, and the H616 on the Orange Pi Zero 2 was the only SBC I could find that was cheap and had a 1080P@60fps encoder. Conviniently enough, this is the board I plan to run Klipper on anyway (unless the yet-to-be-released Biqu CB1 comes in at like £25 or something because the Zero2 is around that price and the CB1 would be a much nicer solution with the MANTA M8P), so theoretically I could go down that route, but for now I probably should stay in my lane.*Goes to Twitter to get link for CB1*
![]()
https://twitter.com/BigTreeTech/status/1542541155862097920/video/1 GUH! 10 DOLLAZ!!! Yikes I got to get in on that earlybird before they all get grabbed up!!!Achem. Anyway, so when I redesigned the Slight, the camera pcb was sticking out. Preferrably, I want the Slime fully enclosed so that I can pump cool air to components, like what Nasa has done (pg 10). I originally thought that I would use a mirror, but back when the Slime was a lot longer (just under 200mm compared to 106 now), I could just put the camera facing the nozzle without one.
It should be easier to move the mirror than the entire camera assembly. Also, as mentioned in the comment section of the previous log, I found a video on reducers, and I've decided on moving any motor reducer features to the arm holding the Slime (though, it looks more like a Snail now). If I assume that, if half of the SecSavr Spindle's weight is attached, the total mass of the Spindle, extruder motor and magnet is 1kg and the centre of mass is 5.3cm away from the pivot, I require 51.94Ncm of torque. Wait... is that right? Seems kind of low. I guess that's why my reduction was only 3.75:1 before. That simplifies things. I was thinking I was going to use the capstan drive [below], but a simple belt pulley should be enough. I can use some thick belt to mitigate elasticity in the joint.
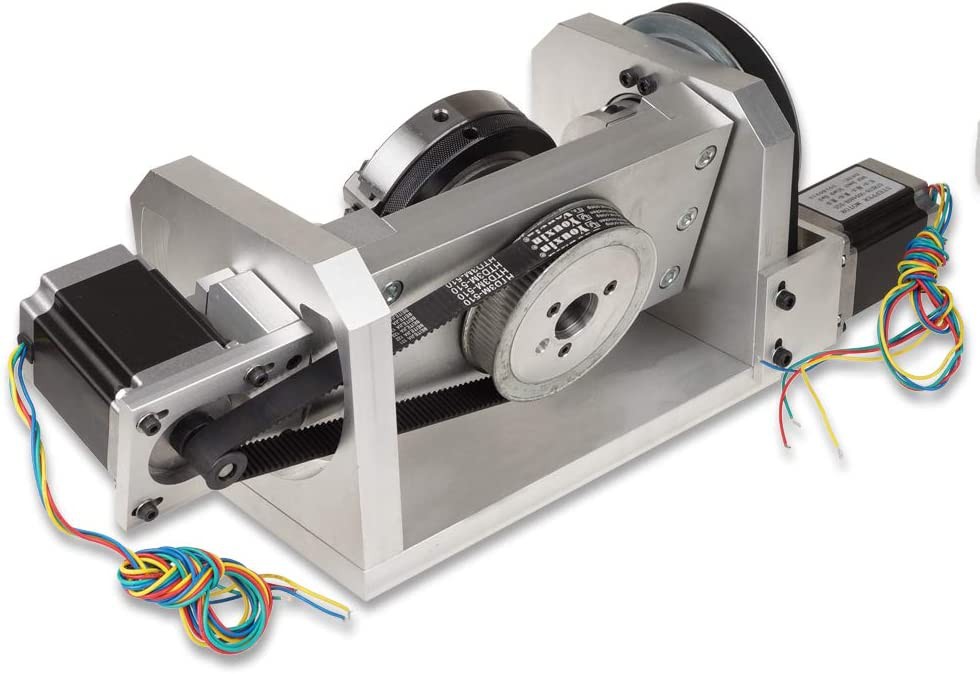
I must be missing something though, because I found this listing for a 5 axis attachment and they've got higher reductions than 3:1 on motors that are likely at least 126Ncm.
![]()
![]() The 5th axis is likely what I'd need, and it's probably so that steps aren't skipped due to milling forces, especially when the stepper is rotating. Assuming that the motors are 76mm Nema 23's with 1.9Nm (190Ncm) of torque, I'd need a 28.5:1 reduction with a 40Ncm Nema 17 to get equivalent torque.
The 5th axis is likely what I'd need, and it's probably so that steps aren't skipped due to milling forces, especially when the stepper is rotating. Assuming that the motors are 76mm Nema 23's with 1.9Nm (190Ncm) of torque, I'd need a 28.5:1 reduction with a 40Ncm Nema 17 to get equivalent torque. -
[R] Worm gear for V axis?
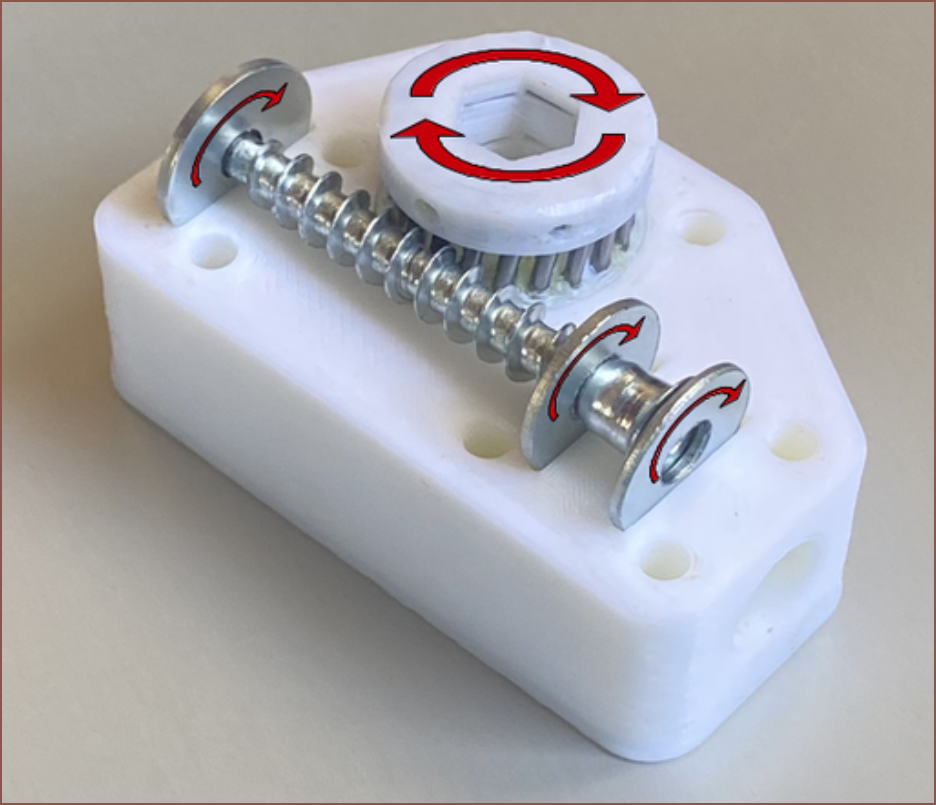
06/30/2022 at 01:18 • 3 commentshttps://www.instructables.com/Strong-Worm-Gear-on-3d-Printer/
![]()
I just found this. I might not use it because it's a 20:1 and so could be quite slow (but if I can get 60rpm with decent acceleration, I wouldn't mind).
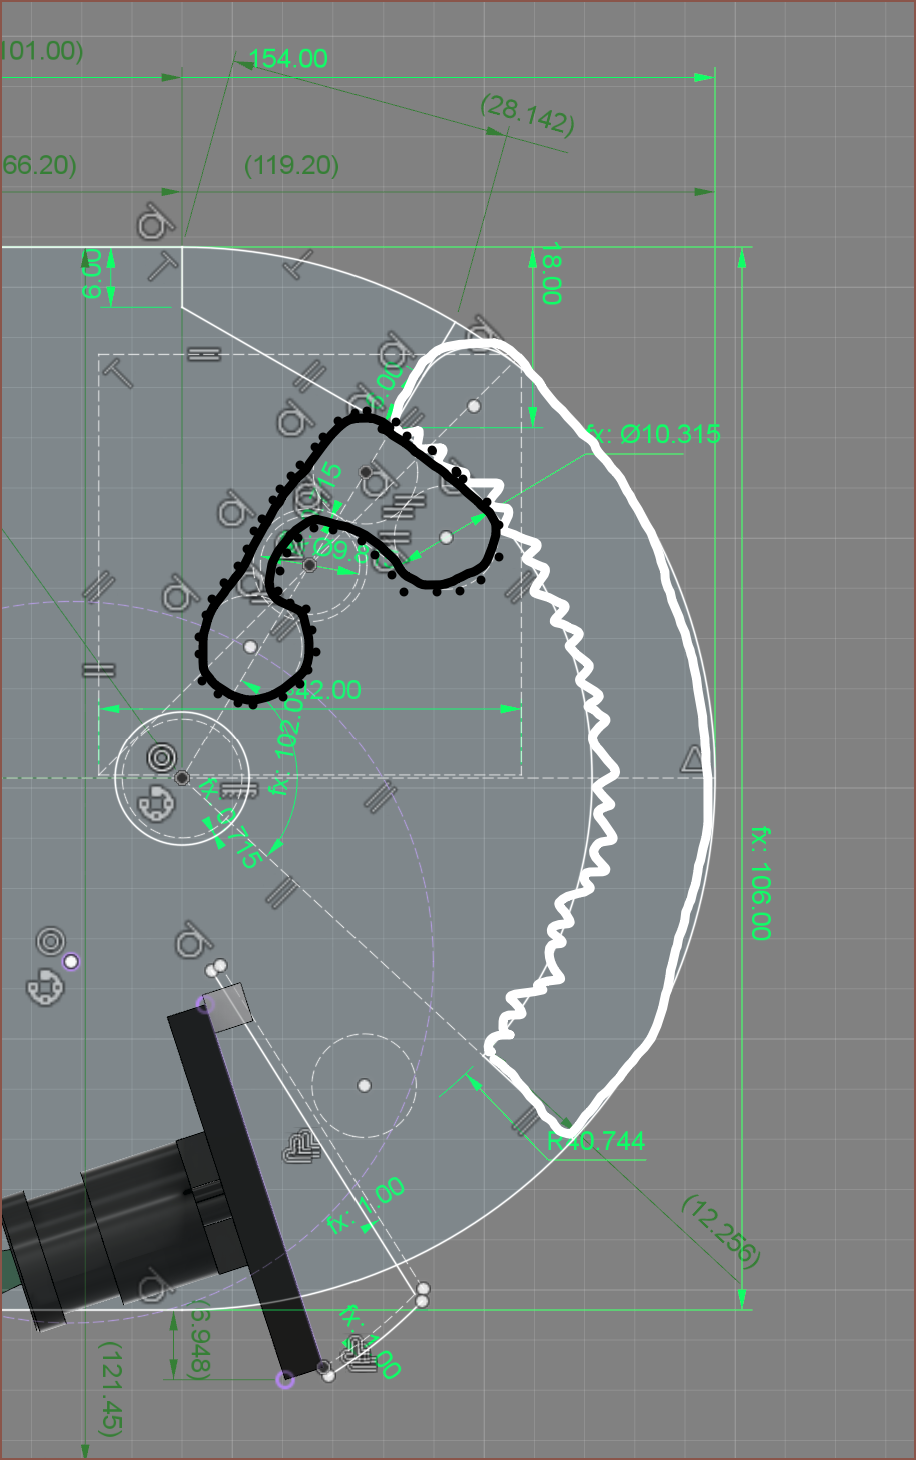
Currently, my plan is to have a curved GT2 rack and drive a closed belt.
![]() While this method means that I may not have to worry about backlash, I am still worried about effective torque and elasticity in the axis. Using a large width of belt will mitigate the latter, but if I recall correctly, I'm using a 16T to 60T, meaning 3.75:1 reduction on a standard 40Ncm Nema17. I was planning to counterbalance it, but that currently sounds like it would add complexity to the design and the installed tools would likely have different weights.
While this method means that I may not have to worry about backlash, I am still worried about effective torque and elasticity in the axis. Using a large width of belt will mitigate the latter, but if I recall correctly, I'm using a 16T to 60T, meaning 3.75:1 reduction on a standard 40Ncm Nema17. I was planning to counterbalance it, but that currently sounds like it would add complexity to the design and the installed tools would likely have different weights.Going cyclodial is probably the route out of this situation, but I thought the DIY worm gear looked cool so I wrote this log.
-
[M][P] Cheap glass found on Ebay
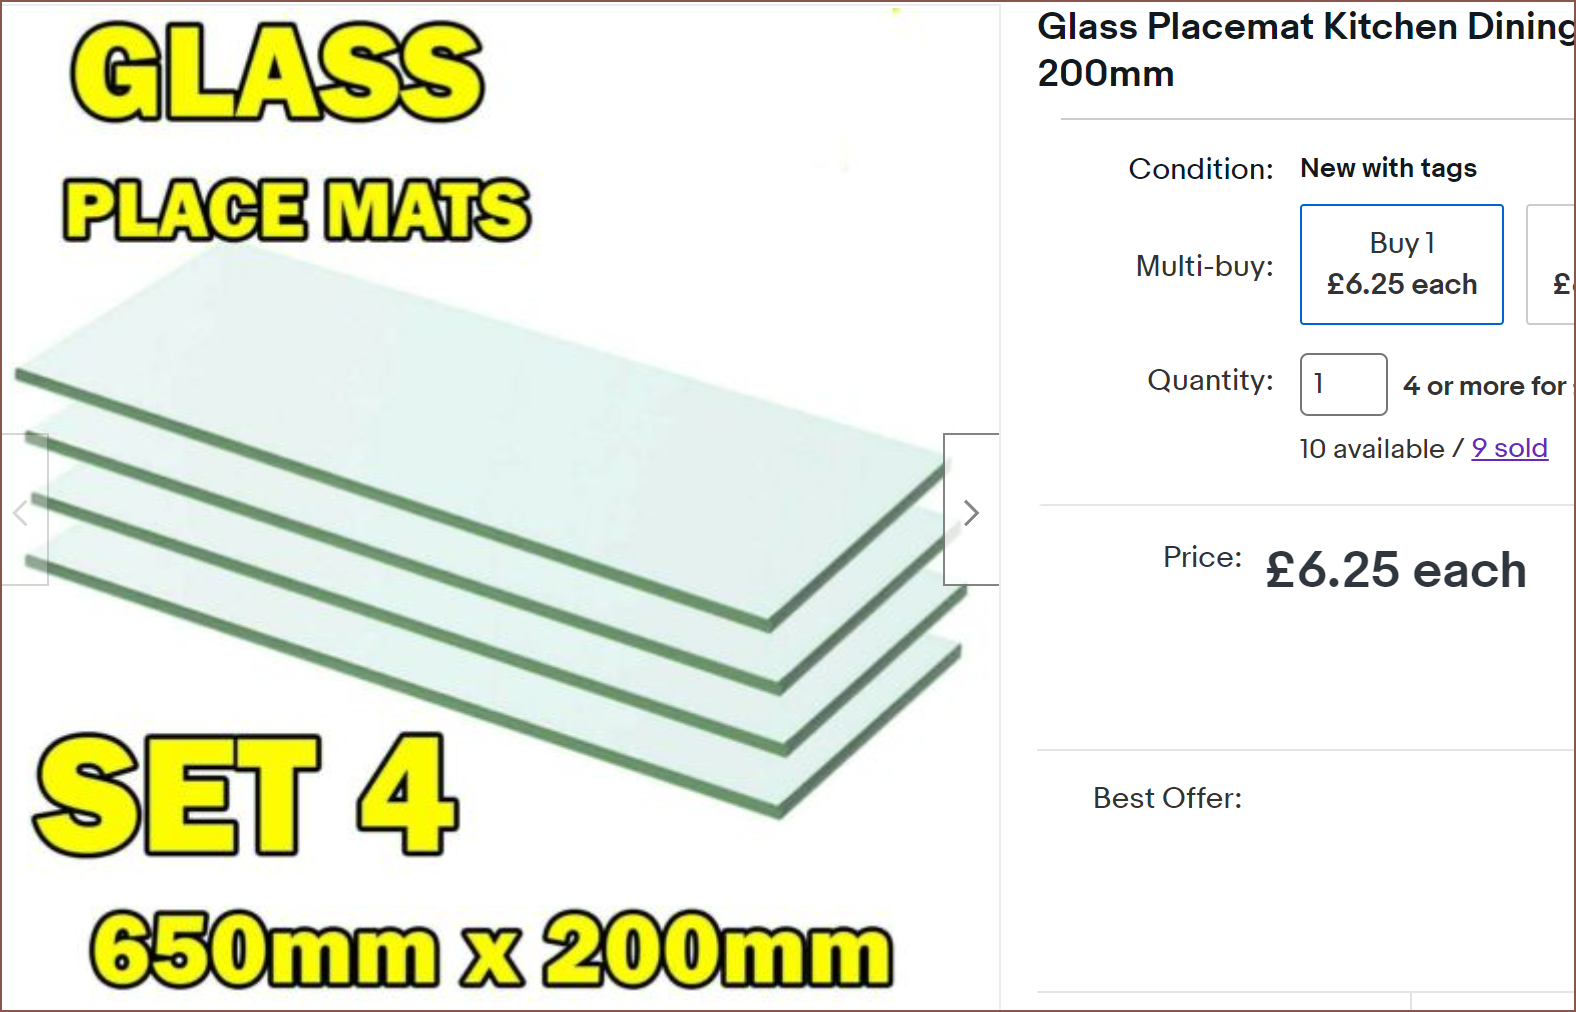
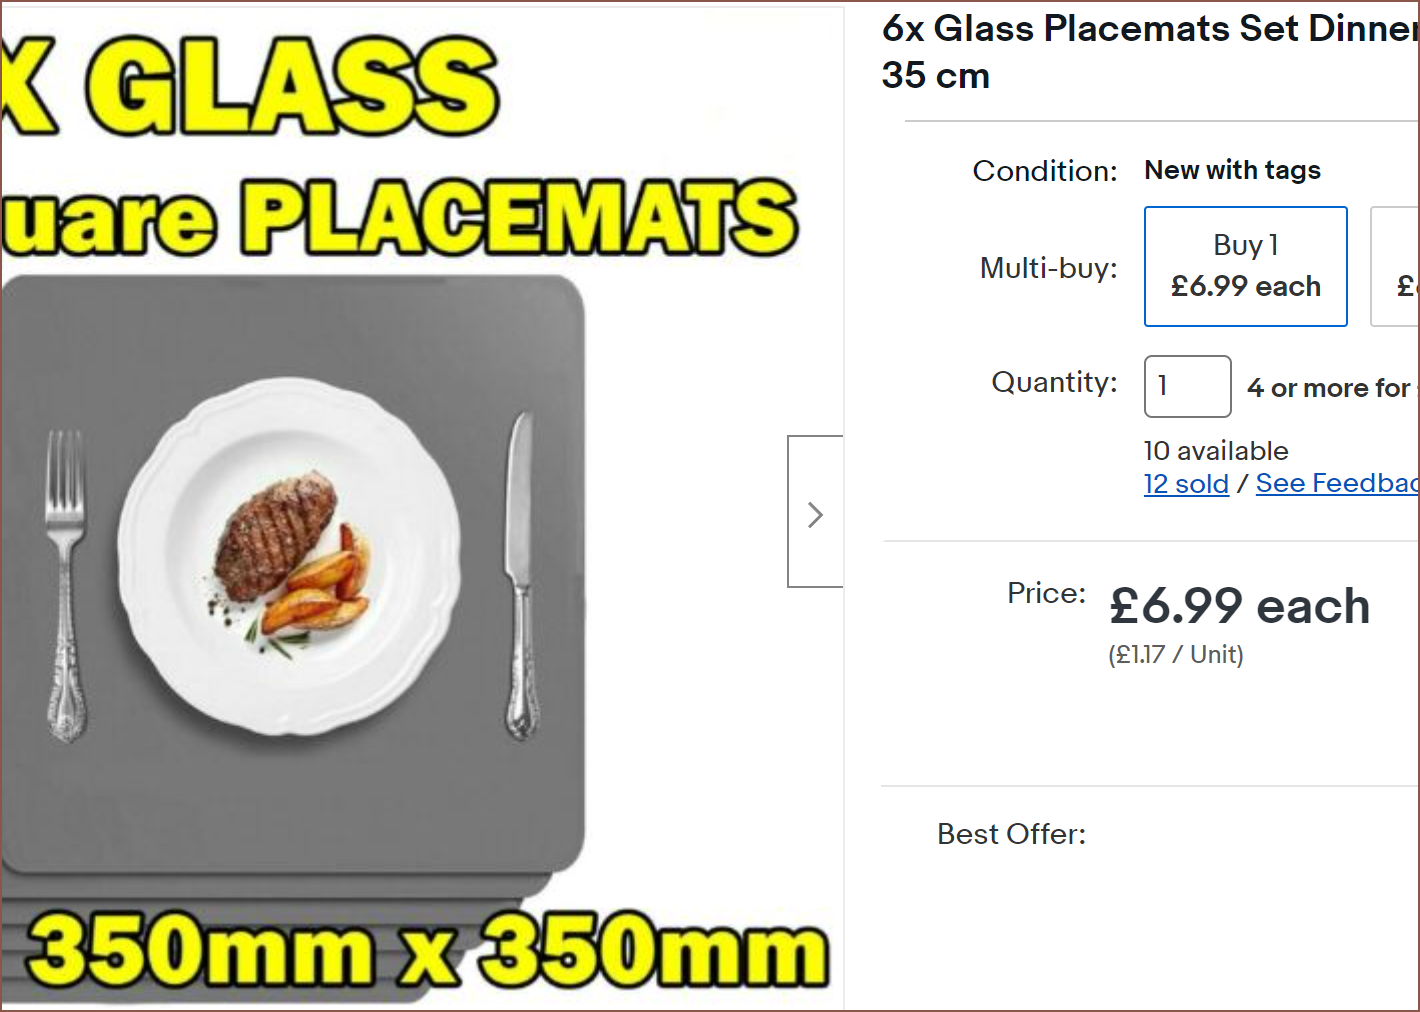
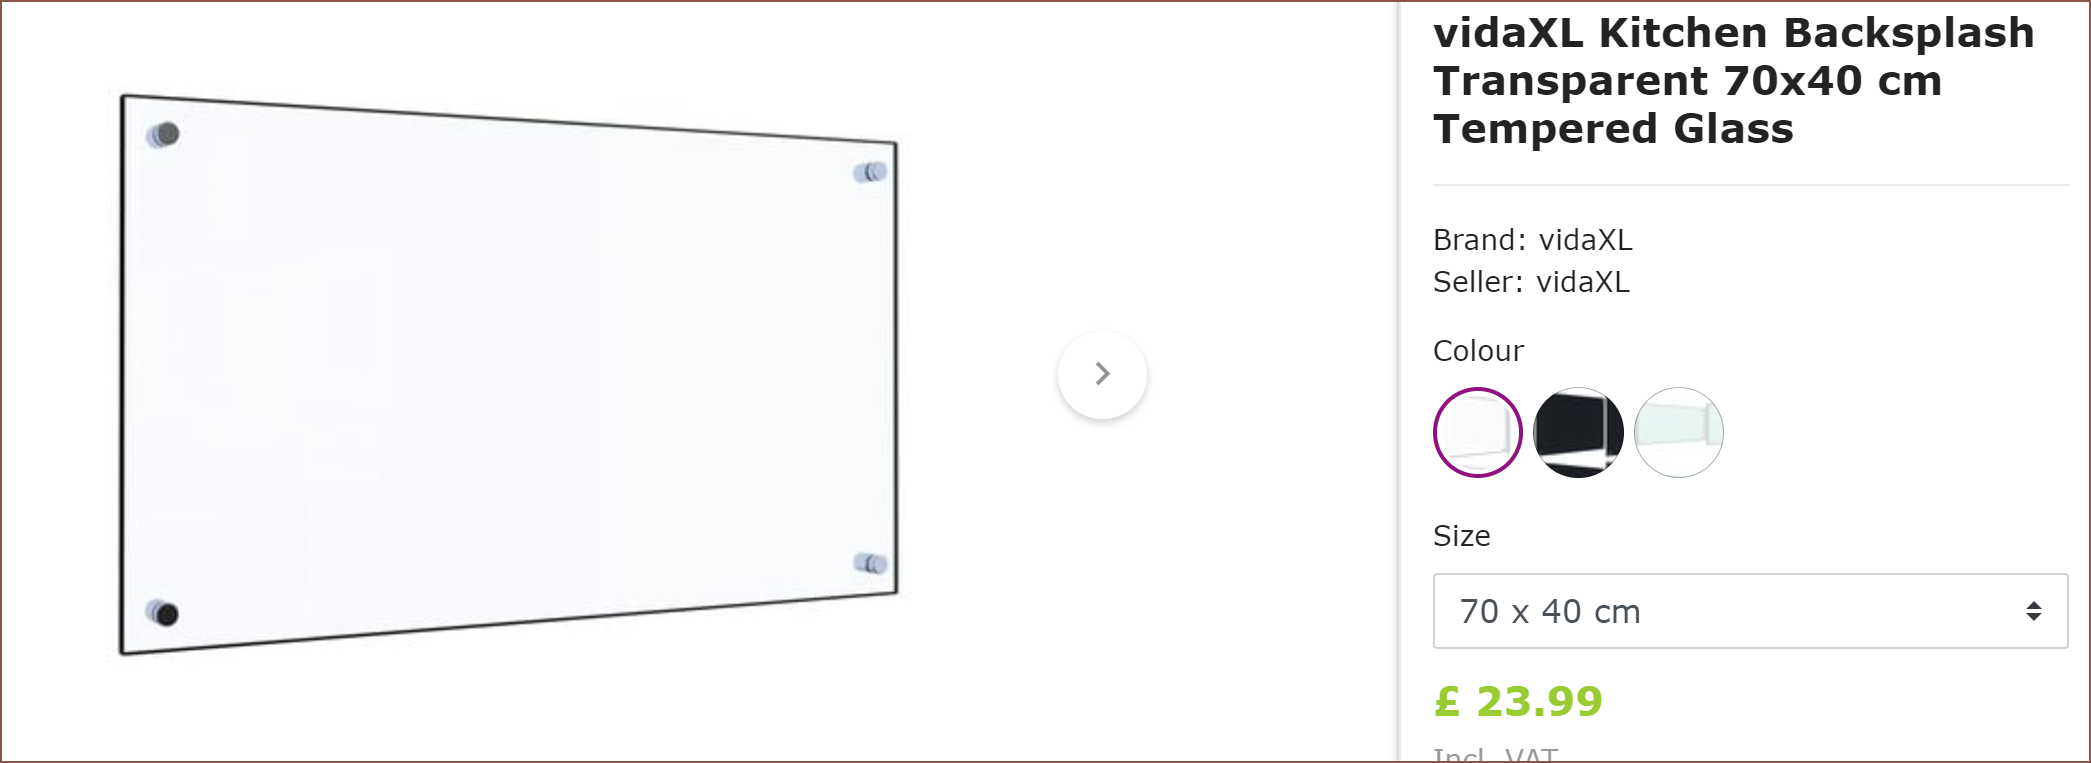
06/28/2022 at 15:32 • 0 commentsWhile looking at glass shelves for gd0105, I stumbled on some listings for cheap glass:
![]()
![]()
The long pane of glass was miles cheaper than the one I was thinking I was going to have to get for the 4 segment bed:
![]()
And remember that I'd have to get 2 of them. The square panes would also be much cheaper than the 300x400mm worktop savers I was planning to use for the 2 segment rotary bed. The last time I checked, which was months ago, the best I could find was 6 for £20. Seems that kind of deal is gone now, because I can only find £10 per each now.
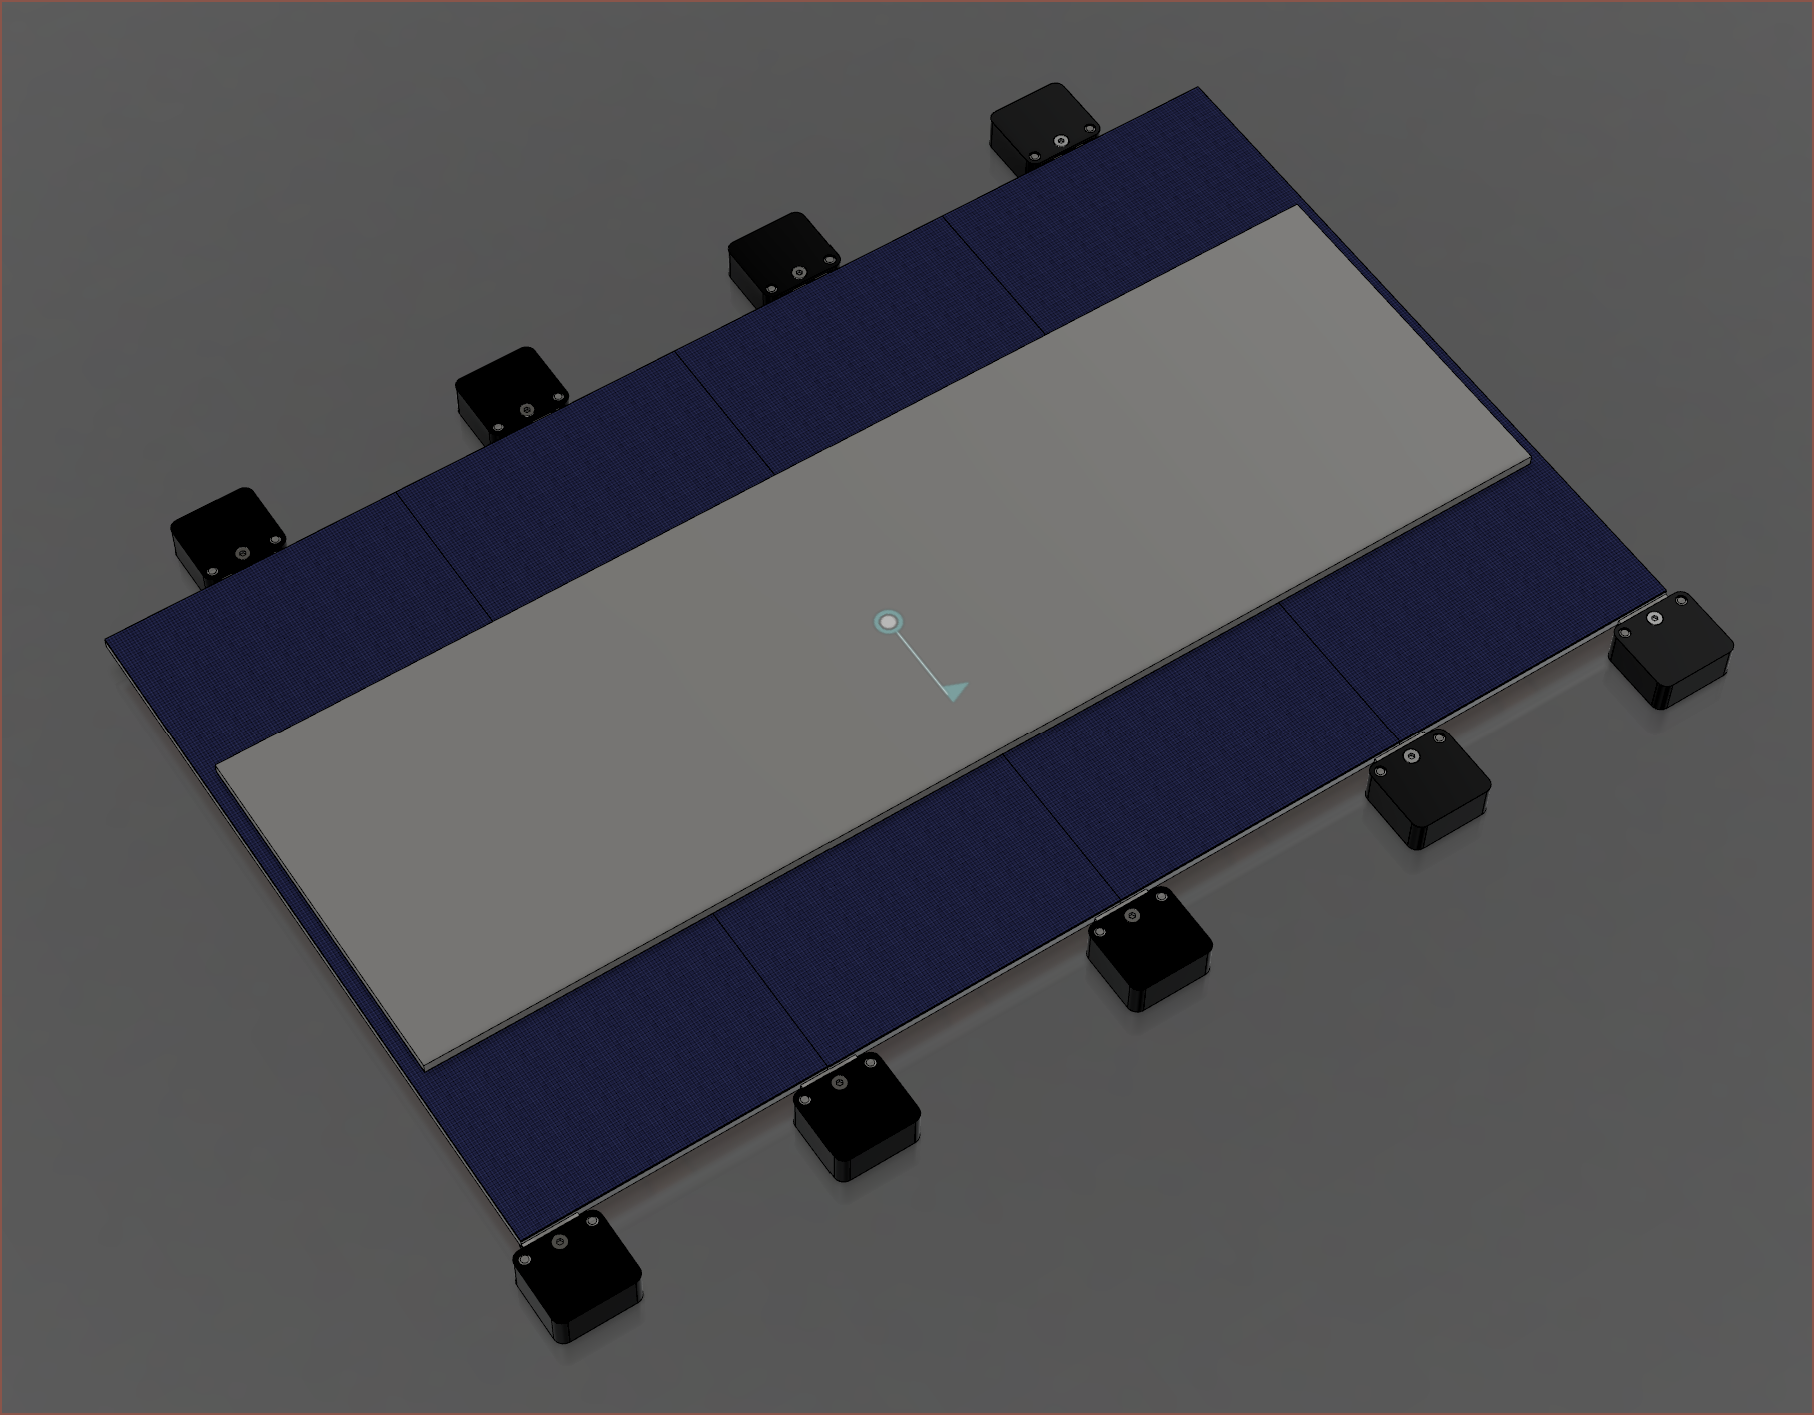
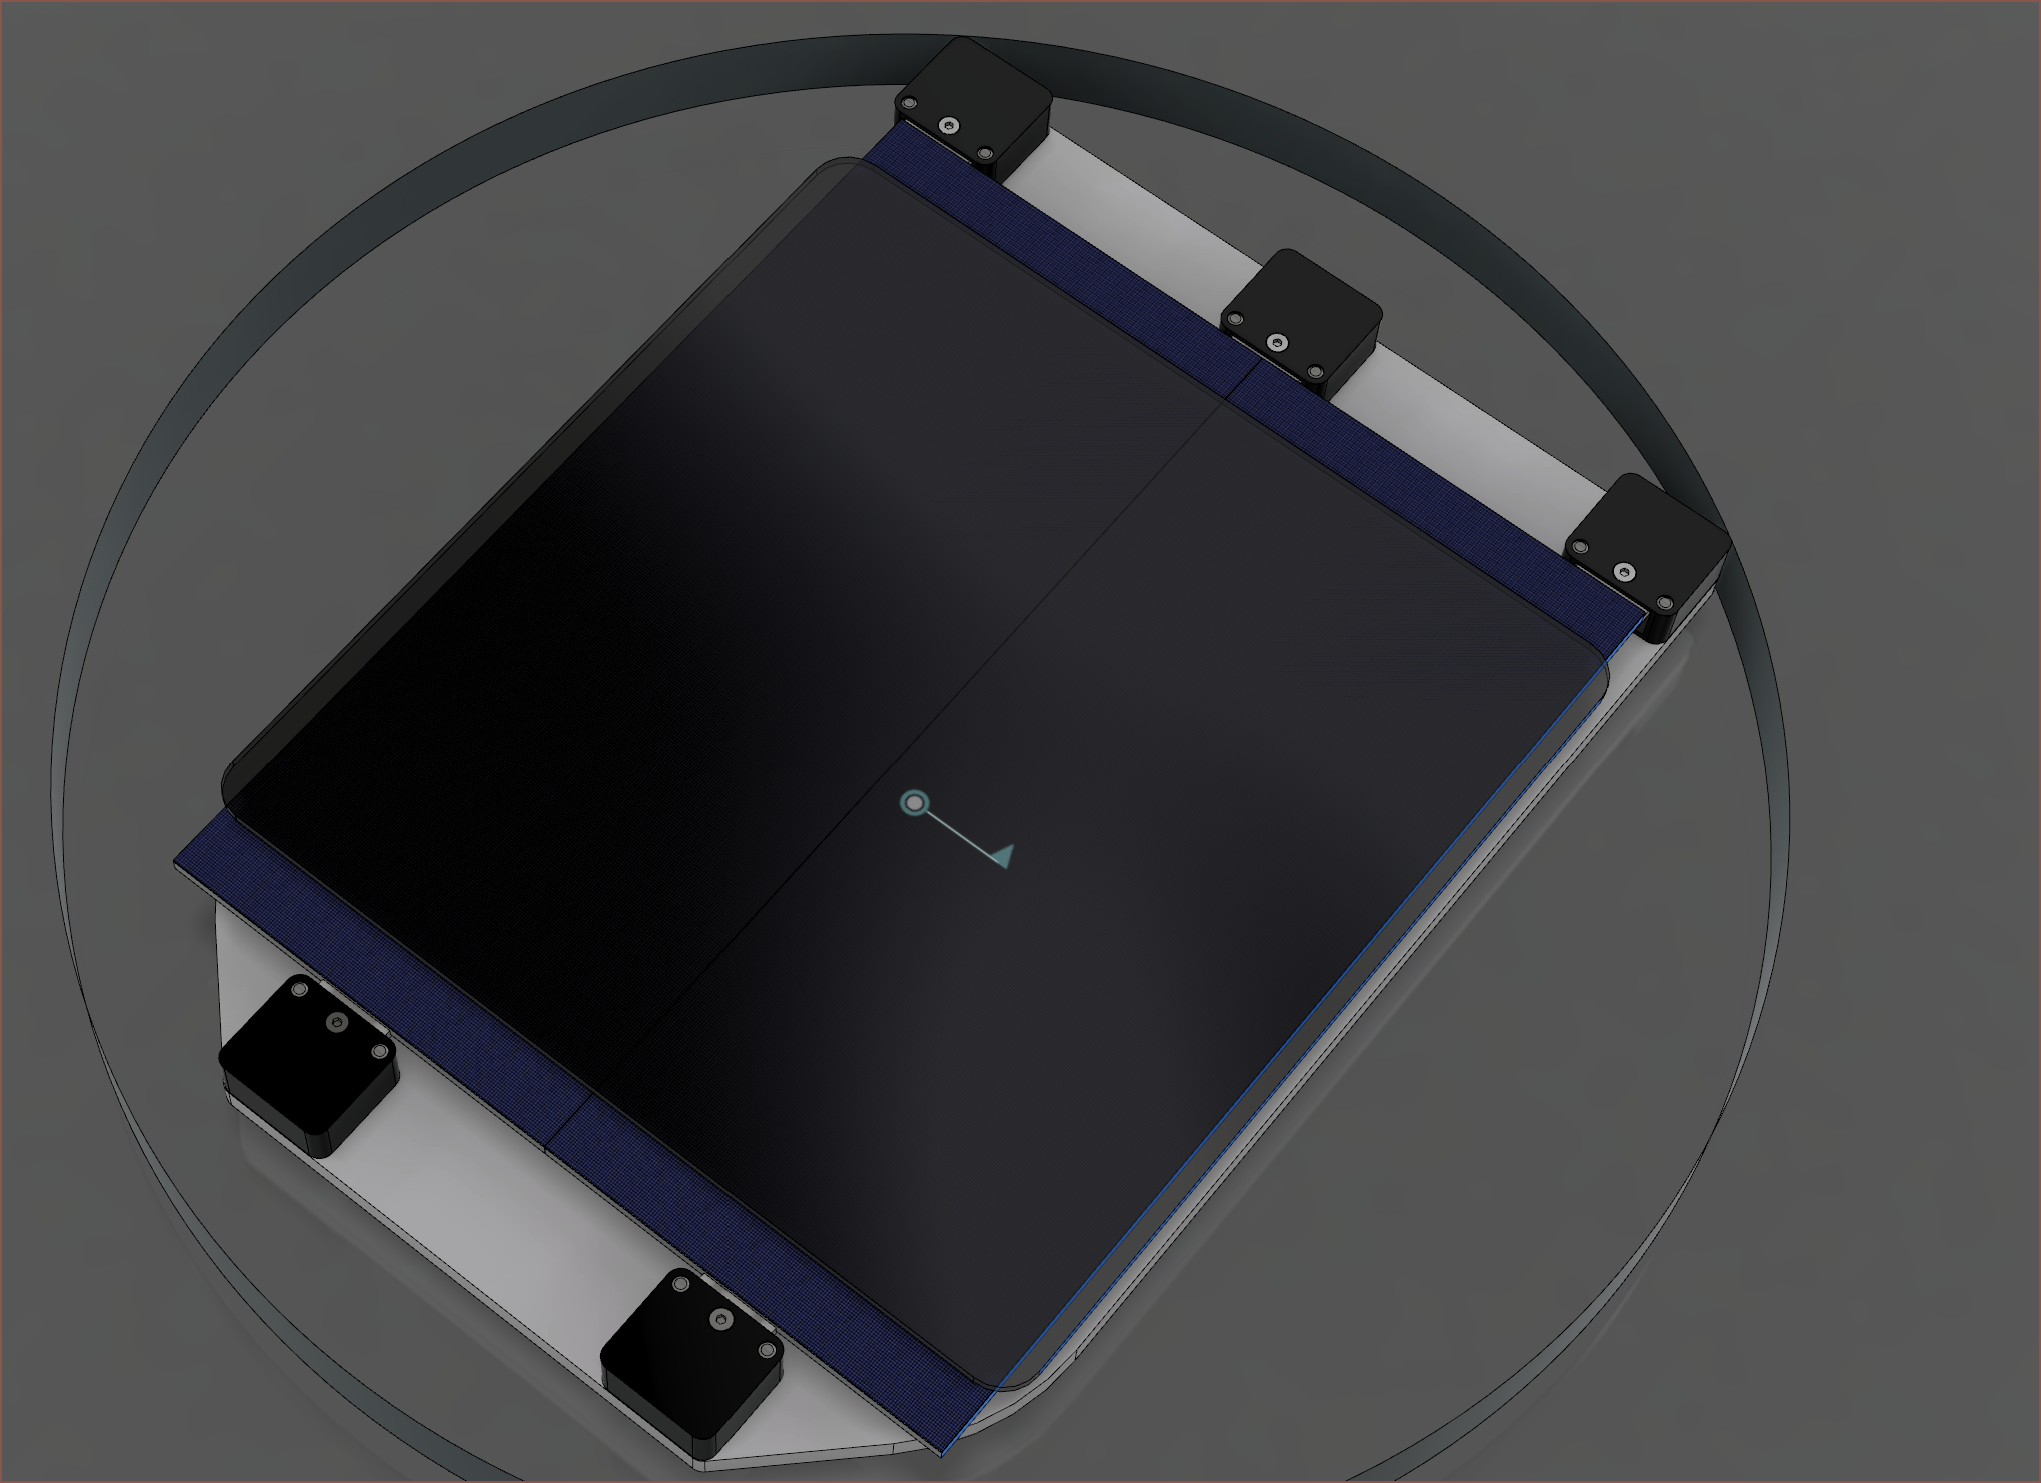
These glass sizes weren't exactly the kinds of sizes I'd need, so I modelled them:
![]()
![]() They're both pretty close though, and I feel like I'd be able to find suitable binder clips. I hope an edge in the middle of the 65x40cm print area won't be an issue, but from research into gd0105's build area, I doubt I'd even have prints wider than 20cm anyway. As for the 35x35cm, it's likely a better choice than 30x40 anyway because the usable circle diameter increases from maybe 29cm to maybe 34cm if no other limitations get in the way.
They're both pretty close though, and I feel like I'd be able to find suitable binder clips. I hope an edge in the middle of the 65x40cm print area won't be an issue, but from research into gd0105's build area, I doubt I'd even have prints wider than 20cm anyway. As for the 35x35cm, it's likely a better choice than 30x40 anyway because the usable circle diameter increases from maybe 29cm to maybe 34cm if no other limitations get in the way. Glass Arrives
They came yesterday, together in a well sized box and it was a heavy one. I do wonder what kind of margins the sellers were actually making on this glass and I feel like it's just some sort of clearance.
![]() The square panes were bubble wrapped in 2 packs of 3, and the bubble wrapped pack of 4 were under them. each pane is then further protected by a wrap of cardboard each.
The square panes were bubble wrapped in 2 packs of 3, and the bubble wrapped pack of 4 were under them. each pane is then further protected by a wrap of cardboard each. ![]() The glass is actually a nice light grey, if not off-white. What interested me was the matte backing:
The glass is actually a nice light grey, if not off-white. What interested me was the matte backing:![]() According to the listing, this glass is rated to 90C, but since glass is glass, I can only assume that this bottom coating or possible binding agent is what limits the working temperature.
According to the listing, this glass is rated to 90C, but since glass is glass, I can only assume that this bottom coating or possible binding agent is what limits the working temperature. ![]()
![]() Contrary to the listing's image, the 65x20cm "glass placemat" also came in this lovely off-white and matte backing. Nice to have something better than the listing image for once. I was still suprised that the glass was actually delivered at all.
Contrary to the listing's image, the 65x20cm "glass placemat" also came in this lovely off-white and matte backing. Nice to have something better than the listing image for once. I was still suprised that the glass was actually delivered at all.Testing the glass backing
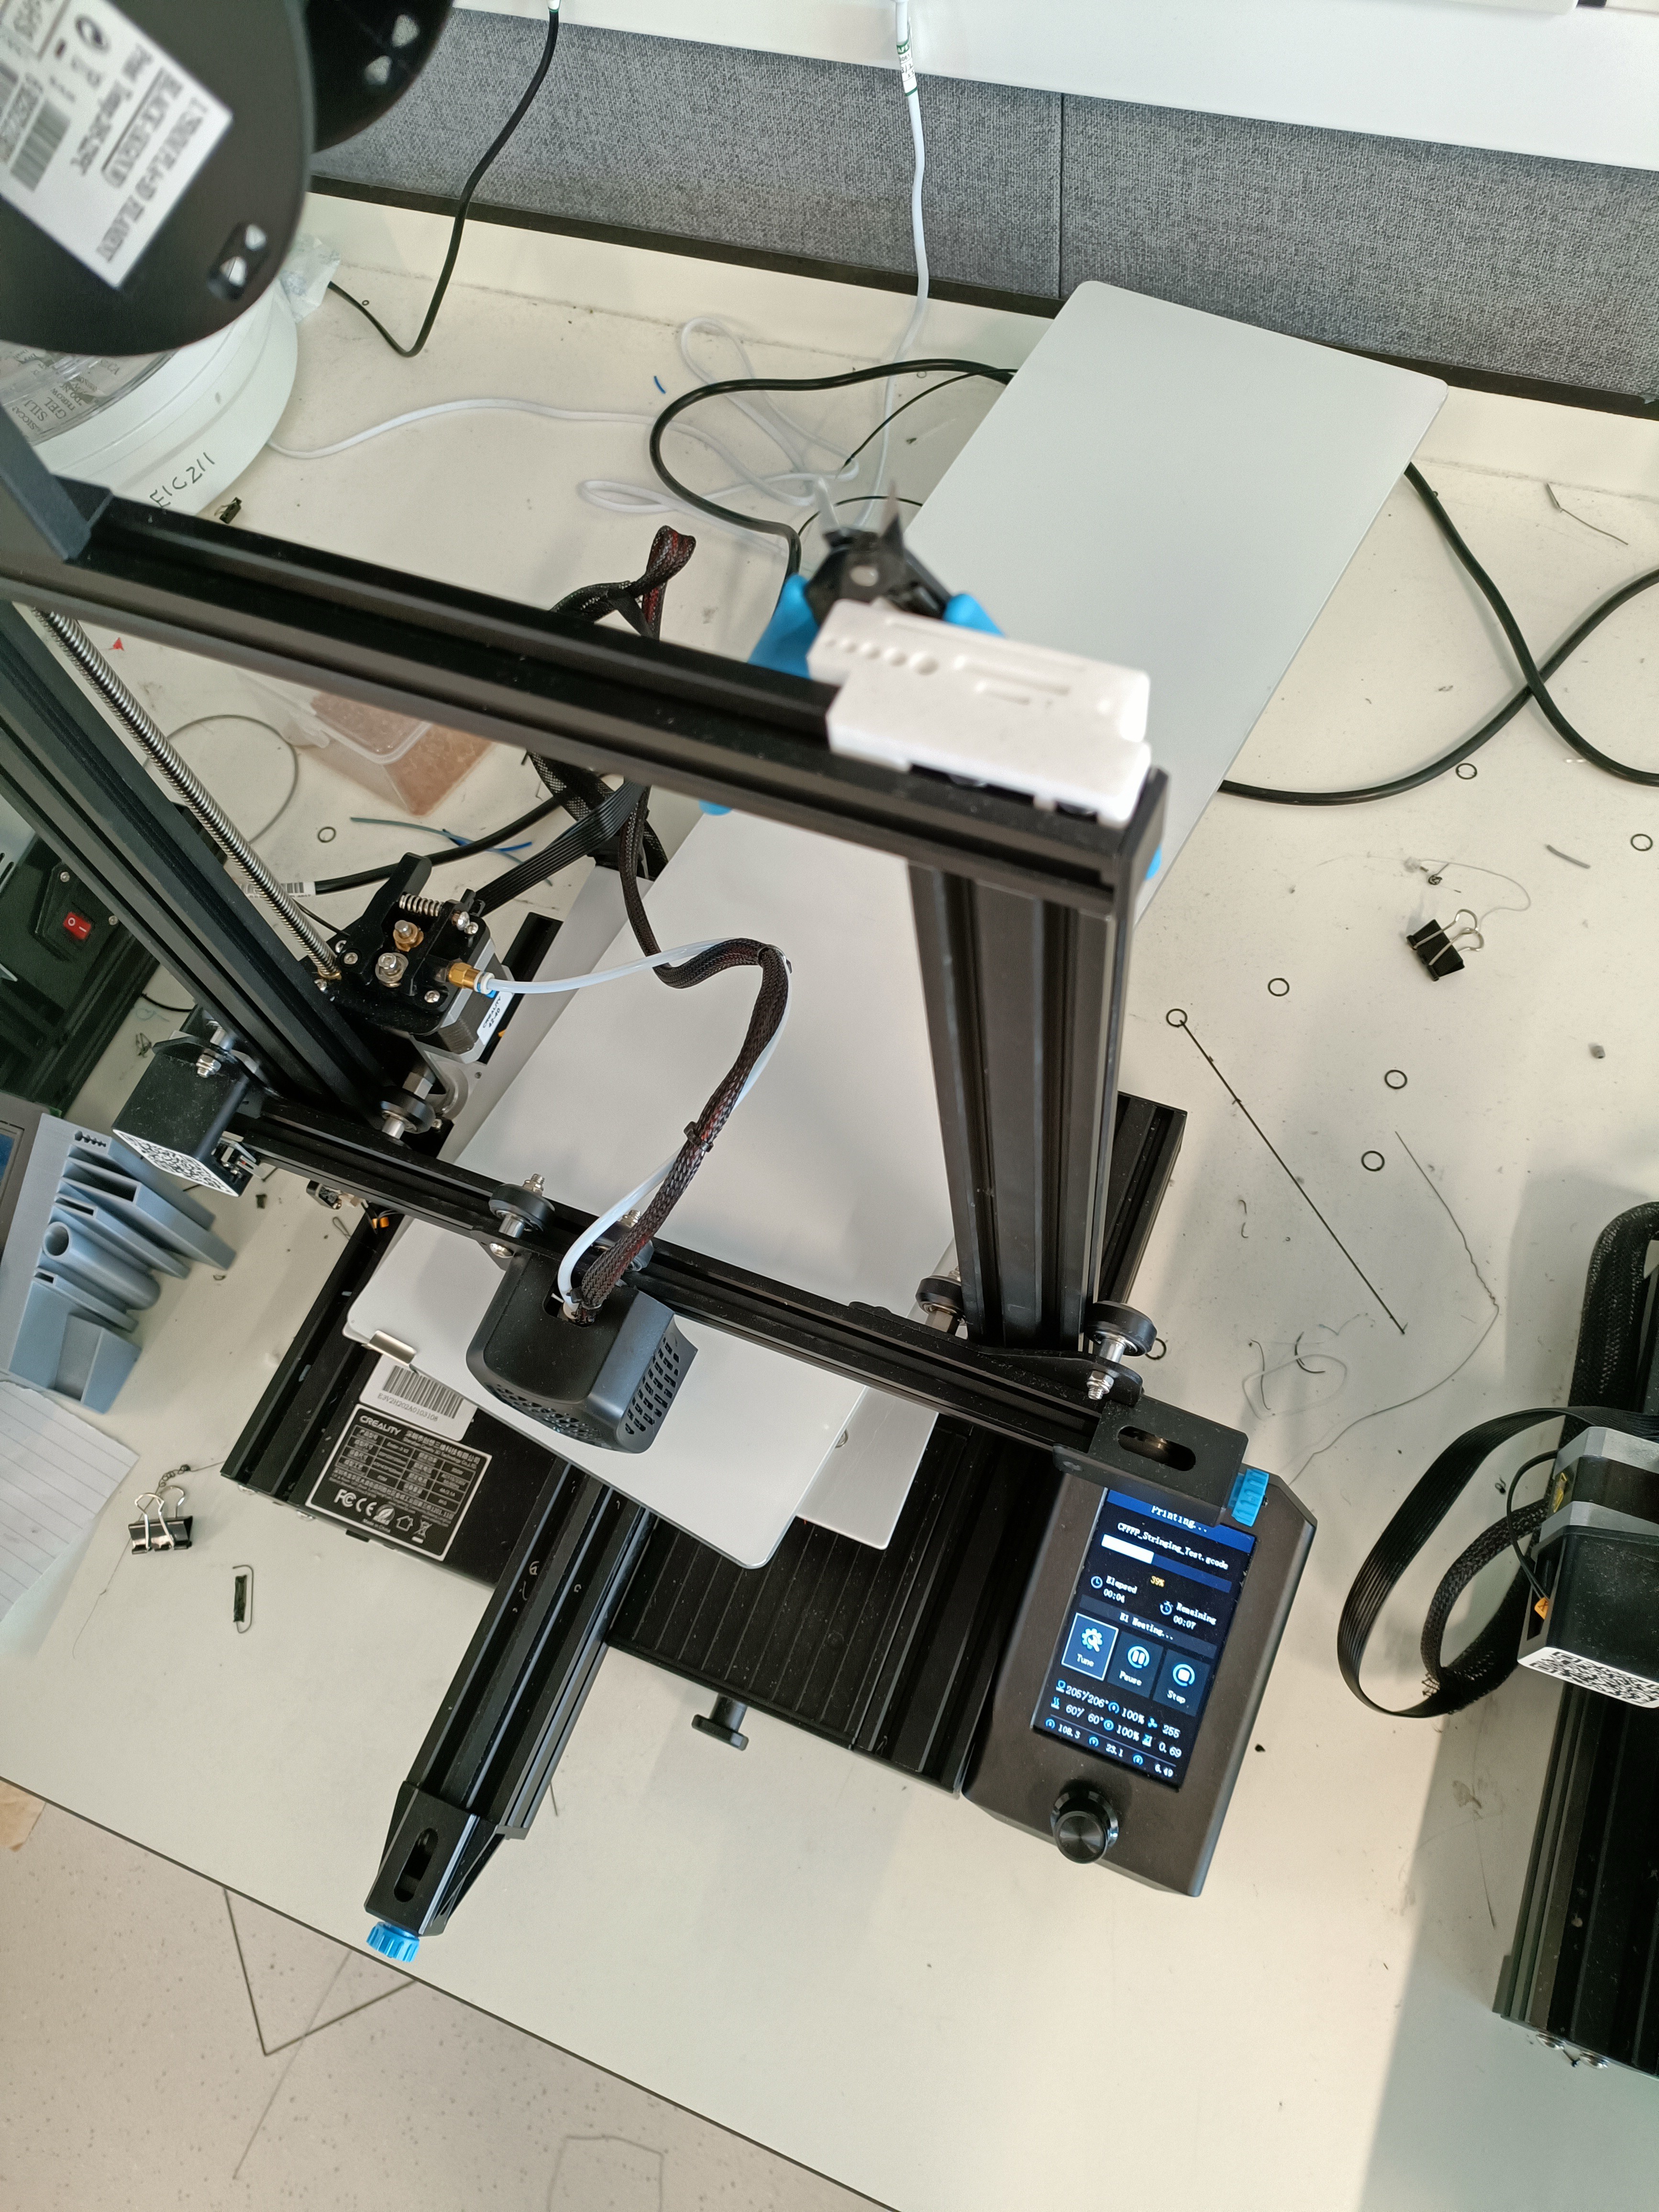
I rushed over to the 3D printers my university just happens to have and eventually installed it into the Ender3 V2.
![]()
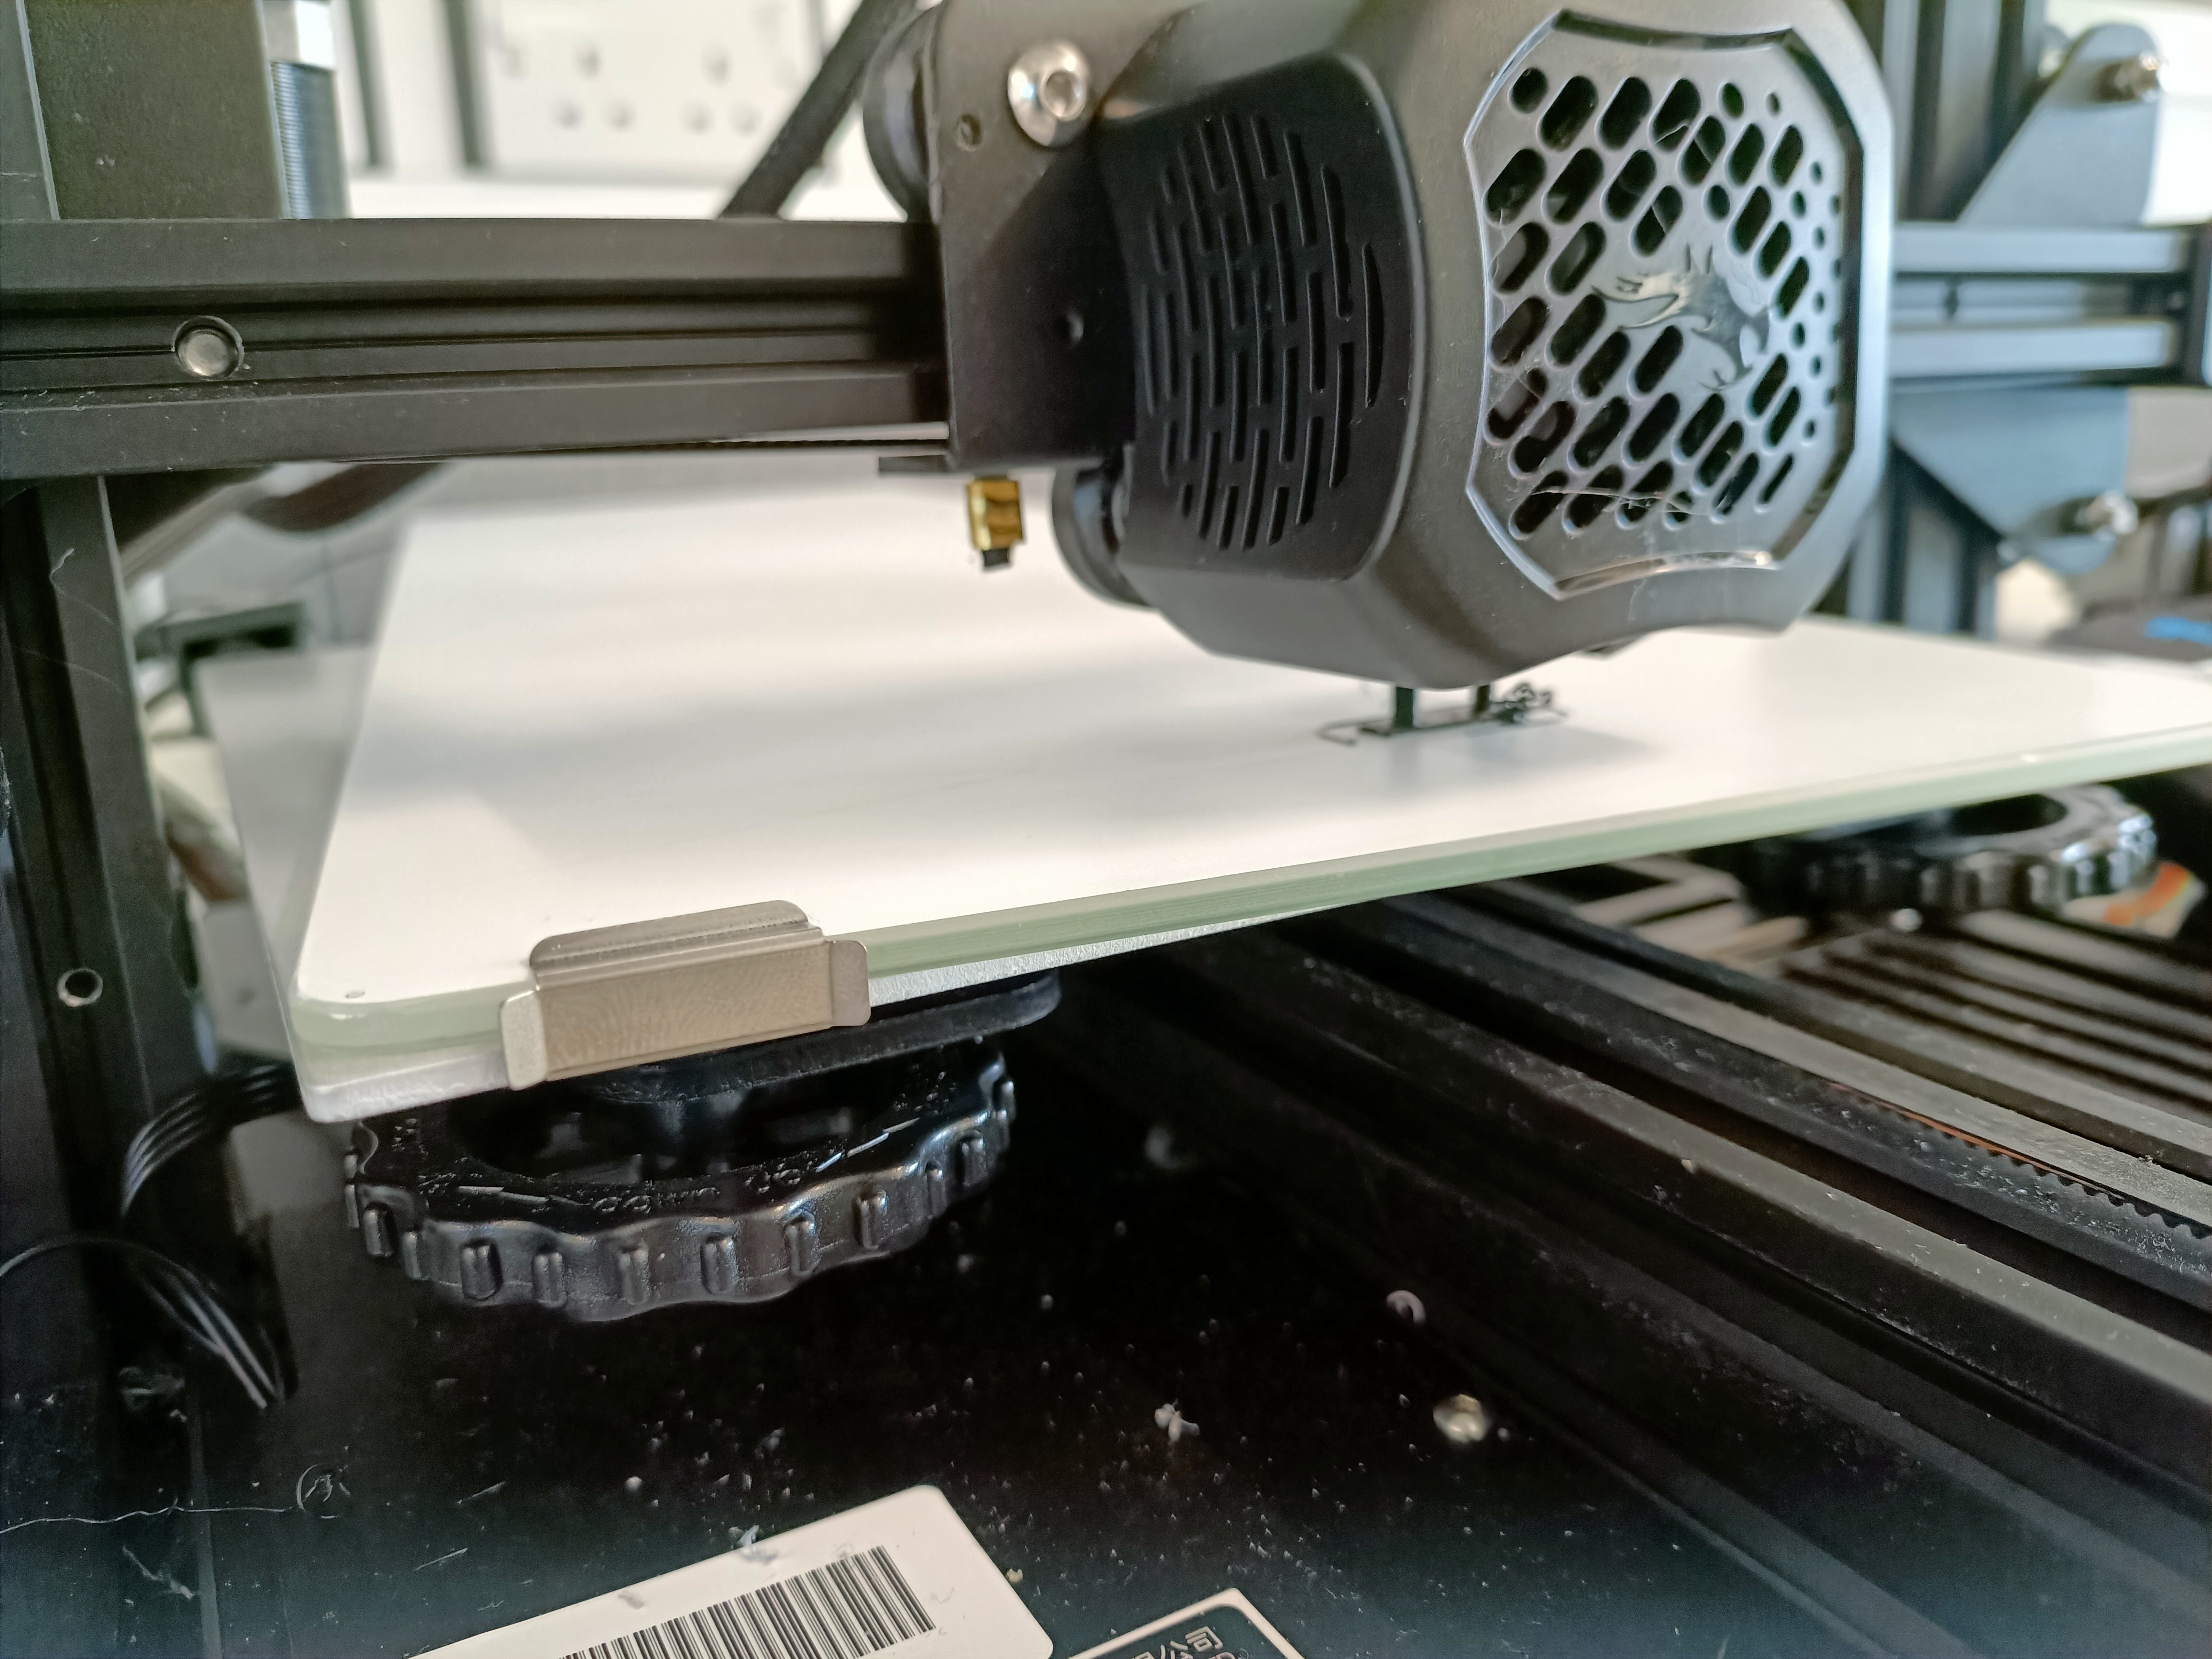
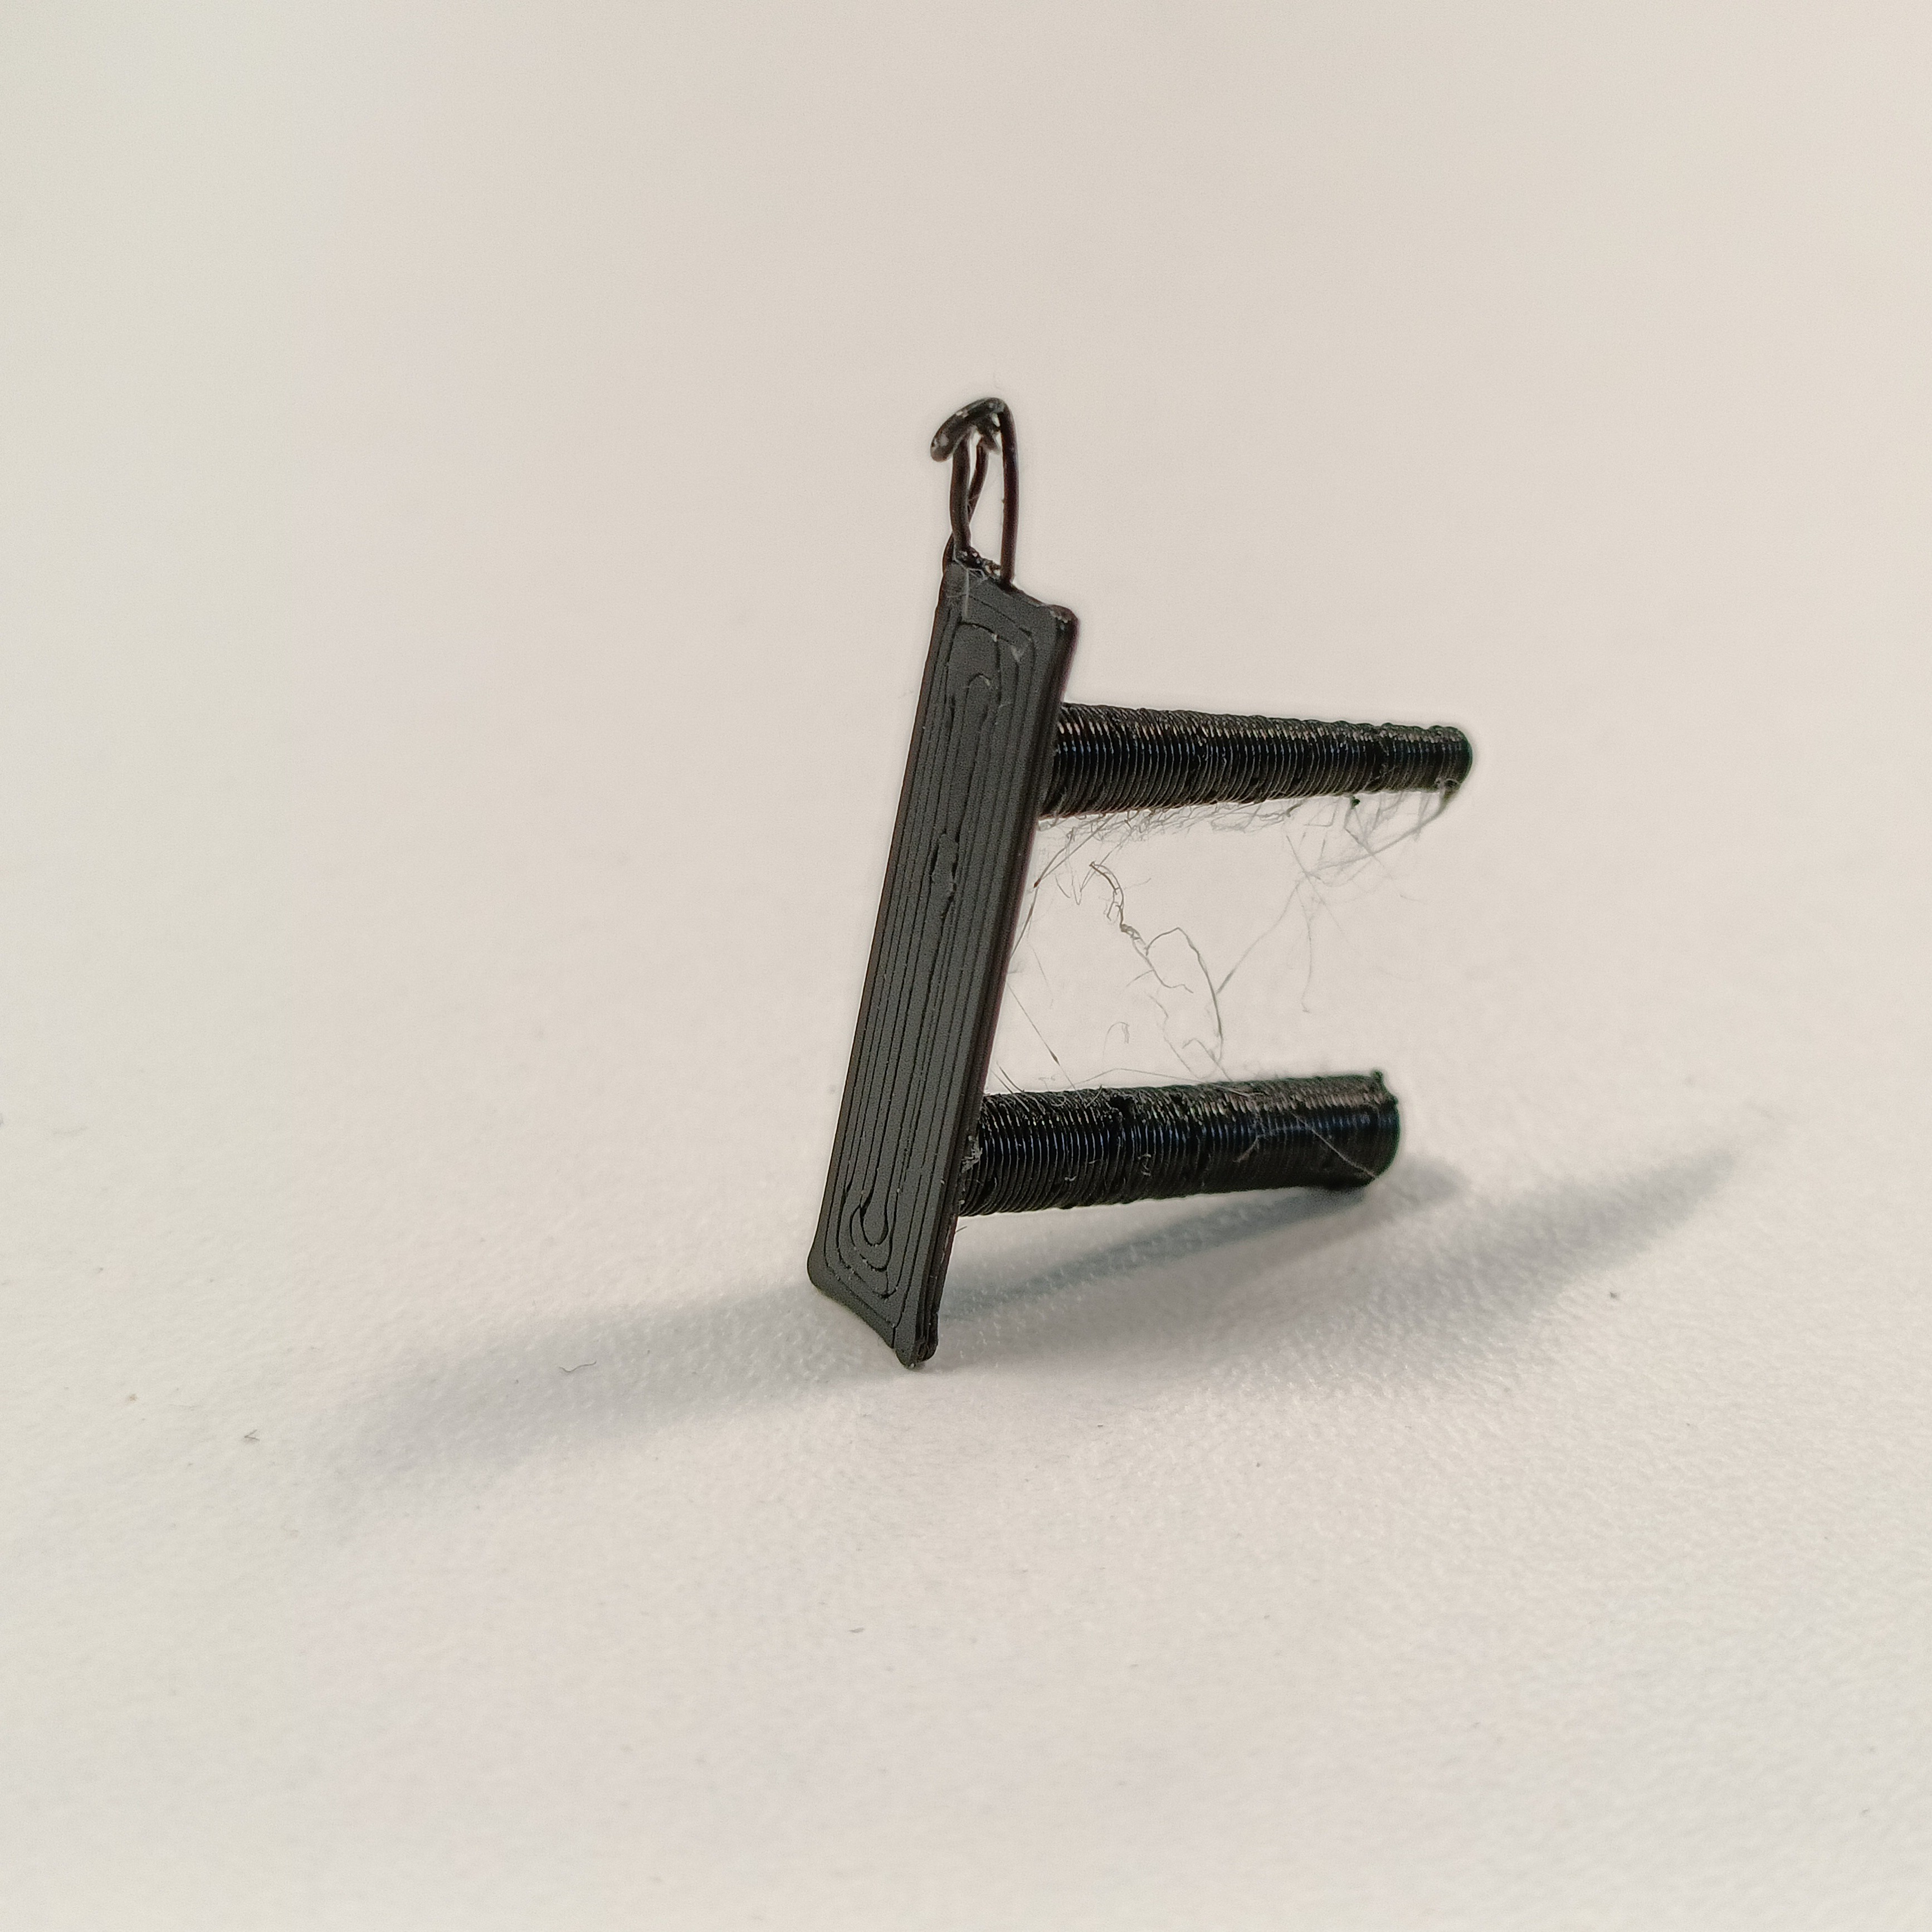
Don't worry. I eventually realised I could straighten it out and have 3 binder clips holding the glass from the front right corner. The first thing I tried was a stringing test as I've also updated to Cura 5.0 now that the Materials Settings plugin has been updated. This PLA+ (never used this before) and printed with temps of 206/60 at a initial speed of 60mm/s.
![]() That seemed to stick ok and had a gloriously matte bottom layer:
That seemed to stick ok and had a gloriously matte bottom layer:![]() Thus I printed a 10x80x10mm print to see if I could get some warping.
Thus I printed a 10x80x10mm print to see if I could get some warping.![]() No it came out flat.
No it came out flat.![]()
![]() The bottom looked like the nozzle was a tad far from the bed, so I adjusted the levelling screws and upped the stakes a bit: PETG, 240/82, 60mm/s, 10x100x10mm. As it was printing, I noticed that the material looks kind of familiar to the stuff ontop of the Ender glass:
The bottom looked like the nozzle was a tad far from the bed, so I adjusted the levelling screws and upped the stakes a bit: PETG, 240/82, 60mm/s, 10x100x10mm. As it was printing, I noticed that the material looks kind of familiar to the stuff ontop of the Ender glass:![]() I also tried to scratch it with a filament cutter and there didin't seem to be any visible damage, so it's at least more durable than something like a printer bed sticker, lexan or the Ultrabase I briefly tried years ago. Anyway, the PETG seemed to have stuck even better to the surface:
I also tried to scratch it with a filament cutter and there didin't seem to be any visible damage, so it's at least more durable than something like a printer bed sticker, lexan or the Ultrabase I briefly tried years ago. Anyway, the PETG seemed to have stuck even better to the surface:![]() ABS, however, wasn't happening:
ABS, however, wasn't happening:![]()
![]() It just didn't want to stay on, even with the glass side. It wasn't even on there long enough to warp. It just popped off as if it was too cold, even though the bed was set to 108C.
It just didn't want to stay on, even with the glass side. It wasn't even on there long enough to warp. It just popped off as if it was too cold, even though the bed was set to 108C.
SecSavr Sublime [gd0036]
An FDM 3D printer that I described as "The FULL Coverage, Extended X, Pro Max, Ultramatrix Solution".
 kelvinA
 I didn't notice that there was a gap between the inner hole and the edge of the face, and now it makes sense how the walls stay solid and without voids.
 As you can also see from the image, the hotend takes in 2 spools of filament, so I was happy to realise that I could create a tool that used both Slimes a few logs ago because it meant that the potential of printing tubes was possible. The tubes almost freeze in place so some really extreme overhangs are possible. I wonder if it would be suitable for a 5 axis version of wire printing, or perhaps used as tree supports.
 I do wonder what an opaque material would look like, but a more immediate question would be "How would I manufacture it?"
 This diagram gives some ideas, but I'm not sure how the outer brass looking block attaches to the aluminium looking block.
 The more I model, the more it looks like a snail. "Slime" was only supposed to be an internal name, technically speaking.
  For reasons unknown to me, 6000 series bearings are noticably more expensive than 6200 or 6300 series.
 I put the connector inside the Tool Plate file and wow this connector is larger than I expected. I guess I just didn't register how large an 8 x 30mm connector would be in relation to the size of the SecSavr Slight, and wonder if there would be enough space for the 8 to 1 paths in the Slime or the air inlet for component and part cooling. I could extend the size of the Slime from 106 to 108mm and put the pogo's there.
 Yeah... it's possible. I think having the solder cups facing down would also make it easier to solder/inspect when out in the field, though I need to be able to shield the connection to prevent material dust (from spindle) causing issues or becoming a hazard.
 As for the Slime, there seems to be no conflicts, though I may want to opt for a 16mm lens instead of a 12mm.
 Timed myself and it took 52 minutes to model, another 5ish to make the design parametric and probably another 10 to upload to
  As expected, it's over 170mm in length. Seems that it'll be closer to 180mm.
 Notably, the CPU is over 100MHz slower and I can't see any CANbus headers or port. The red cover for the input terminals does look more refined than the orange ones on the OctPro though. Hopefully the STM32G0 is still fast enough to send signals for 6 steppers simultaneously.
 The pogo pin connector is more expensive than the pogo target connector, so the former will be on the Slime. Months (or maybe even over a year ago) I planned to do the opposite so that the "consumable" connector was on the removable component and I could make a PCB circuit that counted how many mating connections the tool had undergone, but swapped now due to the cost difference and high durability.
 I'm still annoyed about how much the OV4689 PCB costs (£48) over a OV4689 module (£18) but my research into finding something that could accept a 4 line MIPI and encode it resulted in a solution fail. If I recall correctly, I did some calculations months ago with 2 lane MIPI estimates and would be able to acheive the framerates advertised on the PCB, and the H616 on the Orange Pi Zero 2 was the only SBC I could find that was cheap and had a 1080P@60fps encoder. Conviniently enough, this is the board I plan to run Klipper on anyway (unless the yet-to-be-released Biqu CB1 comes in at like £25 or something because the Zero2 is around that price and the CB1 would be a much nicer solution with the MANTA M8P), so theoretically I could go down that route, but for now I probably should stay in my lane.
 The 5th axis is likely what I'd need, and it's probably so that steps aren't skipped due to milling forces, especially when the stepper is rotating. Assuming that the motors are 76mm Nema 23's with 1.9Nm (190Ncm) of torque, I'd need a 28.5:1 reduction with a 40Ncm Nema 17 to get equivalent torque.
 While this method means that I may not have to worry about backlash, I am still worried about effective torque and elasticity in the axis. Using a large width of belt will mitigate the latter, but if I recall correctly, I'm using a 16T to 60T, meaning 3.75:1 reduction on a standard 40Ncm Nema17. I was planning to counterbalance it, but that currently sounds like it would add complexity to the design and the installed tools would likely have different weights.
 They're both pretty close though, and I feel like I'd be able to find suitable binder clips. I hope an edge in the middle of the 65x40cm print area won't be an issue, but from
 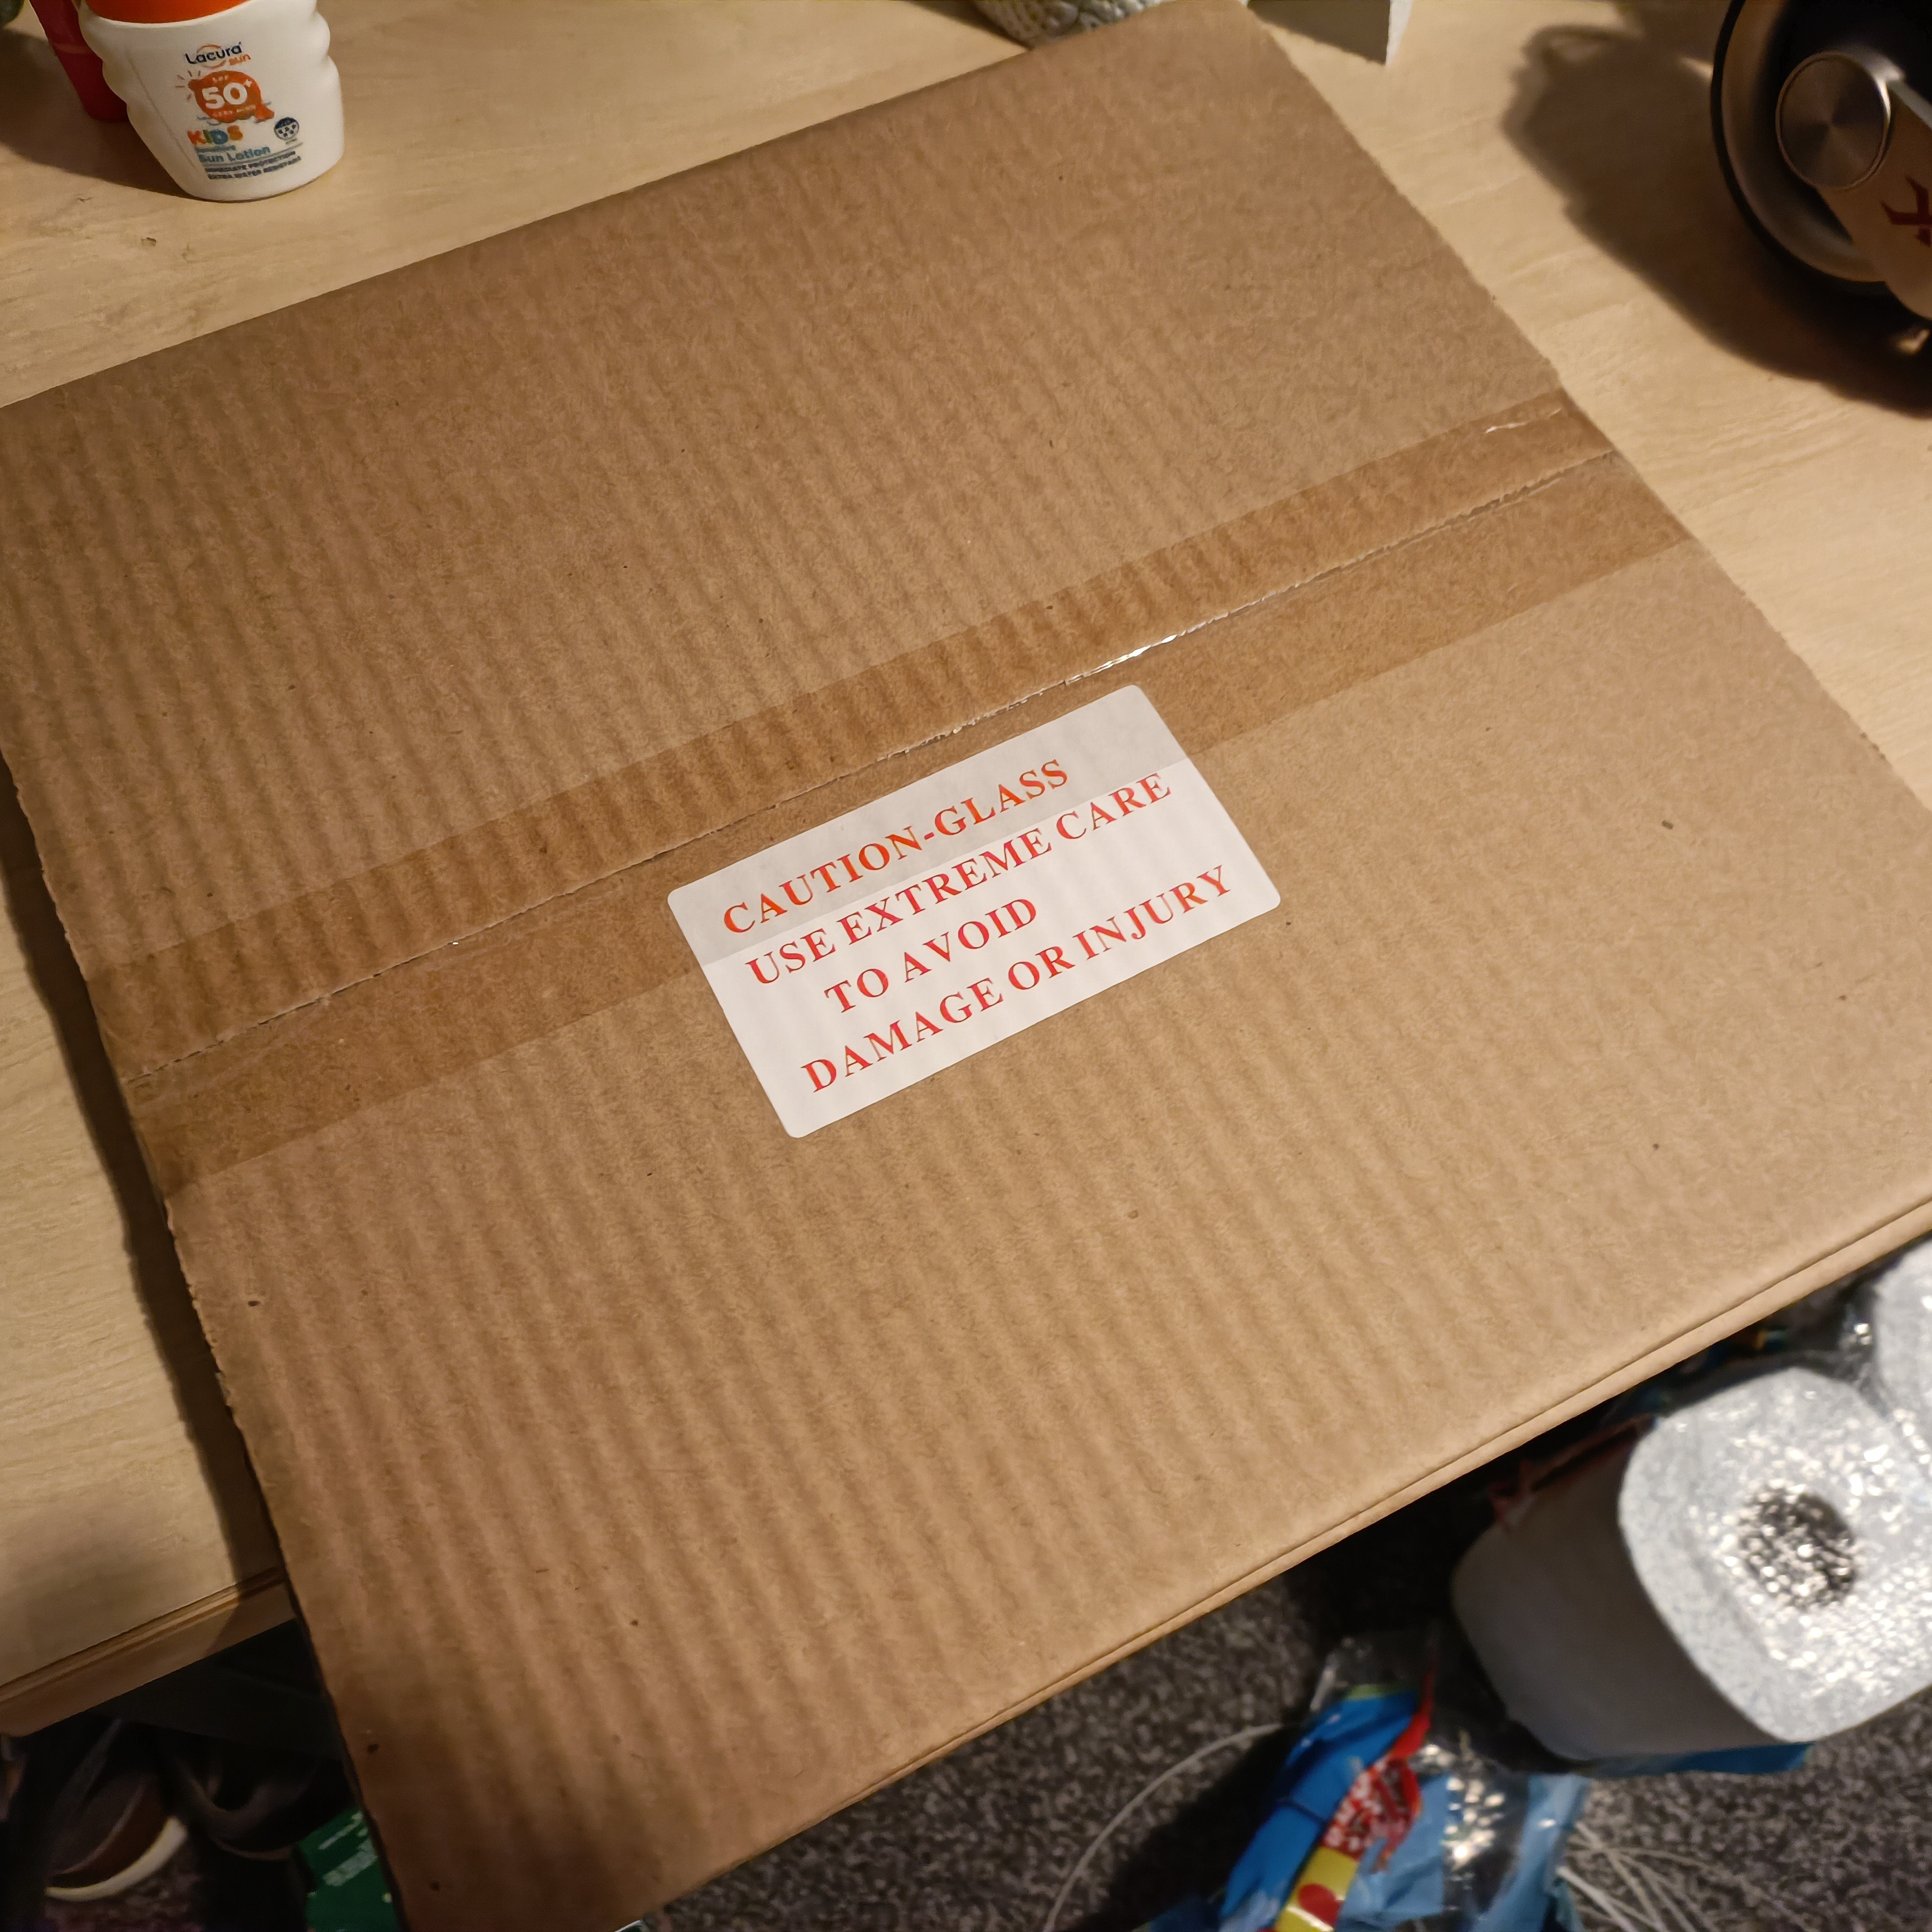 The square panes were bubble wrapped in 2 packs of 3, and the bubble wrapped pack of 4 were under them. each pane is then further protected by a wrap of cardboard each.
 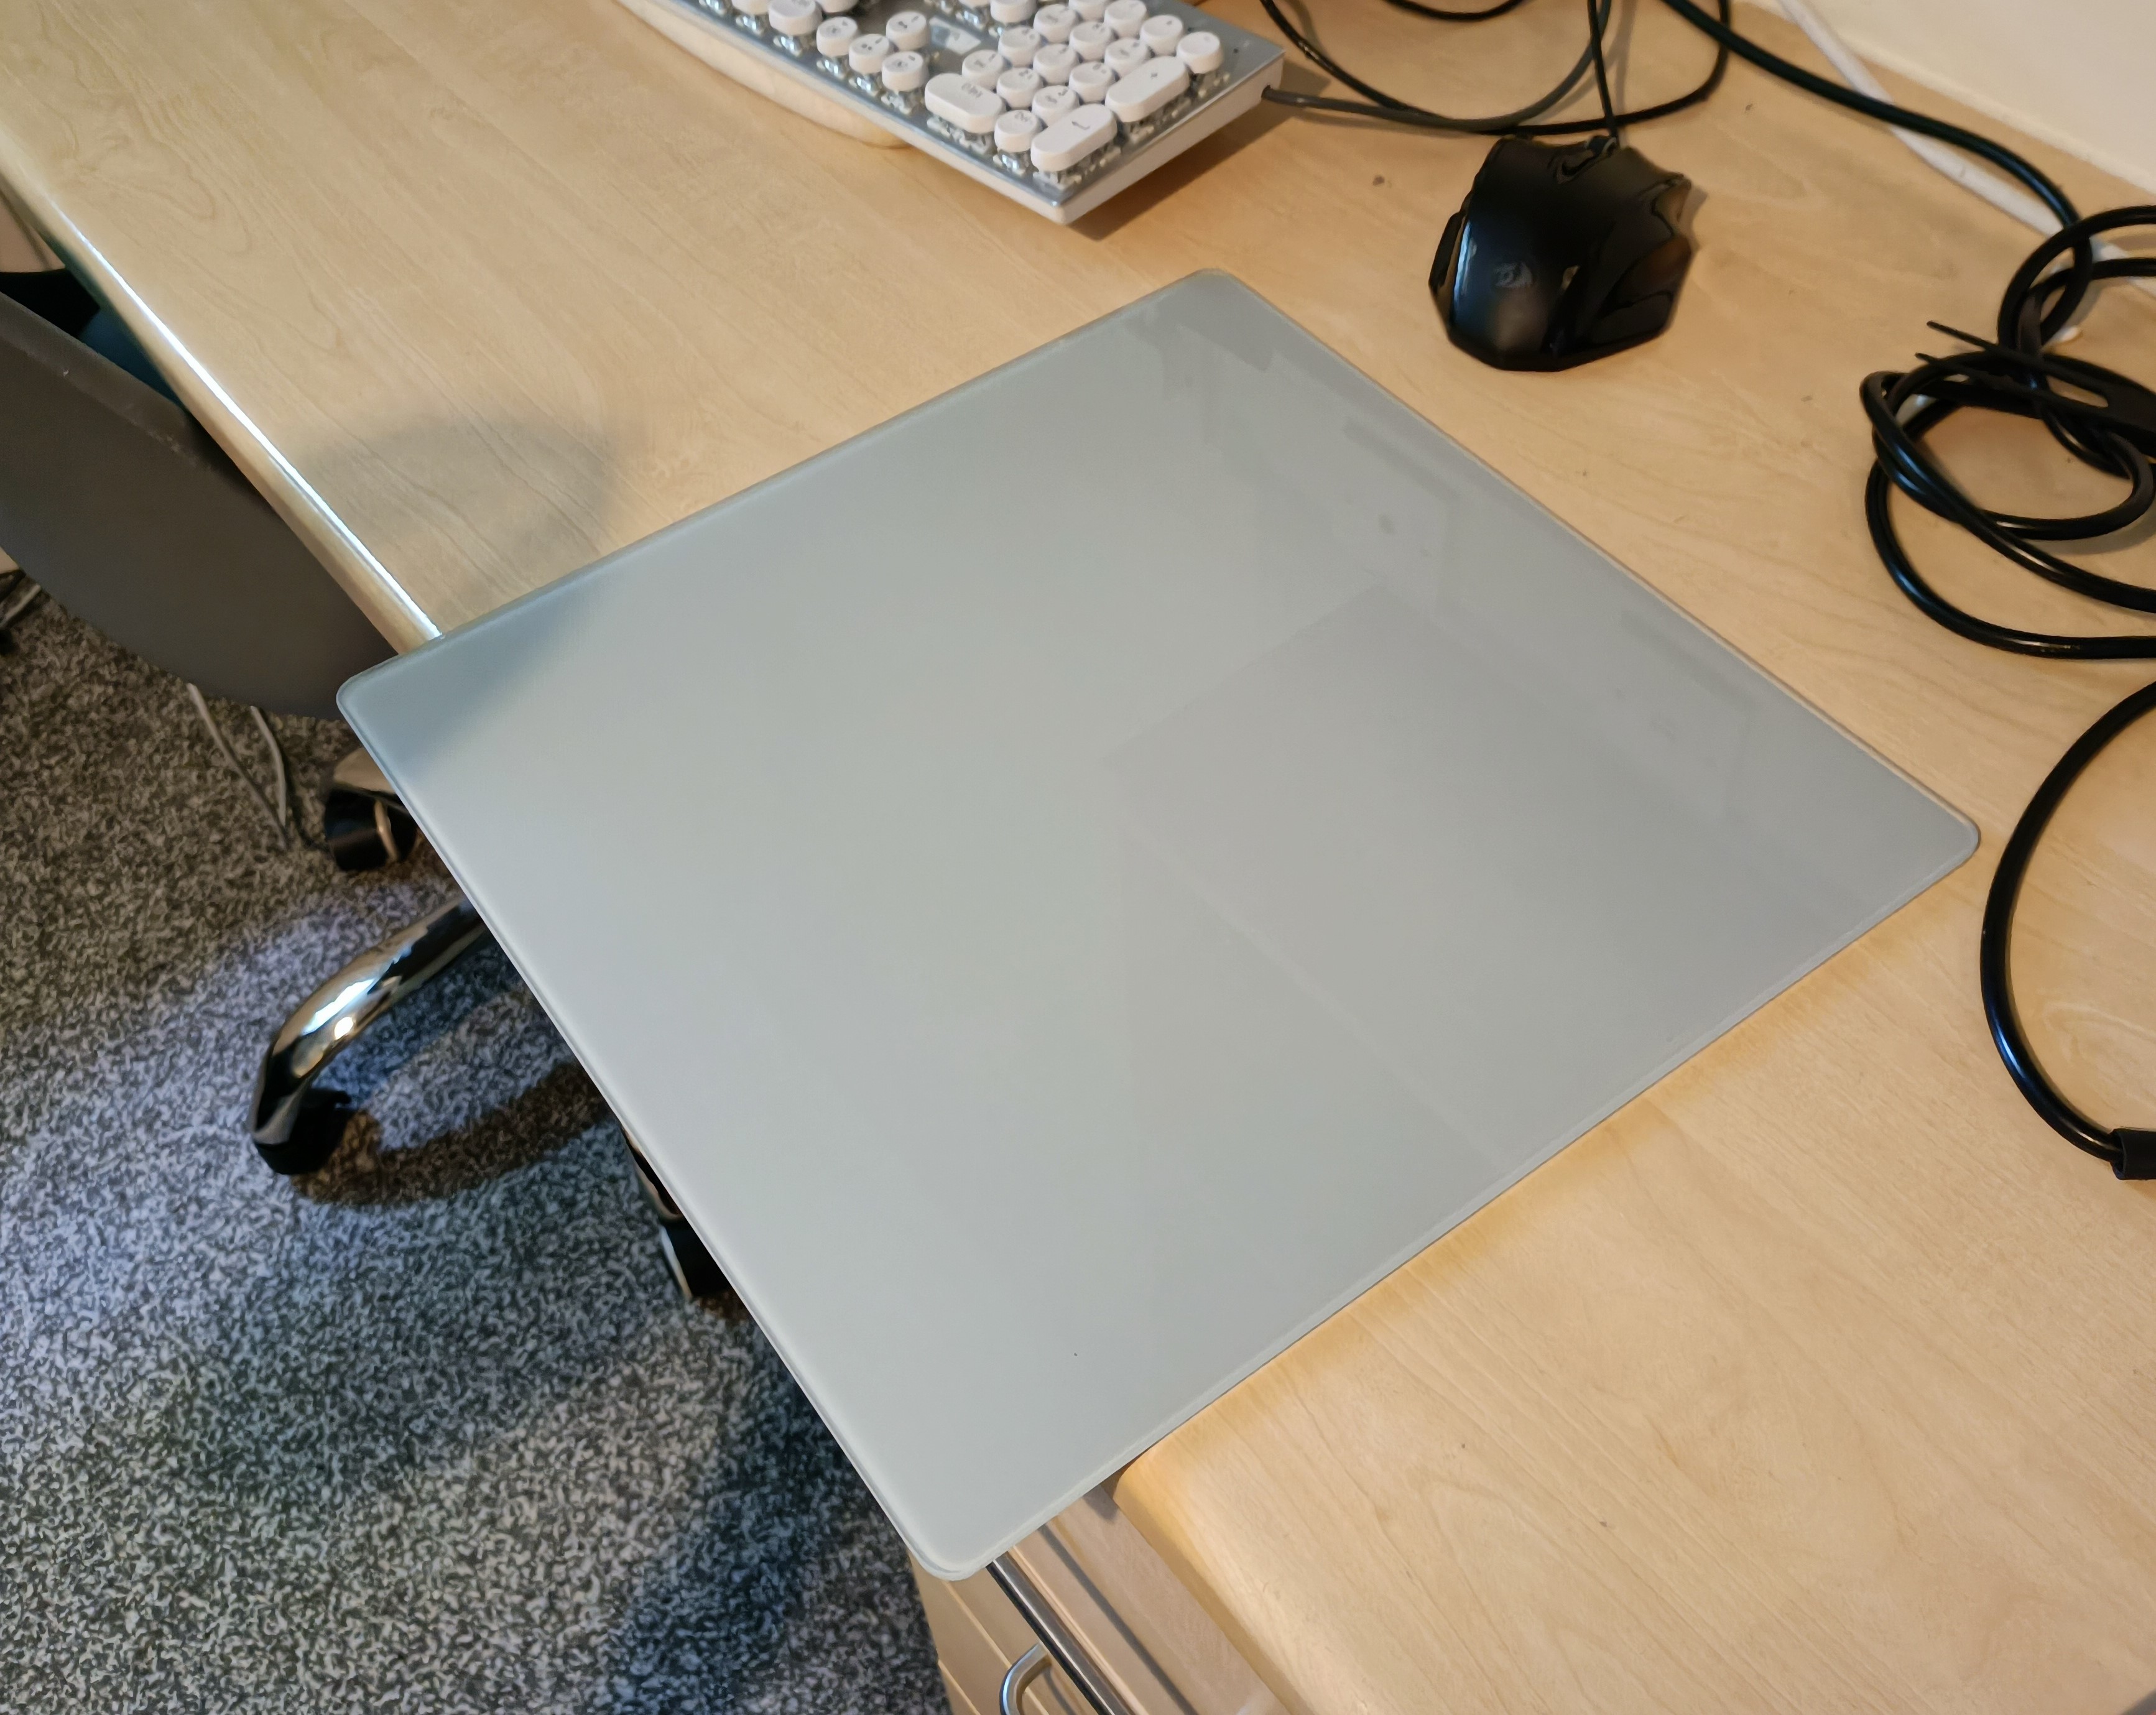 The glass is actually a nice light grey, if not off-white. What interested me was the matte backing:
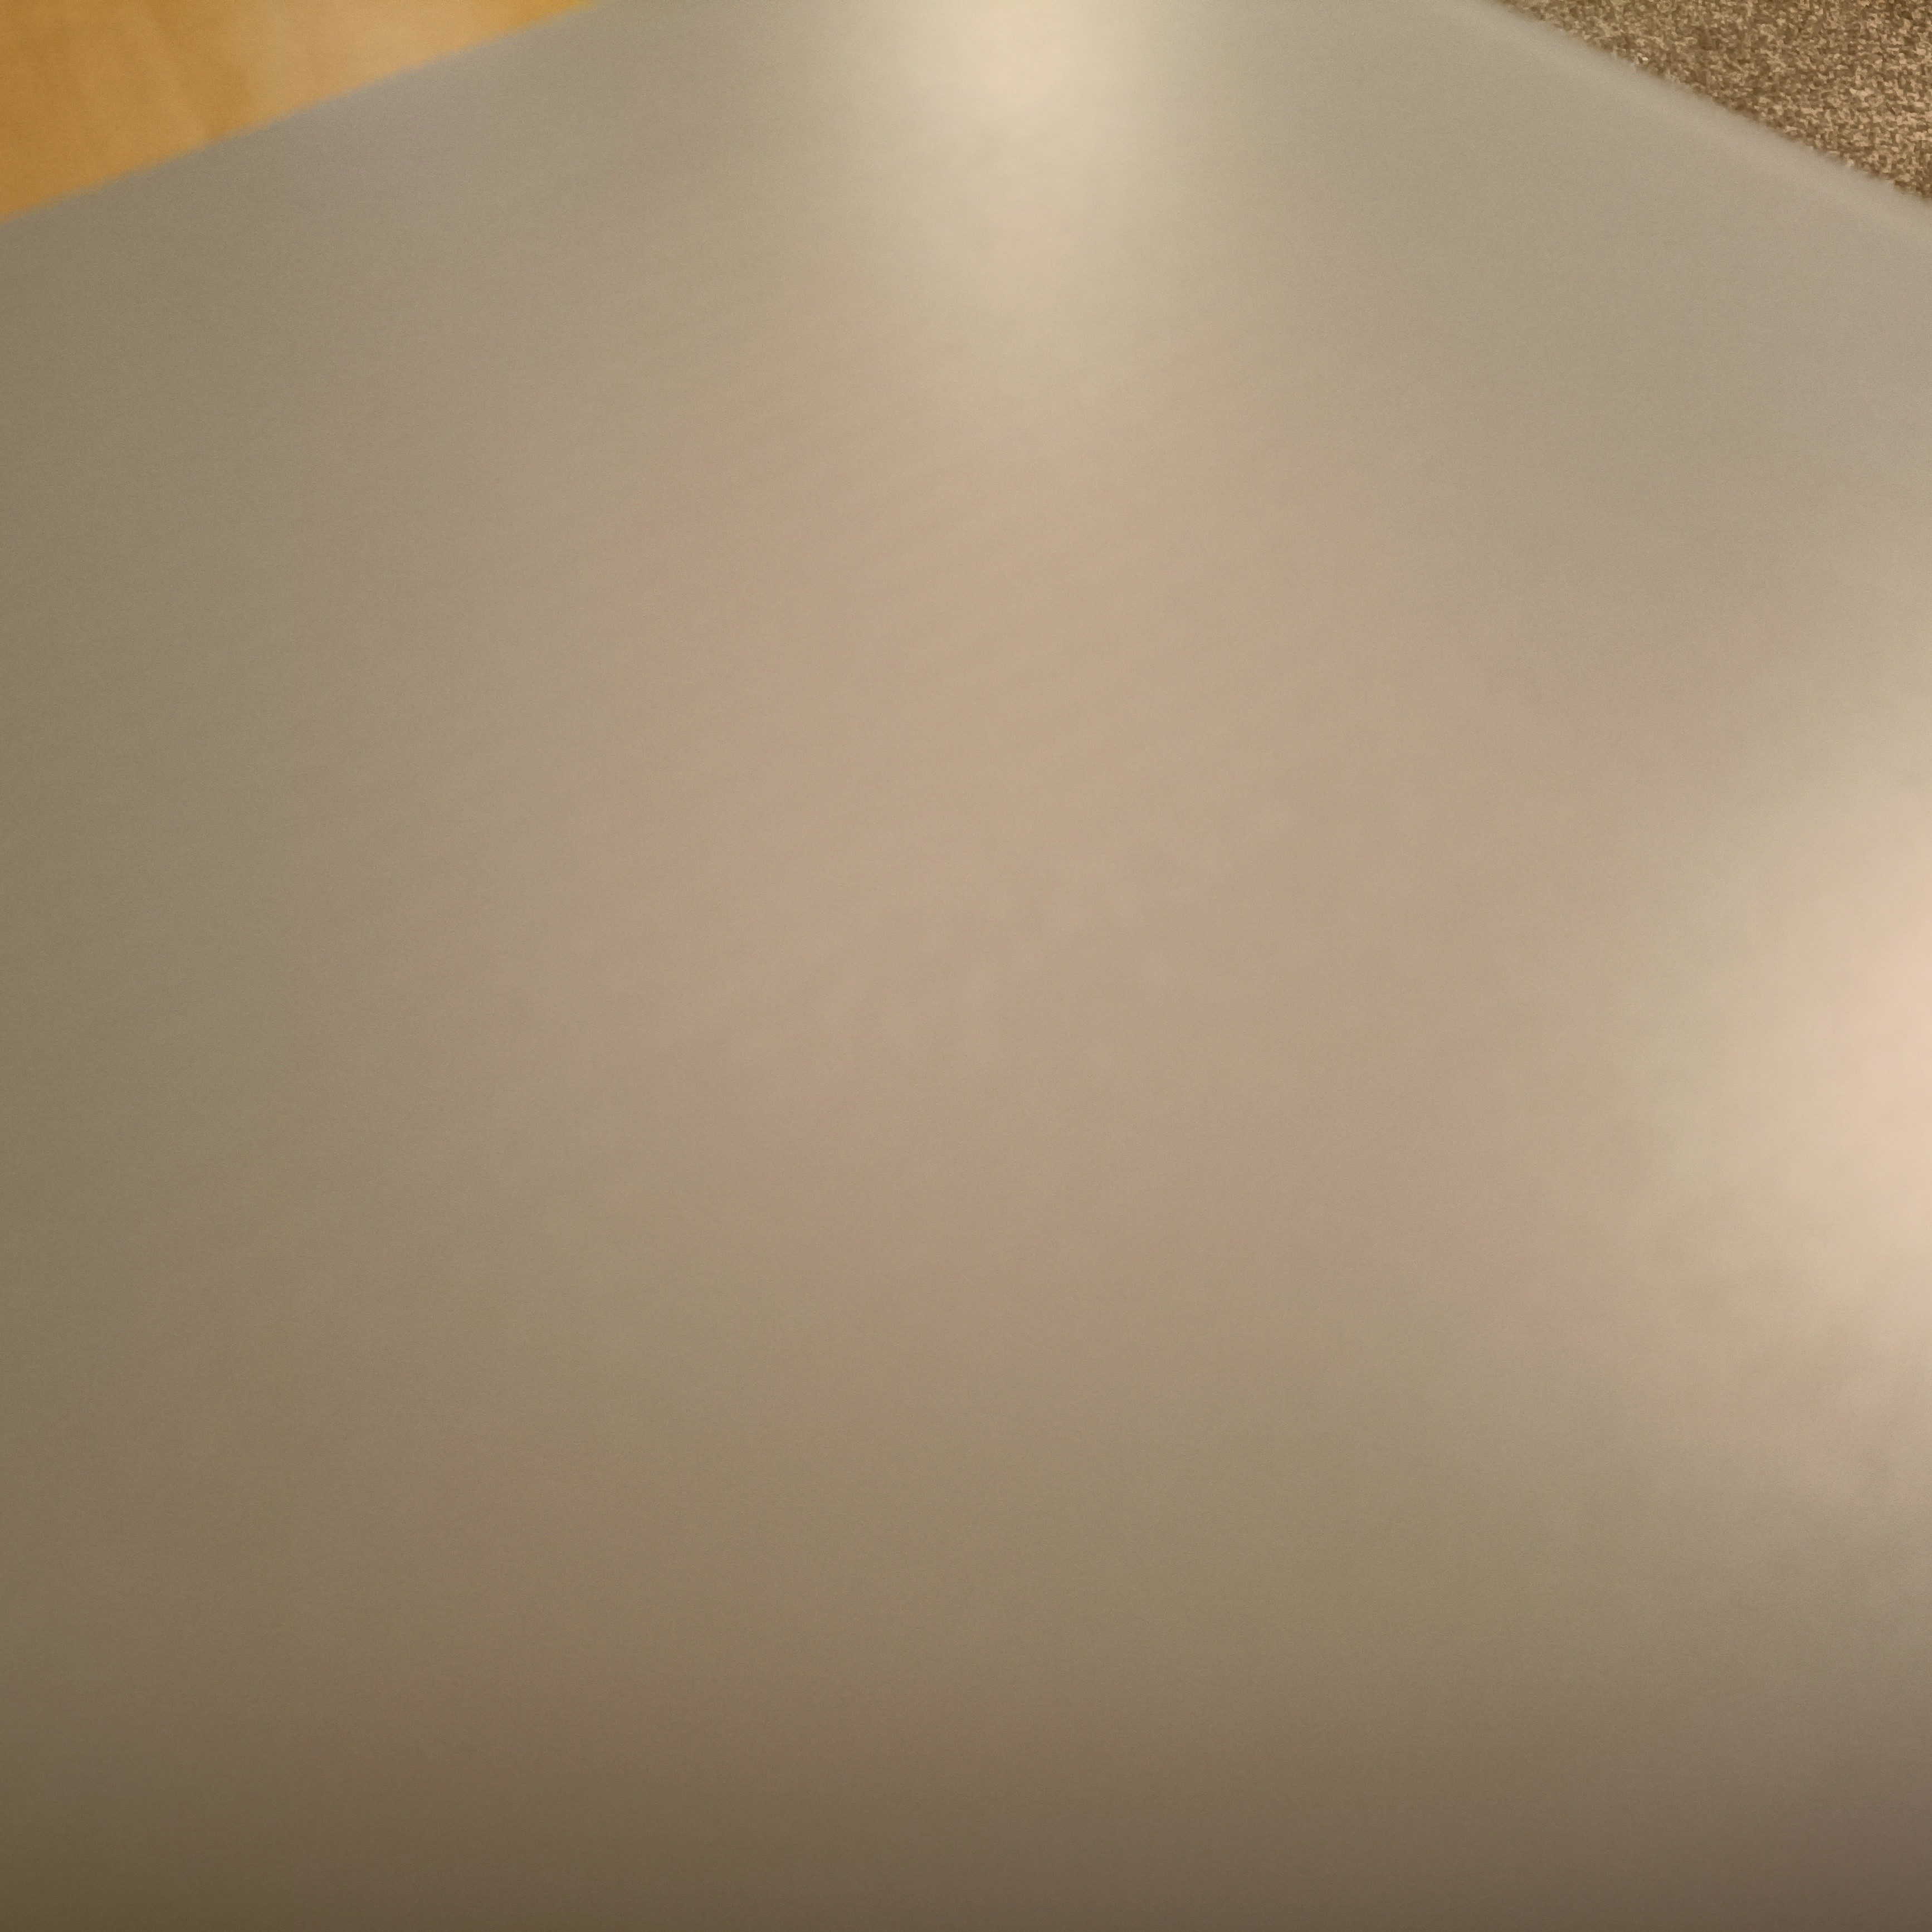 According to the listing, this glass is rated to 90C, but since glass is glass, I can only assume that this bottom coating or possible binding agent is what limits the working temperature.
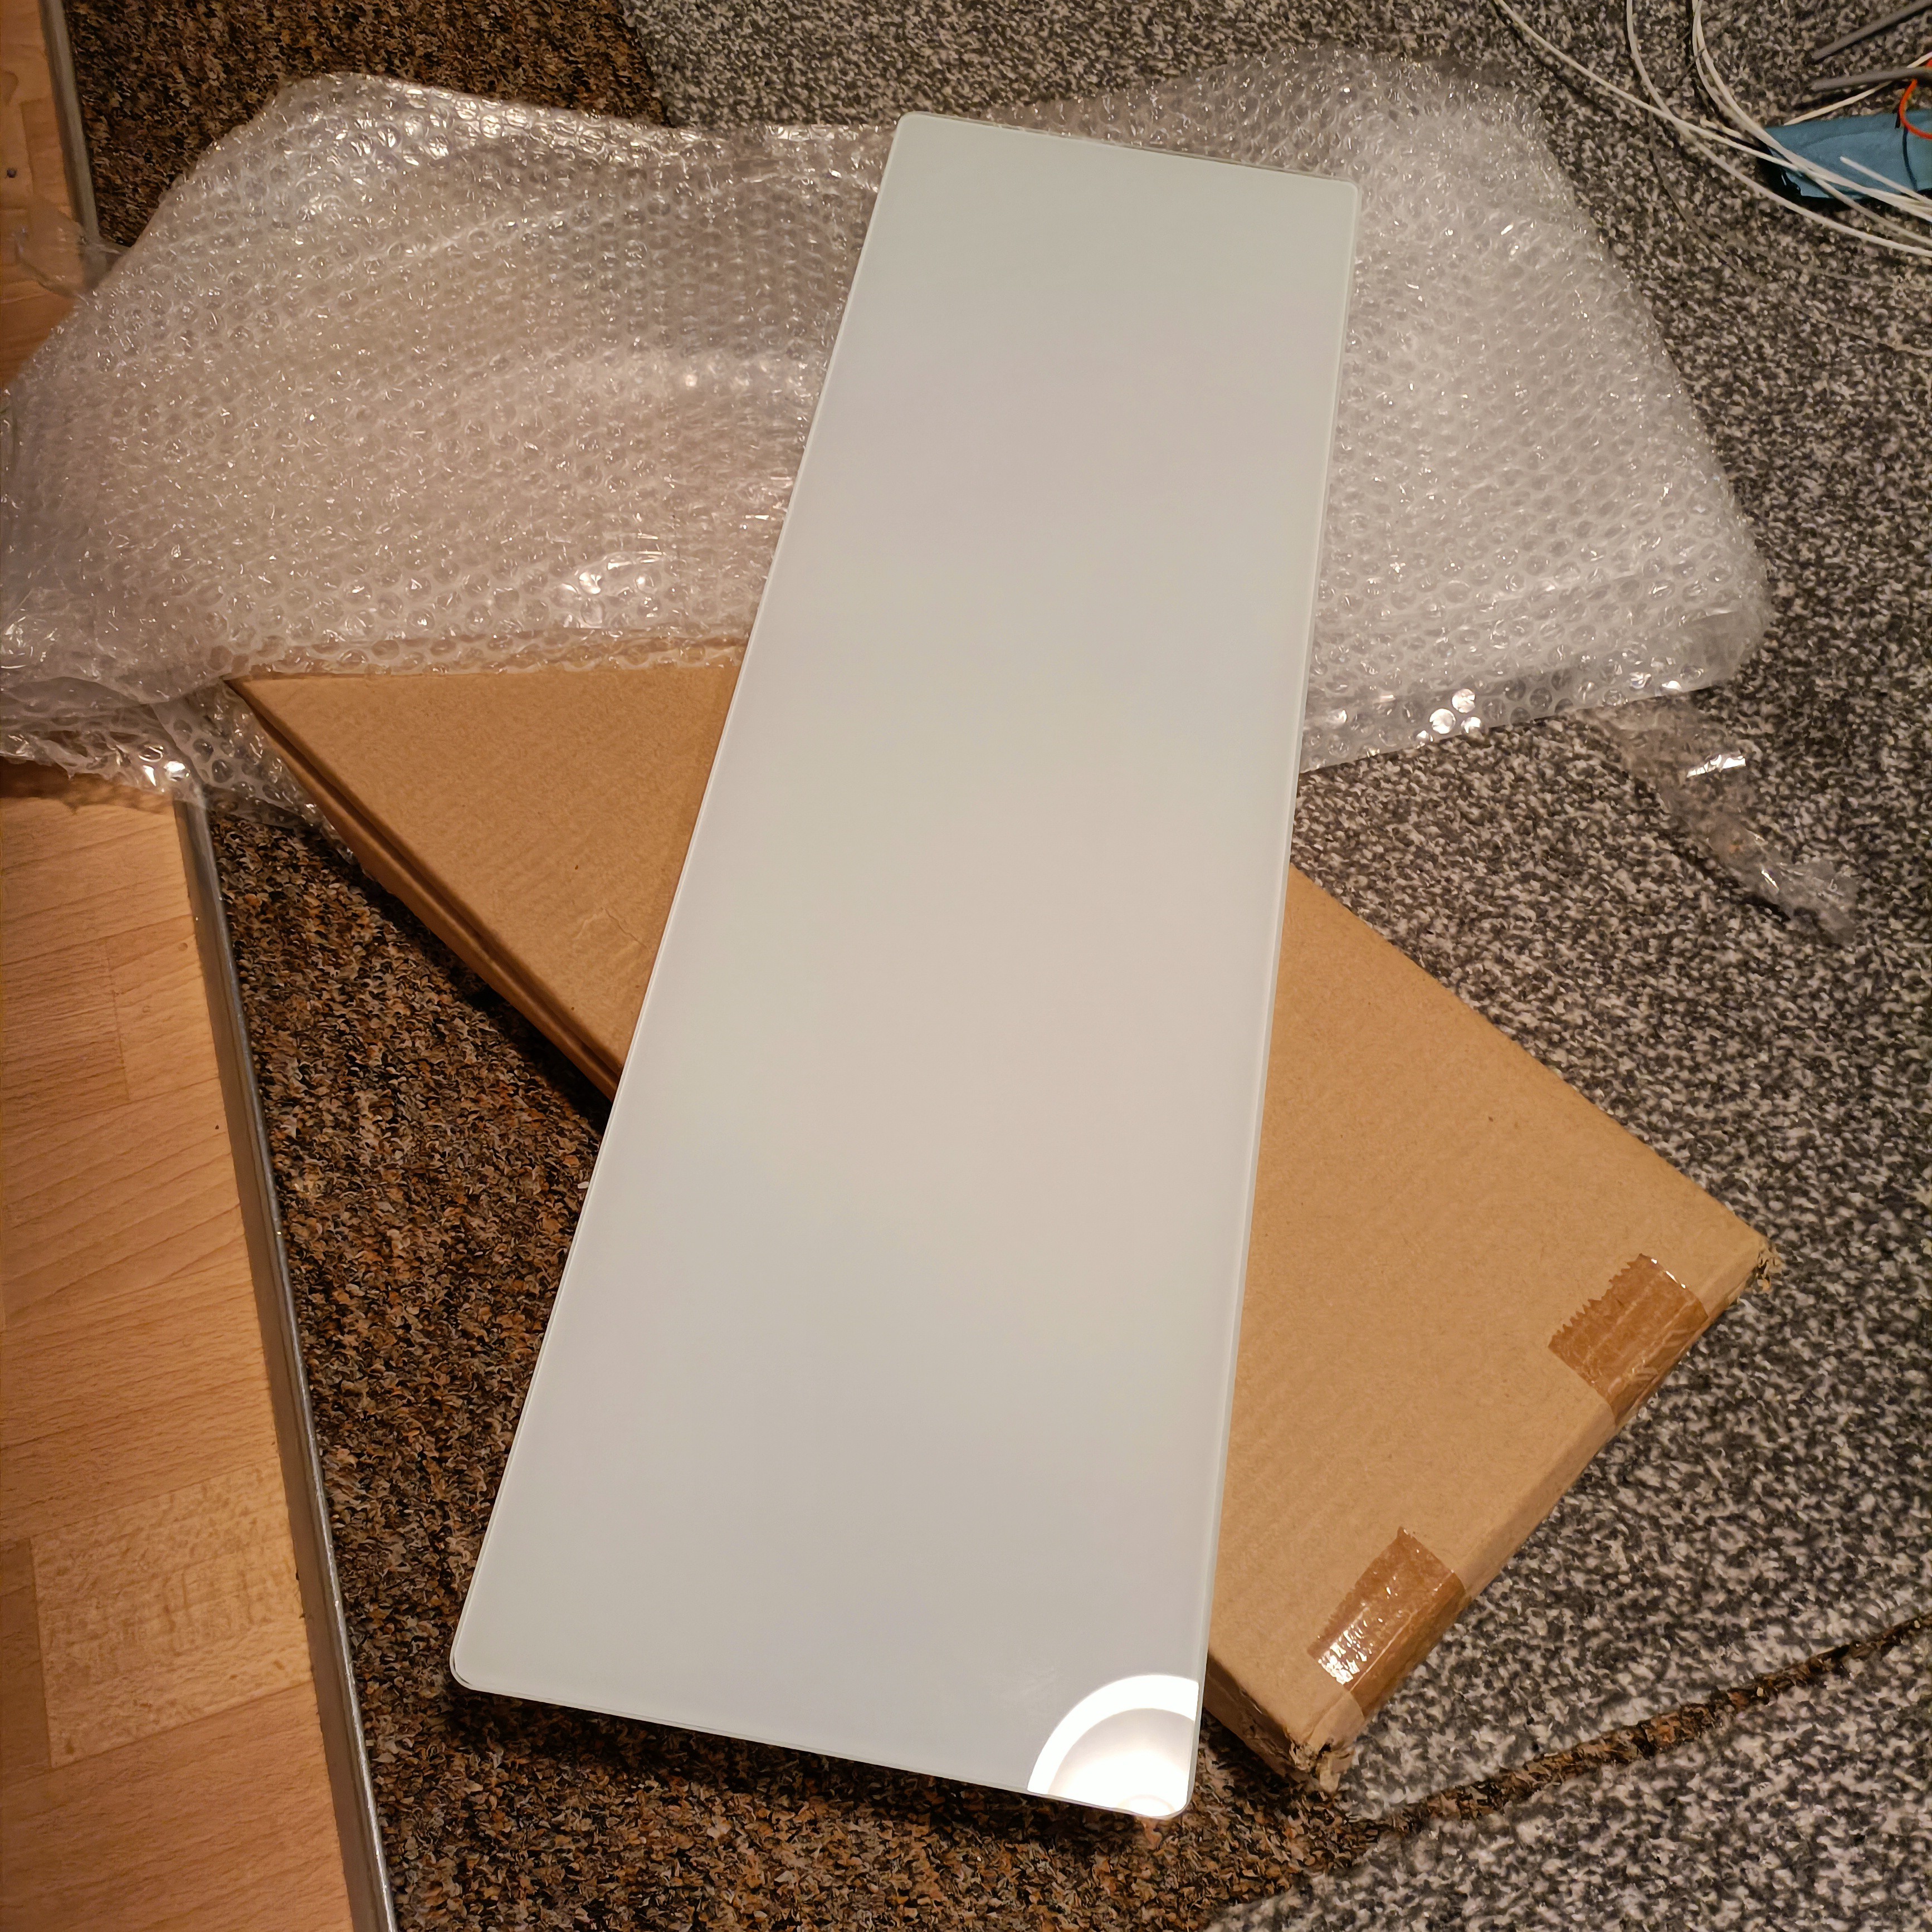
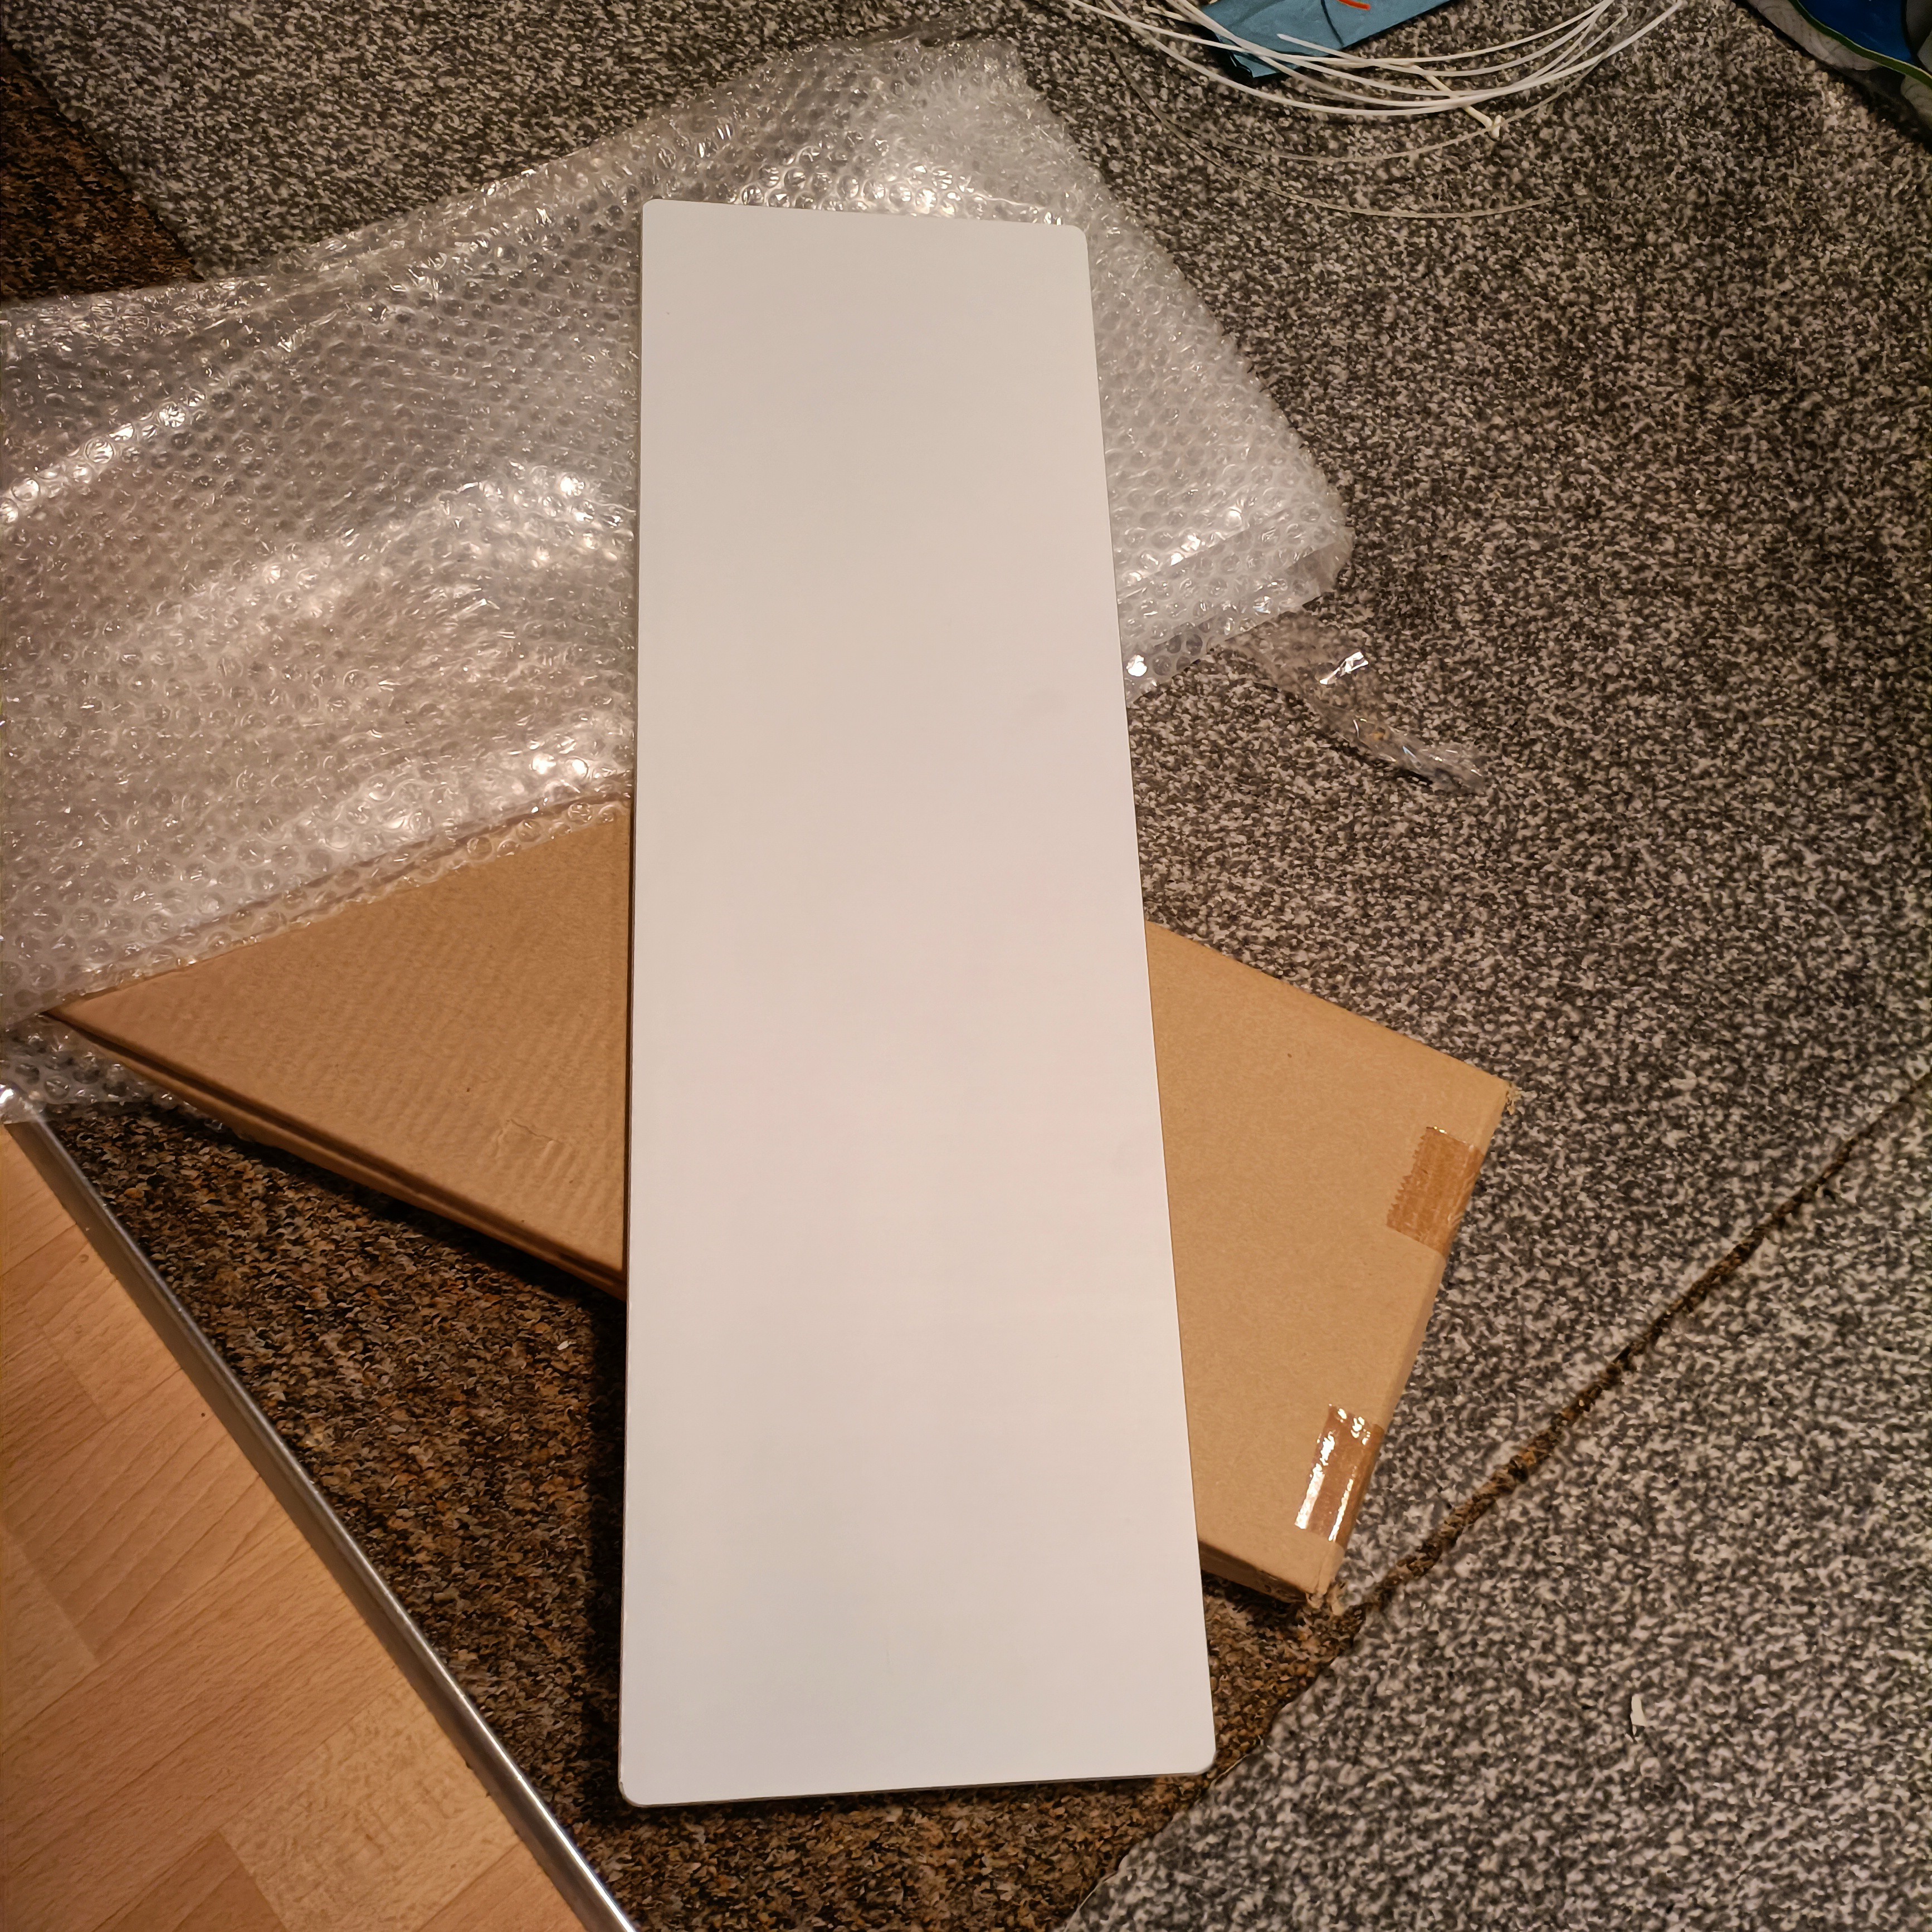 Contrary to the listing's image, the 65x20cm "glass placemat" also came in this lovely off-white and matte backing. Nice to have something better than the listing image for once. I was still suprised that the glass was actually delivered at all.
 That seemed to stick ok and had a gloriously matte bottom layer:
 Thus I printed a 10x80x10mm print to see if I could get some warping.
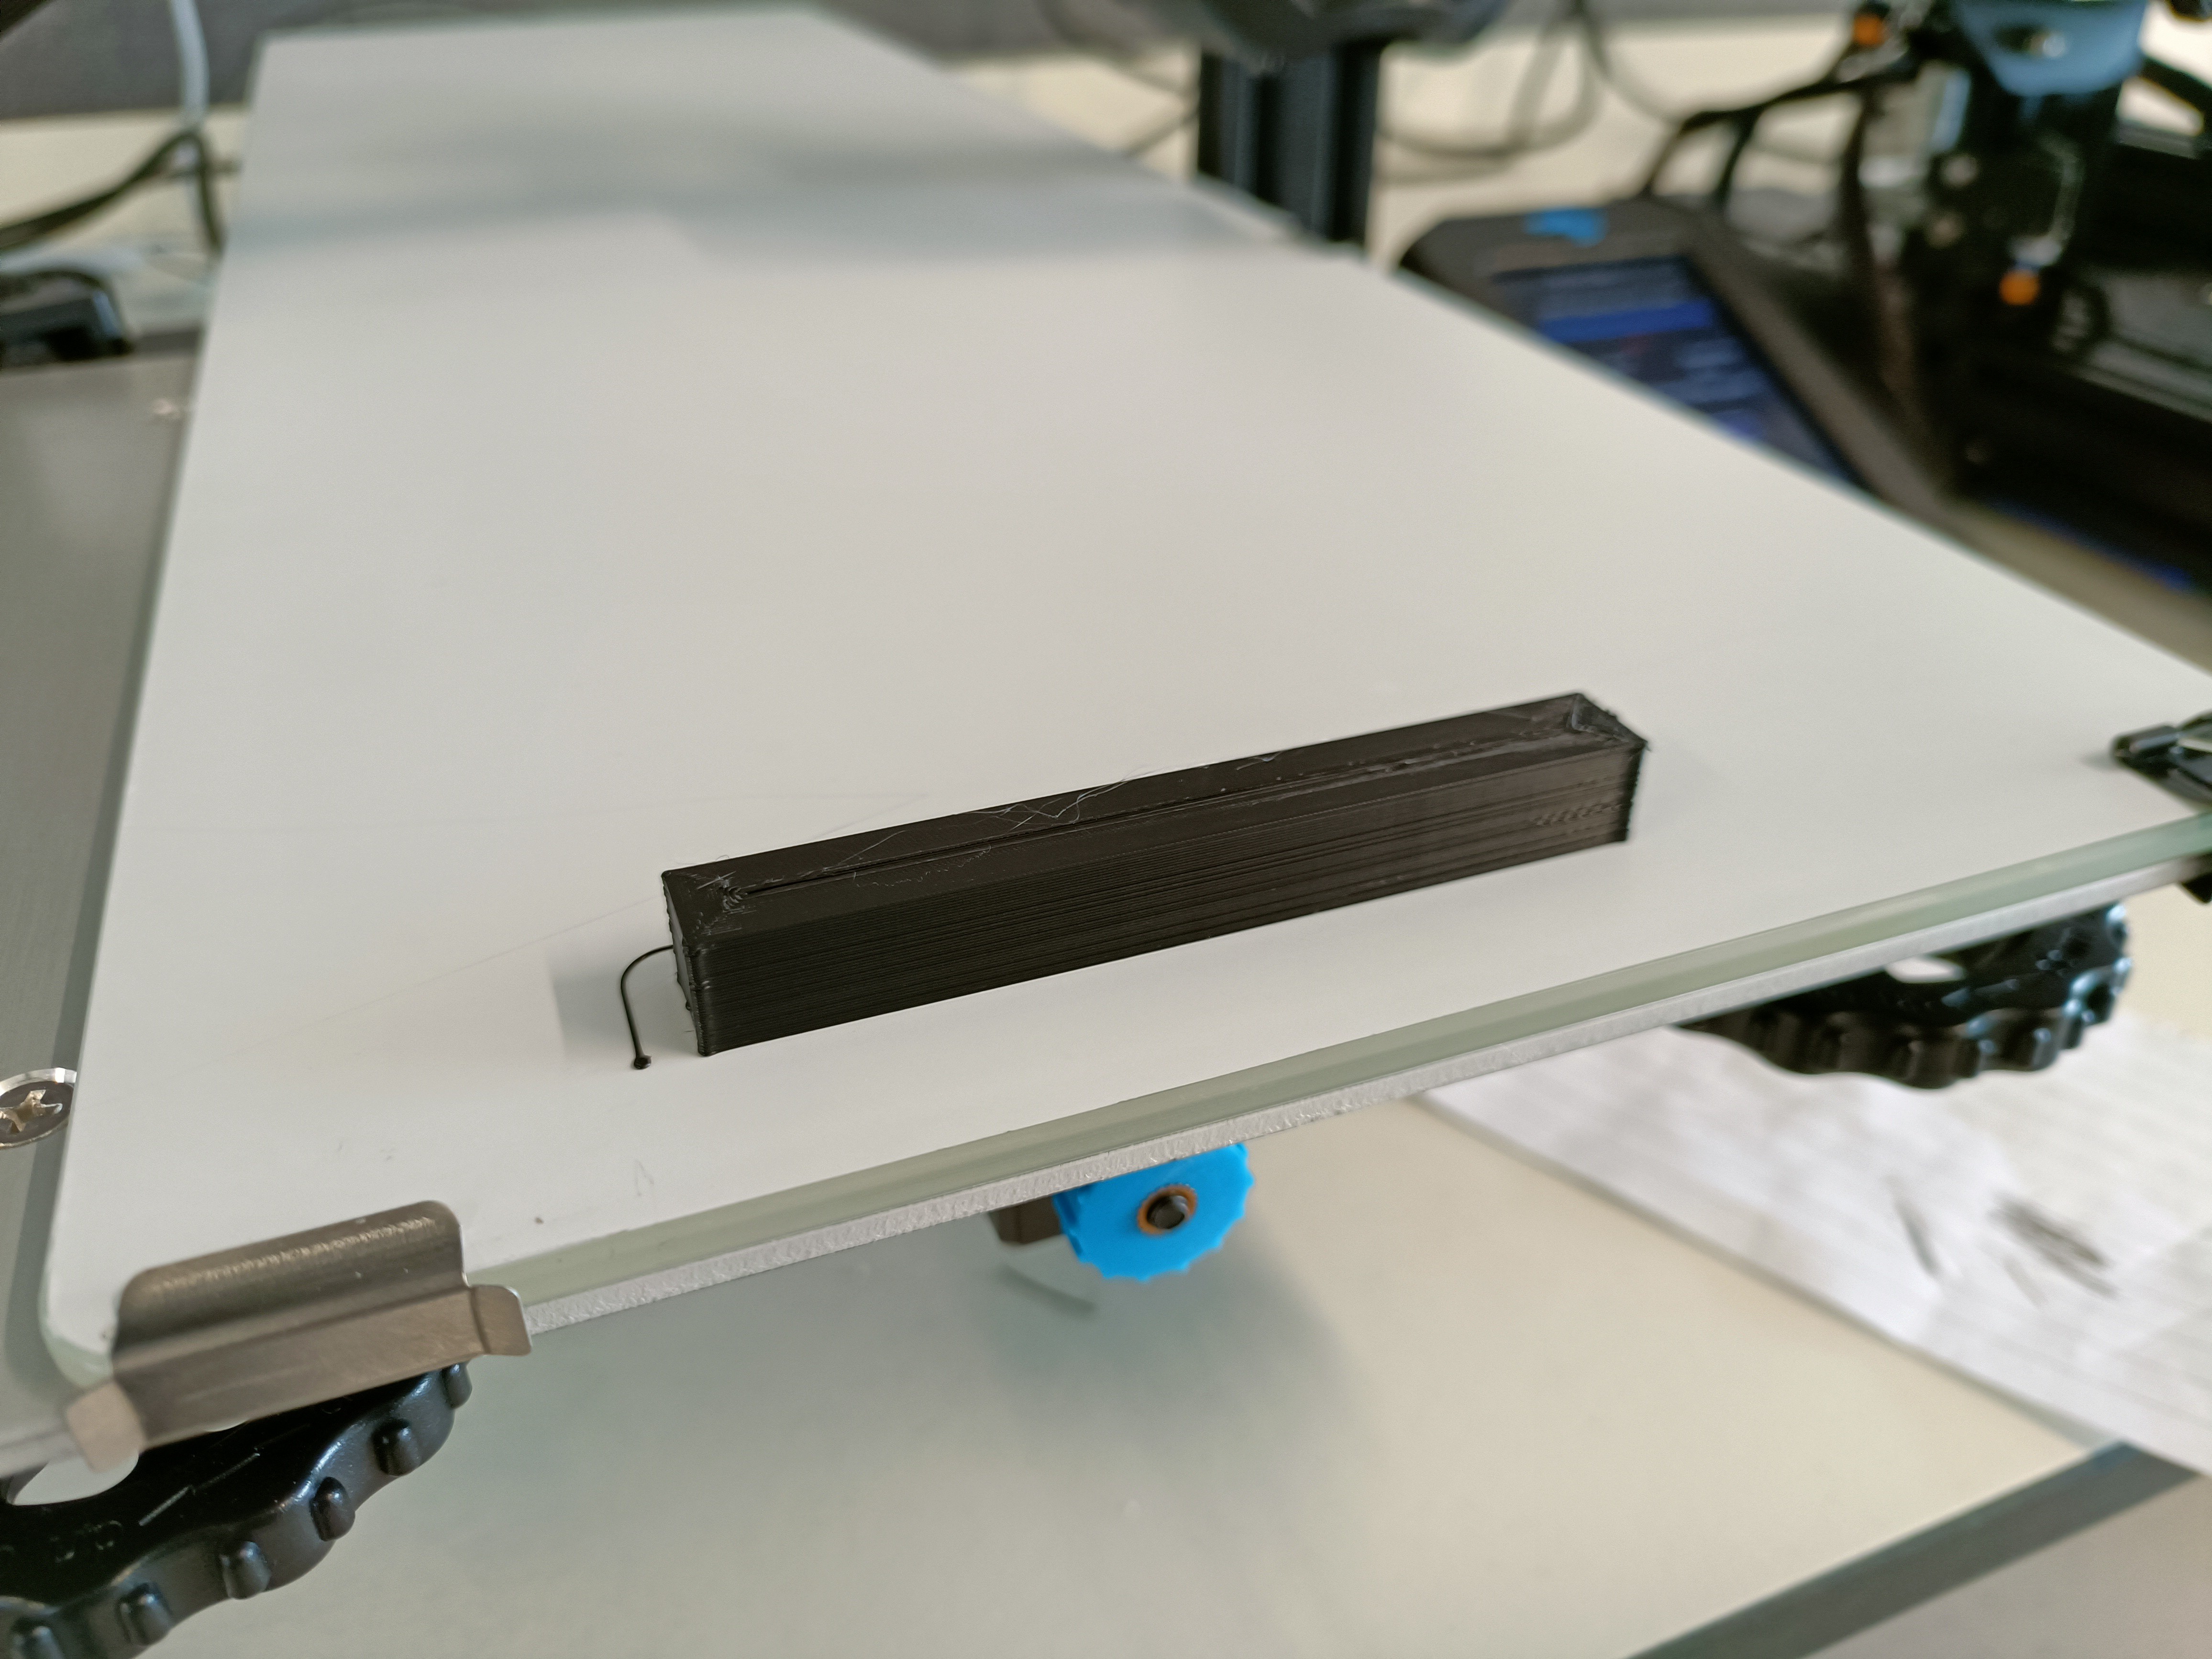 No it came out flat.
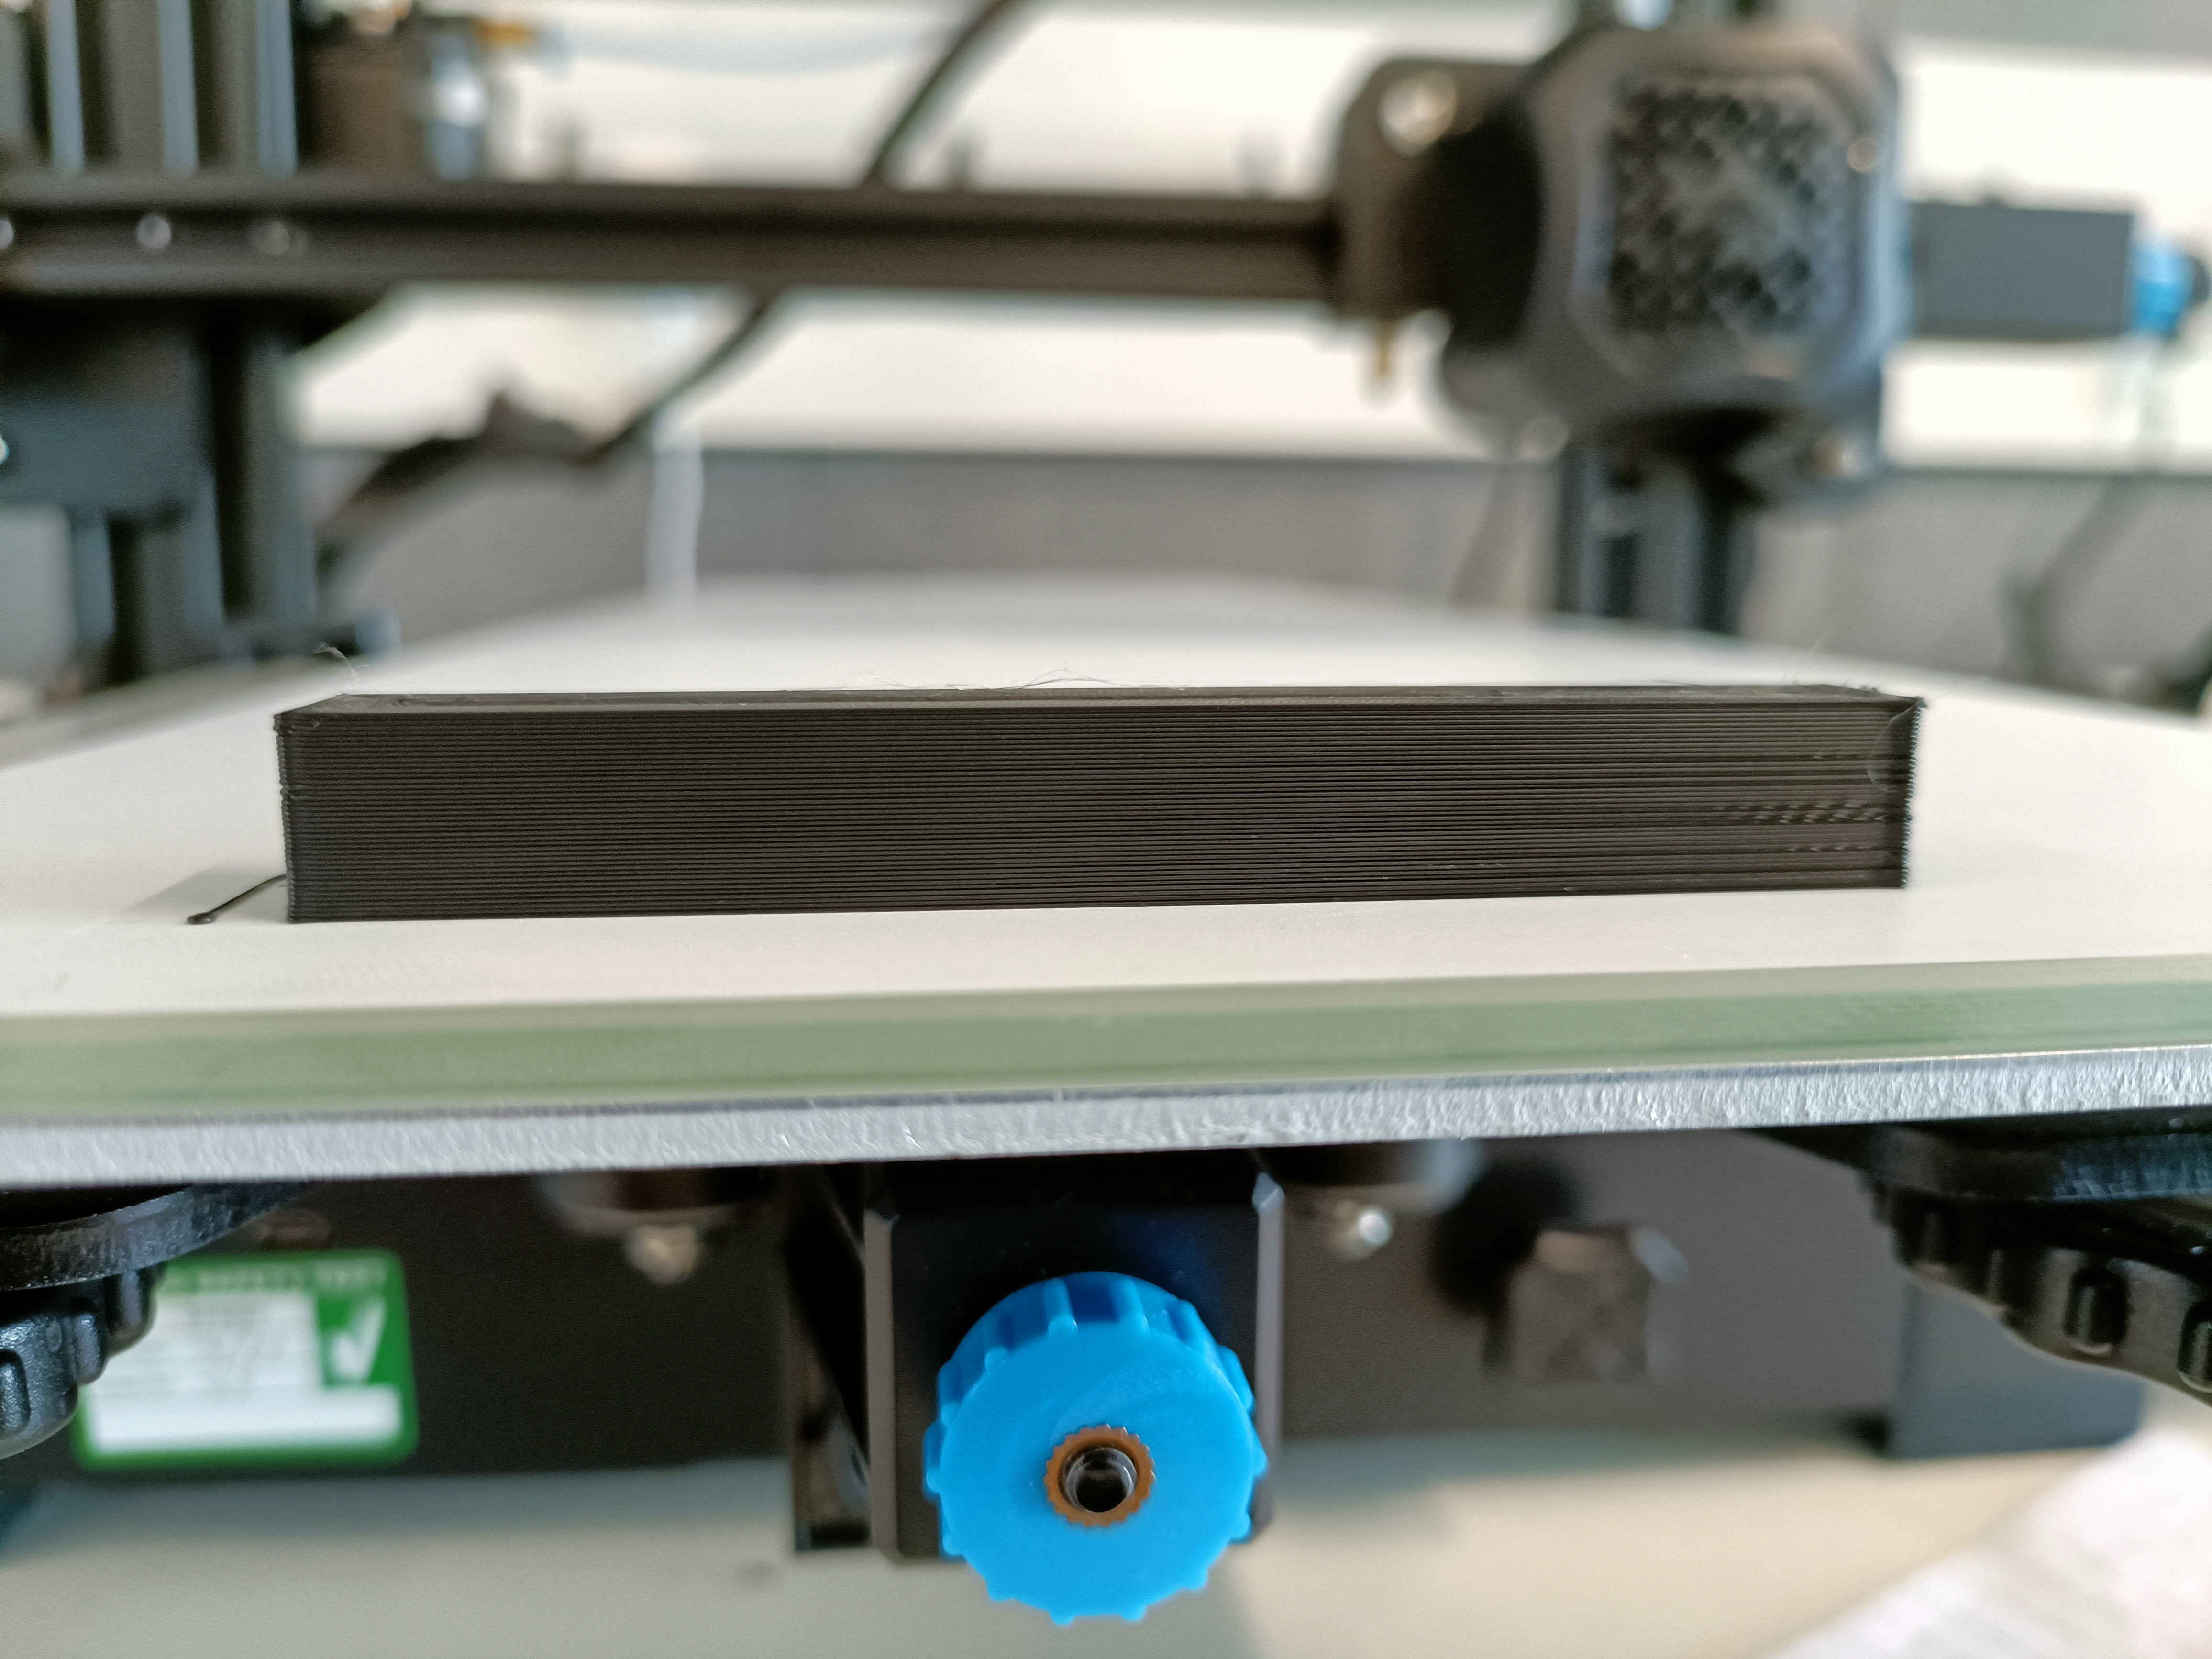
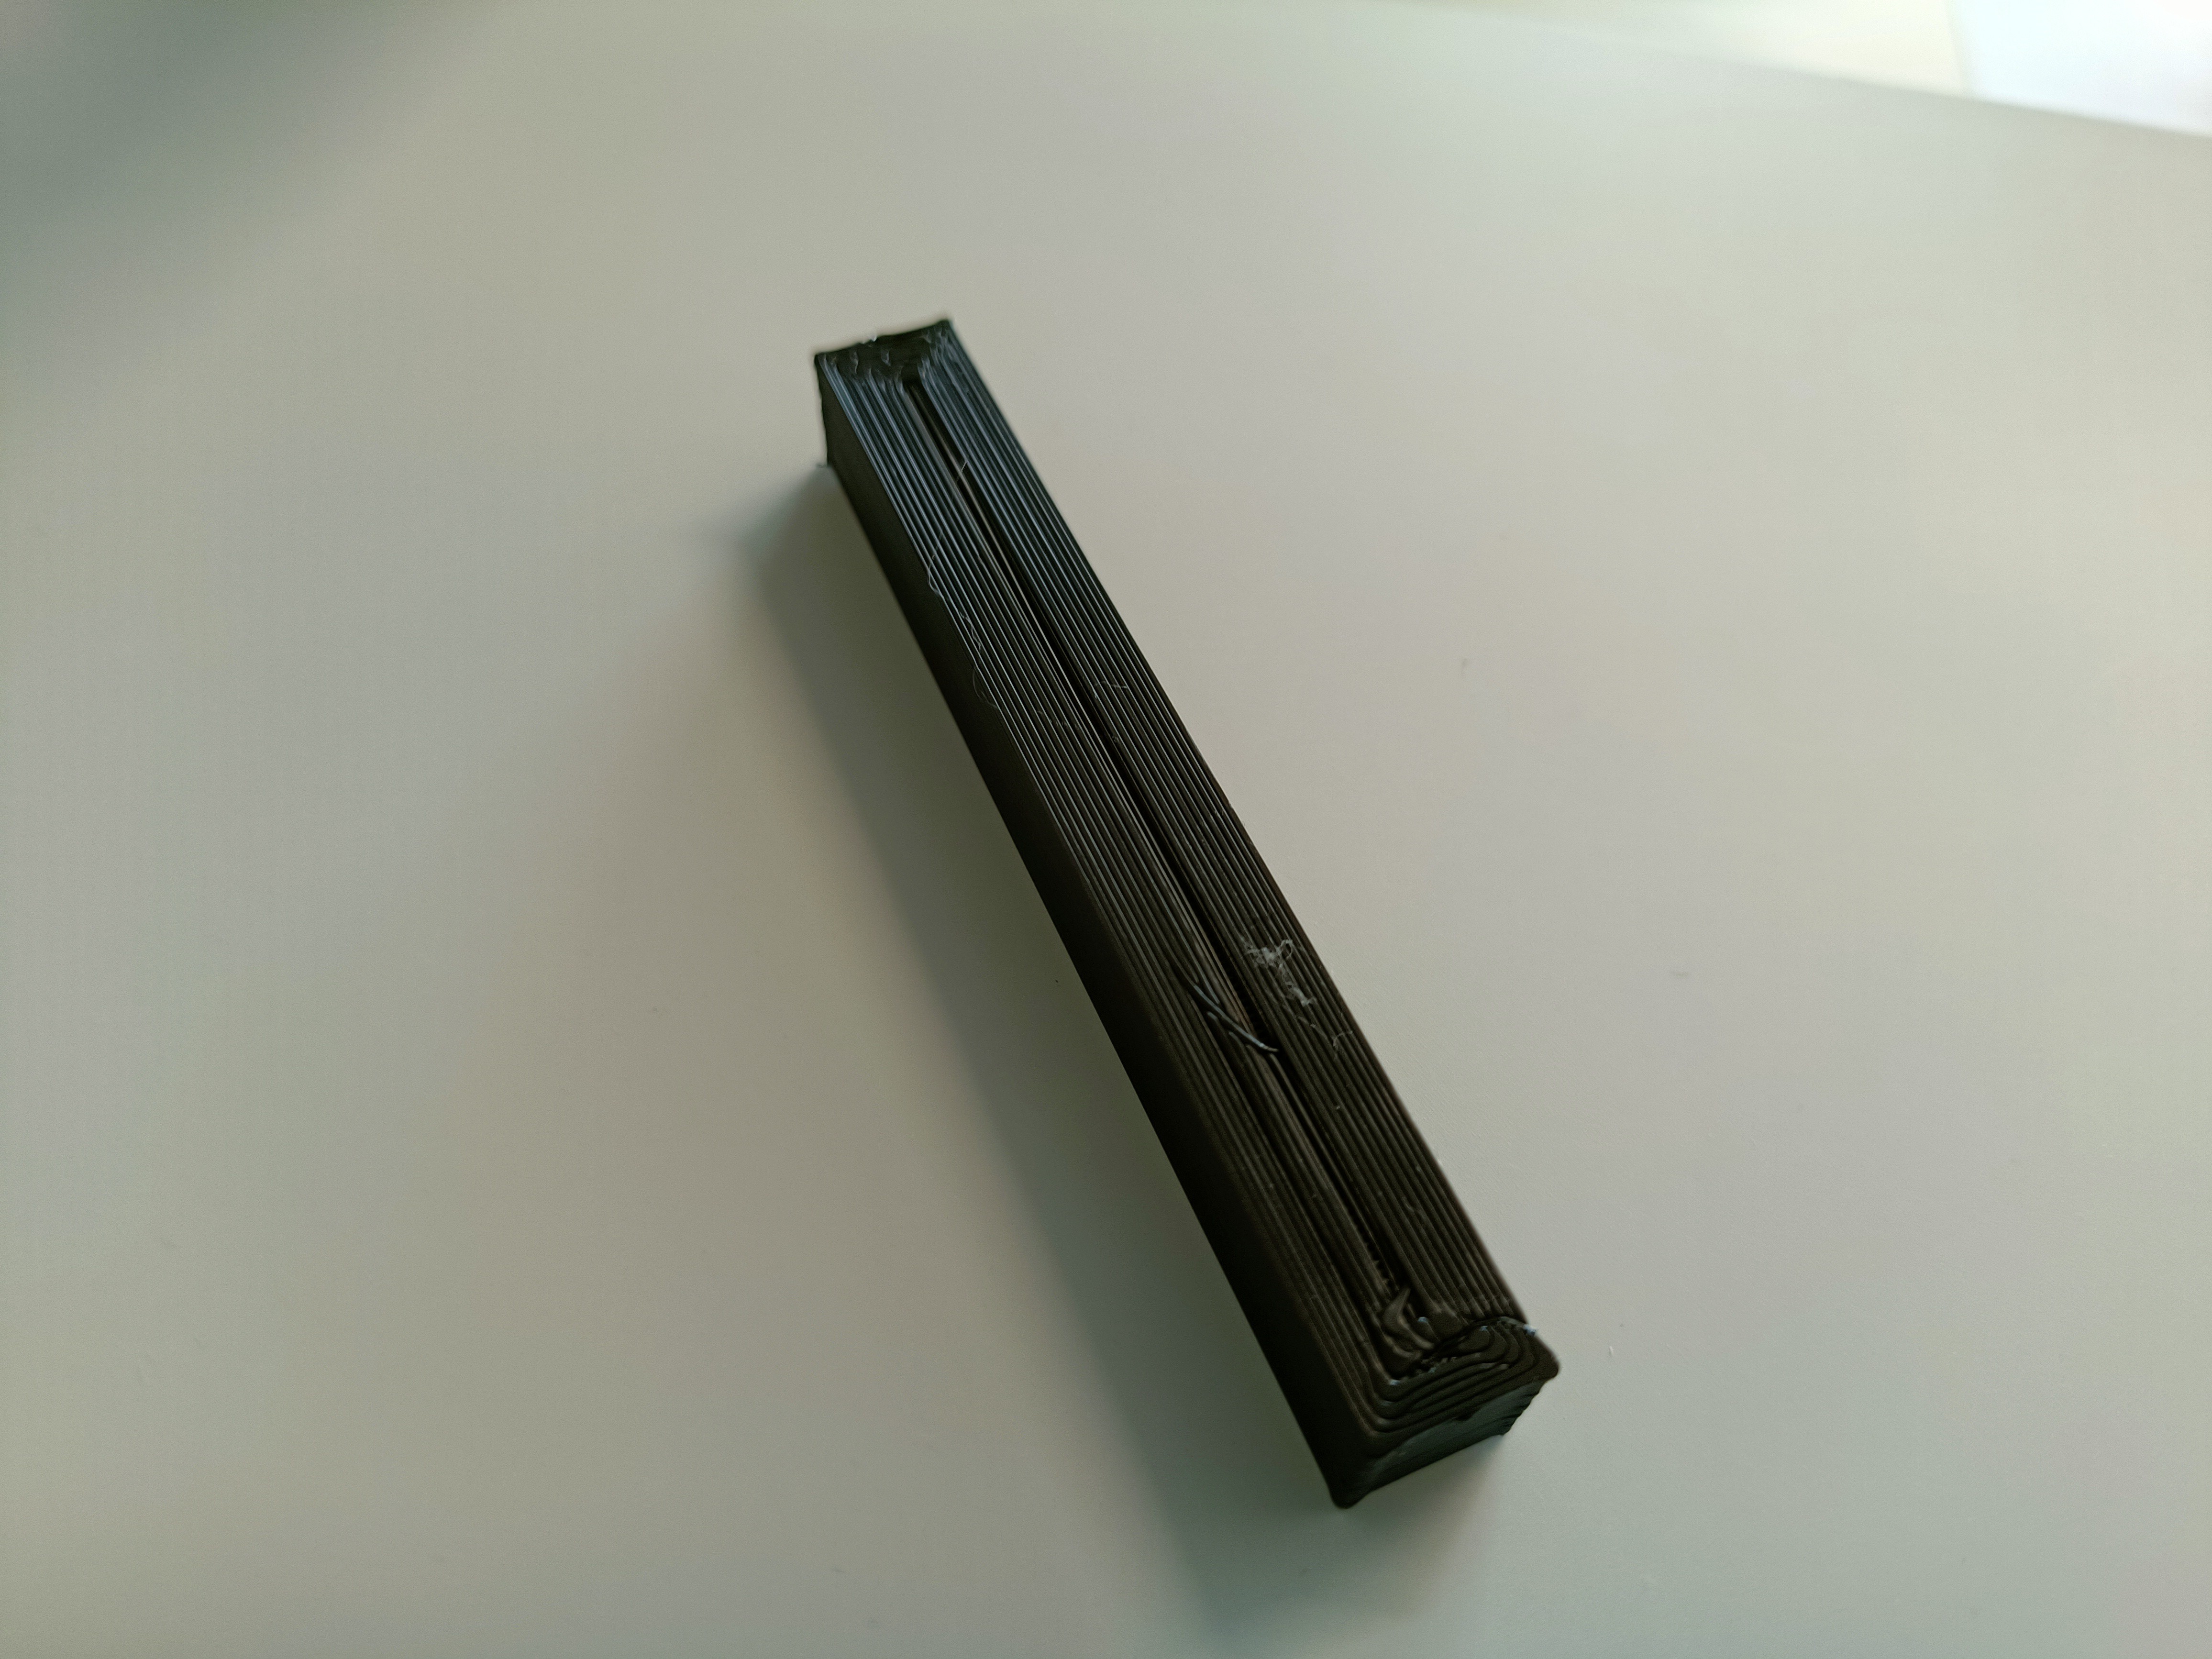 The bottom looked like the nozzle was a tad far from the bed, so I adjusted the levelling screws and upped the stakes a bit: PETG, 240/82, 60mm/s, 10x100x10mm. As it was printing, I noticed that the material looks kind of familiar to the stuff ontop of the Ender glass:
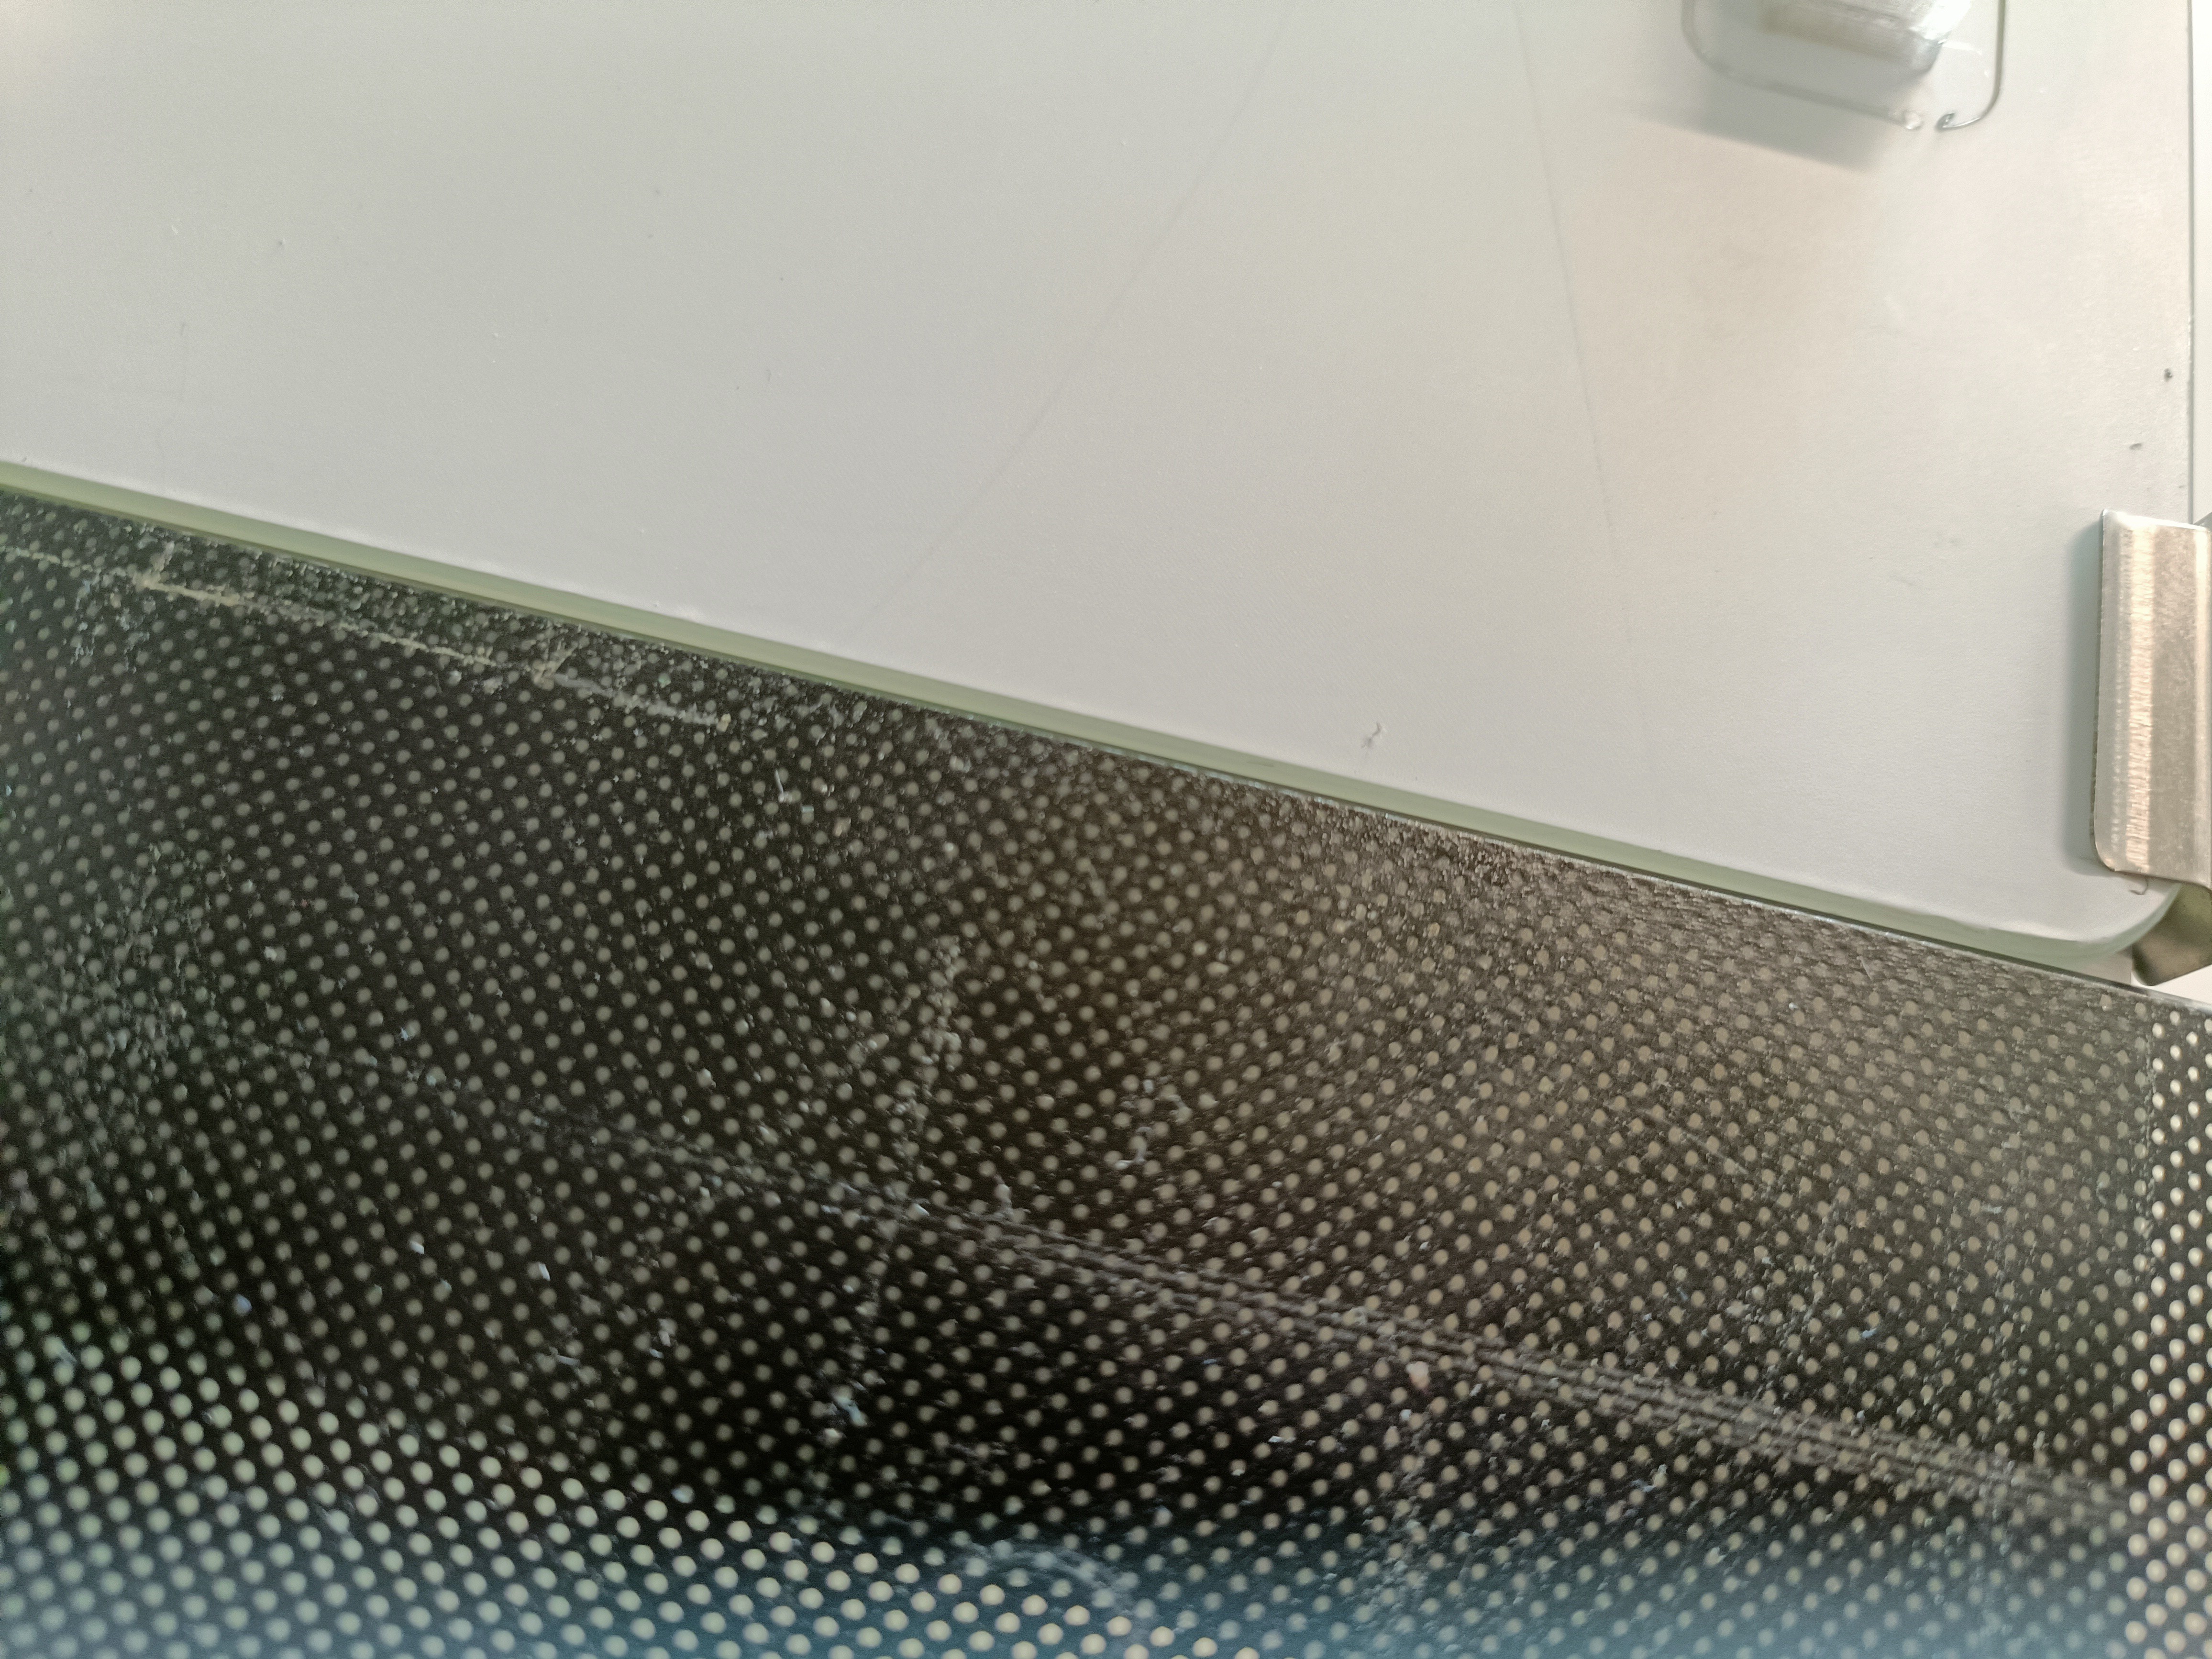 I also tried to scratch it with a filament cutter and there didin't seem to be any visible damage, so it's at least more durable than something like a printer bed sticker, lexan or the Ultrabase I briefly tried years ago. Anyway, the PETG seemed to have stuck even better to the surface:
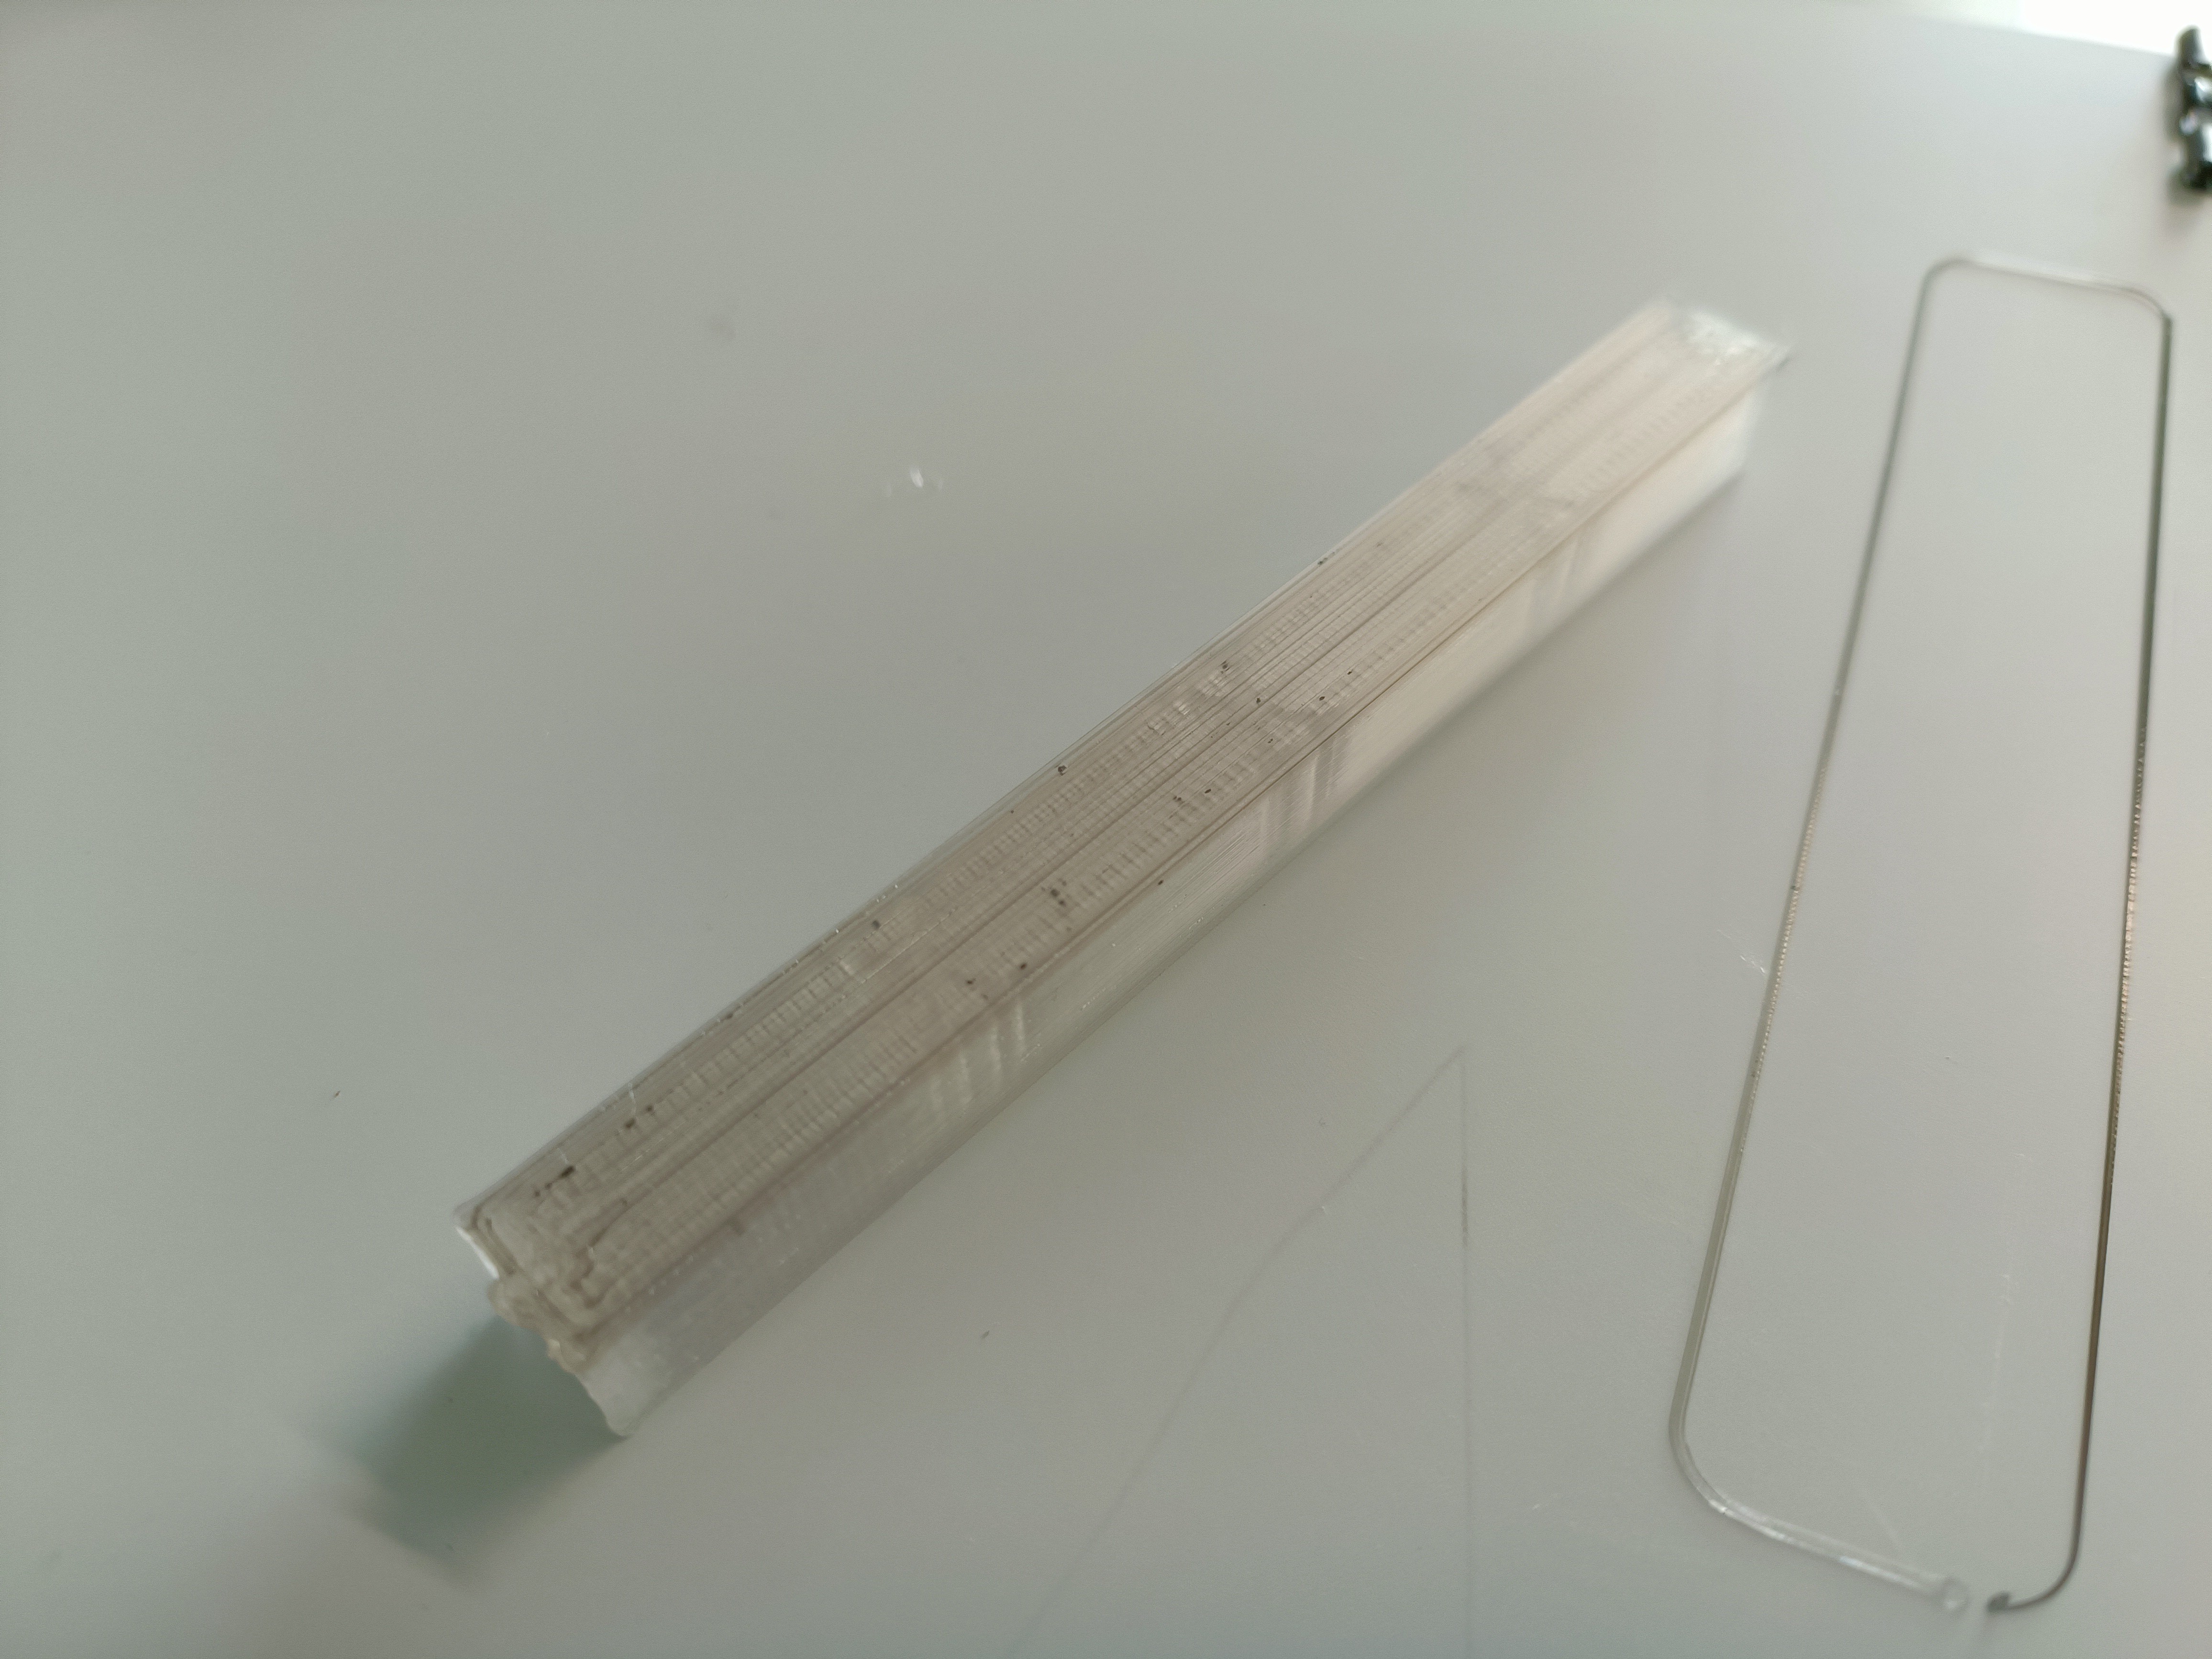 ABS, however, wasn't happening:
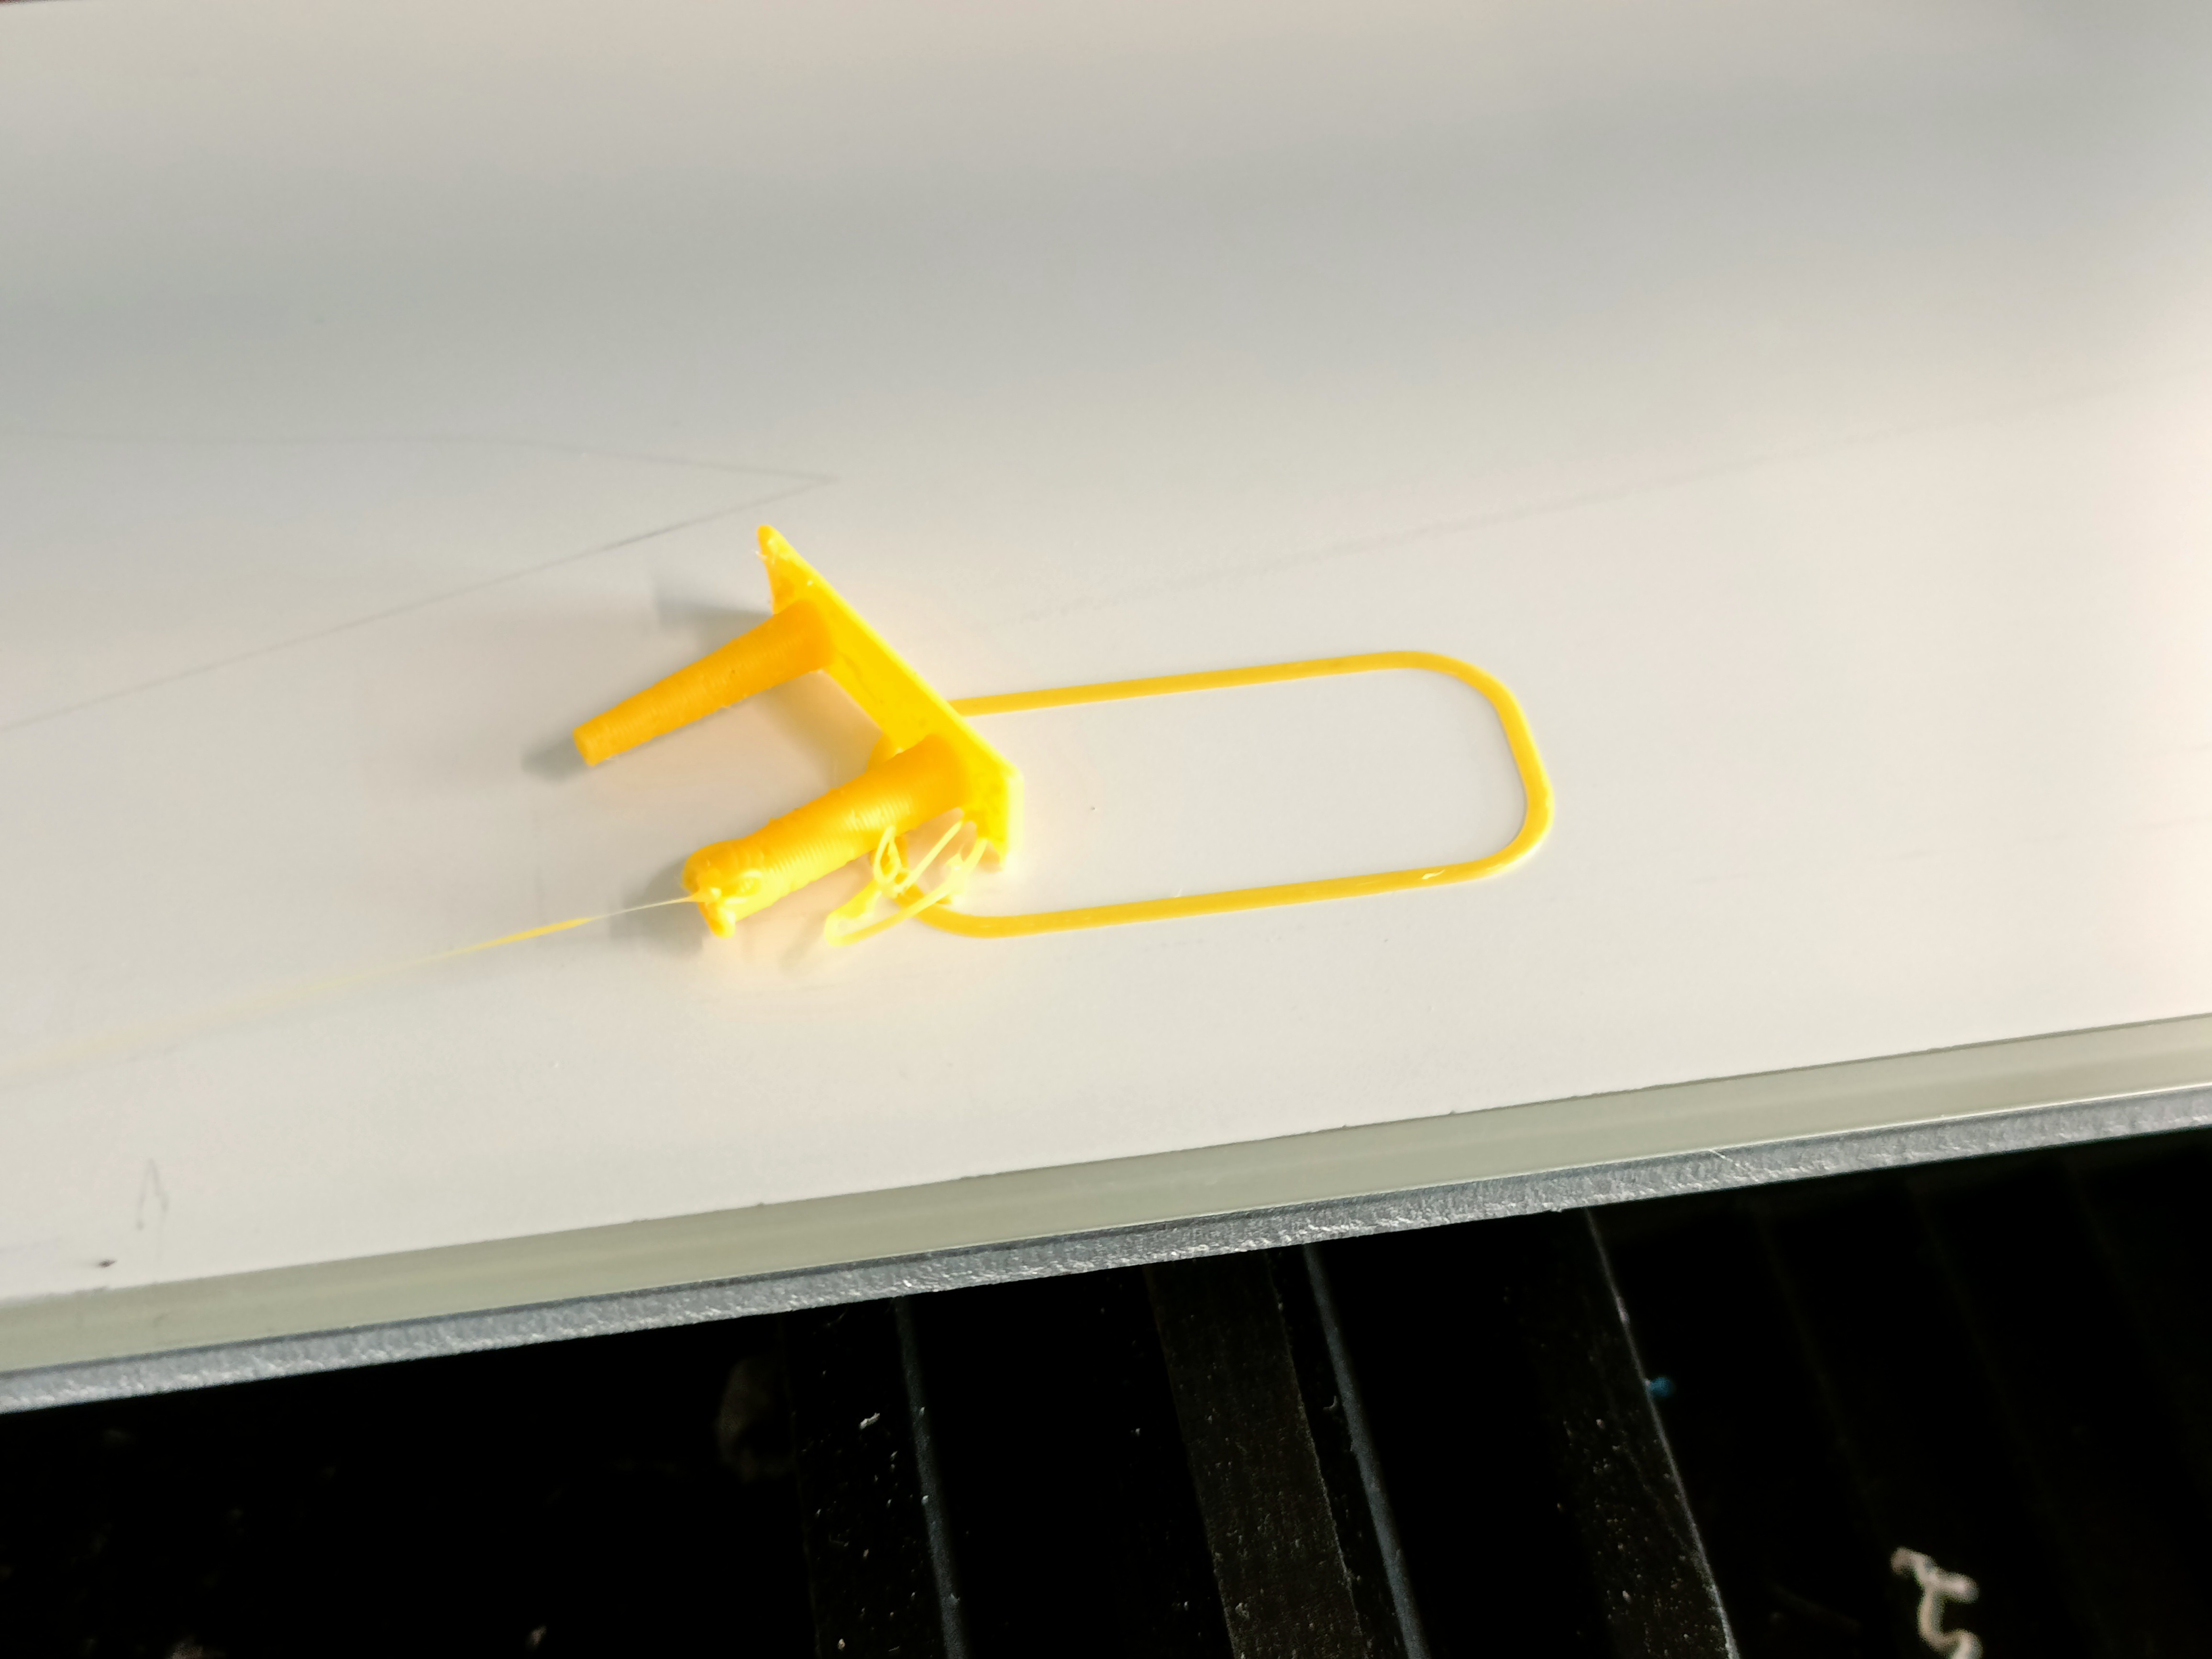
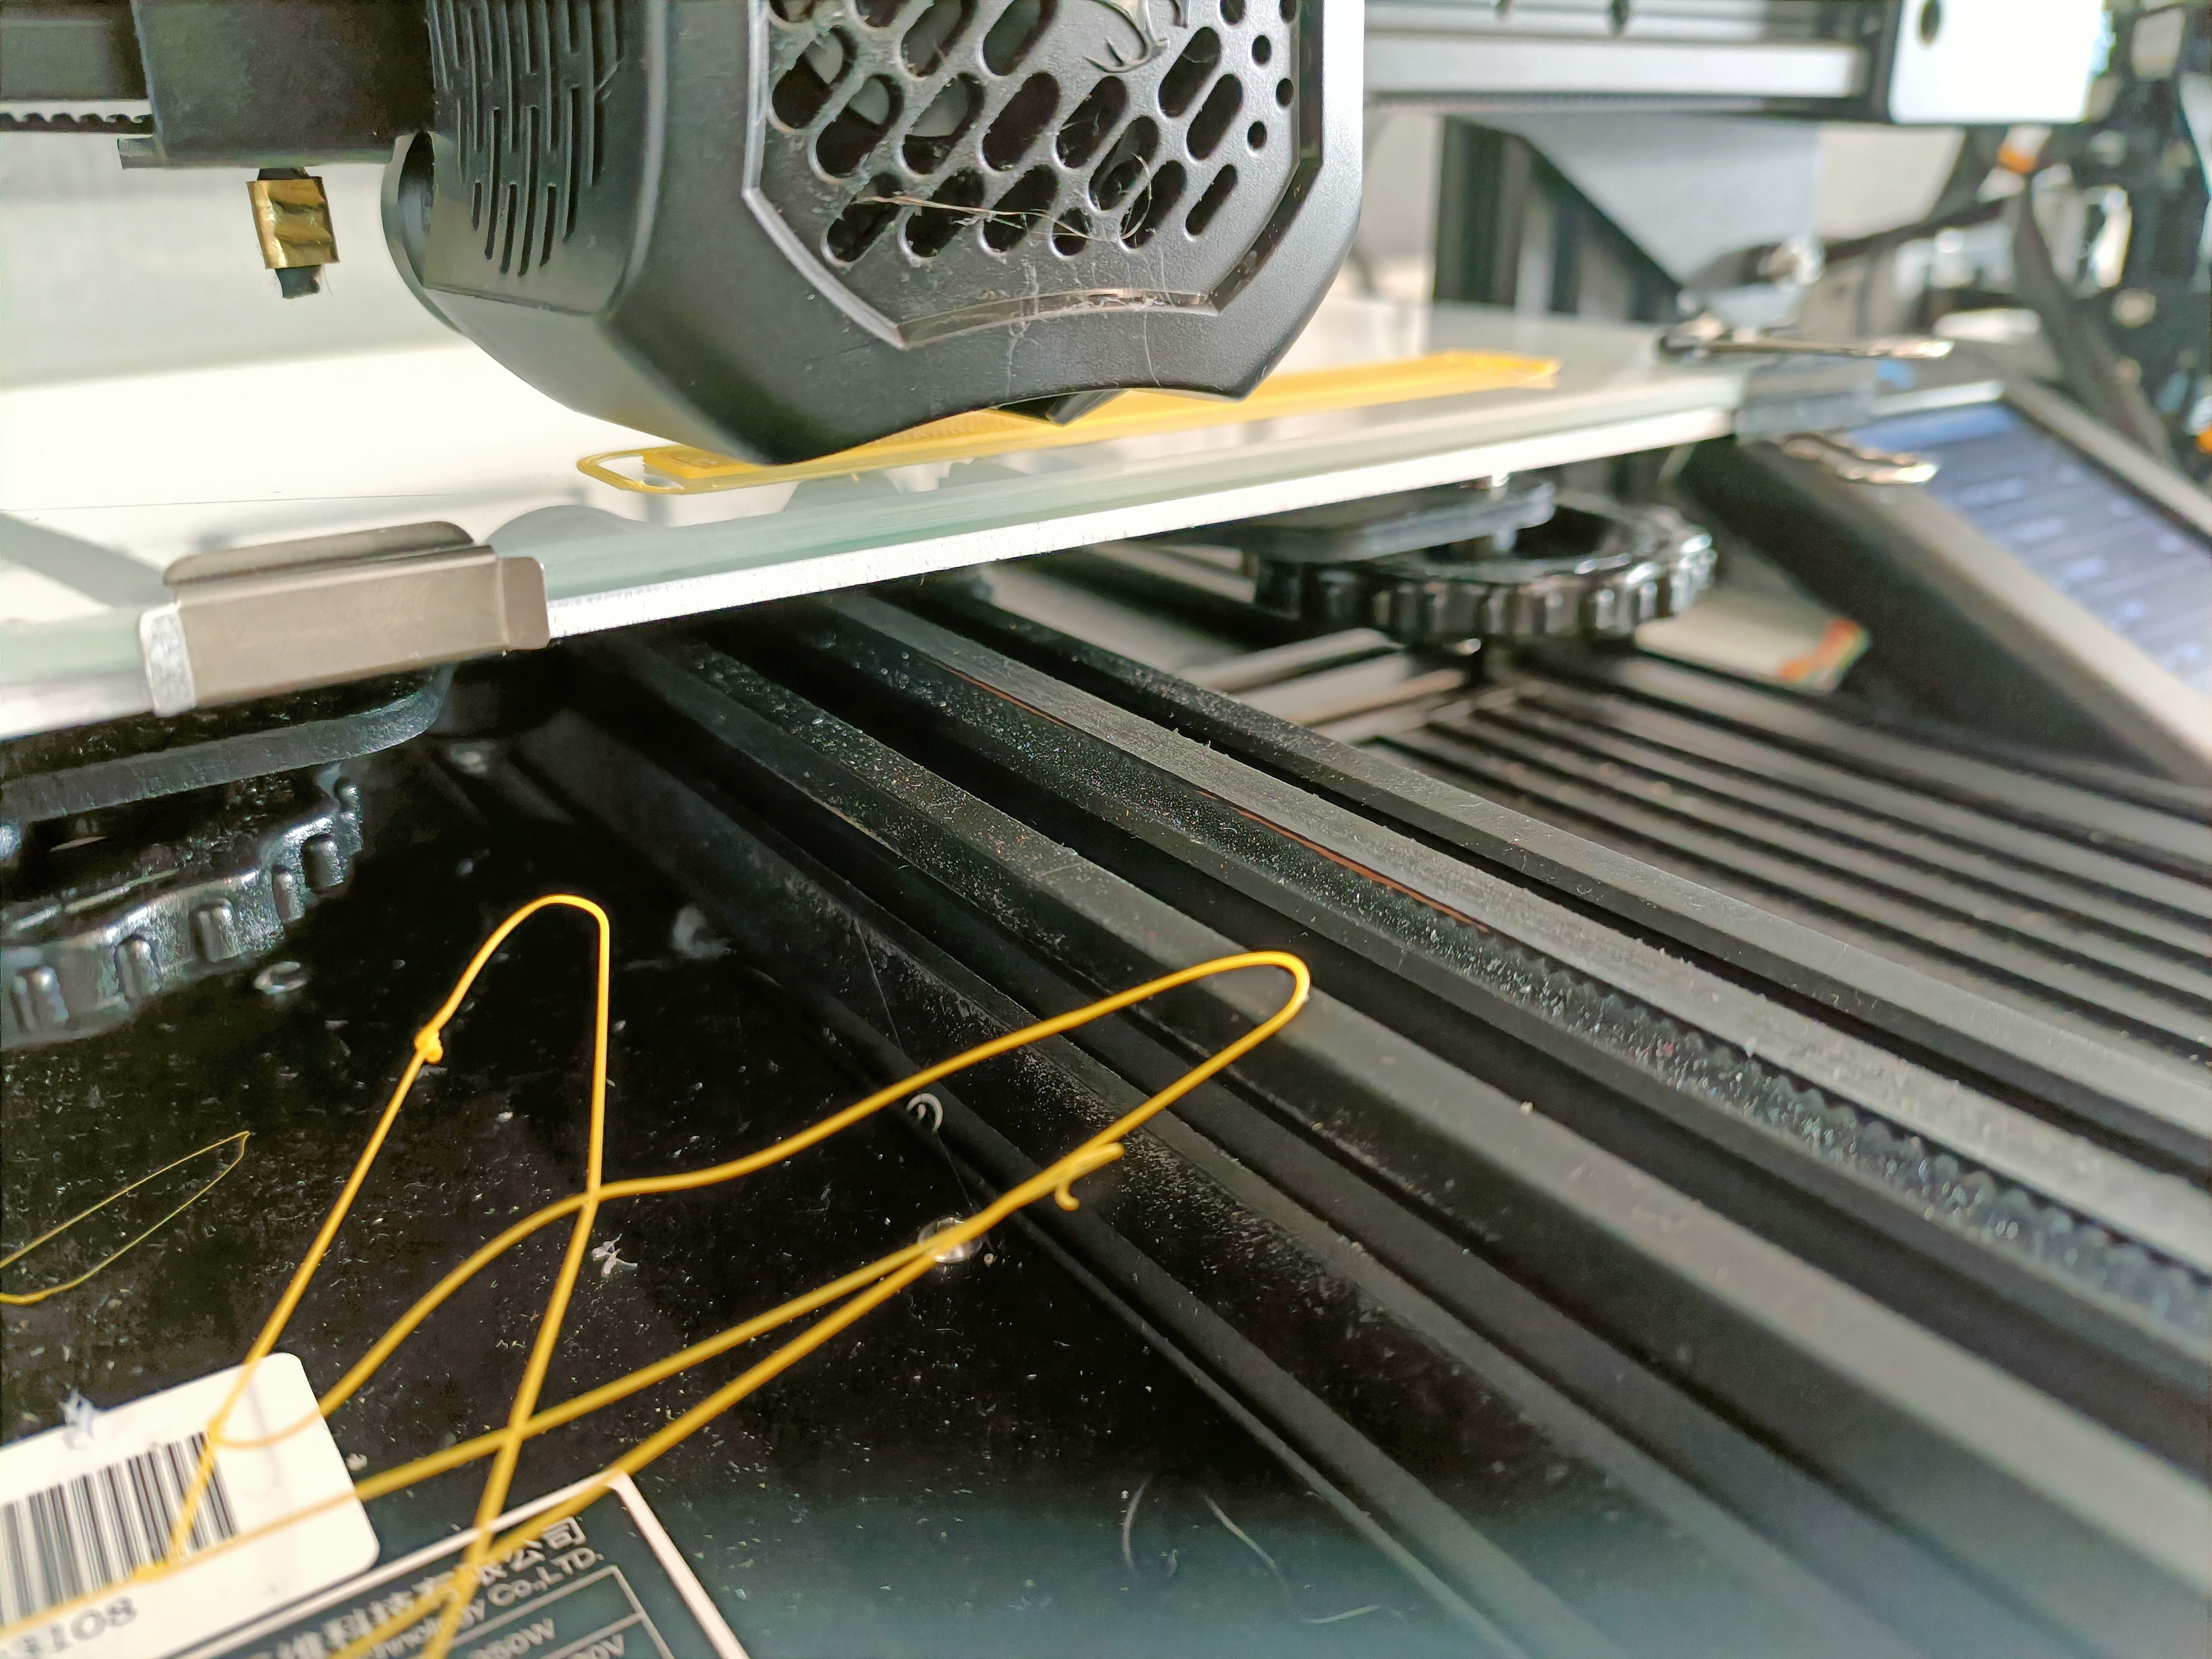 It just didn't want to stay on, even with the glass side. It wasn't even on there long enough to warp. It just popped off as if it was too cold, even though the bed was set to 108C.