-
[R] Auto PaintShop
06/05/2022 at 15:28 • 0 commentsI've been hoping for a method to be able to apply full colour to objects, or at the very least, solid colours that can't be bought in the chosen material (such as copper coloured polycarbonate). I was thinking that because the SecSavr is 5 axis and could technically have 1 tool for each of CYMKW and still have tools left over for the actual print, a feature I call "Auto PaintShop" could be implemented.
Sounds like Hackaday thinks so too: https://hackaday.com/2016/11/16/direct-to-object-3d-printing/
Solutions I have also thought of in the past:
- Airbrush
- Paint could get in unideal places, such as the build plate. A sacrificial shield could be printed to prevent this.
- Acrylic pens
- They are only usable for single colour filling.
- Airbrush
-
[R] Computer vision for tool offset calibration
06/04/2022 at 10:17 • 0 comments -
[T] Tubes, Fabrication and Milling
06/02/2022 at 18:18 • 0 commentsResults after computing some SecSavr concerns:
- Spend the £17 extra to change 2x27mm cylindrical tubes into 1x40mm box tube that is 1m long
- I can get them cut to size, but unlike tubes, they are bought in fixed sizes.
- If I want a length more than 1m, I'd have to get like 1.5m and ask them to cut it down
- Also, 1m of 40mm costs like 50% more than 2m of 27mm
- There are benefits though.
- For the low low price of £17 total (as in, for both gantries), I save 1.54kg on each Z axis, translating into 752g saved on each Y axis.
- There's more material further away from the axis lines where it counts, so I assume that the second moment of area would be larger.
- The diagonal is 56.56mm, which is the equivalent of having the horizontal and vertical orientations of the 2 27mm tubes at the same time.
- Easier to build as there's just 1 tube instread of 2
- The X and Y sliders should be smaller, meaning that the cantilever for the Slime's center of mass is shorter, further reducing vibrations.
- I was thinking that using 4 beams for the "hulkbuster" equivalent of the Slime (for metal CNCing) was kind of excessive. 2 square beams is probs fine.
- The bearings have more contact area.
- I can get them cut to size, but unlike tubes, they are bought in fixed sizes.
- Look into ways to get cut (and bent?) sheet metal cheaply
- https://hackaday.com/2020/03/10/forming-sheet-metal-parts-with-3d-printed-dies/
- I want to look into other manufacturing methods that could still be done easily but would produce a part better than a 3D printer.
- I was thinking of making a vice that clamped onto the bicycle racks I was walking in a circle next to, then printing equipment to do the folds or cut tubing
- (I don't have a workshop/garage)
- Find a 24V motor that will do 10K RPM
- https://hackaday.com/2014/08/03/brushless-dc-motor-used-for-high-speed-cnc-spindle/
- I'm thinking that there might be a different Slime variation that has the spindle motor instead of the Nema17 motor, or perhaps the spindle motor is a tool that also has another degaussing electromagnet to clip on different bits as tools.
- Motors are expensive and I'd rather look into a system that allows me to change drill bits without having to buy a motor (and ESC) for each one.
Concerns I still have:
- Should I now use 42.4mm tube for the Y sliders for higher stiffness?
- Positive:
- Stiffer, possibly increasing the usable acceleration even though peak acceleration is lower.
- Same as Z axis and frame, so would look more consistent and be easier to source
- Negative:
- Would negate the weight savings of using 40mm box tube for the X axis
- Y Slider increases by 13mm in height, which could mean that the effective Z height reduces by the same amount.
- Positive:
- Should I look into making the Slime body out of sheet metal, metal trusses or continue with the fully printed idea?
- I'm thinking of fully printed as that would still acheive a minimum viable product.
- The procedure required to swap the Slime for the beefier equivalent, and if the beefier equivalent would even be necessary for the materials I want to cut.
- An answer to the latter would require a MVP anyway, so I'm going to assume it isn't until proven otherwise.
- How will the bed be attached to the rest of the frame?
- Is the Mozzle heatsink enough to cool the cold end side of the SecSavr Slight, and if so, can it be modified to thread 5mm into the heater block?
- Spend the £17 extra to change 2x27mm cylindrical tubes into 1x40mm box tube that is 1m long
-
[T] Octopus Pro + EXP MOT and the Tool Bar
05/24/2022 at 13:29 • 0 commentsPublished: 14:53, Tues 24th May
A few logs ago, I said I was going to watch a Spider V1.1 listing to wait until it got taken down or I could deduce it was legit, and the former happened as expected. There was even a Spider V2.2 for the same price, magically.
Controller Boards
Anyway, after thinking over my options multiple times, I just decided to see how much more it would cost me to go down each other route for both SecSavr bays:
- Monster8 x 4 + EXP MOT x 4 + Tax = £152
- (All orders under £135 from a single seller have 20% added on as tax)
- Oct Pro x 3 + EXP MOT x 4 = £153
- (I've already got one of the Oct Pros so I only need 3 more)
- Monster8 x 6 = £152
As you can see, and as I found out, I was basically worrying about barely a difference. However, this relies on the idea that I don't need to motorize the Tool Bar, or else I'd need 23 steppers per SecSavr bay. The EXP MOT's also make wiring up the 3 micro steppers much easier as I can just send 5V to those boards. I also don't have to start soldering a bunch of wires and capacitors with the Oct Pros, and I don't need to buy a seperate 5V PSU either (Monster8 doesn't have enough amperage on the 5V rail for a SBC).
Tool Bar
Having the tool bar connected to the main gantry is the simplest and cheapest option, with the only drawback being that I might need 5 counterbalance pulleys and the top acceleration will be further reduced. The control boards are in the tool bar so that I don't have to make as many extremely long wire runs to components. With this method, I just have to have long runs to the heated beds and the W axis motors, as well as the PSUs.
An option I thought of is to have the Z axis slider
- a) have a grub screw so that it can be fixed at a location on the Z axis tube and
- b) use it for the bed holder too.
I'd then want to make swapping the Z axis motors as easy as unscrewing and screwing in 8 screws and adding 2 cables. However, this feature only makes sense to implement if the "bed gantry" is significantly lighter than the main gantry and the achievable acceleration makes a real difference in print times / noise / vibrations without quality loss, for which I'm skeptical about.
- Monster8 x 4 + EXP MOT x 4 + Tax = £152
-
[R] 10 Axis Printer
05/23/2022 at 18:54 • 0 commentsJust found this really cool looking printer:
-
[M] SleepCinema Panel Adjustment
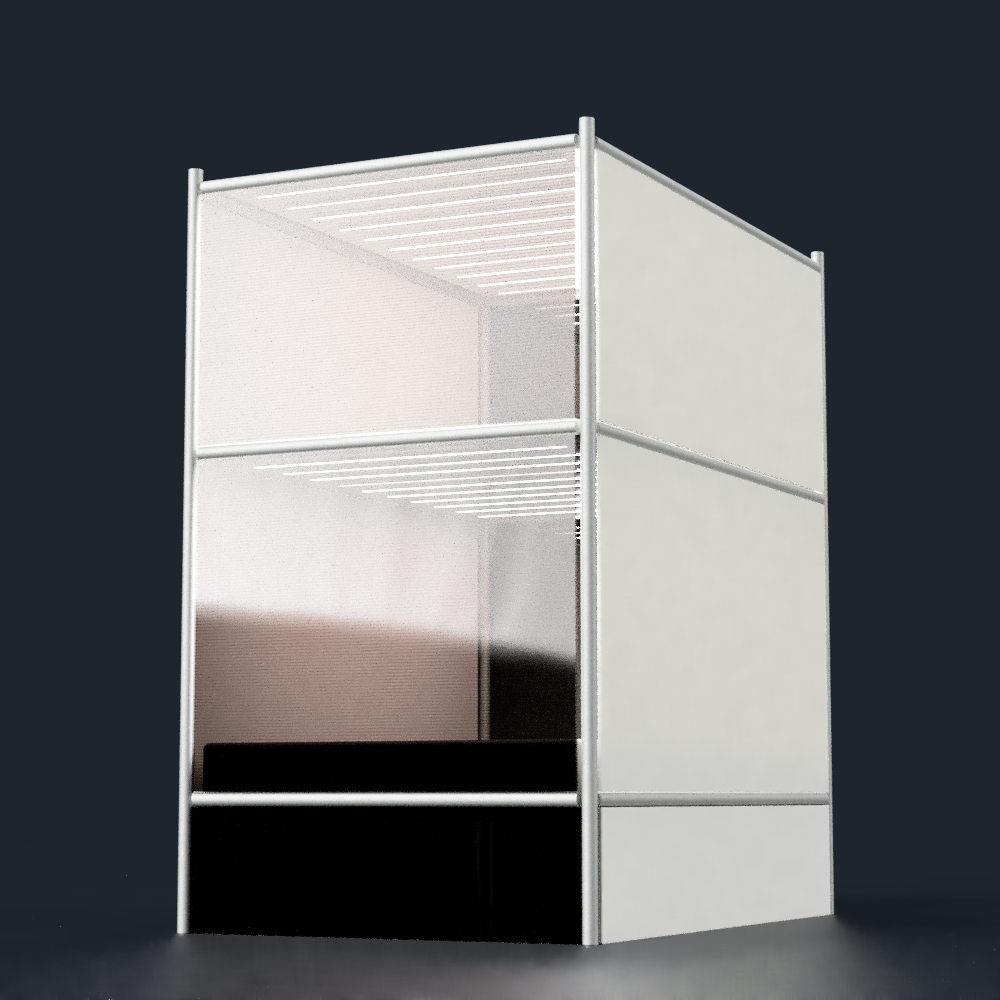
05/21/2022 at 19:04 • 0 comments![]()
I thought about this redesign a week ago, and have just rendered it. The doors are still on the wide white side, but they're now opal. Both short sides are now bronze polycarbonate. I've also added LED's into the small double bed section.
The CeilingSingle would look similar to this, just that the door is now the bronze side, the white sides is about half length and the back "new long side" is opal. I think it would look pretty professional.
-
[M] Sketching Tool Bar and Sliders
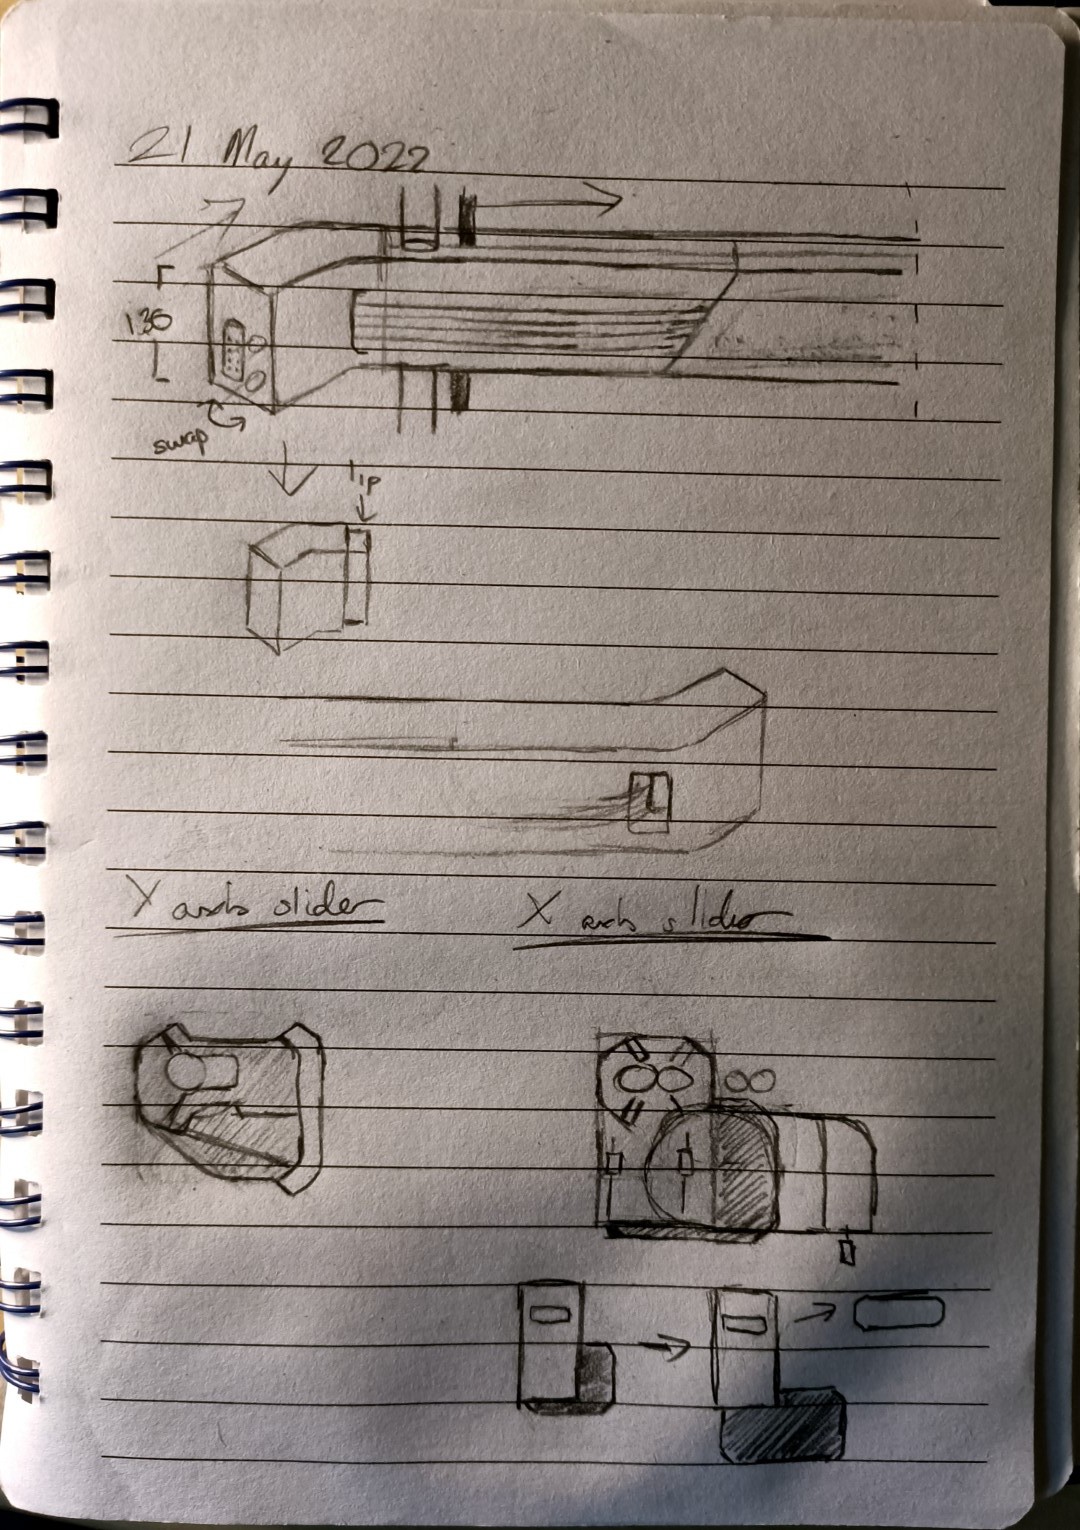
05/21/2022 at 18:53 • 0 commentsSince my designs are both dependent on form and function, as well as other parts of the design, I've been hitting a few too many unknowns while trying to compute a solution for the tool bar and axis sliders.
![]()
Tool Bar
I've gone with the idea of having the #SecSavr Select [gd0091]'s inside a main body that looks like a bracket (see my logo), along with the electronics (not including PSU's. I'm not sure how the tool bar is going to be moved, so I'm just going to assume via stepper motors and push forward. Originally, I was thinking of having the reverse bowdens go around the back, but I thought about accessibility issues and so moved it to the front (only 4 bowdens are drawn). Actually, now that I write this, I've realised that I forgot about the tool part of the tool bar. I'll have to sketch more.
130mm is the height the Selects are likely to be, so I went with that. I've also thought about how to aesthetically split up the part for printing, building and maintenance.
Sliders
The Y slider had to be extended so that the steppers could fit, and now it doesn't look good, so I've drawn a redesign.
![]() The X slider is a lot more tricky since it's got the mini Z axis and the V axis counterbalance, both of which I haven't designed in my mind yet. The slider is covered so that it looks like a cuboid, and the Z axis is likely to get a (non cuboid) cover so that it looks a bit nicer. I'm also thinking of where the mini linear rails for the mini Z axis would go.
The X slider is a lot more tricky since it's got the mini Z axis and the V axis counterbalance, both of which I haven't designed in my mind yet. The slider is covered so that it looks like a cuboid, and the Z axis is likely to get a (non cuboid) cover so that it looks a bit nicer. I'm also thinking of where the mini linear rails for the mini Z axis would go.For both sliders, I'm thinking of a white and black contrast print, and have shaded accordingly.
-
[T] Spider V1.1?
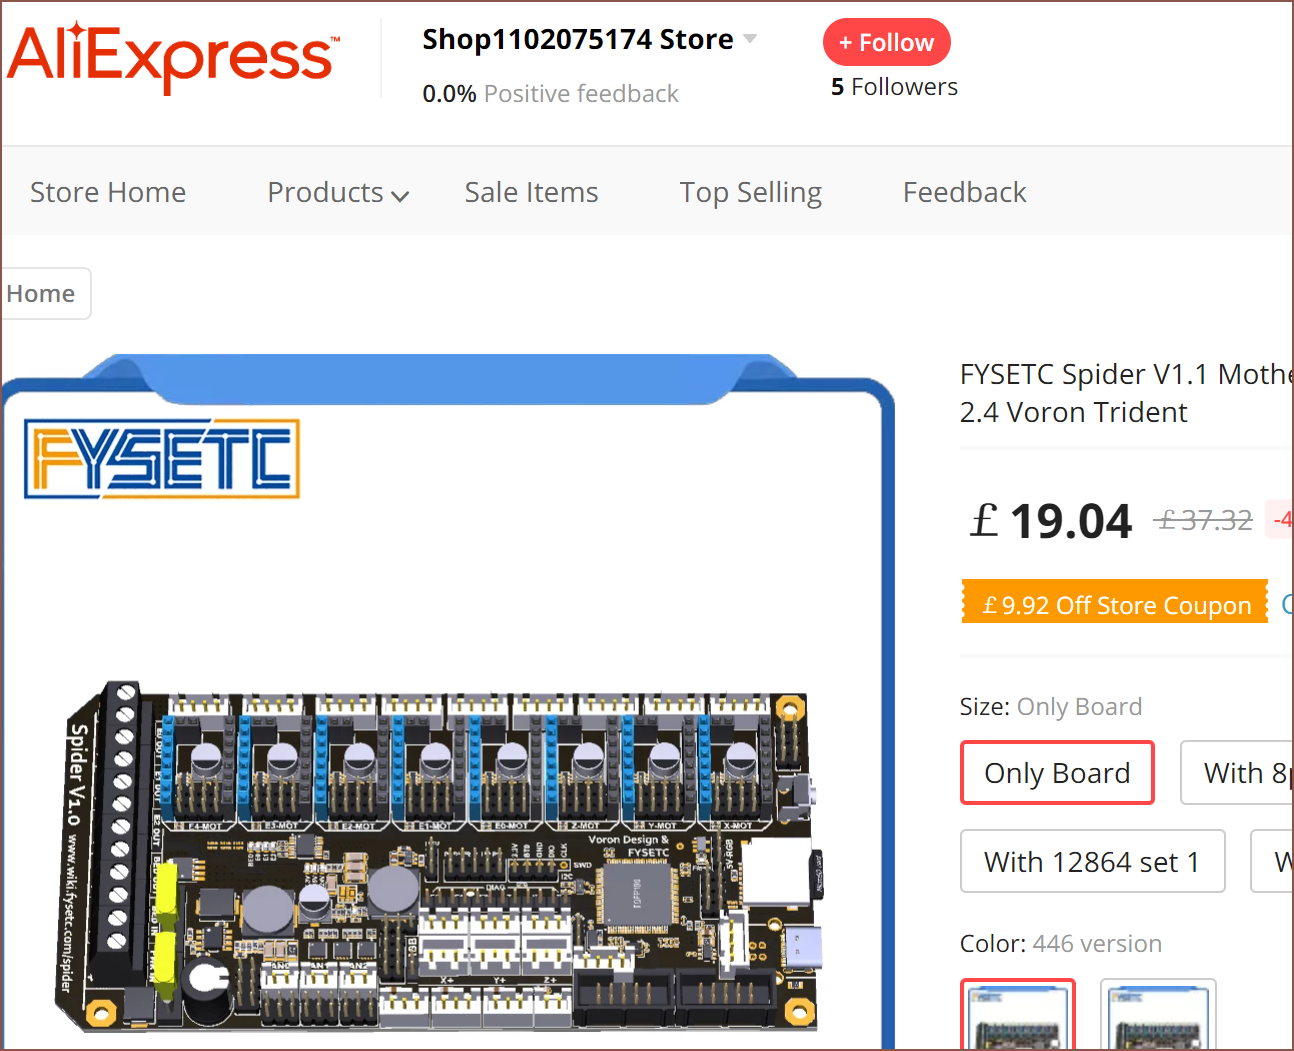
05/21/2022 at 06:15 • 0 comments![]() I know. This listing looks suspicious, but I'm imagining for a second that some random sellers got a bunch of old stock. At this price, I could get 3 Spiders per SecSavr Bay/Core/Somethn for like £4 more than 1 singular Super Infinity. That then gives me 24 steppers to work with, which after learning about how those cheap unipolar drivers work by just amplifying the waveform generated by the controller, I might need. I'm fine spending the calming 30+ minutes snipping pins and soldering capacitors on a bunch of stepper drivers for those kinds of gains.
I know. This listing looks suspicious, but I'm imagining for a second that some random sellers got a bunch of old stock. At this price, I could get 3 Spiders per SecSavr Bay/Core/Somethn for like £4 more than 1 singular Super Infinity. That then gives me 24 steppers to work with, which after learning about how those cheap unipolar drivers work by just amplifying the waveform generated by the controller, I might need. I'm fine spending the calming 30+ minutes snipping pins and soldering capacitors on a bunch of stepper drivers for those kinds of gains. -
[T] Octopus Pro Price
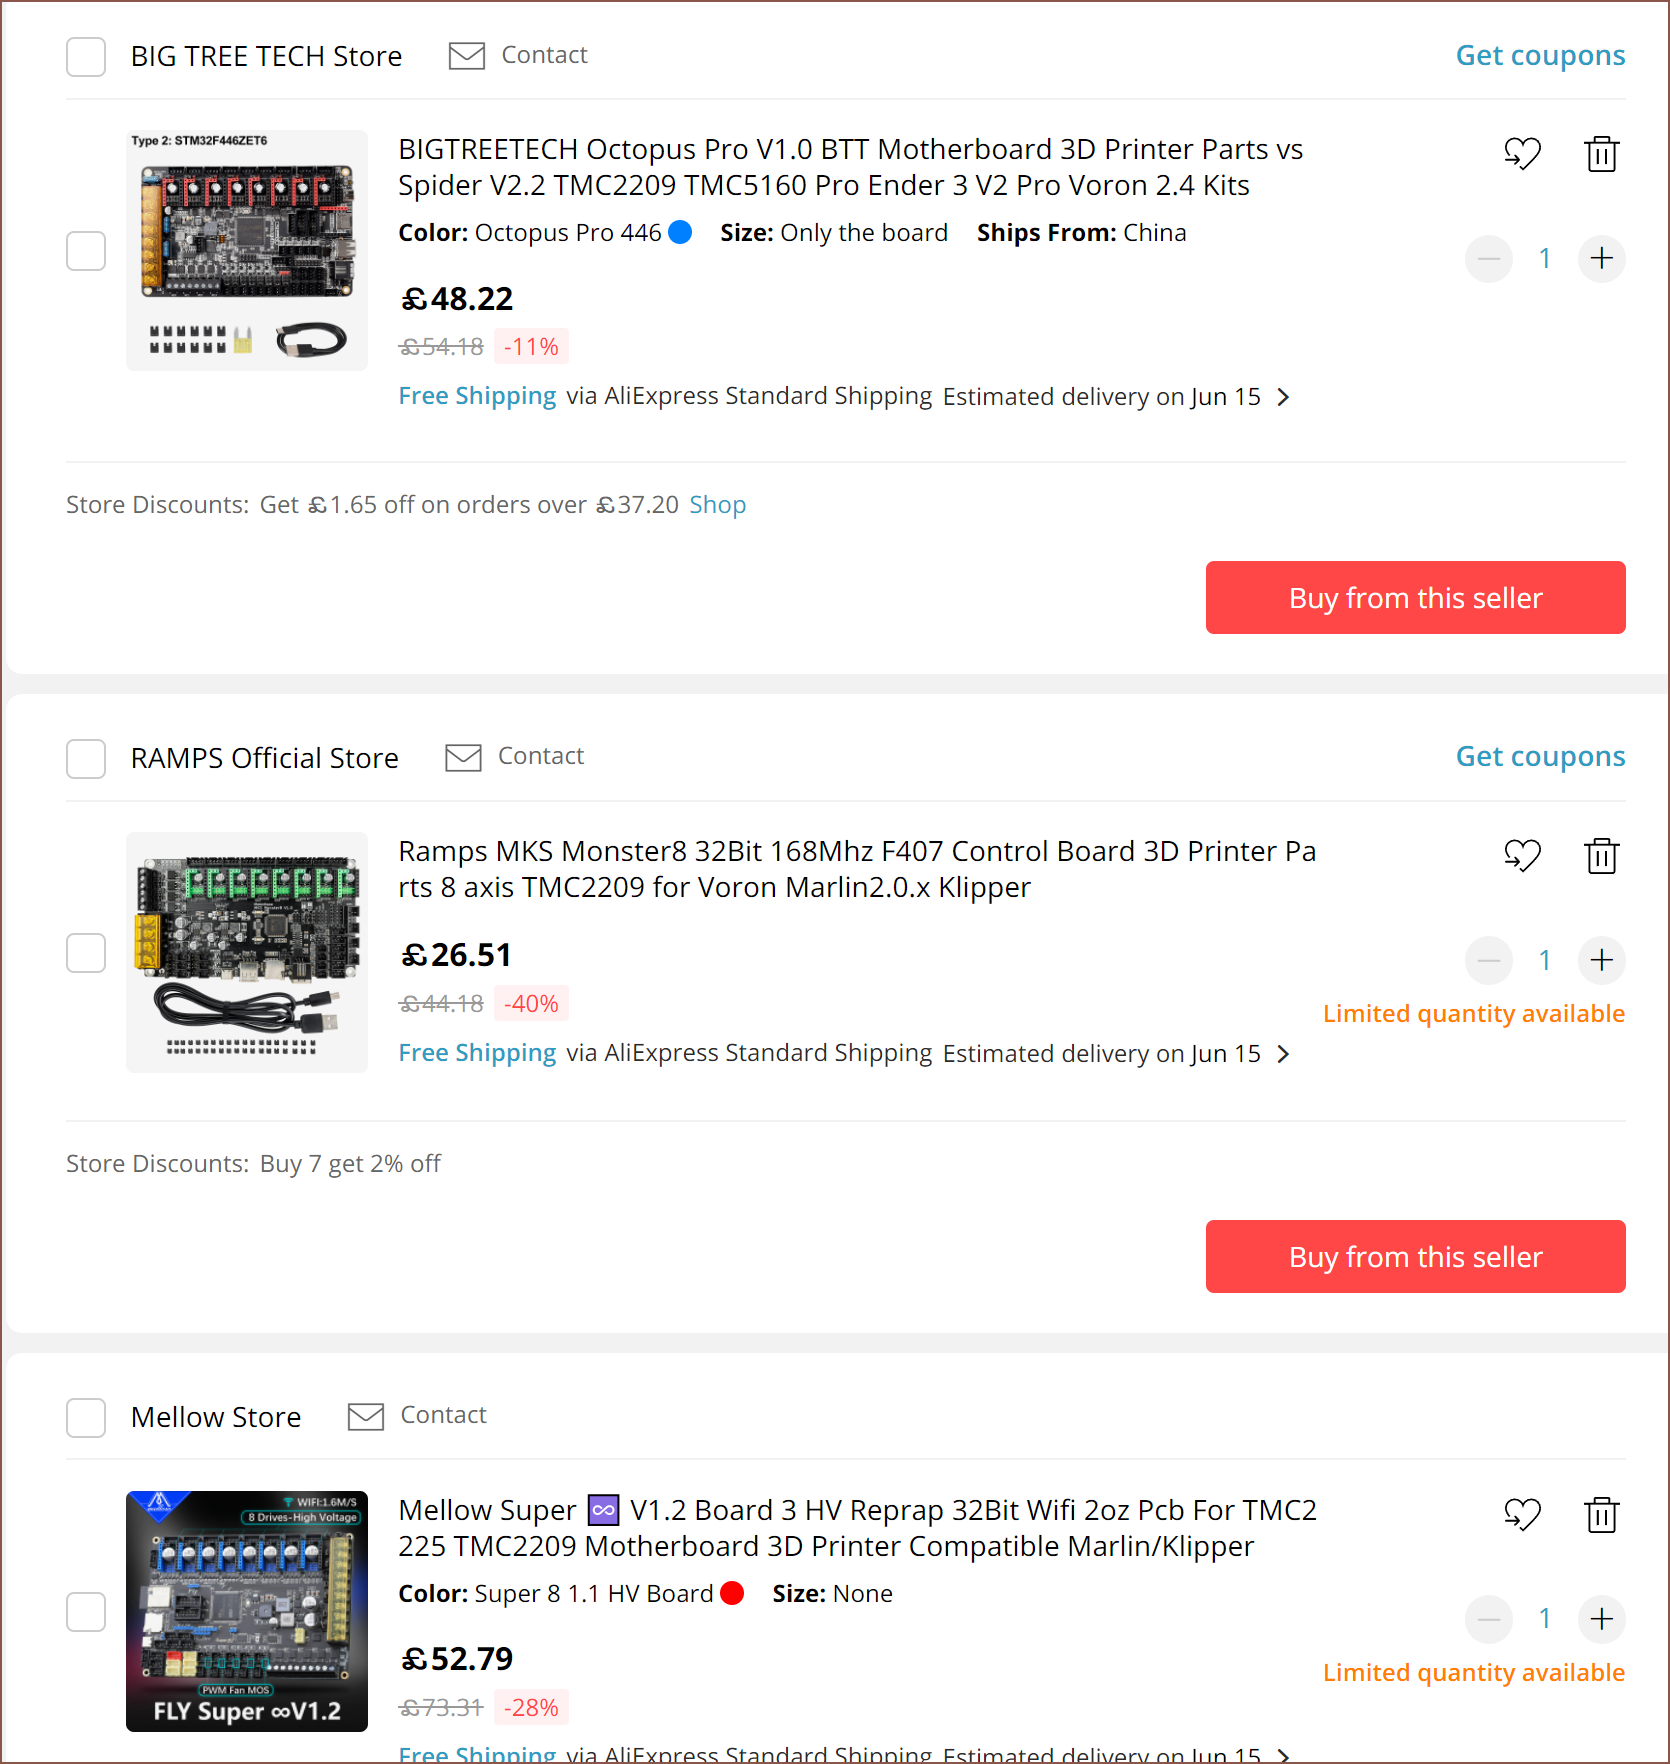
05/21/2022 at 05:31 • 0 comments![]() The price of the Octopus Pro has been steadily increasing while other boards with 8 steppers have had a somewhat fixed price. Now I'm wondering if I should consider the £6 more expensive Mellow Super Infinity which has WiFi (that I won't use), more fans (that I probably won't need), more hotends (though I could probably get by with 4) and a larger footprint (which I don't want) or if I should just cut the Vmotor pins of the stepper drivers and solder a 50V or 63V capacitor with power leads on the Monster8 or other 24V only board.
The price of the Octopus Pro has been steadily increasing while other boards with 8 steppers have had a somewhat fixed price. Now I'm wondering if I should consider the £6 more expensive Mellow Super Infinity which has WiFi (that I won't use), more fans (that I probably won't need), more hotends (though I could probably get by with 4) and a larger footprint (which I don't want) or if I should just cut the Vmotor pins of the stepper drivers and solder a 50V or 63V capacitor with power leads on the Monster8 or other 24V only board. -
[T] Frame: SecSavr CeilingSingle
05/18/2022 at 17:38 • 0 commentsOh look at that; 50 logs already.
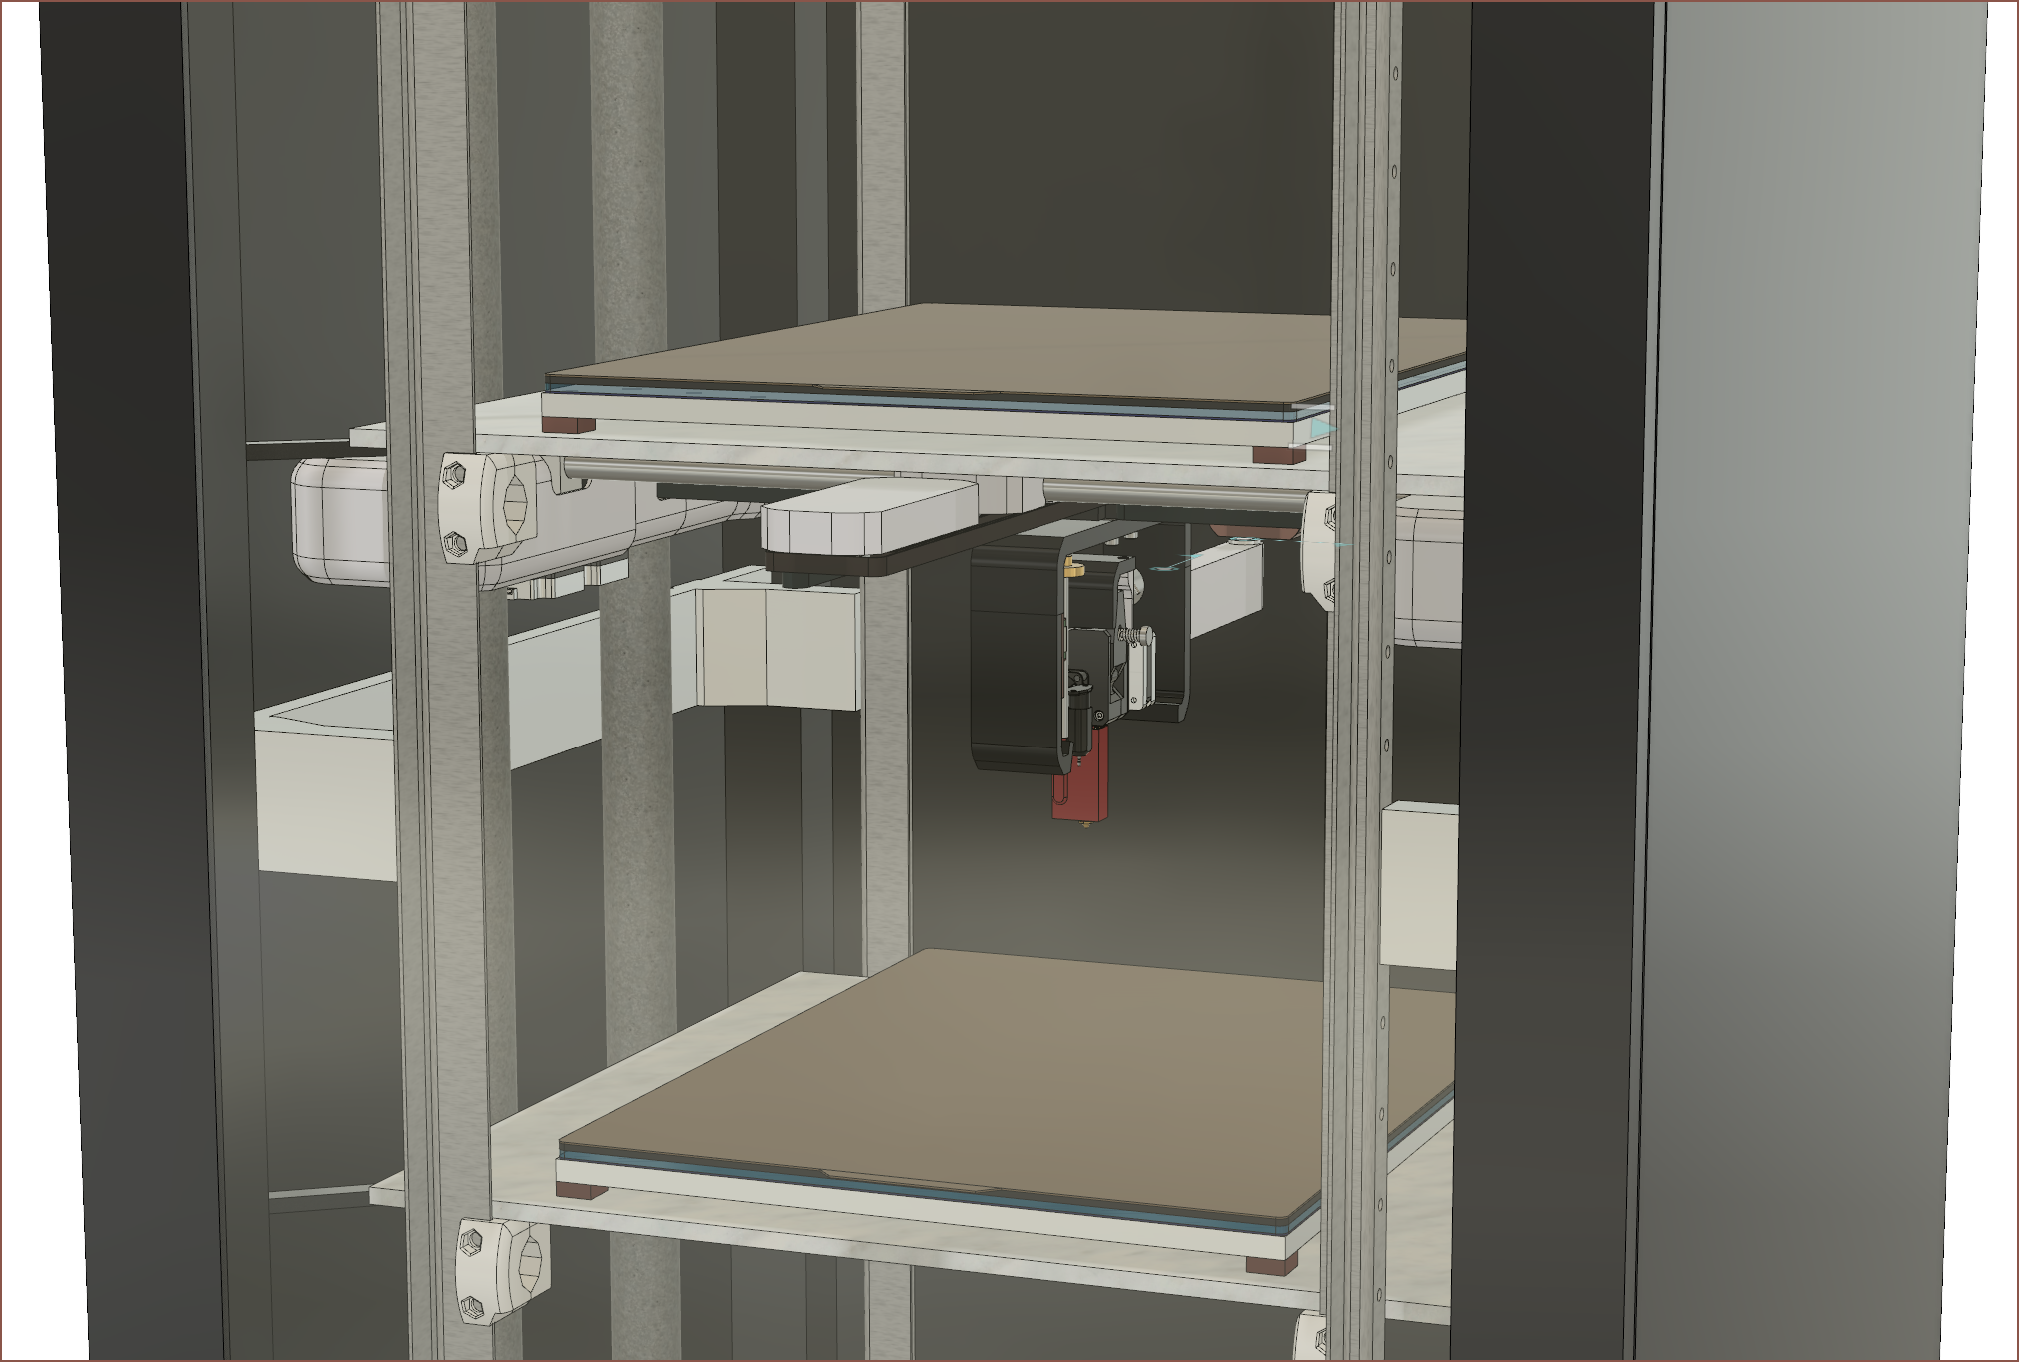
Anyway, as you may know, this SecSavr printer (that most likely would be called the SecSavr Slab) is somewhat frame agnostic. That's the reason why the frame I'm building, the SecSavr SleepCinema, has its own name. However, it's very unlikely that someone else building it is also starved for bedroom space, incentivising them to build their printer above their bed. Additionally, I've also got to confirm that the "Slabs" can be stacked vertically, as originally intended in the SecSavr Space seen below.
![]()
Therefore, I'm also planning to design another frame called the SecSavr CeilingSingle ("single" because the SleepCinema has 2 sets of Z tubes instead of 1). It would be somewhat of an "example frame" for anybody interested in building the SecSavr to start from.
UK ceilings are 2.4m on average, so I'll design to that, but it doesn't need to be ceiling height if your requirements don't ask for it. Ideally, I'd also design a left-sliding and right-sliding door variant. I'm not sure if sliding doors are sound-proofable but I like the look and feel of those kinds of doors better than hinged ones, thus I'm doing it on the SleepCinema as well as the CeilingSingle.
SecSavr Sublime [gd0036]
An FDM 3D printer that I described as "The FULL Coverage, Extended X, Pro Max, Ultramatrix Solution".
 kelvinA
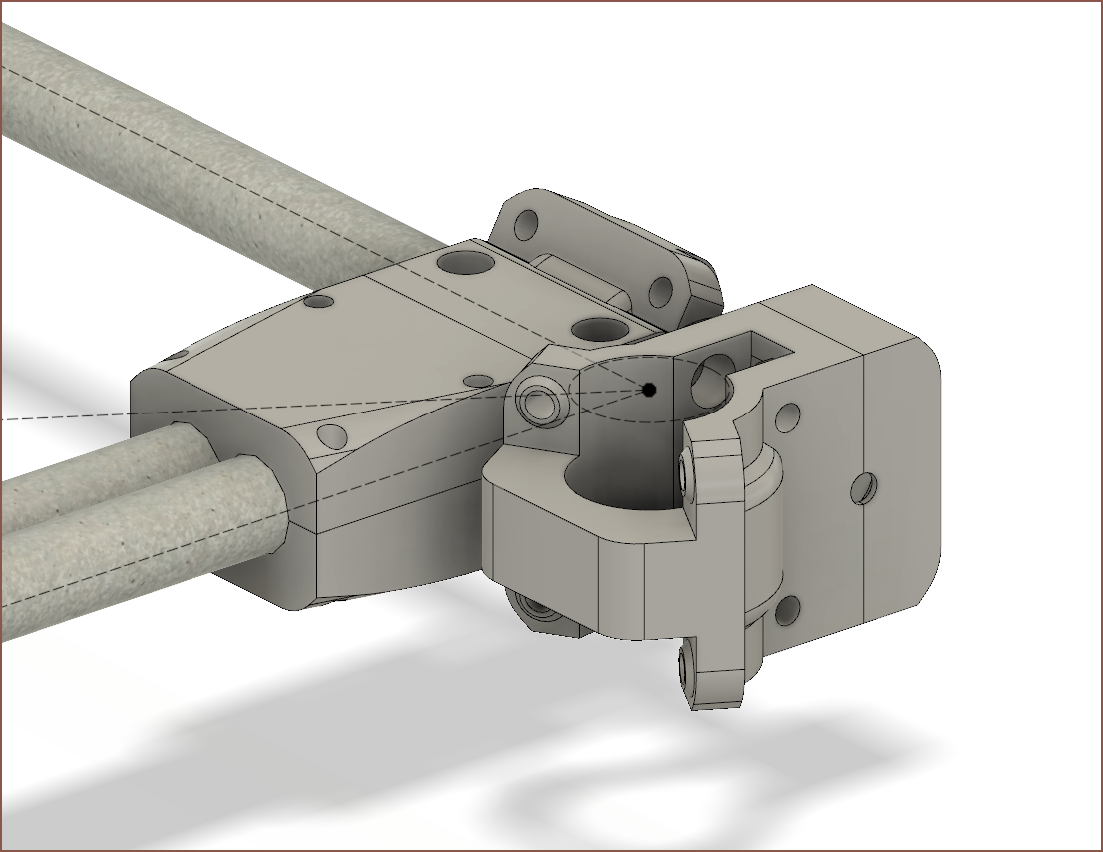 The X slider is a lot more tricky since it's got the mini Z axis and the V axis counterbalance, both of which I haven't designed in my mind yet. The slider is covered so that it looks like a cuboid, and the Z axis is likely to get a (non cuboid) cover so that it looks a bit nicer. I'm also thinking of where the mini linear rails for the mini Z axis would go.
 I know.
  The price of the Octopus Pro has been steadily increasing while other boards with 8 steppers have had a somewhat fixed price. Now I'm wondering if I should consider the £6 more expensive Mellow Super Infinity which has WiFi (that I won't use), more fans (that I probably won't need), more hotends (though I could probably get by with 4) and a larger footprint (which I don't want) or if I should just cut the Vmotor pins of the stepper drivers and solder a 50V or 63V capacitor with power leads on the Monster8 or other 24V only board.