Close
0%
0%

Electronic CV

Yet another overly engineered business card, that probably I would never give a way, because it is too expensive.

Public Chat
Similar projects worth following
Welcome! Hope you are doing well. This is my journey of creating an electronic CV. As you probably figured out, it is not going to be very practical business card, but it is going to be a cool one. What is the porpoise of it then? Well this is me dipping my toes in the world of radios. It is my first BT project and the first time I am using silicon from Nordic Semiconductors. I went into it with a lot of enthusiasm and little knowledge. Hopefully you, the reader, can tag along and learn with me or at least get some entertainment. I will be making a lot of mistakes, some of them will be because I did not pay enough attention, other will be because I am lacking some insight. This is way I would much appreciate your comments and suggestions.

Let's go!

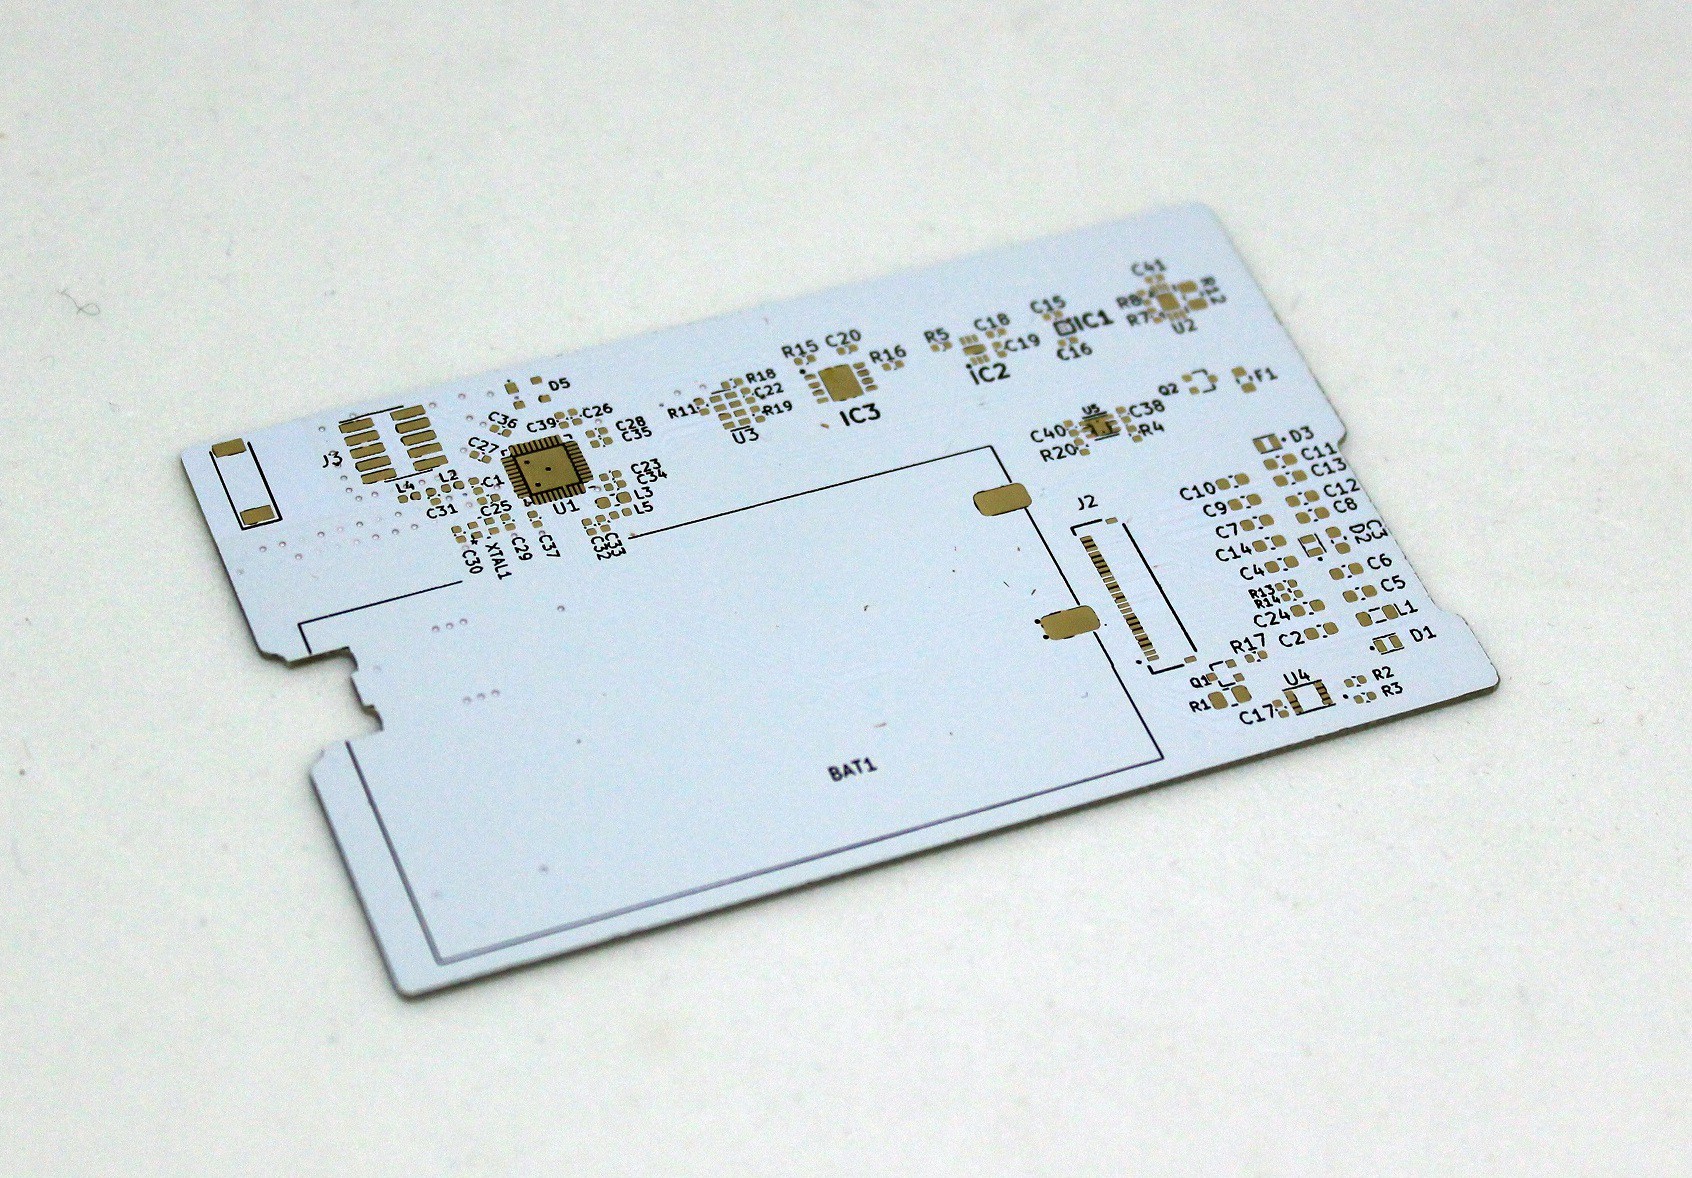
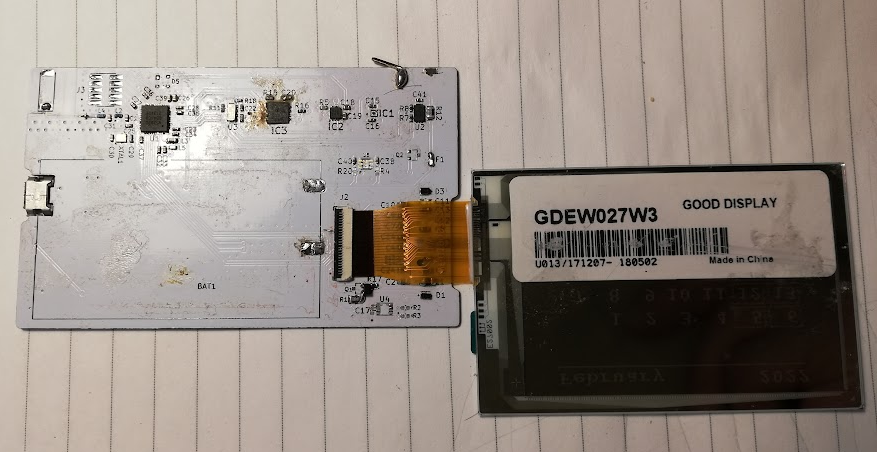
The size of the board is the standard size business card 8.9 x 5.1 cm. On it there is 2.7" GDEW027W3 e-paper display from Good Display (2 or 3 colors both work just fine). One thing that is very important to me is that the device is very slim. This is why I chose LP103053 90mAh battery. It does not have a lot of capacity, but in regular user it should be quite enough for a month or two. The BMS consist of protection, charger and a fuel gauge. Continuing with the slim theme, the USB port and the flat flex connector are chosen, so they have the flattest profile possible. To be able to store images and files we have W25Q64J flash. It is very popular and there is a lot of code for it. On the "entertainment" side we have a RTC and an environment sensor BME680. Everything is tied to a nRF52820 Bluetooth 5.3 SoC.

  • 1 × nRF52820 MCU
  • 1 × GDEW027W3 epaper display
  • 1 × W25Q64J QSPI Flash
  • 1 × MCP73830LT Power Management ICs / Power Supply Support
  • 1 × RV-3028-C7 RTC

View all 10 components

  • eCV and BSEC

    Dimitar07/12/2022 at 19:17 0 comments

    Hello all, it has been a while! 

    If you are following this project, you know that I would like to make the eCV a little bit more useful. To accomplish this, I have added a gas sensor called BME680. Cool little gadget. It reports on temperature, humidity, pressure and also indoor air quality index (from now on called IAQ).

    This sensor is from BOSCH. They were very kind to provide drivers for it. You can find them at their git hub repo  [here] .

    Before we start you can find my example code and the modified BOSCH libraries at my repo [here].

    Part 1 - Get the BME68x running on I2C

    First get the provided library from the repo [BME68x-Sensor-API]. There is just one source file and two headers to integrate. It is straight forward process. I have chosen to use I2C interface and 0x77 address for my project (the address is configured in hardware). What is needed are three functions: reading/writing to the sensor and a delay function in microseconds. 

        airSensorAddr      = BME68X_I2C_ADDR_HIGH;
        airSensor.read     = user_i2c_read;
        airSensor.write    = user_i2c_write;
        airSensor.delay_us = user_delay_us;
        airSensor.intf     = BME68X_I2C_INTF;
        airSensor.intf_ptr = &airSensorAddr;
        airSensor.amb_temp = 25;
        
        airSensorResult = bme68x_init(&airSensor);
        if (airSensorResult != BME68X_OK)
        {
            while(1);
        }
    
        airSensorConf.filter  = BME68X_FILTER_OFF;
        airSensorConf.odr     = BME68X_ODR_NONE;
        airSensorConf.os_hum  = BME68X_OS_16X;
        airSensorConf.os_pres = BME68X_OS_1X;
        airSensorConf.os_temp = BME68X_OS_2X;
    
        airSensorResult = bme68x_set_conf(&airSensorConf, &airSensor);
        if (airSensorResult != BME68X_OK)
        {
            while(1);
        }
    
        /* Check if rslt == BME68X_OK, report or handle if otherwise */
        heaterConf.enable     = BME68X_ENABLE;
        heaterConf.heatr_temp = 300;
        heaterConf.heatr_dur  = 100;
    
        airSensorResult = bme68x_set_heatr_conf(BME68X_FORCED_MODE, &heaterConf, &airSensor);

    You should test your interface functions by reading the sensor ID. When you are sure that everything is running correctly you call a few functions to configure the sensor. The above values are taken from the examples making a basic setup. 

    Part 2 - Getting the BSEC library to run

    This part is harder. You only need this if you want the VOC, CO2, IAQ index. If you are happy with temperature, humidity and air pressure, you do not need bsec. First thing first, get acquainted with [Bosch Software Environmental Cluster - Integration Guide].  Next get the library's binary from [github]. Be careful though, you have to choose the correct one for your MCU. I know right? Not an open source this one :( 

    Note: I am going to use the bsec2 

    The interface functions provided for the bsec2 are written in C++, so I made C version you can get from my repo. The choice is yours. They are not pretty, but it works okay.

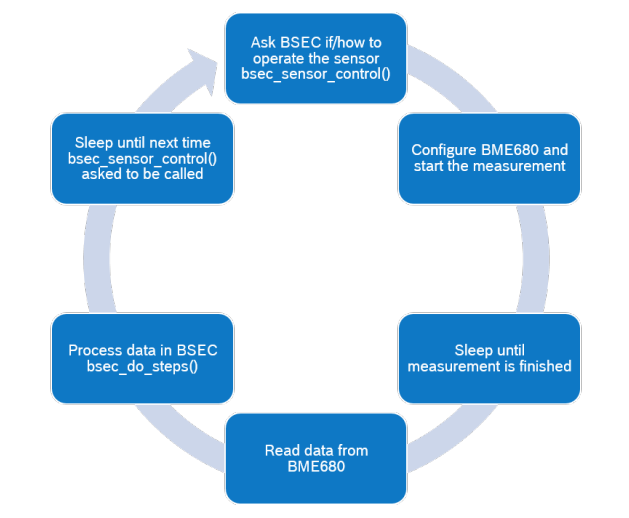
    A visual aid is in order. This gem is directly taken from the integration guide. 

    You can think of the BSEC as a black box. It has input from real world sensors and virtual sensors as outputs. For an example: you feed it raw data from the BME860 such as temp, humidity, pressure and air resistance and you get IAQ, CO2 and VOC index.

    In essence it does some voodoo, and it is very very strict the way it does it. You do not get to configure many things. In fact you get provided two configurations for the BSEC library... like a BOSCH. 

    One is called FieldAir_HandSanitizer and the other is Default_H2S_NonH2S. Very catchy. 

    Things you may mess up: Using bsec configurations with bsec2 library - this is a no go. The bsec configs are quite smaller than bsec2. The first ones start with [0,8,4,1,...] and the later ones start with [1,6,0,2...]. Check bsec_get_version to be sure.

        statusBSEC = bsec_init();
        
        if (BSEC_OK != statusBSEC)
        {
            return 1;
        }
    
        statusBSEC = bsec_get_version(&version);
        
        if (BSEC_OK != statusBSEC)
        {
            return 1;
        }
    
        statusBSEC = bsec_set_configuration(FieldAir_HandSanitizer_config, BSEC_MAX_PROPERTY_BLOB_SIZE,...
    Read more »

  • Lets talk about software.

    Dimitar03/11/2022 at 21:13 0 comments

    Hey everyone, 

    In this log I want to talk about what the eCV would be able to do.

    Before we start we need to set things up. The device has a NOR Flash. Any reading, writing or logging would be done on it. The different screens, that are displayed on the device I also regard as pages. There are two buttons on board. The one I call top button is the one near the USB and the other one as bottom. 

    1. The main porpoise is to show your professional path. The default page of your CV would be more or less your business card: name, current position and some contact info. 

    2. When you click on the bottom button you will go through the pages of the CV. I imagine people would start with their education, go through their working experience and end with their qualifications. This would be absolutely customizable. I would add a timeout. If there are no inputs it will go back to the default page. 

    3. The first page to be displayed when clicking the top button will be a calendar and a clock. The external RTC will come in play here. It is super accurate and will be able to keep the time quite well.  There will be a alarms/reminders. Users can set those. For example a holiday or a birthday. 

    4. Next screen will be the environment data collected from the sensor. That would be air pressure, temperature, humidity and air quality. I plan to make a log with this data. 

    5. The last page would be so called "Quote of the day". I have made a file with quotes from around the world and there will be a different one displayed everyday on this page. 

    6. When you keep the two buttons press, the card will go into Bluetooth mode. This way you can connect with your phone and through the app upload or remove pages from the CV, get the logged data or set an alarm. 

    7. I can see a use of this card as a smart sign on a meeting room for example. The BT 5.2 allows for a mesh networking, to send info.

    What other use can you think of about the card?  Please, let me know in the comments.

    Cheers,
    Mitko 

  • Bring up board v2

    Dimitar03/07/2022 at 20:08 0 comments

    Hello everyone,

    For this log we are going to work on the second version of the PCB. The bring up was fairly easy. Everything was working. But there were still issues. The first type were regarding assembly. The second type is regarding performance. 

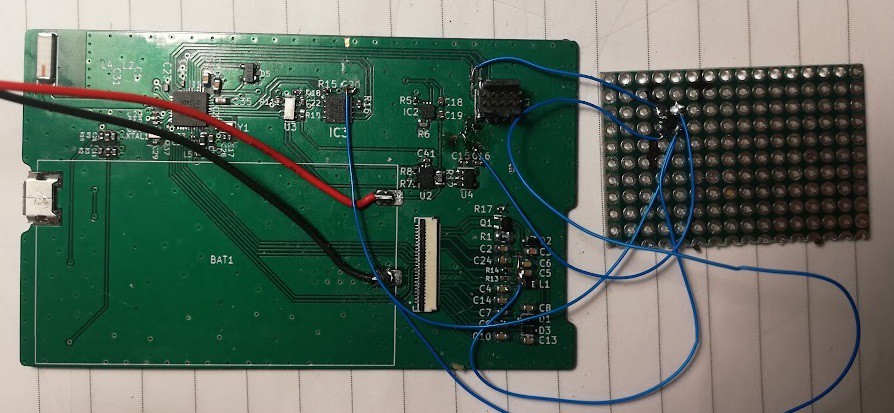
    The show stopper is that the current consumption is too high. From the datasheet of the MCU, RTC, Flash and the e-paper display I assumed that the current draw would be in the neighborhood of 15-20 uA. That would have been great. In reality it was 240 uA (when the display was refreshing 8mA) I wrote a program to initialize all the peripheral chips and issue sleep commands. I would measure the progression after each shut down. The only subsystem that did not made any significant difference was the e-paper.

    One final experiment was in order. I connected everything. Went through the shut down procedures and then physically disconnected the screen from the board. And like that the current dropped to the needed 23uA. I agree, not 15 but my multimeter is not so great and we do have losses when using an LDO (now I changed that for a second time). 

    I decided to add a high side power switch to the circuit. It will remove power from the e-paper display and the flash. If we do not have display we don't need the flash to read graphics from.

    Again I put my soldering skills to use. I wired a small board with the switch on it. Also cut the traces for 3.3v for the flash and display. The problem was that I did not had any free pins. I decided to use the RST pin on the MCU for power control. It is a pin that can be used as a GPIO. I tested with the debugger if I can still program everything and if can toggle the power. All good!  

    Now the assembly issues

    • The buttons were not oriented correctly on the footprint, so it was not easy to solder them.
    • I bought a few batteries all the same model. I just got one and measured the space between its terminals and assumed that they are all the same. But I was wrong, so I changed the footprint to accommodate the variations. 
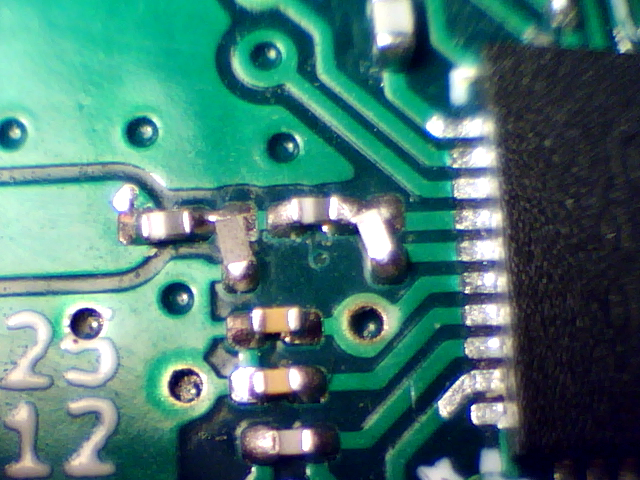
    • There were a number of caps and resistors, that were too hard to place because they are too close to each other and are very small. Sometimes they stuck together. See picture.
    • The R/C network for debouncing the buttons was not correct. 

    The improvements for the next revision. 

    • I added a overcurrent / under voltage and shortcut protection for the next revision. The battery does not have one. It was shown on the datasheet, but in reality there is none. 
    • Add BME680 a Bosch environment sensor.
    • Put more spaces between resistors and caps.
    • Fixed the buttons and battery footprints
    • Added protections and high side power switch

     Thank you for your interest!

    Cheers,

    Mitko!

  • PCB update

    Dimitar03/06/2022 at 20:56 0 comments

    So for this log I am going to write about the changes I have made for the second version of the board. 


    Lets start with the front.


    • The most obvious thing is that we went to green color.
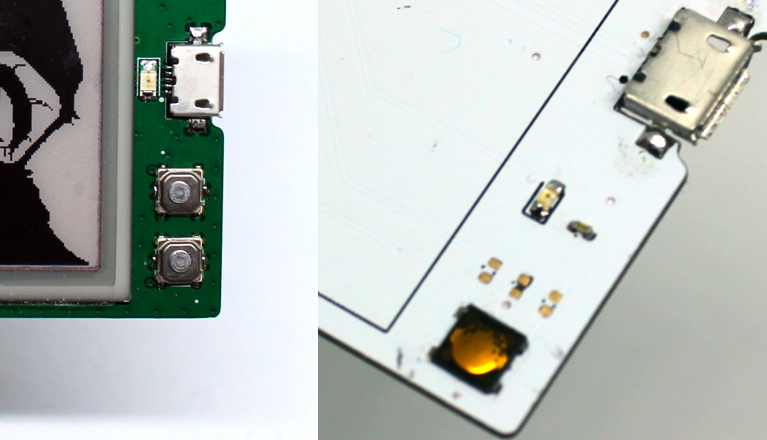
    • Add a second button. This will help with navigation.
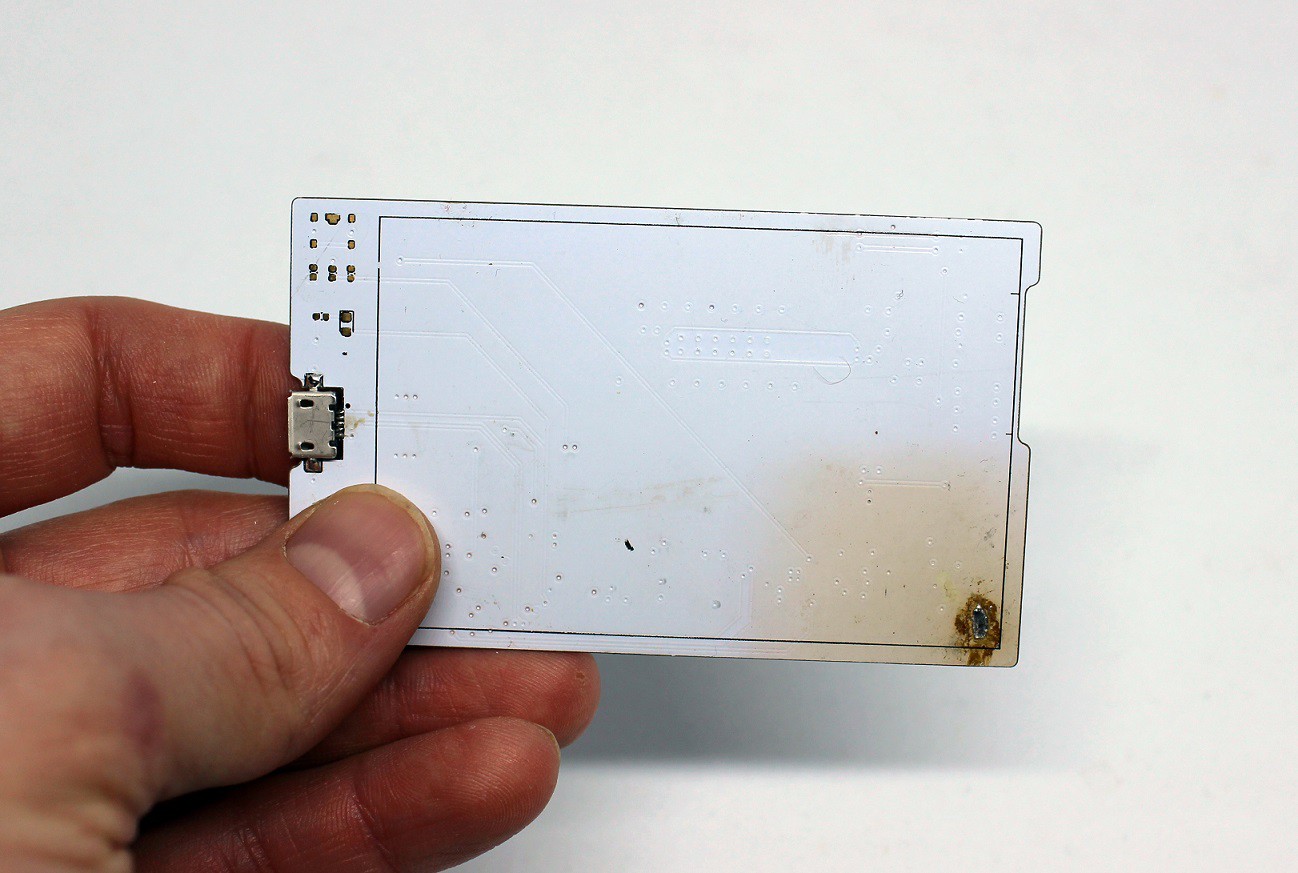
    • Moved the LED next to the USB. Also I chose a bigger package. This way I can put it in line with port and have the D+/D- lines pass between the pads for the LED.
    • I chose e different style of buttons. The one I had in the begging was EVQ-P6PB35 from Panasonic. It was very slim and small. Too slim and too small. Very hard to push. The ones I got next had a little stem, which improved the experience. And have some ingress protection. 
    • I had some resistors and caps on the front for the button debouncing and for the LED. They went to the back of the board. 

    Lets move to the other side.

    • Fix the ordering of the pins on the flat flax connector.
    • Connected the ground pin on it as well.
    • Put the correct transistor footprint. 
    • Removed the temp sensor for the e-paper display. It is not needed.
    • Changed the LDO because the BGA one was pain to solder.
    • Moved the debug header so it does not interfere with the radio.
    • Removed the RST pin on the debug header and connected it to the second button. It can be configured as a GPIO.(this is not done on this revision)
    • Added that low frequency crystal I deleted on the first version.
    • Add a fuel gauge for the battery.
    • I removed the battery over current protection IC. It was a bad choice from the begging. 
    • Changed the trace that is going to the antenna. Now it has the correct impedance. 
    • Moved some components around to have cleaner look. 

    More or less that were the changes. Thank you for reading my logs. 

    Cheers,

    Mitko

  • “A superior pilot uses his superior judgment to avoid situations which require the use of his superior skill.”

    Dimitar03/05/2022 at 22:10 0 comments

    This is the first version of the PCB. I put up the extra money to make it white. I figured it would look more like paper. It didn't. It all went down hill for the white PCB.

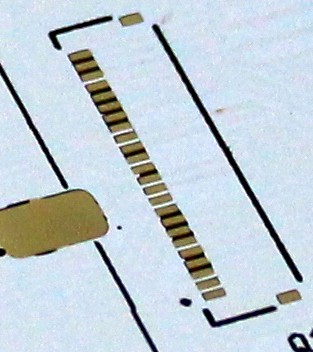
    The white solder mask seems to come off very easily. You can see it on all fine pitch components. For example the flat flex connector footprint.  

    I did not make a big deal of it at first. But when the soldering stared. I got a lot of solder bridges. This meant putting a lot of flux. 

    Which brings me to the next point. Every little stain on the board is super visible. At one point it drove me crazy. I had to soak everything in alcohol to clean it. 

    But wait, there is more. If you over heat the white solder mask (may be you had a lot of solder bridges to fix), it kind of turns yellow / brownish. The effect is done with the help of my hot plate @ 250C. To be honest I did let it on the heat a bit more. But this could easily be done with hot air. So now you know. 

    May be the green board also change color but it is not so obvious. What ever lets move on. 

    Next thing I started to add components. First was the LDO. To test it I put two wires where the battery would have been and powered it using my bench power supply. I had 3.3V - perfect. 

    Next I installed the MCU with all of its bells and whistles. I could connected to it with the debugger and run some code. Yeah baby!

    The QSPI flash (SPI in my case) and the RTC were next. Both work from the first time.

    Next on the list was the charger. I copy the exact circuitry from the eval board and was not surprised that it was okay also.  

    At that point I ran out of luck. I tested the e-paper display and it did not work. Sh*t... The radio part of the build failed too. Double sh*t. 

    It was very important to fined out what was wrong with the board and fix everything before I spend money for revision 2.0 

    Lets start with the radio part which was surprisingly the easier of the two.

    The first thing I thought was the problem, was the low frequency crystal. It was marked optional on the provided examples. Soo I deleted it. It turns out that, it is a really good idea to have one if you had BT, but not crucial. I configured the MCU to use the internal RC oscillator for the radio. Still no bueno.

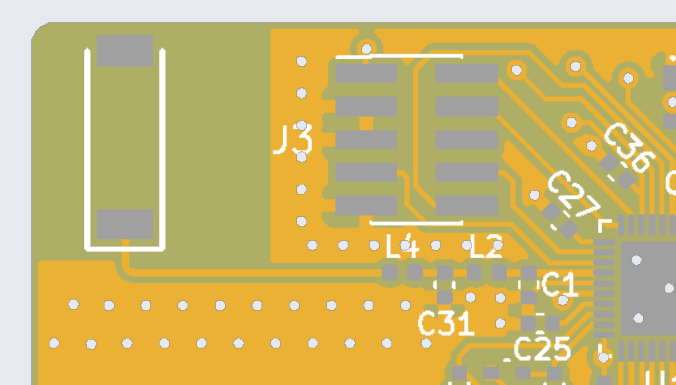
    The problem was more annoying. I used the impedance calculator from my PCB manufacturer. This calculator was waaaay off. The track in the picture above is just too narrow. I made some research and found how to calculate it. We are so spoiled with all the tools we have. I will do my own homework from now on. 

    Next was the display. 

    I have changed a number of components from the example schematic in the datasheet. No surprise there.

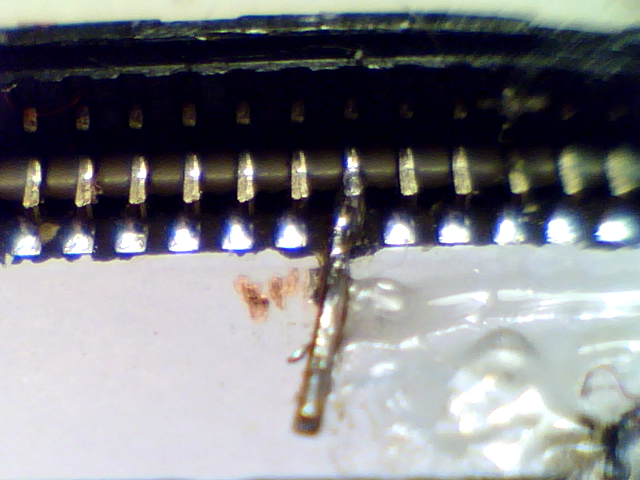
    • First thing wrong was that number 1 pin on the display was not number 1 on the connector. I took my microscope and looked inside the flat flex connector. It had pins on the top and bottom. So just turn the display around and connected it. 

          But still no image. I thought I have burn the display. I put it on the Pi HAT and it ran. Lucky for me,        that was not the only mistake I have made.

    • Looking back at the schematic I have forgot to connect the GND pin. To paraphrase the title of the post. A superior engineer uses his superior design skills, so he does not have to use his superior soldering skills. Unfortunately I don't have superior design skills and had to use my dodgy soldering skills to fix this. I scrape the solder mask (that was super easy as we know already) to expose the GND plane and with a small wire I connected the pin to ground. 

         Connected everything everything up and nothing. No image. Spicy!

    At this point I figured I have made bad selections for my components. Again I got my trusty Pi HAT and desoldered the inductor. Then put the inductor I have chosen on it. It ran. Good. Then I put the diodes...

    Read more »

  • Setup for success.

    Dimitar03/05/2022 at 19:48 0 comments

    Things I got in preparation for the development. 

    • nRF52833-DK this is development board for the nRF52820 
    • 2.7" e-Paper HAT - Waveshare
    • RV-3028-C7-EVALUATION-BOARD from Micro Crystal AG (this one I got for free from their website, the have free samples)
    • MCP73830L Evaluation Board
    • I had W25Q64J lying around, just put it on a adaptor board and got myself a dev board for it.

    Having those things, gave me the ability to work on the software, before I had my board made. One down side about working with dev boards is that jumper wires are messy. They can pop off and you have to double check connections often.   

    Another crucial thing about having all of this stuff is, that I will have at my disposal hardware I know works 100%. When I am not sure if the problem is hardware or software I can always go back to my mock up and test.   

  • The starting point.

    Dimitar03/04/2022 at 21:49 0 comments

    First lets talk about the design. The starting point for the shape, was a standard business card i.e. 8.9 x 5.1 cm. I looked at many e-paper displays. GDEW027W3 fitted well and was affordable. I had bought a HAT for Raspberry Pi with that exact display on it. Also it is available from my local electronic component supplier. All said that was actually not the perfect choice. I found a flexible display that is the same size, but thinner and has better resolution. Unfortunately it was too expensive and not readily available. 

    I went for 1 mm thick PCB. I was afraid that 0.8 mm board would flex too much and break the the display. I have decided to round the edges of the board to protect people from getting hurt. Also the sharp corner can get stuck in your pocket, when trying to get the card out.

    The nRF52833 DK, that I got  for developing software, had it's USB ports indented. I thought that was very clever and decide to do the same for both USB and flat flex. This way I eliminated  two snagging hazard. Also the connectors themselves are very low profile 1mm for the display and the USB is middle mounted. 

    The LP103053 battery is just 1mm thick as well. The down side is its low capacity. I have chosen a low profile buttons for nav. The debugging port is the same as the port on the nRF52833. This made my life easier. I was not afraid of pulling wires, bad connections or clips popping off. Also the debug connectors are keyed and you can't connect the cable backwards. The down side is that it had to be removed after programming the final PCB. 

    This is why the board has that shape.

View all 7 project logs

Enjoy this project?

Share

Discussions

pdalover wrote 04/01/2022 at 09:13 point

This is a very interesting project.

If you could add a touchscreen (e.g. https://www.good-display.com/product/259.html) that would convert the device into a miniPDA as a modern replacement for Xircom REX 6000. This also would fix the need for more buttons.
I know that it would expand the functionality more than initially planned (as business card) but would be very cool.

  Are you sure? yes | no

Dimitar wrote 04/01/2022 at 19:30 point

Hello pdalover,

Great Idea. There is a touch panel available for this display. I would order one and make some demos. 

Cheers,

Mitko

  Are you sure? yes | no

digiLeaf wrote 03/11/2022 at 23:51 point

You know one possible idea is to have something where if someone else had a similar device, you could quickly exchange business card info by being near each other or at a press of a button. Or a way to provide a way to sync contact to someones phone, like a Barcode generated that they scan. I love it though. ^_^

  Are you sure? yes | no

Dimitar wrote 03/12/2022 at 16:51 point

Hey @digiLeaf,

this is really cool idea. Most defiantly I will look into it. Easy exchange of contacts and a catalog of people you have met. Could be used in events as job fairs to locate people or show interest. 

On my version of the eCV I got QR code for sharing links. 

Thanks for your comment!

Cheers,
Mitko

  Are you sure? yes | no

teraz wrote 03/06/2022 at 14:14 point

Im not electronic ;( but in my opinion one pin can working with more than one button.

knob is very fast for input or moving on menu. Trouble is with enter and escape/up. meybe knob , can use other gpio port, pwm etc?

2 button is trouble with input data. 

What You think about adding irda? old irda for transfer data or normal light. 

one diode and light reader can transfer data from any dewice. for example blinking screen on phone or computer. and communications 2 way.

P.S. usb hiden in PCB is good idea, not breakable.

  Are you sure? yes | no

Dimitar wrote 03/06/2022 at 16:27 point

Hi teraz, 

You can put multiple buttons on one pin by using a resistor network and reading an analog value. Unfortunately the MCU does not have analog pins. 

Other possibilities would be an IO expansion IC. 

Keep in mind the design must be as slim as possible. So a lot of buttons knobs etc my not be the best.

The devices is Bluetooth 5.3 enabled. Also the USB works just fine. There are options for connecting to the card.

Cheers,
Mitko   

  Are you sure? yes | no

teraz wrote 03/05/2022 at 08:45 point

I need more buttons or 2 buttons and knob/joystick

what You thing about fuzix system?

  Are you sure? yes | no

Dimitar wrote 03/05/2022 at 20:35 point

Hi teraz, 

Unfortunately there are no more free pins. But the idea is good. If in the future I redesign with MCU with more IOs would defiantly add more buttons. 

On the fuzix system, I am not familiar with it. For now I am trying to get Zephyr OS working on it. 


Thank you for the comment.

Cheers,
Mitko

  Are you sure? yes | no

Similar Projects

Does this project spark your interest?

Become a member to follow this project and never miss any updates