STORY
Do you want to build an IoT-enabled home monitoring system that can measure environmental parameters and also detect intrusion but don't know where to start? This easy tutorial will deliver everything you need with only two major components: a Raspberry Pi and a Sparrow Wireless Sensor Node kit. No soldering, and minimal wiring needed!
With this system, you will be able to remotely monitor and log temperature, humidity, pressure, luminosity, IR and UV indexes and also detect intrusion. The system is also extensible, you will be able to add multiple wireless sensors to your home, monitoring every room in your house or outdoor parameters.
For this project you will need a RaspberryPi, two Sparrow Wireless Sensor Nodes and two Sparrow Nest programming boards. Also, if you want intrusion detection to work, you will need a PIR sensor.
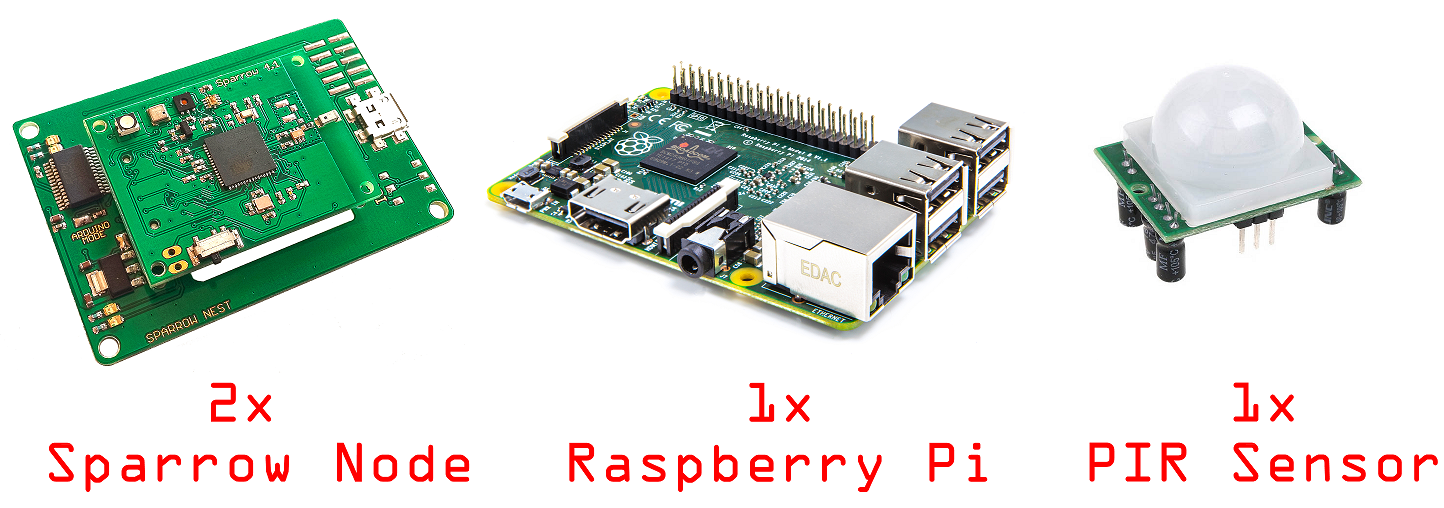
Sparrow Nodes
First, you will need to install the Arduino IDE and also the patch to make it work with the Sparrow nodes. You will find everything you need in this tutorial.
Each Sparrow node has integrated sensors for temperature, pressure, humidity and light levels, so we will need to write a small program that periodically reads these values and sends them through the serial port.
While it's not mandatory, it would be a good idea to check out the basic tutorials here in order to get accustomed to the sensor node.
For this project, you will need to install the following libraries for the Arduino IDE: SHT2x for the temperature/humidity sensor, Adafruit's Si1145 for the light sensor and MS5637 for the barometer/altimeter.
We will also be using the SparrowTransfer library for the wireless transmission of data between the two nodes. There is also a tutorial for it here.
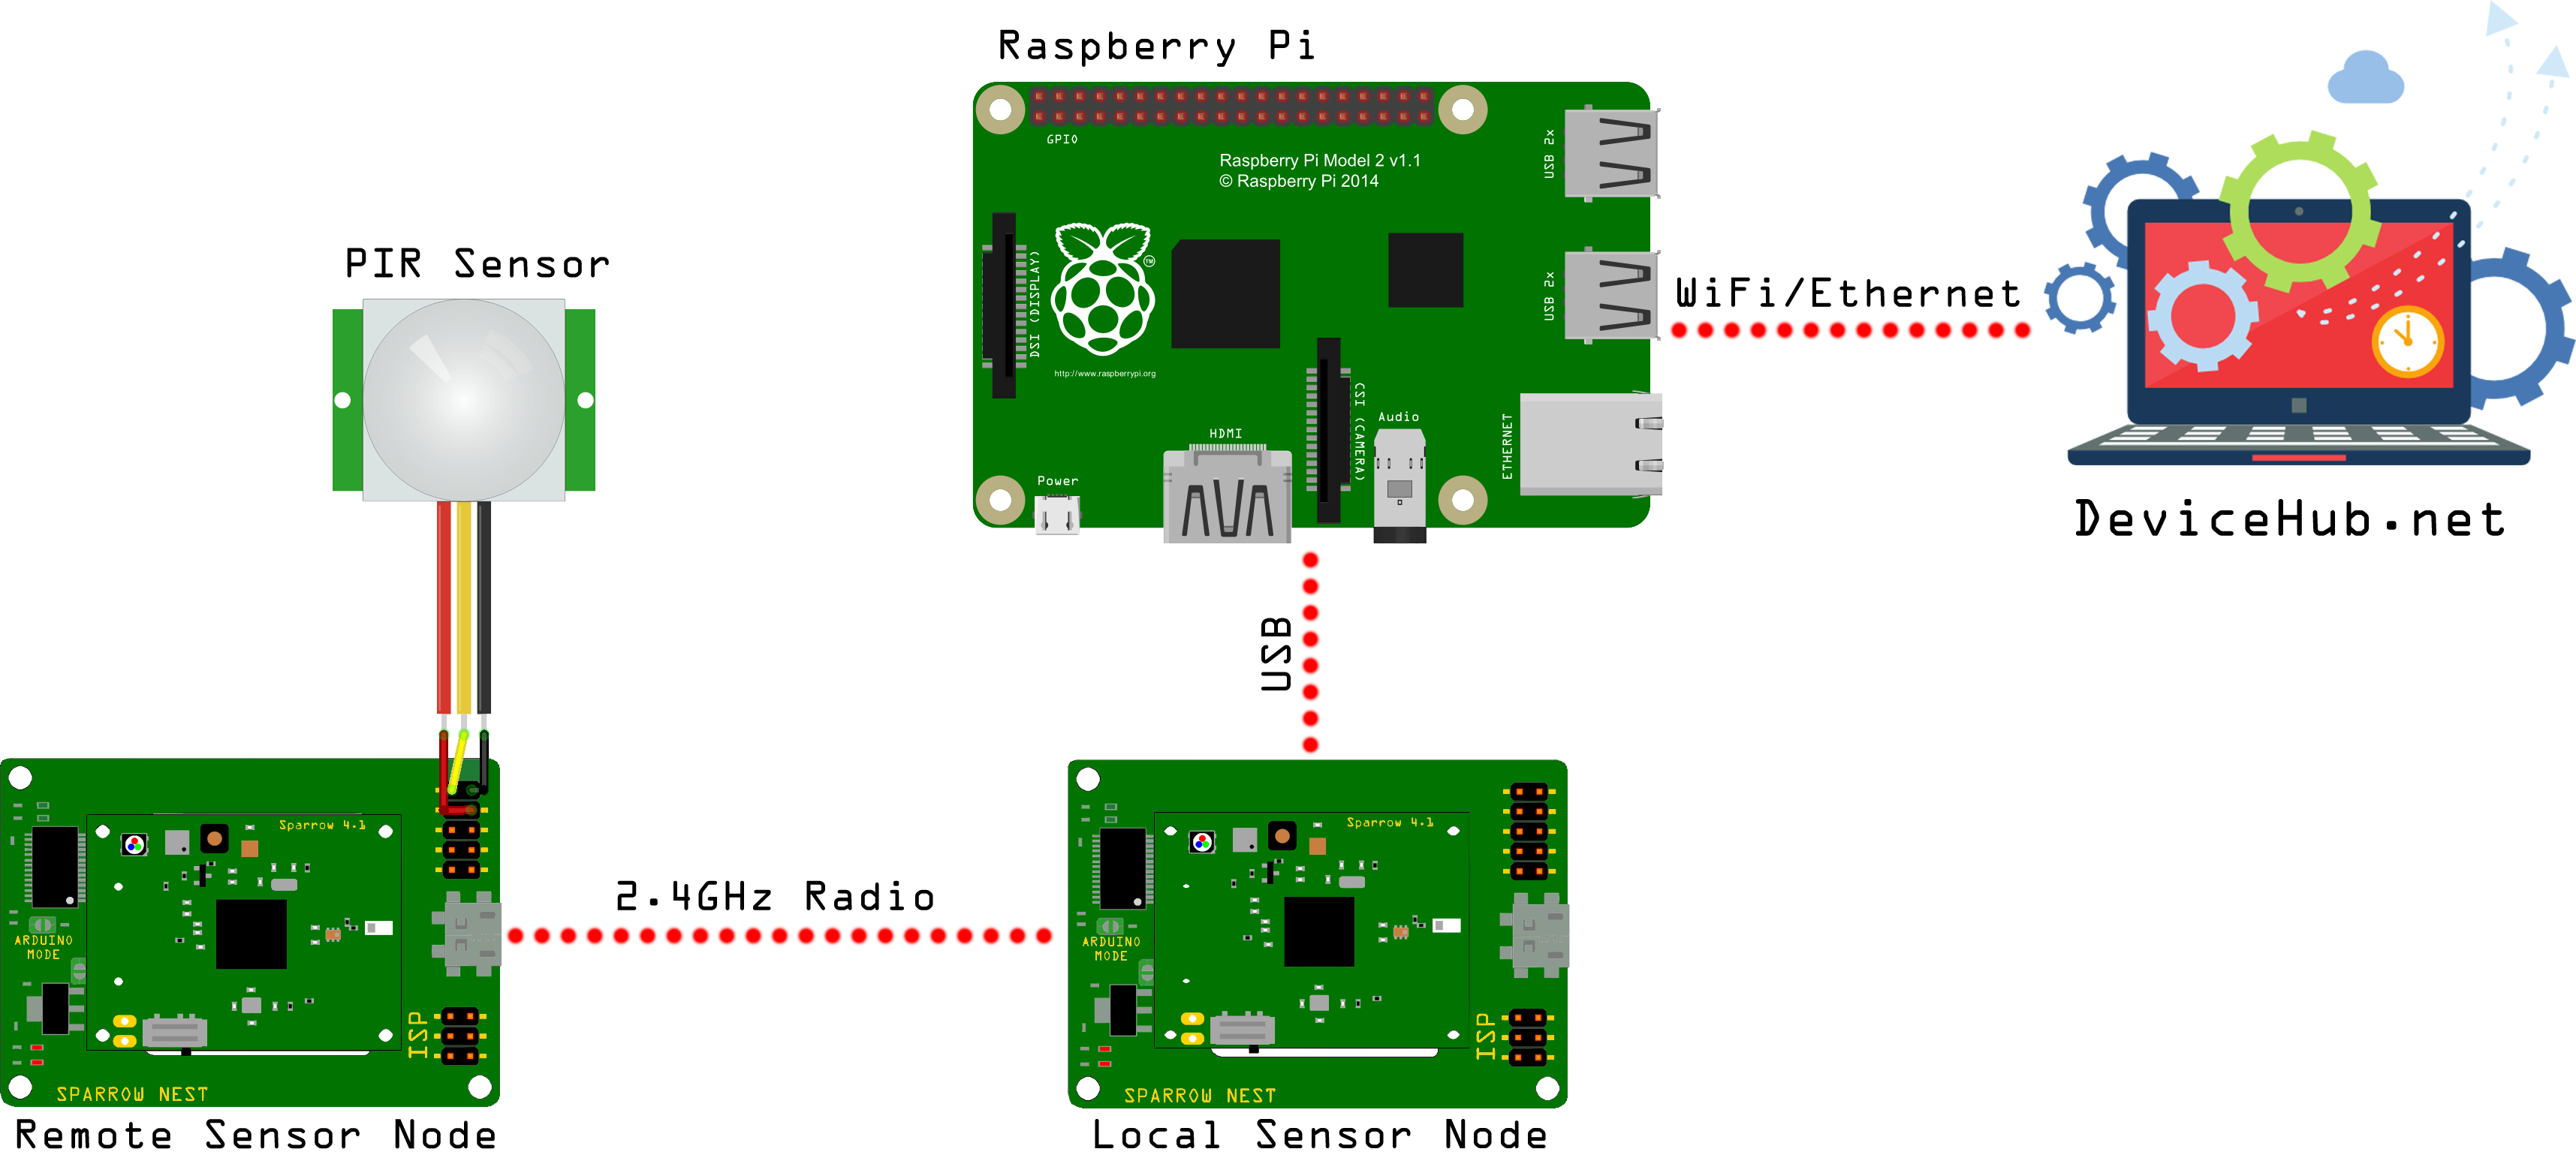
The project configuration will be the following:
- a remote sensor node with the PIR attached to it, sending presence data
- a receiver node, measuring also environmental parameters (temperature, humidity, light etc.) connected to the RaspberryPi
- RaspberryPi connected to the Internet and sending all sensor data to DeviceHub
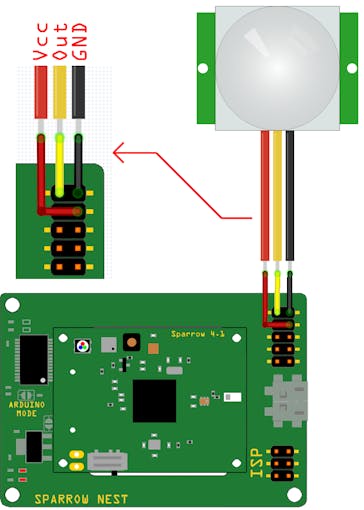
Connect your Sparrow node to your computer through its Sparrow Nest adapter. Also, if you have the PIR sensor, connect it to the board like this:
Now, let's write a simple program on the Sparrow node that will read the PIR state, the temperature and then send them through the radio transceiver:
#include "SparrowTransfer.h"
#include <Wire.h>
#include <SHT2x.h>
#define DEBUG 1
//create object
SparrowTransfer ST;
struct SEND_DATA_STRUCTURE{
 //put your variable definitions here for the data you want to send
 //THIS MUST BE EXACTLY THE SAME ON THE OTHER SPARROW
 uint8_t presence;
 float temperature;
};
//give a name to the group of data
SEND_DATA_STRUCTURE mydata;
int redLedPin = 8;              // red LED
int greenLedPin = 11;           // green LED
int inputPin = 18;              // choose the input pin (for PIR sensor)
int pirState = LOW;             // we start, assuming no motion detected
int controlPin = 7;             // sensor on/off control
uint8_t detect(){
 int val = digitalRead(inputPin);  // read PIR input value
 if (val == HIGH) {            // check if the input is HIGH
     digitalWrite(redLedPin, LOW);  // turn LED ON
     return 1;
   }
 else {
     digitalWrite(redLedPin, HIGH); // turn LED OFF
     return 0;
   }
}
void blinkLED() //blinks the green LED
{
 digitalWrite(greenLedPin,LOW);
 delay(20);
 digitalWrite(greenLedPin,HIGH);
}
void setup(){
 pinMode(greenLedPin, OUTPUT);      // declare green LED as output
 pinMode(redLedPin, OUTPUT);        // declare red LED as output
 pinMode(inputPin, INPUT);          // declare sensor as input
 pinMode(controlPin, OUTPUT);       // declare sensor control pin as output
 digitalWrite(controlPin, LOW);     // turn on sensors
 delay(1000);
 Wire.begin();
 //start the library, pass in the data details
 ST.begin(details(mydata));
 mydata.presence = 0;
 mydata.temperature = -1.23; //default value to test if something is wrong
 digitalWrite(greenLedPin, HIGH); //start with all LEDs off
 digitalWrite(redLedPin, HIGH);
 #ifdef DEBUG...
Read more »
 Dan Tudose
 Nevyn
Nevyn
 Andrew Lamchenko
 valencia.ca