 Splendide_Mendax
-
1Introduction to AMB23
Ameba is an easy-to-program platform for developing all kinds of IoT applications. AMB23 is equipped with various peripheral interfaces, including WiFi, GPIO INT, I2C, UART, SPI, PWM, ADC. Through these interfaces, AmebaD can connect with electronic components such as LED, switches, manometer, hygrometer, PM2.5 dust sensors, …etc.
The collected data can be uploaded via WiFi and be utilized by applications on smart devices to realize IoT implementation.
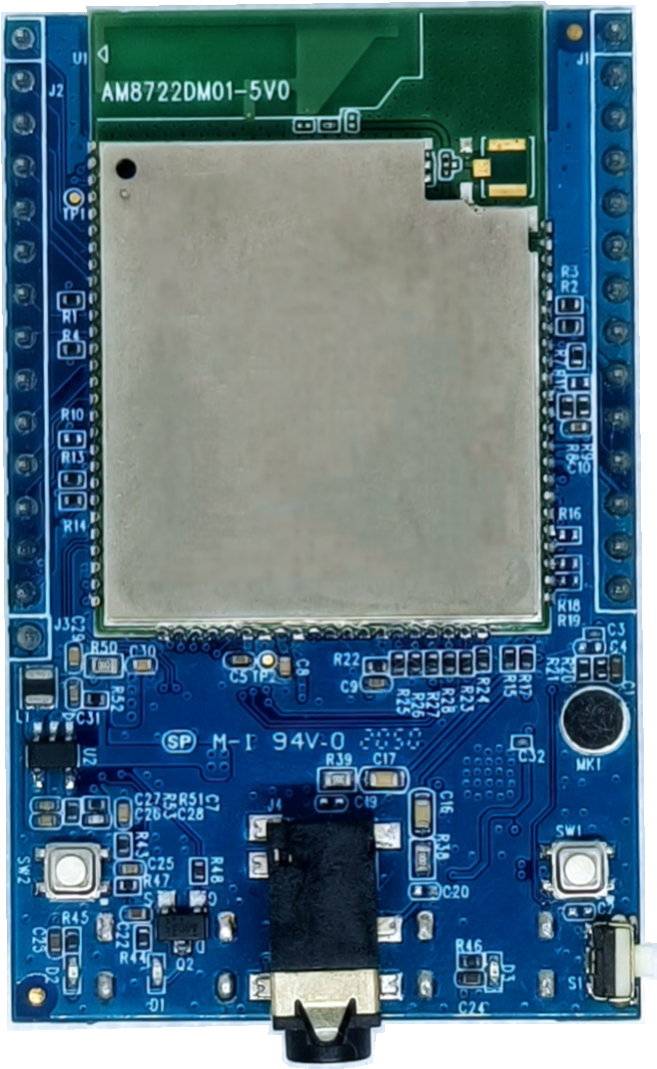
![get-start-1]()
It has a smaller size than Arduino Uno, as shown in the above figure.
![get-start-2]()
AMB23 uses Micro USB to supply power, which is common in many smart devices. On the bottom of the board, there is a micro SD card adapter in the middle of the board.
-
2Preparation
Insert a MicroSD card into the onboard SD card reader of the AMB23 board. And you can try to play with multiple available examples in our Arduino SDK listed in the following steps below.
-
3Example 1 Create Folder
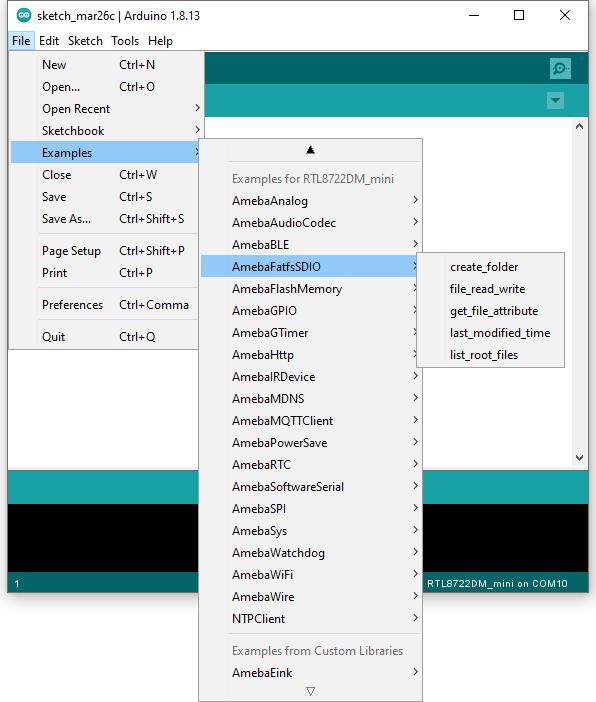
Open the example, “Files” -> “Examples” -> “AmebaFatfsSDIO” -> “create_folder”.
![get-start-1]()
Upload the code and press the reset button on Ameba once the upload is finished.
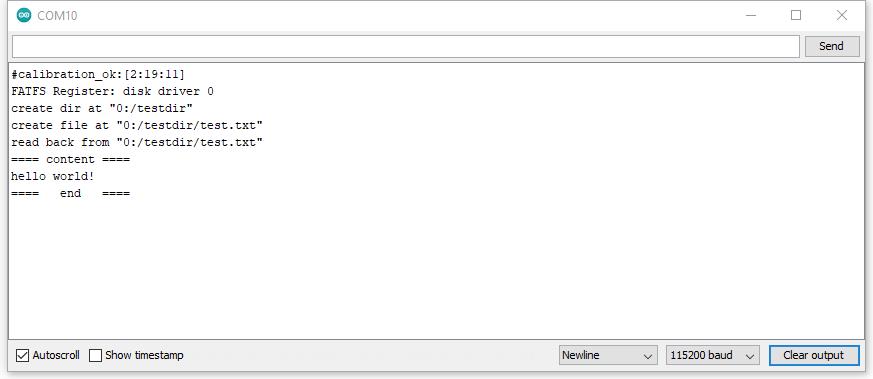
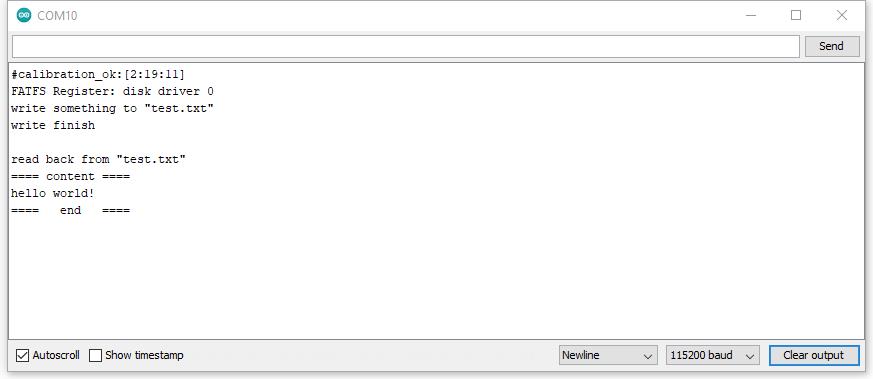
In the sample code, we first create a folder “testdir”, then text file “test.txt” with the content “Hello world!”. Read the file and print content to the serial monitor.![get-start-1]()
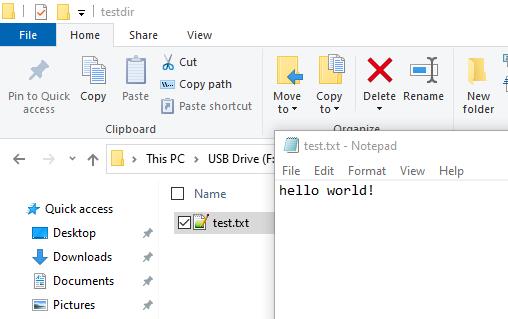
Next, insert the SD card into the card reader, and check whether the operations succeeded.
![get-start-1]()
-
4Example 02 File Read&Write
Open the example, “Files” -> “Examples” -> “AmebaFatfsSDIO” -> “file_read_write”.
Upload the code and press the reset button on Ameba once the upload is finished.
In the sample code, we create a text file “test.txt” with the content “Hello world!”. Read the file and print content to the serial monitor.![get-start-1]()
Next, insert the SD card into the card reader, and check whether the operations succeeded.
-
5Example 03 Get File Attribute
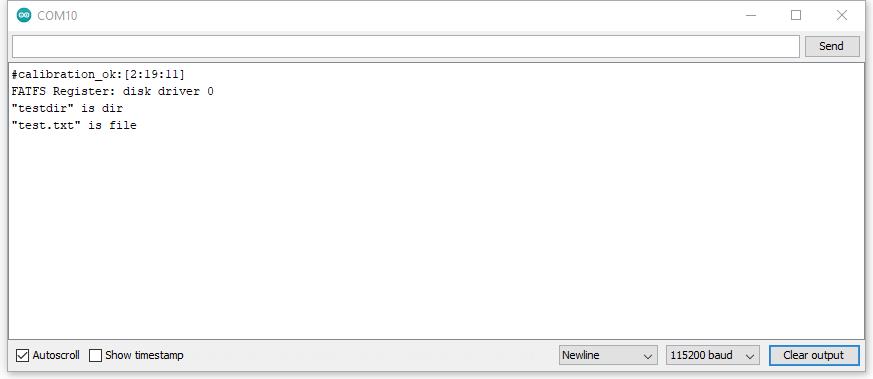
Open the example, “Files” -> “Examples” -> “AmebaFatfsSDIO” -> “get_file_attribute”. Upload the code and press the reset button on Ameba once the upload is finished. In the sample code, the system will print put all file attributes to the serial monitor.
![get-start-1]()
Next, insert the SD card into the card reader, and check whether the operations succeeded. In this case, we already know the attribute should be folder “testdir” and text file “test.txt” by referring to the above pictures.
-
6Example 04 Last Modified Time
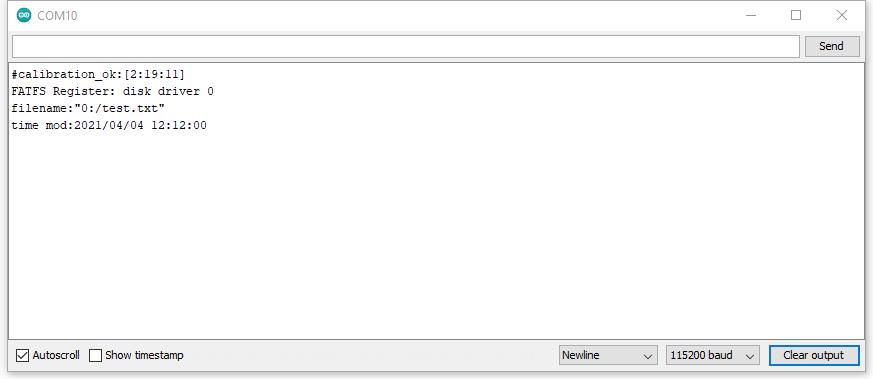
Open the example, “Files” -> “Examples” -> “AmebaFatfsSDIO” -> “last_modified_time”. Upload the code and press the reset button on Ameba once the upload is finished. In the sample code, the system will print put the target file last modified time to the serial monitor.
![get-start-1]()
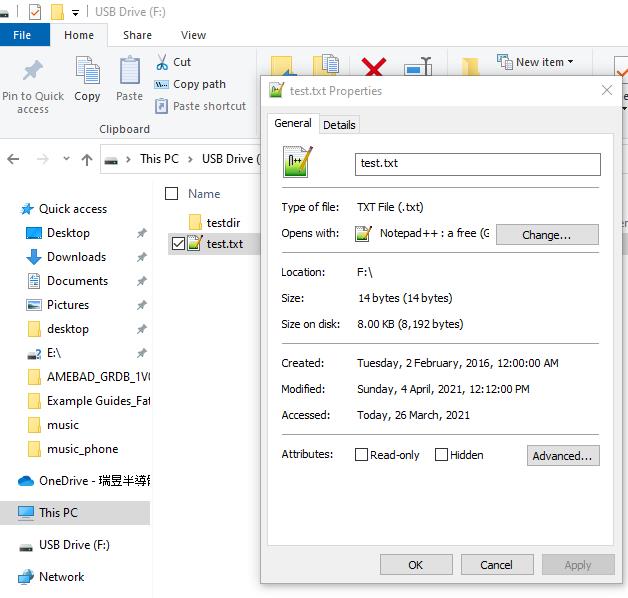
Next, insert the SD card into the card reader, and check whether the operations succeeded.
![get-start-1]()
-
7Example 05 List Root File
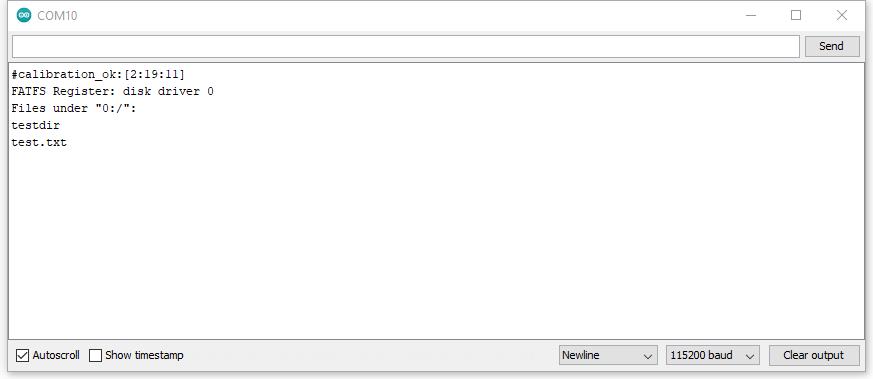
Open the example, “Files” -> “Examples” -> “AmebaFatfsSDIO” -> “list_root_files”. Upload the code and press the reset button on Ameba once the upload is finished. In the sample code, the system will print put all rooted files to the serial monitor.
![get-start-1]()
Next, insert the SD card into the card reader, and check whether the operations succeeded. In this case, we already know the root files folder “testdir” and text file “test.txt” by referring to the above pictures.
-
8More References
Please visit the following websites for more details about the board & other examples:
- AmebaIoT Official Website: https://www.amebaiot.com/en/
- AmebaIoT Official FB Page: https://www.facebook.com/groups/AmebaIoT
- AmebaIoT Forum: https://forum.amebaiot.com/
AMB23 Fatfs SDIO - File system in SD card
AMB23 (RTL8722DM MINI) contains an onboard SD card module that eases the file reading/writing to the micro SD card.

Discussions
Become a Hackaday.io Member
Create an account to leave a comment. Already have an account? Log In.