Close
0%
0%

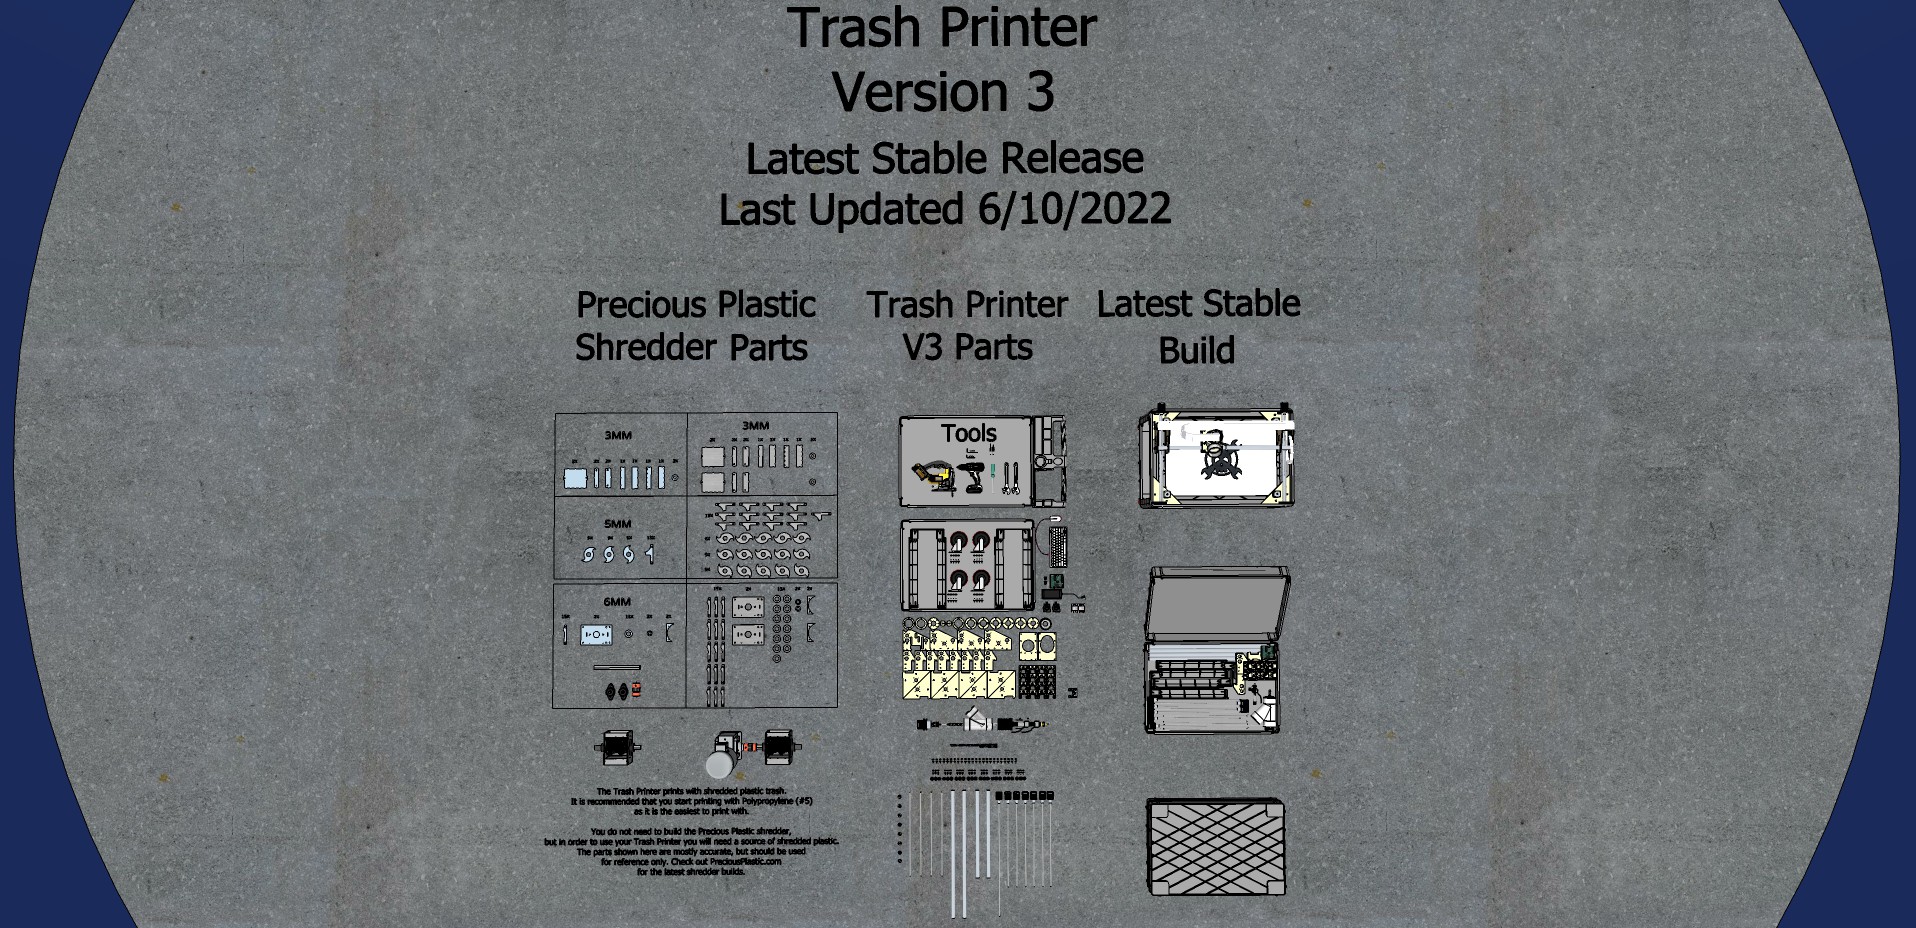
The Trash Printer - Version 3

An open-source, low-cost, large-format 3D printer that can print directly from shredded plastic trash instead of filament

Similar projects worth following
The Trash Printer is an open-source large-format 3D printer that can print new and useful things directly out of shredded plastic trash. Polypropylene (#5) works best, but I've also printed with HDPE and LDPE (#2 and #4) Together, these common plastics make up over 50% of all household plastic waste!

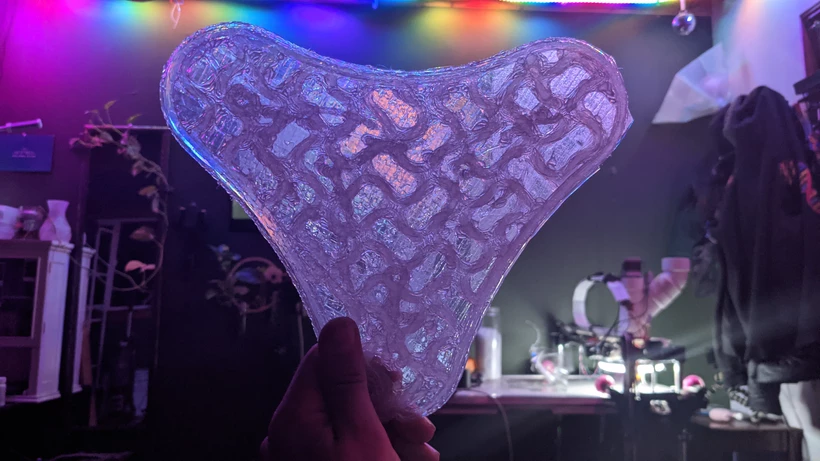
The parts aren't as detailed as typical 3D printed parts, but they're incredibly strong, light, and flexible; more comparable to parts made by injection molding than those made by most desktop printers. Skipping the filament-making step entirely reduces the recycling process to just two steps: Shred, and Print.

Version 3 Overview:

Estimated Build Time: 12 hours
Estimated Cost: $1000-1500 or $3000-3500 with solar power
Energy Cost: About 1 watt-hour per gram
Print Area: V3: 22" x 14" x 22" V3 Mini: 8" x 16" x 22"

The Trash Printer was inspired by the Precious Plastic movement, a global, open-source, small-scale plastic recycling movement! It started with 4 open-source machines - a shredder, an extruder, an injection molder, and a compression oven. Since the original designs were published in 2013, a global network of makers has emerged, modifying, improving, and developing the original tools, and adding their own!

The Trash Printer is my small contribution to that global open-source effort. Precious Plastic is one of the most inspiring projects that I know of, and it’s changed the way I look at plastic. For my entire life, plastic was a material that I felt I had zero agency over. I didn’t get to decide what got made out of plastic, and I didn’t get to decide what happened to it after it was thrown away. It felt like all I could do was feel bad about it.

What I love about Precious Plastic is that it’s not about telling people what they shouldn’t do, or  what the people in power should do, it’s about what we can do, right now, with our friends and the tools and materials we have around us. 

None of the Precious Plastic machines are particularly revolutionary- the technology has existed at an industrial scale for decades. But that technology has always been large-scale, requiring huge facilities, tightly-held patents, highly-specialized skills, and lots and lots of money. 

What Precious Plastic did that was revolutionary was take those basic machines and make them accessible to a much wider range of makers, lowering the barriers to entry, by making them smaller, cheaper, and fully open-source, so that people can get together with their friends, and actually DO SOMETHING about their plastic waste, instead of just feeling bad about it!

Like the other Precious Plastic Machines, the Trash Printer isn’t a particularly revolutionary machine. It’s certainly not the first or only pellet/flake extruder or large format printer - I was originally inspired by the RichRap extruder, and the SeeMeCNC Part Daddy, which showed me that printing from flakes instead of filament was possible. 

It’s also not  the only printer to print with recycled plastic. The PullStruder and PolyFormer Plus can print high-detail parts using recycled PET (#1), and the enormous Bloft MK2 (also inspired by Precious Plastic) can print huge parts! I've always wanted print a whole surfboard out of plastic trash!

When you're up against a challenge as big as global plastic waste, there really isn’t such a thing as competition. The “competition” is the plastic waste problem itself. The waste problem is distributed, and it requires equally distributed solutions, not one single machine or one idea.

Every new open-source tool we can add to our toolkit expands what YOU and YOUR FRIENDS can do with YOUR trash, and ultimately, that's what Precious Plastic is all about. It’s about what YOU can do about it. The Precious Plastic machines were the first plastic recycling tools that were simple and well-documented enough to make me go, “Hey, I could do that!”

My deepest hope is that the Trash Printer might do the same for you. My primary design goal for this entire project has always been to make the Trash Printer as easy as possible to build, requiring the simplest tools, the most widely available parts, for the least amount of money possible.

I’m not a 3D printing expert, and the Trash Printer was the first 3D printer that I ever built. If you are a 3D printing expert, you can probably tell.

When I first started building the Trash Printer, I knew nothing about how 3D printers worked, and "3D printer people" seemed to possess some magical, mystical, deeply technical knowledge that felt far beyond my understanding.

I didn’t know what I didn’t know, and didn’t know where to start. I didn’t even know what questions to ask. They would say things like, “all you have to do is flash Marlin onto a RAMPS,...

Read more »

Trash Printer -Version 3 -10-22-2022.zip

This is a zip folder of the complete documentation, it's the same files, but easier to download (and share)

x-zip-compressed - 38.18 MB - 10/23/2022 at 04:17

Download

Marlin 2 for Trash Printer V3 9-28-22.zip

x-zip-compressed - 5.86 MB - 10/10/2022 at 05:43

Download

Trash Printer V3 - 10-6-2022.skp

SSEYO Koan Play File - 26.54 MB - 10/10/2022 at 05:42

Download

B5 - Extruder Bottom Spacer (1x).stl

Standard Tesselated Geometry - 70.79 kB - 10/10/2022 at 05:42

Download

B6 - Extruder Bottom Spacer (3x).stl

Standard Tesselated Geometry - 57.50 kB - 10/10/2022 at 05:42

Download

View all 38 files

View all 56 components

  • The Story of the Trash Printer

    Sam Smith10/22/2022 at 18:14 0 comments

    This project is a totally redesigned new version of the Trash Printer, which I originally built as just one part of my entry to the 2018 Hackaday Prize, which was for a trash-powered-off-grid-recycling center. I did eventually get it working, 3 years later, but not in time for 2018 Hackaday Prize finals.

    This new design includes the original extruder head, but now also includes full documentation for the entire 3D printer gantry as well, so you can build the whole printer from start to finish!

    This new design is cheaper, easier to build, and makes bigger parts than my previous two versions, and is fully open-source!

    To give you context for what a breakthrough this new design is for me, it helps to understand how I got to this point. So gather around kids, and let me tell you the story of the Trash Printer.

    It all started way back in 2016, when I first built the Precious Plastic open-source plastic shredder, using money from my Patreon. The shredder allowed me to shred up plastic trash into small flakes, and it's what got me started on this whole wild project.

    In March of 2017, I built the Precious Plastic Extruder, and I was finally able to start extruding those shredded plastic flakes into... well, basically spaghetti. The Precious Plastic community has done some truly incredible things with this extruder, but making anything useful with it is time consuming and requires a lot of skill, and to be honest, I didn't really have the patience for it.

    But the long strands of plastic that came out of the extruder looked a lot like 3D printer filament, and it got me thinking. The day I built the extruder, I took it over to the CNC router in my friends' shop, and  I said, "I wonder if we could just strap this to a robot...?"

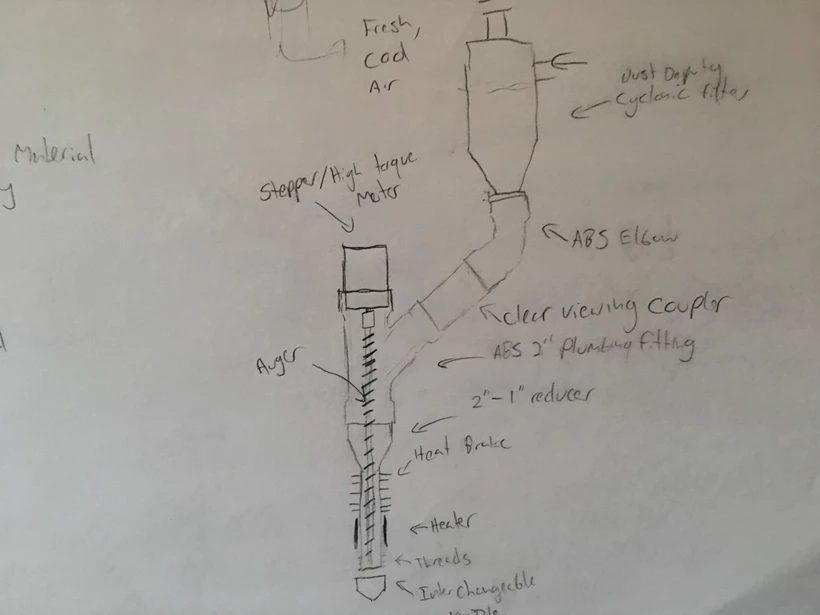
    In December of 2017, I started making design sketches, taking what I had learned from the Precious Plastic design, and putting it on a vertical axis so that it could act as a 3D print head

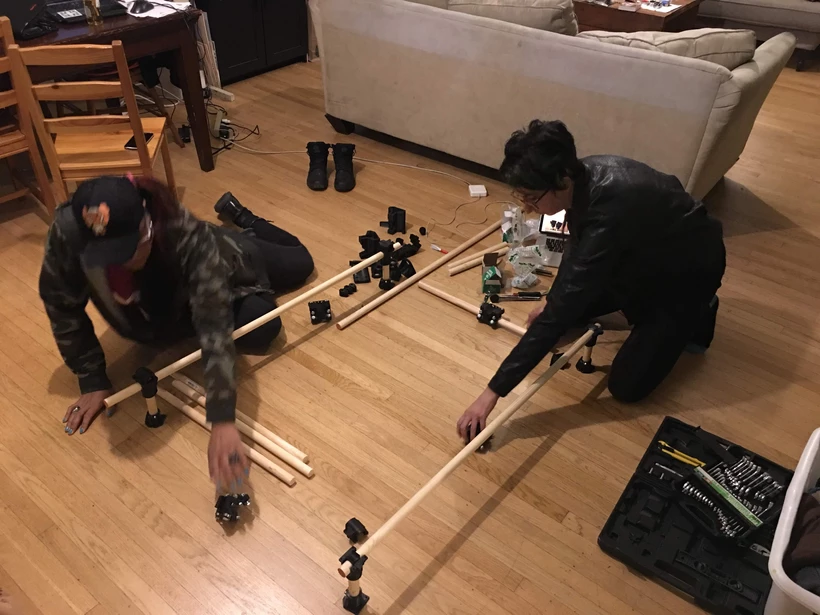
    In February 2018, I started asking my friends who knew about 3D printers how I might go about getting the extruder actually moving. At the time, I knew basically nothing about how 3D printers worked. With A LOT of help (Big thanks to Darcy N, Molly M, Jonathan D, and Nathaniel G) I 3D printed the parts to build the MPCNC (Mostly Printable CNC) designed by V1engineering. I picked that gantry because it was cheap, 3D-printable, and it used common, hardware store parts.

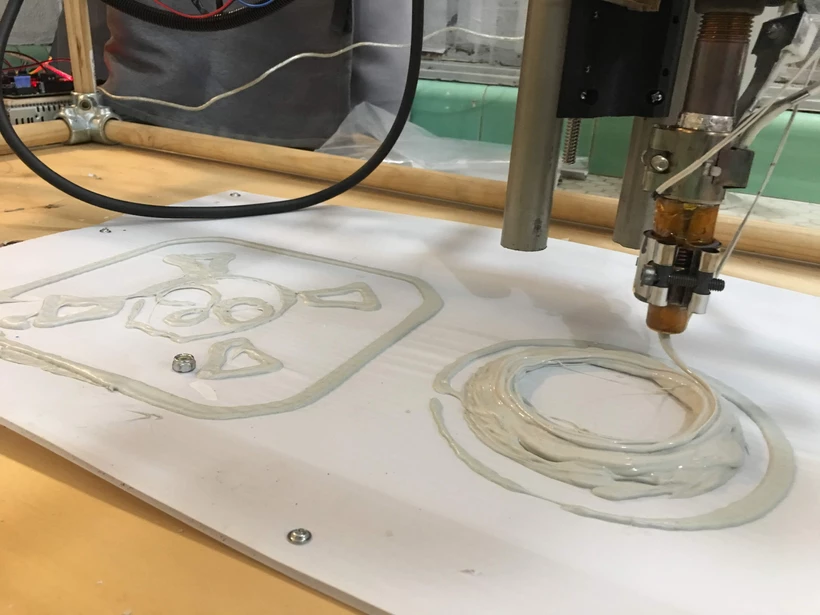
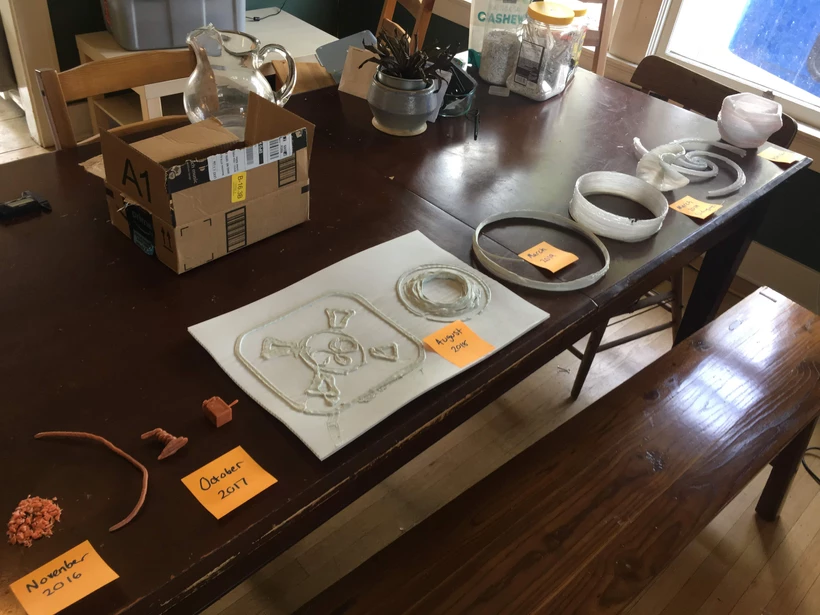
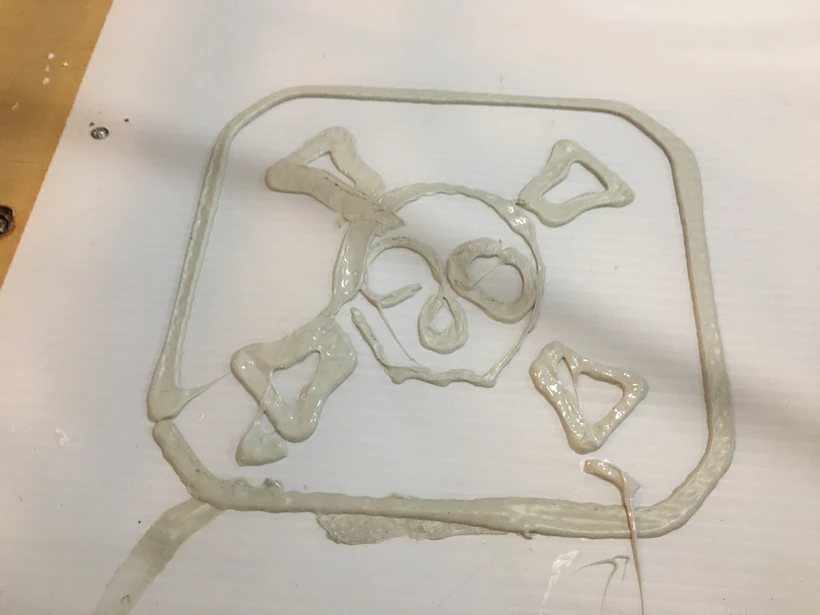
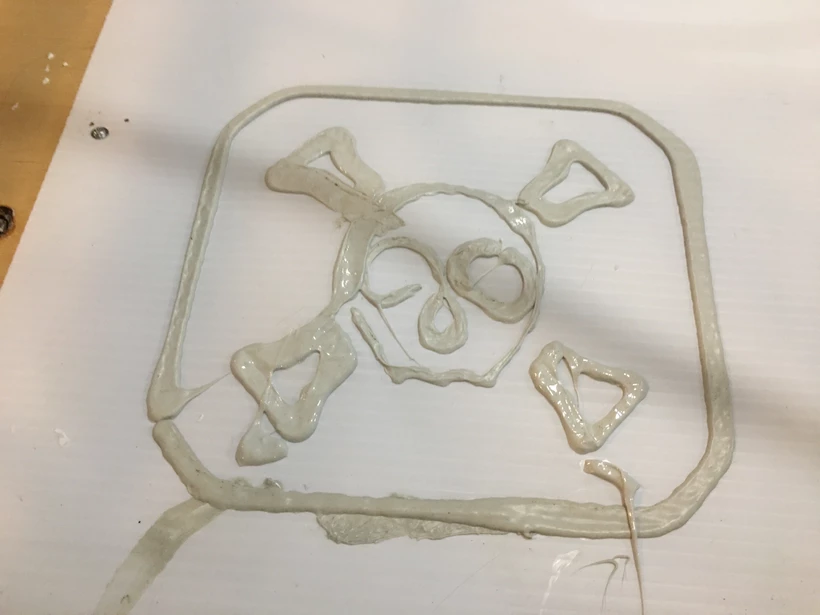
    My goal was to figure out how to build a fully functional Trash Printer by October of 2018, as just one part of my submission to the 2018 Hackaday Prize. It proved to be a lot more difficult to do than I had hoped, and by the time the deadline for the Hackaday Prize arrived, I had only succeeded in building the gantry and getting the printer moving for the first time, making these first, very basic shapes.

    The deadline came and went, and I failed to make it to the finals, and I gave up on it for a while. I wasn't able to even look at it again for a few months, but in the spring of 2019, I finally made my first actual prints, with actual layers, which were the first things you could really call "things".

    After that, my prints improved quite quickly, but I was still limited to pretty basic shapes, and the prints weren't very consistent. I started using shredded up polypropylene test tubes as my feedstock, which provided a nice, stable, clean material to test with, even though it wasn't really the same as using post-consumer household trash, which was always my goal

    One of the first things I ever printed was this little, 4" tall "wind turbine". It was a promising proof-of-concept, but hardly functional. Still, it did prove to me that the concept was workable, and until that point, I hadn't really been sure if what I was trying to do was even possible.

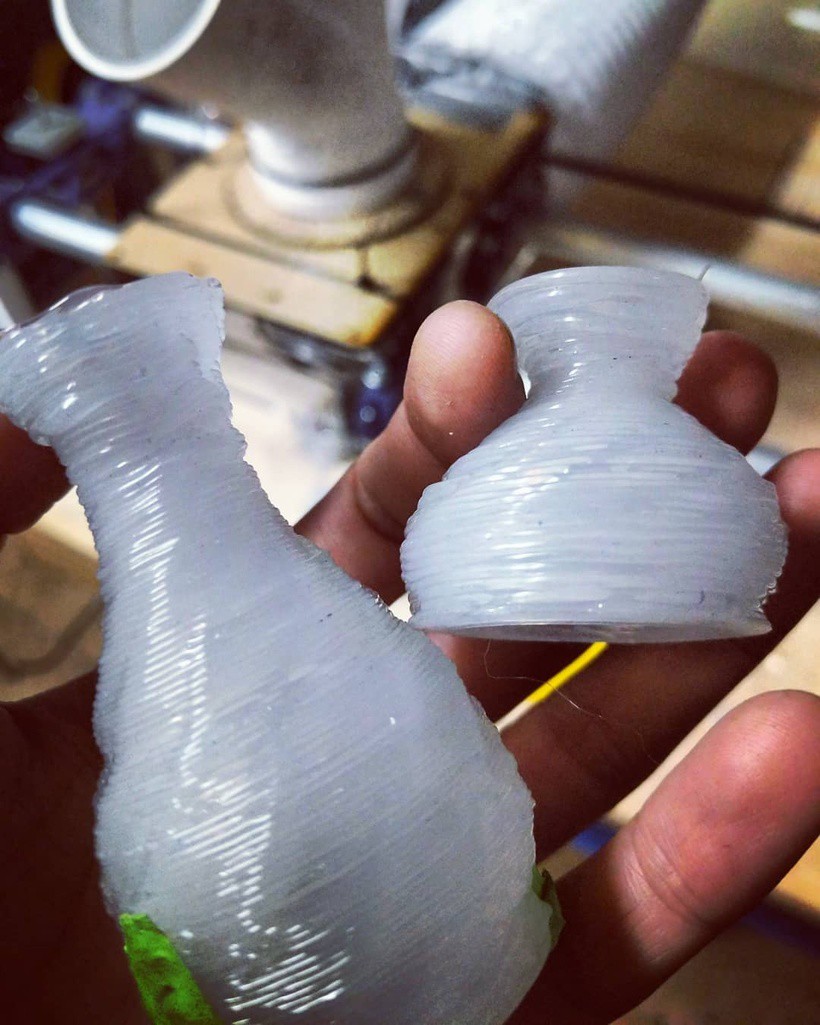
    By the Summer of 2019, I was printing simple vases pretty consistently, but not with real trash, and...

    Read more »

  • [backlog] September 30, 2022

    Sam Smith10/07/2022 at 23:50 0 comments

    [ Backlog - This log was adapted from my Patreon, to fill in the details about how this project has developed over the years. Check the link for the full post, and if you appreciate this project, consider supporting it! ]

    Hey there strangers! You haven't heard from me for a few months, but I've got some exciting updates to share! I've spent this whole summer getting ready to sell my house in Portland, so that I can live in the Magic Tool Bus full time, and devote more of my time and energy to building open-source trash eating robots!

    That process has taken up pretty much all of my time, and so I haven't had much progress to share with you. But this month, I've been getting ready to give the Hackaday Prize my very best shot, by making the documentation for the Trash Printer Version 3 as complete as I possibly can.

    I first got the Trash Printer printing real objects in the Spring of 2019, and so for 4 years I've known that real, useful objects can indeed be printed directly out of waste plastic. But being able to shred up and print my trash ultimately doesn't make much of a difference in the world - the Trash Printer is really only a "disruptively useful" idea if OTHER people can do it too, and that's where I've been stuck.

    The previous iterations of the Trash Printer, Versions 1 and V2, were both very difficult to set up, and required the use of third-party CNC gantries that I had modified to fit my extruder. That made making full, complete documentation for the whole project tricky. With the development of the Version 3 printer, I knew that I finally had a design that I could make full, complete, easy-to-follow documentation for, but I still wasn't quite there yet.

    Now, I'm finally getting there! The Hackaday Prize is judged in part by how well a project is documented, and whether or not other people can realistically replicate it. Winning the Hackaday prize (or any of the 5 finalist prizes) would not only mean that I would get a lot of money to keep hacking on the project, it would also mean that a TON of people would hear about it, and potentially want to build their own.

    My dream has always been to see the Trash Printer "go viral" - to have other people build their own and then modify and improve the design, so that together we can figure out what we can make out of trash, and build an open library of parts that we know are printable. If we all have more or less identical machines, then the parts that other people are able to print are parts that I know that can print too - we can just swap GCODE files!

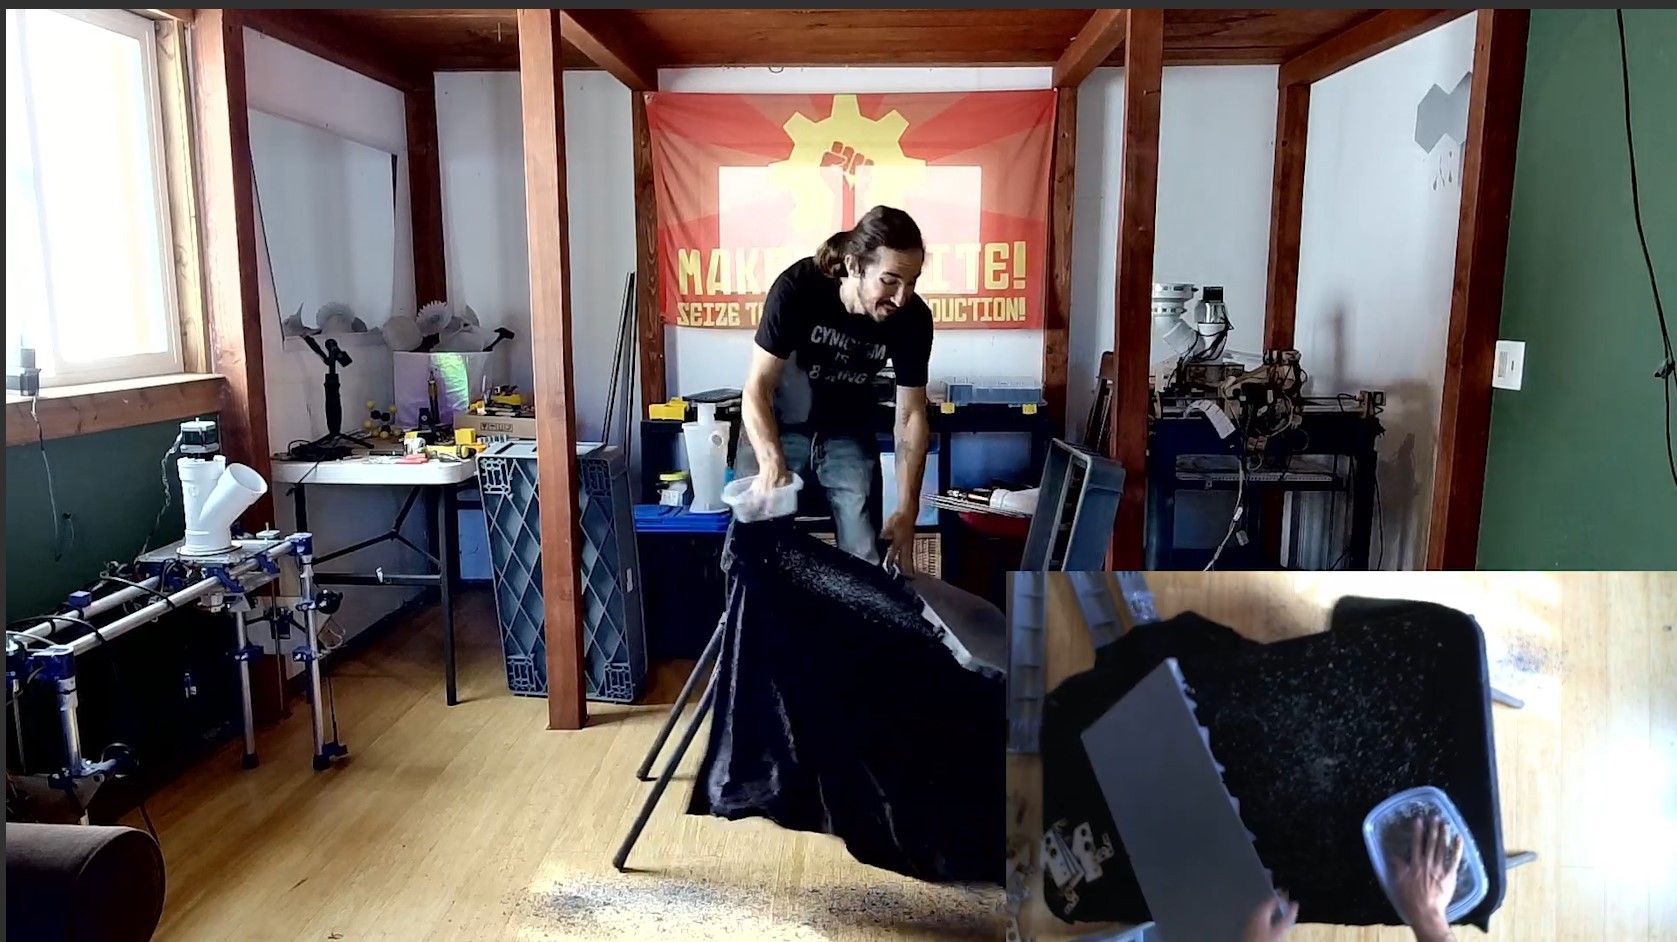
    I've been working on the Version 3 prototype since 2020, and so the one I have was built slowly, bit by bit, and I've forgotten a lot of the details for how I put it all together. So in order to make sure that other people can build one, I've been building a new one entirely from scratch, and livestreaming the whole process to Twitch.

    This is the first time that I've gotten my livestreaming setup working well enough to stream a whole build, and now that I've got that down, I'm going to start adding in live audio from the "Twitch" channel in the Patrons-only Discord, so that my Patrons can ask me questions as I build in real time.

    This new iteration of the V3 design is built around a smaller 16" x 30" service cart, instead of the original 24" x 36" version, so that I can fit it in the Magic Tool Bus and travel around showing it off and teaching people how to build their own. The parts required for the "mini" version are exactly the same, the only difference is the length of the leadscrews and rails.

    Livestreaming a build is a great way to make sure that I capture all the of the bugs and issues that I run into, and so that I don't skip any steps. It can also be a little embarrassing, like when my work table fully collapsed on day 2, but it keeps me on my toes and makes sure that everything I do is captured and automatically published, which keeps my perfectionism at bay.

    I'm currently about 80% done with the new build....

    Read more »

  • [backlog] June 30, 2022

    Sam Smith10/07/2022 at 23:37 0 comments

    [ Backlog - This log was adapted from my Patreon, to fill in the details about how this project has developed over the years. Check the link for the full post, and if you appreciate this project, consider supporting it! ]

    Those of you who have been following me for a while know that the Hackaday Prize is a big deal for me. Way back in the Spring of 2018, the prompt for the first round of the Hackaday Prize was "Design the best plan possible for the boldest idea you  can consider. No prototypes are necessary for this challenge, only pictures, charts and theory."

    "Game on!" I thought. So I pitched them the boldest idea I could consider - An entirely trash-powered recycling center that turns waste biomass into biochar and energy, and uses that energy to shred and print waste plastic into 3D objects, such that the system has a metabolism and effectively "eats" trash, just like a living organism.

    I dubbed this theoretical trash-eating robot idea "the Metabolizer", and it won $1000 and was selected as a first-round finalist, making it eligible to be considered for the grand prize. BUT, to win the grand prize, you needed to produce a working prototype. Pictures, charts, and theories were not enough.

    "Welp..." I thought. The theory was fairly sound. Biomass contains a lot of energy, and shredding and recycling plastics doesn't take all that much energy. "Trash" is made up primarily of recyclable plastics, and waste biomass that can be burned for energy, so if you collected enough trash, and figured out a way to generate a little bit of electricity and whole lot of heat from it, surely you could recycle at least some plastic waste into something new.

    But, "how do you actually do that?" was the $50,000 question, and at the time I didn't have a great answer. I spent the entire summer of 2018 trying to answer that question. In less than 6 months, my goal was to figure out how to generate electricity from biomass like cardboard trash and woodchips, and use it to power my Precious Plastic shredder and feed it to a 3D printer that would print directly from the flakes. I didn't know how to do any of it.

    By the time the October deadline rolled around, I had made some compelling progress, but I had definitely not come up with a working prototype.

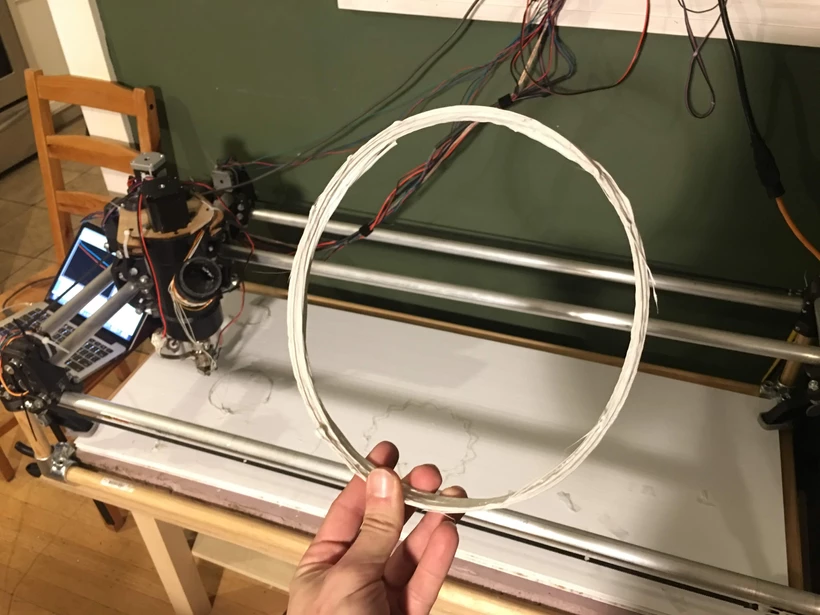
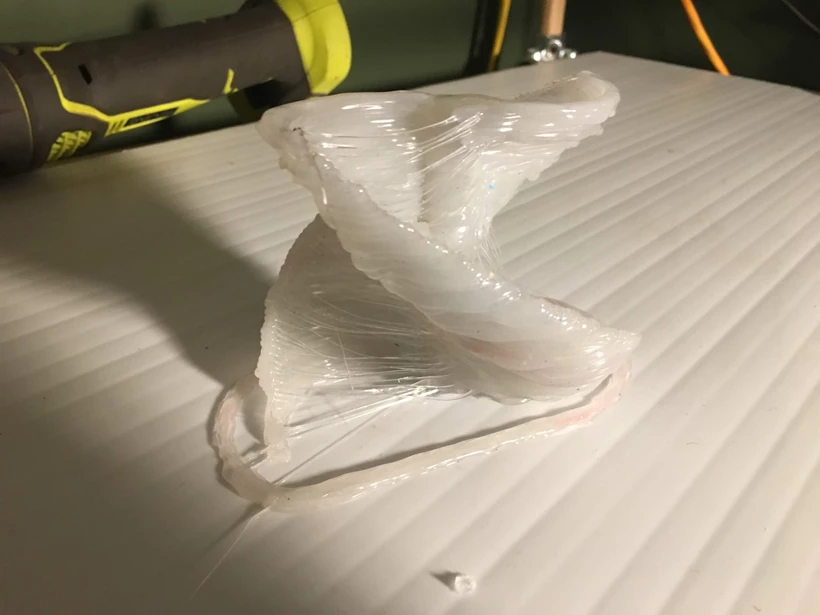
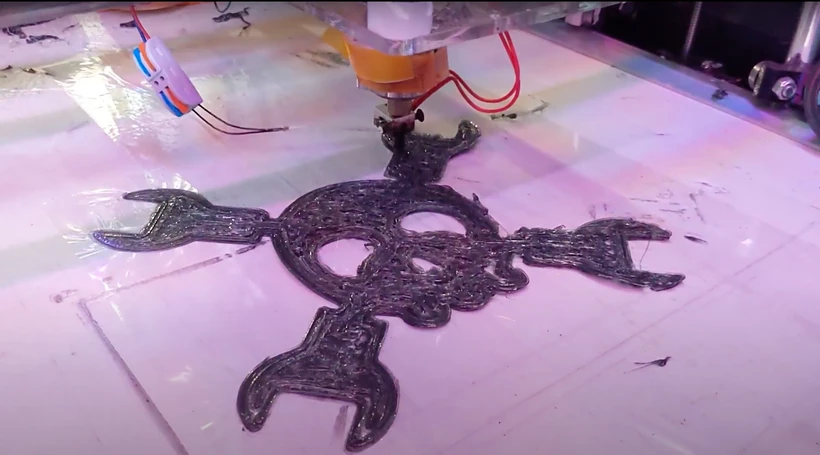
    This was the best print I had ever gotten out of the Trash Printer by the time the deadline came, and then went, in October 2018, and I wasn't selected as a finalist in the grand prize round.

    So, when I saw that the theme of one of this years challenges was "Reuse, Recycle, Revamp," I though that this might be my chance for a re-match.

    I submitted my full documentation for the Trash Printer Version 3, and yesterday I learned that I was selected as a finalist, and that the Trash Printer will be considered for the Hackaday grand prize this fall!

    So, game on...again!

    I want to thank all of my Patrons for making this happen! The only reason I've been able to do this is because I know that I can count on a monthly budget. I could not do this without your support. Thank you!

    Stay tuned!

  • [backlog] December 31, 2021

    Sam Smith10/07/2022 at 23:29 0 comments

    [ Backlog - This log was adapted from my Patreon, to fill in the details about how this project has developed over the years. Check the link for the full post, and if you appreciate this project, consider supporting it! ]

    I made a lot of progress this year, and reached a few major milestones. I've done my best to document that work as best I could, so that it can be resource for others. But the resolution of my documentation is still lower than I would like it to be.

    With open source hardware, the proof is in the pudding. Are people actually replicating your design? Because it's not really open source until other people can build it, and actually do.

    This year, my goal is to increase the resolution of my documentation.

    To that end, I've just created two shared Google Photo Albums, one for photos and one for videos, covering all of the major milestones of the project in 2021. Feel free to dive in to the nitty gritty. If that's what you're into, then here you go. It's raw and un-edited, but if you want details about how I'm doing this stuff, start there.

    If you've got questions about how it all works, I've also been working on finally building out a Patrons-only Discord server, where patrons can ask me questions about the systems and help me improve the documentation.

    This is something experimental that I'm trying out, and I may or may not have the capacity to answer every question, so don't subscribe if you want my undivided attention. But my goal is to have a place where people who are genuinely interested in learning about how these machines work and how to build them can talk shop and ask me questions, or offer ideas and solutions, and help me fill in the gaps in my existing documentation.

    My goal for 2022 is to start using the Discord server as a platform for streaming runs of the Metabolizer and Trash Printer on Twitch,  so that patrons can join the voice channel and ask me questions live while I work, but everyone can watch. Not sure how that will work, exactly, but that's never stopped me before!

    In September, for the first and only time this year, I ran the entire Metabolizer system, entirely off the grid, on solar power and trash power, for about 4.5 hours. The battery pack powered the reactor, which turned waste cardboard, wood chips, and amazon packaging into biomass gas, which I used to run a generator, and used the power generated from the gas to power the Precious Plastic shredder, to shred up waste #5 plastic, and then 3D print it into this cup. You can watch the 5-minute abridged video of that run HERE.

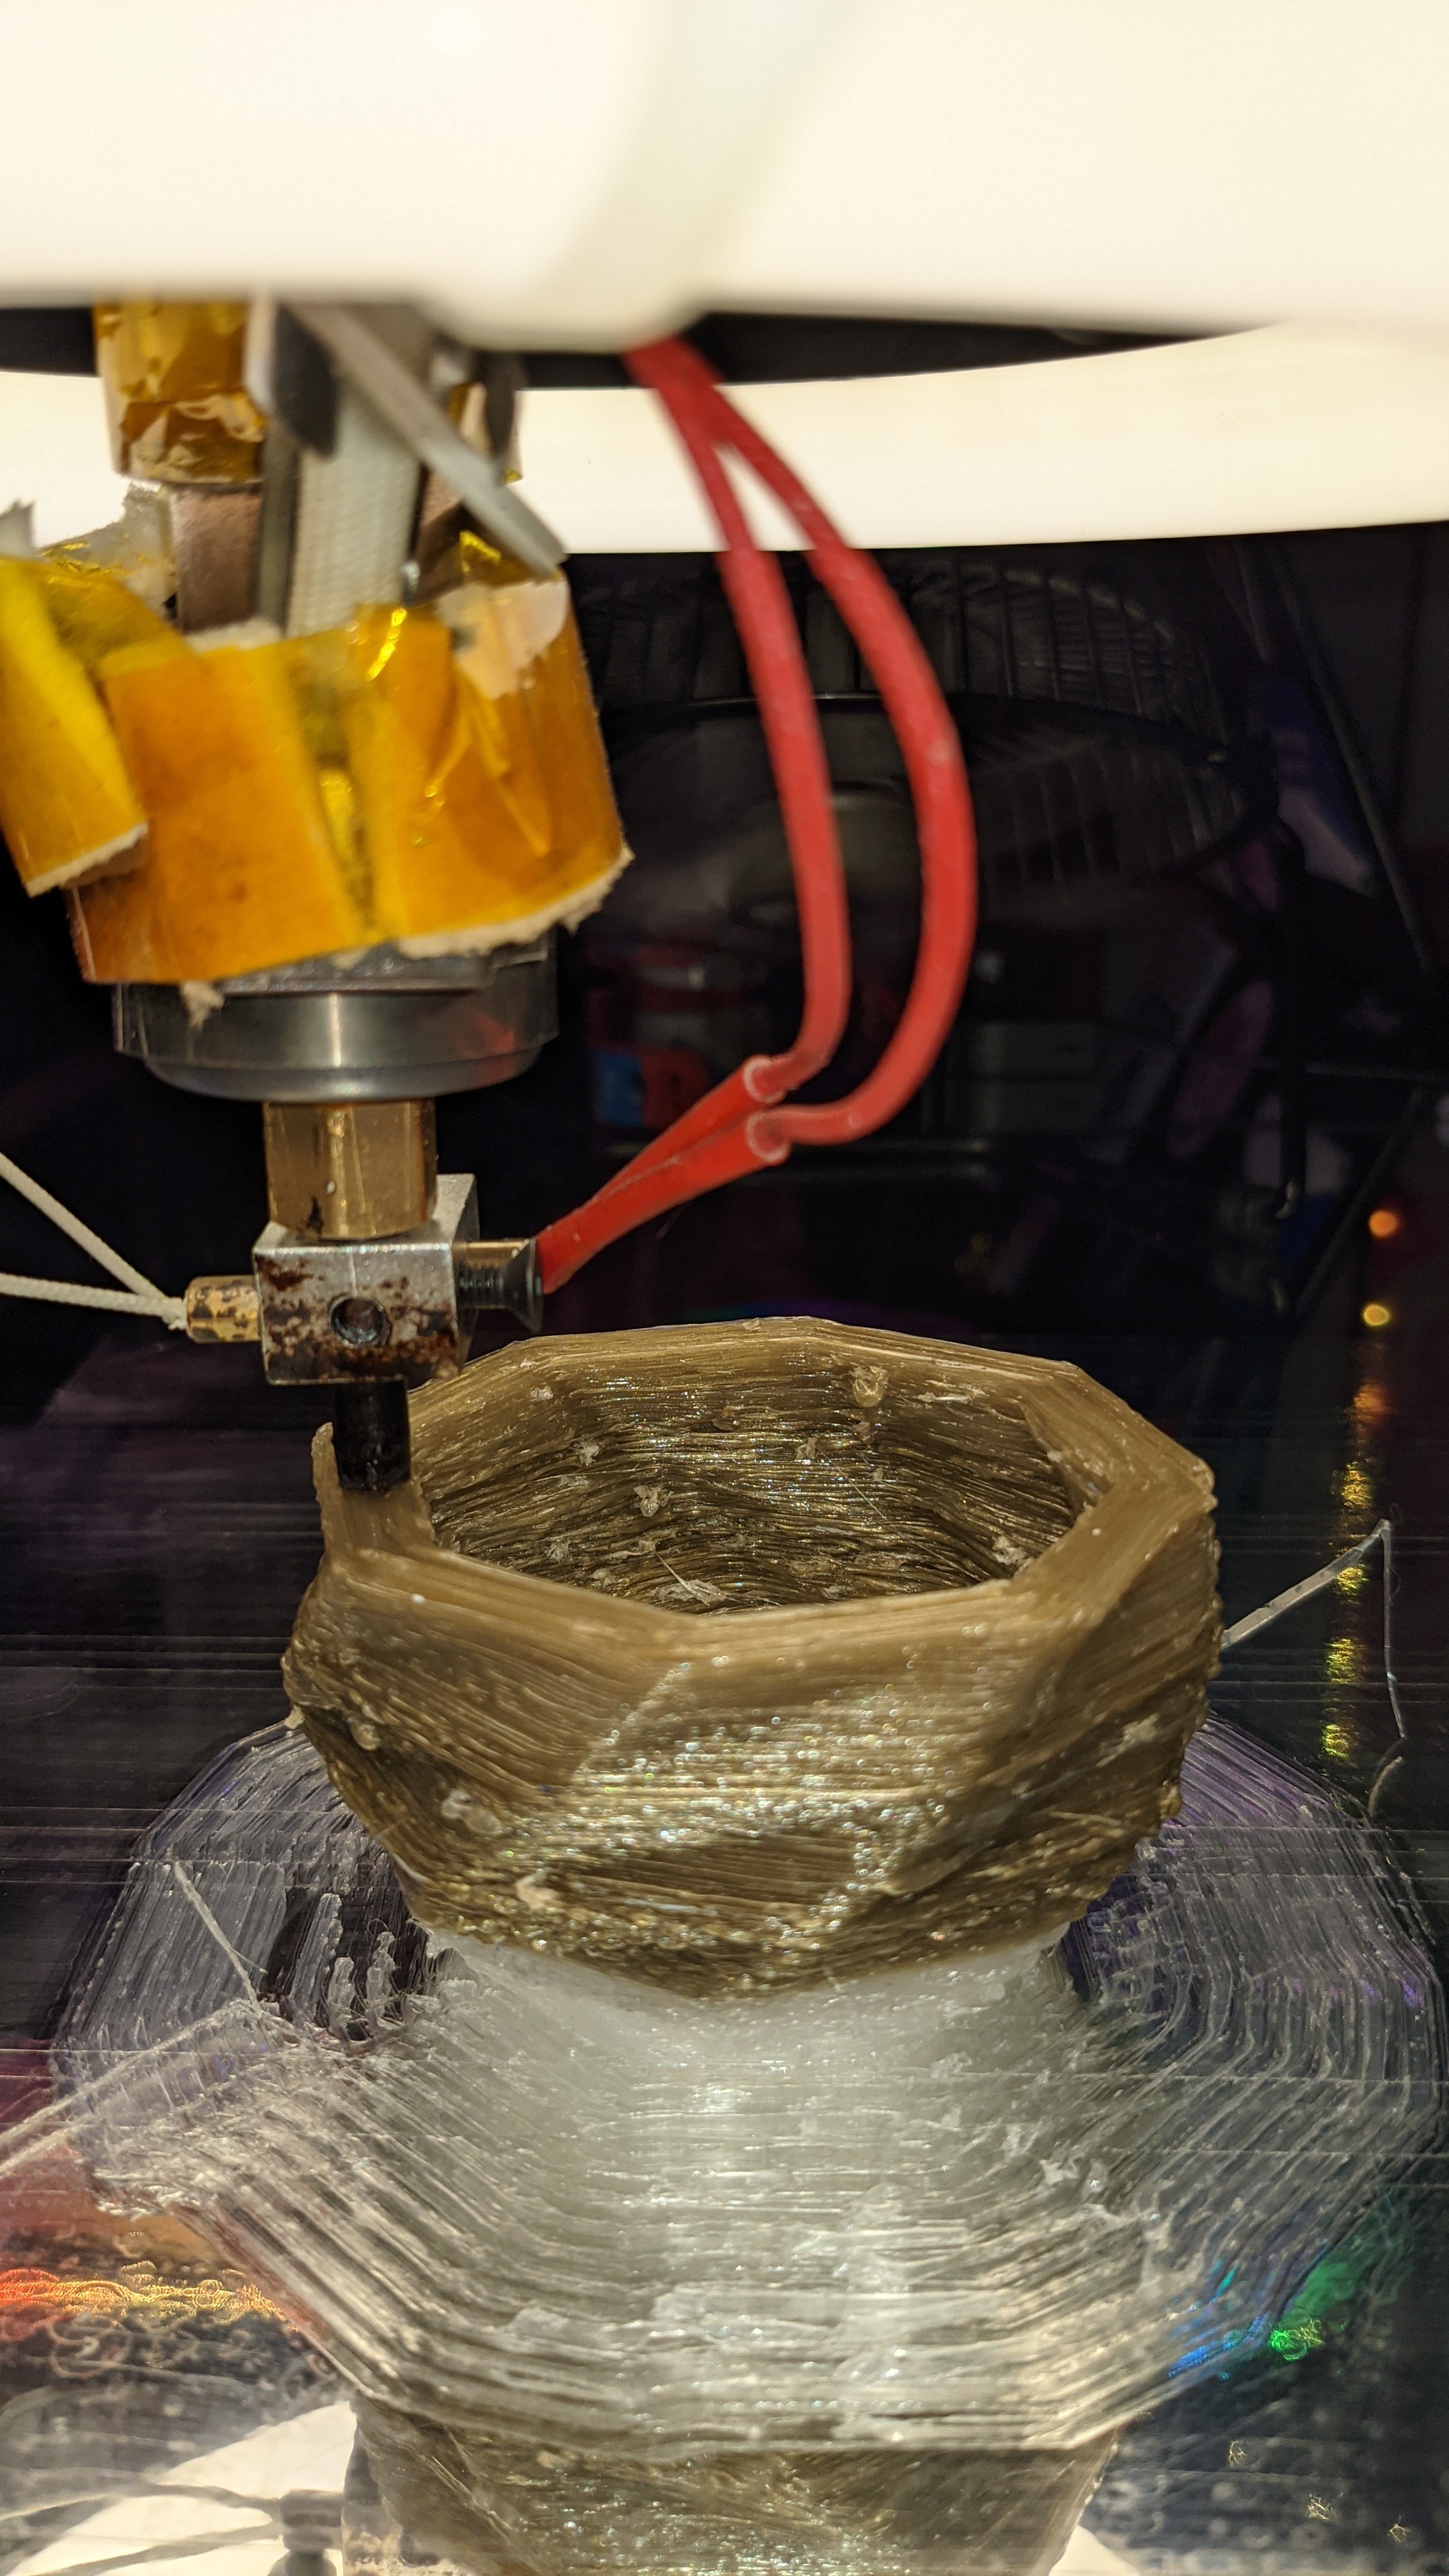
    This is the cup I printed off the grid, made with real trash, shredded with an biomass power, dyed black by a handful of char dust I threw into the hopper of the printer. Not my best work, but that's the first time I got it to work at all!

    In November, I accidentally broke the sieve plate on my Precious Plastic shredder, which filters the size of the shredded plastic.

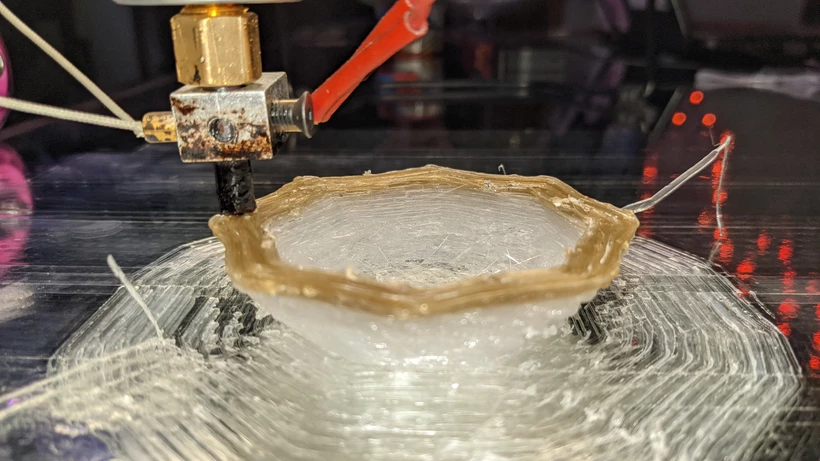
    Without it, I couldn't shred up plastic fine enough to print with, and I was running out. So I took the last bit of shredded plastic that I still had and I designed and printed a custom sieve plate out of trash, just to see if I could. It took me 3 tries to get it just right, but it not only works at least as well as the old metal one, but it just press fits right in there! And now if I want a finer shred, I can just make another one and drill smaller holes.

    That was a really good feeling. It was one of the first times I was able to make something that I actually needed, that actually works, out of actual trash. It really does actually work, at least that well. It may not be disruptively useful just yet, but it is definitely increasingly useful, and that's good sign.

  • [backlog] November 31, 2021

    Sam Smith10/07/2022 at 23:19 0 comments

    [ Backlog - This log was adapted from my Patreon, to fill in the details about how this project has developed over the years. Check the link for the full post, and if you appreciate this project, consider supporting it! ]

    I really didn't feel like I got much done this month until I looked back through my photos to make this post. It turns out I got a lot done! The transition into winter always catches me off guard. As it gets dark and wet, I have to shift my tinkering indoors. Part of how I've been coping with that transition this month, besides binge watching Downton Abbey, is by spending a lot of time experimenting with the Trash Printer.

    So naturally, I turned my coffee table into a Trash Printer. For years, I've been using a plastic folding table as the platform for the printer, which was cheap and portable, but I always had trouble with the bed being too uneven to get good first-layer adhesion, and without good adhesion, its really hard to get good prints. 

    Taking a tip from my friend Darcy over at the Trash Hackers Collective, the only other person in the world (so far) to independently replicate a Trash Printer, I started experimenting with just using packing tape. A lot of packing tape is polypropylene-based, which the plastic bonds strongly to, and the adhesive holds it firmly in place. Between the tape and the flatter, sturdier table, my print success rate went way up, and the overall print quality got better too.

    I ended up putting some glass down to protect the wood, and with the tape, it works great! Since then I've been able to make much more consistent prints that fail much less often! 

    So far, I've mostly been experimenting with this nice, clean translucent polypropylene that the Trash Hackers gave to me, that came from trash-bags full of one-time-use test tubes donated by a wine company that produces them as a waste product of their business.

    But here's the thing - it's called the Trash Printer, not the Highly Pre-Processed Industrial Waste Printer. The goal of this project has always been to be able to take real, actual trash as its feedstock, as unrefined as it may be. 

    The stuff I have been using is technically trash, but it's not really the same as actual household trash - the actual plastic items that actually accumulate in our homes everyday, like takeout containers, prescription bottles, coffee cups, and milk jugs.

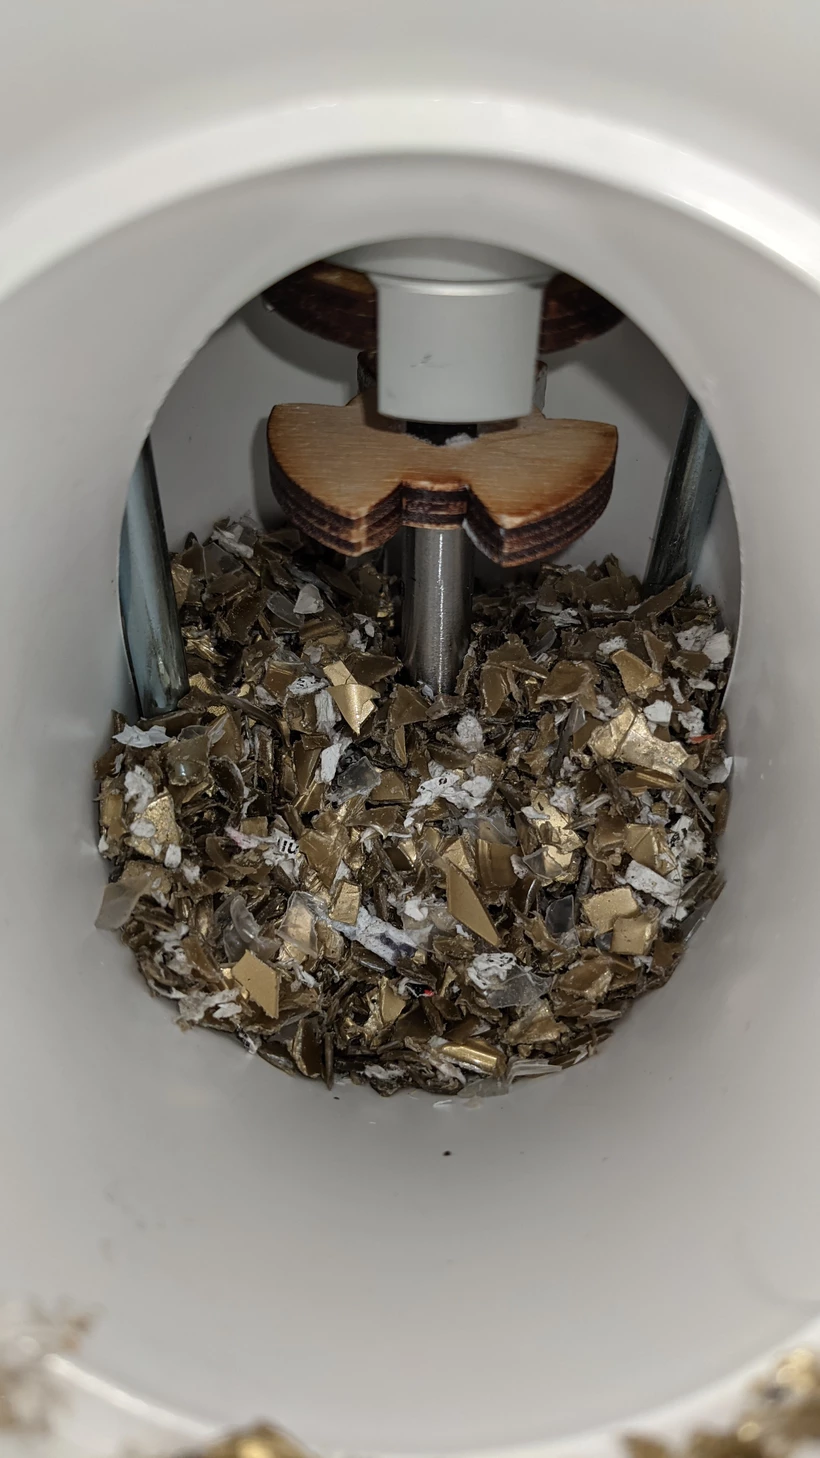
    If the Trash Printer could print with that kind of trash, with all the bits of paper, dirt, food, and grit, just thrown into the shredder and recycled on the spot into kind-of-anything-you-want, that would be kind of a big deal.

    So I felt obligated, now that the printer is working better, to try and down-grade the quality of my feedstock, and try printing with real-world plastic waste.

    It turns out you can pretty much just do that. The bits of sticky paper labels didn't seem to affect the auger, or get stuck in the extruder, as I had feared. This is one of the main benefits of skipping the filament-making step - you lose resolution but you can use much lower quality material, with lots of contaminants that would otherwise clog the extruder on a typical 3D printer.

    The bits of paper just came out with the plastic, and made some noticeable ridges on some of the layers, but that was about it. And that means that while you CAN clean your plastic for cleaner looking prints, you don't HAVE to, and that's a big deal. 

    So recently I've gotten into the habit of taking my take-out containers and other #5 trash and just throwing it into my shredder instead of into the bin! It's so satisfying! 

    There is something really magical about making this transition from theory into practice, to finally be able to start using actual trash as feedstock, turning it right back into something new and interesting, as all life does. 

    As Dr. Ian Malcolm so eloquently put it, "Life, uh, finds a way." 

    So thanks for helping me, uh, find a way.

  • [backlog] October 31, 2021

    Sam Smith10/07/2022 at 23:02 0 comments

    [ Backlog - This log was adapted from my Patreon, to fill in the details about how this project has developed over the years. Check the link for the full post, and if you appreciate this project, consider supporting it! ]

    3 years ago, I entered this wacky project into the Hackaday Prize, which challenged makers to "build the best hardware module or device possible for the boldest solution you can envision." I pitched the idea of a trash-powered plastic recycling system, which was the boldest solution I could consider a the time. It still is, though my understanding of the problem has evolved considerably since then.

    The idea was selected as a first-round finalist in the 2018 Hackaday Prize, but you had to demonstrate a working concept of your proposed idea to make it to the finals, and by October of 2018, I was no where close. 

    I had learned enough about woodgas to get an engine running on it, and I had built most of the V1 Trash Printer, but had never really printed anything useful. I had proven to myself that the concept could work, but actually making it work was still well beyond me.

    I fell far short of my goal to demonstrate a working prototype, where biomass energy was used to power a shredder to shred up plastic to print in to useful plastic objects. But, with your support, I kept at at, in this month I finally achieved a major milestone!

    For the first time, I was able to operate the Metabolizer system using entirely off-grid power, using solar power to generate woodgas from amazon packaging and woodchips, and used that gas to power the generator, which powered my Precious Plastic shredder as I shredded up take out containers, and then fed them to the Trash Printer, which printed a small sign and a cup over the course of roughly 4.5 hours, using only trash and sunshine as fuel, a new record!

    It's the first time I've operated whole system under its own power in real time. There are still a lot of improvements that I  need to make before it reaches it's next milestone, which is sustain operation for a full 24-hour period. To do that, I know that I'll need more solar panels, and a bigger battery bank. But now I have a benchmark to work from, and set of parameters to minimize and maximize.

    So I spent this month's budget on a new livestreaming camera and a big SD memory card, so that I can record and livestream these runs in realtime, powering the camera from the system, so that when the power dies, the stream dies. My goal is to be able to broadcast my runs to Twitch, keeping a record of each try and recording it's results each time. 

    The video above was my first attempt at doing that, so I recorded the whole thing, but didn't go live. The camera did great, though, and now I have a play-by-play recording of what happened that I can learn from for the next run.

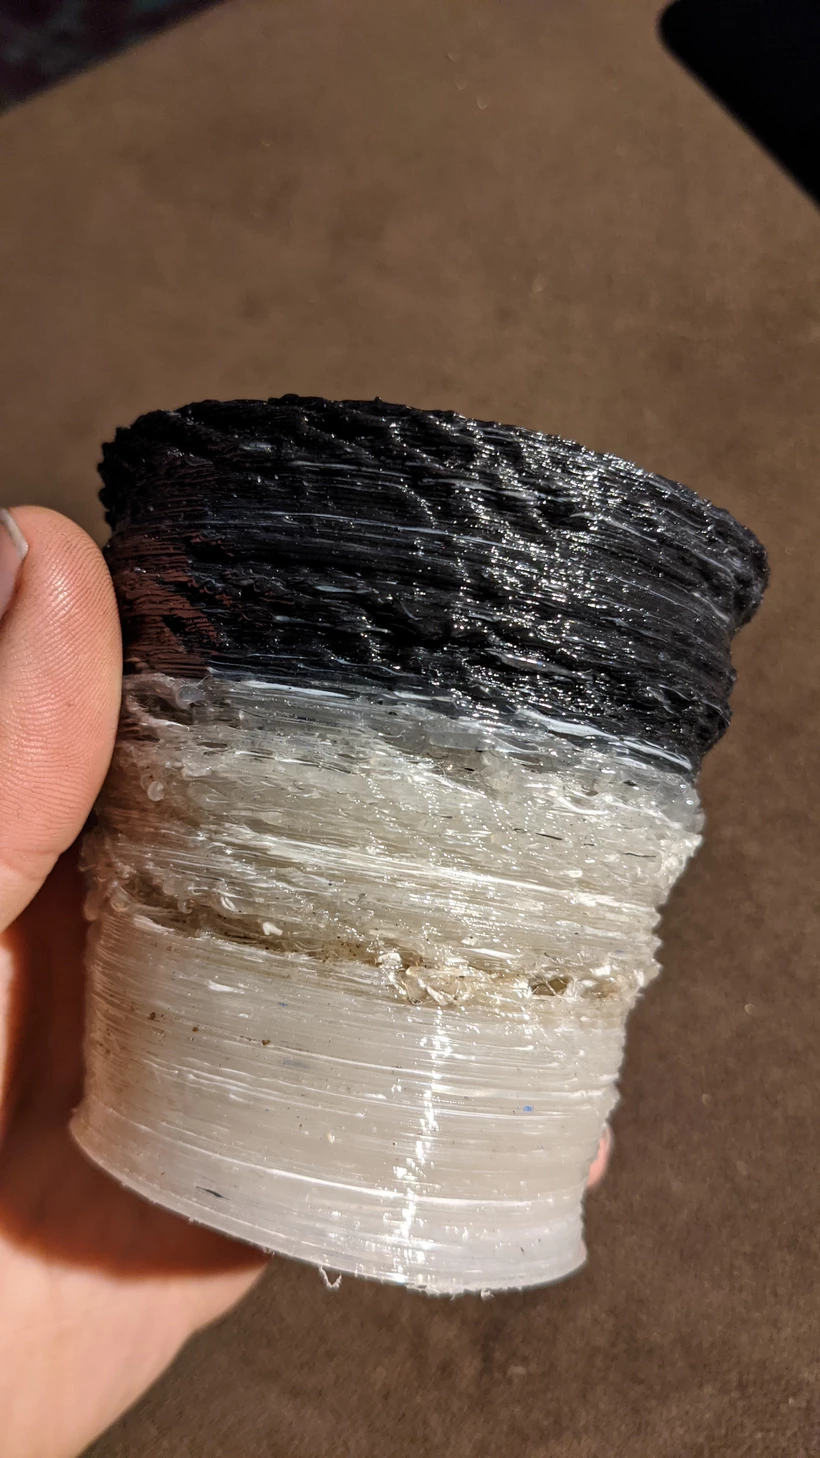
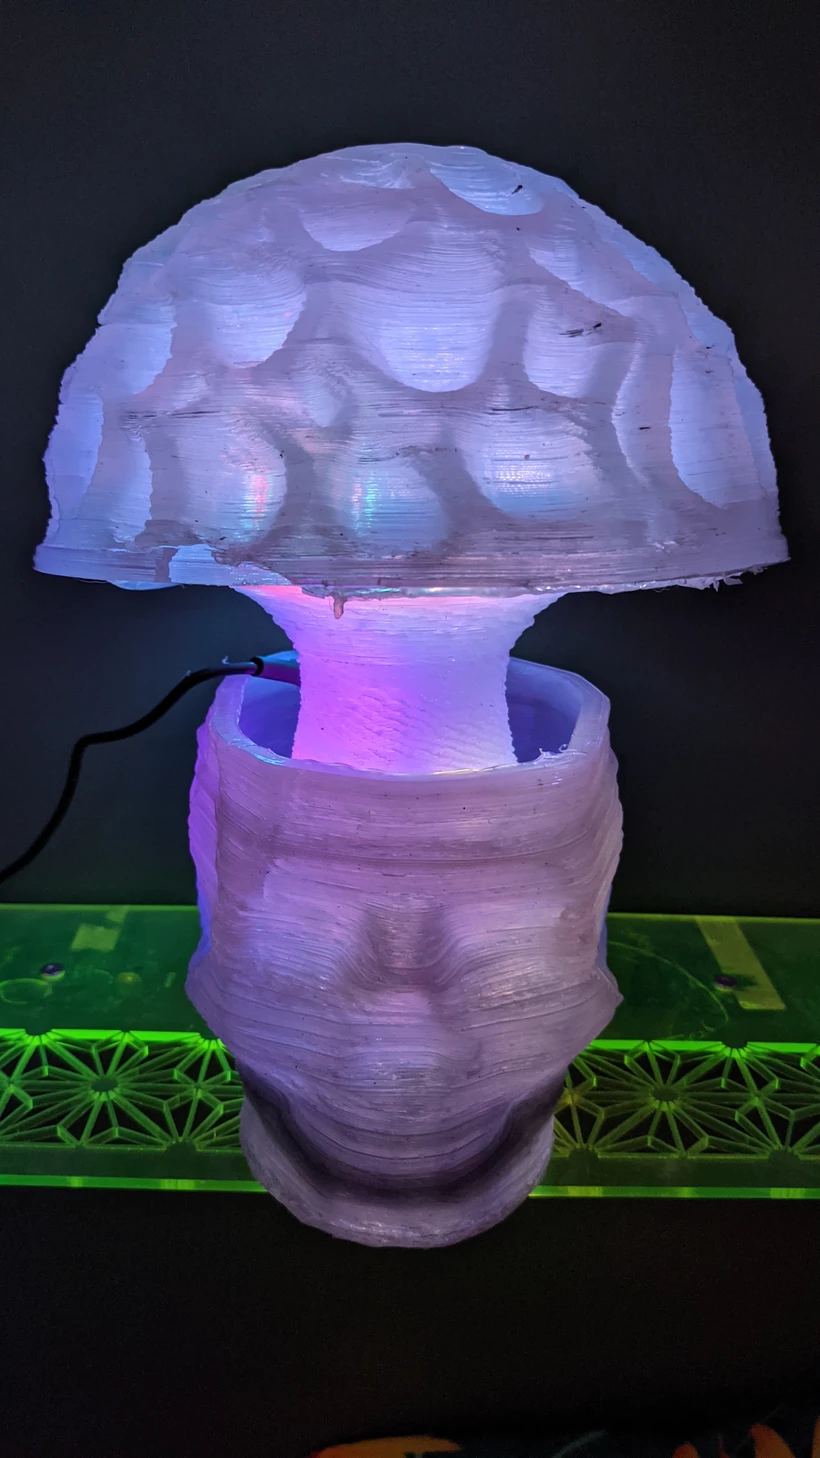
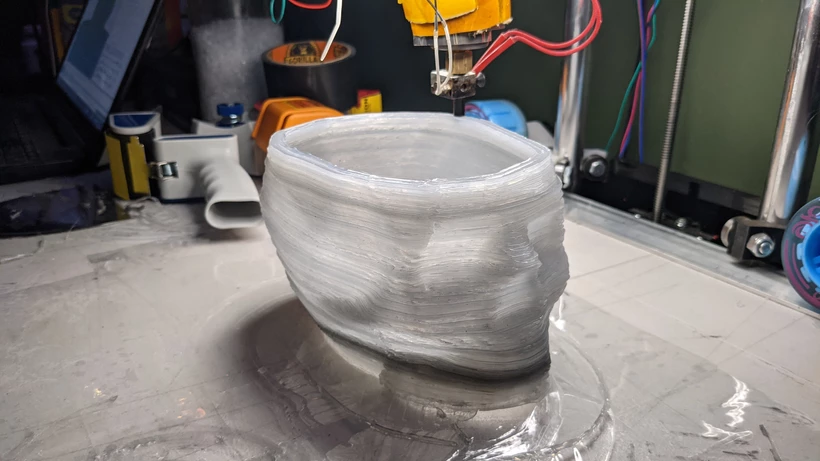
    Now that I've got the Trash Printer printing again, I've been printing all sorts of new stuff. I printed this neat skull vase to fill with candy for Halloween. That streak of black/gray you see near the bottom is what happens when I mix in charcoal dust from the biochar reactor into the hopper of the Trash Printer, sequestering a tiny amount of carbon, and making the plastic more UV resistant!

    The biochar mixed with shredded Polypropylene test tubes gives the plastic a really nice "smoky quartz" effect!

    Thank you so much for your support all these years!

  • [backlog] September 30, 2021

    Sam Smith10/07/2022 at 22:51 0 comments

    [ Backlog - This log was adapted from my Patreon, to fill in the details about how this project has developed over the years. Check the link for the full post, and if you appreciate this project, consider supporting it! ]

    I spent the last part of this month rebuilding the Trash Printer, which has been out of commission and in storage since the beginning of the pandemic. 

    It's been collecting dust for over a year!

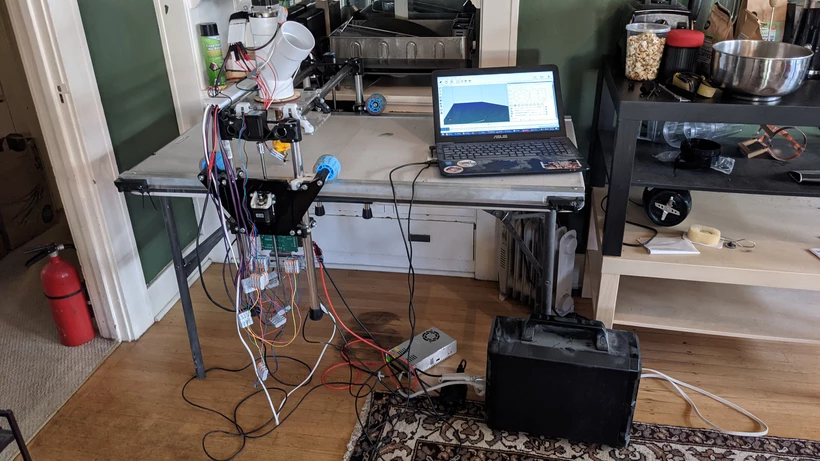
    The wiring was a mess, and the table I was using was too big to be practical. The plastic bed isn't level enough to take advantage of the full travel, so it doesn't really make sense to have a 6' bed, though I was really hoping to be able to print 5+' parts. So I had to take it all apart, transfer it to a smaller table, replace the Z motors, and mess with it for hours, but I finally got it printing again!

    The Trash Printer, it turns out, when printing, takes about 160 watts on average. That means with a small solar generator, it can print using just the direct output of a single 300 watt solar panel! 

  • [backlog] August 31, 2020

    Sam Smith10/07/2022 at 21:55 0 comments

    [ Backlog - This log was adapted from my Patreon, to fill in the details about how this project has developed over the years. Check the link for the full post, and if you appreciate this project, consider supporting it! ]

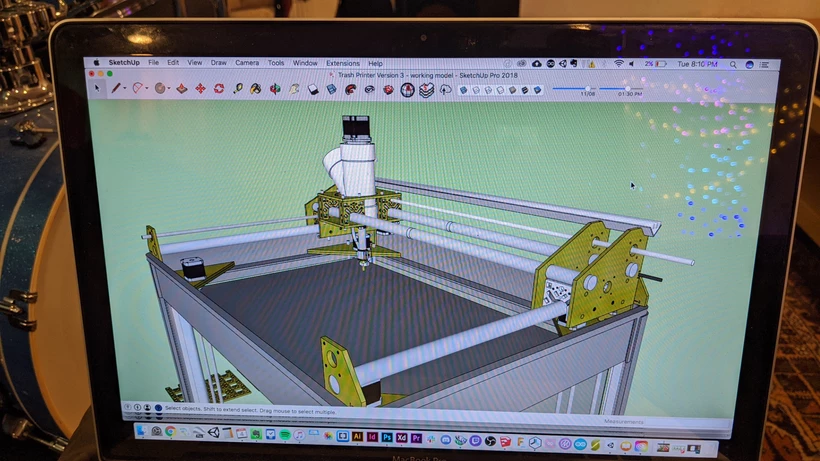
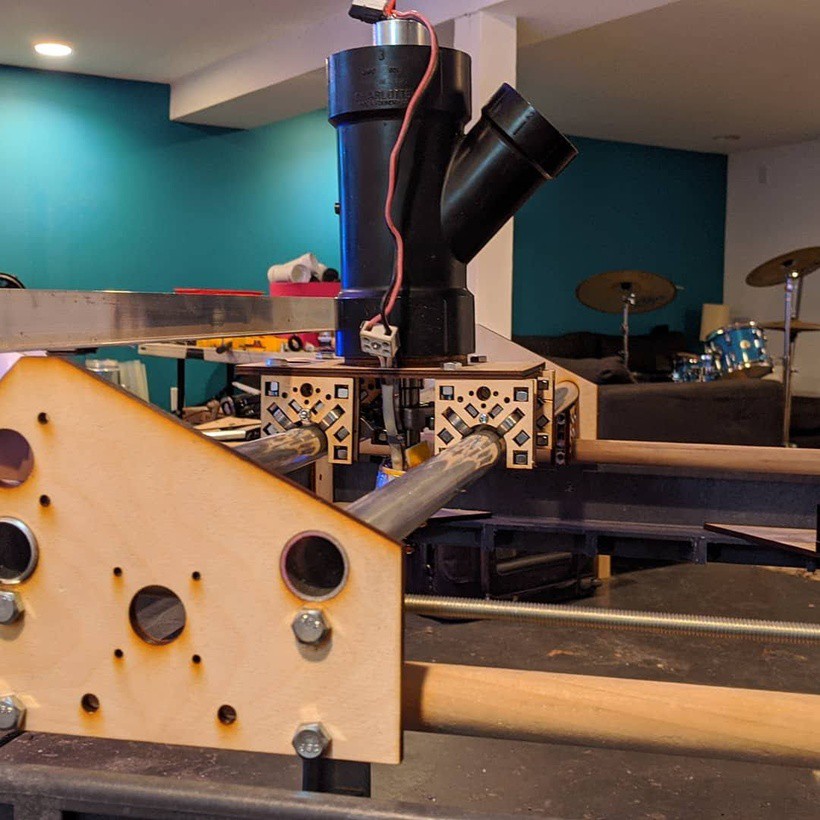
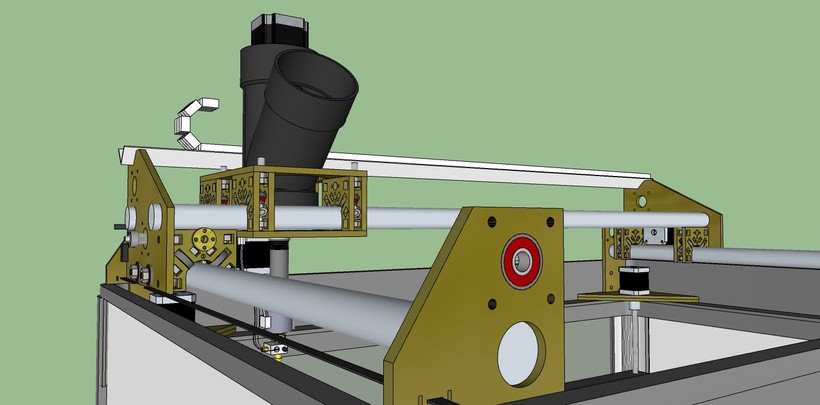
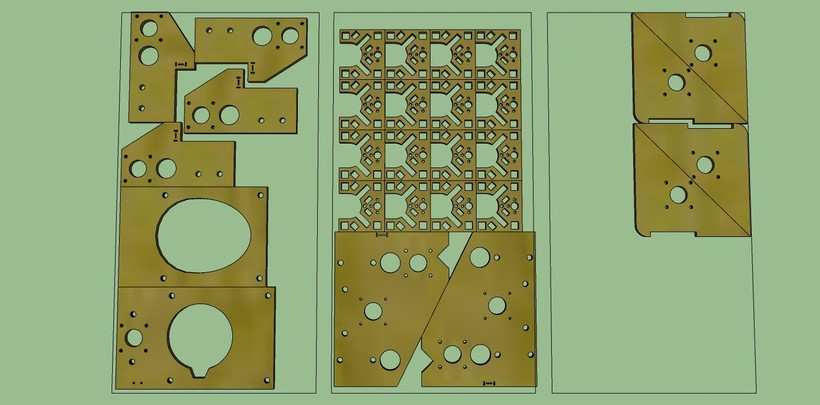
    This month I made some really major progress on the new version of the Trash Printer, that I started prototyping back in April. I've completely re-designed the gantry so that it uses 100% open source parts, and optimized it for 2D cutting rather than 3D printing, so that the parts can be laser-cut out of wood or acrylic in a fraction of the time it took to print the old parts.

    Whereas the old Trash Printer gantry took around 70 hours of 3D printing to make a full kit, the parts for this new design can be manufactured by a laser cutter in about an hour. 

    The parts can be cut out of a wide range of materials, using a wide range of tools, depending on what you have available. I'm prototyping the parts with 1/4" plywood, which ends up being remarkably rigid and cheap. All of the parts can be cut out of about $30 worth of hobby plywood. 

    The design is still a work in progress, but things translated from my Sketchup design to real life way more smoothly than I expected, and I was able to mount the motors, control board, and lead screws, and get the whole thing moving. I haven't gotten a chance to print anything yet, but once I wire a up a few cables I'll be ready to give it a shot!

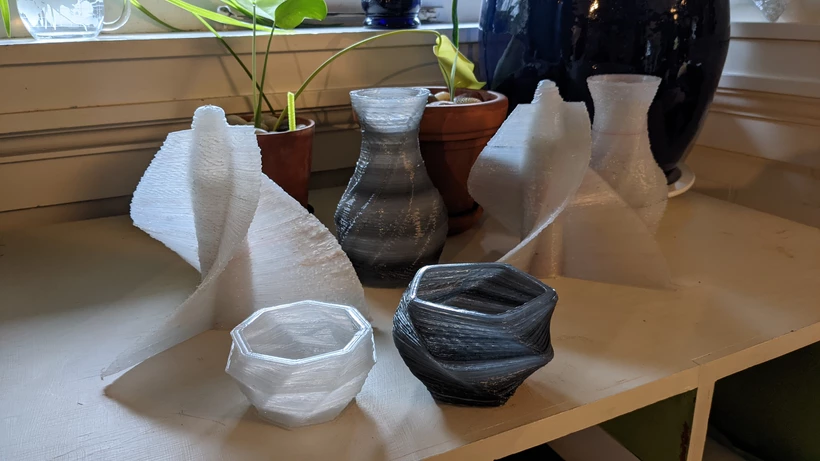
    Speaking of getting things printing for the first time, my friends over at the Trash Hackers Collective recently got their own replication of the Trash Printer up and running, and printed out these little vases as their first test prints! This is the first independent replication of the Trash Printer design, and it's exciting to see the idea finally spread beyond my basement! Replication is the highest form of flattery. Hopefully it won't be the last!

  • [backlog] March 31, 2020

    Sam Smith10/07/2022 at 21:52 0 comments

    [ Backlog - This log was adapted from my Patreon, to fill in the details about how this project has developed over the years. Check the link for the full post, and if you appreciate this project, consider supporting it! ]

    Like many of you, I've spent the last 2 weeks doing my very best to stay as far away from all of you as possible. While I've been trying keep my urge to be maximally productive during a global pandemic in check, the extra time at home has given me the opportunity to make some exciting progress that I'm excited to share with you!

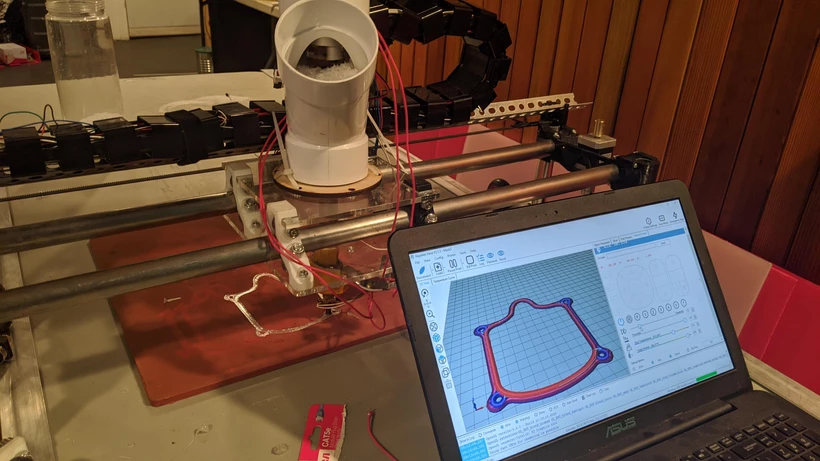
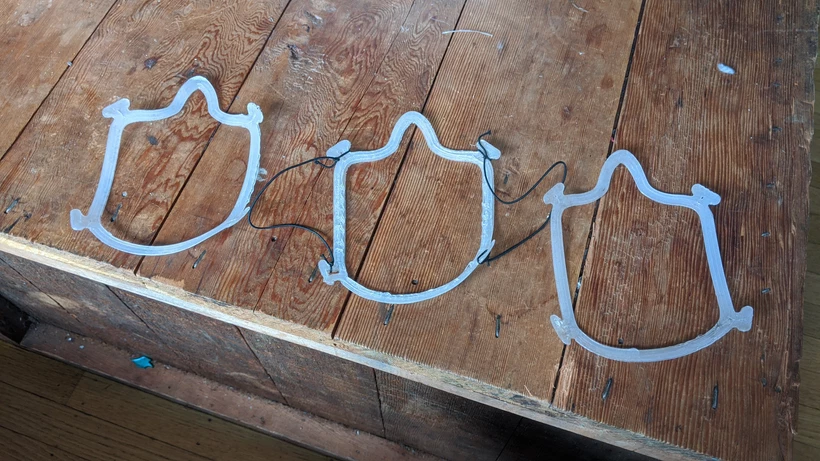
    I work at a local TrueValue hardware store, and due to the pandemic we've been out of N95 masks for weeks now. As an exercise in distributed design, I decided to see if I could print a mask from trash! I modified this design slightly so that it would print well with the trash printers large nozzle, and was able to print a remarkably comfortable mask frame in about 5 minutes!

    Not an earth-shattering innovation, but a promising proof-of-concept for how trash printers could be used to create useful objects directly from locally available trash! The large nozzle of the Trash Printer allows it to crank out a mask in about 5 minutes, much faster than a typical 3D print, making it comparable in production time to injection molding, without the need for an expensive mold. The plastic I used for these masks came from Polypropylene test tubes, and the heat required to melt the plastic is well above sterilization temperature (260C/500F).

    I was able to print and assemble 6 masks in an hour, most of which I gave away to my co-workers at the hardware store. Which is pretty neat! But the ability to do this in my basement isn't really particularly world-changing. My vision for the Trash Printer has always been to make it something that other people can ACTUALLY REPLICATE. I want to see this technology actually being implemented by other people, and so far the barriers to replication have been a bit too high. I'm working hard to fix that.

    I got the original prototype of the Trash Printer working almost exactly one year ago! A major barrier has been that the gantry I'm using isn't my own design, isn't fully open source, and isn't specifically designed for trash printing. The MPCNC I've been using also requires nearly 60 hours of printing time, and so I've been trying to design my own version of a gantry, so that I can release the full plans for the WHOLE PRINTER, and not just the extruder, which I think will make the whole build a lot less daunting. For the past few months I've been refining a new design for the trash printer that uses laser-cut parts instead of 3D printed parts, which can be made much more rapidly, with a much wider range of materials, on a much wider range of tools.

    All of this time "social distancing" has allowed me to refine this concept to the point where it's finally ready for real-world testing. While the design isn't particularly pretty, its extremely versatile, allows the use of lead screws or belts as the drive mechanism, and uses low-cost and widely available parts and materials. 

    All of the parts can be laser cut out of just 3 sheets of 12x24" 1/4" plywood, or any comparable sheet material, using a laser cutter, CNC router, or they can be printed with a desktop 3D printer. The shapes are simple enough that one day I hope to be able to cut or print them using this gantry itself, so that once built a trash printer could trash-print more trash-printer parts.

    That dream is still a ways off, but it's also closer than it's ever been! This month, I've spent your money buying the final parts and materials I need to dive into real-world prototyping of this new Trash Printer during April, to see what works and what needs more work. Once complete, this new design should be easy to fabricate, have a build area of 2.5x2x2 feet, be fully open source, and cost between $500-800 [Update 10/22: It's more like $1000-1500] to build.

    Thank you, as always for supporting this work so that...

    Read more »

  • [backlog] February 28, 2020

    Sam Smith10/07/2022 at 21:46 0 comments

    [ Backlog - This log was adapted from my Patreon, to fill in the details about how this project has developed over the years. Check the link for the full post, and if you appreciate this project, consider supporting it! ]

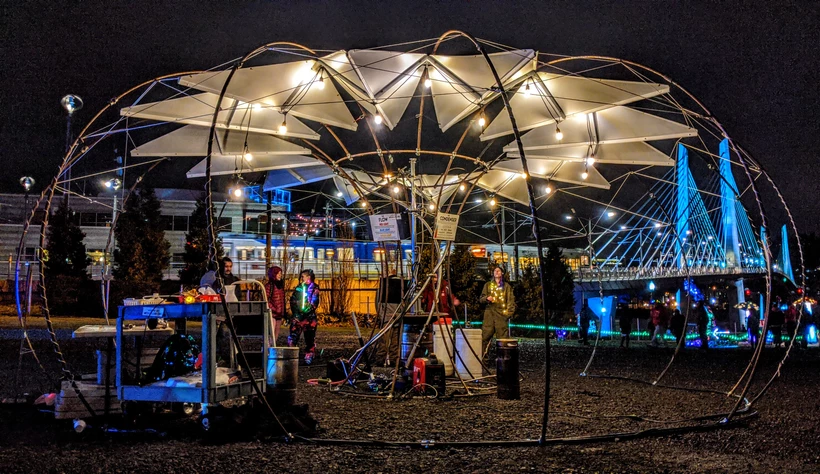
    This month I installed the Trash Printer, along with the rest of the Metabolizer system, at Portland Winter Light Festival!

    Between the rain, lack of shelter, strong winds, and large crowds, we ultimately decided to not to try and run the Metabolizer on Friday and Saturday nights, and opted instead to use LEDs and informational signage to demonstrate the flows of energy and material through the system.

    Although I was a little disappointed to not be able to not be able to show the whole system running this time around, the demonstration version was a lot easier for people to engage with and understand, and we had a great time showing off the system and Trash Printer on Saturday Night.

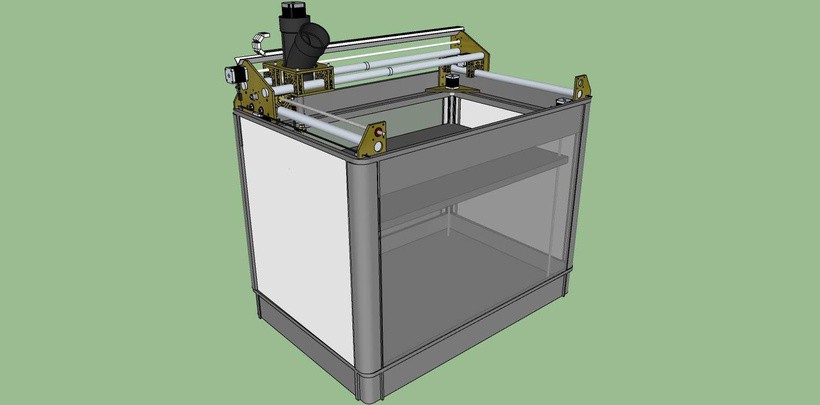
    For next month, I've started working on a new design of the Trash Printer (Version 3), built around a cheap and widely available harbor freight service cart, which gives it a much larger Z axis, and a completely redesigned XY gantry, so that the system can be fully-open source. 

    Currently I'm using some else's design that is partially closed source, and while it's easy to build and cheap and I still recommend it, a fully open-source system will make documentation and replication much easier in the future. The enclosed design allows for the chamber to be heated, which helps with warping and adhesion issues, and also makes fume-mitigation easier. 

View all 16 project logs

  • 1
    Download the Plans

    I am fascinated by the idea of disruptively useful information. 

    Disruptively useful information is information for how to do or make something so incredibly useful that it challenges the status quo. In order to be disruptive, disruptively useful information cannot be simply a neat idea or a promising technology, it must be the specific practical application of a useful idea. In order to be useful, people must be able to understand how to do it and why to do it, so well that they actually do. 

    Disruptively useful information must be a complete unit of information that contains ALL of the information required for the idea to be replicated anyone, anywhere, without permission. If you have access to disruptively useful information, you already have everything you need.

    I do not believe that the plans for the Trash Printer counts as disruptively useful information - not yet anyway. An idea like the Trash Printer can't possibly be disruptive unless a lot of people can actually do it too.

    The Precious Plastic open-source shredder is one of the best examples of disruptively useful information that I know of.

    The coolest thing about the Precious Plastic machines, IMHO, is that the plans are freely available for you to download, and if you have access to them and the means to follow them, you and your friends can build your own plastic recycling workshop. Disruptively Useful Information spreads like a meme. 

    If you see it, and you like it, you can copy it, and you can change it. You can do whatever works for you without asking for permission, and if you figure something out that works particularly well for you, you can share that with others. That kind of rapid, global, decentralized hacking is what gives me hope that we may actually be able to find ways to adapt to the challenges that we face, as quickly as we need to, come what may.

    If you do replicate your own version the Trash Printer, please let me know by commenting on this page or on my Patreon.  I would love to see photos of the stuff you build with it.

    If you make improvements, please post your changes in the Github Repo.

    If you appreciate the work that I've put into this project so far, consider becoming a Patron! Everything that I make is posted publicly for everyone to see, but patrons give me a working budget to keep hacking, and get access to a private Discord server so we can chat while I'm livestreaming.

    My Patrons currently give me a monthly budget of around $650 a month, and they're the reason I've been able to keep hacking on this all these years. I'd love to get up to $1200 a month, because then I could buy, build, and livestream a new Trash Printer build video every month. If you'd like to see that happen, and have a buck or two to spare, you know what to do.

  • 2
    Build your Community

    The Trash Printer will probably cost you somewhere between $800-1500 for you to build, depending on what tools, skills, and parts you have access to. A lot of the parts can be found locally, and/or used, or scavenged from old 3D printers.

    The shredder is not required, but without a shredder of some kind you will not be able to print with your own trash. You can check the Precious Plastic map to see if there is workspace with a shredder near you, and see if you can get shredded plastic from them! If not, consider starting your own!

    Like the other Precious Plastic machines, the Trash Printer can be an expensive and difficult tool for one person to build, but a very affordable and easy tool for a small community of people to build. 

    So if you want to build one, start by asking for help! Talk about it with your friends and comrades. Pitch it to your school, business, city, or maker space. See who has the skills, space, spare parts, tools, and time or money to help make it happen. DIY means do it yourself, but don't do it by yourself!

  • 3
    Gather your Tools

    You can watch the FULL 12 hour Trash Printer V3 Mini build video here. I wouldn't want to watch the WHOLE thing if I were you, but it's here for reference, in case you get stuck. Sorry about the audio, this was my first attempt at livestreaming an entire build, but it hopefully won't the my last. Doing a live-build from start to finish is a great way to iterate on the design, and build new documentation in the process!


    To assemble the Trash Printer, you will just need a few basic tools:

    Access to a laser cutter, CNC router, or 3D printer (ask your local maker space!)

    • Jigsaw with 1.5” offset from guide to blade (“fast wood” bit)
    • Power Drill or Impact Driver
    • Step Drill Bit
    • 5/16” Drill Bit
    • 11/32” Drill Bit
    • Metric Hex Key Set (3mm hex usually comes with the Shaft Couplers)
    • Wire Cutter/Strippers
    • Philips Screwdriver
    • ⅜” Deep Socket
    • Hex Driver and/or ratchet
    • Adjustable Wrench (Knipex highly recommended)
    • Small flathead screwdriver
    • Tubing Cutter

View all 12 instructions

Enjoy this project?

Share

Discussions

Similar Projects

Does this project spark your interest?

Become a member to follow this project and never miss any updates