 jude_pullen
-
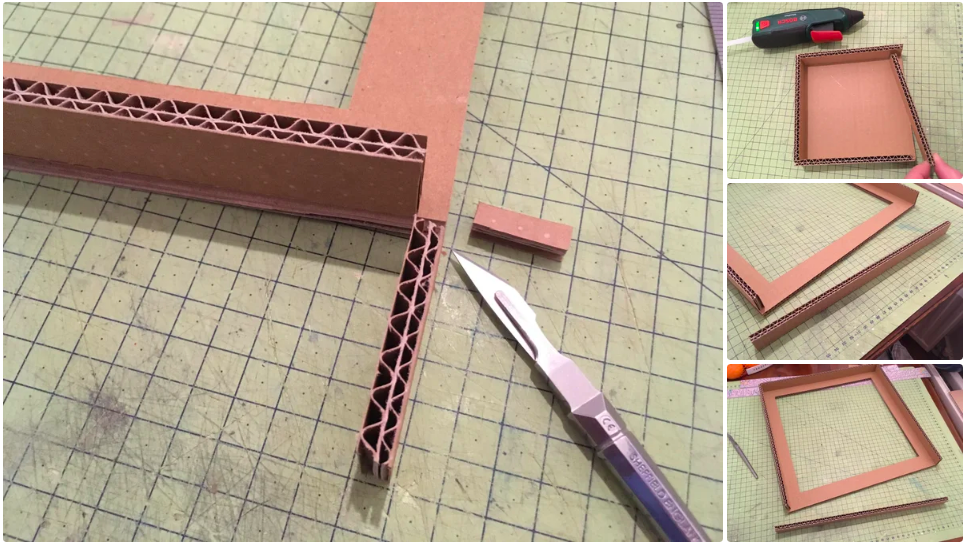
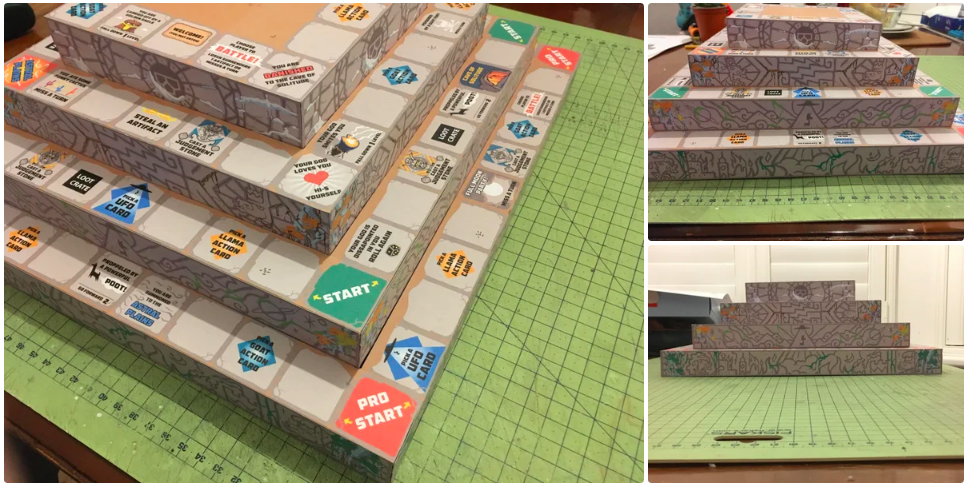
11Walls Around
![]()
Now that you have mastered this 'relative fit' thing, you can do the same with the length...for example the top for me is 150mm wide, so my walls should be 150-7=143mm long. Bear in mind you 'stagger' these as they go round in a 'spiral' as shown.
-
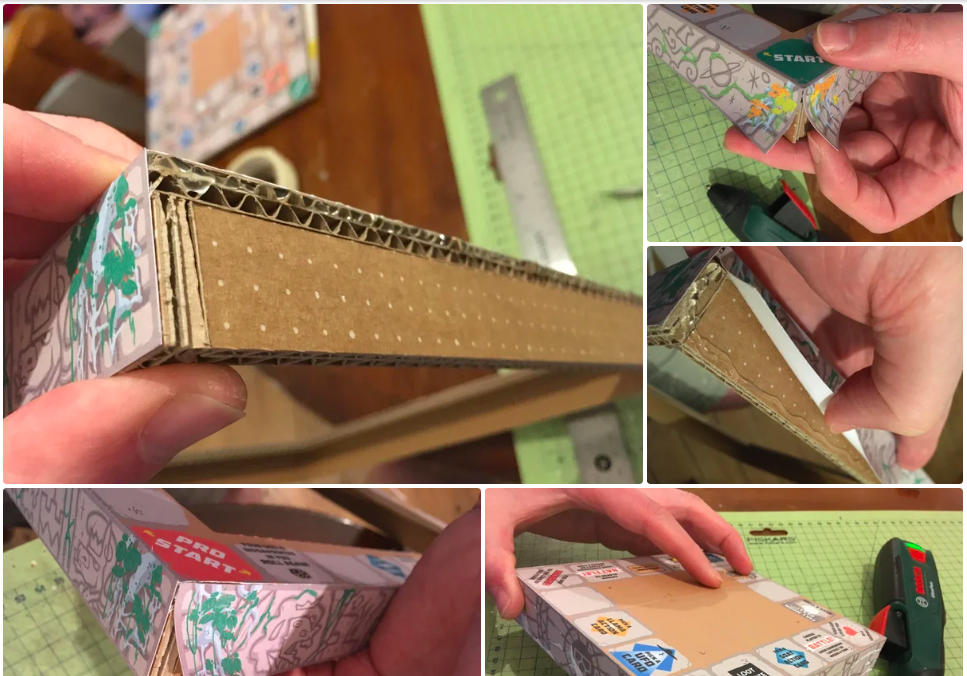
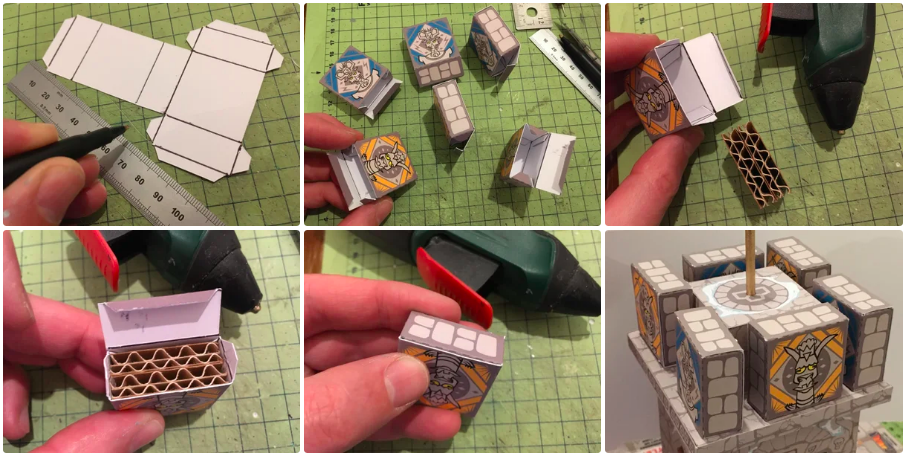
12Glue Graphics to Walls
![]()
As you can see - the graphics now fit the total height. I suggest gluing the top edge first, then the rest of the paper in a second go. Use Hot Melt as this 'fills the gaps' better than a 'thin' glue.
-
13Topping Off
![]()
Download the "Topping Off" PDF, and stick on top if you want a clean finish (no visible joins of the paper).
-
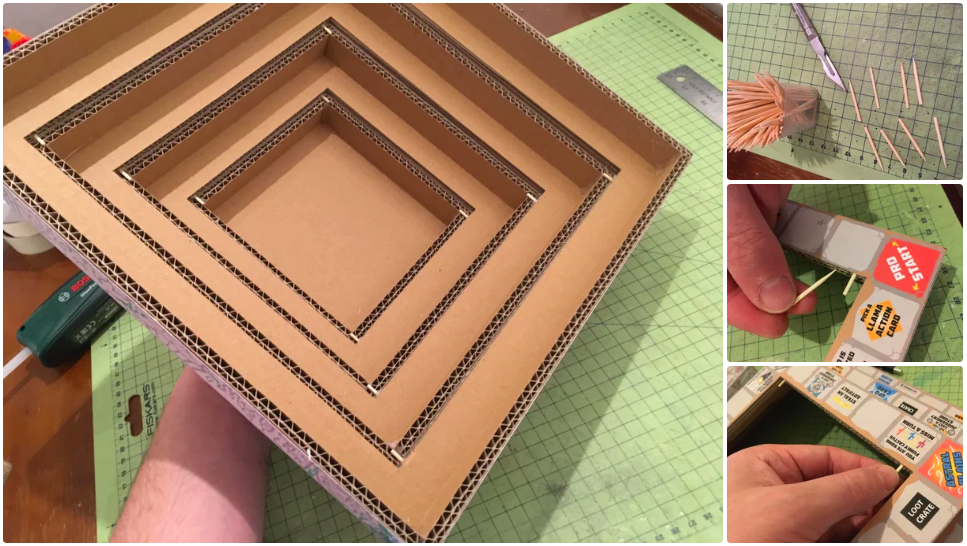
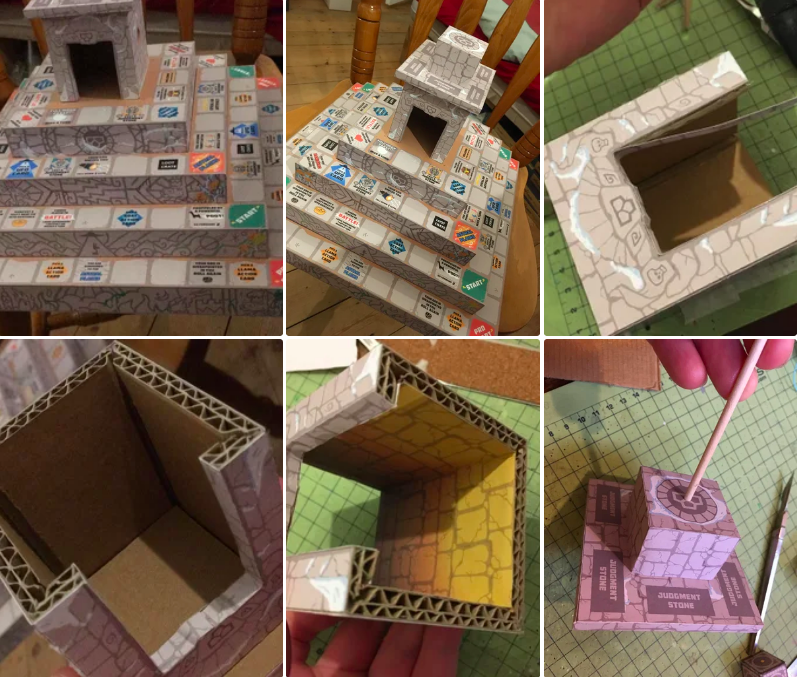
14Internal Supports
![]()
I used Cocktail Sticks to create 'ledges' to hold each layer, as shown. You can use pretty much anything you can wedge into the corrugations as shown. Glue in place / cut to size.
-
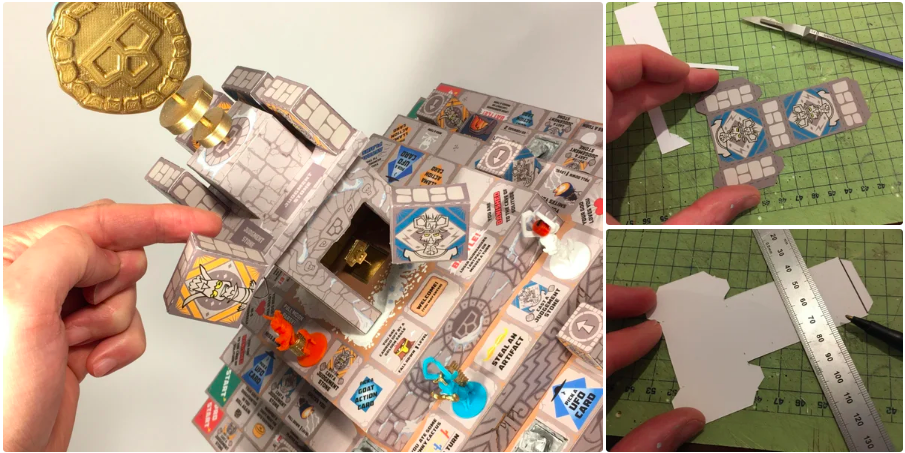
15Tower Done!
![]()
So there you have it - hope you enjoy the side-on graphic Mark did too ;o)
-
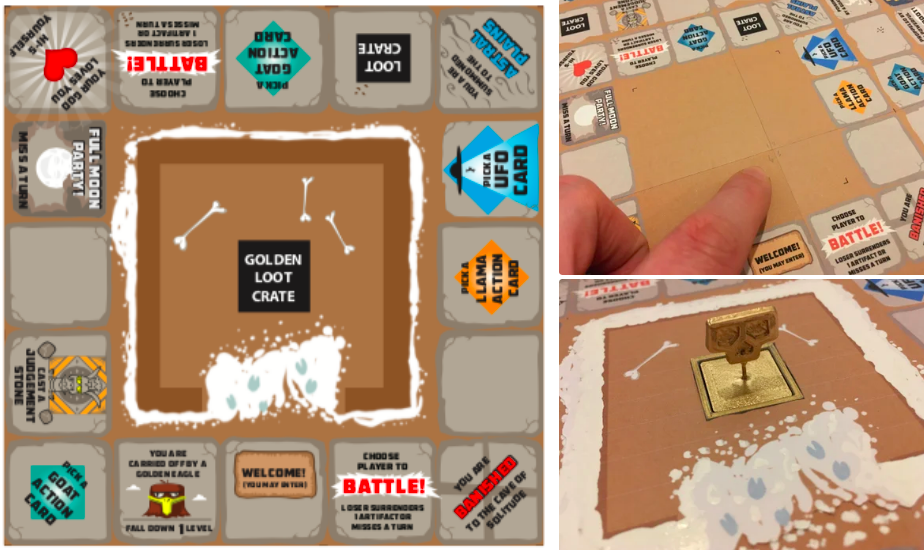
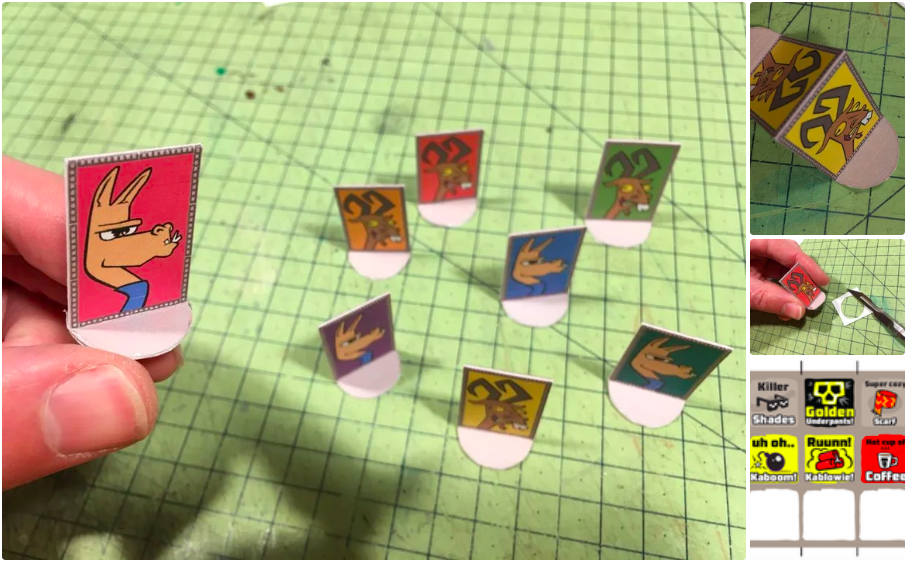
16No 3D Printer - No Worries - Print Paper Game Pieces
![]()
Although you can print the cool 3D pieces, it's also fine to print on paper, and stick to card like a cereal box, though if you printer can handle thin card (many can, but check), I suggest 220gsm.
-
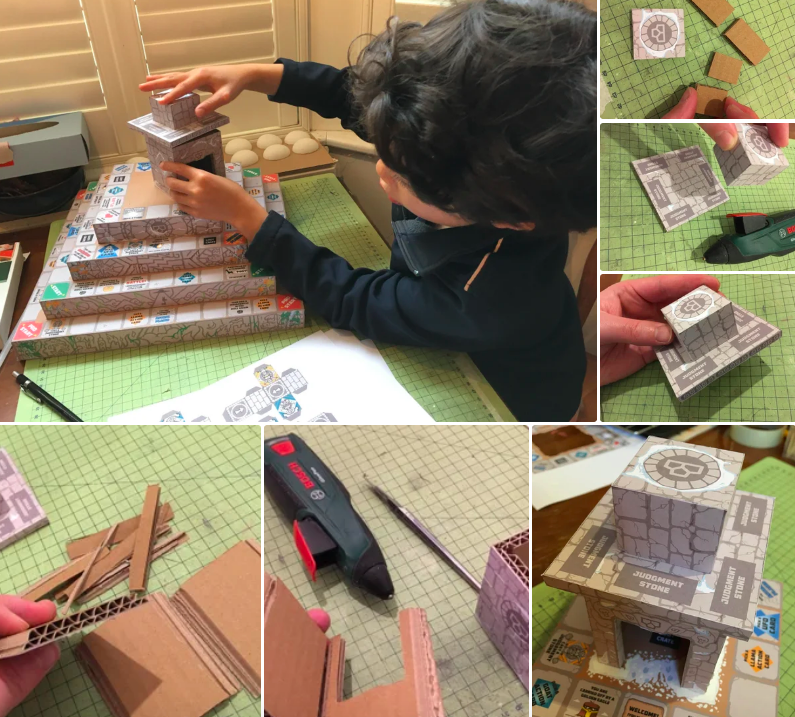
17Tower - Part 1
![]()
Download, Print and Stick Down the "Temple Sides" and "Temple Top with Medal" PDFs on paper and do as you would in previous steps to construct the Temple.
-
18Temple Interior - Optional
![]()
If you wanted a cool 'eerie glow' in your Temple, do as shown here for extra cool effect.
(You can add the stick hole as shown, and make the medal too if you like).
-
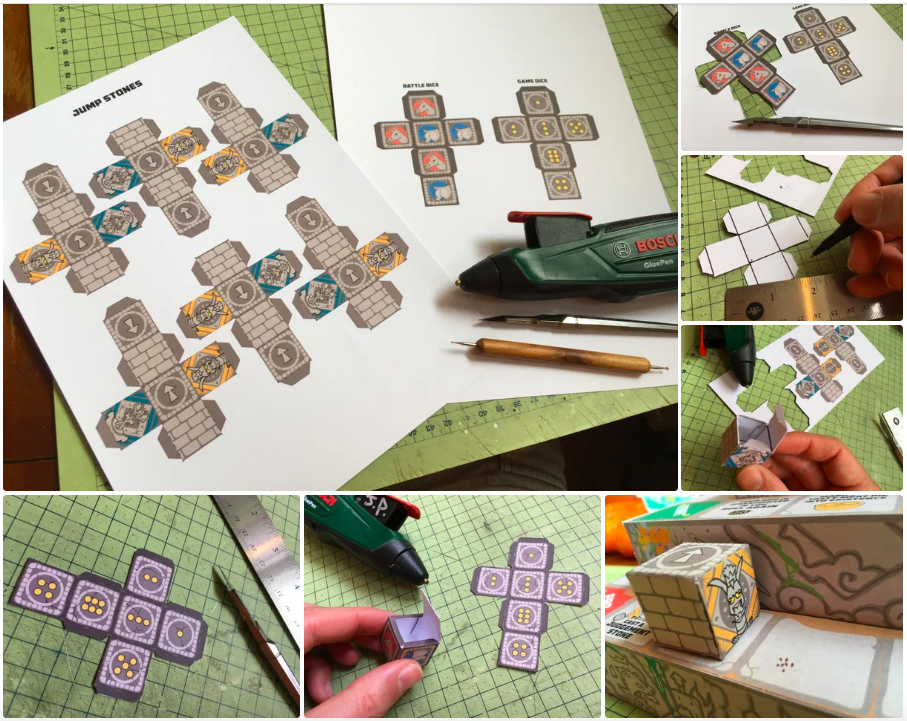
19Dice & Jump Stones
![]()
The "Dice" and "Jump Stones" (Download PDF) are pretty straightforward to assemble, as they are a typical 'net' for a cube/cuboid. Use Hot Melt to assemble.
-
20Judgement Stones
![]()
![]()
The "Judgement Stones" (see PDF), are pretty similar - with the addition of stuffing them with a bit of cardboard for weight/heft.
Goats vs Llamas - a New Downloadable 3D Board Game
This game is an exploration of how much you can do by downloading a game - using both a paper-printer and a 3D printer.
Discussions
Become a Hackaday.io Member
Create an account to leave a comment. Already have an account? Log In.