Fabio


After my old Sharp PC-1403 popped out of a dusty box, where it had lain almost forgotten for a decade or two, I immediately wondered how I could “modernize” it somehow.
At the time (I’m talking about the mid-’80s to the early ’90s), what I thought my Sharp PC was missing most was a convenient way to store and load programs.
Many can remember how entering a BASIC listing by hand, maybe copying it from a paper magazine page, was one of the most frustrating tasks in the early days of home computing.
Magnetic cassettes played on a standard tape recorder were the most common (and affordable!) storage medium back then, but I had no cassette interface for my Sharp PC. Besides, cassettes were slow and cumbersome!
Back in the day, I had no idea that Sharp Pocket PCs could be expanded with a wonder like a diskette drive.
That changed recently, when I discovered the CE-140F, the disk drive that could be interfaced with them. I immediately started imagining how it could be emulated using contemporary technology.
The CE-140F was a rare and expensive accessory, compatible with a wide range of Sharp Pocket PCs: PC-1280, PC-1285, PC-1425, PC-1403, PC-1475, EL-5500III, PC-E500, etc. (see also: pocket.free.fr).
The project became even more realistic when I discovered that a very kind person had managed to emulate many Sharp devices in software (https://pockemul.com/), including the CE-140F, and was generous enough to share technical details with me, after his exceptional reverse engineering of the proprietary protocol on a real device.
The prototype
The initial idea was to build something self-contained, not relying on a PC, that could emulate at least the LOAD and SAVE commands, to store and retrieve programs on a standard SD card.
I developed the project starting from the early prototype below, based on a Nucleo STM32 L053R8 board, using the Mbed online tools to develop the firmware.
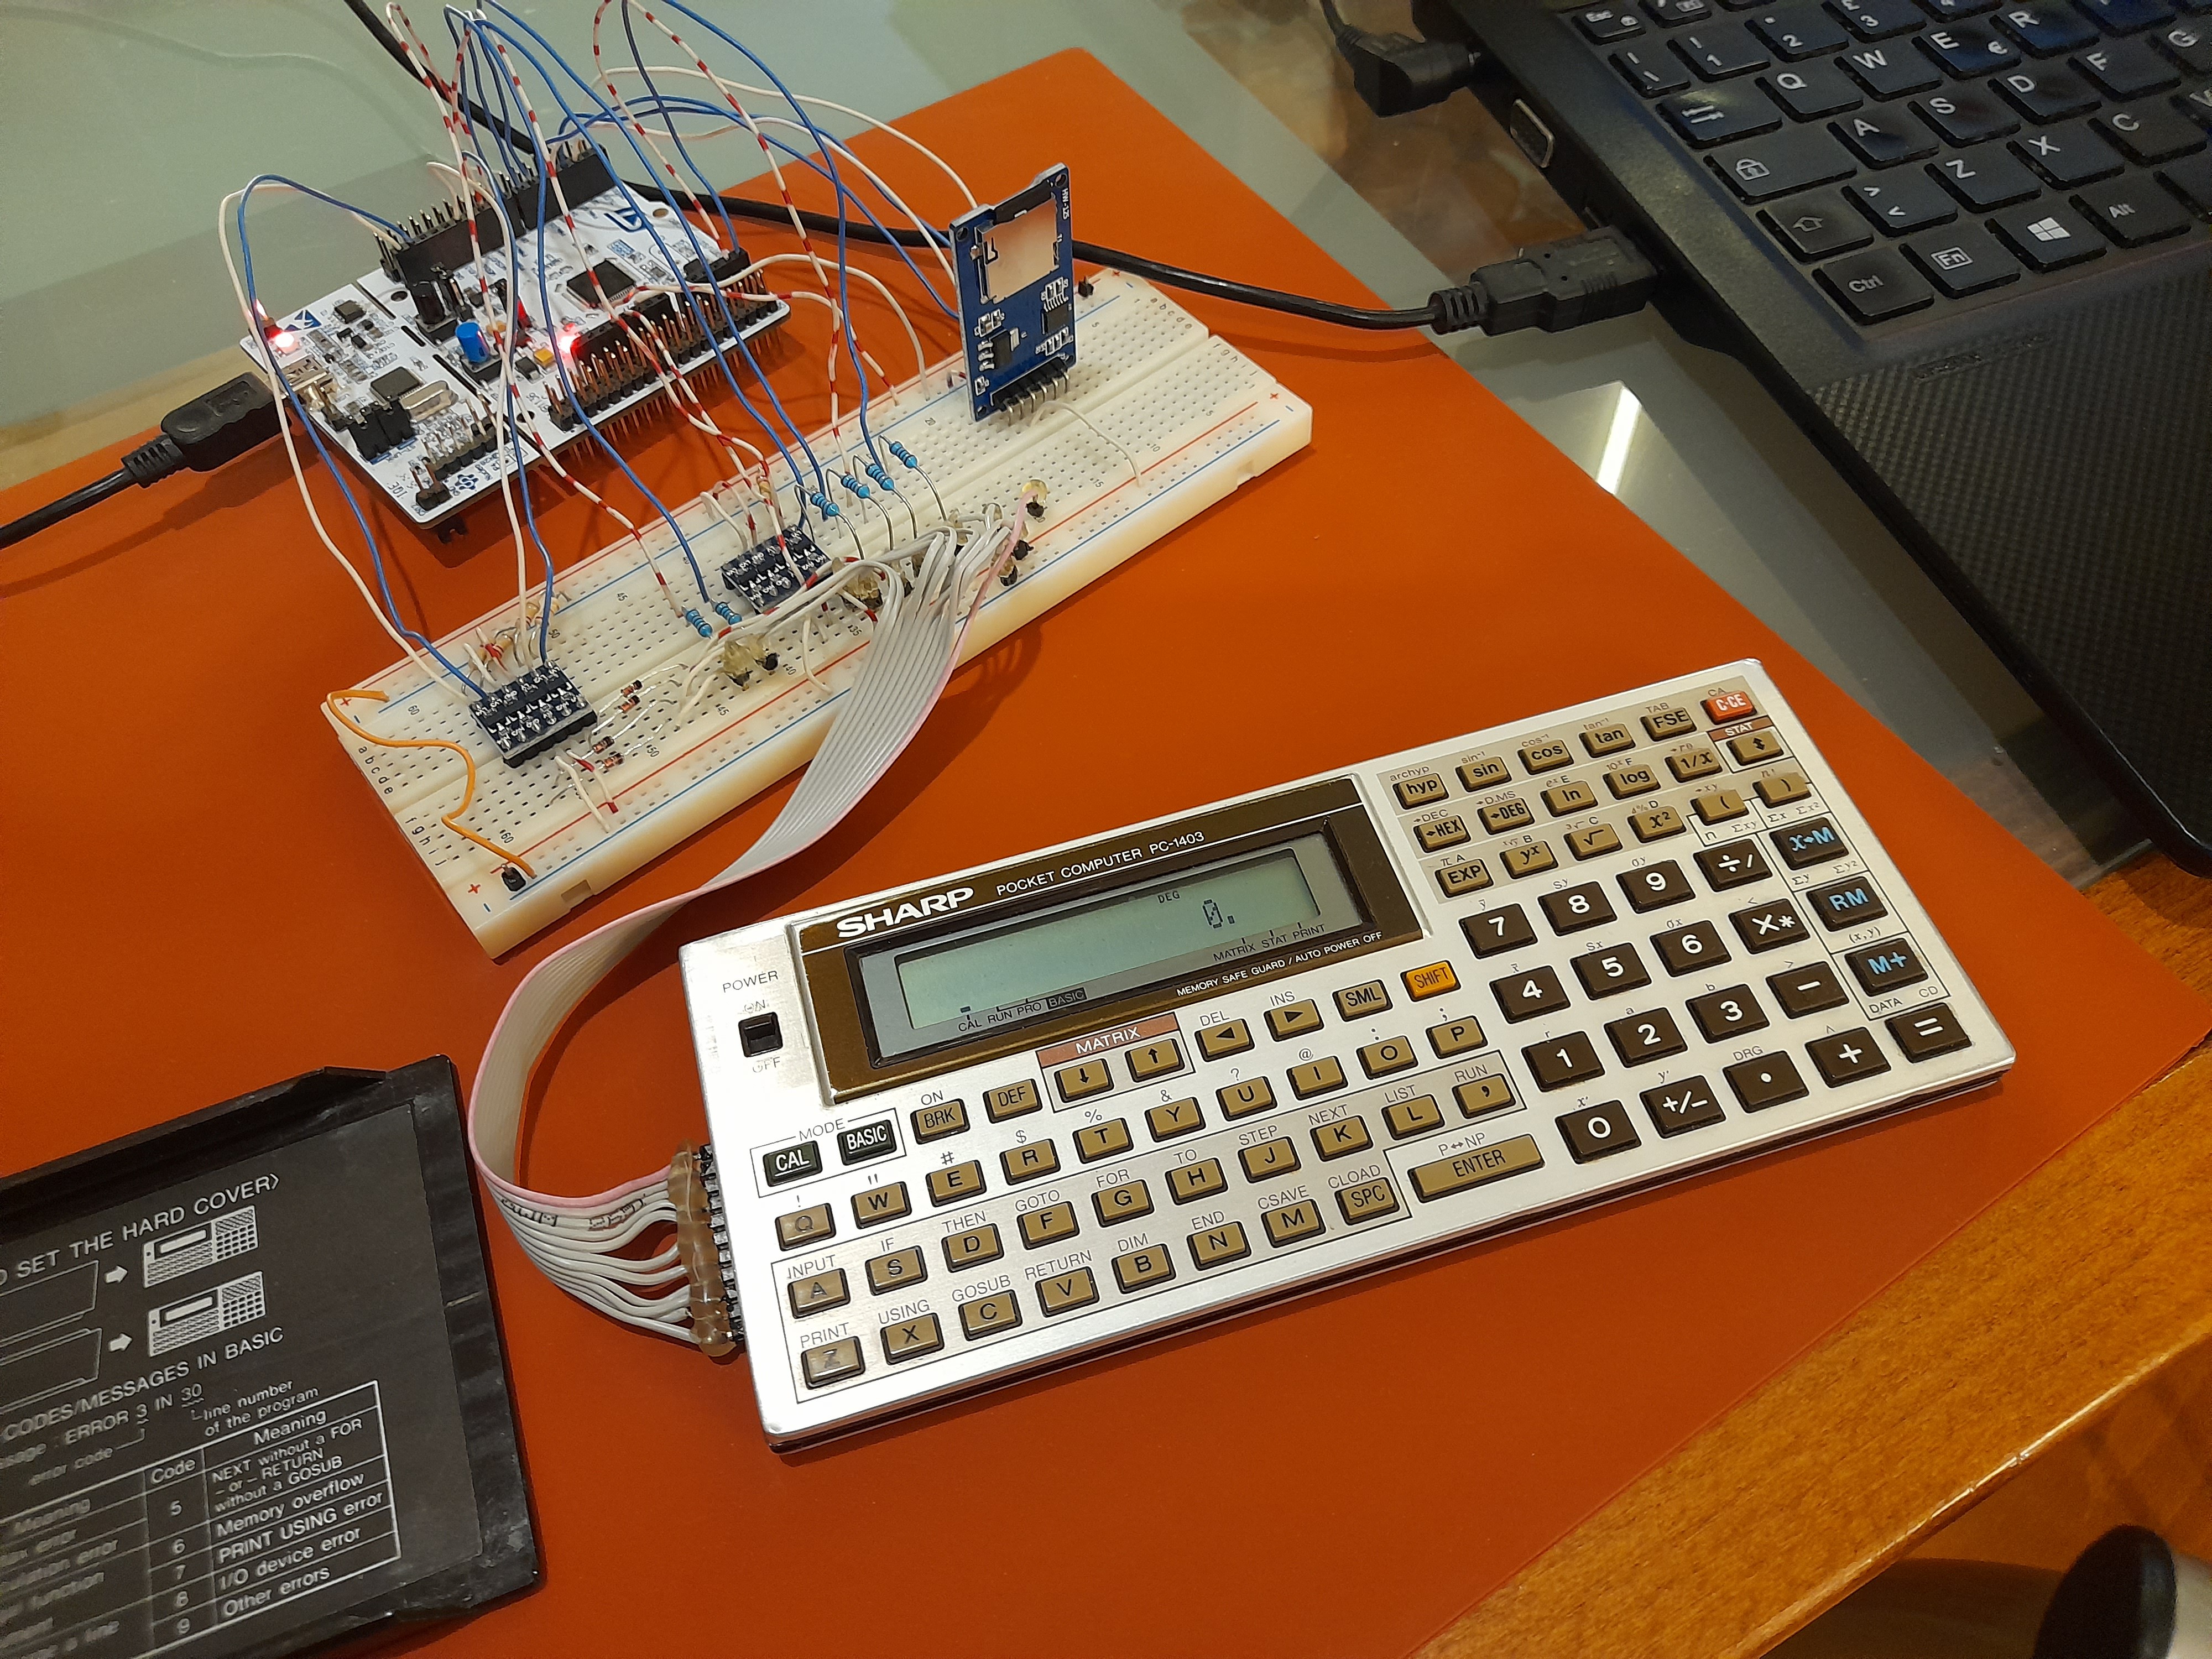
Here, the PC connection serves only two purposes: powering the device and serial-terminal debug logging. No functional service to the device.
Below is the very first demo I recorded, showing successful LOAD and SAVE operations. A milestone for me!
https://www.youtube.com/watch?v=3_DliJE_47g
The PCB version
Next most obvious step - translating the prototype to a PCB.
The the relatively small community of Sharp PC enthusiasts was so kind to support my Indiegogo campaign (Sharp_ce140f_emul on Indiegogo), to fund a small batch of the PCBs.
The PCB holds the Nucleo (now a more powerful L432KC), the SD card, and the interface circuitry.

The hardware design
Interface schematics (find the complete KiCad progect on github - KiCad v1 project), is relatively simple:
 What I struggled with most, even on the prototype, was the level conversion. I was unlucky to have only a Nucleo board at hand initially, and I stuck with it. Starting the project on an Arduino might have made the first steps easier.
The Sharp PC uses 5V CMOS logic, while the Nucleo board runs at 3.3V, so level shifting is needed. The Nucleo’s inputs are 5V-tolerant and can read the Sharp’s outputs directly, but its 3.3V outputs aren’t enough to drive the Sharp’s inputs. For that direction I used a SparkFun-style level converter (or rather, one of its clones).
Receiving the device code (0x41), the first step of the handshake, was the hardest part. With converters on every line, the board always read 0xFF, probably because of the Sharp’s high-impedance outputs. The solution was to use separate pins for the return path, removing the converters from the Sharp-to-Nucleo direction, and to enable the internal 45K pull-down with a 10K series resistor as a voltage divider. During output, the input pins are set to high impedance (PullNone).
The two devices share only ground, to spare the Sharp’s PC coin cells. For now the Nucleo is USB-powered, with battery power planned in the long term.
The software
Although I authored the original...
Read more »
 Fernando "FG1998" Garcia
 evac

 Arnov Sharma