 jasonwinfieldnz
-
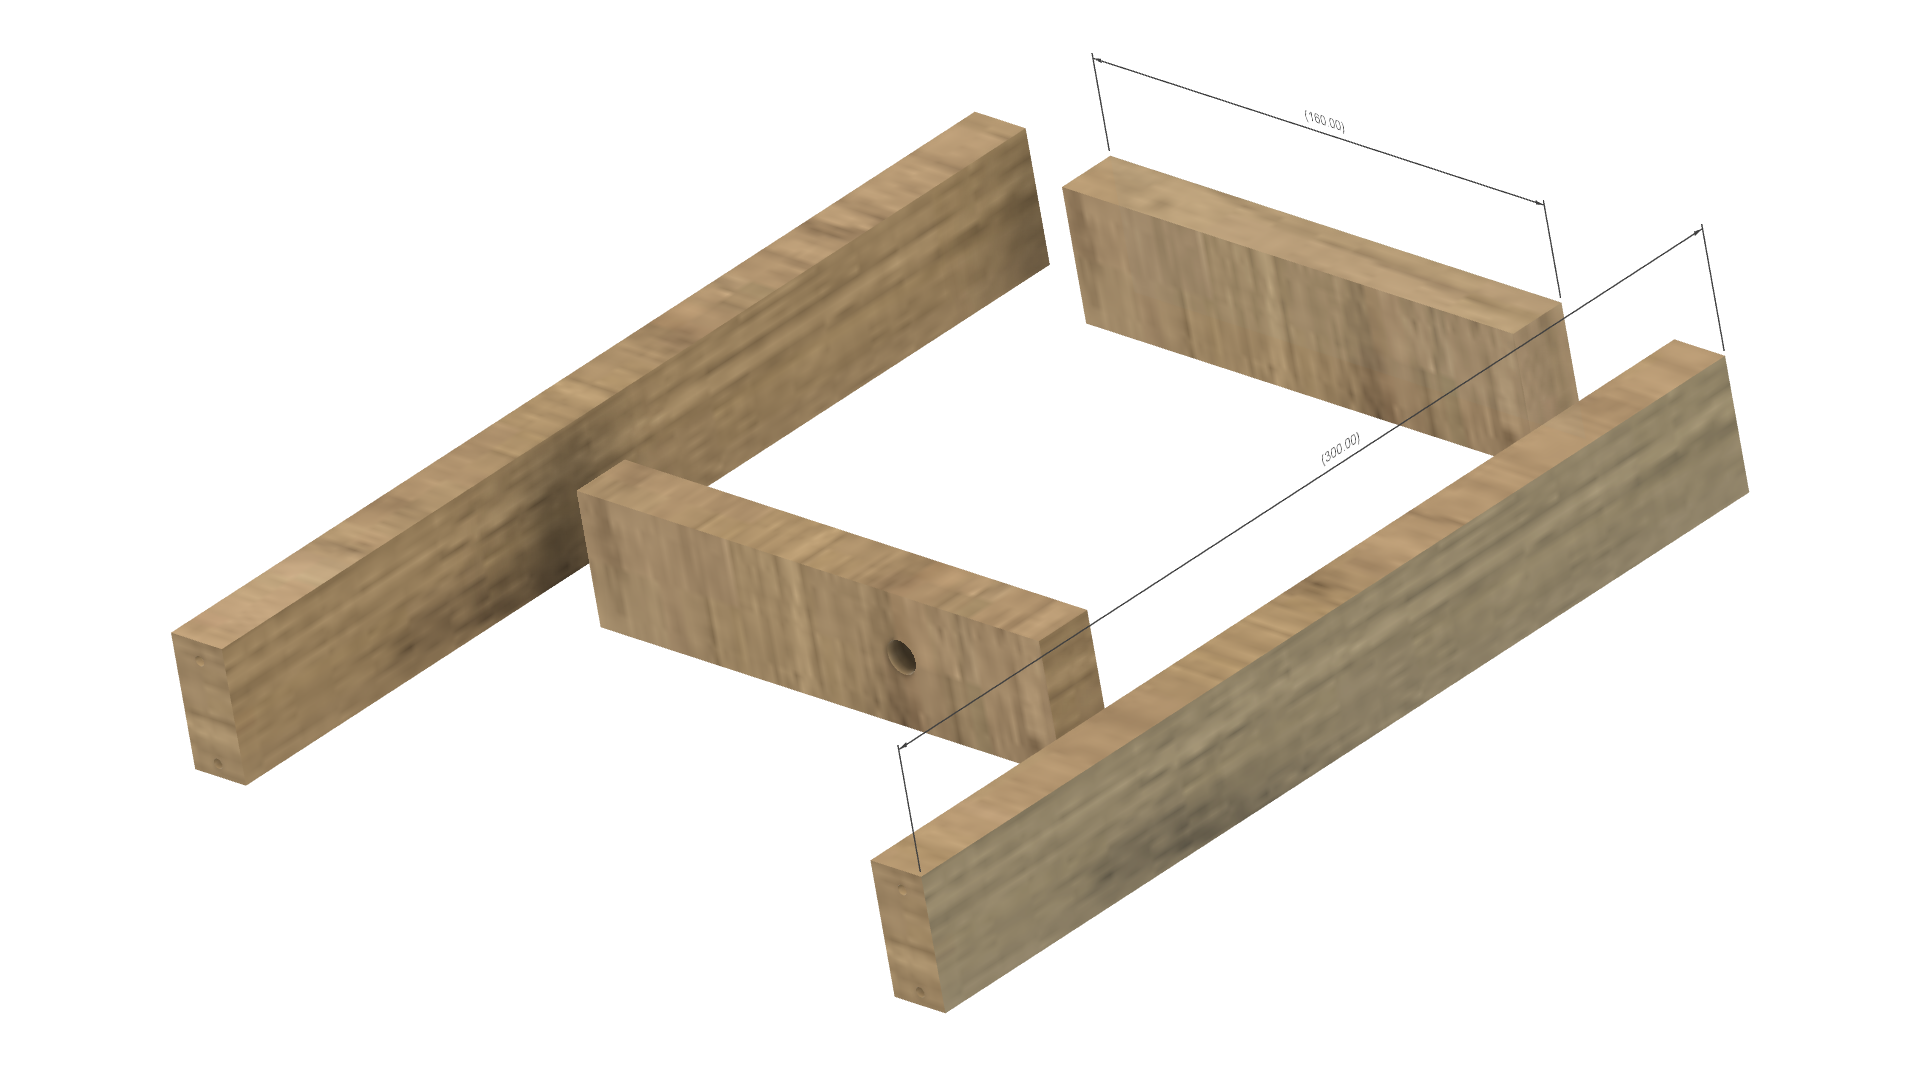
1Prepare framing
![]()
Cut your wood to the dimensions shown in the picture above. I used 18x40mm wood for this project. Don't join the frame together yet.
-
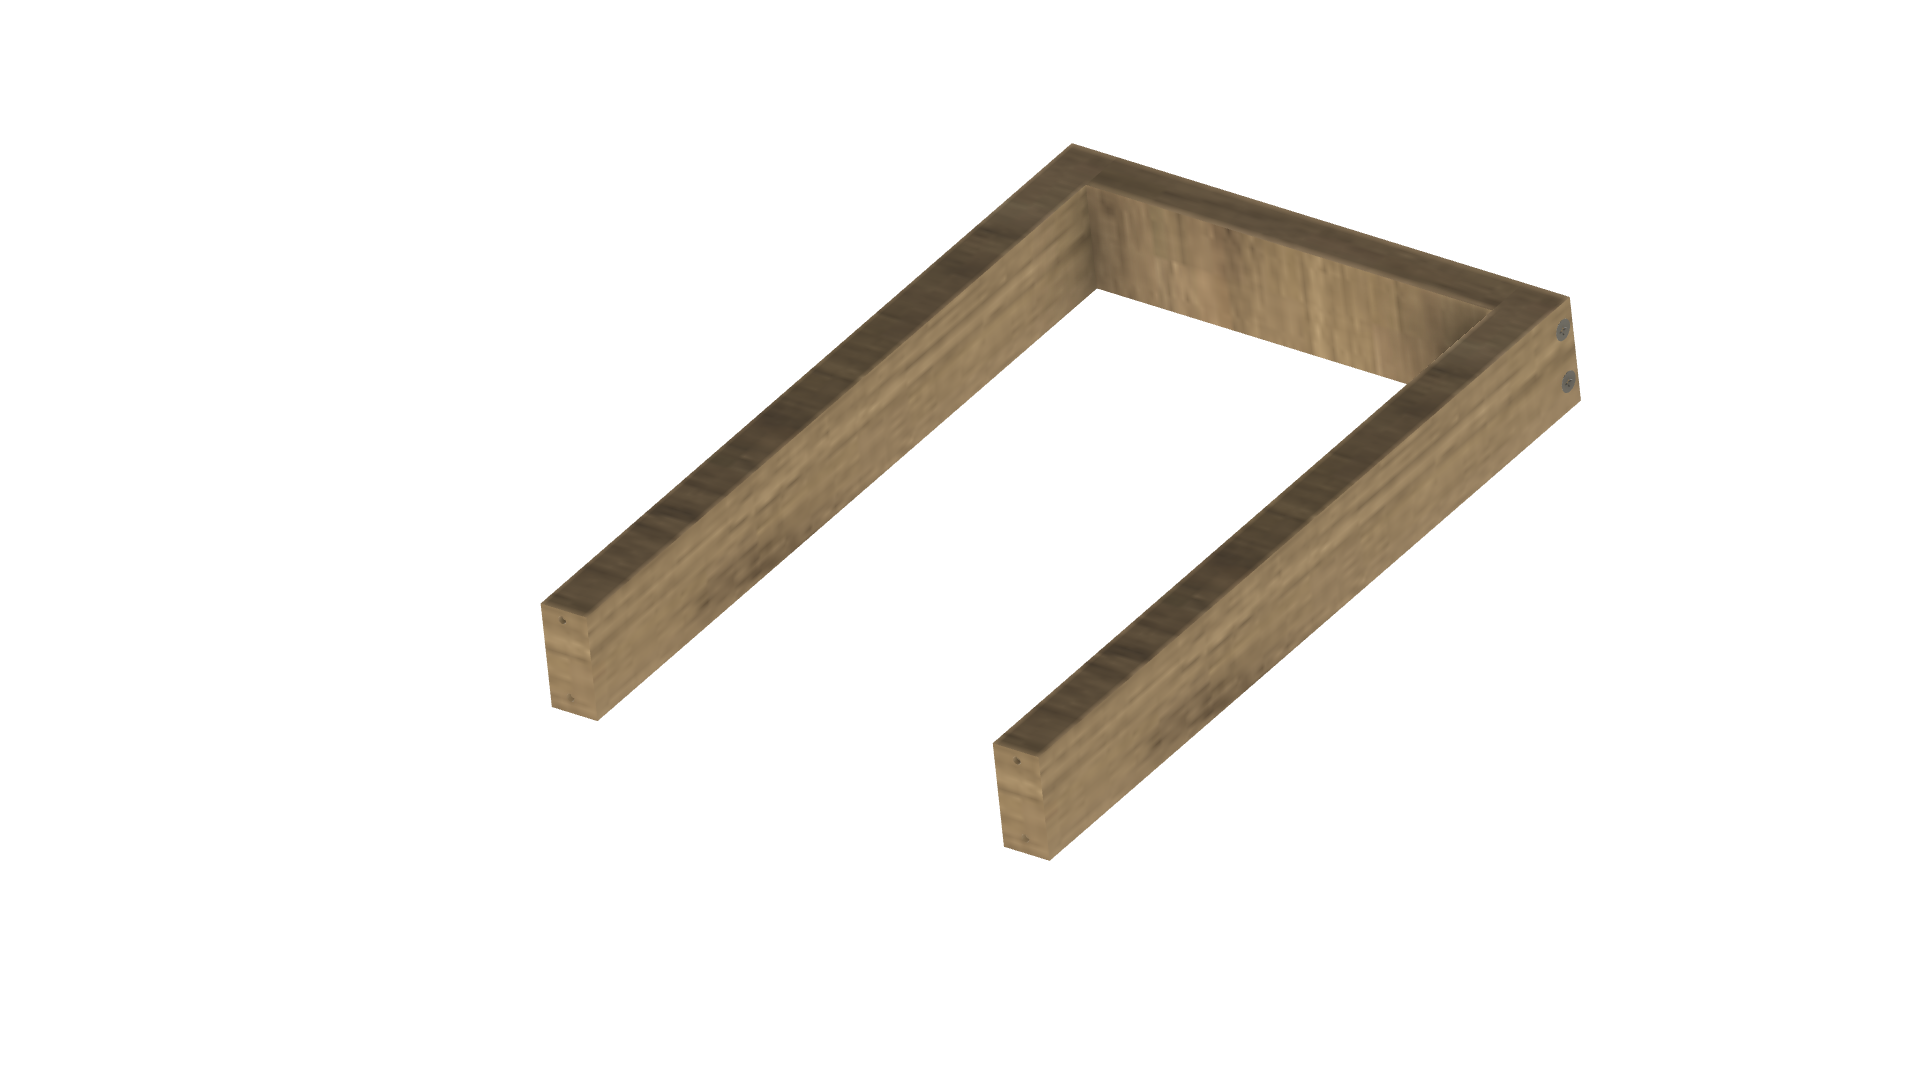
2Join part of the frame together
![]()
Join the two sides and the back of the frame together only. I used long wood screws and glue for a strong frame.
-
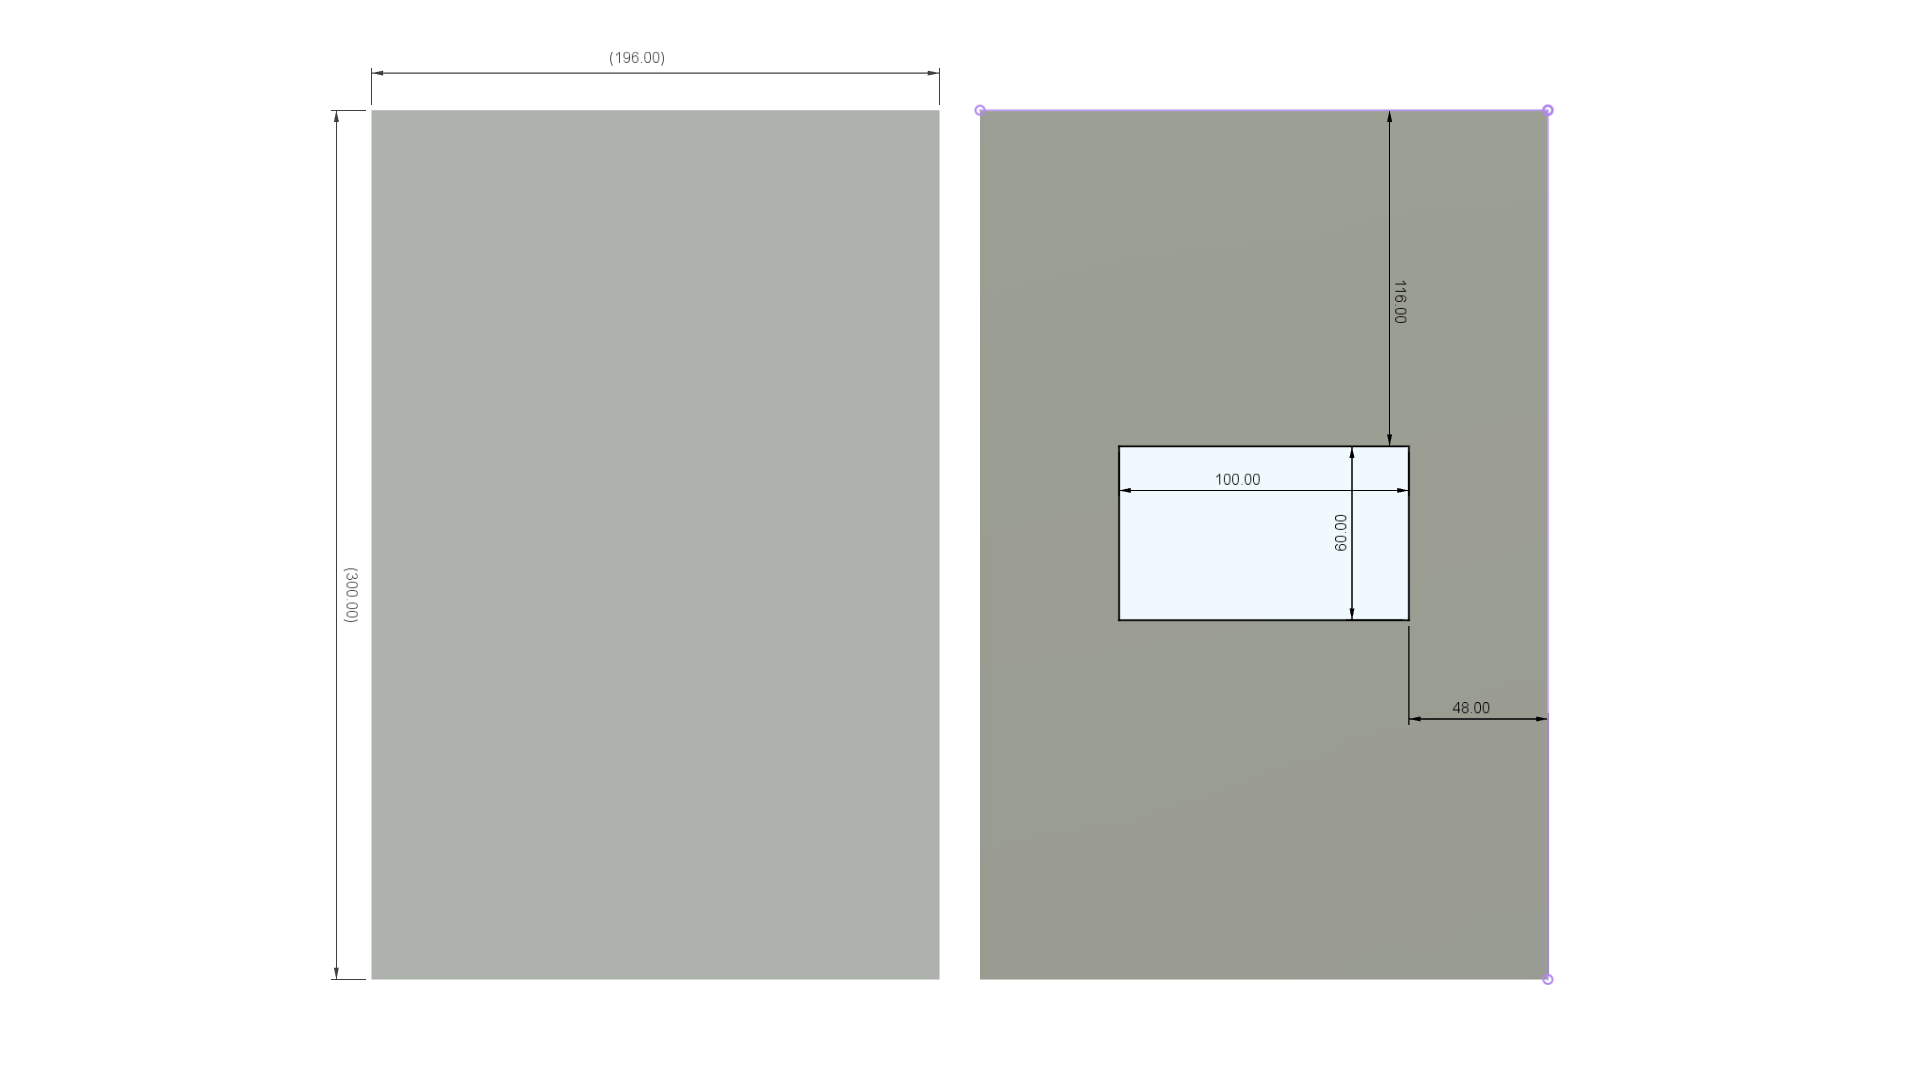
3Prepare top and bottom covers
![]()
I used some scrap material I had around my workshop both around 5mm thick. You can either print the SVGs I supplied and use these as a template or mark out the dimensions shown above.
-
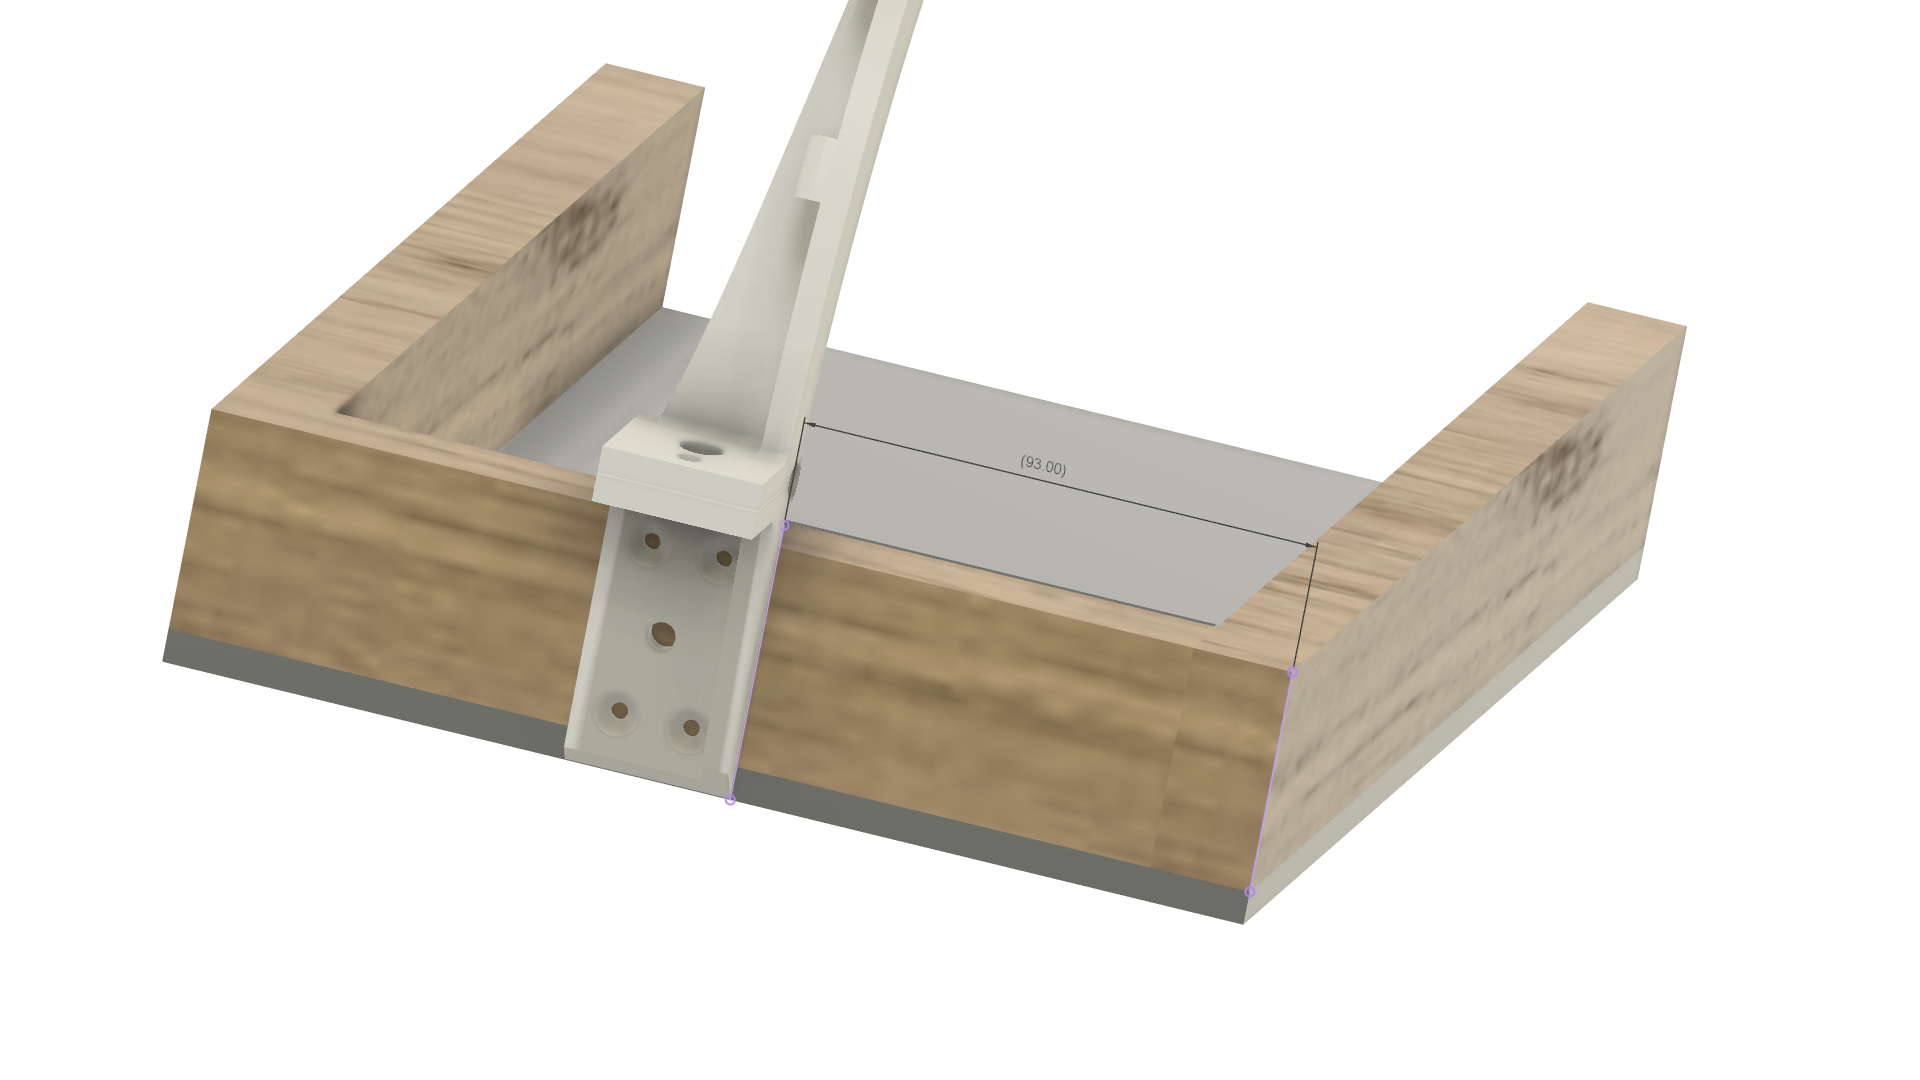
4Assemble the bow
![]()
Attach the baseboard to the frame with screws and wood glue. Assemble your bow (I don't have the bolts in the picture) Use the M6 bolt and wingnut and the M4 bolt and wingnut. The right-hand side of the bow (from the back) should be 93mm from the edge of the frame (see picture). Mark the holes with a pen. The hole in the center of the mount is for the wire to the top of the bow.
-
5Mount terminal plate
![]()
Center the terminal plate where you like on the back of the frame and mark the holes out.
-
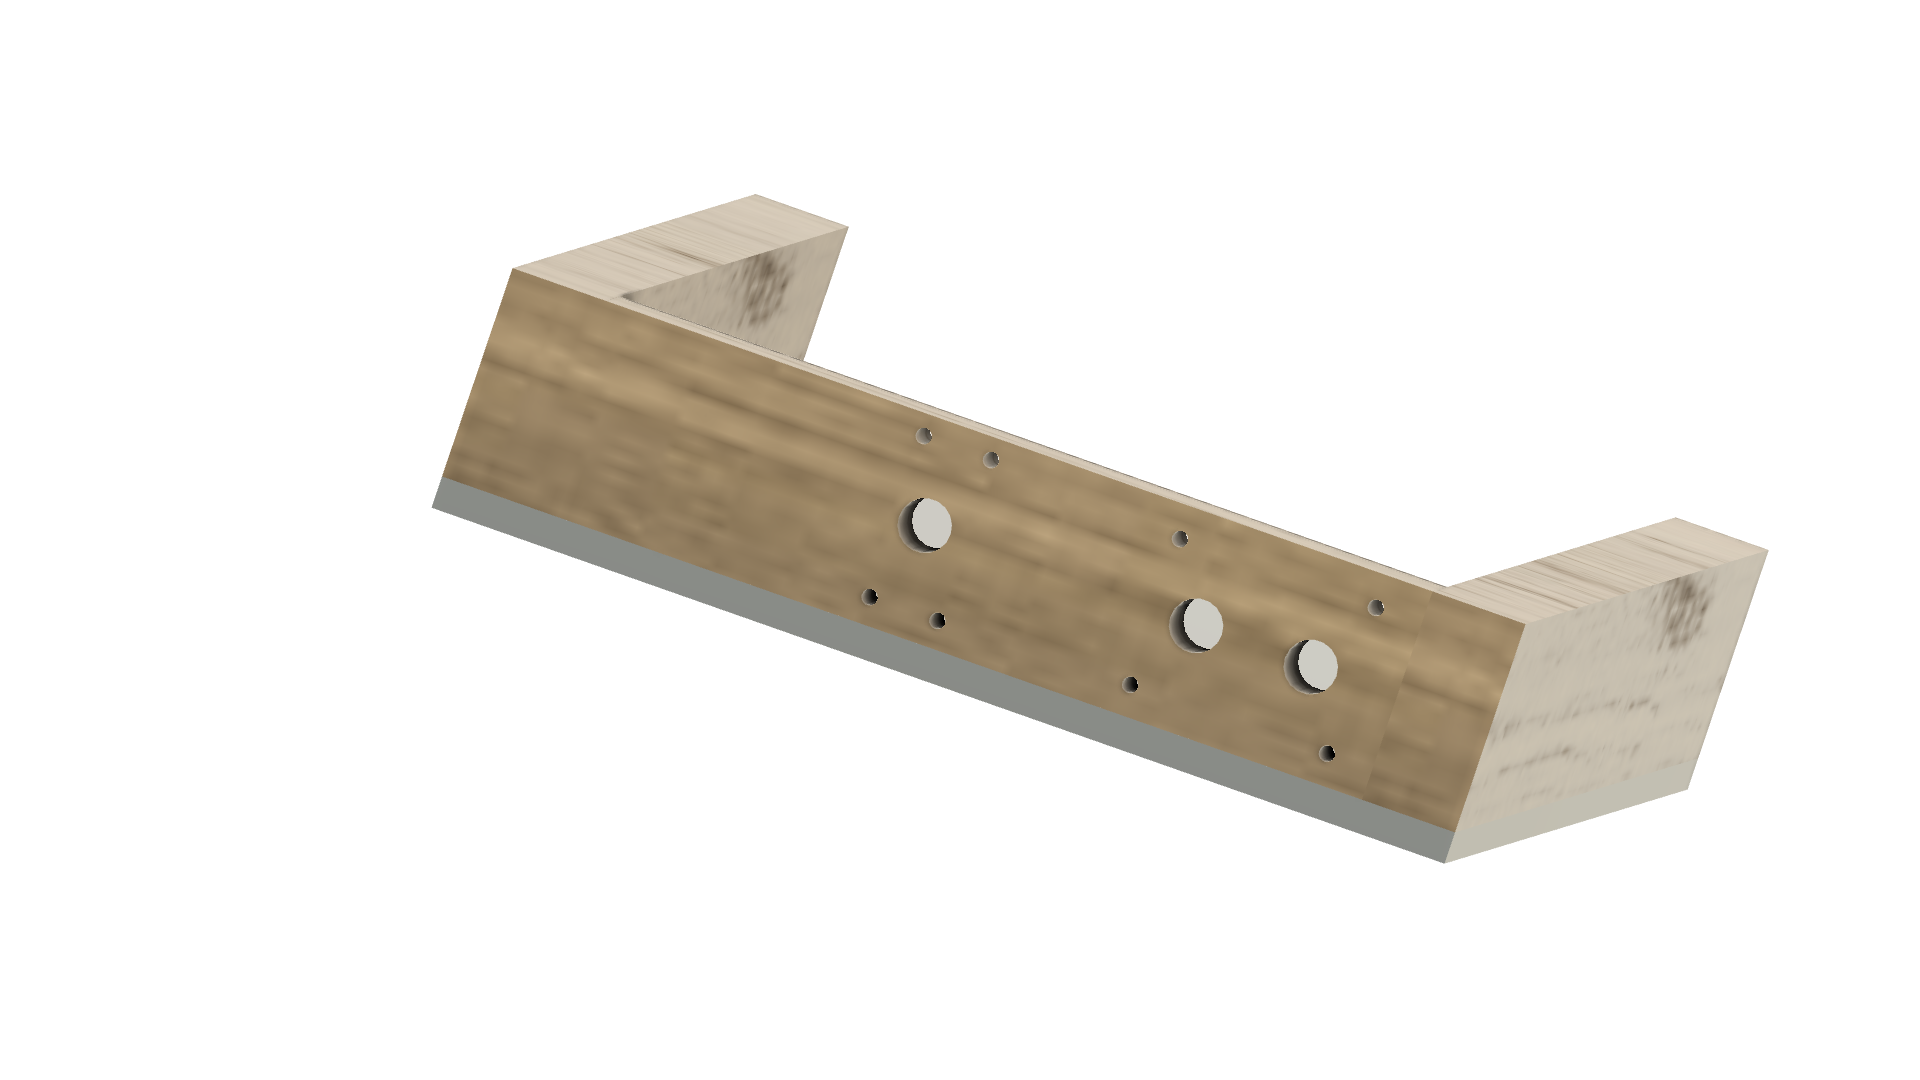
6Drill holes for mount and terminal mount
![]()
Drill out the holes for the screws with a 1-2mm drill to prevent the wood splitting. The larger holes should match the size of your banana terminals.
-
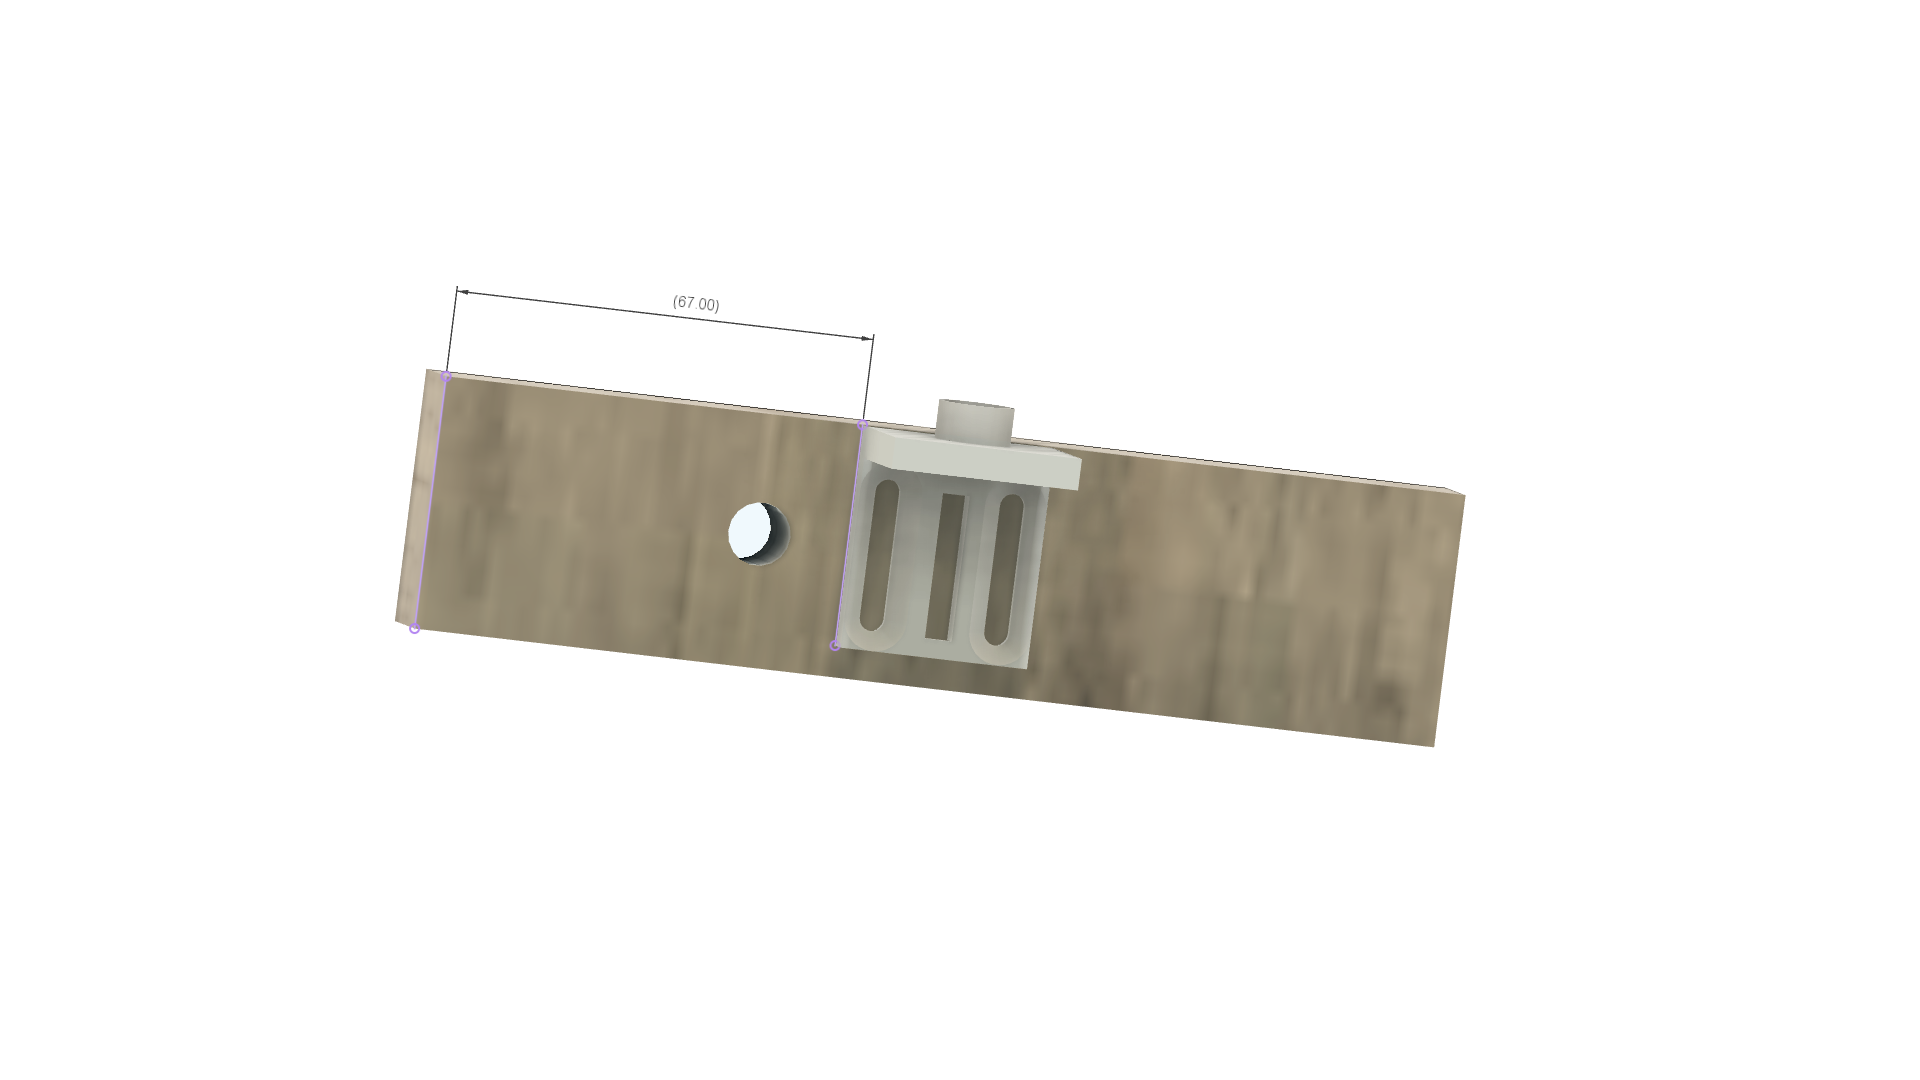
7Mount the bottom tension point
![]()
With the last piece of cut, framing mount the bottom tension point. It should be 67mm from the edge of the frame (see picture) also drill a hole in the frame where you like. This is for the wiring to the speed controller. Drill holes on either side of the tension point for the screws. This part should move up and down freely. Drill a 4mm hole in the middle slot for the tension bolt.
-
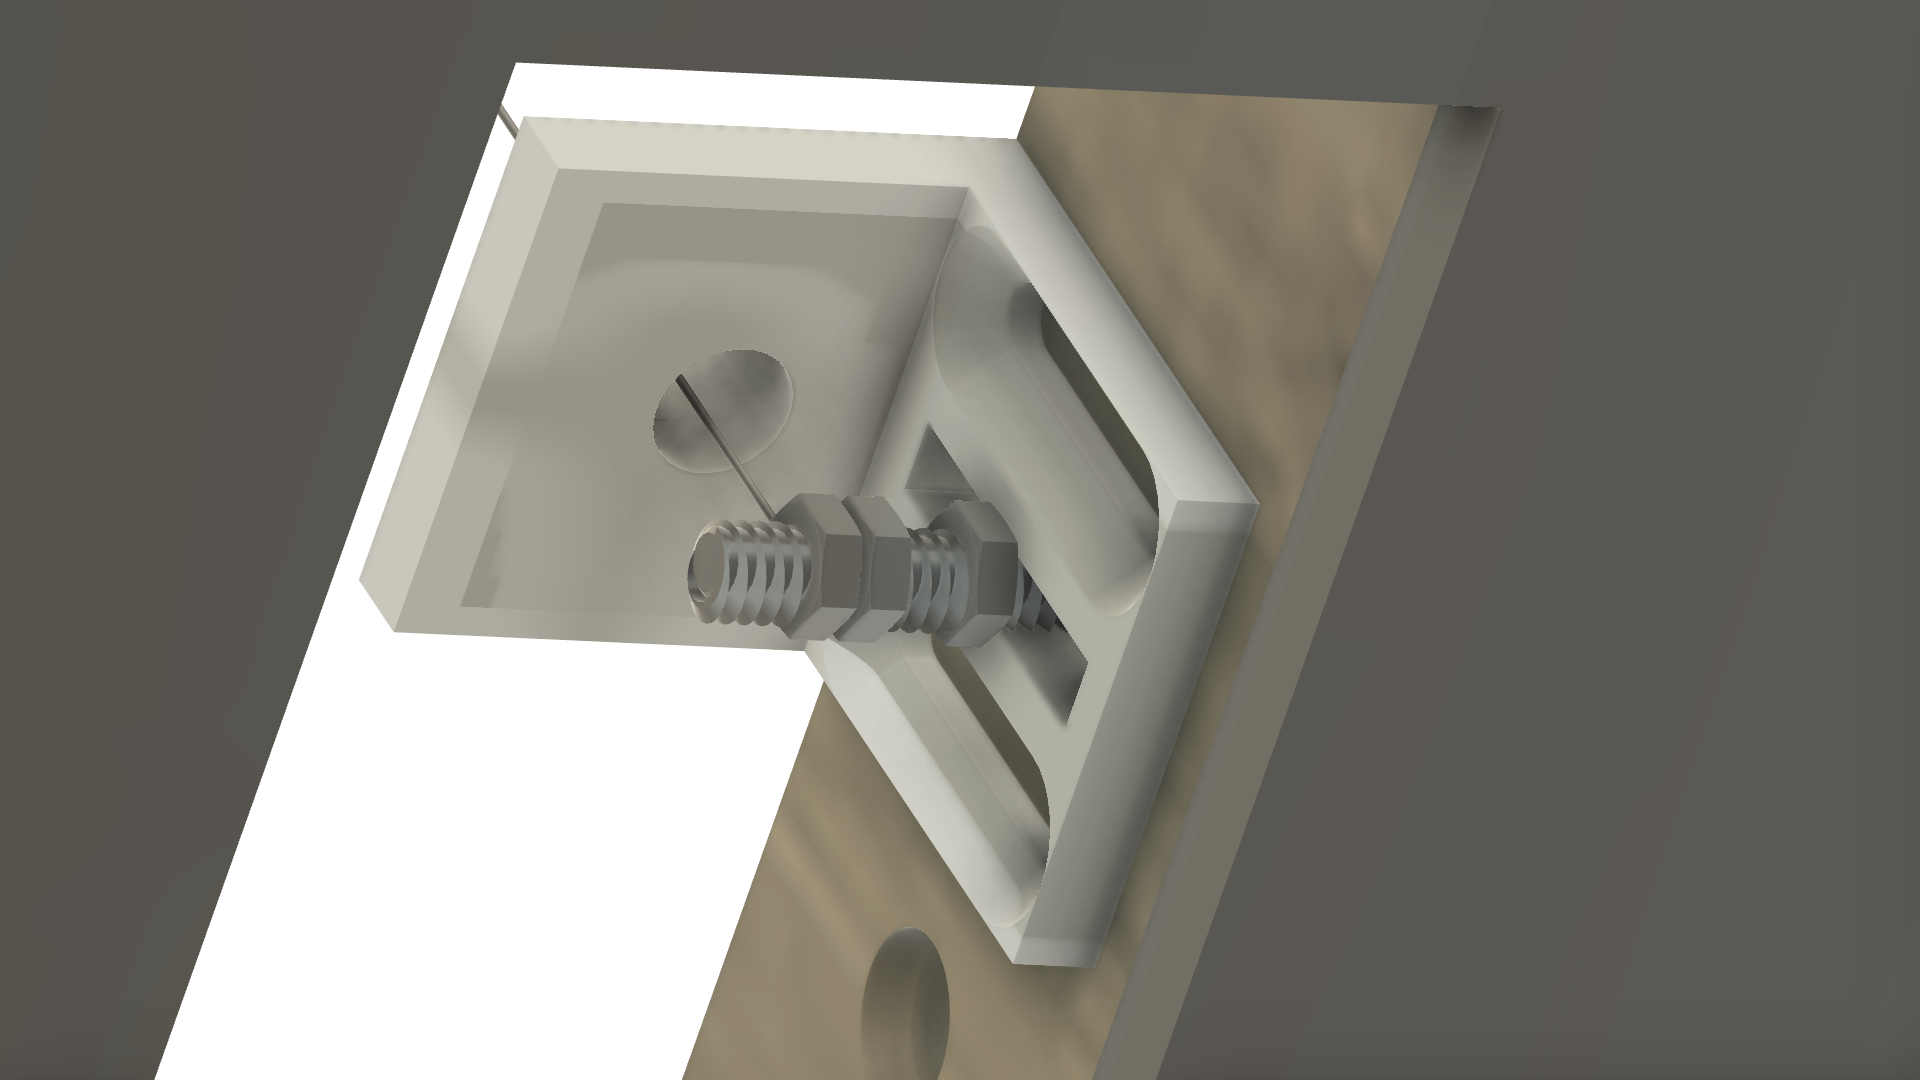
8Set the wire mounting point
![]()
Prepare your nichrome wire with a loop in the end. Feed the long M4 bolt from the back and use one of the bolts to hold the bracket in place. Between two other nuts place the nichrome wire so the wire is in the middle of the hole at the top of the bracket.
-
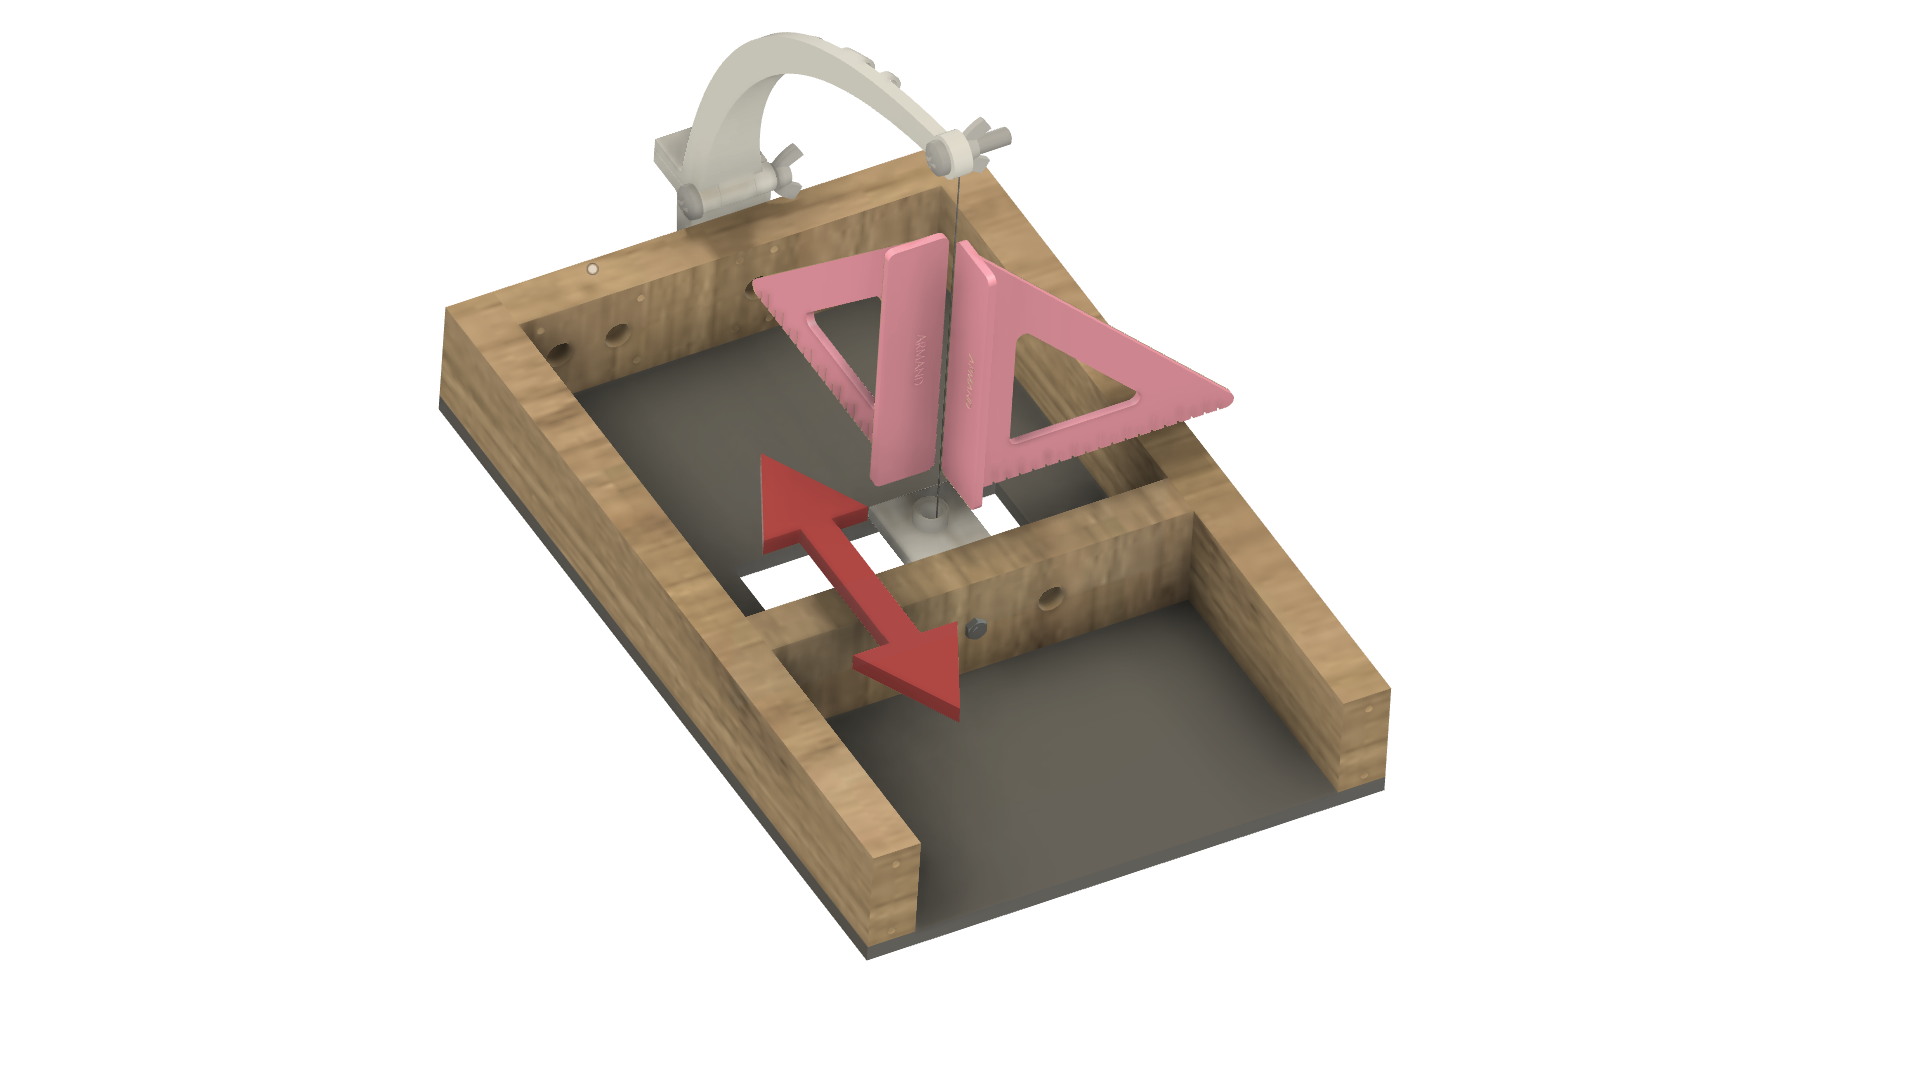
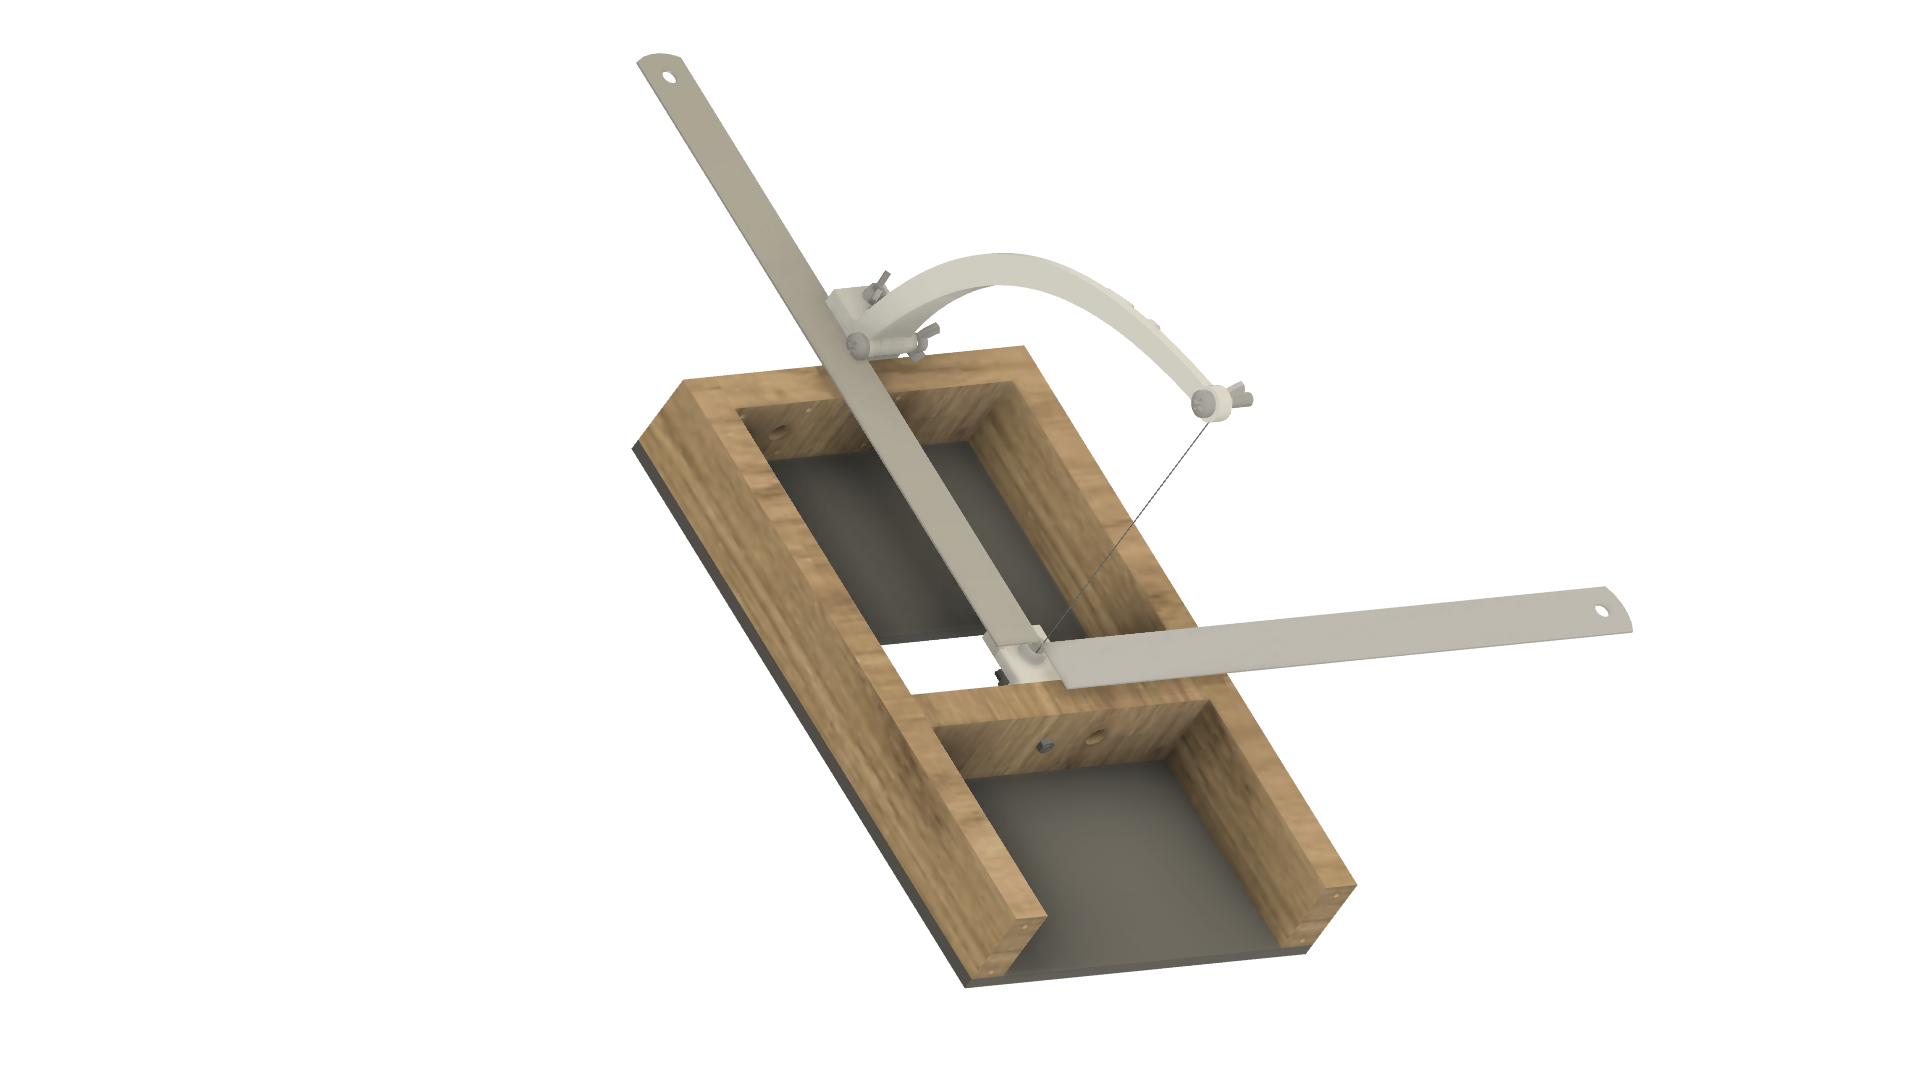
9Align cutting wire.
![]()
Place the bottom framing with the tension bolt into the rest of the framing. Tighten the nichrome wire around the top of the bow with enough tension that the wire is tight.
The wire gets hot and PLA doesn't like hot so you should use a locking bolt like on the bottom tension point to absorb any heat. Then add a further locking nut.
Move this framing back and forward until the wire is at 90 degrees to the rest of the frame. Use a square if you need to check this. Mark the position on the frame and drill the last piece of framing in place.
Potentially you may need to move the bottom mount bolt left or right to get the correct angle. Later this plate will be screwed in place.
-
10Find center of cutting wire
![]()
Using a ruler measure the distance between the cutting wire from the back and side of the frame.
Super simple foam cutter
This hotwire cutter uses a PC power supply and no spring to cut foam and polystyrenes.

Discussions
Become a Hackaday.io Member
Create an account to leave a comment. Already have an account? Log In.