 Julien OUDIN
-
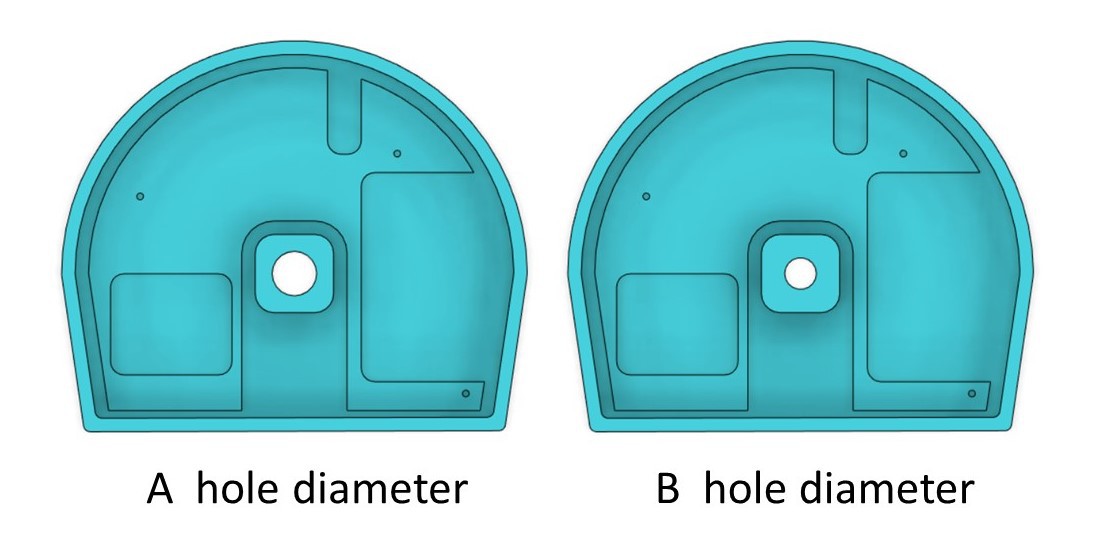
1Select the design fit to your needs
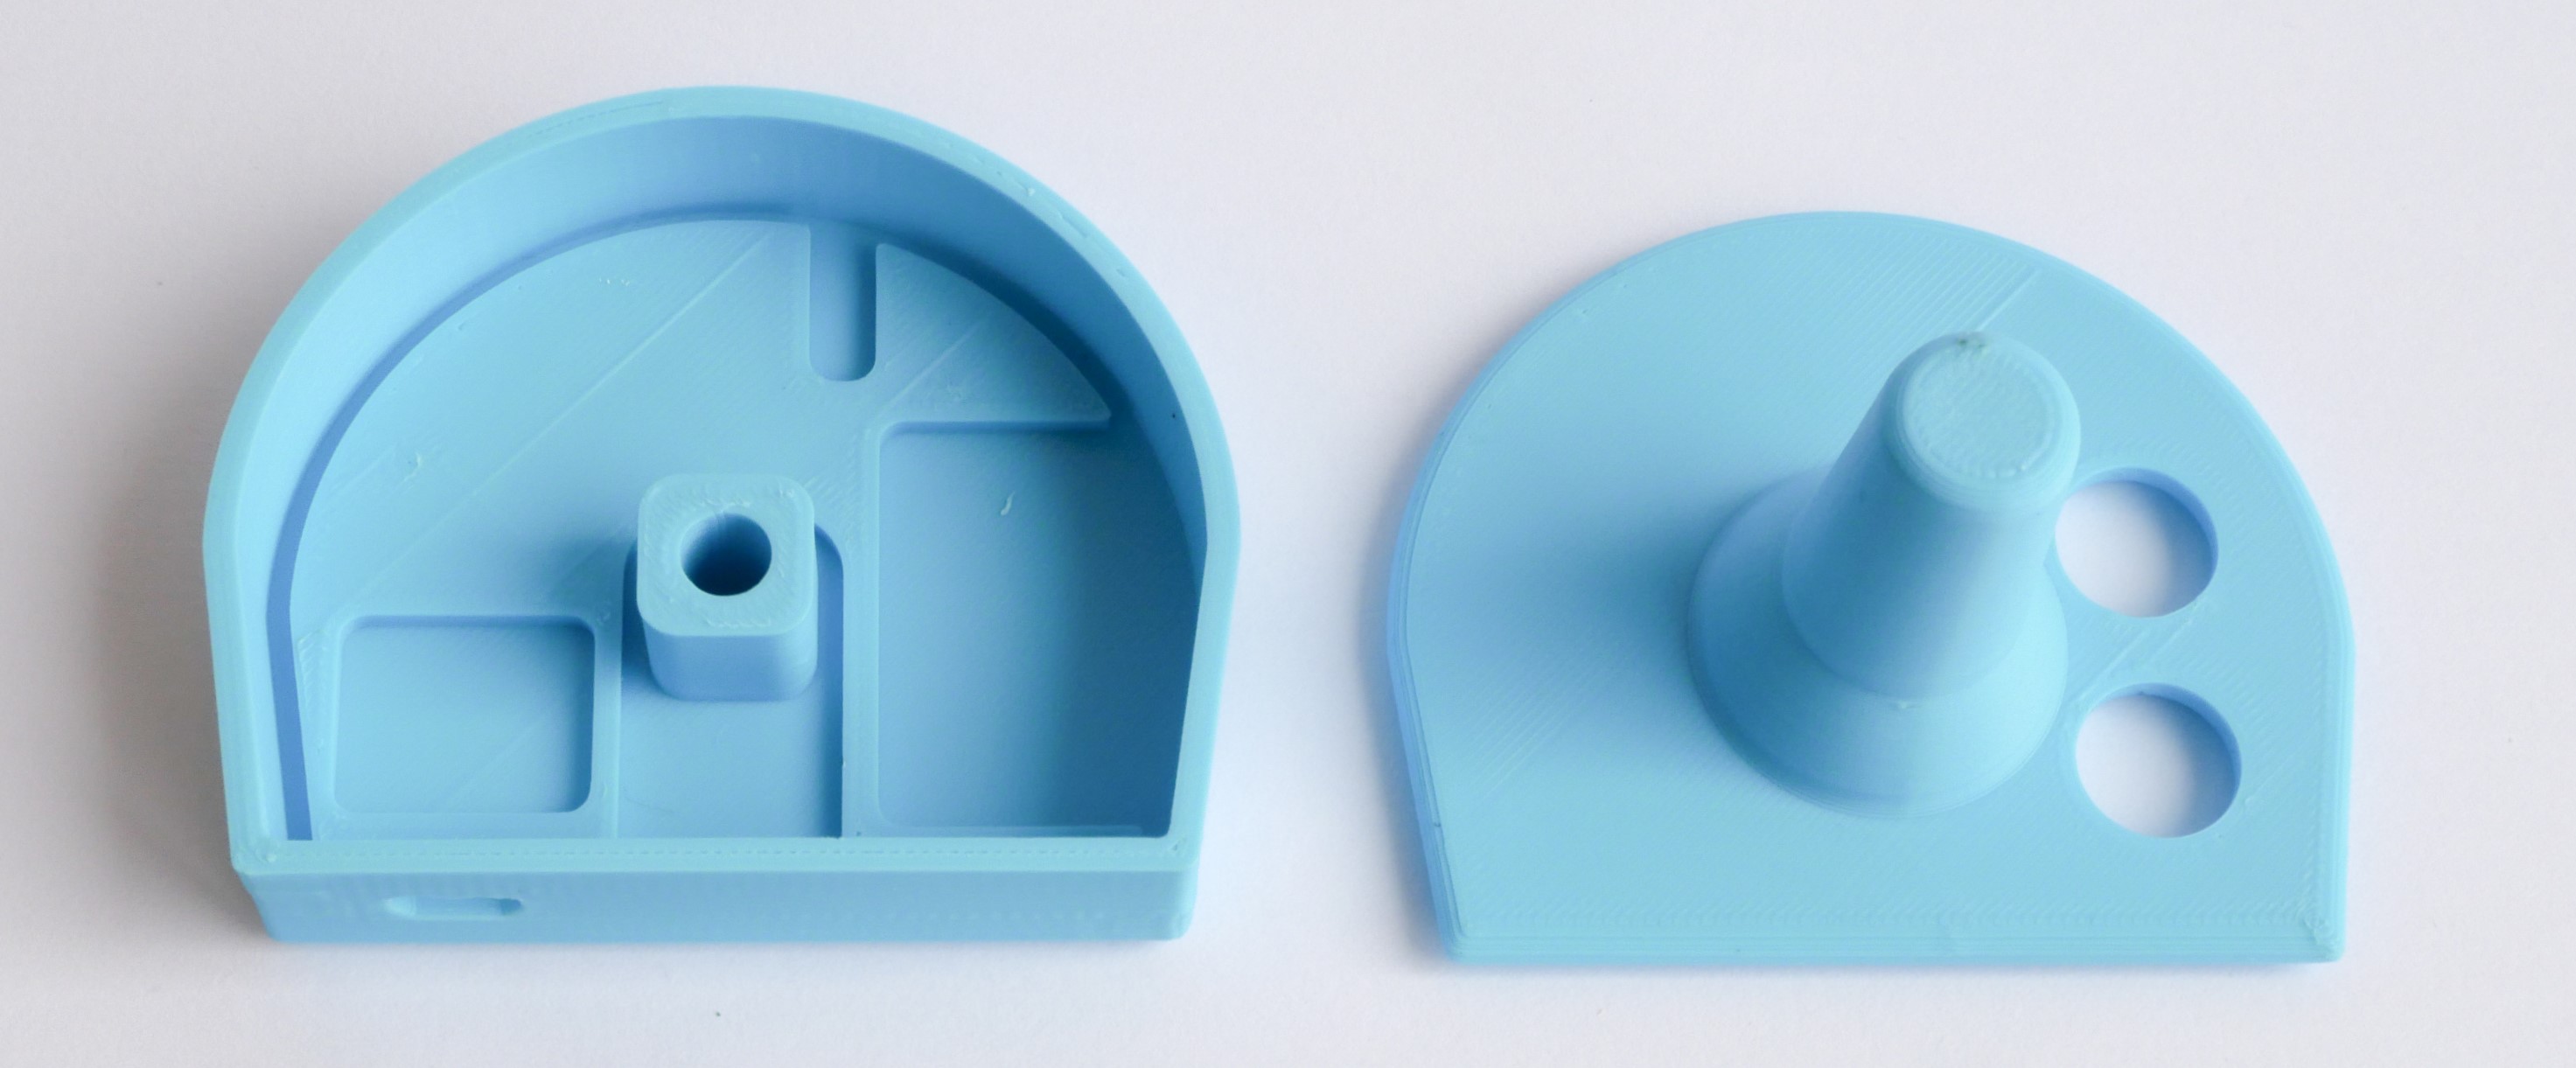
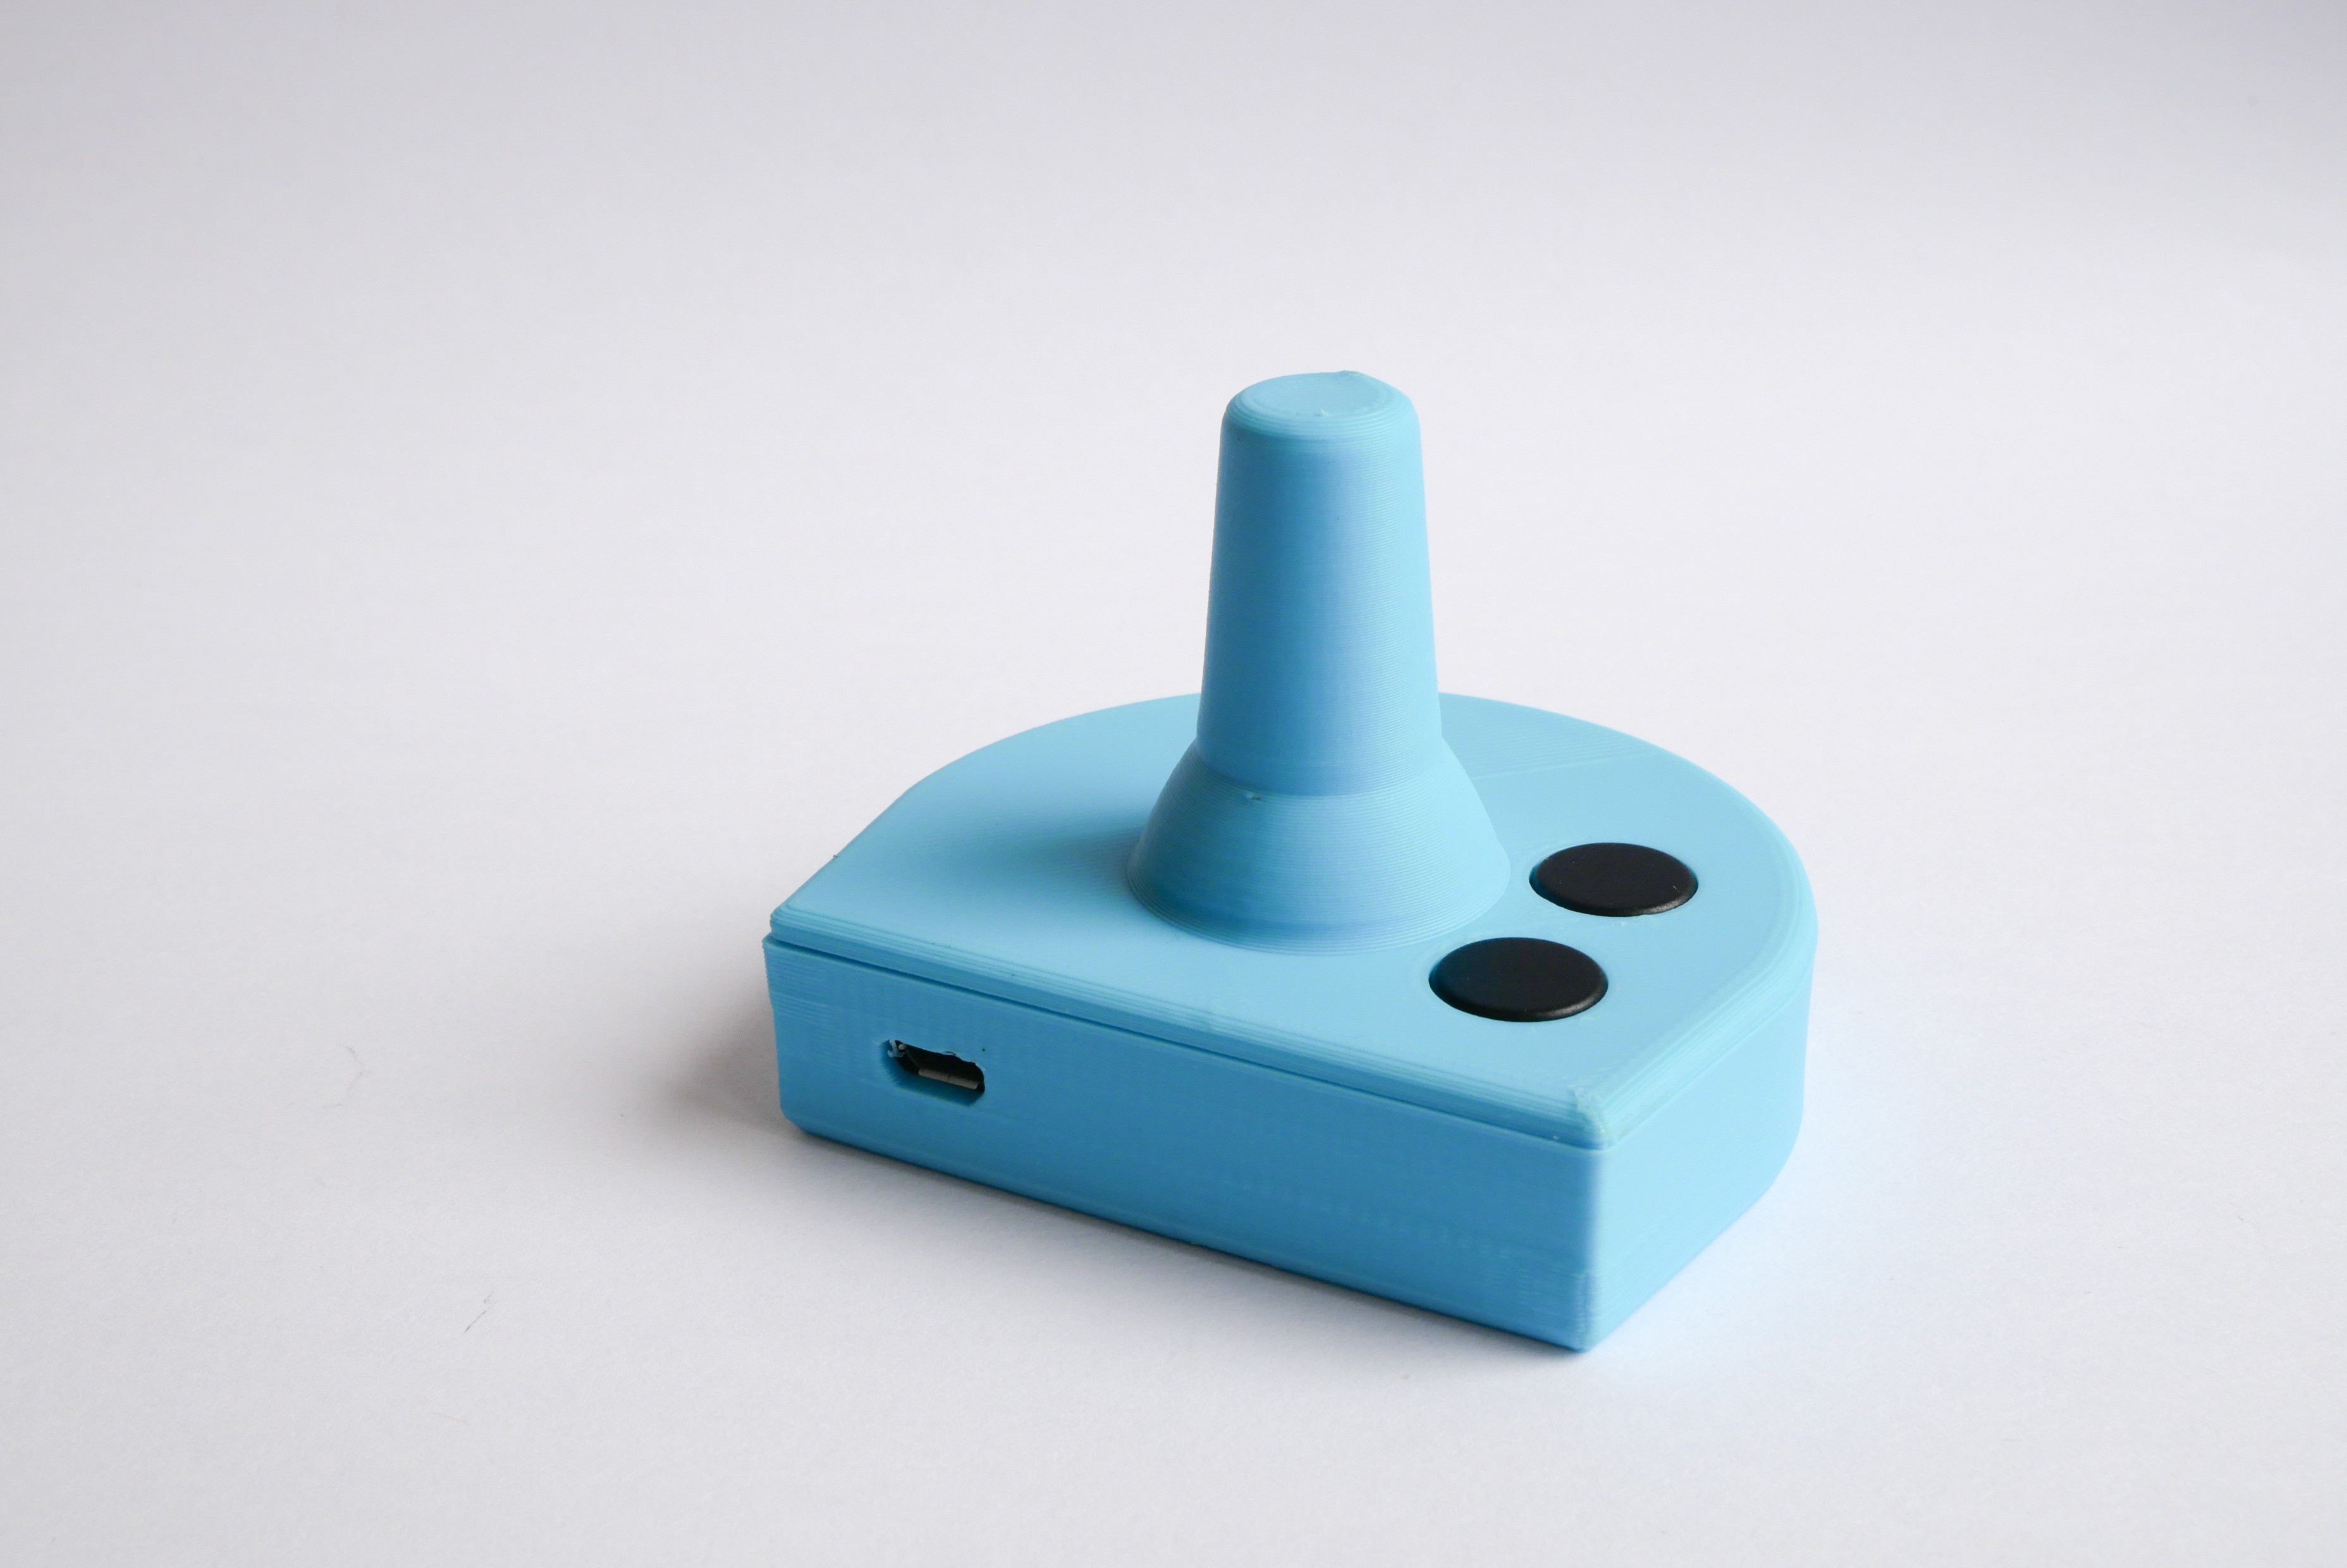
The enclosure is made of two printed parts (base and top) wich will clip together .
Select the right design, fit to your needs
- WHEELCHAIR COMPATIBILITY
For a 6.4 mm diameter joybar = Power wheelchair with Rnet or PRIDE electronic : Permobil, Ottobock, Sunrise, Levo.
select : base A_6.4 mm hole.stl
For a 5mm diameter joybar = Power wheelchair with Linx electronic (Invacare)
select : base B_5mm hole.stl
![]()
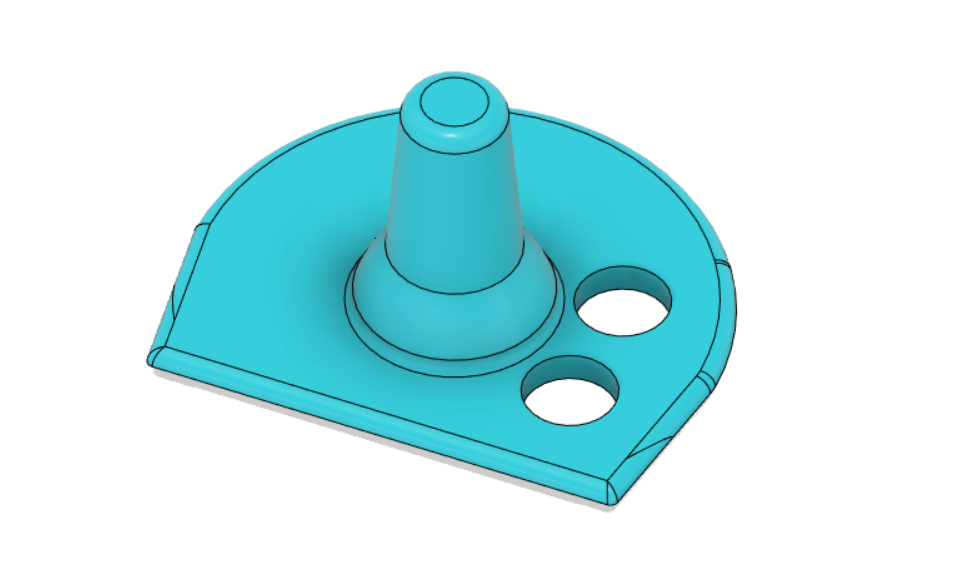
- HANDLE
For standard needs (standard joystick handle) : select top_joystick.stl
![]()
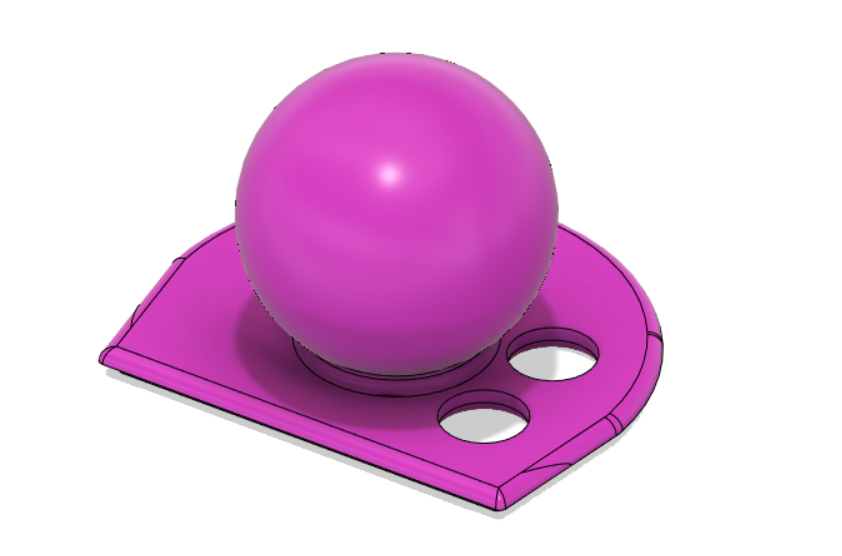
If you need a ball to facilitate gripping select : select top_ball.stl
![]()
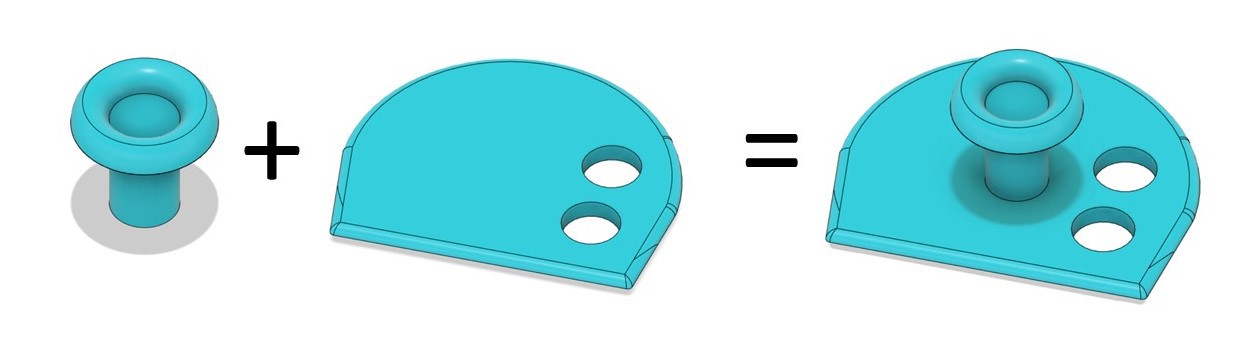
You can also design a specific handle adapted to your need (ergonomic, esthetic) and mix it to this base : top_flat.stl
![]()
-
2Print the 3D parts
Material :
We use ABS on a Zortrax M200 for its resistance and its functional prototyping properties.
It should work well with other plastic types, depending of the 3D printers you use.
![]()
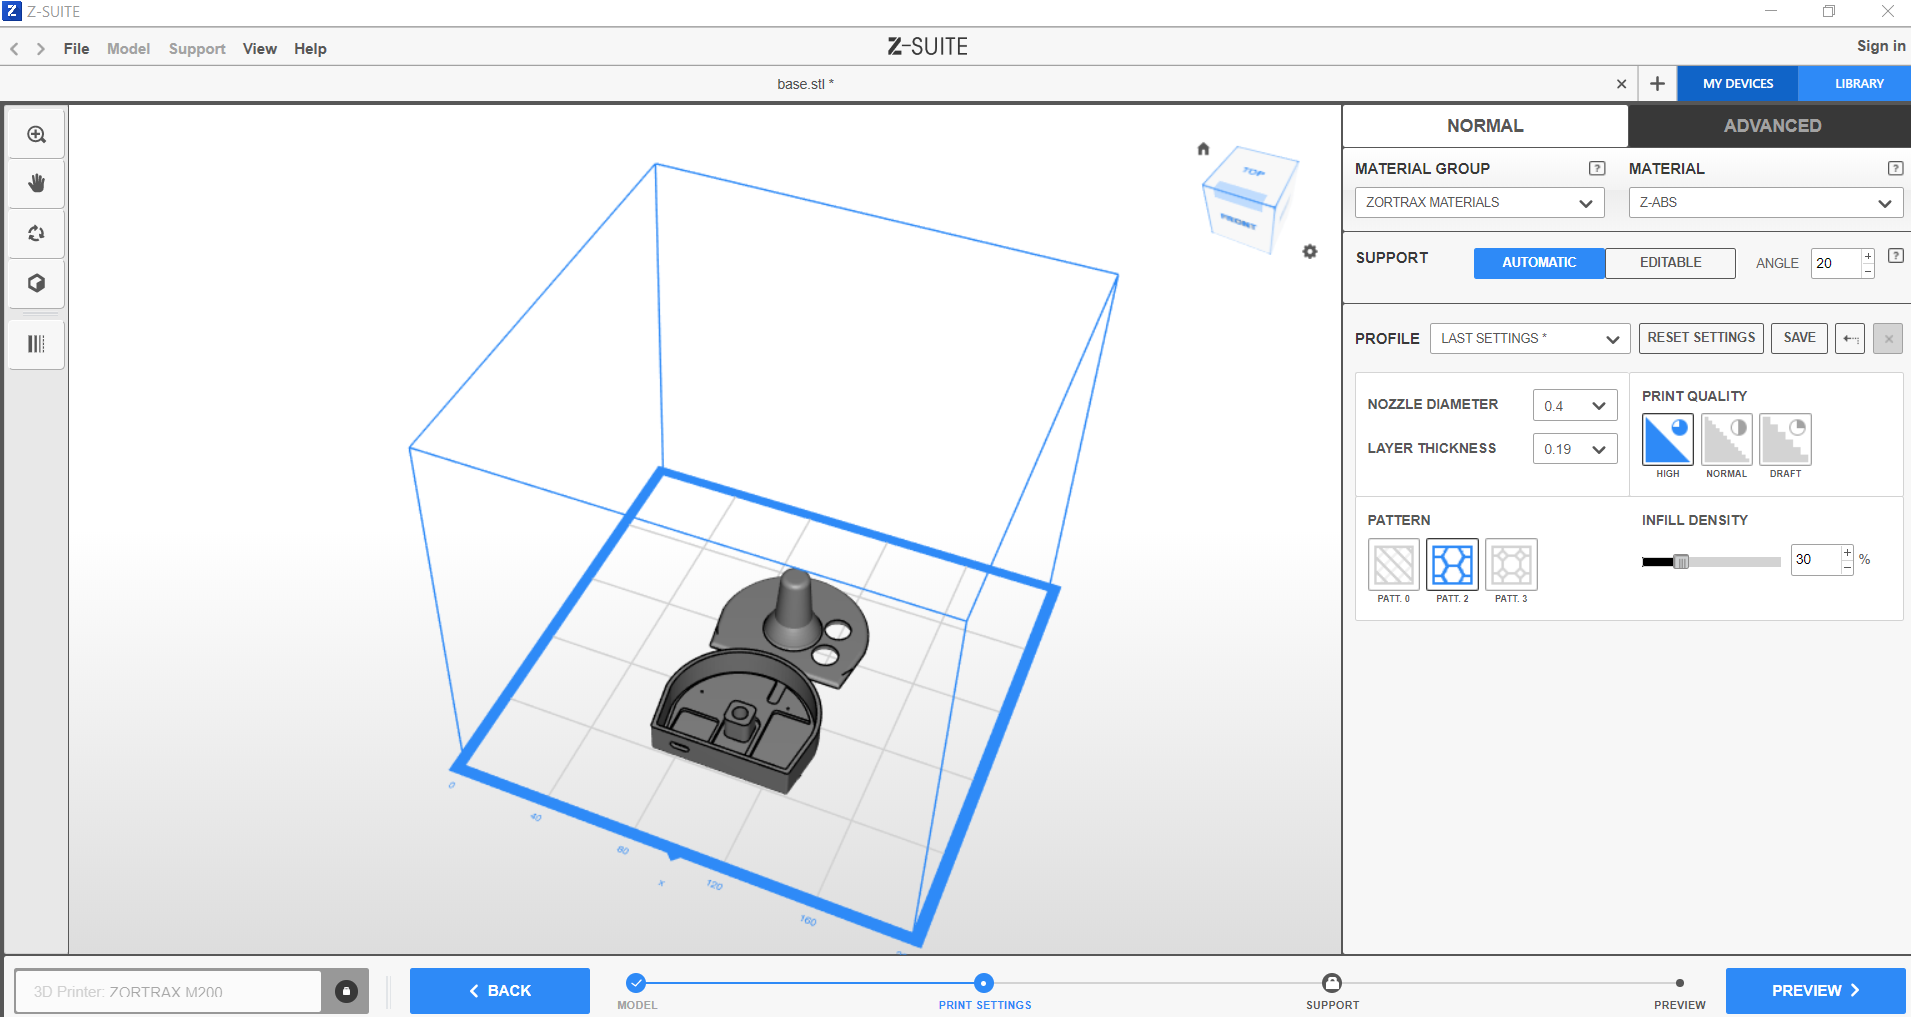
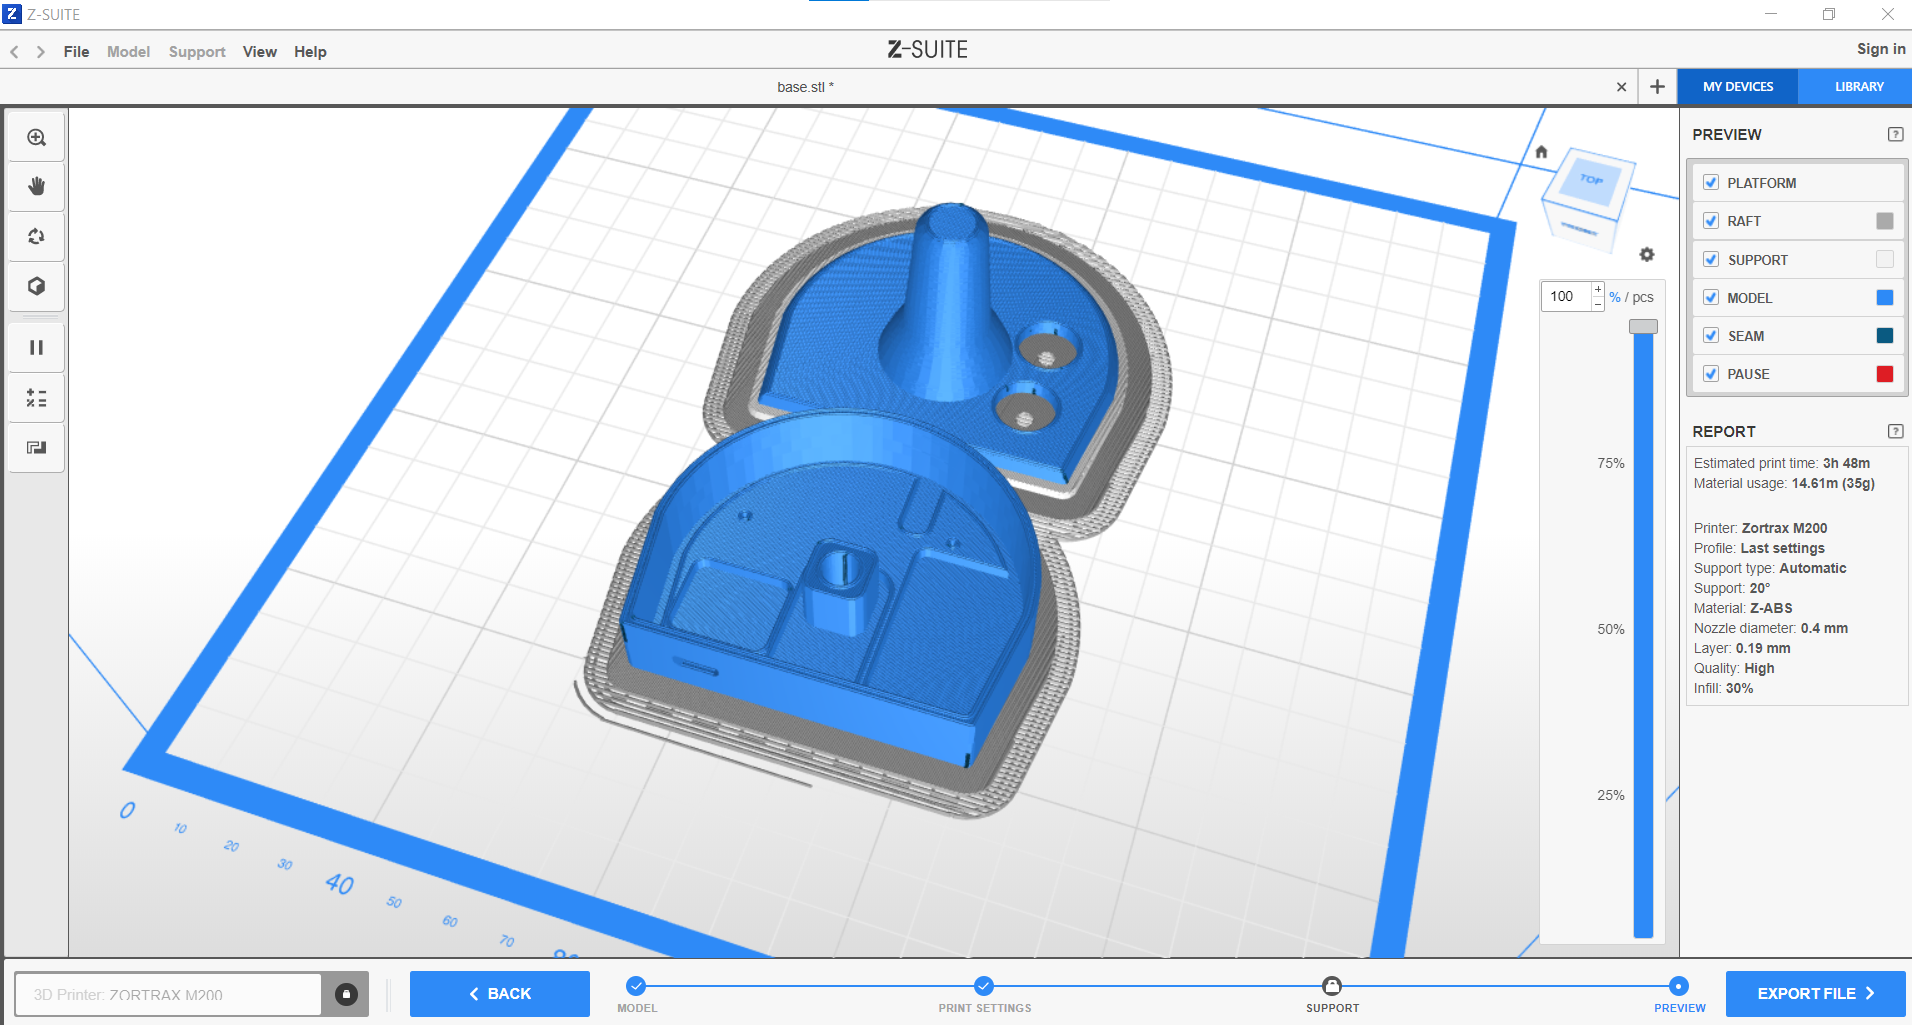
For a standard print, we have good result with this parameters :
Infill = 30 % of
Layers thickness = 0.19mm
No support added
Printing time : 3h48
Material usage : 14.6 m, 35g
![]()
-
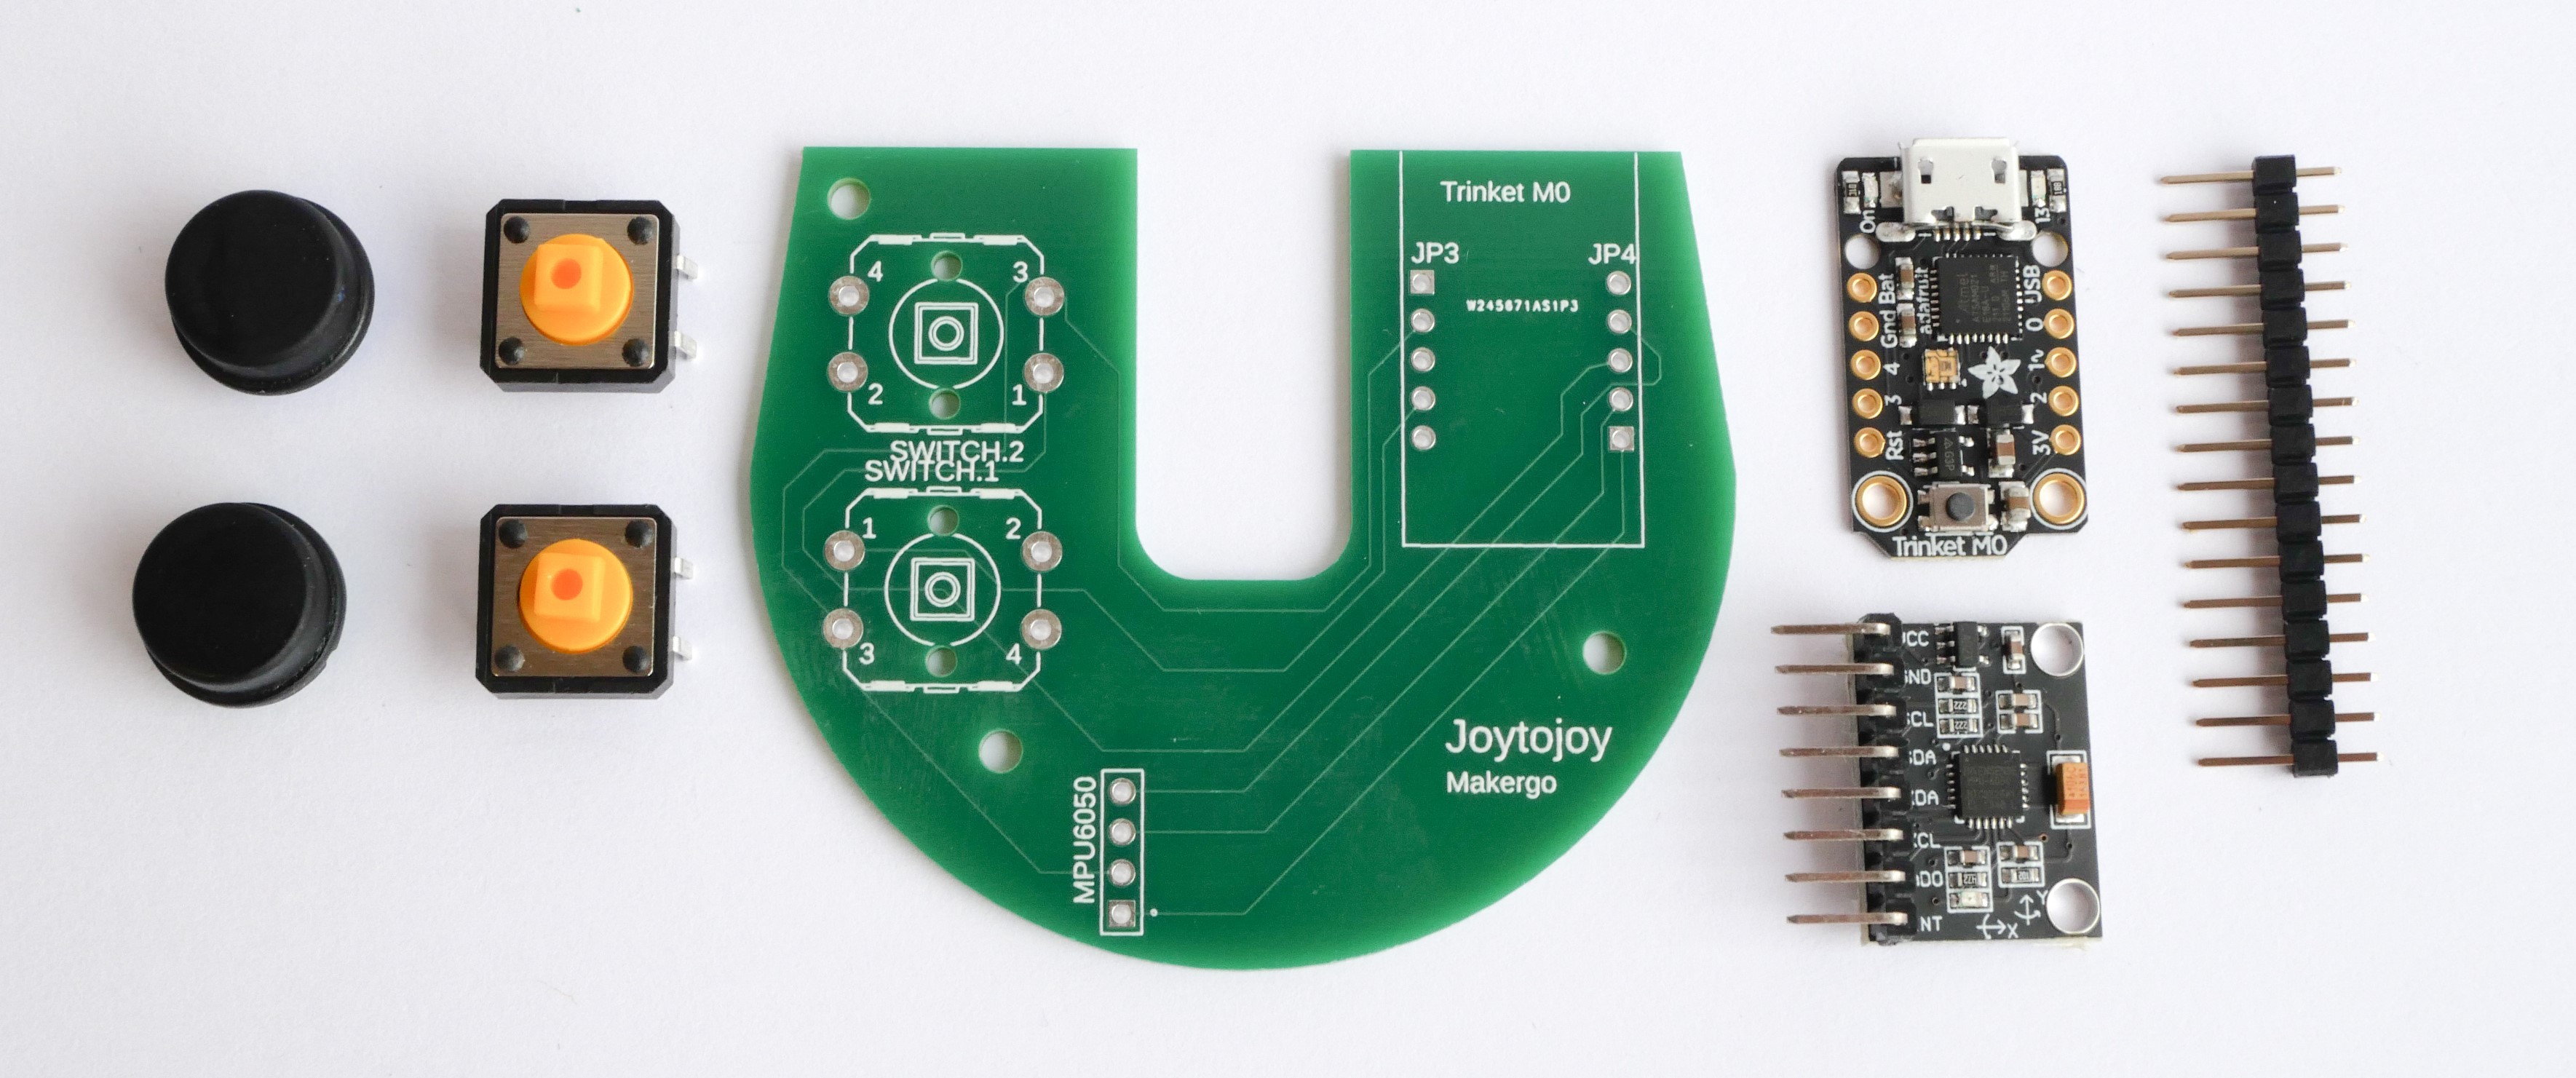
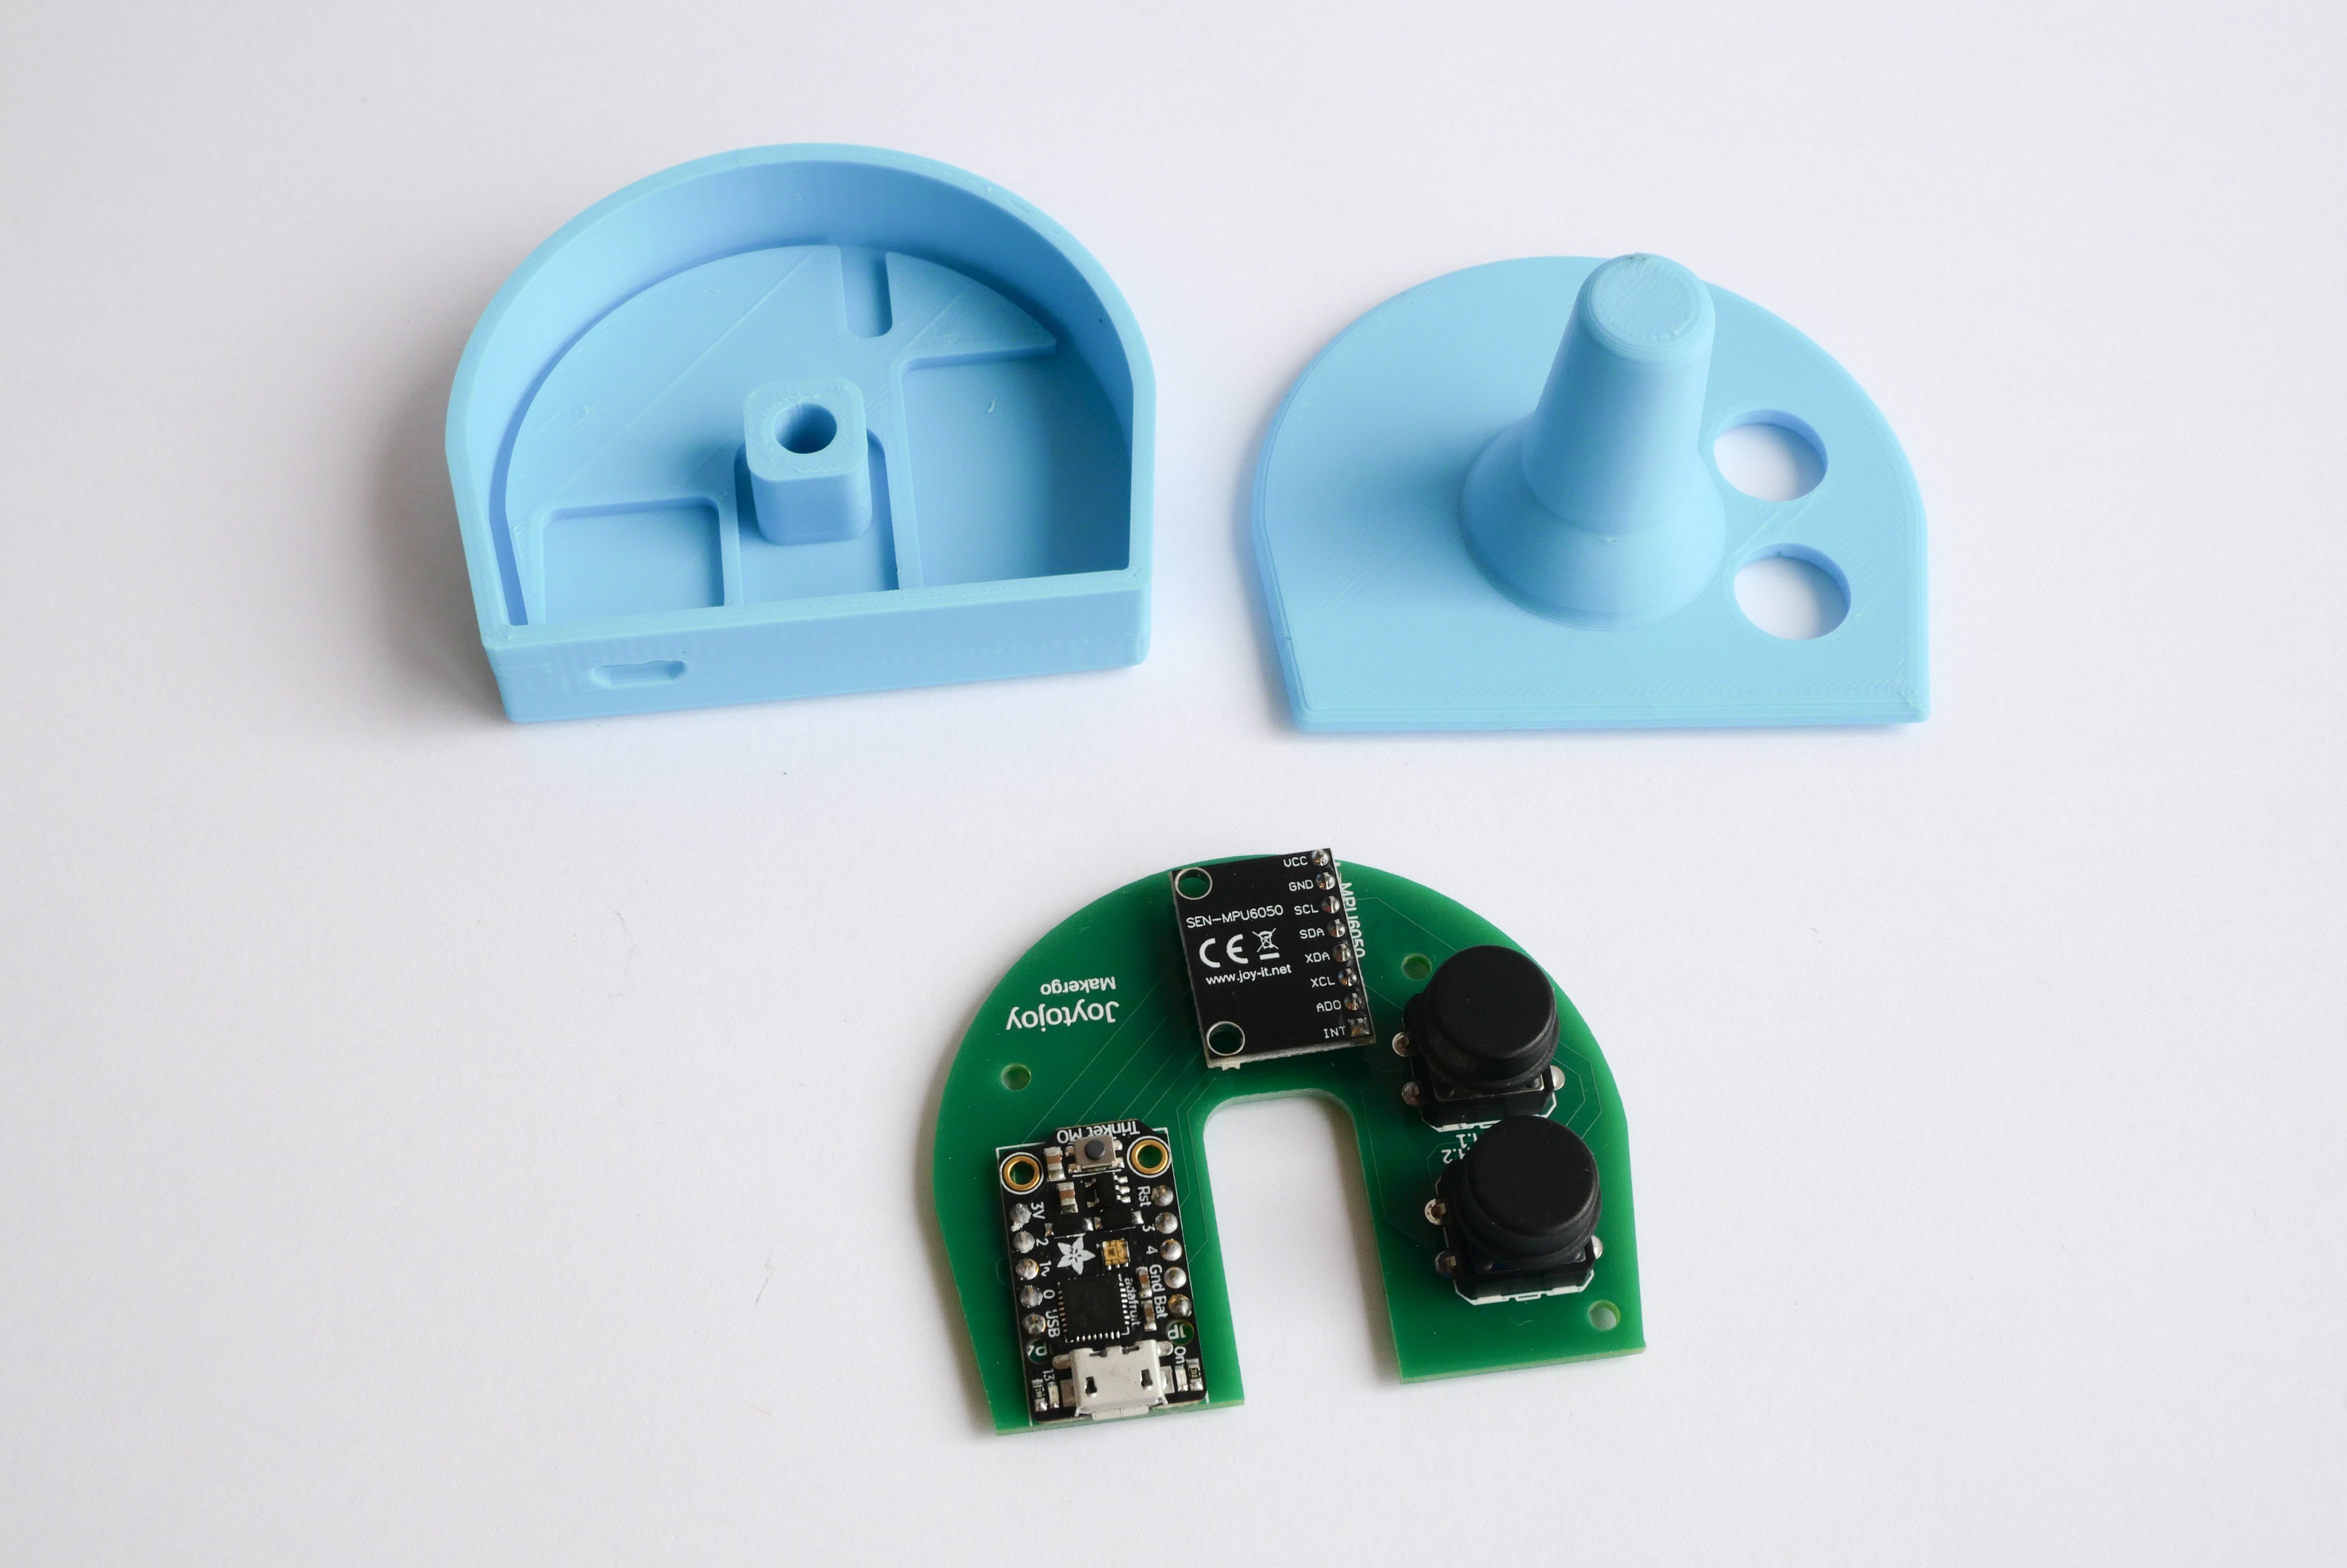
3Electronic assembly
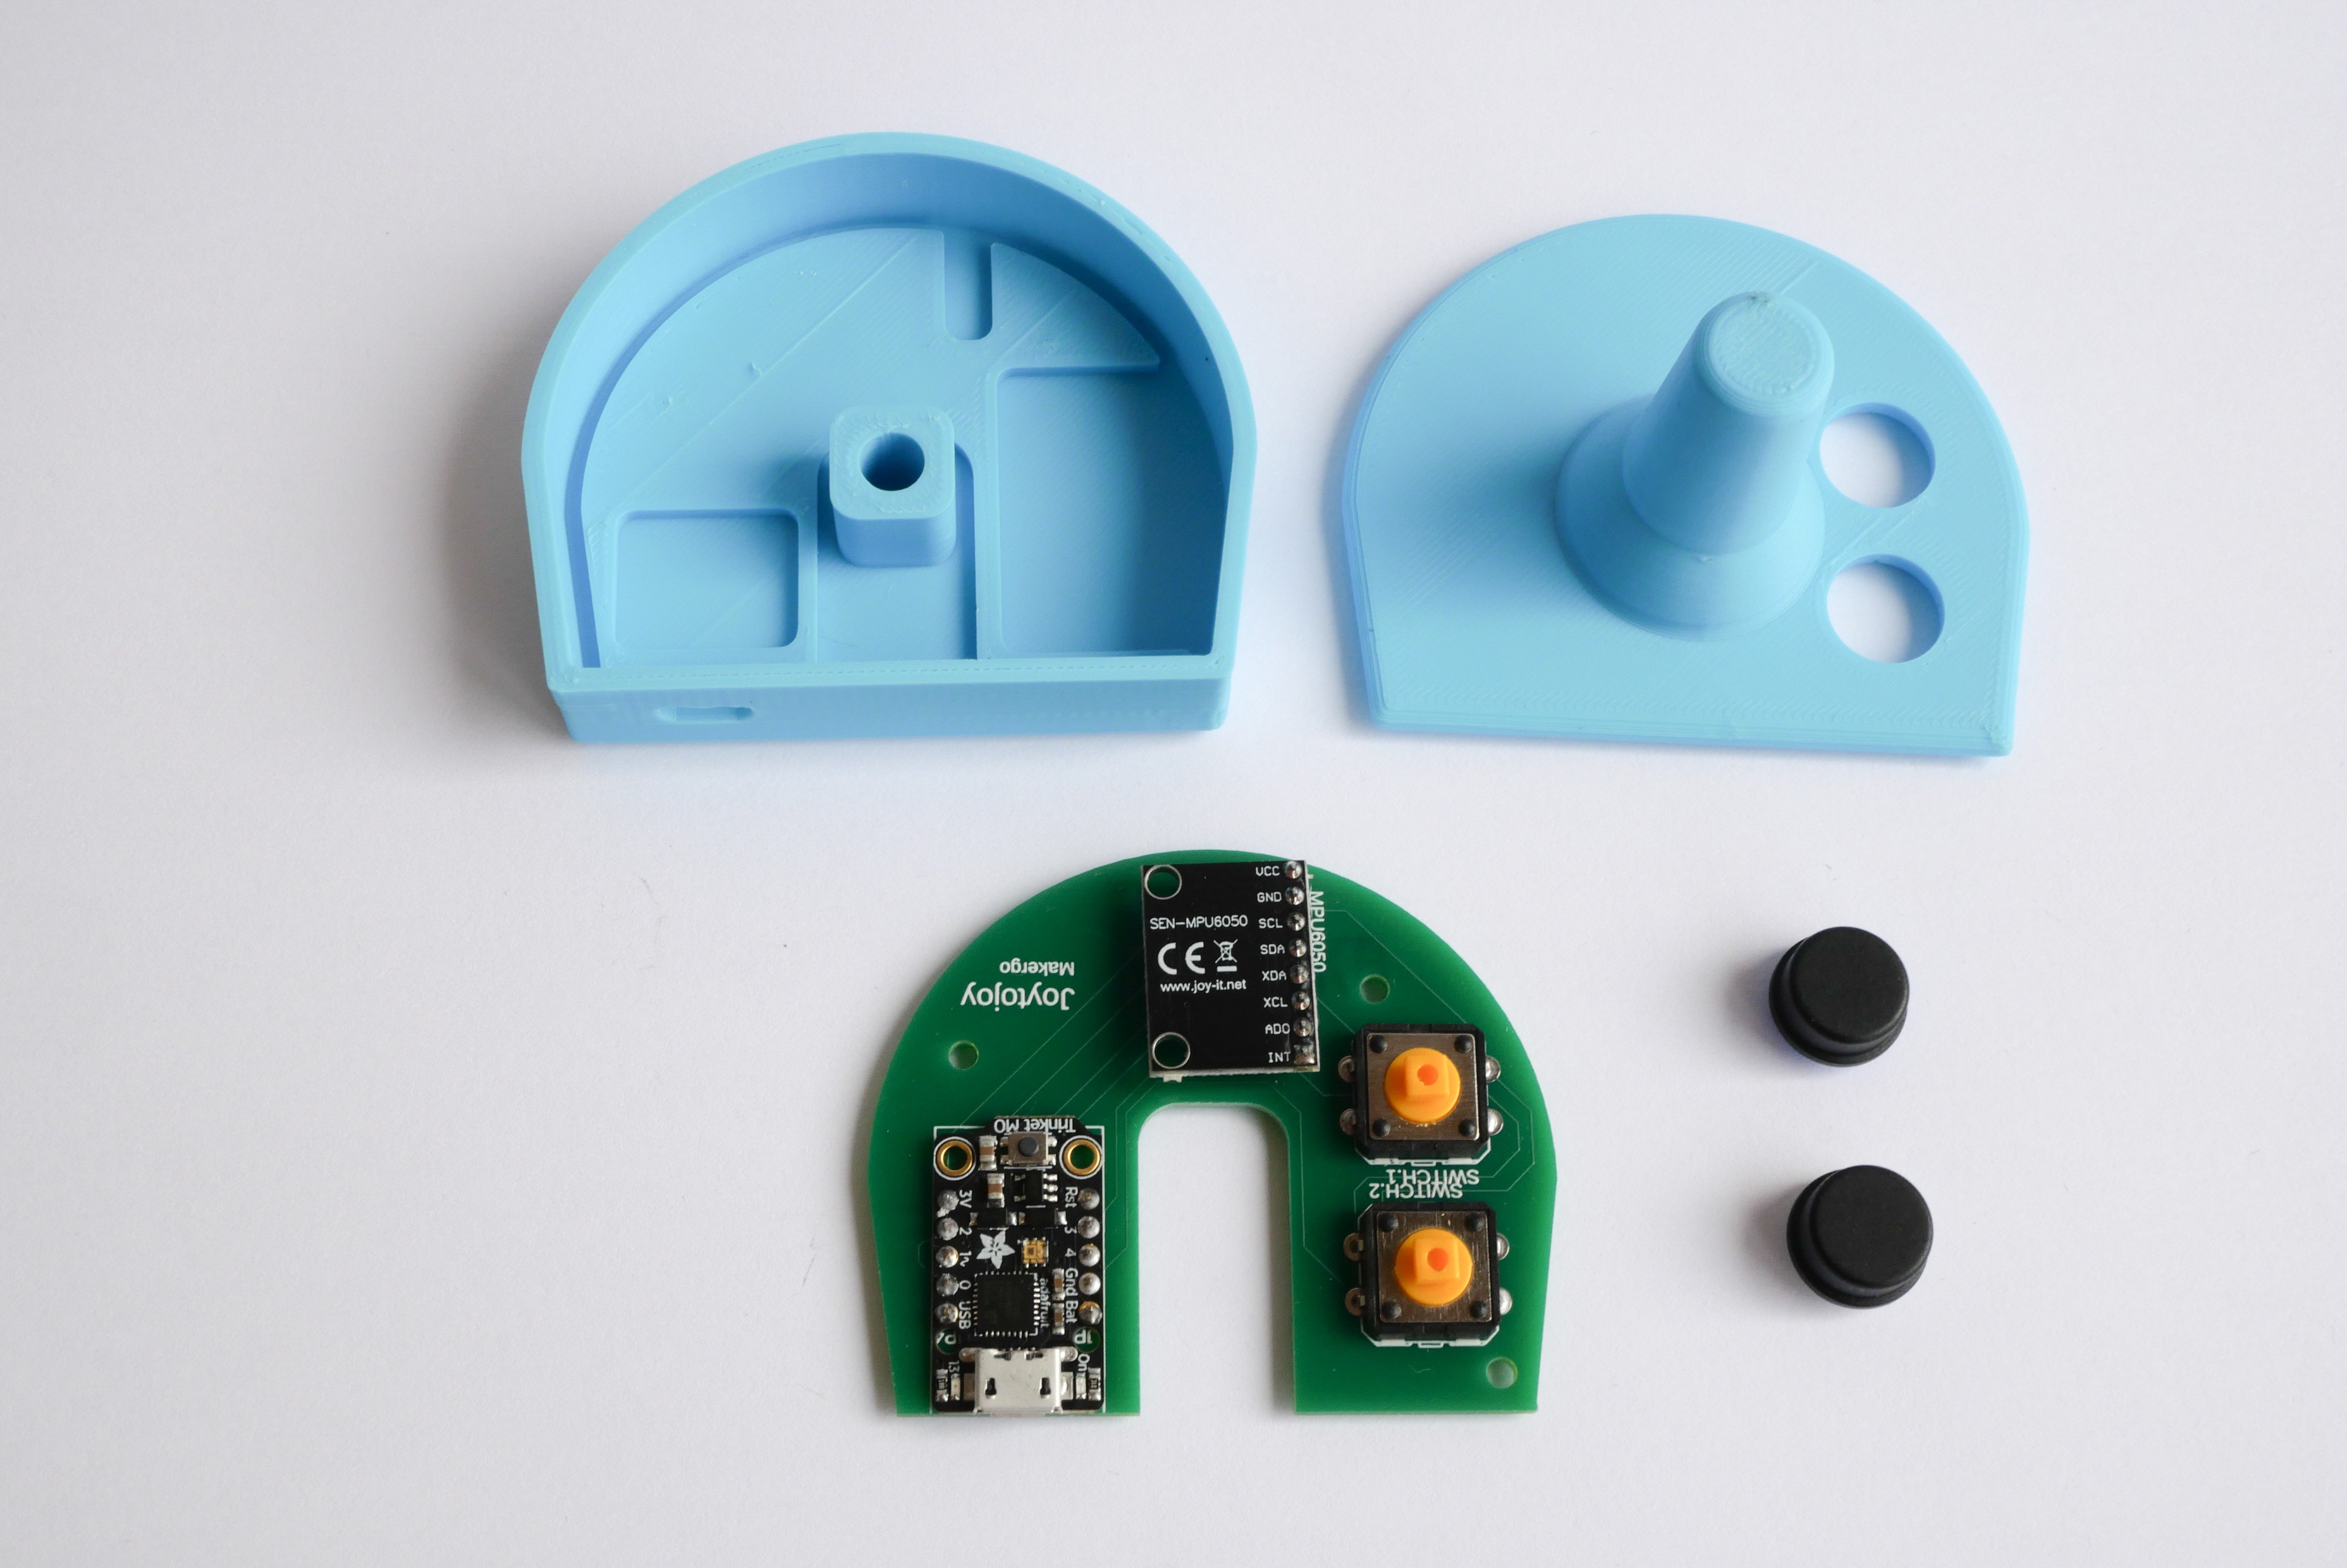
- Bring together the different components
- Individually prepare the components :
Solder headers on the trinket m0
![]()
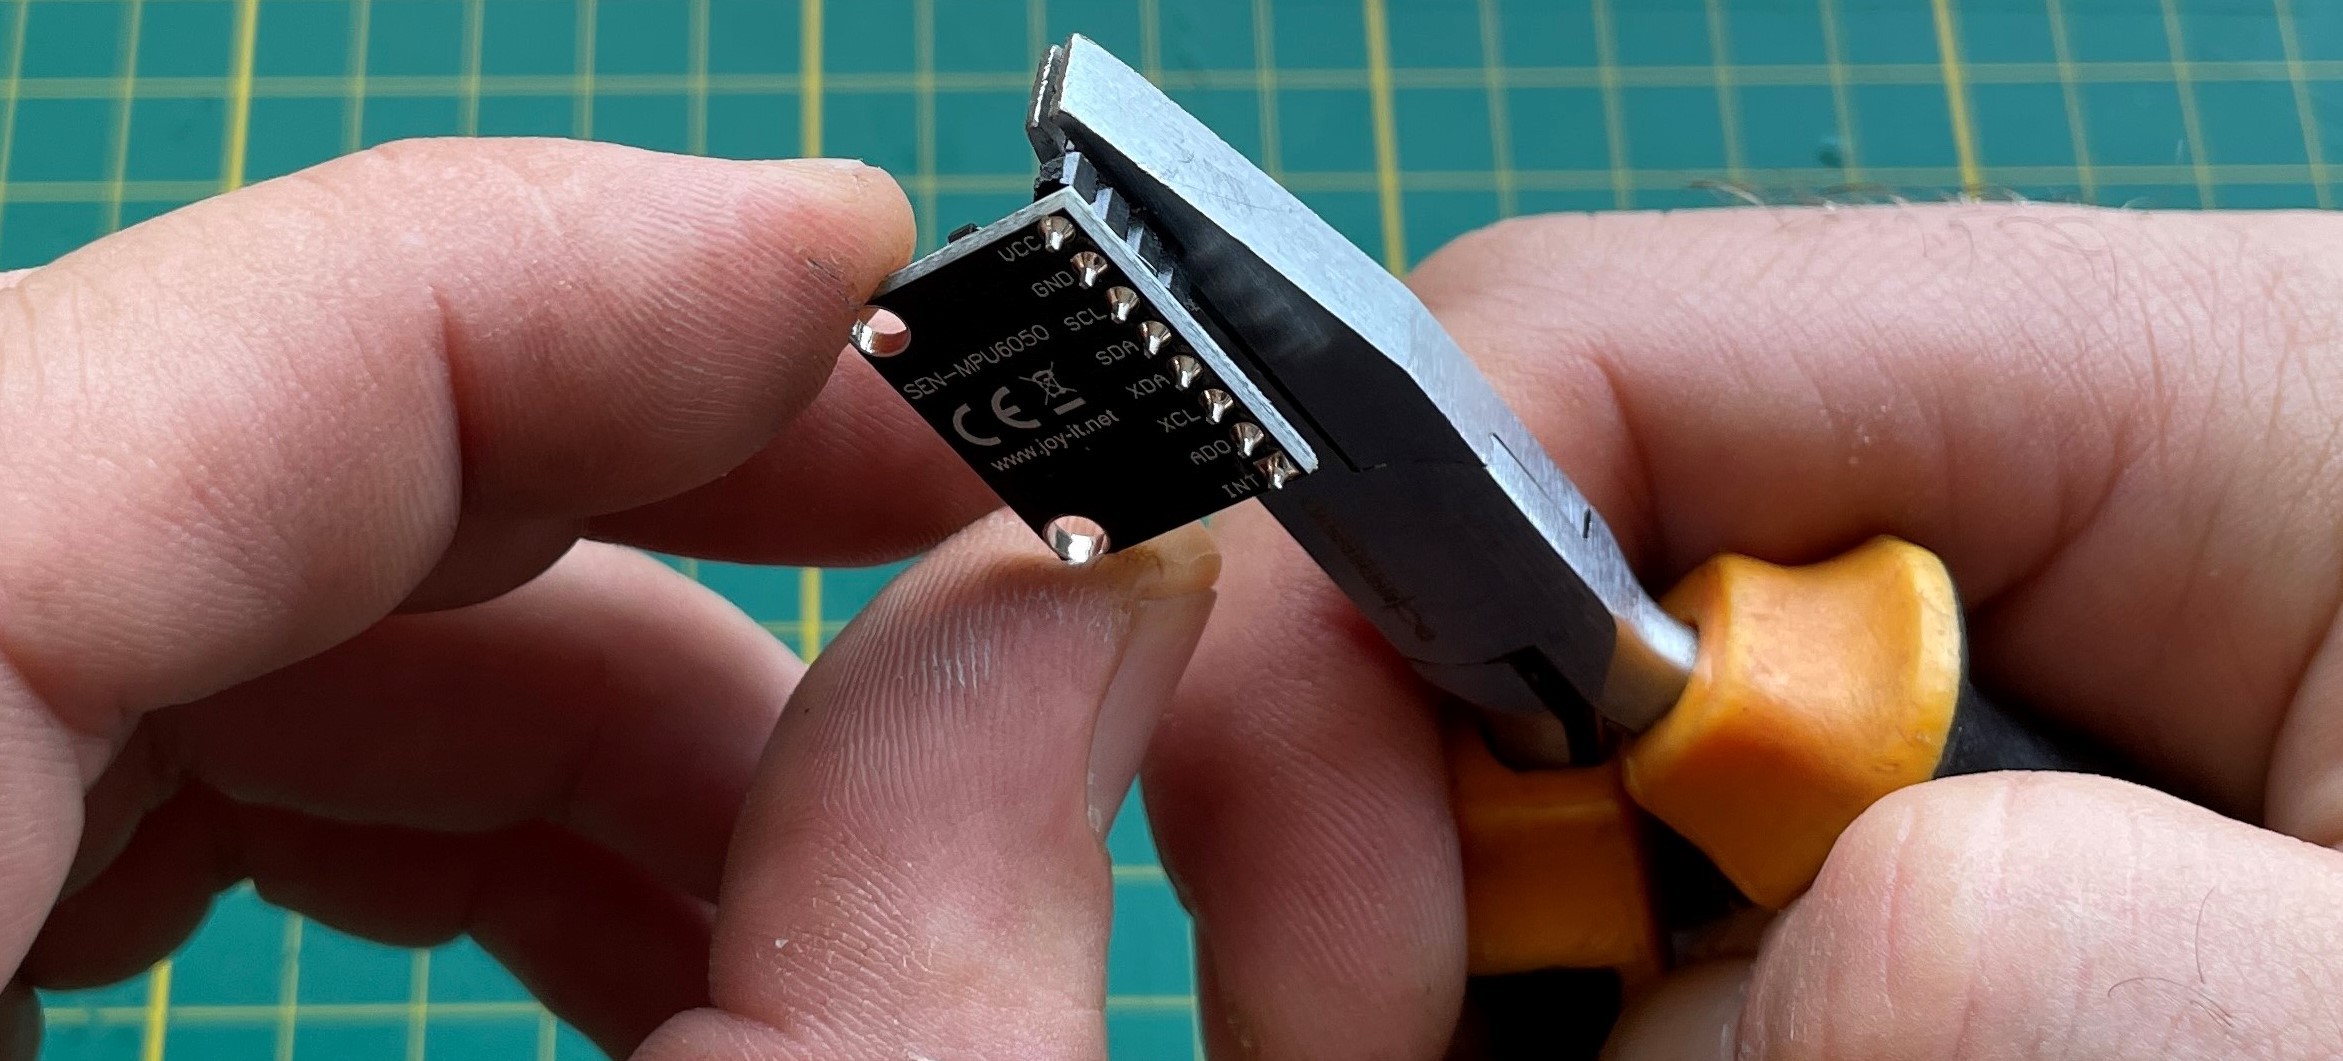
Cut off the four no use headers of the SEN-MPU6050 ( XDA, XCL, ADO, INT)
![]()
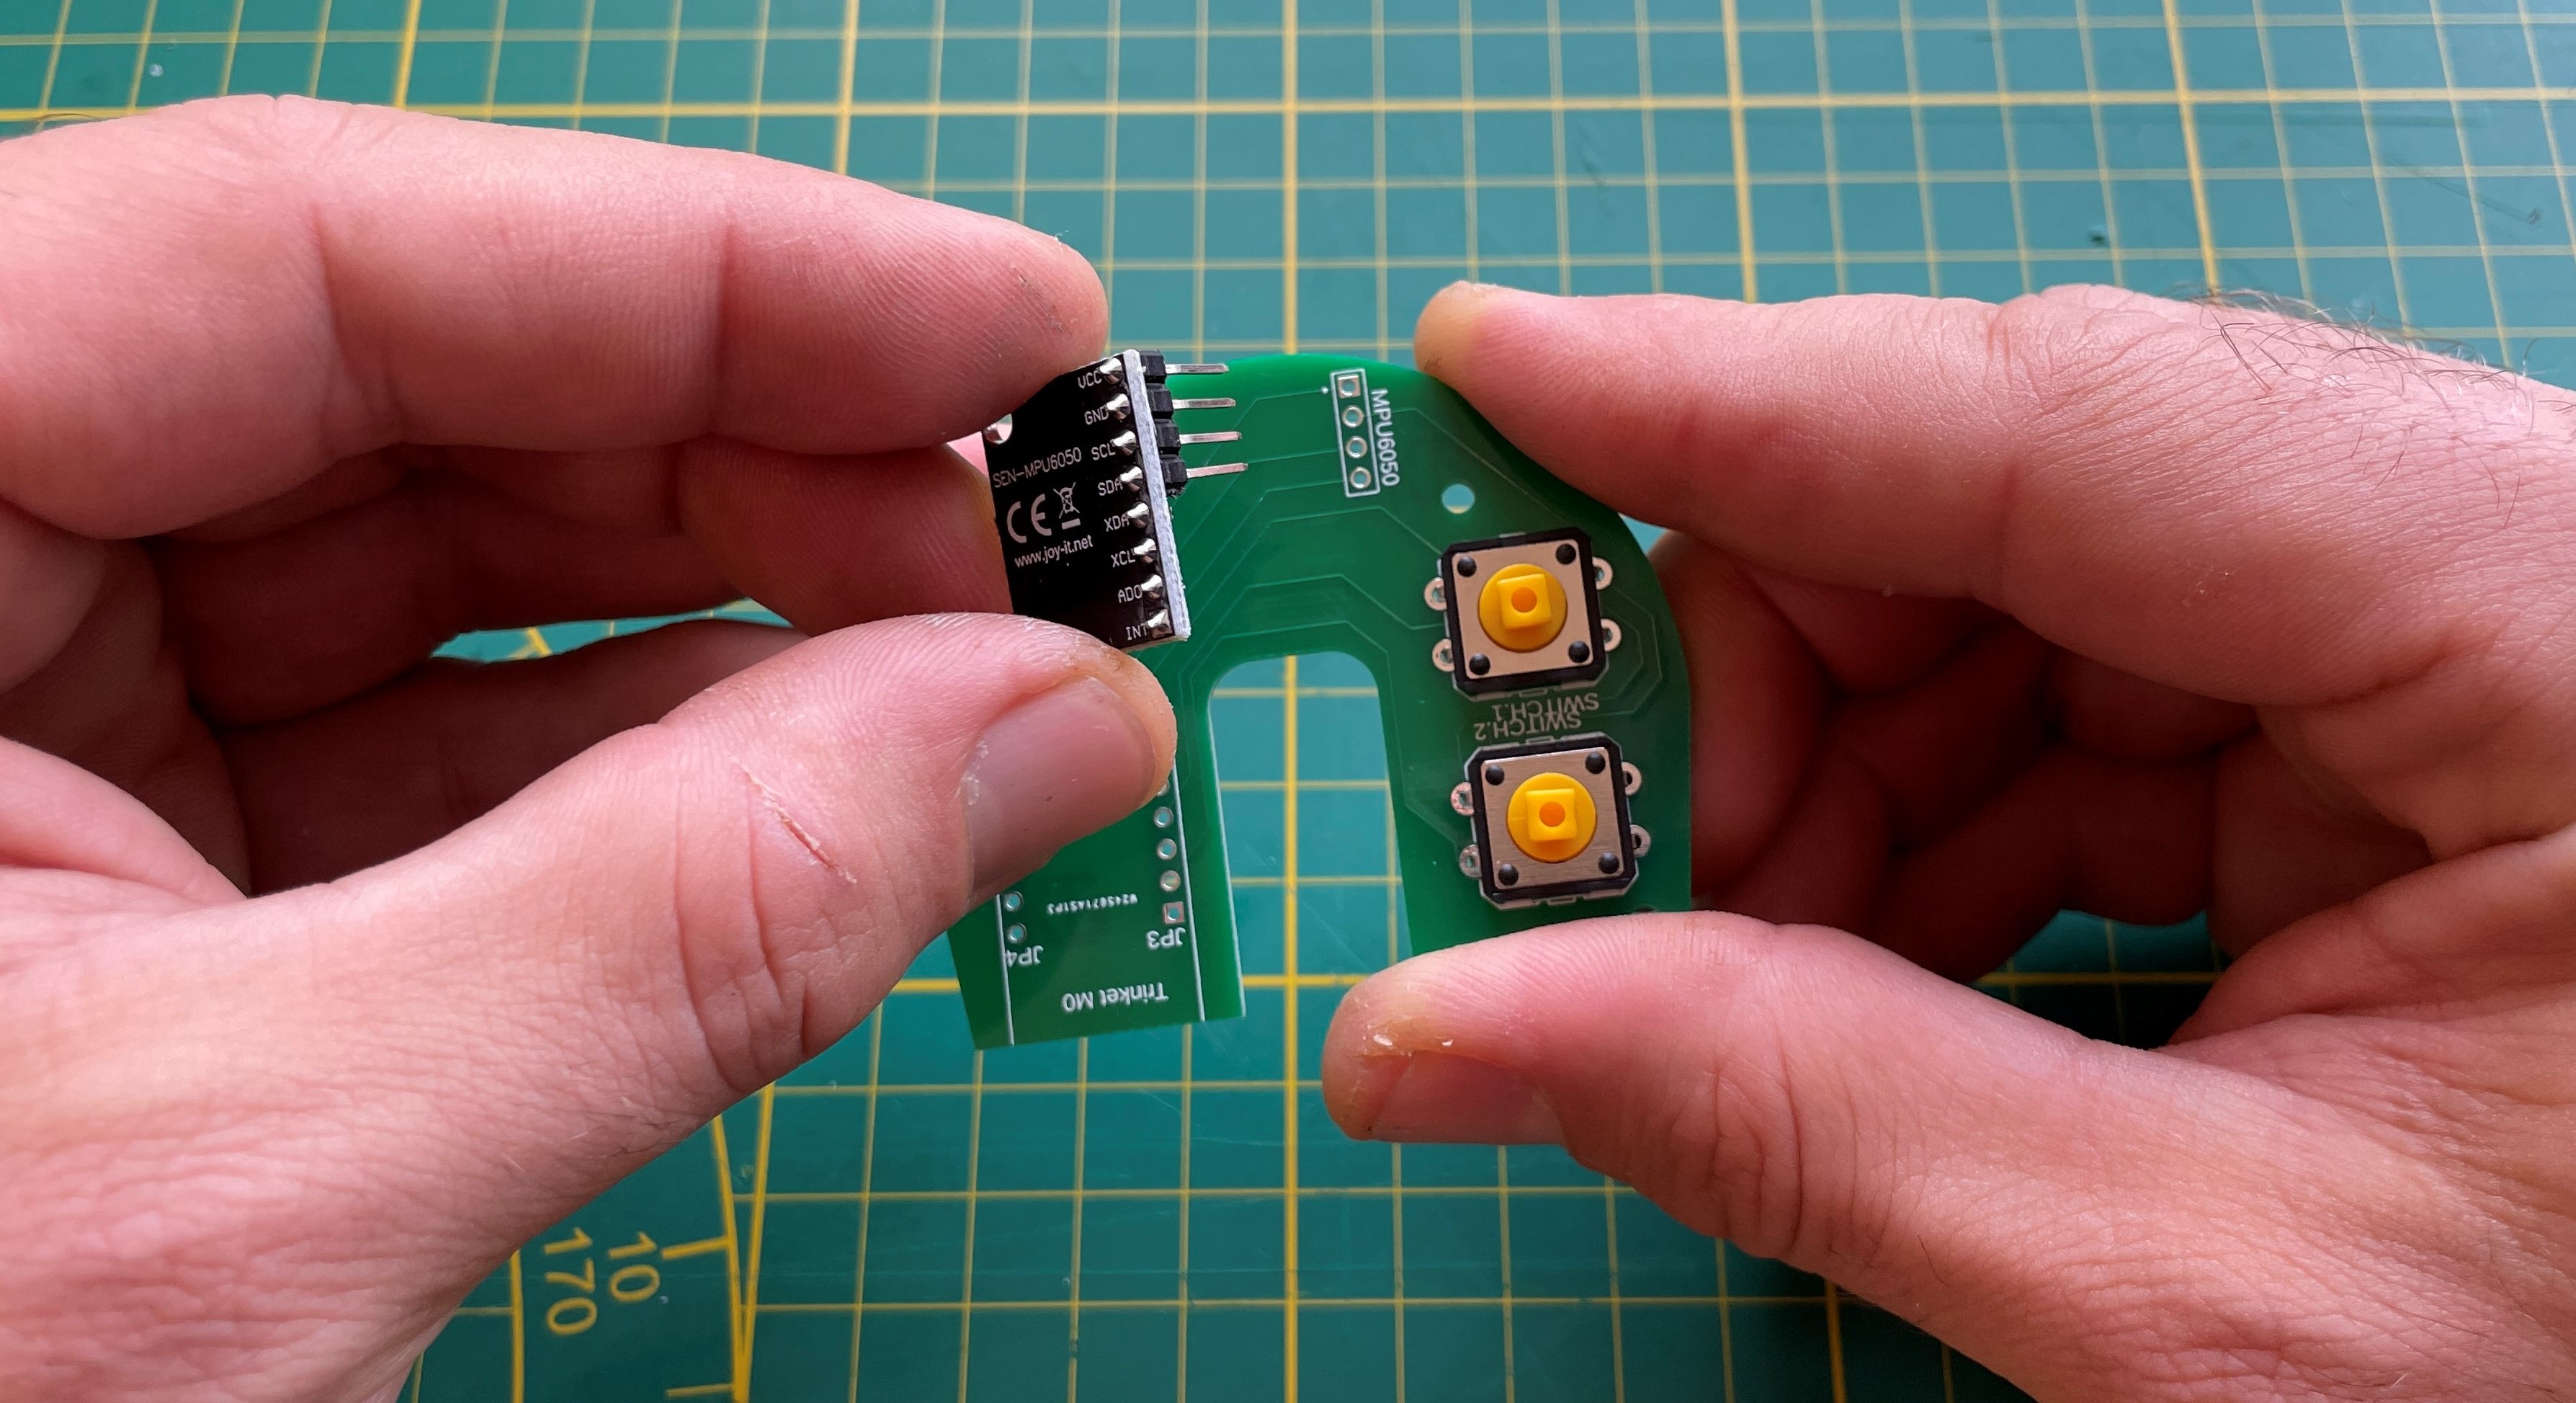
Bend the four headers (VCC, GND, SCL,SDA) at a 90 degree angle
![]()
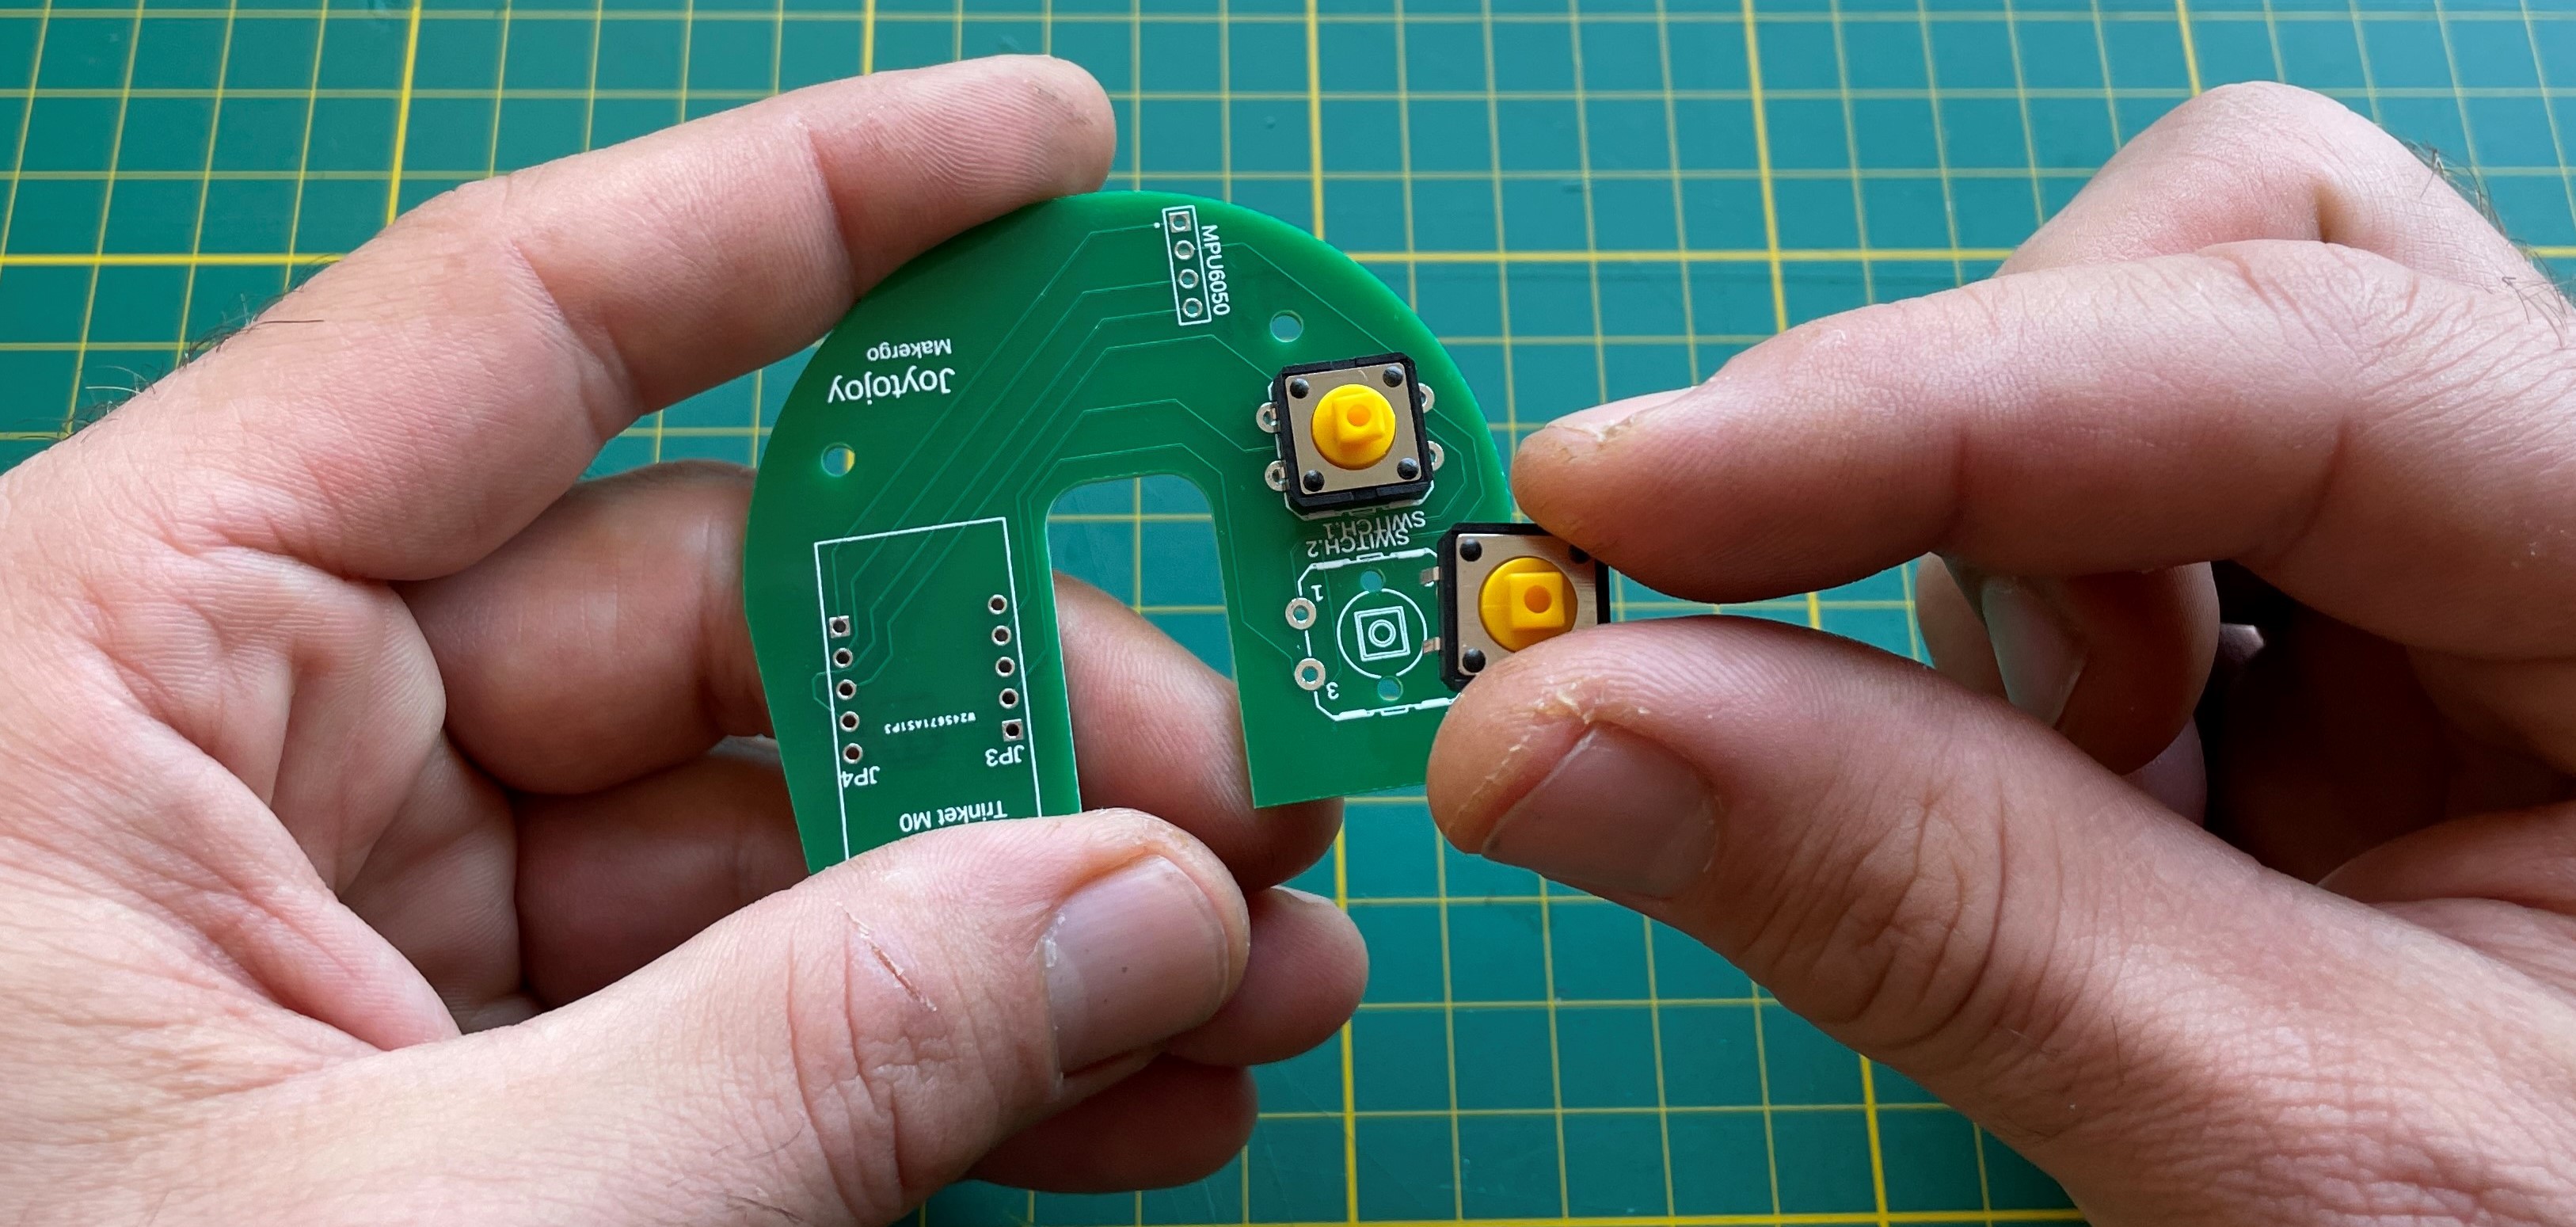
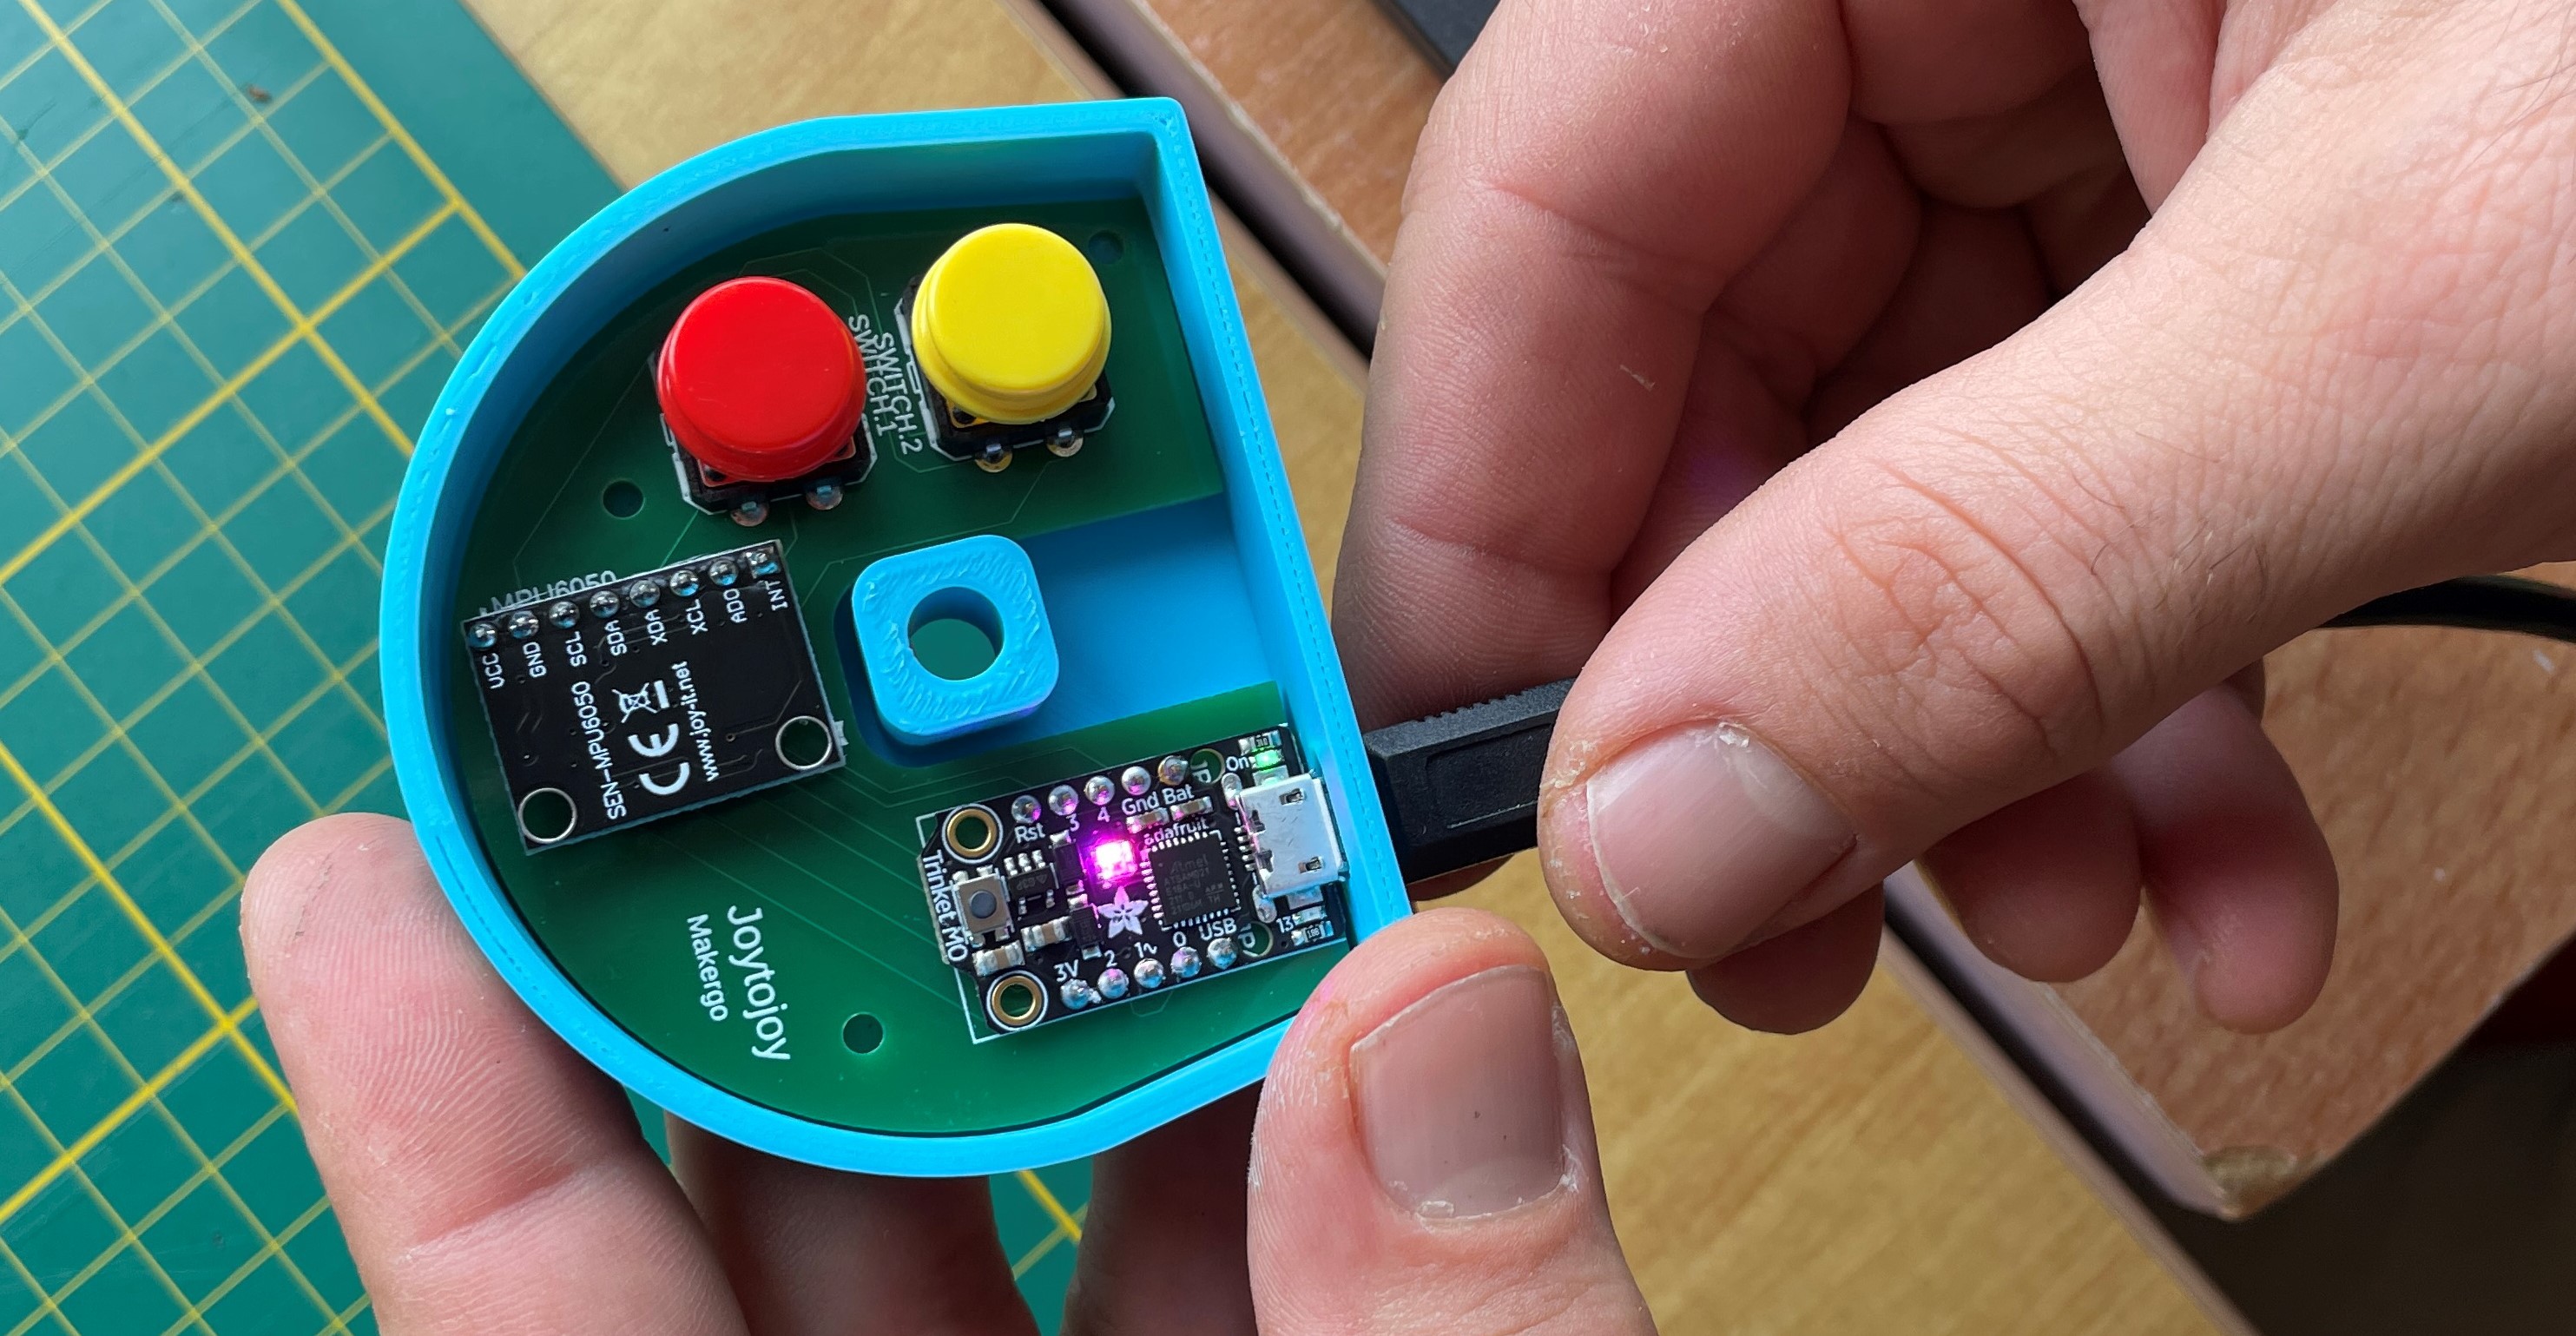
- Insert the components on the PCB, following one board printed indications
Switches
![]()
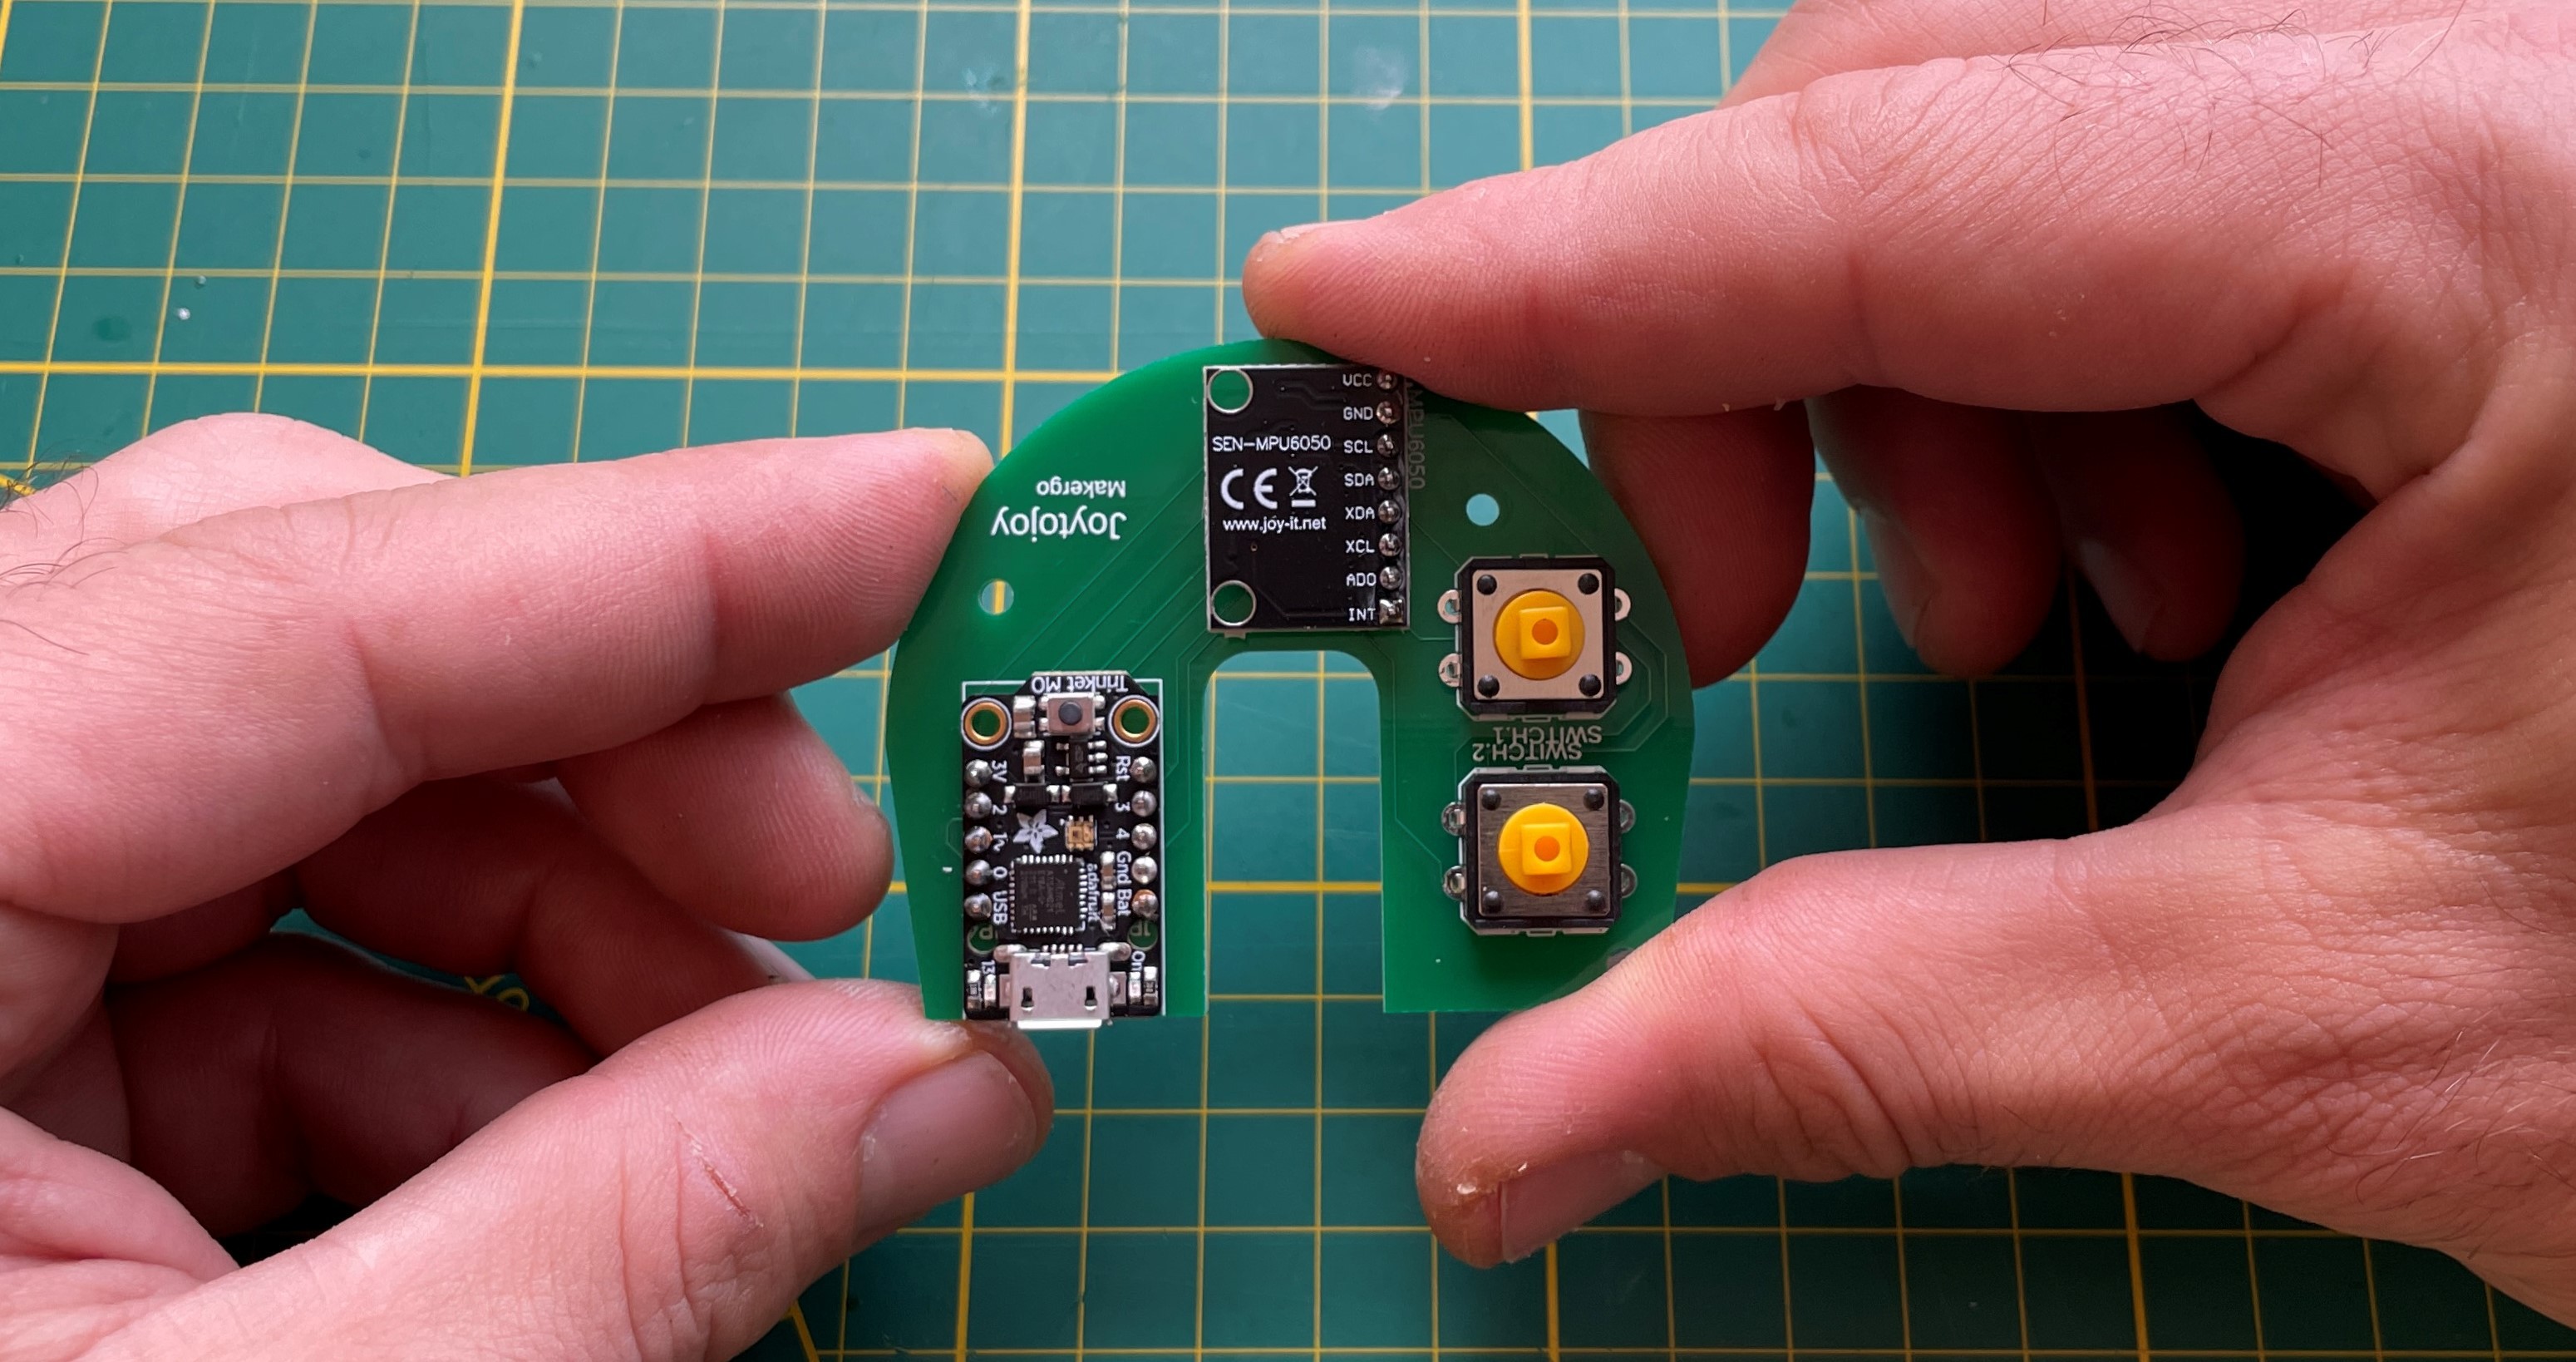
MPU6050![]()
Trinket M0![]()
- Soldering
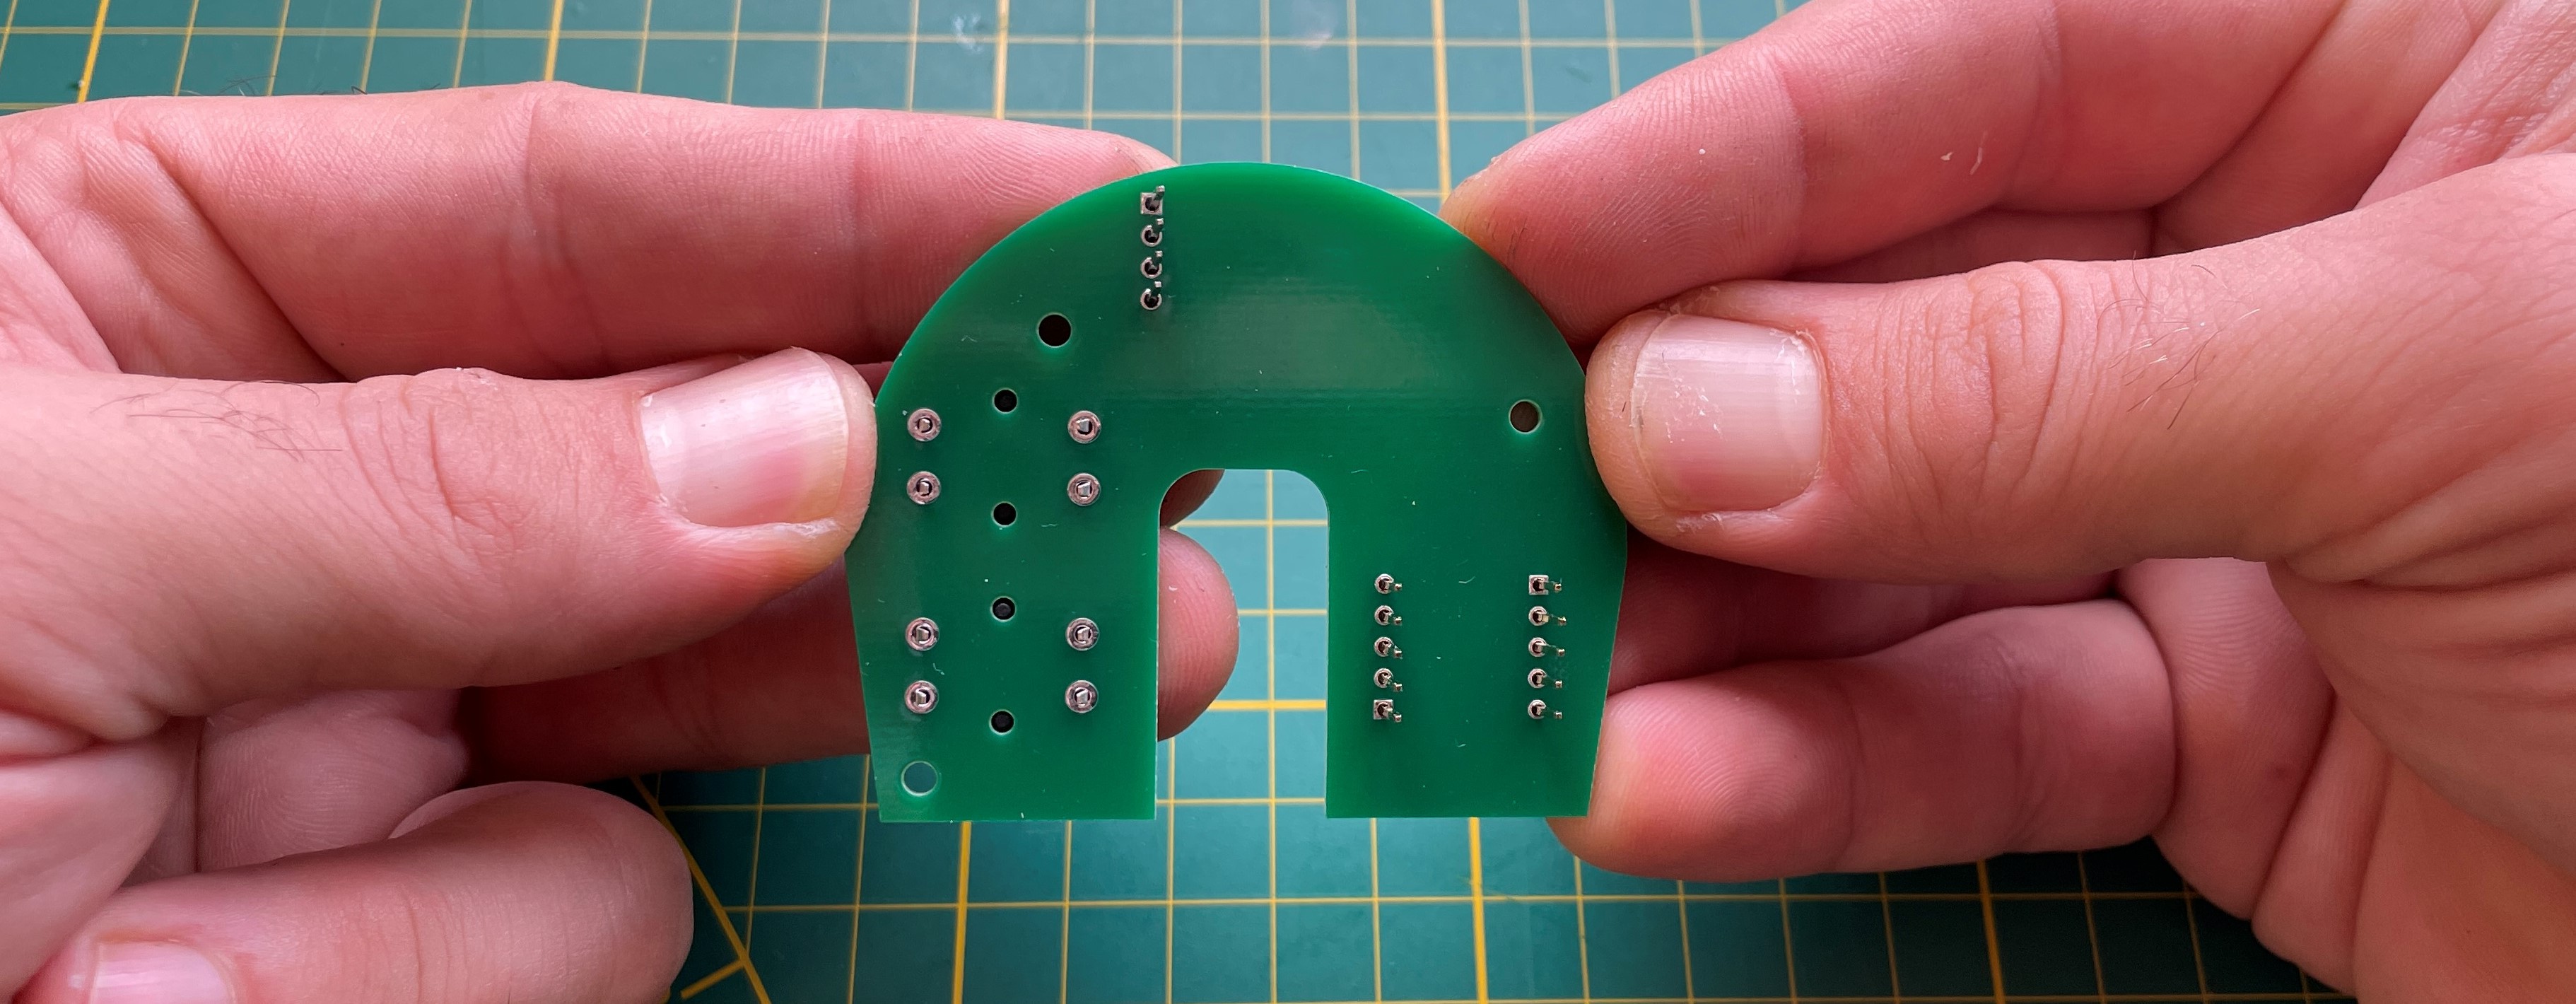
Turn the PCB
![]()
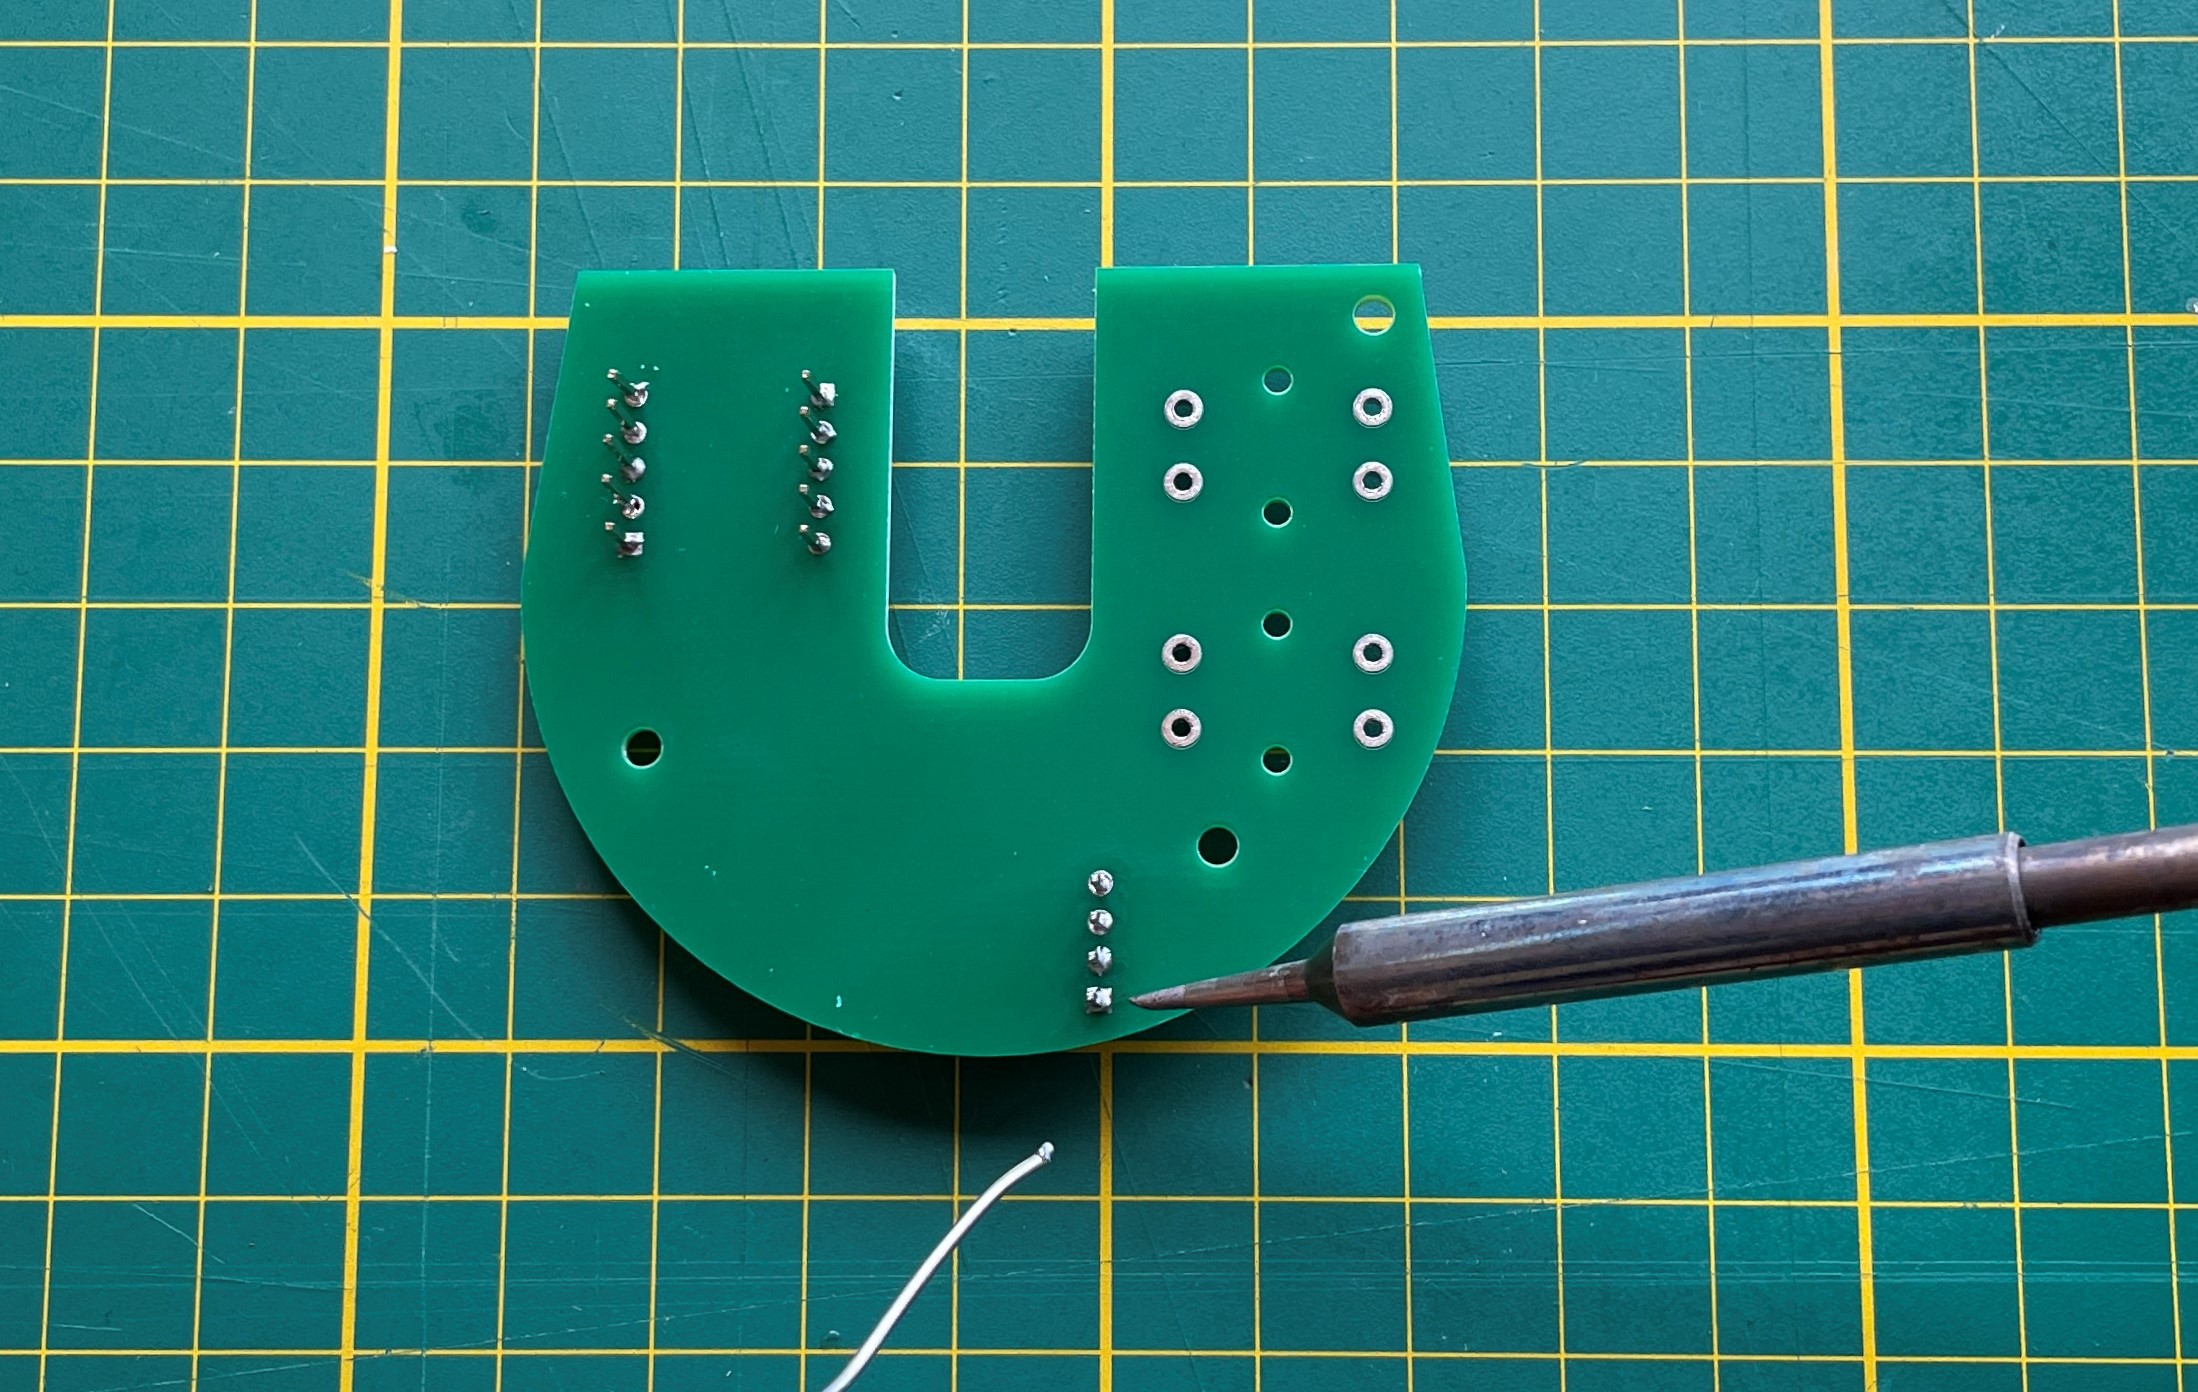
Solder the different components pins
![]()
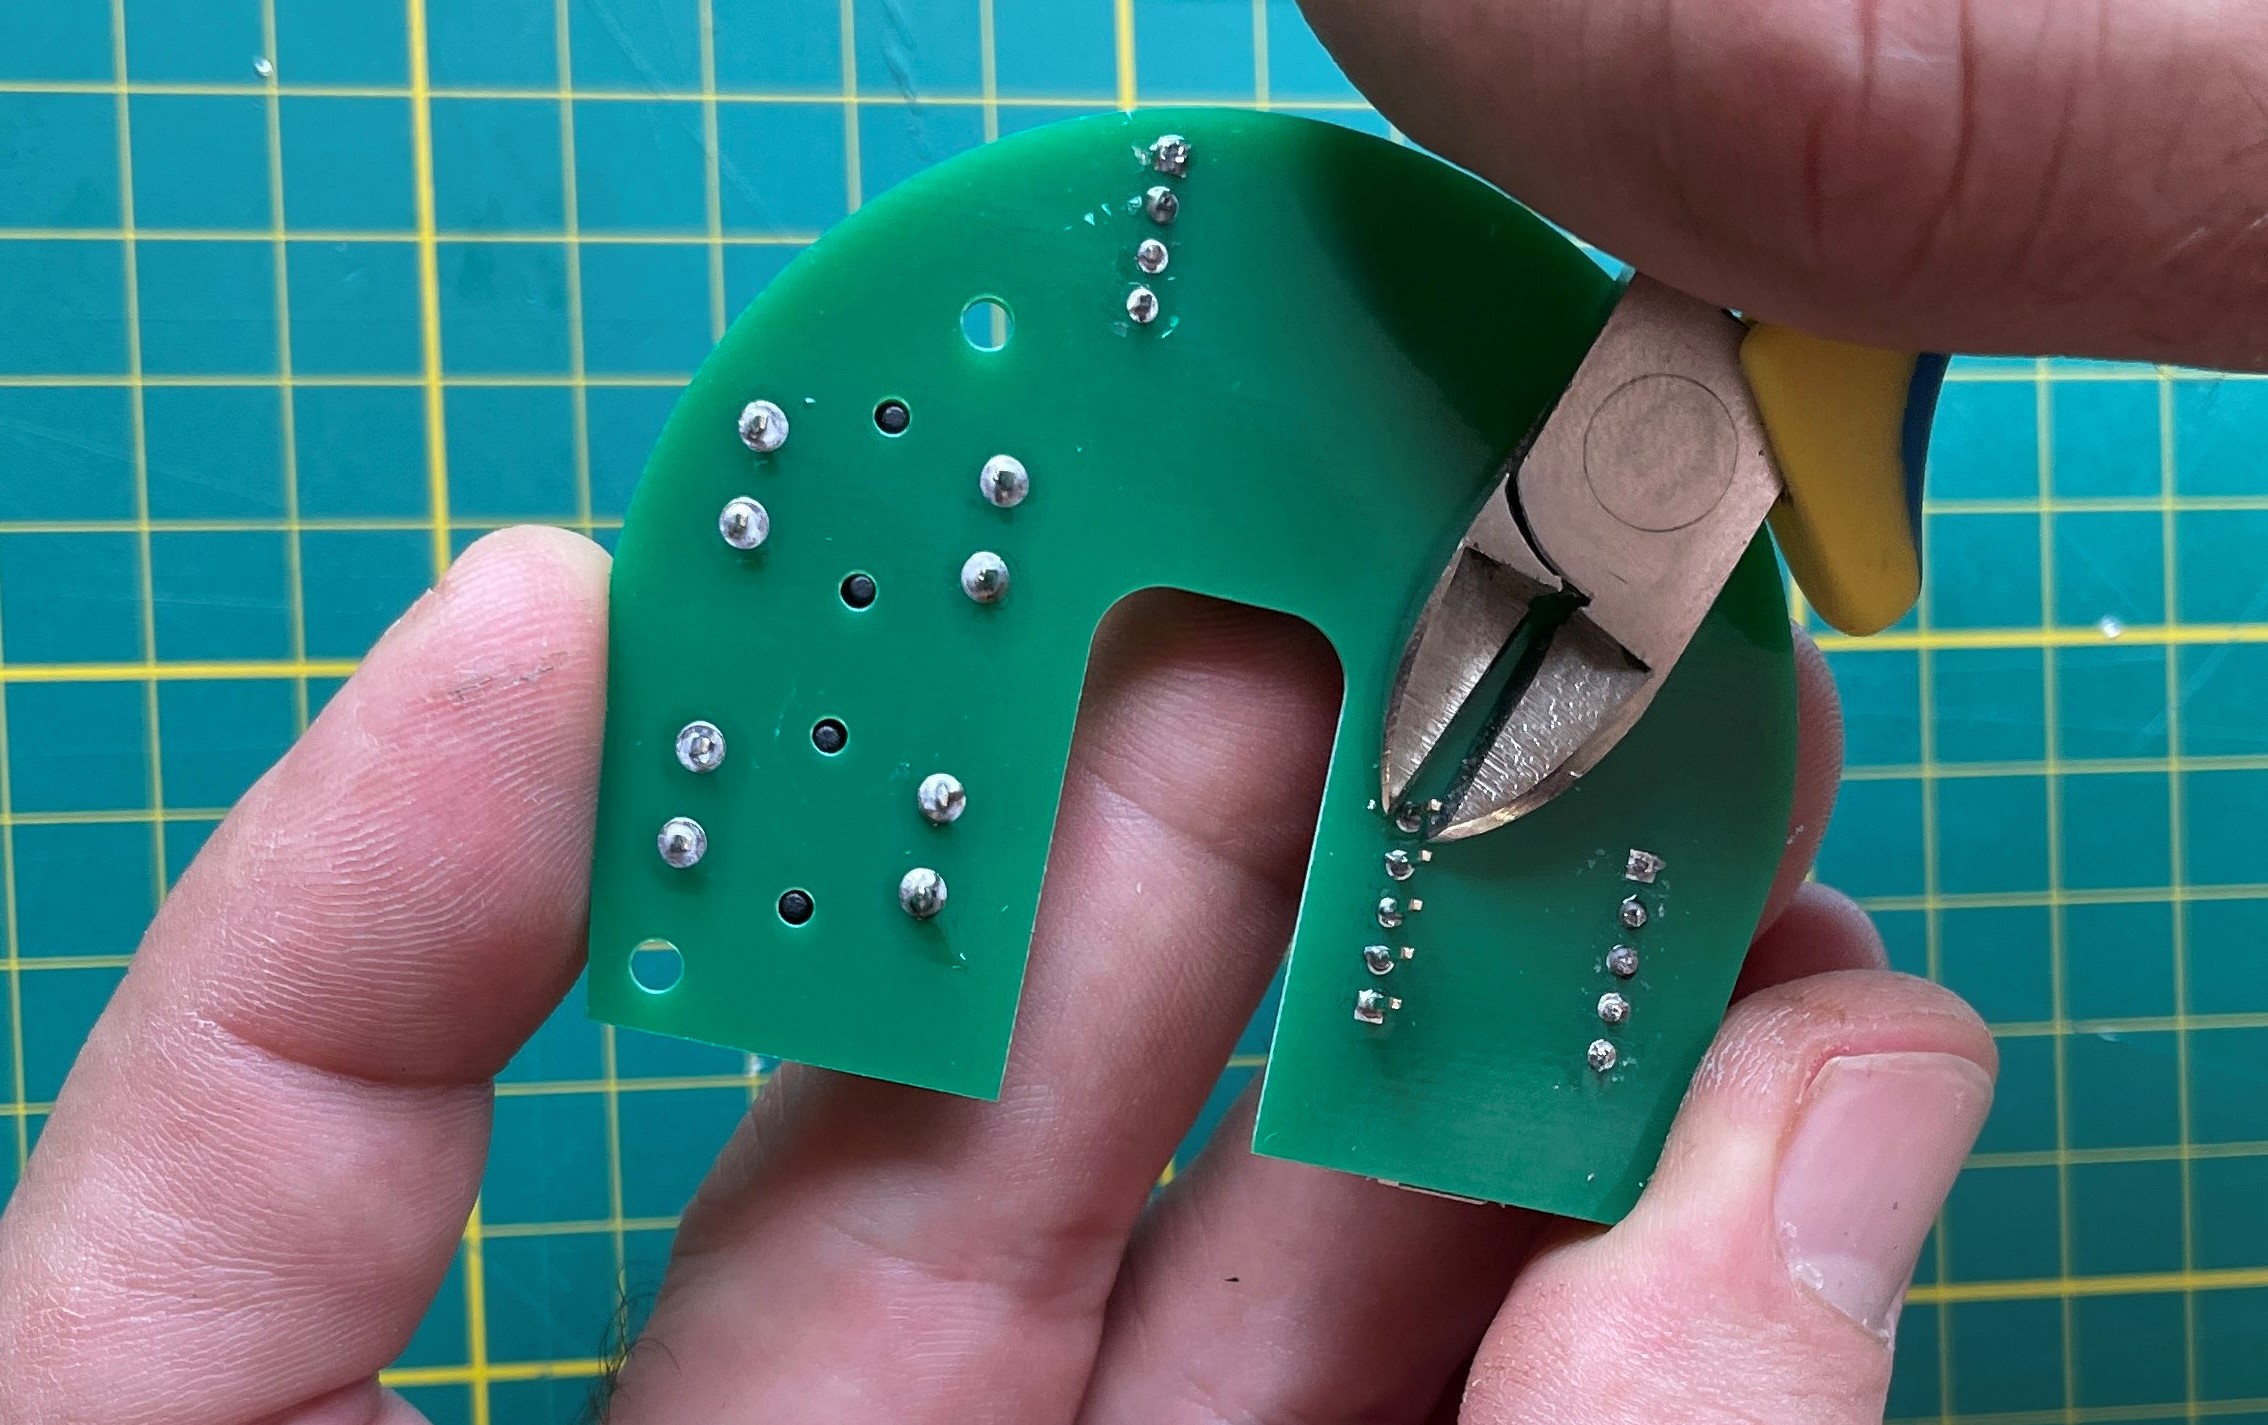
Cut of the excess lenght of the pin
![]()
-
4Mechanical assembly
![]()
Place button caps on switches
![]()
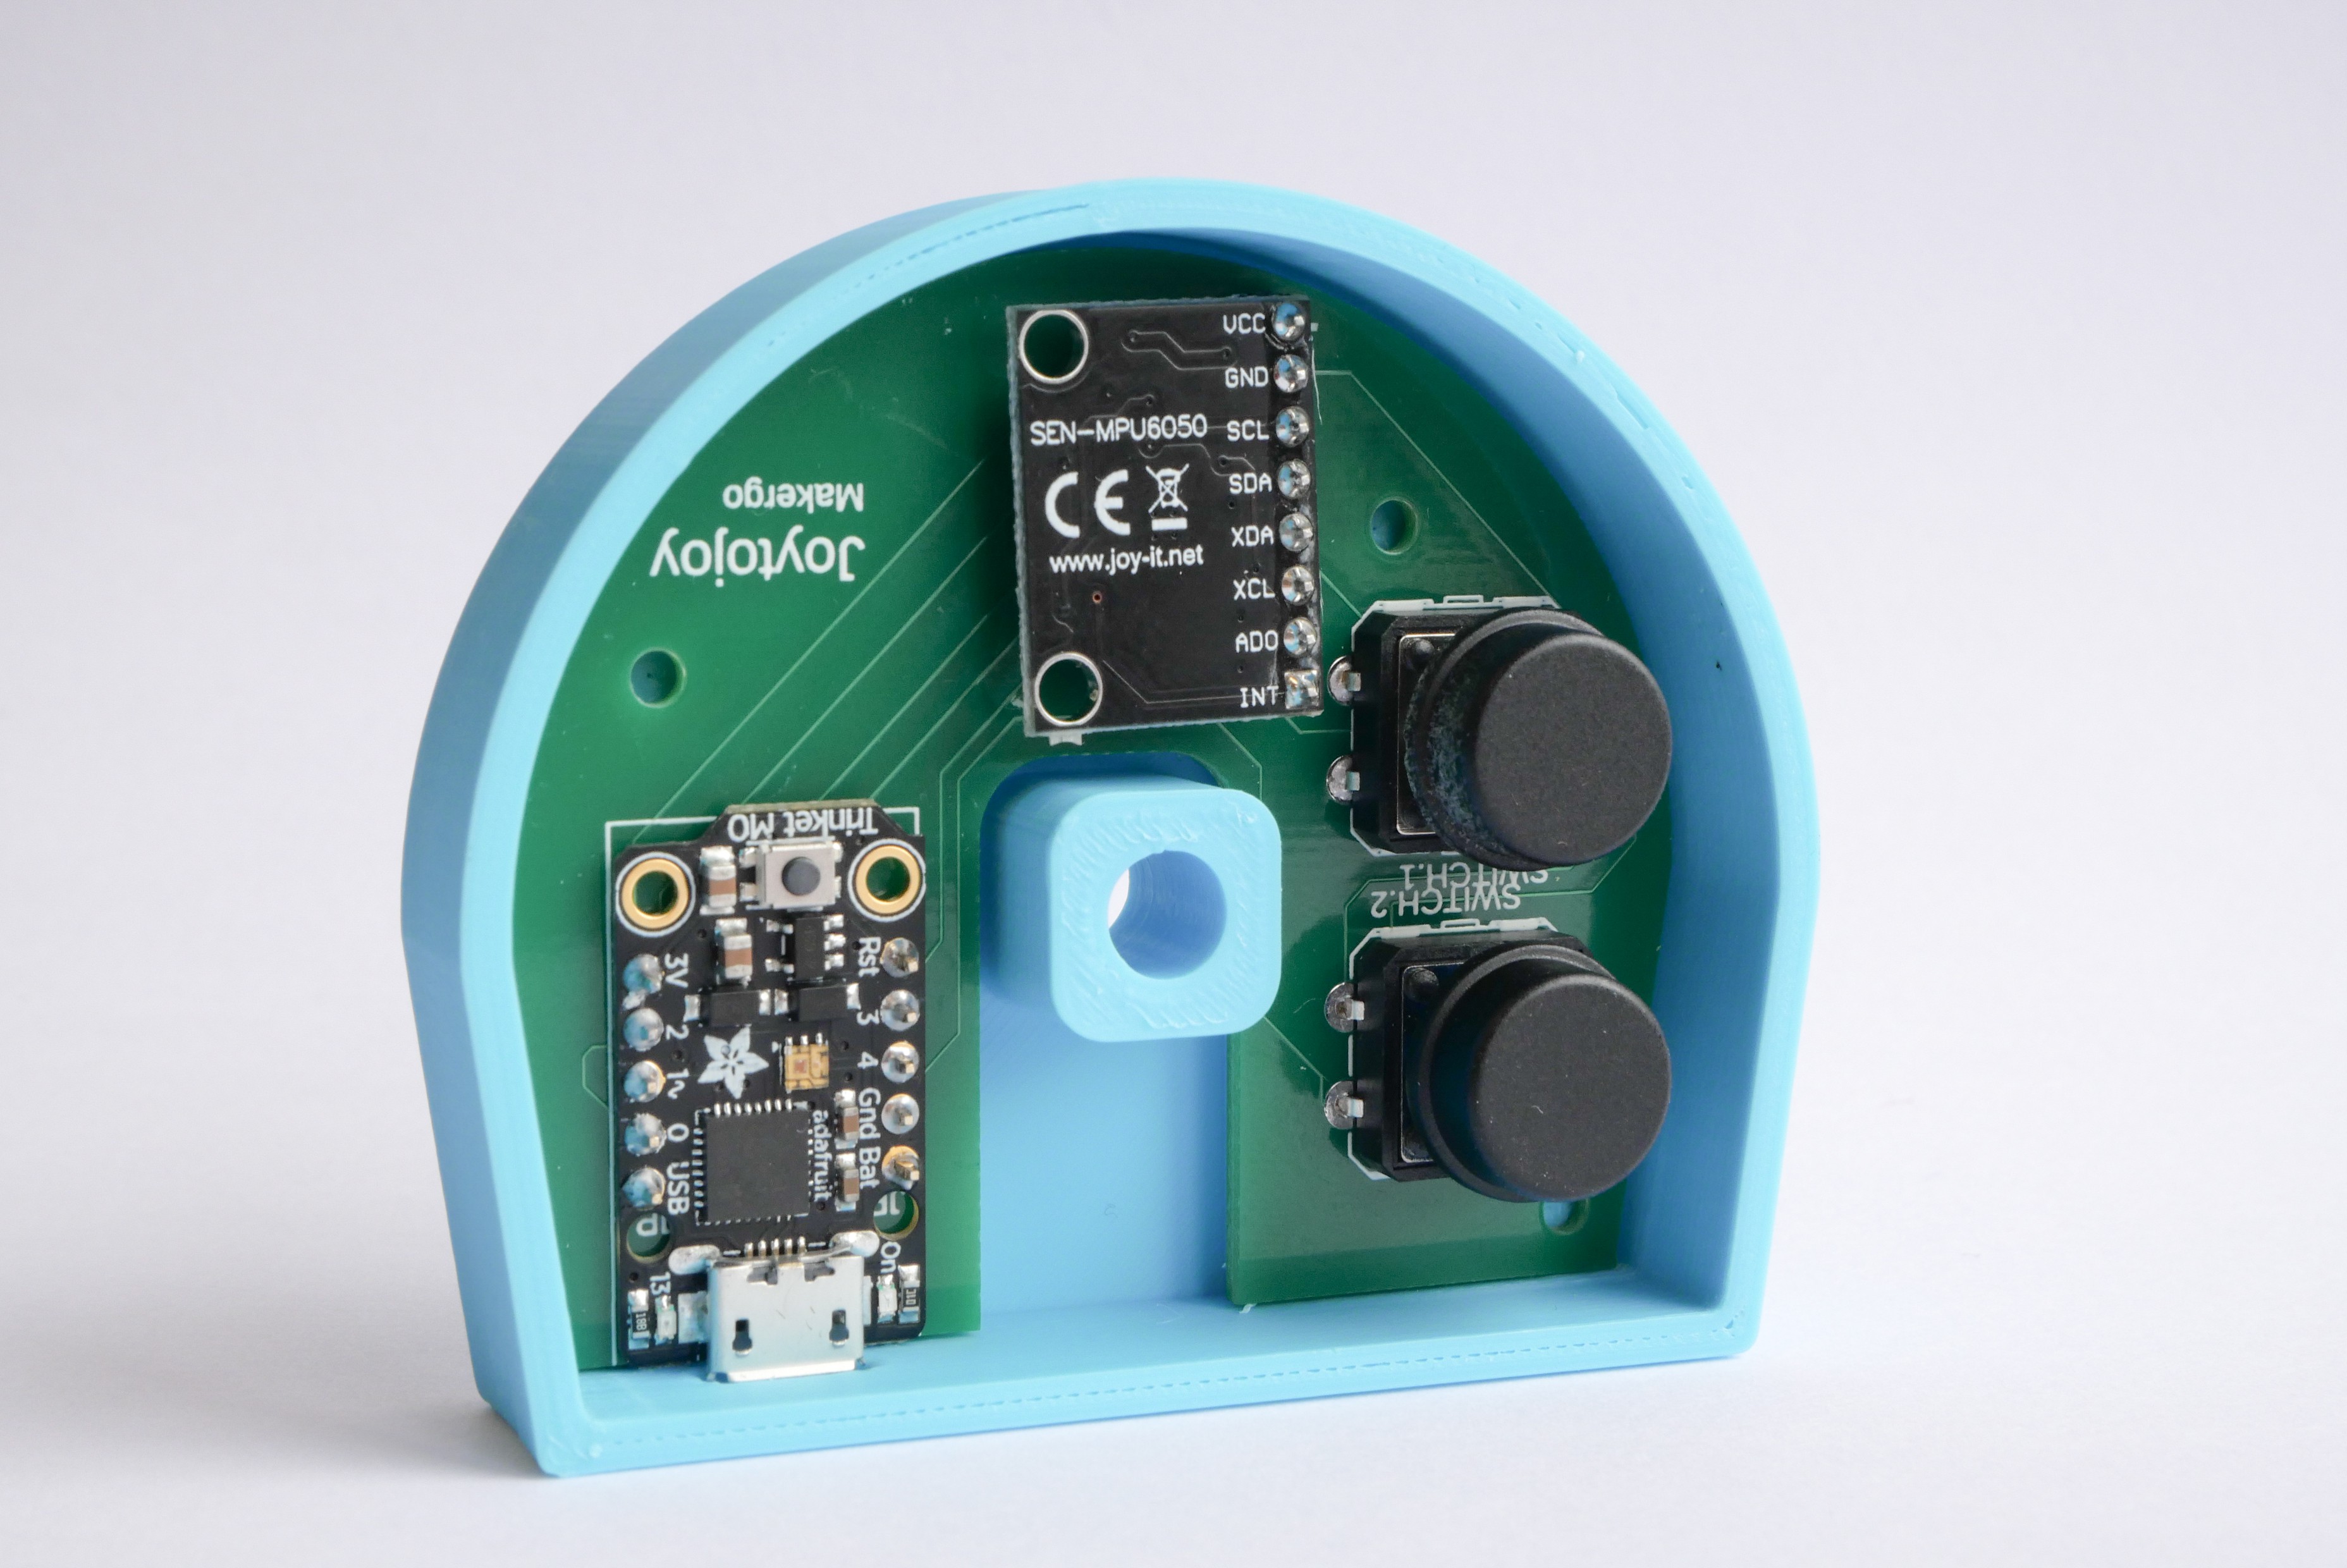
Insert PCB onto the enclosure
![]()
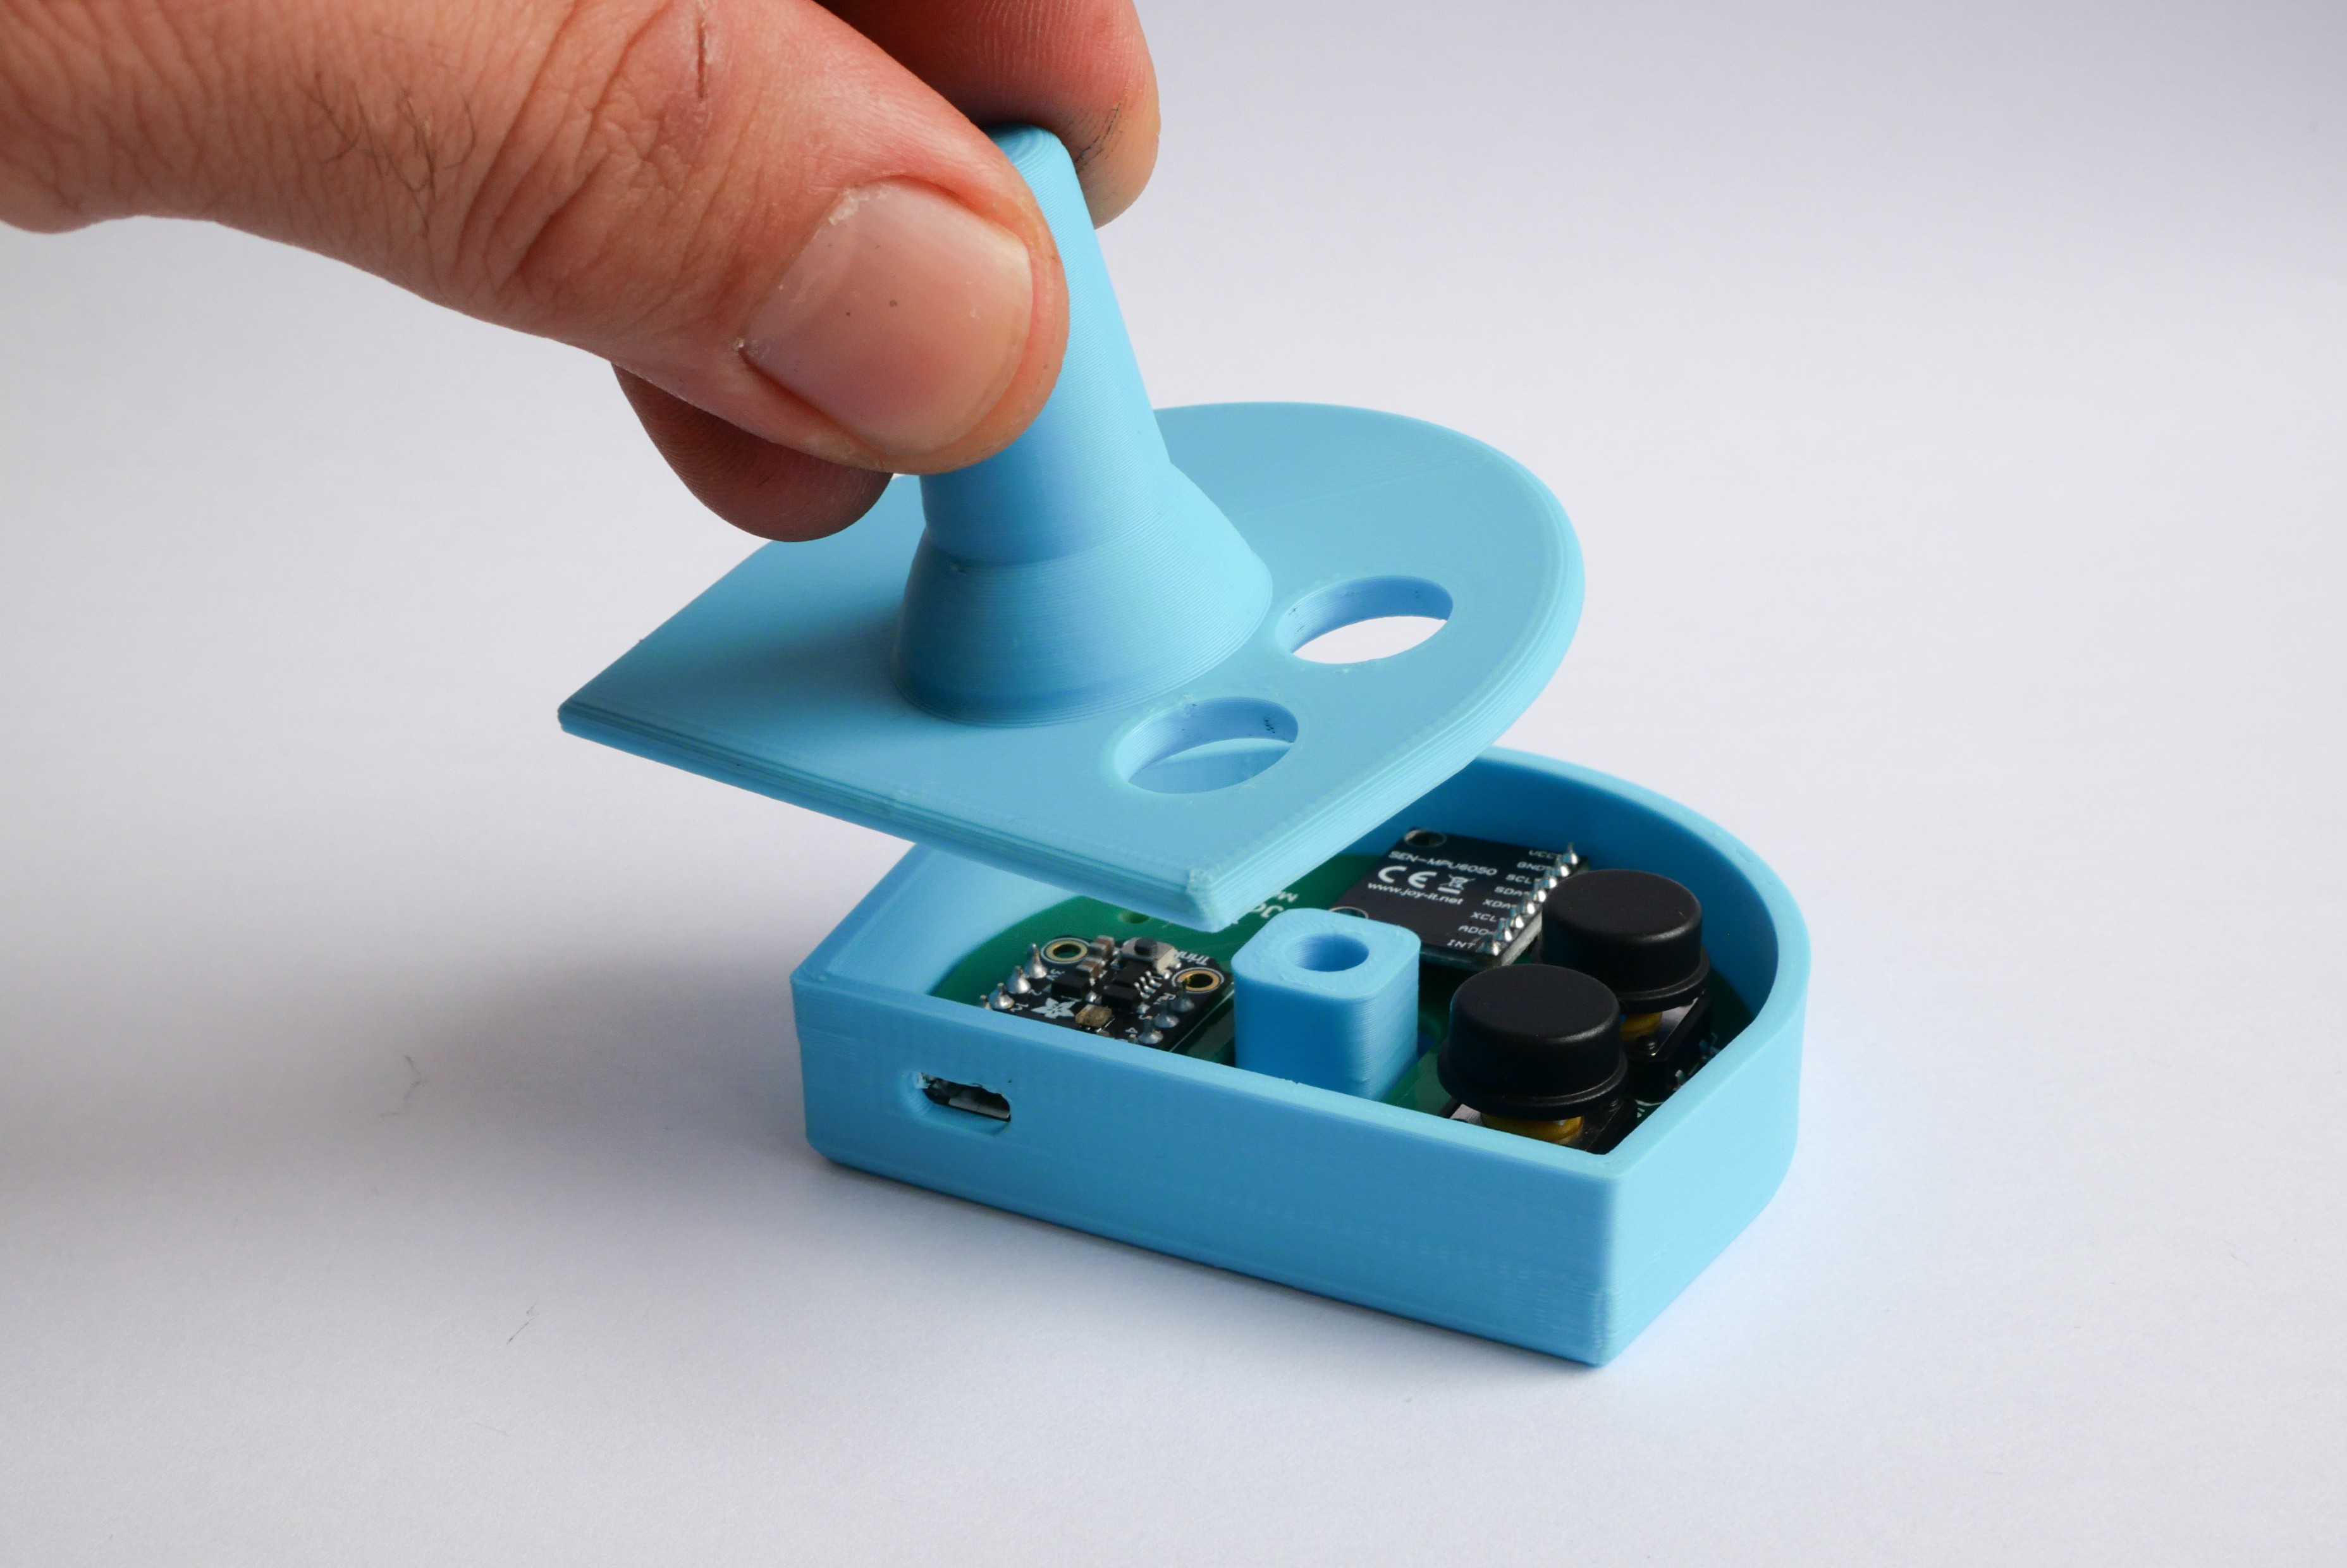
Place the top part on base part
![]()
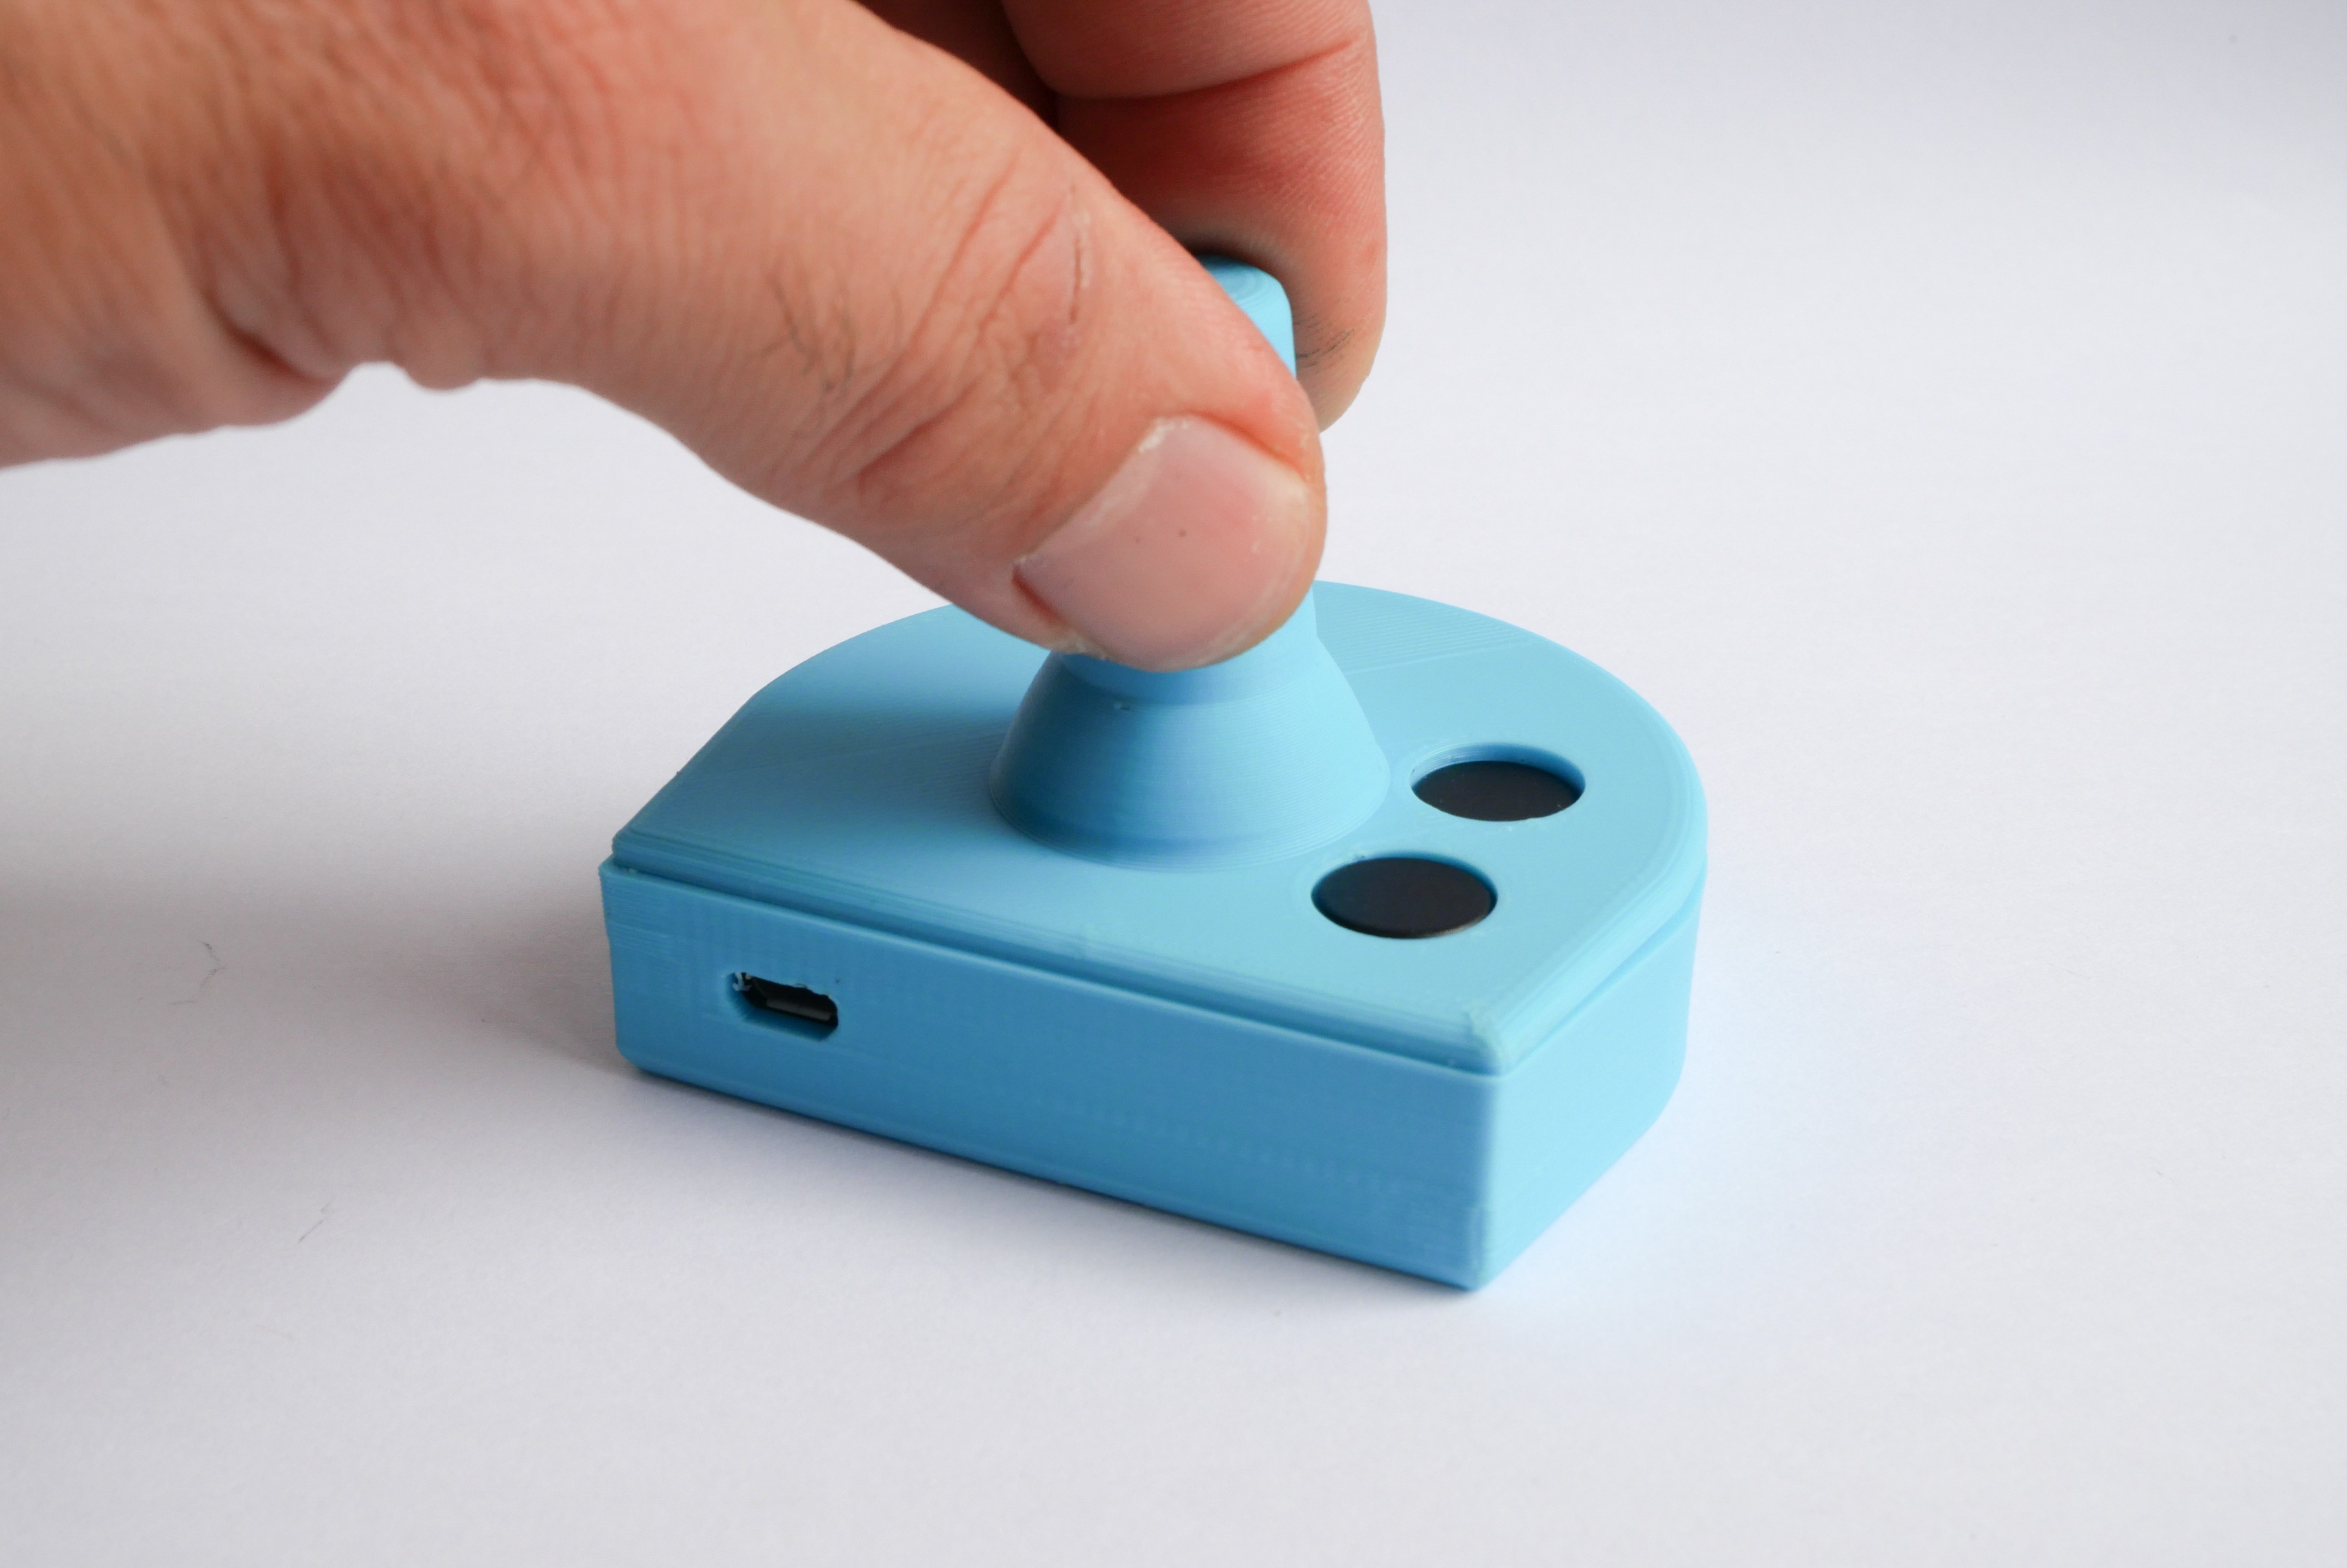
Push it to clip the two parts
![]()
![]()
-
5Programming
Select the right program either you need a game stick or a mouse :
- For a game stick :
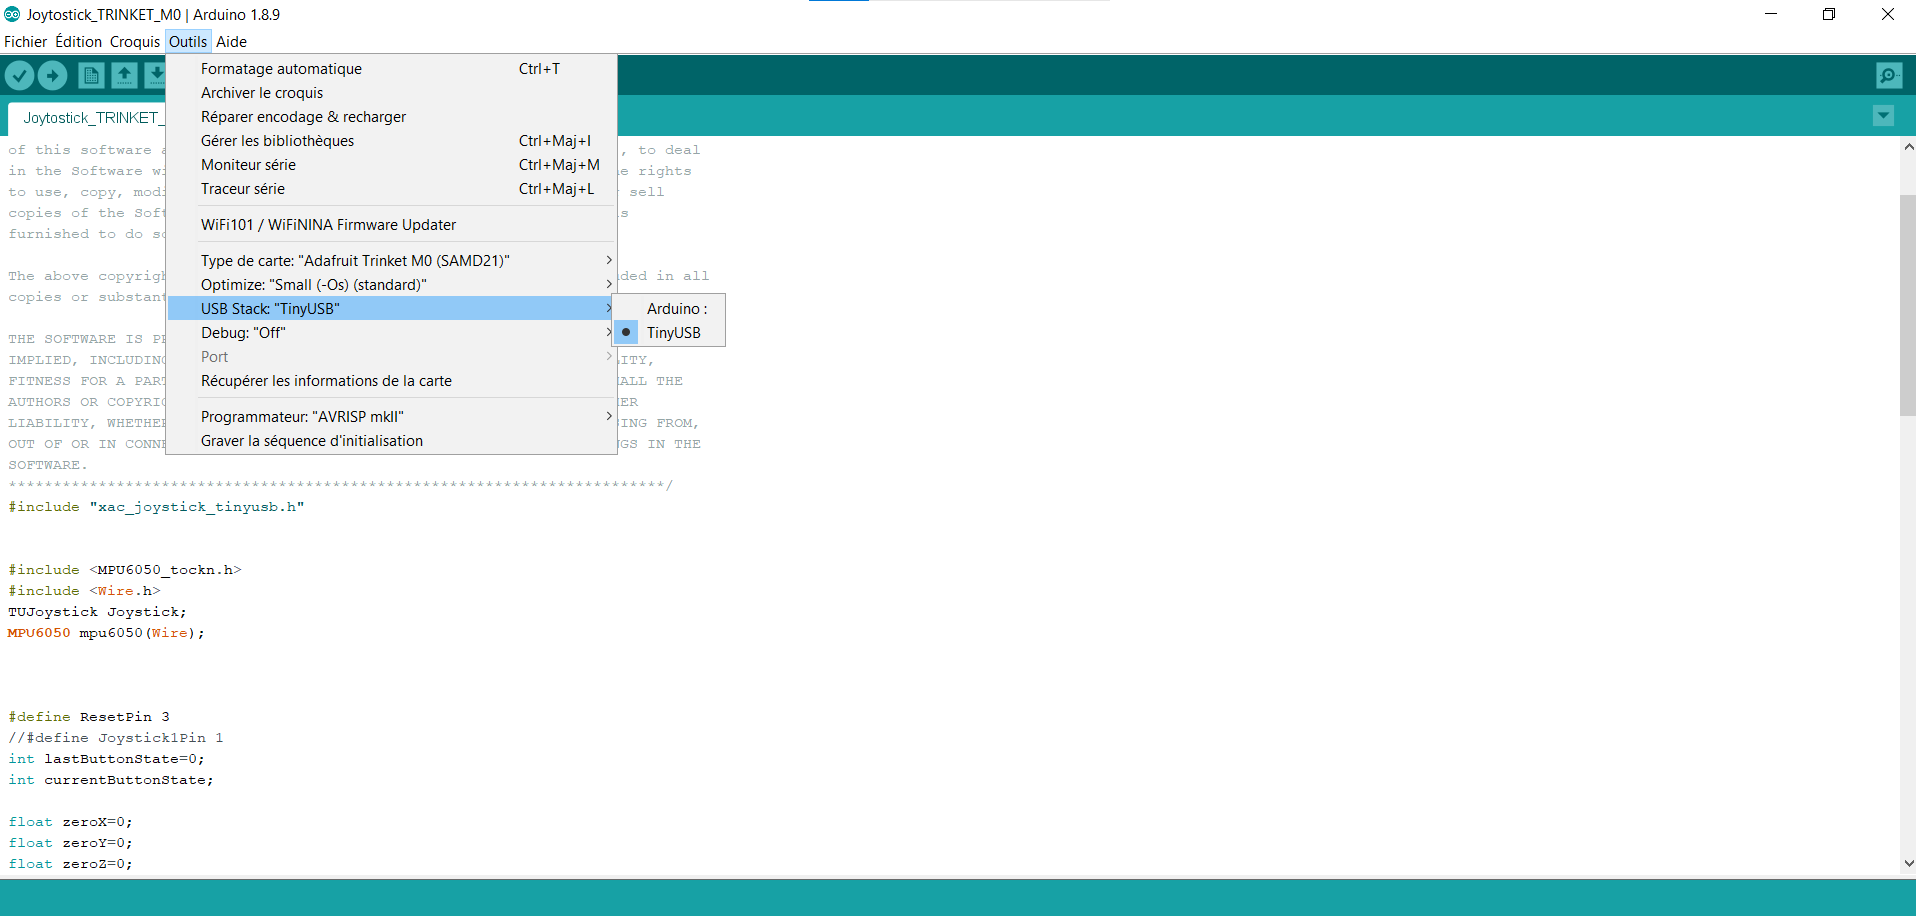
Select the arduino sketch in the files project : Joytostick_TRINKET_M0_v2.ino
Set Up arduino IDE, see ADFRUIT's Trinket Information and follow instructions https://learn.adafruit.com/adafruit-trinket-m0-circuitpython-arduino/arduino-ide-setup
Download and install theses libraries to the arduino IDE:
MPU6050_tockn by tockn
Joystick Library for Adafruit TinyUSB by gdsports
Connect the usb cable : Micro B Male on the Trinket and USB 2.0 Male in the PC
Be sure to set the USB Stack to TinyUSB
![]()
Upload the sketch to the Trinket
Check it proper functionning by using Gamepad tester website.
The values corresponding to AXIS 0 and AXIS 1 will vary according to the movements of the device, it means it works.All that remains before playing is to install the box on a wheelchair controller
- For a mouse :
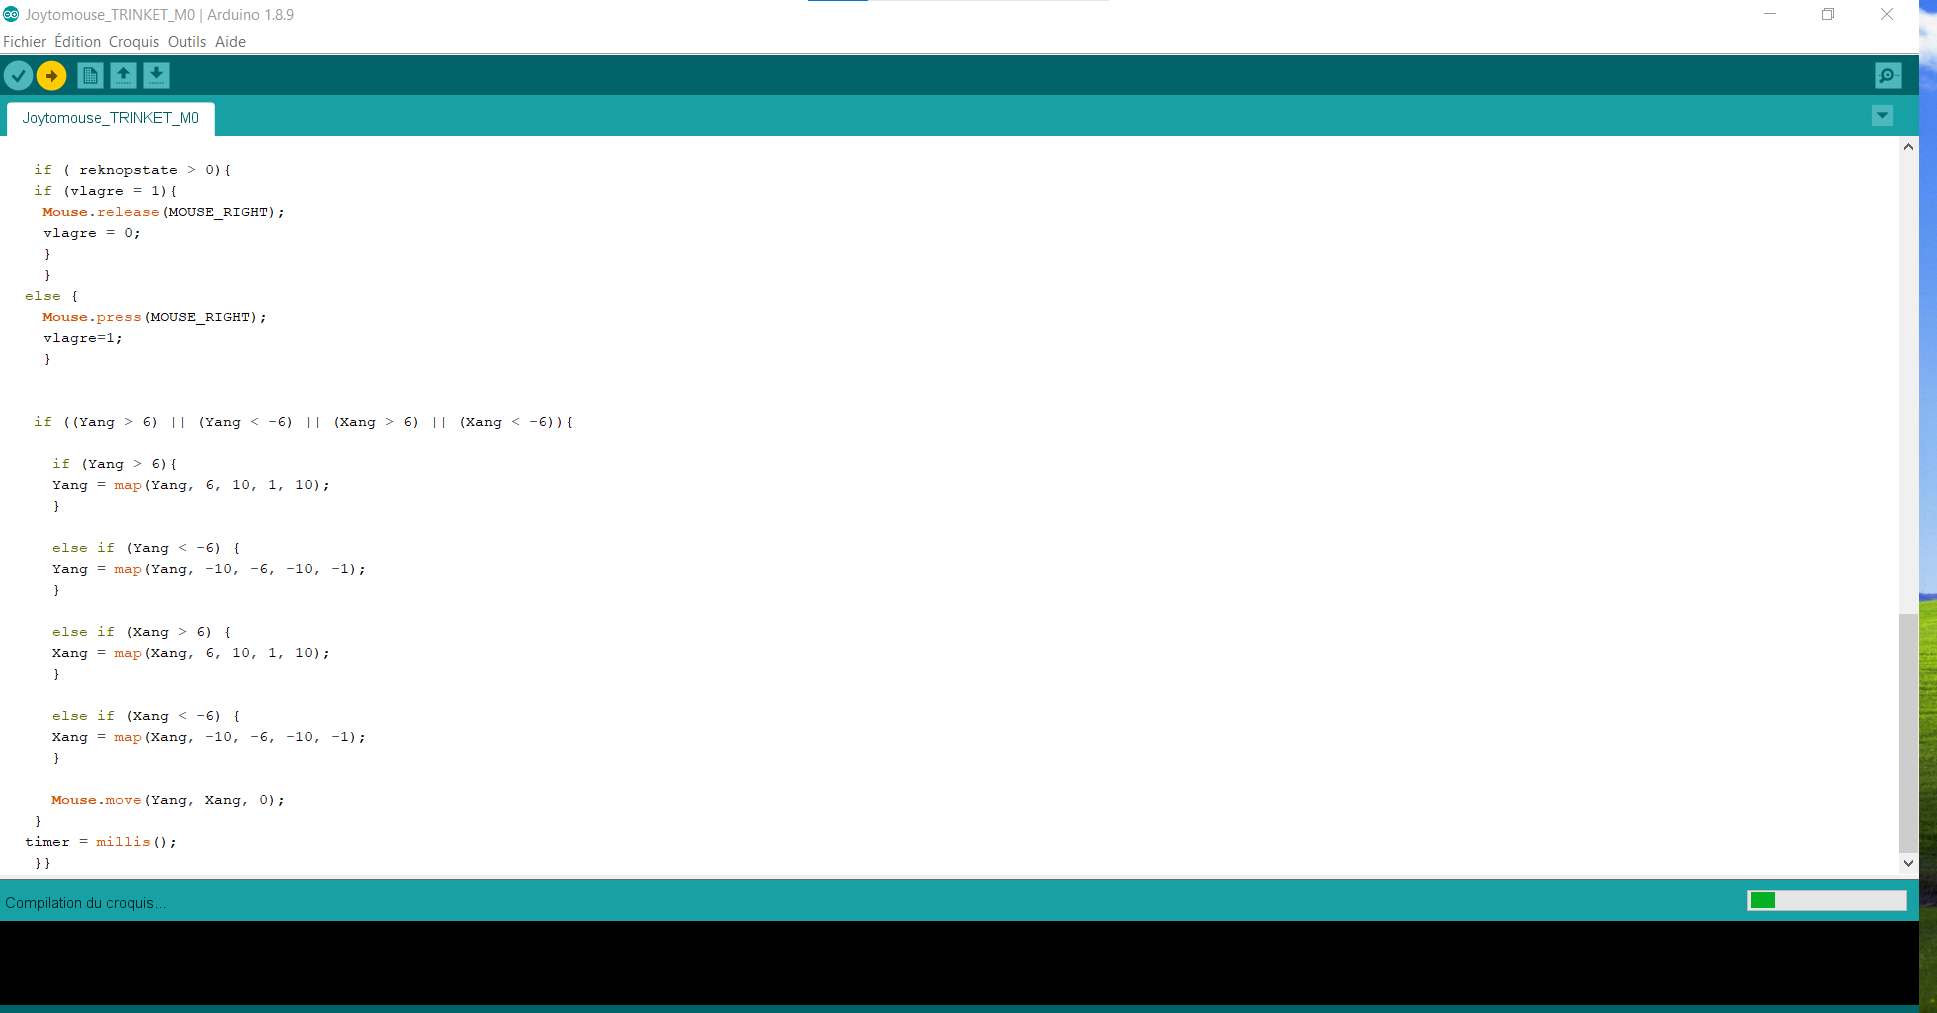
Select the arduino sketch in the files project : Joytomouse_TRINKET_M0_v2.ino
Download the MPU6050_light library in the library manager of the arduino software.
Upload the program to the Trinket
![]()
We can check its proper functioning by connecting the joystick to a PC (windows, linux, MACOS, or a smartphone)
The device is recognized as a mouse device and works without further manipulation. The movements of the box move the cursor on the screen and the buttons correspond to left and right clicks.
- For a game stick :
Joytojoy
An Open assistive device design to add mouse or video game stick capabilities to your power wheelchair controller


Discussions
Become a Hackaday.io Member
Create an account to leave a comment. Already have an account? Log In.