 jegatheesan
-
1Step 1
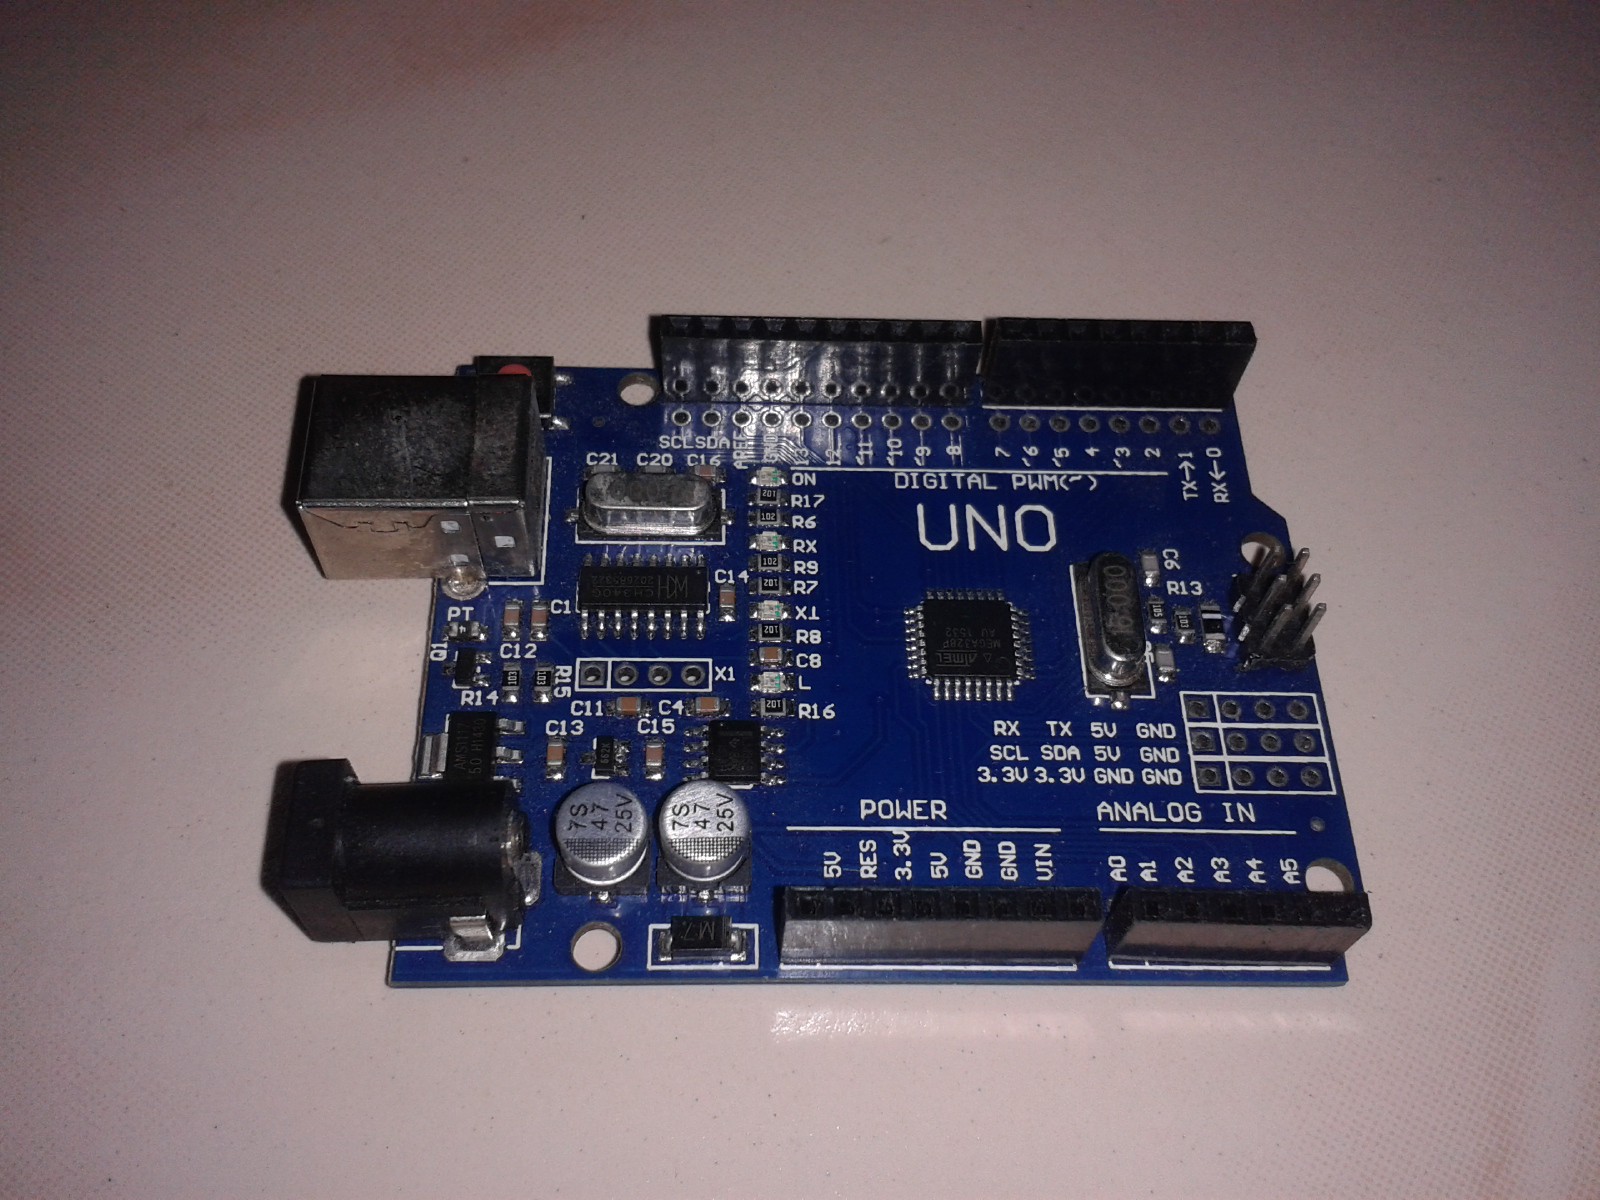
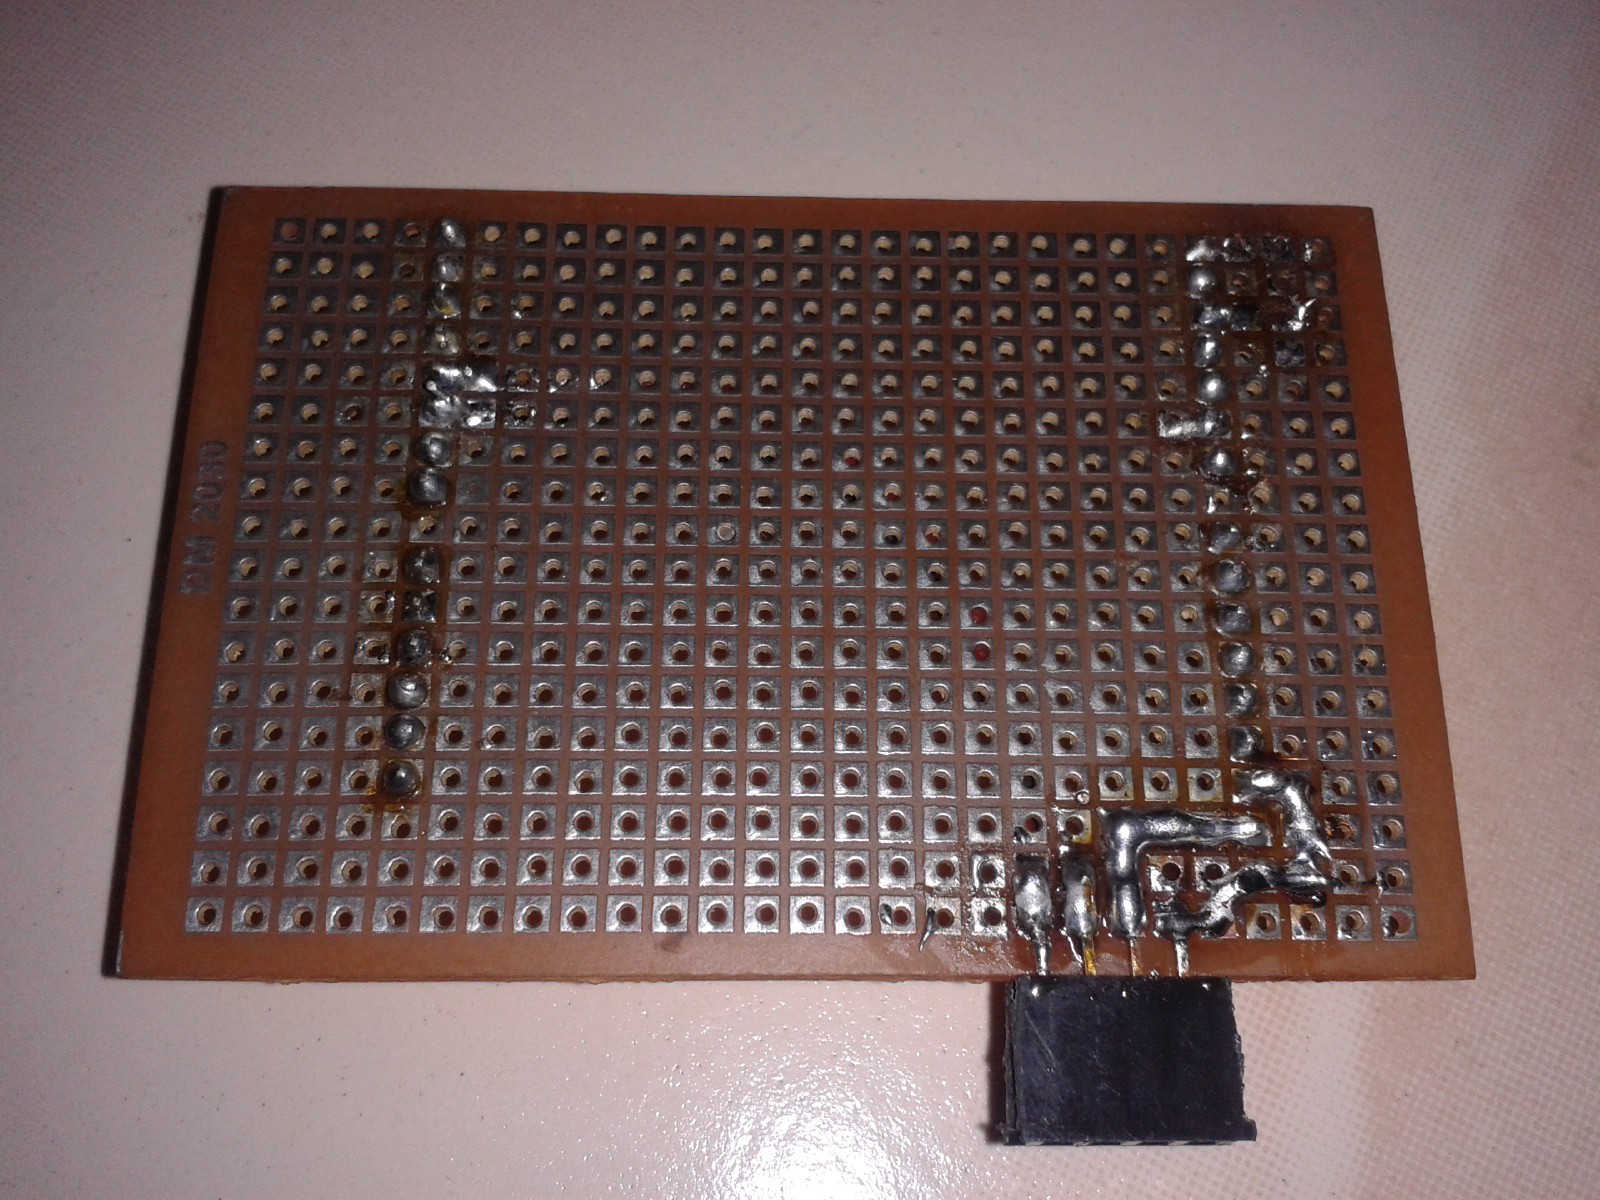
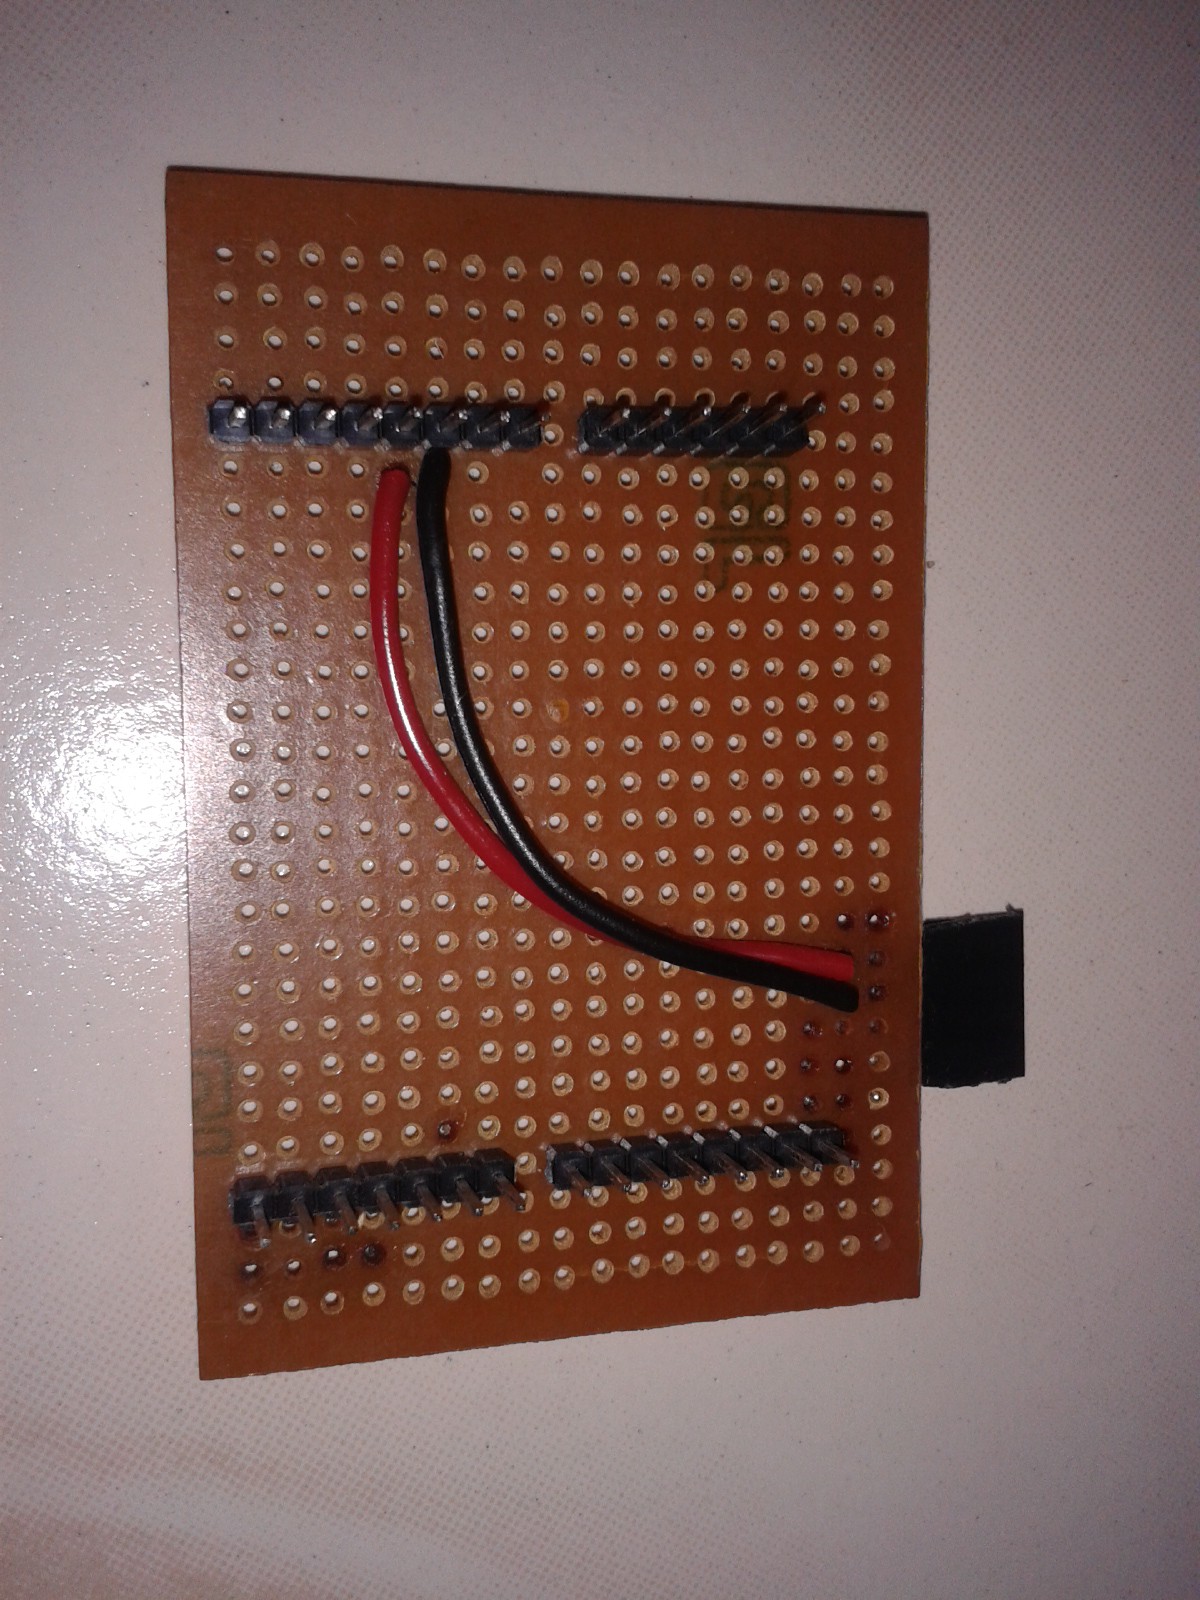
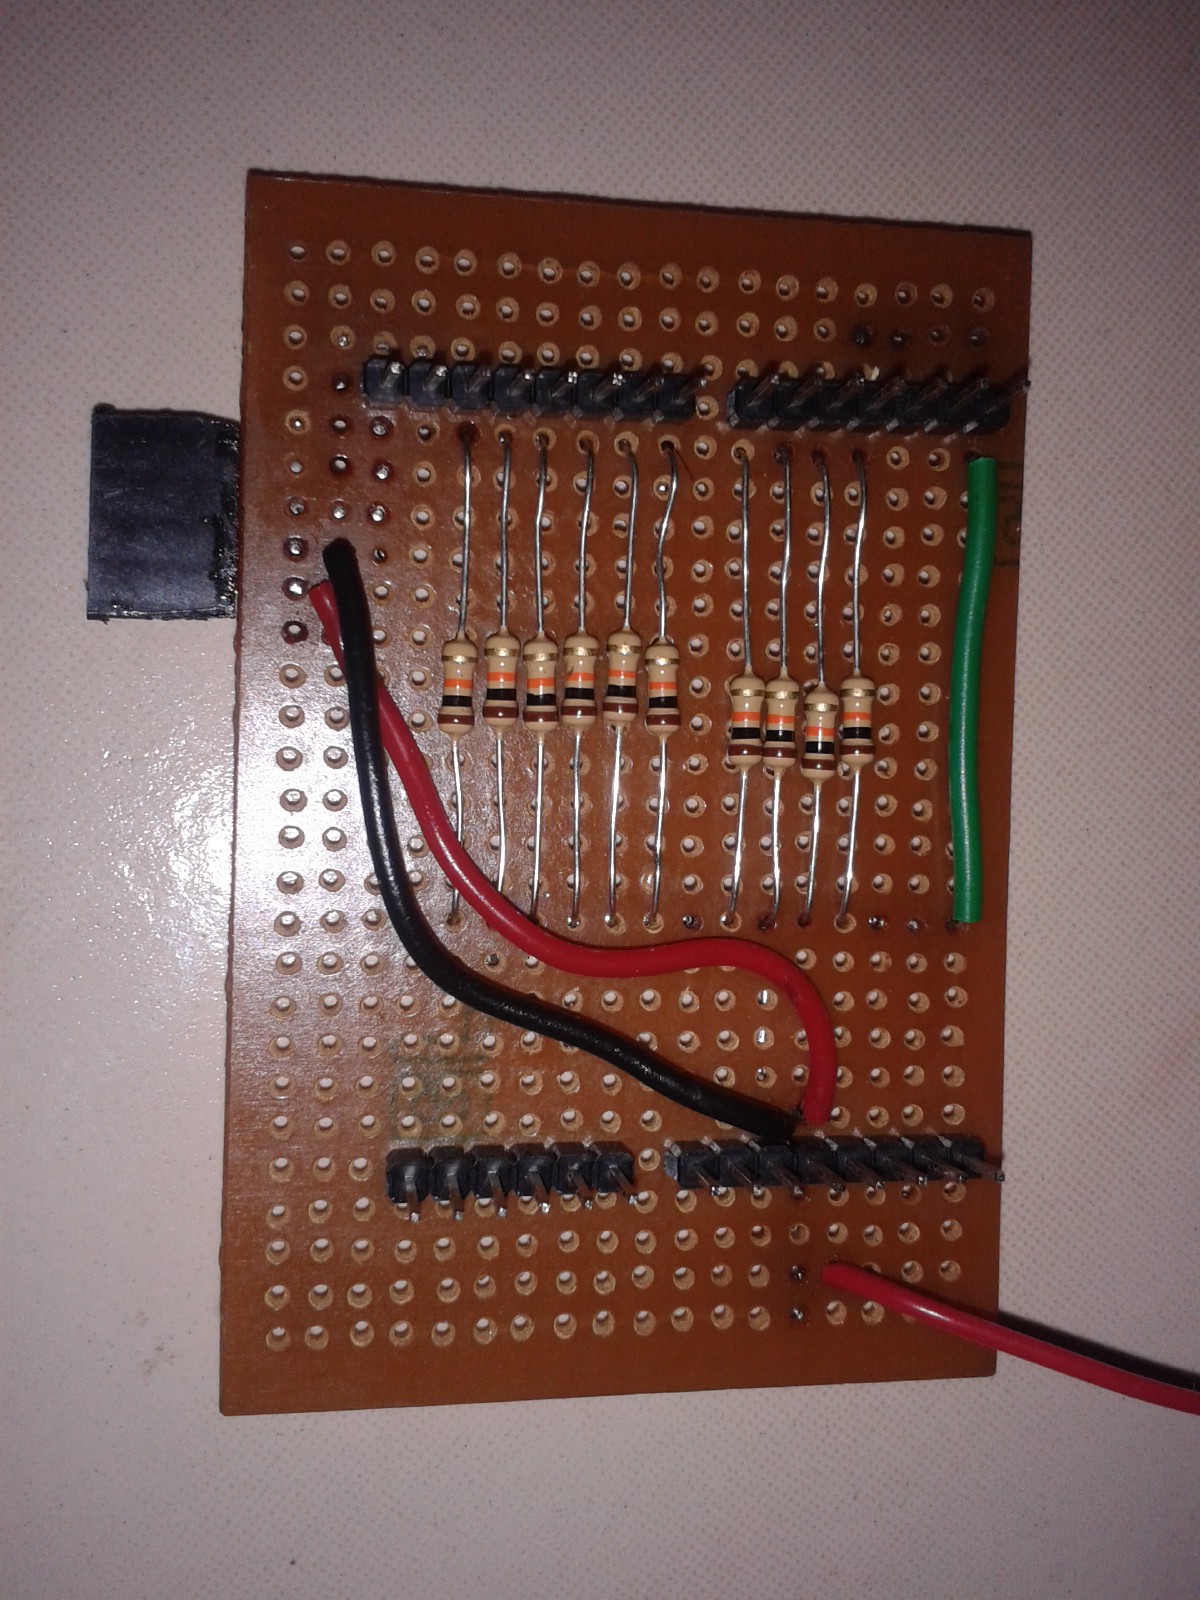
Make a Shield and Connect Bluetooth
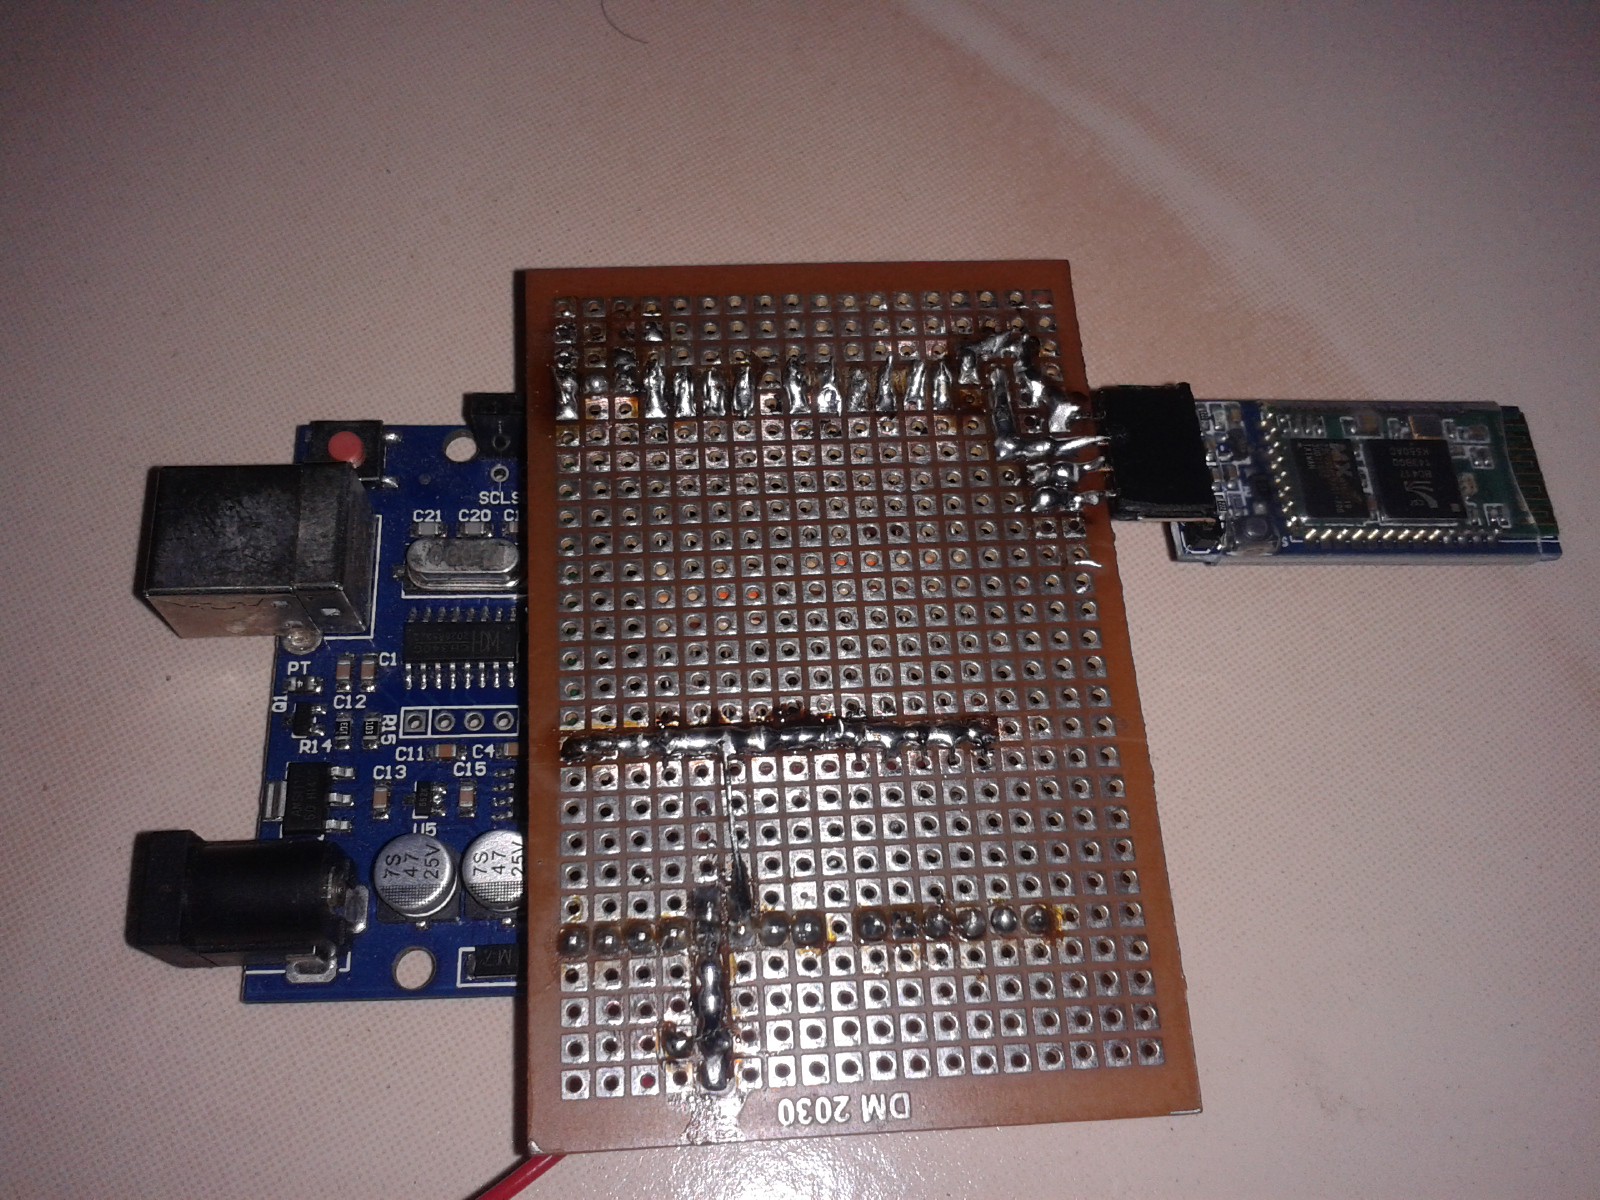
1) Solder male Header pins to connect the Plain PCB to Arduino Uno.
2) For HC-05 Blue tooth module connection
a) 5V Vcc from Arduino UNO to HC-05 VCC.
b) Gnd from Arduino UNO to HC-05 GND.
c) D0 (Rx) from Arduino UNO to HC-05 TxD.
d) D1 (Tx) from Arduino UNO to HC-05 RxD.
3) Then Hot Glue the Female Header pin to the Board to hold it tight.
4) Use Digital Pins D2 To D11 for Digital Input.
5) For that Solder 10 K ohms resister from each Digital Pins and Solder the opposite end to the GND.
6) Now take a Wire From a 5 Volt Supply and short to each pin. Check it with test program and Print the Pin numbers in Serial port and Found ok.
7) Now connect the HC-05 BT Module to the shield we Prepare.
8) Connect the Shield to Arduino Uno and Use Test programs Check the Bluetooth and Keys button.
9) For Make it full wireless Connect the UNO to a Battery.
10) Now the Circuit is ready Its time to make Switches.
![]()
![]()
![]()
![]()
![]()
-
2Step 2
Programming Arduino IDE
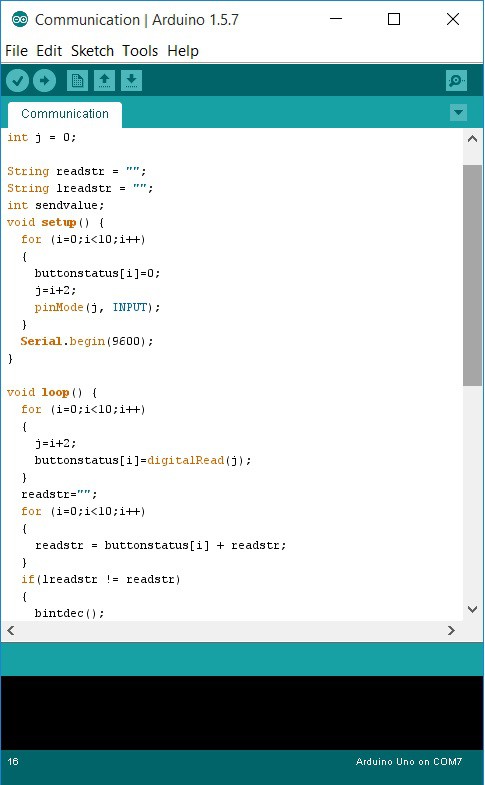
Before Making Switch Write a Program to test the goal is reached.
Arduino Uno
Note
While Write program and Upload Remove the HC-05 Module from the shield because it used the Pin D0,D1 used by IDE to write program to processor. If not remove Error in Upload Listed.
1) For Blue tooth just open the serial port and write the data what we have.
2) Record the current Binary value
3) Read the switches D2 to D11 and Convert it to Binary.
4) Check the next binary value. If both the value are different then.
5) Convert the Binary value to decimal and Send the Decimal value through Blue tooth.
6) Store the last binary value to current binary value.and go to step 3.
Coding is attached in the files
![]()
-
3Step 3
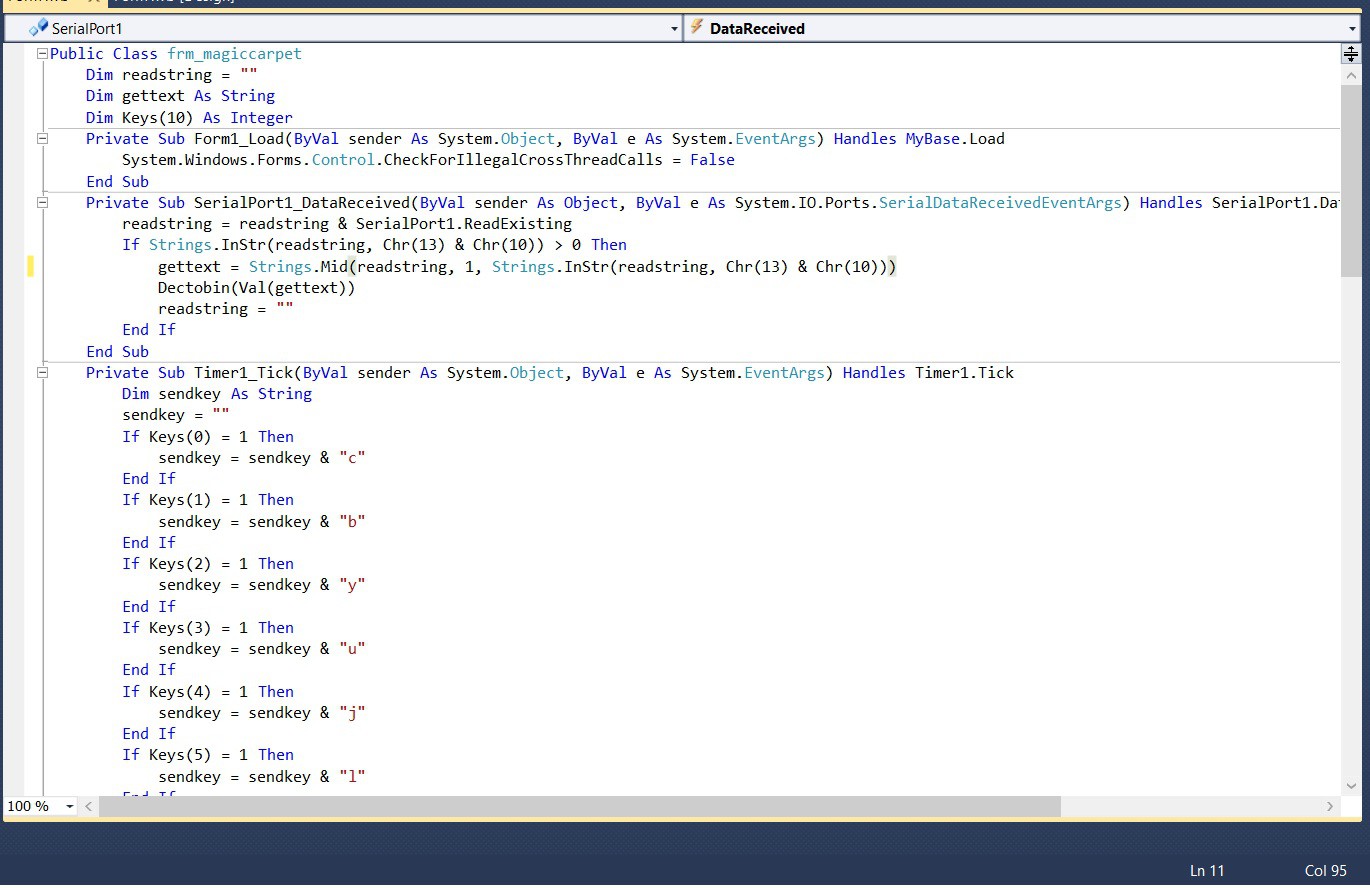
Programming Visual Studio
1) Open a new application Program in Visual Studio.
2) In the form use a serial port to connect with the Buetooth com port.
3) The received Decimal value is converted in to binary and Save it in a array.
4) Then use a Timer and sendkeys.send function is used to call the keys.
5) As per Gaming the Send keys corresponding to the pressed keys changes And U able to play games and rum applications etc.
![]()
-
4Step 4
Test Running
1) Switch on the Arduino.
2) Scan the Blue tooth in Laptop and Found HC-05 while pair put the Key as '1234' Default key for HC-05.
3) Now open the application and select the Bluetooth port (Found the setting of blue tooth as Com Port and select the second port marked as outgoing port)
4) Click Start in the application and Now the application minimize to the taskbar.
5) Now run the Game or Application u want to control.
6) In the Arduino now use the wire from 5V to tough the D2 to D11 or combined to see the play.
-
5Step 5
Make Switches Top portion
1) Switch on the Arduino.
2) Scan the Blue tooth in Laptop and Found HC-05 while pair put the Key as '1234' Default key for HC-05.
3) Now open the application and select the Bluetooth port (Found the setting of blue tooth as Com Port and select the second port marked as outgoing port)
4) Click Start in the application and Now the application minimize to the taskbar.
5) Now run the Game or Application u want to control.
6) In the Arduino now use the wire from 5V to tough the D2 to D11 or combined to see the play.
![]()
![]()
![]()
![]()
![]()
-
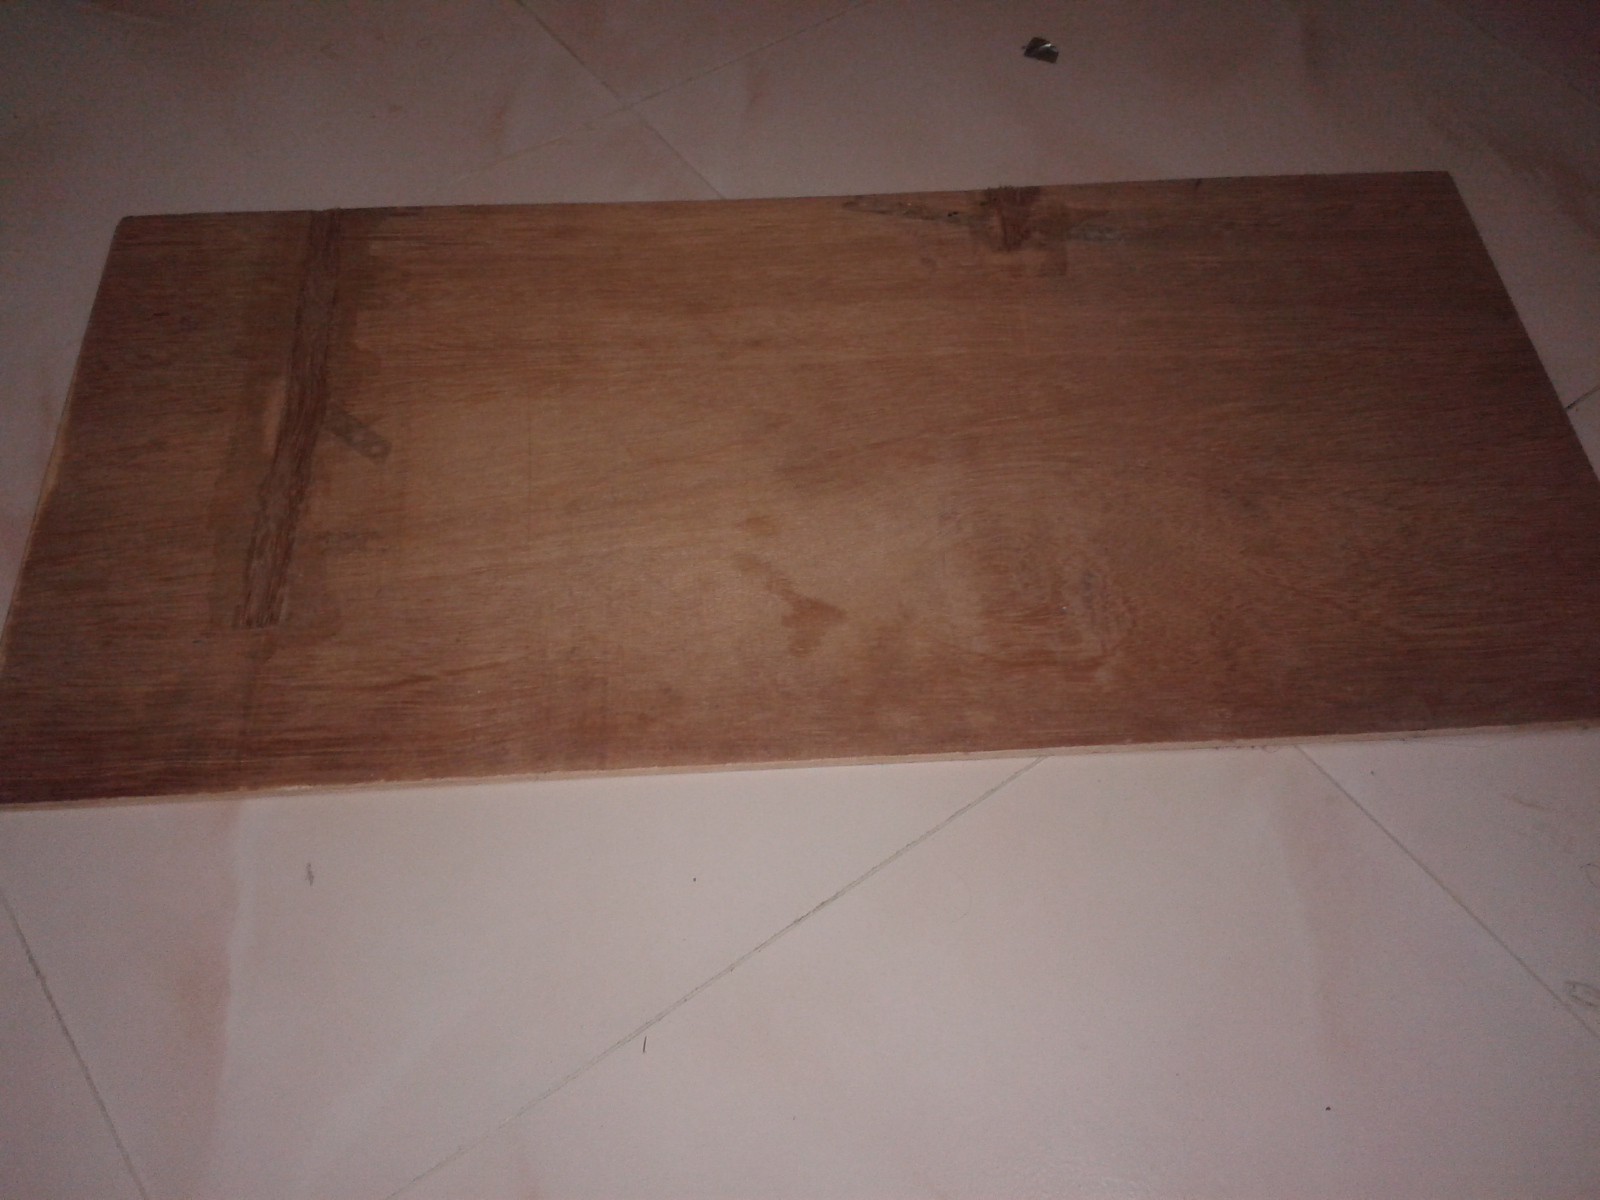
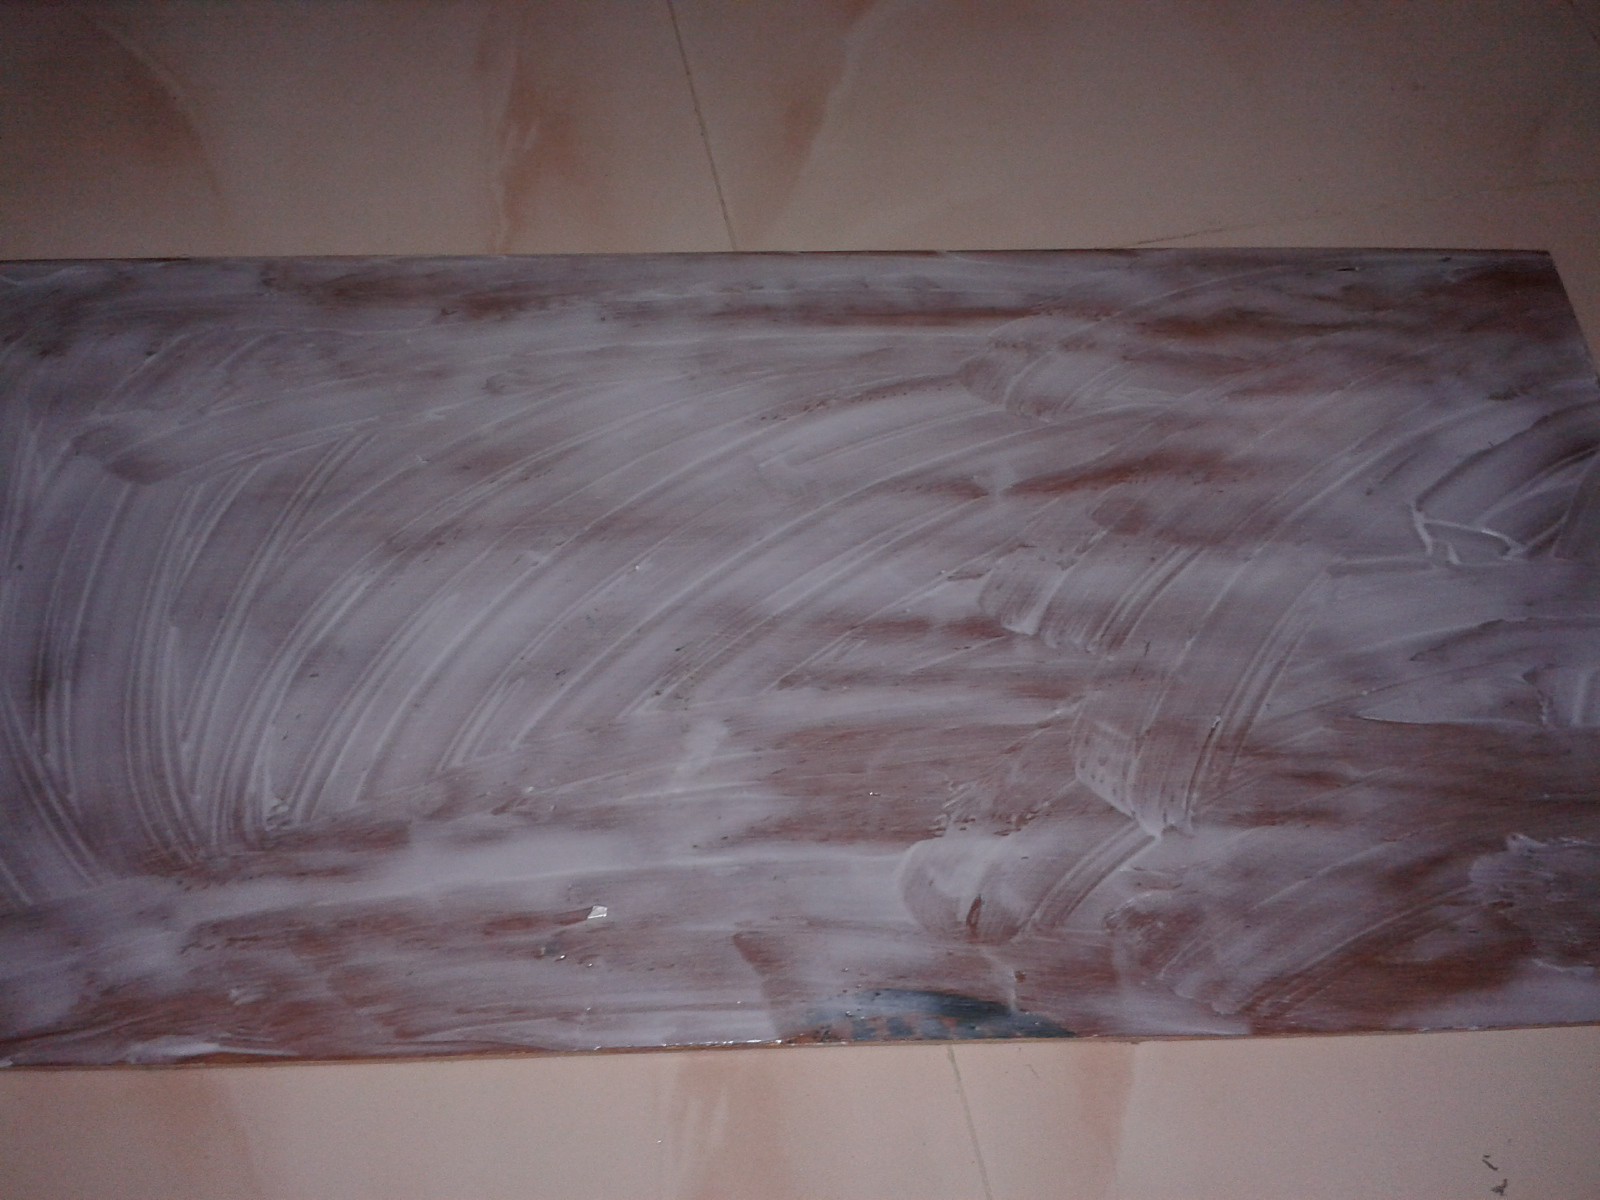
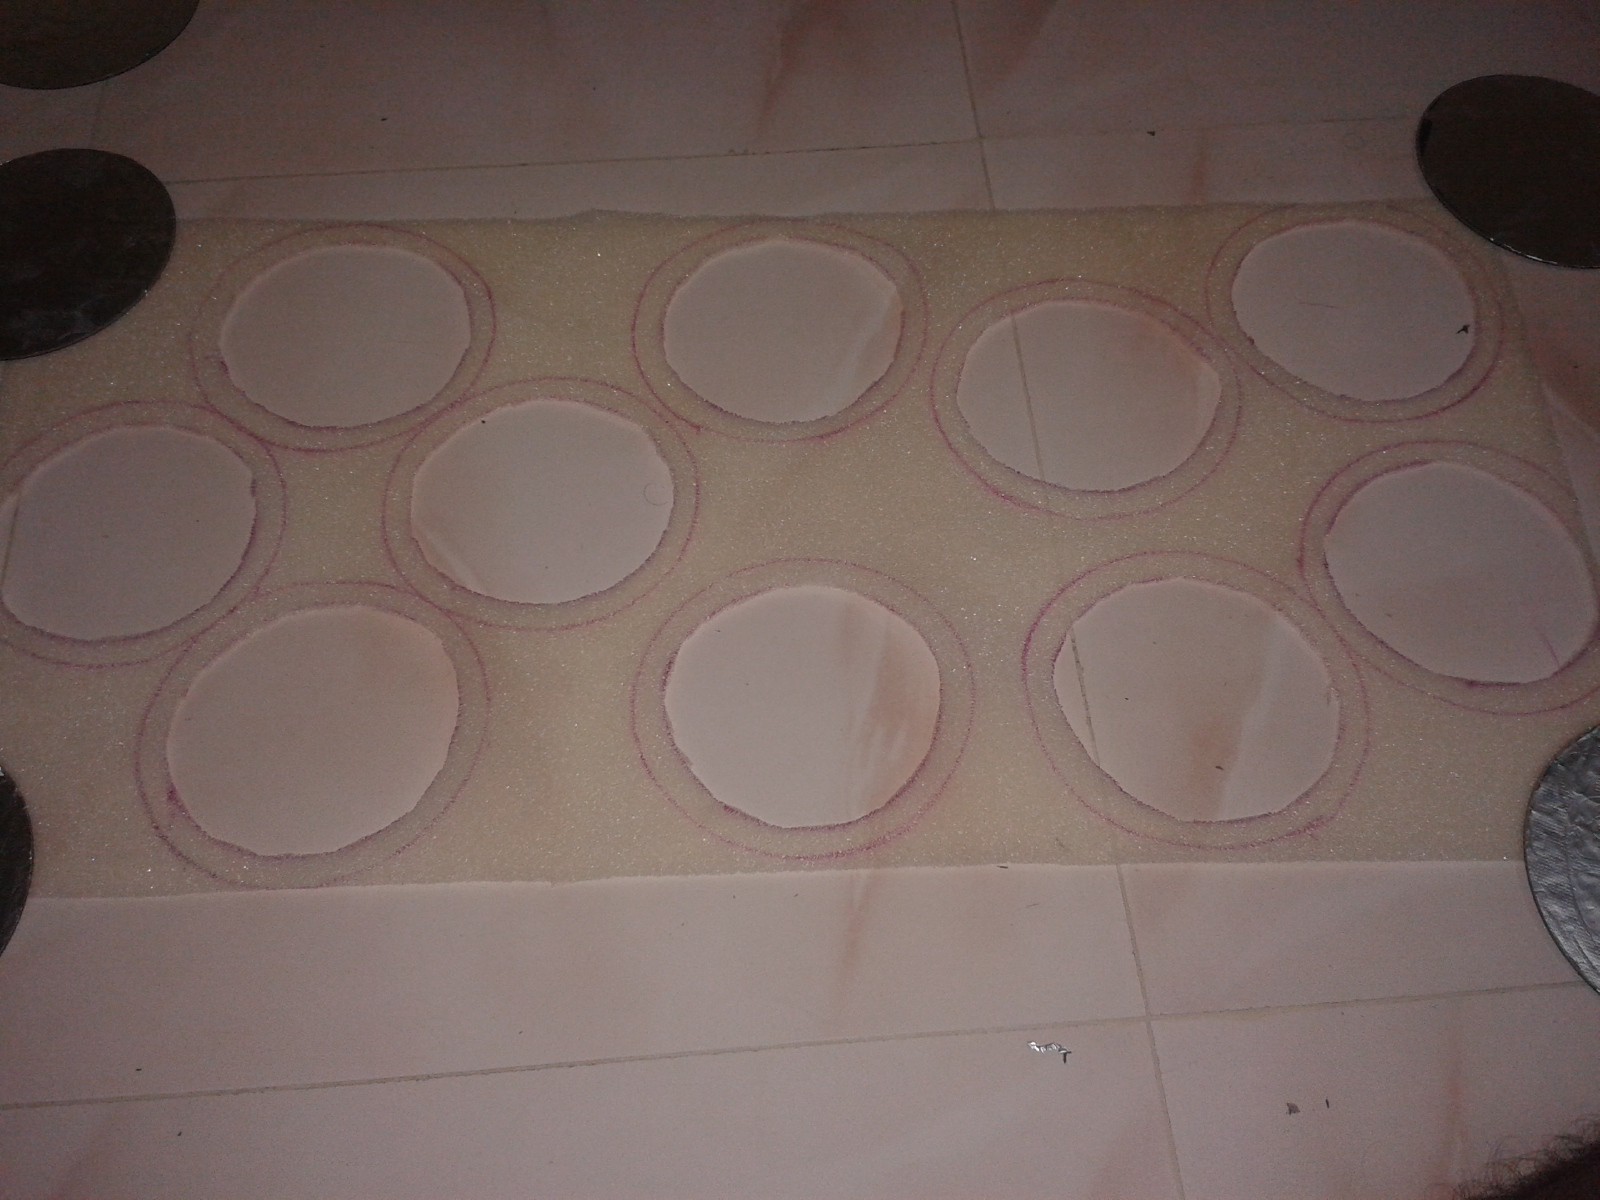
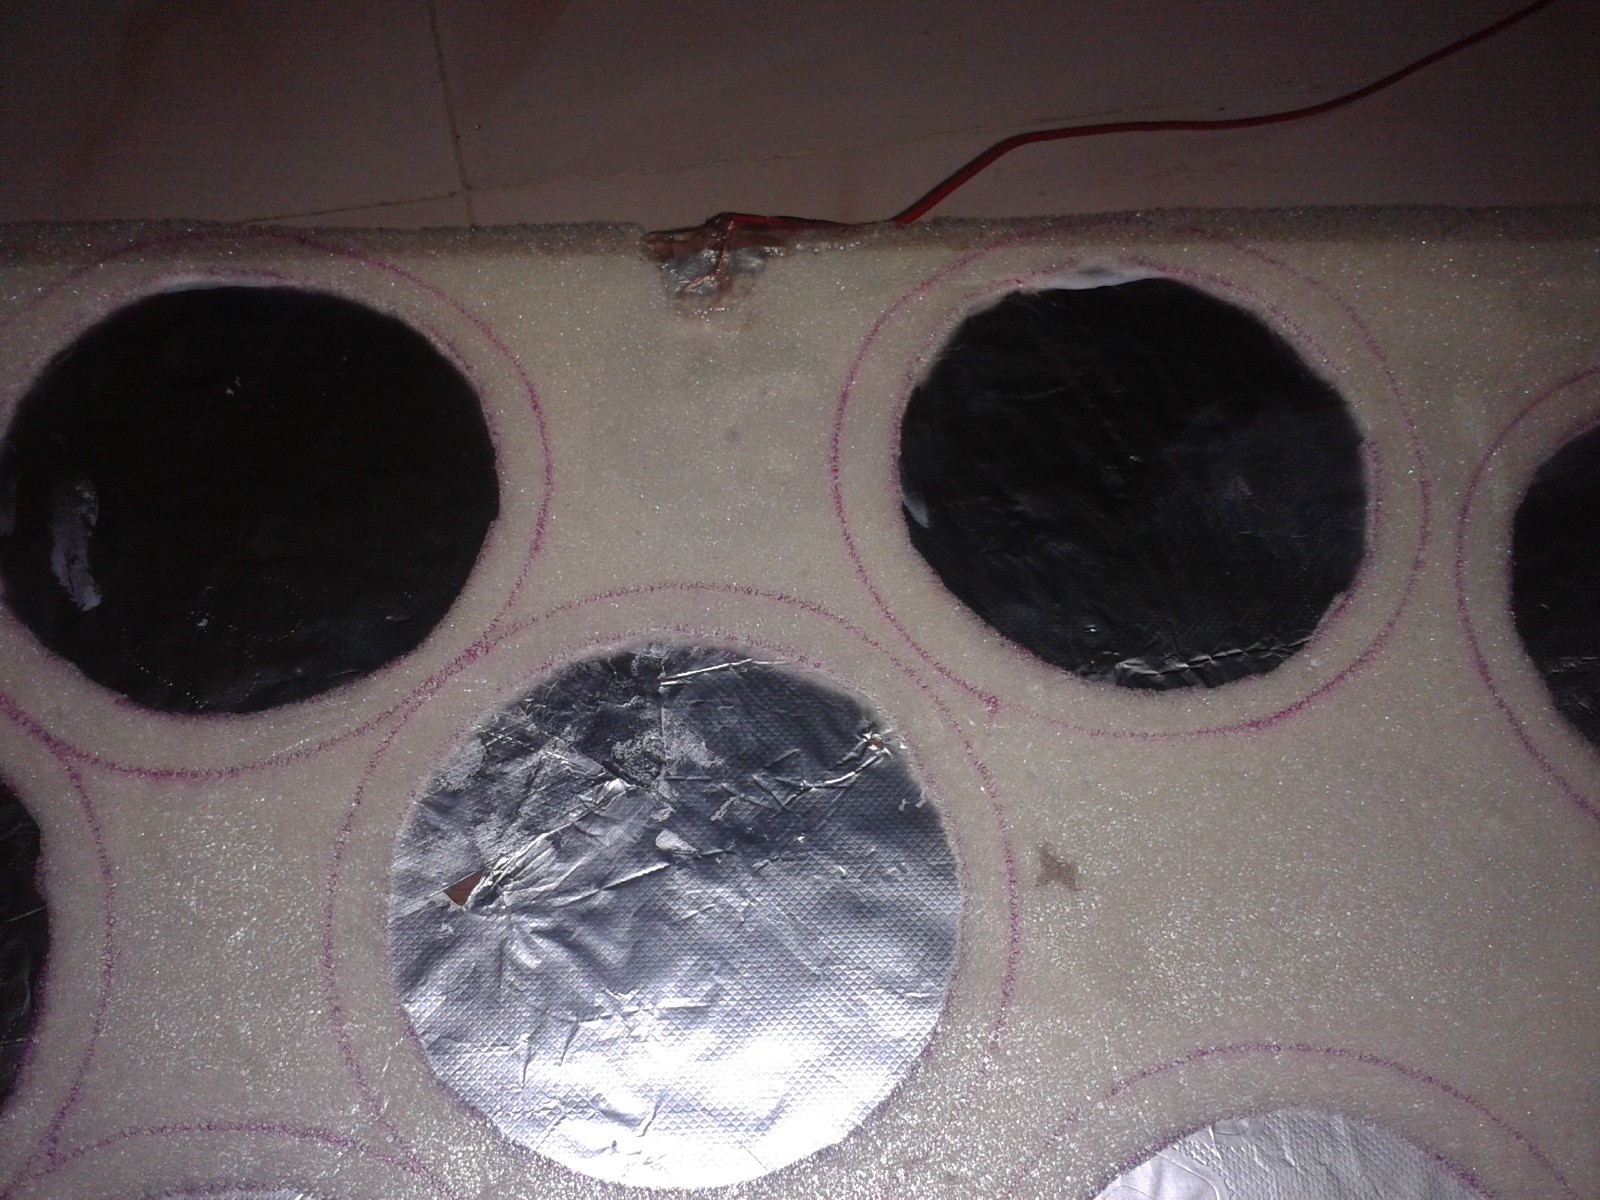
6Step 6
Make Switches Bottom portion
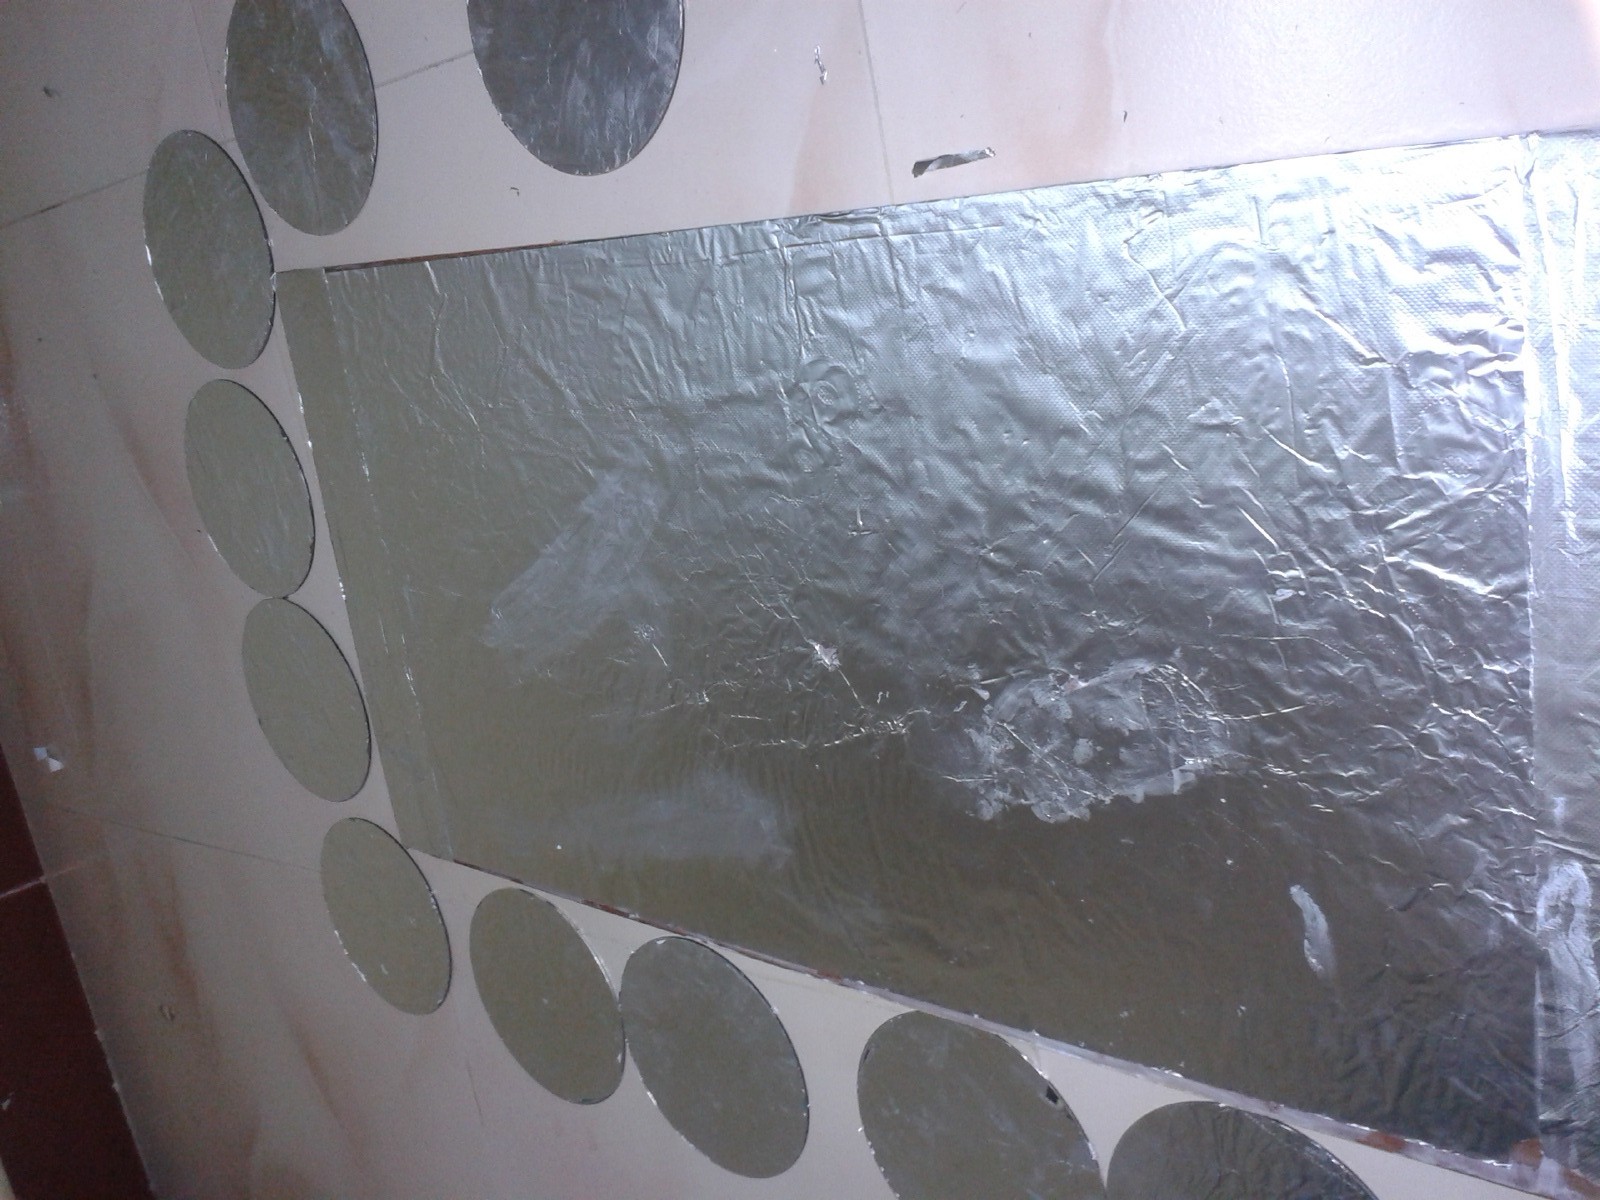
1) Take a Thin playwood of size good enough for Nos of switches u have. I have 10 switches and i did it for my kid so i dont leave lot of space between each switch.
2) Apply fevicol (GUM) all over play wood and spread it evenly.
3) Paste the foils fully over the board and make it flat using a card board, but dont rub very hard it tear the foils.
4) Allow Top and bottom of switch to dry.
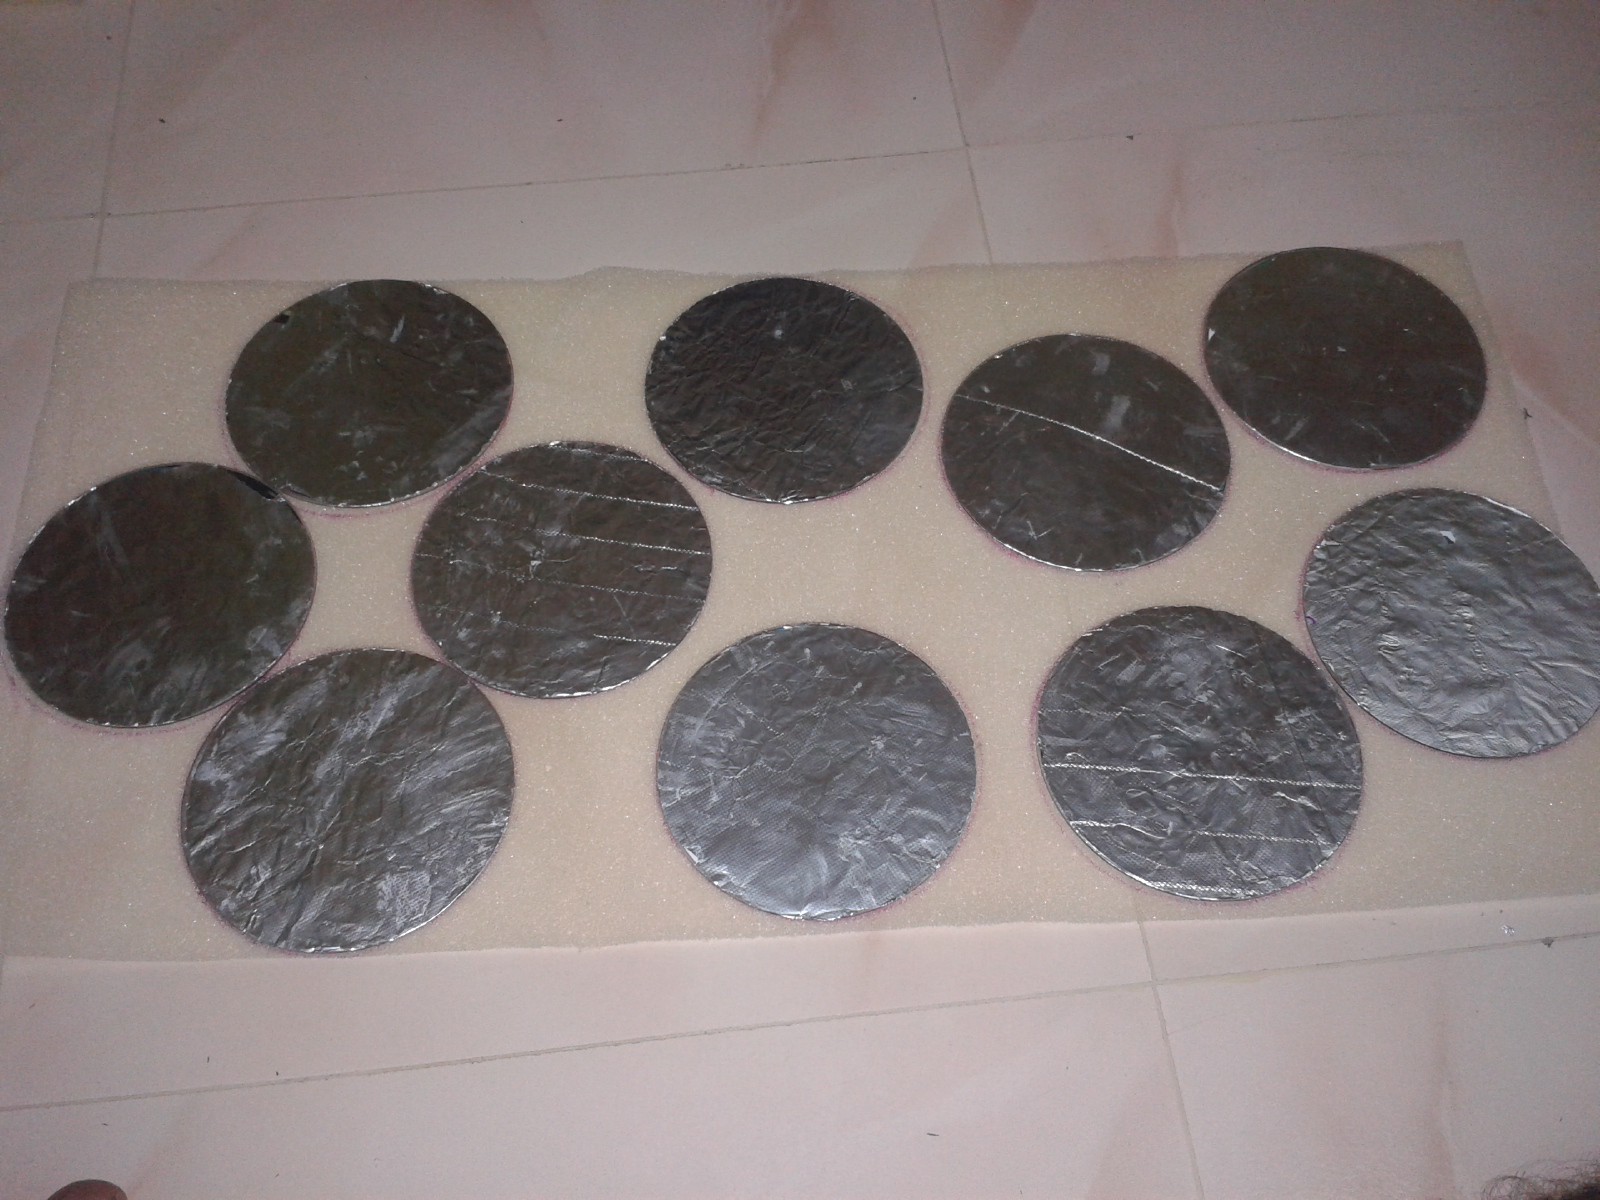
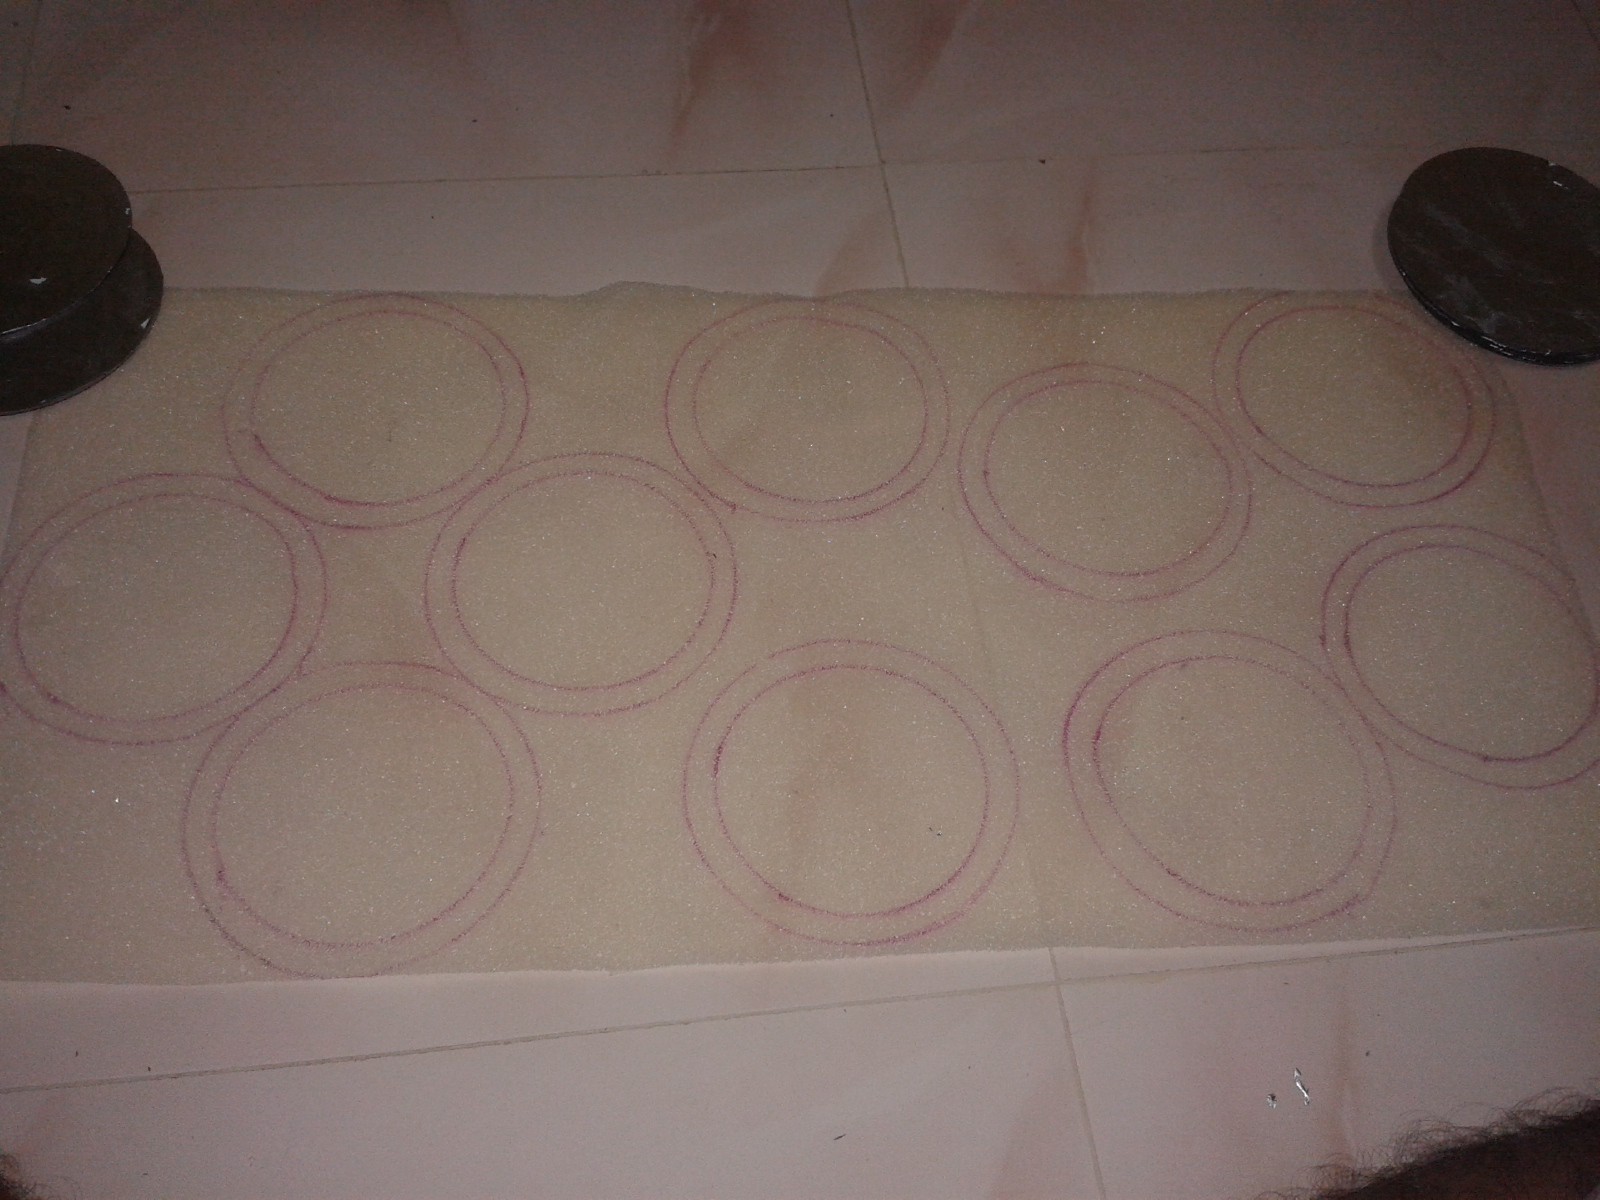
5) Now take a thin sponge and cut to the size of the board.
6) As per position plan of the switch. Draw circles on the sponge using sketch pen.
7) Draw anothe circle inside the first circle smaller than 1 cm radius.
8) Cut the small circles and now the spong to ready to paste.
9) Step by step paste the sponge on the bottom board with out make the circle shape as oval.
10) So apply Fevicol(GUM) step by step, leave the spaces of cut in the sponge.
11) Allow it to dry now the bottom portion of the switch is also ready.
![]()
![]()
![]()
![]()
![]()
![]()
![]()
![]()
![]()
-
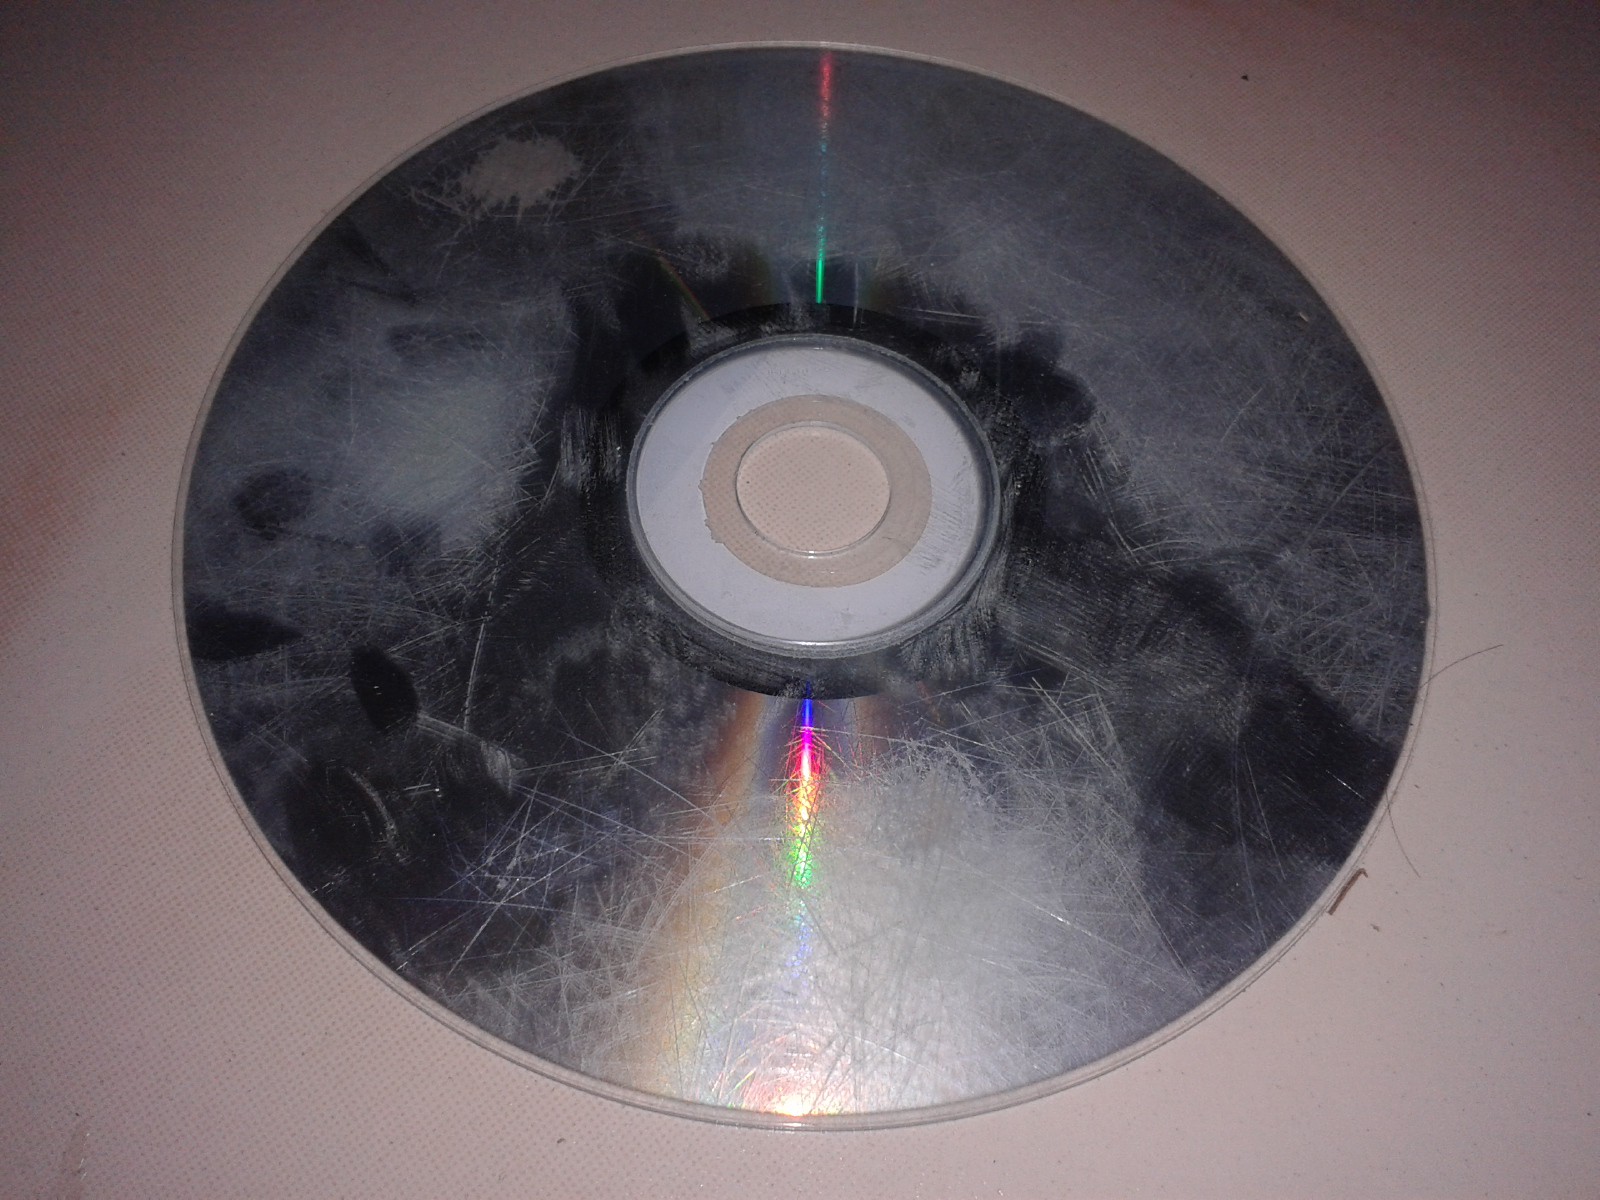
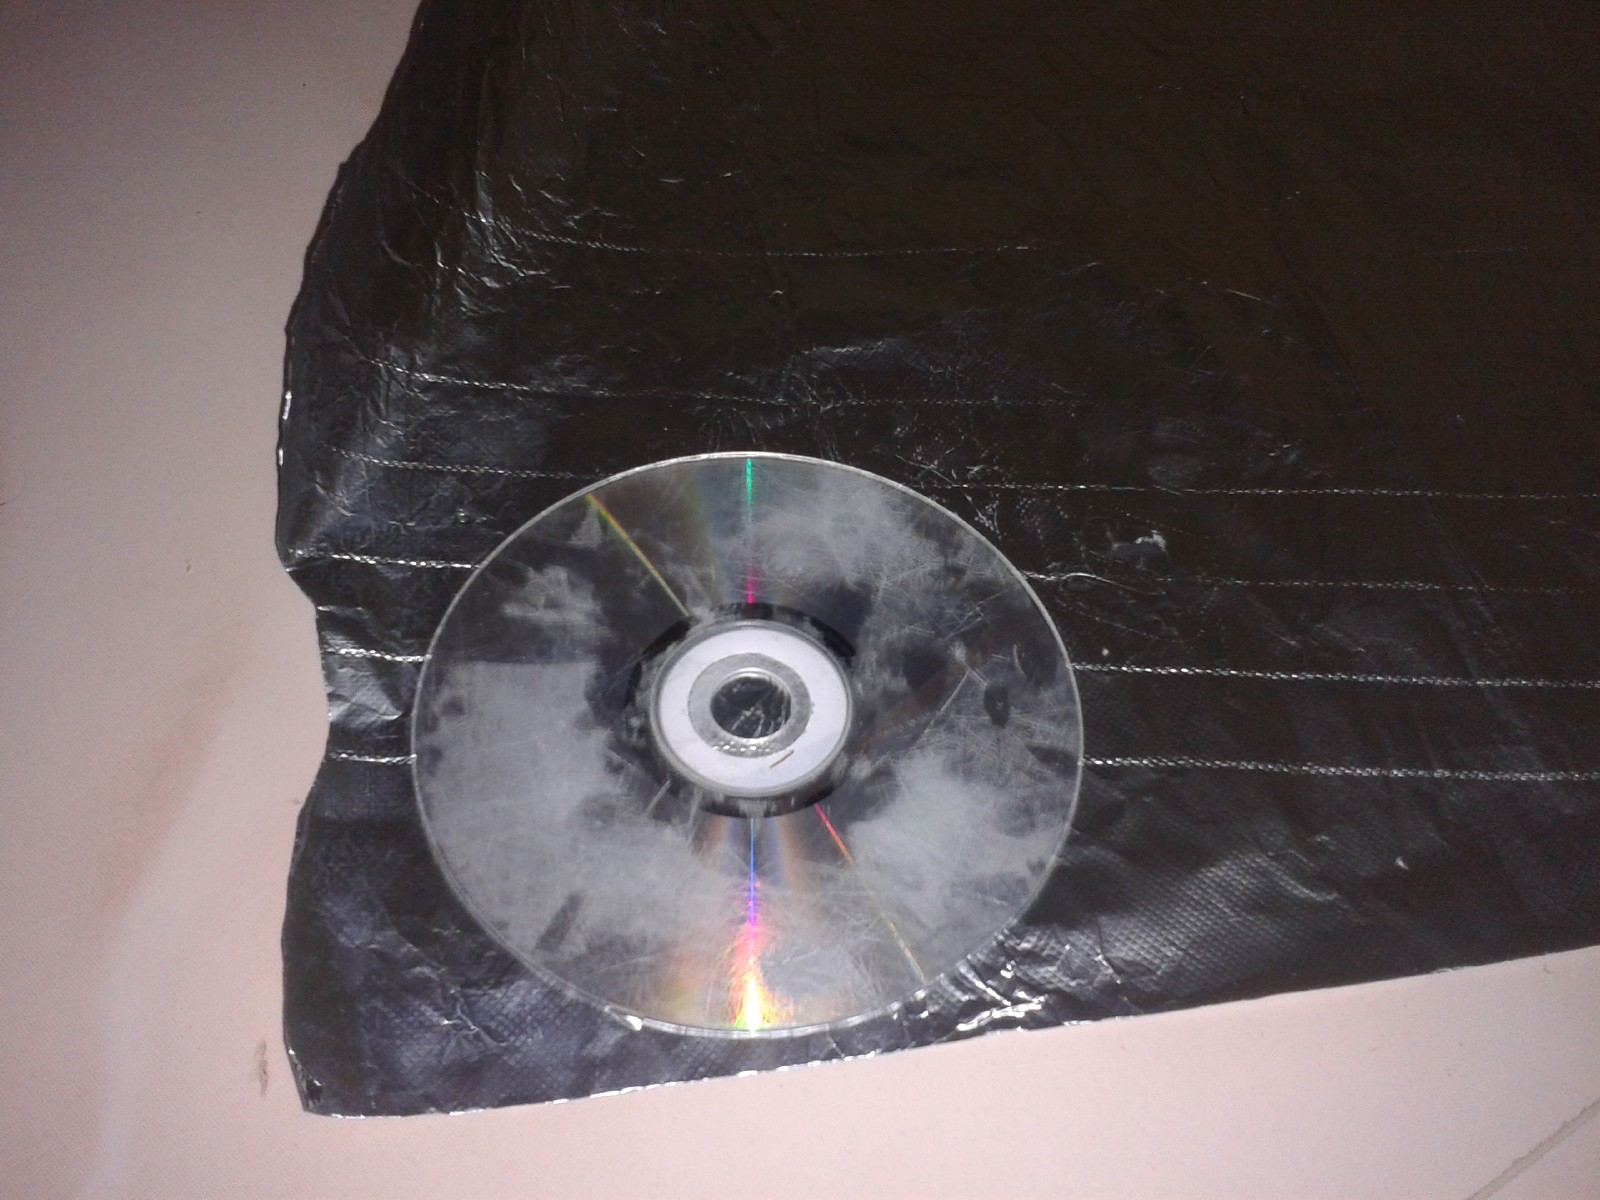
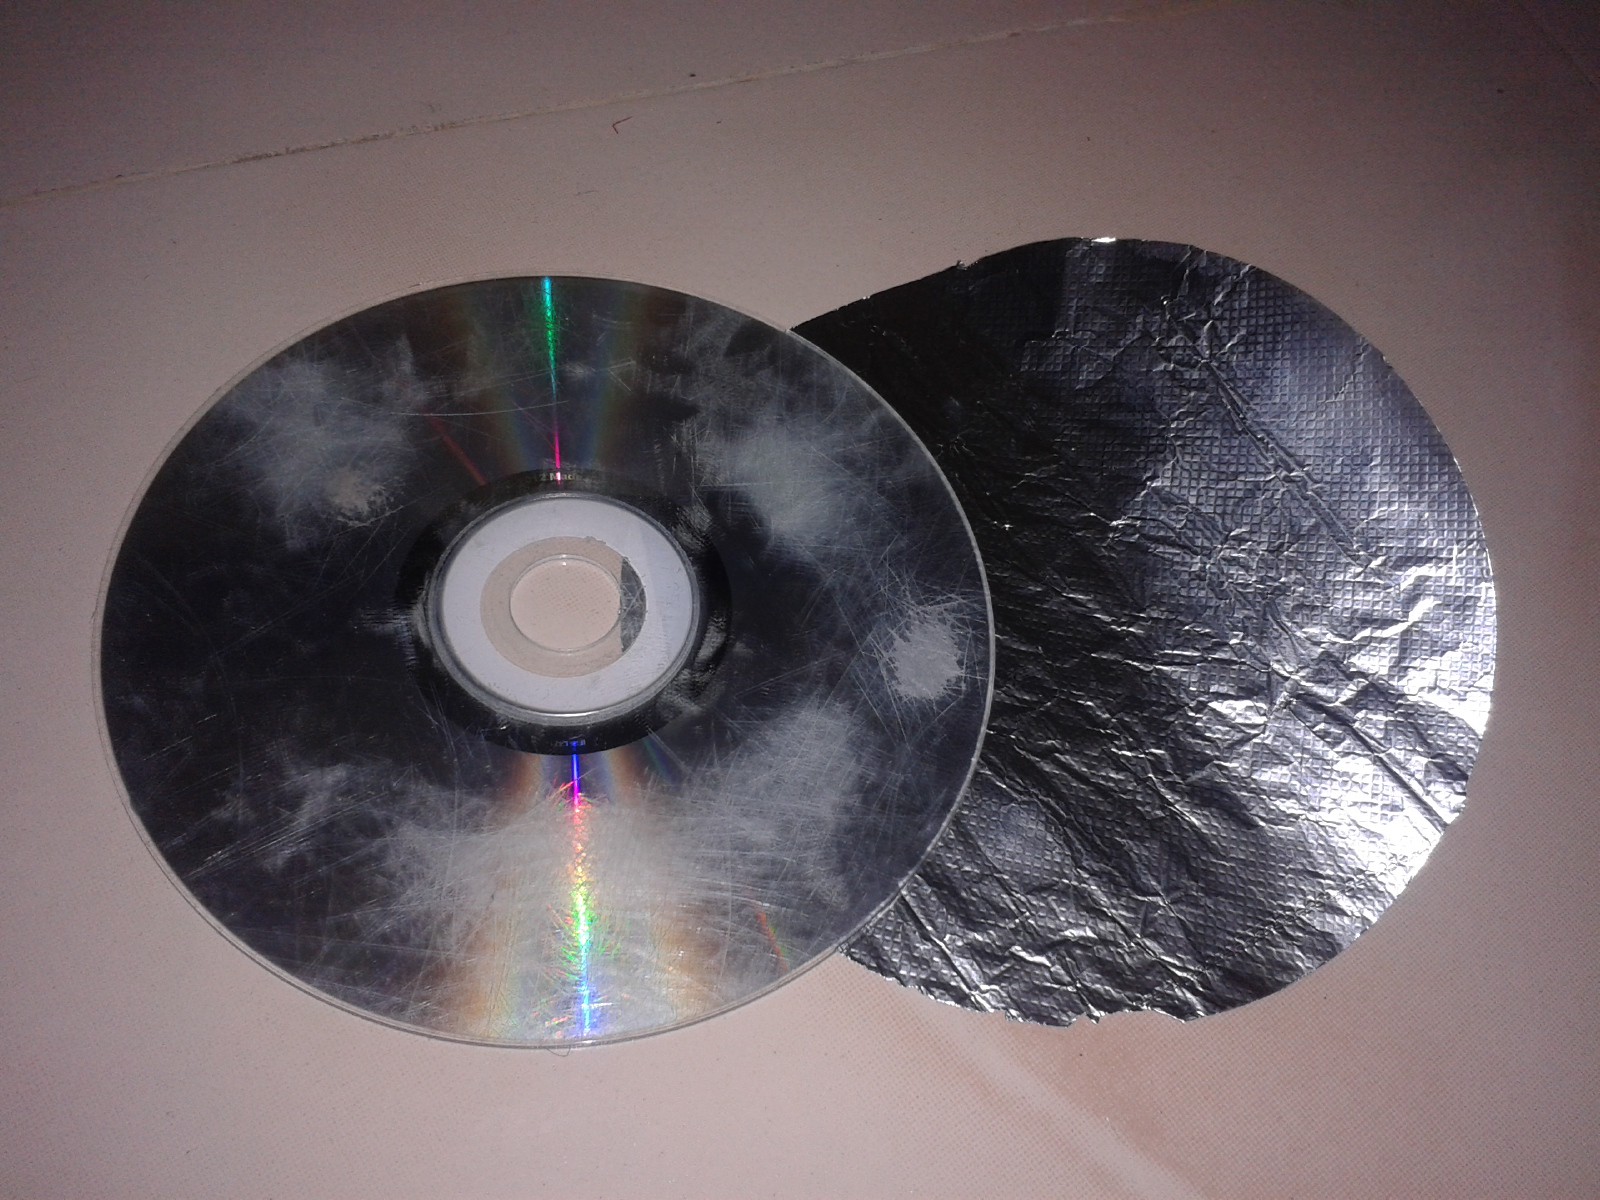
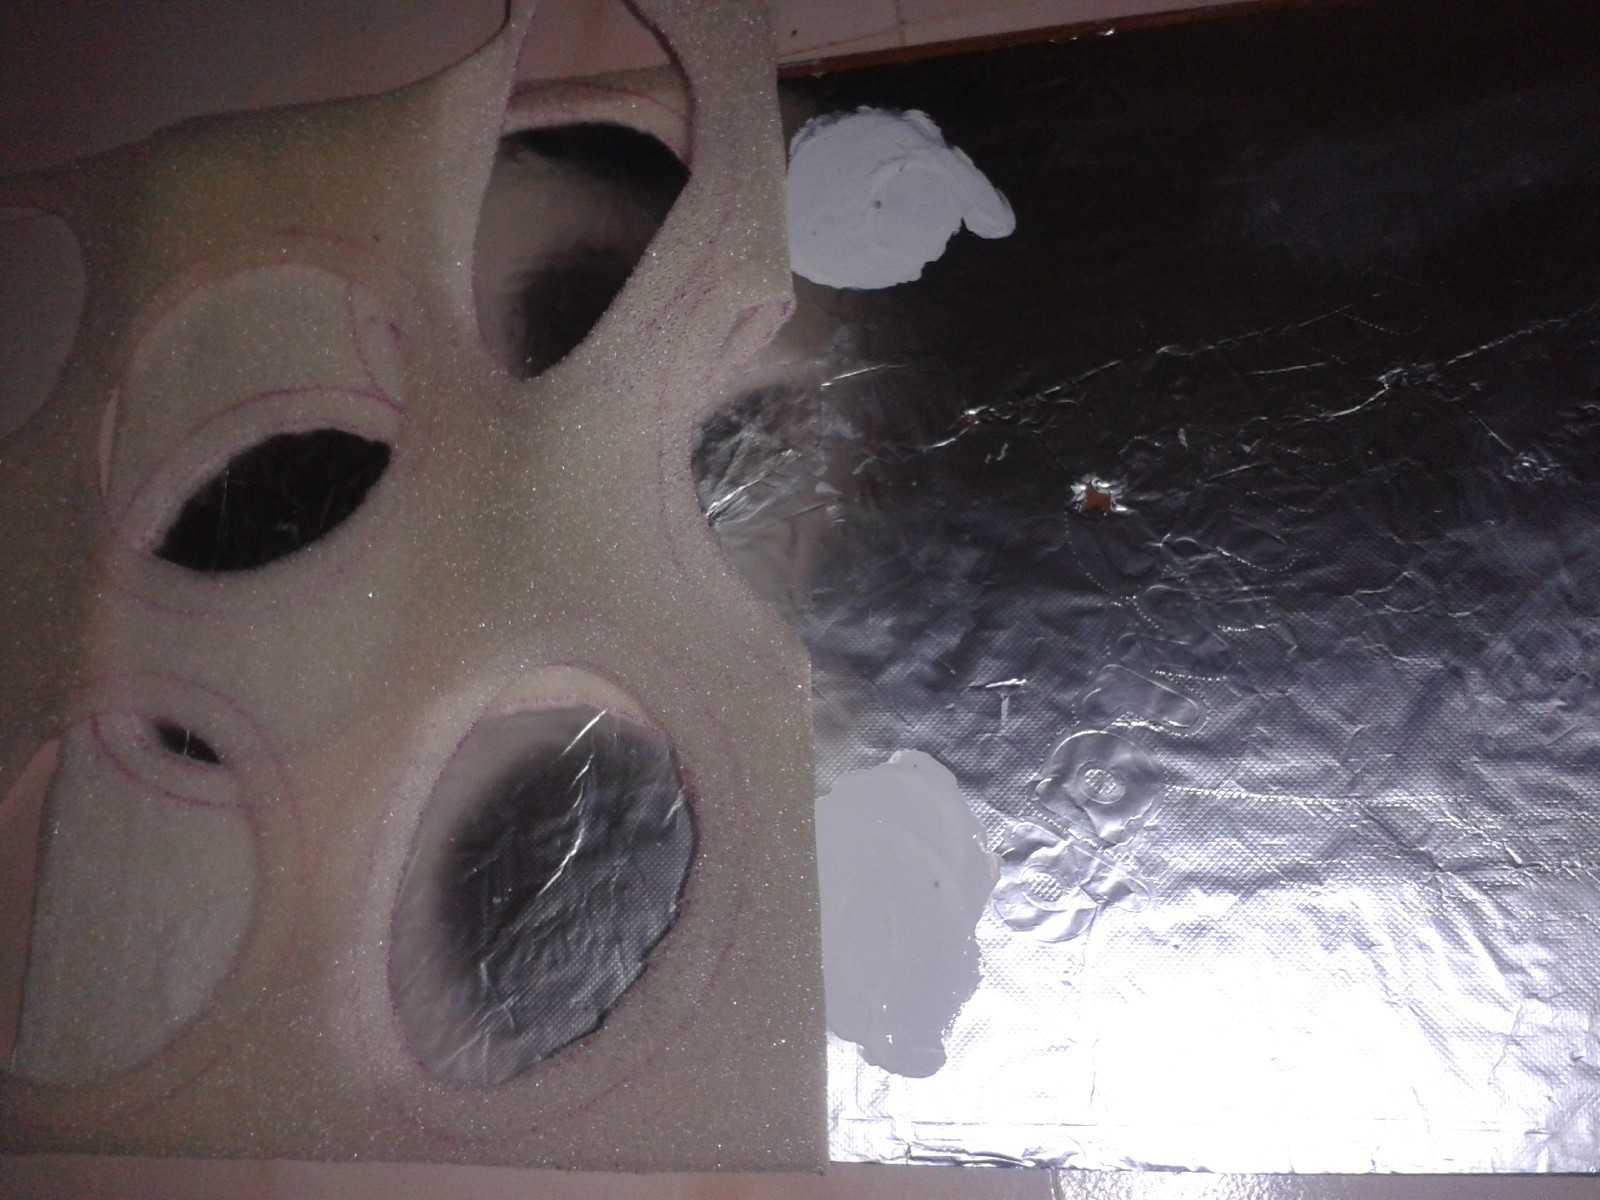
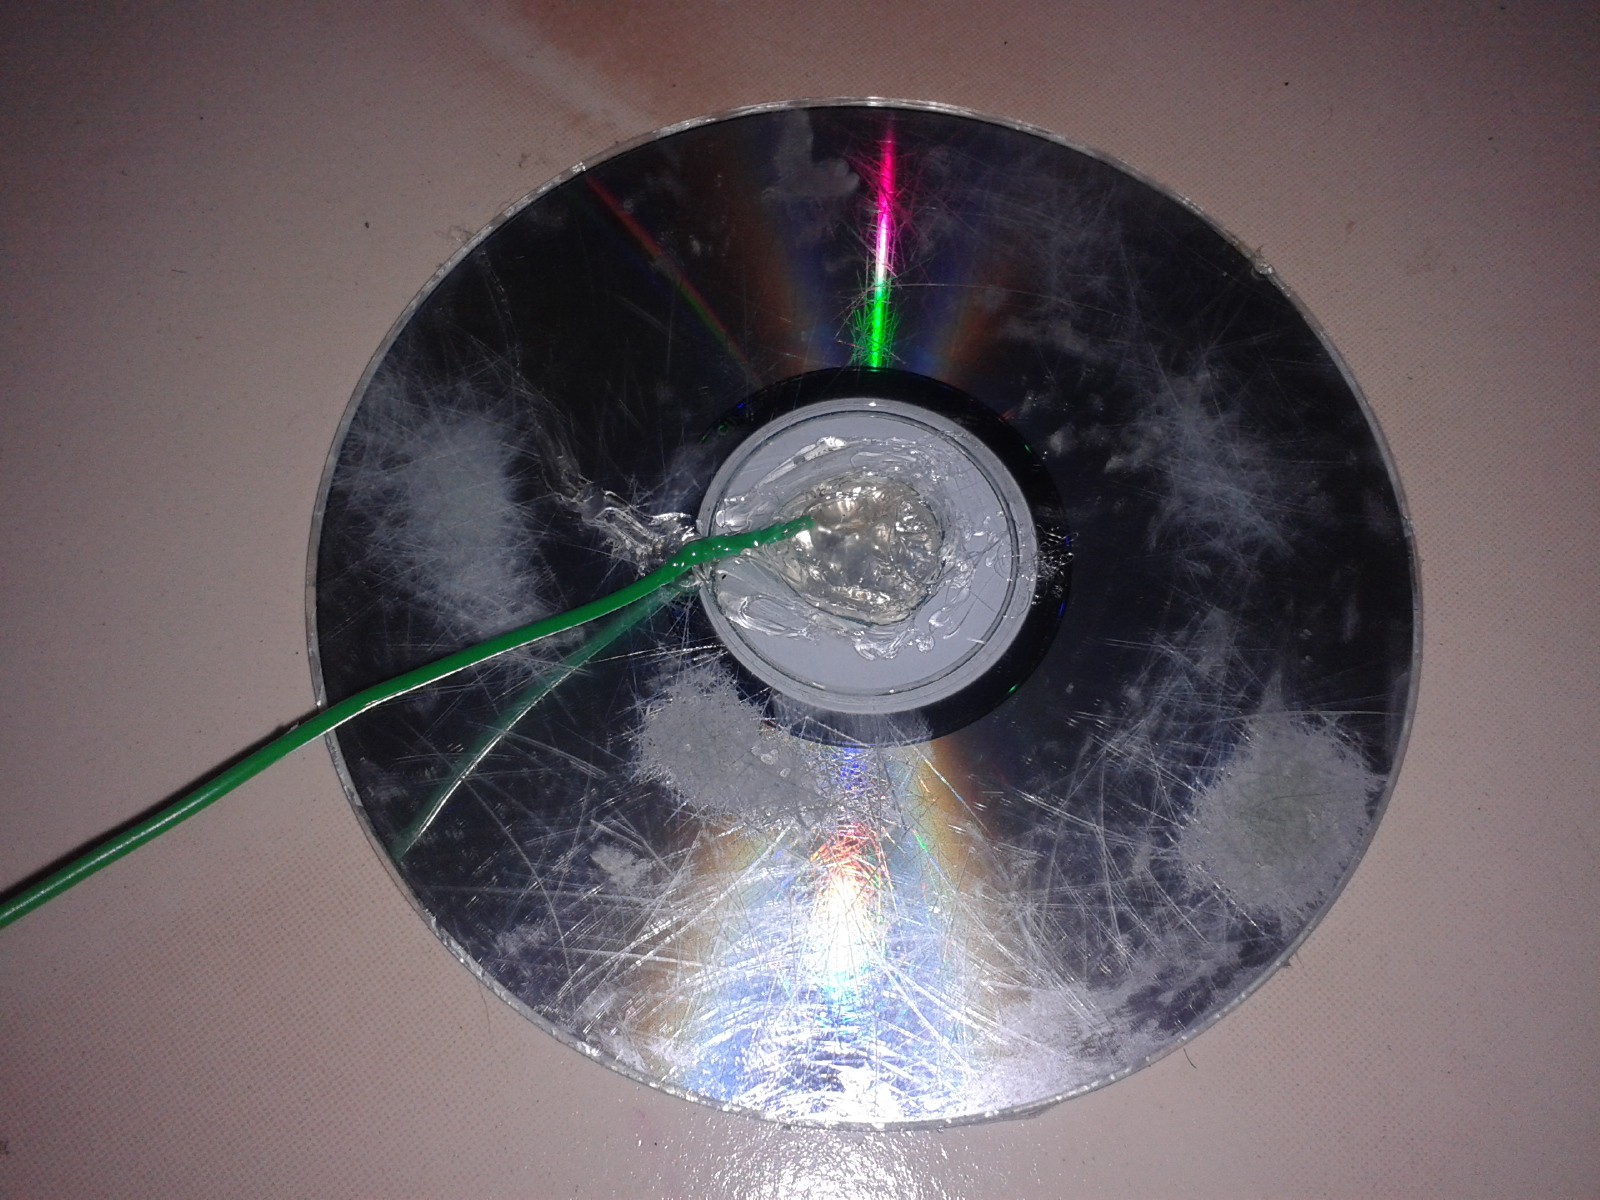
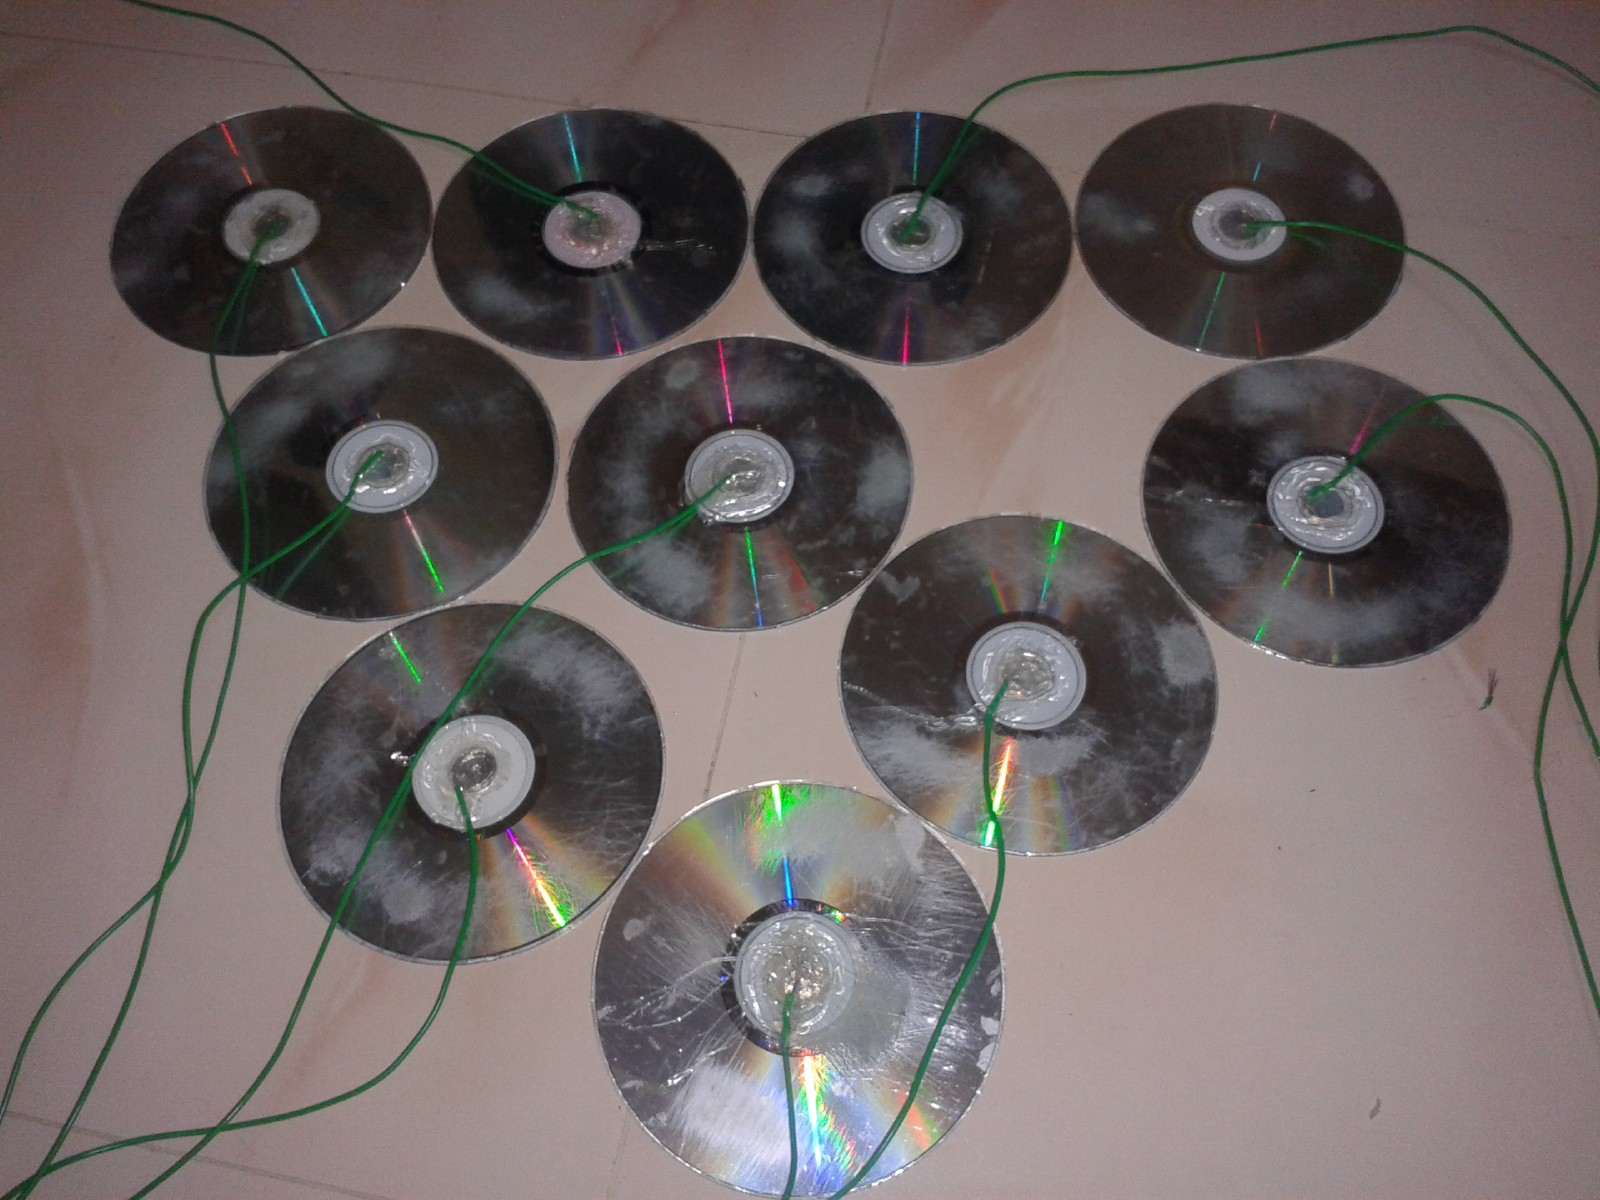
7Step 7
Connecting wire to Switch
1) Take long multi turn wire of two color one for the Top and other for bottom.
2) For bottom cut one piece common wire (Red color) and For top cut 10 pieces(green color) of wire.
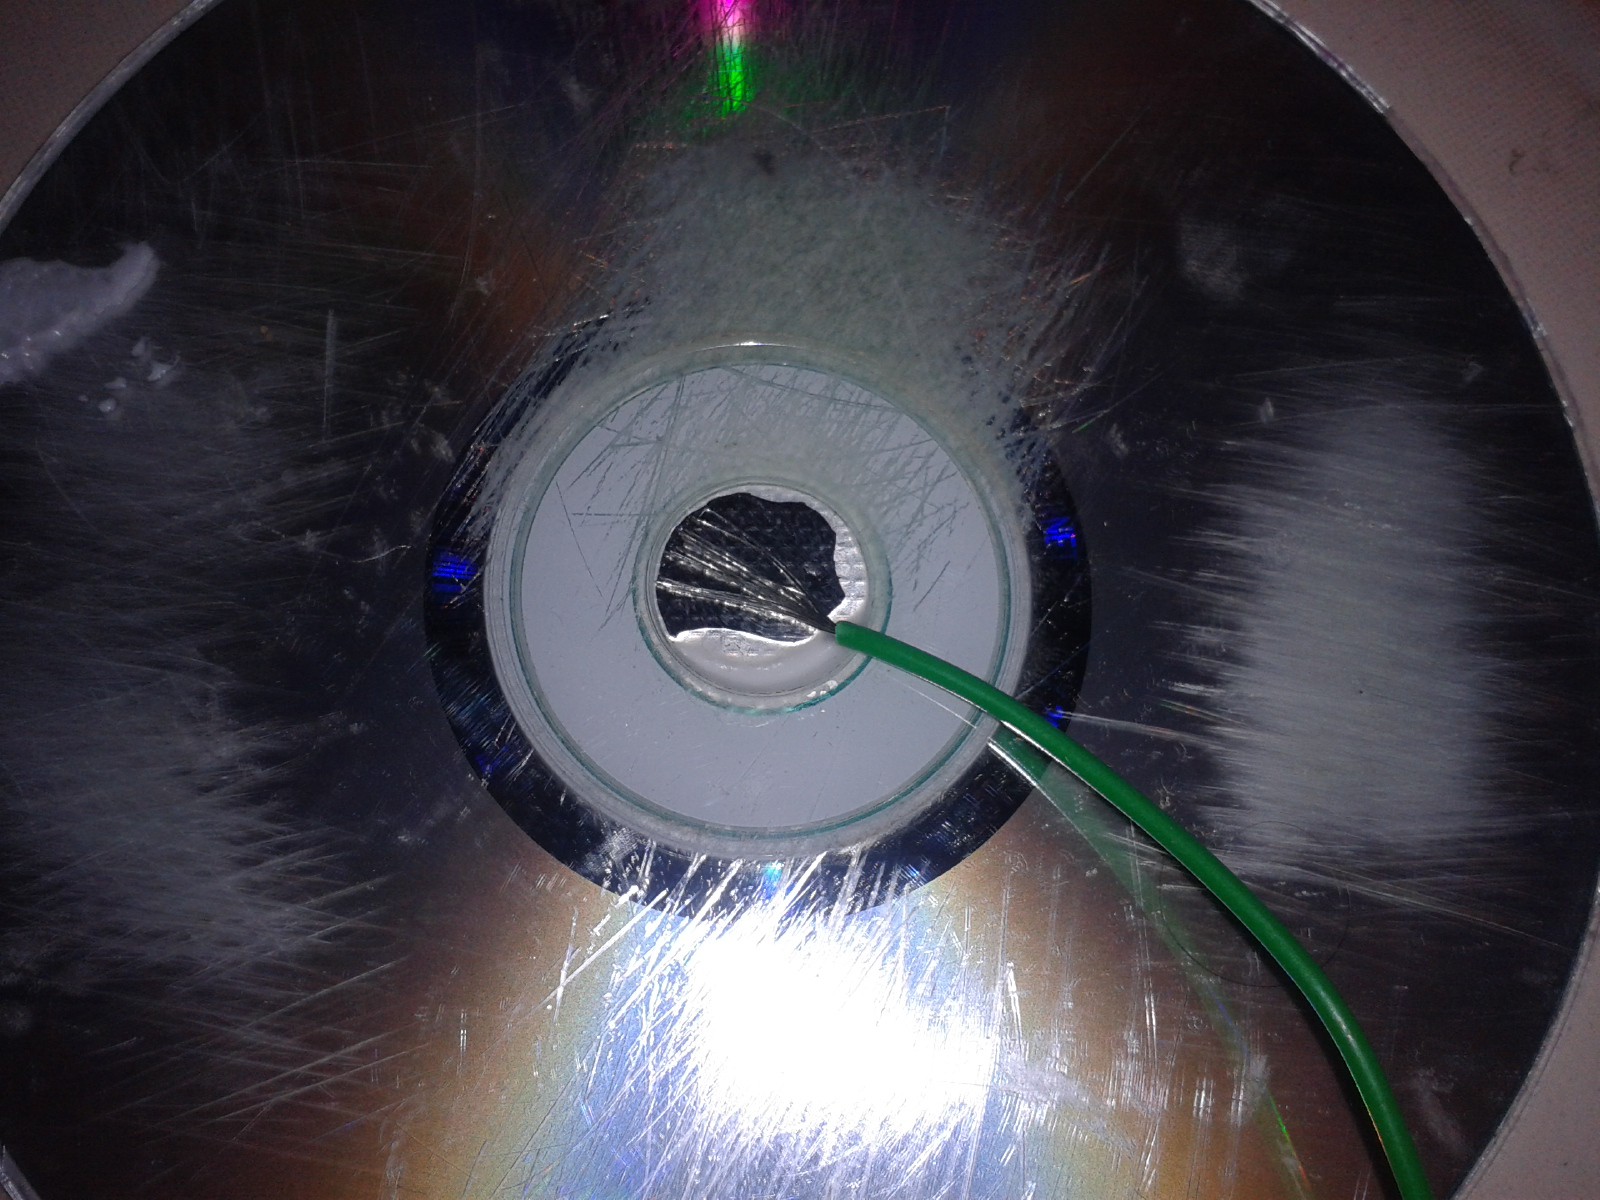
3) For CD spread the multi turns of the wire and insert the edges between the CD and Foils and hold it tight then paste it using hot glue gun.
4) If u don't hold it tight Glue enter between the wire and Foil. Then continuity between the Coil and wire disturbed.
5) After hot glue check the other end of the wire with foils continuity using multi meter.
6) Check all the Cds Foil to Wire continuity.
7) For Base plate remove the sleeve a large portion of wire and make two circle one below the foil and another above the foil hold very tight and hot glue it. Check the continuity of other end of wire and each portion of the foil.
![]()
![]()
![]()
![]()
-
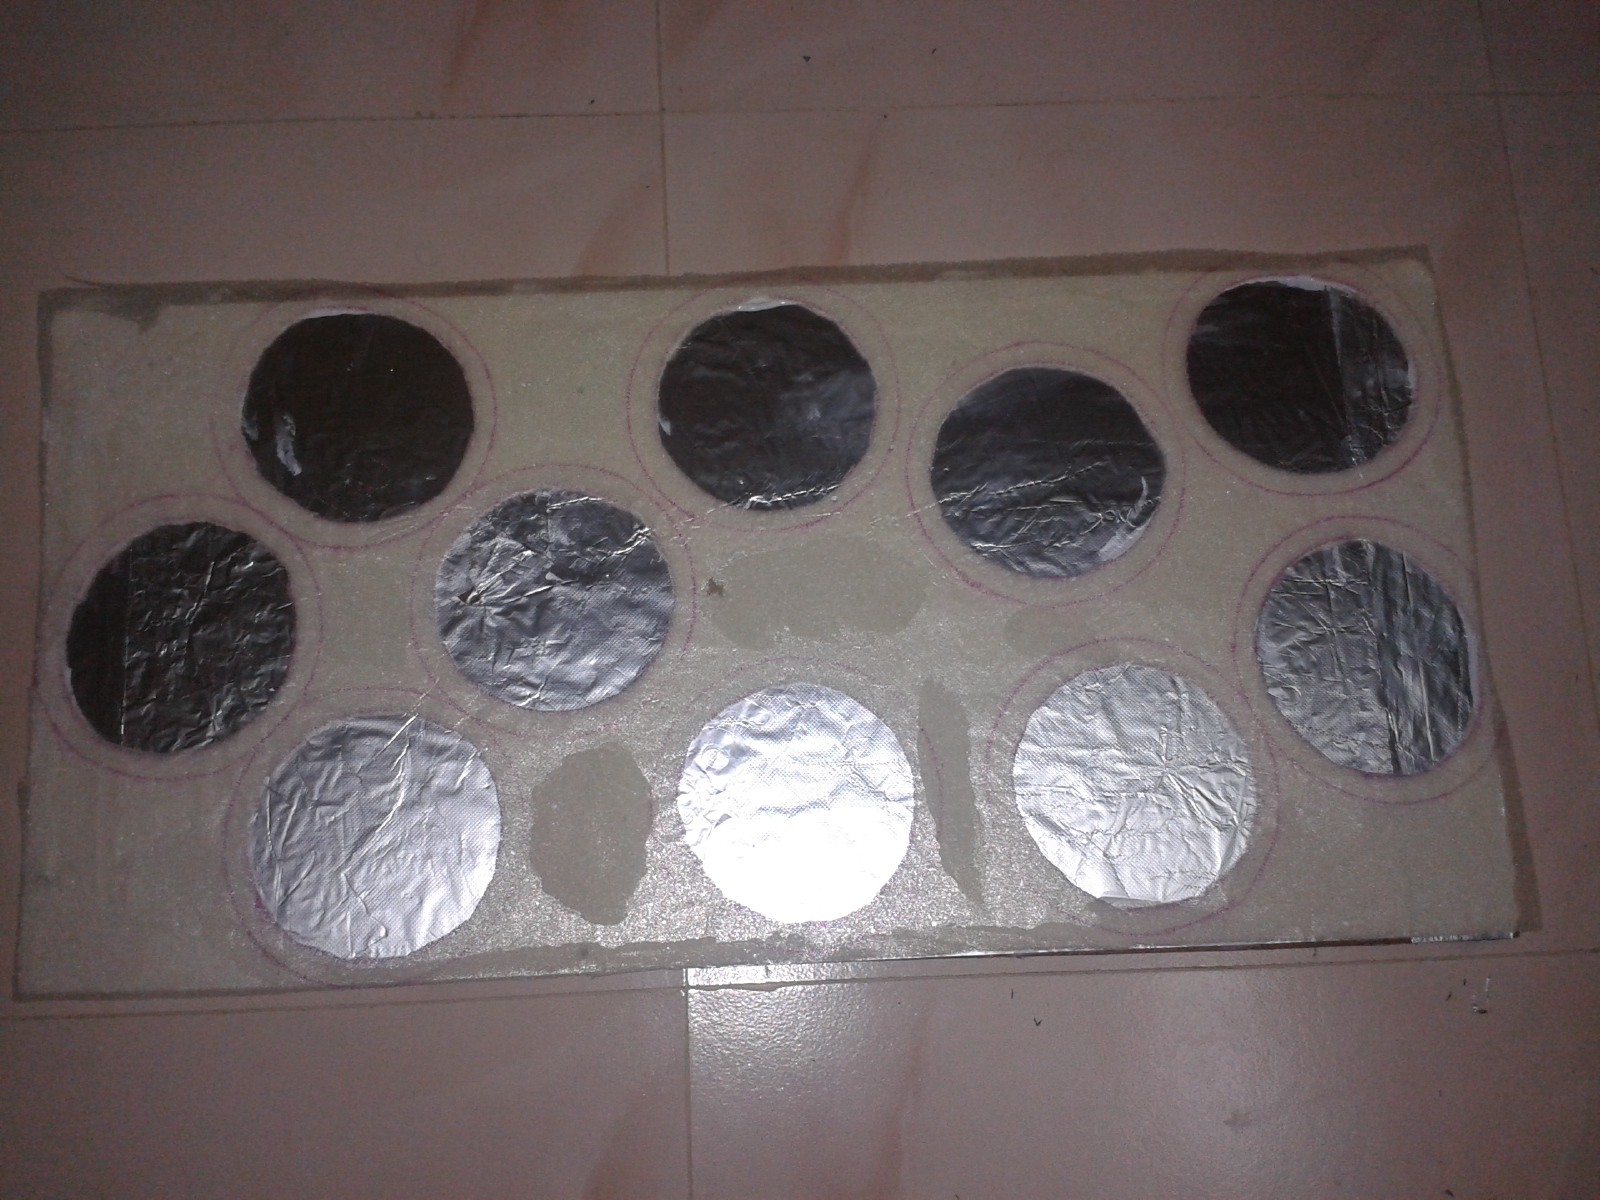
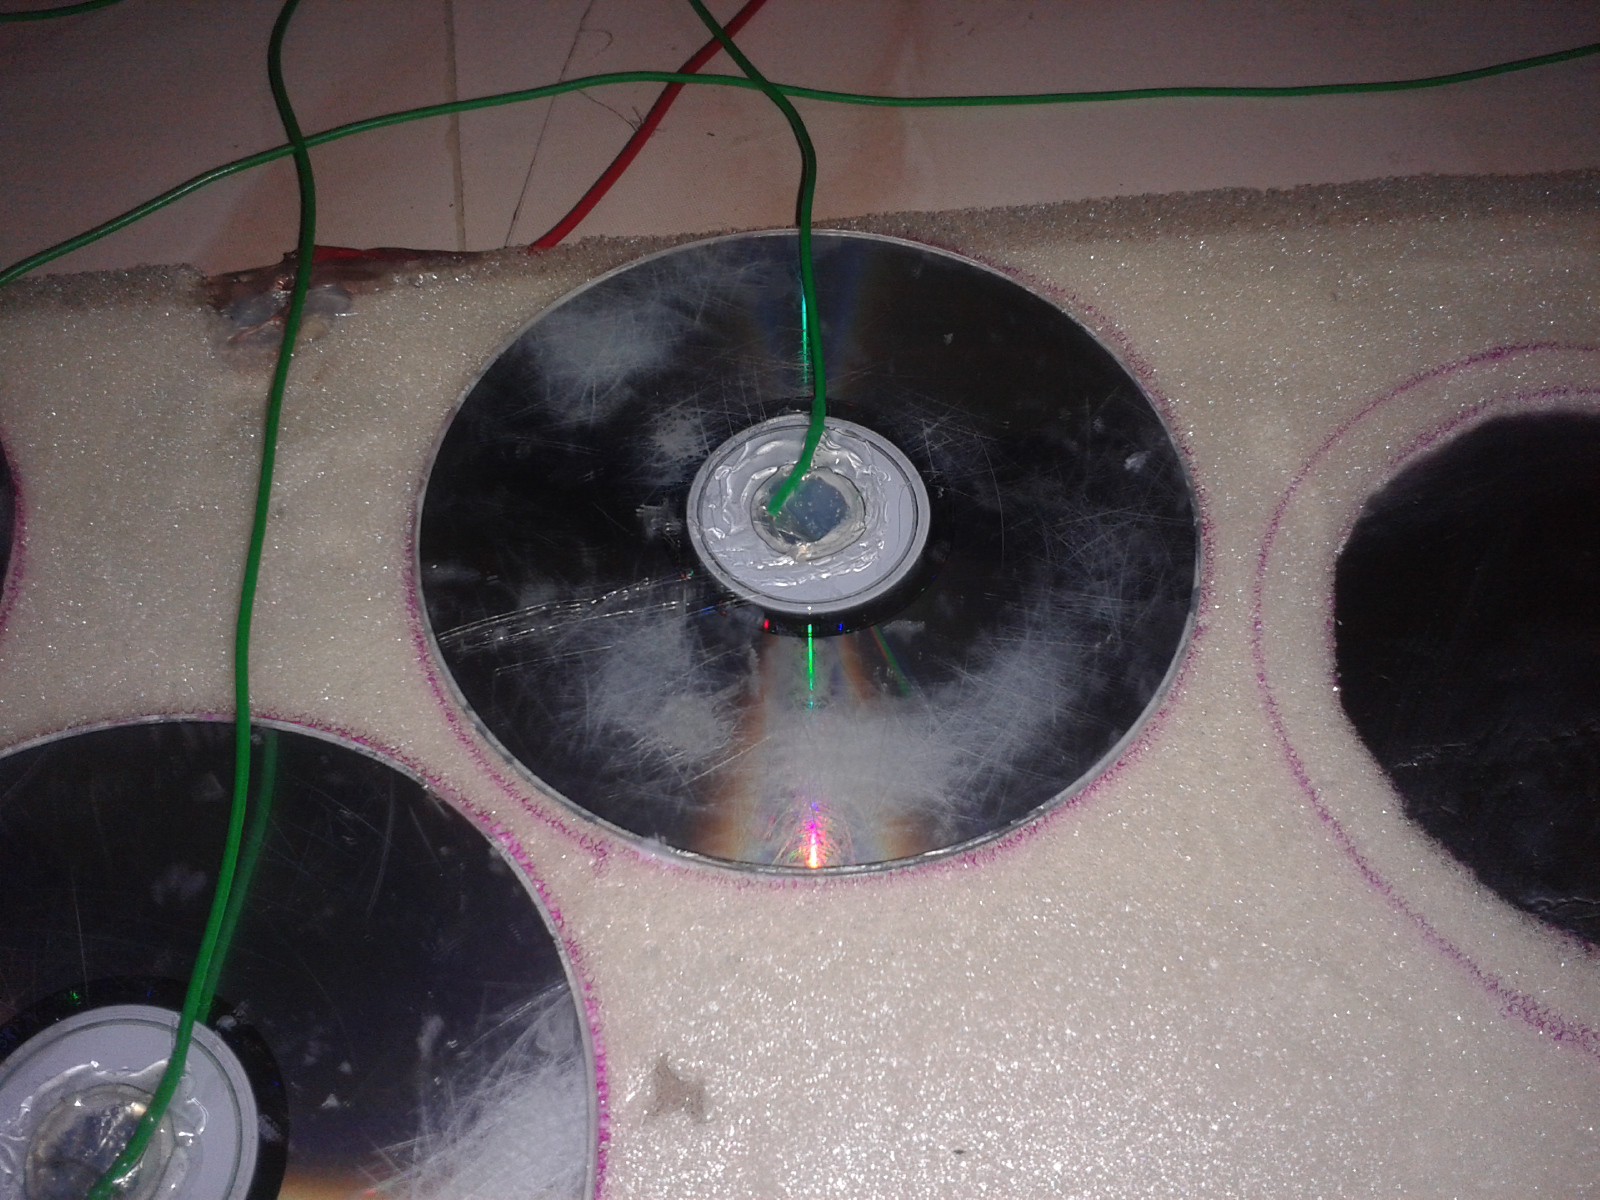
8Step 8
Finish The Switch
1) Now the base plate and Top CD with foil is ready.
2) Apply 1 cm circumference Fevicol(GUM) to the cd foil side and paste it over the Sponge we already marked.
3) Like wise paste all the 10 CDs and now the switch is ready.
4) Connect the red wire end to the multimeter and other wire to each switch wire end and test the switch by press the cd.
5) When Cd is pressed the continuity is ok and when release then the continuity breaks.
![]()
![]()
![]()
![]()
![]()
-
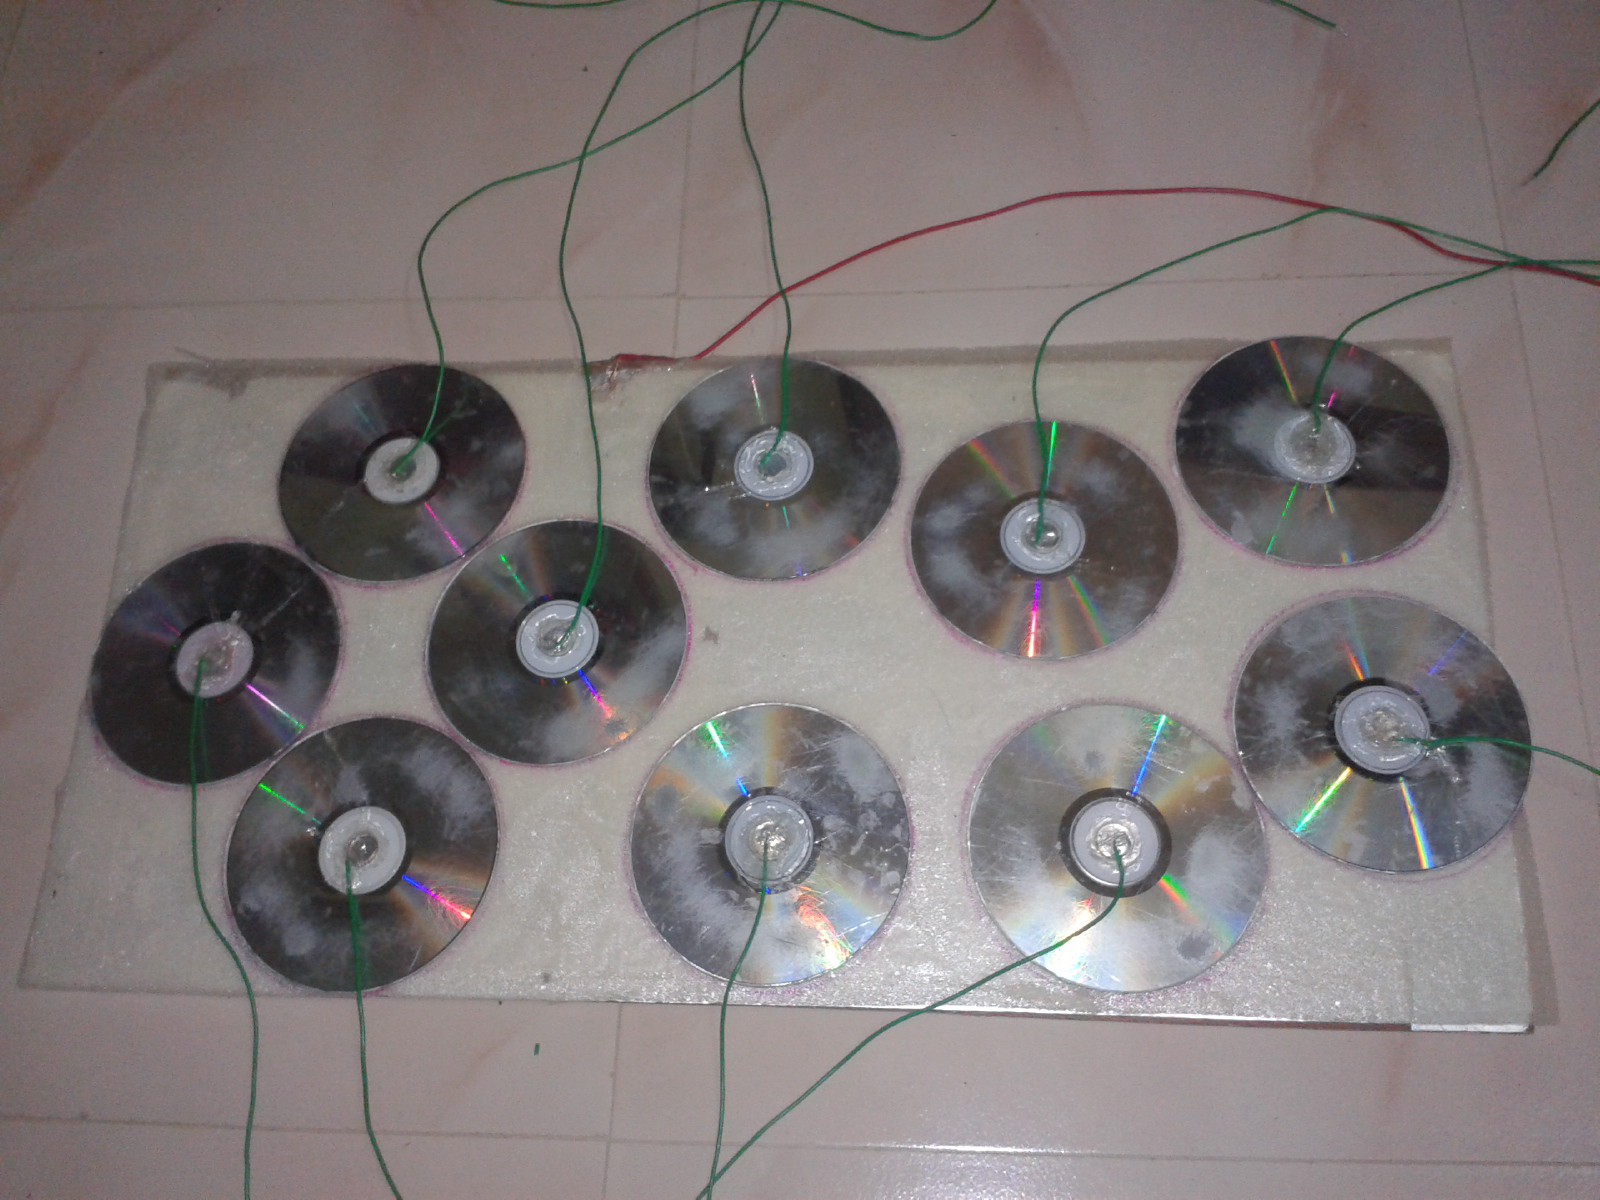
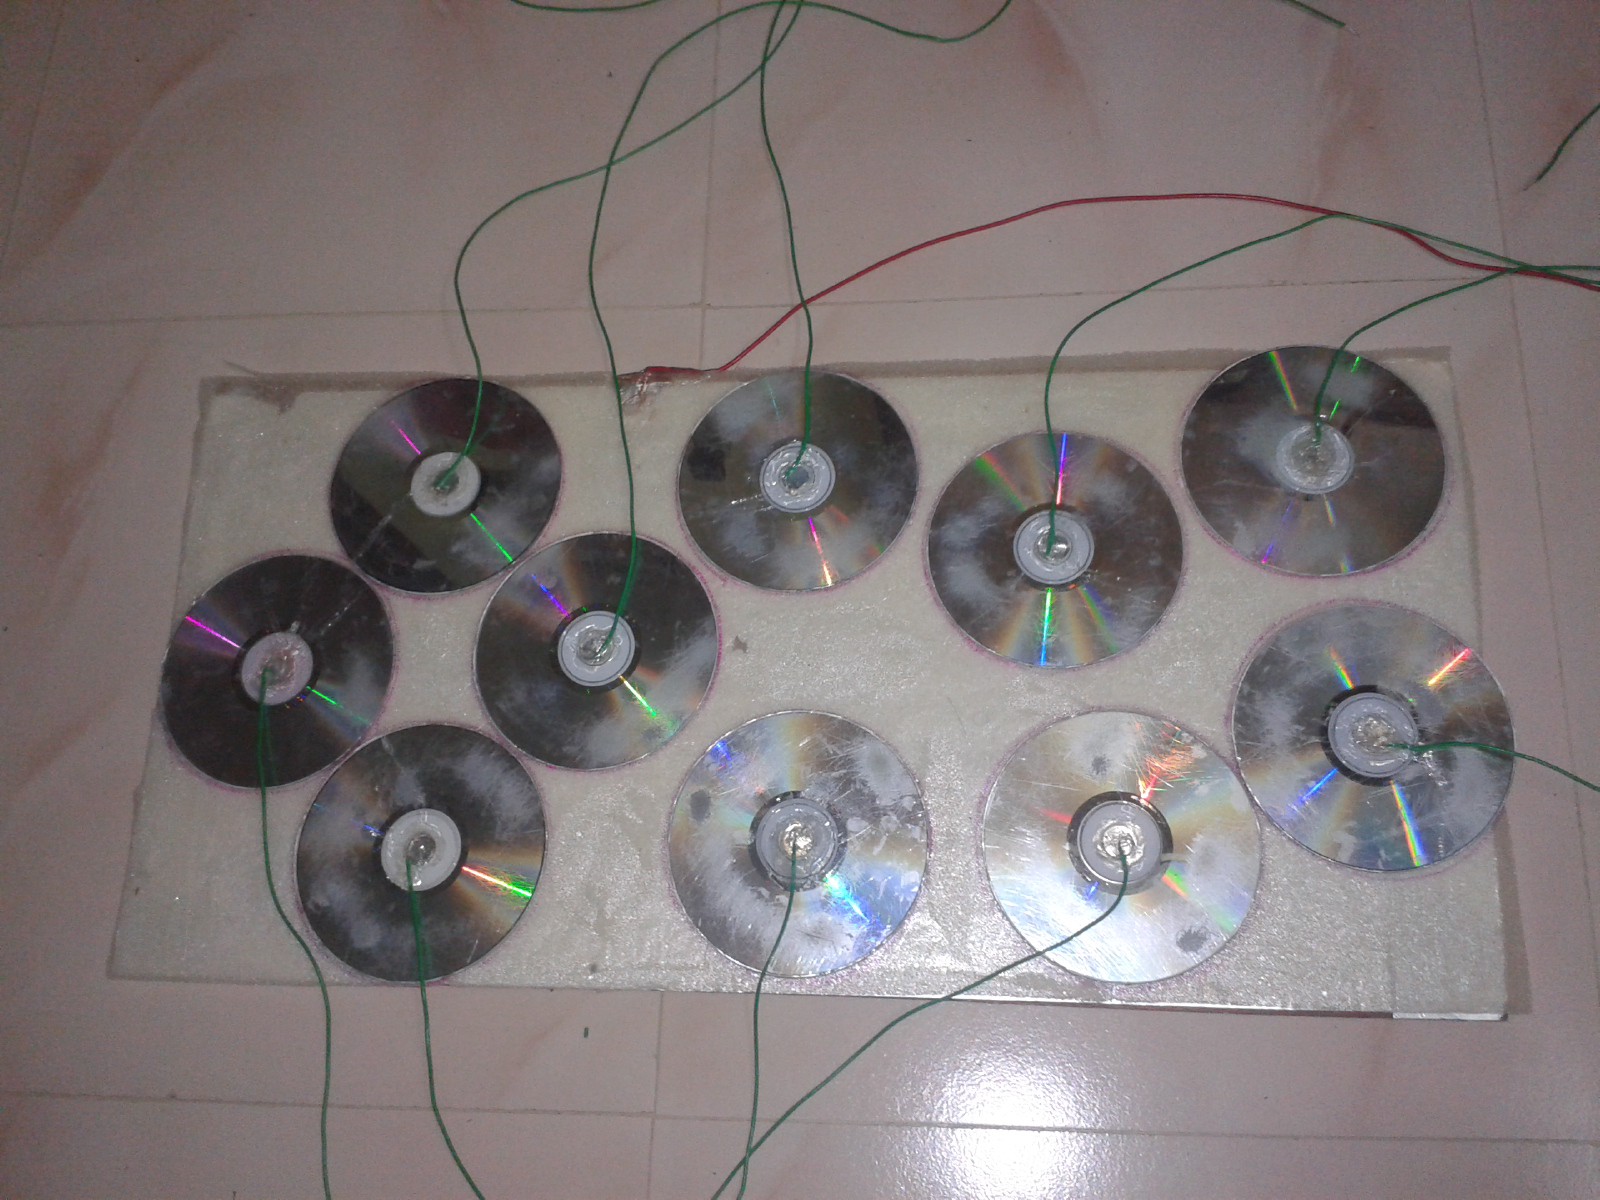
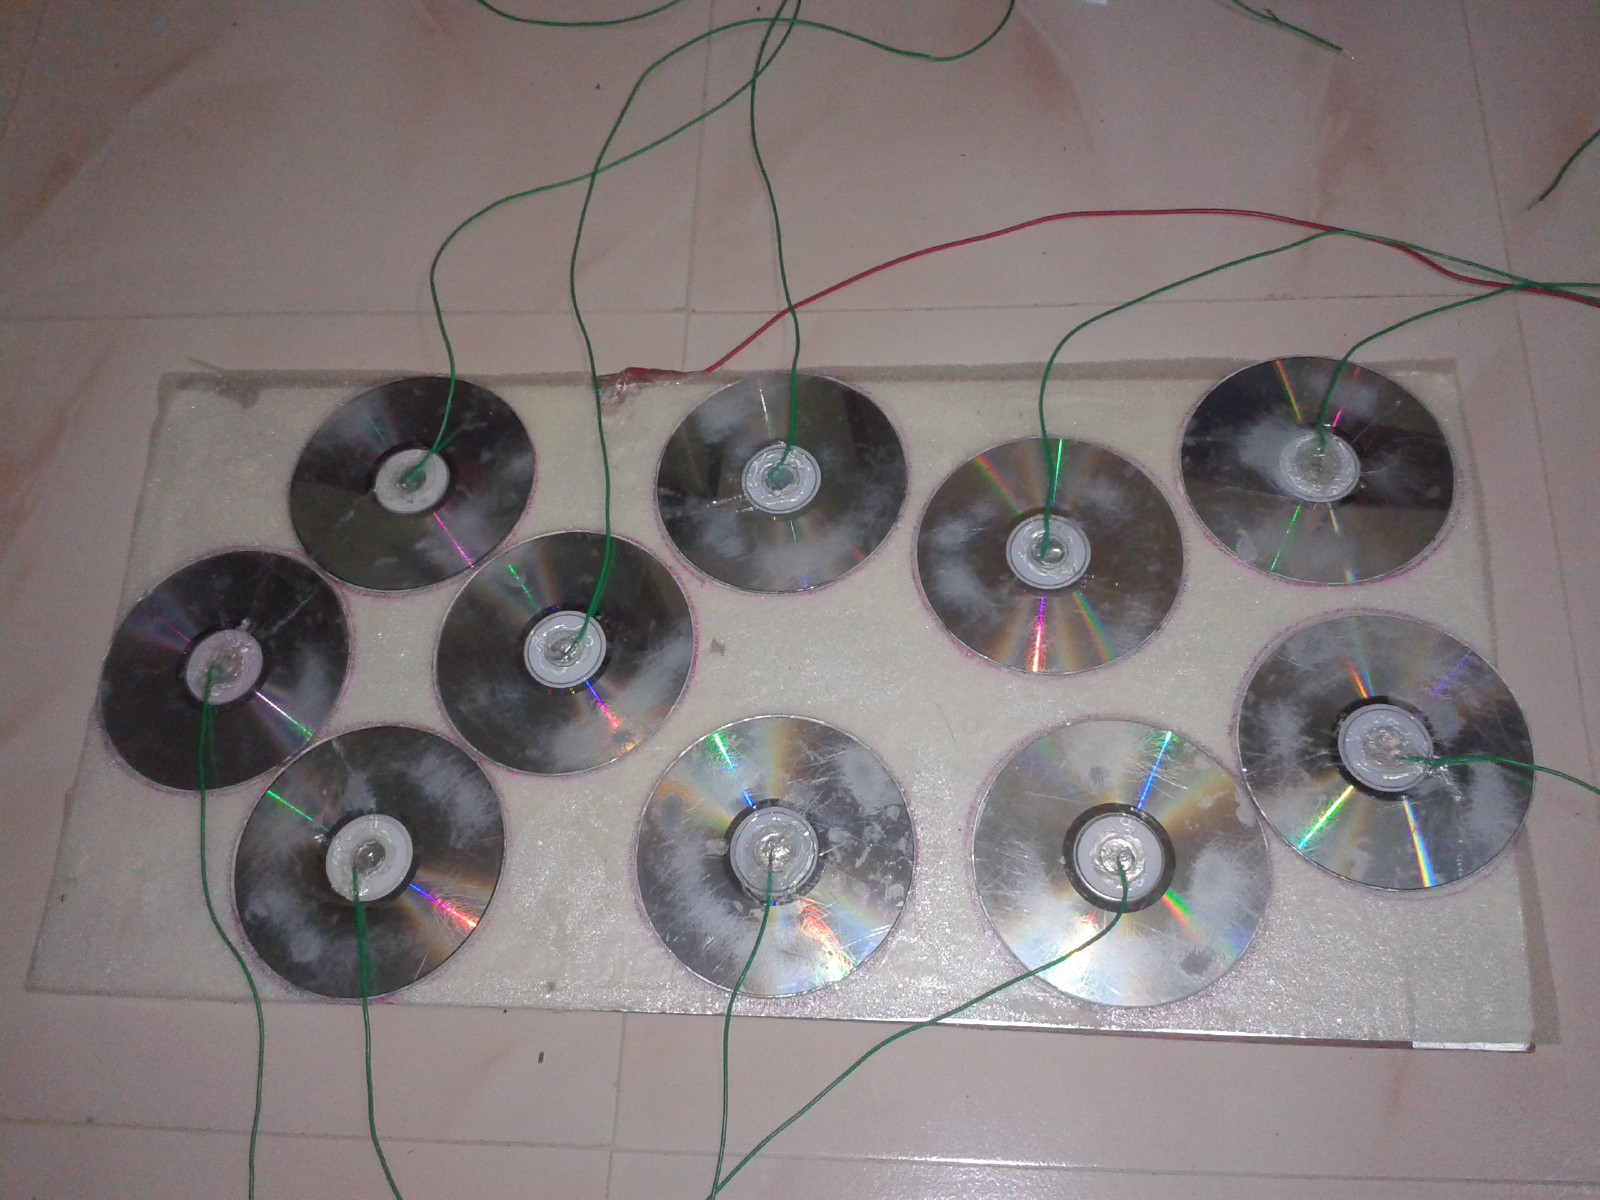
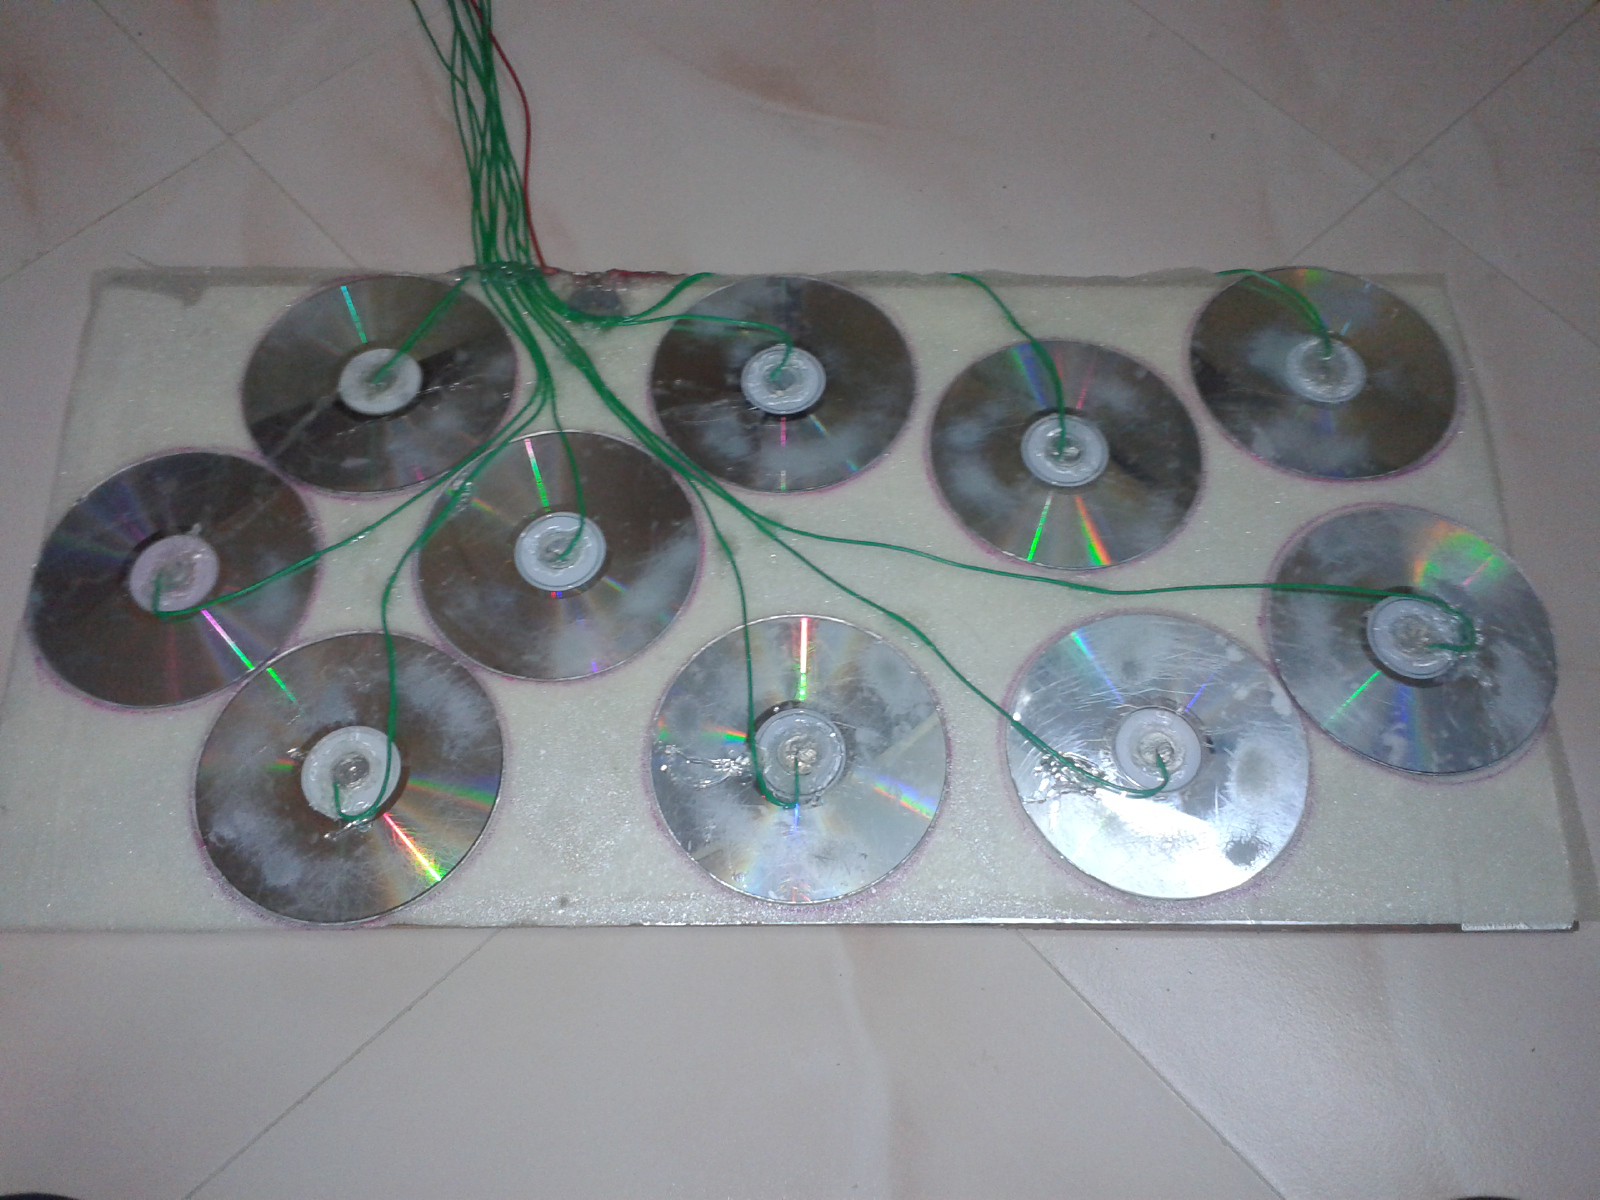
9Step 9
Wiring the Switches
1) Bring all the wire to the top of the board like Joy stick.
2) Connect the wire between buttons and buttons and gather in one place.
3) Bring the red wire also to one side of the wires.
4) Hot glue all the Wires to make it neat and bring it to one place for easy soldering.
5) Take the shield we already prepare and Connect the Data pins 2 to 11 to the other end if switches produce.
6) connect the base wire of the base plate to 5v through foil and wire.
Now connections are ok
![]()
![]()
-
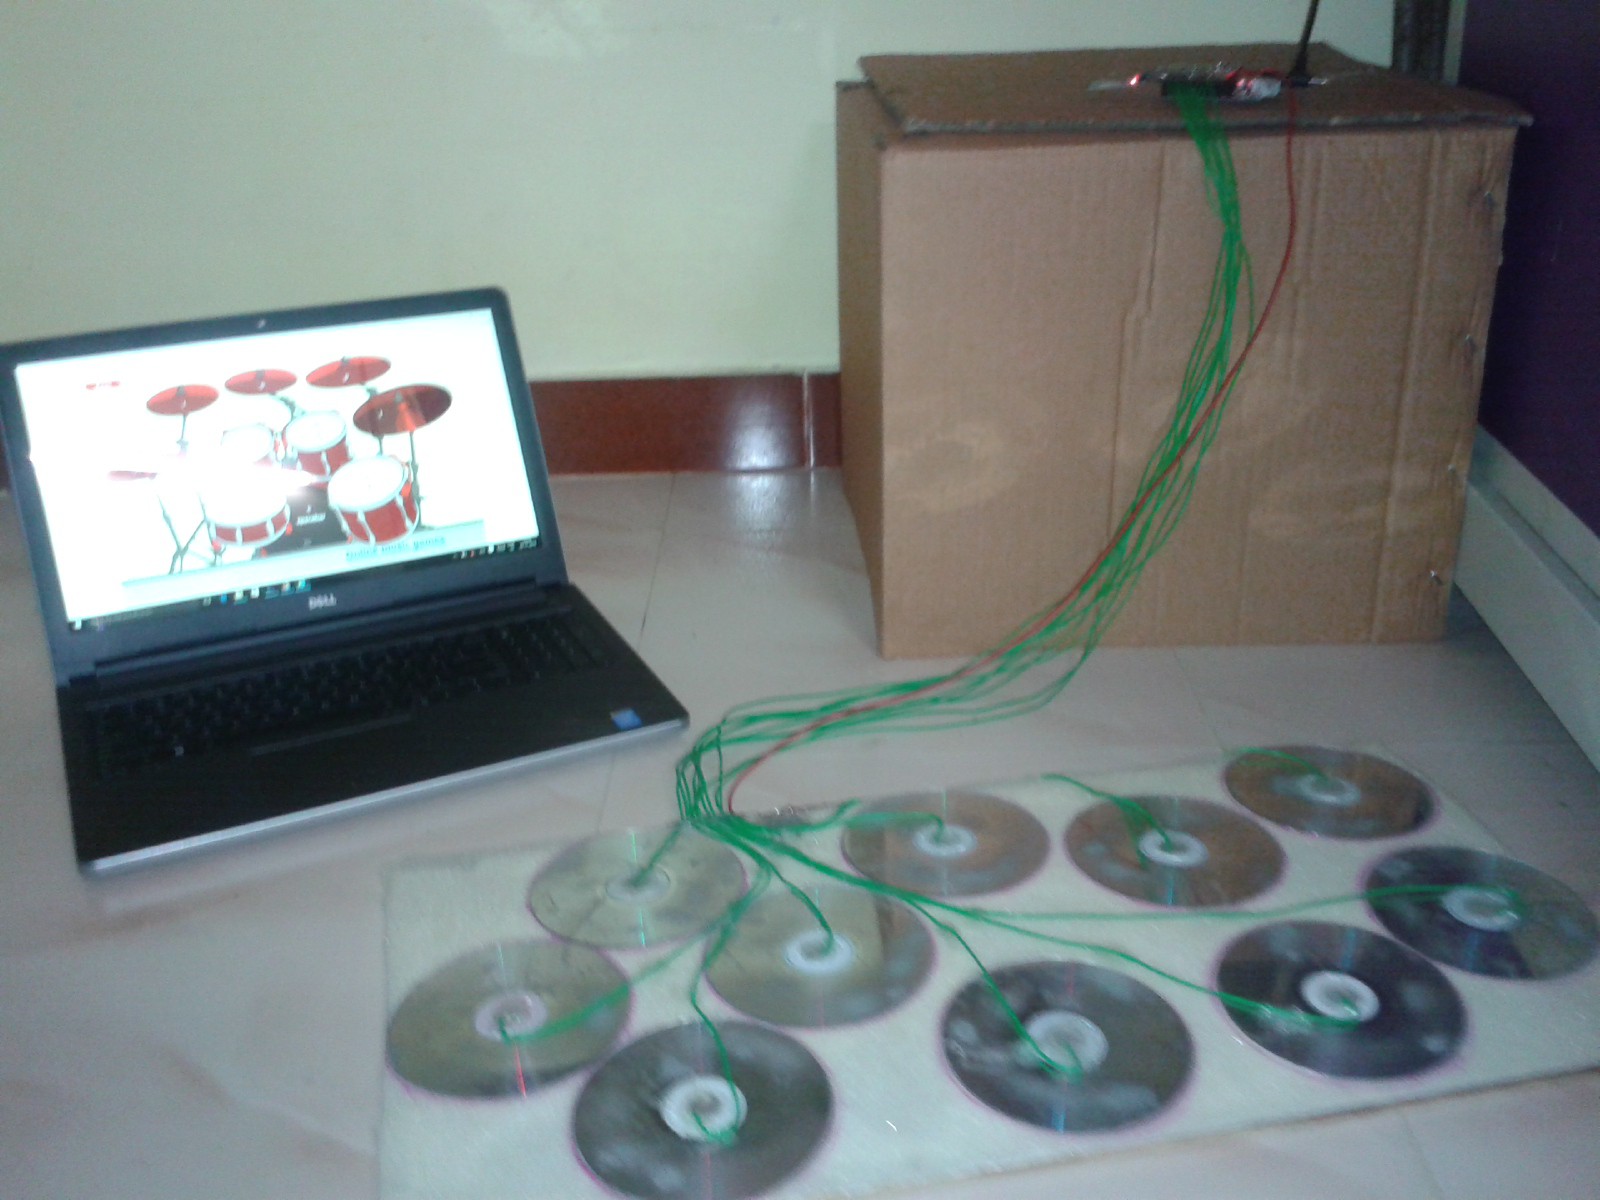
10Step 10
Prelinary test
1) Before design the carpet, first want to check all the functions in the frame work.
2) So connect it with the circuit and check the working with an online flash application.
3) This application play drums for each keys. I map that keys in the VB program and check the function. Found ok.
![]()
Full function Wireless joystick Rug for PC
I like to make cheap joy stick for all gaming and application purpose in Computer for my child. By jump and move around she play drums.


Discussions
Become a Hackaday.io Member
Create an account to leave a comment. Already have an account? Log In.