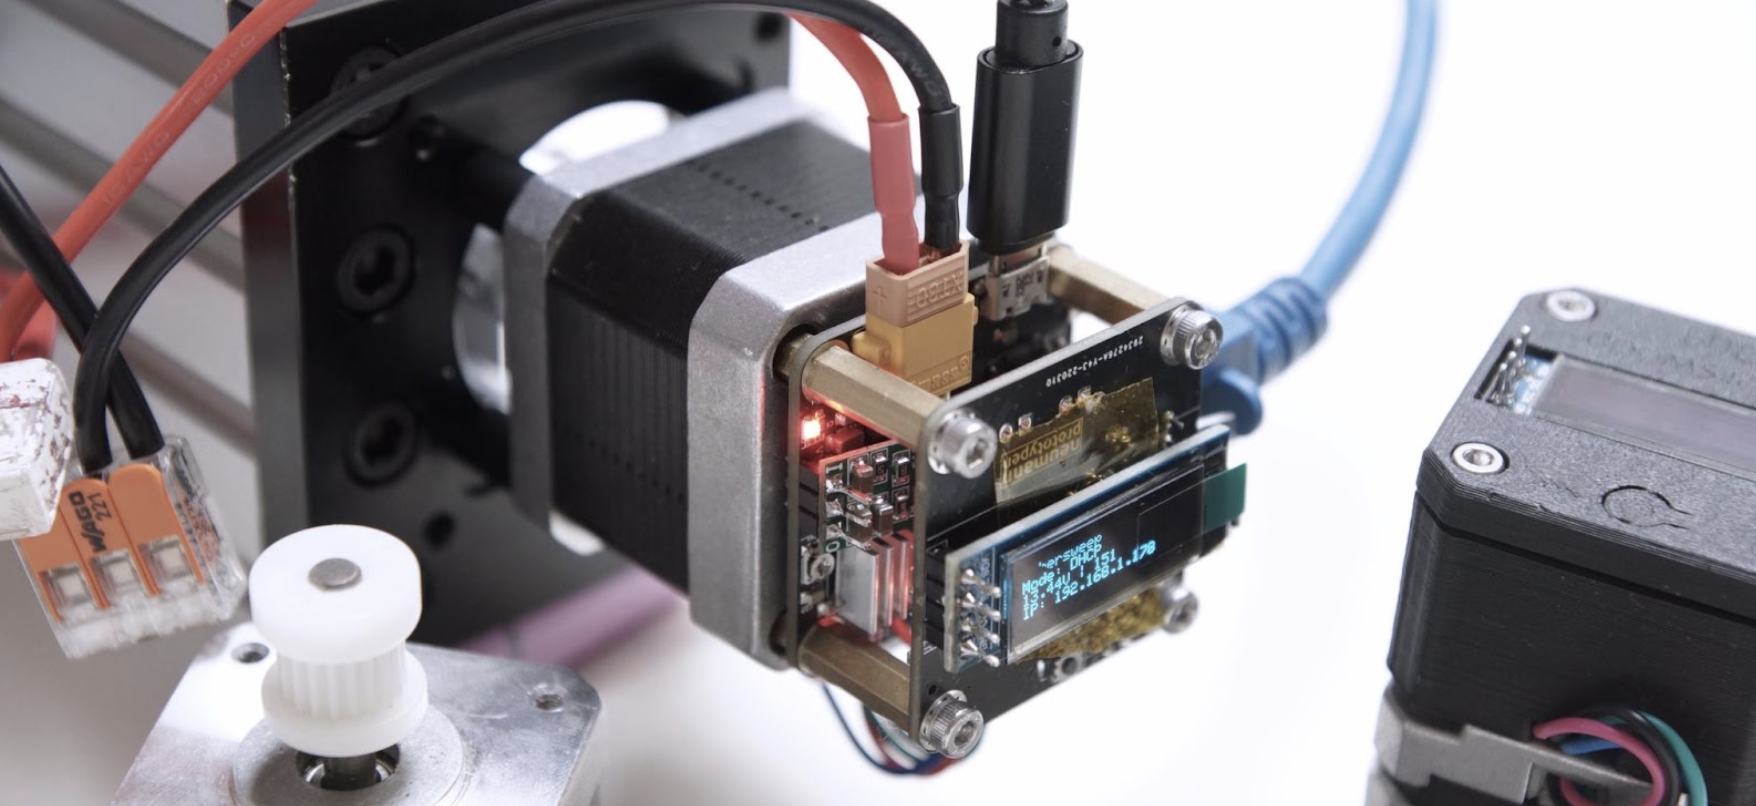
What it does:
Ethersweep offers easy interfacing from computers/machines/backends to motion control. Every UDP-supporting language can communicate with it and can control as many motors (on your network) as you like.
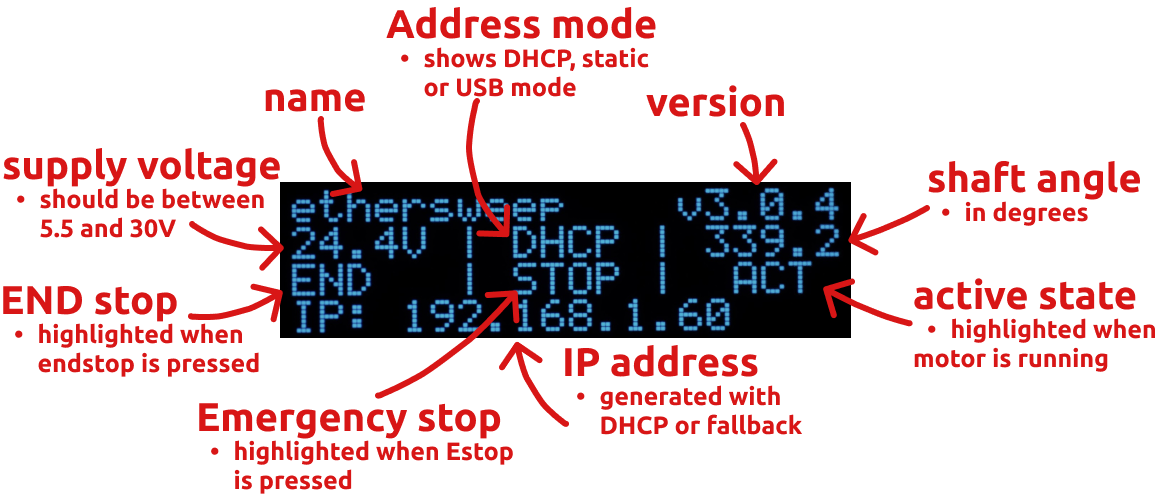
It gets an IP address from a DHCP server and shows data like IP, operating voltage, button, and operating states on the OLED display. It can be powered from any DC power supply between 5.5V ... 30V, as long as it delivers enough power (approx 1A, but this depends on the motor). The motor current (motor torque) can be set by a potentiometer.
When no network is available, or you need only a few motors for your project, you can also use the USB option to send drive commands to the motor. It takes the same JSON-encoded strings as the Ethernet connection.
Ethersweep is a great way to get easy access to robotics and automation, as the interface is fast to learn and shortens the build time of robotics and automation projects. People without electronic knowledge can use Ethersweep to build machines without the need to build electronics or drivers. In mechatronics projects, it makes the electronics part less complicated and faster to implement and lets you focus more on the mechanics and software side.
Ethersweep was used in the WiFi scanner project: https://hackaday.com/2021/11/22/visualizing-wifi-with-a-converted-3d-printer/
How to get started:
Build an (or multiple) Ethersweep controllers. All manufacturing and assembly files work with JLCPCB (or any other board house, but part numbers have to be changed) and it only needs some simple THT soldering + ICSP bootloader burning when the boards arrive. Arduino code is available in the GitHub repository and in the files.
After you have built and flashed the firmware onto the boards, connect your Ethersweep controller to your network via ethernet and connect it to a 5.5...30V power source. Stick an encoder magnet (magnetized) on a NEMA17 motor shaft and connect the controller to the four M3 screws of the motor. Once connected to power and Ethernet, it searches for an IP address using DHCP. When an IP is found, the controller shows it on the display, and it's ready to use. When no IP is found, it defaults to 192.168.1.111. When you want to use USB instead of Ethernet, just send a byte at 9600 baud to the controller while it starts up. It will automatically switch to USB mode.
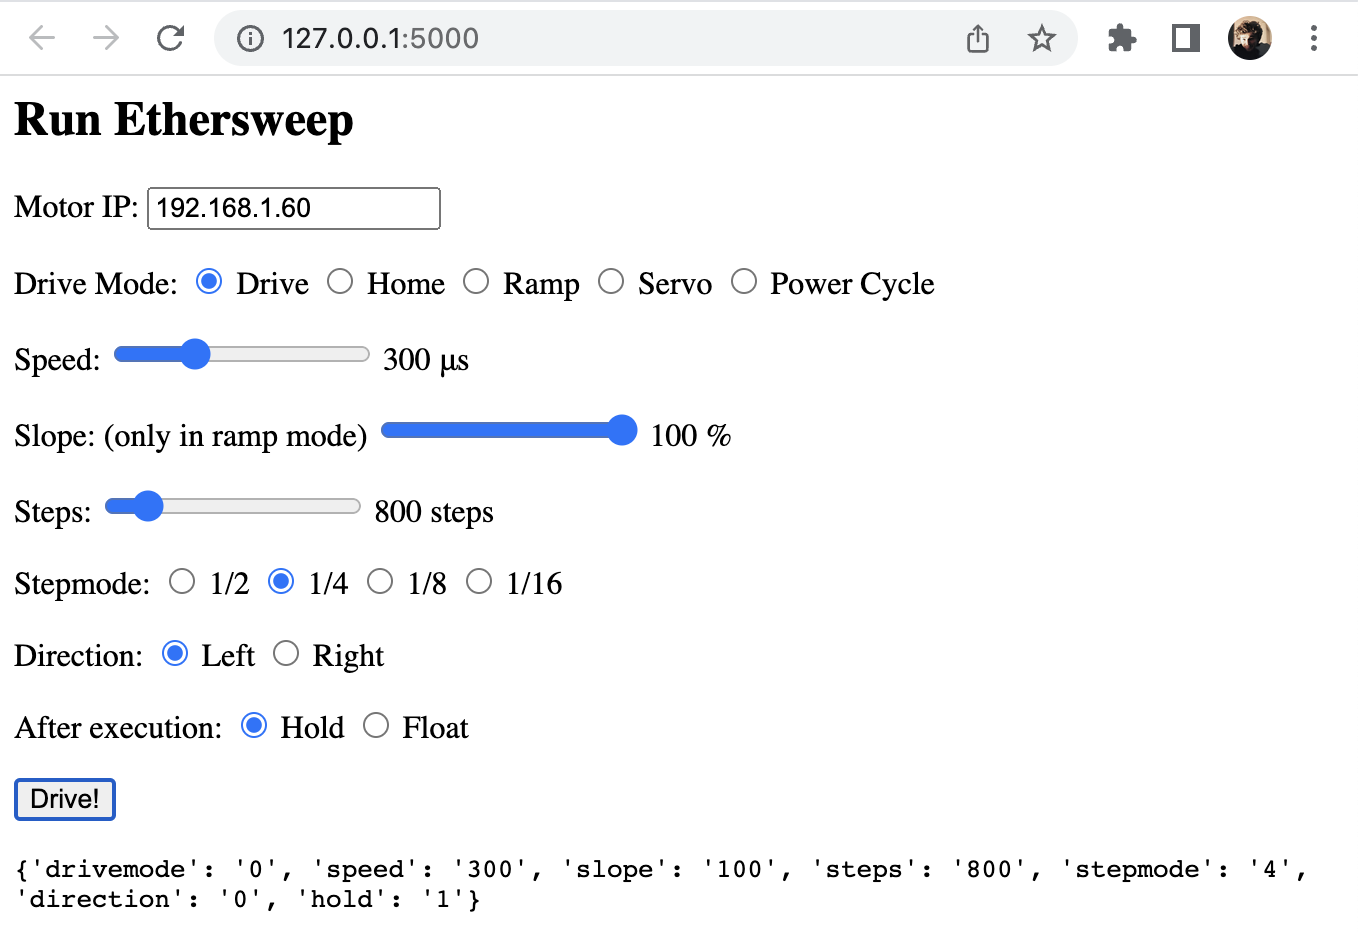
When connected to Ethernet or USB, you can send JSON-encoded strings like this to control the motor:
{'drivemode': '2', 'speed': '300', 'slope': '100', 'steps': '800', 'stepmode': '4', 'direction': '0', 'hold': '1'}
This command drives the motor in ramp mode, with a delay of 300 μs delay between the steps, a slope of 100% (ramps the speed 50% of the steps up and 50% of the steps down), for 800 steps, in 1/4 steps (motor takes 200 full steps per revolution), in direction 0 (left in this case), and holds the motor shaft after execution (could also be set floating).
The command can be sent via a virtual serial USB interface (for example via the Arduino IDEs serial monitor), or via UDP and Ethernet to port 8888 and the IP address that is shown on the display.
To try out the motor, you can use the Flask application to send commands to the controller using a small web interface and test different drive modes. You can also copy the JSON strings and send them from the programming language of your choice.
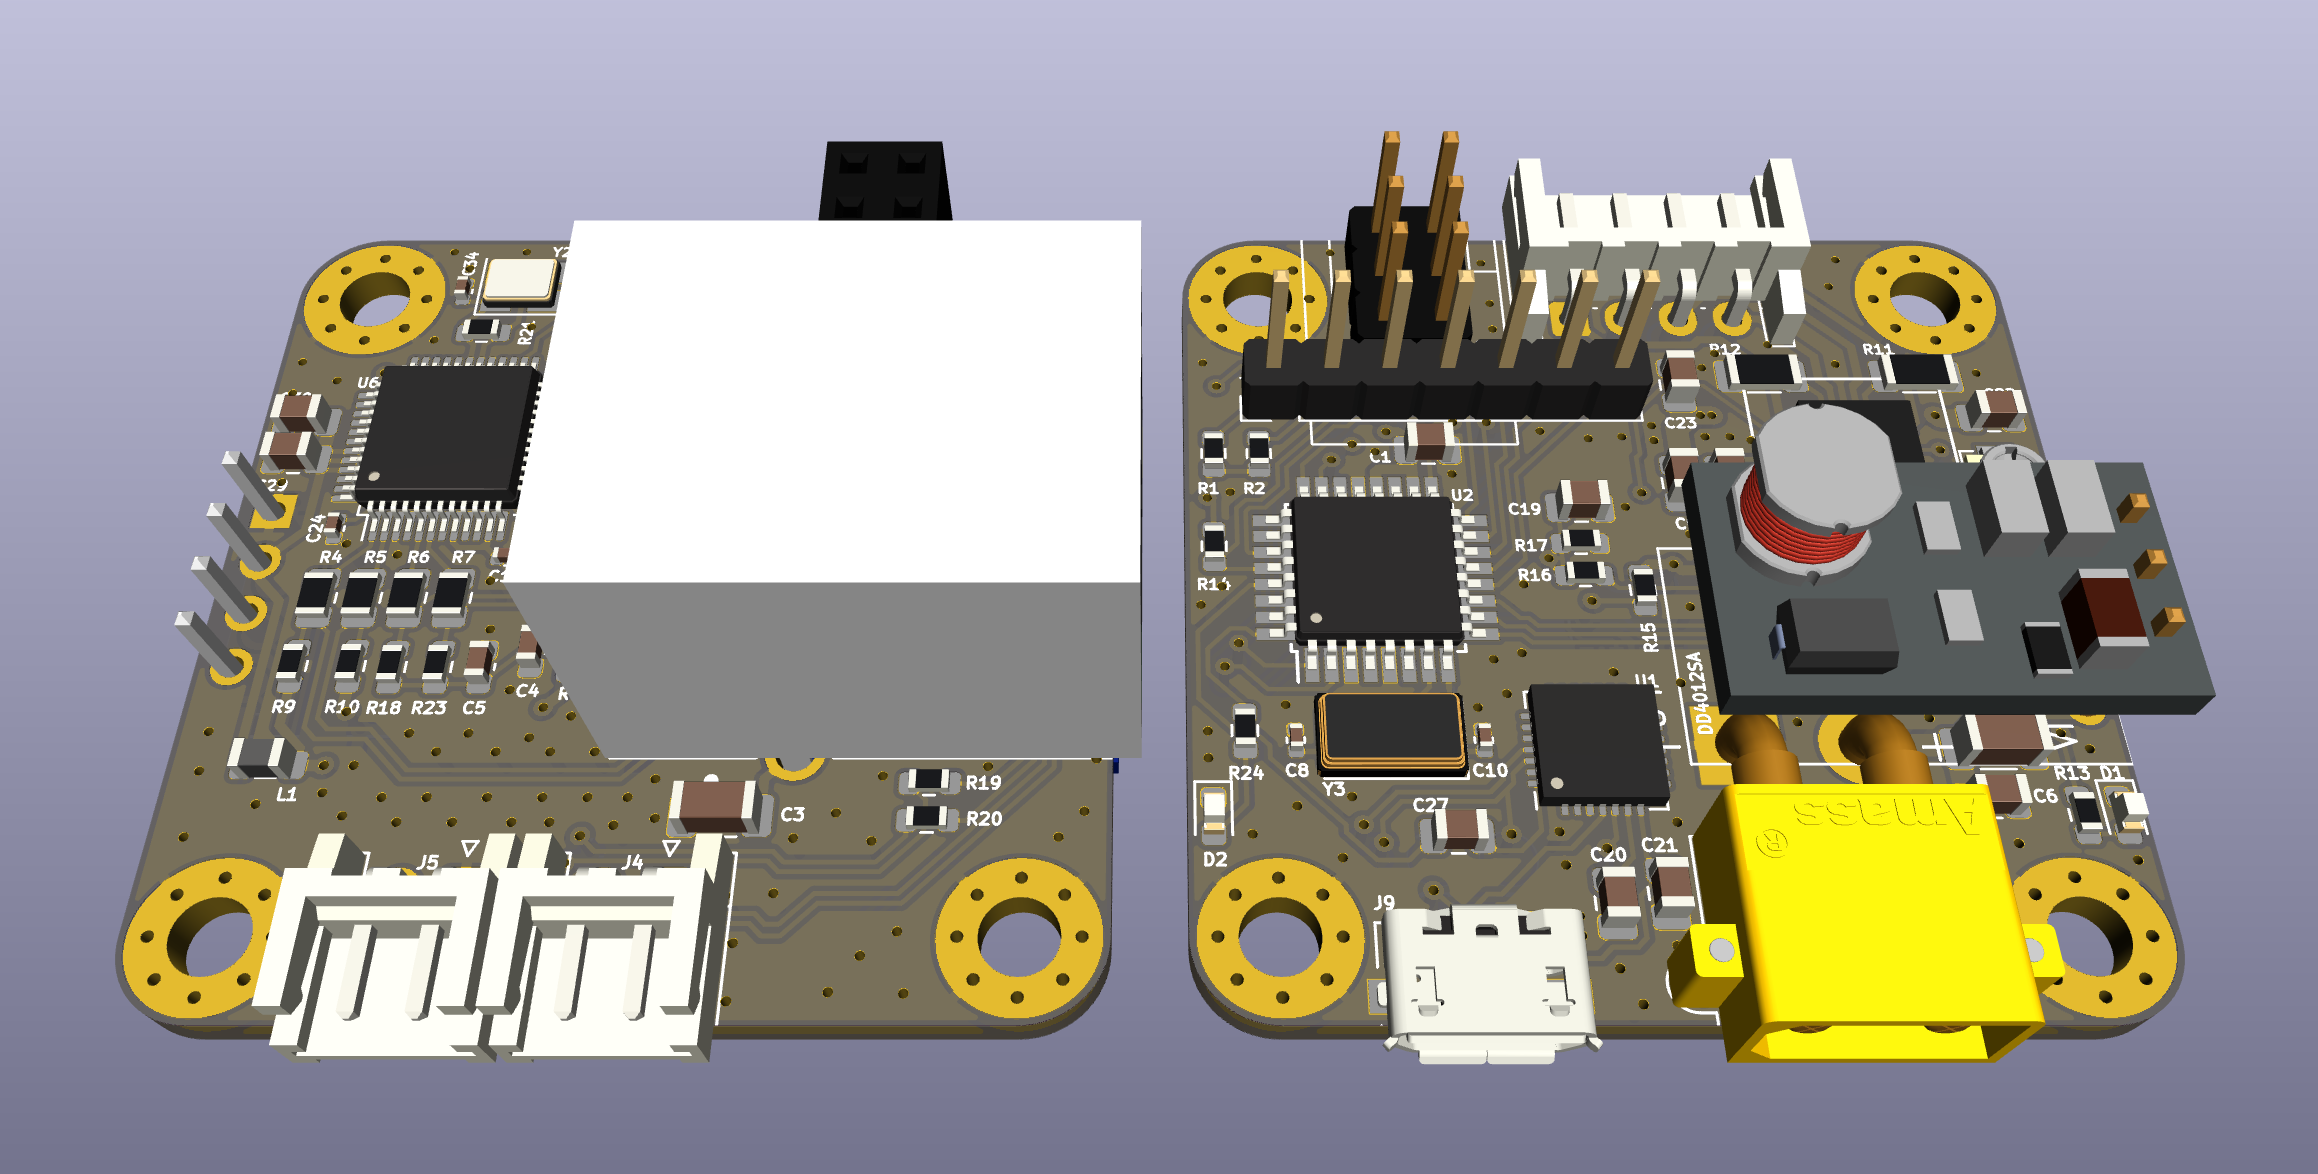
How to build an Ethersweep controller:
Code and Assembly files are on GitHub and in the attached files of this project. https://github.com/neumi/ethersweep
You can directly order the PCBs at JLCPCB with the attached production files. Costs...
Read more » Jan Neumann


 Karol
Karol
 Andy Geppert
 Krockwell
great stuff! I'd really like giving it a go and rebuild it for usage in a small robotics project. Is PID already readily implemented? And how about absolute position feedback (measured in steps I guess) through the encoder?