Close
0%
0%

Converting Inkjet printers into FDM 3D printers

Inkjets could be used as an FDM Resin 3D printer by replacing the ink by other fluids and adding a Z axis.

Public Chat
Similar projects worth following
The idea is to replace the inks with other fluids, such as resin and its hardener (and others) and then add a Z axis "somehow".
The "somehow" is exactly what I need to figure out in this endeavour.

I don't know anything about Programming, 3D printers (I do have a Creality 3D 3 Pro, but I hate it) and Inkjet printers, so I will just take some old/broken/used Inkjet printers and brute force my way into a 3D inkjet resin printer (this is not a good idea [I'm dumb {and broke}]).

What I want:

I'm broke and dumb, so I want an user-friendly and cheap printer that all my homies can use.

The market is full of overpriced 3D printers that are a pain in the chucks to learn and use (maybe just like conventional printers at this point, lol) with filaments that are super expensive and hard to make at home (at least for my country's currency, the dollar is 5x the value of my country's currency).

What I could find:

  1. There is the "Oasis 3DP", a inkjet that wets powder to print coloured 3d objects, but the objects are quite brittle and fragile (there are people that suggested to replace the powder with cement tho).
  2. And I found this DIY that converts a creality 3D into a conventional printer, but I don't think the results are that precise. Not to insult the creator (the project is awesome), but the actuators used are piezoelectric actuators, not inkjet nozzles.
  3. Some time ago I found a 3D printer company that made a method to use UV resin to print lenses, it is just a super precise inkjet printer that shines an UV light to harden the droplets.
    Obviously, You can't just buy one of these, but this informational video is quite useful.
  4. There are a ton of papers on the subject of resin printers, but I find this articlequite interesting, because it shows a method of changing the mechanical properties of the print by changing the amount of Silicon and Epoxy Resin.
  5. And this video about how Inkjet printers work can be insightful.

What I thought on so far:

First I thought on, just like the company, on using UV hardening resin for the printer. It simply spits the droplets and then the Printer hits it with a small UV light.
But in that case, I would need a UV activated Resin, and UV activated resins are expensive (at least on my country) and only sold to be used in laser resin 3D printers.

So the point of being cheap would be thrown out of the window.

Then I came to believe the best choice is to replace the variety of colours of a conventional Inkjet printer with resins. Like a "colour 1 - magenta" for the resin and the hardening element as a "colour 2  - cyan", so they are added simutanesly.

Of course, this allows for more options of materials and even colours to be added if you simply increase the number of printing nozzles. Materials like Epoxy, Silicon, Sodium Silicate, oil (to lubricate mechanical pieces) and even edible stuff (pasta? Chocolate?).
  • 5 × Broken/Used/Old Inkjet Printers Quantity is not exact, the more the merier. You will break or lose stuff by accident, so better use ones that nobody needs.
  • 1 × Soldering Iron and other soldering equipments. You know, regular equipment for soldering electronics. You will use it a lot.
  • 1 × Screwdrivers specific for electronics. Printers often use a specific type of screw (I believe it is a "star" like screw hole). It normally comes with screwdrivers inside "electronic soldering kits", you can just search for it in specific. You won't be able to disassemble the printers without it.
  • 5 × Photo Encoders (linear o not) Quantity is not exact, the more the merier. Inkjet printers normally have 2 to 3 photo encoders, one for the linear motion of the printing head, and other for the movement of the paper. You can add as many as you want in your project.
  • 5 × Printing heads Quantity is not exact, the more the merier. The printing head (in a lot of inkjets) are both the ink compartment and the extruder head. You can use the compartments for different materials and hardeners. You can add as many as you want in your project.

View all 8 components

  • Project Log 10: Maybe I need help...?

    FulanoDetail10/02/2022 at 21:20 0 comments

    Project Log 10: 

    18:05 hours - Brasilia Timezone - 2 of October

    Great news that I forgor to talk about: I got more printers and even more printers are coming!

    These few days have been quite... Agitaded for me. I got some new tools too, but I don't know if they will be useful for this project.

    Also, I need some help with some things. In specific, I'm trying to save the printer encoders.

    Of course, I'm starting to study about this subject in specific, since it has a ton of free tutorials on the internet (including here on hackaday). But if you already have an answer for that, I wouldn't complain if you commented it or tried for yourself and completed the project before me so I don't need to finish it...

    Just sayin... 👀

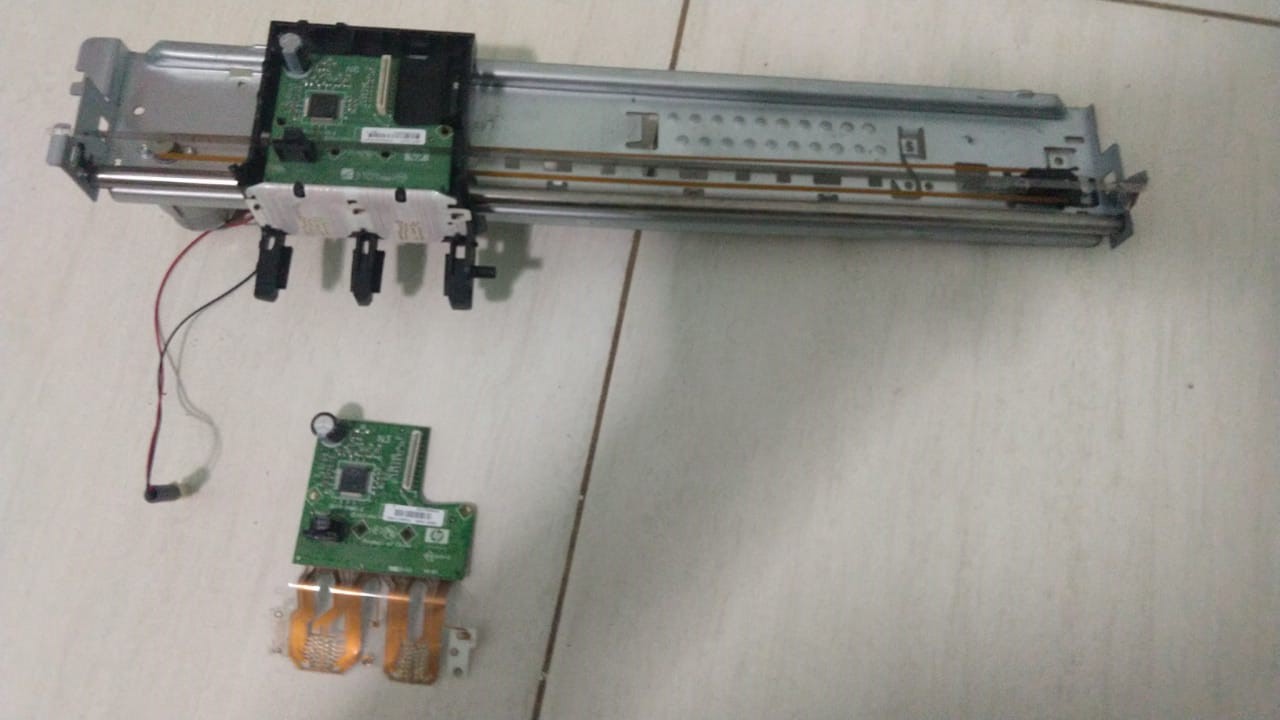
    So, first item for the project acquired: printer rail.

    I'm just saving this rail in specific because I will study about encoders and the circuits.

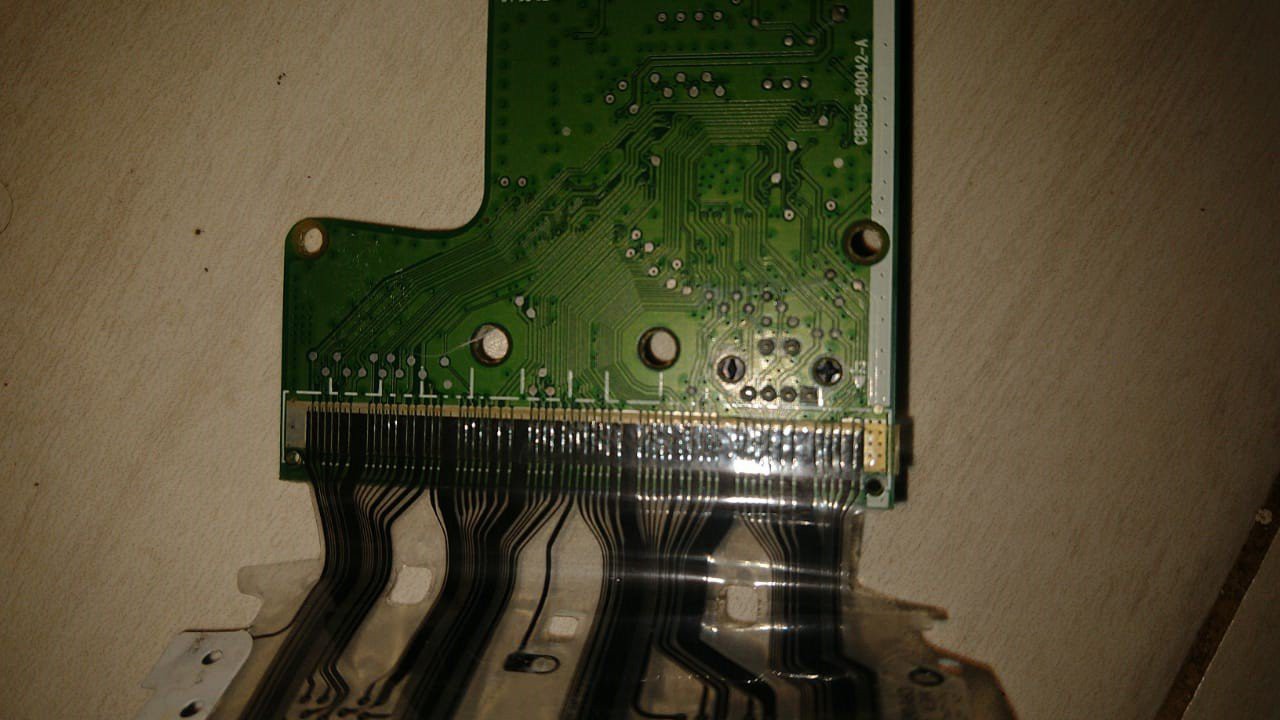
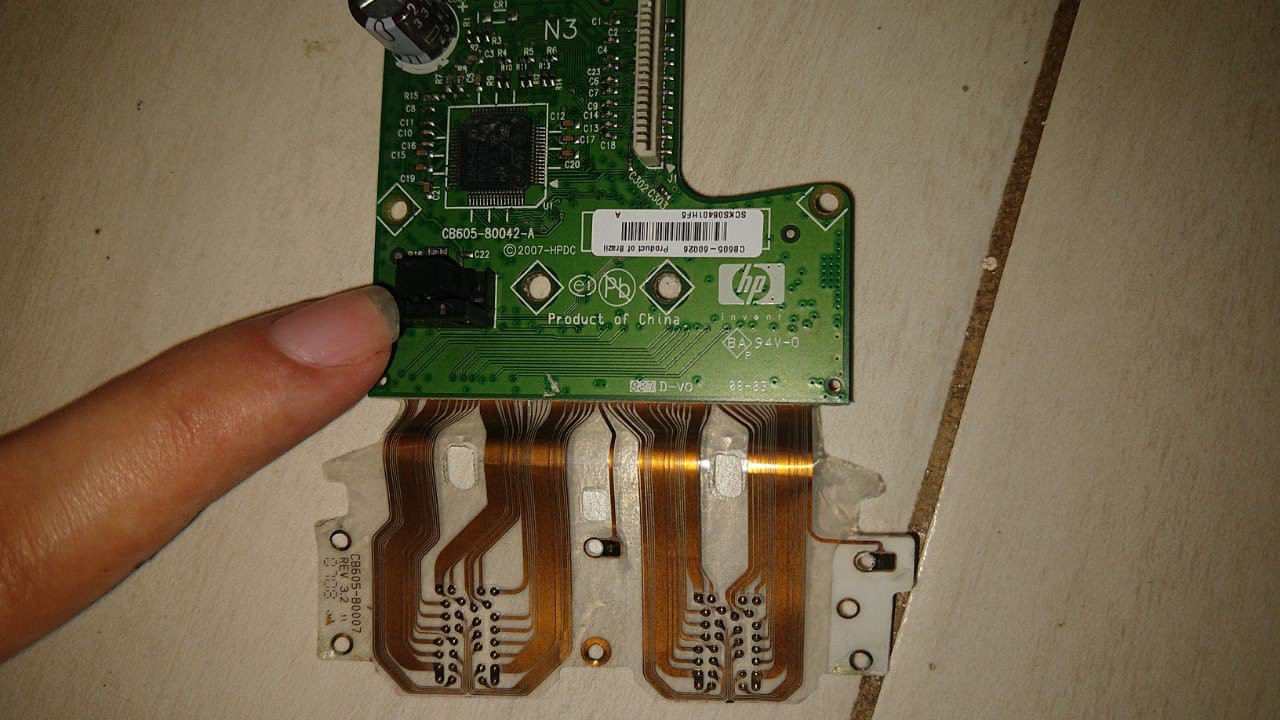
    This thign were I'm pointing at is the linear encoder of the printer rail, I will have to figure out how to remove it from the pcb and insert it in a future pcb. And the plastic thingie too, since I will need to control the damn thing...

    Below is the back of said pcb, those five dots protuding from the pcb are the downside of the encoder.

    I don't know what to do with the rest of the damn thing, but I will try messing with it later.

    I feel like I will take a while to finish studying, to be honest... So I think I will start with the structure itself using some PVC tubes or whatever.

    I will try to make a 3D model of it tomorrow.

  • Project Log 9: Maybe maybes

    FulanoDetail09/28/2022 at 21:18 0 comments

    Project Log 9: 

    18:06 hours - Brasilia Timezone - 28 of September

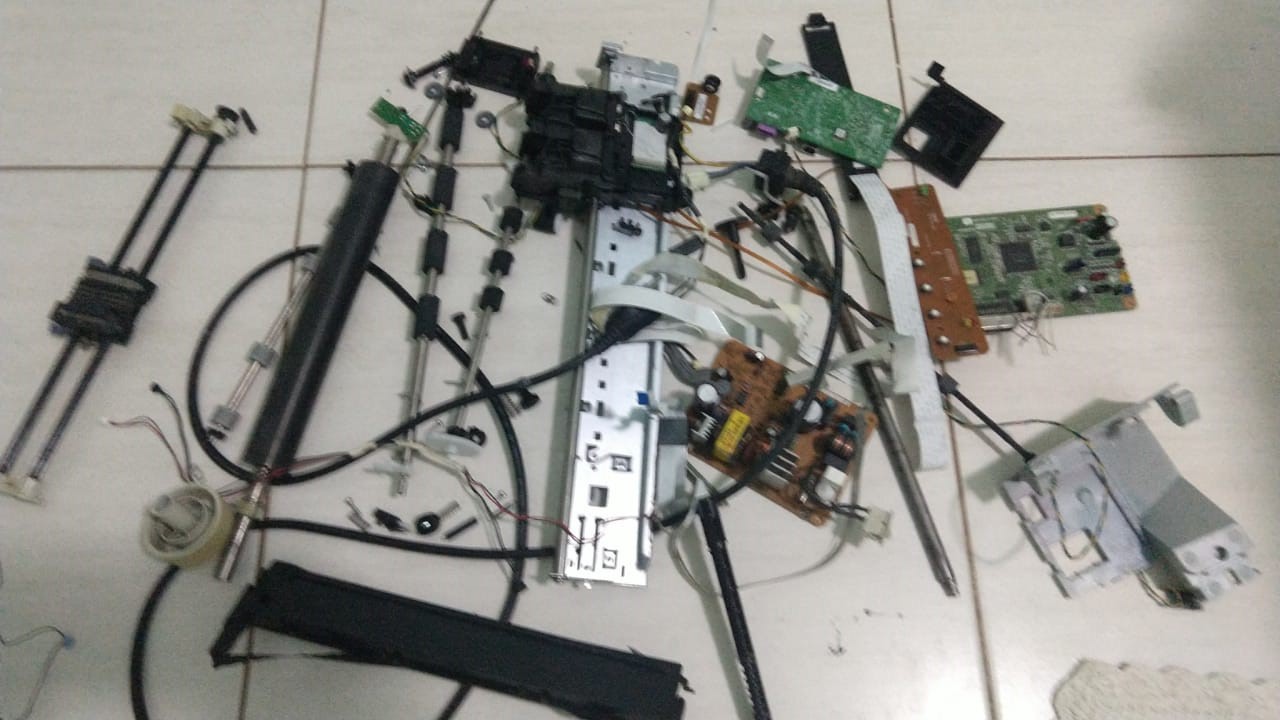
    I took all day to disassemble these inkjet printers and I obtained a lot of parts...

    But... Sigh...

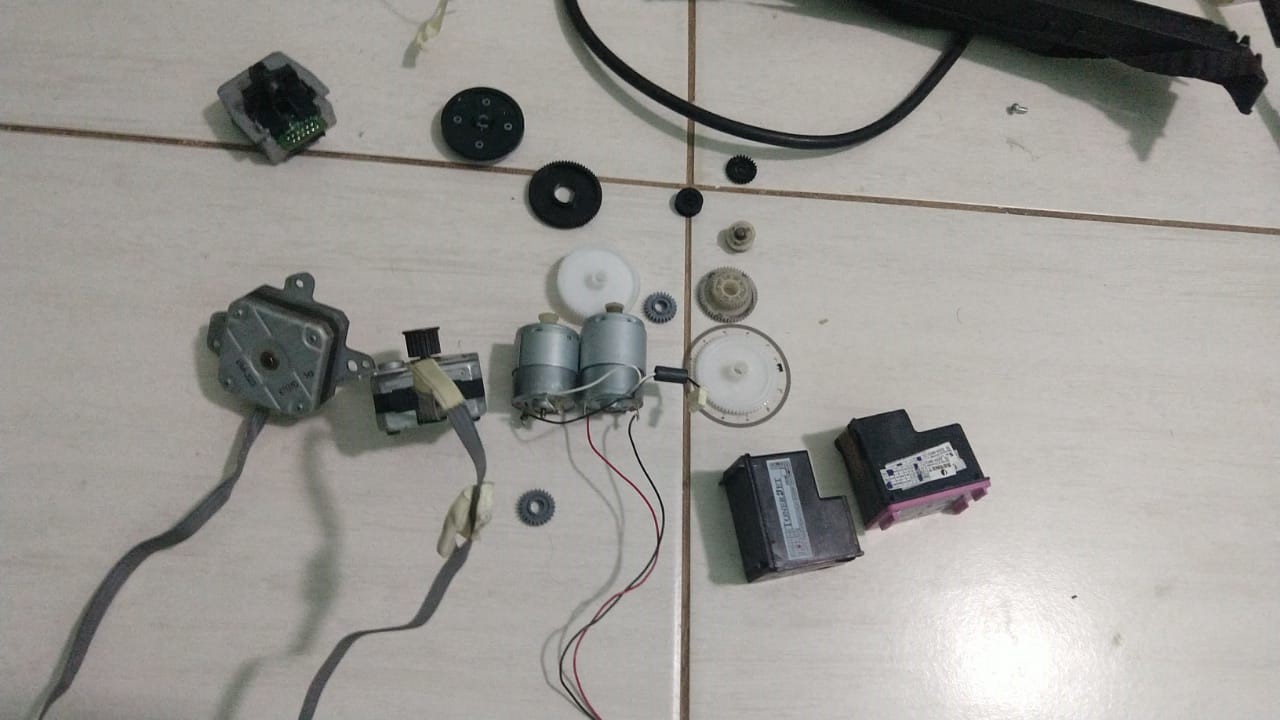
    Well, as you can see in the first image below, I got 2 printing heads, 2 stepper motors and 2 motors that are probably DC motors. A lot of gears and a lot of rods... And some PCB circuits that I will maybe take apart to use the resistors and things like that.

    The problem is that I feel like this was a disaster a waste of time and effort (and sweat).

    I was as careful as I possibly could, but every time I was trying to disassemble, things started to fall to the ground, break or disappear.

    And I feel like I broke a lot of things that shouldn't have been broken, and lost a lot of things that shouldn't have been lost.

    The printing heads came rolled into cotton pieces so dirty that I thought it was actually a layer of rust and dust that clumped together over time, but after taking the "bad part" apart in a not so gentle manner, I finally understood that it was actually an envelope to secure the printing heads.

    Even if these were working, I don't know if they are anymore. And I need a new to secure and store them.

    And that also apply to the circuits, they were dirty as heck, but they weren't broken. And I don't know if would be possible to "hack" the system to replace it with something like the program used on open source 3D printers.

    Anyway, I will keep going, but I will complain all the time.

  • Project Log 8: Finally some printers

    FulanoDetail09/28/2022 at 00:11 0 comments

    Project Log 8:

    21:06 hours - Brasilia Timezone - 27 of September

    I finally got some mother-hecking inkjet printers.

    It is broken, but I don't know for which extent, but it is a printer after all.

    And the best part is that maybe I will be able to get another printer tomorrow.

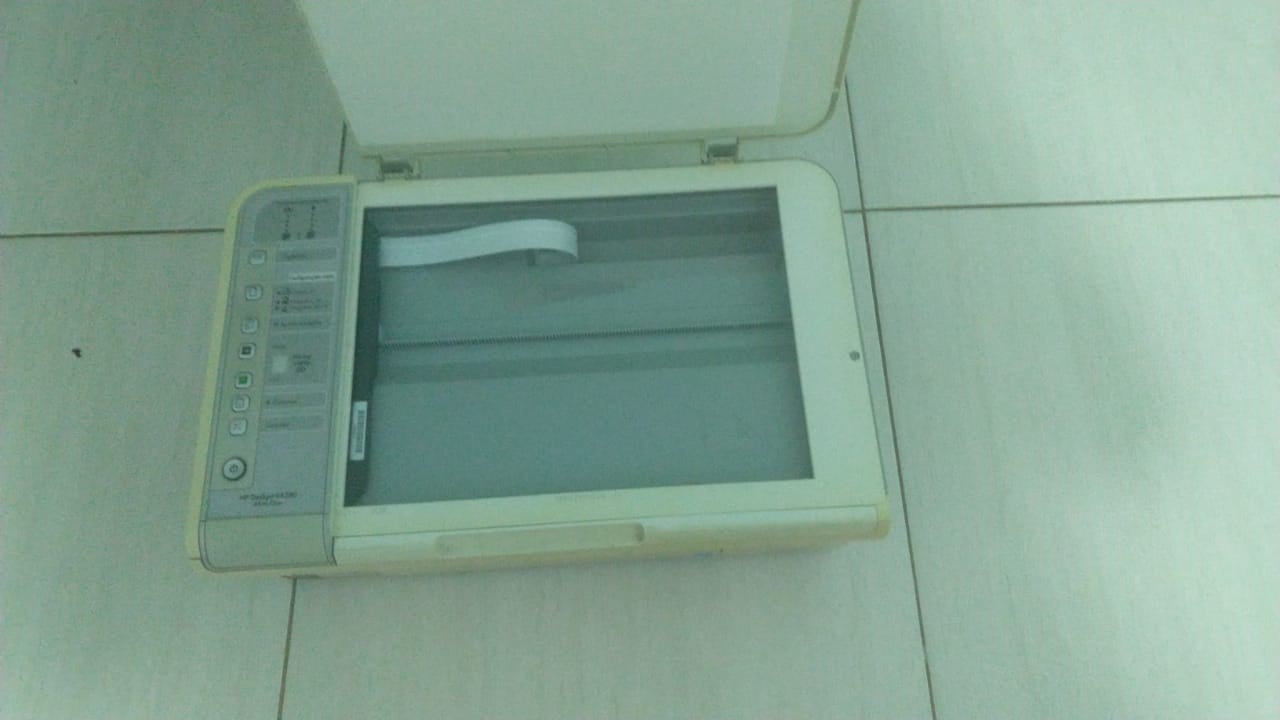
    Well, for some reason this photo had a blue-greenish colour over it.

    I don't know which number series this is, but I know it is an HP printer.

    Well... Oof.
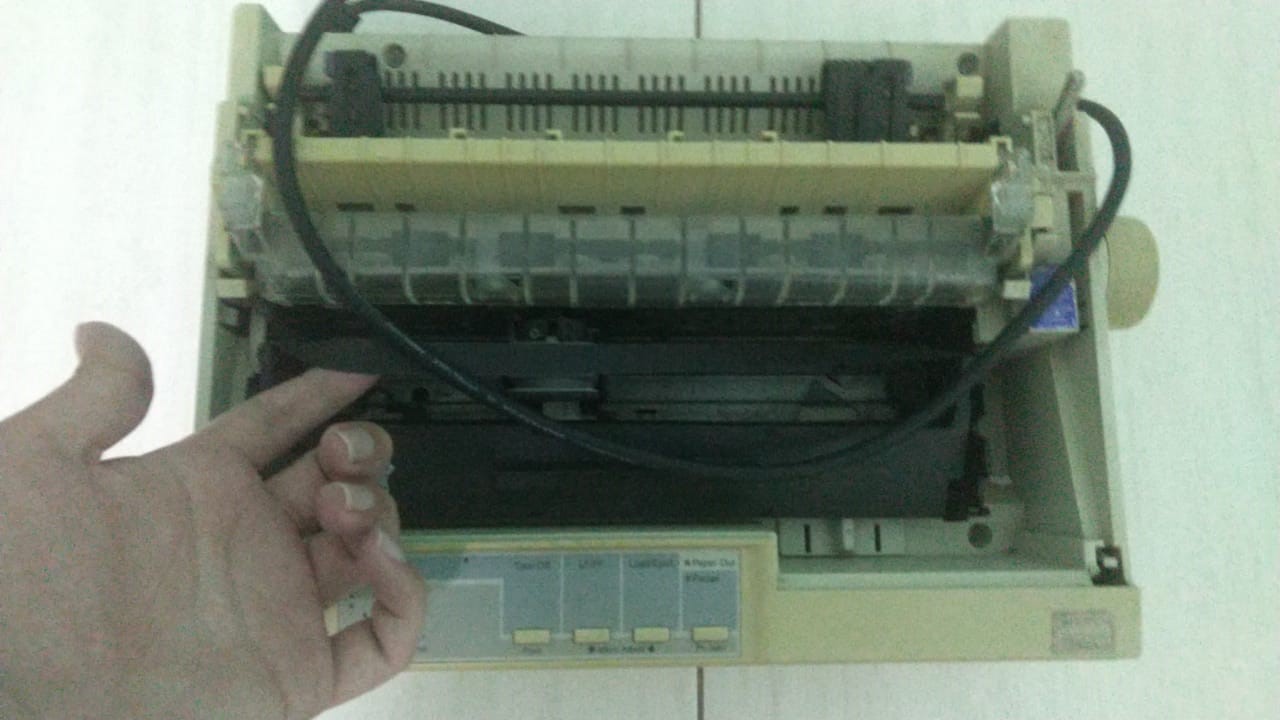
    I don't know if you can see on this image, but the finger is under an "Ink Ribbon". These were used on typewriters and electronic typewriters. So I don't know if this is a printer or a typewriter (or both).
    So the "Oof" is because this is a fricking dinosaur.

    And for what I heard, both printers are working somehow. I will disassemble them tomorrow and see what I can do with this dinosaur.

    Now I have to juggle two projects at once, ugh... My anxious impulsive self that always makes my own life harder...

  • Project Log 7: Time is of the essence.

    FulanoDetail09/18/2022 at 17:35 0 comments

    Project Log 7:

    14:29 hourse - Brasilia Timezone - 18 of september

    Dunno if someone cares, but I will start taking Saturdays and Sundays to do absolutely nothing. I'm getting absolutely exhausted from the work I'm doing (not this one, of course).

    And to begin with, I received more work (which comes with more money), so I will start to let this project in the 2º plan (or the last of my priorities). Not to mention that more useful scrap is coming my way, and it will take time, some weeks, to be exact.

    Which is kinda concerning for myself, because I have a terrible tendency to start and never finish my projects. Thus the reason I tried to make project logs every day, to keep myself focused on this project.

    Nevertheless, I hope I keep going.

  • Project Log 6: Scrap! Scrap! Scrap!

    FulanoDetail09/17/2022 at 01:10 0 comments

    Project Log 6:

    22:04 hours - Brasilia Timezone - 16 of September - SCRAAAAAAAAP

    Good night guys!

    Today I finally got some electronic scrap!!!!

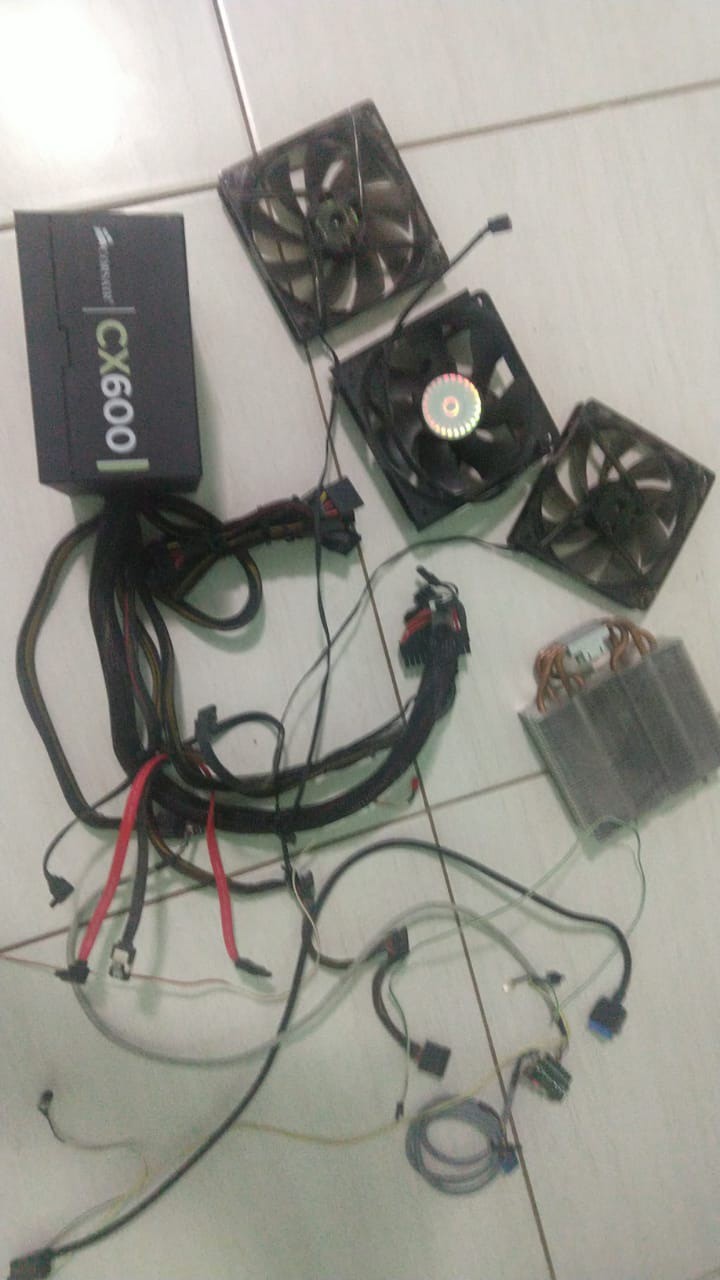
    For now these are like, 3 fans, a copper heat pipe with a heating dissipator and a computer power supply with a "CX600". It has its own fan too, so I think it is probably a really powerful piece. It can be useful in future projects of mine.

    Still no inkjet printers, but at least I'm happy to salvage some really good parts!

    Scraaaaaaaap!!!

  • Project Log 5: The Scrap is a lie

    FulanoDetail09/15/2022 at 22:39 0 comments

    Project Log 5:

    19:14 hours - Brasilia Timezone - 15 September

    It took me almost 3 hours to reach there, first a bus, then a metro, then walking for an 1 hour. They apologised saying "the trash was collected yesterday" (yet, they swore beforehand that they were "holding it for me").
    I got so pissed off that I simply took a Uber (and paid it, it wasn't cheap). I'm trying to keep myself from spending money as much as possible because (I'm broke, and) I want this project to be as accessible as possible for everyone.

    The biggest problem is that I never needed a god dang inkjet printer before, and from what I remember, someone could buy it for around 200 brazilian bucks at worst. Now these are as expensive as actual 3D printers.

    My Creality Ender 3 Pro 2 was around 1.600 R$ (around 500 dollars at the time, and yes, I know most of you paid around 100 bucks for it, and yes, I feel like crap remembering it), any inkjet printer costs around 1200 R$ (around 200 dollars). Just ?!?1?

    I just feel really frustrated and stupid right now, simply because I'm 6 days in this project without any progress, without any material to work with and specially because I didn't made a price research before hand to see if it was even economically viable.

    And yes, I tried to see if I could at least just buy the inkjet nozzle/printing head and just work from there, but just the head alone is like 300 R$?!! (around 50 dollars, maybe cheap for you guys, not for me).

    I also checked those "micro inkjet printers" that are basically just a printing head, and they are as much expensive.

    I've talked to a bunch of online sellers that sell broken printers for salvaging parts, no answer until now. But at least I'm doing my best. I guess...

    And just saying, I kinda wait until around 19h to 22h to write project logs because I want to be as calm and relaxed as possible...

    Anyway, tomorrow I will try to think on what to do next. I'm just so tired right now...

    Note: "Scrap is a lie" is just a joke with the "The cake is a lie" from the game "Portal". If anyone is wondering...

  • Project Log 4: I forgor

    FulanoDetail09/14/2022 at 22:12 0 comments

    Project Log 4:

    19:03 hours - Brasilia Timezone - 14 September

    Well, I was supposed to go get the electronic scraps from my friends today, but I forgot to wake up early and... Well, no electronic scrap still.

    Also, I've been adopting a new daily schedule involving a lot of physical activities which is letting me tired on a daily basis (probably not "a lot" for a lot of people, but definitely it is for me). I'm still studying on my own as much as my smooth brain possibly can tho.

    And I hope this doesn't discourage me from this project in the long run...

  • Project Log 3: Still Studying

    FulanoDetail09/14/2022 at 01:47 0 comments

    Project Log: 3

    22:42 hours - Brasilia Timezone - 13 of September

    Unfortunately, you can't absorb every knowledge you need with a magic trick... As expected, the free online courses about mechatronics are... Not as good.

    I'm still on the introduction, but they hired people that are not fluent on english to speak english and... Well... Good thing they have written their scripts, because I would be completely lost...

    Finally I received news about the electronic scraps, and tomorrow I will go to my friend's house to take a neat PC case, cooling system and a broken smartphone.

    Still no printers, but I think these are nice enough to be honest.

  • Project Log 2: Studying

    FulanoDetail09/12/2022 at 22:59 1 comment

    Project Log 2:

    19:54 hours - Brasilia Timezone - 12 of September

    Well, people are still taking their time to send their electronic scrap to me (since they have their own lives to live), but this isn't a reason for not working on myself.

    Soon or later I will need to study, and I've made a list of online free (and not free) courses about mechatronics and robotics (I won't post here because I didn't watch them yet).

    I will start watching them tomorrow, but I doubt they will be more than beginner level; not that I would need industrial supa dupa level of knowledge, but I hope it will be all itty bitty fine.

    Narrator: "It won't be itty bitty fine".

    I'm doing this Log thing right, tho?

  • Project Log 1 - Screw the List

    FulanoDetail09/11/2022 at 18:48 0 comments

    Project Log 1:

    15:40 hours - Brasilia Timezone - 11 of September

    It seems that everyone is closed in this god dang Sunday (my mistake), but at the end of the day, these places only specialise on collecting electronic scrap and are not quite fond on giving it away for free.

    I will still receive news from my friends about their own scraps to see what I can do, but honestly, if I don't receive any responses from them, it seems I will have to buy it online (with that dang shipment fee).

    The best way would to just look around, but I always do that when I take my dog for a walk. I can't just "walk" around the city centre, this is not a first world country with good public transport. And I hate to go around knocking on doors. I did it a few times when I was younger, and let me just tell you, there are more crazy and rude neighbourhoods than you are willing to think.

View all 11 project logs

  • 1
    1 - Finding Inkjet printers

    I just use/focus on Home Inkjet Printers, they are simpler, with more free tutorials on the internet and more common parts available on the internet with accessible prices and thus, easier to deal with.

    If you want to use other types of 2D printers, such as laser printers, I don't think this project will be able to help you.


    Inkjet printers are the common "2D" printers you often see at homes, offices, universities or schools.

    There are a lot of types of inkjet printers with even more types of parts and ways of working, so try to stick to the cheapest home printers because they are more standardised than the rest.

    Some places use "professional" or industrial level inkjet printers that will be more complex and harder to find new parts, they probably won't have as many tutorials as you see on the internet.

    Do not buy new ones, just go to areas where there are a lot of electronic trash pilling up: office centers, junkyards etc. You can even ask for your friends and/or family for their broken ones, you will be surprised on how much electronic trash people produce.

    Useful materials:

    What are the types of printers?

  • 2
    2 - Disassembling the Inkjet printers

    You will lose/break parts by accident.

    Thus the need for broken/old/used/thrown away printers that you will probably find for free.

    As careful as you will try to be, eventually you will break stuff without knowing it. So better have a spare for everything...


    I don't know exaclty the name/type of the tip you will need to use to disassemble the printers, but normally a normal interchangeable screwdriver kit will have all the tips you will need. It is normally sold as "screwdriver for electronics". It doesn't have a lot of mistery to it.

    As I said, there are a lot of free tutorials on the internet, and the disassembling process will depend heavily on the type of printer you're trying to take apart. But don't worry about that, just go searching around the printer and eventually you will find the screw holes.

    Useful materials:

    Here is a video showing the disassemblying process/instructions for HP Inkjet printers, that are normally seen on homes:

View all instructions

Enjoy this project?

Share

Discussions

RunnerPack wrote 12/20/2022 at 15:58 point

If you can, you should try to get Epson printers, rather than Canon or HP, since they use an actual piezo pump print head, as opposed to the bubble jet system of HP et al.  I like your idea of printing the two parts of an epoxy with separate "colors", instead of using expensive UV resins.

  Are you sure? yes | no

kelvinA wrote 09/16/2022 at 14:45 point

You sound like you'd be interested in some of the research I've done for the SecSavr Suspense (https://hackaday.io/project/184896-secsavr-suspense-gd0105), which is a Liquid Laminate Lithography (L^3) 3D printer.

  Are you sure? yes | no

FulanoDetail wrote 09/16/2022 at 17:11 point

Wow! That is fascinating! How far have you gone?

  Are you sure? yes | no

P wrote 09/14/2022 at 17:05 point

Good luck in your endeavors, an open-source, affordable, multi-materials inkjet printer is a dream of mine too. Some others on hackaday have made lots of headway into reverse-engineering some inkjet printer cartridge driving interfaces/protocols (https://hackaday.io/project/176931-hp-printer-cartridge-control-module), which may be helpful to you. You may also be interested in the polyjet process used in some stratasys printers which uses inkjet nozzles to print UV-curable resin.

  Are you sure? yes | no

FulanoDetail wrote 09/14/2022 at 22:05 point

Wow! Thanks! That's a lot of help, I will study/use it for sure!

  Are you sure? yes | no

Peabody1929 wrote 09/13/2022 at 00:22 point

How about filling the printer cartridge with "plastic glue"  (MEK or Methyl Ethyl Ketone) and printing a layer on plastic powder?  Cover this layer with more plastic powder and print another layer of glue.  Repeat.  Don't try to raise the print head, instead lower the build platform.

  Are you sure? yes | no

FulanoDetail wrote 09/13/2022 at 11:59 point

That's a nice idea too.
But I don't know where to find or make plastic powder without building extra machines.
I also couldn't find MEK to buy online (maybe because I'm not from the same country as you).

  Are you sure? yes | no

Similar Projects

Does this project spark your interest?

Become a member to follow this project and never miss any updates