-
1Step 1
You can get the kit including all parts here: http://www.cubic-print.com/TimeFrame
Tools
- Soldering stuff
- Battery-powered screw gun
- Various drill bits(2mm, 3mm, 6mm)
- Pliers & wire cutter
- Mini USB-B cable for programming the Arduino
Frame
- 1x 12V 1A power supply
- 1x picture frame (at least 25mm deep, better 35mm)
- 2m LED stripes (3 pieces of 60cm each)
- 1x thin metal plate like thickness metal gauge (thickness: 0.3mm size: 10x70mm)
- 1x rod fixation plate (eg. Aluminum 20x55x2mm)
- 1x wood block about 4 mm longer than the iron core
- 3x wood screws + washers
- 1x iron rod / screw / nail (length around 60mm diameter: 6-12mm)
- 1x fixation for iron rod like M6 bolt or just a nut in case you use iron screw
- 45m (=40gr) 0.41mm (AWG26) isolated cooper wire
- 3x small Neodym magnet (d=10 h=2)
Electronics
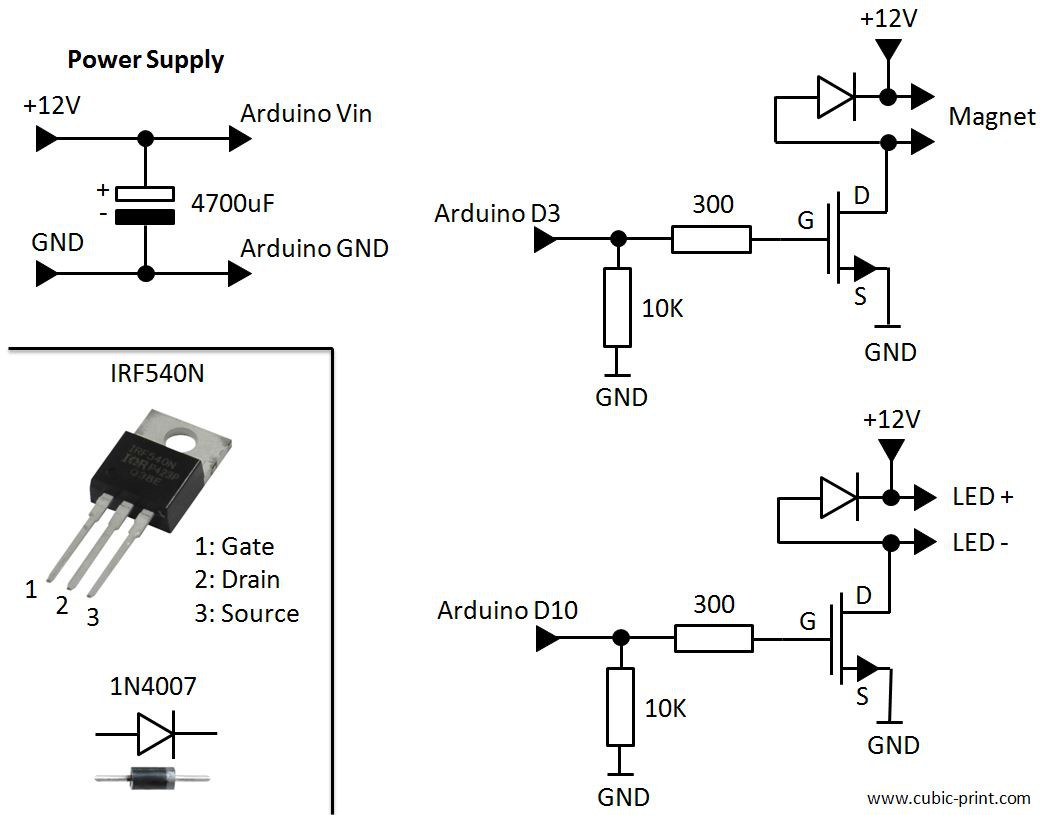
- 1x Atmega Nano V3.0 328P
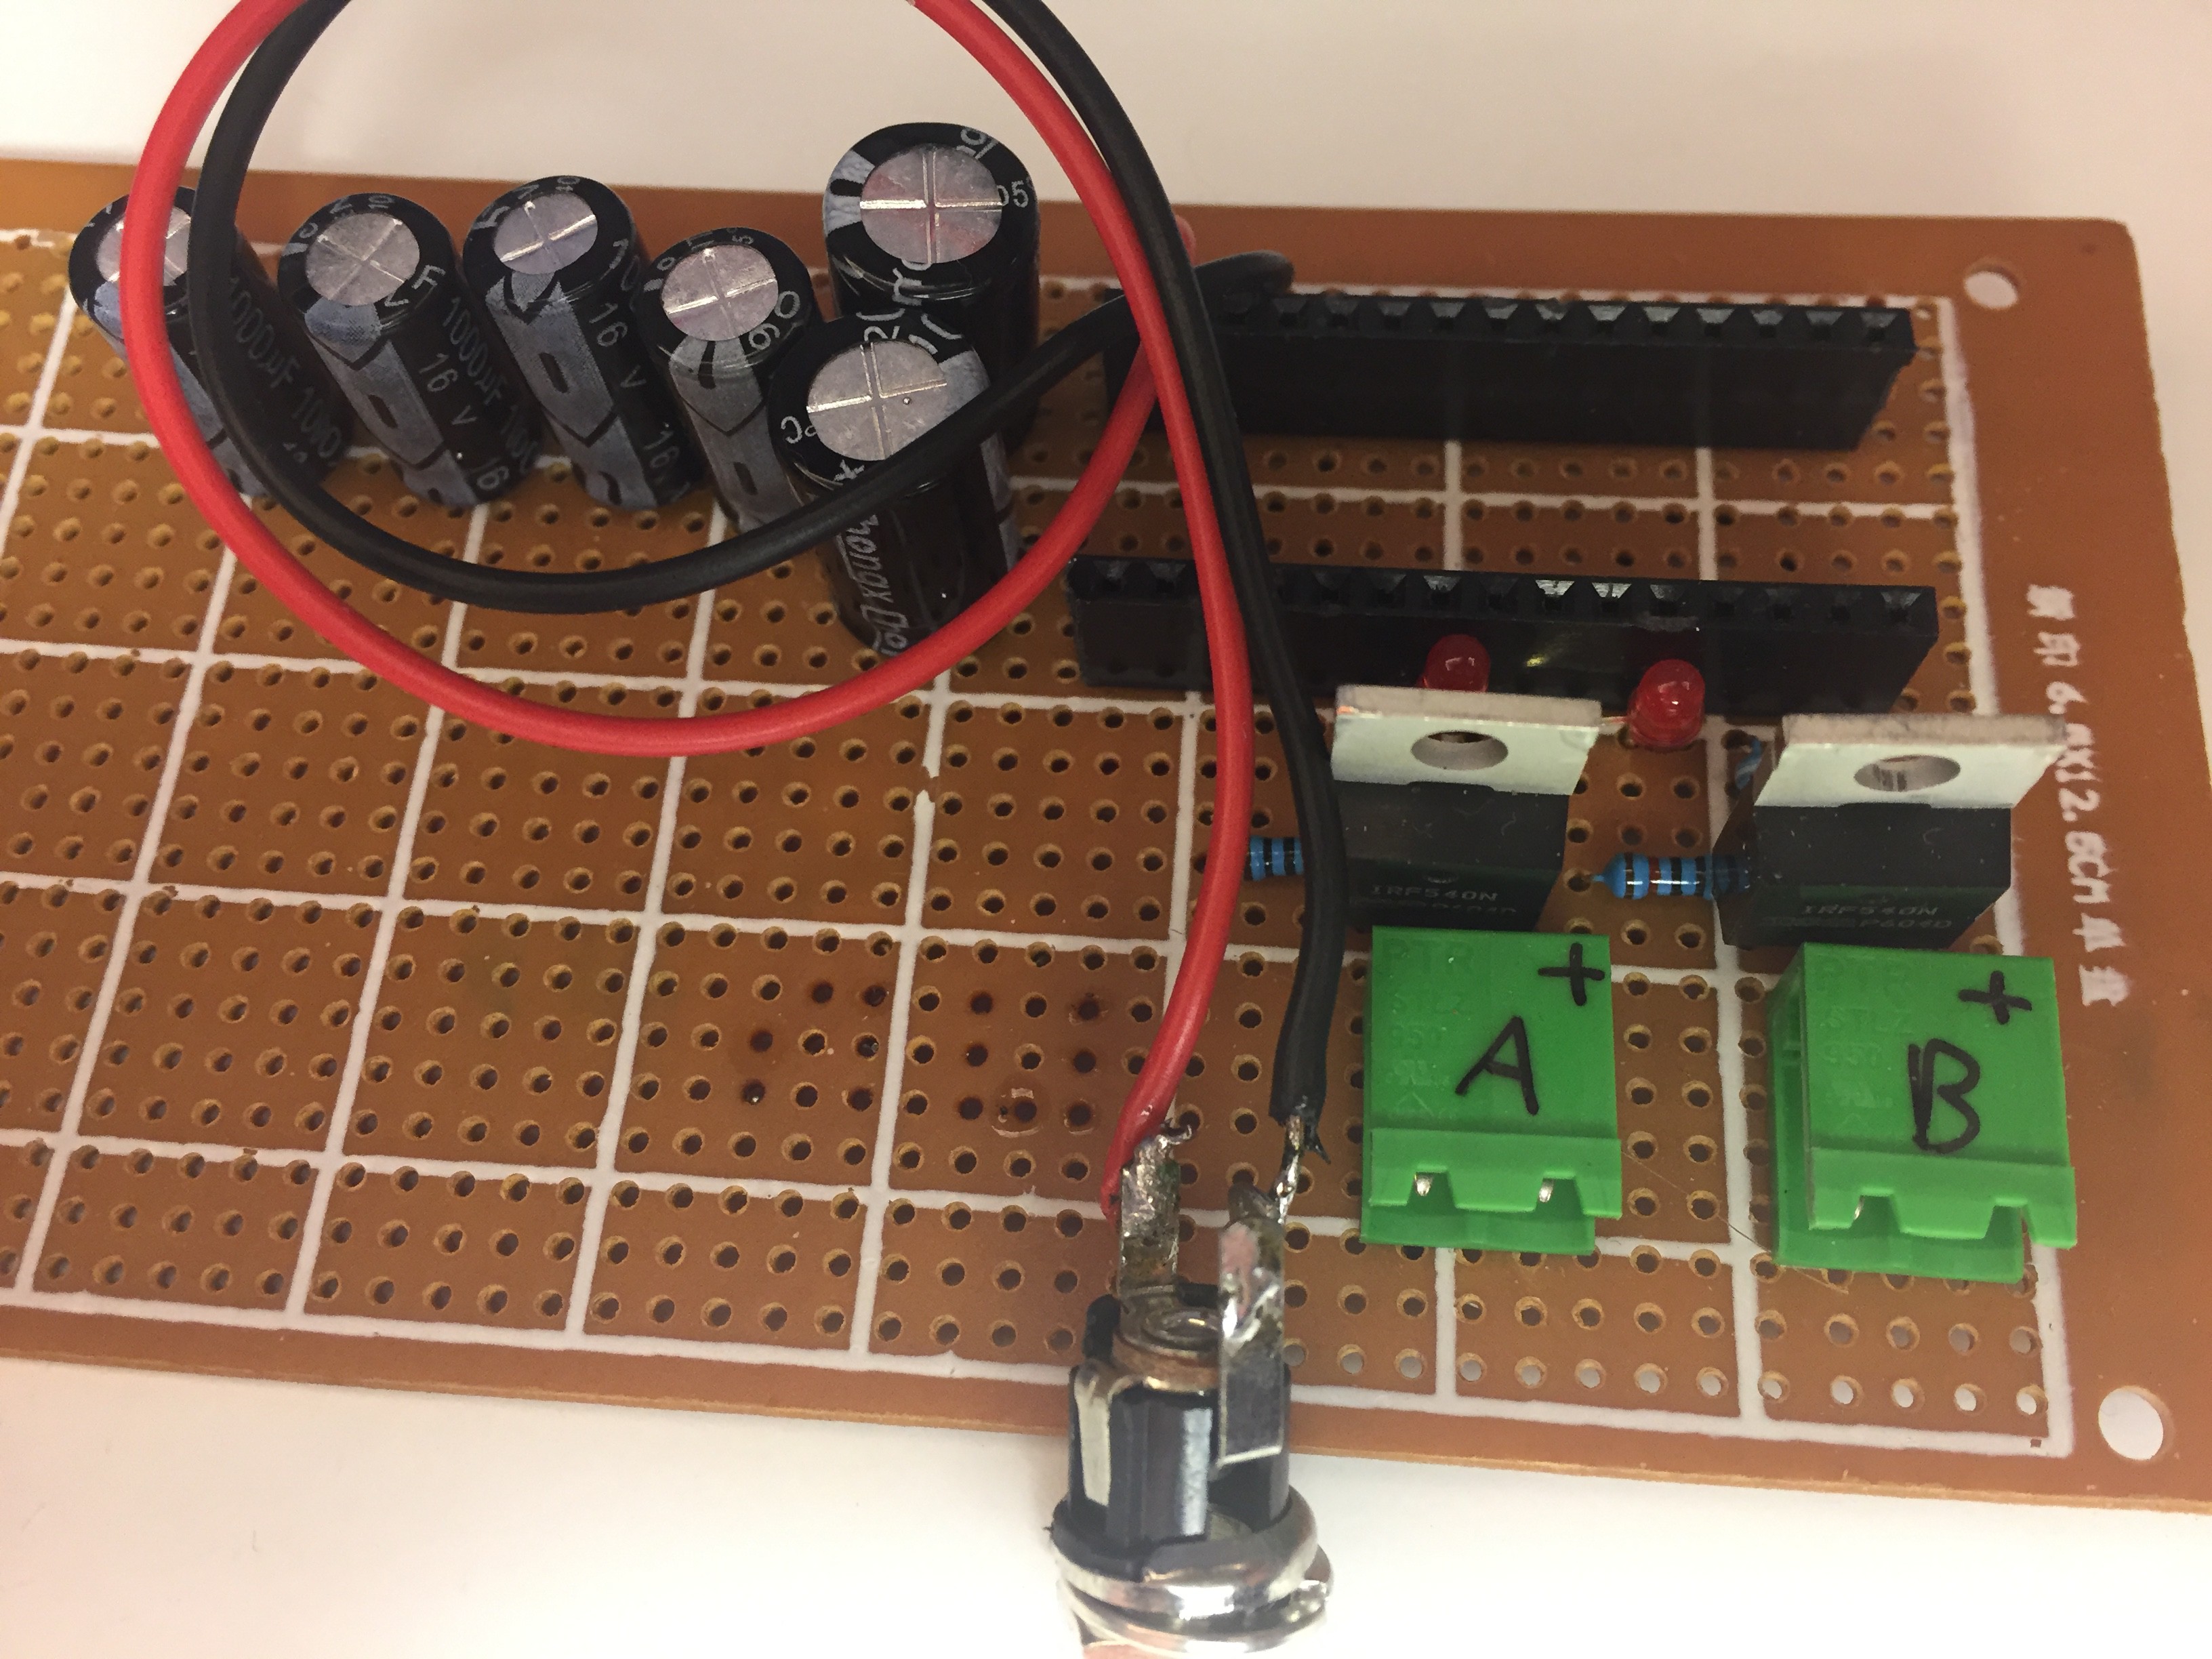
- 1x Capacitor 16V 4200 uF
- 2x Mosfet IRF44N
- 2x 10K Resistor
- 2x 300 Ohm Resistor
- 2x Diodes 1N4007
- some cables for LED connection
-
2Step 2
-
3Step 3
Cut 3 LED stripes with a length of 600 mm each. Only cut the stripe in the position indicated with a scissors symbol on the stripe.
Connect all 3 rows in parallel. Pay attention the printed polarity on the stripe. Depending on where you cut the stripe “plus” and “minus” might not be on the same side for all 3 rows.Glue the LED to the inside of the frame. Connectors are on the right side. To achieve a good performance even in normal daylight cover the left, right and upper inner side of the frame with 3 rows of LED stripes. For 600mm stripes start 5cm above the bottom to get it symmetrical. The 3M tape of the stripes might not be sticky enough for paper frames. Just use additional glue to fix them.
-
4Step 4
Wind the copper wire around the iron rod as tightly as possible. Leave 20 cm of wire at the start for later electrical connection and overlap the first turns to avoid slippage in order to ensure tight windings right from the beginning. Start at the end where the washer is mounted. We recommend at least 6 layers (3x forward and backward). Do not wind too close to the open end to avoid the wire slipping over the end of the rod. A second person holding the spool and keeping tension in the wire is highly recommended. Similarly, leave 20cm of wire at the end. The final resistance of the coil will be around 6 Ohm and you should have roughly used 38 gram of the copper wire.
Use a lighter to burn the ends of the insulated copper wire for electrical connection. Scratch away the black area of the wire with a knife until you see the shiny copper.
-
5Step 5
Flowers and leaves work best. Please make sure they are dry so that the metal base is not rusting. Feathers also look truly amazing. Not sustainable enough? Paper-Flowers work as well. These can be a bit noisier depending upon material used.
Just use a rubber band to fix the flower on top of the resonator plate. For thin flowers you can also use a magnet to squeeze it in. The included magnets serve two purposes. They enhance the magnetic force and balance the momentum of the whole resonator. The amount and position is greatly influences the noise and amplitude of the movement.
All magnets have a north and south pole. They will better work in one or the other orientation depending on your coil winding direction. Just try were you think they offer more clamping force towards the running resonator plate.
The strongest force you get with the magnets opposite of the coil.
To increase the force even further you can put one magnet dictly on the end of the iron core of the electro magnet and not on the resonator plate. If you want to lower to force you can move the magnets up/down as well. This works especially well if you have only a small flower with low momentum it often makes sense to use less magnets, but move at least one magnet up where the flower is attached. This increases the tip weight and will remove any fast jitter from the movement.
TimeFrame - The Desktop Time-Portal
amazing slow motion illusion for flowers and feathers
 cubic-print

Discussions
Become a Hackaday.io Member
Create an account to leave a comment. Already have an account? Log In.