Nithin PS
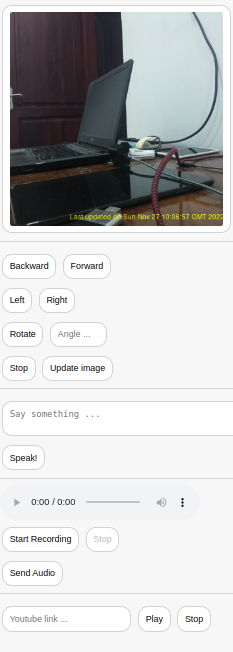
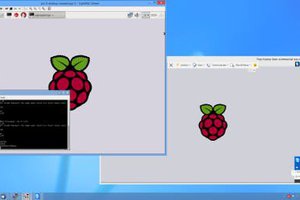
The Raspberry Pi Zero W used in this project is running the latest Raspberry Pi OS Lite 32-bit version on a SanDisk 64GB micro sdcard. Once the image is burned into the sdcard. Insert the sdcard into the pi zero. Connect the monitor to the pi and turn on the power.
Once the pi boots up enter the username ("pi" in my case) and password. Login to the pi using the username and password.
Once you are logged in to the terminal, setup wireless network on the pi by running the following command
sudo raspi-config
Enter your wireless access point name and password under "Wireless LAN" section. Also enable SSH under "Interface Options" for connecting to the pi over SSH later.
Also enable "Legacy camera" in "Interface Options".
By default pi connects to wireless network using dynamic ip addressing in which the ip address of the pi changes each time the pi reboots. This is not ideal when connecting to it remotely over SSH as we don't know the ip address of the pi. Assign static IP on the pi by editing /etc/dhcpcd.conf by running the following command
sudo nano /etc/dhcpcd.conf
Insert the following lines to the end of the file
interface wlan0
static ip_address=192.168.1.25/24
static routers=192.168.1.1
static domain_name_servers=192.168.1.1 8.8.8.8
where 192.168.1.25 is the newly assigned static ip of the pi and 192.168.1.1 is the gateway address of the router.
Save the file.
Reboot the pi by running the following command
sudo reboot
Once the pi reboots run the following command to see the ip address of your pi
hostname -I
You should see the static ip address we assigned before.
Run the following command to check internet connectivity on the pi
ping www.google.com
Now we have the pi set up for remotely connecting over SSH.
Once you have the zumo robot built and wired. Turn on the power.
Connect to pi@192.168.1.25 by running an SSH application from another computer connected to the same wireless network as the pi.
Once you have the remote terminal of the pi upgrade the packages to the latest version using the following command.
sudo apt-get update
sudo apt-get upgrade
Install Apache webserver and php using the following command
sudo apt-get install apache2 php libapache2-mod-php
Enable apache2 at startup and start the webserver using the command
sudo systemctl enable apache2
sudo systemctl start apache2
Install pigpio GPIO pin control using the command
sudo apt install pigpio
Enable pigpio daemon on startup by editing /etc/rc.local and inserting the following line just before exit 0.
pigpiod -t0
We are using -t0 to use PWM instead of PCM. PCM is being used by voice bonnet speaker out.
Install espeak-ng (used for text-to-speech) using the following command
sudo apt-get install espeak-ng
Install imagemagick (used for embedding timestamp on pi camera photo) using the following command
sudo apt-get install imagemagick
Recording voice from webpage using javascript requires having a secure http connection. So SSL needs to be enabled on apache2.
By default Apache executes shell commands using the 'www-data' user. So user 'www-data' needs to be added to the 'video' group for taking pictures from the pi camera. For text-to-speech to work using espeak-ng we need to add 'www-data' to 'audio' group. Run the following commands to do so.
sudo usermod -a -G video www-data
sudo usermod -a -G audio www-data
Install Voice bonnet drivers using this guide - https://learn.adafruit.com/adafruit-voice-bonnet/
Install Google assistant on the pi using this guide - https://learn.adafruit.com/using-google-assistant-on-the-braincraft-hat
Clone the zumo-robot github repository using the following command
git clone https://www.github.com/ps-nithin/zumo-robot
Copy the contents of zumo-robot/zumo-web/ to your apache web root directory using the following command.
sudo...Read more »

 Dmitry