 Peter Walsh
-
1Step 1: List all the explanations you can think of
I did some research online to see if anyone else had the same problem, and the only reference I could find was a company that stated that ragged edges is caused by low-quality stepper motors, and I should replace the motors with better ones.
Replacing the motors on a laser cutter is a complete PITA and would take many hours of swearing and scraped knuckles (and significant expense), so I was understandably hesitant to try this without some evidence that it would work.
As a first step in debugging the problem, I listed all the explanations I could think of. During the debugging process I thought of some more and added them to the list as well.
Here's what I came up with:
- Crappy stepper drivers
- Crappy stepper motorss
- Loose linear bearings
- Stepper power supply
- Puffing air assist
- Chiller low
- Stepper drivers too much resolution
- Too much mass on laser head
- Lasers tube frequency
- Reflections from the hex grid
- Laser housing
- Drive belts vibrating during cutting
These are not in any particular order.
-
2Step 2: Is this a real problem?
Hypothesis:
This is not a problem, it happens with all cheap laser cutters
Discussion:
Have I jumped the gun on this issue? It may be that all laser cutters have this issue (or at least, all the cheap ones) and there's nothing to be done.
I don't remember this being an issue on other laser cutters I've used, but it's good practice to check to see if you're chasing something real.
Experiment:
My local makerspace has a console laser cutter similar to mine, run the same test there and compare the results.
Results:
The makerspace cutter does not have the same problems, or at least doesn't have the problem to the same degree.
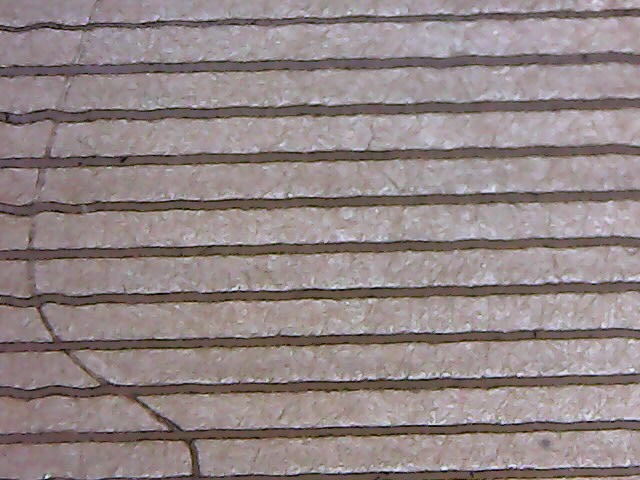
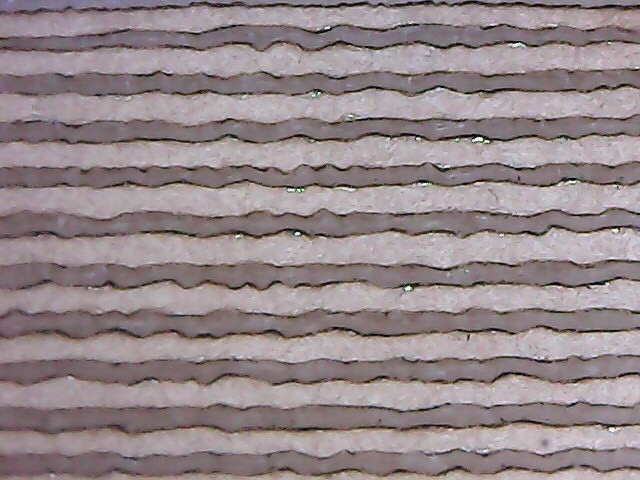
Comparing the same cut profile from the makerspace cutter (top image, below) shows relatively smooth cuts, not the ragged edge of my laser cutter (bottom image, below).
![]()
![]()
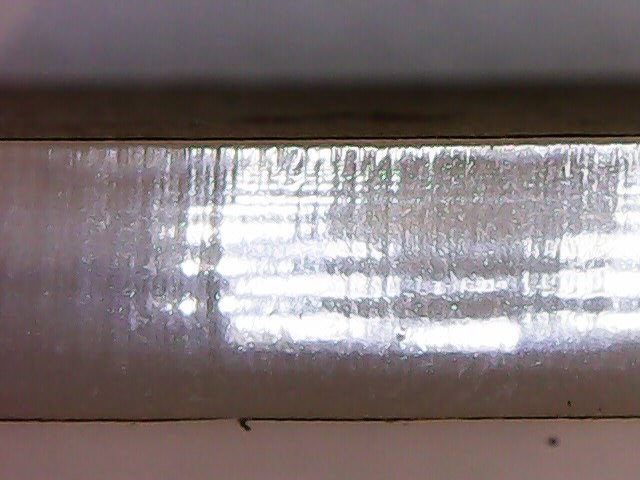
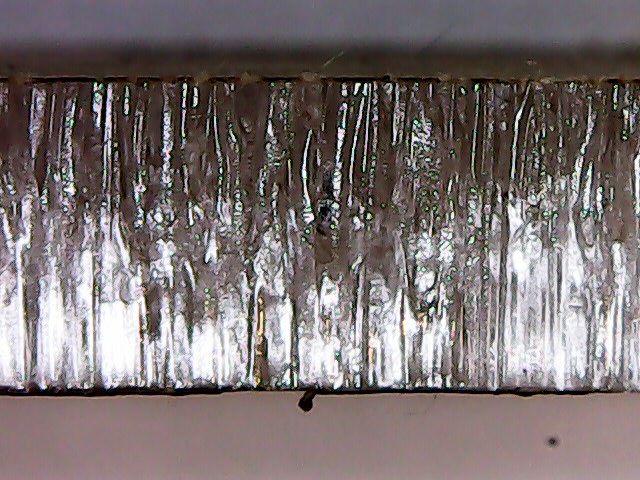
As further evidence, prior experience I know that the edges of an acrylic piece should be polished and smooth. Comparing the cut edges of a 6mm piece of acrylic from the makerspace (top image, below) with mine (bottom image) shows in stark contrast that it's definitely a problem with my machine.
![]()
![]()
Side note: On the makerspace cut above (top image of four) notice the extra hairline cut going top to bottom? That's the makerspace laser not turning off after the job is complete. The laser tube runs at a small power level at all times - even with the lid open and the interlock engaged! Yikes! This observation led to a parallel investigation of the HV power supply at the makerspace.
It turns out that the trigger mechanism of HV power supplies tends to fail in the "on" position, this can be confirmed by seeing a non-zero value on the ammeter after a job is complete, and even with the lid open. When that happens, it's time to replace your HV power supply. -
3Step 3: Conduct experiments to confirm or deny all explanations
Hypothesis:
Low chiller water is causing the laser tube to glitch.
The chiller water level gauge is on the border of yellow ("low") and red ("not enough"), maybe intermittent water is causing the laser tube to overheat and periodically glitch out.
Experiment:
Refill the chiller and see if the problem goes away
Results:
No change.
Note: A shadow across the water gauge made the water level appear low. Examining the gauge with a flashlight revealed that the chiller was actually full, no extra water was needed.
Side note: no perceptible loss of water was noted after a year of use, so apparently no water is leaking and no water is evaporating from the system.
Hypothesis:
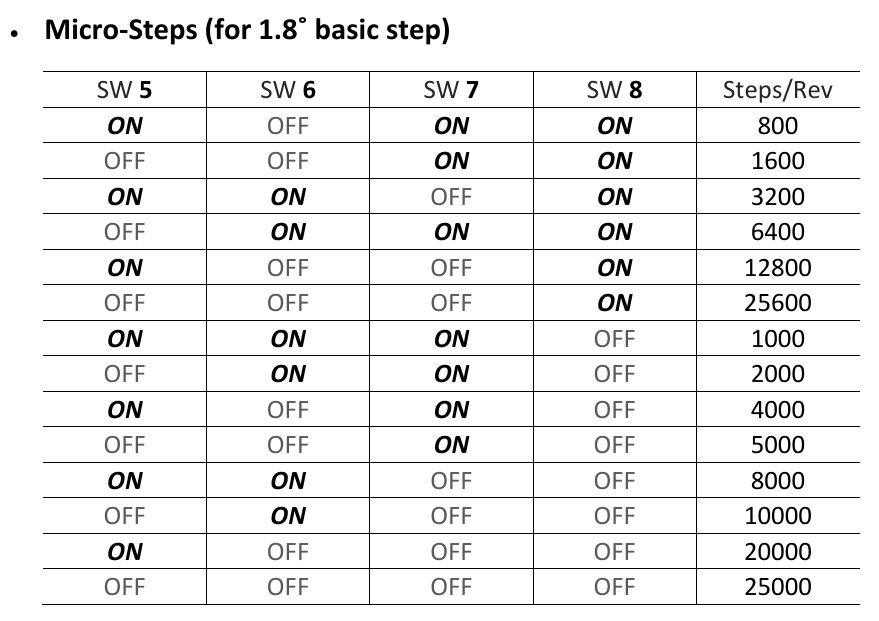
Stepper motor drivers have too much resolution.
Discussion:
Stepper motors have a resolution of 1.8', which is 200 steps per revolution. The drivers can PWM the coil excitation to get microstepping, or steps between the physical motor steps.
Microsteps have much less power than the physical steps, perhaps the mass and friction of the laser head carriage is too much for the motor driver? Or perhaps the motor driver is cheaply built and a good driver wouldn't have this problem?
Experiment:
Change the switch settings on the stepper driver for less precision, see if the problem persists. When changing the settings, also change the corresponding "distance per step" setting in the controller, so that the laser head doesn't go outside the cut area.
![]()
![]()
Results:
No change.
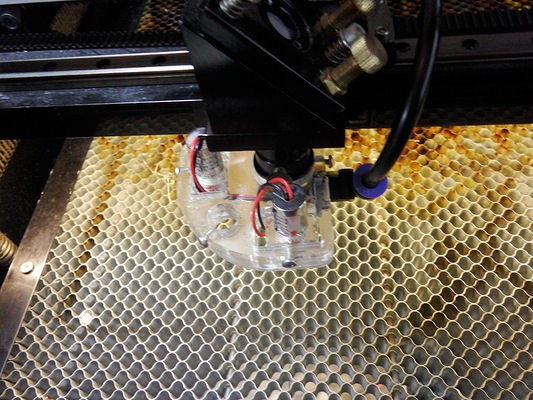
Hypothesis:Laser head extra mass is causing problem.
Discussion:
The extra mass from the targeting lasers attachment thingy might be causing resonance in the carriage while the laser is moving, the extra mass might be too much for the motors, the wires (for the target lasers) might be rubbing against the toothed belt, or something else due to the extra attachment.
![]()
![]()
Experiment:
Remove the extra assembly and see if the problem persists.
Results:
No change.
-
4More experiments
Hypothesis:
Laser pulse frequency is too slow
Discussion:
The laser settings has a pulse frequency setting. Is the ragged edge due to laser pulses as the beam travels across the work?
![]()
Experiment:
Change the laser pulse settings and see if the problem changes
Results:
Don't do that.
According to research online, low-end CO2 lasers are driven by DC, and the pulse frequency is converted to an analog signal by the power supply. (At a guess, there's an RC circuit on the PS inputs that does this.)
Only high-end RF laser cutters actually use the pulse frequency setting, this value is set by the manufacturer, and shouldn't be changed.
Hypothesis:Linear bearings are worn/bad/sloppy (or just cheap).
Experiment:
Per this youtube video, manually tug on the bearings, see if there's any noticeable slop.
Results:
No noticeable slop in any of the bearings.
This is not a definitive test, it's quite possible that the bearings are sloppy in a way that's unnoticeable: the bearings could be sloppy only while moving, or the slop could be so small that a human can't detect it (and it's magnified by the beam distance).
Experiment 2:
Turn the test case 90 degrees, see if the Y-axis is as sloppy as the X-axis
Results:
The Y-axis shows exactly the same ragged edge as the X-axis. It's unlikely that the bearings all have the same wear, or have the same wear characteristics since the X-axis uses a single bearing and the Y-axis uses 2.
Still not definitive, but given the evidence the probability of this hypothesis being correct is low.
Hypothesis:Ragged edge is caused by the laser beam reflecting off of the hexagonal grid.
Experiment:
Raise the work piece. Since the laser is focused to the top surface of the material, it will be spread out by the time it hits the grid, and reflections will be diffuse and dispersed.
Results:
No change.
-
5The solution
Hypothesis:
Ragged edge is caused by vibration of the laser console.
Experiment:
Lock the wheels and place a heavy weight on the console.
Results:
No change.
Hypothesis:Air assist is not a constant flow of air, the "puffing" air causes the ragged edge.
Experiment:
Unplug the air assist.
Results:
Ragged edge disappears!
Discussion:
Color me surprised!
Okay, actually: color me astonished!
I could find no information online about this, that can't be the reason, it's too simple.
Hypothesis:
It's not the puffing of the actual air, it's the compressor drawing power for each puff, forcing the line voltage low for each puff, and this is making its way into the electronics somehow.
Experiment:
Use longer tubing to connect the air assist compressor to the laser
Discussion:
I recently replaced the 2 foot section of tubing with a 3 foot section, so that the compressor sits further away from the laser (and the same distance as the chiller). The minimum length of tubing for purchase is 25 feet, so I have an unused 22 foot section of tubing available.
Results:
Ragged edge disappears!
Discussion:
OK, so it's *actually* the puffing air that causes the problem.
This can probably be solved by putting a tank inline with the air assist. It's equivalent to using a capacitor to smooth out a DC voltage.
-
6Attempting a fix, part I
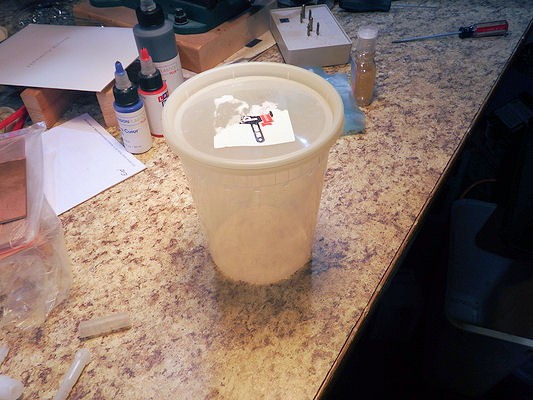
To fix the air puffing, I need the equivalent of a capacitor in the air line.
In other words, a small tank that will even out the puffs of air before they reach the laser head.
Starting with a plastic soup container and a plastic barb, I cut the barb in half using a bandsaw and glued the barb to holes cut into the lid of the container using silicone sealant:
![]()
![]()
![]()
![]()
I haven't installed this yet and already I hate it.
The barbs are floppy and not securely welded to the lid, the silicone doesn't adhere to the plastic, it looks like crap, and I'm having a bad hair day.
Stop. Take a breath. Think it through. Something will present itself...
-
7Attempting a fix, part II
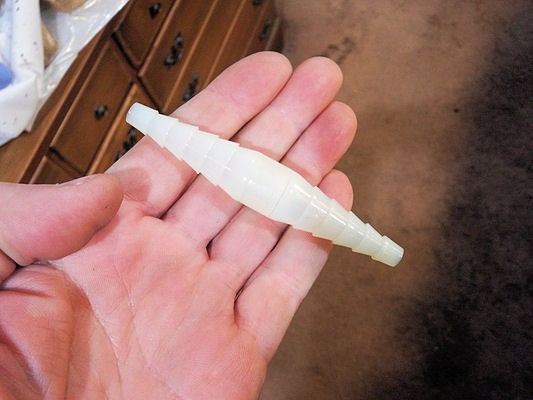
I needed something more robust than a floppy soup container, so I went to the hardware store and got a pair of press-connect air fittings.
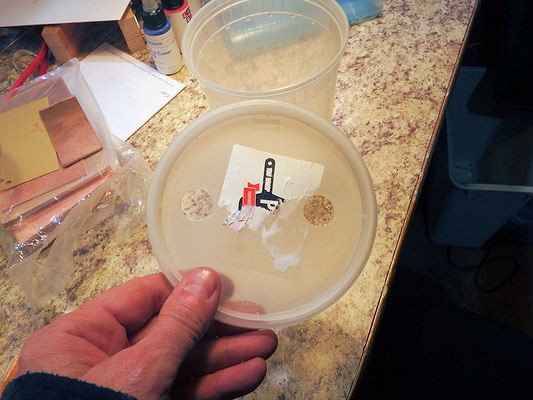
An art-supply glass bottle with a brushed steel top and plastic insert should do the trick. Cut two holes in the top and insert the press-fit fittings.
![]()
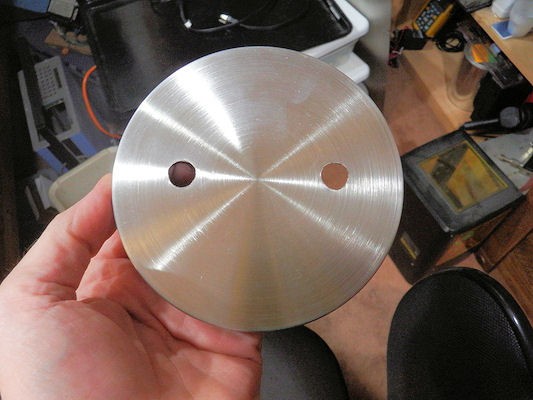
The top is thin, and there's not enough thickness for the fitting threads to grab onto. Acrylic "washers" cut from 9mm acrylic and threaded for the fittings did the trick.
![]()
![]()
I also cut washers from rubber gasket material, just to be on the safe side.
Note that the threads are 1/8-27NPT, which is a *tapered* thread and not something you'll find in a standard thread kit. I happen to have one of these, you can find them online in eBay and Amazon.
![]()
The tap states "21/64 drill" as the tap hole size, which is .328 inches, but cutting the thread hole on a laser is easy. Once you have a piece of acrylic with a thread hole, grab the acrylic with pliers and use your drill gun to thread the hole: in this particular instance, the tap is thick and beefy, it won't break under the stress of tapping acrylic.
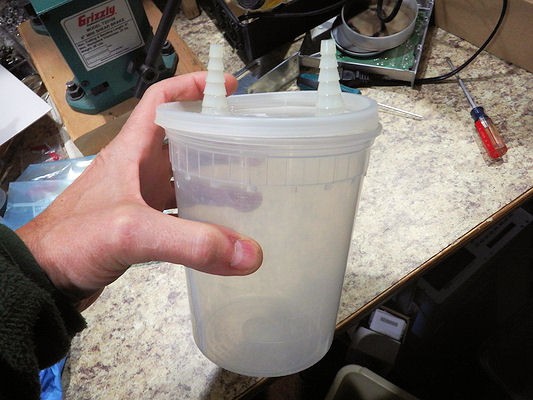
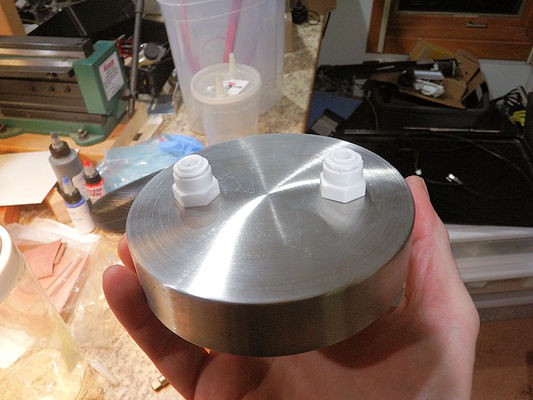
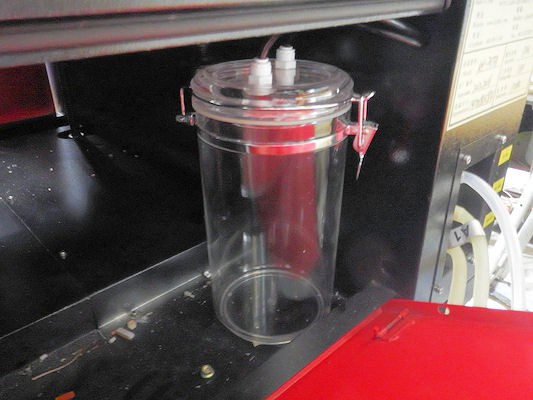
The new tank connects inline with the air assist and sits neatly in the back compartment of the laser.
![]()
![]()
Aaaaaaand... it doesn't work.
The air assist pressurizes the tank, the lid separates from the plastic inner gasket, causing the top to pop off. Sealing the inner gasket to the lid using epoxy and silicone sealant does not solve the issue, because the inner gasket and the metal lid are slippery and the glue won't stick.
Assuming 3 PSI from the air assist compressor, if the lid is 4" diameter then the lid is 12 square inches x 3 PSI, which is 36 lbs of force pushing the lid up and off of the internal gasket. Probably more, since the compressor is probably closer to 5 PSI.
Back to the drawing board.
-
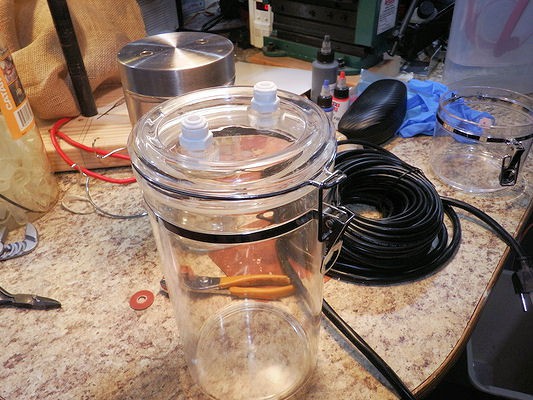
8OK Rocky, this time fer sure!
Rinse and repeat.
I had an actual air tight container kicking around. I got it from the Salvation Army surplus store just because it looked like it might be useful for vacuum experiments.
Drill 2 holes in the lid, mount the air connectors, install in laser, and test.
![]()
![]()
Aaaaaand... it works. Air assist no longer feels "puffy" (via finger held under laser head), and test cuts no longer show the ragged edge. Victory has been achieved.
![]()
Laser cutter ragged edge problem
Using scientific inquiry to diagnose and fix a laser cutter problem


Discussions
Become a Hackaday.io Member
Create an account to leave a comment. Already have an account? Log In.