Close
0%
0%

PanoBot

360 degree panoramic video on an omnidirectional chasis, controlled in VR.

Similar projects worth following
This project uses a cheap esp32cam board, fancy optics and a hacked toy to create an immersive telepresence robot controlled in a virtual reality user interface or 2D touch controls.

A little background...

Around the year 2000, I came across CMU's Palm Pilot Robot Kit, a really cool looking omni-directional robot driven by a palm pilot. It was mind blowing to a middle schooler and a little beyond my means. About the same time, there was a fad around Quicktime QTVR panoramas, and newfangled immersive videos thanks to fancy optics and a little trig on a computer powerful enough. My pubescent brain wanted to put the two together for a telepresence robot.

Fast forward a couple decades and the electronics are cheaper, I have more money, and the programming skills to match.

So the PanoBot is born.

Control and streaming is from an ESP32 camera board, Panoramic video is done with fancy optics.

On the software side, the microcontroller is programmed in C++ running a small webserver with websockets. The panorama is transmitted as raw video 720x720 resolution, a decent tradeoff between framerate and video quality. **EDIT** Now streaming in 1024x1024 in the latest software version.

The website uses javascript, WebXR and webGL shaders to de-warp the image and render the scene in 3D for VR mode, and simple javascript and canvas for 2D touch control mode.

VR viewing is through my modified Samsung Gear VR headset or through an Oculus Quest 2. In VR mode, control is with either an xbox controller or Oculus touch controls.

A few gripes:

I'm pissed with Google. They abandoned Google Daydream and all of their support for WebXR on mobile. So full VR content in Chrome on Android is buggy at best. On my Pixel, the left and right images are off center because they don't account for the camera notch. You'll see what I mean in the video. AND their site for creating a Google Cardboard headset is offline. Someone didn't maintain their firebase instance!

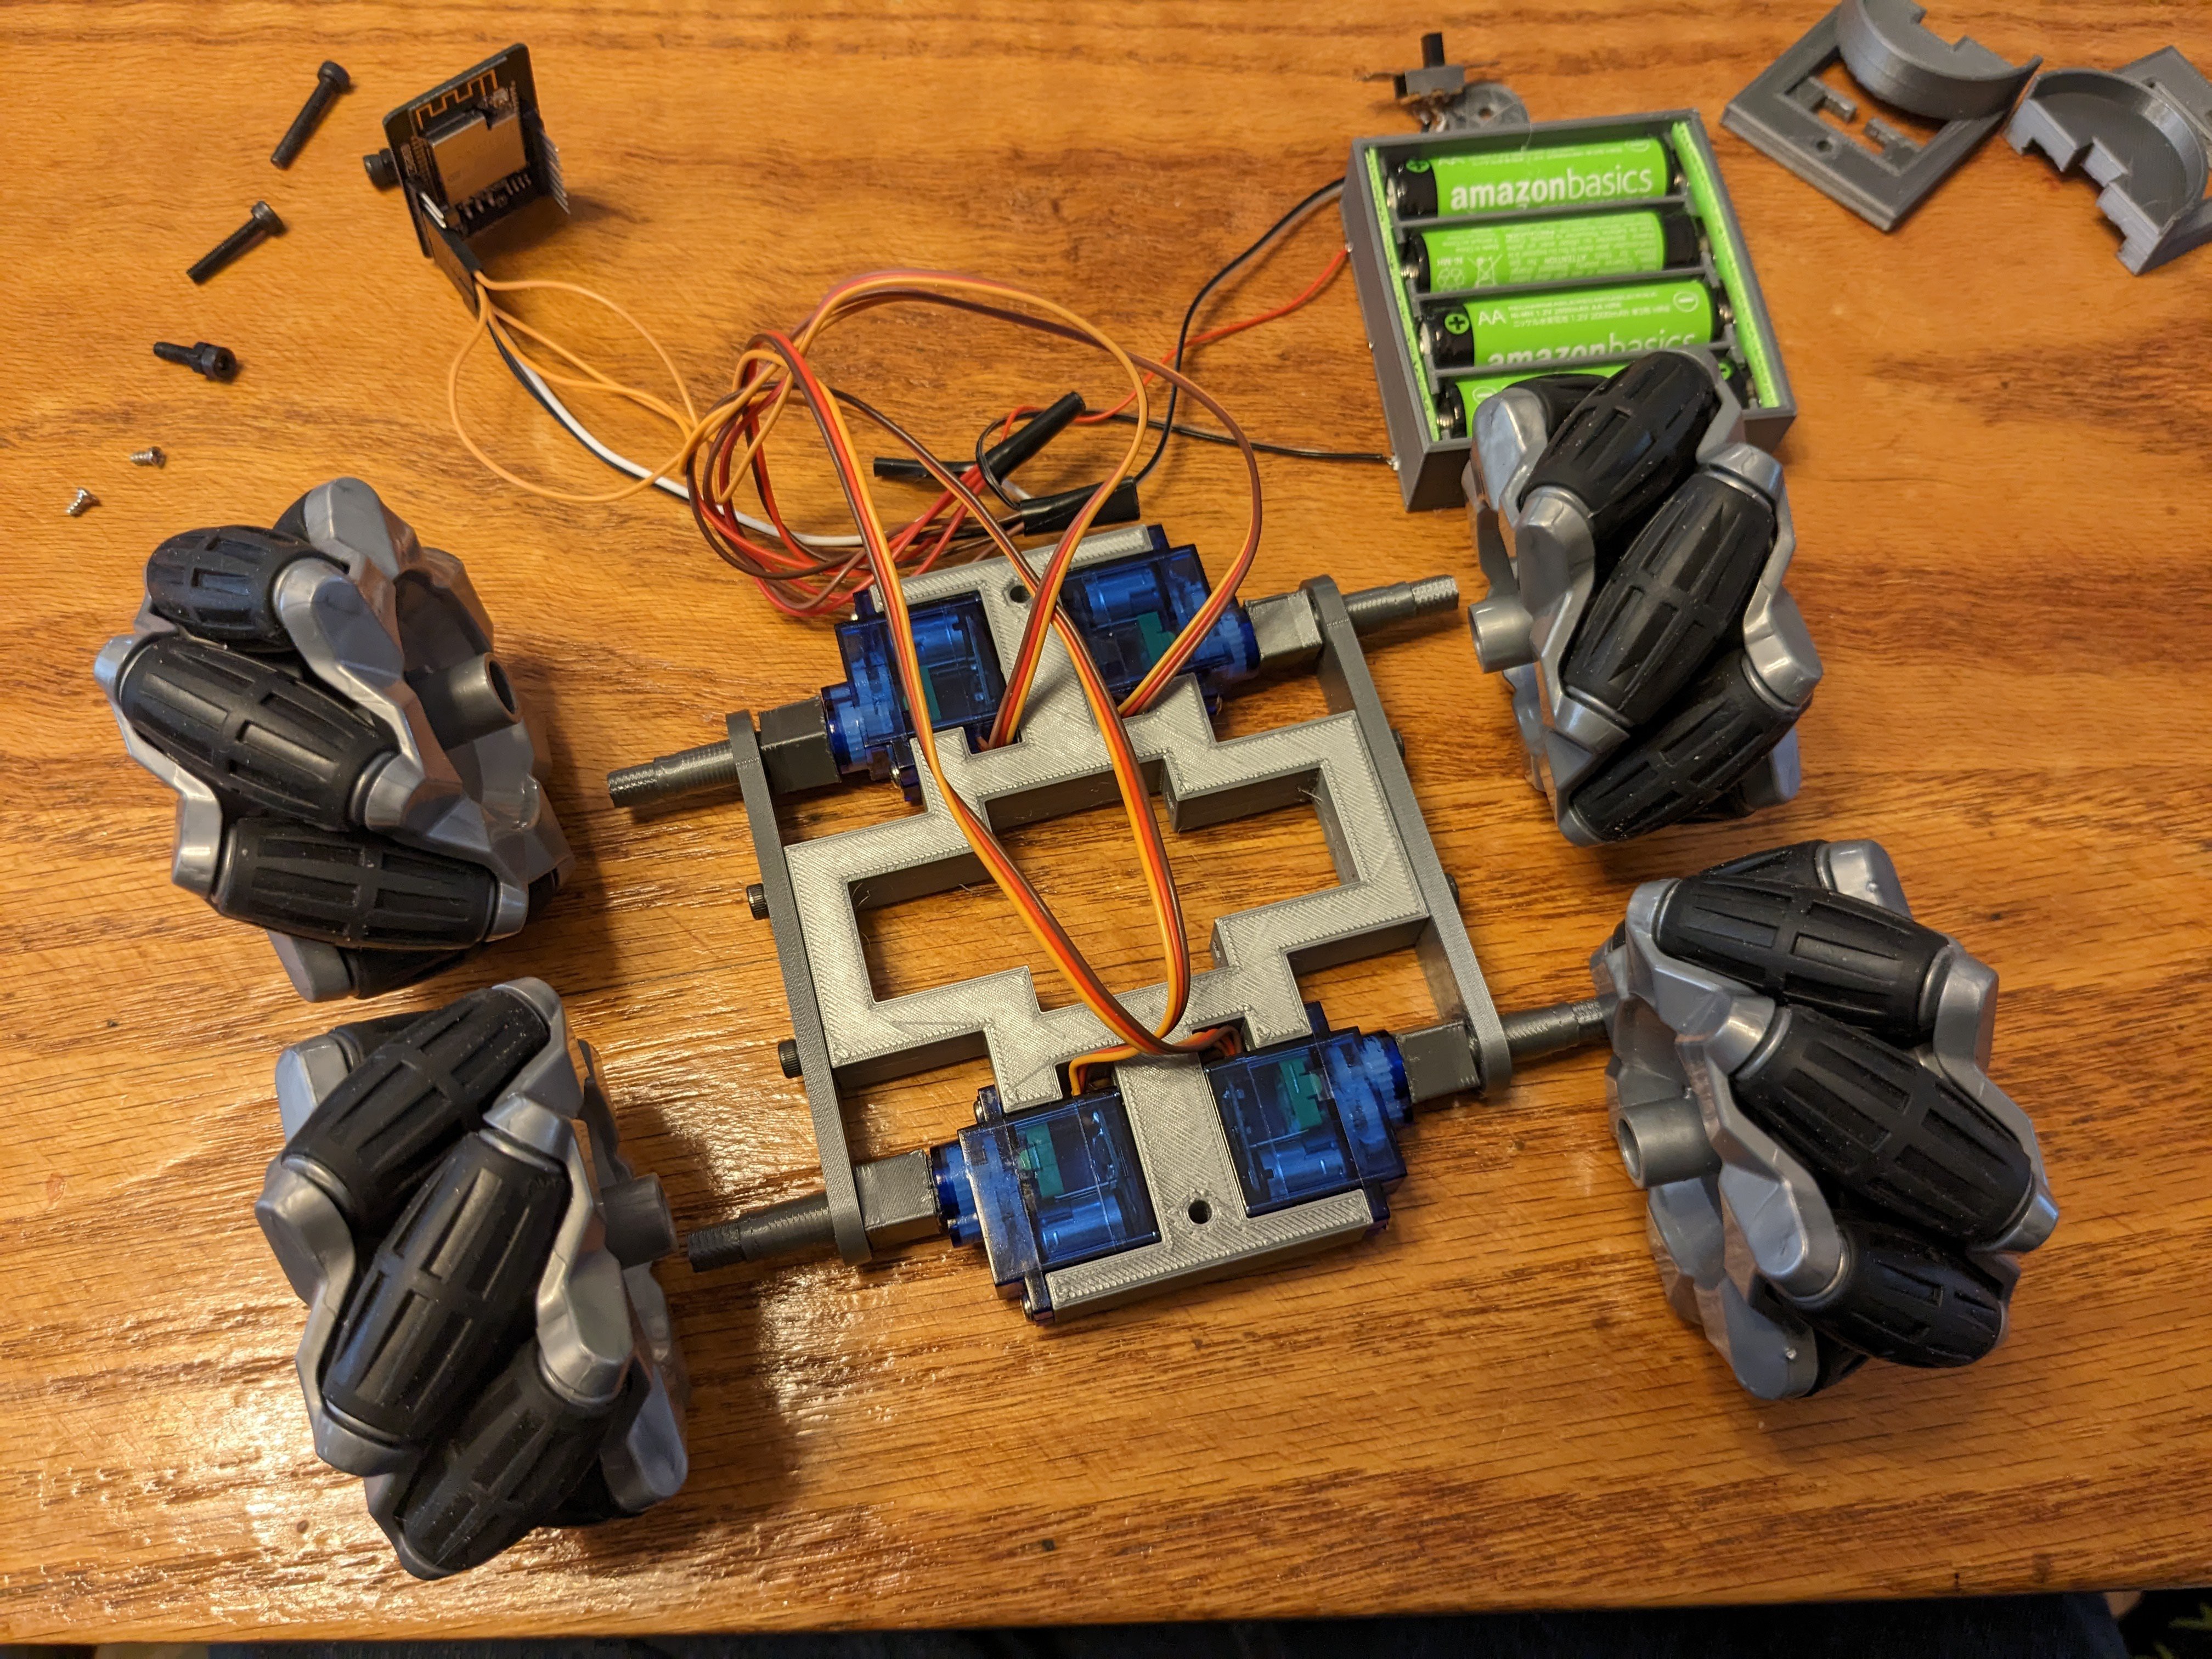
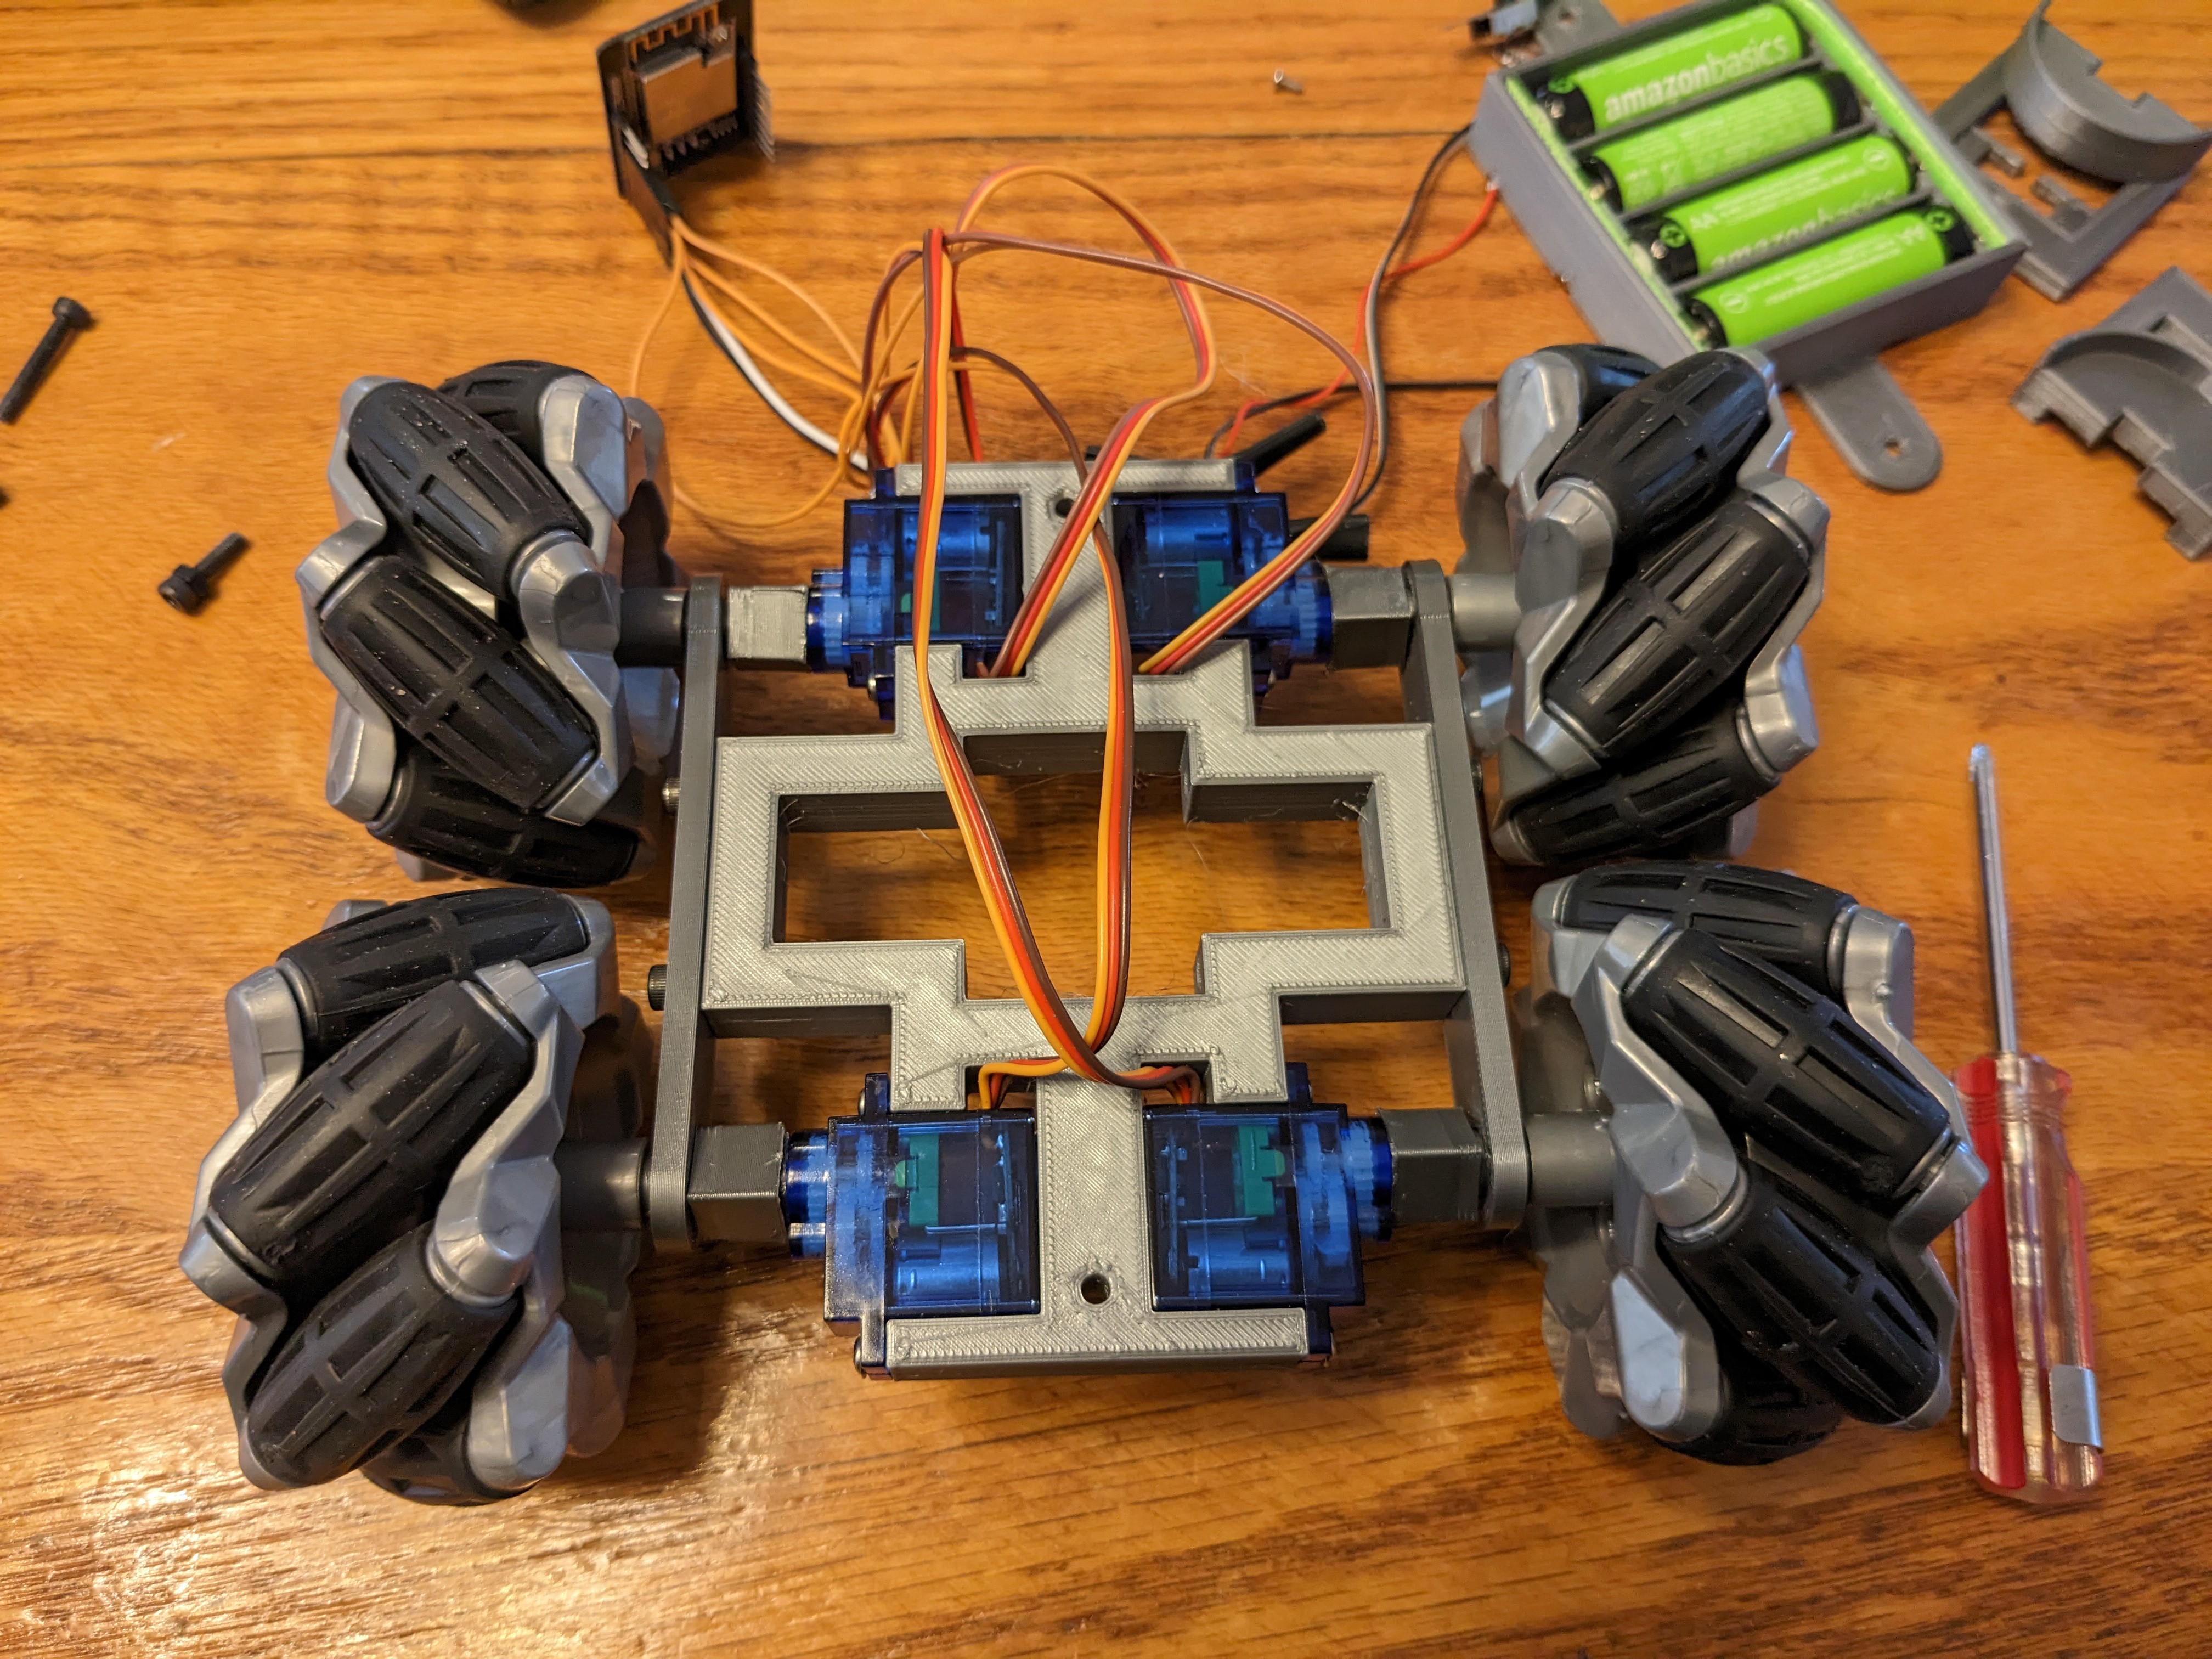
Anyway, the instructions are an afterthought. The assembly photos are of re-assembly so my kids can feel like they built it.

Here's some super crappy demo videos:

Version 1, VR mode in Cardboard, controlled with xbox controller.

Latest software version, running in Oculus Quest browser, controlled with Oculus touch controllers.
servo chasis v2.FCStd

Updated CAD design. Lens holder now has holes for M3 screws to adjust lens placement and orientation.

fcstd - 1.15 MB - 12/30/2022 at 05:16

Download

vrBot3.7z

Final code for this version of PanoBot. VR mode works in Quest and Google Cardboard. 2D mode also works. For VR mode, navigate to panobot.local/vr.html (use the IP address in Quest, since mDNS isn;t supported)

x-7z-compressed - 10.01 MB - 12/30/2022 at 05:11

Download

vrBot.7z

Source files for ESP32. VR mode is currently half working. Update forthcoming. 2D mode works again!

x-7z-compressed - 10.04 MB - 12/27/2022 at 05:51

Download

servo chasis v1.FCStd

CAD design files for the chasis. Print files will be uploaded to Printables.com soon

fcstd - 1.07 MB - 12/26/2022 at 05:10

Download

View all 8 components

  • I didn't win.

    joe5700501/17/2023 at 00:05 0 comments

    At least I got front page. Anyway, if you like my project, I'd really appreciate it if you could head to my Printables page, like the design, and download the print files. Enough downloads and likes will get me more filament for my next project.

  • Postmortem and future plans

    joe5700512/30/2022 at 05:08 0 comments

    This didn't quite turn out how I had hoped. The robot chasis turned out far better than I expected, but the video leaves too much to be desired. I like the VR view, but the resolution is just plain crap and barely useable. It looks far worse in person than it does in the videos, due to Quest 2's screen recording weirdness. My plan is to keep the chasis, but redo the camera setup. I'm going to ditch the panorama lens. Back when lens-based panorama videos came out, expensive lenses were still cheaper than having more than one camera, and easier to manage. That's not true anymore. Since each esp32cam is only $8.00, and they can only stream at resolutions too low for good panoramas, I'm going to switch to multiple cameras in a circle.

    I'll measure the view angle of the cameras and buy enough to get a full 360. I'll have one set up as the webserver and command and control for the others. I may have each camera have its own websocket connection to the webpage.

    As to the VR code, that'll stay largely the same, but I can lose the shader. I'll just have the panorama view be multiple cylinder segments (easy to do in A-Frame.js) and crop the textures in-memory using offsets. It'll be way easier.

    As to the panorama lens, it won't go to waste. There's a neat navigation algorithm that uses single-pixel height panoramas and it will very likely fit in the RAM of an ESP32. And I've been itching to give my roomba a lobotomy.

  • Finalized for now...

    joe5700512/30/2022 at 04:48 0 comments

    I'm calling this done for now. I'm not satisfied with the stream quality. I made a few final tweaks to increase the resolution without sacrificing framerate. As promised, here's some demos of using it in Oculus Quest. But before we get to that, more complaints! Screen recording in Quest is janky as hell! I couldn't record more than two minutes or it crashes and losing the video I recorded! So after a few attempts, here's what I could manage...

    This video demonstrates calibrating the panorama stream in VR. Note that the panorama gets correctly calibrated, and in my headset it looks correct, however the screen recorder captures it weird. It's doing something odd to the WebGL textures that shows up in the recording, but not in the actual headset view. But it is what it is.

    In the second video, it just continues where the previous left off.. I realized I didn't give a very good view of the virtual vehicle, so this one opens with that.

  • Close to the finish!

    joe5700512/28/2022 at 15:21 0 comments

    I've gotten the old control scheme to coexist with the new Oculus touch controls and I've added the 2d touch control mode. The last thing I have to do is figure out how to force a high resolution texture on my shader in VR mode. Right now it shows the panorama at an unacceptably low resolution. And A-Frame's documentation on shader textures is dismal. But the 2D mode isn't using my shader, it's using plain old inefficient JavaScript and canvas, so it's full resolution. Upload of latest version later today. Hopeful I'll have the resolution problem fixed by then. Stay tuned.

  • Boxing Day update

    joe5700512/27/2022 at 05:44 0 comments

    Debugging VR for Occulus Quest is a bit annoying. Anyway, I got video streaming working in Quest VR and the driving controls are now working. Now I just need to figure out a convenient way to adjust the panorama dimensions with the Quest touch controllers. Also, I finished the 2D touch controls. I'll upload the updated code for that tomorrow. For now, enjoy this new demo of 2D mode, as I (poorly) drift around Flat Eric.

  • Christmas Update

    joe5700512/26/2022 at 05:16 0 comments

    As this is an ongoing project, I'm getting ready to submit for the prize as is. In its current state, it'll work with a google cardboard viewer and xbox controller. I will be updating the code over the next few days to improve the web frontend. Speciffically, I'll be adding a mobile 2D touch control mode, as well as add support for Quest 2. It does not work in the Quest 2 web browser in VR mode. For some reason the main thread pauses when it enters VR, so the textures never update with the video feed and the controls do nothing as I haven't figured out the Quest controller mappings. Stay tuned...

View all 6 project logs

  • 1
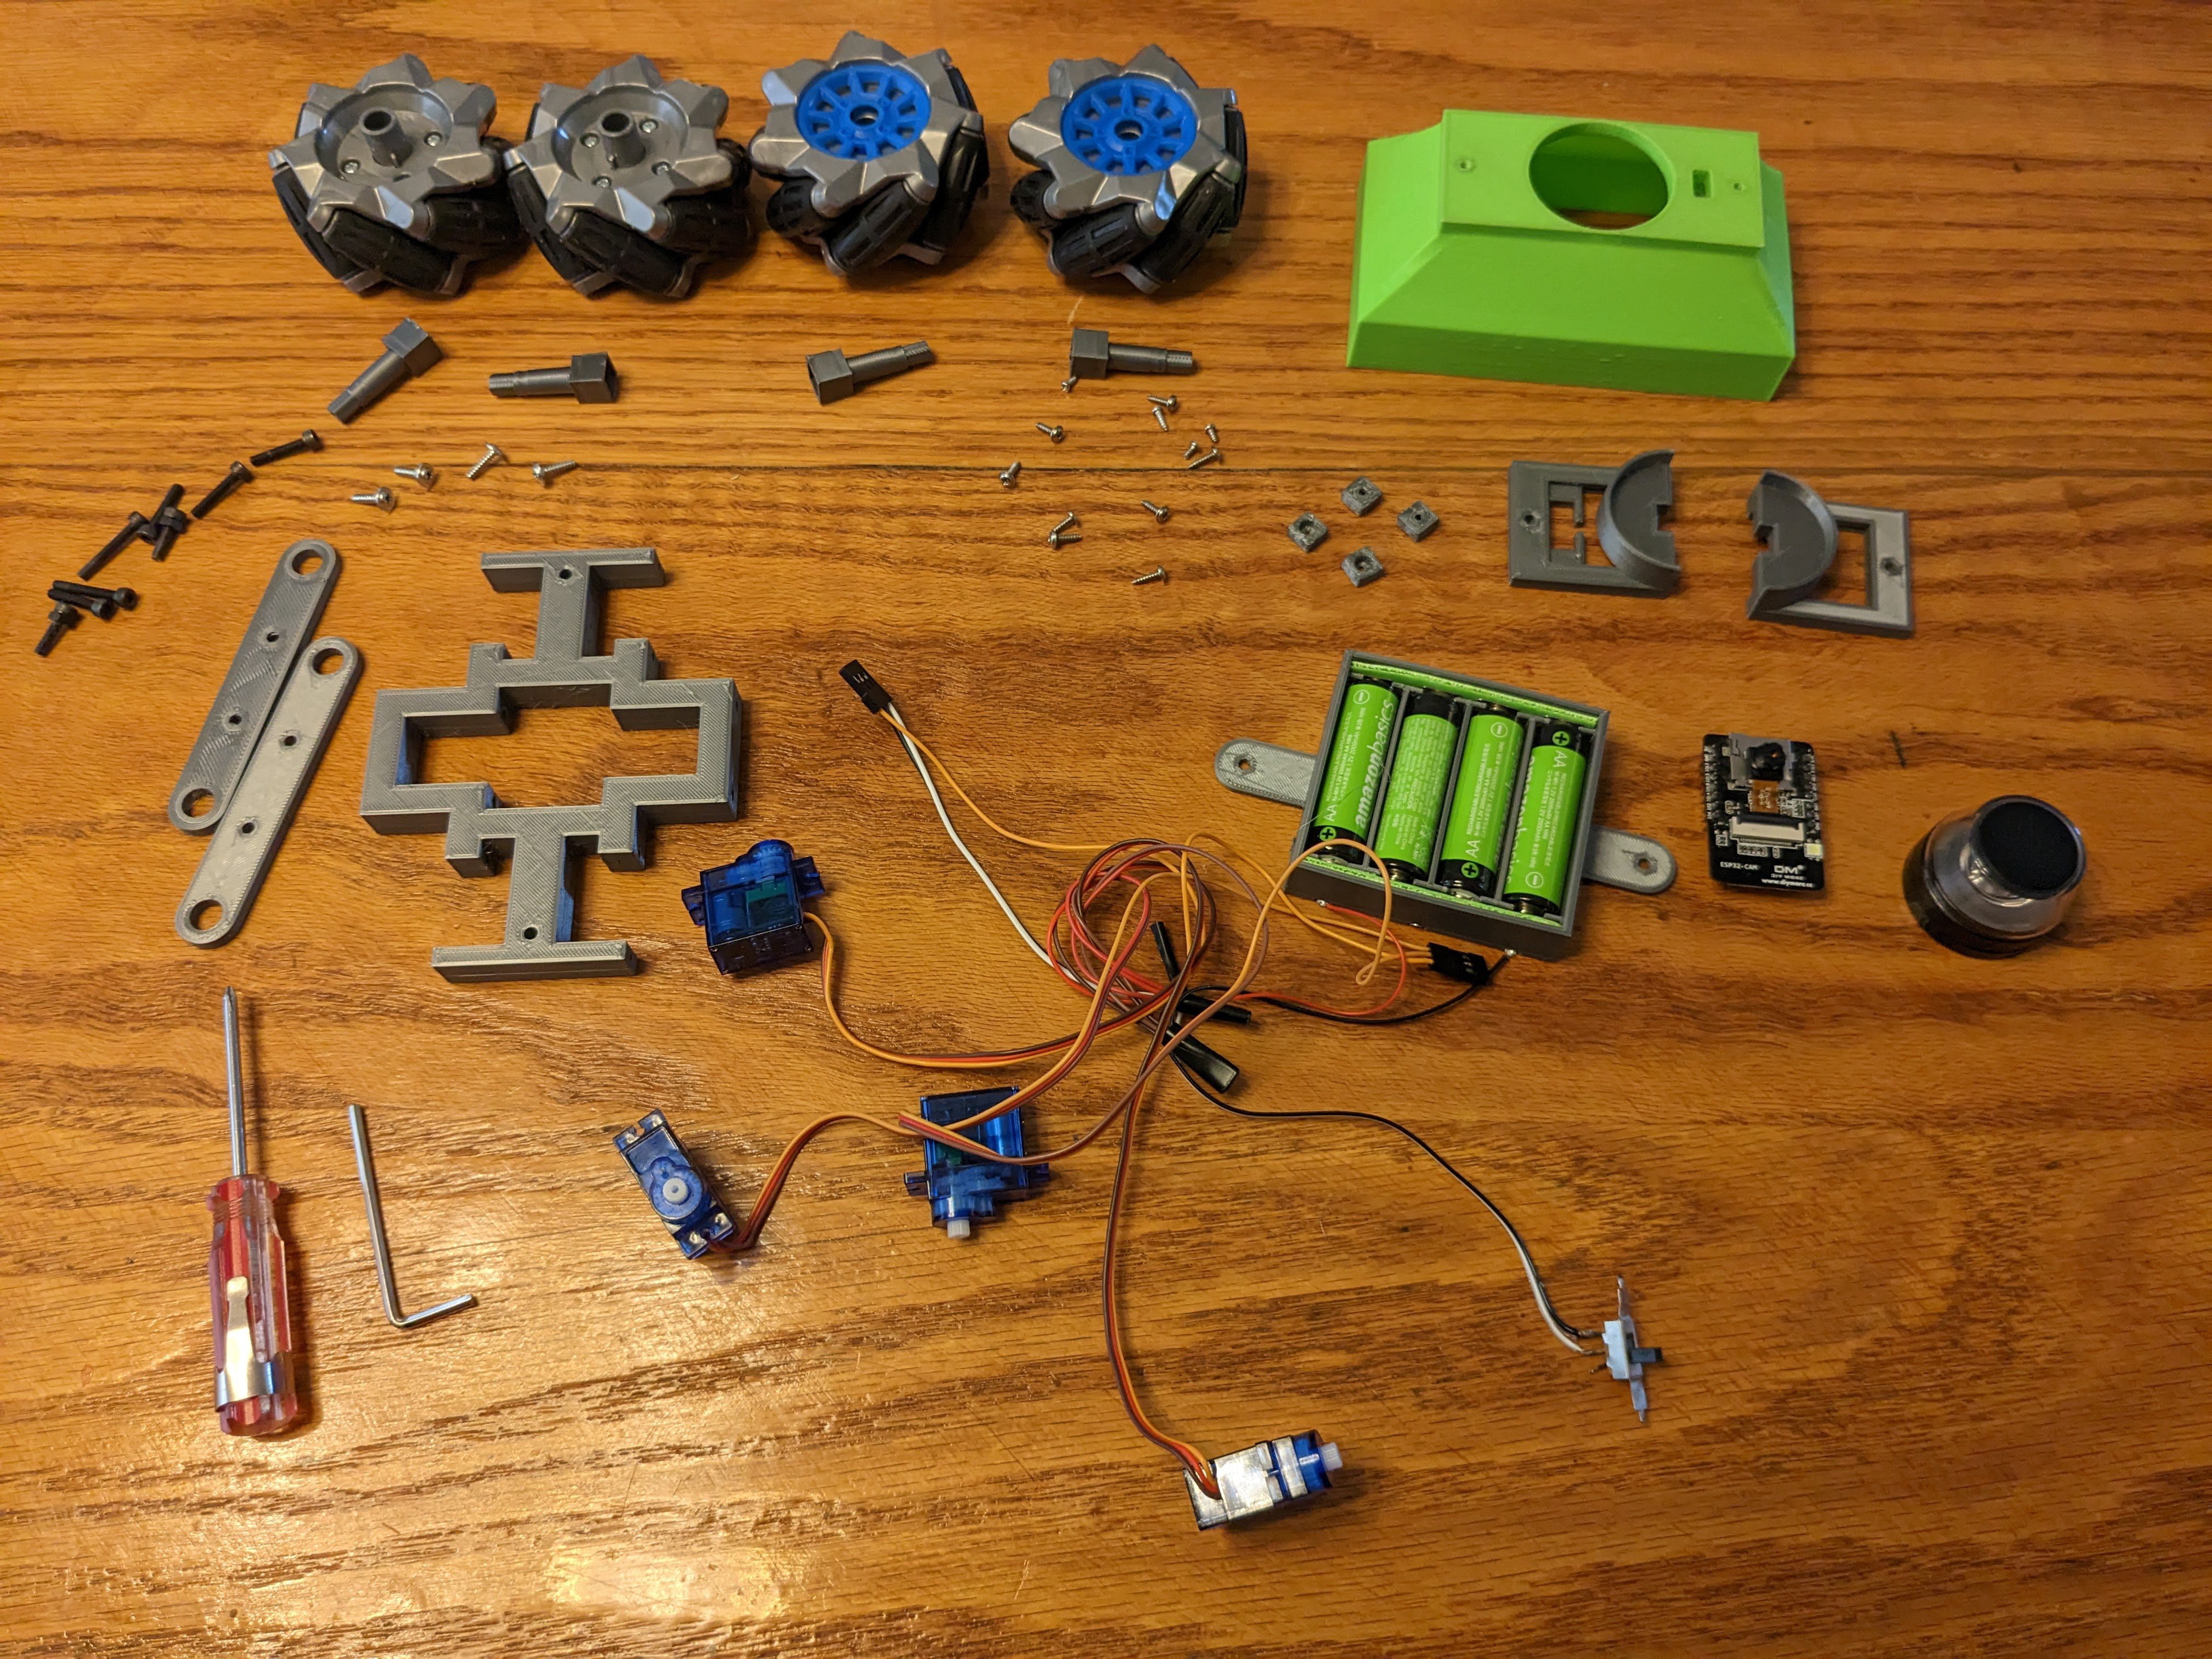
    Print and gather parts

    Read the rest of the instructions before printing so you have an idea which parts may need adjusting for tolerances. 

    Print files on Printables.com or just export from the FreeCAD source file.

    Print the following:

    • 1x Battery holder
    • 1x Cam holder A
    • 1x Cam holder B
    • 1x Chasis
    • 4x servo shaft square
    • 4x wheel shaft coupling
    • 1x top cover
    • 2x wheel holder bar

    I printed most in PETG, except the top cover is ABS.

  • 2
    Assembly: Mount the servos

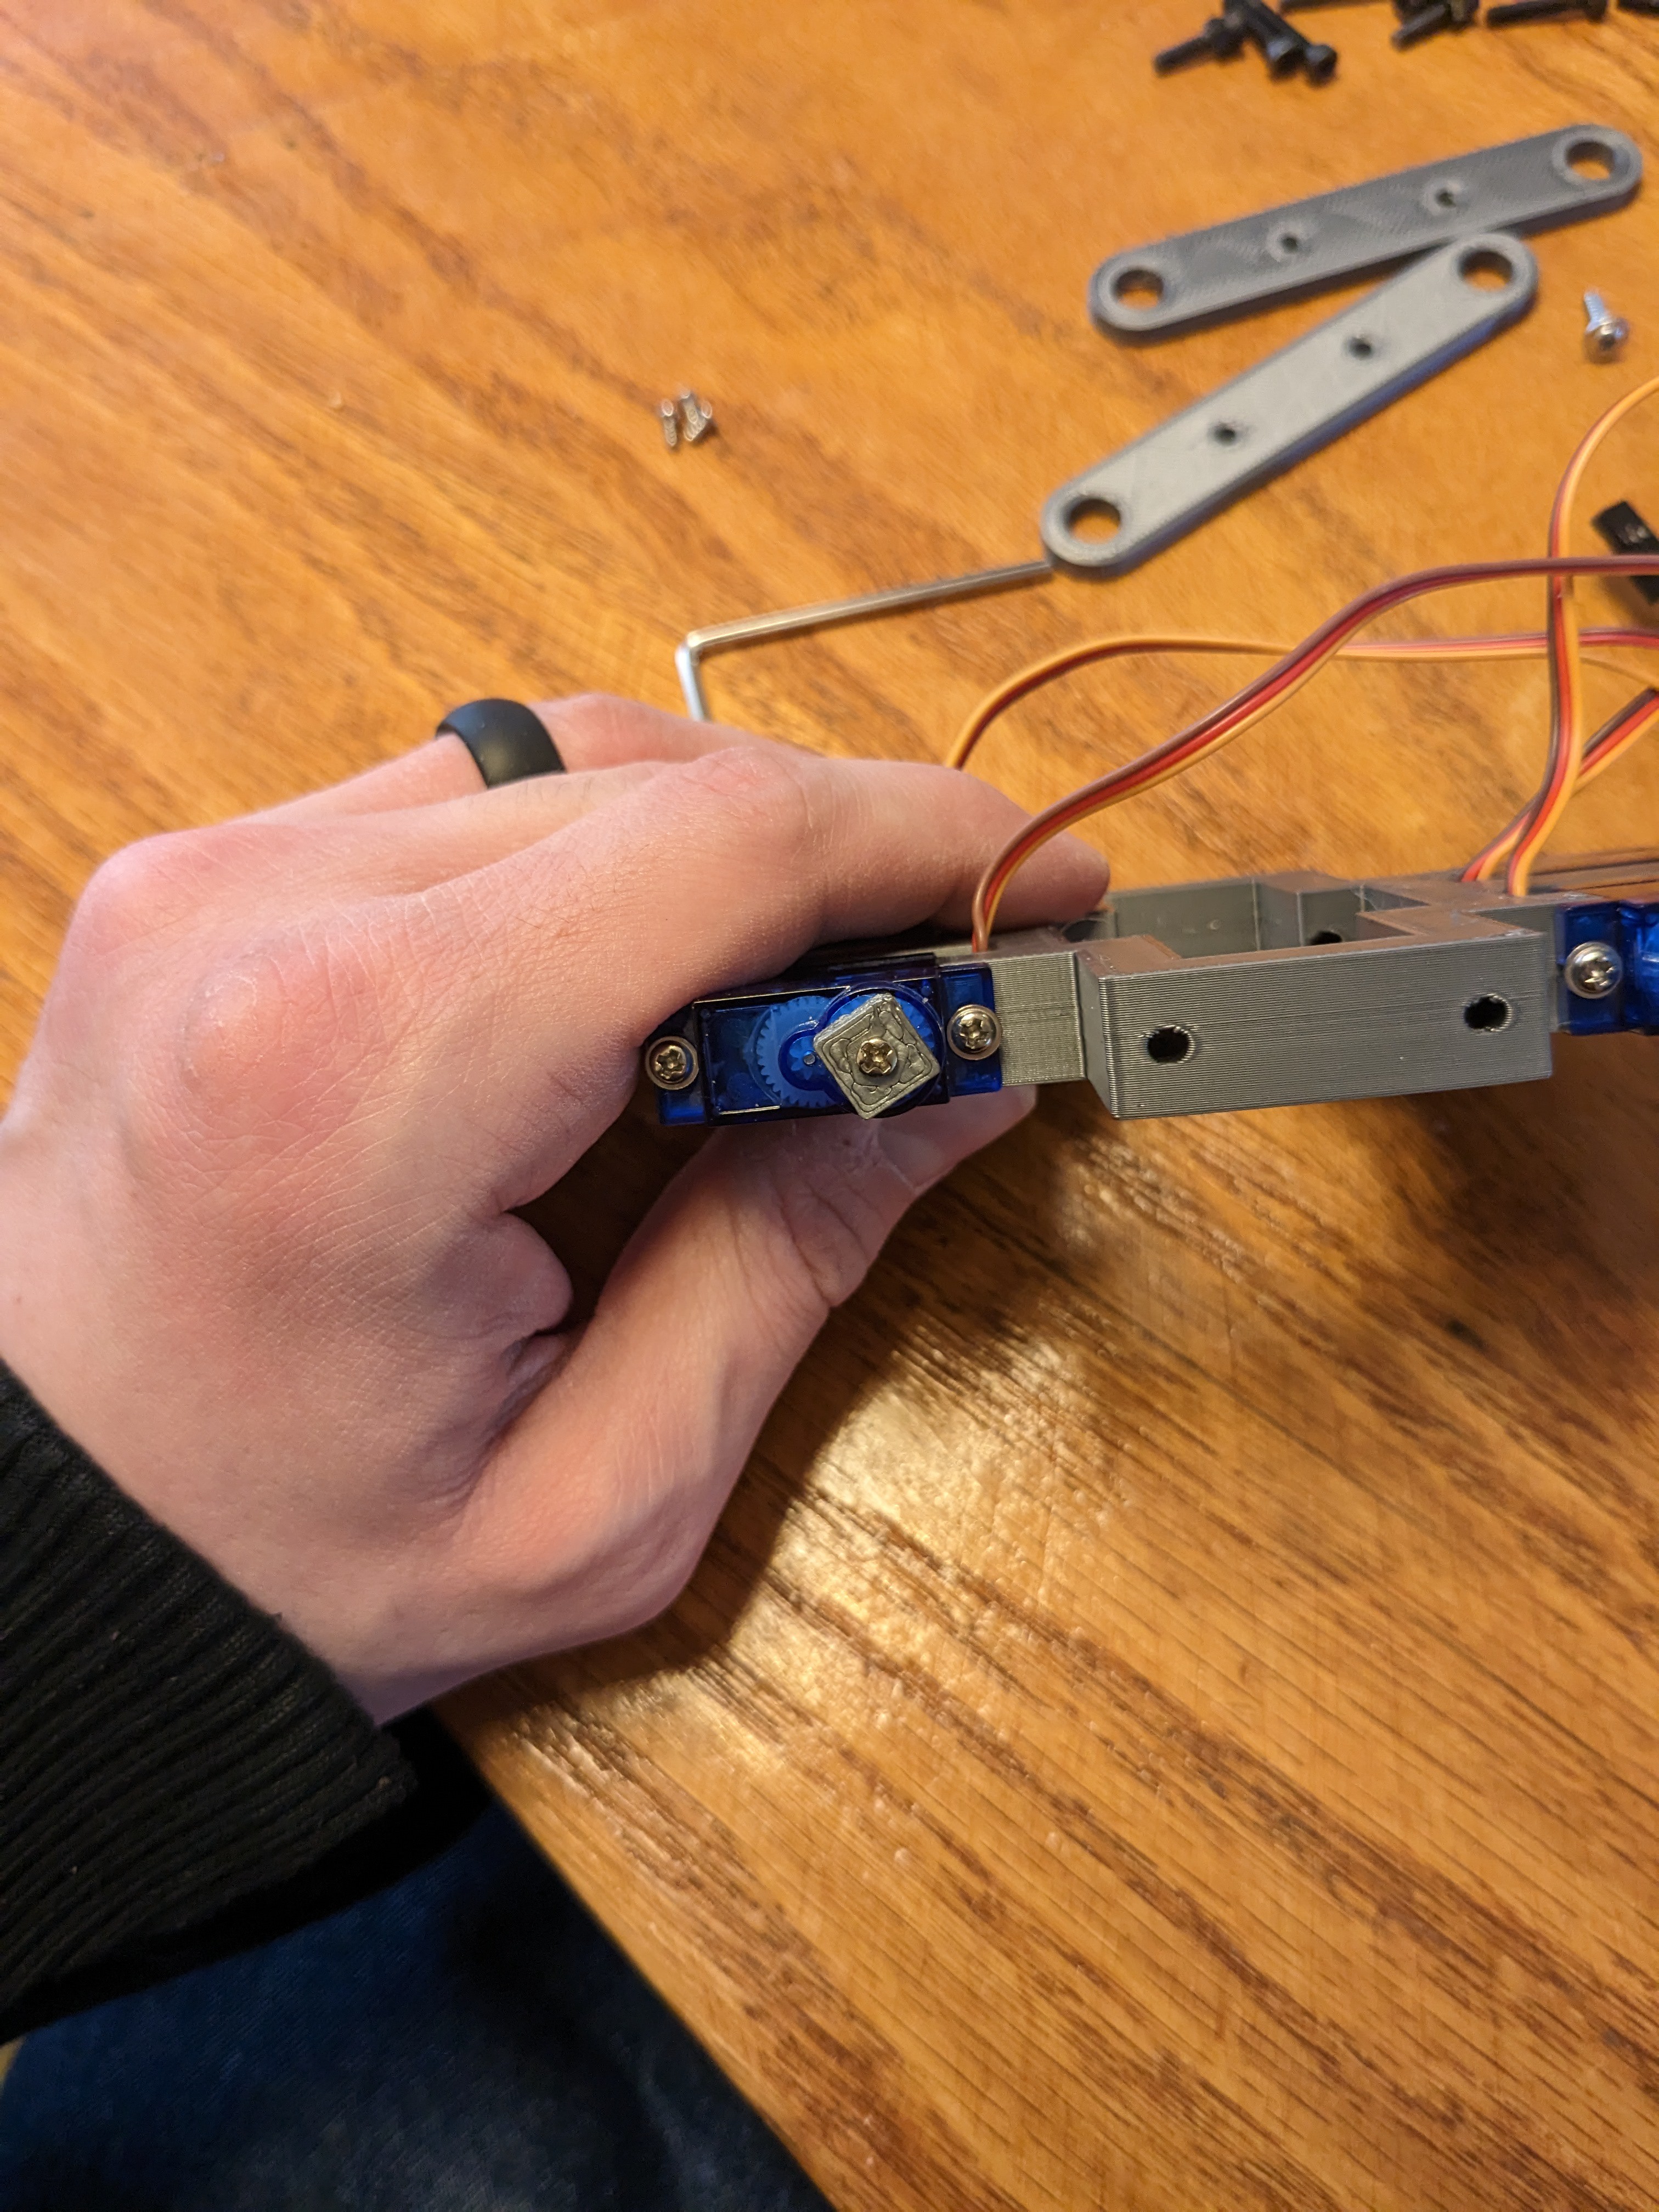
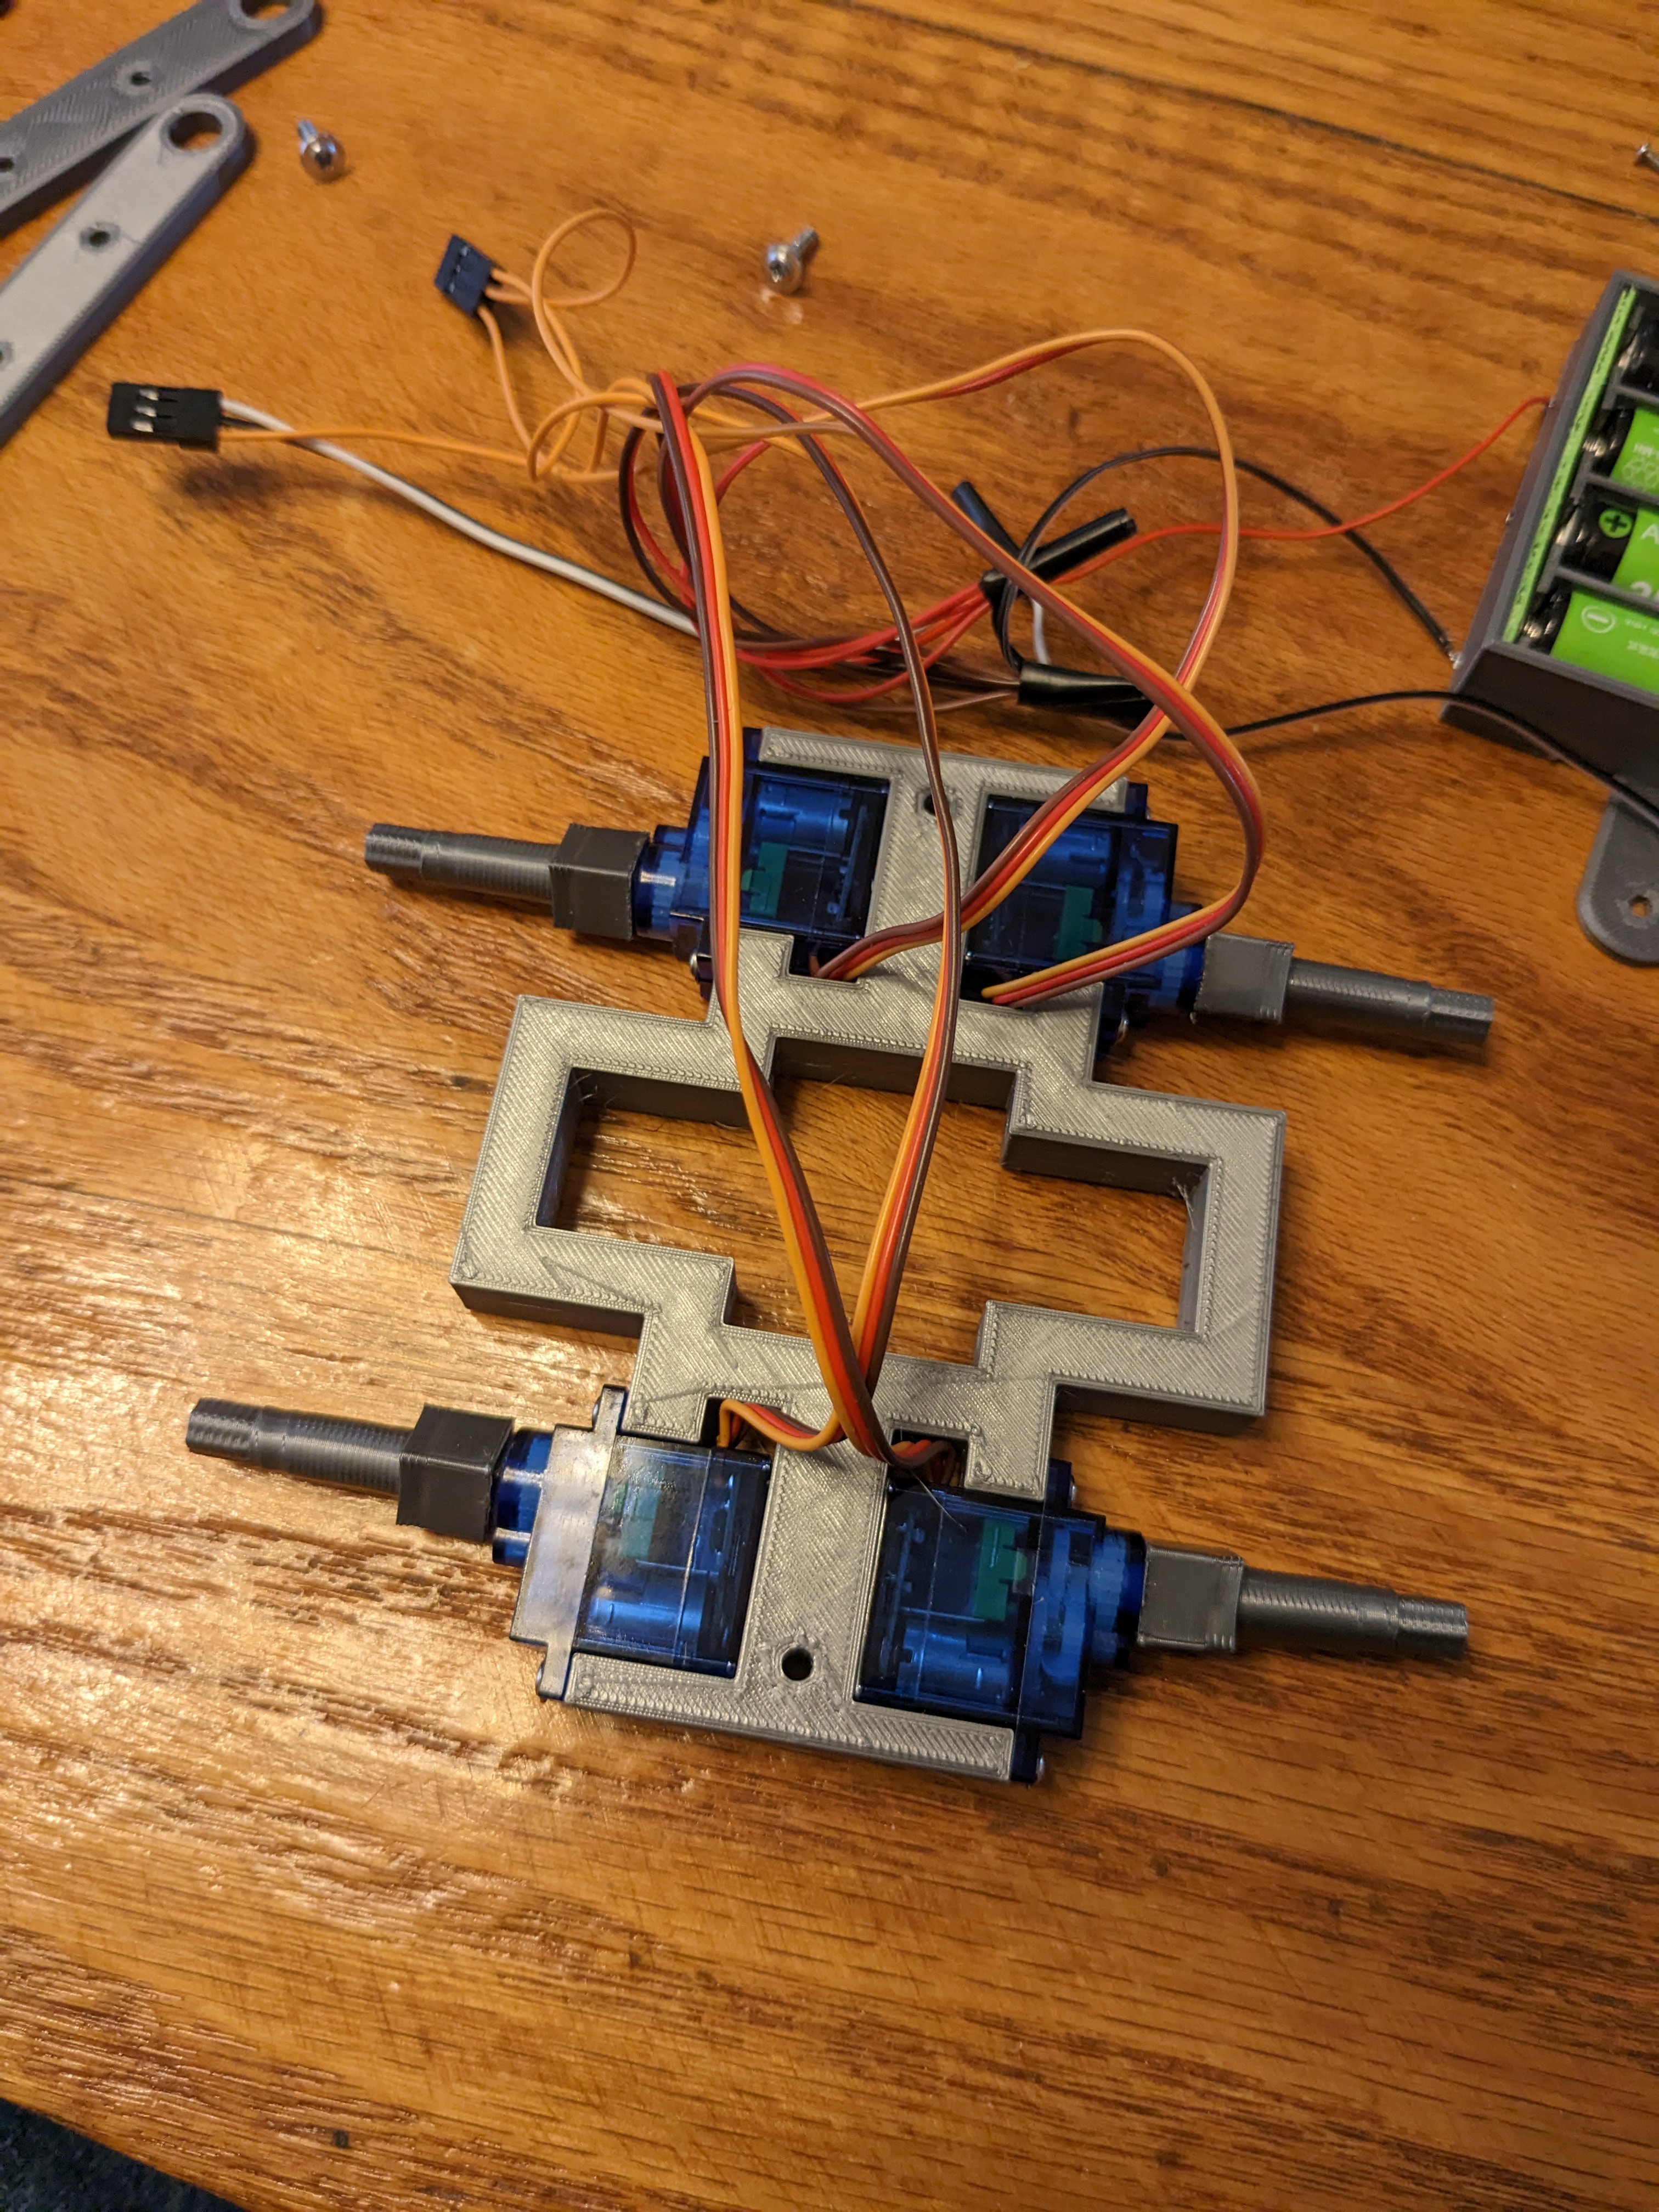
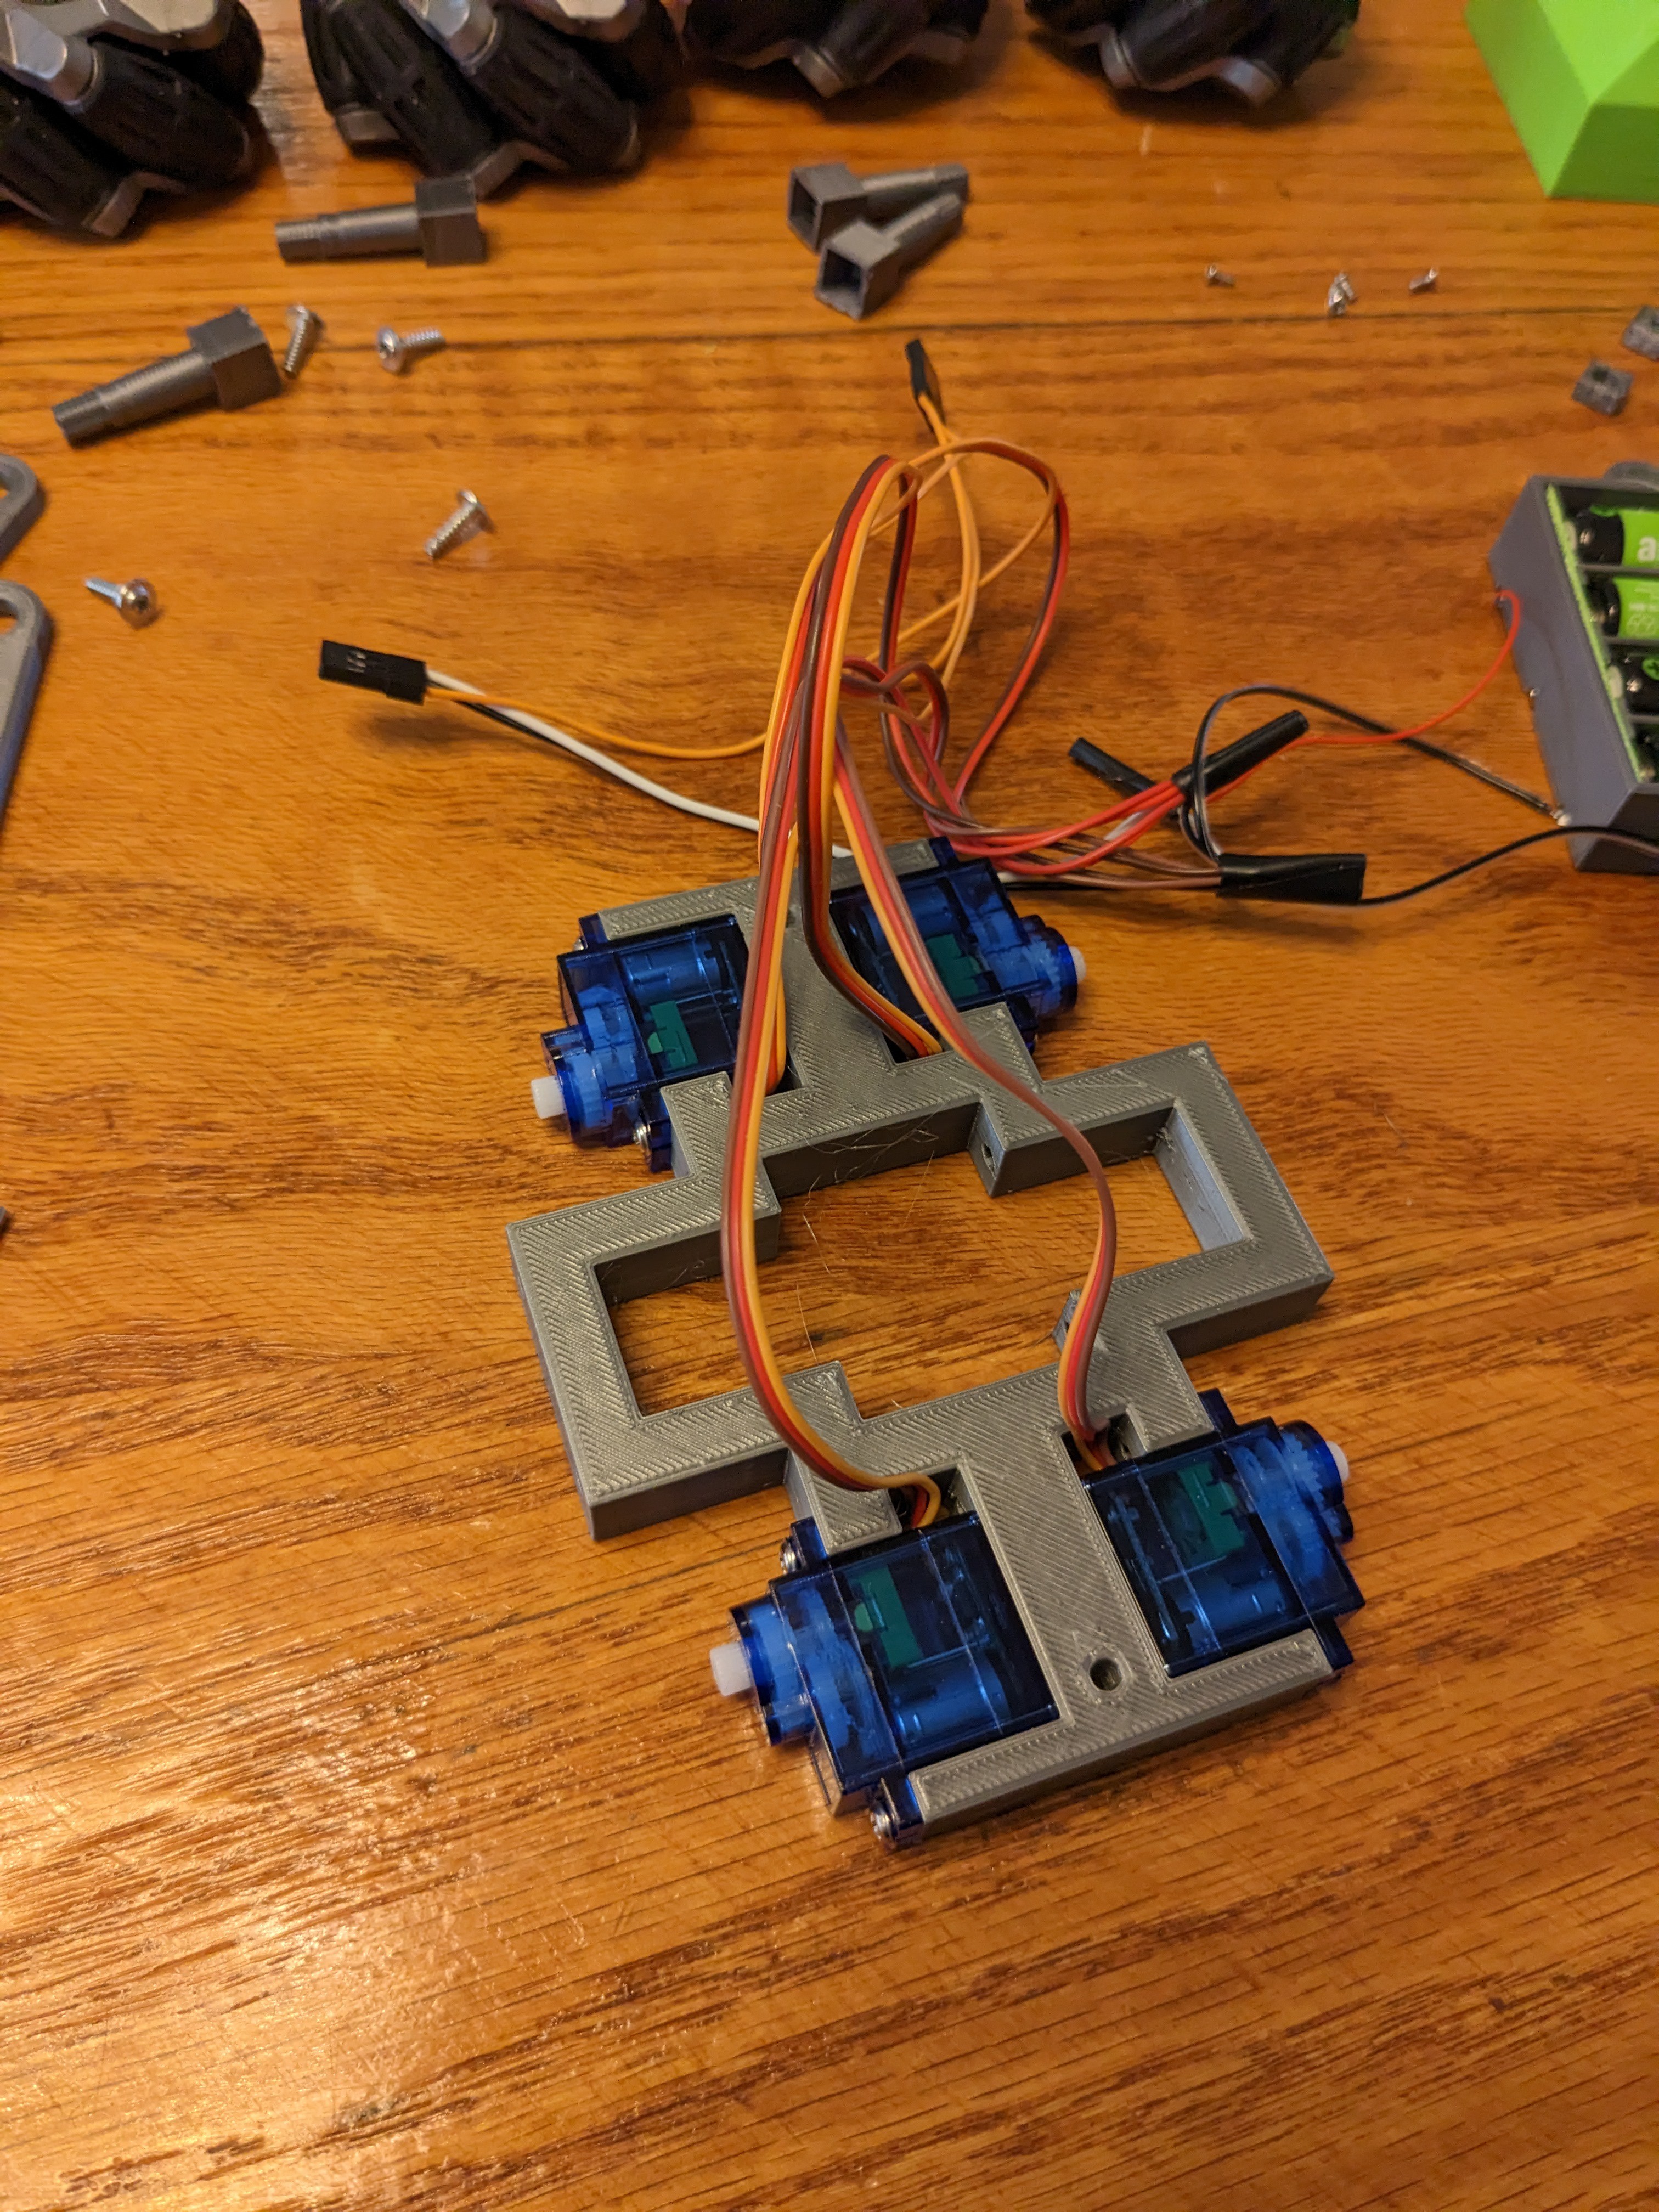
    Mount the servos like so. Note the wire paths.

    Hopefully they came with mounting screws. The screws must be a tight fit in the holes.

    Put the servo shaft squares on the servo shafts. They should be a tight fit. Hold them in place with a shaft screw.

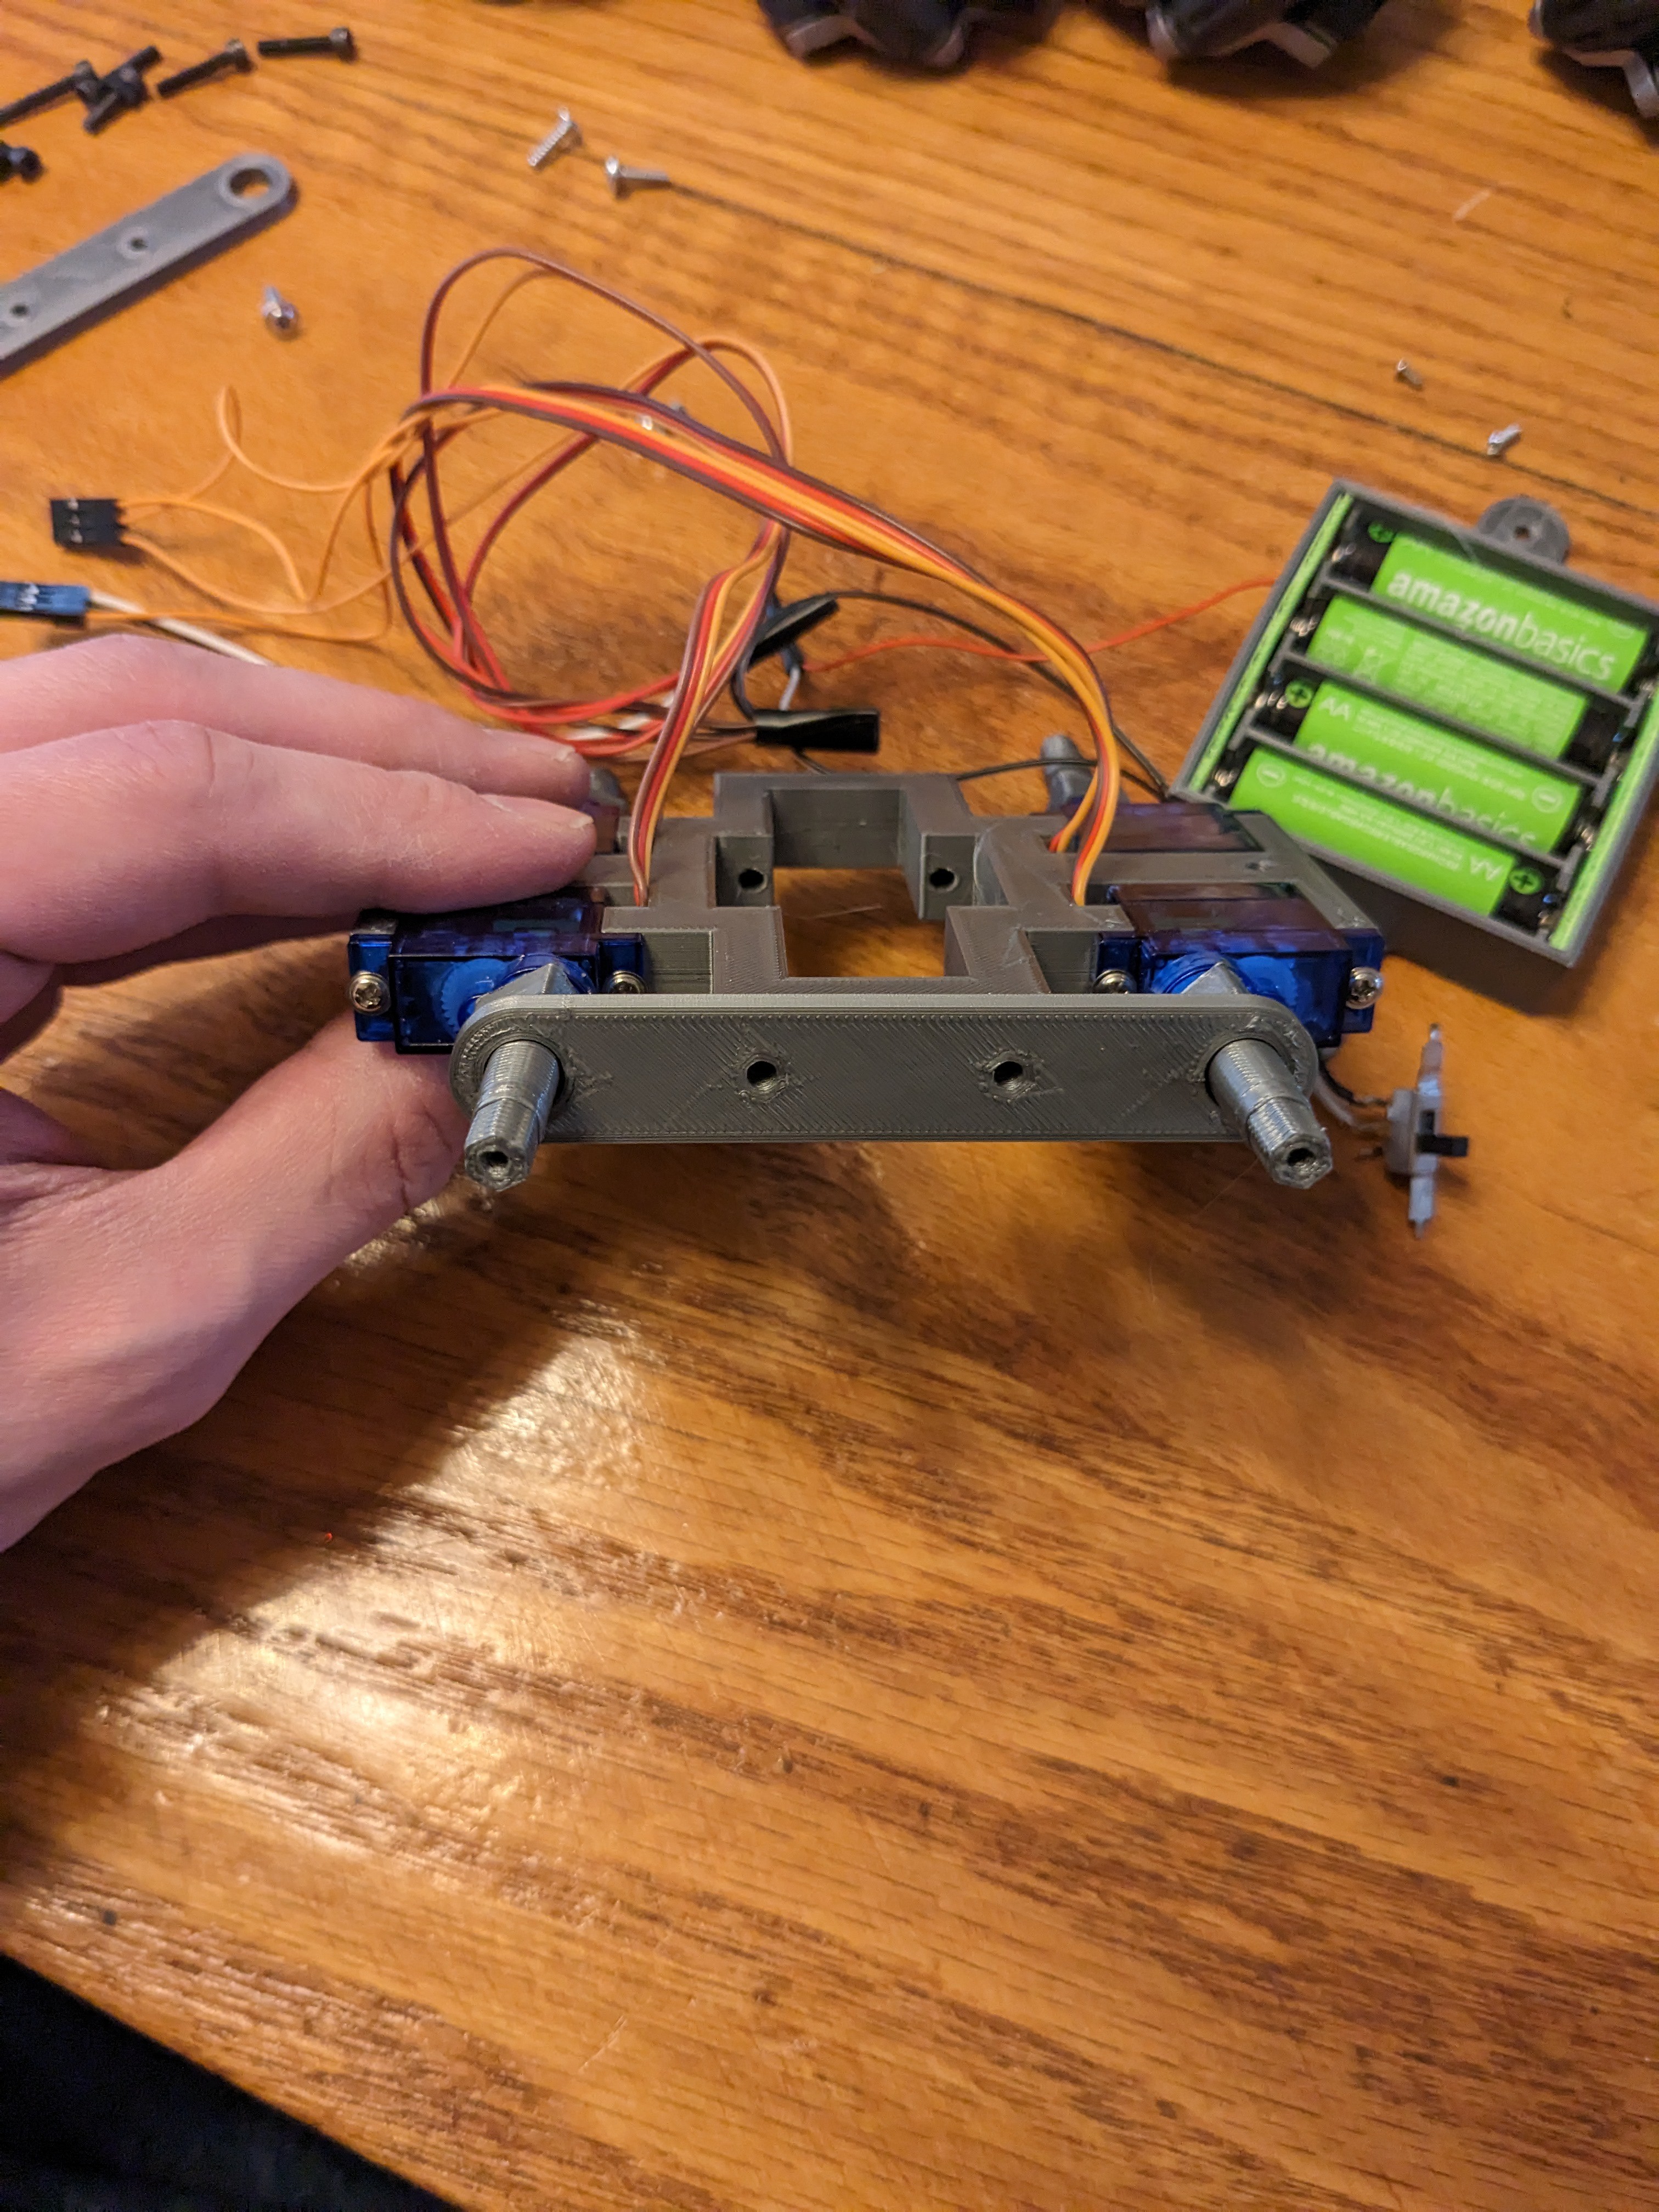
    Place the wheel shaft couplings on the shaft squares. They shouldn't be a tight fit, but it's not bad if they are.

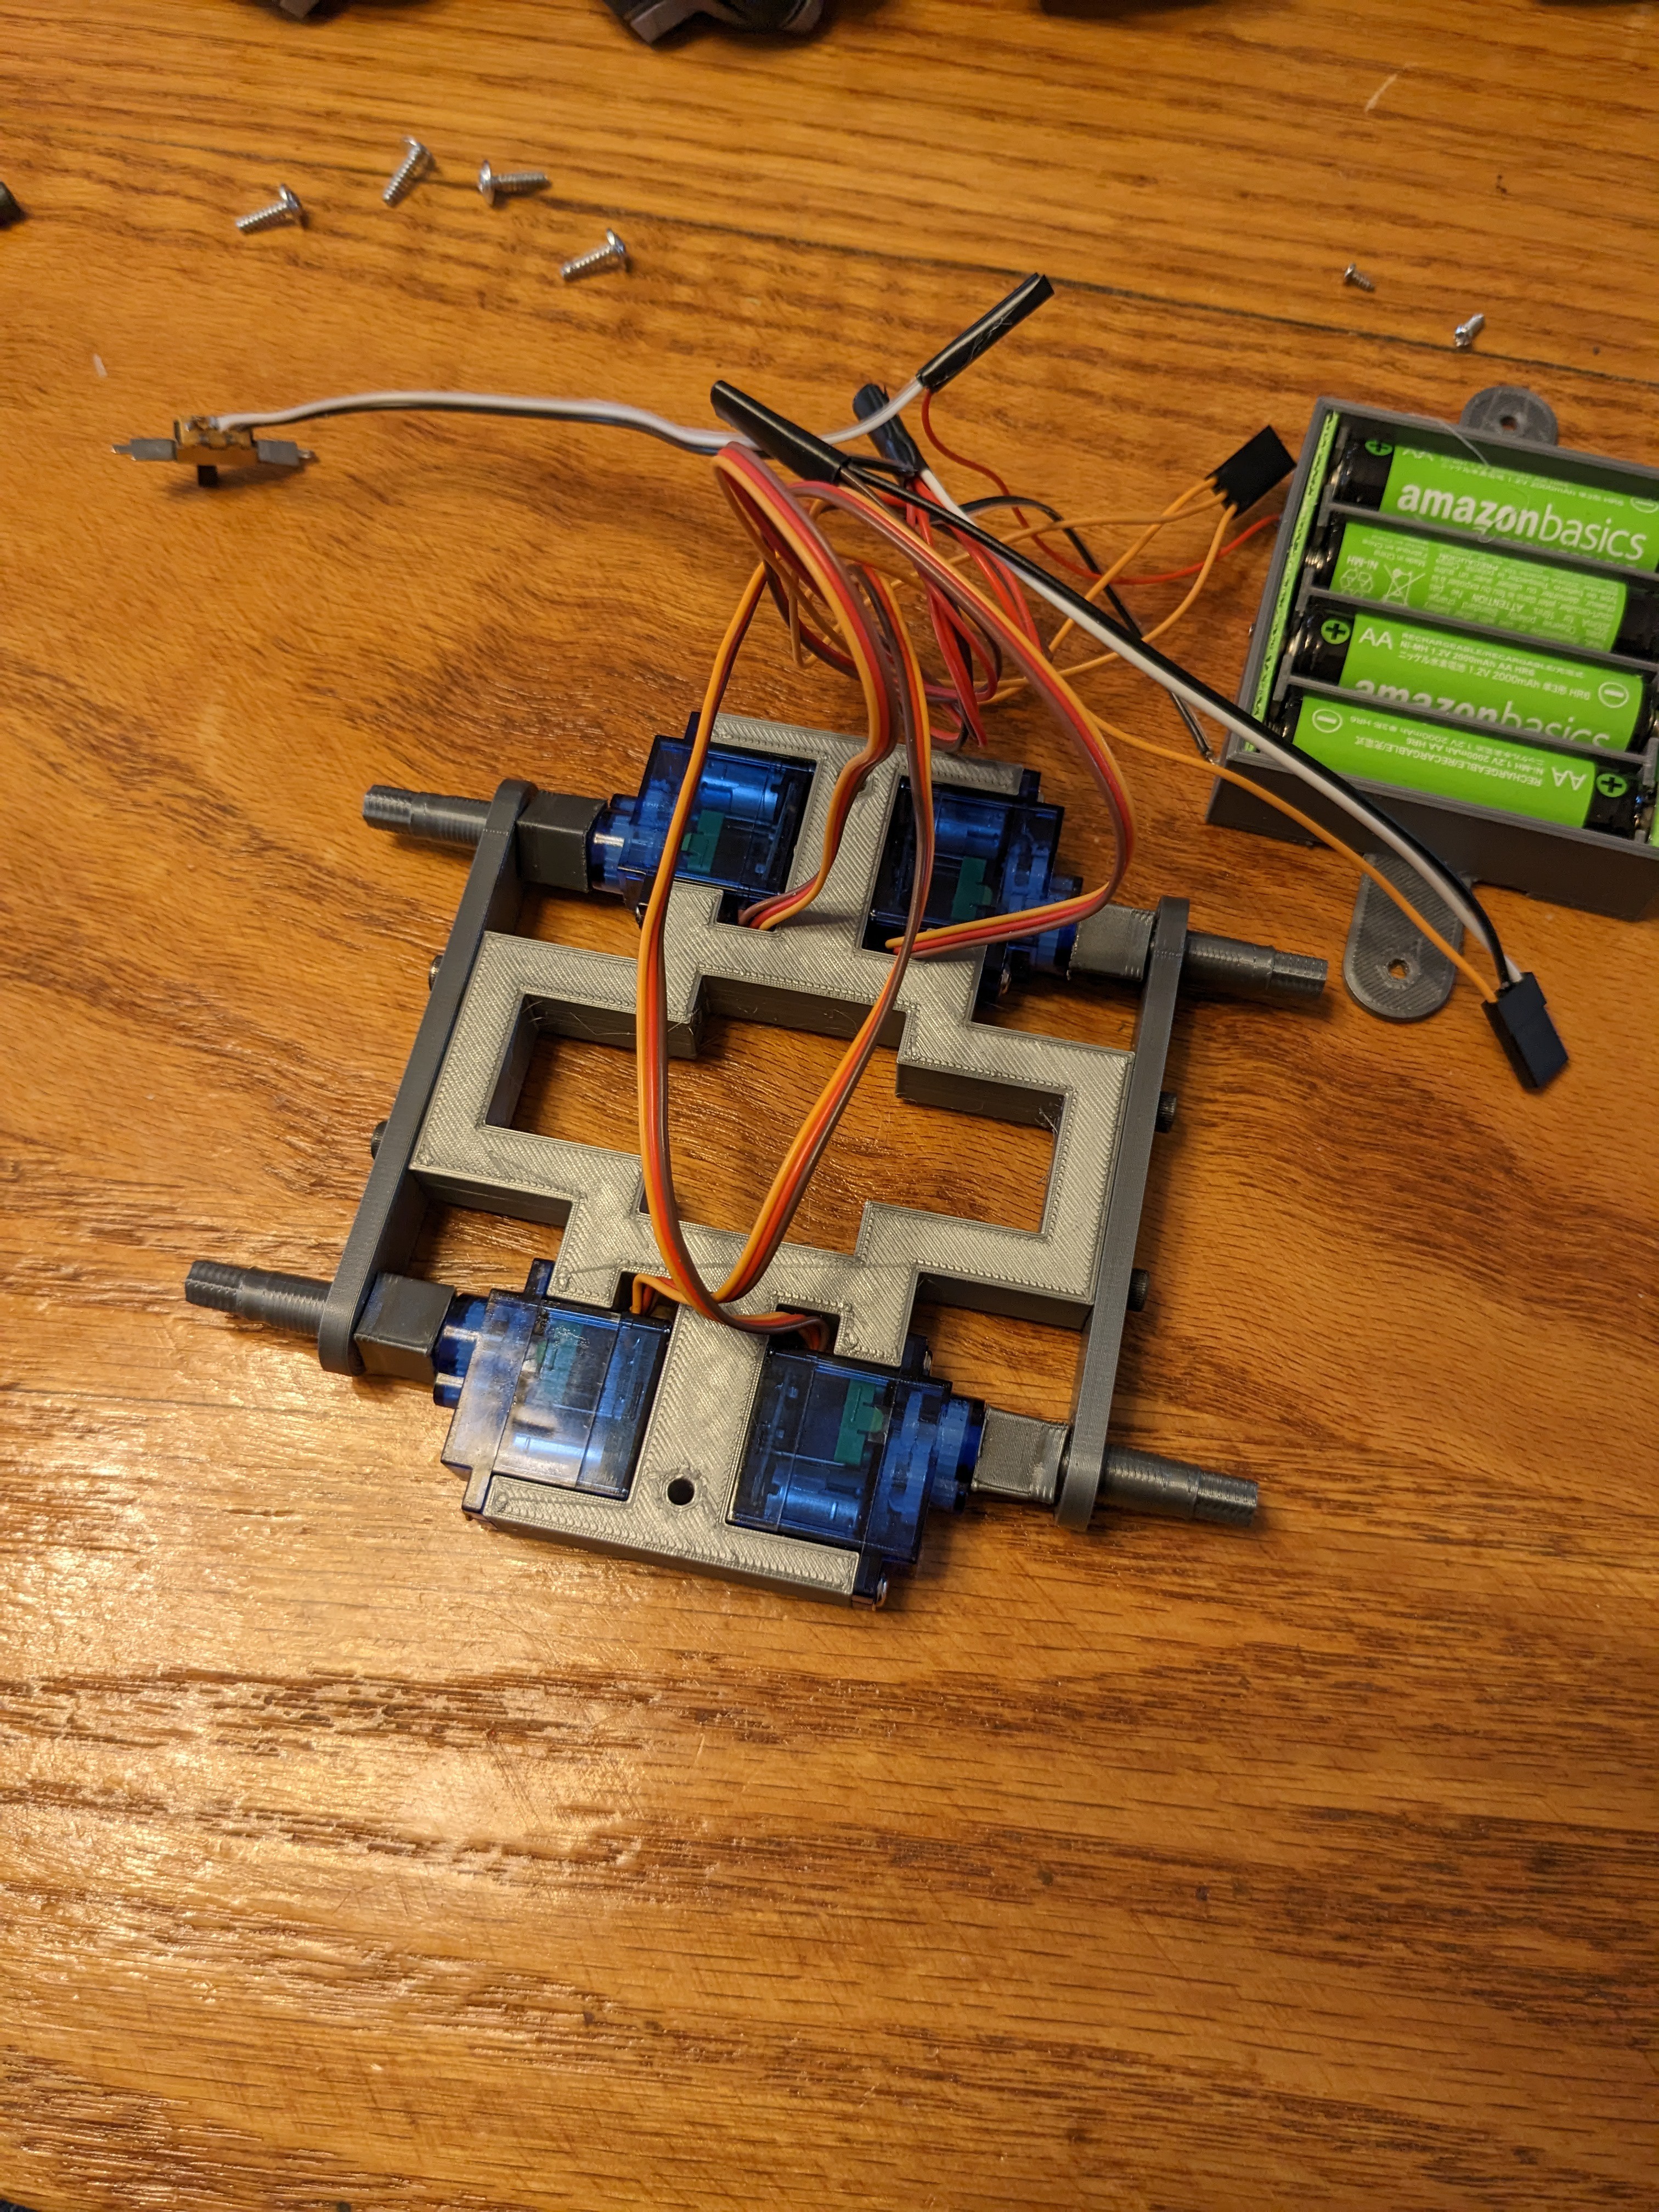
    Place the wheel holder bars over the shafts. They must be a loose fit so the shafts can rotate. Fix them in place with 16mm M3 screws. The screws must be a tight fit.

  • 3
    Mount the wheels

    Wheel orientation is critical! The only parts from the toy you need to keep are the wheels and the screws they're mounted with. Note that the toy has many other useful parts, including a motor control IC, 3.2V lithium cell with charging circuitry and many other parts. I'll be putting them in other projects.

    If you get the wheels in the wrong order, the kinematic equations in the code won't work. Best case it'll go the wrong directions.

    Use the screws from the toy to hold the wheels on the shafts. The screws must be a tight fit or the wheels will pop off.

View all 8 instructions

Enjoy this project?

Share

Discussions

David wrote 12/28/2022 at 12:52 point

This is awesome!!! I'm curious, is the latency from the camera pretty noticeable when your driving it? 

That panorama lens is cool, it's a bummer that it discontinued.

  Are you sure? yes | no

joe57005 wrote 12/28/2022 at 16:48 point

The latency was a bit of a problem at first. Chrome kept buffering the websocket messages to the robot as they got delayed further and further, so it would suddenly become undrivable. I modified the client code to stop sending messages when the buffer has more than one message in it, and I made the server handle 5 incoming messages for every one outgoing message. So now the latency is from 100-500 ms, depending on how hot my phone and the robot get. I also put a timer in the robot, so if it ever stops receiving for more than half a second, it shuts off the motors.

Ditto on the lens! I got mine from some chap in England on eBay. It was like 8£ and the shipping cost more than the item. After conversion it was like $20 total.

  Are you sure? yes | no

Similar Projects

Does this project spark your interest?

Become a member to follow this project and never miss any updates