Supplyframe DesignLab
-
Flashcards - Illustrations
09/05/2023 at 21:20 • 0 commentsNot all open source projects are created equal, and this one has a few interesting elements. It includes the usual firmware (code), hardware, mechanical design files, some instructions, but also, illustration templates. Natalie Gonzalez did all the illustrations for this project and I was absolutely delighted every time I got a message with new illustrations. I think she embedded a playful nature for each word, concept, verb, adjective, in ways that speak to children directly. So, here is an editable PDF file with all the illustrations. Feel free to use them for a different language, and if you want to use them as inspiration only and provide your own, even better! It would be a dream to see this becoming a useful platform for children's education in several languages.
Practical information about the flashcards is found in the Files, Components, and Instructions sections of this project.
![]()
![]()
![]()
-
Function
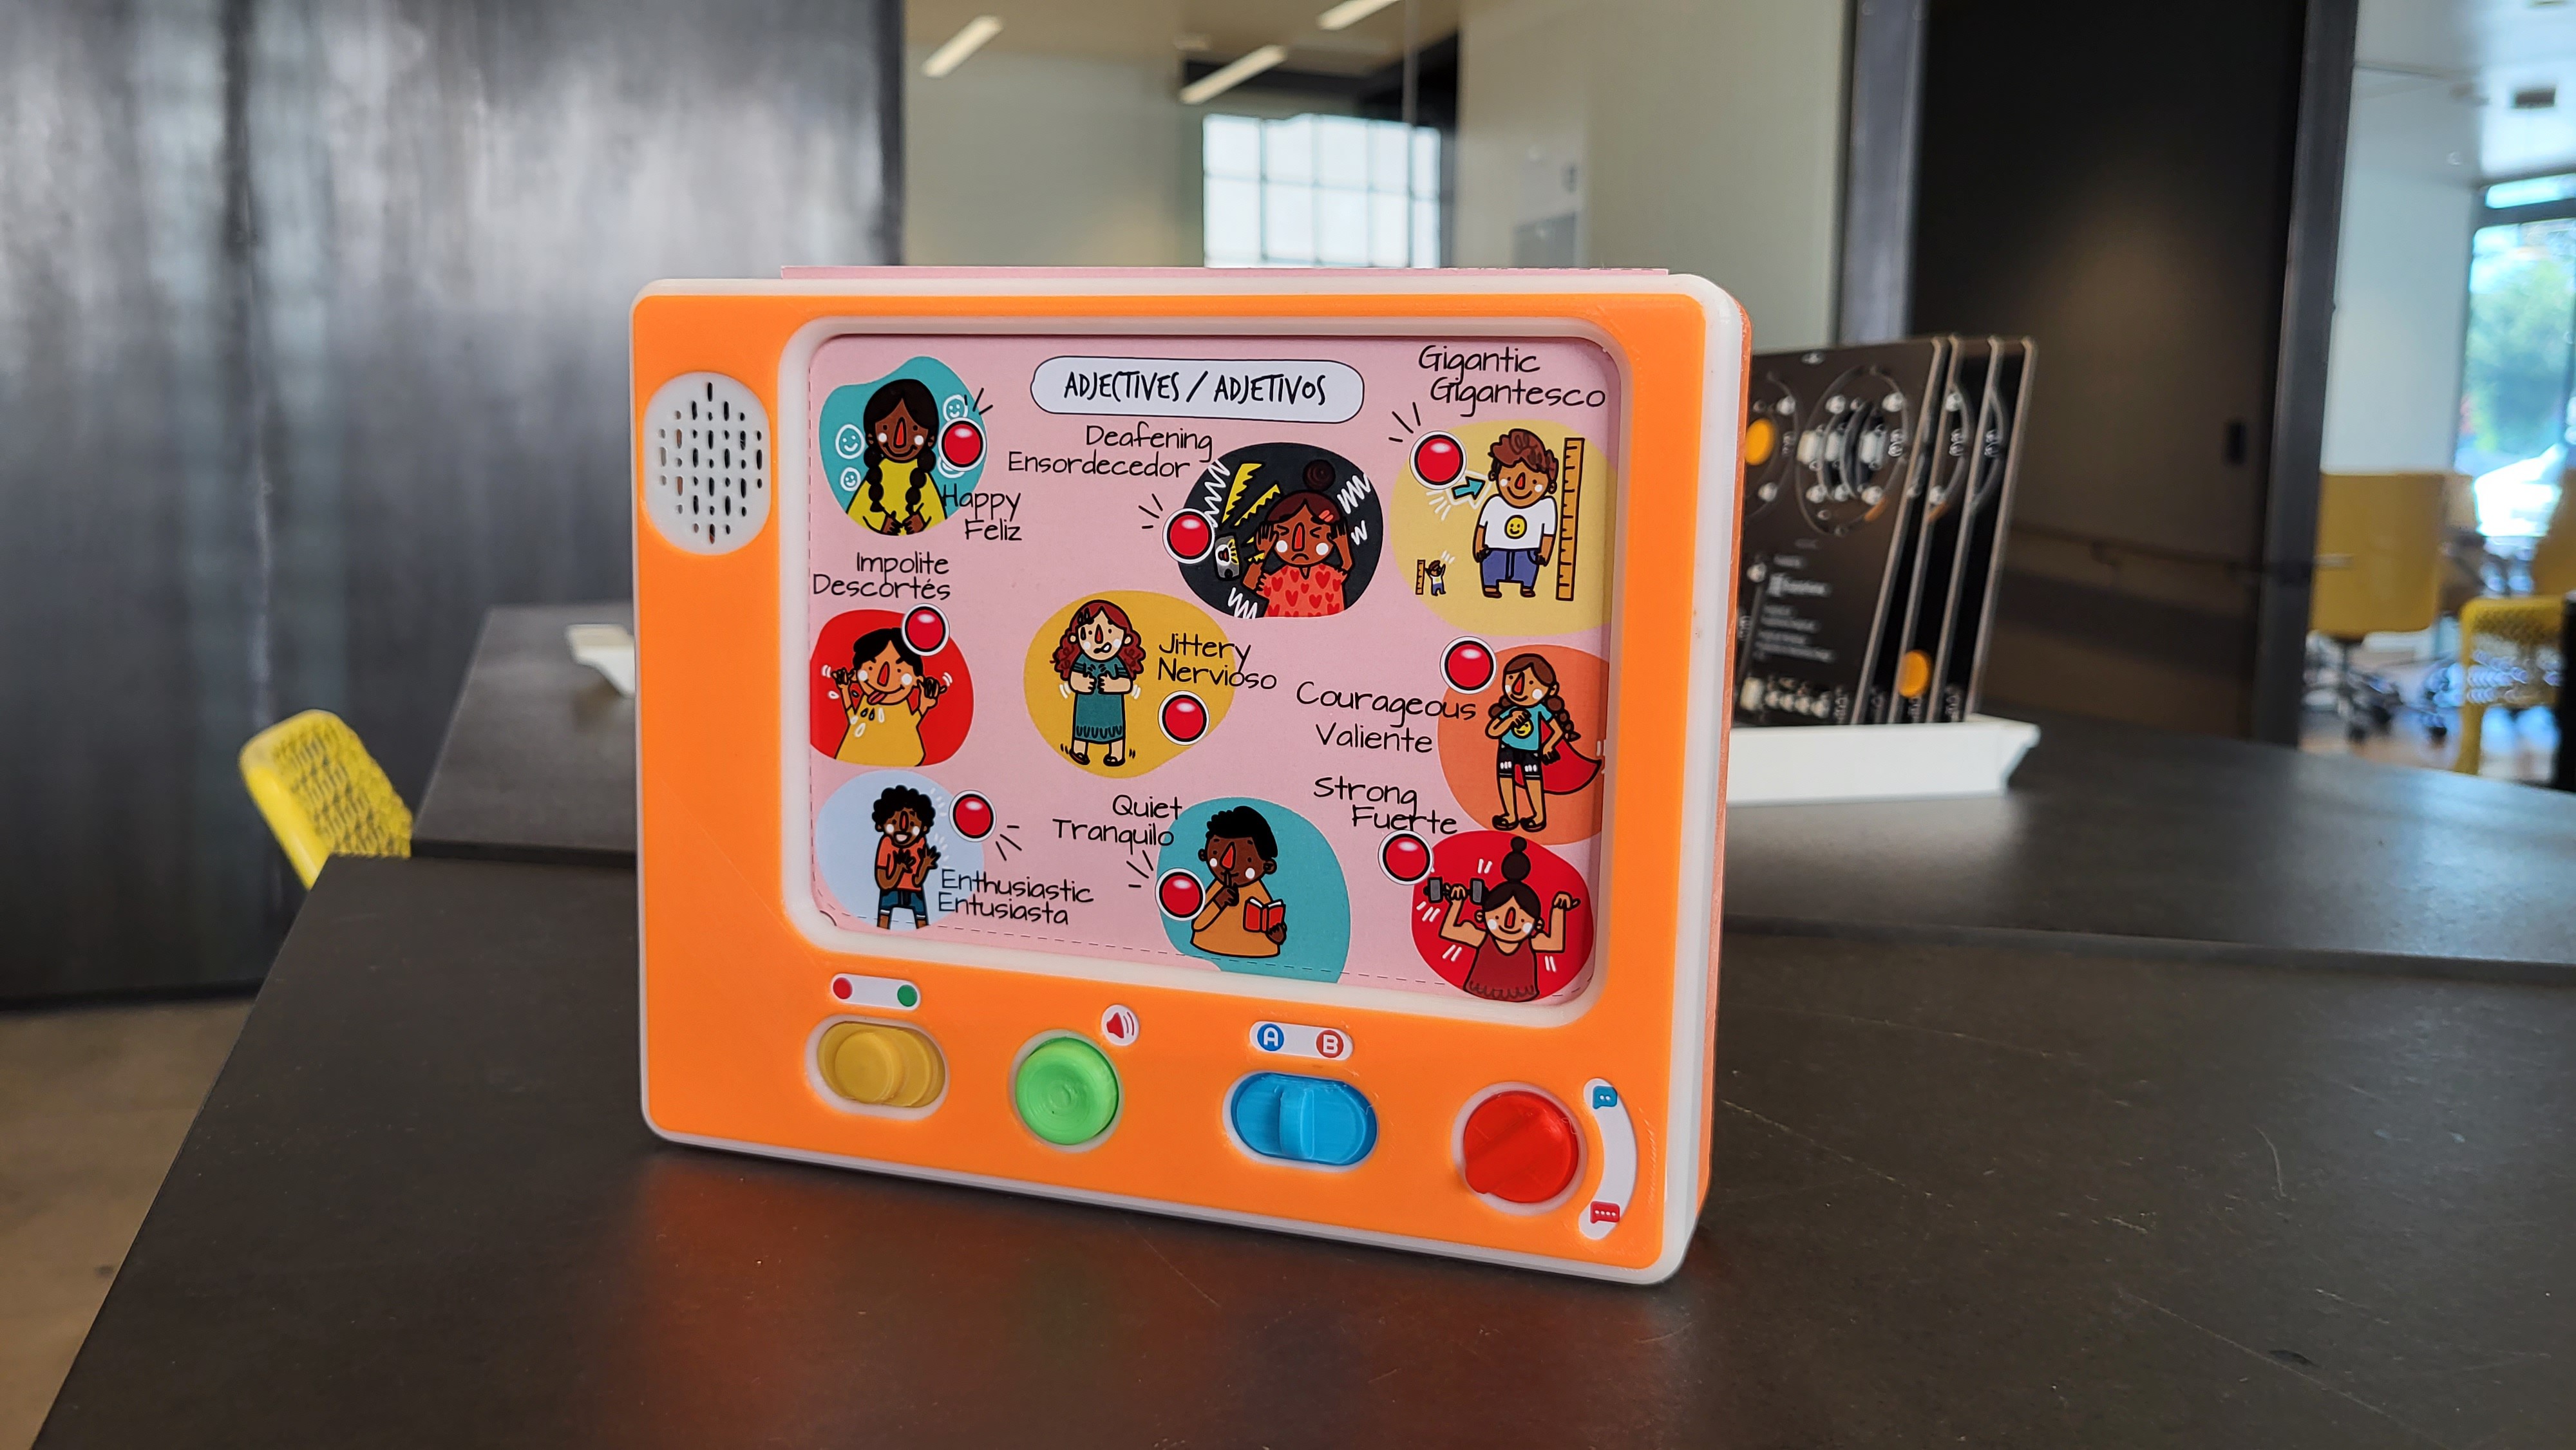
09/05/2023 at 20:05 • 0 commentsSo here it is! This is how the unit looks without a flashcard in it. The cards are stored in the back. Once a card is inserted (and provided there is a MicroSD with a language pack in the device too), it's play time! Here is a little demonstration of a fully operational unit , switching flashcards. While these particular prints look pretty cool, I must stress that the unit can read flashcards printed with a regular home or office printer as well.
And for your bloopers section, this is what happens when you scramble the file names.
-
Ergonomics
09/01/2023 at 19:39 • 0 commentsHaving the right product dimensions for children is the first step, but there are several additional factors than can help provide users (in this case children), a fulfilling experience.
When we press a button, there is a lot of feedback that we expect from it to let us know that things worked. For example (not all need apply in every circumstance):
- Buttons move, reassuring us that we exerted the right pressure
- Buttons make a sound, letting us know that we took it to the right point
- Buttons need to have just the right amount of force exerted to them to work
- They can be visually identifiable
- They can trigger an action either within the button, or through a screen notification, sound, etc.
I am not a big fan of small buttons in electronics. They fulfill a purpose but sometimes it's hard to tell if you pressed it. And the mechanical design is just harder :)
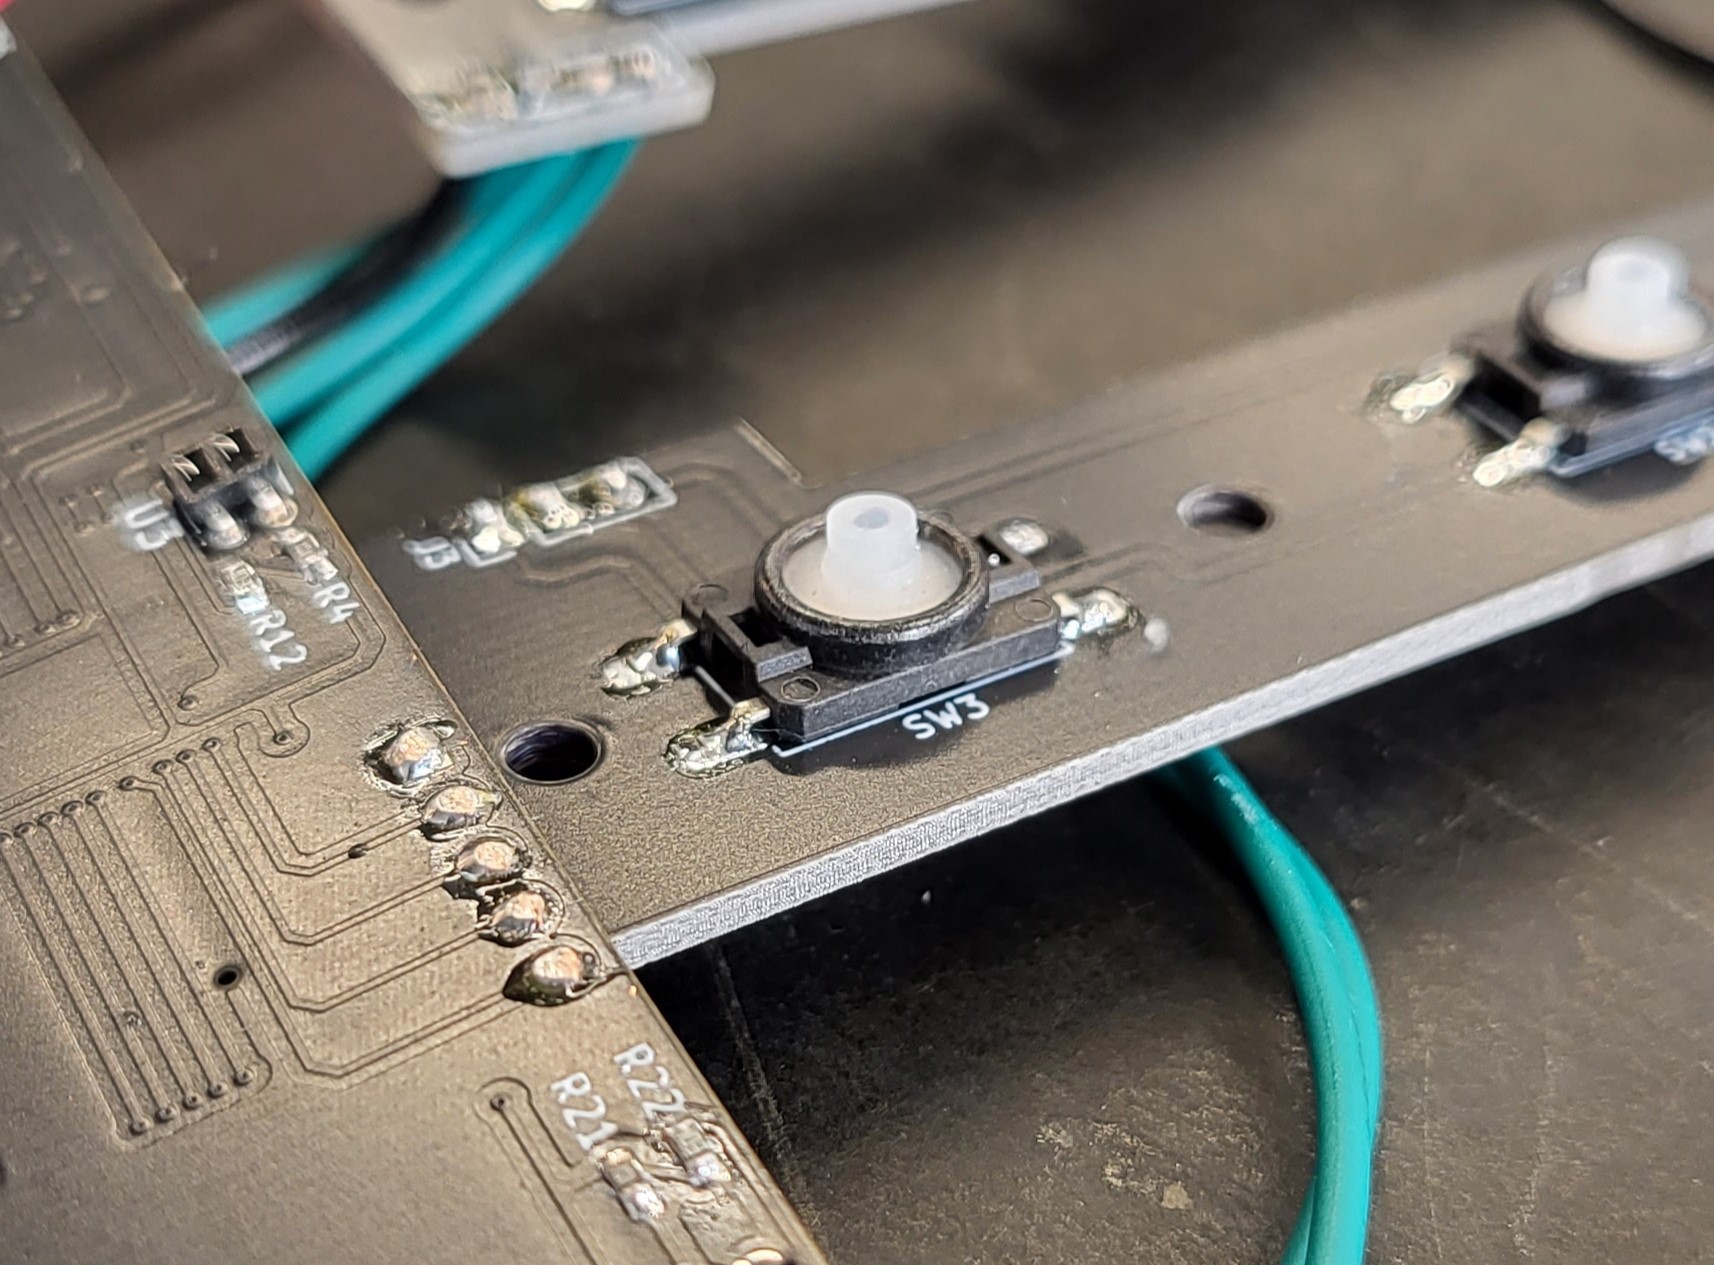
We shopped around and evaluated a lot of options. My favorites were the 7TR12S short travel key switches by Biwin (Data sheet in components). These have the right force for children (3.5N), a nice travel and feedback sound. I just don't like that stock is variable, and the prices have been increasing lately.
![]()
When children are learning fine motor skills, it is important to give them a healthy dose of variety. Otherwise they get confused, and eventually bored. So, buttons should be somehow different, for different actions. But components are expensive and it's better to buy in bulk. I added two of the same slide switches with a different color and tactile feedback, one push button just like the ones on the back, and the dial is 3d printed.
![]()
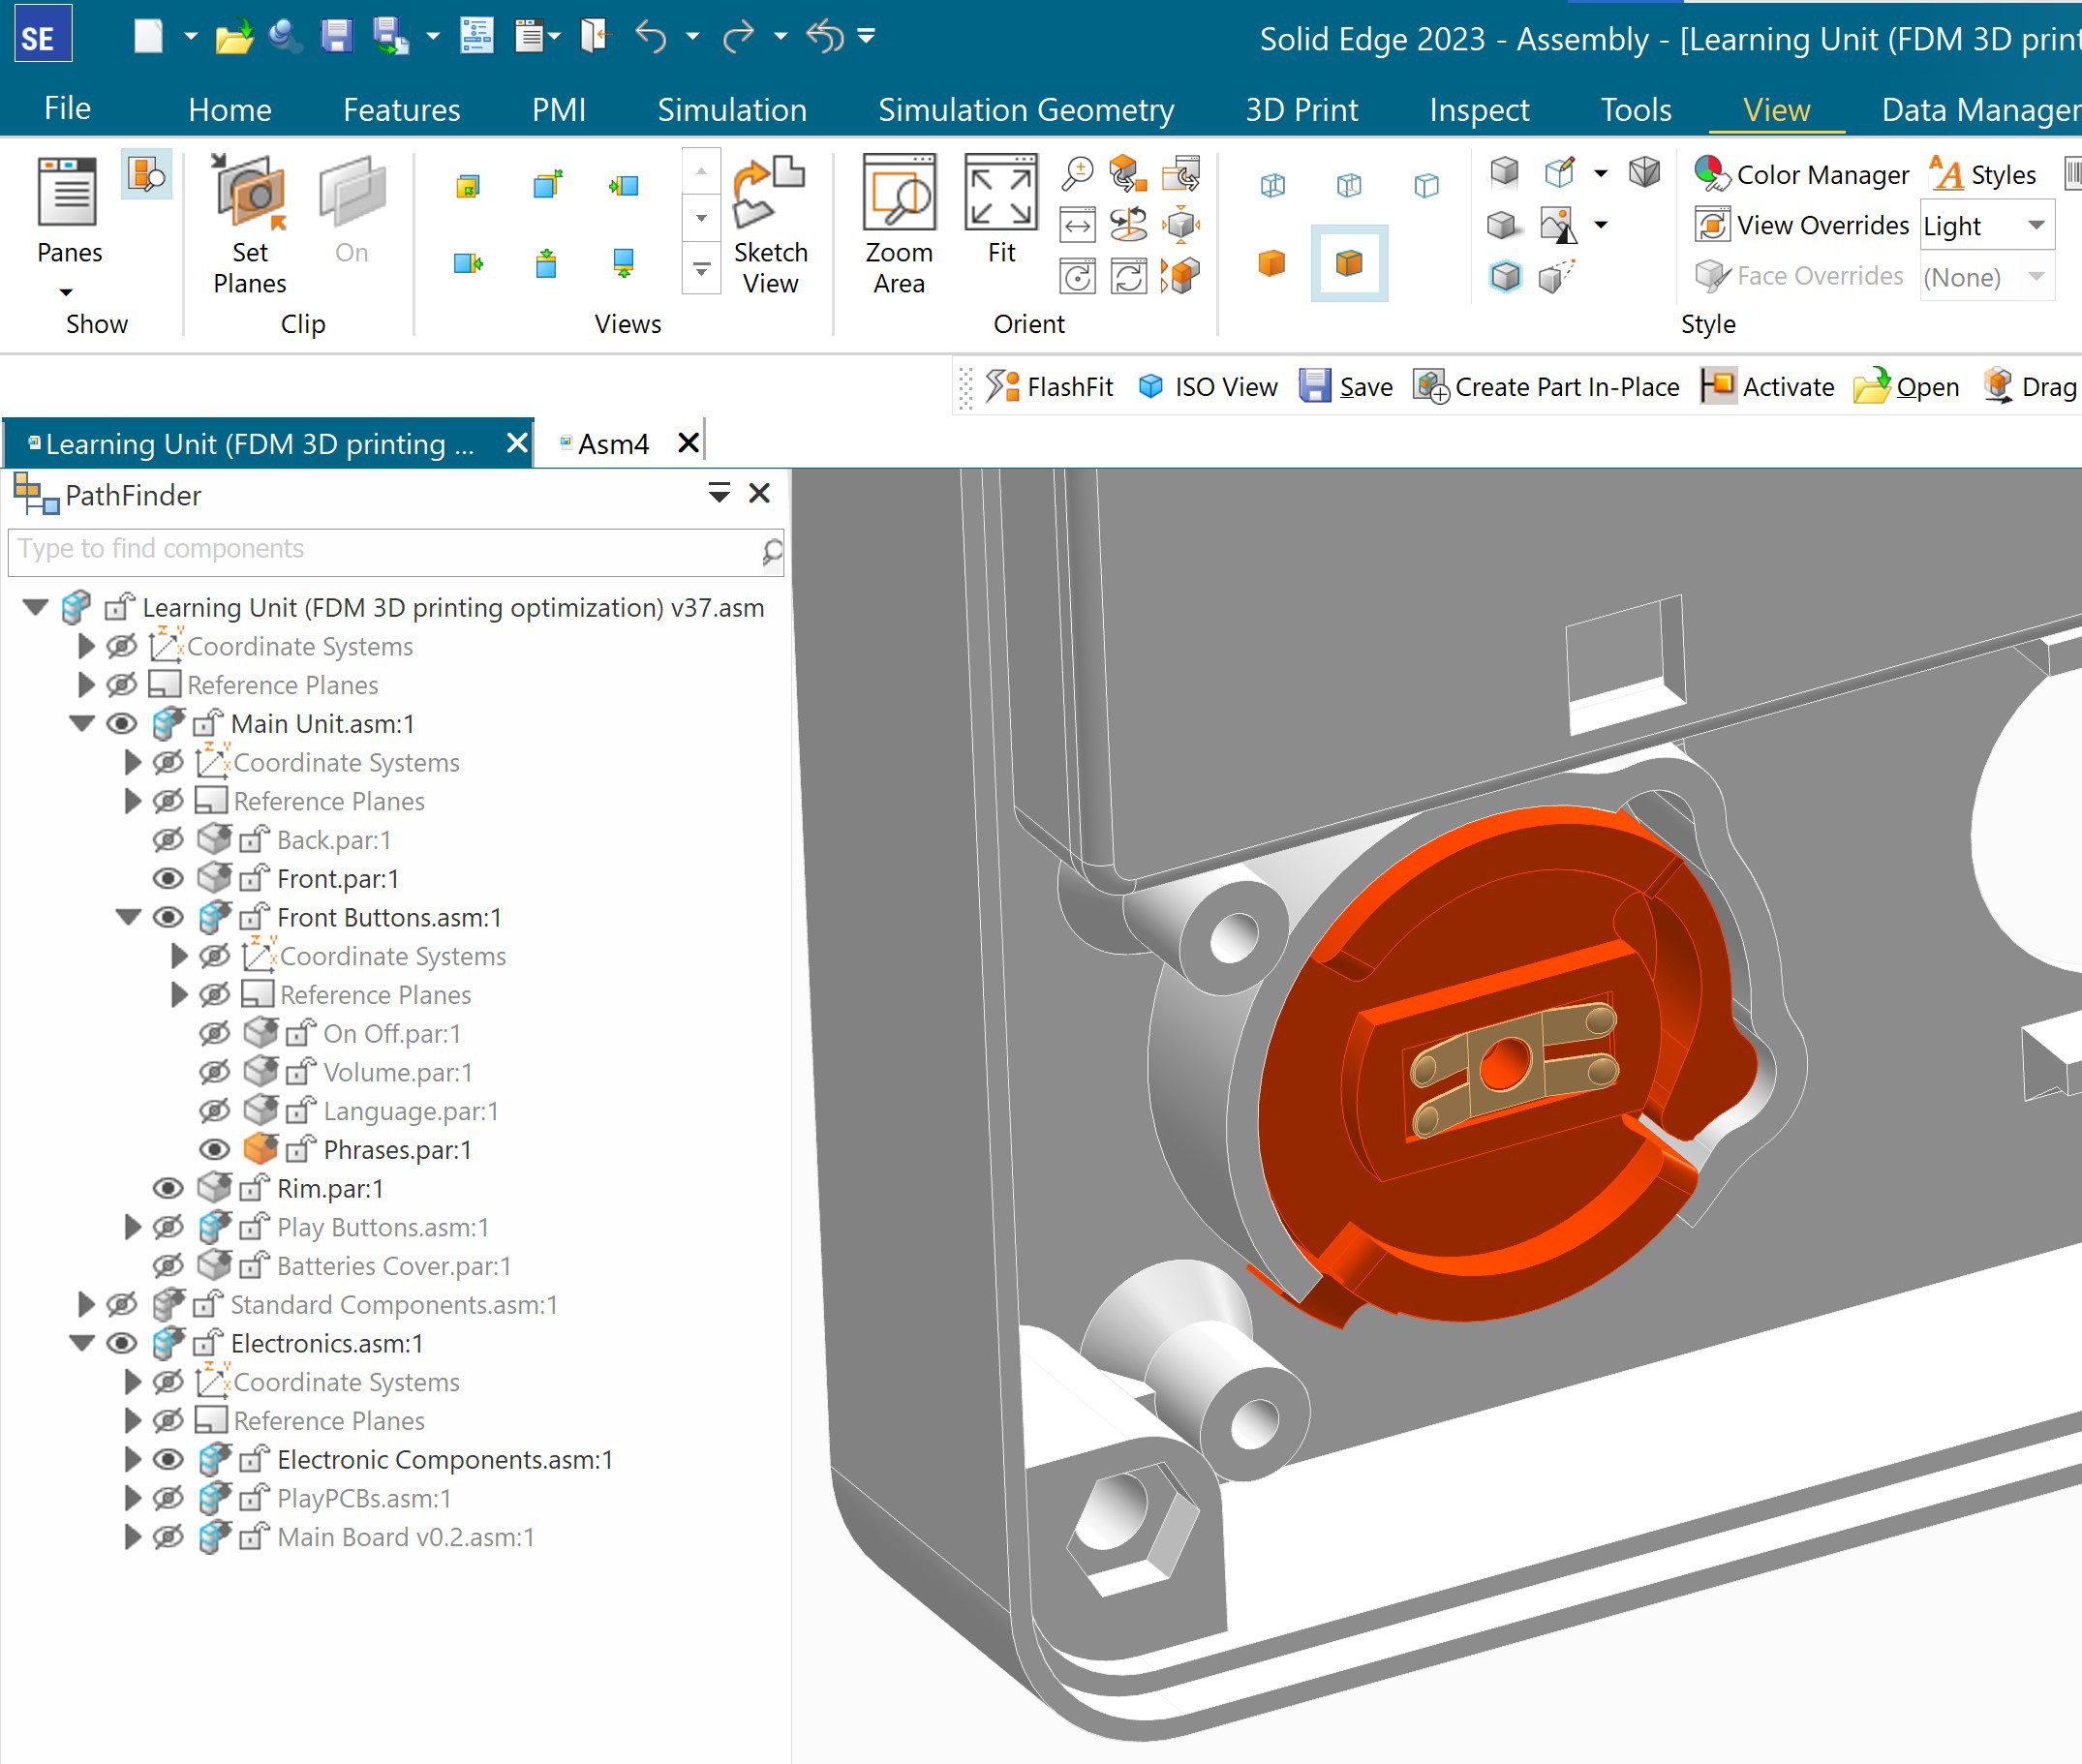
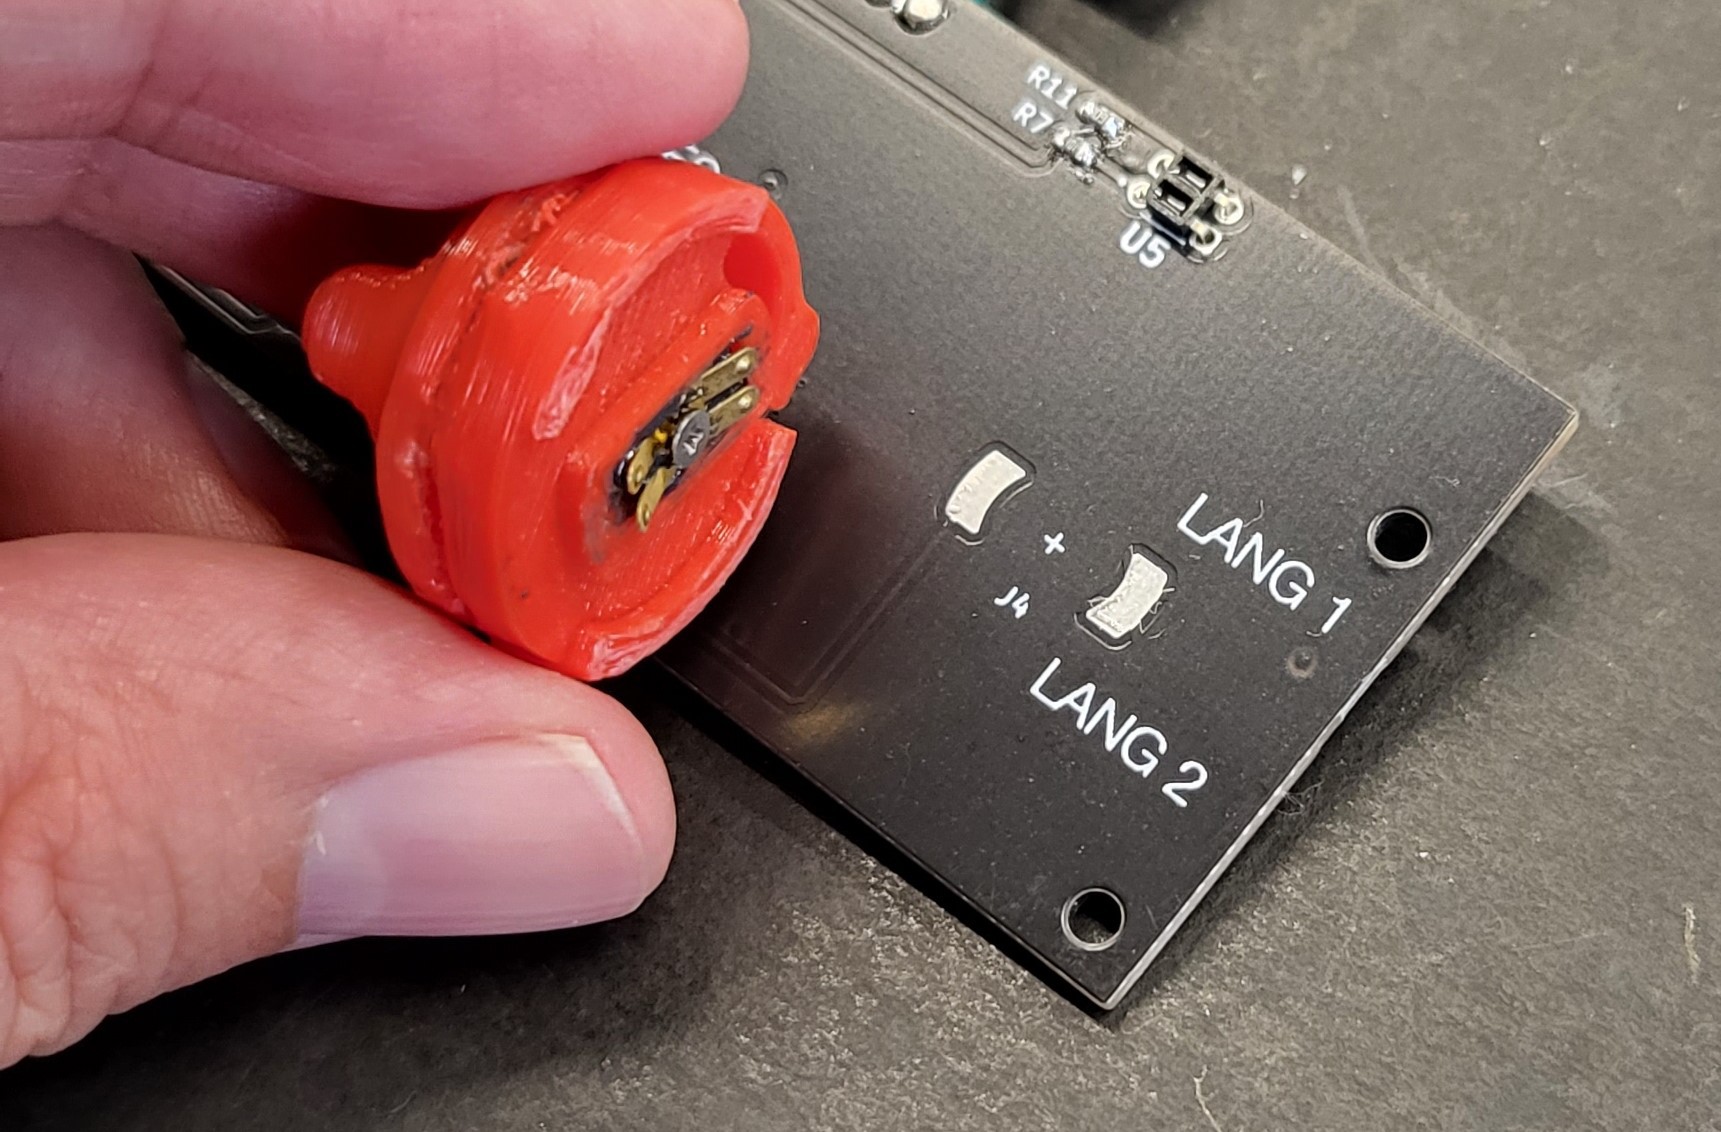
Dials are expensive and clunky. And you still have to design something that fits their mechanism, in case you don't like the industrial feel most of them have. Inspired by multimeter dial designs, Sabas and I worked a fairly simple solution. It involved making a circuit with two positions using PCB traces, a small metallic piece, and some 3D printed parts. The spring action took a little while to get right, but overall the results are interesting and the dial works!
![]()
![]()
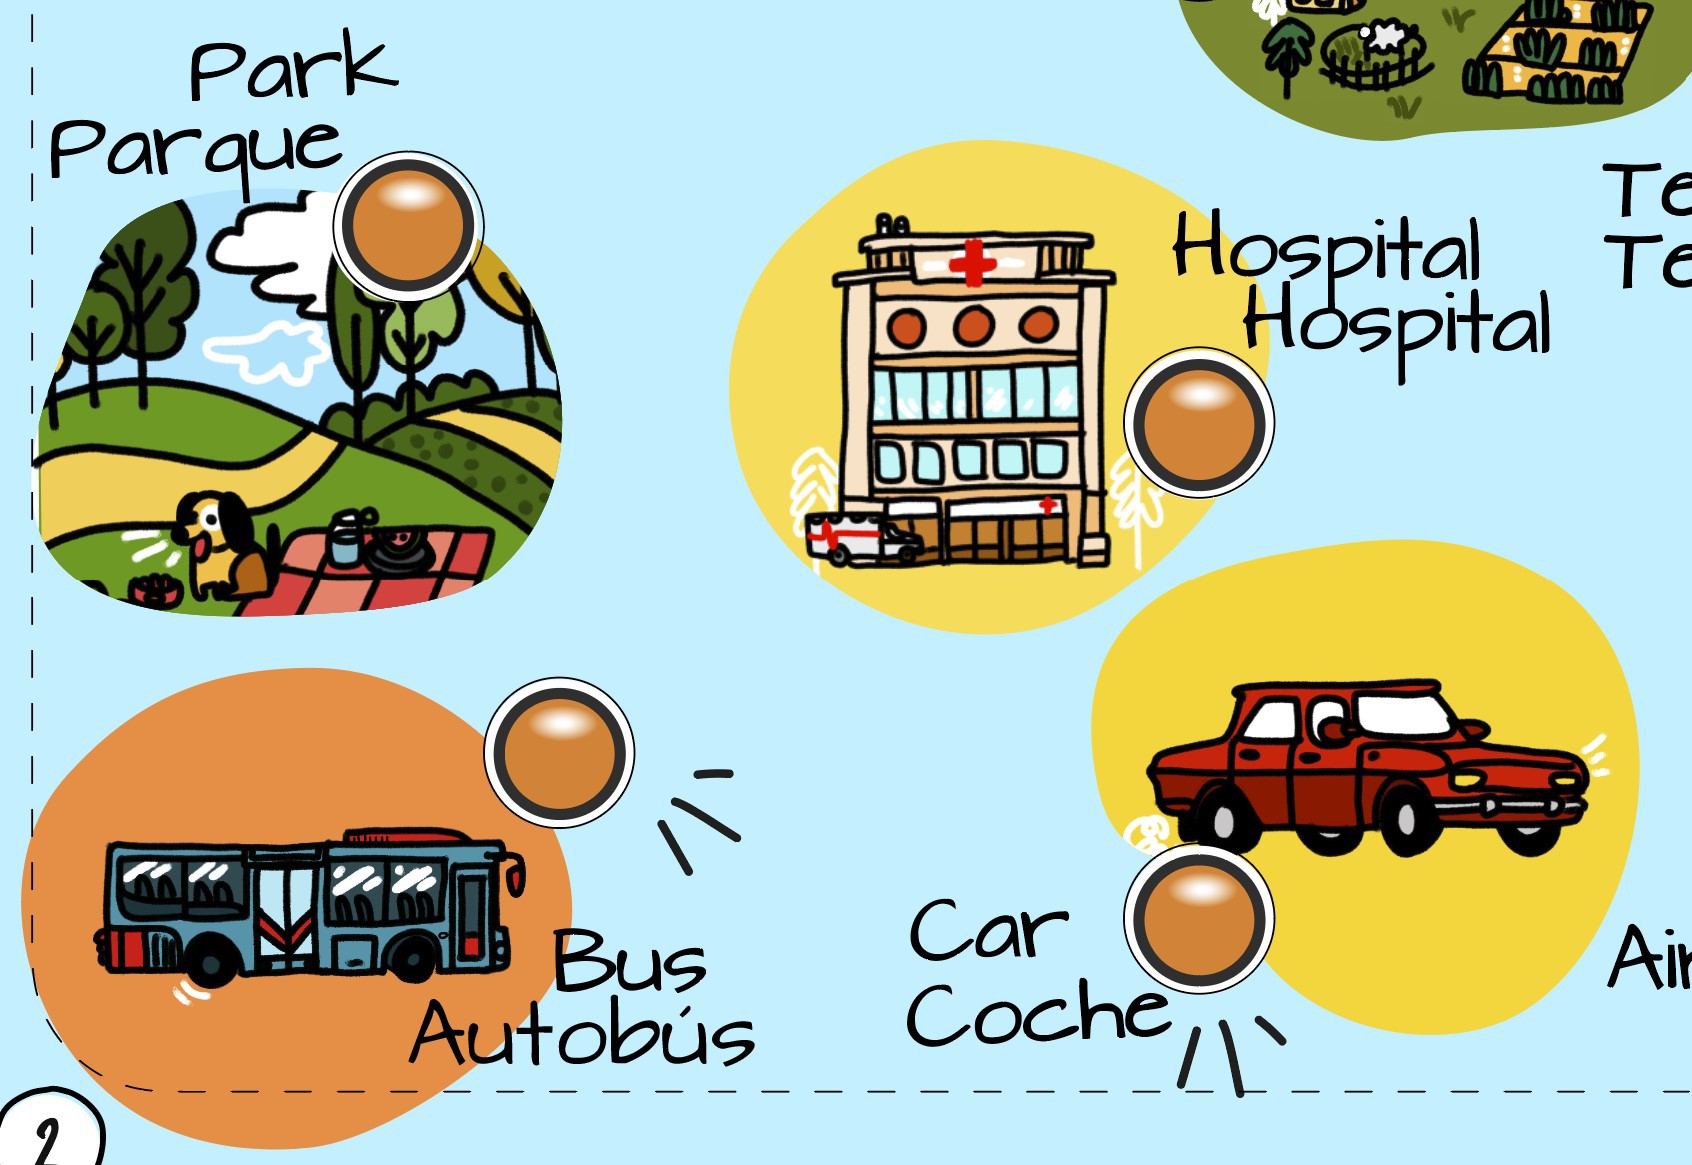
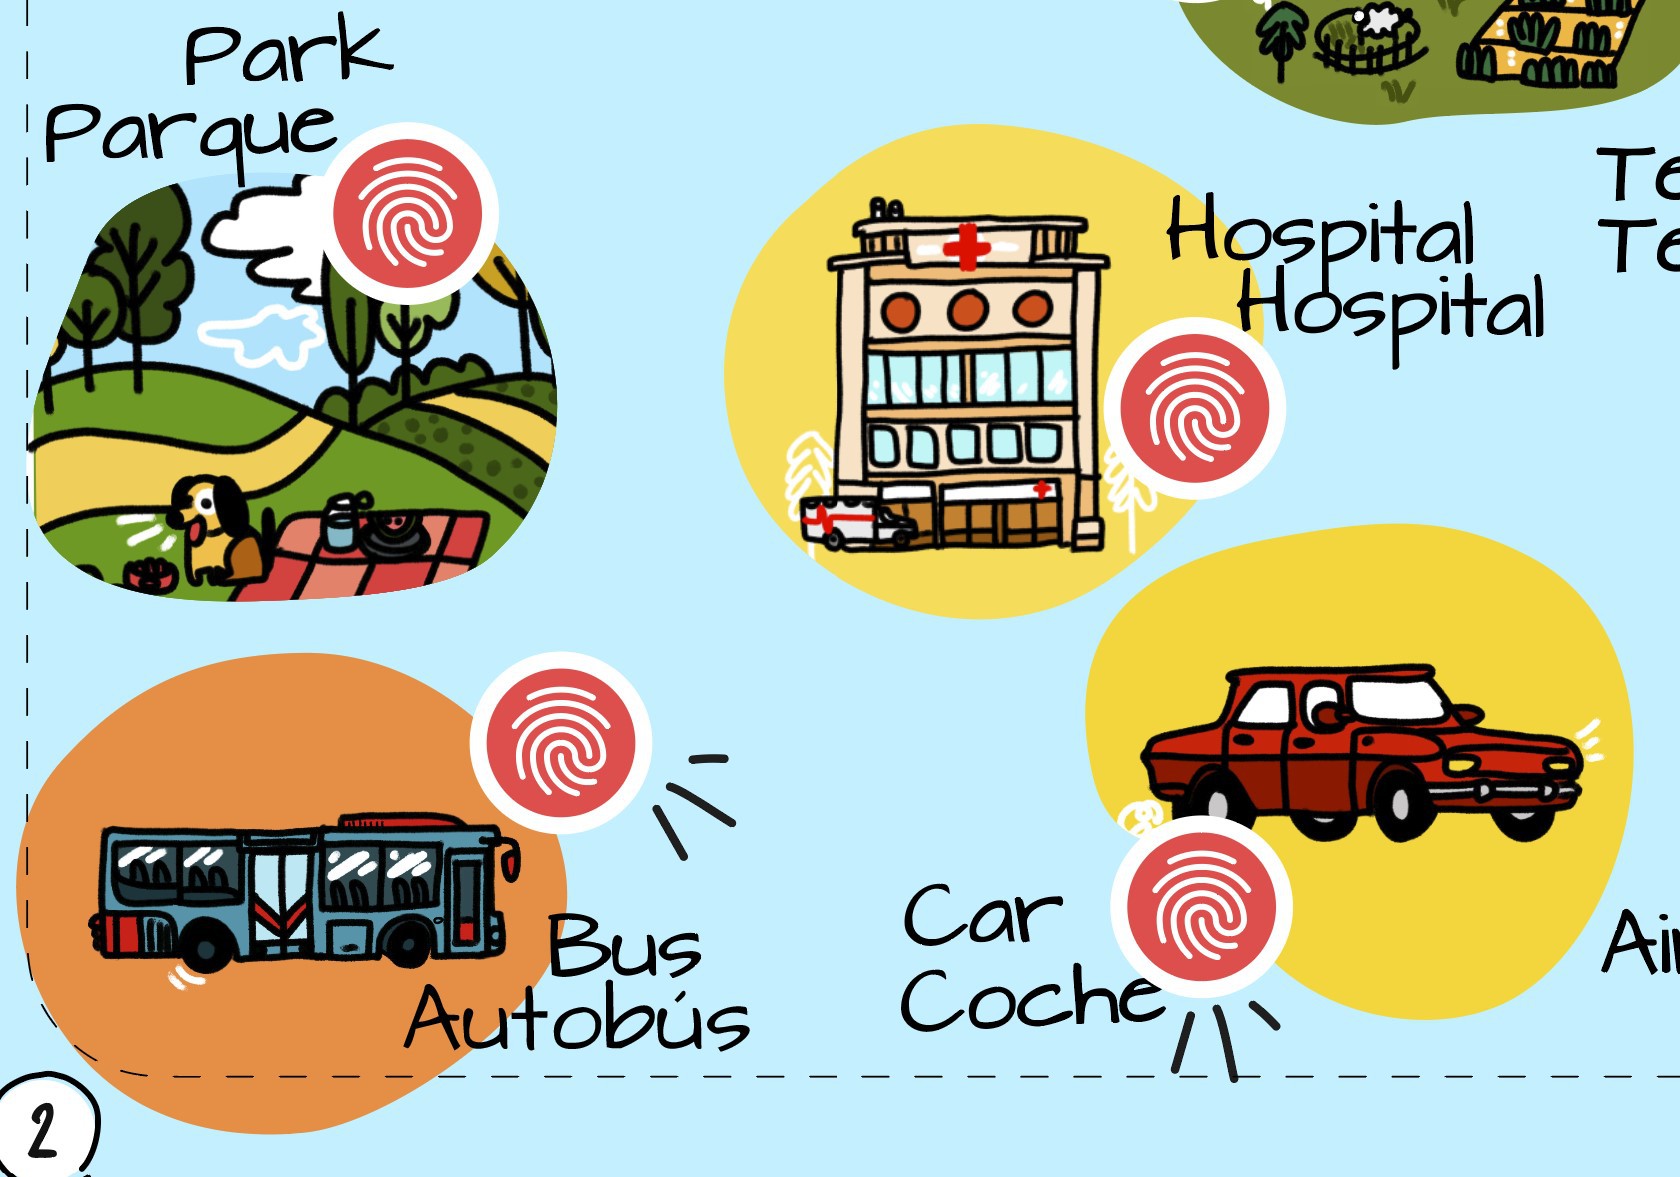
The original button indicator on the paper was a simple dot, but we added a thumbprint instead. I like it. Which one do you prefer?
When I showed the device to my 5 year old she quickly picked up the pace. I was pleased but not surprised. It's designed with the same visual language as all her toys and tools. What I did find surprising is that I gave it to the little one, he's 1 year and 2 months old, and he quickly went for the buttons on the paper! That was a surprise.
![]()
![]()
-
Hardware design
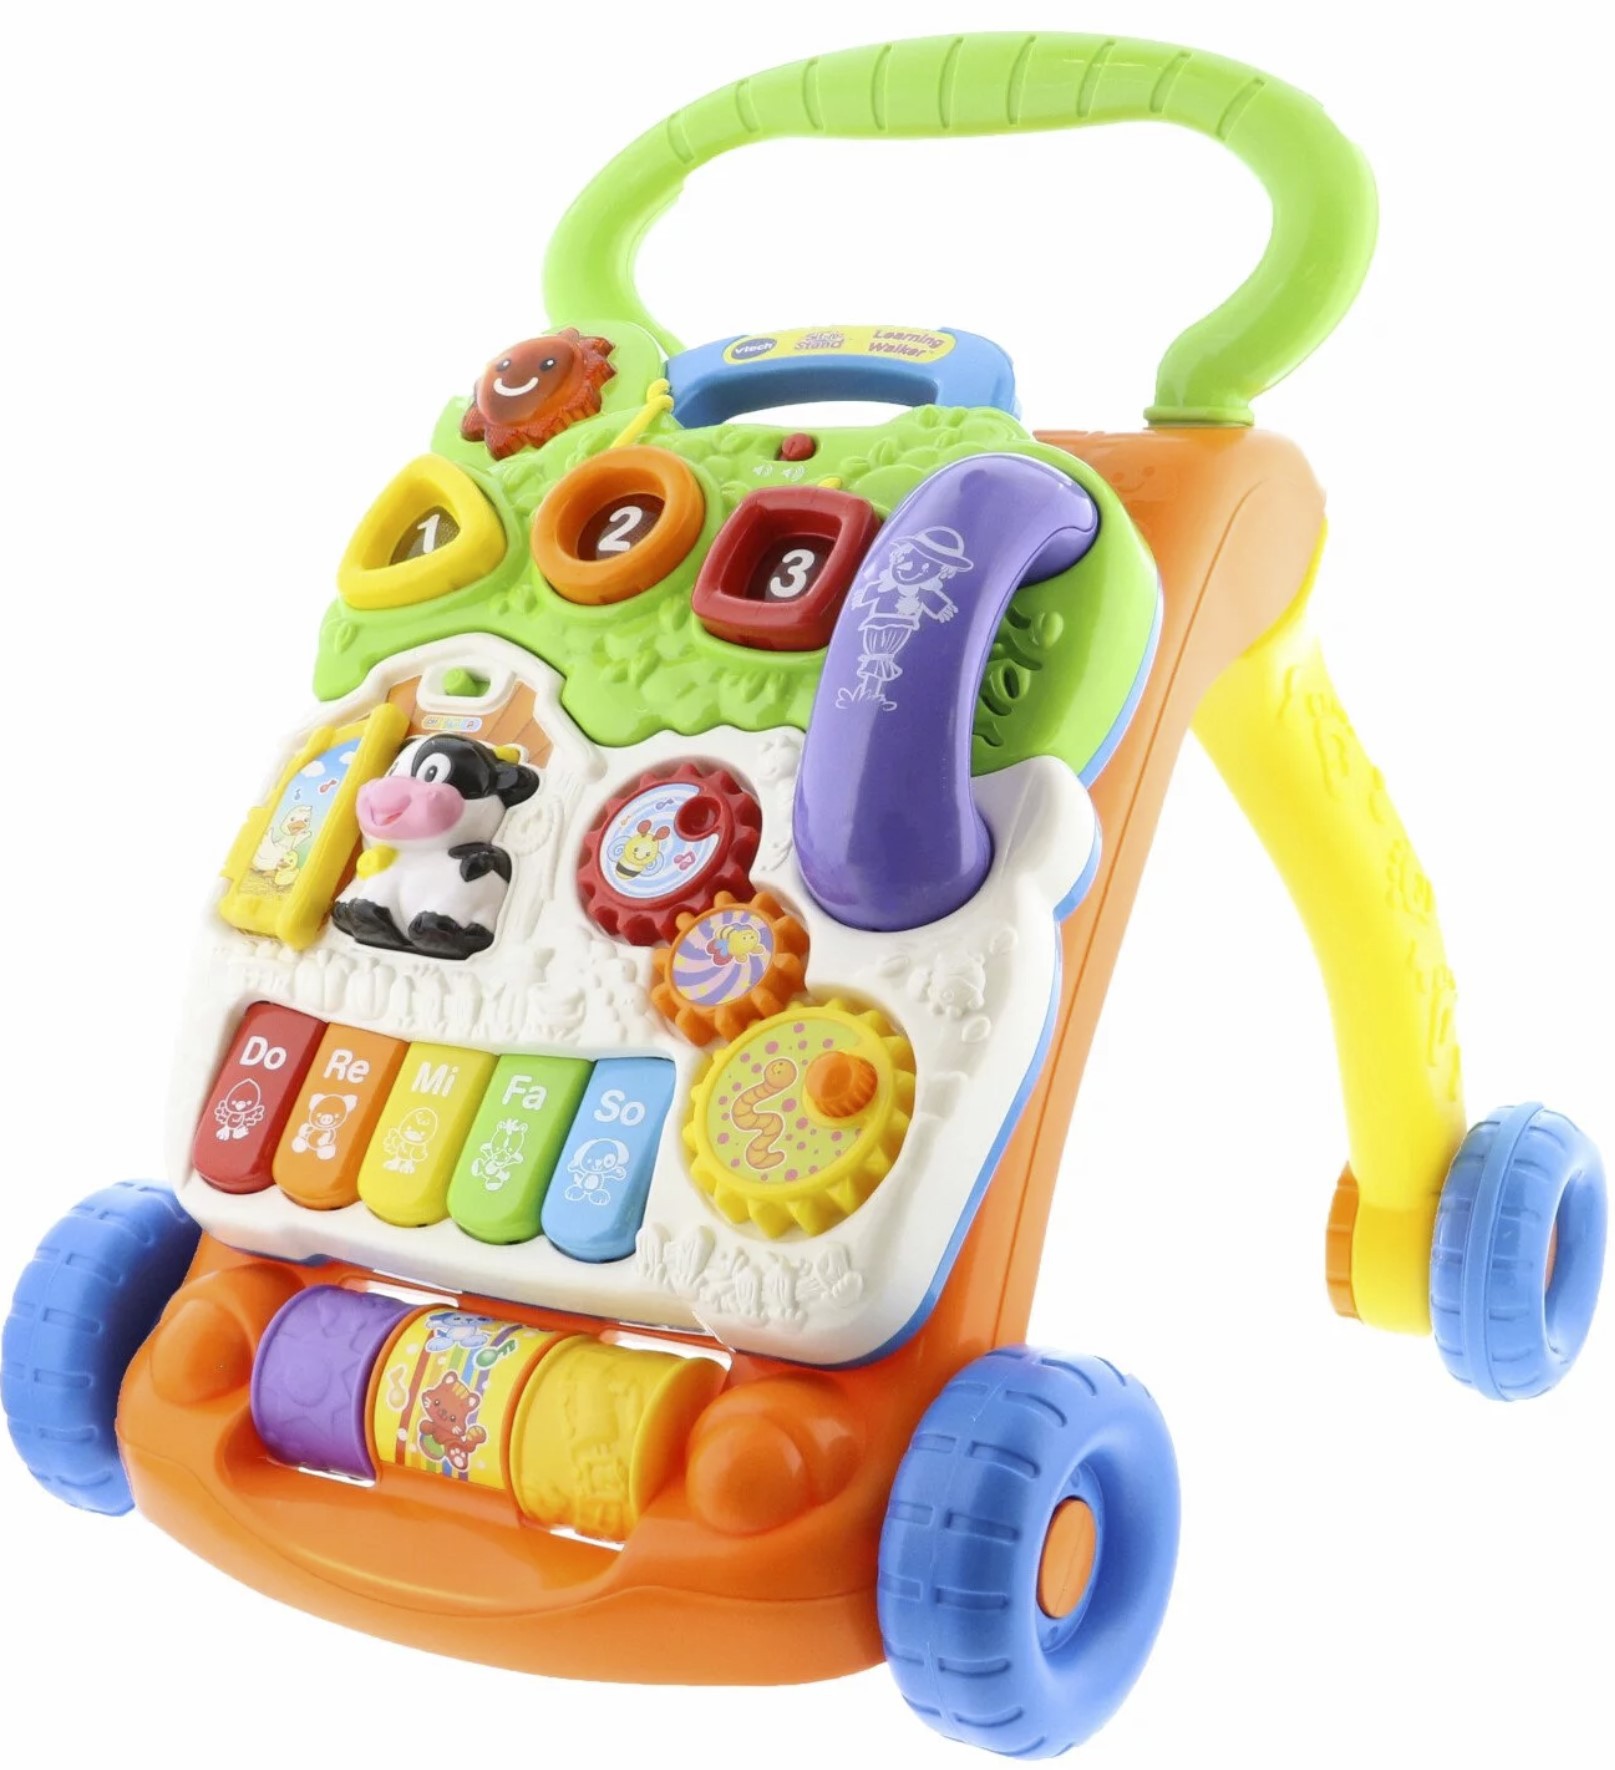
09/01/2023 at 00:05 • 0 commentsThe test board did a pretty good job at helping us test the concept quickly and Andres was able to continue working on the firmware. Meanwhile, I worked on the form factor and planned the product for an eventual production ramp up. The prototyping board had too much unused PCB space. And it would even make the unit heavier, too. For this part, I took a page or ten of inspiration from common children's toys. Vtech's learning walker is a great example. My daughter has one of these and she loves it. I always wondered how the electronics inside those looked like, and now this was a good opportunity to teardown one of their toys.
Vtech's learning walker is huge, and if you have seen it, you'd notice it has buttons, and electronics all over it.
![]()
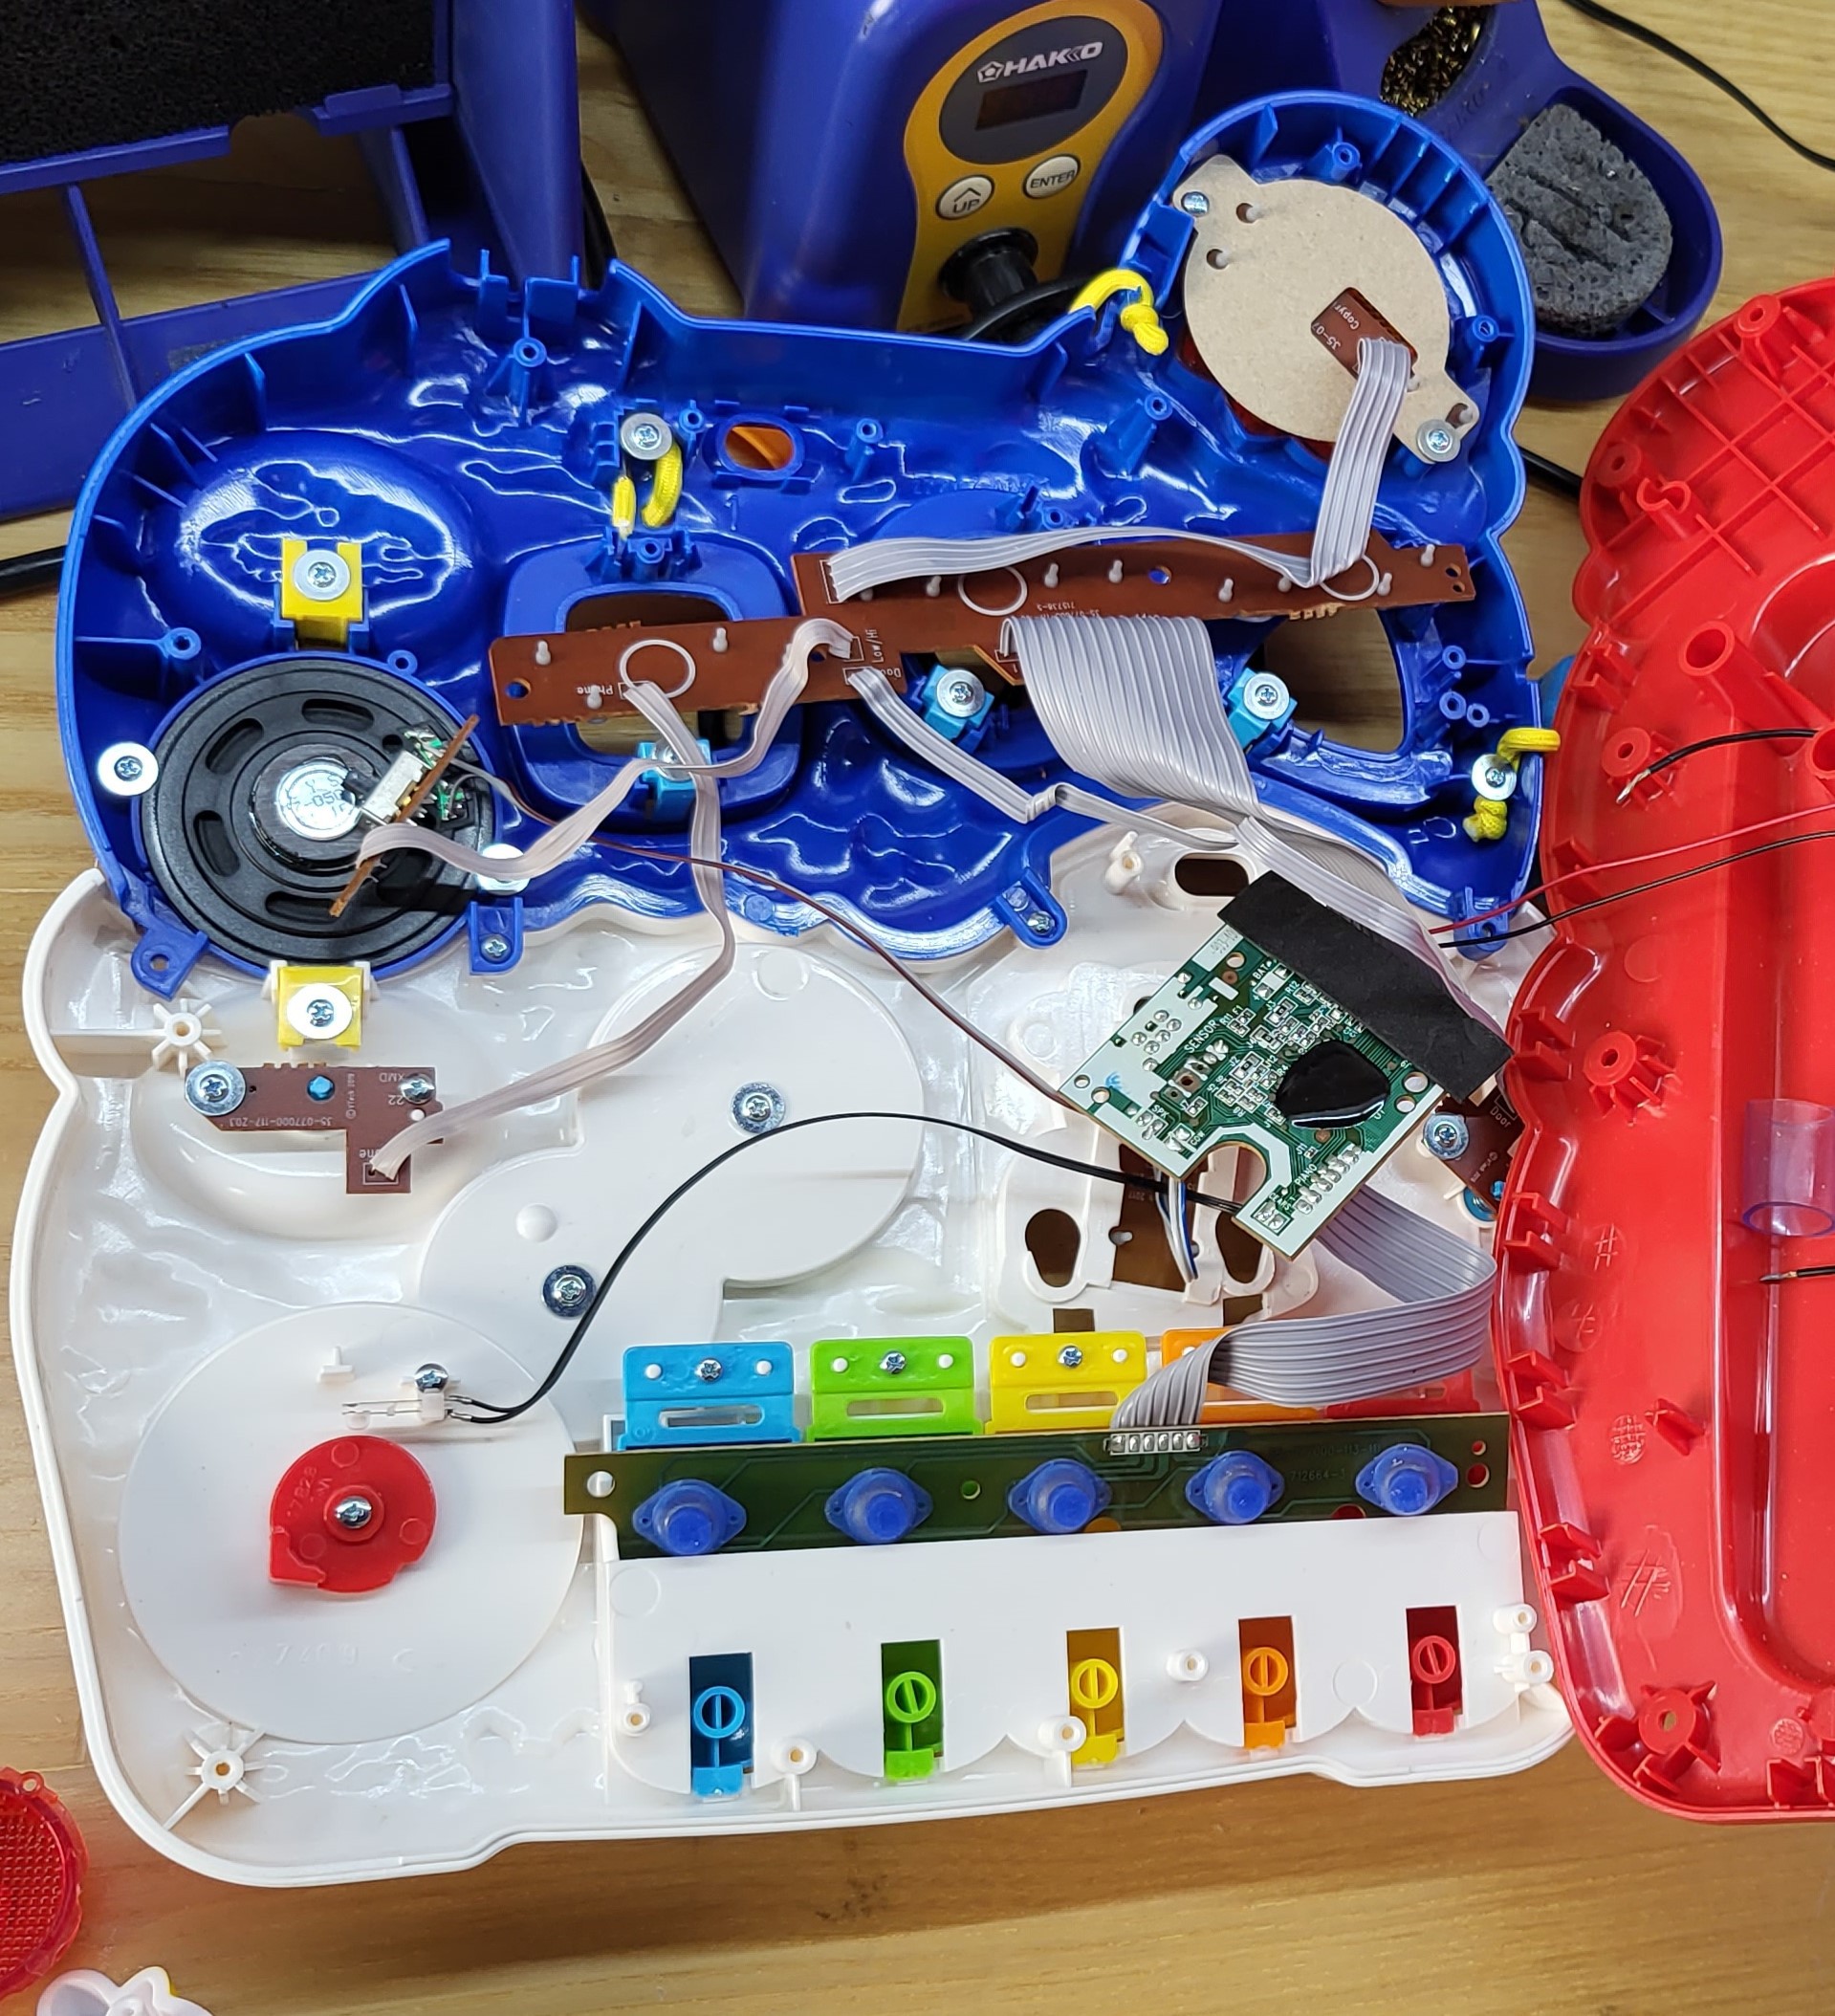
You can see there is nothing too surprising from a "cutting-edge" point of view, but they did do their homework when it comes to selecting the most affordable process/component/part for each section of the toy. Like the black blob instead of packages, and one side PCB's.
I had a lot of fun taking a look at the. The only thing that bothered me was some kid that was weeping and saying "why are you breaking my toy, dad?".
![]()
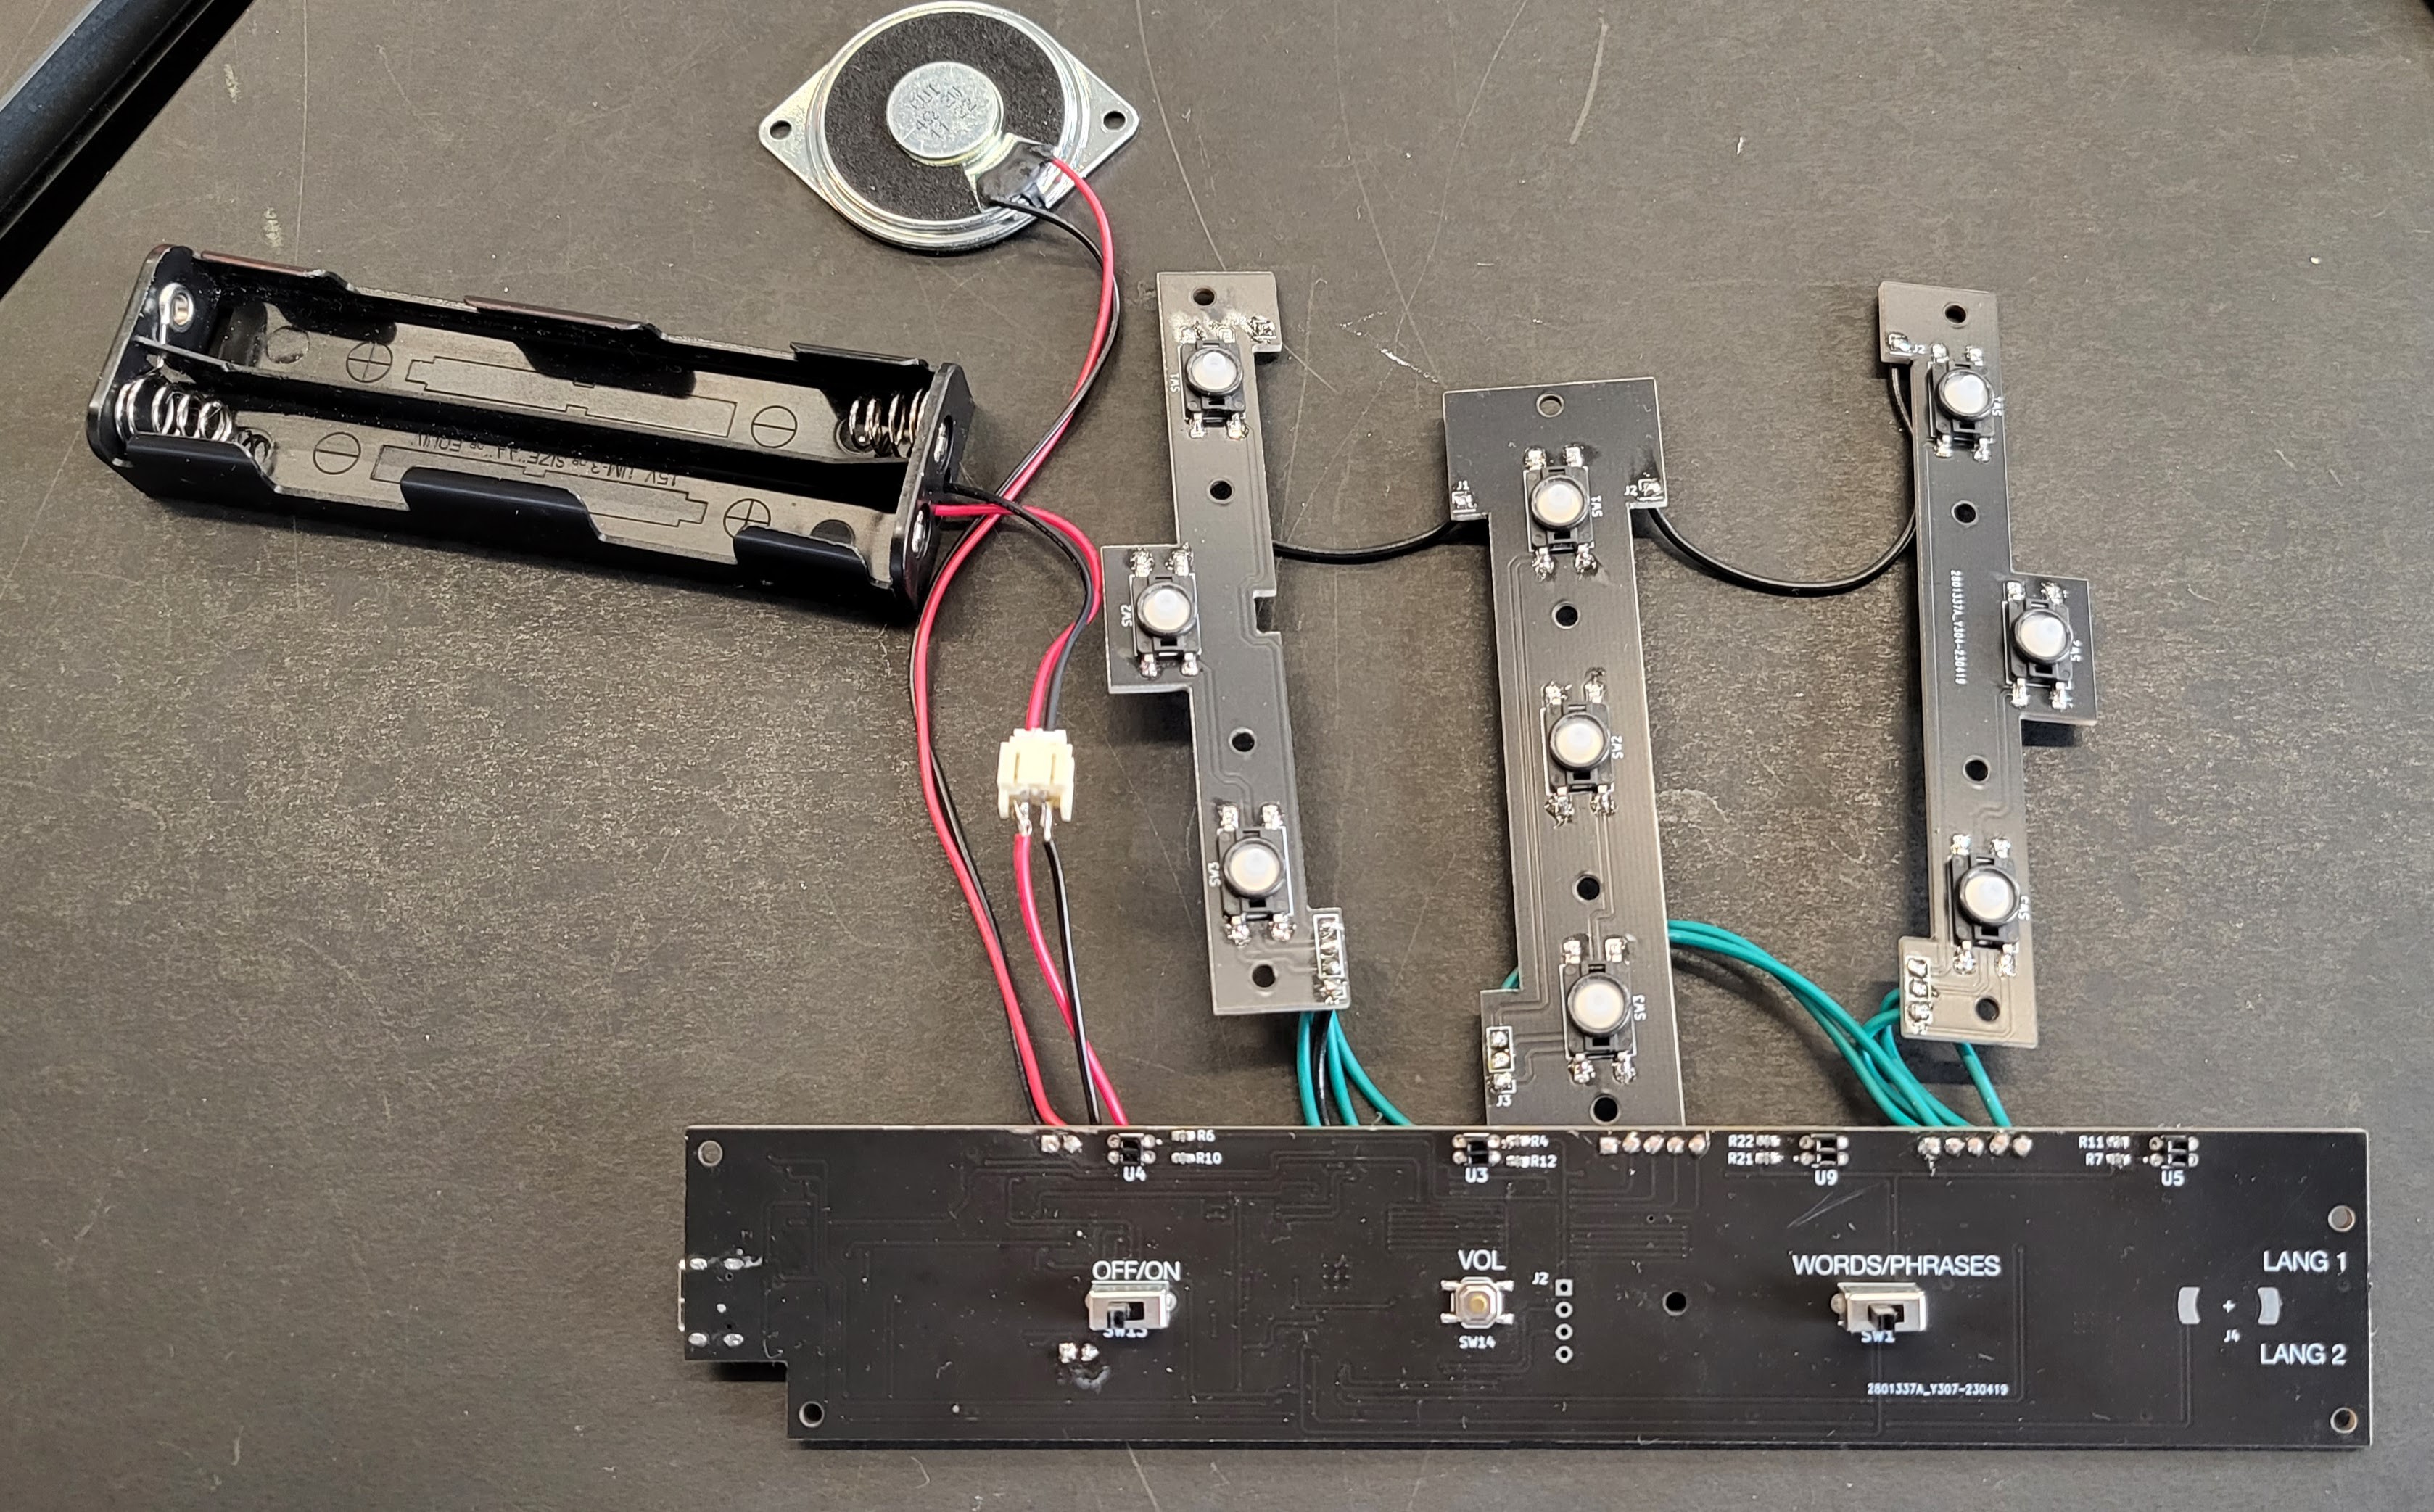
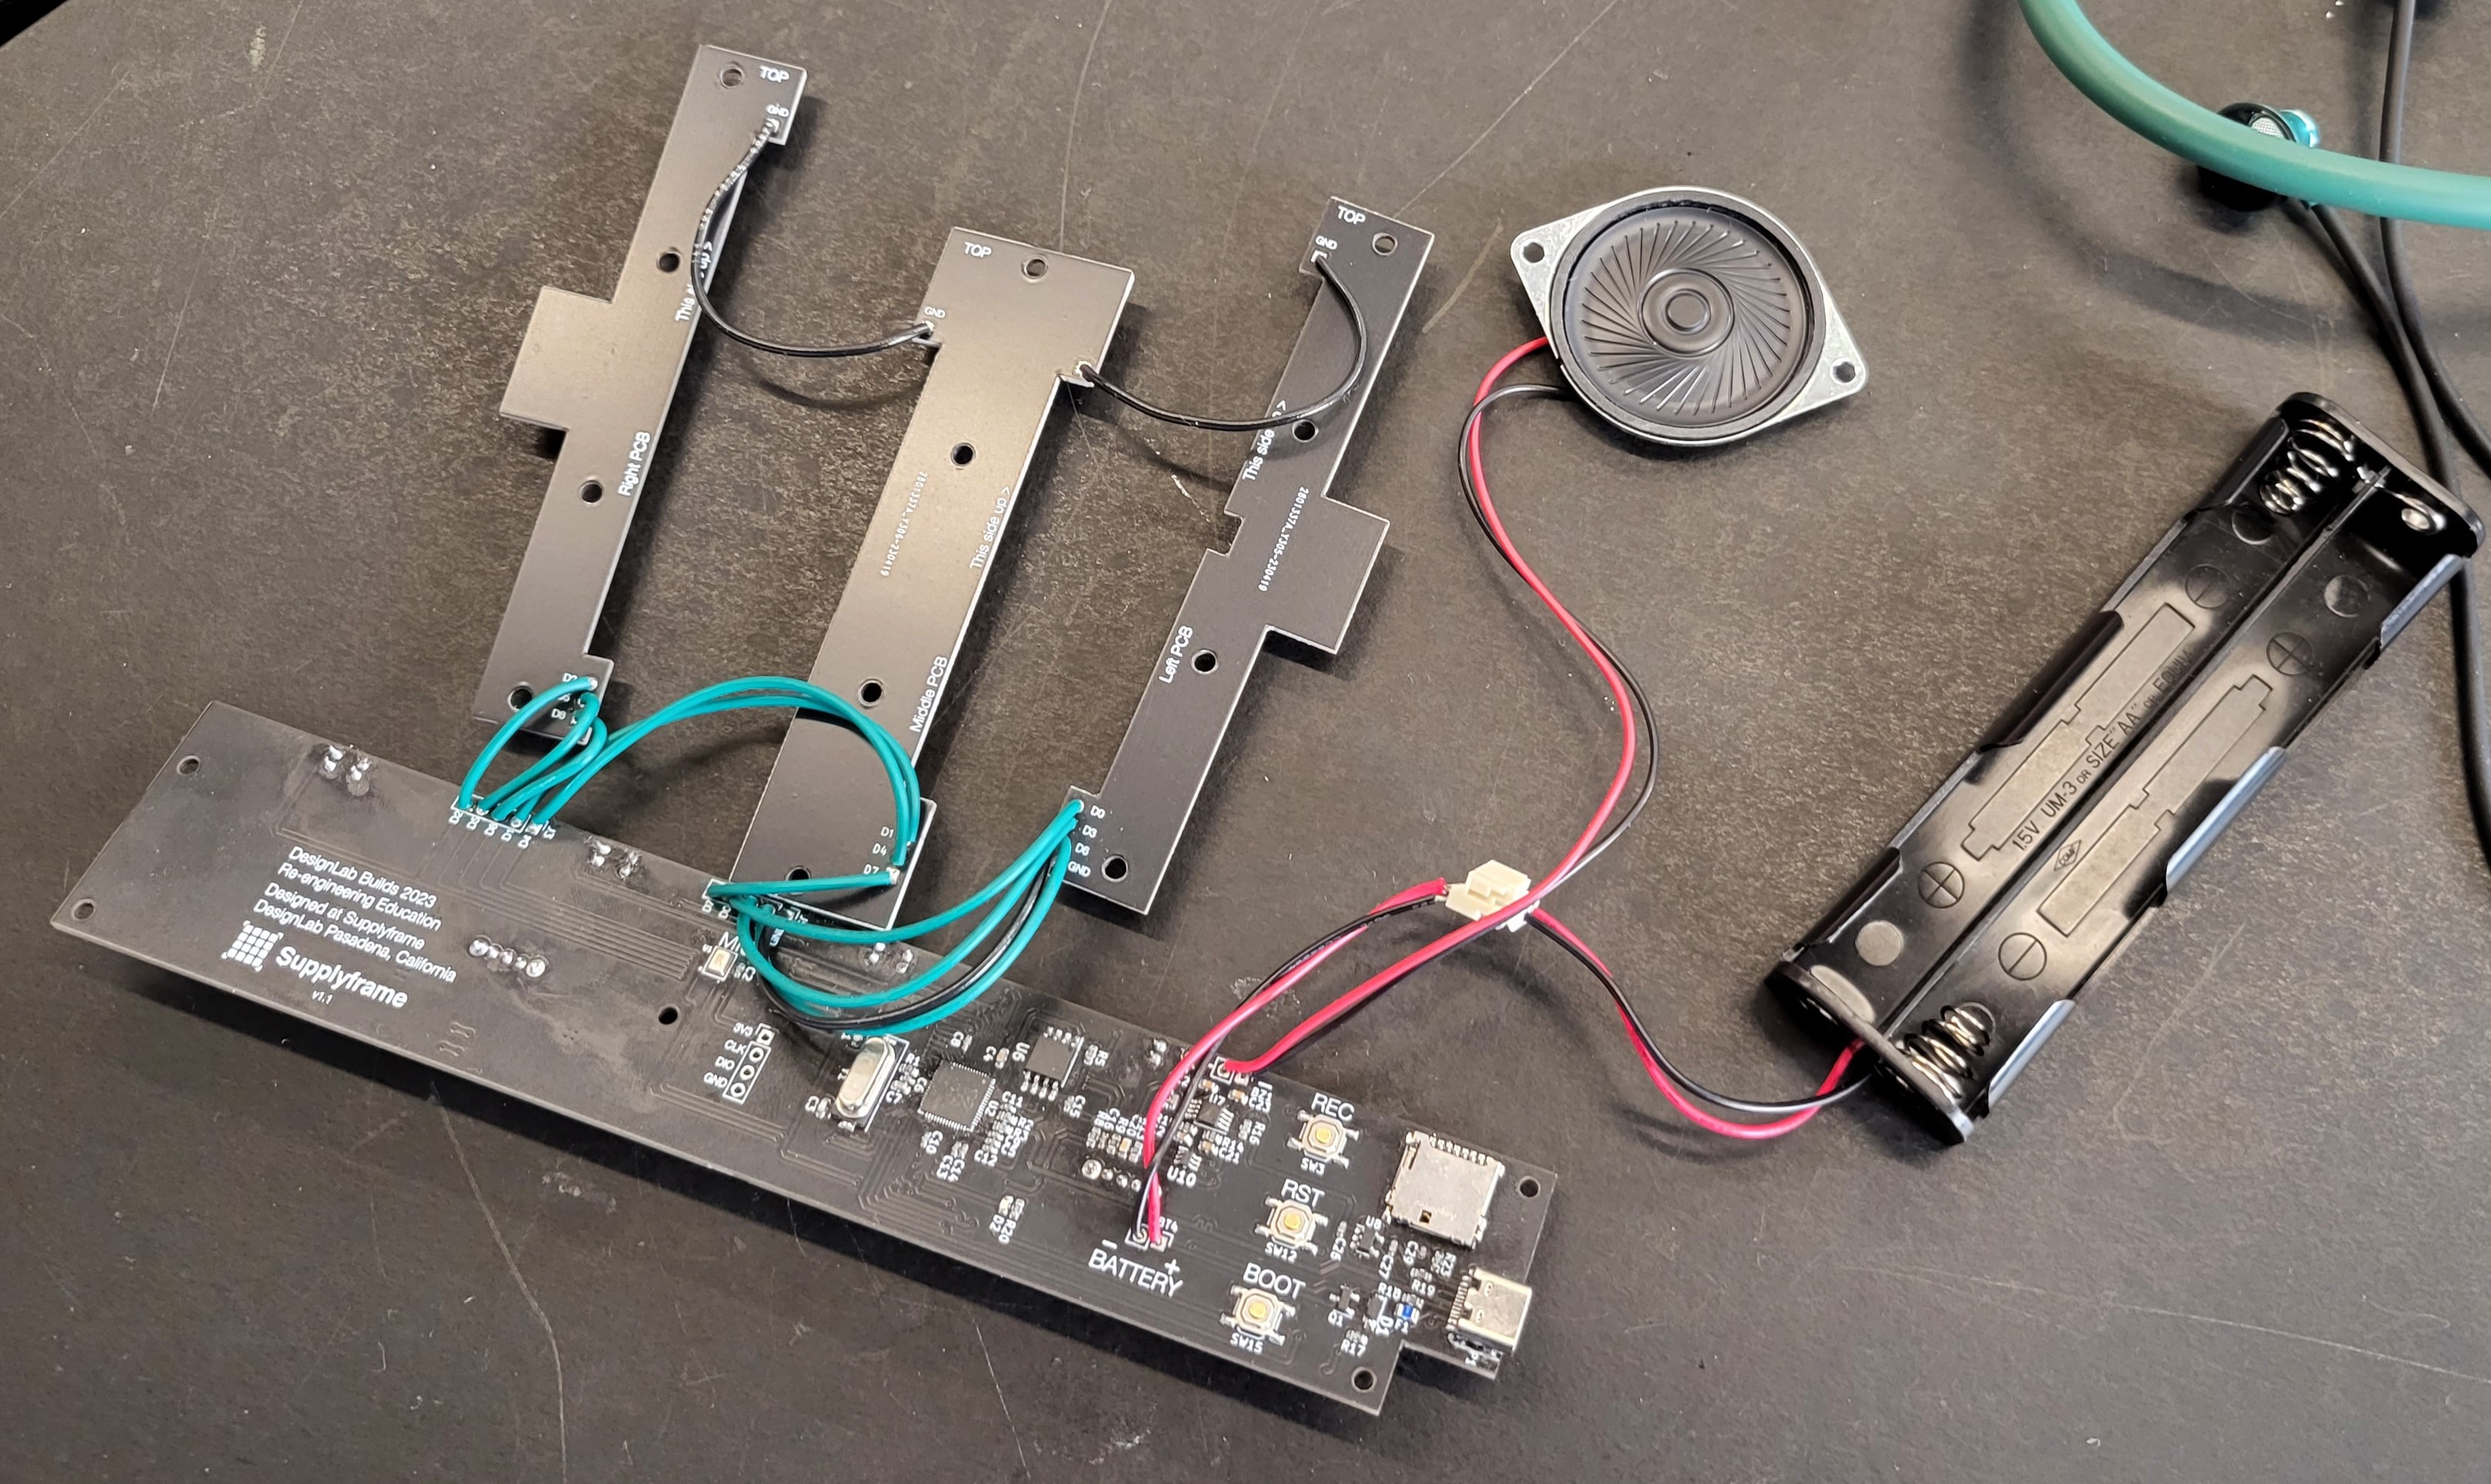
Below is the final PCB design.
Main Board: It has two sides that are equally important and used. The front includes the optical sensors that detect the pages, and the control buttons: On/off, volume, language and word & phrase selector dial. The back is where everything else lives: boot buttons, Microsd card slot, rp2040, and USB-C port. there is no need to unfasten the PCBA to change the language packs or flash a new firmware version. You just need to open the back cover. Oh, and battery and speaker too.
Buttons Boards: These are much simpler, they are one sided, and only have the silicone-cap buttons.
For these boards I went for a three columns array in order to avoid too many cables inside. This can be changed easily by anyone who wishes to have a different array.
![]()
![]()
-
First quick iteration - Electronics
05/12/2023 at 19:24 • 0 commentsI spent a few sessions communicating to Andres what I wanted to achieve for this project and how we could design the hardware / software around that idea.
This was his very first board, and it was the perfect stepping stone for a quick project iteration. If this were golf, we hit the green with the first shot. He would probably ask that you do not pay any attention to that pink cable there, though.
A few interesting things we learned here:
- The first buttons in the top area were too small and not practical.
- The pcb would work, but it was not efficient in terms of area usage
- Sensors worked!
All in all, very good feedback and insights. All the basic functionalities are there, so this allowed him to start programming, and I went back to the drawing board in search of the ideal form factor and more efficient PCB arrays.
-
Deciding the form factor
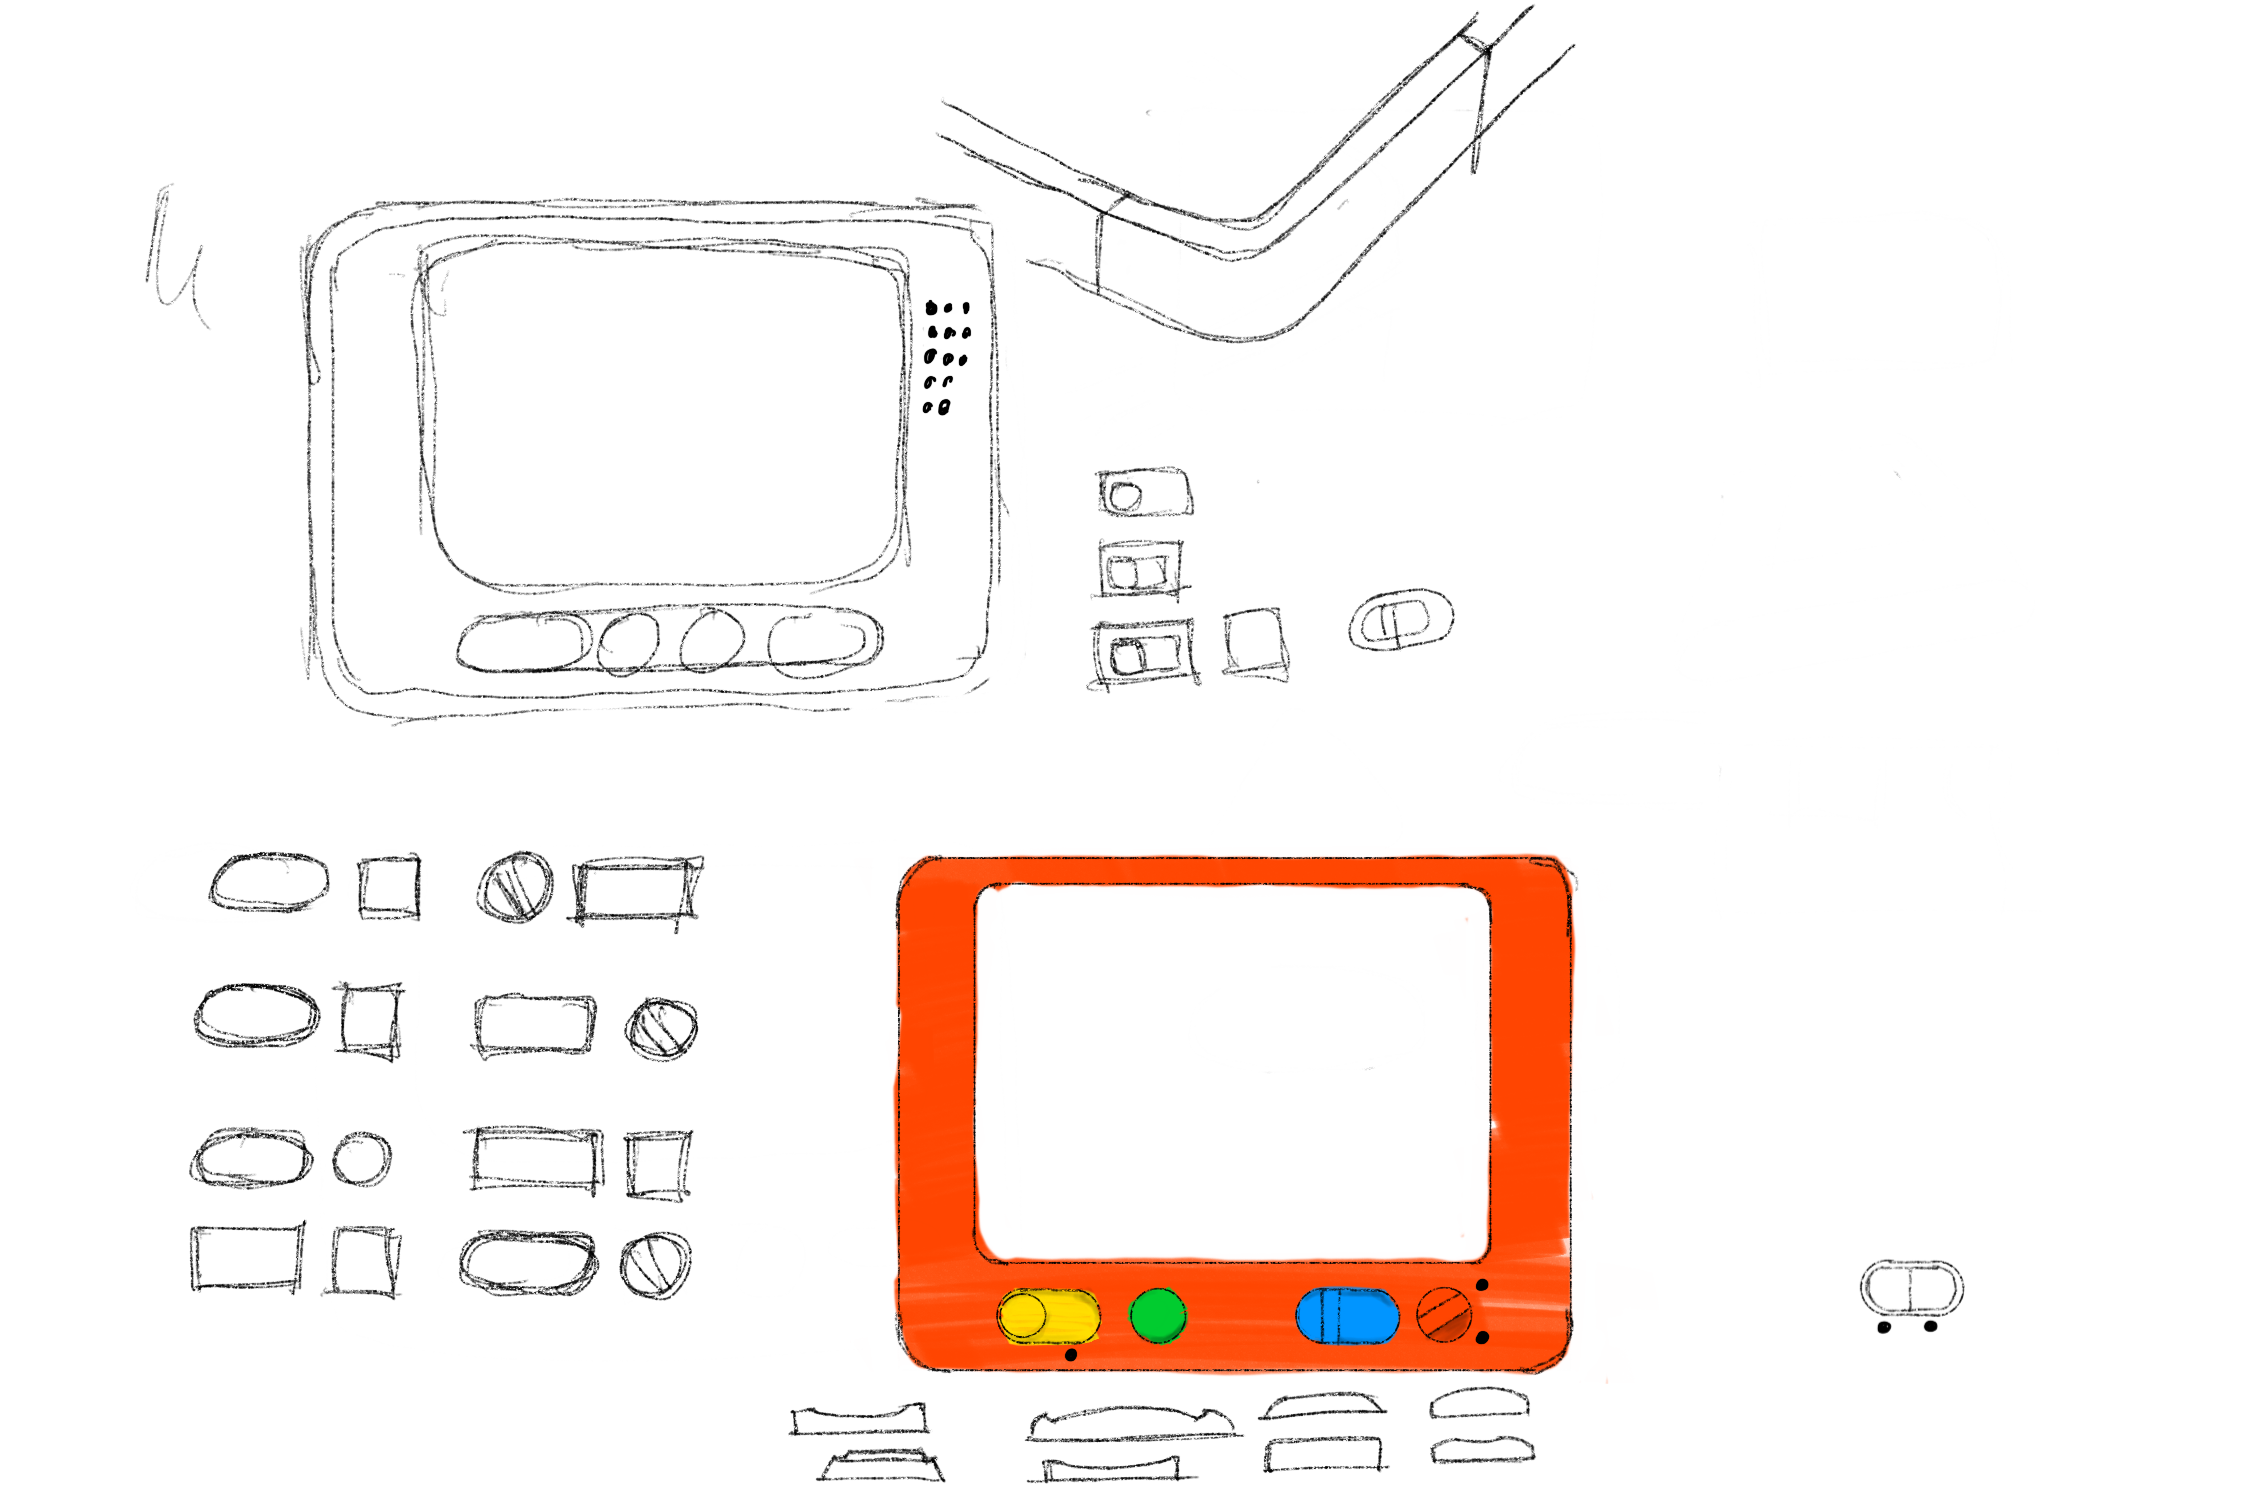
04/24/2023 at 20:46 • 0 commentsIf you read the first logs you'd be able to tell that I was trying different, crazier shapes. However, sometimes going back to the basics is just what you need to do.
Inspired (a little bit) by the Midjourney concepts, I went back to a rectangular shape. It looks great! It has this retro-tv, retro-toy vibe that is also easy to stack, better for storage, etc. Plus, it will be a great analogy for the images that are going to be visible in the "play" area.
Now, since we have this linear shape, I wanted to make it a point for children to have easily distinguishable buttons on the front. I experimented with several possibilities. Ideally, each one would have been a different mechanism, but that would impact cost. So we had to go for one push button, one rotary, and two toggle switches. Here is a little of the design process when trying to determine which functions go where, and with what buttons.
![]()
We have the following functions:
- On/Off - Toggle switch
- Volume - Push button, three levels (low, medium, high, then back to low)
- Language selector: Toggle switch (A or B)
- Words or Phrases selector: Rotary switch (A or B)
During the design phase I could not pass the opportunity to have my favorite tester give it a try:
![]()
She liked this one too!
-
Ergonomics and decisions
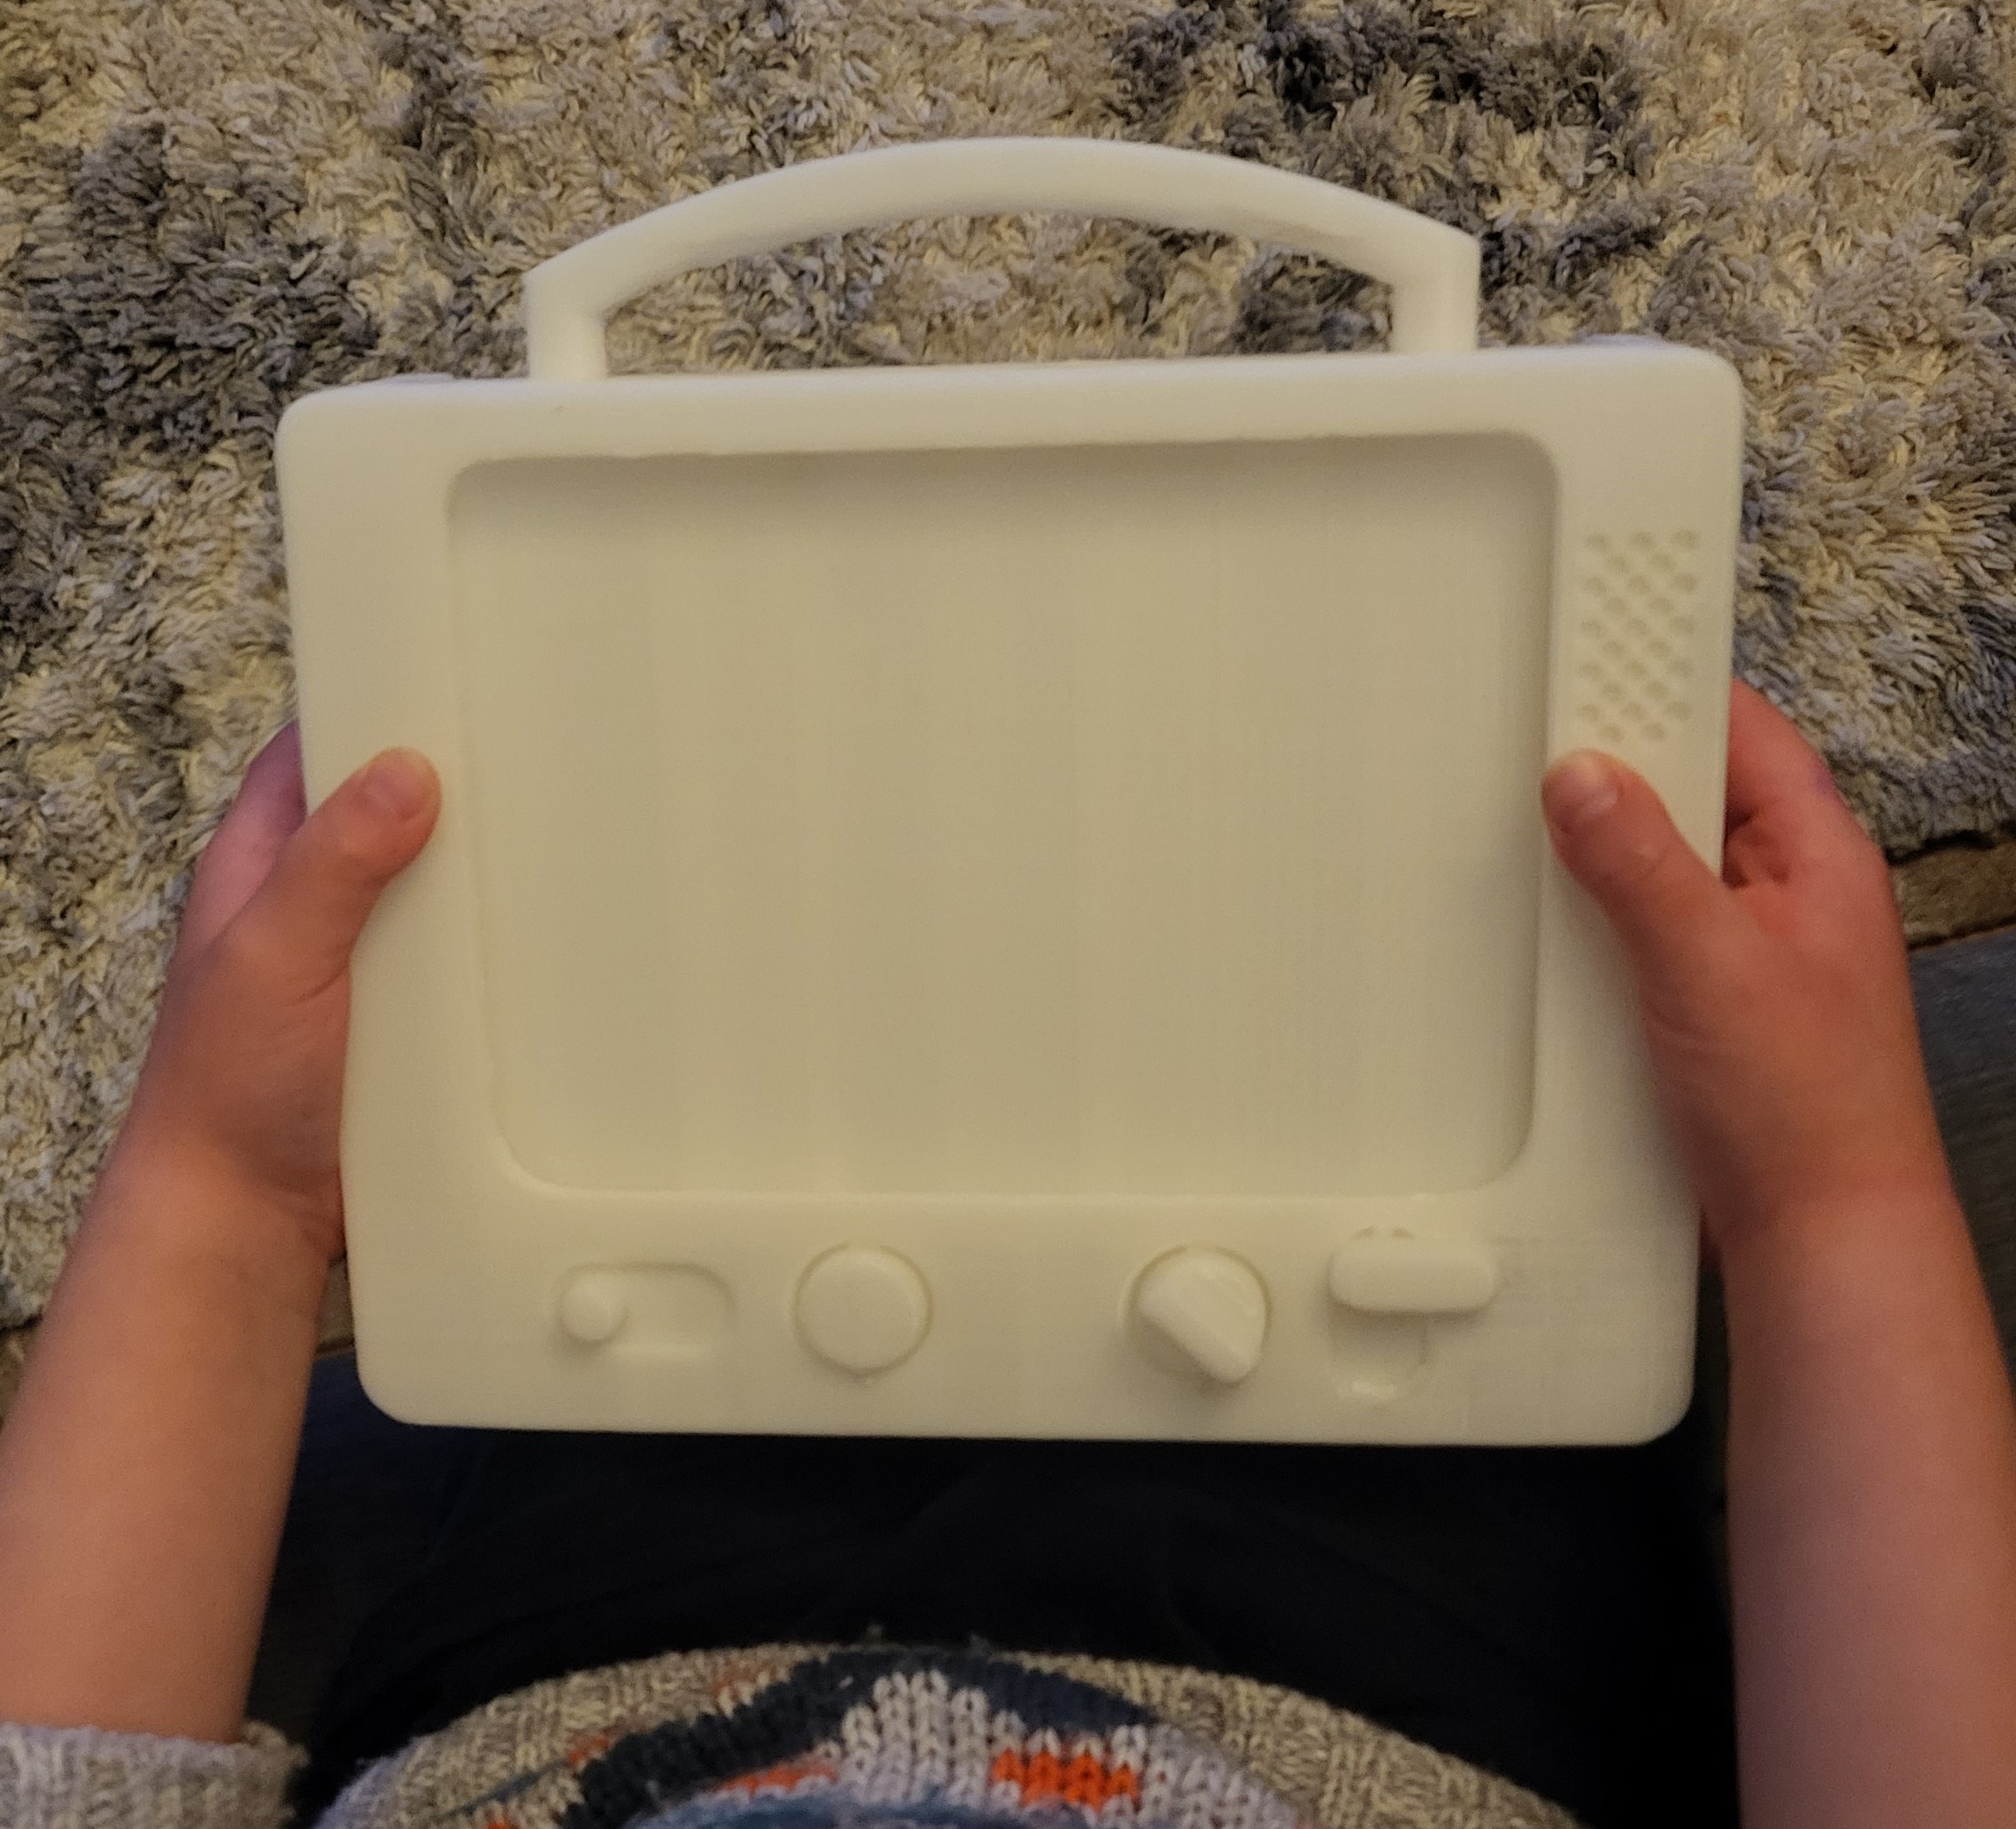
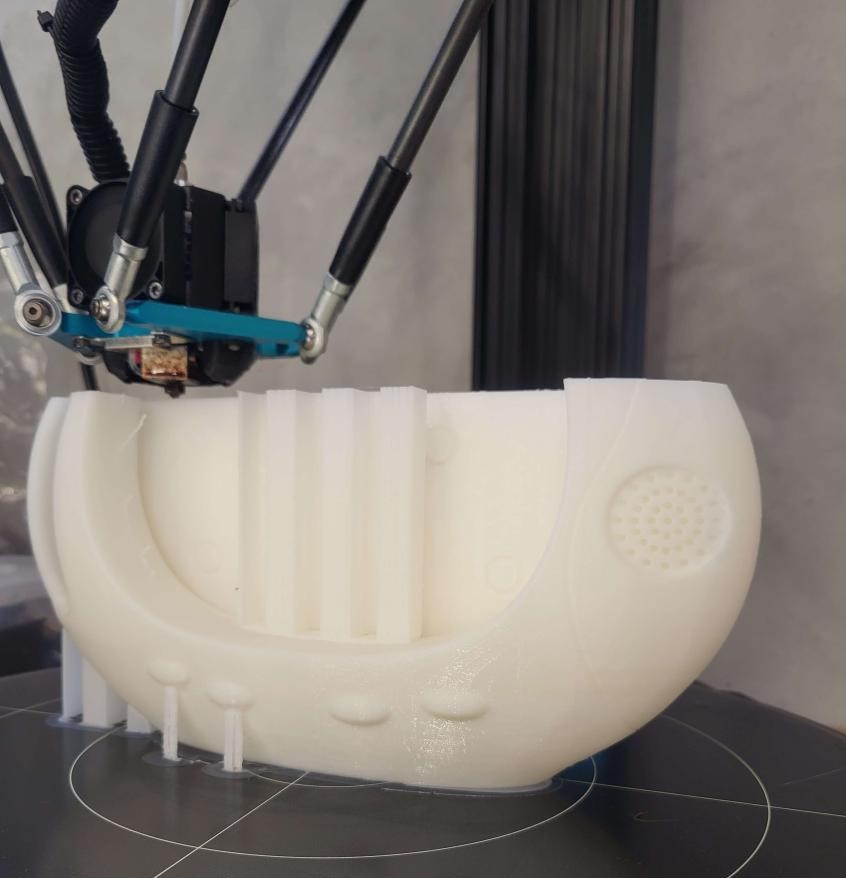
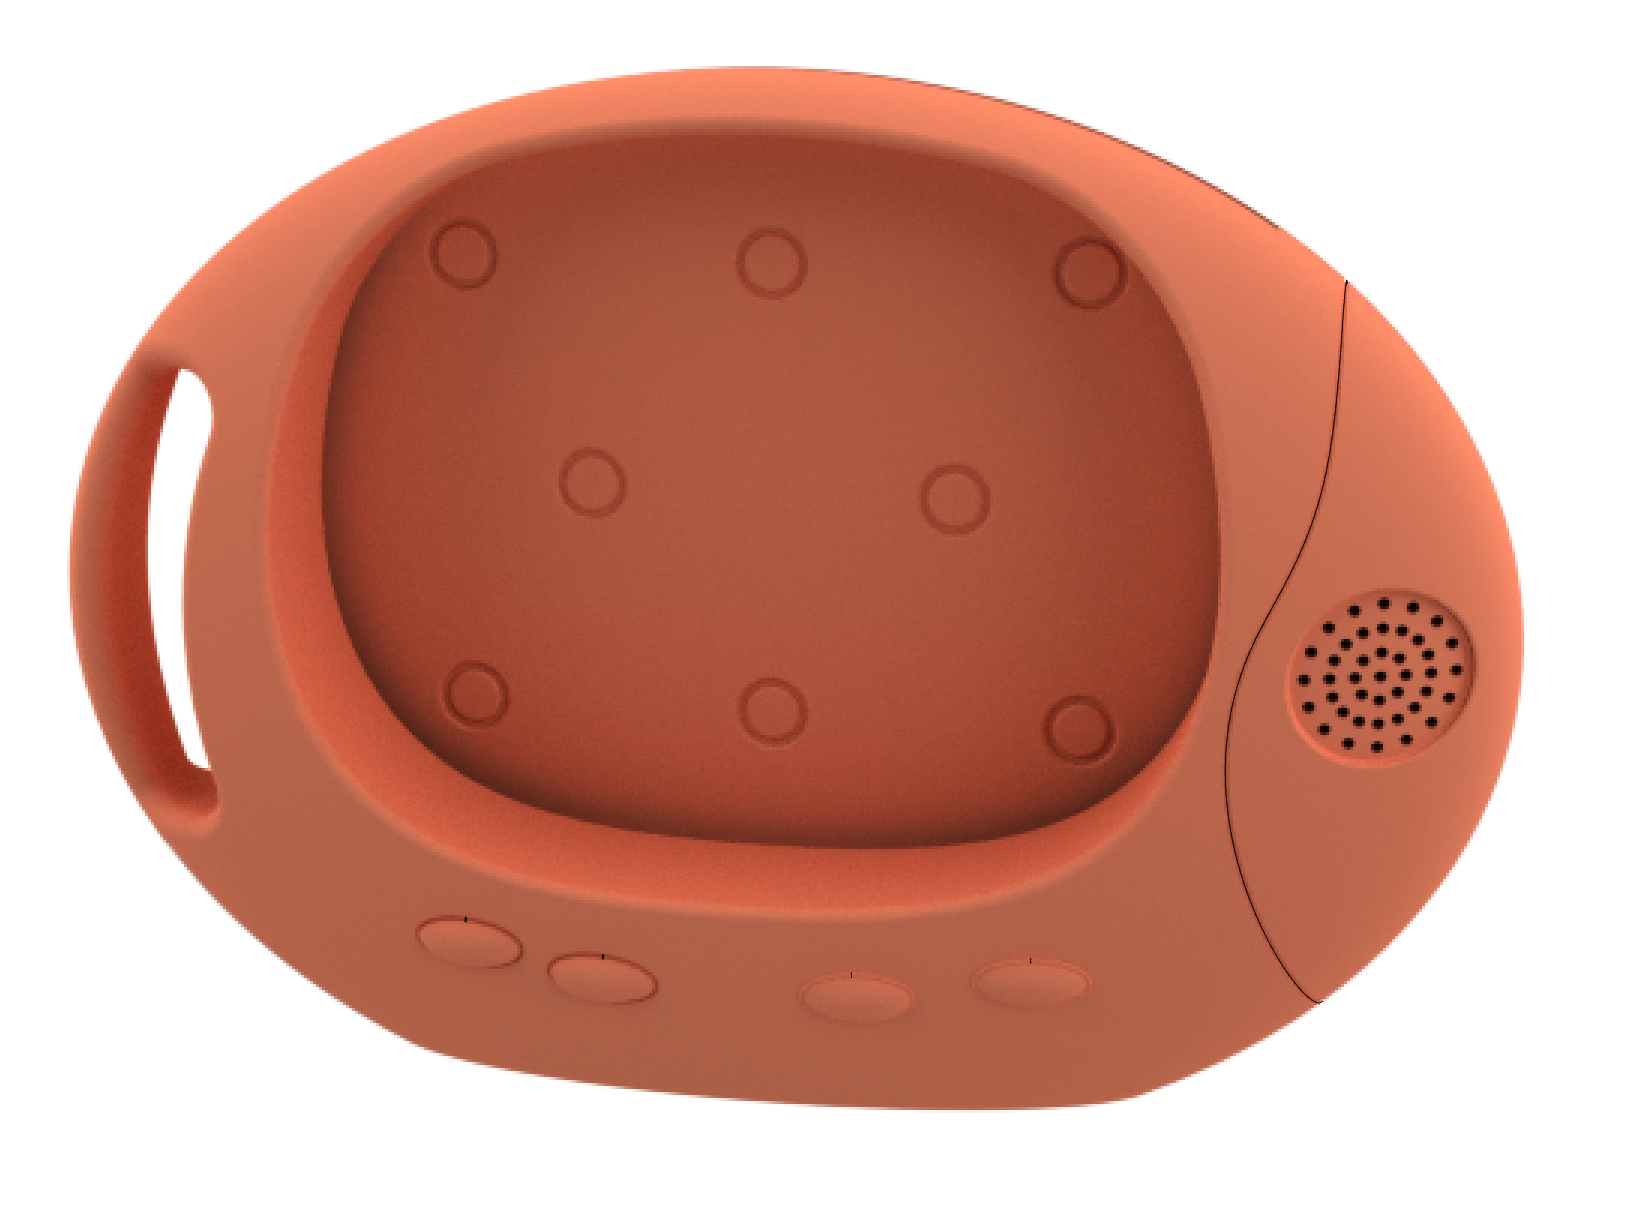
04/24/2023 at 20:10 • 0 commentsLet's print!
This concept had absolutely zero electronics considerations, but I wanted to know early how it would play out. So, nothing better than a one piece print that you can carry around and test.
![]()
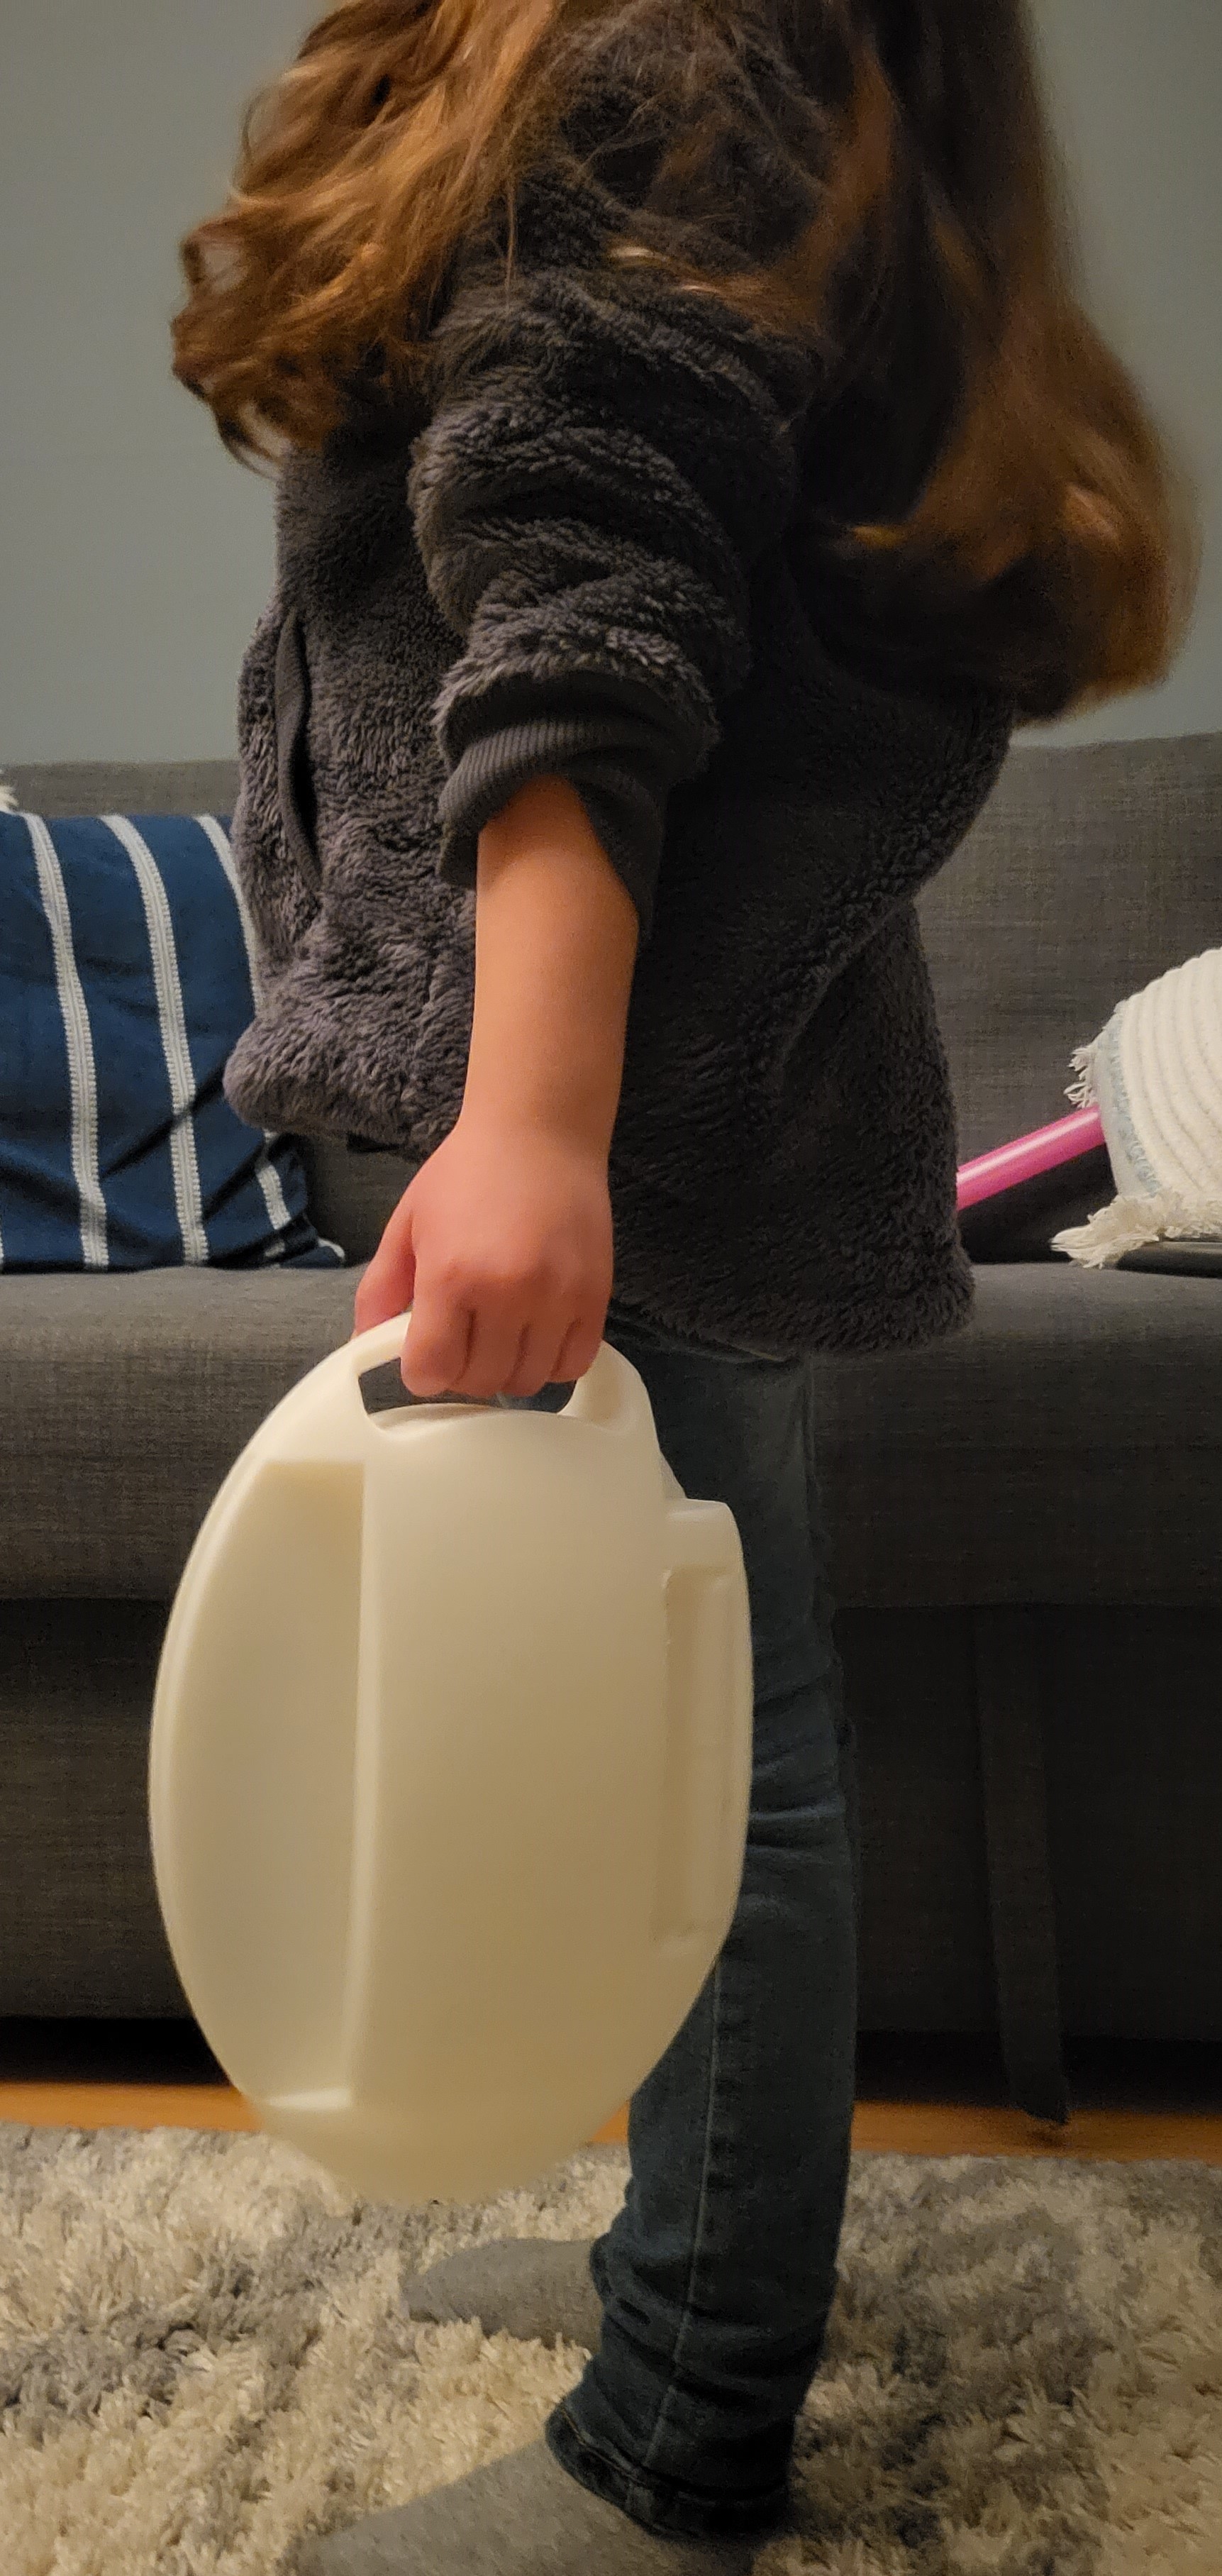
I tested it with a 5 year old who was very curious about it and agreed to help me if in return I would show her and let her play with the final concept. Her terms were acceptable.
![]()
Seeing her using the model gave me very interesting insights. The size of the device and the handle are manageable for smaller children, but having the handle to the side does not work well if you are carrying sheets of paper in the back container.
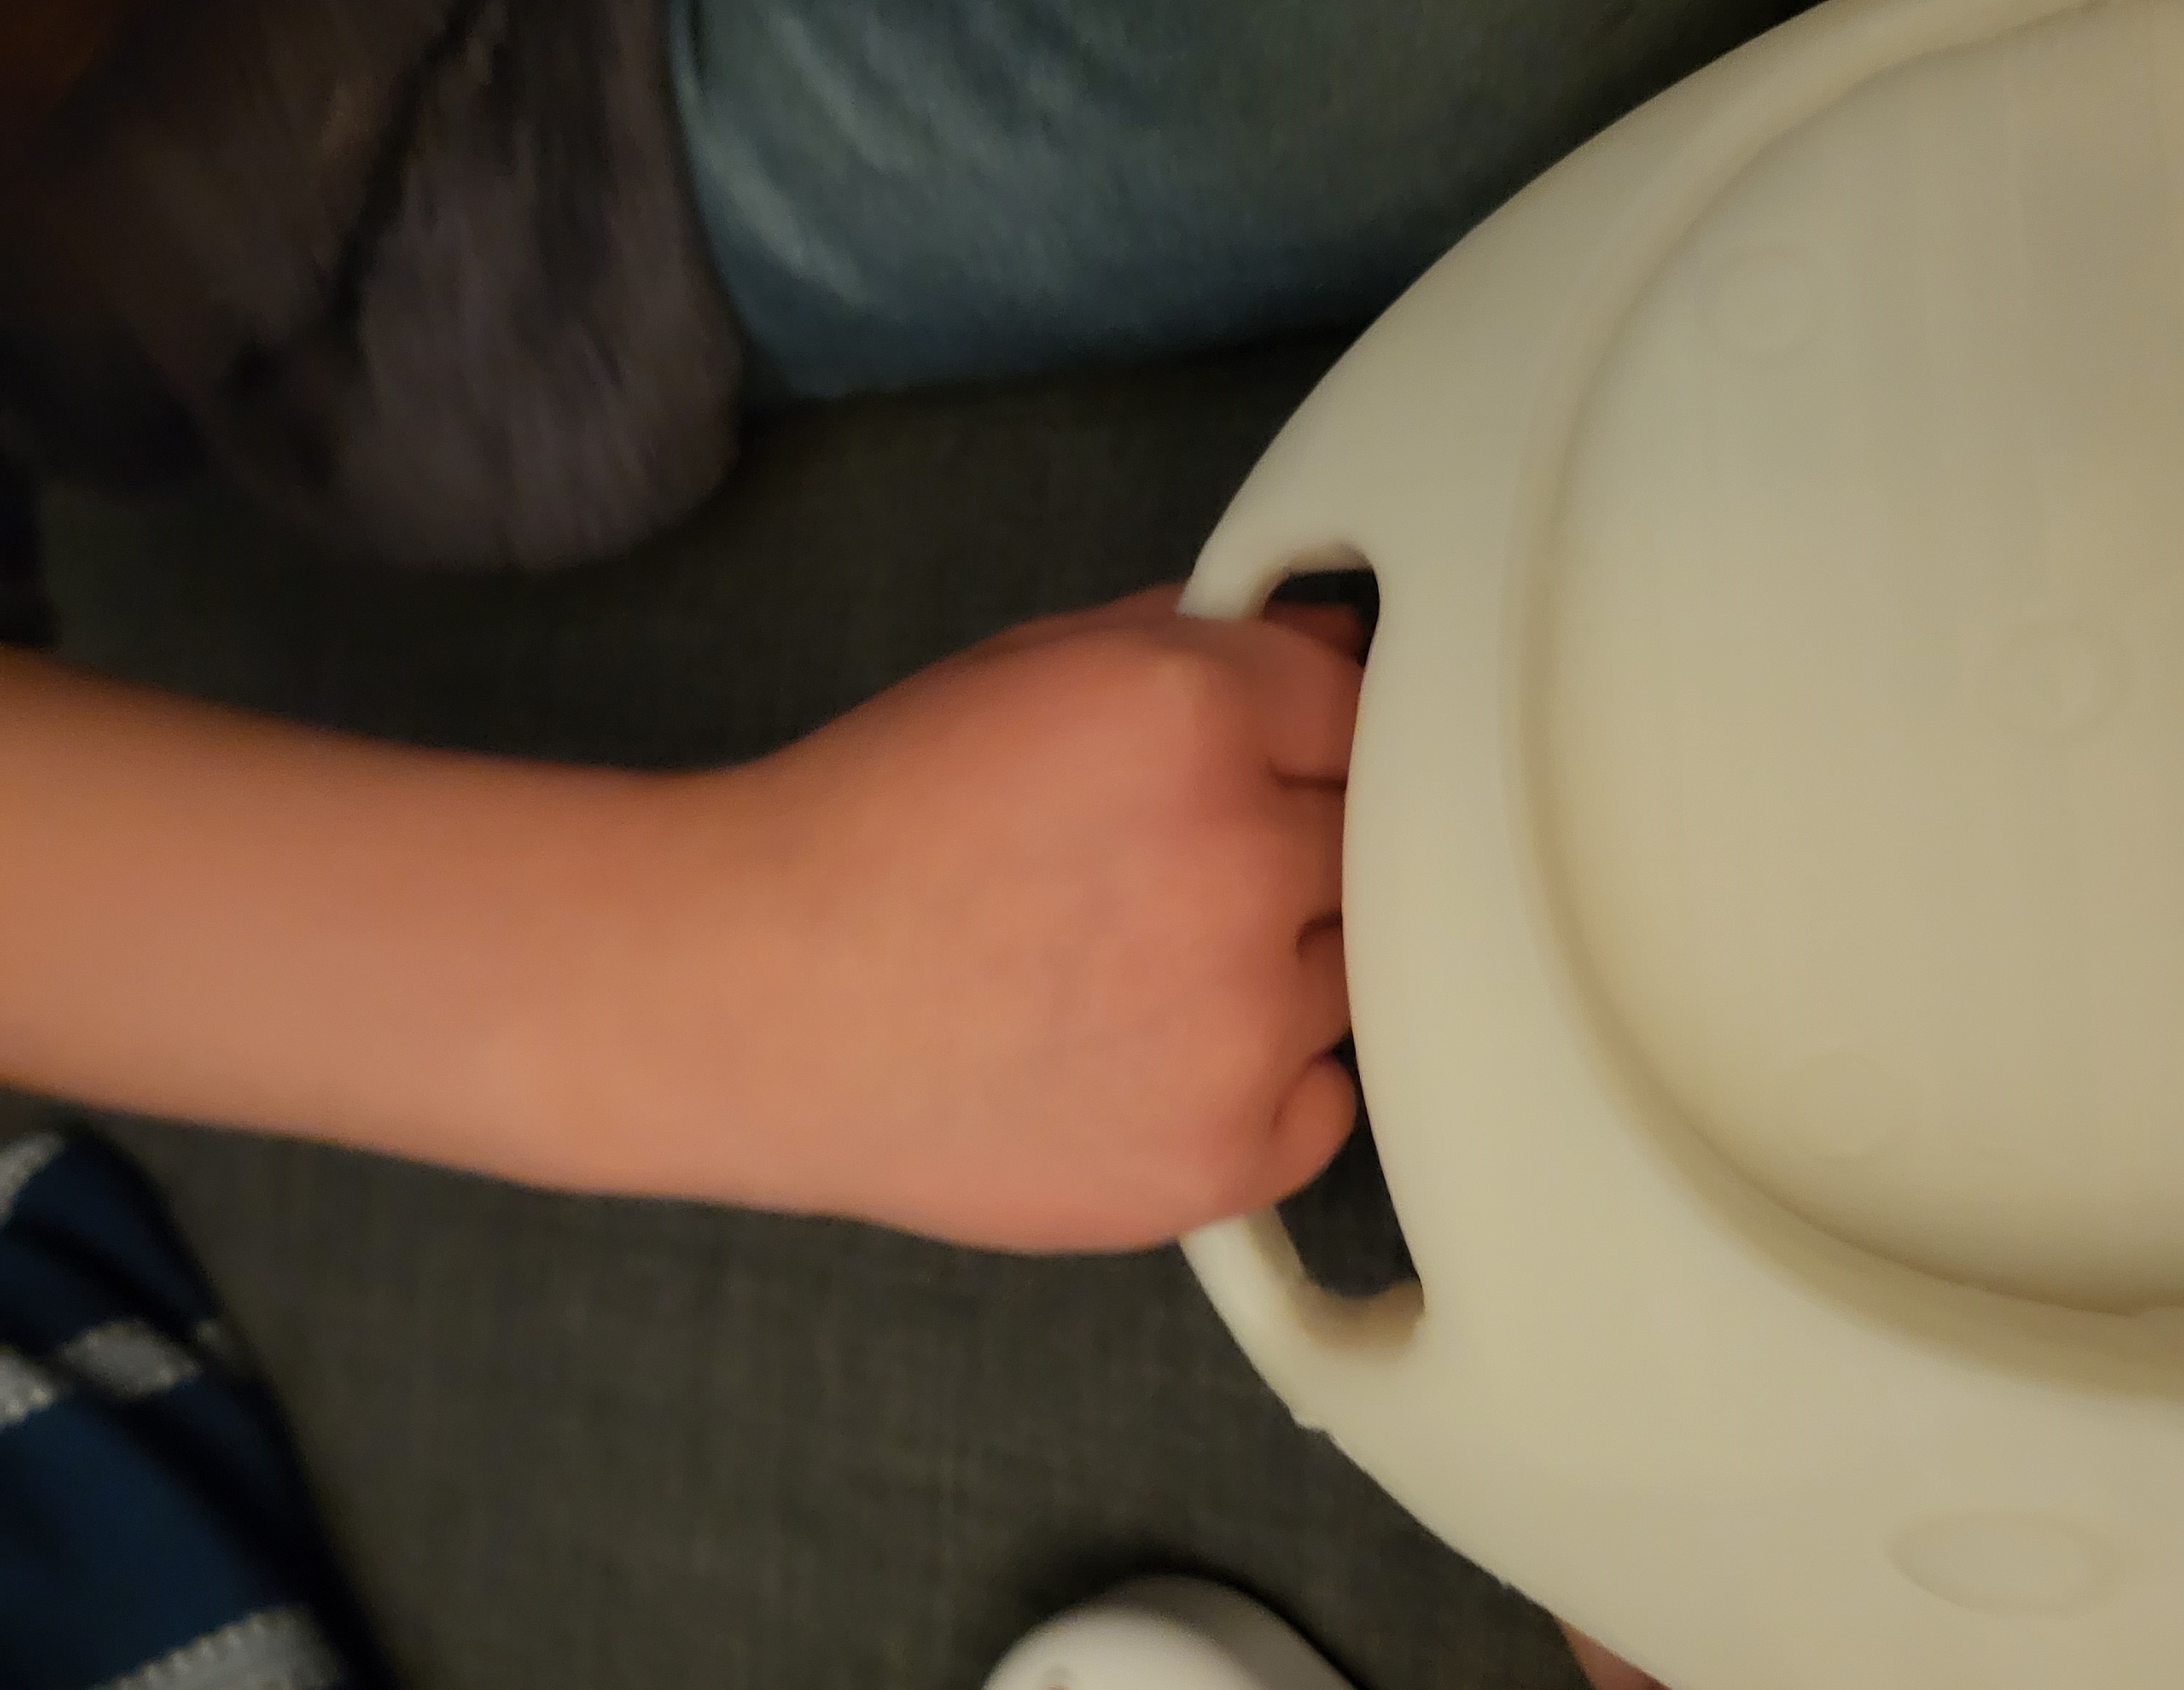
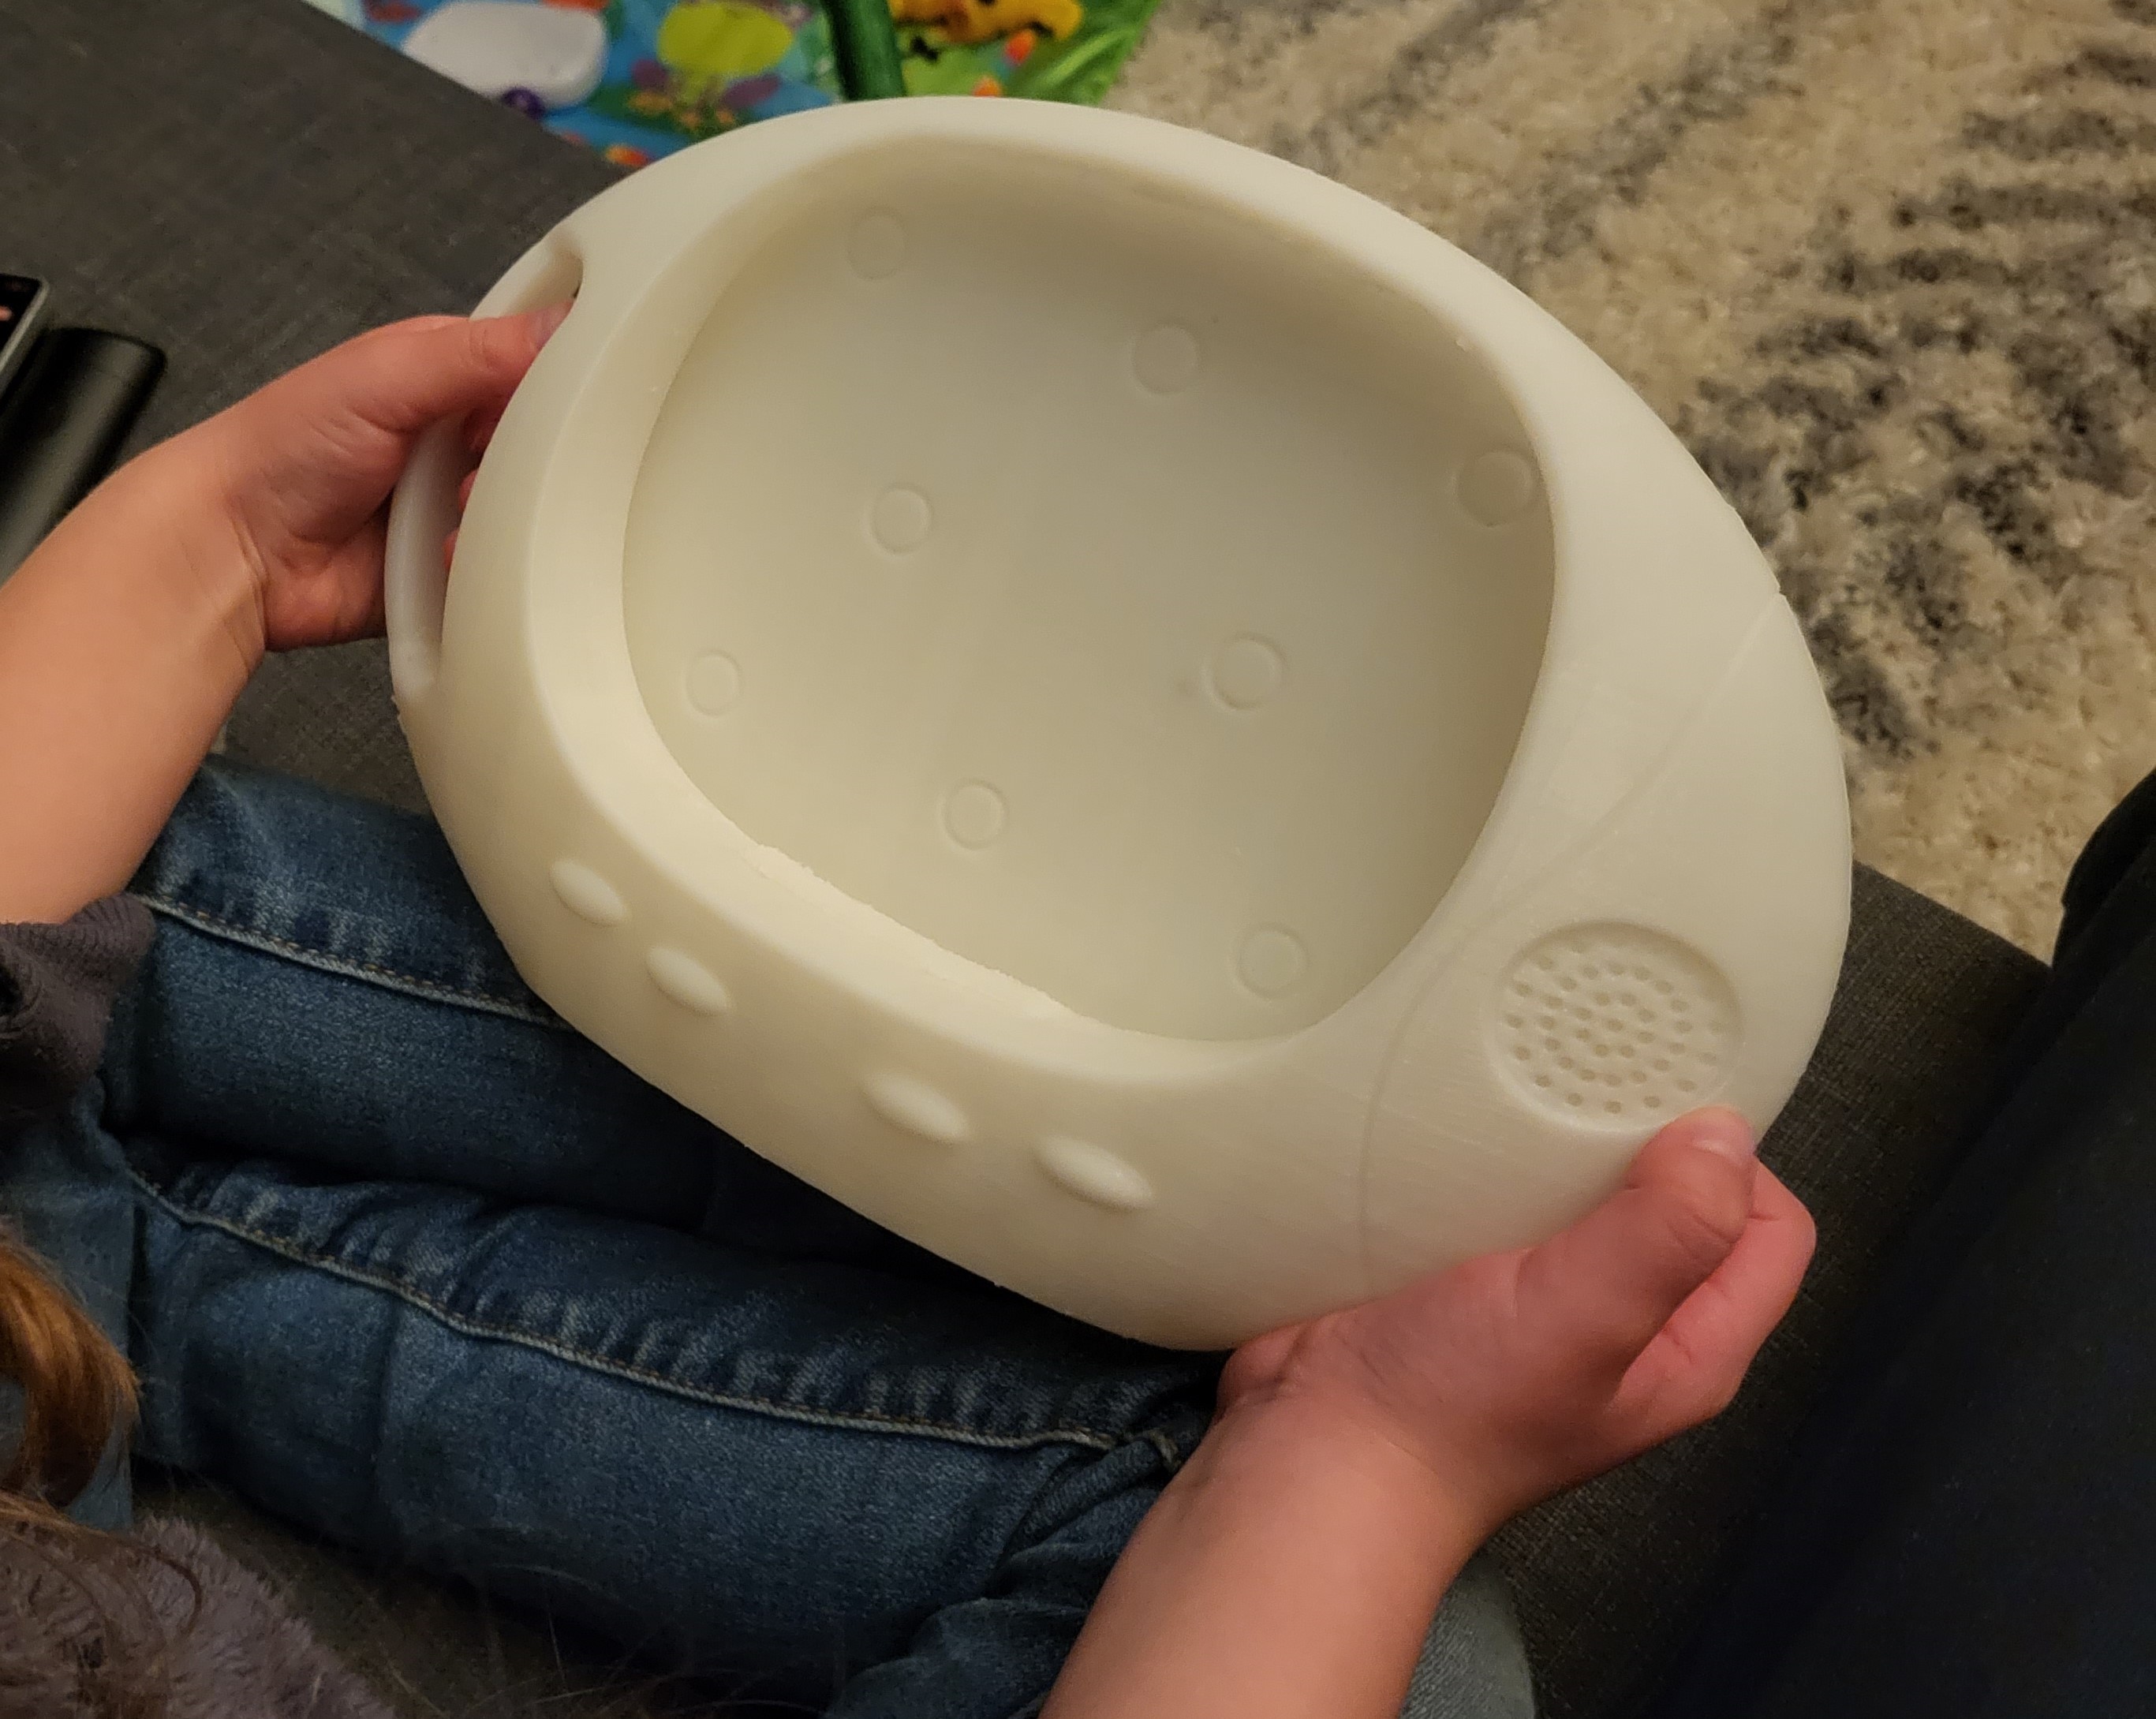
![]()
![]()
Another very important insight was to see how children would hold the device. Based on this, I had to raise the speaker a but more to prevent it from being blocked by their hands.
-
Sketches and first concepts
04/21/2023 at 01:51 • 0 commentsSo two things happened concurrently. While we did some AI concept generation, I started working on the actual concept.
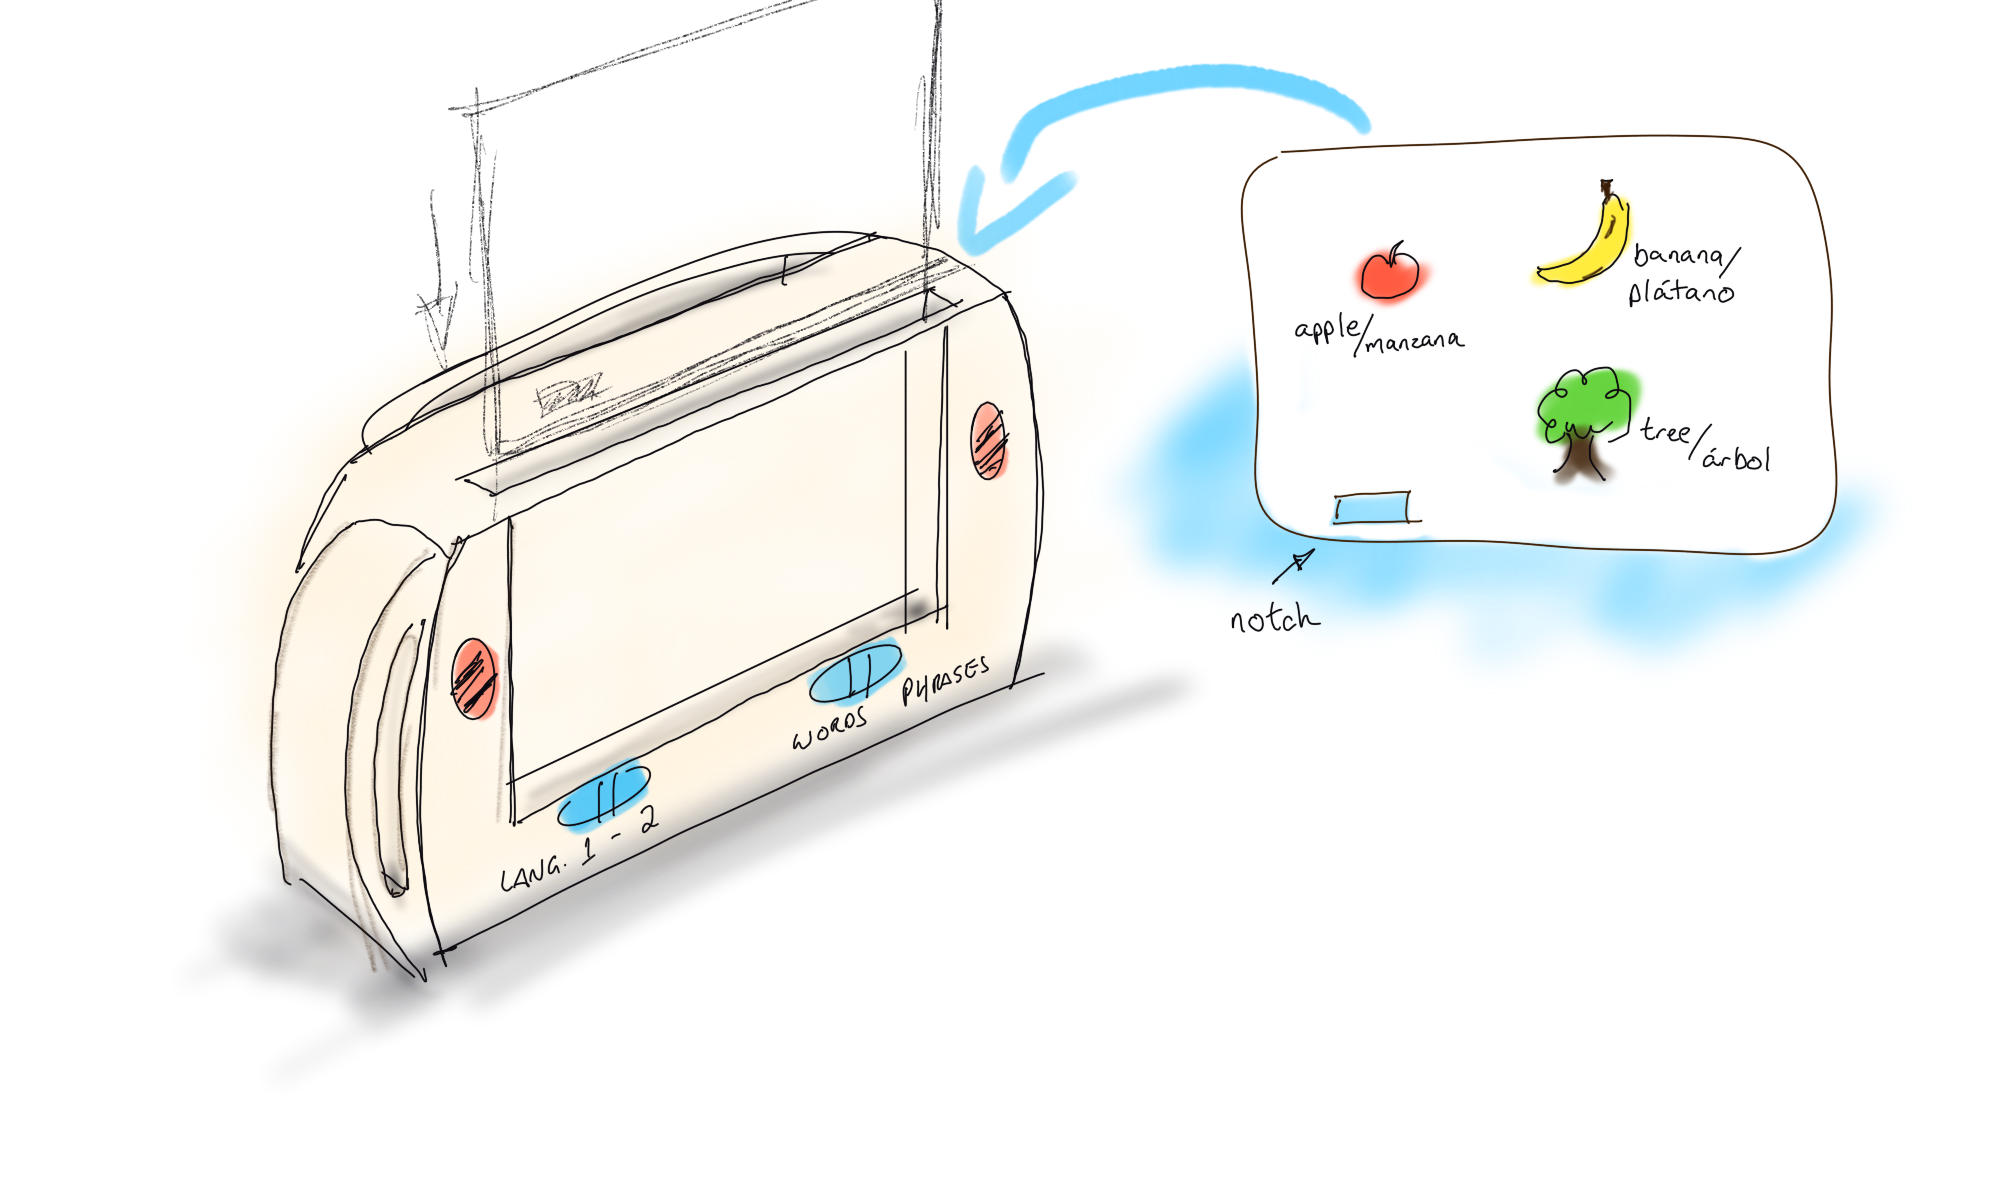
Early sketches focused on entirely on function. The one below shows the basic functions: Swappable cards, possibly detected by the unit via notches, speakers on each side, and selection of language and phrases. These were the primitive ways to communicate what I had in mind for it.
One of the first and more obvious challenges is how to let the system know what page you are on. Embedding something on the paper is cool and fancy and easy, but I steered clear from it. This made our life more complicated, but if we succeed, the pages should be as easy to replicate as printing a simple sheet of paper with a common printer.
During this stage I had the opportunity to talk to the great David Cuartielles and brainstorm how to sense the pages. Always cool ideas!
The second concept was more of a space-age toy. I wanted to start exploring the tridimensional interaction, but still at a very primitive stage with almost no constrains. I just went for what seemed friendly.
![]()
This one generated more passional responses. People either loved or hated it.
What do you think?
-
A.I. for general concepts
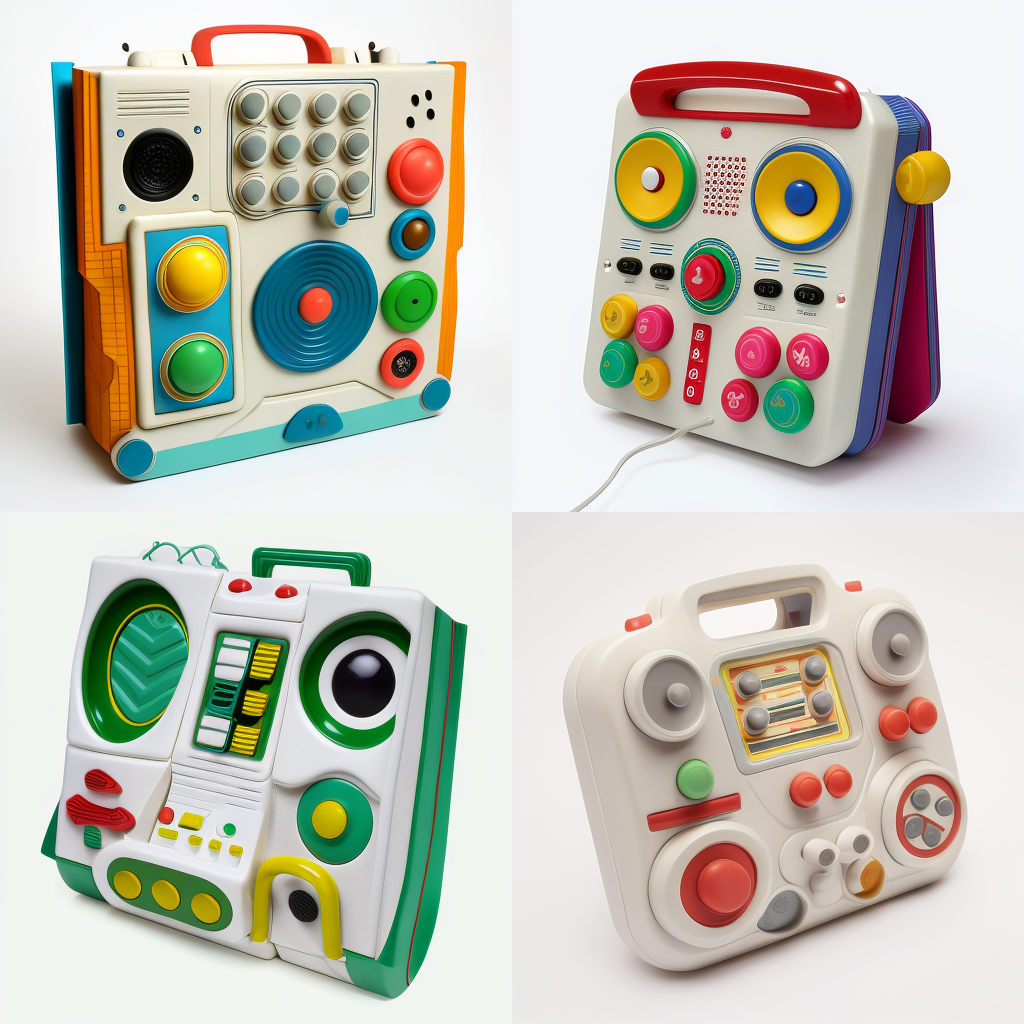
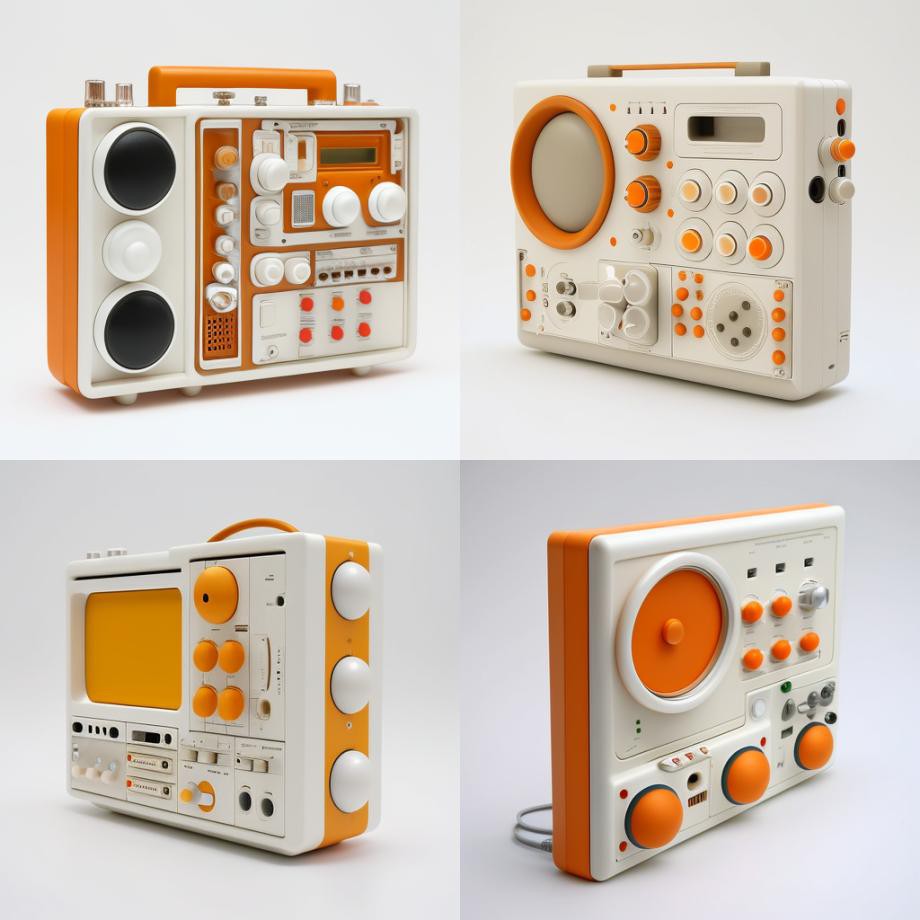
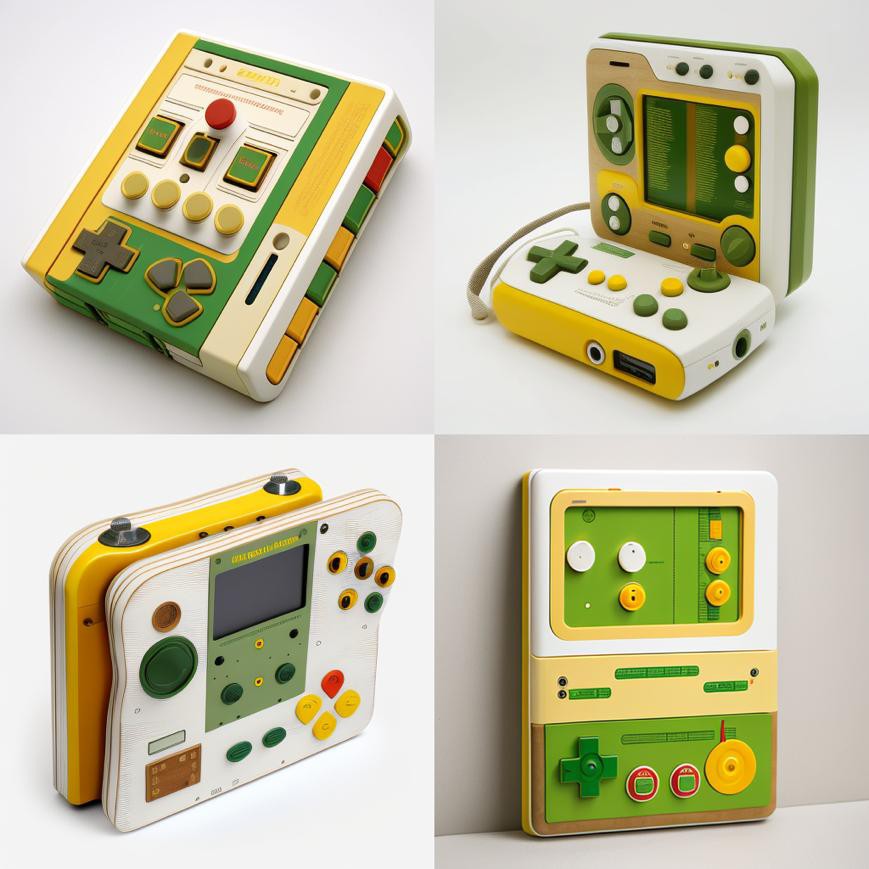
04/21/2023 at 01:51 • 0 commentsA.I. is all the rave right now so of course we had to try it a little bit.
We experimented with some prompts. Here are some of my favorites. We threw in there the whole word salad into Midjourney: 80's, retro, inspired by, toy, children, educational device, etc etc.
As you can see, these are interesting results that maybe with richer prompts, they would yield some results closer to what we need. They are not really functional, lack any ergonomic considerations, and the buttons are clearly copy-paste from other images found online. That said, they opened up interesting avenues for the use of color, proportions, and the playfulness of electronic devices for children in general.
2023 DesignLab Builds - LingoLearn Project
An educational device that can help children of minority-language speaking parents learn any language in a fun way.