minifig404
-
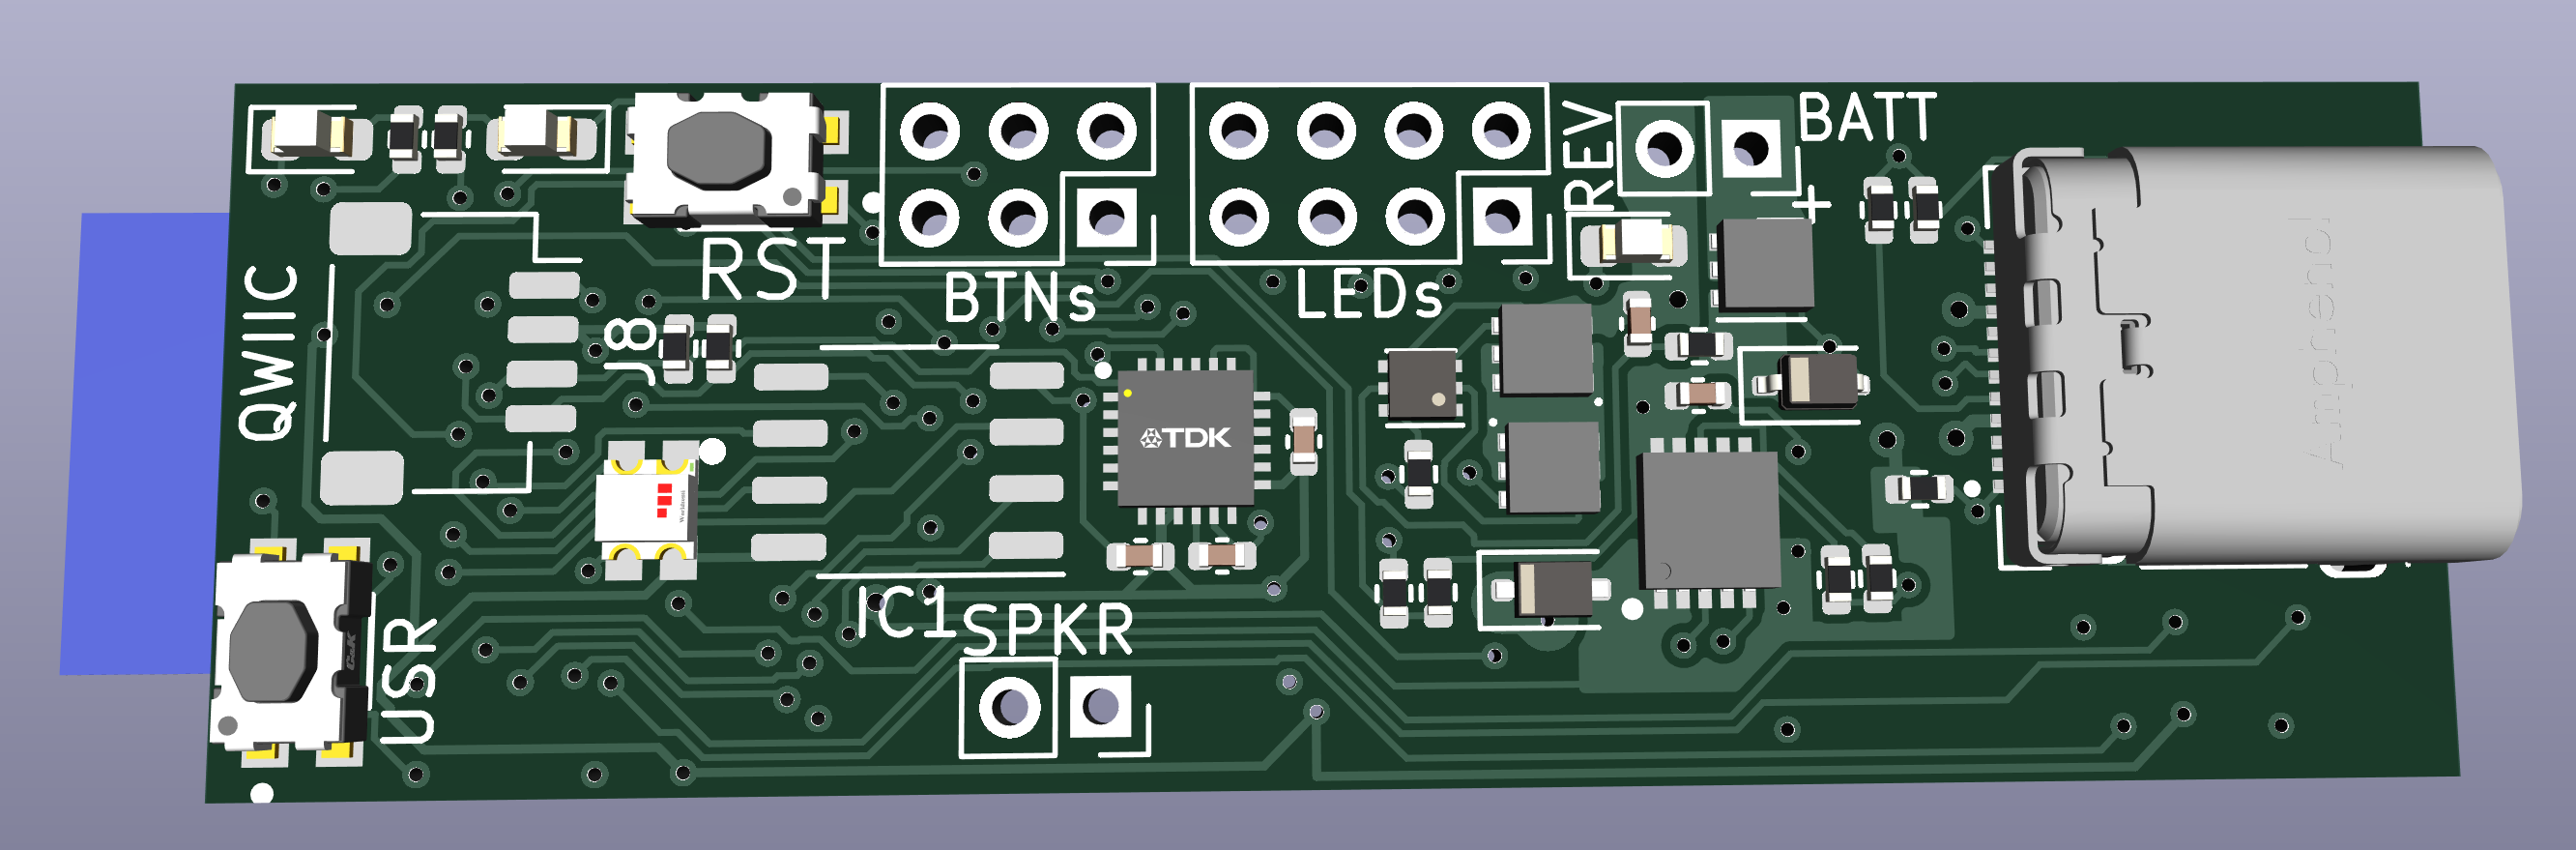
Almost had an assembled board
08/11/2023 at 14:40 • 0 comments...And then I spotted a design issue.
Here's the pictures I got from the manufacturer:
![]()
![]()
I'm going to have one part to do myself, but ah well.
So what's stopping the process? I edited some footprints, and did so incorrectly. Some of the pins got mixed up, and I'd probably fry something as soon as I applied power.
We learn by making mistakes, and this is one of my mistakes. It'll be sorted out soon.
-
Update on Board Progress
07/27/2023 at 13:24 • 0 comments![]()
![]()
Boards have been ordered. This should help save a bunch of space inside the chassis I've been working on, and maybe even fit inside an LGT chassis. We'll just have to see when we get the board.
-
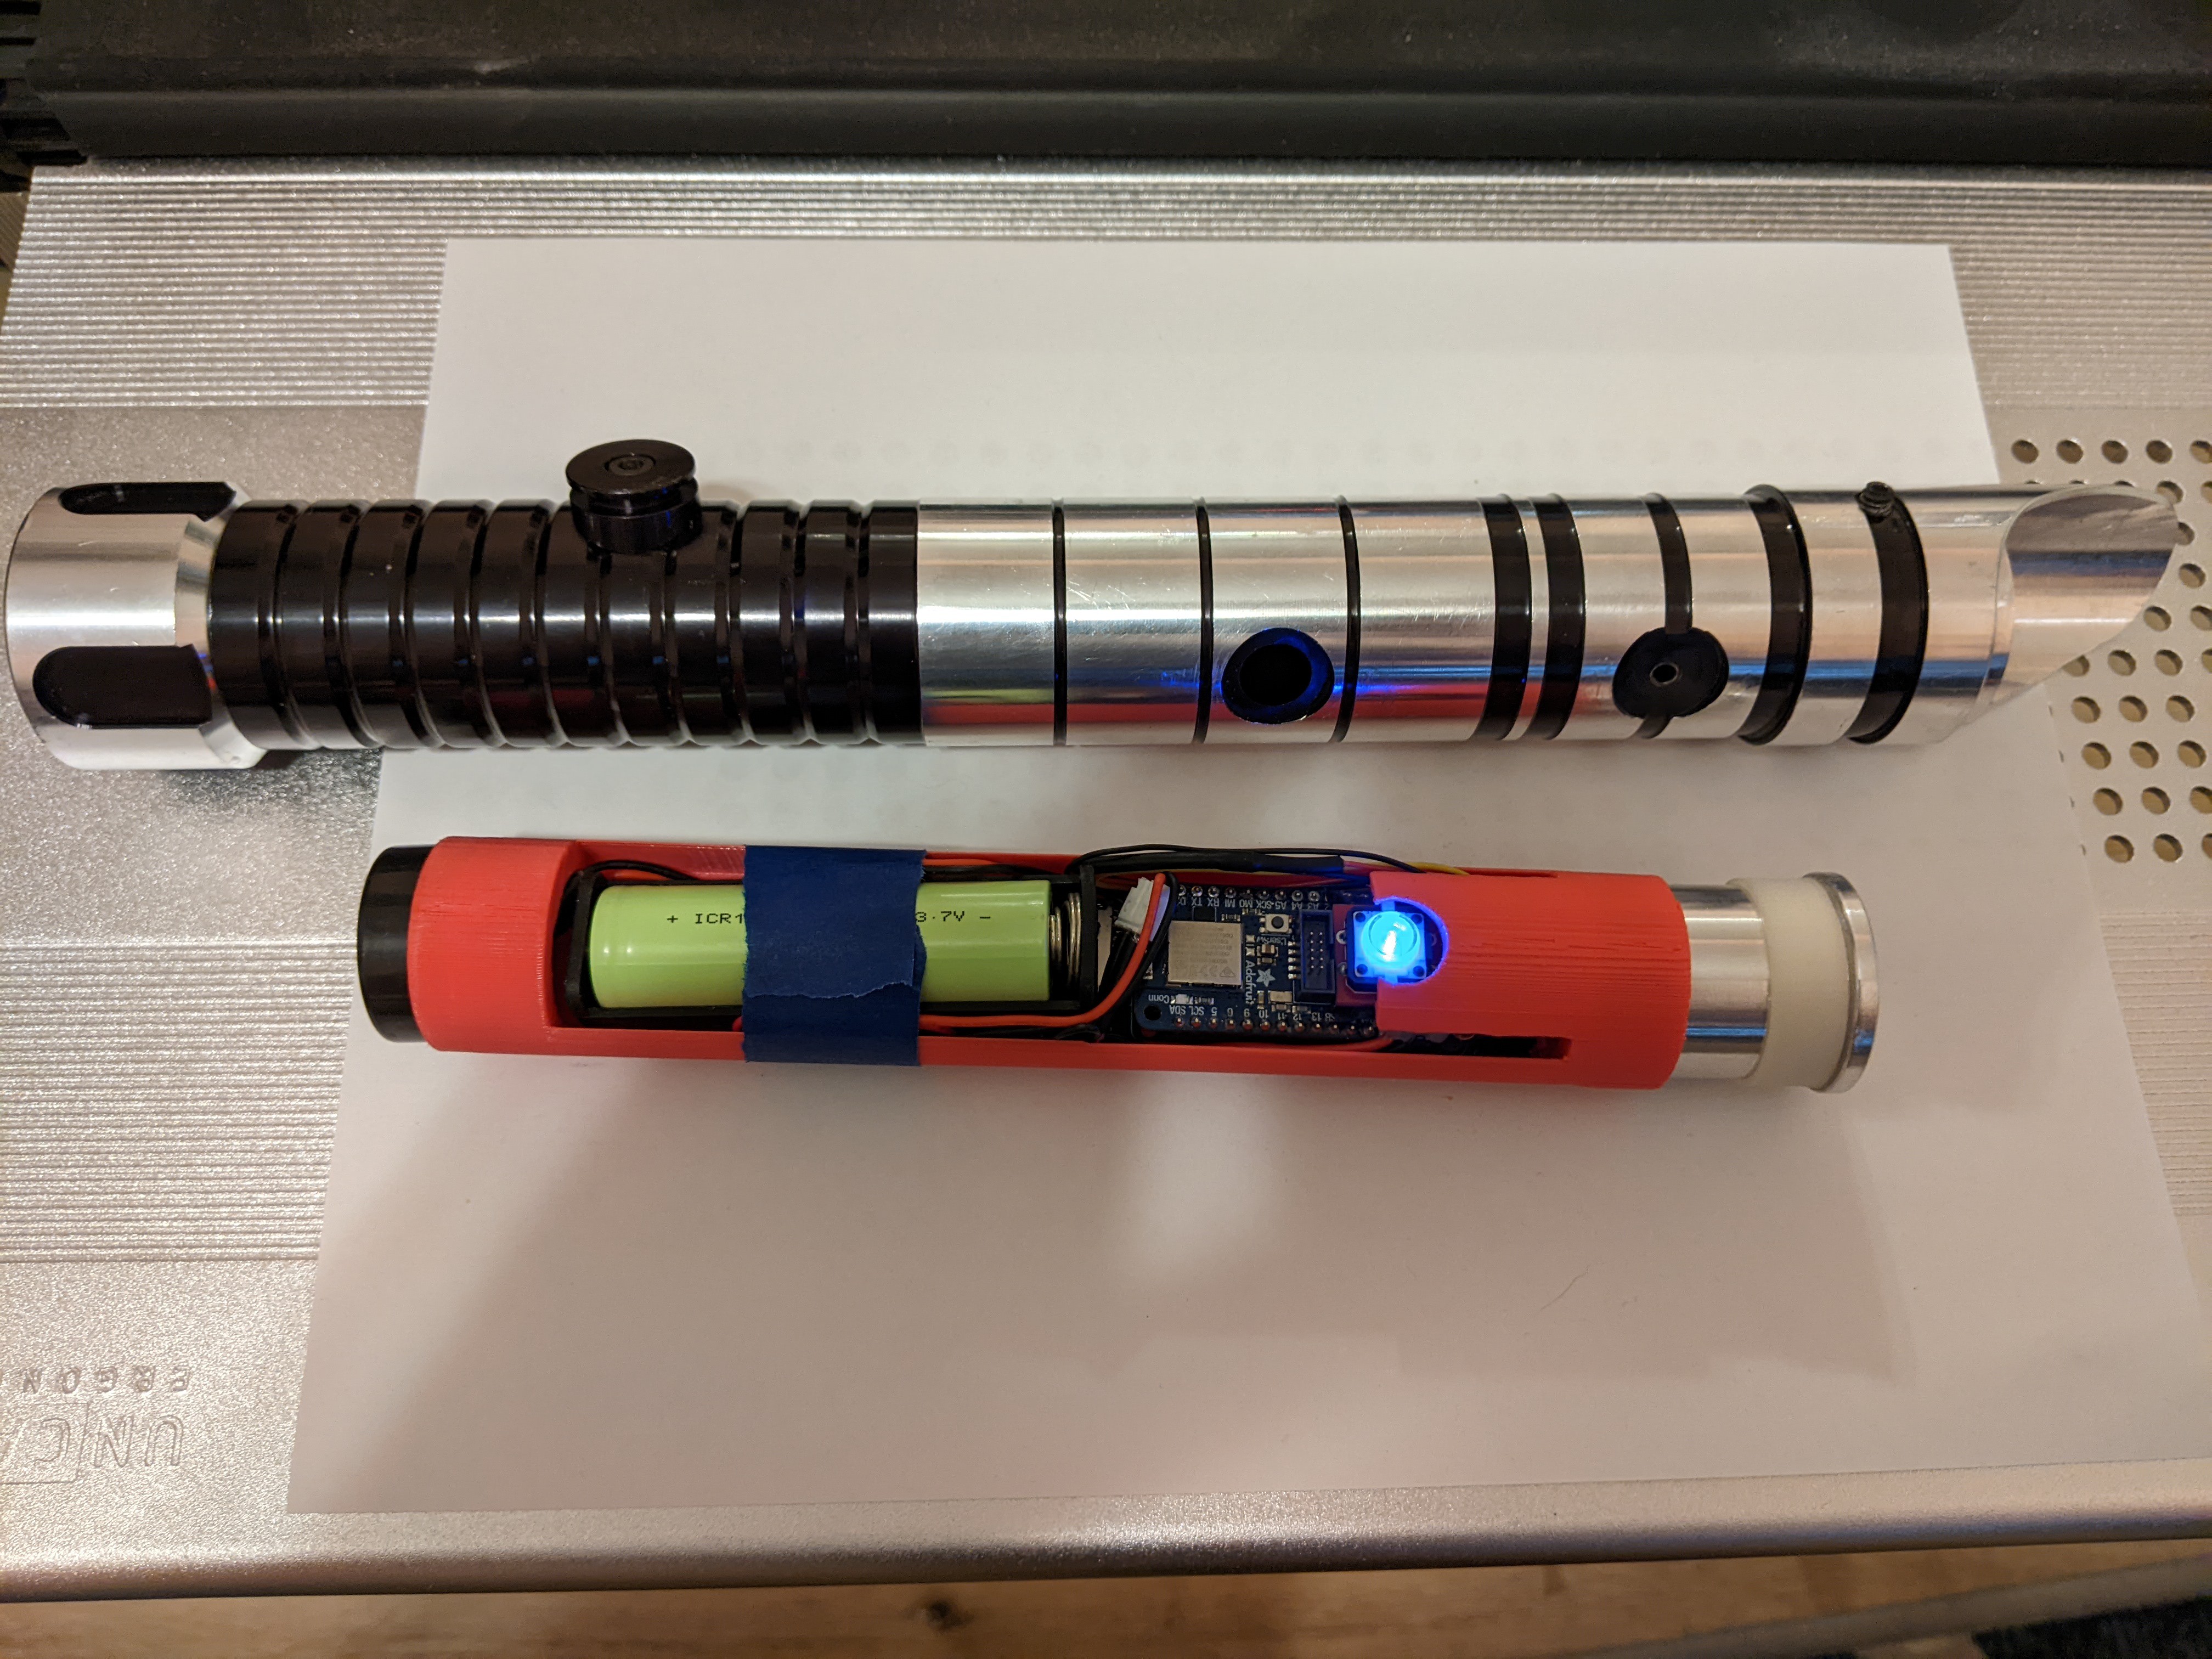
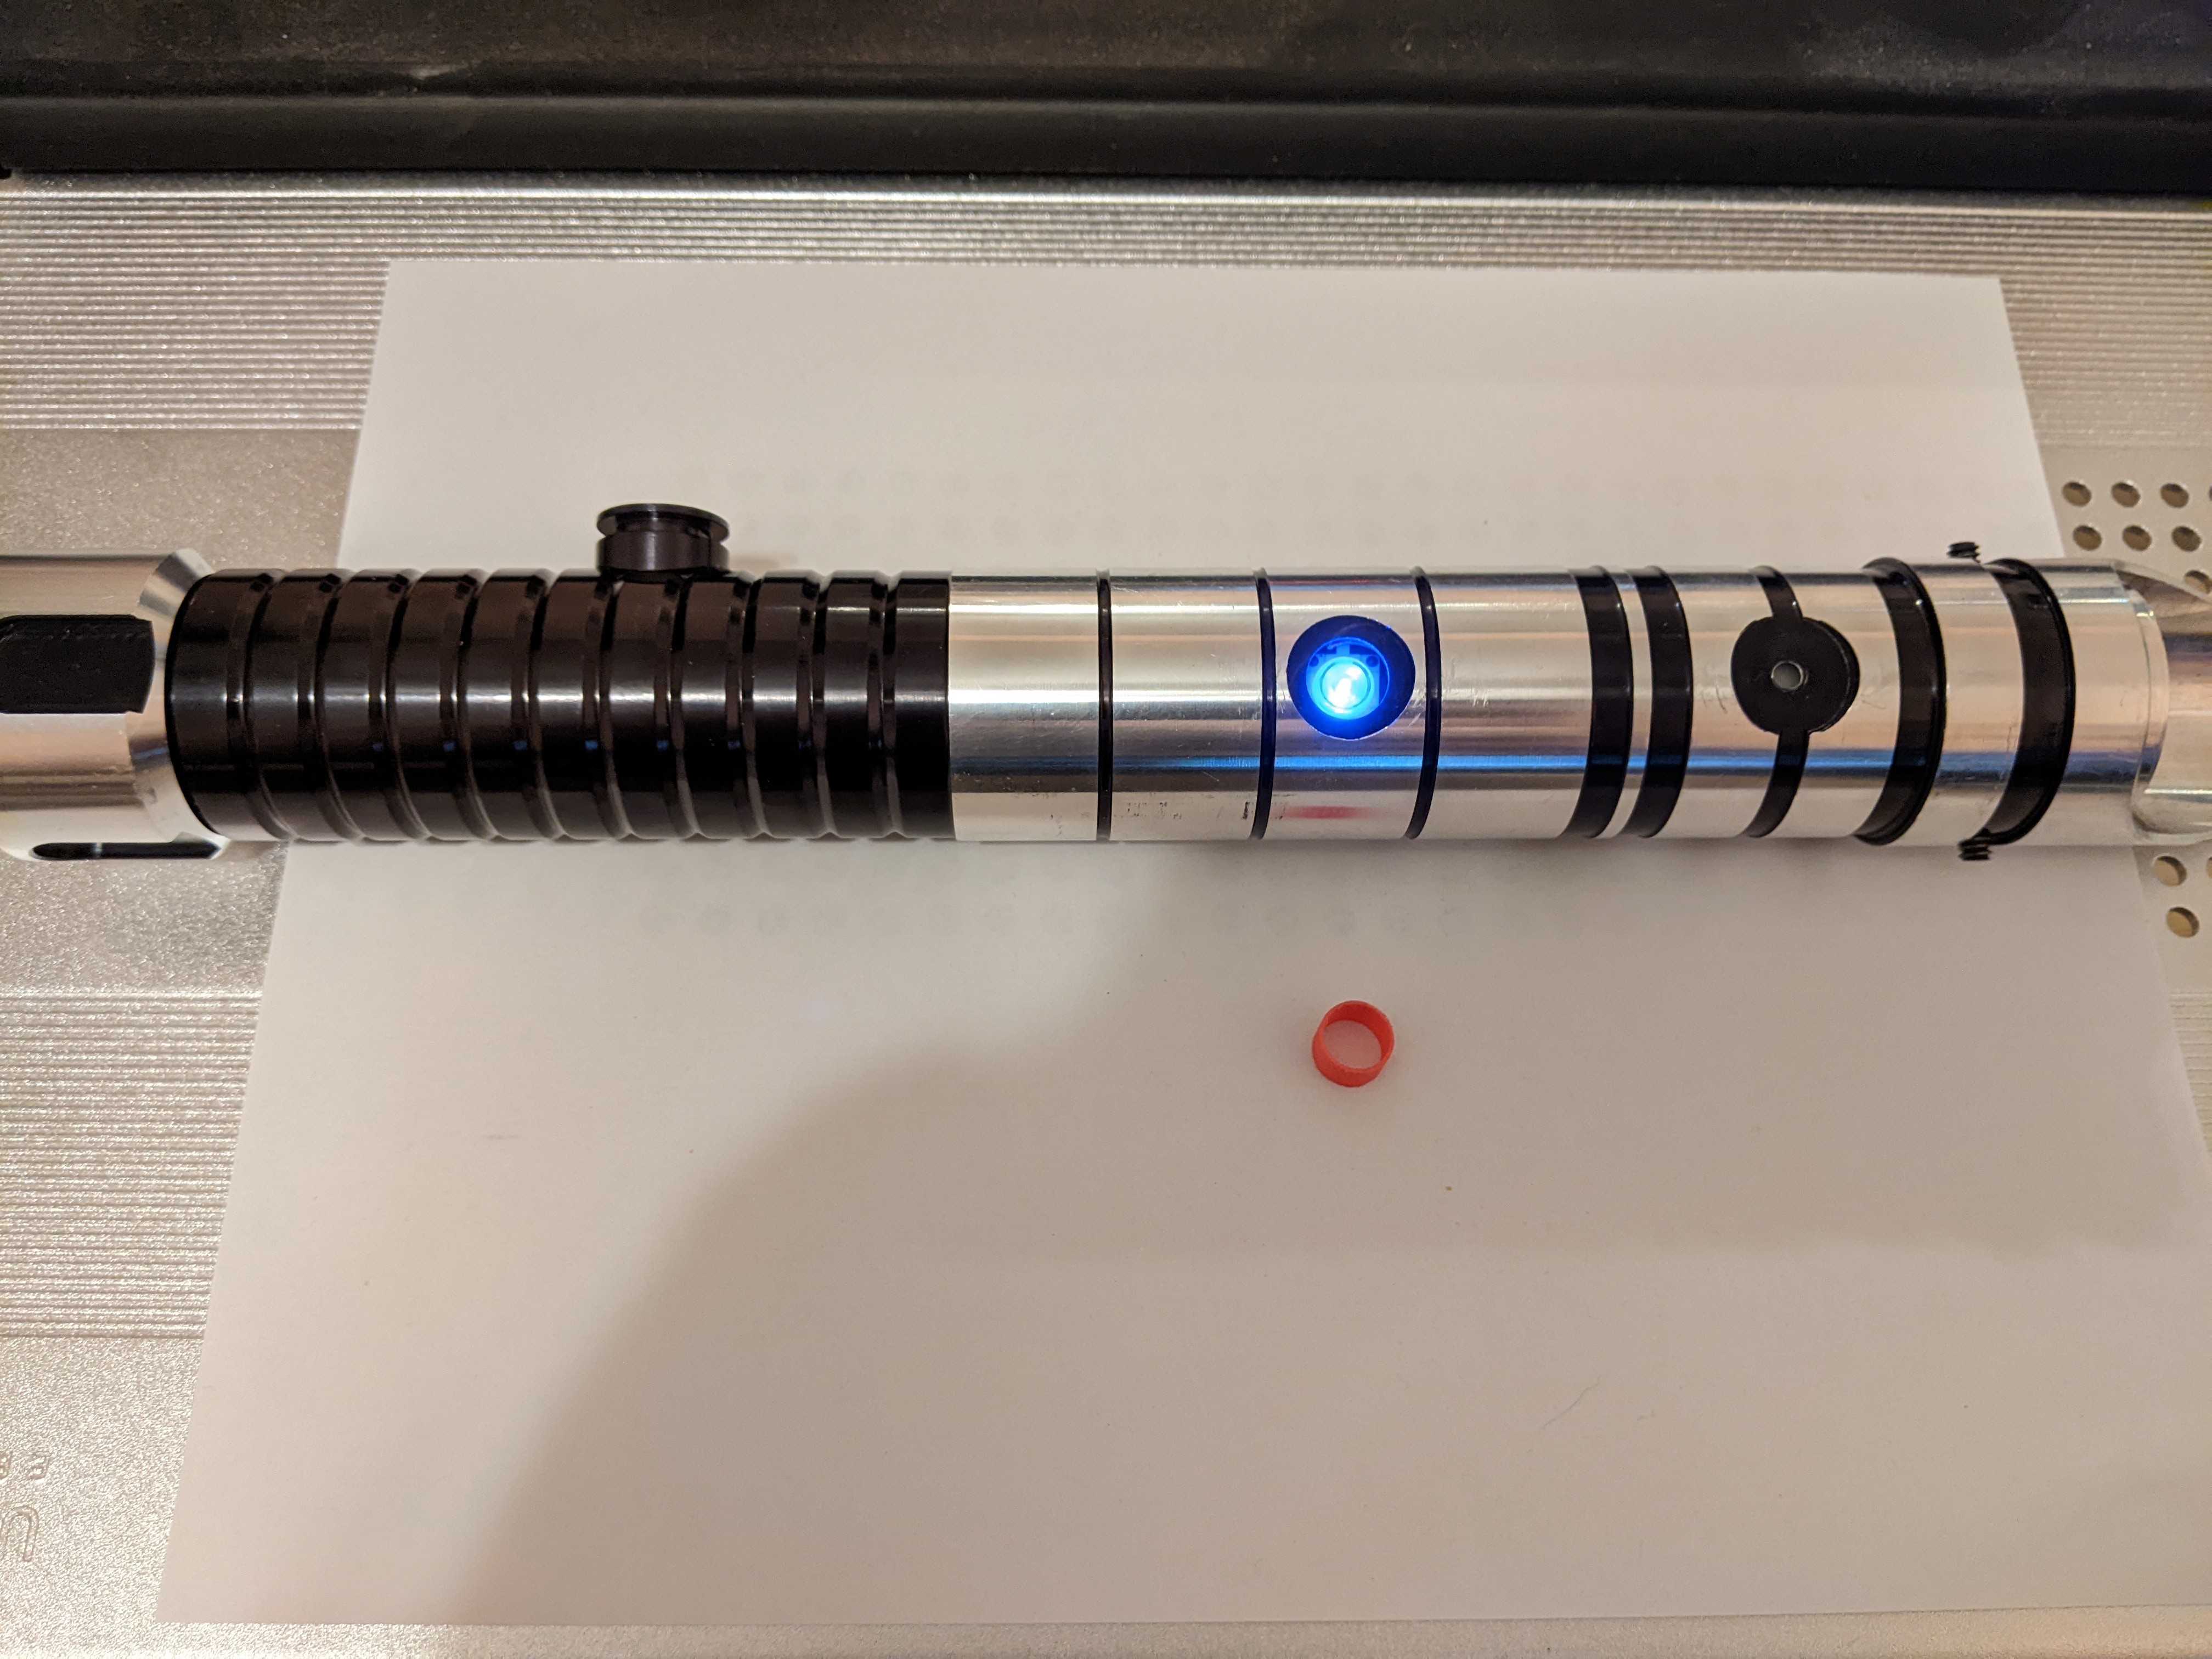
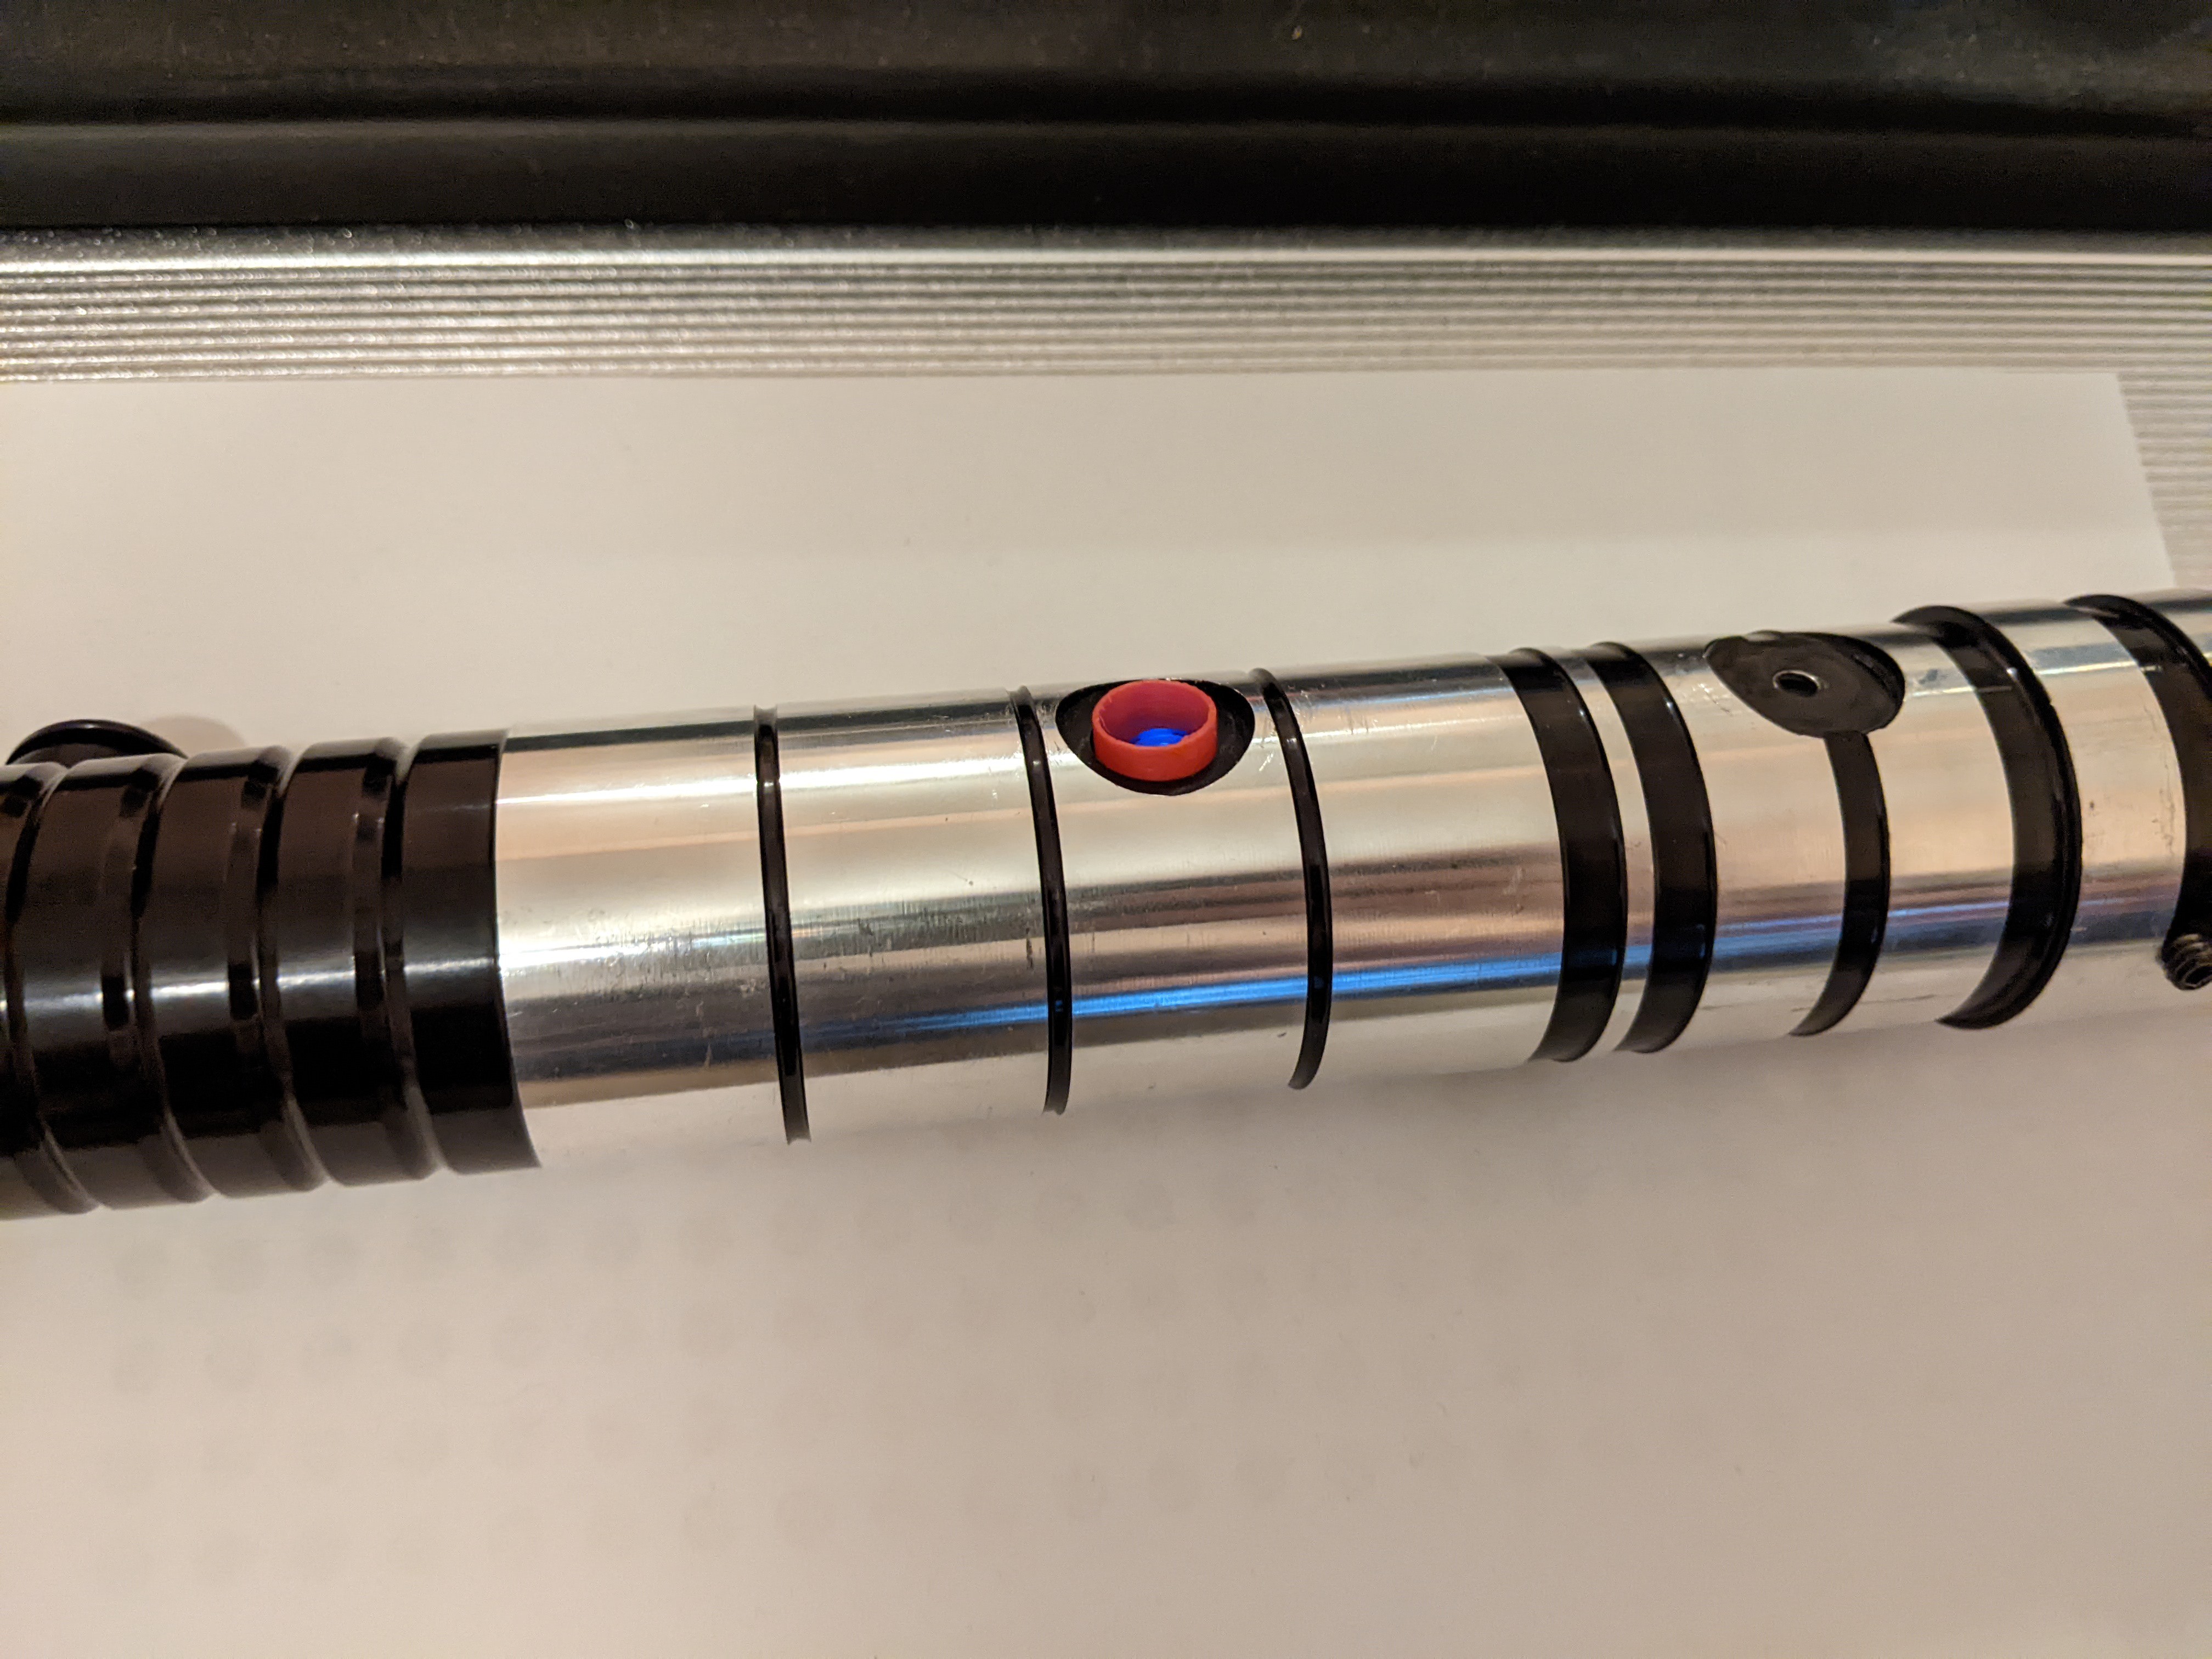
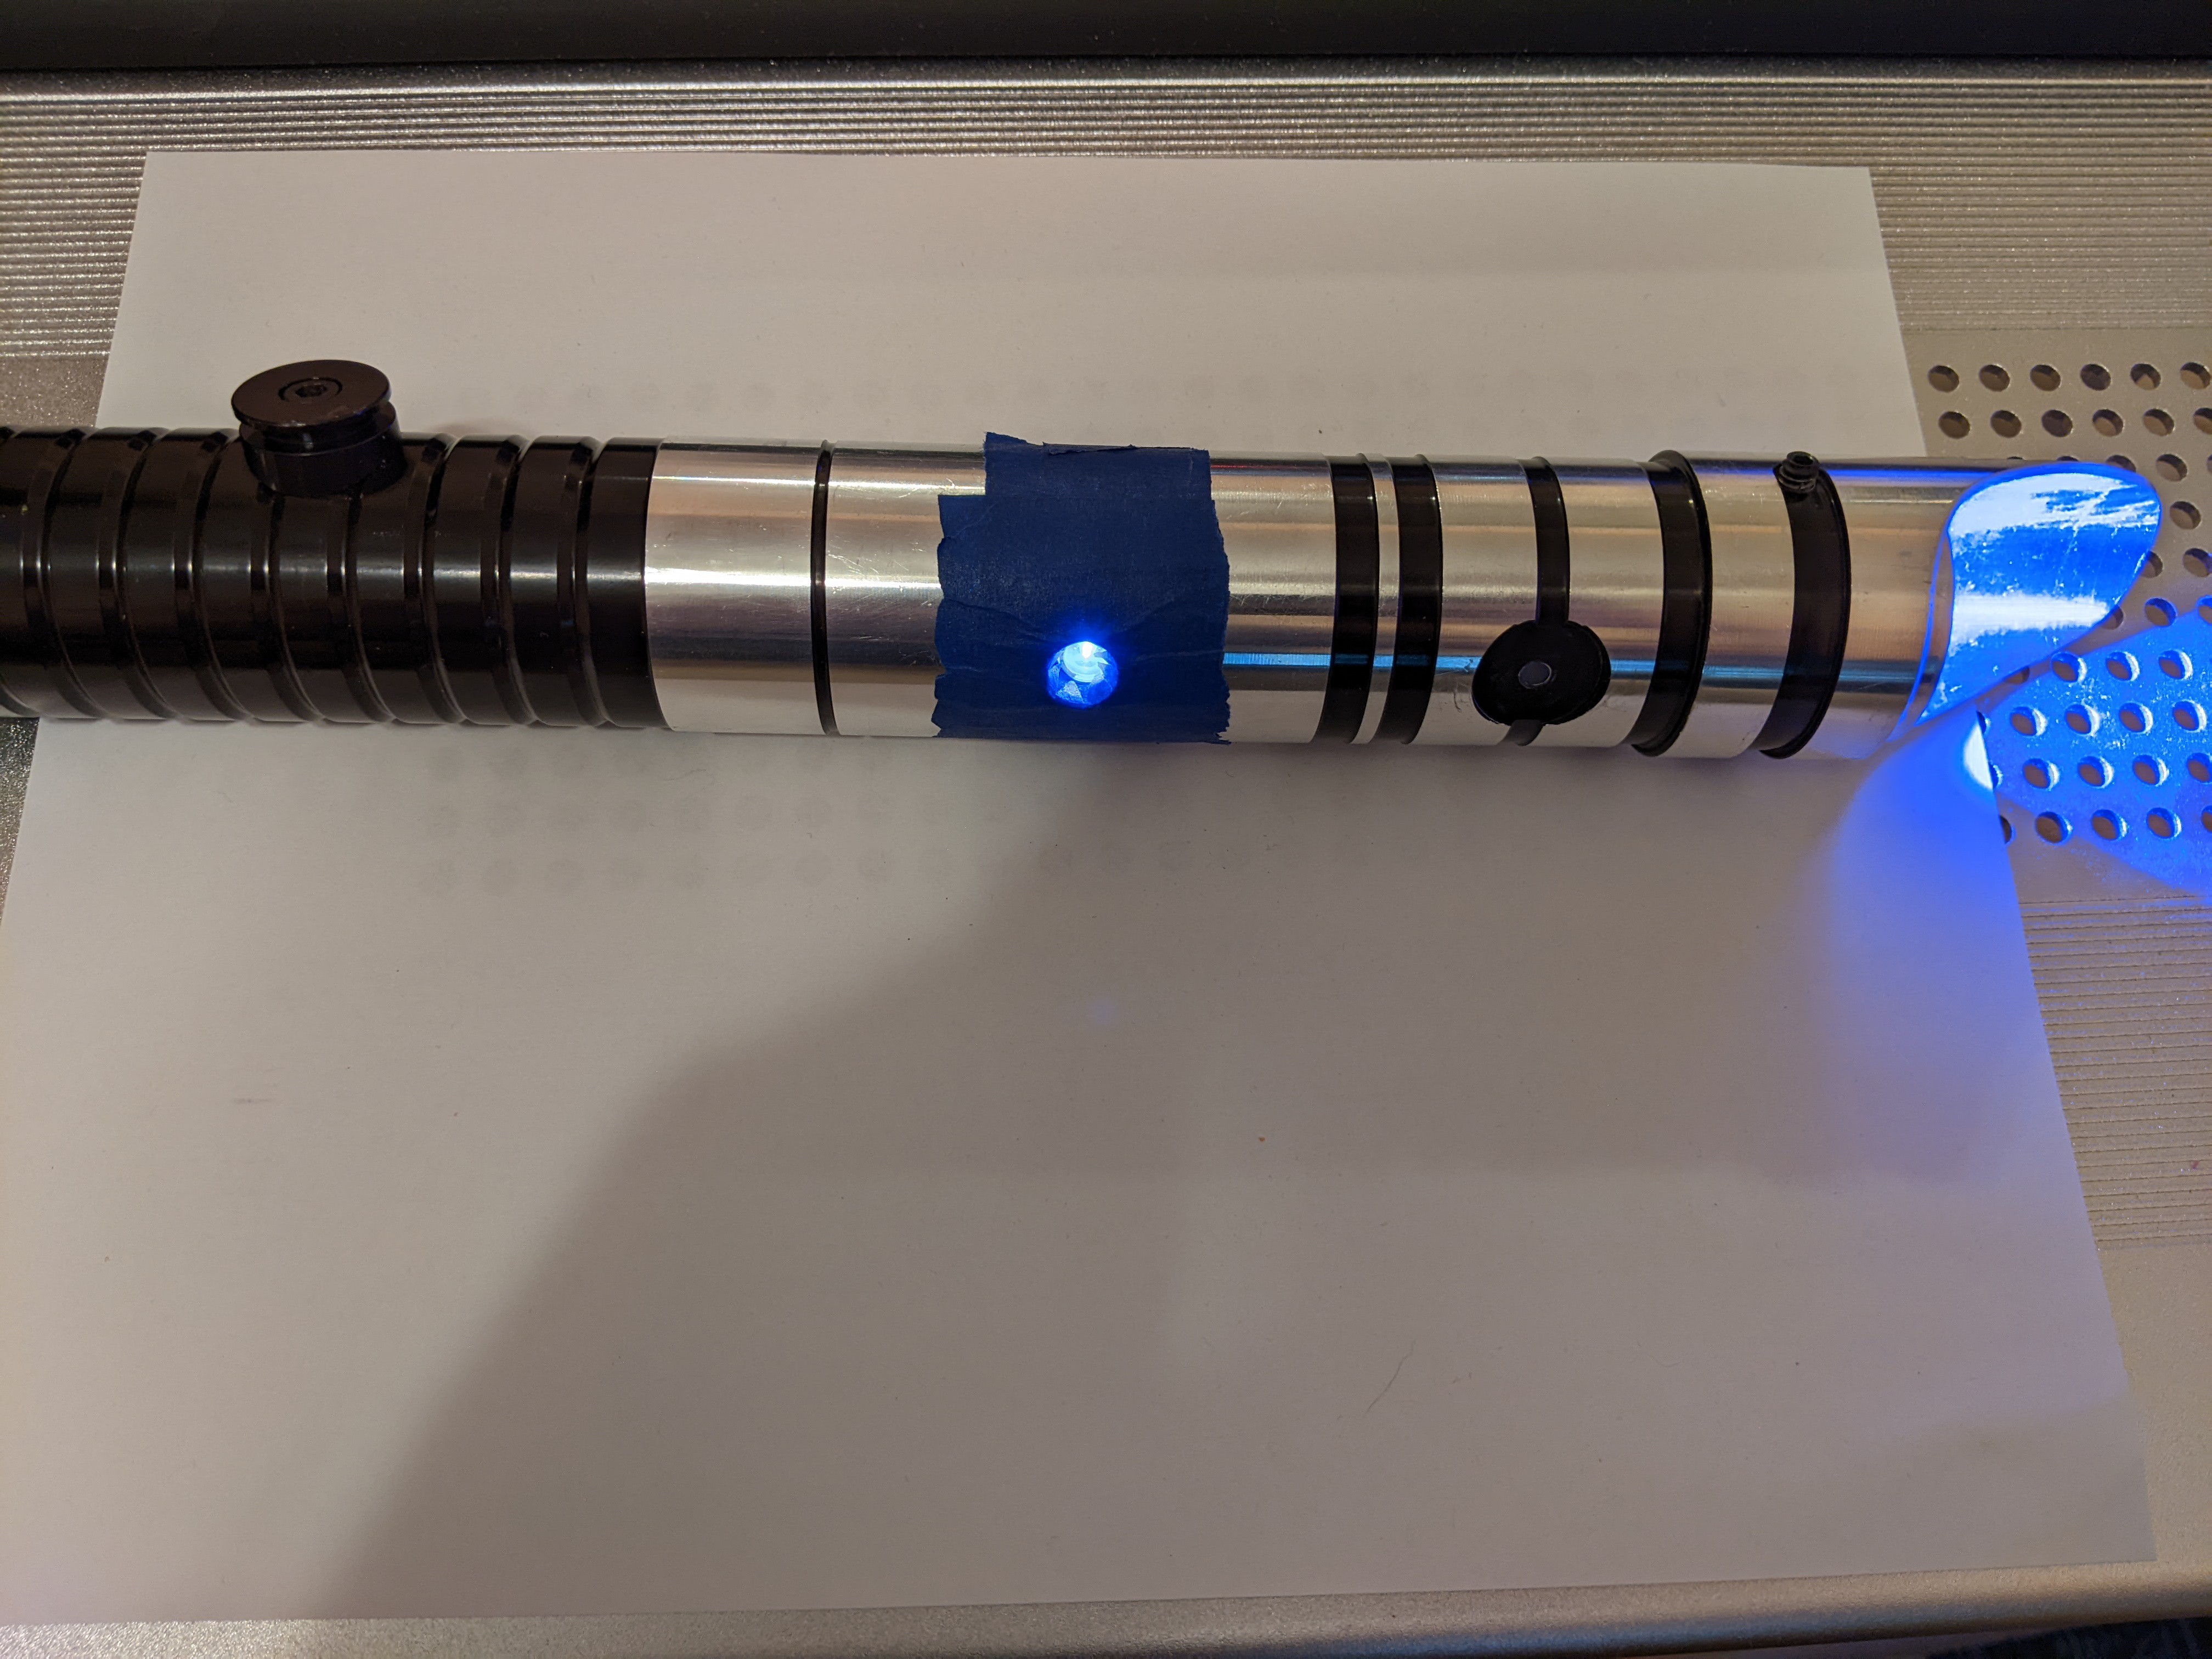
A Successful Test!
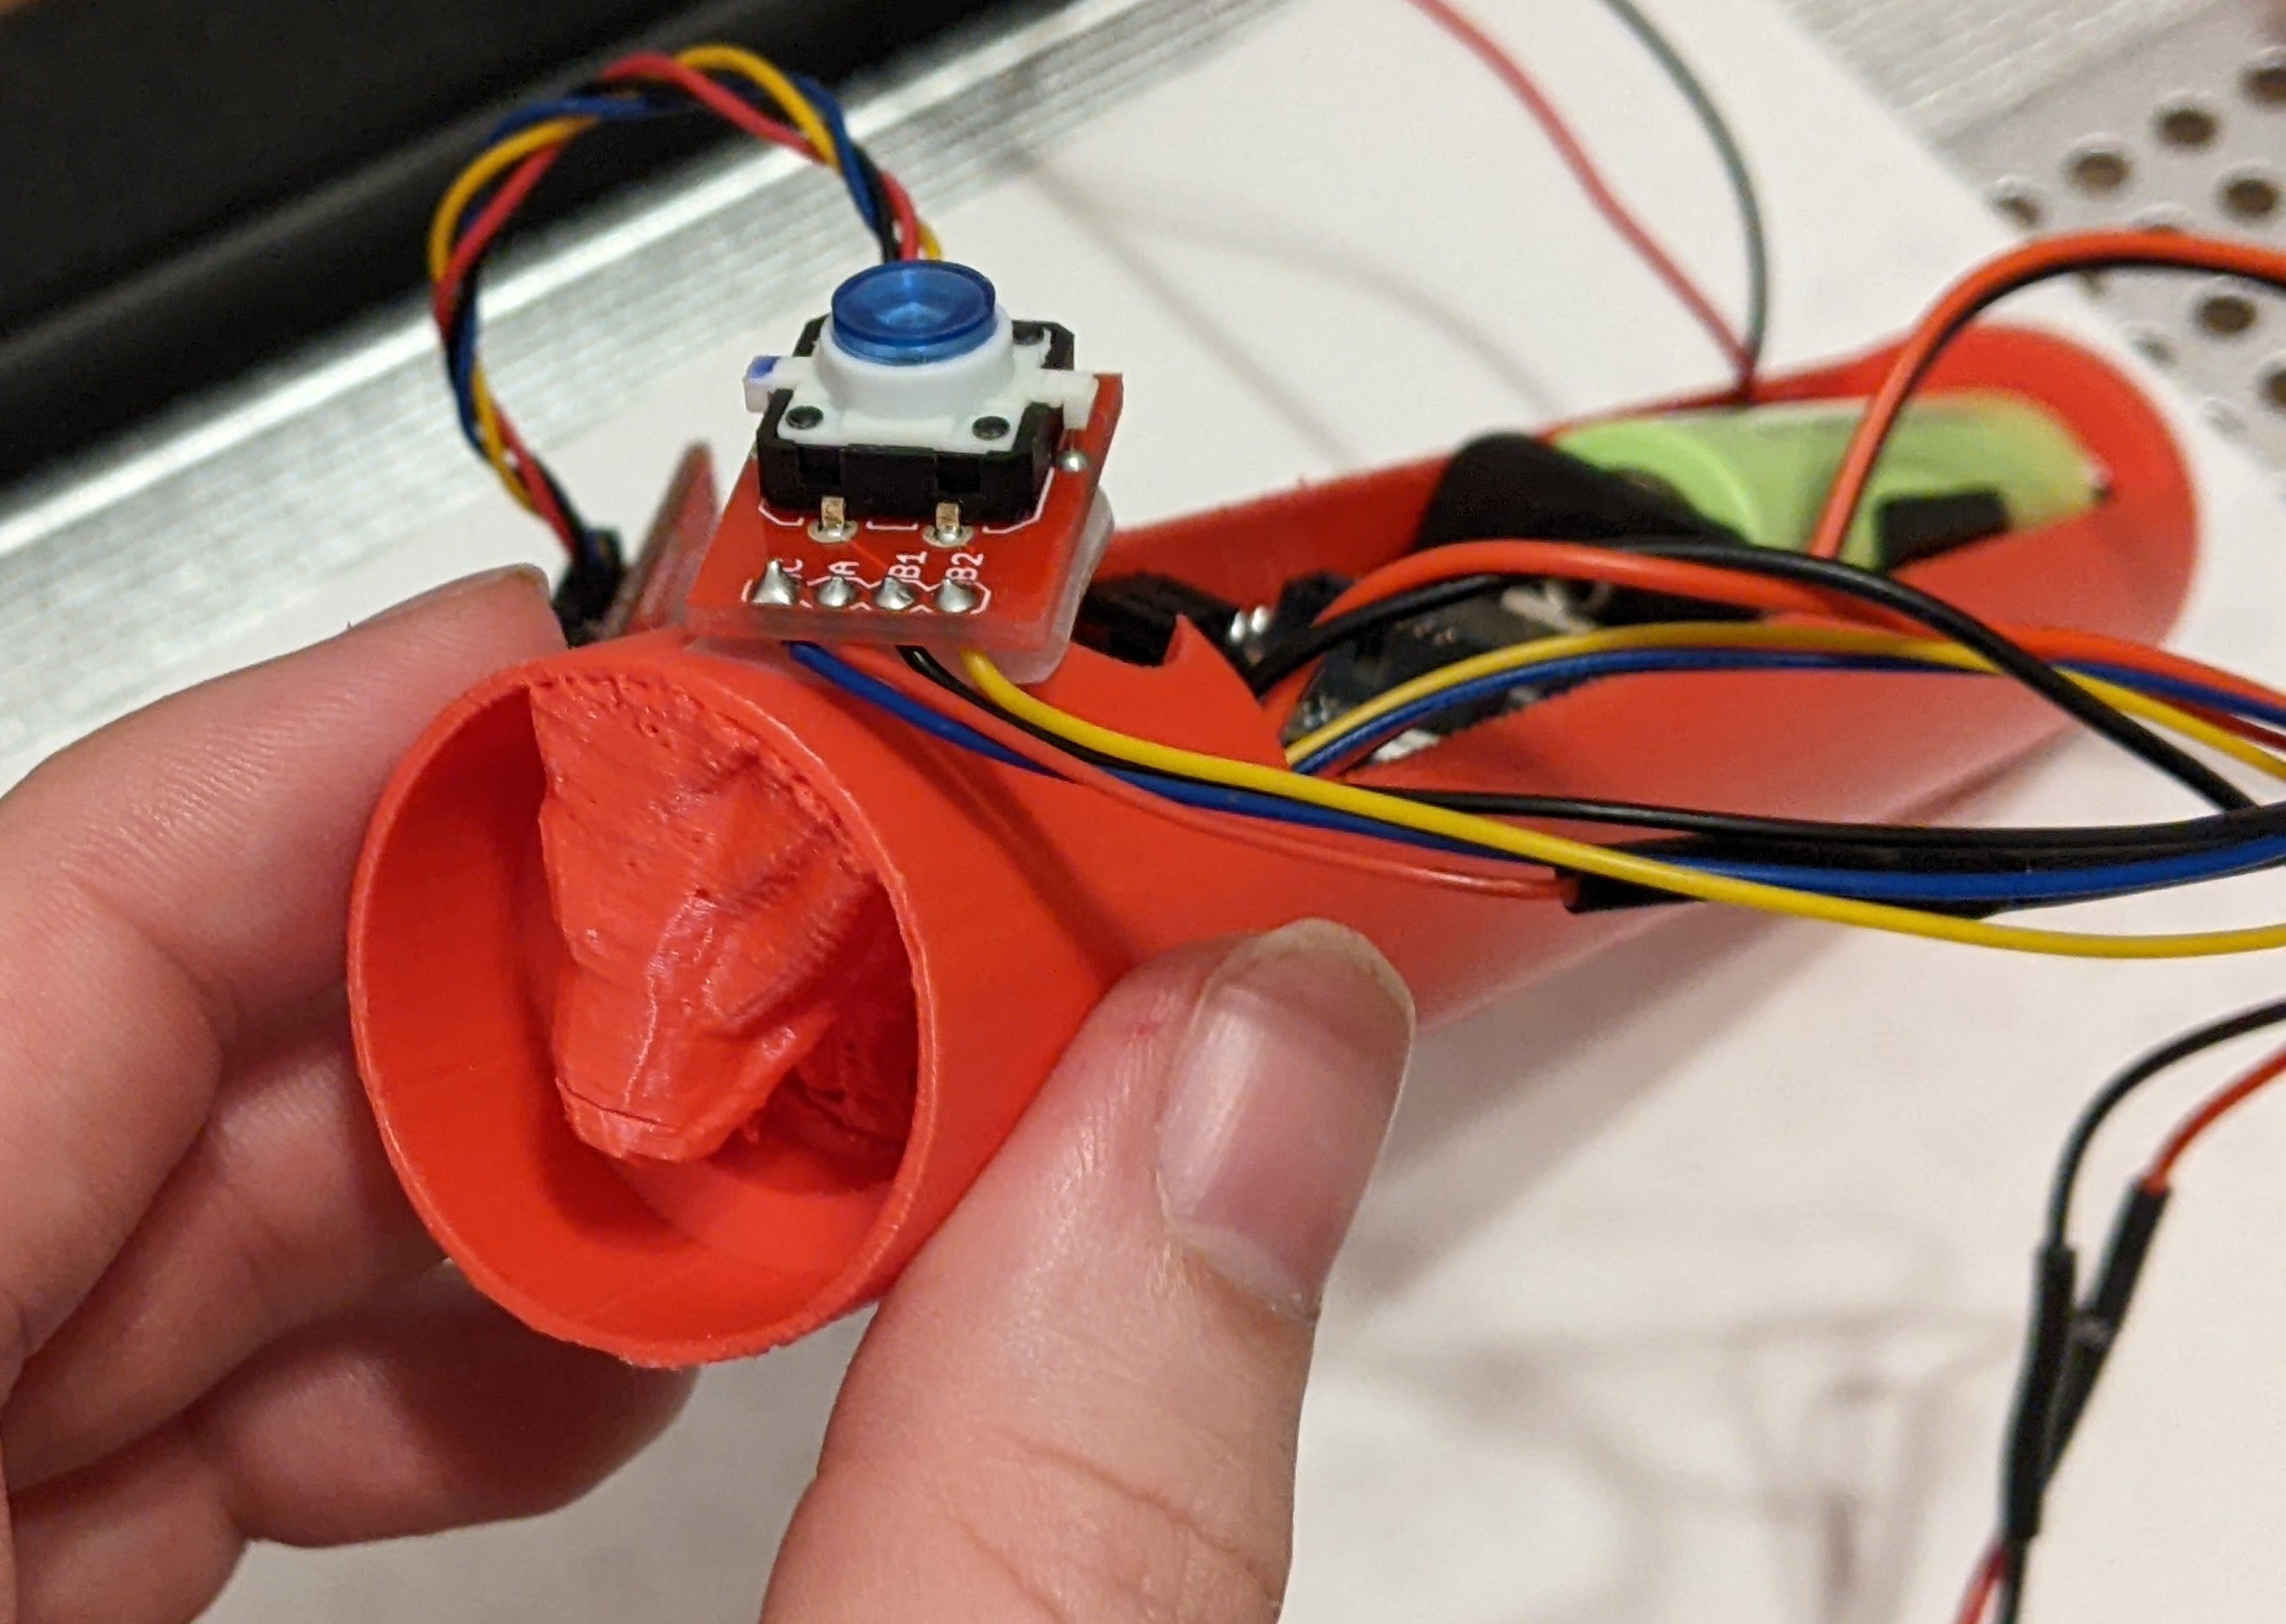
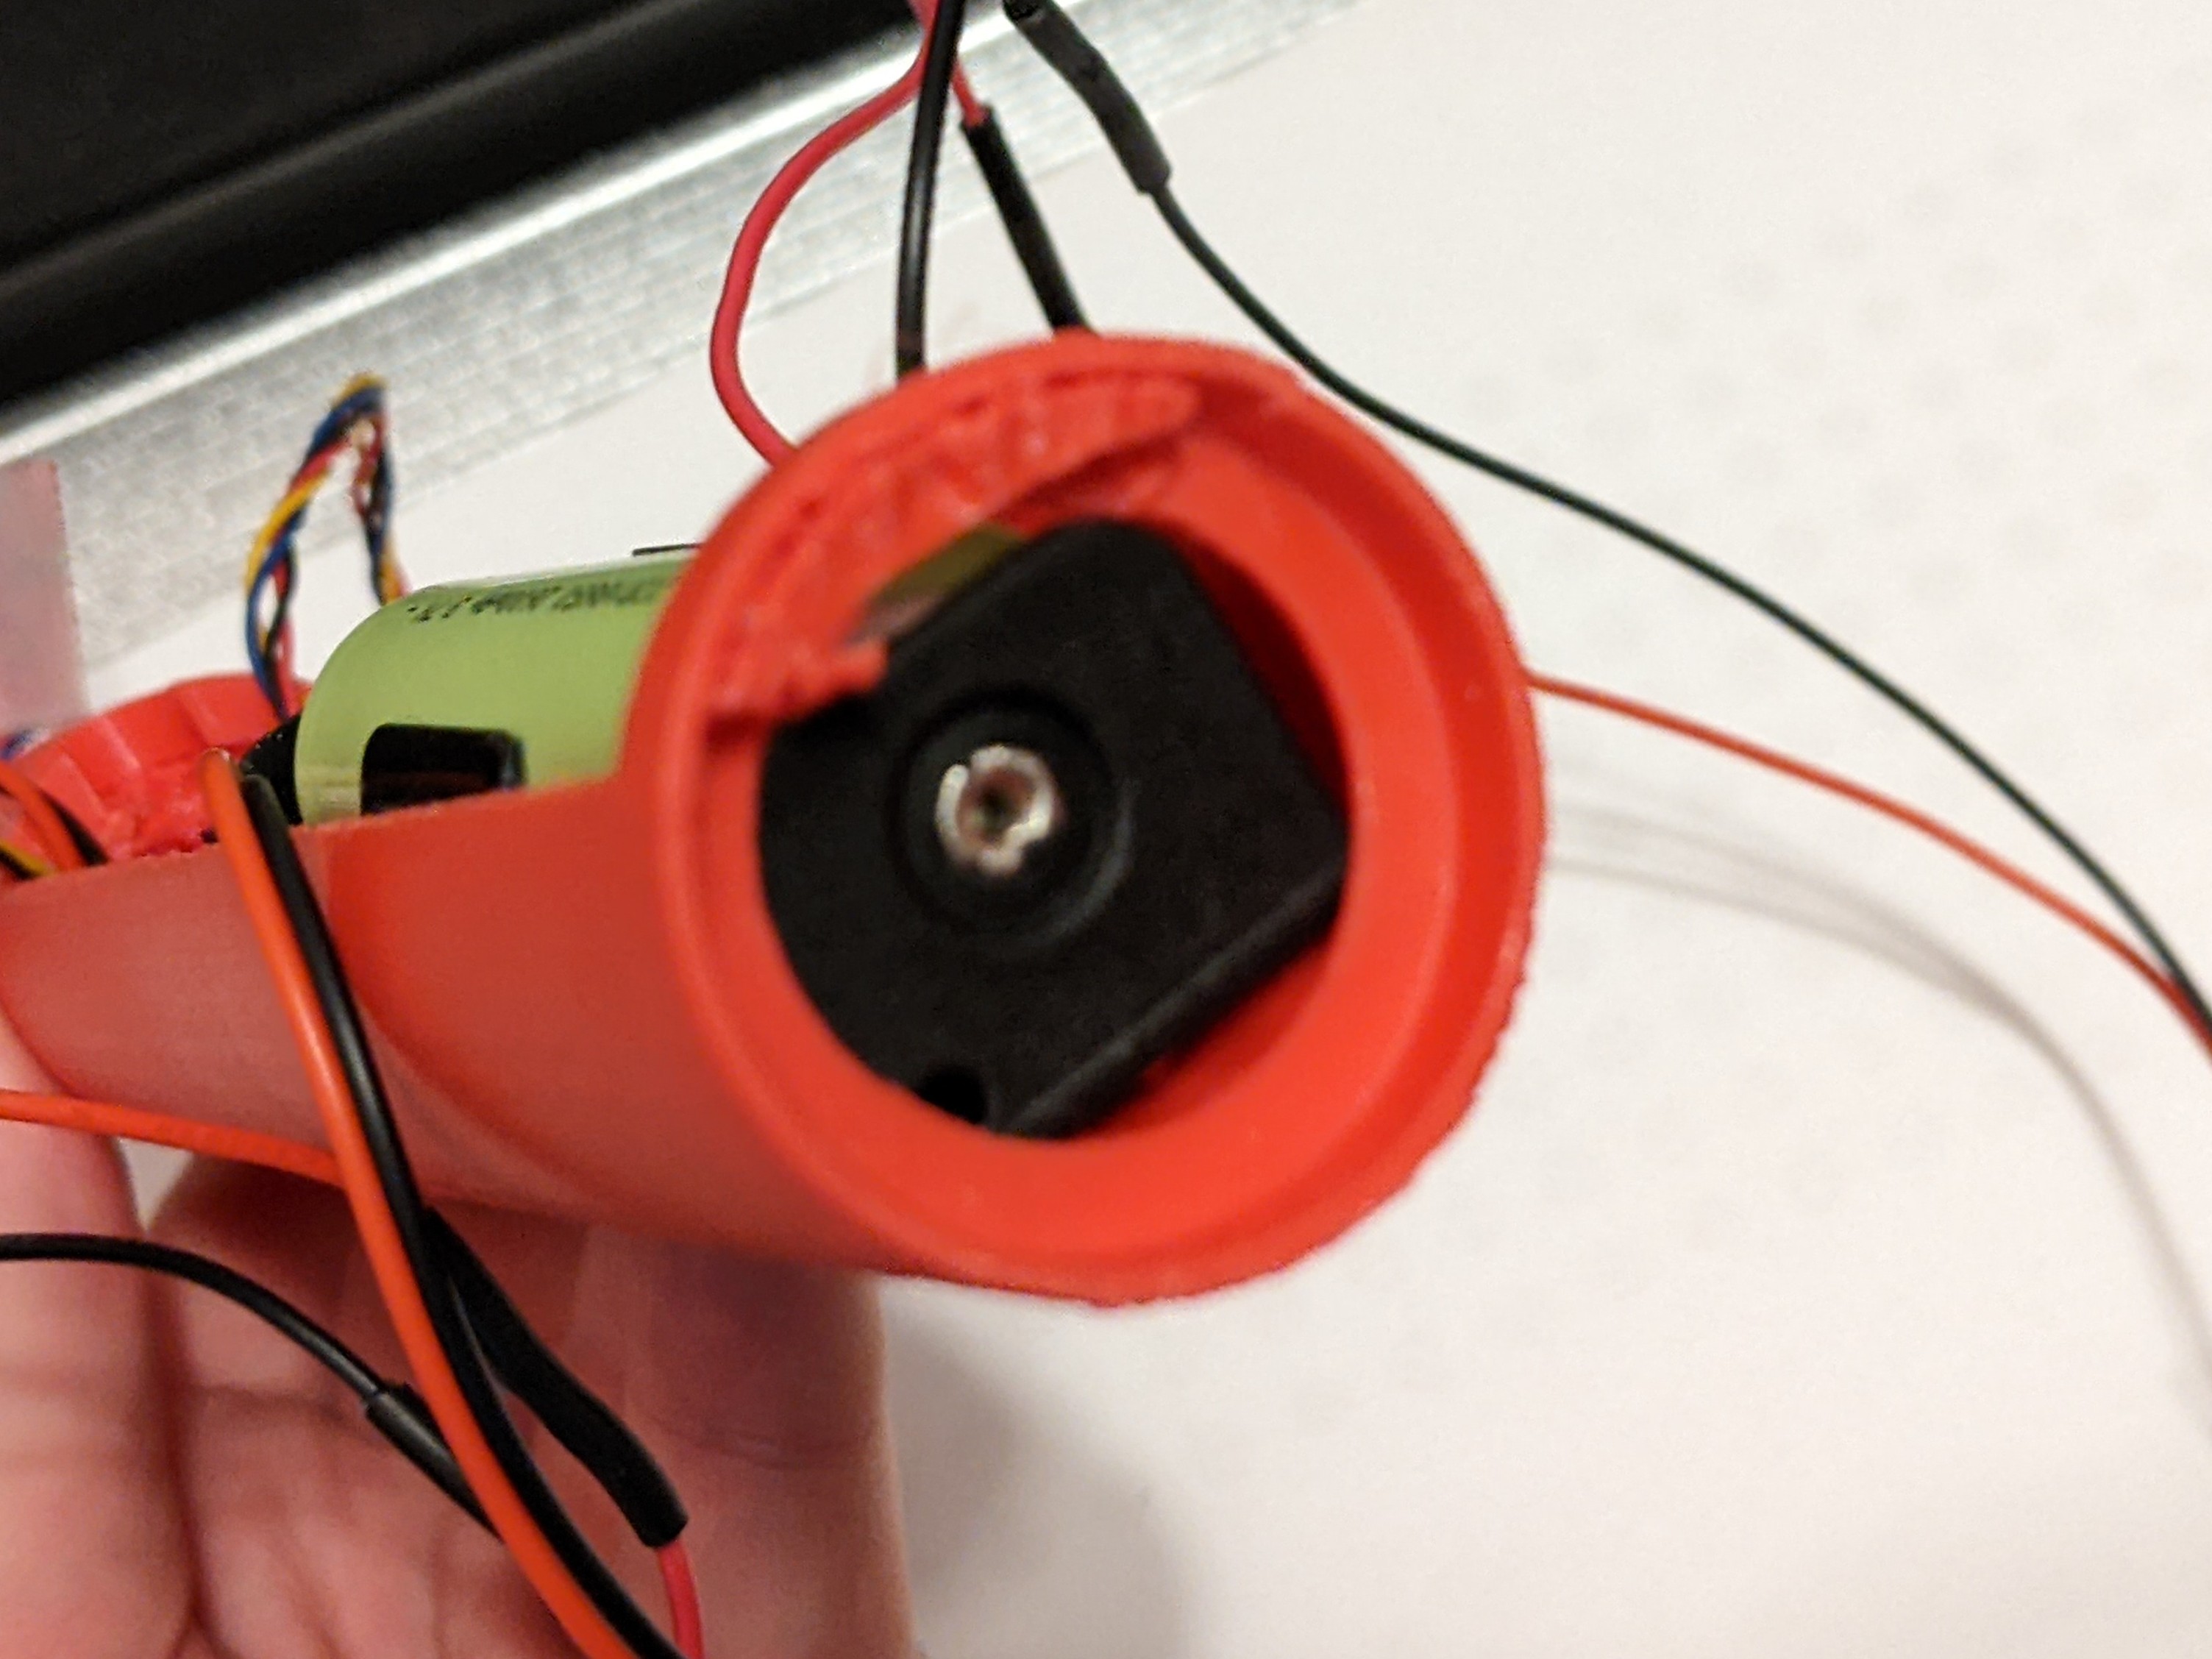
06/14/2023 at 00:55 • 0 commentsLast week, I was able to test my hilt in a combat/dueling setting. It performed exactly as I expected, with no visible damage. I'll put visuals in the Read More, but first I want to talk about some quick notes about current state:
- The button is wrong. I originally made it wrong for testing, but now there's no space to fix it. So, a whole new generation of electronics & chassis will be required (I'm working on it!).
- It's taped together. It still holds up to dueling, but it's definitely not the prettiest option.
Lastly, thank you to the friends who've gotten me this far. I couldn't do this on my own, so thank you for your help, however minor you think it is.
Video & photos below, more info in future updates. Stay tuned!
---------- more ----------The chassis has only changed in component placement/dimensions, so here's the assembly video from last update:
Here's some photos of the current state:
![]()
![]()
![]()
![]()
Yes, the "solution" for the button is stupid. It'll do until I get the electronics replaced.
-
Prototype Chassis: Hilt Fitting
05/30/2023 at 12:46 • 0 commentsI got a chassis to fit in a hilt!
OK, yes, I need to re-print it. It's still pretty exciting that I got this far.
-
Prototype Chassis: Two Steps Forward, one step back
05/11/2023 at 18:57 • 0 comments![]()
Looks nice from this angle, doesn't it? Well, that little blob of spaghetti in the button hole should be a clue that maybe something's off...---------- more ----------Here's some better views of the problems:
![]()
![]()
Yes, the last picture is blurry, but you can see that there's support material stuck on real well. That means this chassis is scrap.
The chassis is getting reprinted. But I did learn a few more things:
- Tree supports in my version of Cura are not yet ready for prime time. They don't contact by point, but rather by area or perimeter. This makes them much harder to remove, and more likely to do damage as they're removed.
- Print tubes on their side whenever you can for faster printing.
- There's not quite enough space for wires to run around.
- The button hole is too deep to access the button at all.
- The button hole is too far towards the blade. Easy enough, but fixing that means I have to juggle some stuff to keep space open for electronics.
- The rest of the critical dimensions are basically correct.
- The chassis does fit in the saber, with around enough room to spare to fit everything.
Next version is printing already. Hopefully I'll be able to physically fit everything in the saber soon!
-
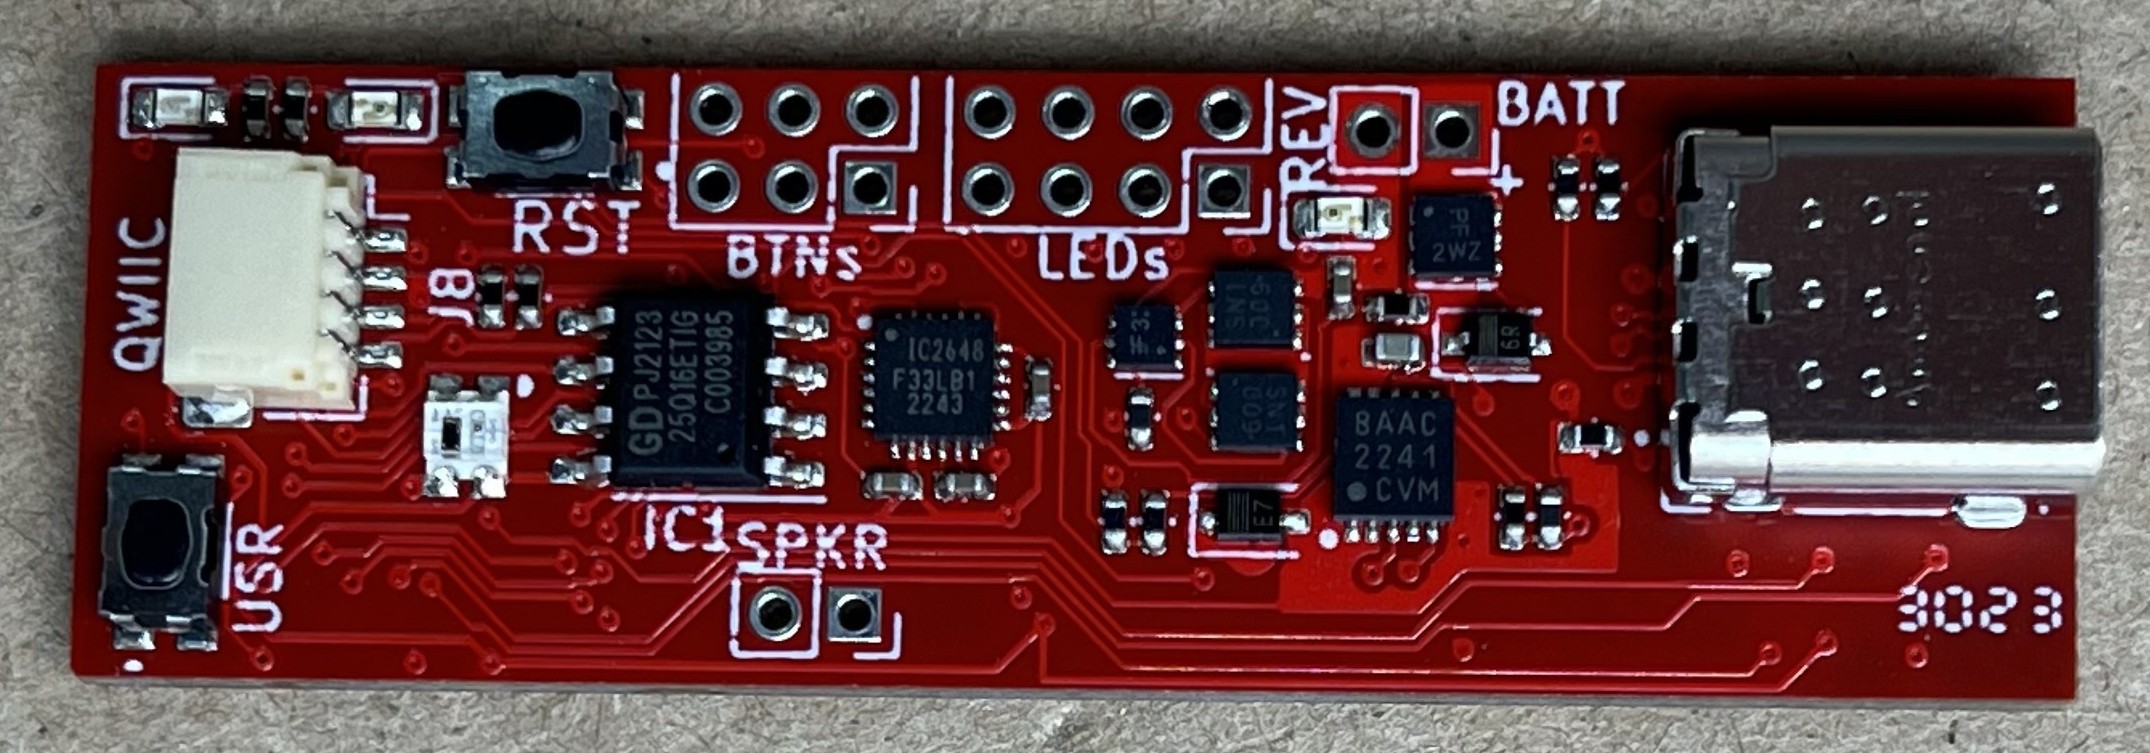
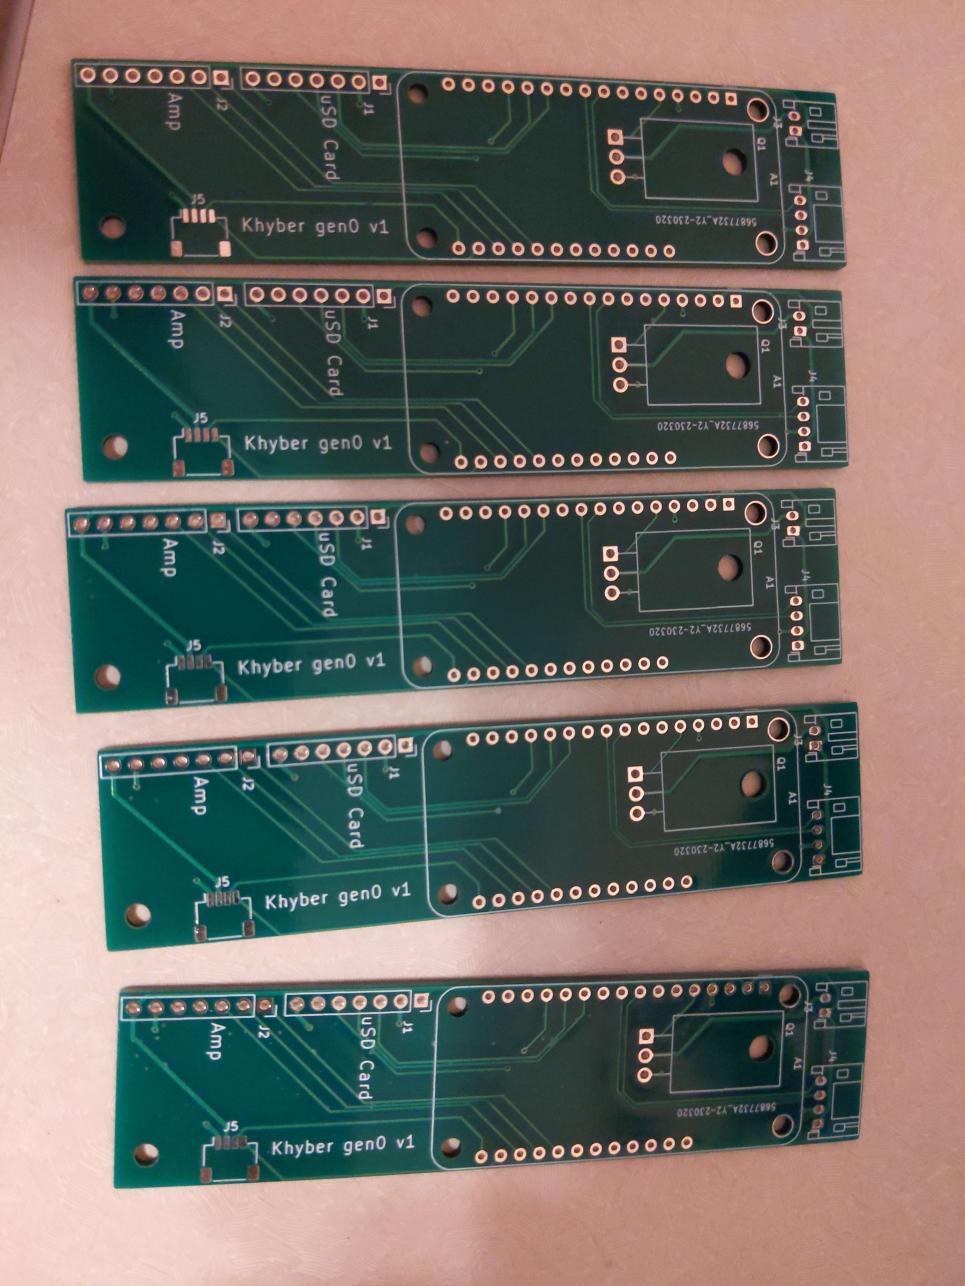
Gen 2 PCB
04/14/2023 at 17:18 • 0 commentsAnother round of hardware!
![]()
This round was mostly a first-pass at shrinking. But I did make a few other changes. Whether the hardware shrink is enough to fit in a lightsaber has yet to be seen.
---------- more ----------Further details:
- The button was I2C based previously, but is now direct-wired. There are certain advantages to being direct-wired (that animation so smooth...), but I2C has a huge advantage in terms of flexibility for saber builders and DIYers. How to proceed on this one is an ongoing conversation.
- The button board is not custom, it's a breakout from sparkfun. It's there for now to save space. Long term will depend on i2c vs. direct-wire, but I don't see that specific tactile button sticking around, what with the popularity of anti-vandal switches in this space.
- The amp is now directly on the PCB. I'm not sure I got all the components picked correctly, but it's good enough to sound good, and that's what matters. This change will probably "stick" for the long term; I don't see people caring which amp is used, so long as it sounds good. Plus, it helps free up space in the lightsaber.
- The microSD card is now directly attached to the motherboard. This is another change I was going to have to do eventually anyway, and also frees up space.
- Moving away from the microSD breakout board means I got to pick my own microSD card socket. I chose a latching connector for user feel, but after working with some of these sample PCBs, I can understand why the industry doesn't seem to prefer latching sockets for microSD cards.
- The speaker now has its own two-wire connector. This should make installation/removal easier, which I immediately nerfed by putting the speaker connector under the microcontroller. That's unfortunately how I could get everything to fit for now, but hopefully that gets fixed soon.
Looking forward:
- Immediate next step is to try to get all this to fit in a saber. This will require a chassis of some kind, more to come.
- The immediate steps after the chassis will be determined by how easily I can get everything to fit in the saber, and what usability quirks I find if everything fits.
- The phone app is approaching MVP. There will be more work after that, but MVP is MVP.
- The firmware is still incredibly basic, and developing it further is on the back burner until after the phone app is ready and I have a chassis in a saber.
- There will be more generations of hardware:
- Creating a dedicated charge port/charge board (to avoid locking in where the charge port is relative to any buttons)
- Scaling power up to handling a pixel blade (or three)
- Removing the Feather board and attaching the MCU module directly to the system board
- Any changes that can be made to ensure supply chain stability & future-proofing
- Any changes that need to be made to make sure the software is rock-solid & performant
Overall, the board is already only slightly bigger than a battery. There's a few millimeters that can be shaved here and there, but until things are a lot closer to being finished, I don't see how this hardware is getting notably smaller. At this point, it's more about getting to MVP and adding features.
-
First PCB
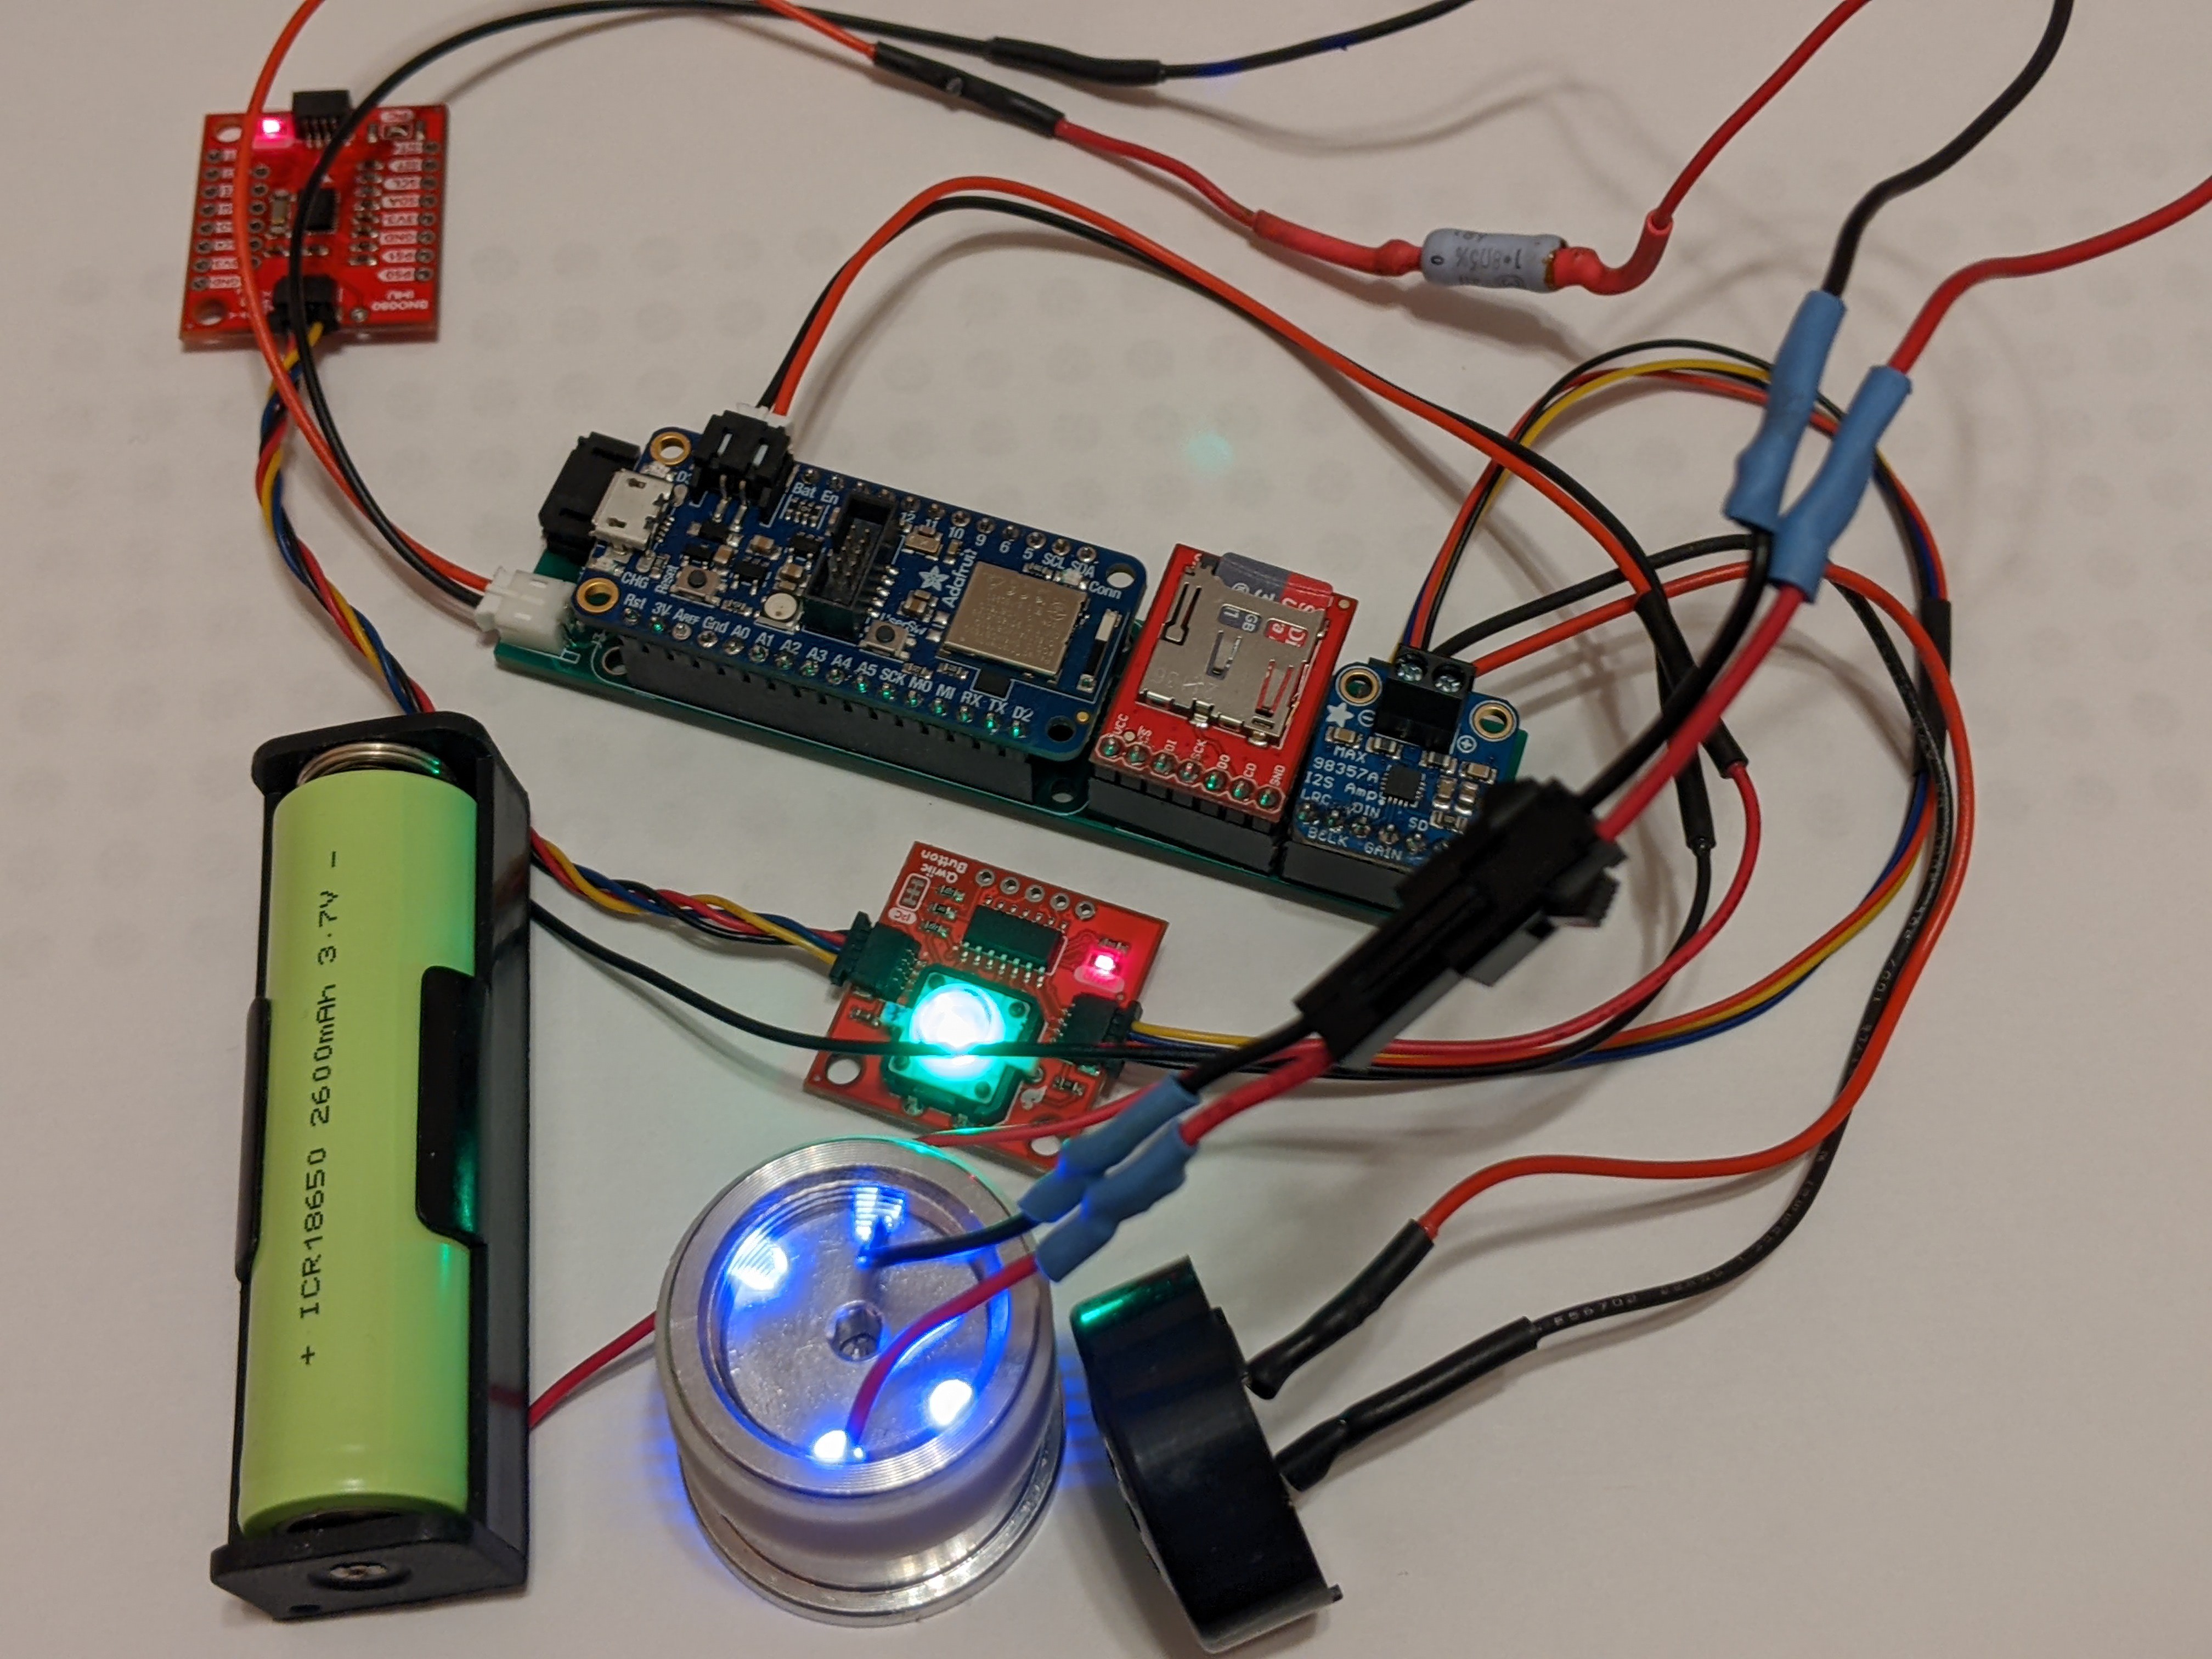
03/31/2023 at 16:57 • 0 commentsWell, here it is. Gen 0 hardware:
![]() ---------- more ----------
---------- more ----------Assembled hardware above, raw PCBs below:
![]()
It's too long to fit inside the saber, but I'm already working on a new revision that should fix that issue.
Hardware used in this version:
- Adafruit Feather nRF52840 Express
- Sparkfun level-shifting uSD Breakout (or you can use the non-level-shifting variety)
- Adafruit I2S Amplifier
- Sparkfun QWIIC Button
- Sparkfun VR IMU (Not used in firmware yet!)
- IRLB8721 N-Channel Power MOSFET (That's the TO-220 hiding under the Feather)
- Misc. connectors & wires
- Existing Blue LED from a donor saber
- Existing high-power resistor from a donor saber
Firmware (and therefore hardware features) have not progressed much since the last update. Instead, I've been trying to focus on hacking together an Android app to control the BLE side. For those with older phones, Bluefruit is an option, but it won't install on my phone, and nRF Connect is only vaguely usable. Once I get the hardware shrunken down enough to fit in a lightsaber hilt, I am going to need a much more usable app for demoing the prototype.
As for the schematic, I'm not committed to the hardware yet. I'm going to have to detour for a bit, juggle details, and then settle on a final circuit. You'll see some of the juggling when I post about the gen1 PCB.
-
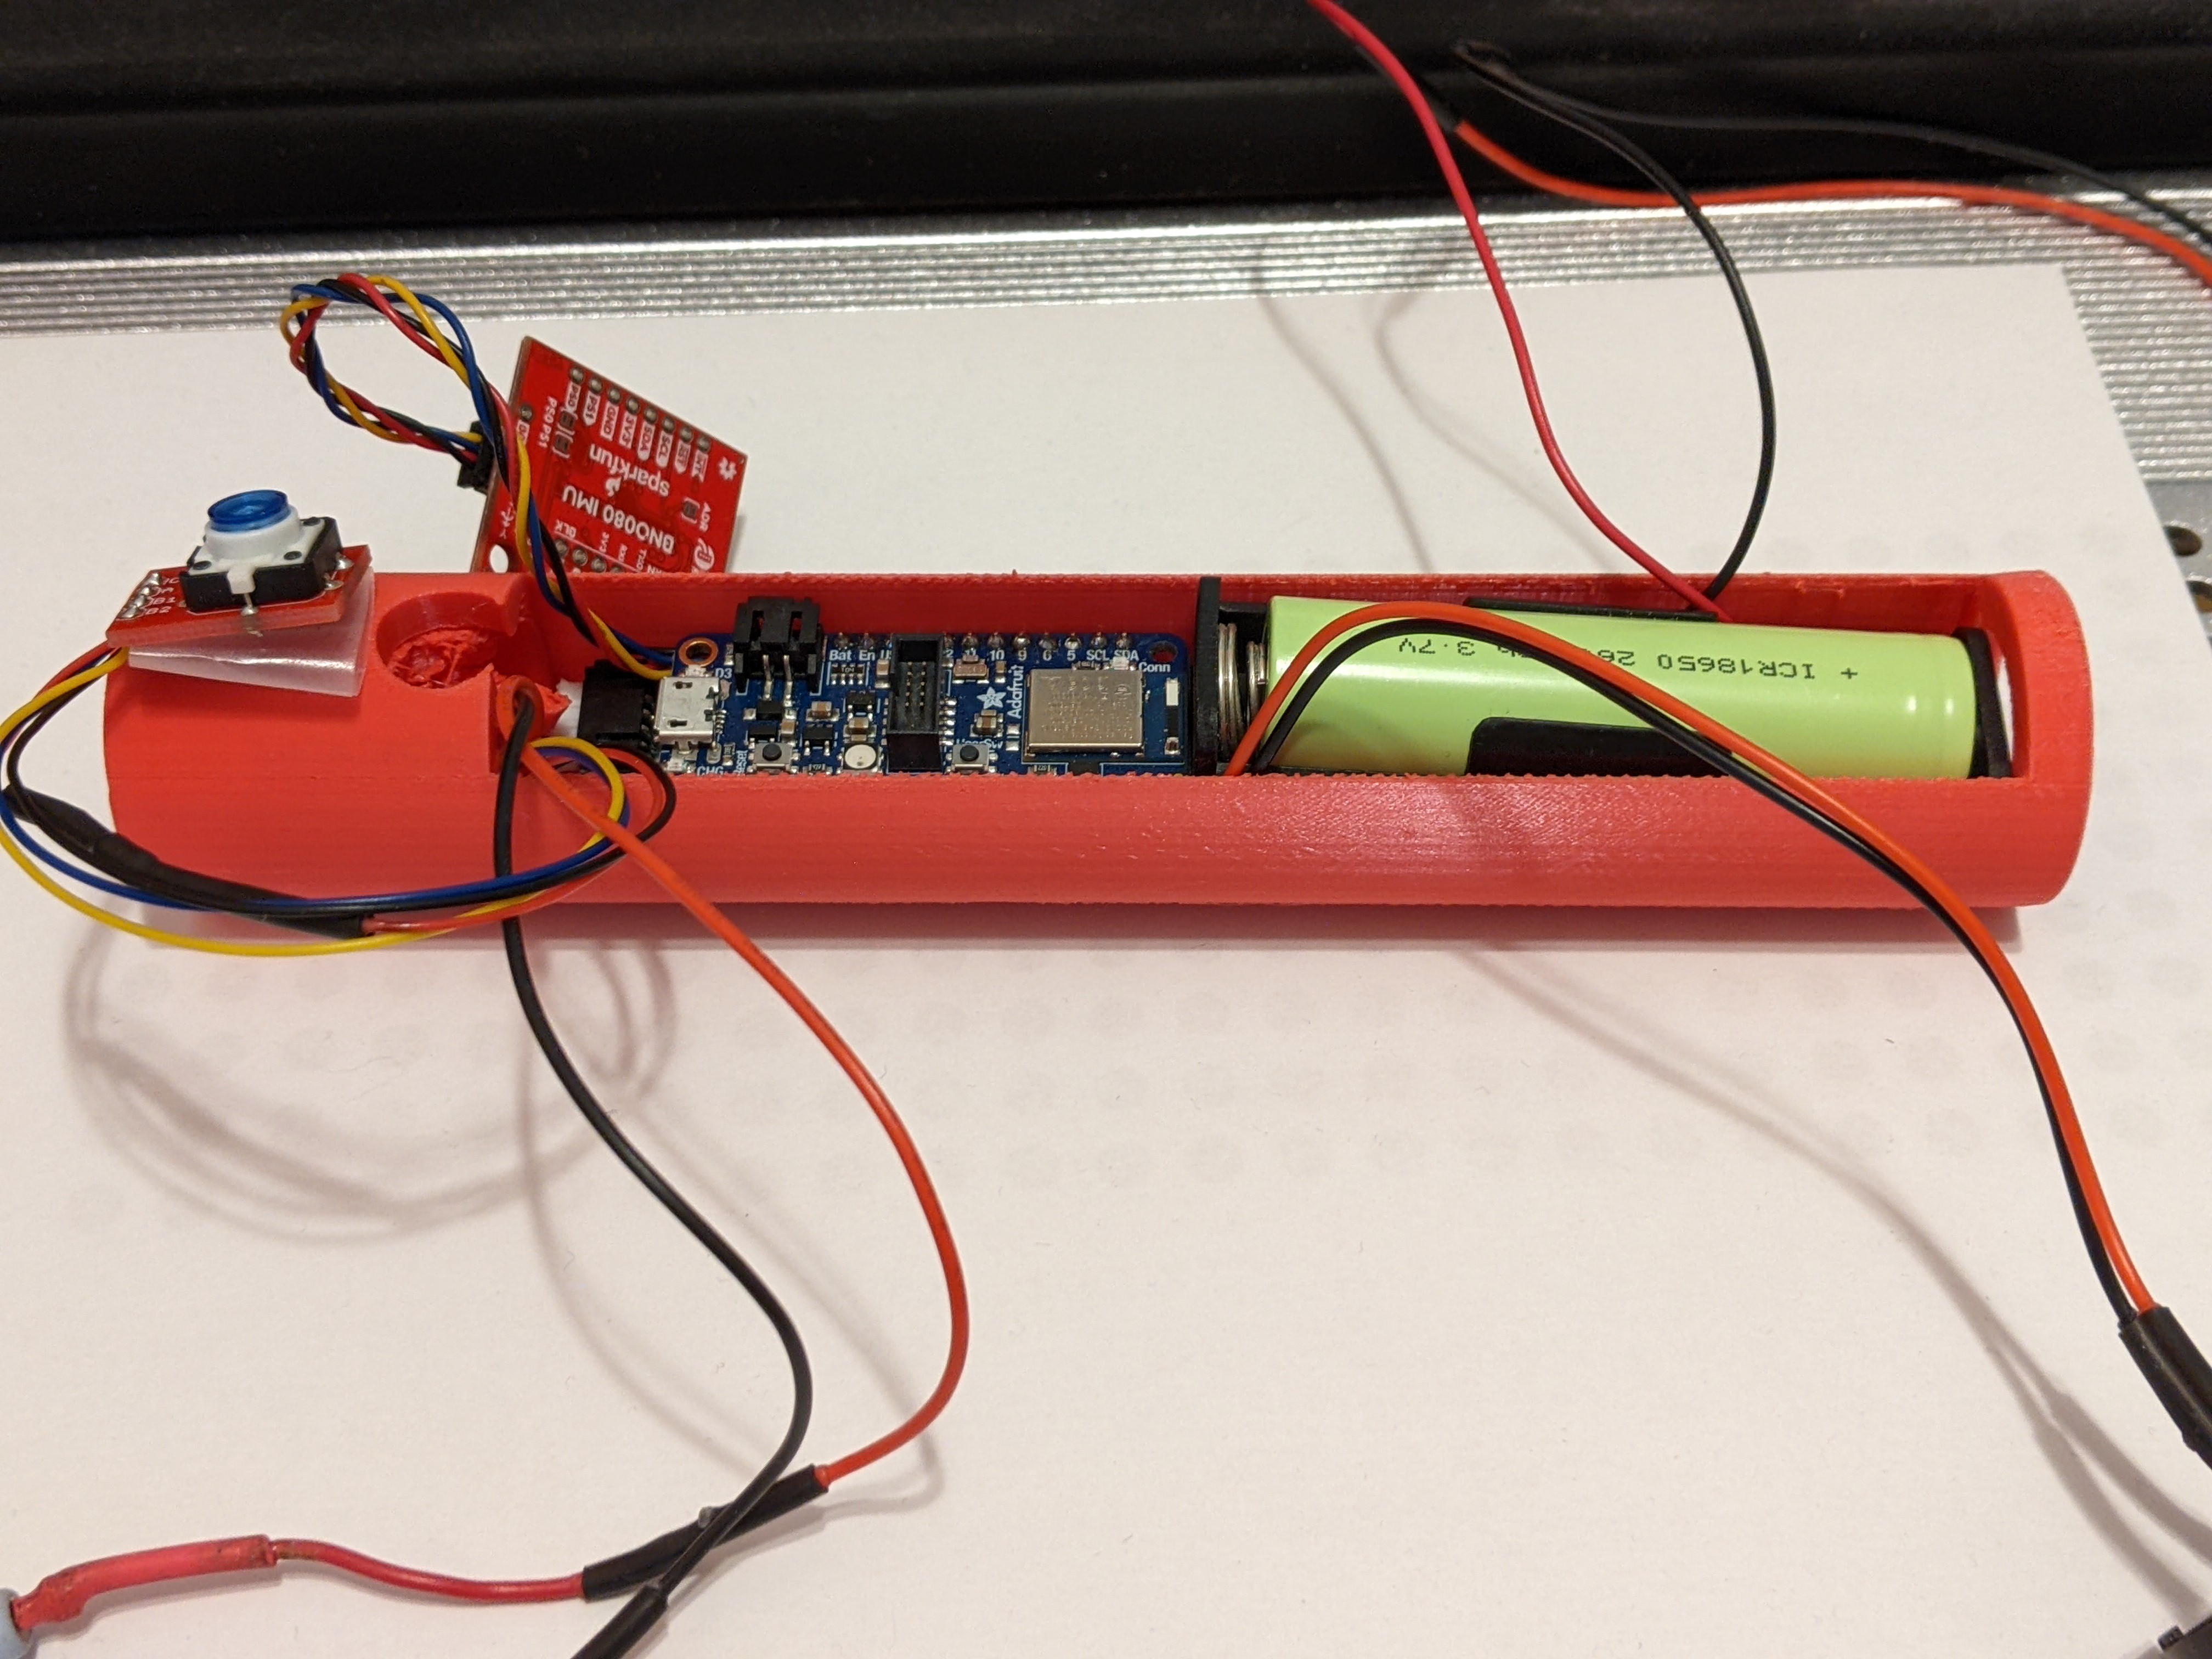
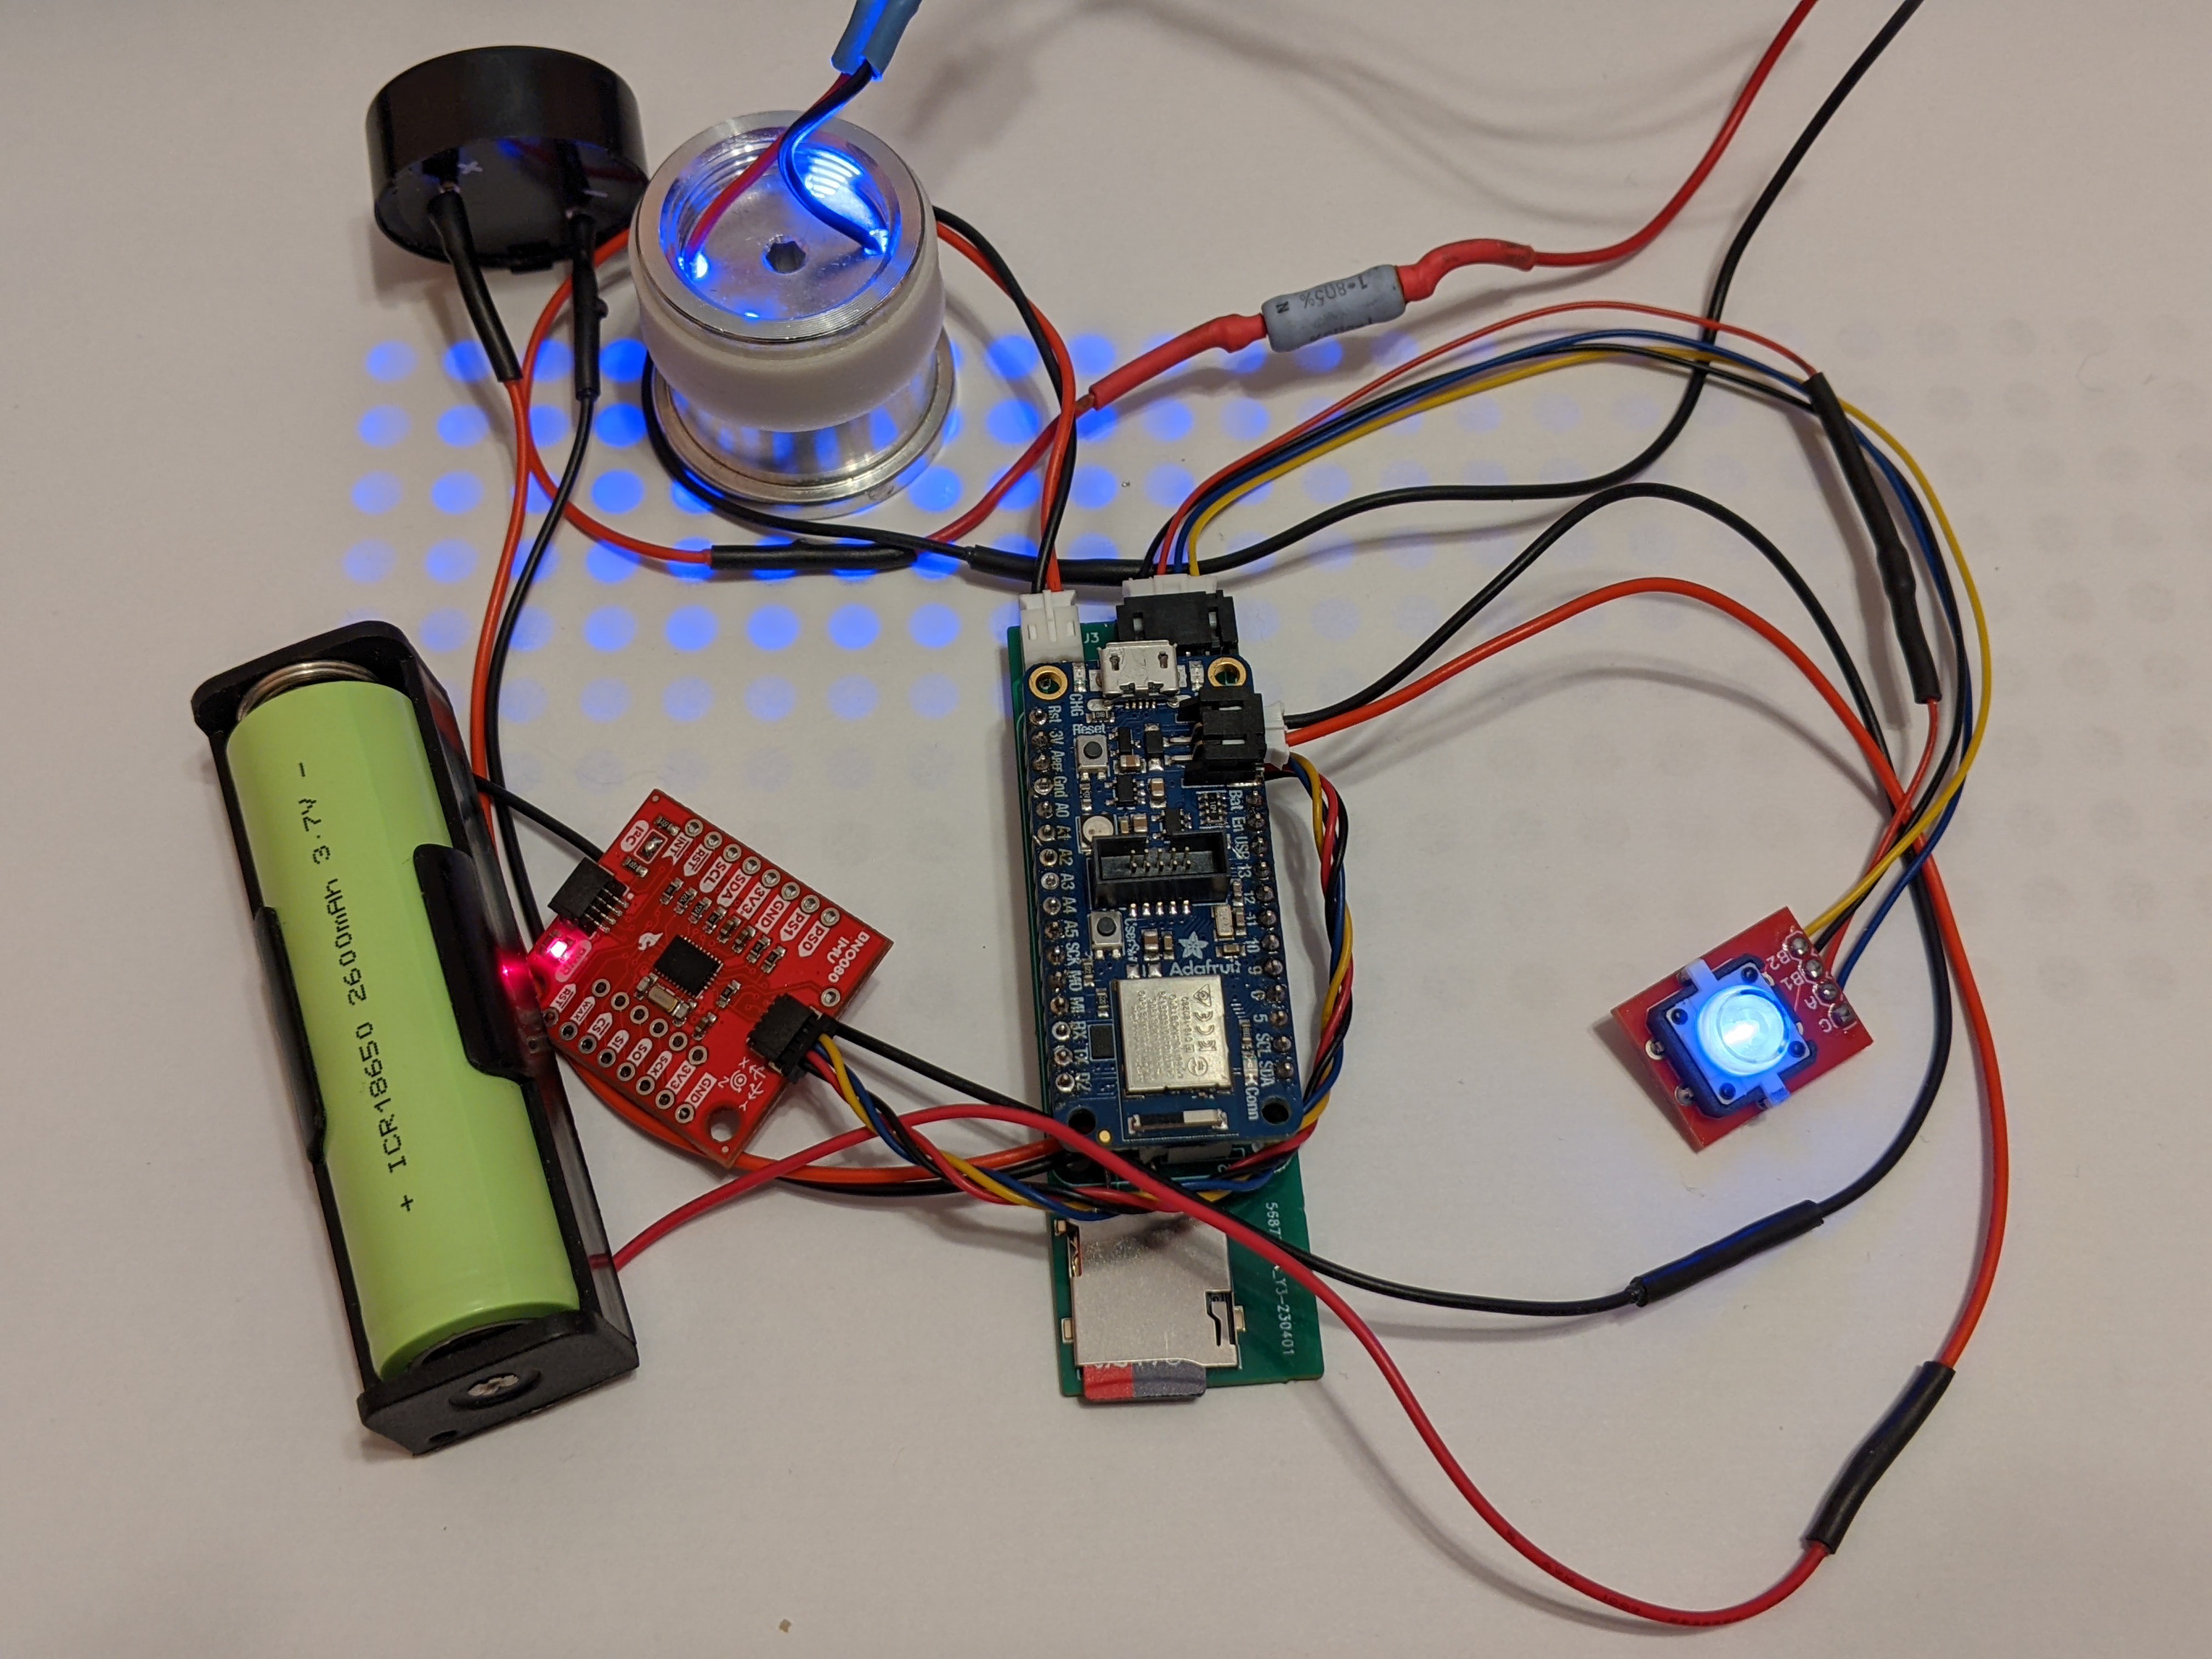
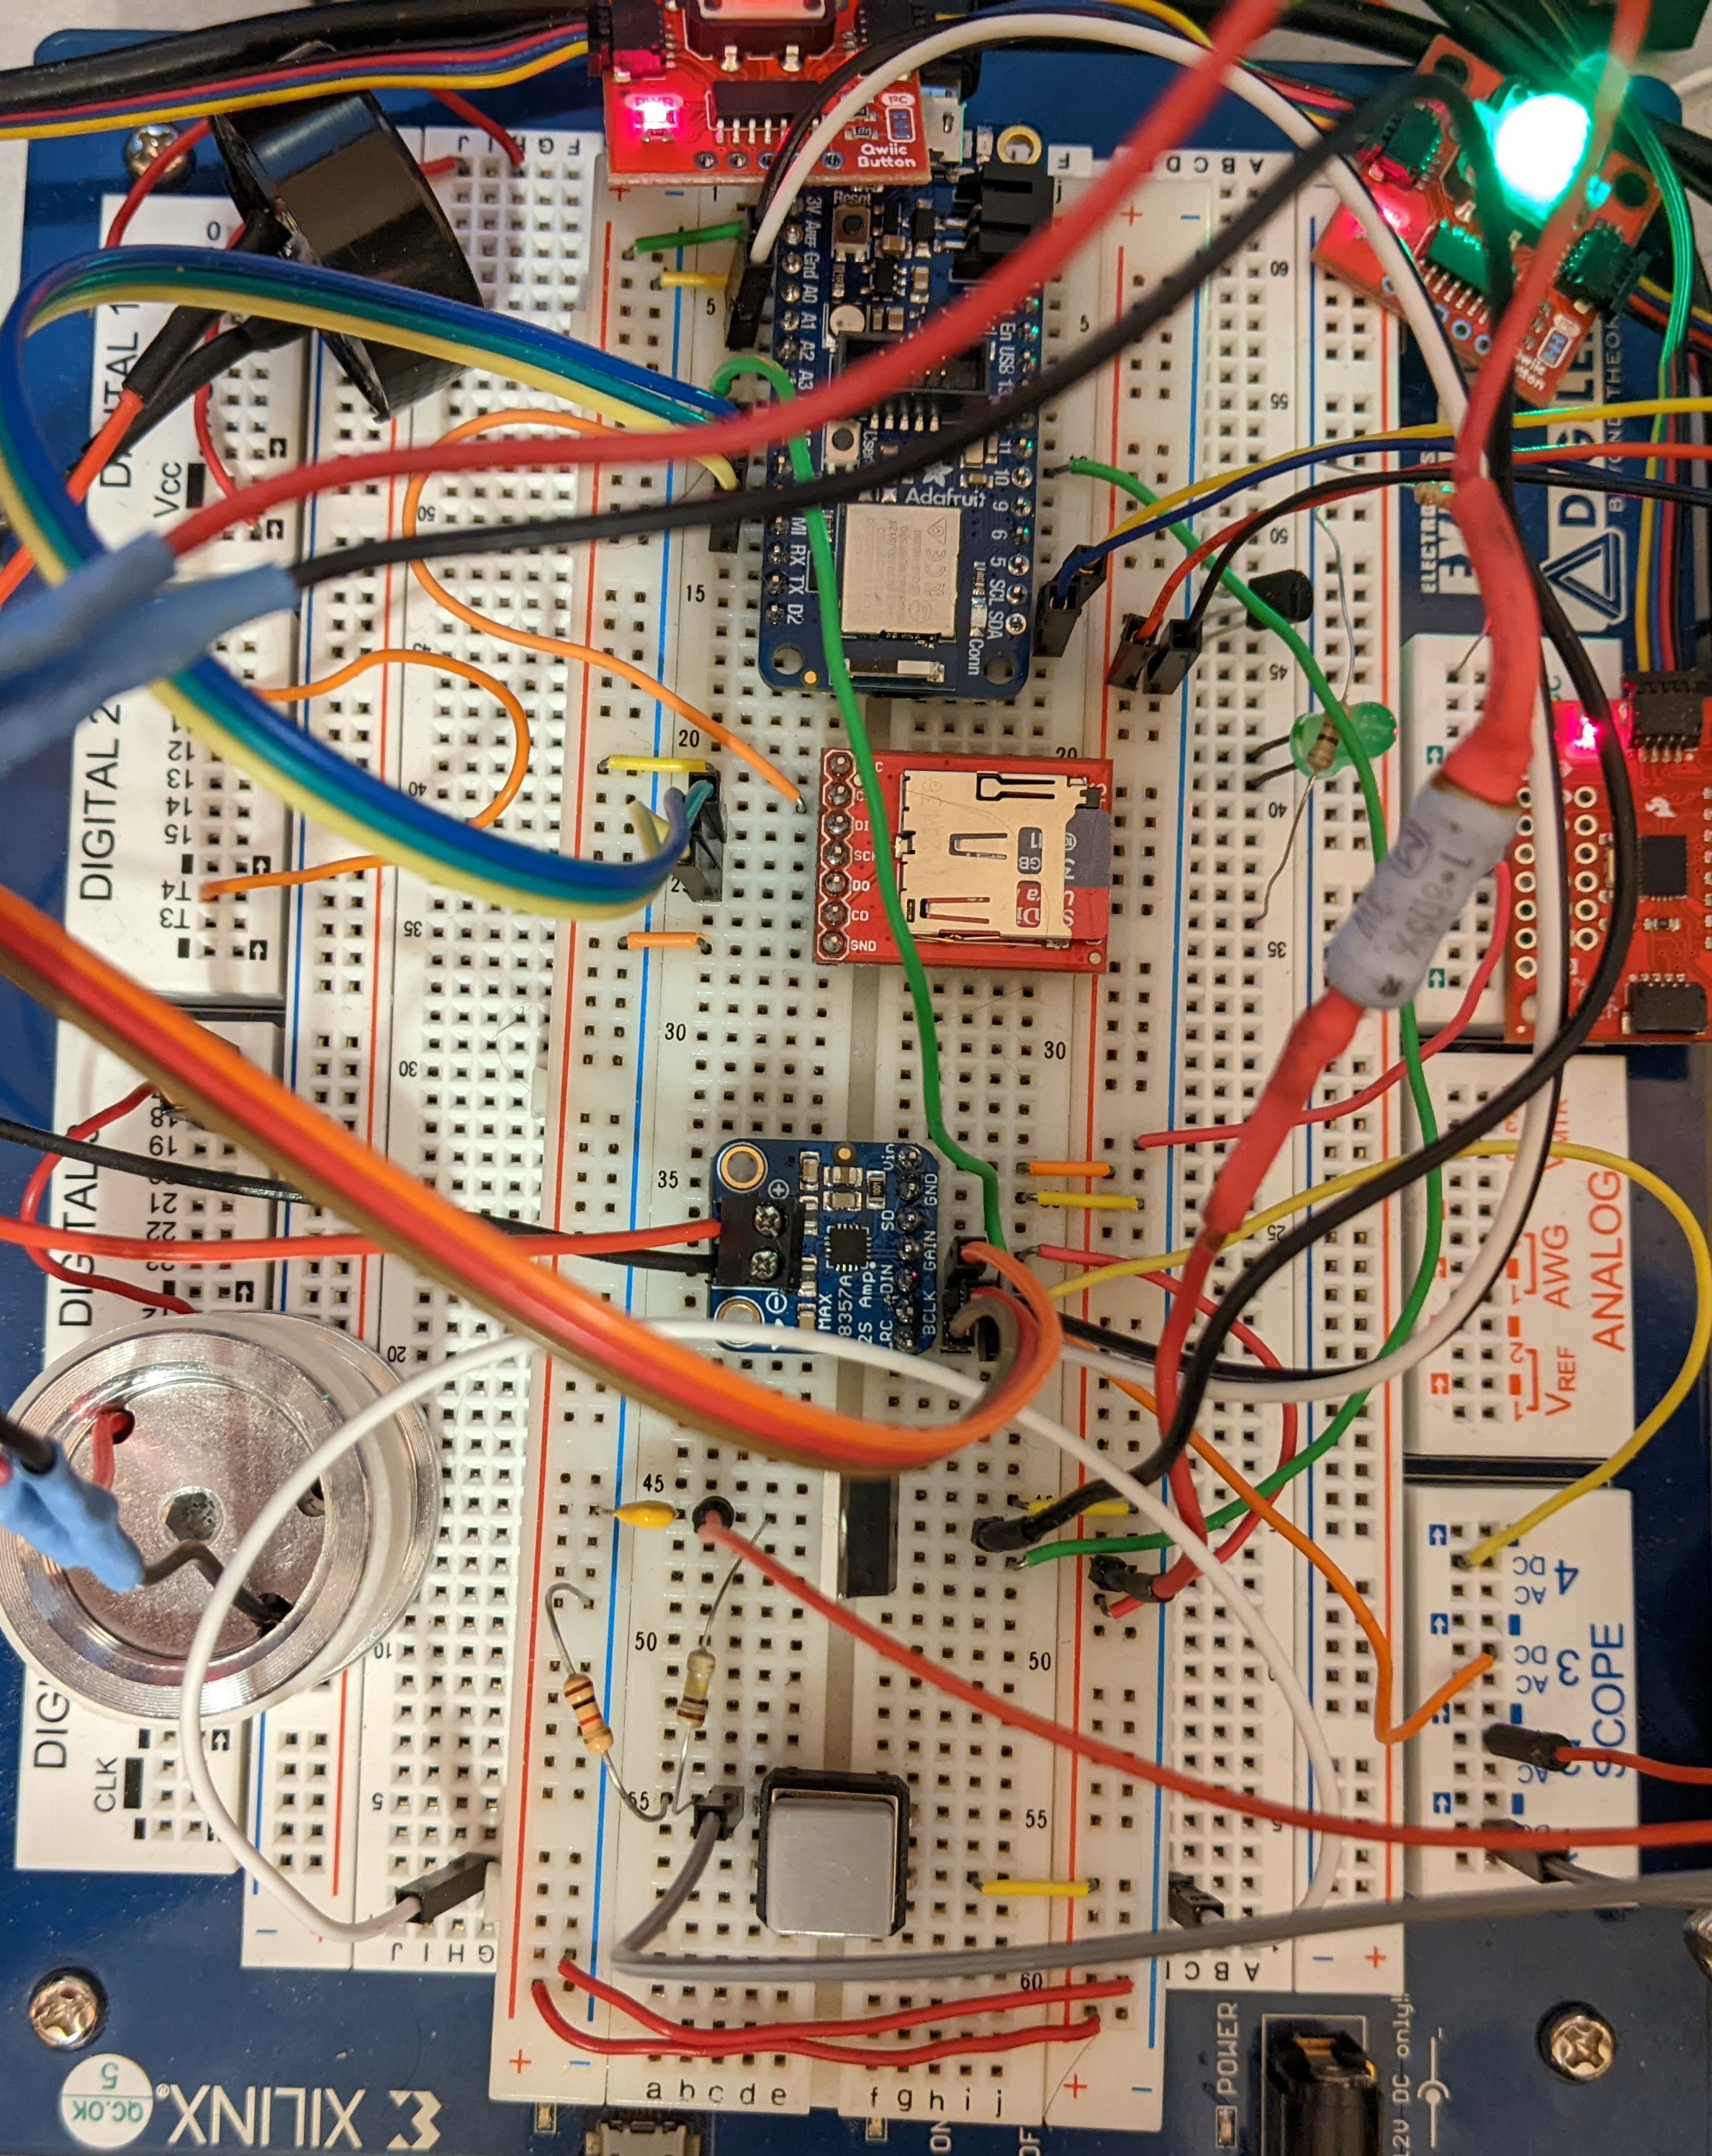
A Technically-Working Prototype
03/26/2023 at 23:55 • 0 commentsEvery project has to start somewhere. For most electronics projects, this "starting point" is the breadboard. The lightsaber is no exception:
![]() ---------- more ----------
---------- more ----------For those that are wondering what they're looking at, it's mostly a rat's nest that you're looking at. Here's a quick tour:
- The two red boards at the very top are Sparkfun QWIIC buttons. They both turn the saber on and off, but there's more interesting things you can do with a second button.
- The black blob at the top-left is a crappy speaker.
- The blue board at middle-top is a Feather board, the microcontroller doing everything.
- The micro SD Card socket is a level-shifting breakout board from Sparkfun.
- The LED to the right of the micro SD card is not connected.
- The blue resistor to the right of the SD Card is the current limiter for the LED module (lower left).
- The red board to the right of the resistor is the IMU (connected, not used).
- The blue board below the micro SD card is an Adafruit I2S amplifier. I2S means the microcontroller doesn't have to generate a precisely-timed analog signal, just a stream of numbers over a serial interface.
- The blue Xilinx board is a PC-based anlog lab from Digilent. It's just there because i didn't want to disassemble the circuit just yet.
A quick description of some features:
- It lights up and makes noise
- The buttons are fixed-color, but they do fade/breathe while the saber is "sleeping"
- The buttons are simple on/off toggles (with momentary switches!)
- There's very simple turning on/turning off animations & sounds
- Sounds are stored on the micro SD card
- The IMU is currently unused
- BLE is implemented. You can change some brightnesses and volumes
- The phone app needed to do this doesn't yet exist.
....And that's just about it. Right around MVP territory, although I bet some would insist that SmoothSwing is a day-one must-have. There is logic in that viewpoint, but it didn't make the cut this time.
My perception is that SmoothSwing is well-documented, and it'll work wherever. BLE has neither of those advantages, and is rather dependent on platform support on mutliple platforms (firmware, phone, and the two put together). So, in my estimation, BLE is a much more important MVP feature than SmoothSwing. All that said, SmoothSwing is a critical feature, and I absolutely need to do it before a can make a demo saber to hand to strangers.
Next pass is to cram all this into a hilt so that I can iterate on a functioning saber and get a feel for what it's like to use.
Sentinel Reforged
A journey to create an easy-to-use lightsaber that you don't have to fear breaking.