Close
0%
0%

Build Your Own Voice Control Module

Add voice control to any projects with an easy-to-build combination of off-the-shelf hardware and open source software.

Similar projects worth following
The Build Your Own Voice Control Module is an open source module build with a Raspberry Pi, 4 mic ReSpeaker and open source software, some available online and some custom. The Build Your Own Voice Control Module will allow almost any project to be controlled with a voice command. If you’re building a home automation, voice assistant, voice controlled robot or the next great chatbot, this is a great project to get started with learning about Artificial Intelligence.

The Build Your Own Voice Control Module is an open source module that offers a combination of entertainment, education, and voice control capabilities for human assistive devices and personal projects. It empowers users to enhance accessibility and independence through spoken commands.

This module provides seamless control over home environments, enabling users too effortlessly manage temperature and lighting settings using simple voice instructions with MQTT protocol and home assistant. In situations requiring assistance, it can be utilized to generate a call for help by connecting it to emergency devices, ensuring safety and peace of mind.
With control over a Python program, this module allows users to exercise control not only over the Raspberry Pi's pins but also enables Bluetooth connectivity for commanding a robot arm or a wheelchair. This functionality opens up new possibilities for enhanced accessibility, enabling individuals to perform tasks and interact with their environment through the power of voice commands.
The Build Your Own Voice Control Module is a versatile open source solution that combines entertainment, education, and voice control capabilities for human assistive devices and personal projects. It enables effortless management of home environments, facilitates emergency assistance, and empowers users to achieve greater accessibility and independence through the utilization of spoken commands.

These days, Artificial Intelligence is everywhere. Everyone is familiar with voice assistants such as SIRI and Alexa. Who would not want to control a robot with voice commands, and better yet, a voice command that does not need an external server to do the decoding. Build Your Own Voice Control Module is a module containing a Raspberry Pi, microphone (in my case a 4 mic array made by Seeed Studio), amplified speaker and some additional hardware. All software is open source. Deep learning will be used for voice to text, voice response with picoTTS, a python program to handle intents and the best system, in my opinion, to tie it all together Rhasspy. Rhasspy has a lot of built in features not only allowing the use of many different speech recognition models but also wake up words and voice response. Also, a lot of different techniques to handle intents such as MQTT for Home Assistant, Remote server and “Command” using and external program. Areas I have a strong personal interest in are systems like remote server (for possible use in a Pi Cluster) and command for possible use with a bluetooth control of a second Raspberry Pi for robotic control. Regardless of which intent handling system we end up with, it is going to be a fun journey and anyone can also build their own Voice Control Module!

**Software licensed under the MIT license, so feel free to do what you want with the code.**

  • 1 × Seeed Studio ReSpeaker 4-Mic Array
  • 1 × Raspberry Pi 4
  • 1 × lm386n audio amplifier
  • 1 × 8 ohm speaker .5 watts
  • 1 × 100uF 16 Volt capacitor

View all 6 components

  • First test of an external python program to handle intents.

    Dennis04/22/2023 at 19:36 0 comments

    First test of an external python program to handle intents. I had a few issues with permissions. For now, I have a program folder inside of the Rhasspy/en file that contains the commands.py file. What was accomplished? Calling an external program, so now we can control anything we want, a working wakeup word and running the LEDs with threading from the python program.

  • Rhasspy Loaded

    Dennis04/15/2023 at 16:56 0 comments

    Rhasspy loaded very smoothly. It runs in the background in a Docker container. So far, Rhasspy is an awesome system to tie everything together. Now some additional code work to add an external python program to handle intents. Details coming soon in the instructions.

  • Deep Speech test.

    Dennis04/15/2023 at 01:52 0 comments

    Just for fun, I loaded Deep Speech to perform a fun quick test of voice to text. There are several examples included with Deep Speech. I couldn't resist modifying the code a bit to add some LED action. It works pretty good even with my backwoods accent. :) 

  • LED test.

    Dennis04/11/2023 at 01:14 0 comments

    A quick check of the LEDs on the 4 mic array hat. After the 4 mic array is installed Seeed Studios includes a neat python program for testing the LEDs. The LEDs are controlled through a SPI interface. To run the program, in terminal CD to the 4mic_hat file and run the program called pixels.py. More details will be added under the instructions soon. 

  • First attempt, first failure and the first fix.

    Dennis04/08/2023 at 16:04 0 comments

    I loaded the latest and greatest operating system from the Raspberry Pi site and then followed the procedure to install the drivers for the 4 mic array from Seeed Studios. And for whatever reason, the Raspberry Pi could not find the 4 mic array hat. So I reformatted the SD card and loaded the legacy version operating system (2022-09-22-raspios-bullseye-armhf-full.img), followed the 4mic array procedure again, and the Raspberry Pi was able to find the 4 mic array as seen from the screen shot of the terminal below. Yay!

View all 5 project logs

  • 1
    Get an operating system

    The first step is to get an operating system. I tried the latest Raspberry Pi operating system but I was not able to get the Pi to recognize the Seeed Studios 4 mic array hat. To work around that problem I loaded to legacy version ( 2022-09-22-raspios-bullseye-armhf-full.img ). Available from the link below.

    https://www.raspberrypi.com/software/operating-systems/  

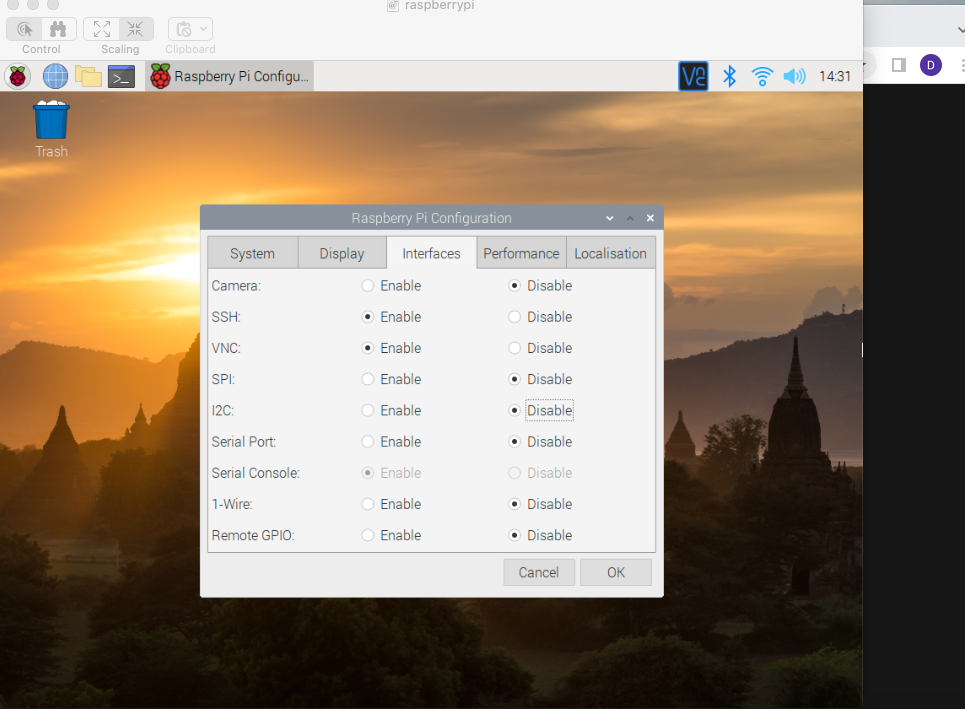
    Copy the operating system, unzip and use the imager available here (https://www.raspberrypi.com/software/) and follow the instructions on the same link.  After the install, the operating system should look like the below image.

    I personally like to code from a recliner on a laptop so I also enabled SSH and VNC. 

  • 2
    2nd step add a microphone.

    A procedure to add a microphone will depend on the microphone selected. The microphone I’m using is a 4 mic array hat made by Seeed Studios. I like the LED array and the mic array, but not too crazy about limiting access to the pins on the Raspberry Pi. So on future versions, I will probably use a USB mic array.  Installing the mic is very straightforward.

    First with the power to the Pi off, plug the 4 mic array hat into the Raspberry Pi making sure the pins are properly aligned and turn the power on.

    Open up a terminal connection to the Pi. The below commands will install the driver and files needed for the 4 mic array hat.

    update the Raspberry Pi

    sudo apt-get update

    Copy the drivers and files to the pi with the below command.

    git clone https://github.com/Seeed-Projects/seeed-voicecard.git

    Go to the speed-voicecard file with the below command.

    cd seeed-voicecard

    Run the install, again with the below command.

    sudo ./install.sh

    After the install is complete reboot the Pi with the below reboot command

    sudo reboot now

    After the pi comes back online reopen terminal and enter the below command.

    arecord -l

    You should see something similar to the below image.

    To work with the LEDs copy the below repository.

    git clone https://github.com/respeaker/4mics_hat.git

    Install the necessary dependencies, from mic_hat repository folder with the commands below.

    sudo apt-get install portaudio19-dev libatlas-base-dev

    pip3 install -r requirements.txt

    SPI will also need to be enabled.

    sudo raspi-config

    Enable SPI and exit config.

    The below link is a more detailed wiki for installing the 4 mic array.

    https://wiki.seeedstudio.com/ReSpeaker_4_Mic_Array_for_Raspberry_Pi/

  • 3
    3rd step adding Rhasspy

    Although Rhasspy is a great system. My intentions are mainly to use Rhasspy to help tie everything together with control of external devices controlled from an external Python program. Rhasspy is available under the MIT license which makes it great for an open source voice control AI project. With its ease of use and great documentation, it is also great for learning about AI and voice to text. Rhasspy can be ran in either a virtual environment or a docker container. For the Do It Yourself Voice Control Module, I went the docker route.

     Rhasspy has an excellent tutorial on loading Rhasspy on a Raspberry Pi at the below link.

    https://wiki.seeedstudio.com/ReSpeaker_4_Mic_Array_for_Raspberry_Pi

    To load Rhasspy on a Raspberry Pi:

    First, open terminal and log into the Raspberry Pi

    Update the Raspberry Pi with the below command.

    sudo apt-get update

    Load docker with the command below.

    curl -sSL https://get.docker.com | sh

    Add yourself to the docker group. I’m using the default “pi” as a username. If you are using a different username, enter the user name in place of “pi”.

    sudo usermod -aG docker pi

    Reboot the Raspberry Pi.

    sudo reboot

    After the Raspberry Pi has come back online, log back in and pull the docker image.

    docker pull rhasspy/rhasspy

    I want Rhasspy to run in the background and start when the Raspberry Pi comes online. The below command will accomplish this.

    docker run -d \
          -p 12101:12101 \
          --name rhasspy \
          --restart unless-stopped \
          -v "$HOME/.config/rhasspy/profiles:/profiles" \
          -v "/etc/localtime:/etc/localtime:ro" \
          --device /dev/snd:/dev/snd \
          rhasspy/rhasspy \
          --user-profiles /profiles \
          --profile en

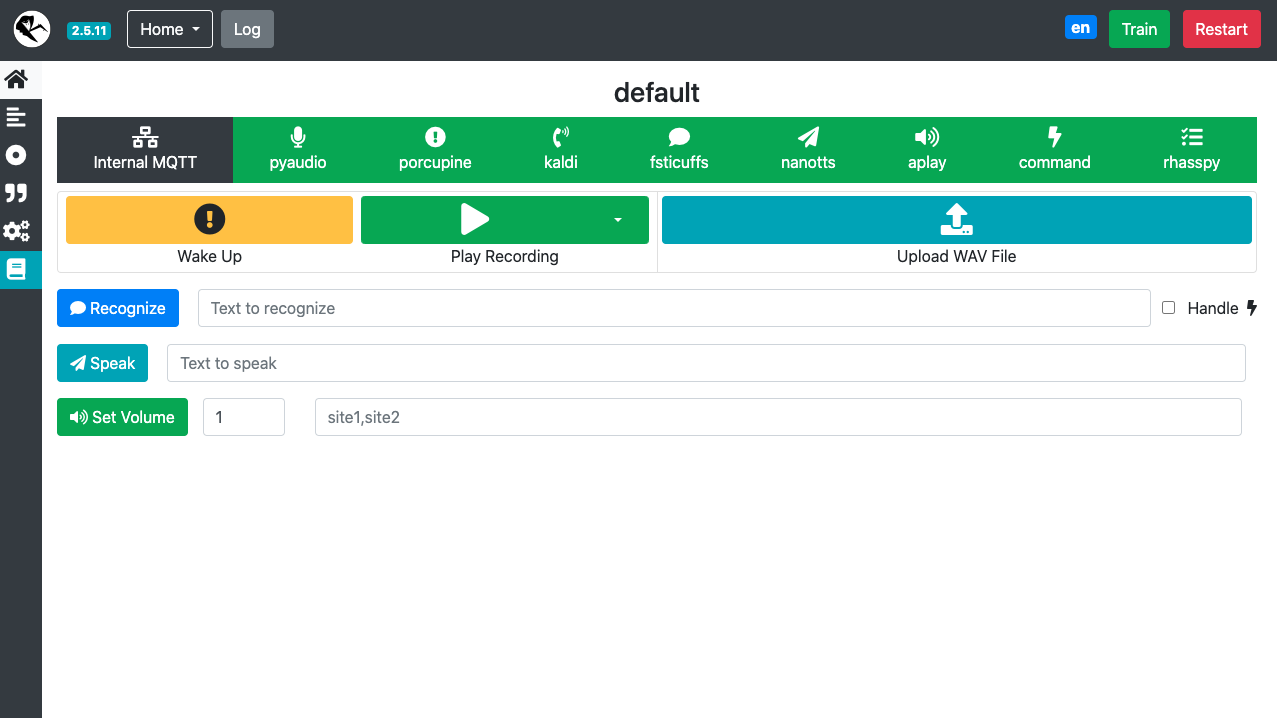
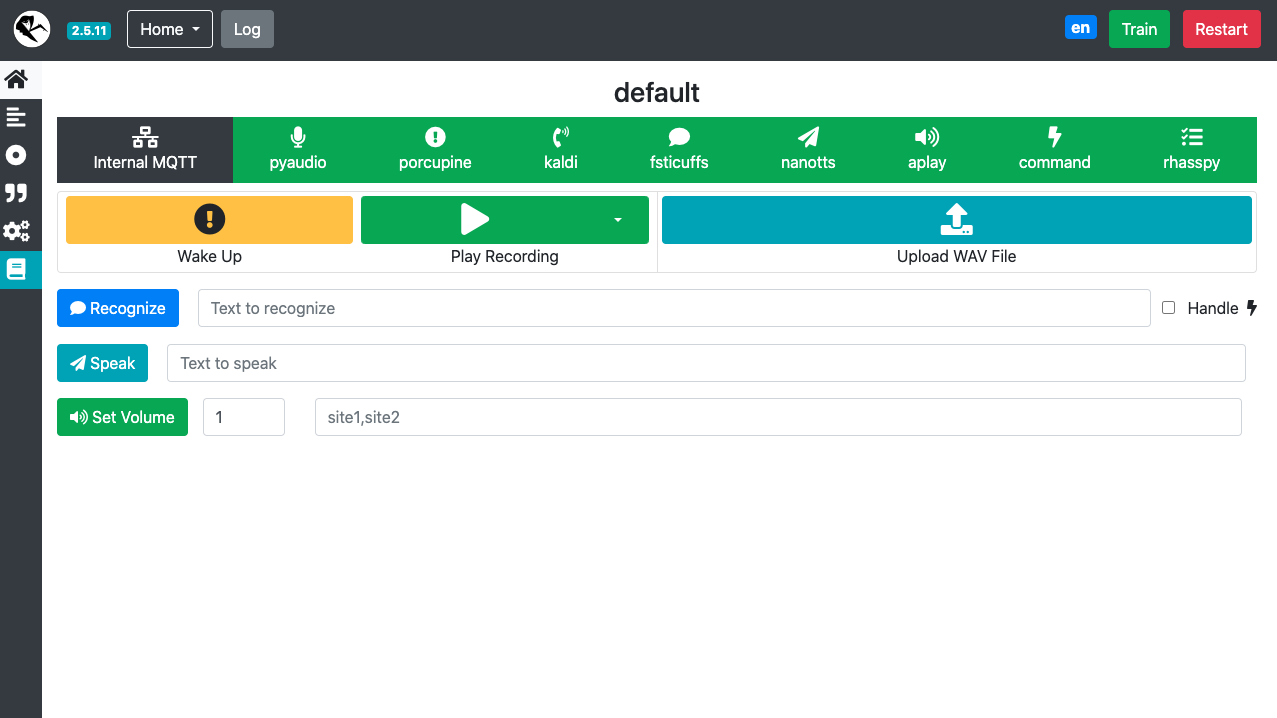
    The Rhasspy webpage for your Raspberry Pi should be available on the Raspberry Pi’s local host on port 12101. On a computer connected to the same network as the Pi. Type the Raspberry Pi’s IP address + port 12101 in the browsers address bar for example 192.169.2.7:12101 and you should see something similar to the image below in the browser. 

    The next steps coming up will be configuring Rhasspy and adding a Python command file.

View all 3 instructions

Enjoy this project?

Share

Discussions

Dan wrote 05/17/2023 at 06:38 point

Found this update to the driver that got me up and running on the latest Raspberry Pi OS:

https://forum.seeedstudio.com/t/respeaker-4mic-array-install-on-raspberryos-with-5-15-kernel/264254

  Are you sure? yes | no

Dennis wrote 05/18/2023 at 01:35 point

Thanks Dan! That is great some information!

  Are you sure? yes | no

Similar Projects

Does this project spark your interest?

Become a member to follow this project and never miss any updates