-
1Get an operating system
The first step is to get an operating system. I tried the latest Raspberry Pi operating system but I was not able to get the Pi to recognize the Seeed Studios 4 mic array hat. To work around that problem I loaded to legacy version ( 2022-09-22-raspios-bullseye-armhf-full.img ). Available from the link below.
https://www.raspberrypi.com/software/operating-systems/
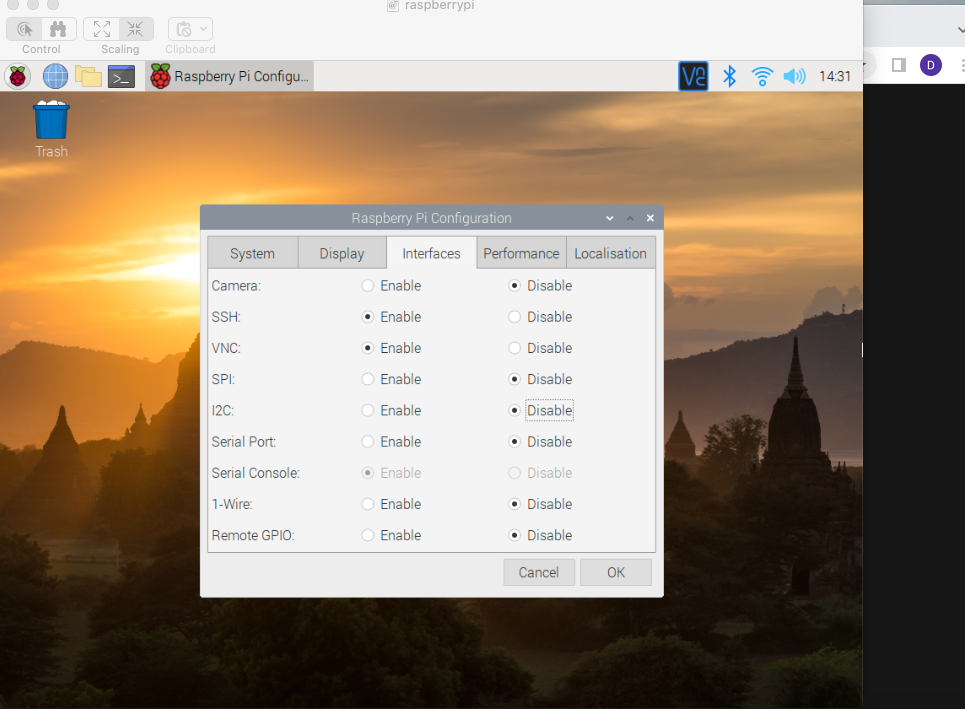
Copy the operating system, unzip and use the imager available here (https://www.raspberrypi.com/software/) and follow the instructions on the same link. After the install, the operating system should look like the below image.
![]()
I personally like to code from a recliner on a laptop so I also enabled SSH and VNC.
![]()
-
22nd step add a microphone.
A procedure to add a microphone will depend on the microphone selected. The microphone I’m using is a 4 mic array hat made by Seeed Studios. I like the LED array and the mic array, but not too crazy about limiting access to the pins on the Raspberry Pi. So on future versions, I will probably use a USB mic array. Installing the mic is very straightforward.
First with the power to the Pi off, plug the 4 mic array hat into the Raspberry Pi making sure the pins are properly aligned and turn the power on.
Open up a terminal connection to the Pi. The below commands will install the driver and files needed for the 4 mic array hat.
update the Raspberry Pi
sudo apt-get update
Copy the drivers and files to the pi with the below command.
git clone https://github.com/Seeed-Projects/seeed-voicecard.git
Go to the speed-voicecard file with the below command.
cd seeed-voicecard
Run the install, again with the below command.
sudo ./install.sh
After the install is complete reboot the Pi with the below reboot command
sudo reboot now
After the pi comes back online reopen terminal and enter the below command.
arecord -l
You should see something similar to the below image.
![]()
To work with the LEDs copy the below repository.
git clone https://github.com/respeaker/4mics_hat.git
Install the necessary dependencies, from mic_hat repository folder with the commands below.
sudo apt-get install portaudio19-dev libatlas-base-dev
pip3 install -r requirements.txt
SPI will also need to be enabled.
sudo raspi-config
Enable SPI and exit config.
The below link is a more detailed wiki for installing the 4 mic array.
https://wiki.seeedstudio.com/ReSpeaker_4_Mic_Array_for_Raspberry_Pi/
-
33rd step adding Rhasspy
Although Rhasspy is a great system. My intentions are mainly to use Rhasspy to help tie everything together with control of external devices controlled from an external Python program. Rhasspy is available under the MIT license which makes it great for an open source voice control AI project. With its ease of use and great documentation, it is also great for learning about AI and voice to text. Rhasspy can be ran in either a virtual environment or a docker container. For the Do It Yourself Voice Control Module, I went the docker route.
Rhasspy has an excellent tutorial on loading Rhasspy on a Raspberry Pi at the below link.
https://wiki.seeedstudio.com/ReSpeaker_4_Mic_Array_for_Raspberry_Pi
To load Rhasspy on a Raspberry Pi:
First, open terminal and log into the Raspberry Pi
Update the Raspberry Pi with the below command.
sudo apt-get update
Load docker with the command below.
curl -sSL https://get.docker.com | sh
Add yourself to the docker group. I’m using the default “pi” as a username. If you are using a different username, enter the user name in place of “pi”.
sudo usermod -aG docker pi
Reboot the Raspberry Pi.
sudo reboot
After the Raspberry Pi has come back online, log back in and pull the docker image.
docker pull rhasspy/rhasspy
I want Rhasspy to run in the background and start when the Raspberry Pi comes online. The below command will accomplish this.
docker run -d \
-p 12101:12101 \
--name rhasspy \
--restart unless-stopped \
-v "$HOME/.config/rhasspy/profiles:/profiles" \
-v "/etc/localtime:/etc/localtime:ro" \
--device /dev/snd:/dev/snd \
rhasspy/rhasspy \
--user-profiles /profiles \
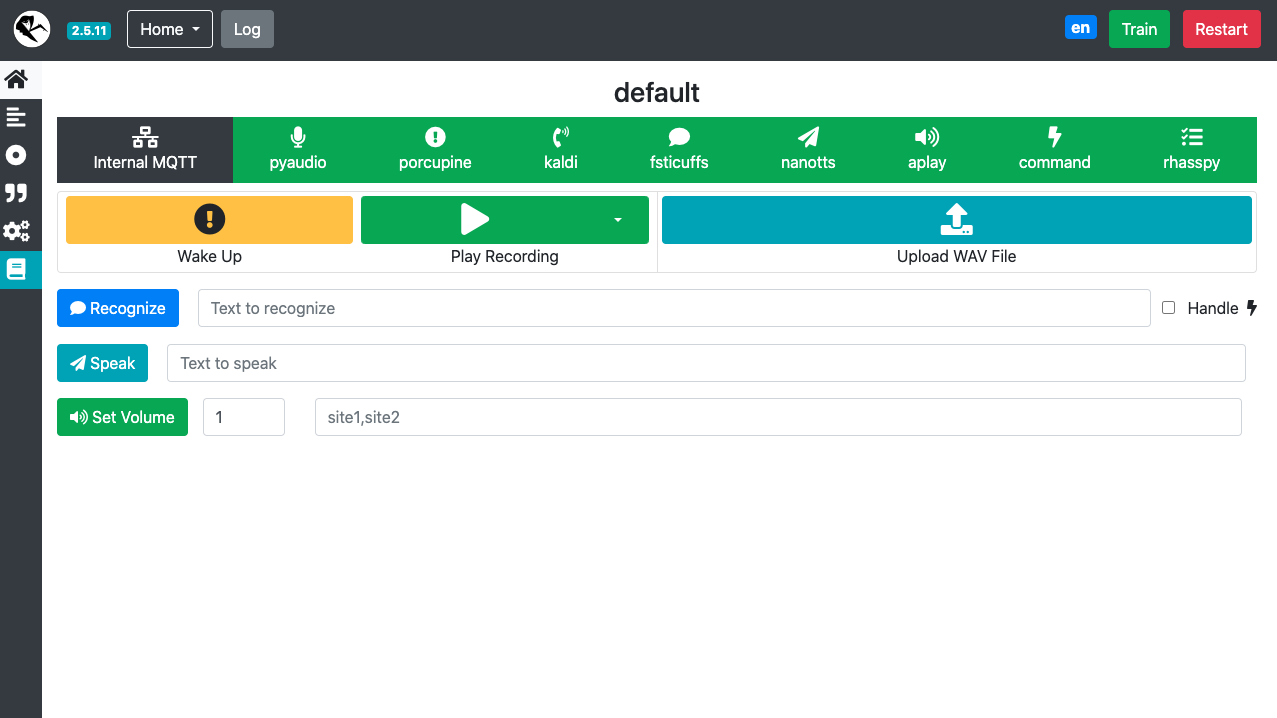
--profile enThe Rhasspy webpage for your Raspberry Pi should be available on the Raspberry Pi’s local host on port 12101. On a computer connected to the same network as the Pi. Type the Raspberry Pi’s IP address + port 12101 in the browsers address bar for example 192.169.2.7:12101 and you should see something similar to the image below in the browser.
![]()
The next steps coming up will be configuring Rhasspy and adding a Python command file.
Build Your Own Voice Control Module
Add voice control to any projects with an easy-to-build combination of off-the-shelf hardware and open source software.
 Dennis


Discussions
Become a Hackaday.io Member
Create an account to leave a comment. Already have an account? Log In.