Close
0%
0%

$1 HCI & BCI

Designing affordable BioPhysiology sensors for Human Computer Interface (HCI) and Brain Computer Interface (BCI)

Public Chat
Similar projects worth following
According to Nature Electronics journal 2023 BCI is the technology of the year. No doubt in this century we are going to learn a lot about our brain and how to leverage it's true potential. It's the era of technological transformation on a scale we have not seen before. We are seeing massive AI boom with technologies like ChatGPT and we are about to see massive transformation in the field of neural interfaces as well with high density implantable sensor array from companies like Neuralink. This massive transformation is exciting for some and truly overwhelming for others. We have great tools and resources available for anybody who want to learn about artificial neural networks but, when it comes to understanding biological neurons and creating interfaces to leverage them to create something amazing we don't have any affordable tools available. We at Upside Down Labs are changing that with our fully OpenSource BioAmp sensor technology.

Would you believe a sensor exists with BOM cost as low as $1 which can be made on a breadboard and can record biopotential signals with such accuracy that you can create sophisticated Human-Computer Interface (HCI) devices with ease?


The GIF animation below shows one such home made sensor I developed during late 2020 which is called BioAmp EMG Pill. The project was covered by Hackaday.com as well.
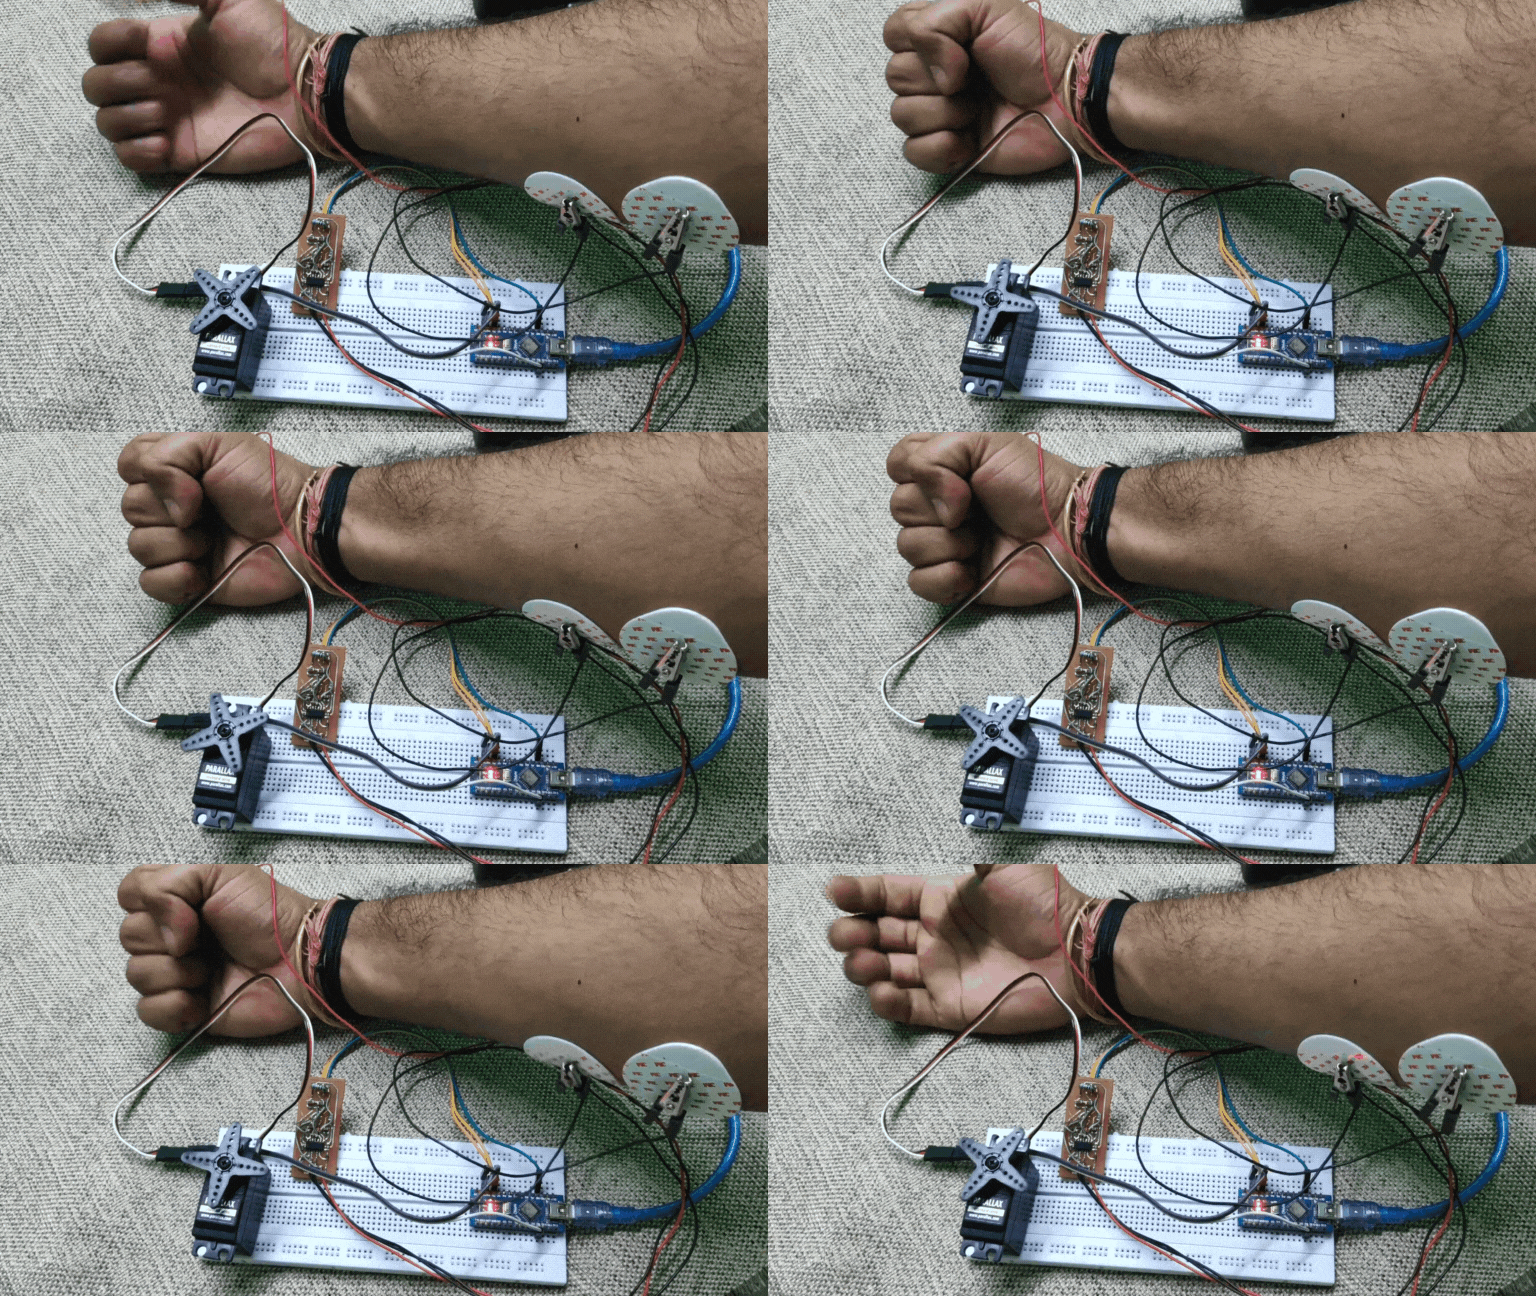


It's all possible because of the years of research I had put into perfecting the BioAmp design making it the most affordable biopotential sensing solution. We at Upside Down Labs believe in open science thus everything we do at Upside Down Labs is open for all be it our Hardware, Software, or Documentation.

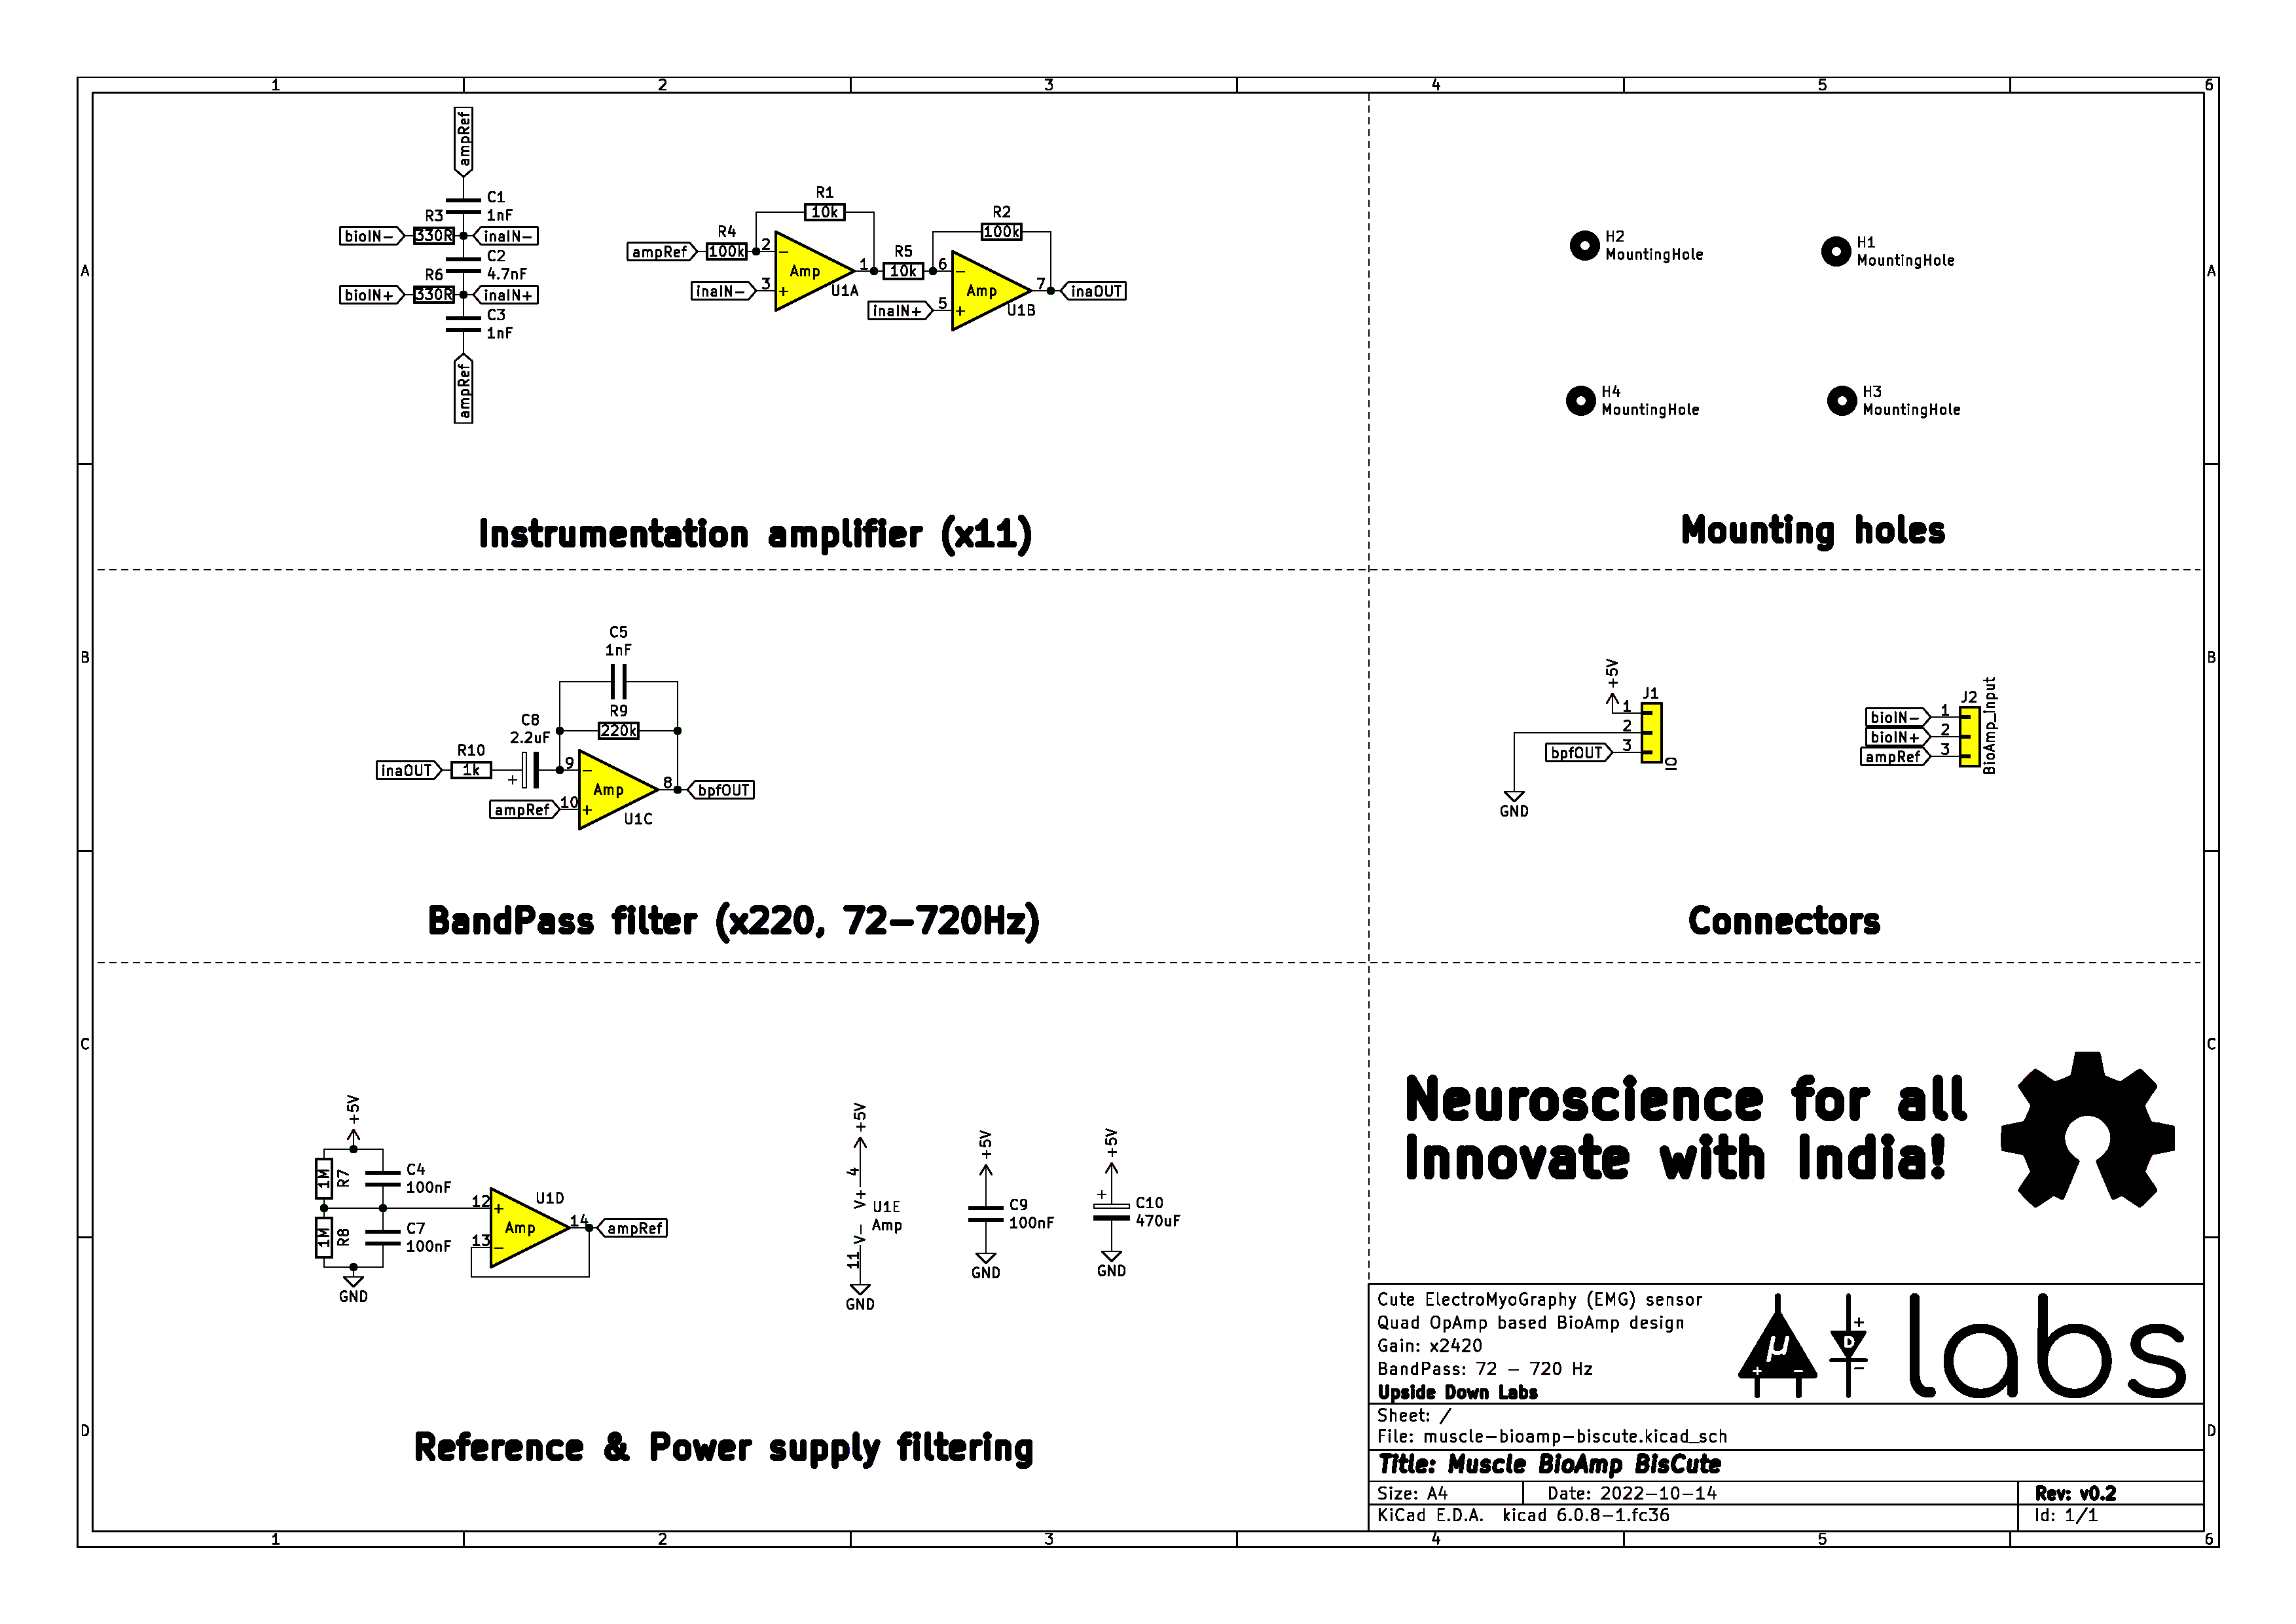
Without considering the overhead cost of setting up a lab and purchasing tools the BOM cost of making a BioAmp can be as low as $1 if you choose the parts correctly. The DIY Muscle BioAmp BisCute design is very minimalist which can easily be built on a breadboard using LM324, 1% precision resistors, ceramic disc capacitors and some electrolytic capacitors. Below is the schematic diagram of Muscle BioAmp Biscute if you are interested to replicate it on a breadboard.
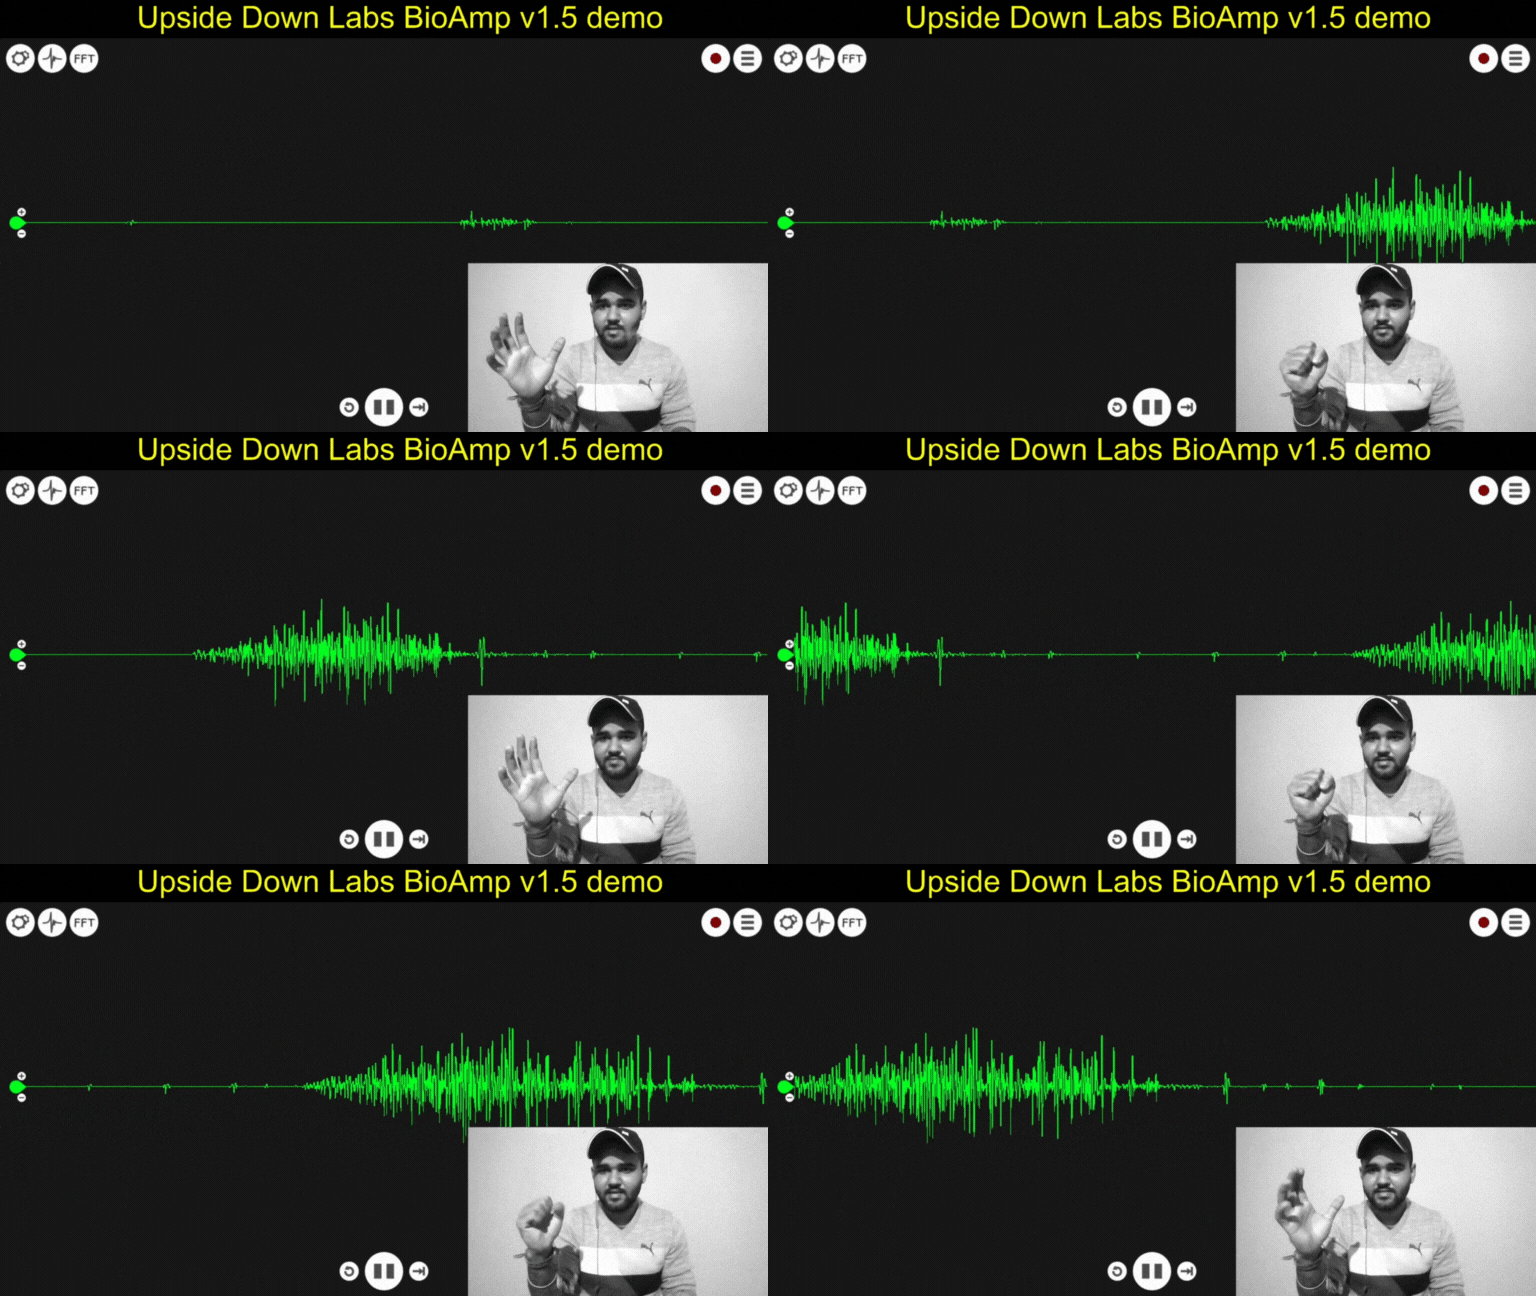
To create even simpler BioAmp for listening your EMG signals using a pair of headphones or visualizing & recording on a mobile phone/laptop using microphone input you can choose to build the BioAmp v1.5 sensor. Below is a simple BioAmp design which uses jelly bean parts like TL074 and 1% precision resistors to create a sophisticated EMG sesnor that can easily be interfaced with a mobile/laptop to create Human Control Interface (HCI) with ease. The digitized signals using microphone input (internal ADC) can be used to create game controller to play various games like chrome dino game. The BioAmp can also be used to create control interfaces to design an assistice device for people with disabilities.
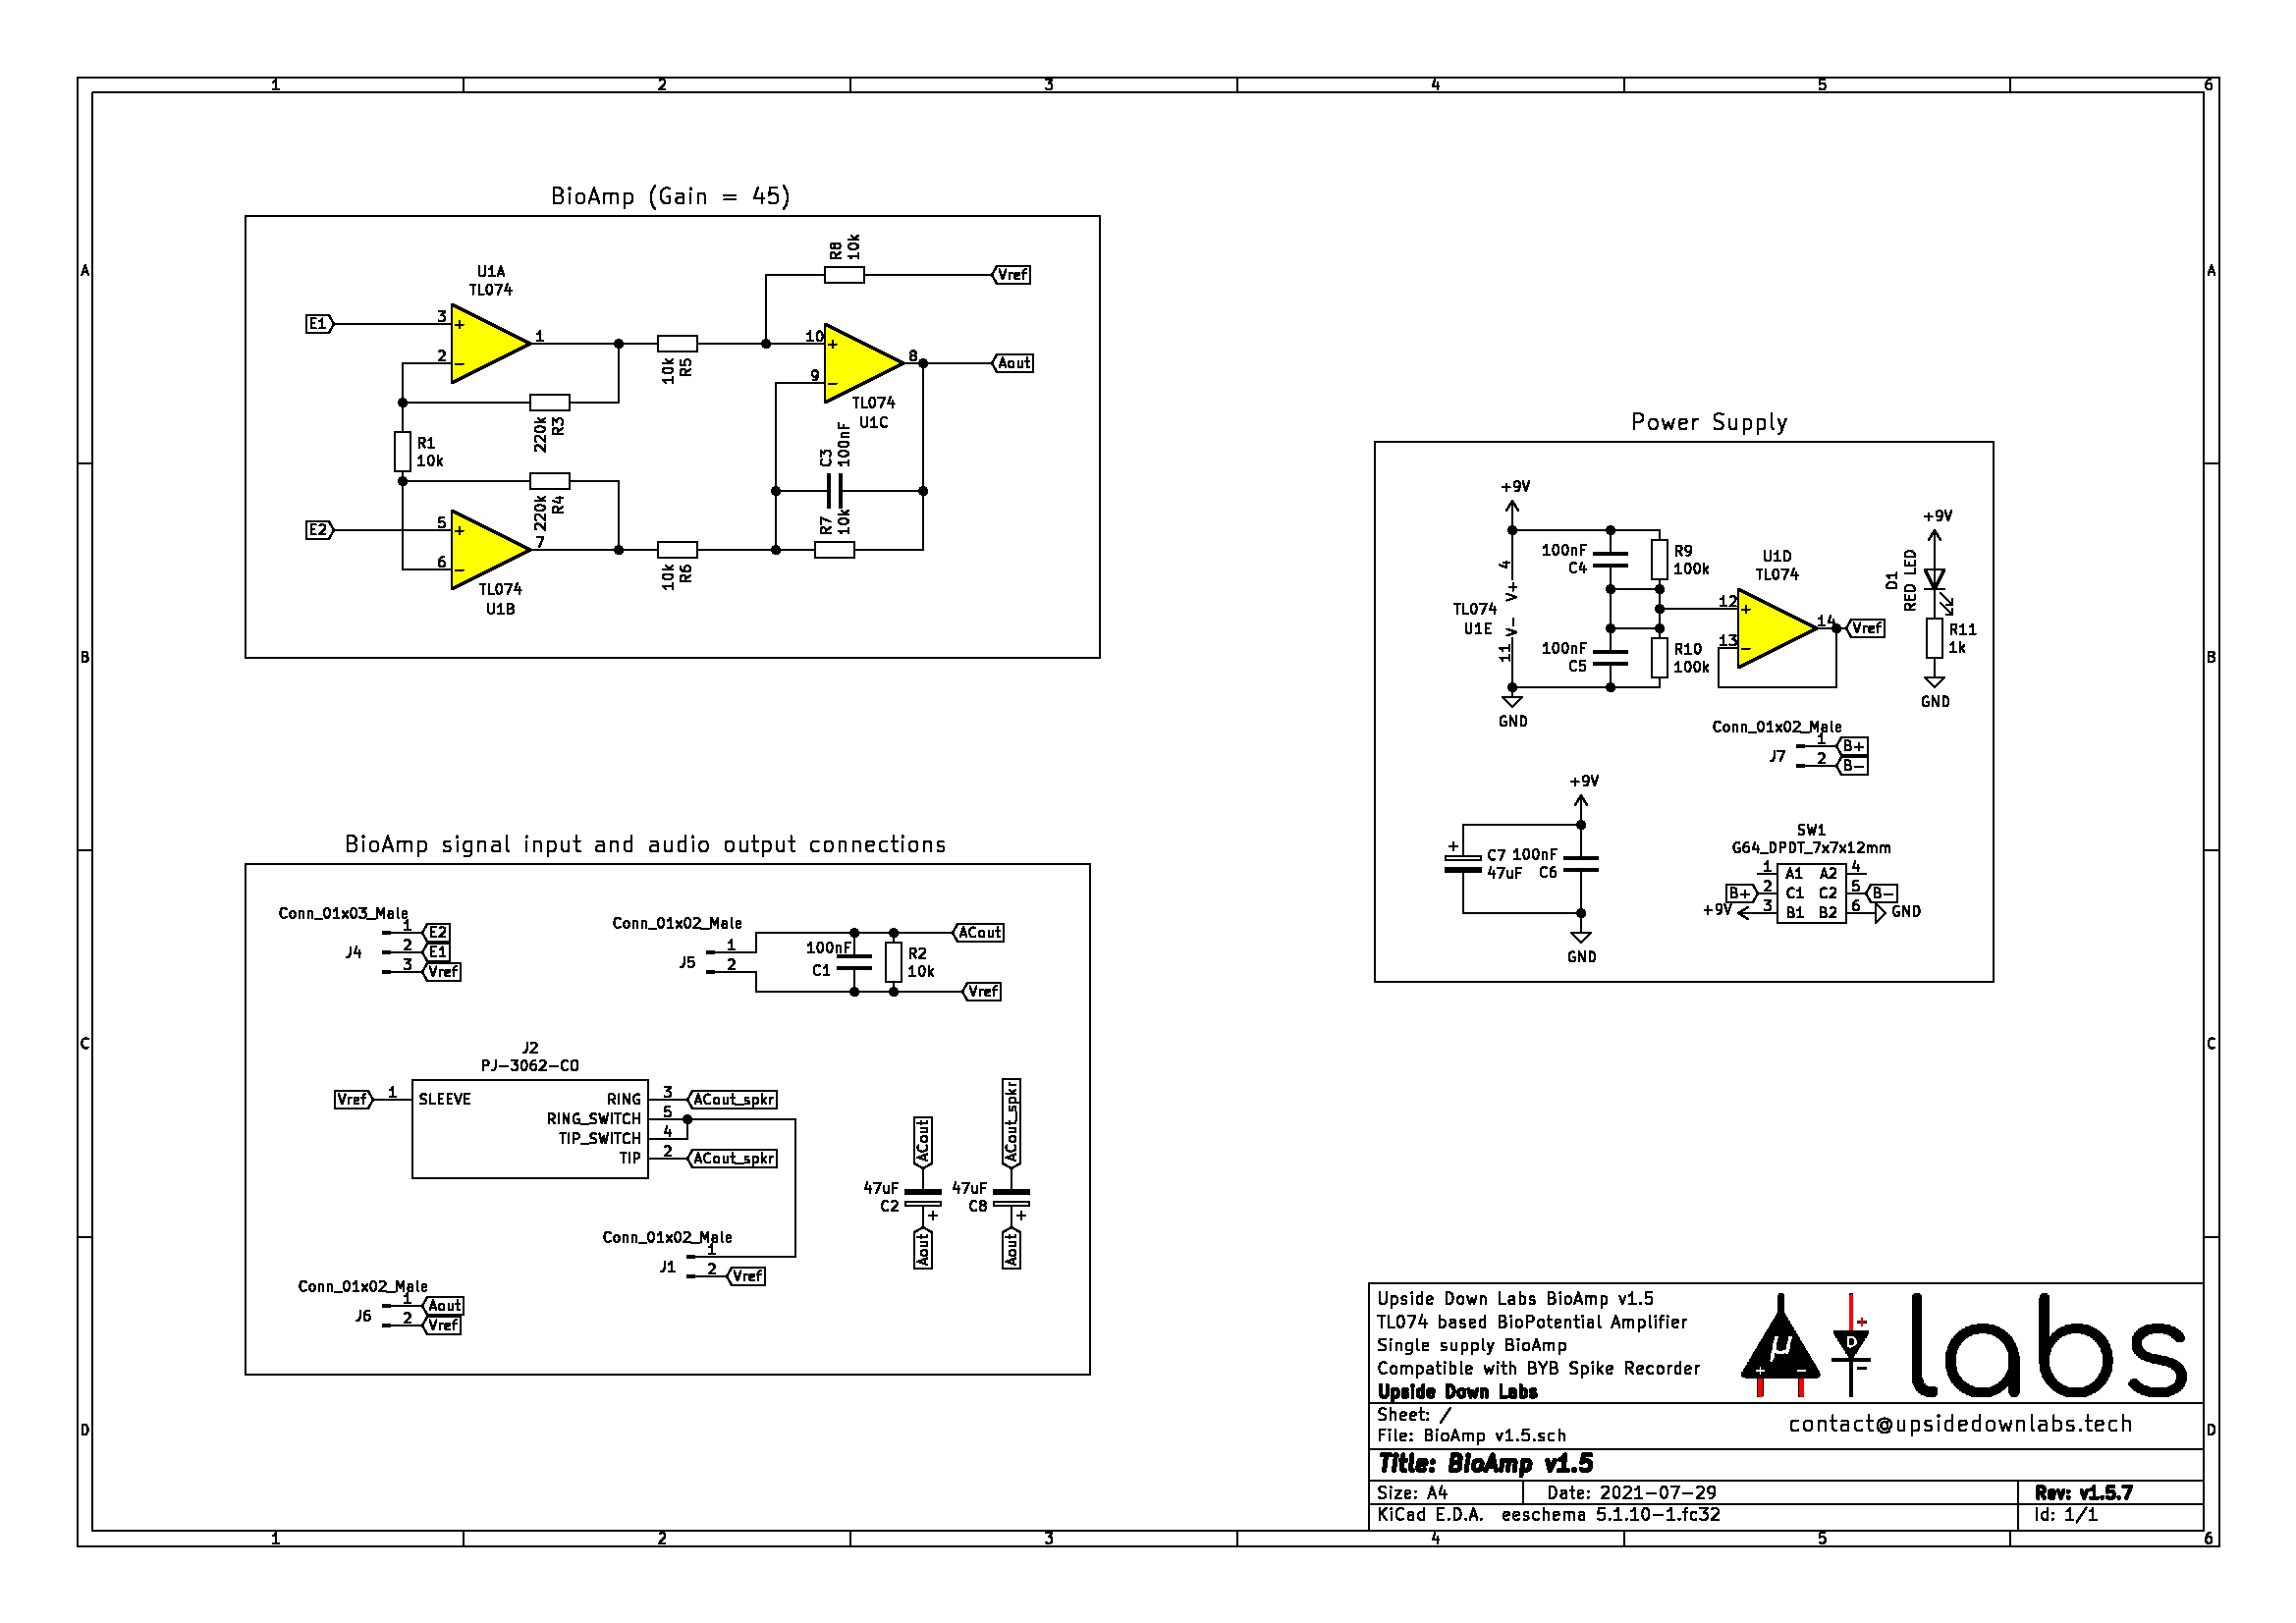
For more detail on how to design a BioAmp you can take a look at the assembly instructions in which we have gone through all the details of design a BioAmp starting at $1

  • 1 × 1% tolerance precesion resistors 1k, 2.2k, 10k, 22k, 100k, 220k, and 1M
  • 1 × 5% tolerance resistors 330R, 1K, 2.2K, 1M, and 2M
  • 1 × Ceramic disc capacitors 100pF, 1nF, 2.2nF, 4.7nF, 10nF, 22nF, 47nF, 100nF, and 220nF
  • 1 × Electrolytic capacitor 1uF, 2.2uF, 10uF, 22uF, 47uF, 100uF, and 470uF
  • 1 × Quad OpAmp TL074, LM324, TL3474 ...

  • 1
    Gather all the tools and resources

    There are several better guides out there to setup an electronics lab, in this section I am just highlighting some things you'll definitely need to create your own low cost BioAmp sensor at home. You'll need some basic tools and electronics components as listed below. You can choose to start building your BioAmp on a BreadBoard but it's highly recommended to transfer it to a perf (copper dot) board. I highly recommend you to get:

    • Assorted component box for
      • 1% precision resistors
      • 5% general resistors
      • Ceramic disc capacitors
      • Electrolytic capacitors
      • General purpose op-amps
      • Light Emitting Diodes (LEDs)
    • Electronics lab tools like:
      • Soldering Iron
      • Solder wire
      • Wire strippers and nippers
      • Different size tweezers
    • Additionally you can get
      • Arduino UNO/Nano
      • Full size BreadBoard
      • Perf (copper dot) board
      • Hobby servo motor
      • Jumper cables
      • Connection wires

    The things listed above should already be in an electronics hobbyist lab setup. If you are very new to the field and even slightly interested in electronics It's highly recommended to get these basic tools and components to start your electronics journey.

  • 2
    HCI and BCI Design Overview

    Our nervous system is divided into,

    • Central nervous system (Brain & Spinal cord)
    • Peripheral nervous system
      • Somatic nervous system (Voluntary muscle movement & reflex actions)
      • Autonomic nervous system (Heart rate, blood pressure, respiration...)

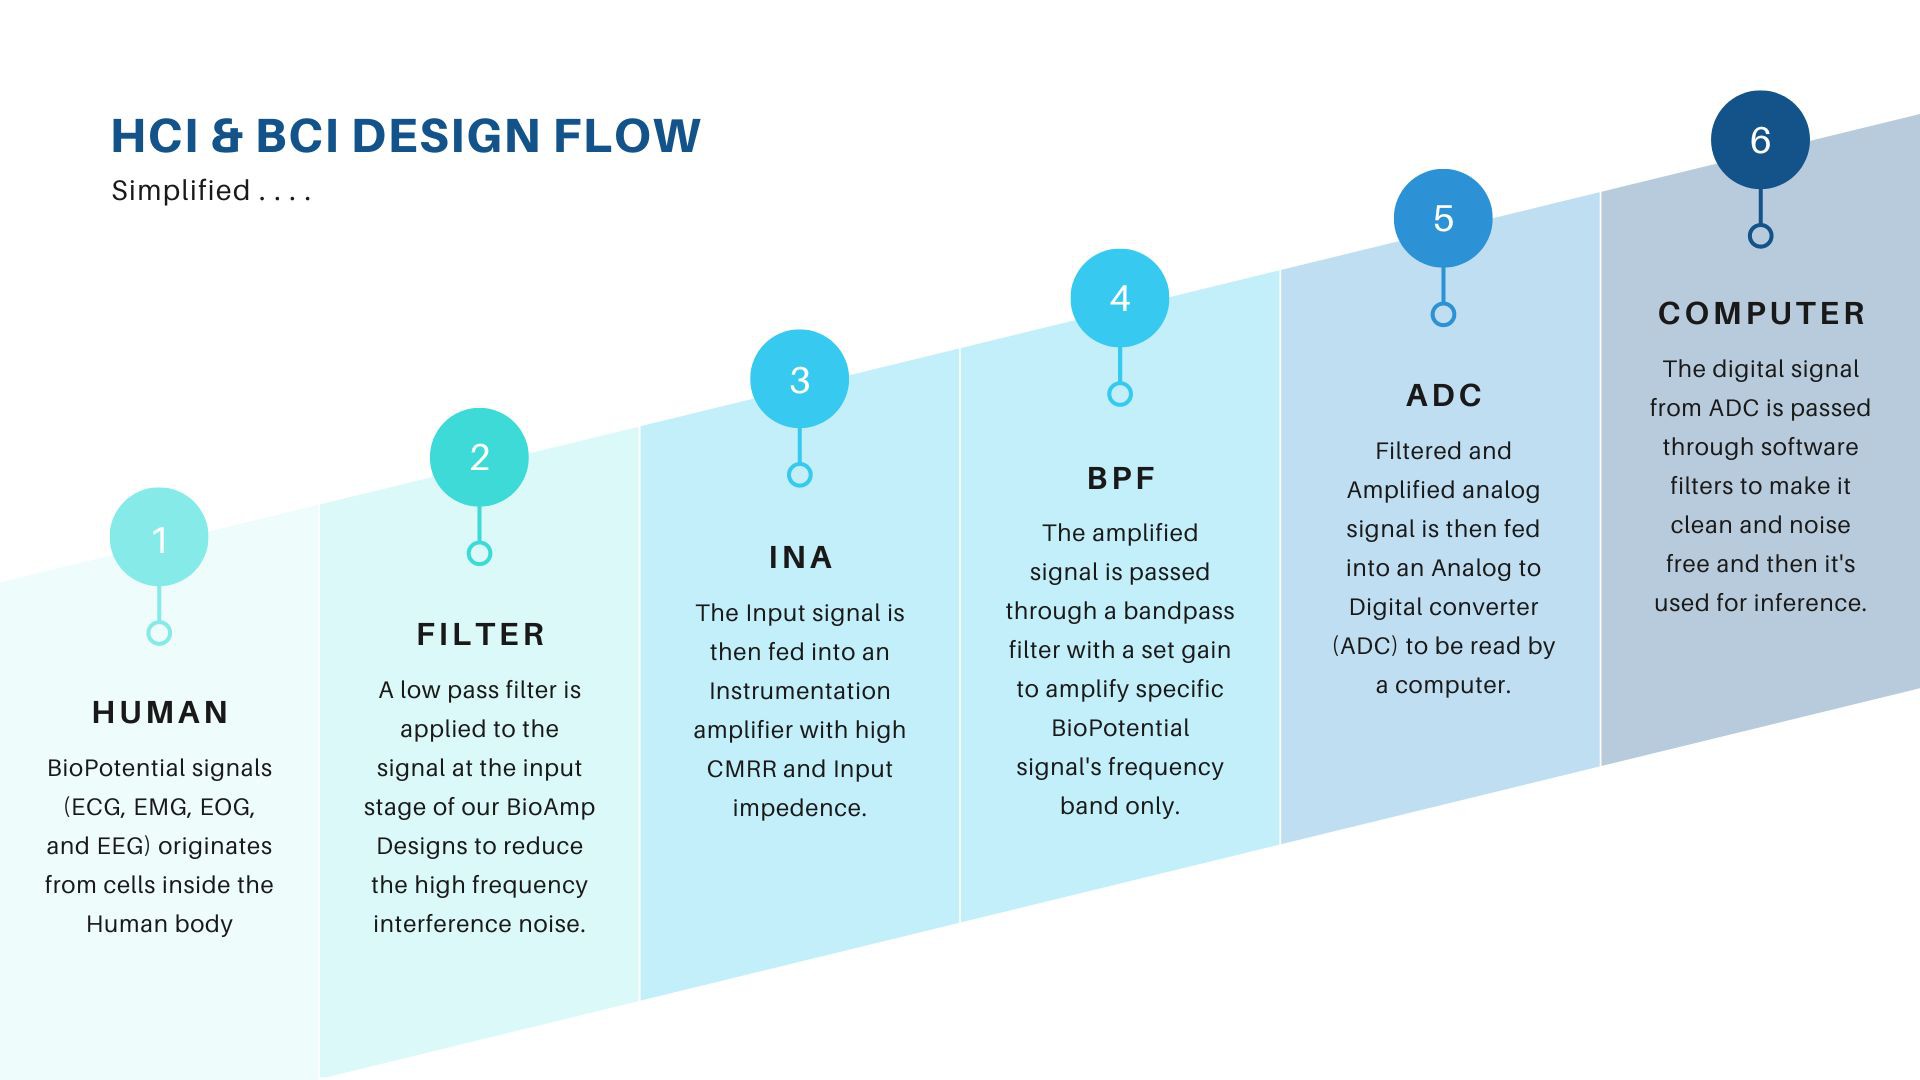
    When we say we are designing a Brain Computer interface we are actually targeting the Central nervous system and when we say we are creating a Human Computer Interface we are actually targeting the Somatic nervous system. A highly simplified HCI & BCI design doc is presented below that shows how we go from signals emerging inside body to recording them using electronics and then using it to manipulate or control things on a computer.

    The six part HCI/BCI design flow contains:

    1. BioPhysiological signals originating from our body (ECG, EMG, EOG, and EEG)
    2. Initial RF low pass filter to remove high frequency background noise
    3. Instrumentation amplifier for high quality signal conditioning
    4. Band Pass Filter (BPF) to aplify signals from a specific frequency band only
    5. Analog to Digital Converter (ADC) to digitize the analog signals into zeros & ones.
    6. Computer to record, visualize and interpret the signals

  • 3
    Overview of BioAmp Design
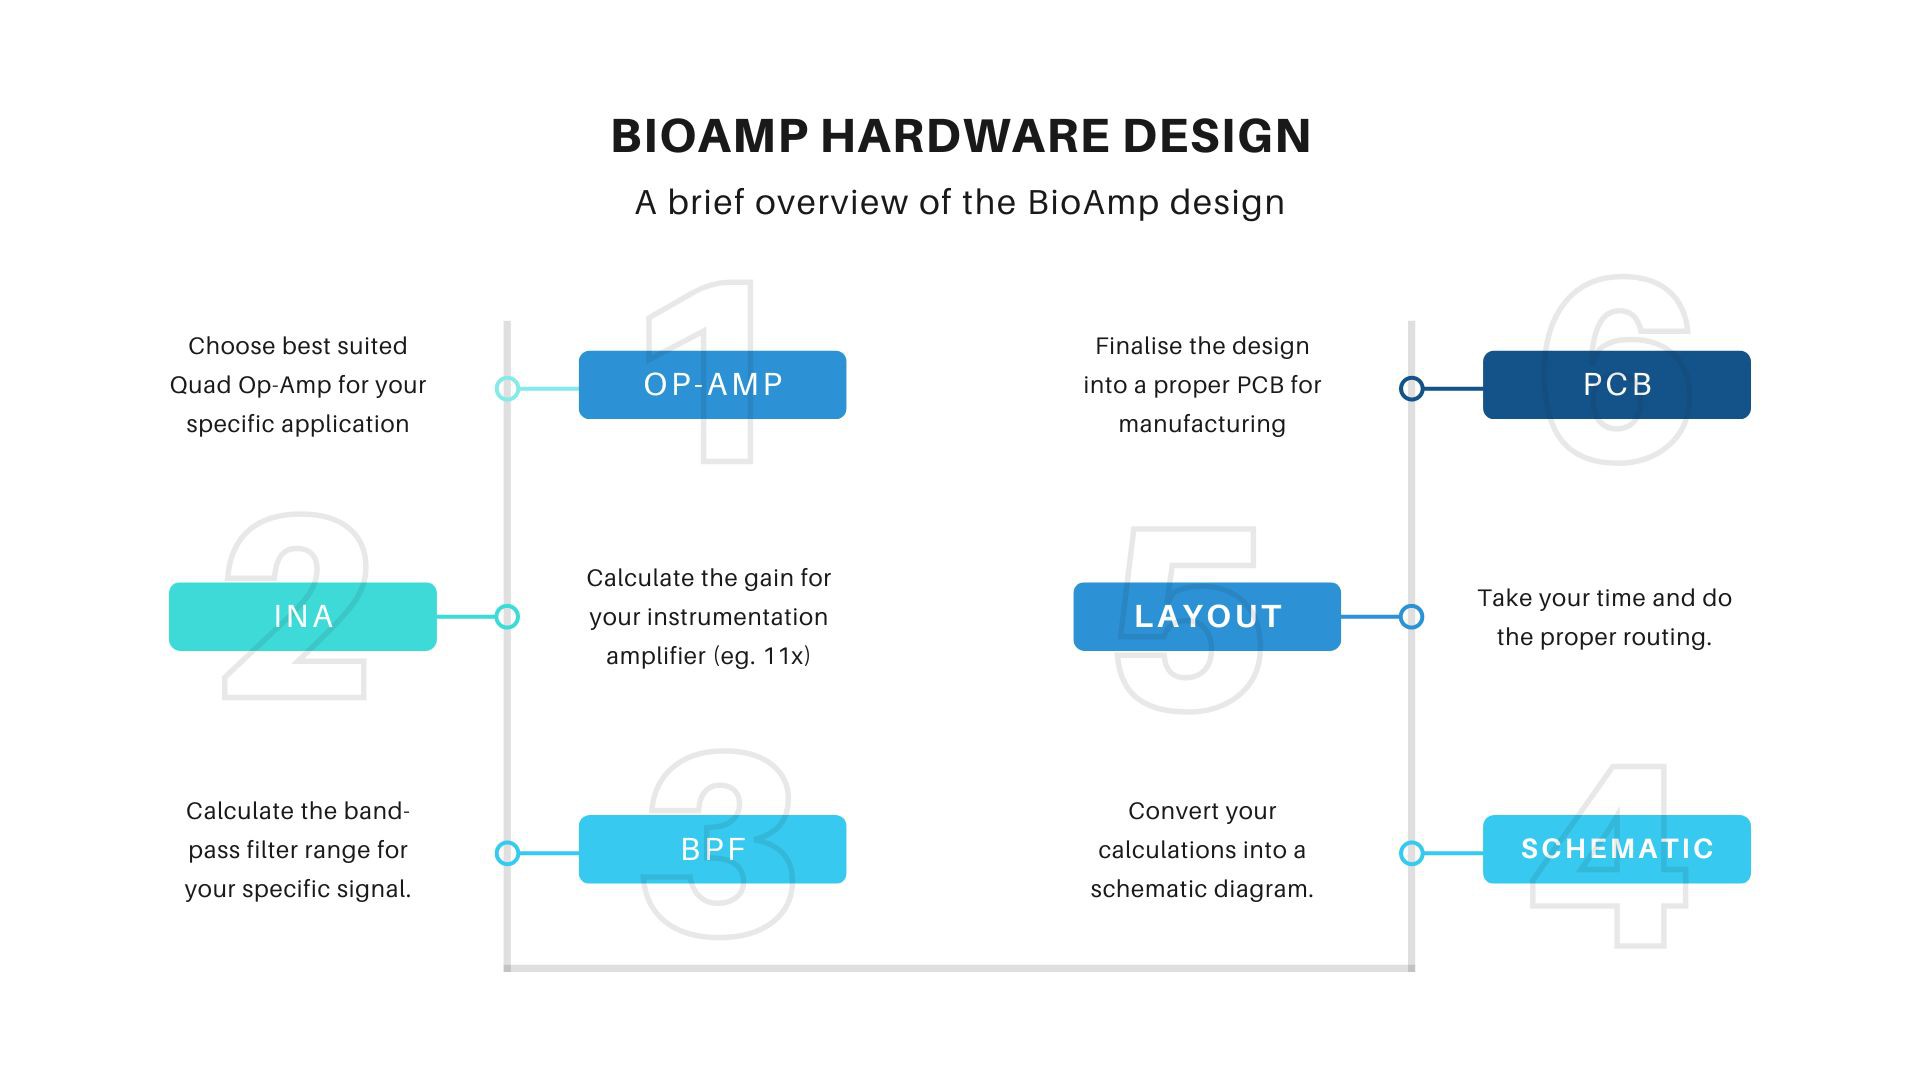
    It's not required to design your own BioAmp PCB to try out the BioAmp circuit but in any case you want to know how we do it you can follow these six steps as shown in the image below.

View all 9 instructions

Enjoy this project?

Share

Discussions

Similar Projects

Does this project spark your interest?

Become a member to follow this project and never miss any updates