There are several better guides out there to setup an electronics lab, in this section I am just highlighting some things you'll definitely need to create your own low cost BioAmp sensor at home. You'll need some basic tools and electronics components as listed below. You can choose to start building your BioAmp on a BreadBoard but it's highly recommended to transfer it to a perf (copper dot) board. I highly recommend you to get:
Assorted component box for
1% precision resistors
5% general resistors
Ceramic disc capacitors
Electrolytic capacitors
General purpose op-amps
Light Emitting Diodes (LEDs)
Electronics lab tools like:
Soldering Iron
Solder wire
Wire strippers and nippers
Different size tweezers
Additionally you can get
Arduino UNO/Nano
Full size BreadBoard
Perf (copper dot) board
Hobby servo motor
Jumper cables
Connection wires
The things listed above should already be in an electronics hobbyist lab setup. If you are very new to the field and even slightly interested in electronics It's highly recommended to get these basic tools and components to start your electronics journey.
2
HCI and BCI Design Overview
Our nervous system is divided into,
Central nervous system (Brain & Spinal cord)
Peripheral nervous system
Somatic nervous system (Voluntary muscle movement & reflex actions)
Autonomic nervous system (Heart rate, blood pressure, respiration...)
When we say we are designing a Brain Computer interface we are actually targeting the Central nervous system and when we say we are creating a Human Computer Interface we are actually targeting the Somatic nervous system. A highly simplified HCI & BCI design doc is presented below that shows how we go from signals emerging inside body to recording them using electronics and then using it to manipulate or control things on a computer.
The six part HCI/BCI design flow contains:
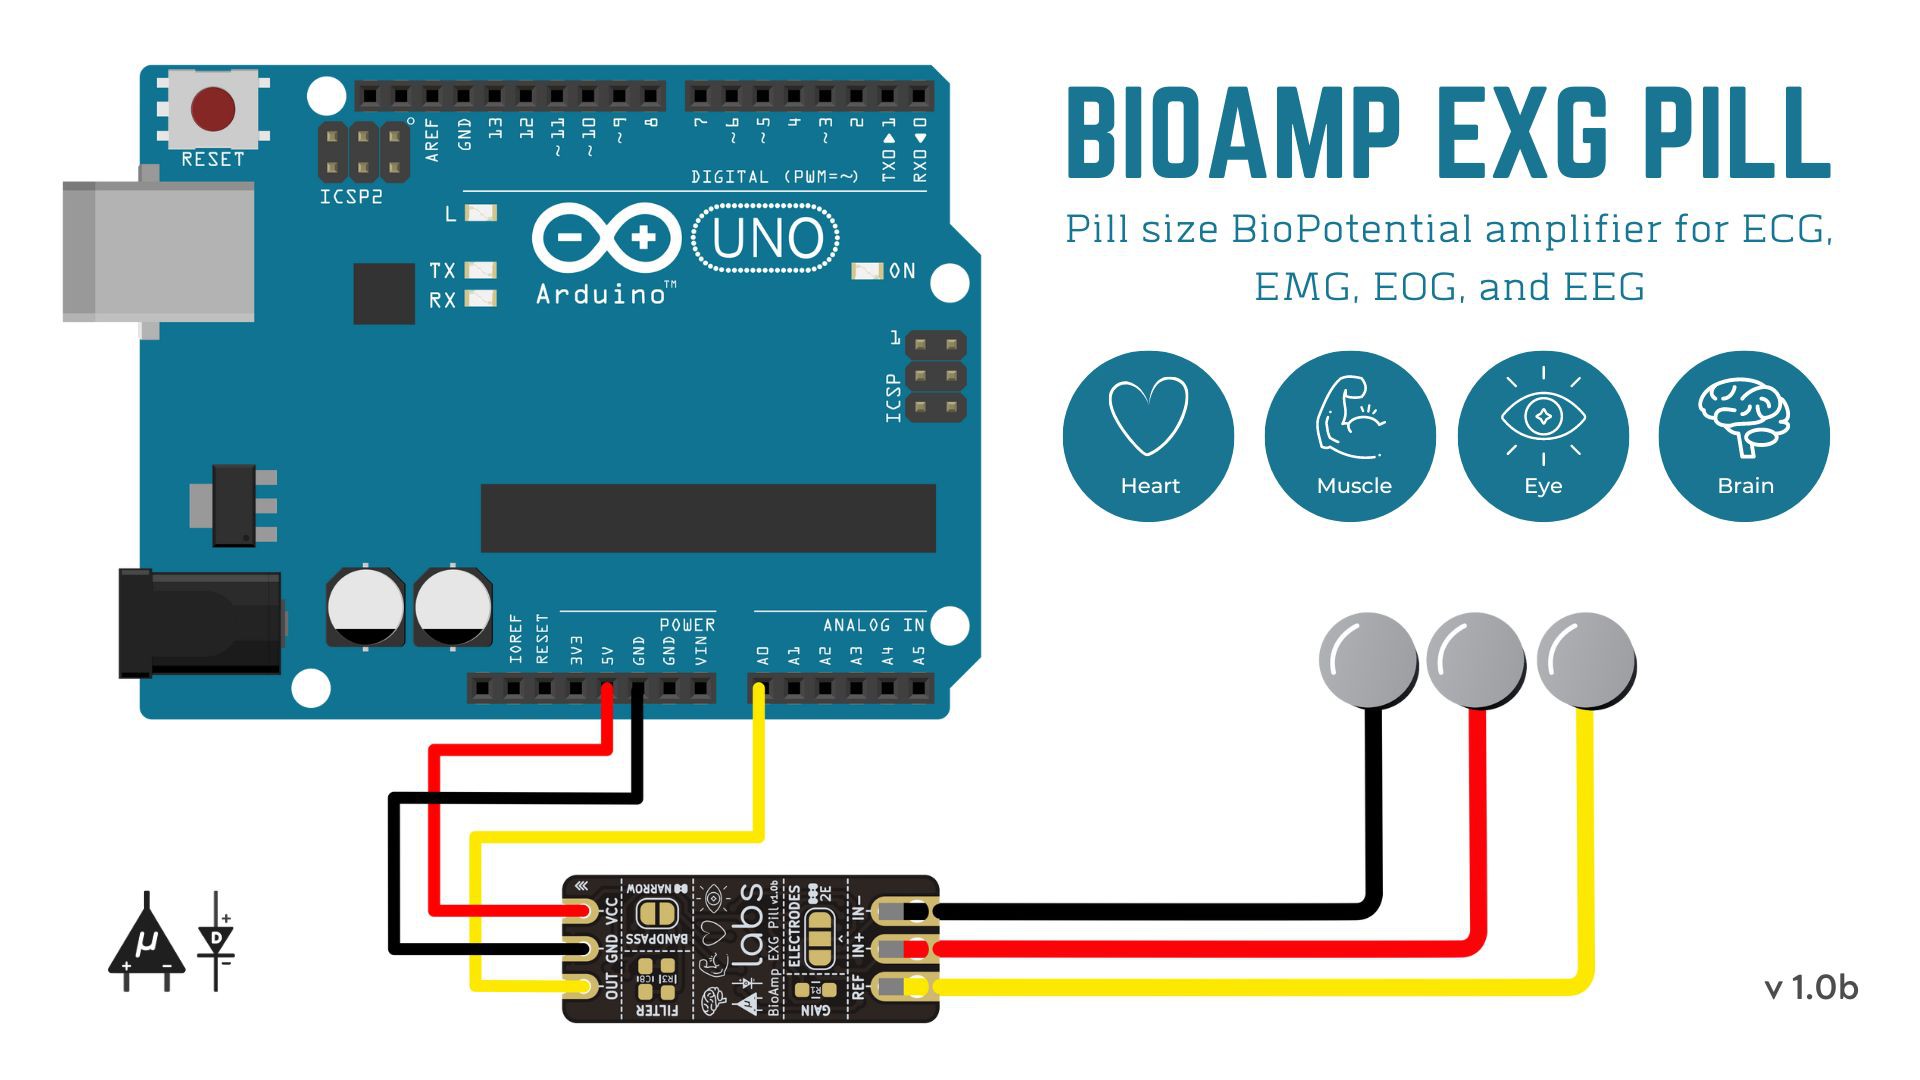
BioPhysiological signals originating from our body (ECG, EMG, EOG, and EEG)
Initial RF low pass filter to remove high frequency background noise
Instrumentation amplifier for high quality signal conditioning
Band Pass Filter (BPF) to aplify signals from a specific frequency band only
Analog to Digital Converter (ADC) to digitize the analog signals into zeros & ones.
Computer to record, visualize and interpret the signals
3
Overview of BioAmp Design
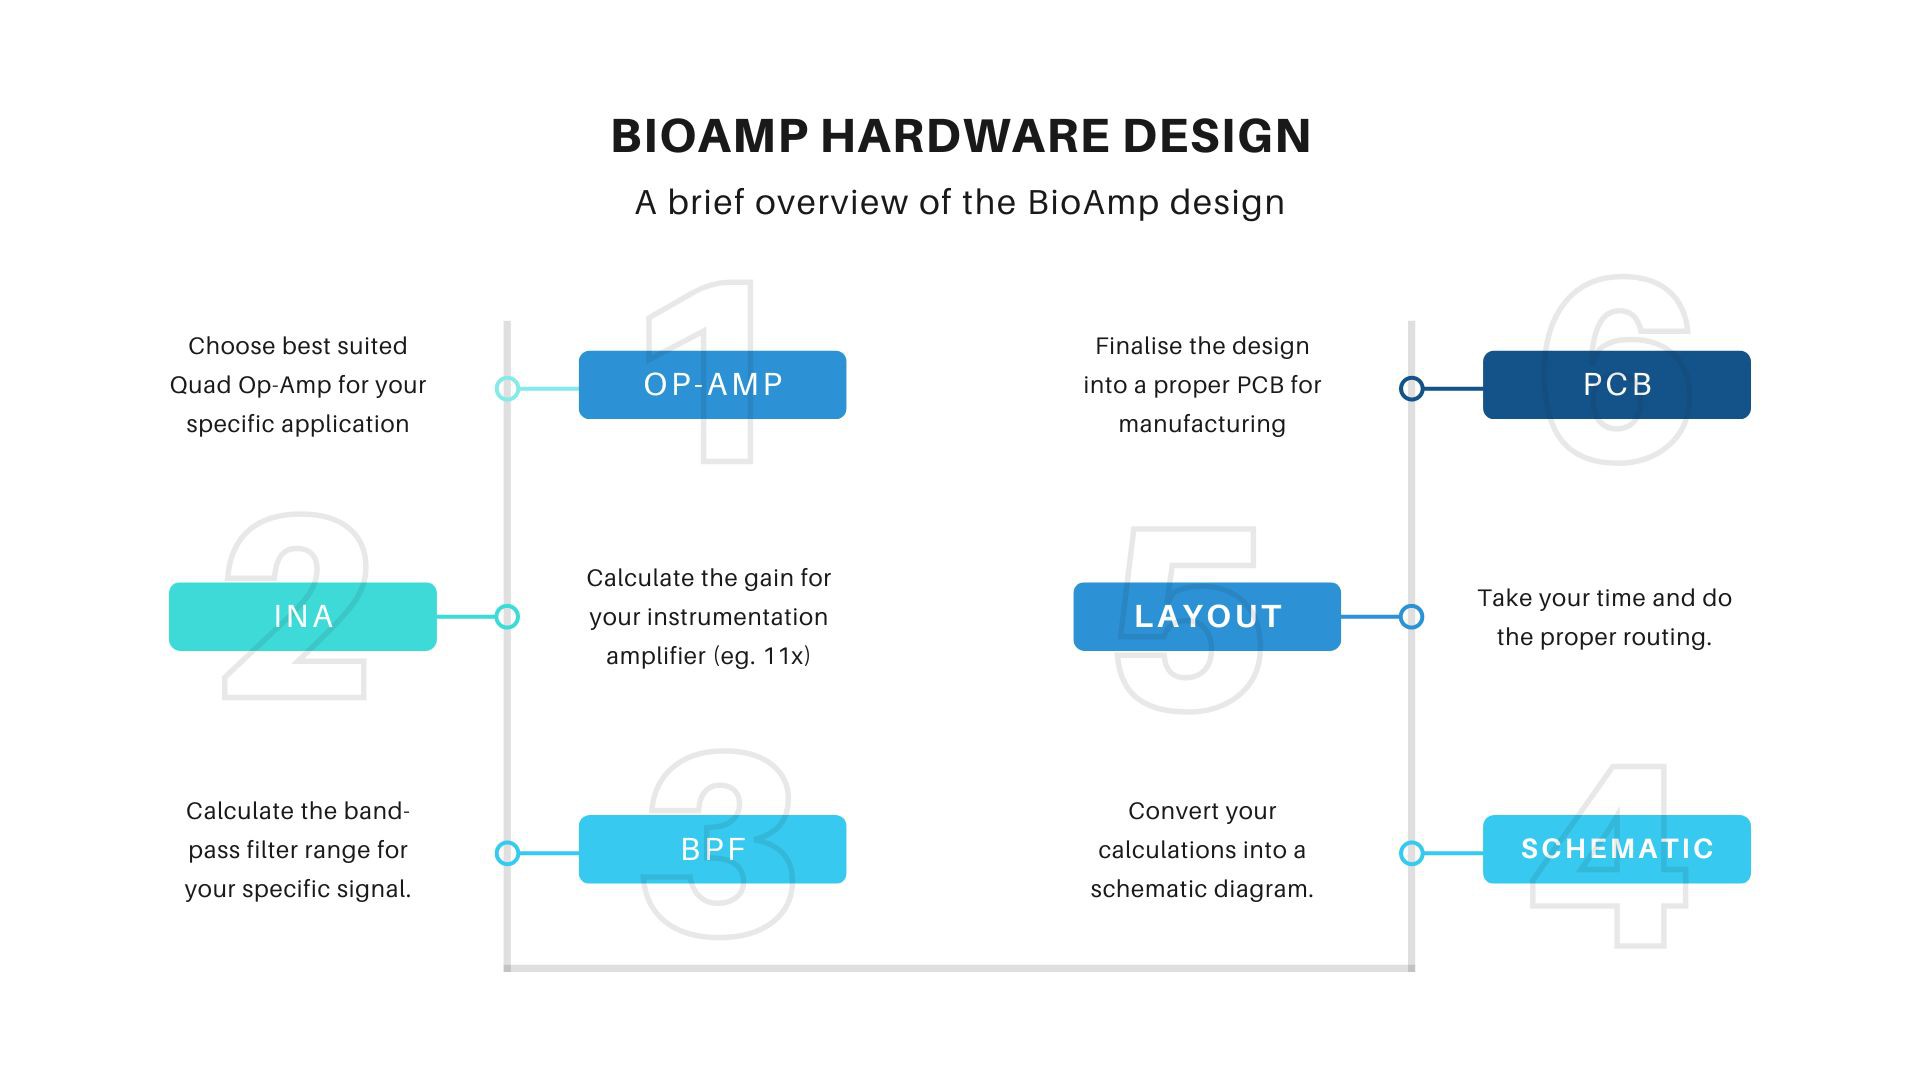
It's not required to design your own BioAmp PCB to try out the BioAmp circuit but in any case you want to know how we do it you can follow these six steps as shown in the image below.
4
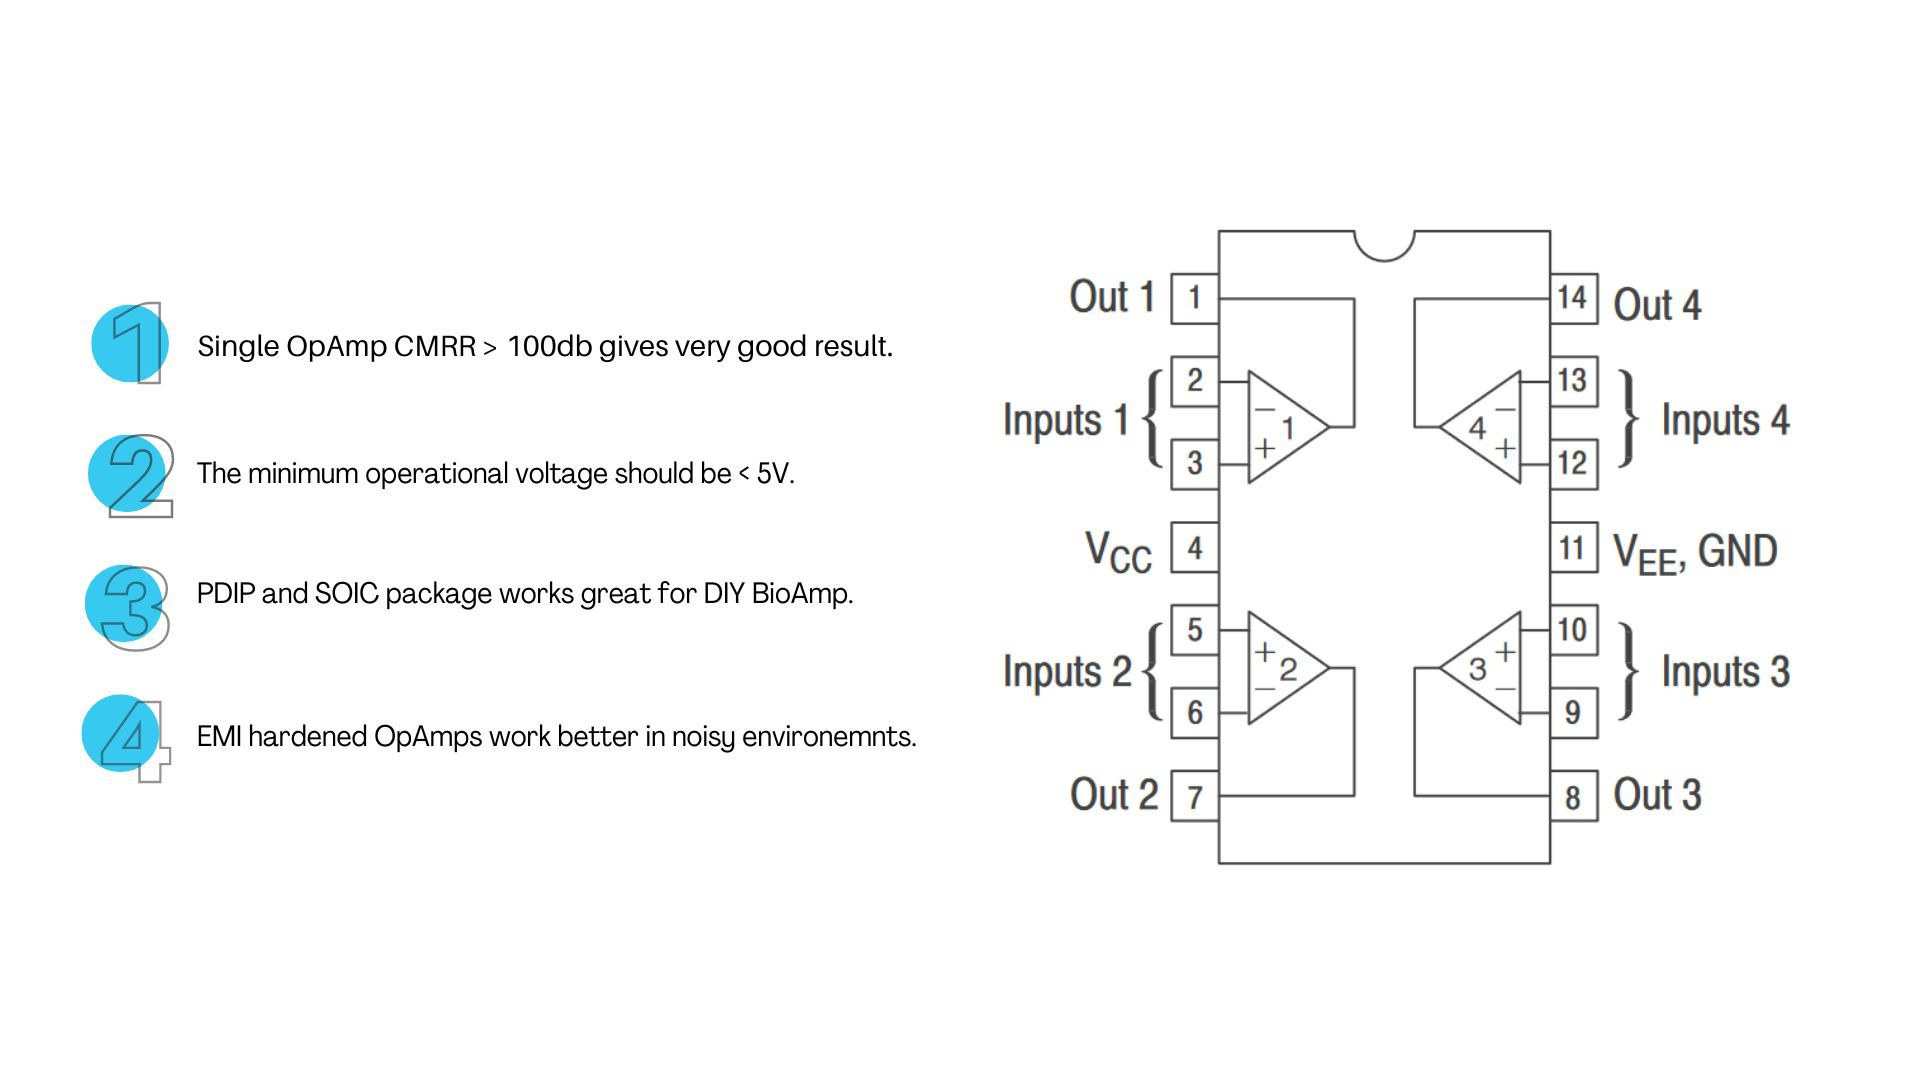
How to choose a good Quad OpAmp?
To create a BioAmp that performs good for your specific requirement you can choose any low cost Quad OpAmp. Below image shows all the characteristics that are desirable to get the best results from a lab grown BioAmp sensor. Although not up to the mark you can choose to use LM324 through hole IC on a breadboard or perfboard to create your first BioAmp for EMG recording.
5
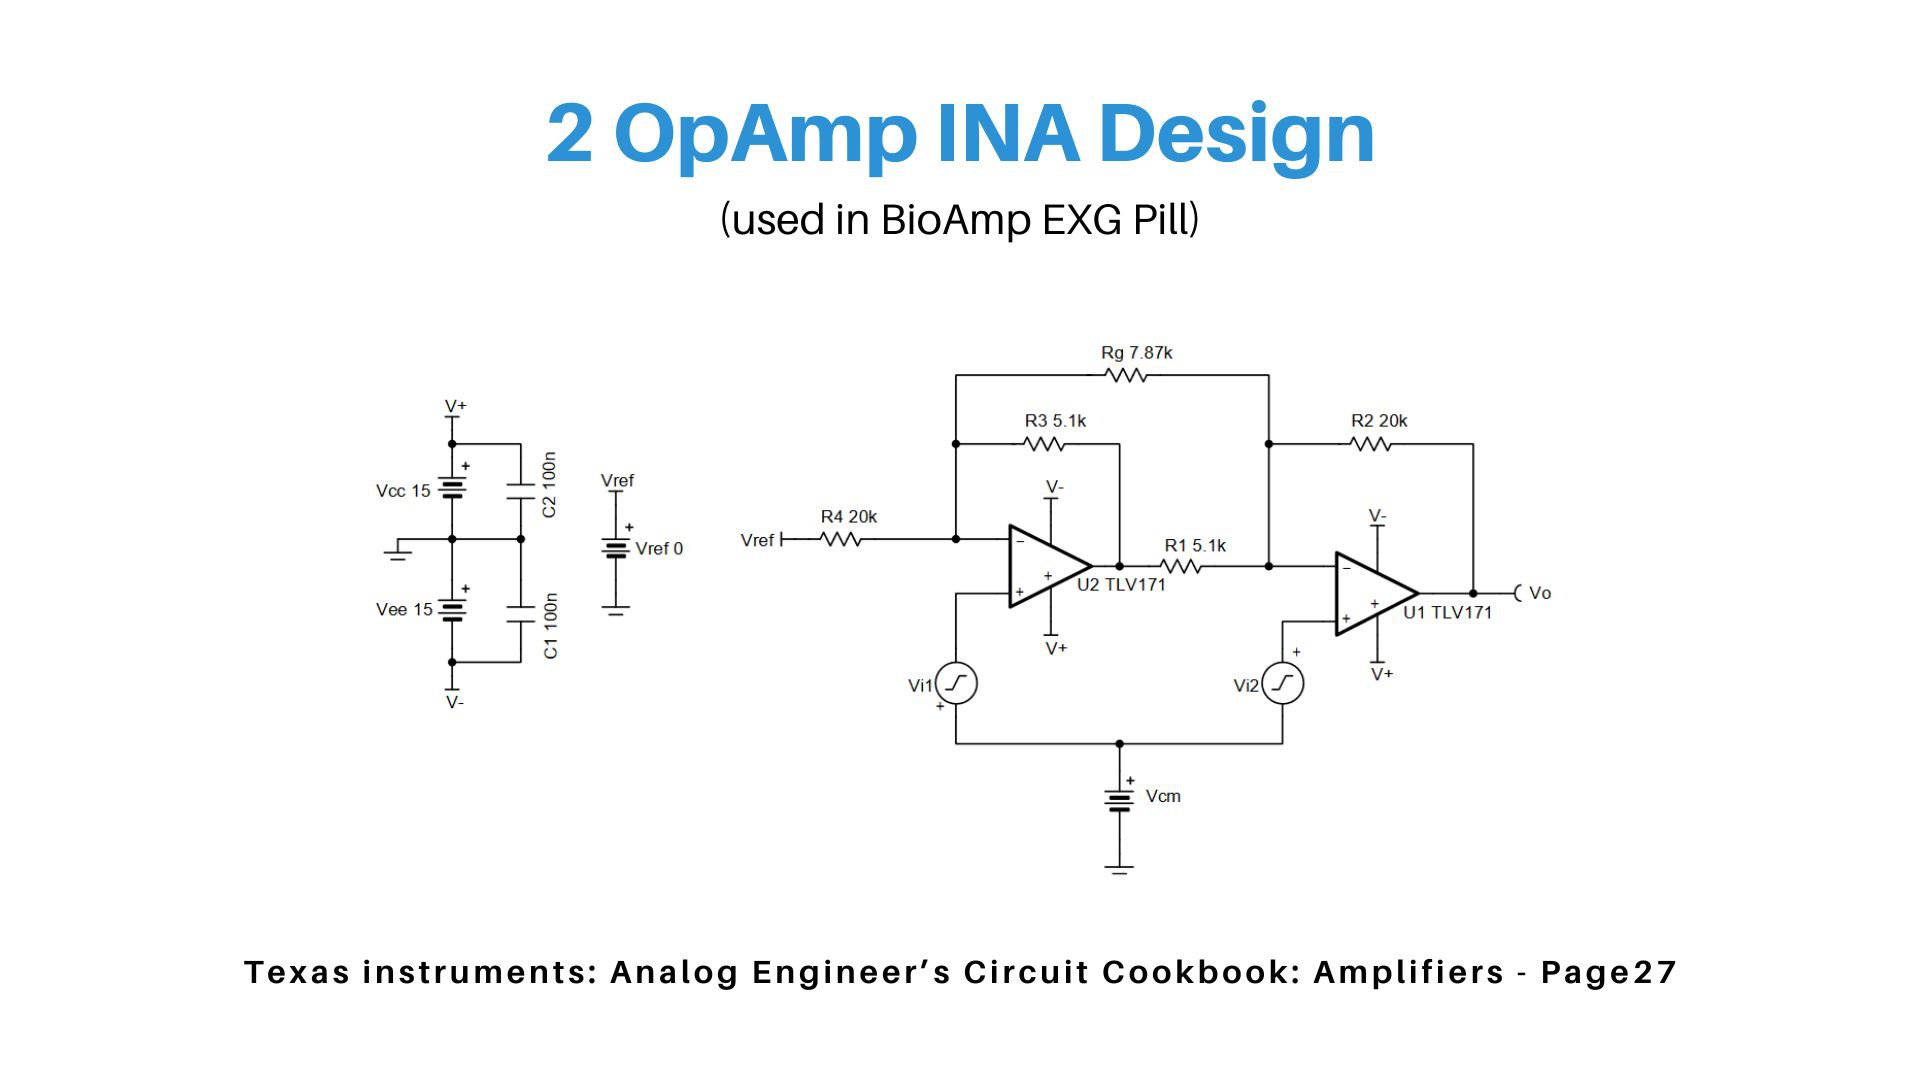
Instrumentation amplifier design
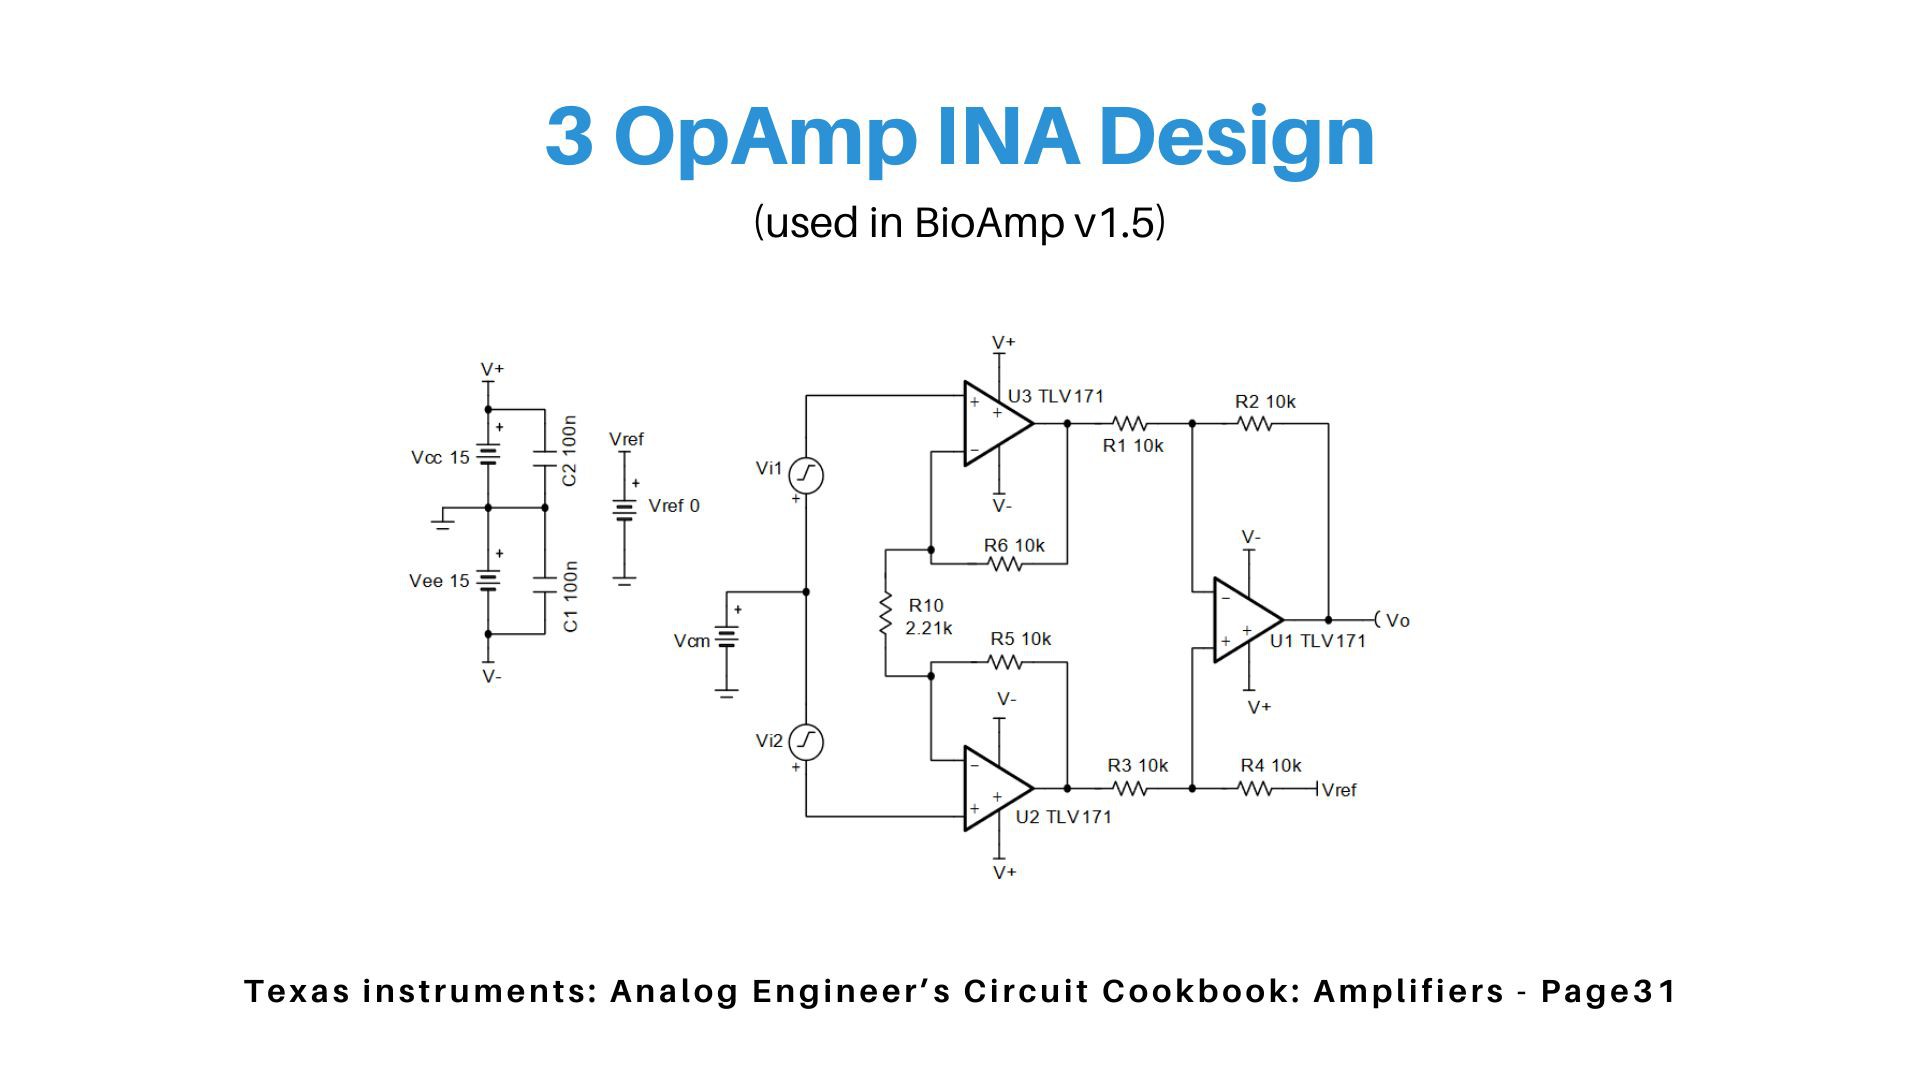
Instrumentation Amplifier (INA) is a special type of amplifier that can be created by joining two or three op-amps like shown in schematics below. You can see the three op-amp version used in the BioAmp v1.5 design and two op-amp design in BioAmp EXG Pill. Both has their own list of advantages and dis-advantages.
6
Bandpass filter design
To create a good BioAmp hardware you need on-board signal filtering so that we get clean signal. To design a bandpass filter you can learn complex equations or use any online calculator like this. Below are the different biopotential signals frequency coverage and amplitude list so that you can design your own bandpass filter,
EEG is a uV signal of 0.5 to 40Hz
EMG is a mV signal of 40 - 2000Hz
EOG is a mV signal of 0.5 - 10Hz
ECG is a mV signal of 0.5Hz to 45Hz
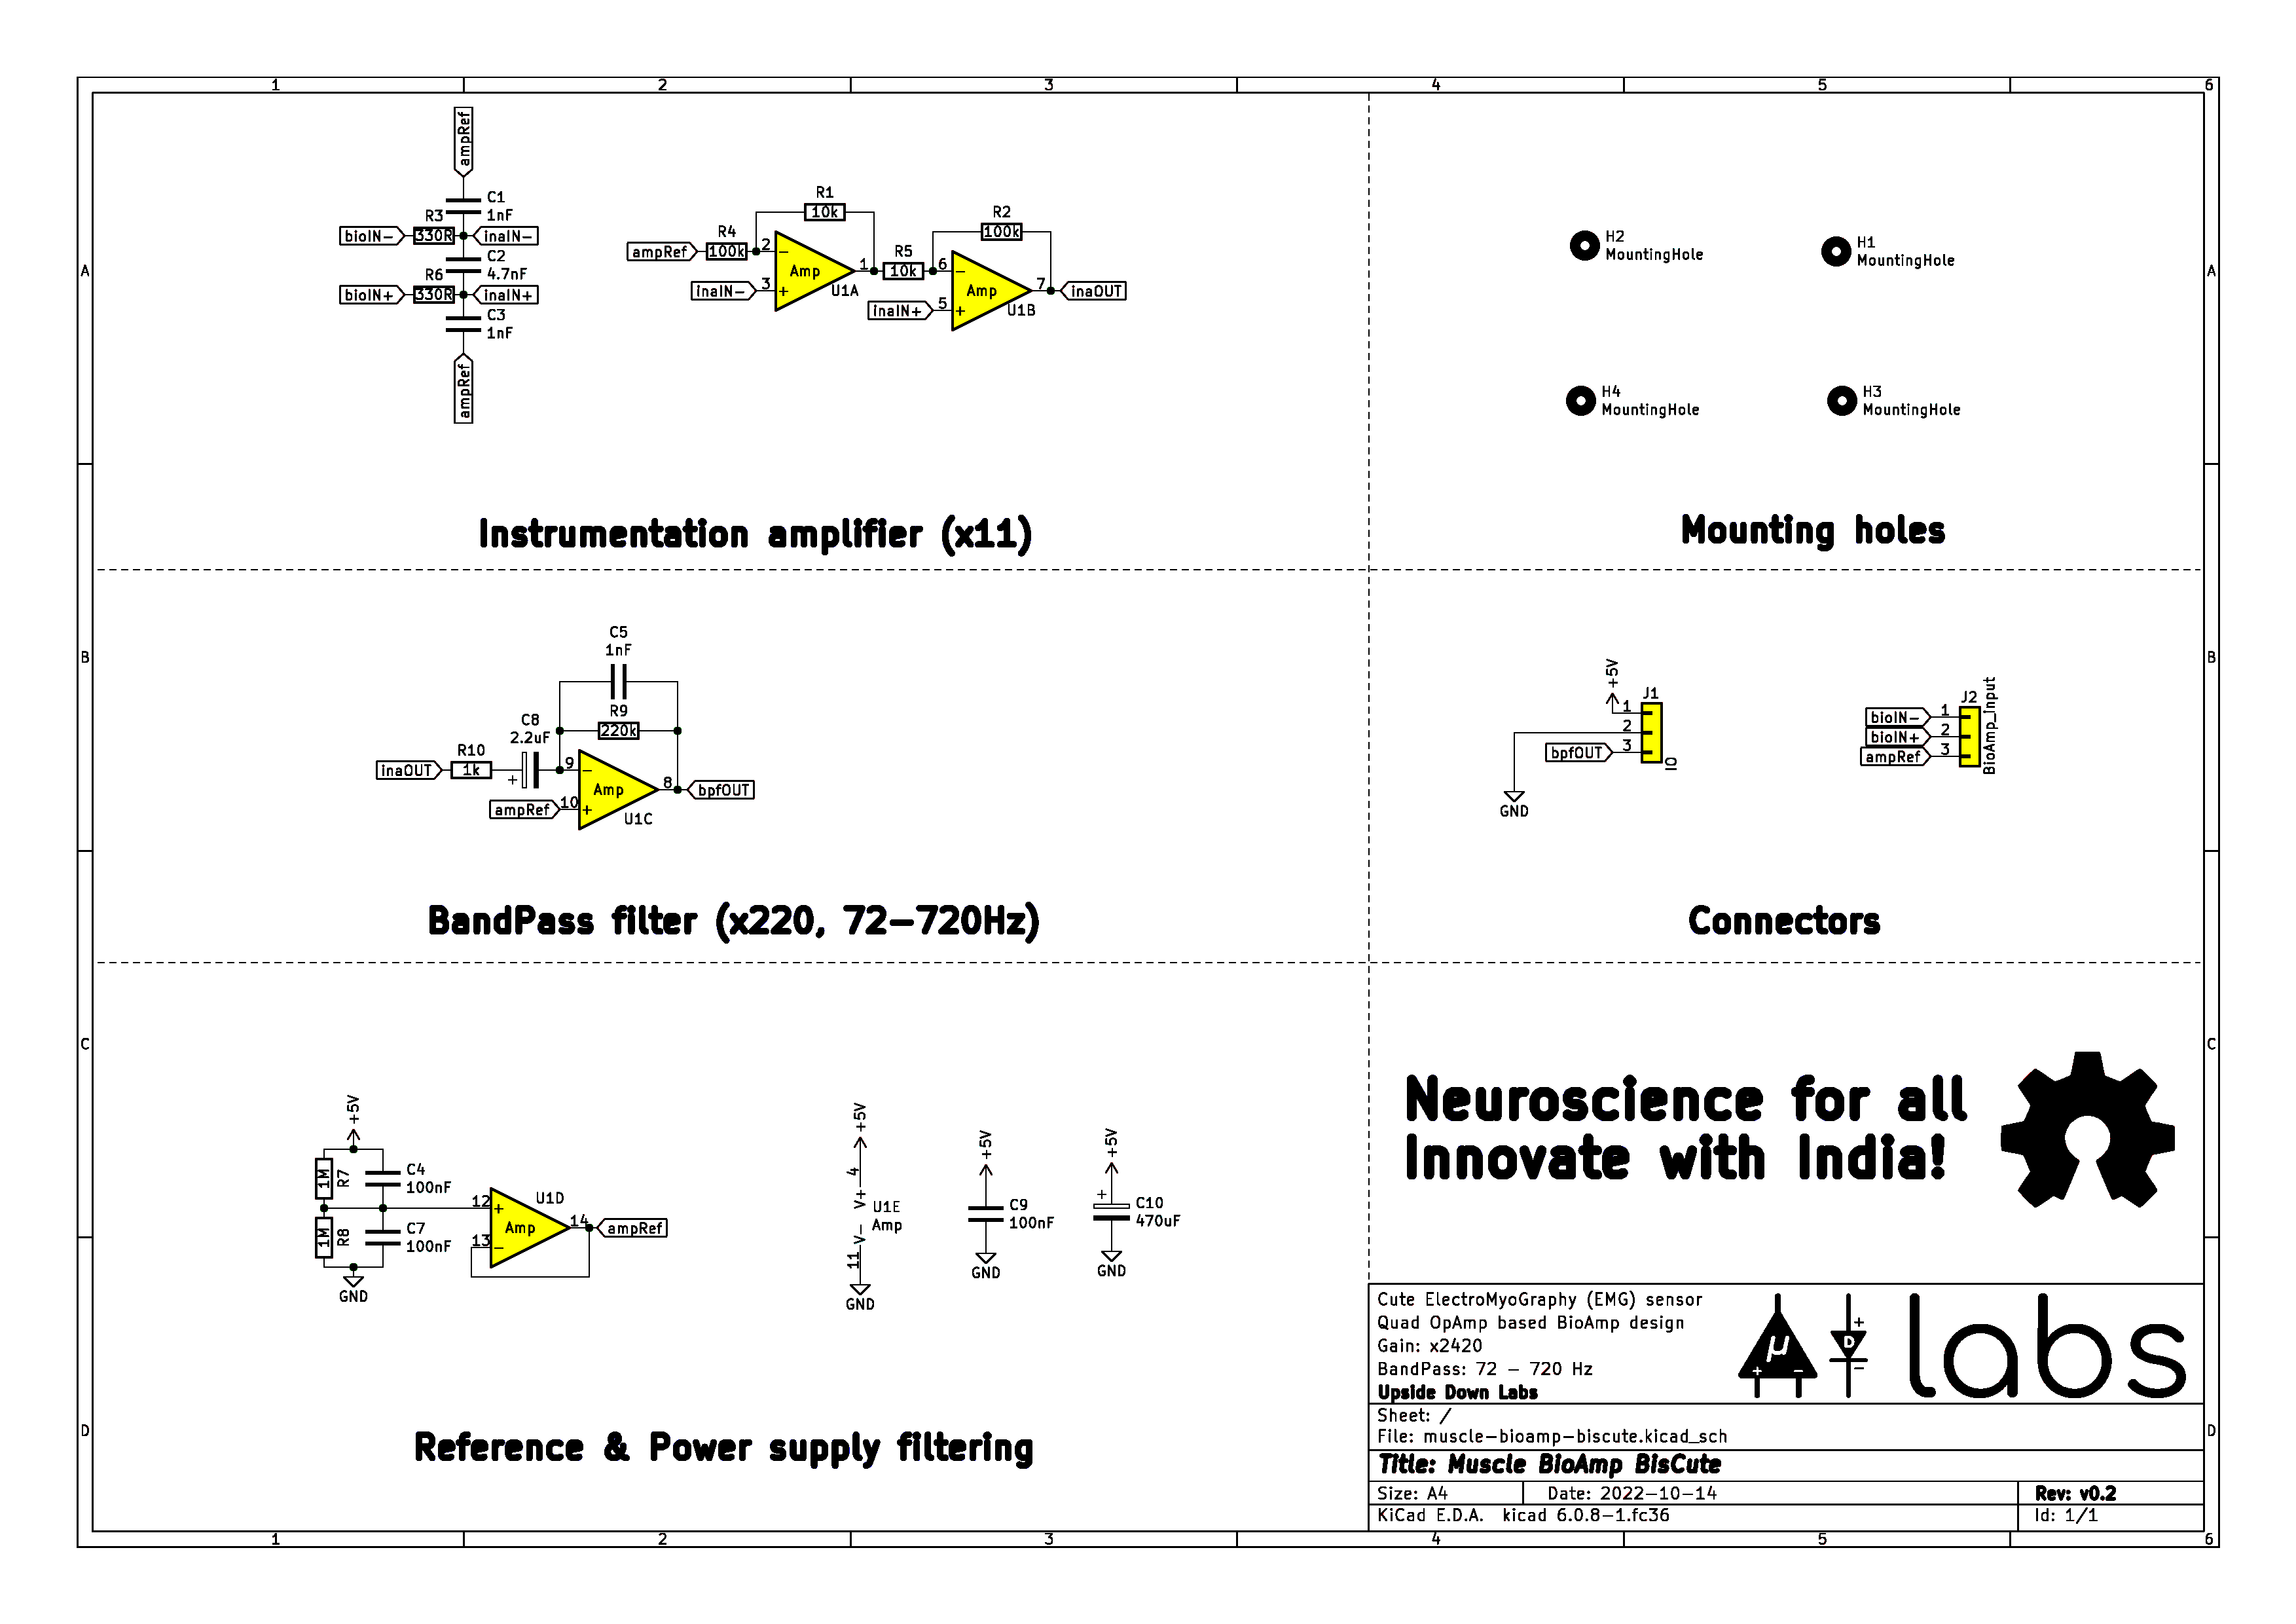
Below schematic diagram shows the Muscle BioAmp BisCute design and all the parts required to build it can be procured for about $1 depending on your location. You can try out building it on a breadboard with LM324, 1% precision resistors and other passive components as per the schematic diagram below.
7
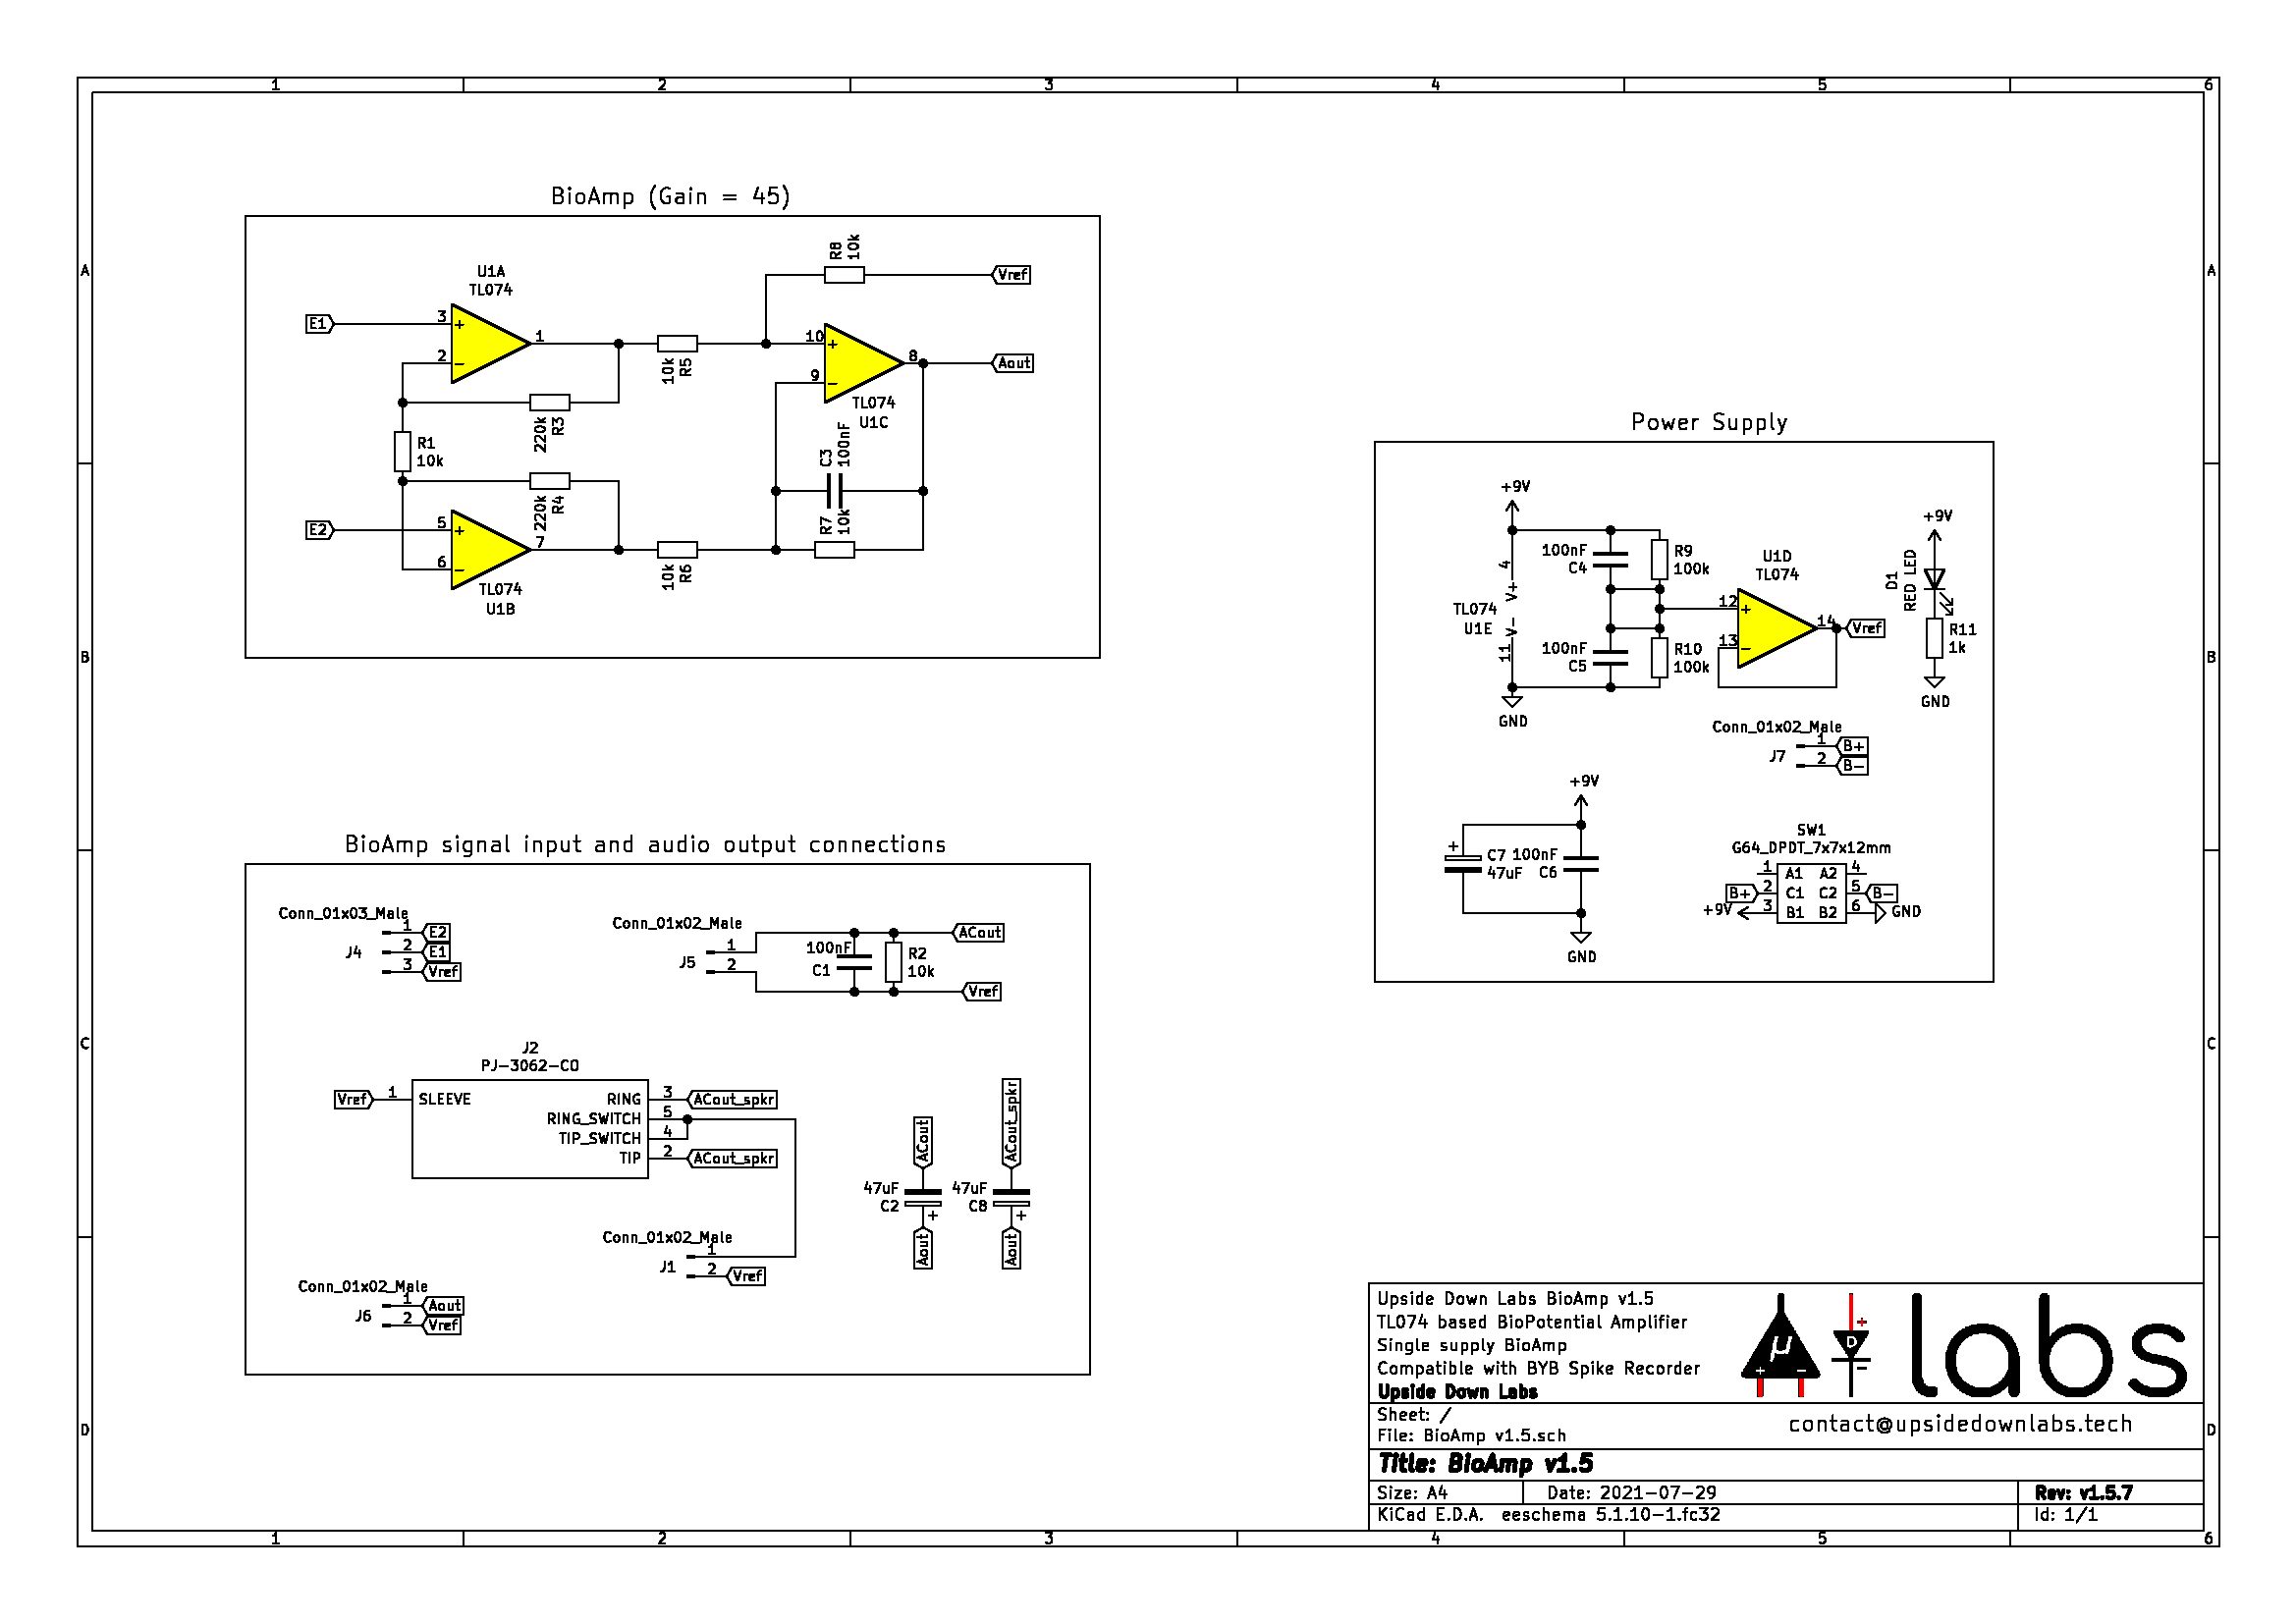
Listening to your BioPotential signals
With 3 op-amp design you can even build a very basic BioAmp to hear your mucle signals using a pair of headphones. BioAmp v1.5 hardware was designed specially for this and the analog signal can also be fed into any microphone input to visualize and record the EMG signals amplified by our BioAmp sensor.
 Deepak Khatri
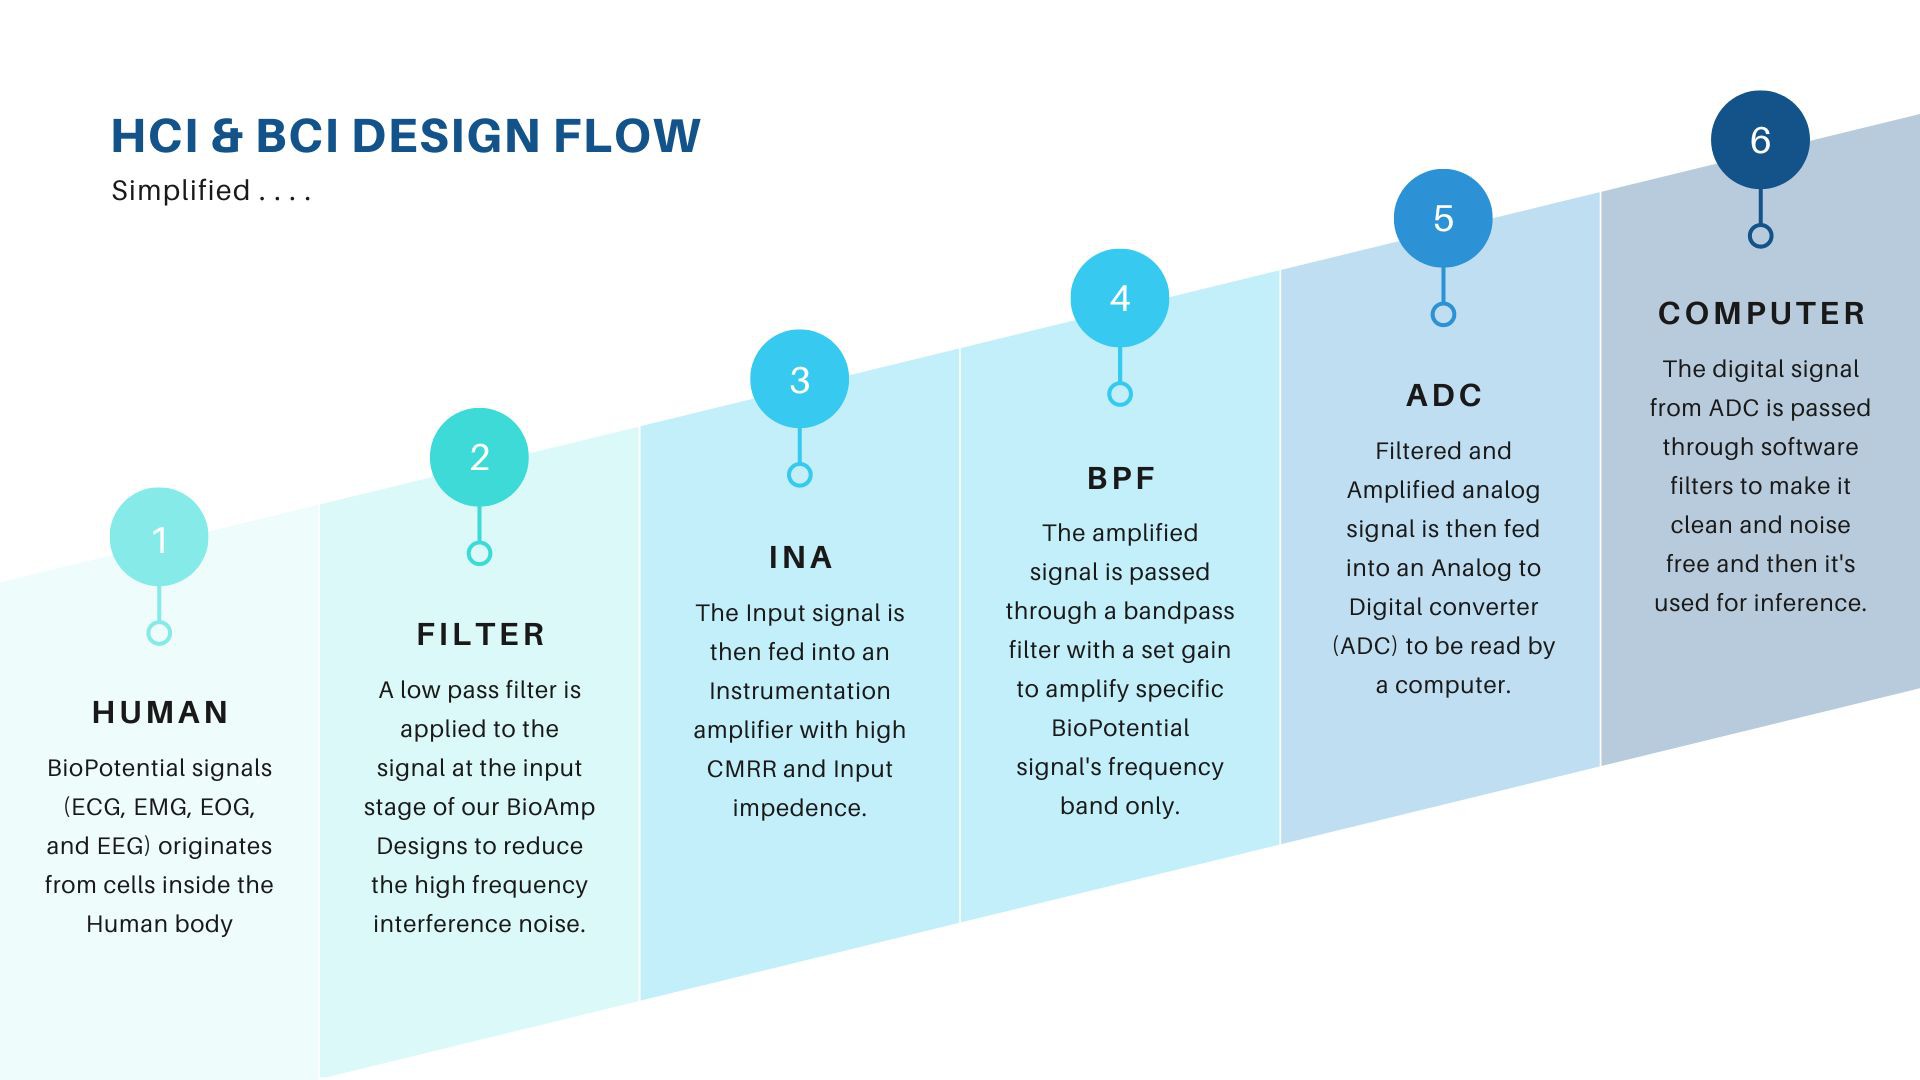
Discussions
Become a Hackaday.io Member
Create an account to leave a comment. Already have an account? Log In.