-
1Preliminary Setup
Basic Hardware
- Raspberry Pi with WIFI capability (tested on Raspberry Pi 4 and Zero W)
- 3.5mm Audio Speakers - can be run on USB speakers but trickier to setup
- Breadboard
- Resistors
- 12V power supply and breadboard power plug if using large LED buttons
Operating System
- Latest 64 bit Raspberry Pi OS Lite (May 3rd 2023)
- It will work with 32 bit Lite as well - watch for one path change in next step
- Install using Raspberry Pi Imaging tool
- Setup with local WIFI
- Check that SSH is turned on using sudo raspi-config | Interfaces
- Install script dependencies (see below)
Google Setup
- Create a ".credentials" folder under your home folder on the Pi
- Requires a Google account with basic Gmail address
- Setup Calendar API (described in a following step)
- Setup Google Text to Speech API (described in a following step)
-
2Install Script dependencies
Update path to avoid pip installation warning messages
- touch $HOME/.bash_profile
- echo -e 'export PATH="$HOME/.local/bin:$PATH"' >> $HOME/.bash_profile
- export PATH="$PATH: $HOME/.local/bin"
For 64 bit install, add libatomic.so library to path
- echo -e 'export LD_PRELOAD=/usr/lib/aarch64-linux-gnu/libatomic.so.1.2.0' >> $HOME/.bash_profile
- export LD_PRELOAD=/usr/lib/aarch64-linux-gnu/libatomic.so.1.2.0
For 32 bit install
- echo -e 'export LD_PRELOAD=/usr/lib/arm-linux-gnueabihf/libatomic.so.1.2.0' >> $HOME/.bash_profile
- export LD_PRELOAD=/usr/lib/arm-linux-gnueabihf/libatomic.so.1.2.0
Install Required Tools
- sudo apt-get install python3-pip
- /usr/bin/python3 -m pip install --upgrade pip
- pip install setuptools -U
- pip install --user --upgrade google-cloud-texttospeech
- See what version of grpcio is installed in the success message like
"Successfully installed cachetools-5.3.0 google-api-core-2.11.0 google-auth-2.17.1 google-cloud-texttospeech-2.14.1 googleapis-common-protos-1.59.0 grpcio-1.53.0 grpcio-status-1.53.0 proto-plus-1.22.2 protobuf-4.22.1 pyasn1-0.4.8 pyasn1-modules-0.2.8 rsa-4.9"- pip install grpcio-tools==#.##.# (where #.##.# from version above, eg 1.53.0)
- pip install --upgrade google-api-python-client google-auth-httplib2 google-auth-oauthlib
- pip install python-dateutil
- sudo apt-get install sox libsox-fmt-mp3
-
3Enable Google Calendar API
First we need to activate the Google Calendar API for a Google cloud project of our choice. Using my experience with this along with some Google Developer API docs and an online example...
- Open Google Developers Console
- From the top Project menu select Create project
If you haven’t created a developer account, you’ll be asked to
- Agree to their terms of service
- On top of page, click on top right button after “Start your Free Trial with $300 in credit…”
- Enter Project Name – and if you’re in a Google Workspace enter your organization
- Click Enable APIs and Services
![]()
- Find and Select Google Calendar API
- Click Enable
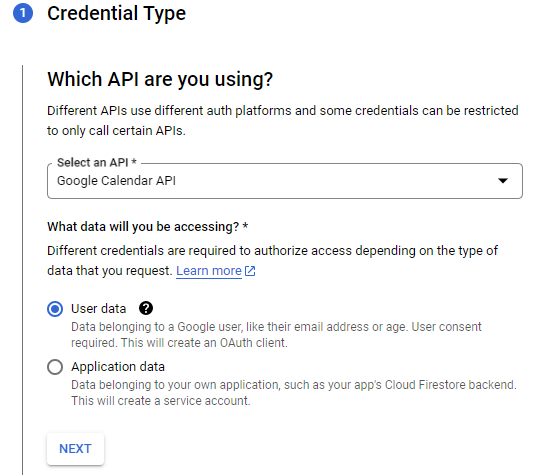
- When the Google Calendar API is enabled and selected, click Create Credentials
- Select User Type is External, choose User Data and click Next
![]()
- Enter an App name is you want, no logo, User support Email, and Developer Support Email, then click Save and Continue.
- Ignore scopes for now
![]()
- Under OAuth Client ID set type to Desktop App, enter app name and click Create
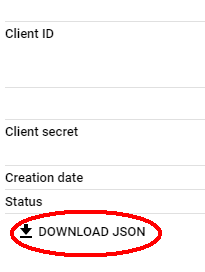
- This will generate your ClientID . Then click “Download JSON” and store the credentials file on your local PC. Move this file to a new “.credentials” subfolder on your Raspberry Pi and rename it “desktop-app.json”
![]()
![]()
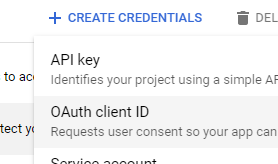
- Under Credentials | Create Credentials | API key
![]()
- Edit the API Key and Restrict Access to the Google Calendar API
-
4Adding Text To Speech to Python
Follow the detailed instructions provide by Google to enable their Cloud Text-Speech API.
You'll be starting from the Google Cloud Console and will have to enable billing - but the important note is that it is free for the first million characters per month. I've never come close to reaching that even in the early development days.
First step is to Enable the Cloud Text-to-Speech API
- Add APIS & Services | Credentials | Create Credentials | Add Key
- Restrict to Cloud Text to Speech API and Save
![]()
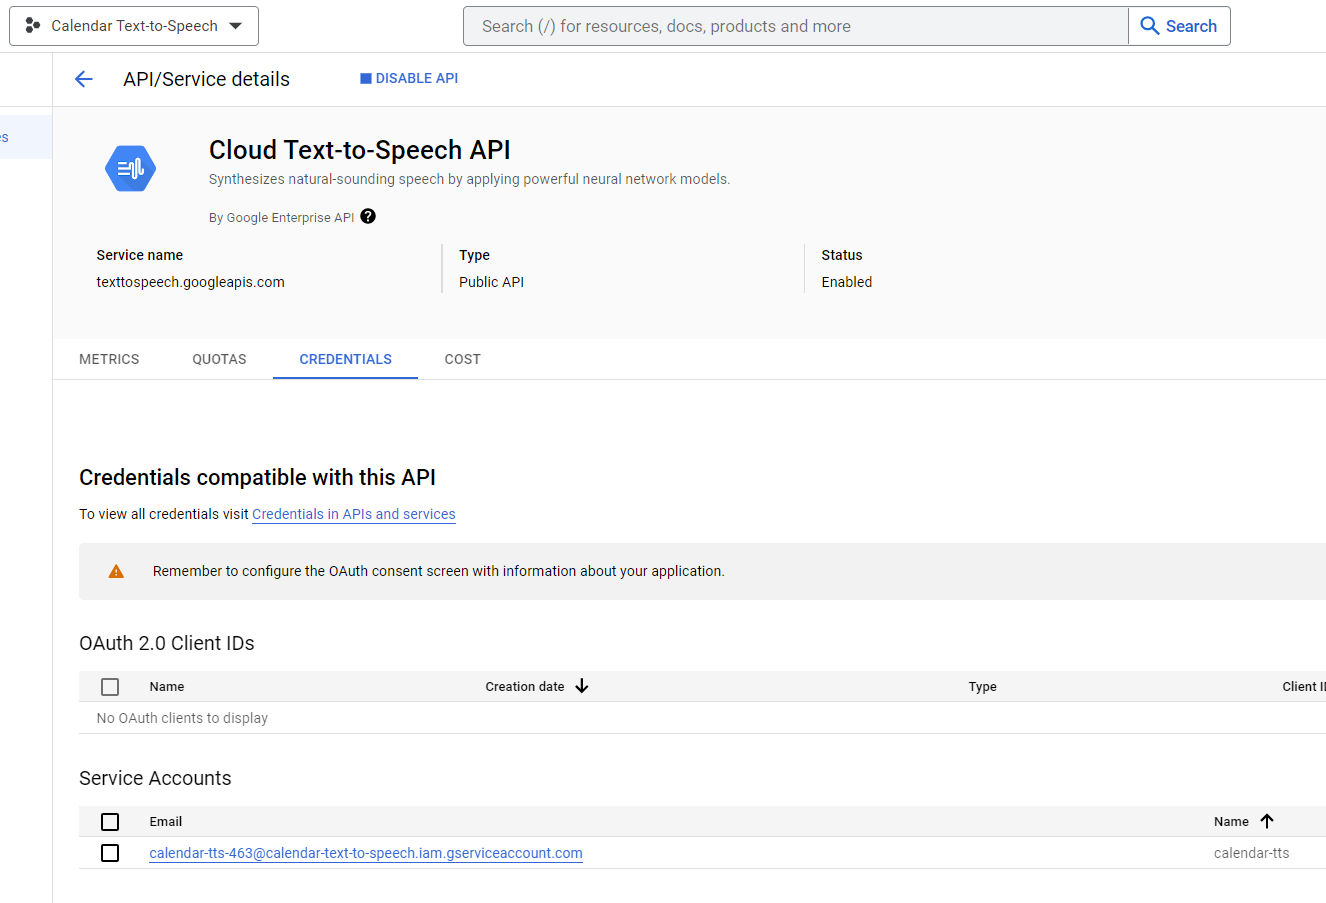
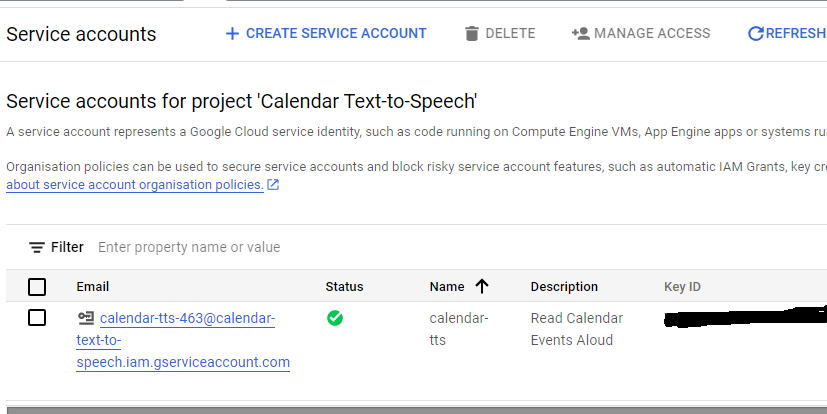
After that you create a Service Account
- Create Service Account
- Select Role as Owner (Quick Access -> Basic)
- Create Service Account Key using same email address
- Keys | Add Key | Create New Key – restrict to Text to Speech
- Save JSON file and copy to computer or Pi
![]()
-
5Testing your install of Google Cloud Text-to-Speech
Here's a simple Python script (test_tts.py) to test your install
#! /usr/bin/env python
# test_tts.py
import os, subprocess
from google.cloud import texttospeech

TTS_KEY_FILE = 'your-downloaded-key-file.json'
CREDENTIALS_SUBFOLDER = '.credentials'

home_dir = os.path.expanduser('~')
credential_dir = os.path.join(home_dir, CREDENTIALS_SUBFOLDER)

tts_credentials = os.path.join(credential_dir, TTS_KEY_FILE)
# credentials for tts
os.environ['GOOGLE_APPLICATION_CREDENTIALS']=tts_credentials


def save_phrase(phrase, audioFile, tempo=0.8):
    # Optional parameter for tempo - slow it down if lower than 1
    synthesis_input = texttospeech.SynthesisInput(text=phrase)

    # Perform the text-to-speech request on the text input with the selected
    # voice parameters and audio file type
    response = client.synthesize_speech(input=synthesis_input, voice=voice, audio_config=audio_config)

    # Write the response to the mp3 file.
    with open(audioFile, "wb") as out:
        out.write(response.audio_content)


def setup_tts(maleOrFemale='male'):
    # Instantiates a client
    global client, voice, audio_config

    client = texttospeech.TextToSpeechClient()

    # Build the voice request, select the language code ("en-US") and ssml
    # https://cloud.google.com/text-to-speech/docs/voices (Test all available voices)

    if (maleOrFemale=='male'):
        voice = texttospeech.VoiceSelectionParams(
            language_code="en-US",
            name="en-US-Wavenet-D",
            ssml_gender=texttospeech.SsmlVoiceGender.MALE
        )
    else:
        voice = texttospeech.VoiceSelectionParams(
            language_code="en-US",
            name="en-US-Wavenet-F",
            ssml_gender=texttospeech.SsmlVoiceGender.FEMALE
        )

    # Select the type of audio file you want returned
    audio_config = texttospeech.AudioConfig(audio_encoding=texttospeech.AudioEncoding.MP3)


def main():
    setup_tts()

    save_phrase('This is a test ', 'THIS_IS_A_TEST.MP3')

    exit(0)

if __name__ == '__main__':
    main()
Run that with
> python3 test_tts_py
and then play the resulting file by typing on the command line:
>play THIS_IS_A_TEST.MP3
Speak To Me: A Button Box
A project to make life easier for my 91 year old father, who has hearing and eyesight loss as well as severe short term memory issues.
 Don Mitchinson


Discussions
Become a Hackaday.io Member
Create an account to leave a comment. Already have an account? Log In.