Close
0%
0%

The Solar Box

A cyberdeck housed in a bamboo clamshell case and powered with solar engery

Similar projects worth following
I have a neat bamboo clamshell case for a (now broken) keyboard I built years ago and I always thought it would be cool to stick a raspberry pi and a screen in the lid, so I'm doing that and running it with solar power. It is meant to be extremely low power and distraction free. I liked the thematic union of the sustainable bamboo mixed with solar power.

The goal of this project is to have a portable linux terminal for hacking that can be easily used outdoors on a nice day (but is still usable inside as well) that is powered primarily with solar power (but that also has the option to plug it in if necessary).

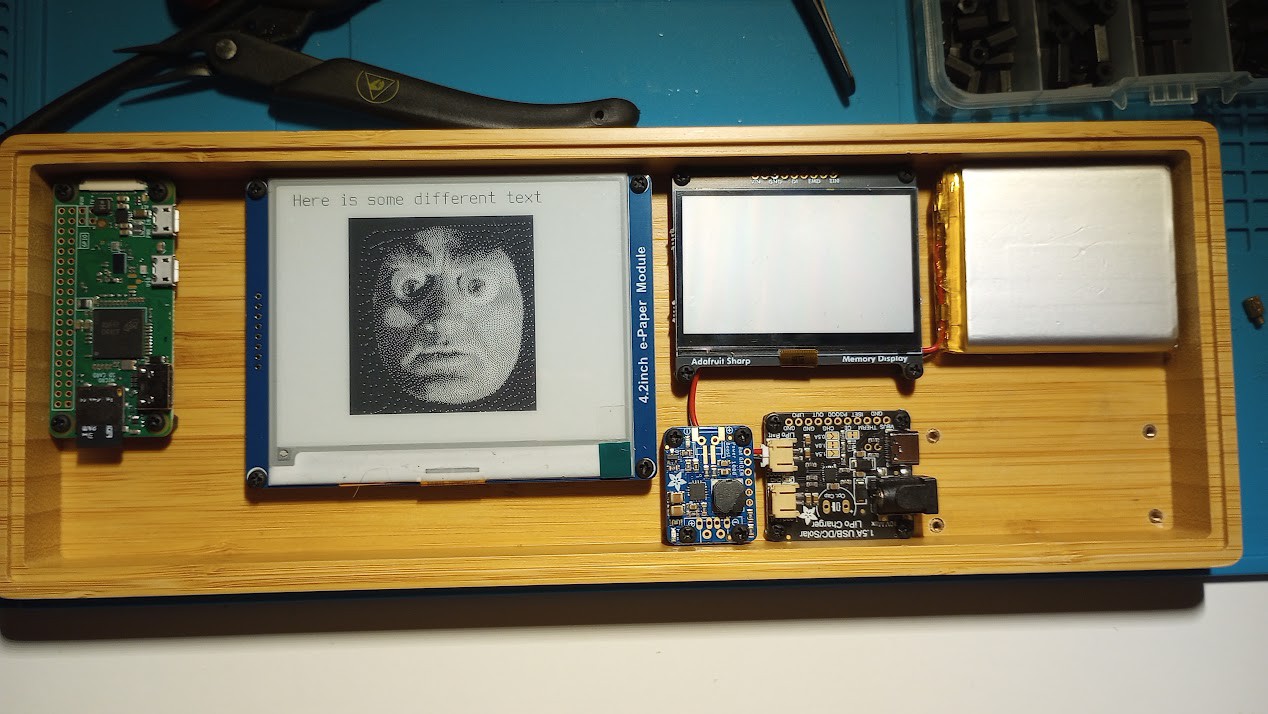
The challenges of this project are going to be space constraints, power, and cooling. I'm using an old, second-hand monochrome 240x64 dot-matrix lcd a Sharp 2.7" MiP LCD and a Waveshare 4.2" ePaper for the display and a raspberry pi zero w for the "brains" so power and cooling shouldn't be a huge issue there. However, the solar panel and the charging of the battery I expect will add some heat to the equation.

Space constraints will be tricky but hopefully doable. I have, altogether between the space in the bottom and the lid of the case, about 282x90x2.5 cm to work with (give or take a couple mm).

Aside from a couple of custom mechanical keyboards, this is my first major electronics project. I taught myself to solder for this project (with tips from my retired telephone engineer father-in-law) and am learning everything else I need as I go.

bamboo deck lid layout.svg

svg+xml - 1.22 MB - 07/13/2023 at 16:41

Preview

View all 18 components

  • Small tweaks

    Nick Scratch08/18/2023 at 20:25 0 comments

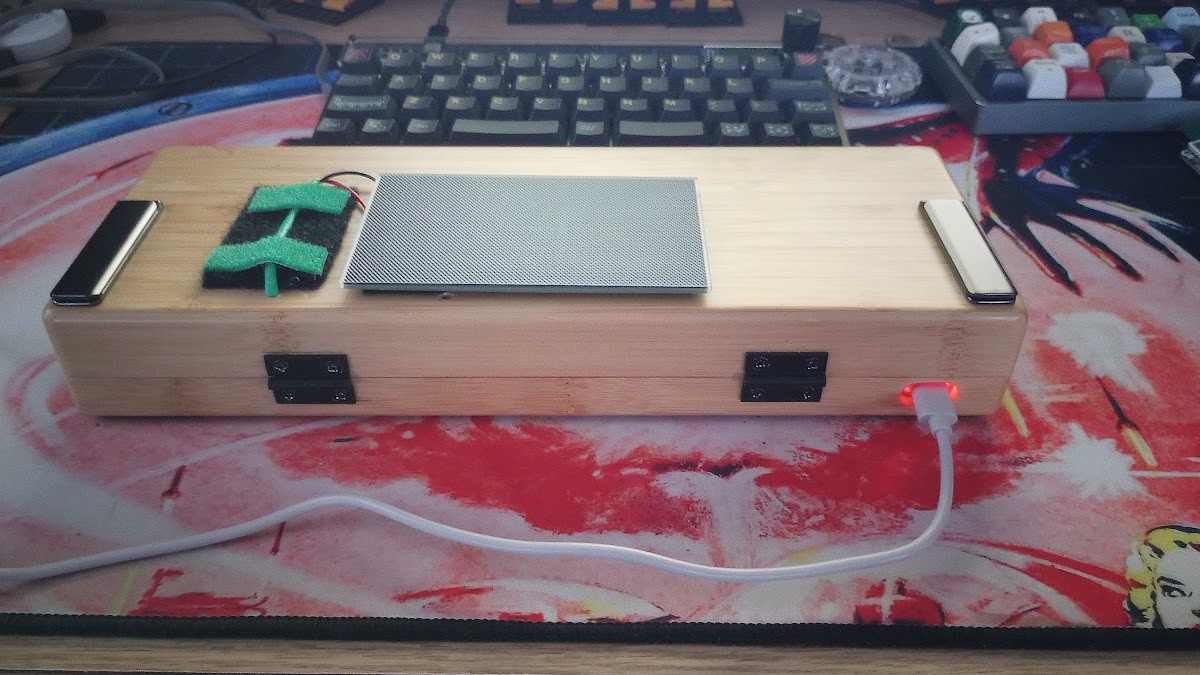
    Couple small tweaks. The bare wire on top was bothering me, so I put some more velcro on there to secure it. Bonus: it kinda looks like some greenery planted in a fresh plot of dirt!

    Also added a usb port and a charging status LED to the spot in the back of the case that was already there for when it was a keyboard case. Eventually I'll also wire the data from that port up to the RPi.

  • Hardware is done!

    Nick Scratch08/09/2023 at 20:41 0 comments

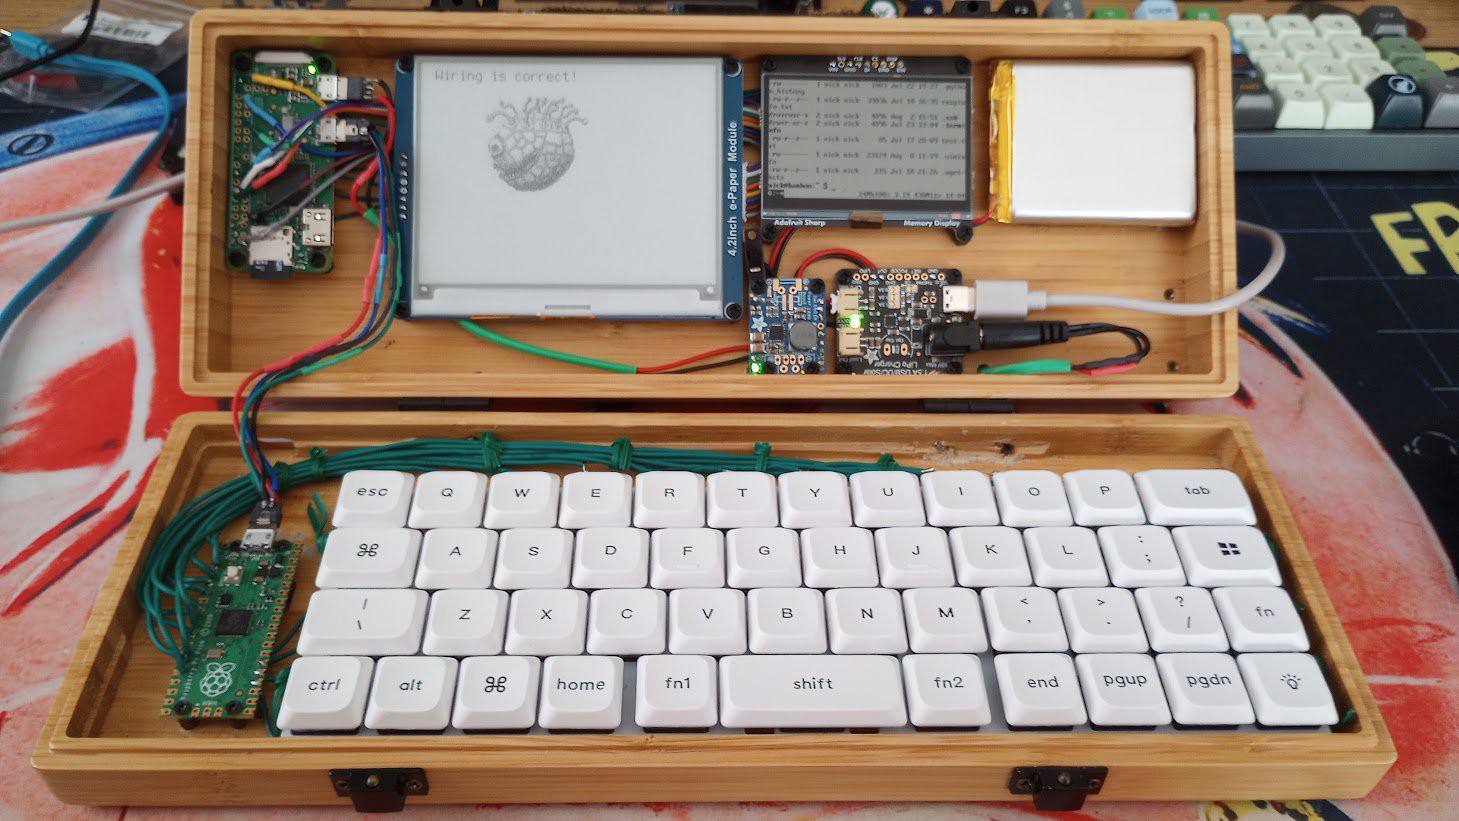
    Everything is mounted, wired, and working perfectly!


    The only things left are some small tweaks for linux console usability on such a small screen, and a more robust CLI utility to send data to the epaper.

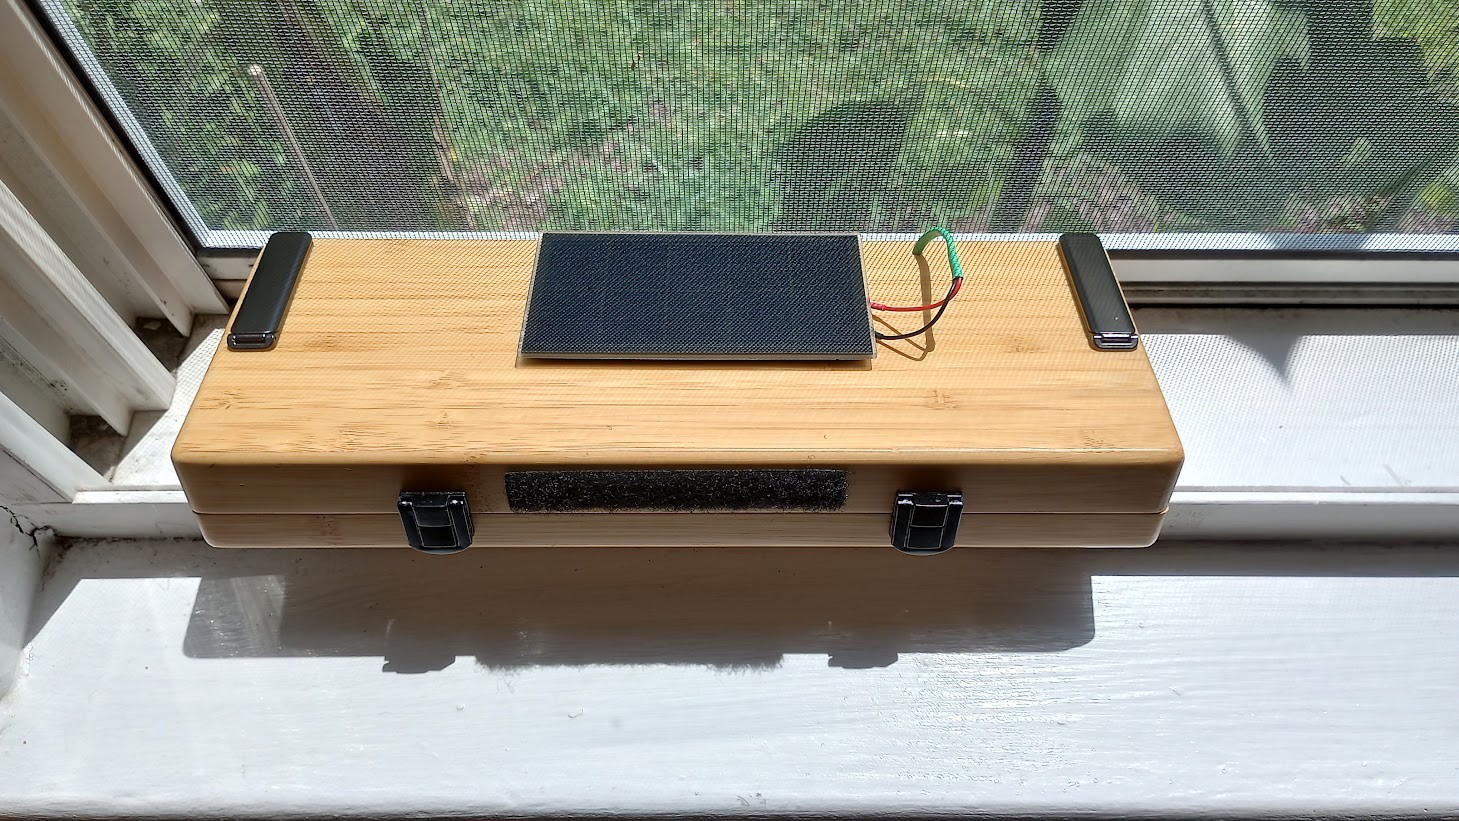
    Here it is, happily charging in the sun. I used some cheap phone kickstands on the sides there to prop up the lid when open, and the mustache velcro strip in the middle front is so you can move the solar panel for the best angle while open.

    I was worried about getting the power boards set up, but those ended up being pretty much plug-and-play. They also don't generate any noticeable heat while charging, tho I've only tried from USB and the solar panel. The charger board can take up to 10V DC, so I'm guessing if I plugged a wall wart power adapter into it then things would probably get pretty hot, though that's not really part of it's use case.

    Had to diy a couple usb cables to fit in the space. Couldn't find one from my stash that would fit without tearing all the molding off. So I did that, and wired them up to the appropriate places. (Please excuse my soldering crimes.)

    I also tweaked the keyboard firmware since the last update to set a max power usage of 50ma and poll less frequently. Haven't tested the power saving, but it hasn't affected the keyboard performance to any noticeable degree.

    I'd like to cut a notch out of the right side of the lid so the lid can be closed over a usb cable if charging off that. I'd also like to put an LED charge indicator somewhere on the outside, so you can see the status while it's closed. But these are both small tweaks for the future. For now, it's perfectly usable as is, so I am calling it 1.0!

  • Mounting Enthusiasm

    Nick Scratch08/02/2023 at 20:36 0 comments

    Found a way to mount everything in the bamboo case. I'm using knurled insert nuts with shallowly drilled holes. It works great, as you can see in the above picture.
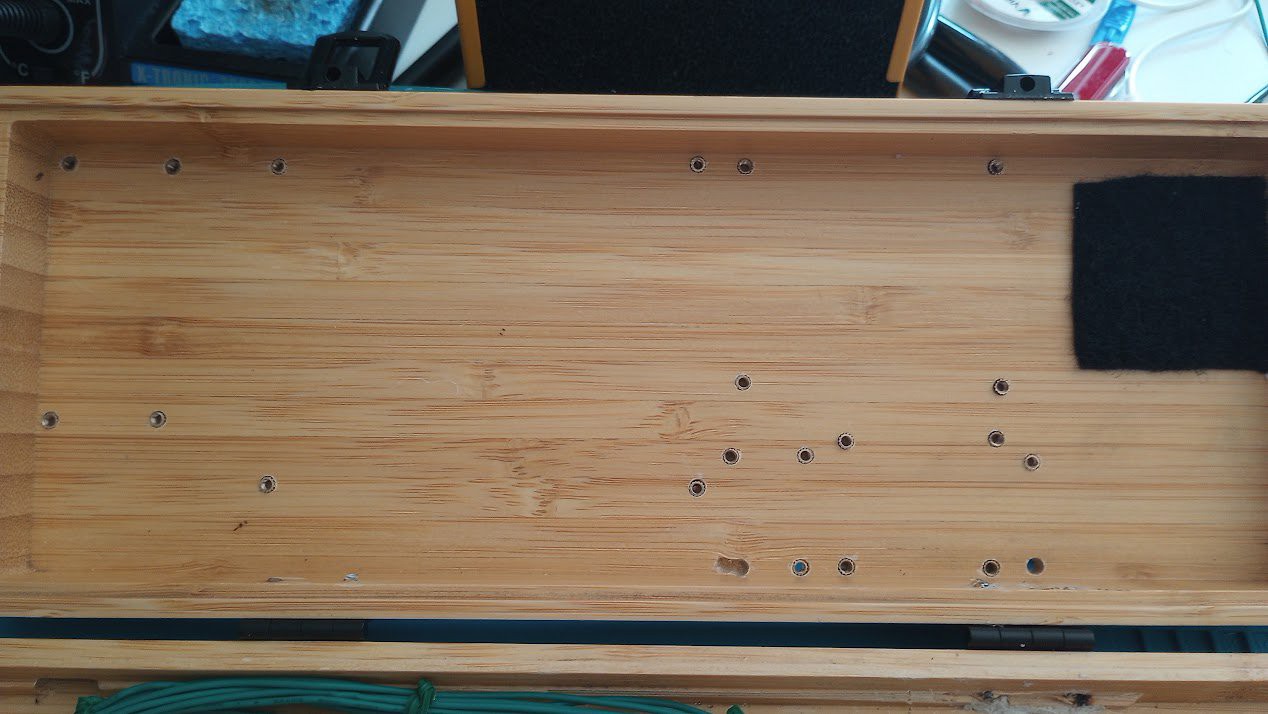
    Here's all the empty nuts. The bottom right was going to be for a small usb hub, but space was too tight, so I decided against it. Instead, this will be where the extra solar panel power cable can be coiled. Unfortunately I drilled a couple of the holes too deep, so now the case has, uh, speed holes. The velcro in the top right is for the battery.

    I also attached the hinges and clasps, and then cut the part of the screws that stuck into the case with a dremel.

    Finally, I redid all the wiring from the keyboard to the rasbperry pi pico controller. It looks a lot cleaner now, but unfortunately, I seem to have burnt out my pico de-soldering all the bits of stranded wire.

    Also ditched the velcro cable ties for the less bulky and thematically appropriate garden ties. I drilled some holes in the bottom and threaded more cable ties through in order to secure the keyboard plate to the case. It all worked out pretty well.
  • Both screens!

    Nick Scratch07/23/2023 at 20:23 0 comments

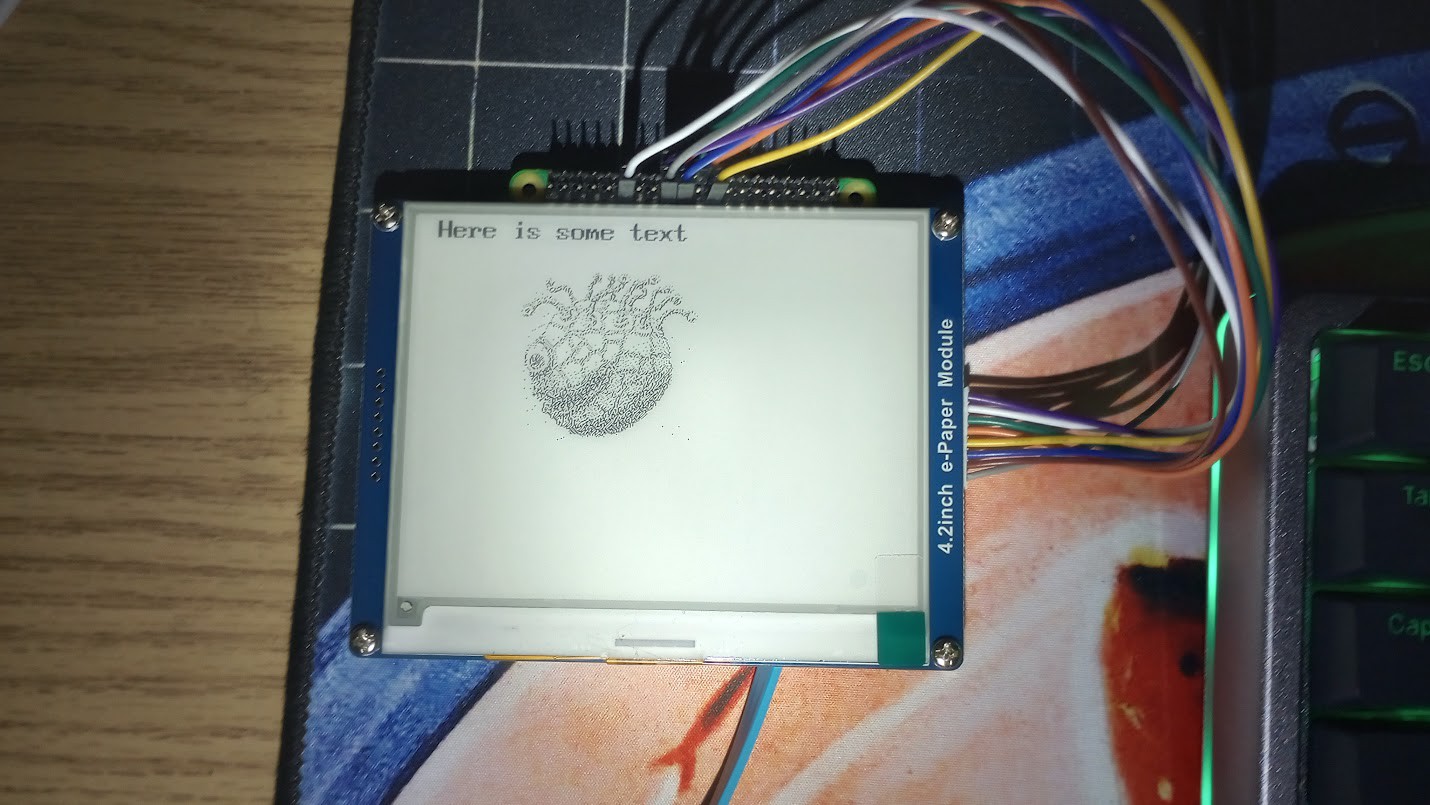
    I have both screens working at the same time now, and I got the Sharp to be inverted (black-on-white) which I think is easier to see on that reflective display. Right now, I'm basically just using the Waveshare python epaper library directly to test the screen out, but I plan to write up a nice little CLI utility (or modify one that exists) in order to display any arbitrary thing on it, including piping std out. That might be the first thing I actually write on the device itself once it's all done.

    I tried using the same SPI interface for both, but I couldn't get it working, so I enabled the second SPI interface on the Pi and am using that for the epaper.

    This is the wiring I came up with use both these screens at once:

    Sharp
    labelgpiopinnote
    vin5v2
    3v3not connected
    gndgnd39
    slck1123SPI0 SCLK
    di1019SPI0 POCI
    cs824SPI0 CE0
    emd3v317
    disp2418
    ein2522
    Waveshare
    labelgpiopinnote
    vcc3v31
    gndgnd6
    din2038SPI1 POCI
    clk2140SPI1 SCLK
    cs1812SPI1 CE0
    dc529
    rst2713
    busy2215

  • Sharp MiP Display

    Nick Scratch07/19/2023 at 14:18 0 comments

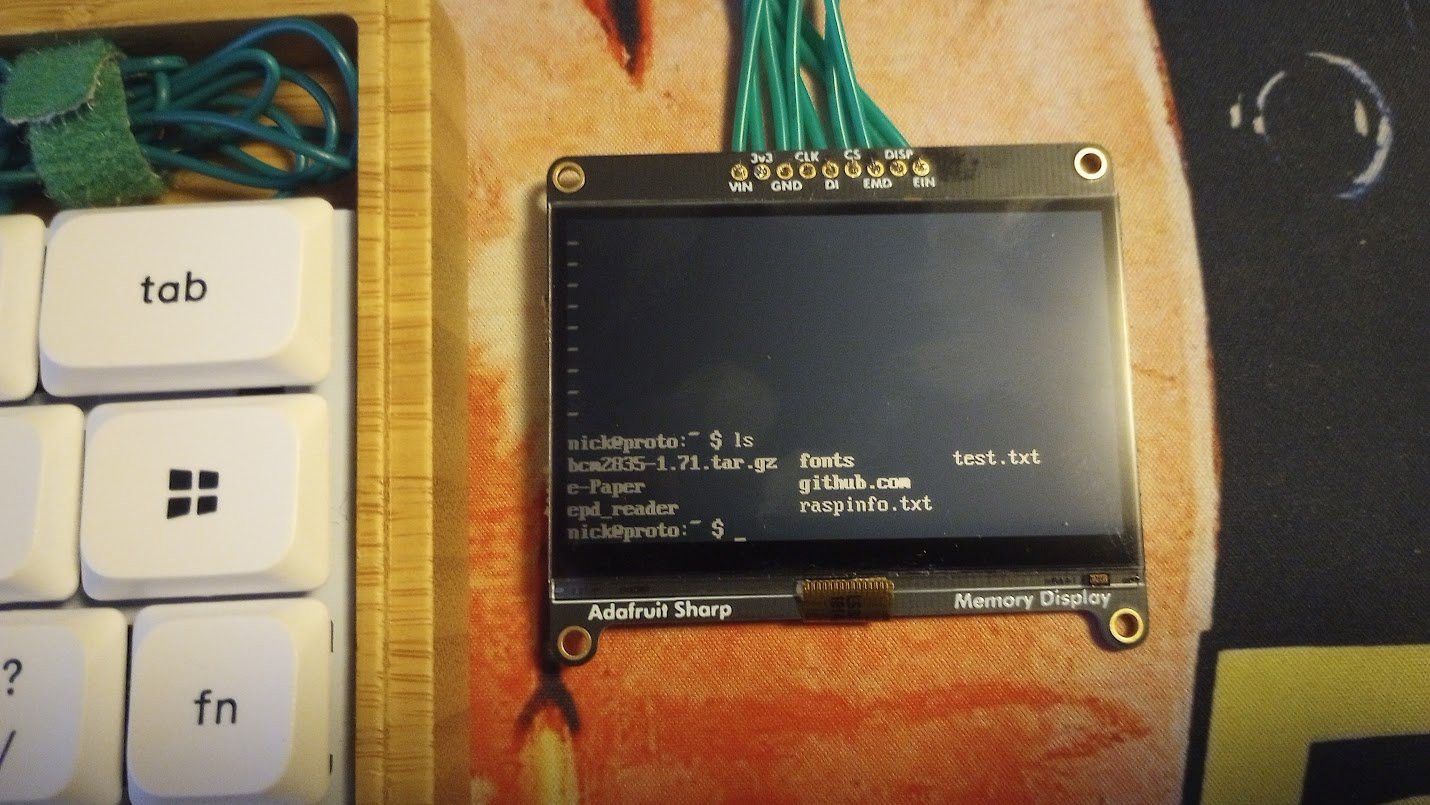
    I got the Sharp Memory-in-Pixel LCD working. Forked an old kernel module on github and made one small change to get it to compile and it worked. The future plan is to hopefully add an escape character that I can add to the keyboard firmware that will invert the display on command. The white-on-black is hard to read on this display. It also might be too small to work with comfortably... ls -l wraps around in an ugly way using the VGA8x16 console font. Anything smaller and I'm afraid my old, busted eyes will have a hard time with it. We'll see once I get the color inversion code in there.
  • Prototyping!

    Nick Scratch07/13/2023 at 15:08 0 comments

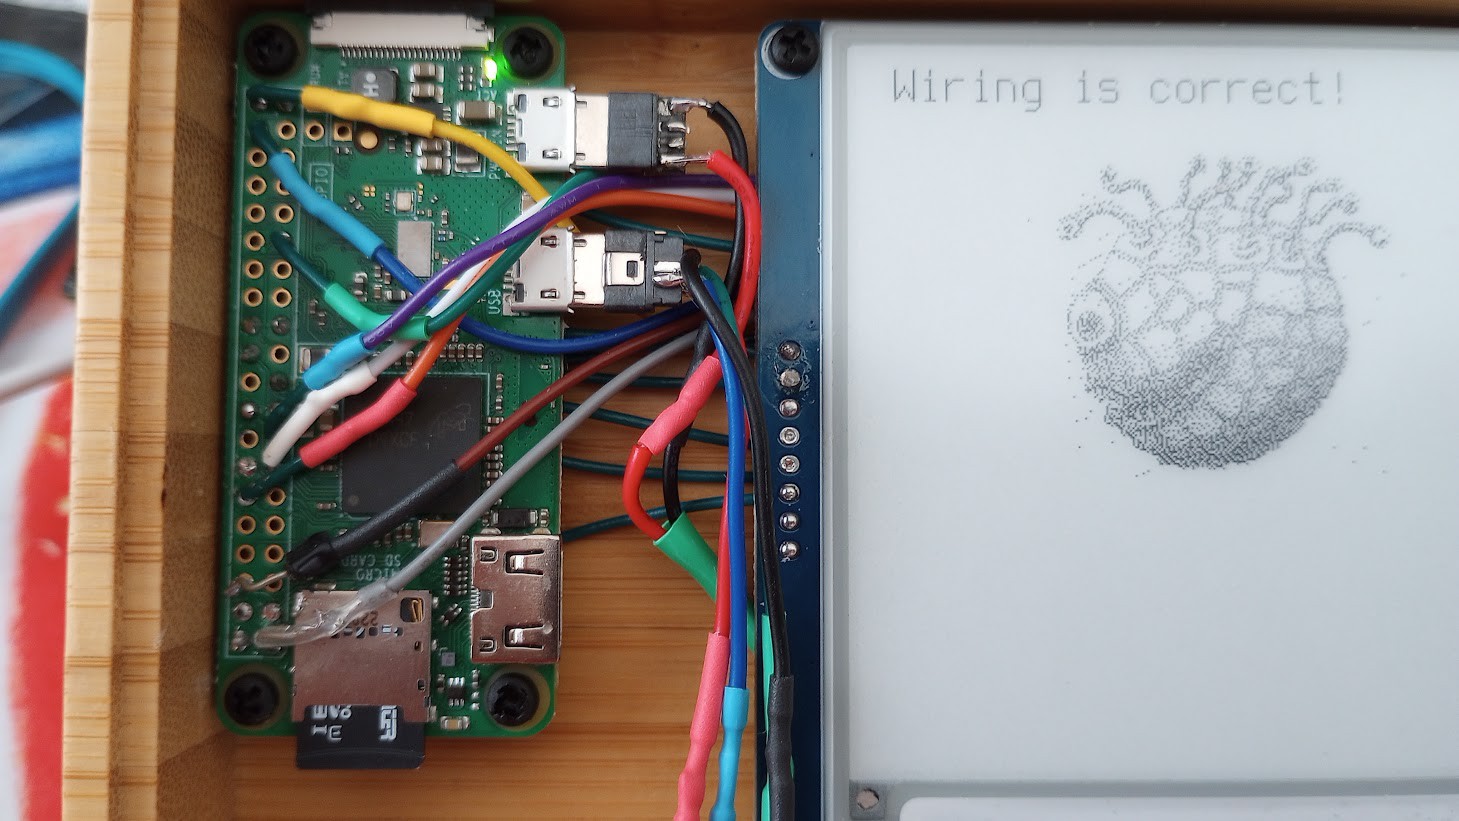
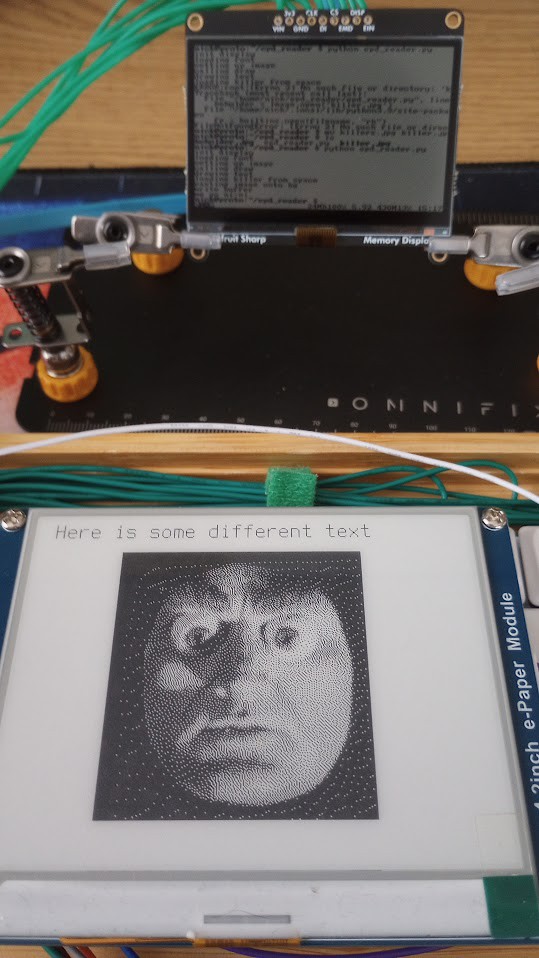
    The fruits of my ePaper experimenting. The RPi Zero is sitting underneath the display (you can see the header poking out at the top)

    While waiting for parts, I've been looking for drivers and libraries for the two displays I have chosen. I think I've tripled the amount of bookmarks in my firefox account this week.

    But now all the parts have now arrived, and I've started prototyping. So far this has just taken the form of getting to grips with the interfaces between the RPi Zero and the displays. The Sharp MiP LCD was the last to arrive, so I don't have much to show for that yet, but I have gotten the ePaper working with some python. My plan for the ePaper display is to set up a virtual framebuffer that I can swap data to and from. Wouldn't make sense for a full fbdev, due to it's slow refresh, but the linux framebuffer gives me an area to drop visual data before sending to the ePaper.

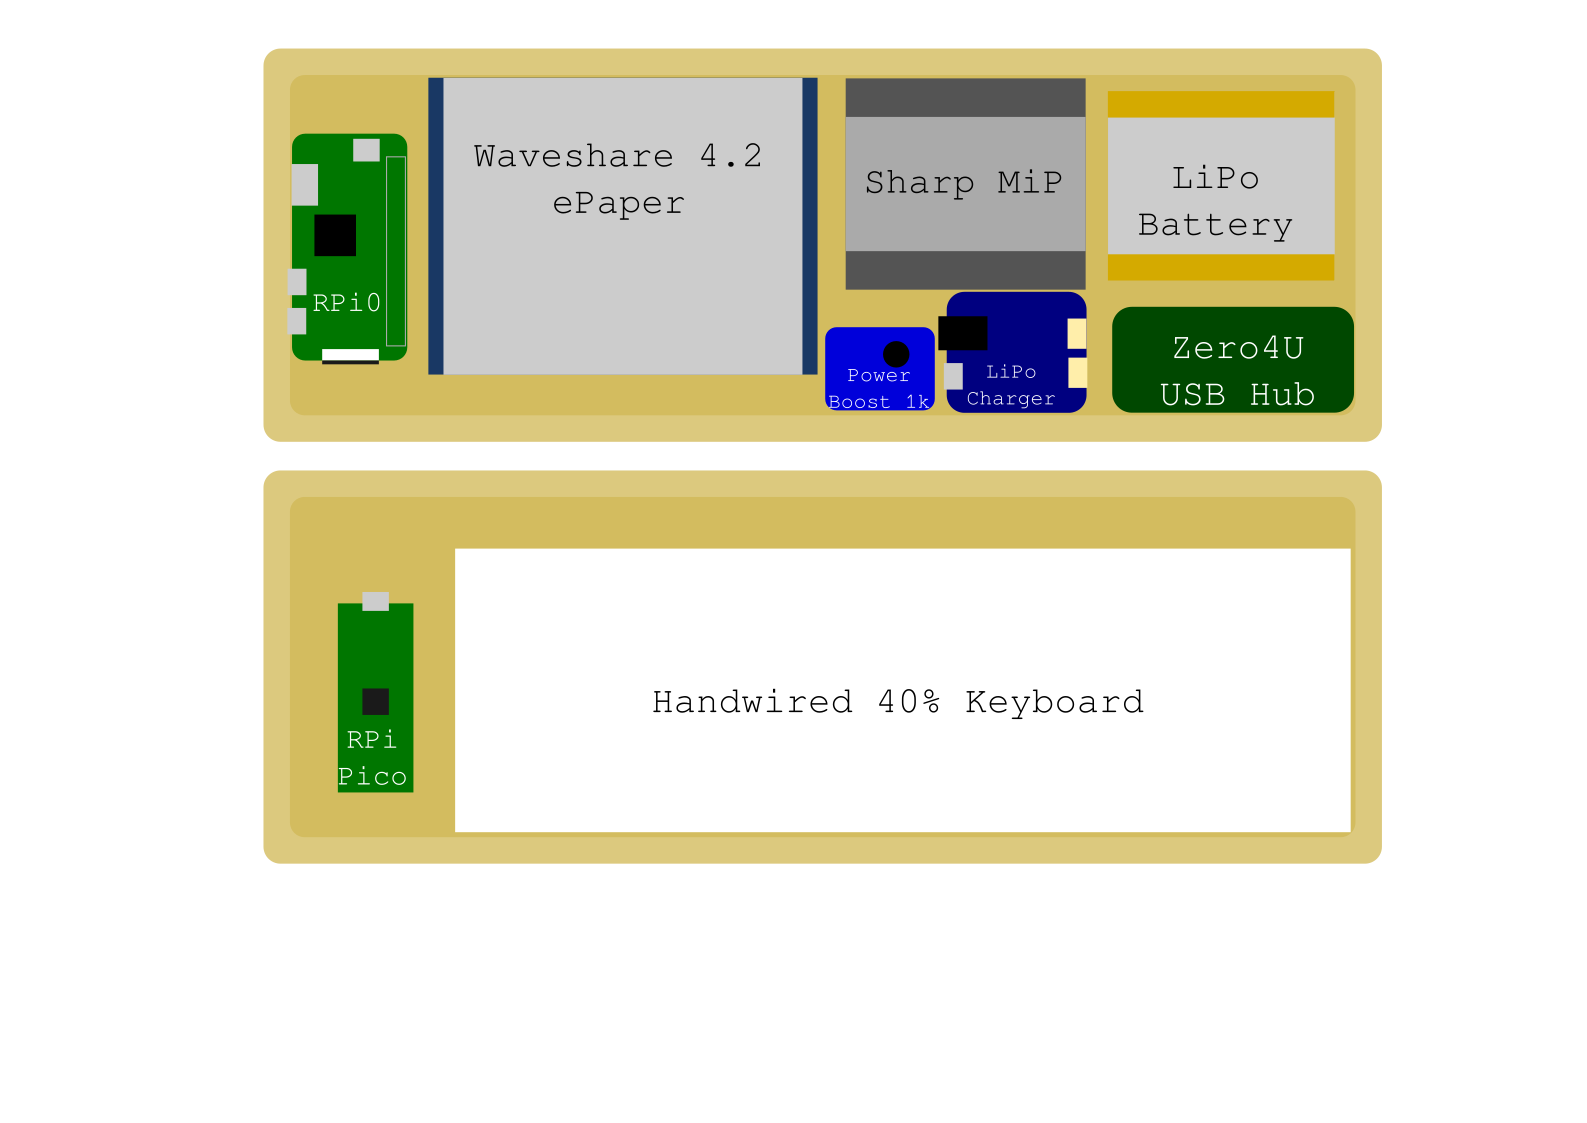
    Also created an SVG in inkscape to help visualize the layout. This is def not final. It is to scale, but please don't use it for anything technical, as it's mostly just to get the silhouettes of the various components in place.

  • New Screen Setup

    Nick Scratch07/08/2023 at 15:16 0 comments

    I've decided on a dual-screen setup of a Sharp 2.7" Memory-in-Pixel display for the active work and a Waveshare 4.2" epaper display for output/reference. Both of these have active development and libraries/drivers for the hardware I'm using.

    I feel bad for buying more new tech instead of recycling like I would have with the hantronix display (which actually is a powertip display?) but I can still use that for other projects down the line. It will be fun to hack on, but it ultimately doesn't fit the goal of this project as being an actively usable field tool.

    The added bonus is that both of these displays together will draw even less power than the powertronix-whatever-it-is display.

  • Hantronix GLCD

    Nick Scratch07/06/2023 at 15:47 0 comments

    The picture of the LCD from the ebay listing

    While waiting for parts to arrive, I've been looking up data sheets and trying to wrap my head around programming the Hantronix LCD. Sadly, there is no existing solution for using one of these as an actual monitor. I have found a few libraries for interfacing with the controller board (a Toshiba T6963C) so maybe I could leverage one of those into this LCD-Linux terminal emulator/kermel module/device driver, which was written for a different LCD controller board.

    Or I could just find a different display that's easier to work with. :(

  • Handwired keyboard

    Nick Scratch07/05/2023 at 18:12 0 comments

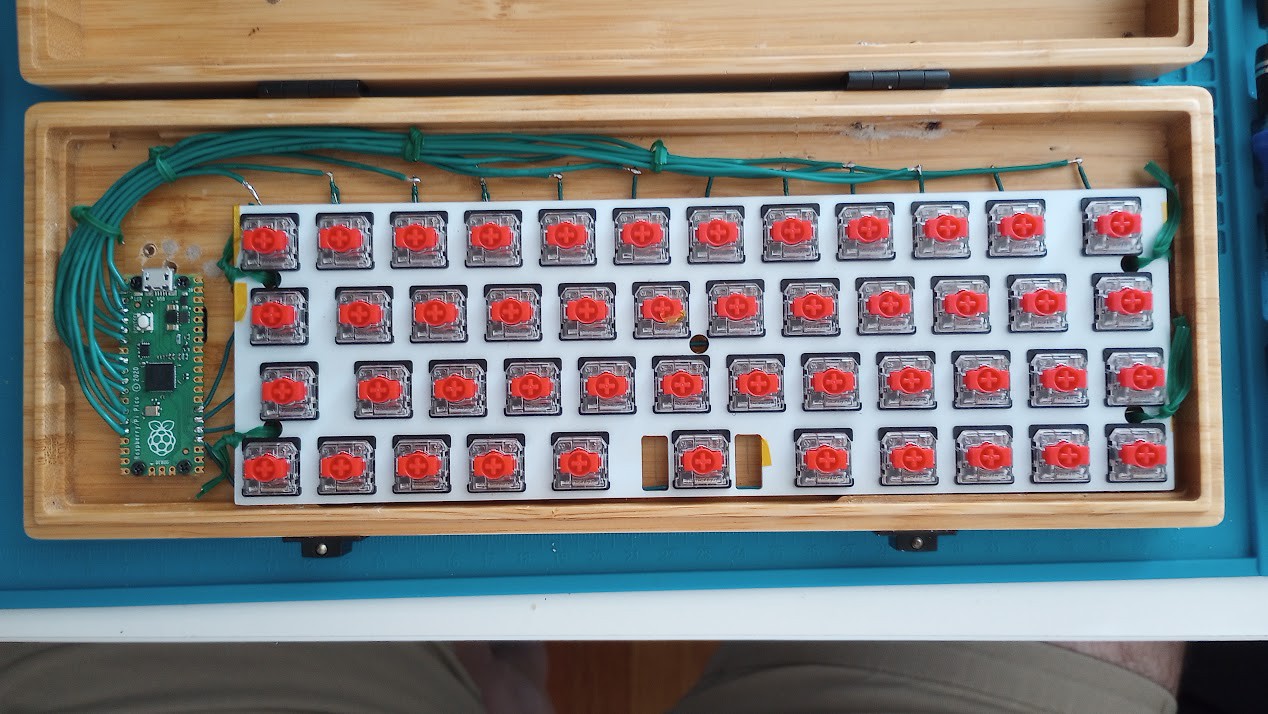
    First thing I had to do was get as much space as possible, so to that end, I built a hand-wired keyboard with a raspberry pi pico as the micro controller.

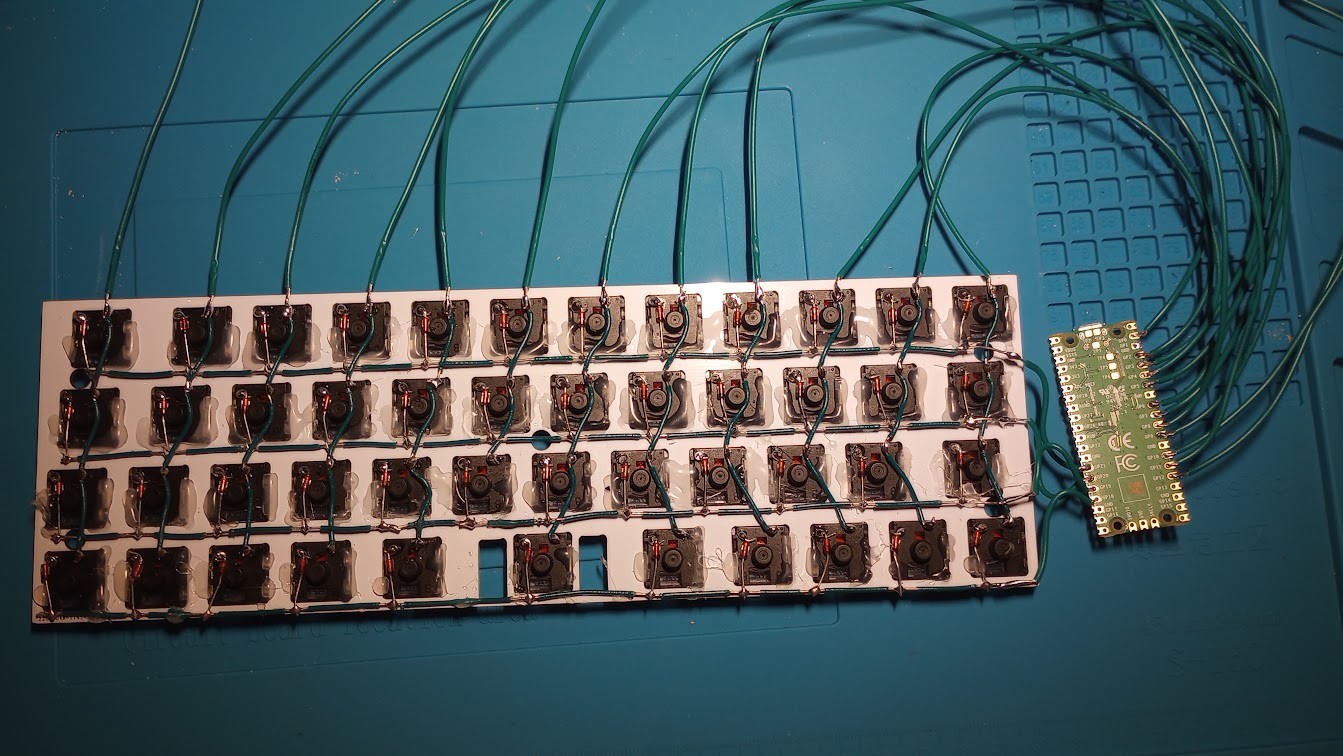
    I used this blog post as a guide. Everything went fairly smoothly. The biggest hurdle was that I used solid-core wire for the matrix, thinking it would make positioning the wire easier, and it did, but it also meant I broke a lot of connections as I manhandled the board later on, and had to re-solder a bunch. Also cutting the insulation with a hobby knife was tedious but worth it.

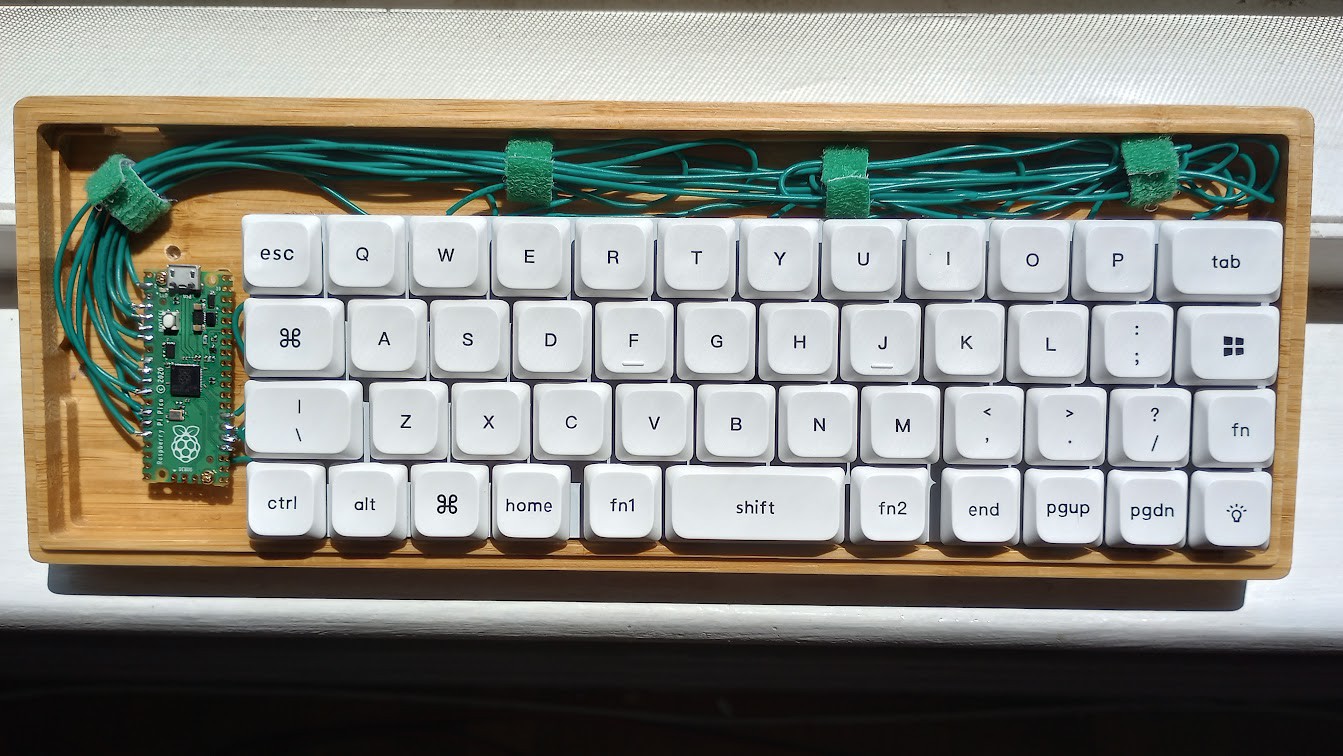
    I used low profile gateron switches (which have a non-standard pin layout, but that didn't matter for hand-wiring) and low profile keycaps to get as much space as possible. The plate/keycap assembly is mounted to the board with a strip of velcro on each side, and the wires are kept in place with velcro loops.

    Green wire was chosen to fit the theme of bamboo.

    Despite getting the pico a little crooked, and having to use keycaps where they fit and not necessarily where the legends match the function, it turned out pretty well, I think. Still tinkering with the layout (which is done with QMK and VIA)


    With the velcro mounting, plate, switches, and keycaps, the keyboard takes up about 16 mm, so I have roughly 9 mm of height left to work with in the lid. According to the data sheet, the LCD module is 11mm. Hmm. I'd like the keys to not be pushed in while the lid is on, but that might not be feasible. Also might have to re-think mounting for the main keyboard assembly as the velcro is surprisingly thick when put together (~3mm or so).

View all 9 project logs

Enjoy this project?

Share

Discussions

Giovanni wrote 07/24/2024 at 00:49 point

Nice project!

  Are you sure? yes | no

Similar Projects

Does this project spark your interest?

Become a member to follow this project and never miss any updates