-
Printing "Hello World"
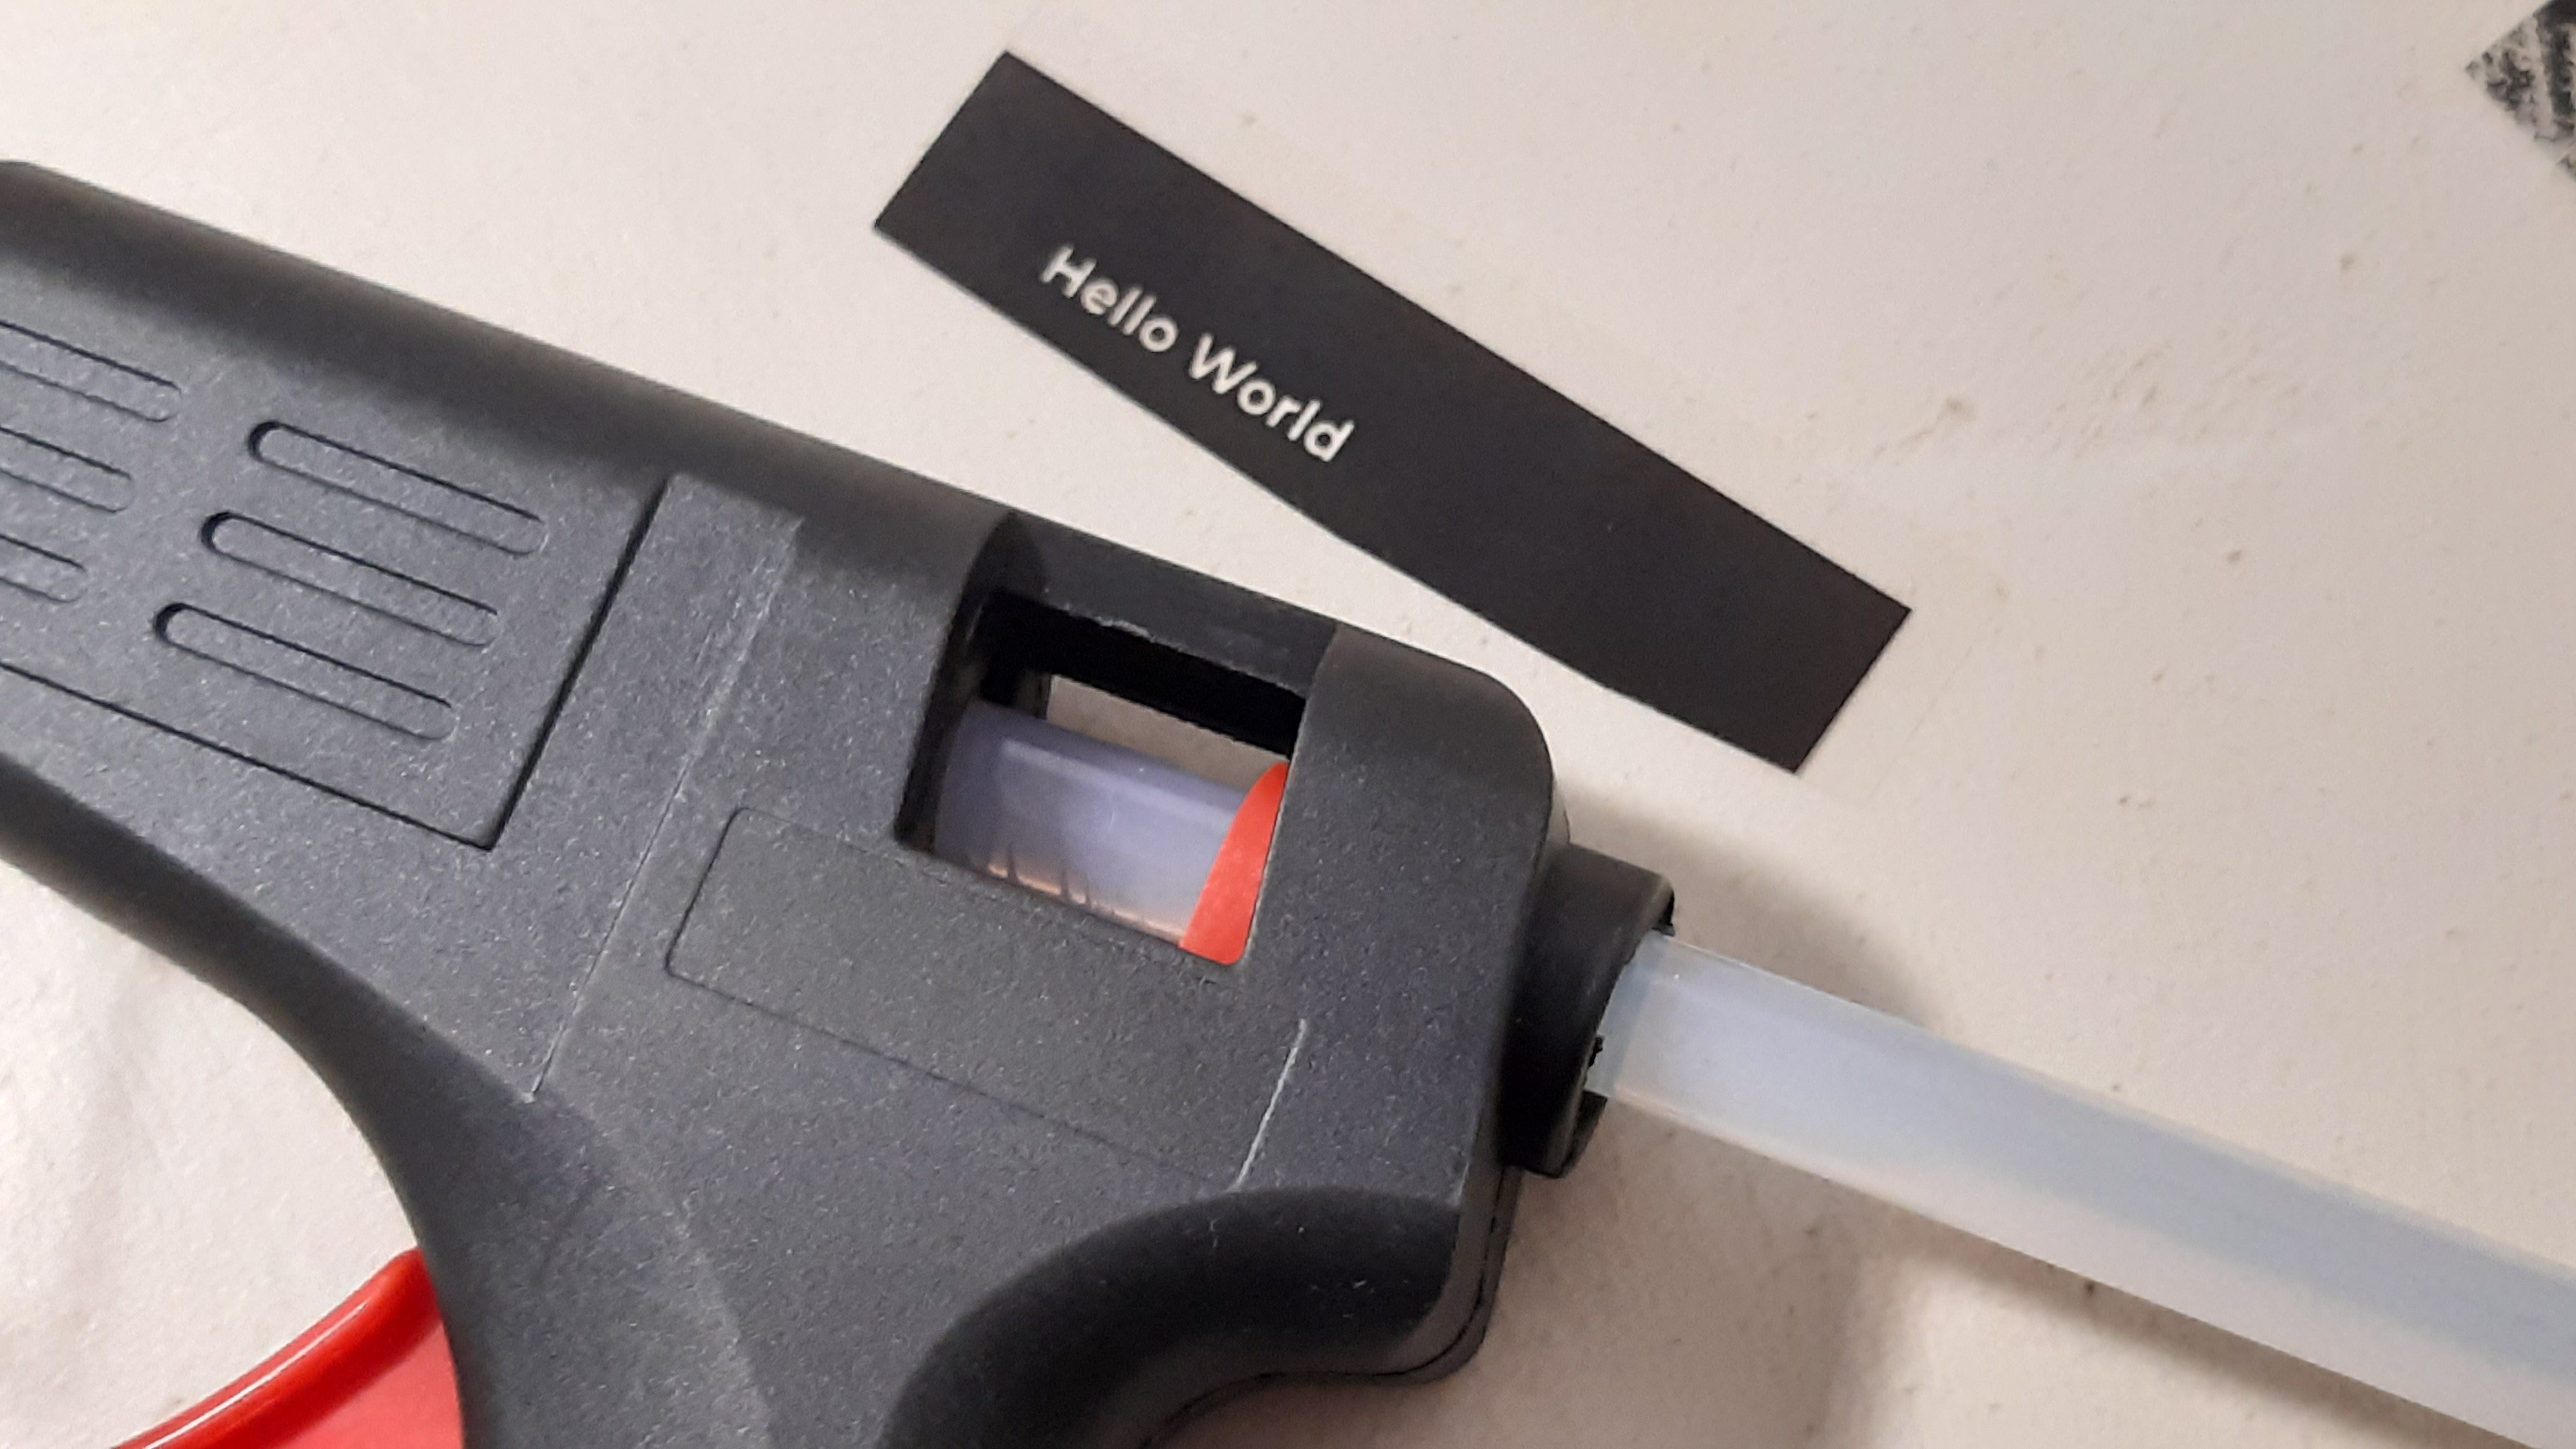
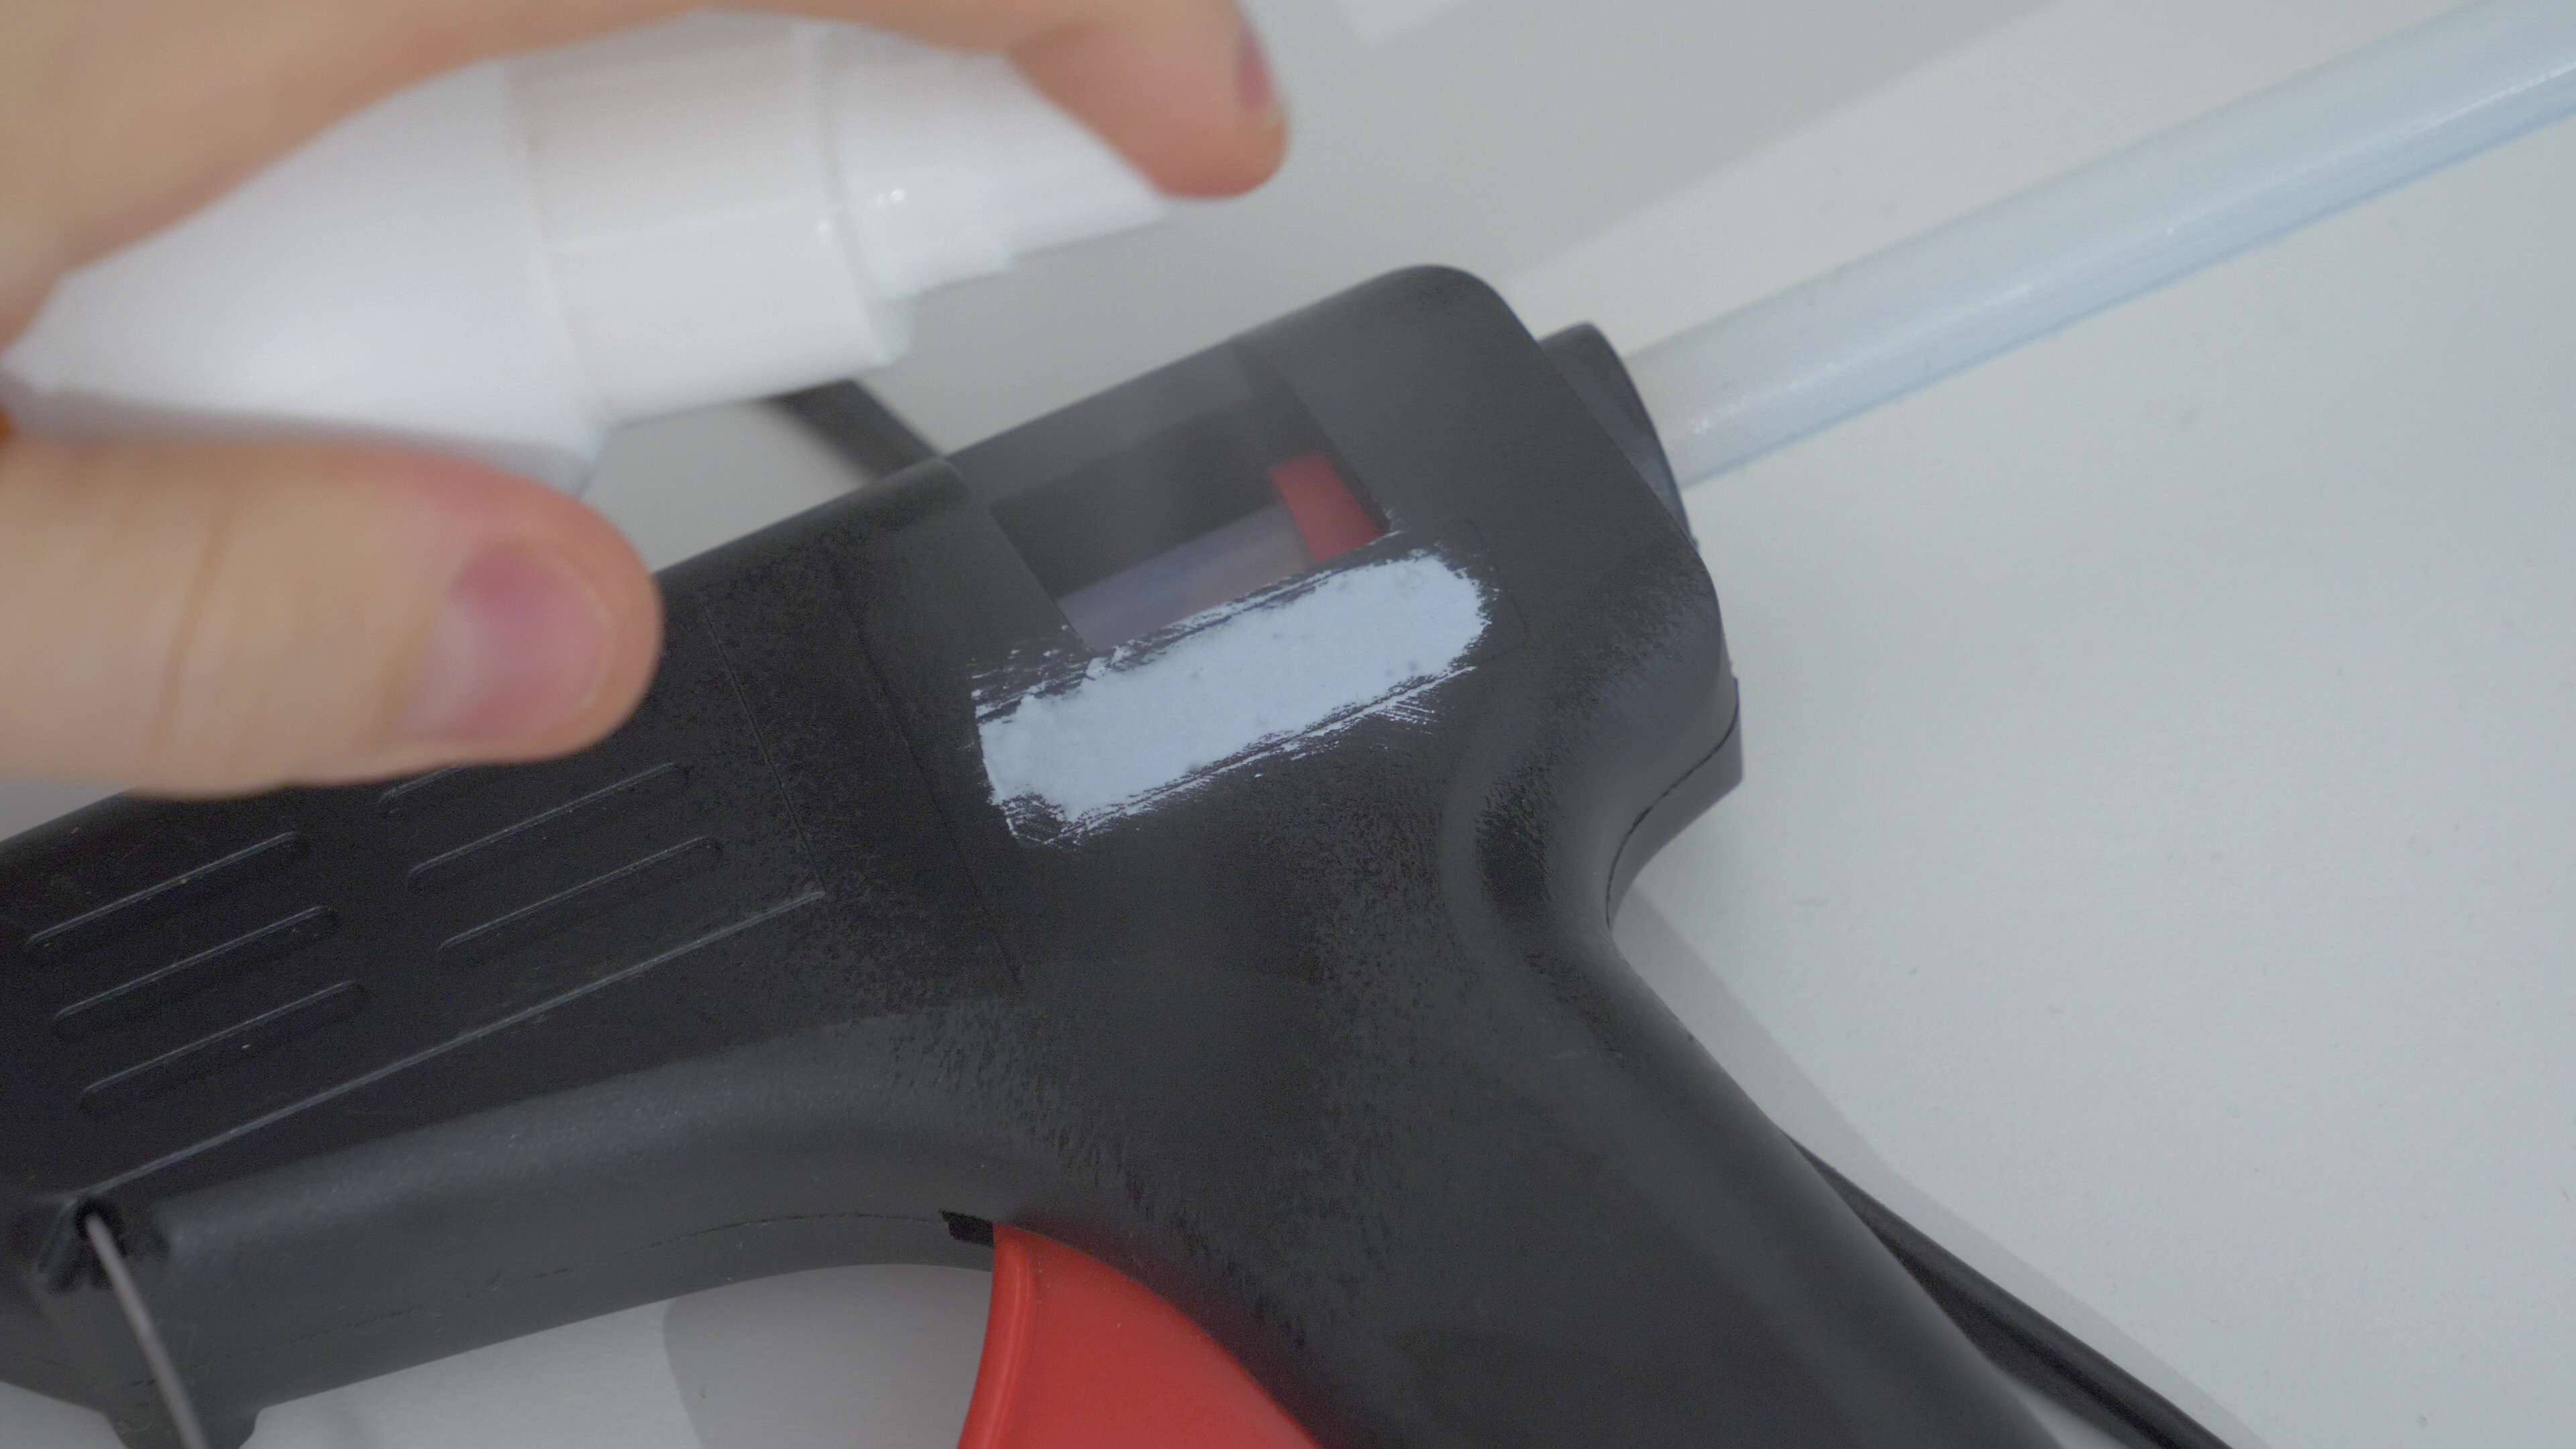
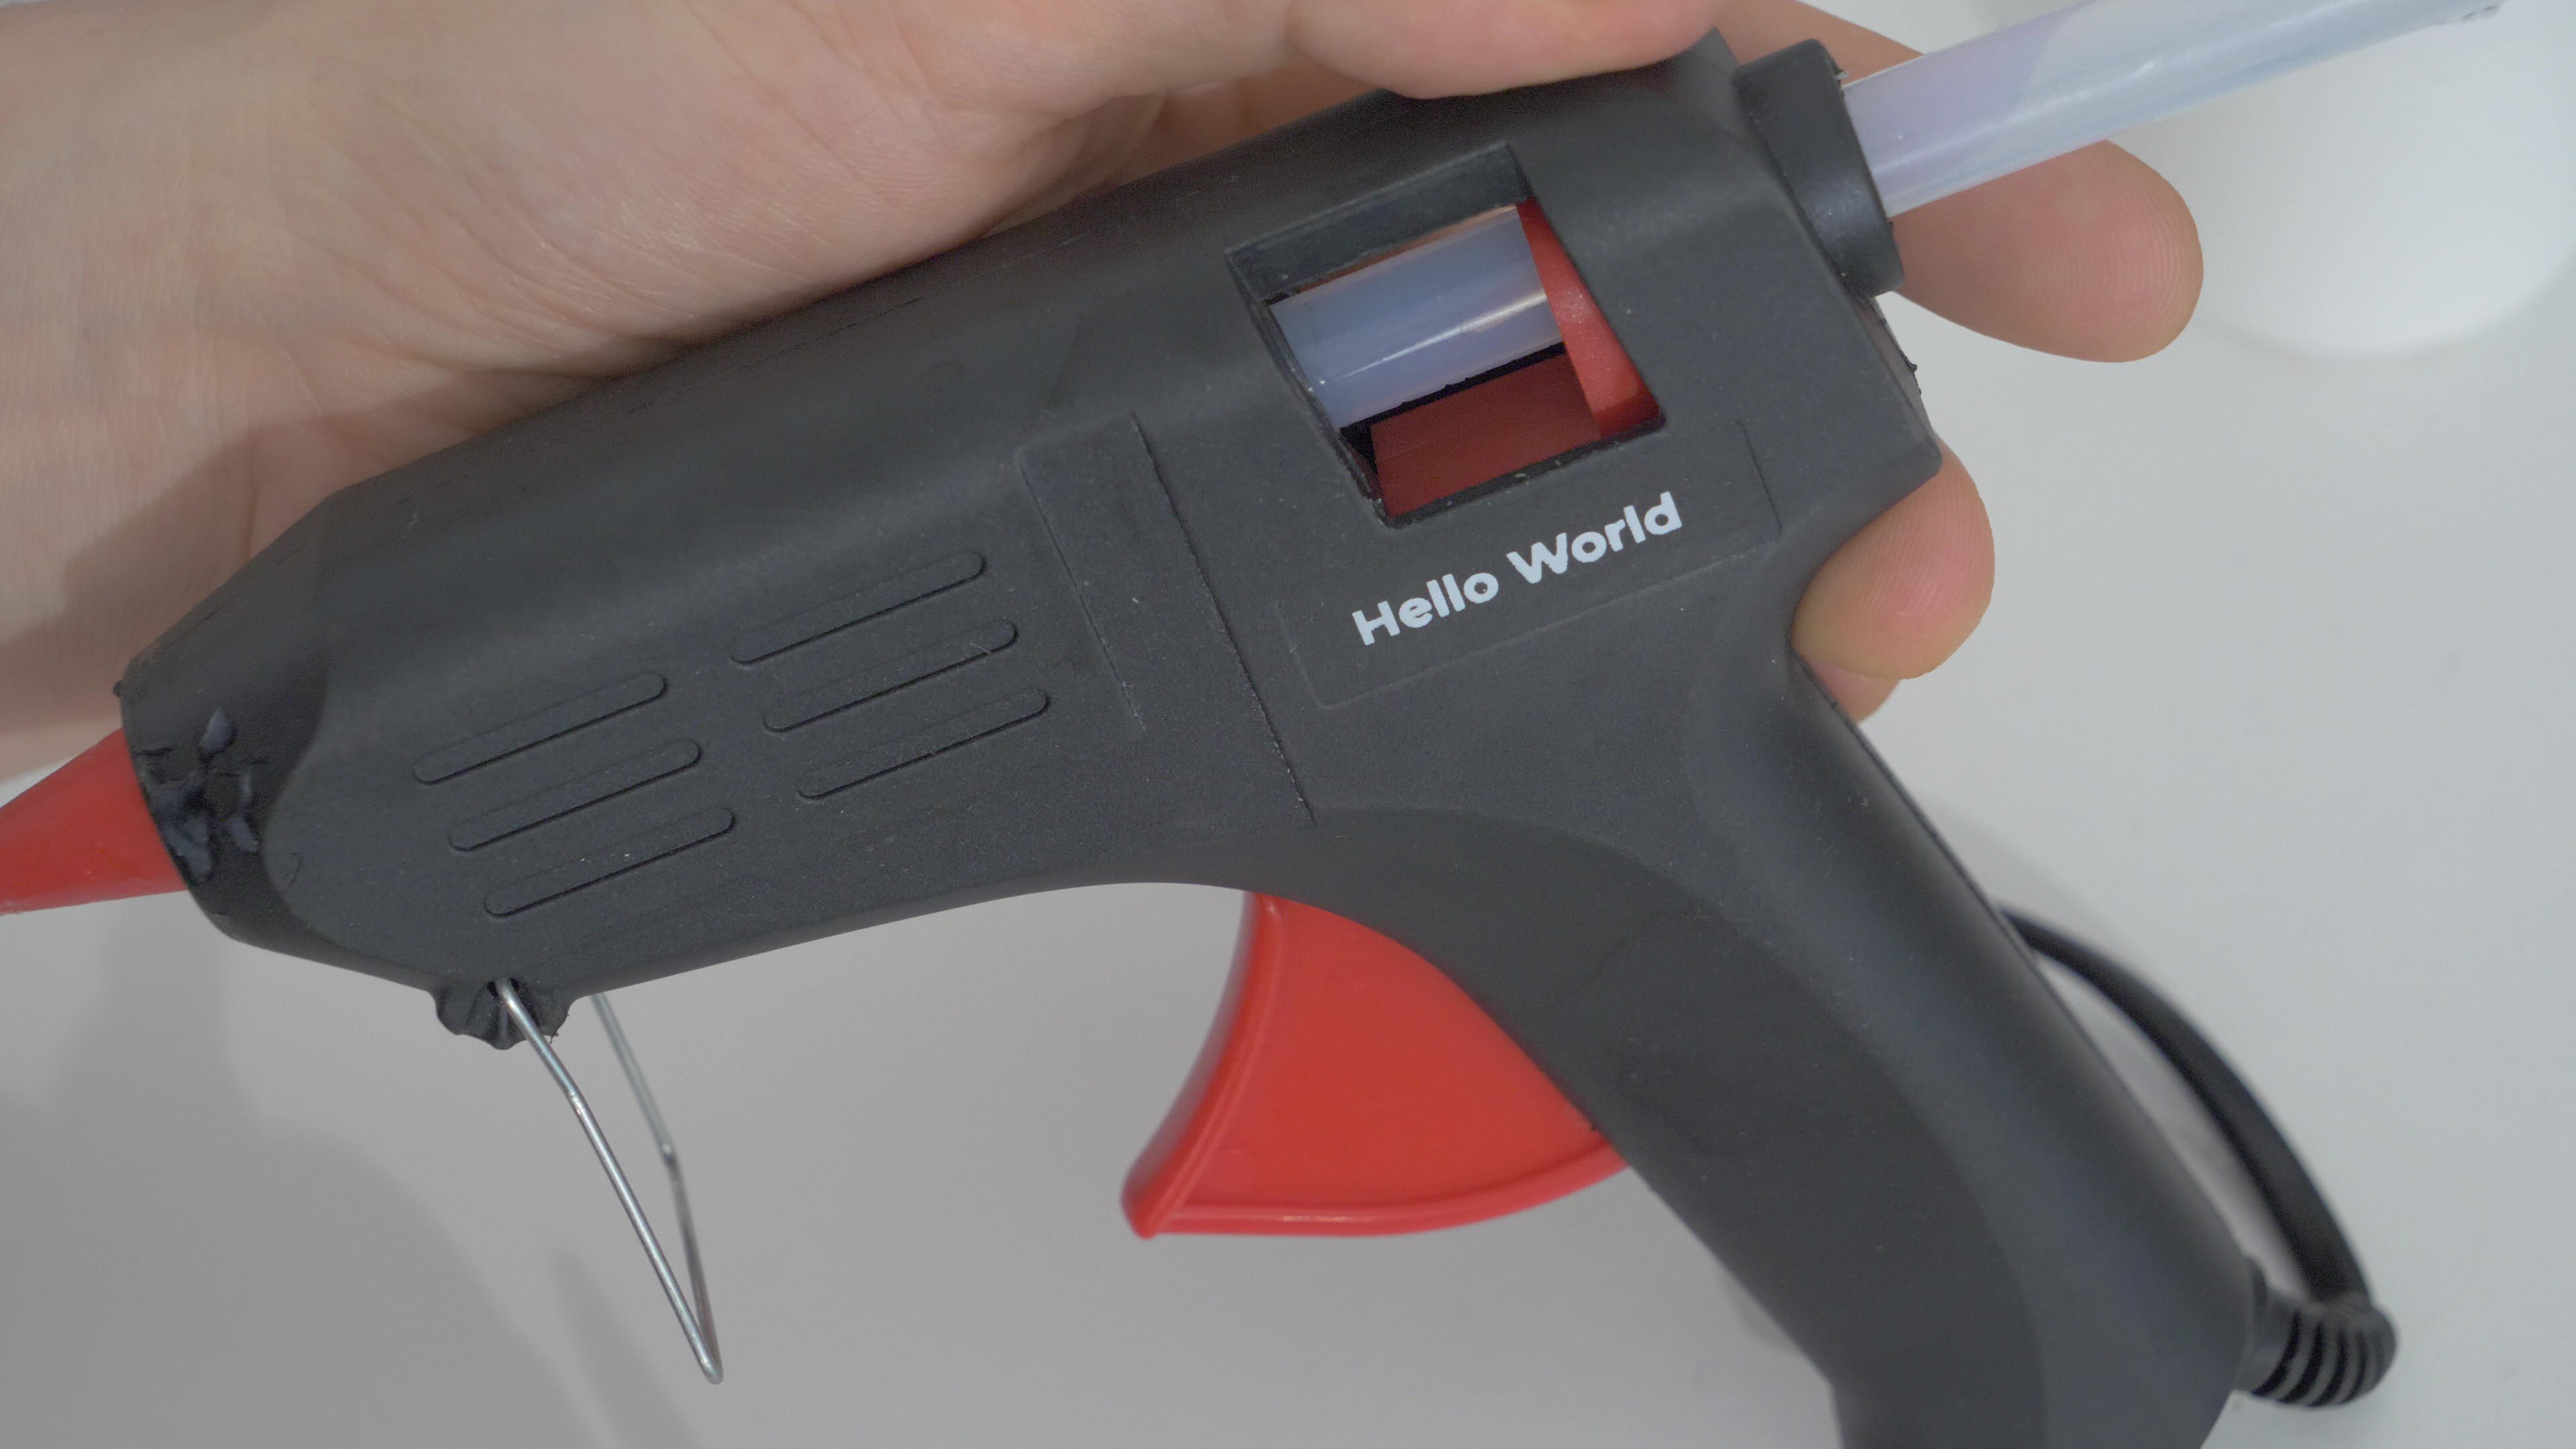
10/09/2023 at 14:55 • 0 commentsDid another test print. "Hello world" exposed with a transparency film onto the case of a hot glue gun.
![]()
![]()
![]()
![]()
The exposure time was 18 minutes. Slightly longer than usual, i am still experimenting with the timing. However such a long time was not necessary, the text came out slightly overexposed - the letters are a bit thicker than in the exposure mask, because the longer you expose, the more the edges of the artwork expand. Staying around the 10 minute mark seems to be optimal. The artwork expansion could also be accounted for in the design stage.
-
Improving the curing process
10/08/2023 at 23:30 • 0 commentsIt would be great if the curing process could be done quicker than 10-15 minutes or so, which it currently takes.
And the curing of UV paint can indeed be accelerated. With some heat and airflow, to be specific. I did try to spread some UV paint on test surfaces and exposed it under UV light with no mask, and a hot air gun set to temperature around 150C. And it did harden much quicker, which was to be expected, as I have already known that soldermask curing can be accelerated with heat (i learned that fact when I was using the UV soldermask for PCB repairs).
However the problem here is that the printing surface is covered with the exposure mask. Therefore "injecting" hot air under the mask could be challenging, but maybe it won't be impossible. Maybe some optics could be used to project the artwork from further away, leaving enough space for fans and heating elements.
Such paint curing acceleration system is something I should think about in the context of developing an "advanced" version of the printing machine (with the exposure mask displayed on an electronic screen).
-
BOM
10/08/2023 at 23:11 • 0 commentsThe prototype is quite inexpensive:
396nm 5W UV LED $5 MT3608 Step-Up converter $2 1W 1Ohm resistor $0.1 USB or barrel jack connector $1 45x45x10mm heatsink $3 3D printed case ~$2 (filament) Magnets $1 total $14.1 It should be possible to build such a device spending less than $15 (if you have your own 3D printer, however an improvised case made out of cardboard or other materials could also work).
There is an added cost for each print, because of the need of printing a transparency film for the exposure mask, but that shouldn't cost a lot.
The UV paint/soldermask is obviously also needed, but it is inexpensive and lasts for long. A 10ml container costs around $2-$5. There are various suppliers, i am using "Mechanic UV Solder Mask" which is available in various colors. Such paint is often available in stores which supply equipment for electronic repair shops, as it is often used to repair soldermask layers (but it is not used too much for actual printing!)
-
Powering the LED
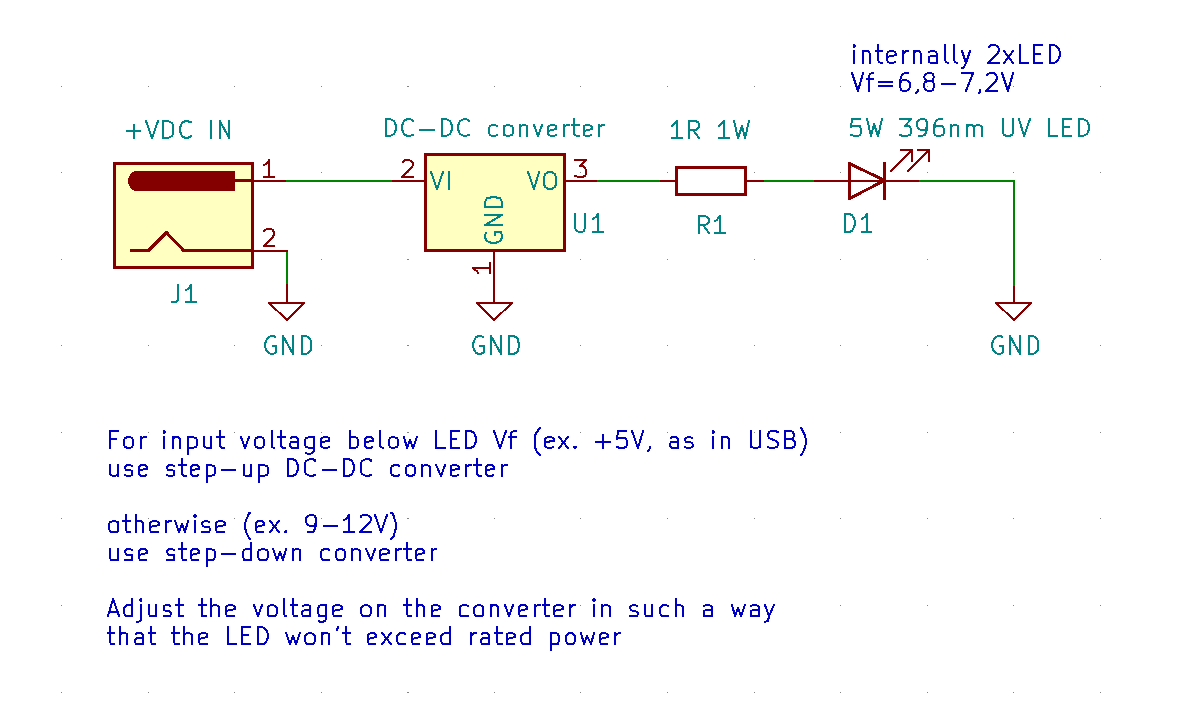
10/08/2023 at 22:56 • 0 commentsThe power circuit is pretty simple in the current prototype:
![]()
Obviously the LED needs to have some way of current limiting. Instead of using more sophisticated control circuit, I decided to just use an off-the-shelf DC-DC converter module to match the voltage closely to the LED forward voltage, with a very small value resistor in series to limit the current (1 Ohm in this case). There will be around 0,5W loss on the resistor or so, but I find such value to be acceptable.
There is no dimming, PWM control or other functionalities, but that's not needed, as we always want to expose the image at the full power.
The circuit can use either step-down or step-up converters, depending on the power source (ex. 5V USB would need a step-up converter, while 12V PSU would need a step-down converter). An universal step-up/down would also likely be suitable (you can even use an adjustable bench PSU, but that would definitely be a less compact solution).
-
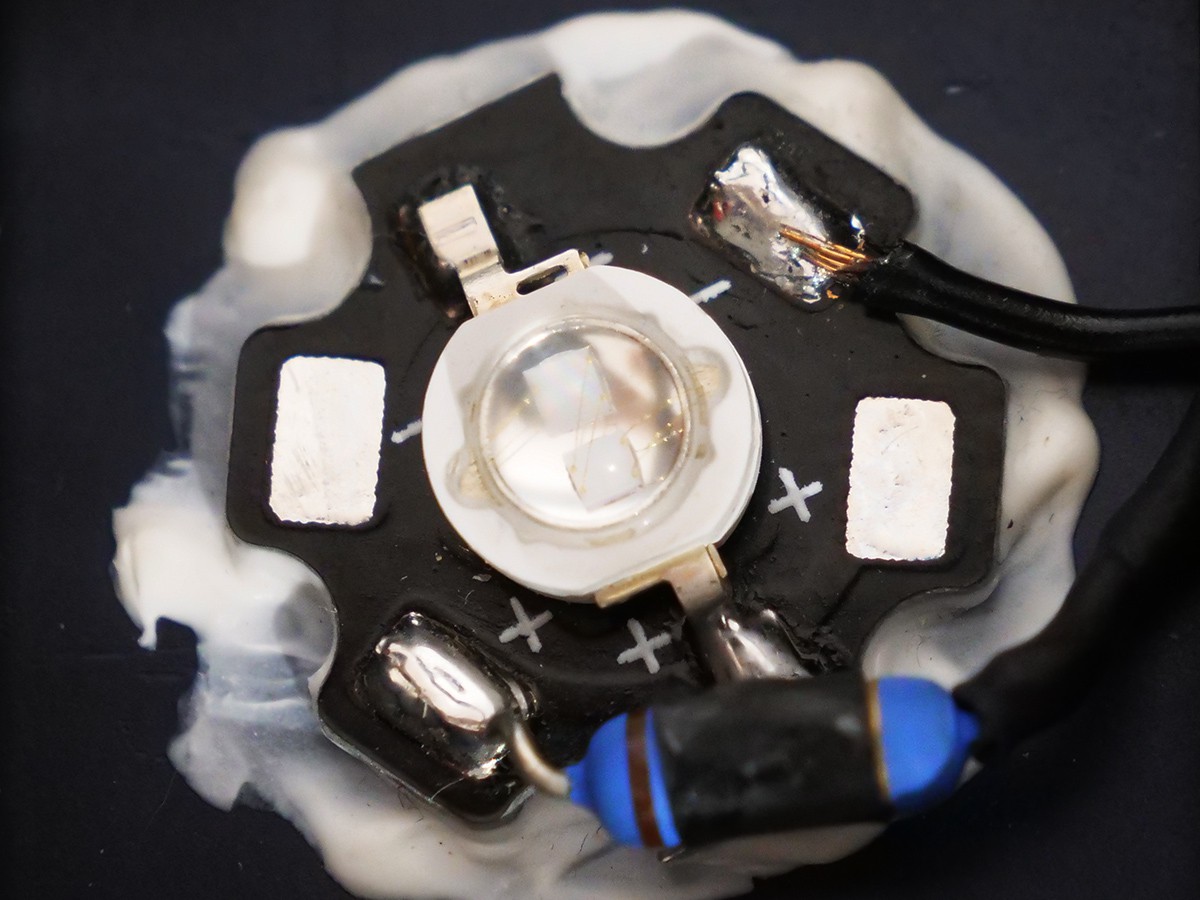
LED choice
10/08/2023 at 22:43 • 0 commentsI wanted to use a sharp UV point light source, so after going through various options I chose a module named EP-U4545R-A3_PCB. It is an LED already soldered to a star-type heatspreader. The specification is as follows:
- 5W power
- wavelength in 390-410nm range (396nm as measured by the seller)
- Vf 6,8-7,2V (two LEDs in single package)
- 120 degree lens
![]()
The wavelength is suitable for the UV soldermask/paint that I am using. 120 degree lens allows to cover a wide area with the UV light, minimizing potential hot-spots.
5W is also quite a lot of power for a small LED module like this one, therefore an additional heatsink must also be attached to the metal heatspreader. I glued one with some typical single-part white heatsink glue.
-
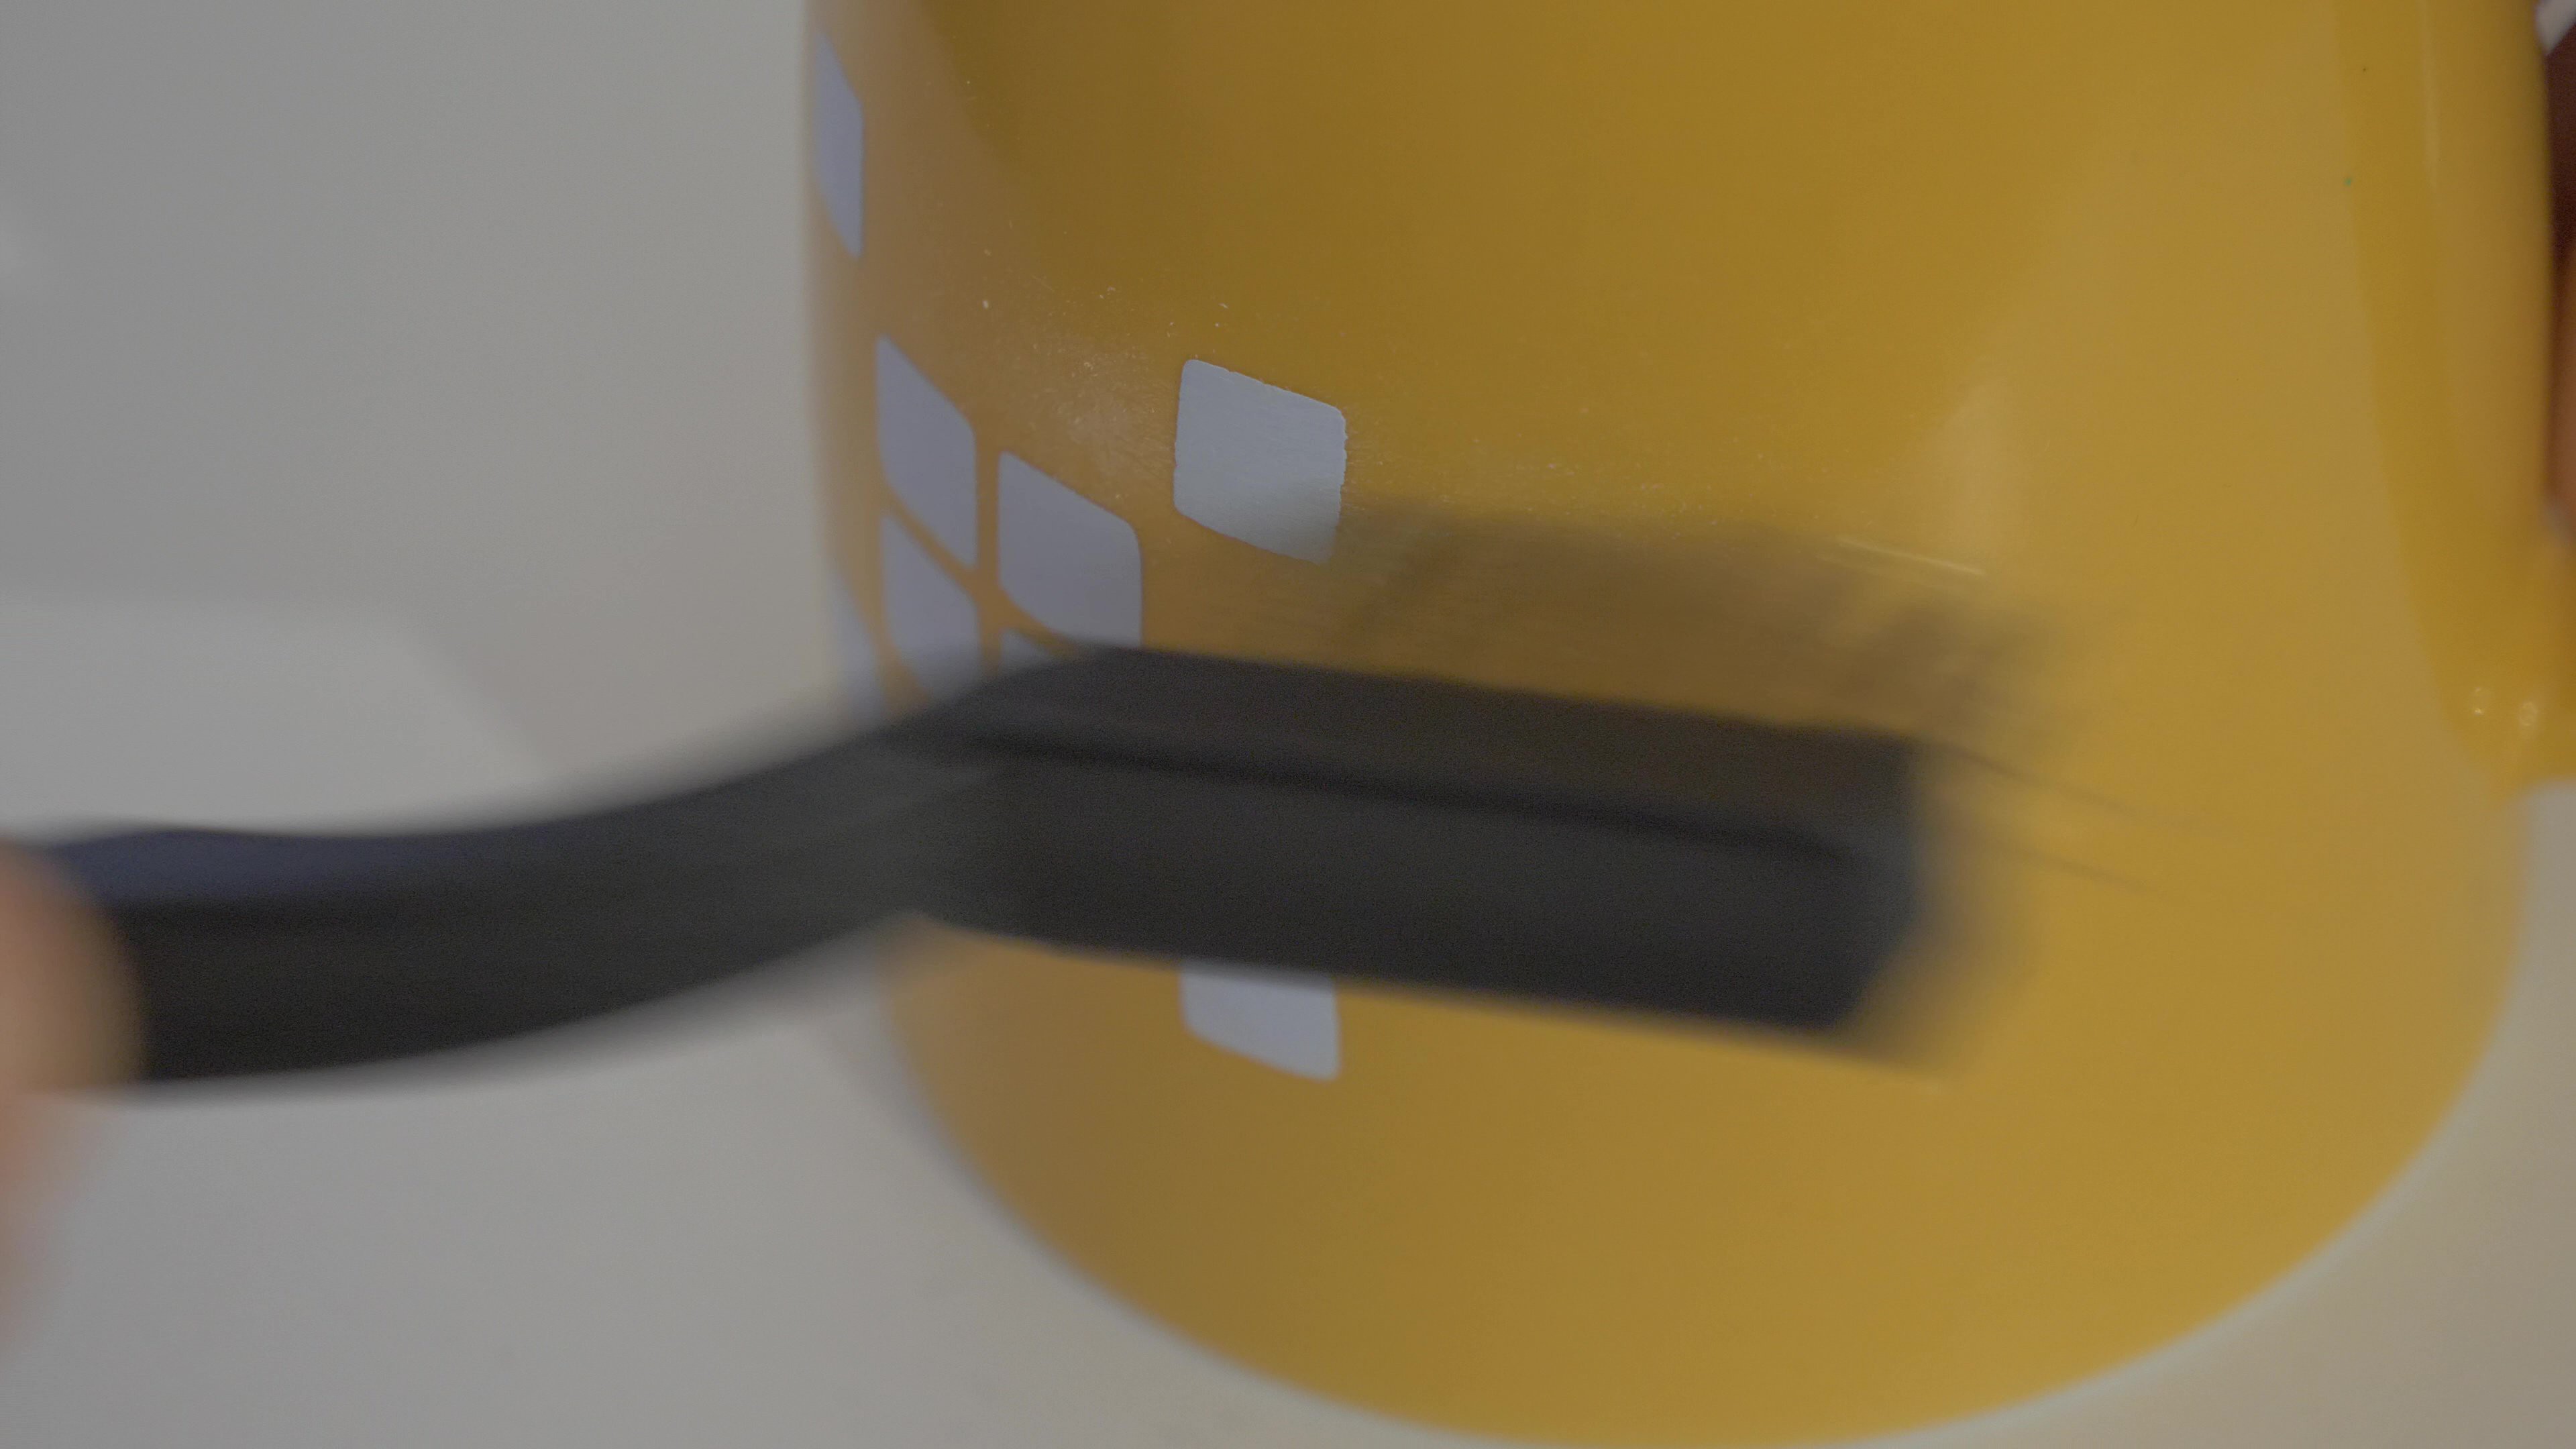
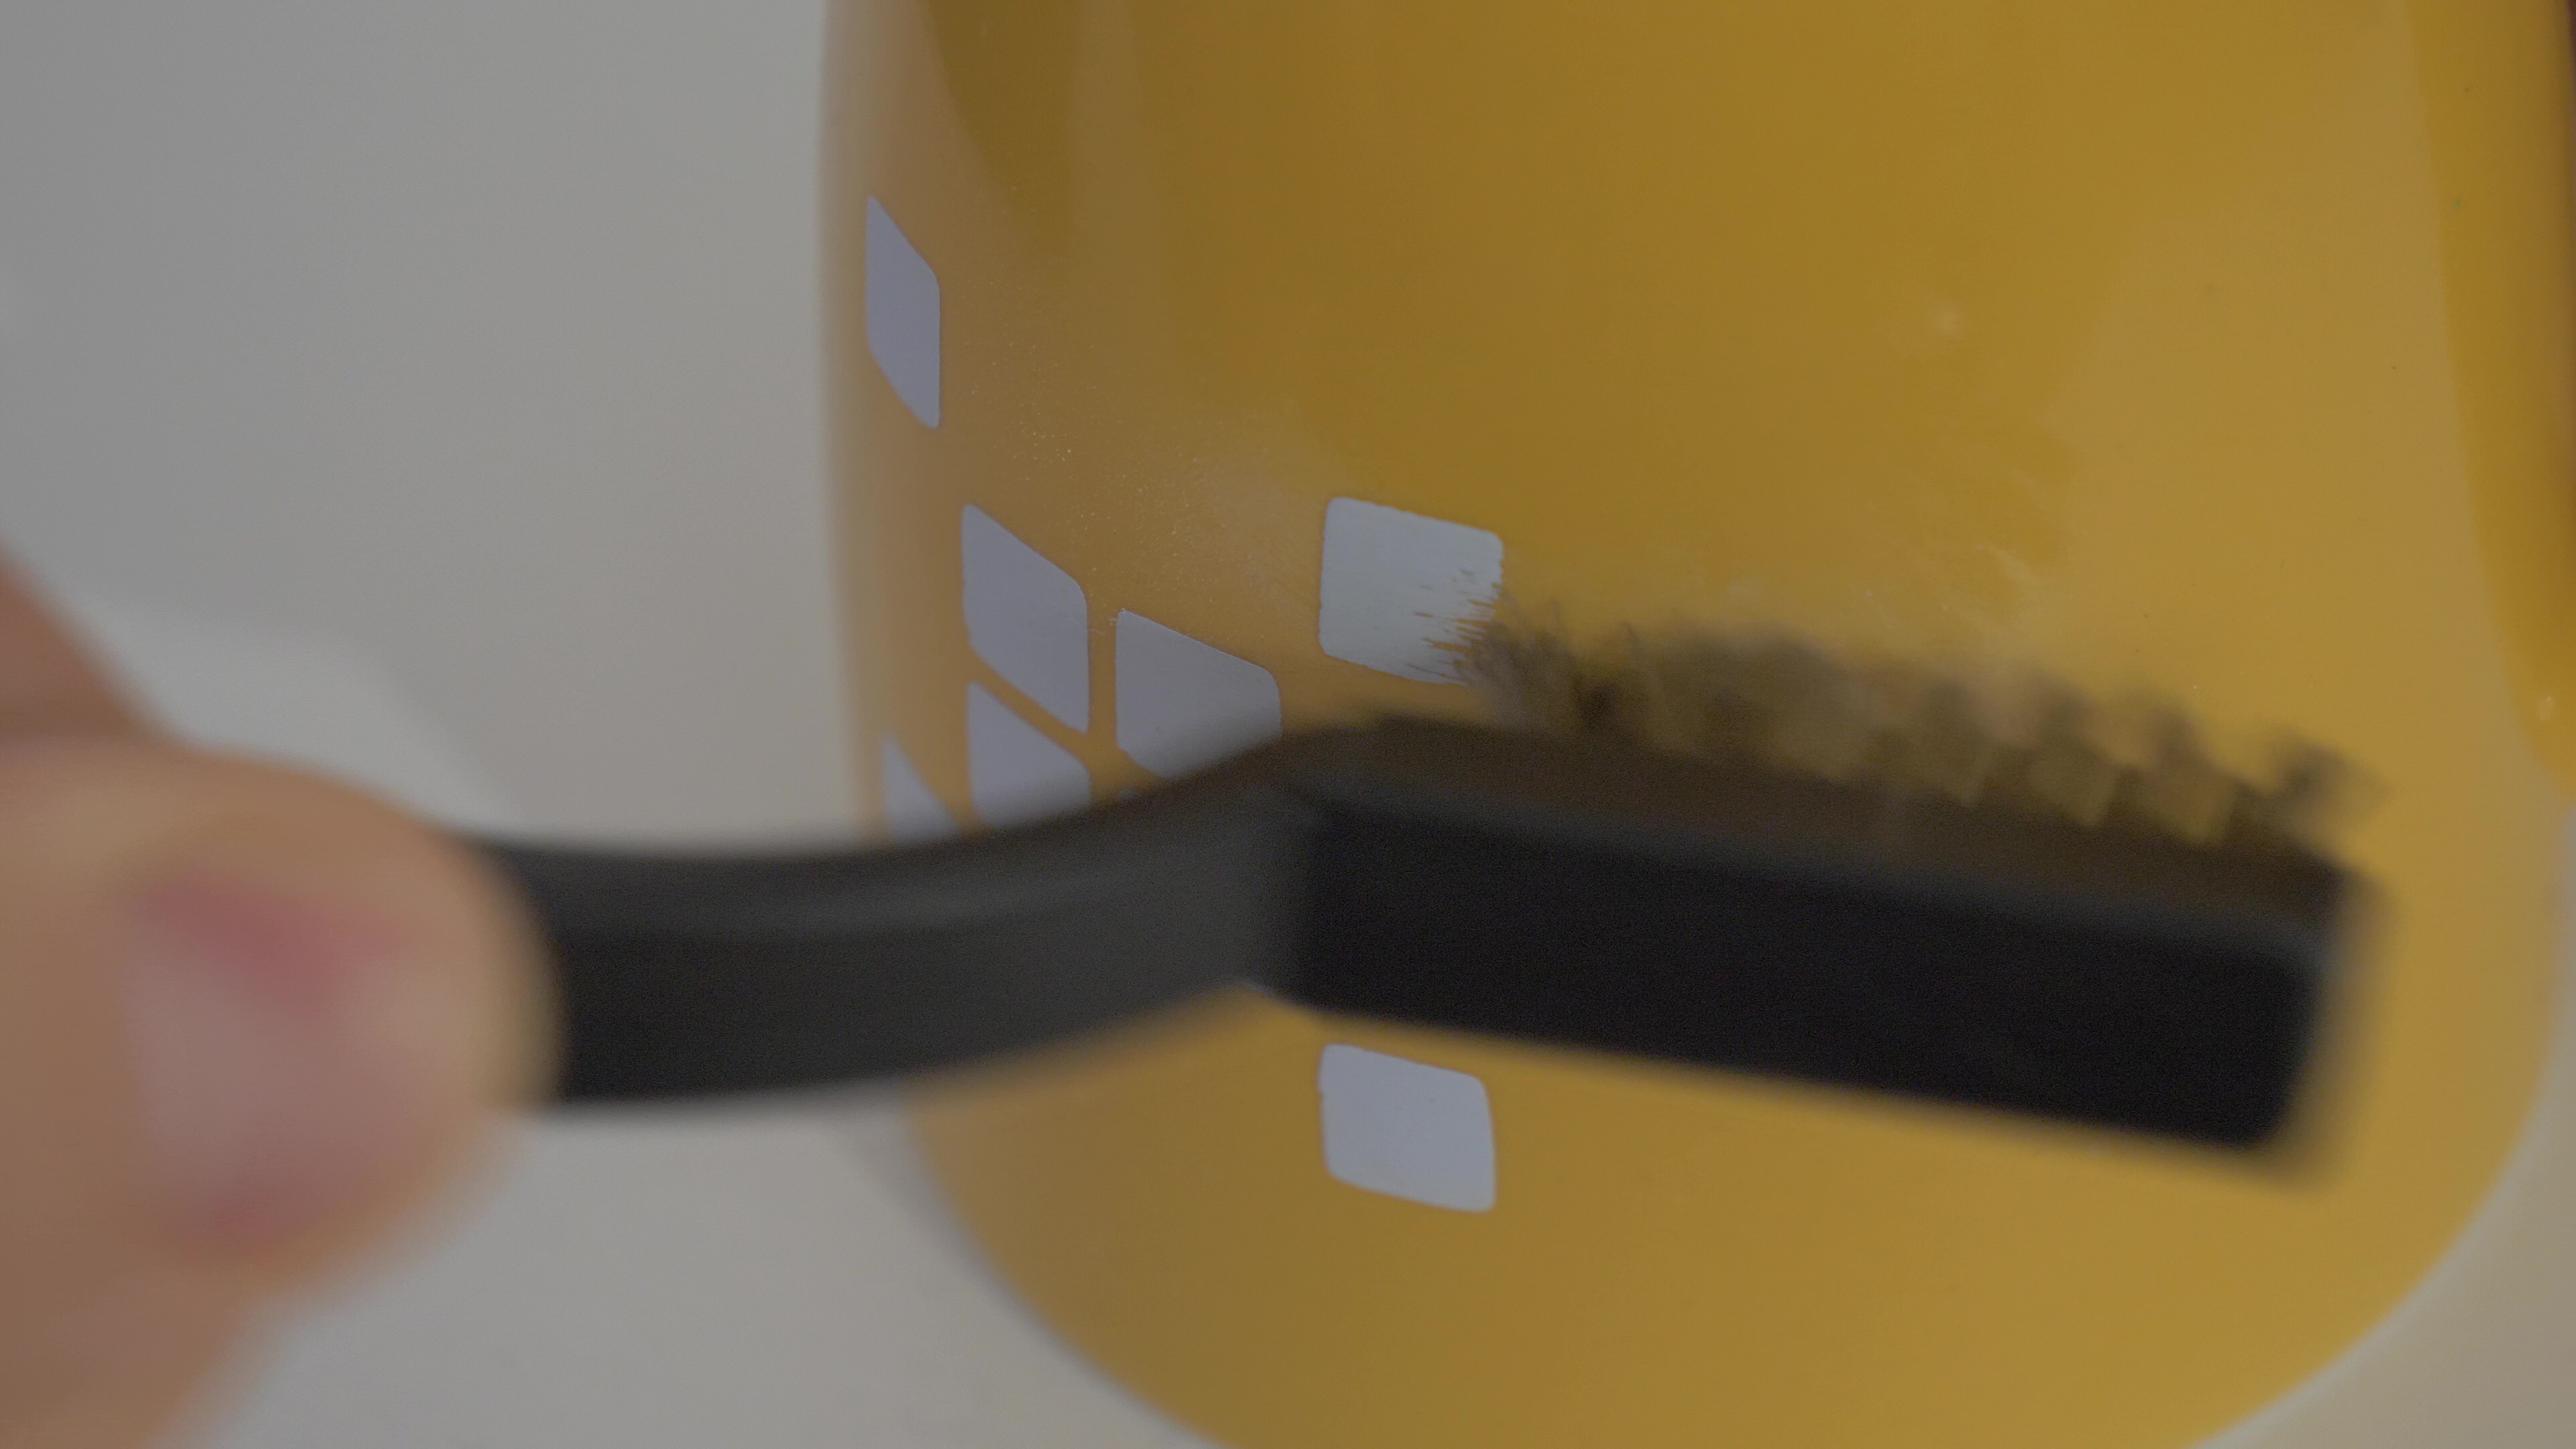
Testing print durability
10/08/2023 at 22:09 • 0 commentsI tested the print durability by scrubbing a ceramic cup with a set of 3 brushes: nylon, brass and steel.
The nylon brush left the print intact.
![]()
Nylon brush The print started to come off when I was using the brass brush, however the process was gradual. The print was not flaking off. First some scratches were created on the surface, turning pieces of the paint to the dust, then the surface of the mug was slowly being revealed.
![]()
![]()
Brass brush
Steel brush worked similairly to the brass brush.![]()
Steel brush ![]()
Effects of using a steel brush (around 30 seconds of scrubbing) The test shows that the print remains fine when it comes into contact with plastic surfaces, but it can be scratched with metal tools. That was to be expected, and it should be kept in mind that if the print was on a plastic surface, the plastic surface would also get damaged by metal tools. So the durability of the print seems to be fine for normal use cases.
Also, because ceramic materials are hard, it is actually possible to remove the print without damaging the original material, and replace the artwork with another one.
-
Video overview
08/08/2023 at 12:52 • 0 commentsHere is a short video which shows the entire printing process:
-
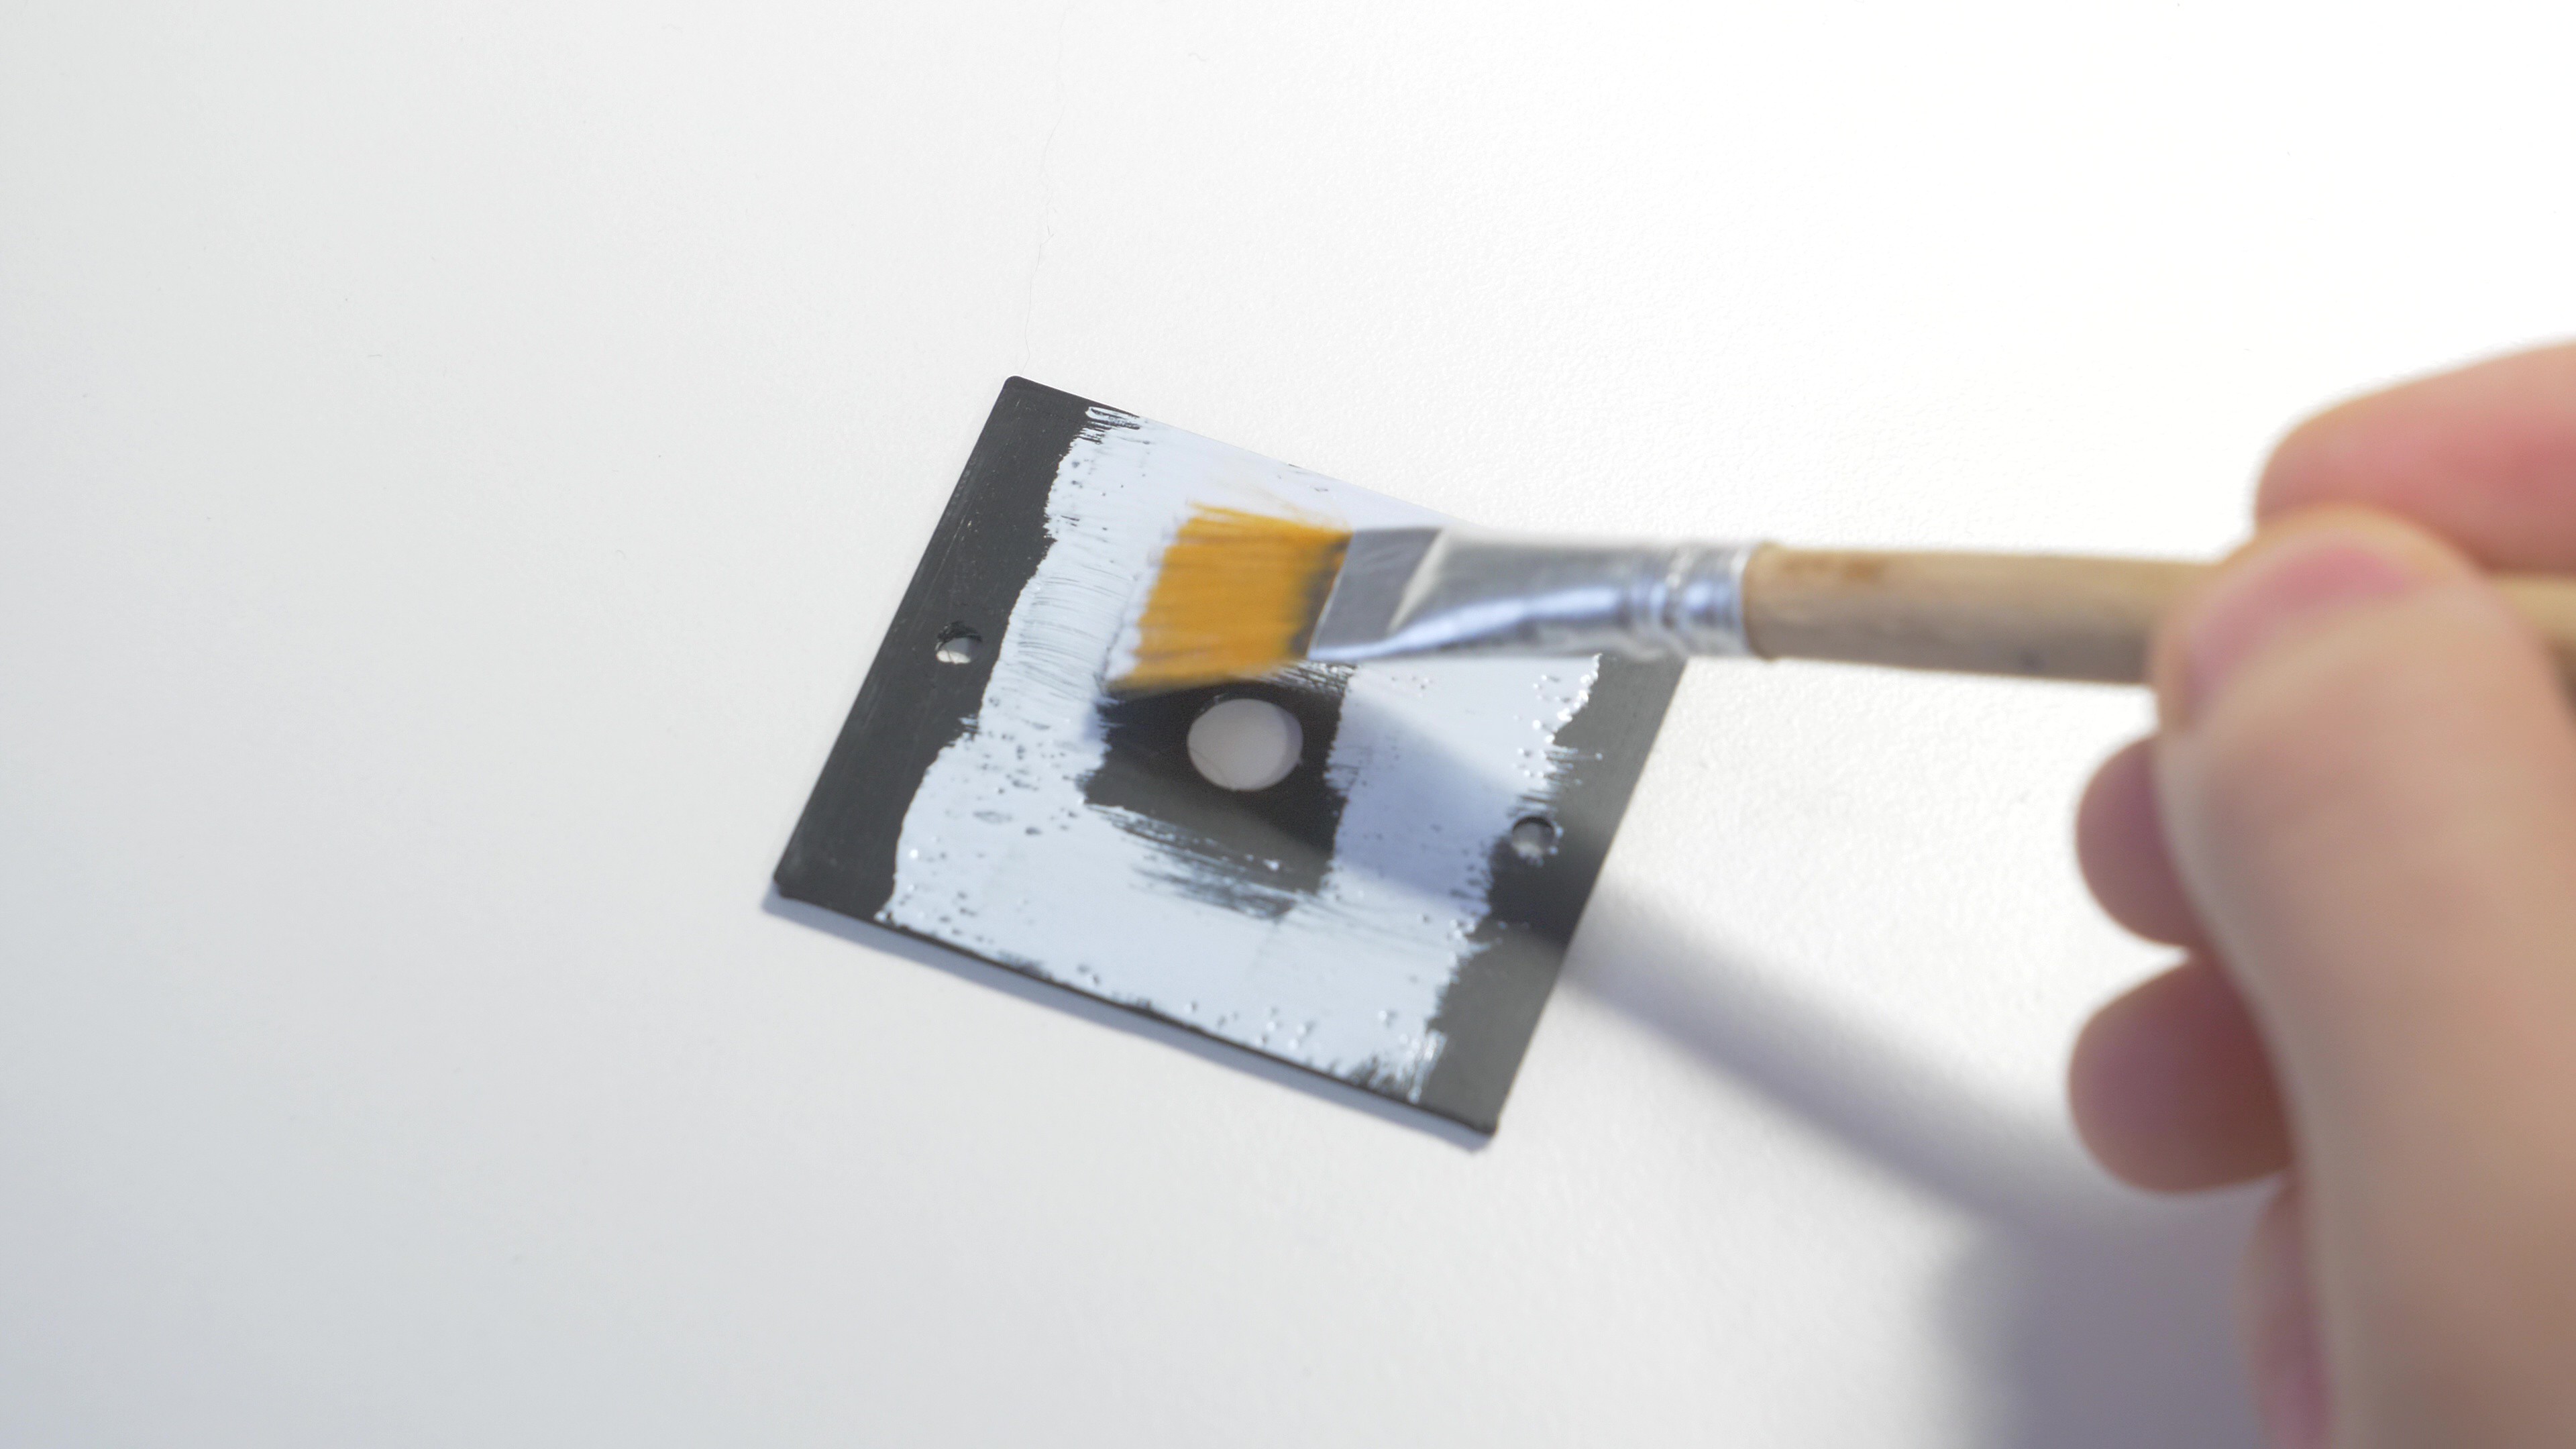
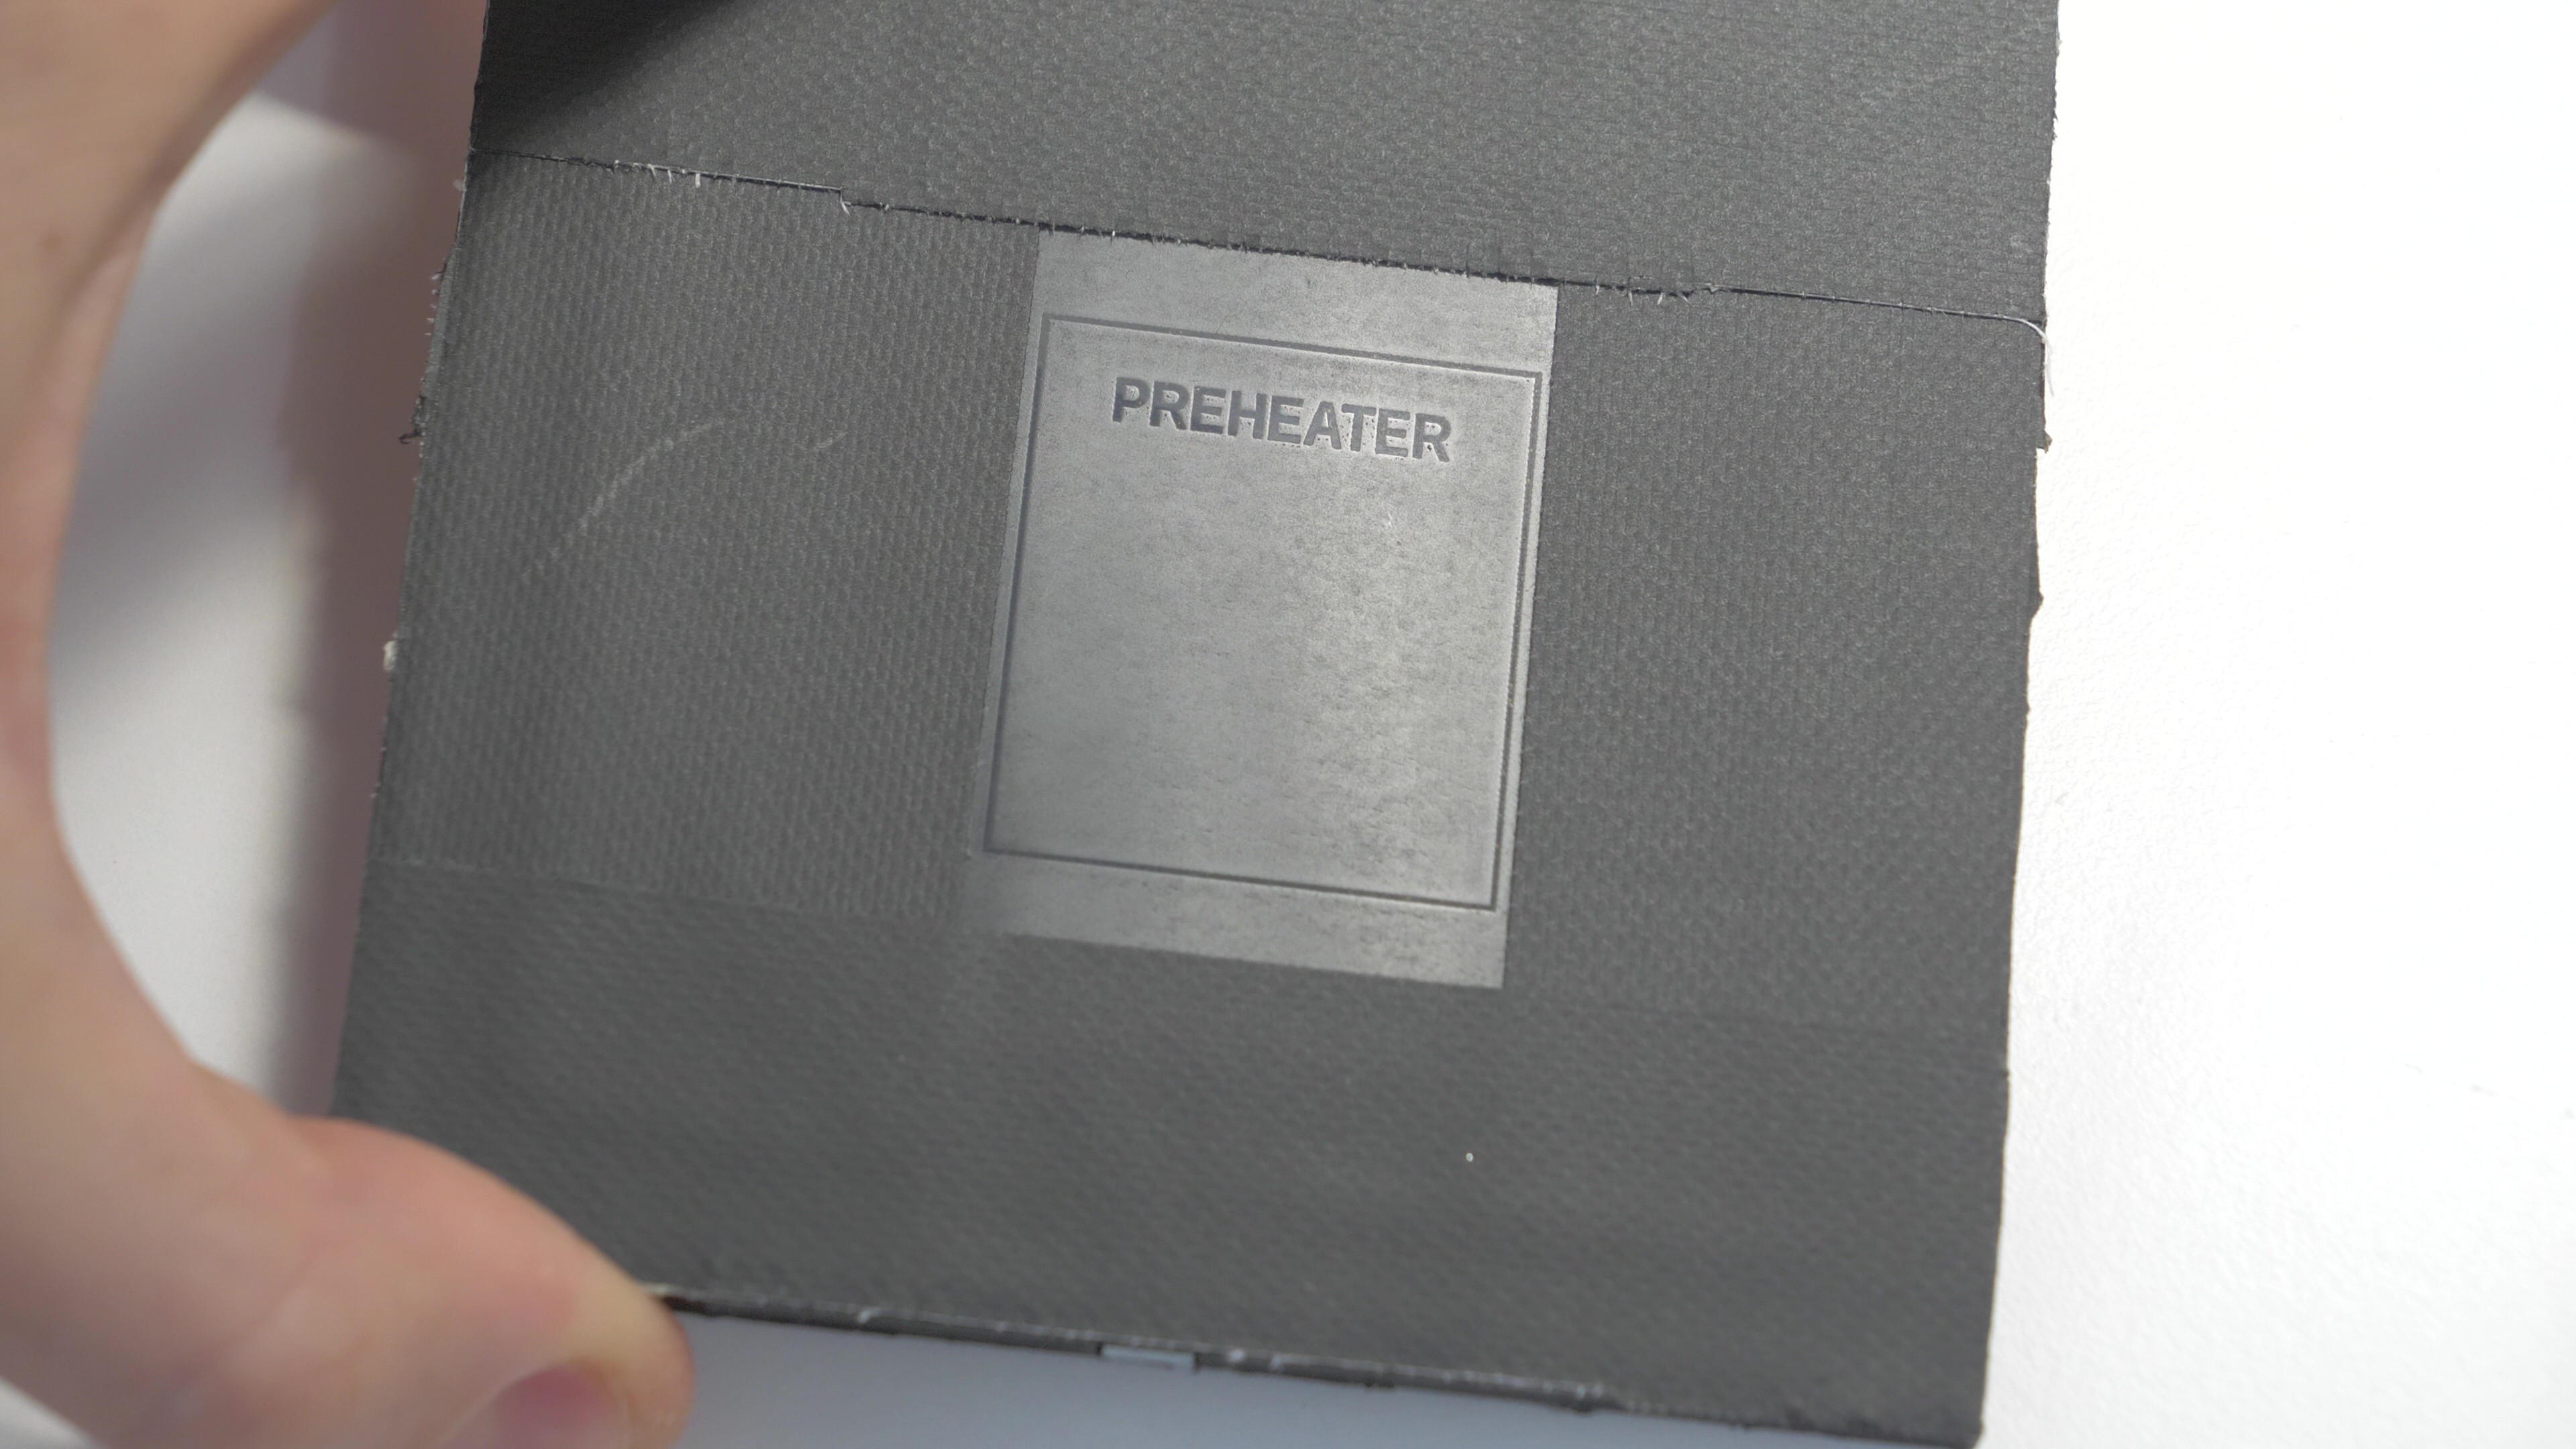
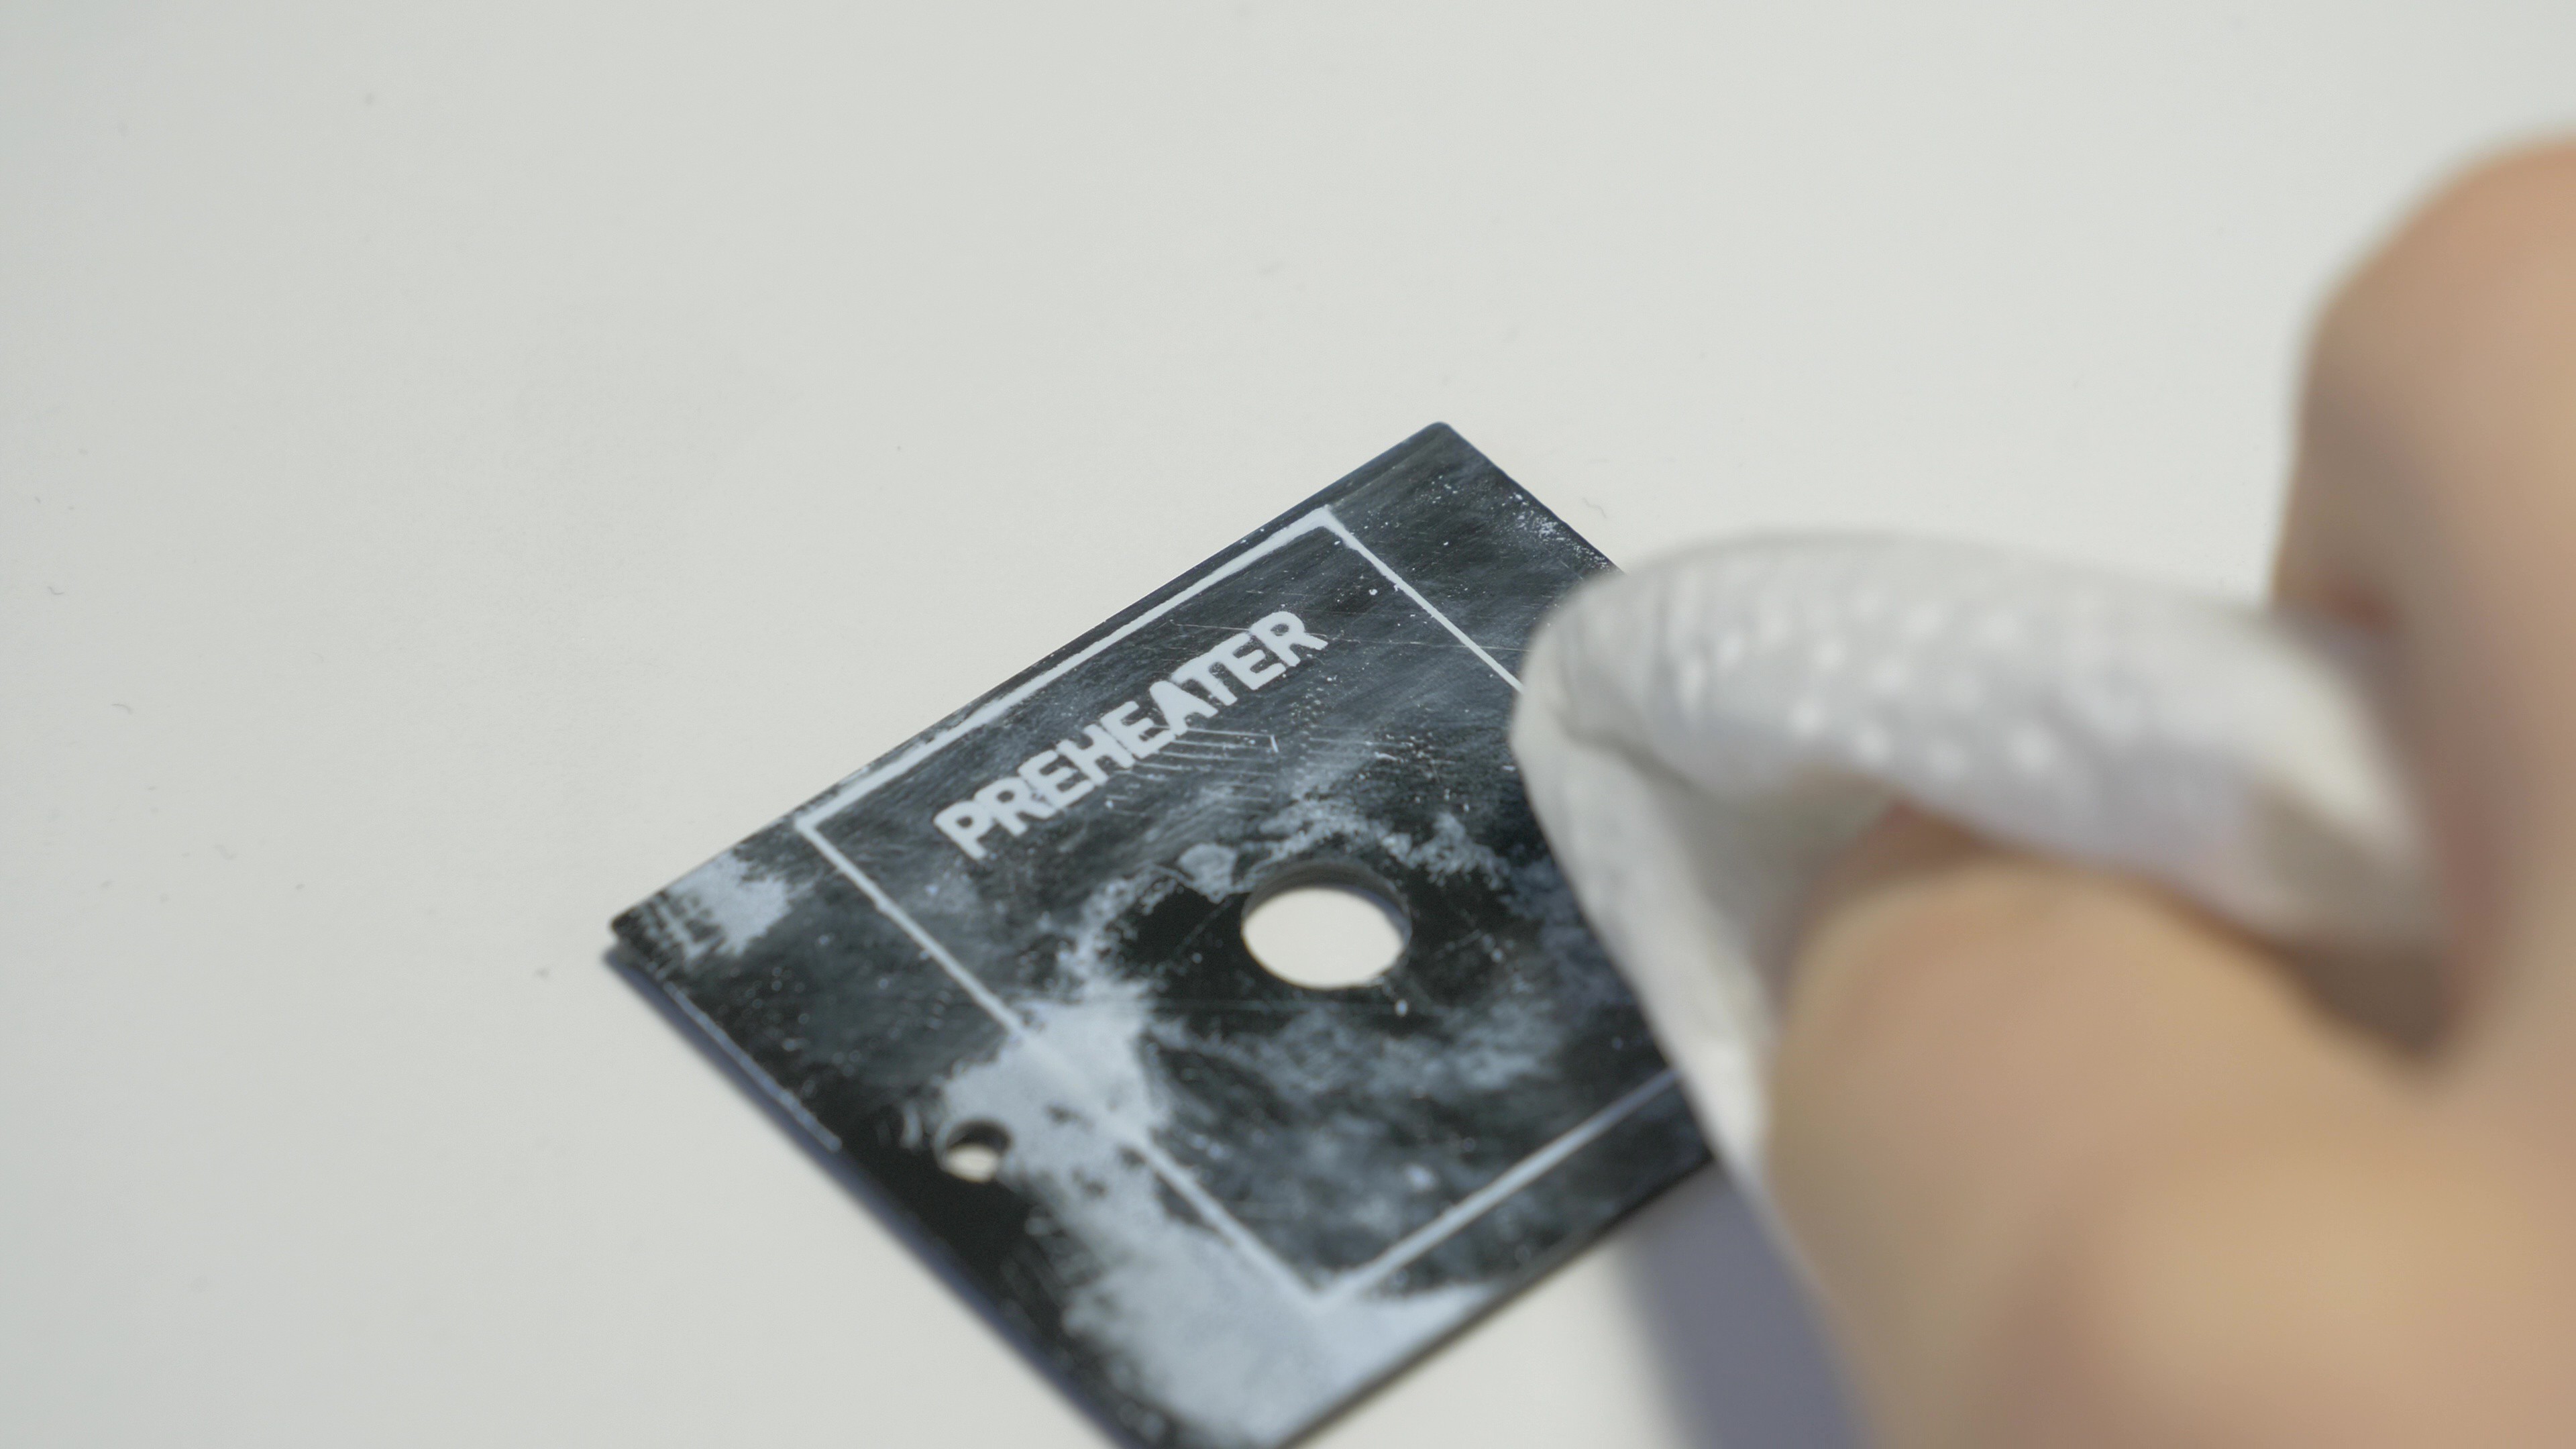
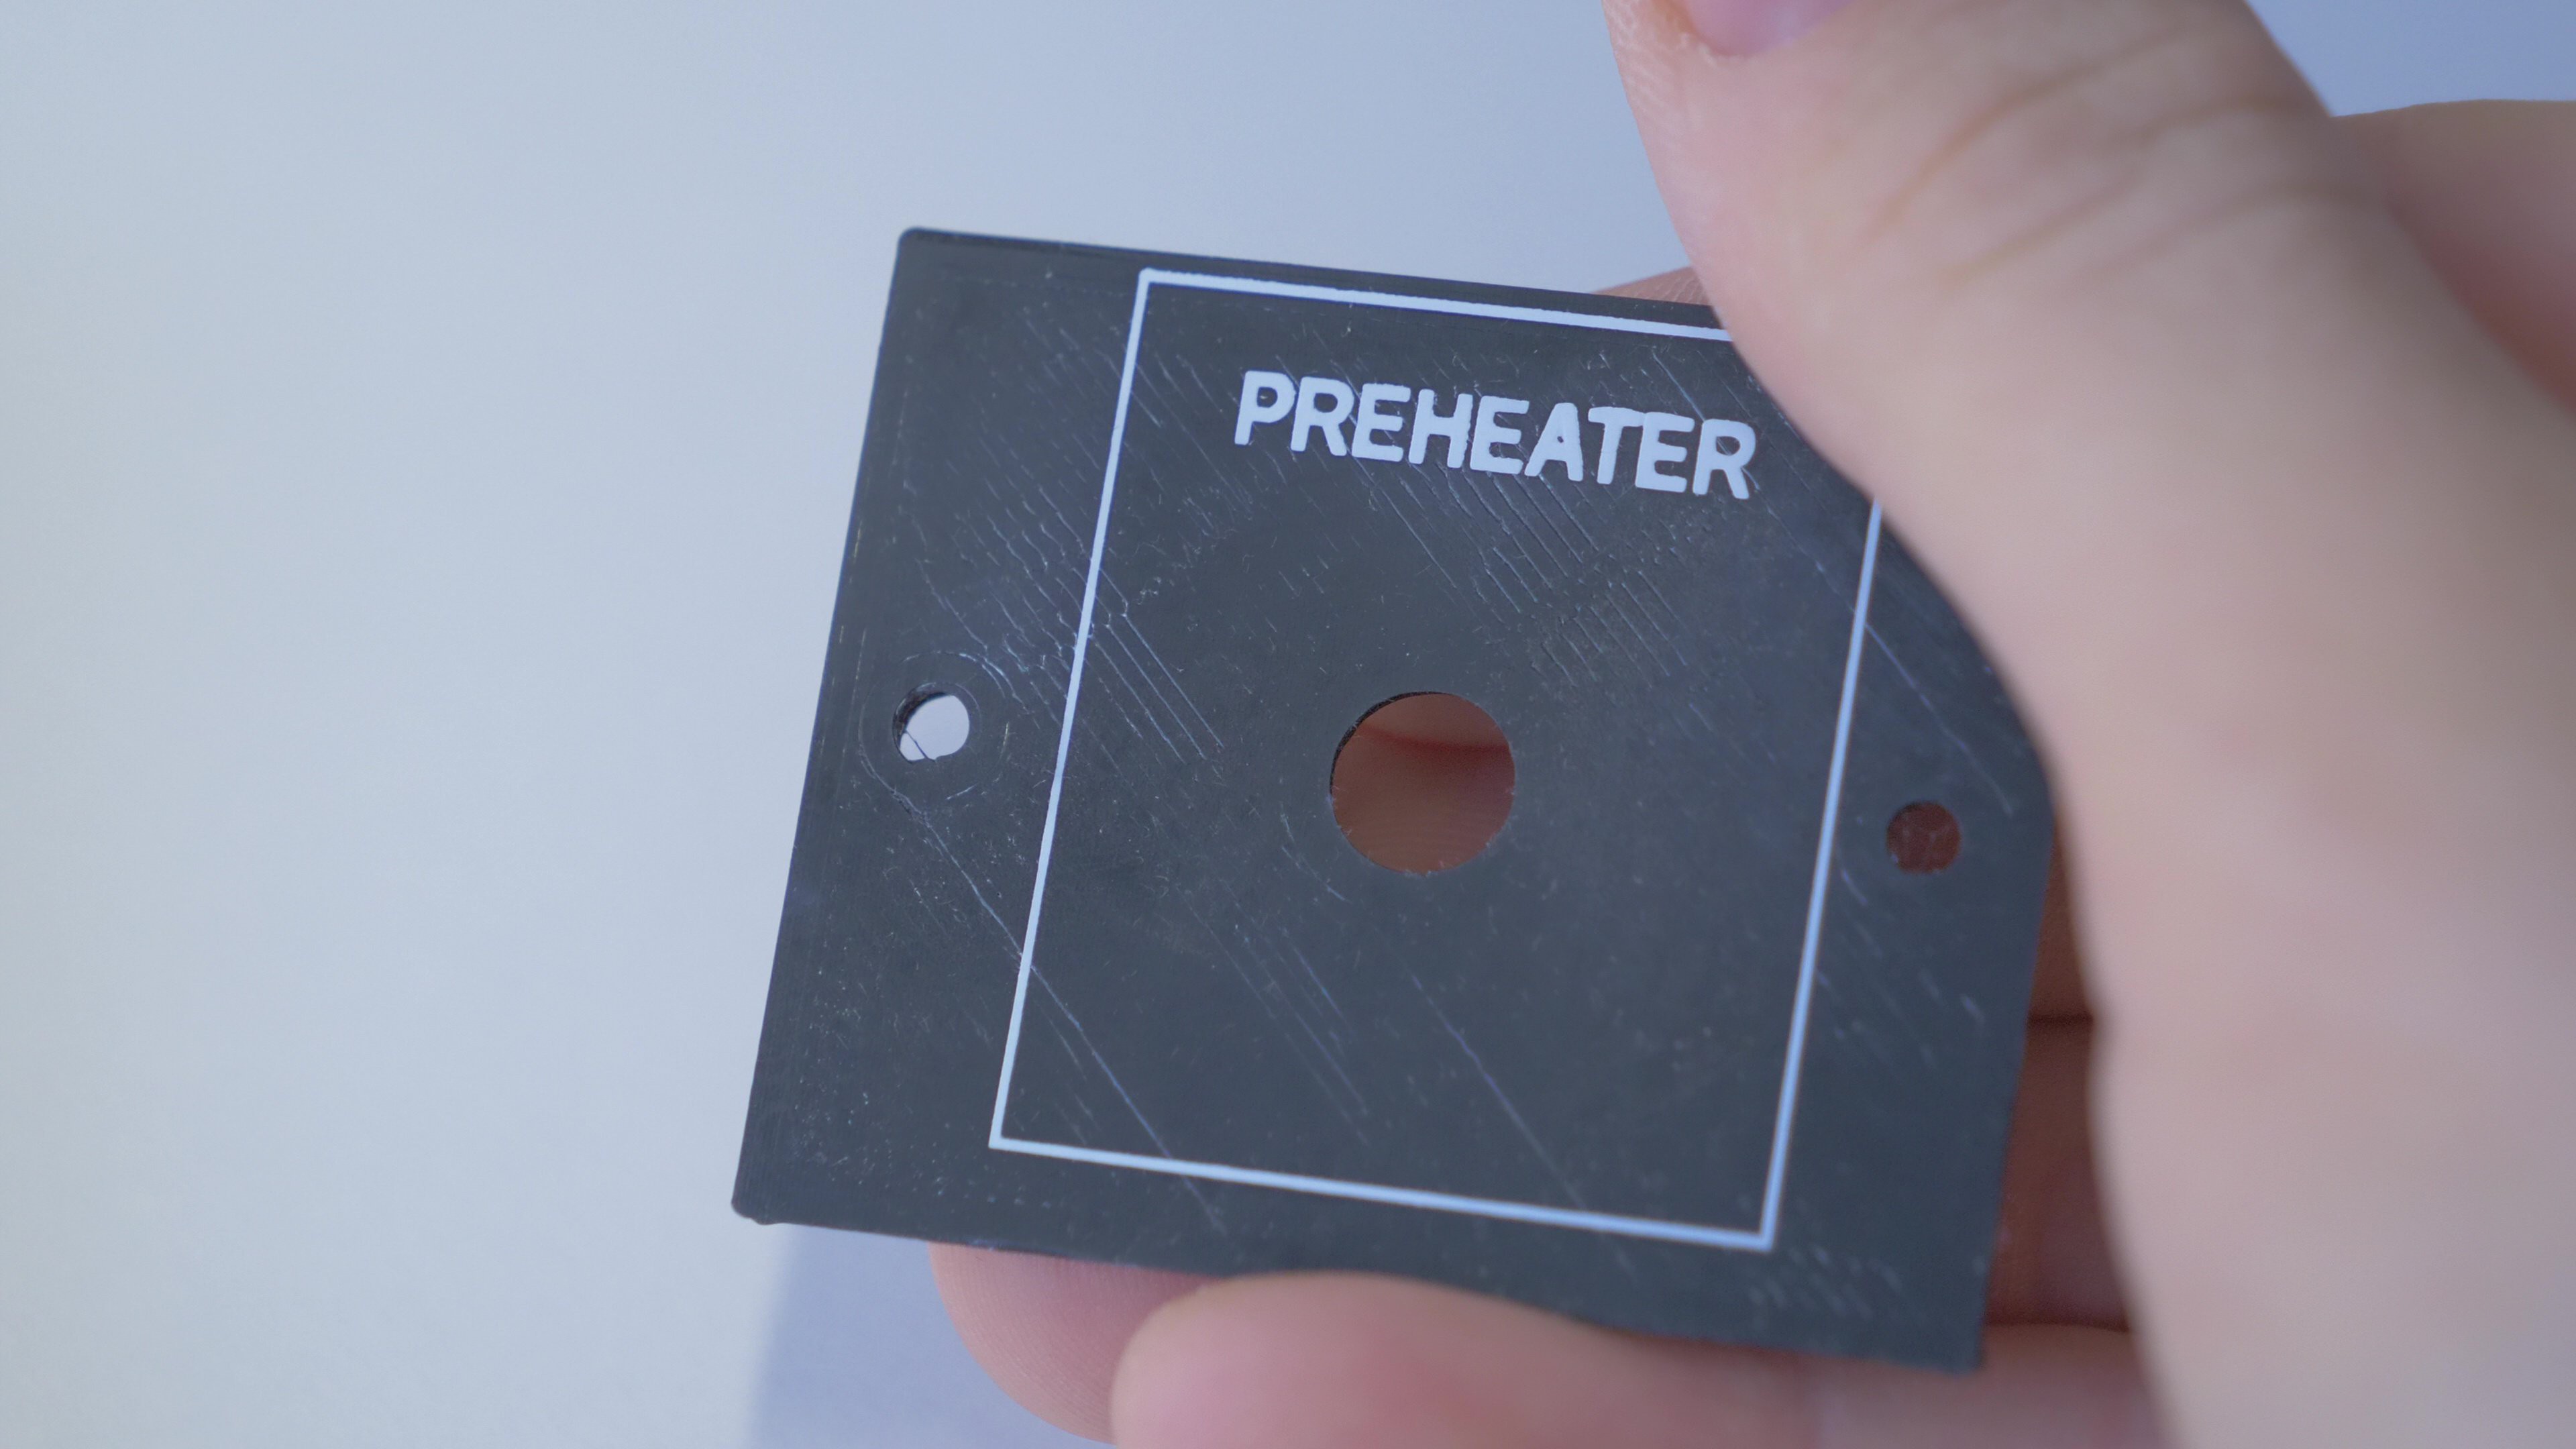
Printing on 3D prints
08/08/2023 at 12:01 • 0 commentsHere is a test print on a 3D-printed PETG panel:
I started by coating the panel with some UV paint.
![]()
This is the mask that will be used:
![]()
I exposed the mask for 25 minutes:
![]()
Cleaning-up the unexposed paint:
![]()
![]()
The letters and lines came out pretty thick, that may mean that 25 minutes might have been slightly too long and shorter exposure time would be fine.
-
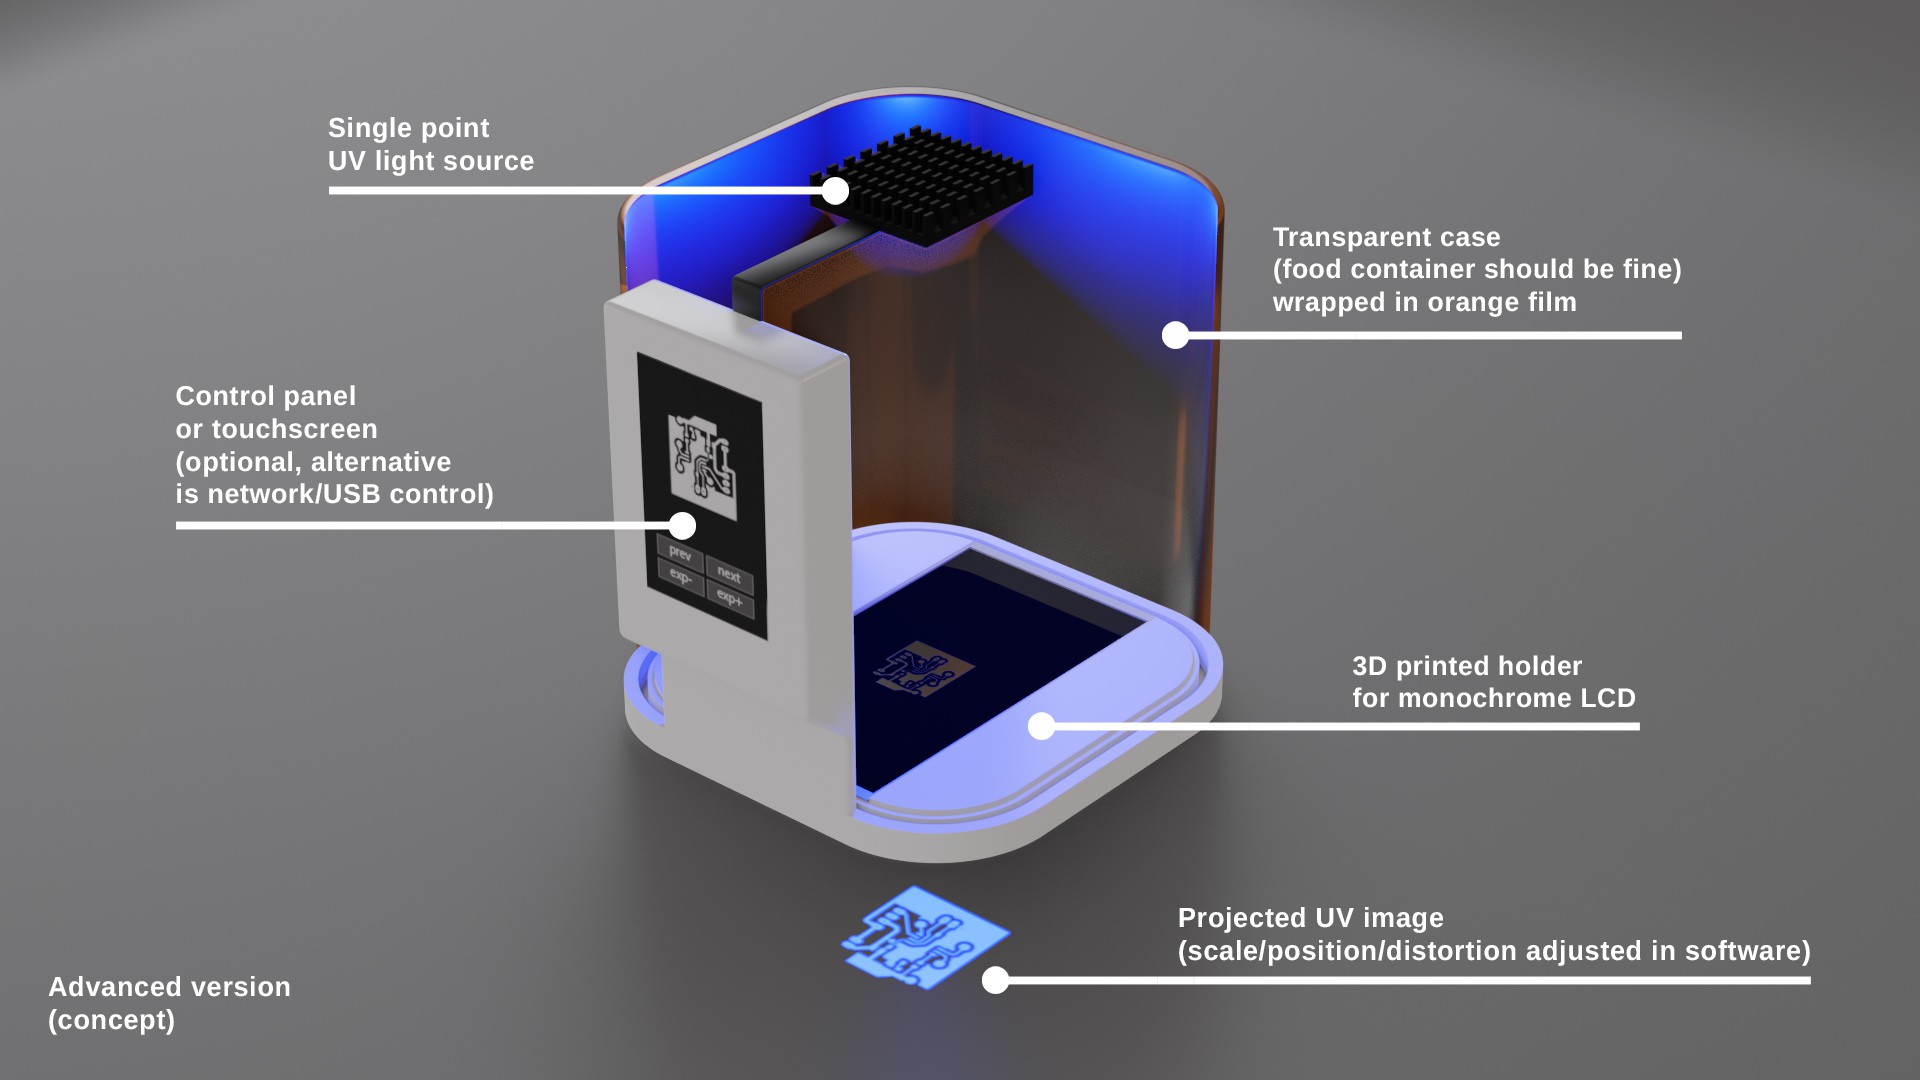
Concept of "Advanced" version
08/07/2023 at 18:02 • 0 commentsAn advanced version of this tool could have a mono LCD screen instead of the transparency film.
Below is a concept art:
![]()
-
Building a prototype
08/07/2023 at 18:01 • 0 comments![]()
First version of this tool consists of two 3D-printed parts: the top part holds the heatsink and UV LED, and provides some distance to the mask which will be placed in the bottom.
The distance is needed to have the light spread evenly, as I'm using only a single relatively high-powered LED, as opposed to an array of LEDs. A single LED seems to be a much cheaper option than so-called "parallel UV light sources", which consists of multiple LEDs and additional optics.
The bottom part is a simple square frame with embedded magnets. The top part also has a pair of magnets, and the mask can be clamped between those two parts.
STL files of the design are attached in the project repository.
UV projection printer for PCBs and item marking
This tool can project UV mask and cure paint on various objects, including PCB prototypes, 3D prints, panels and household items