-
Seats, again <sigh>
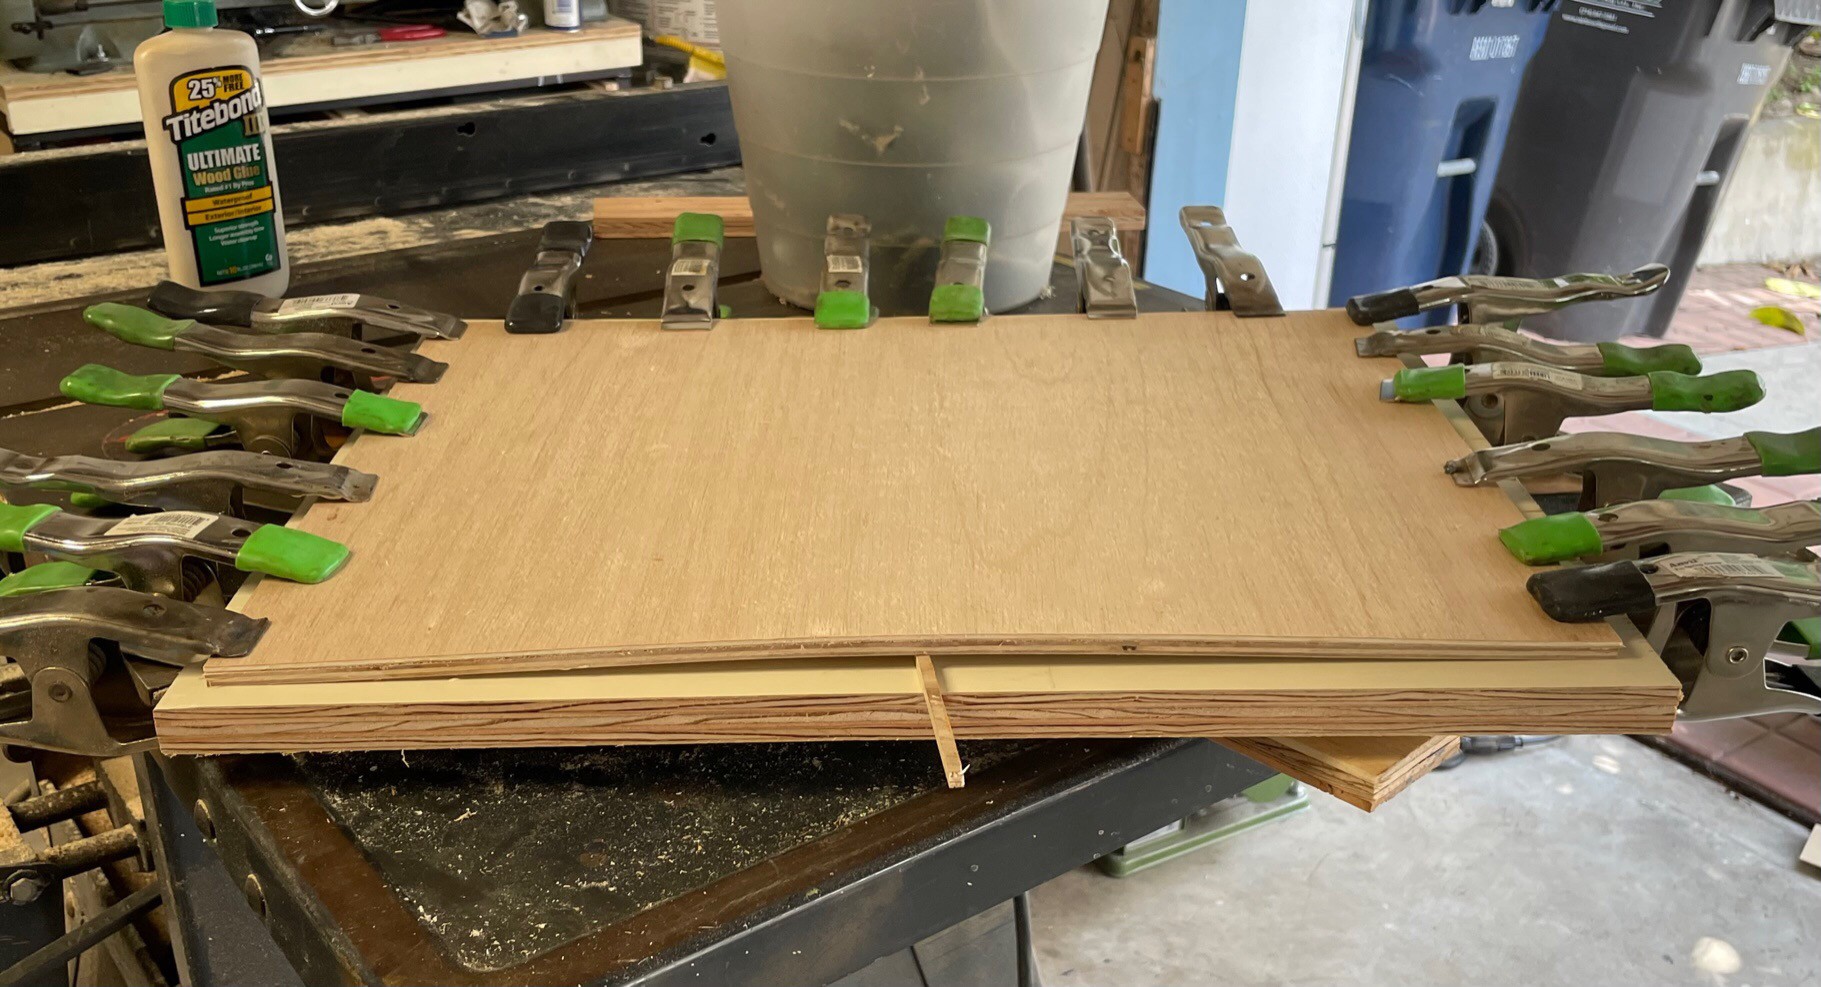
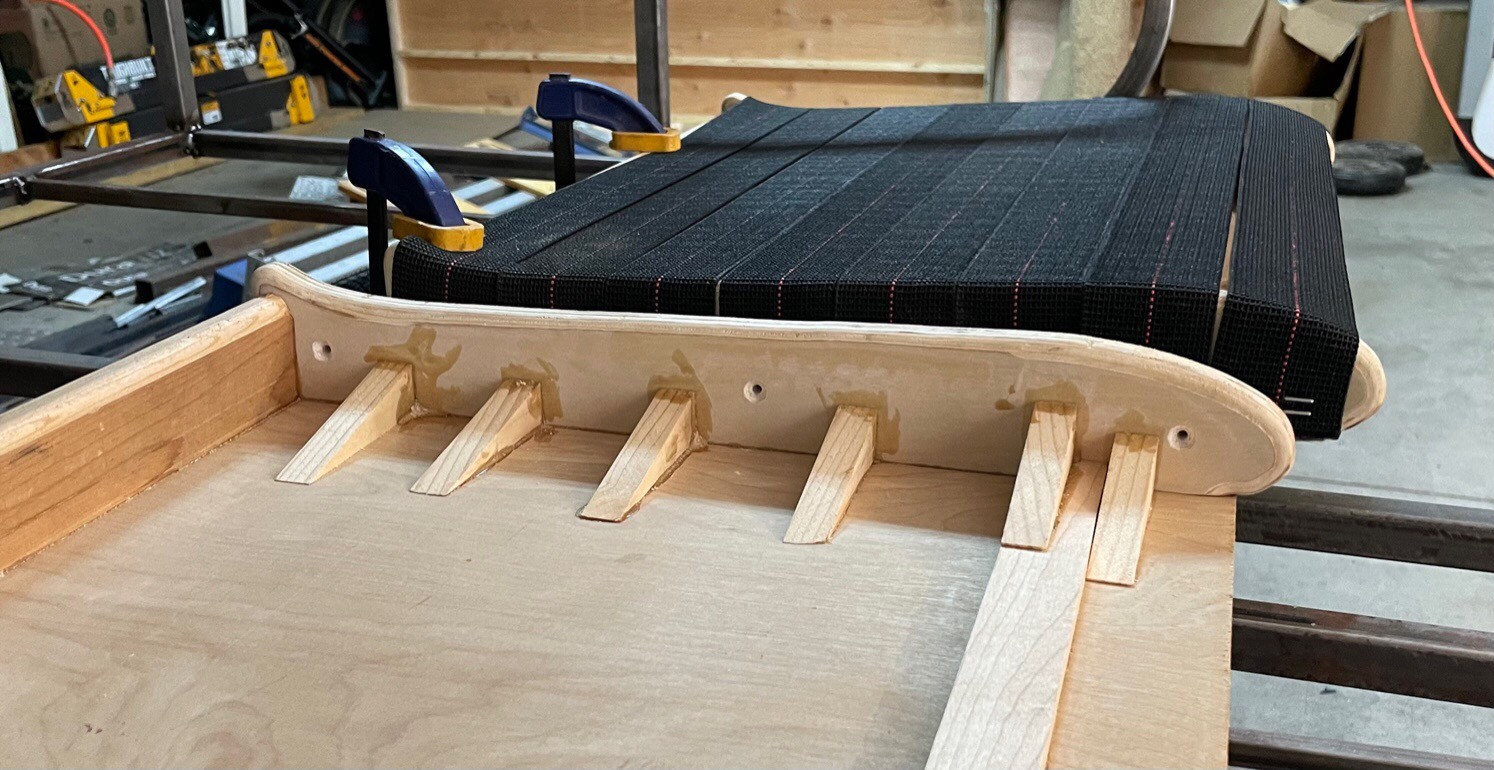
09/21/2023 at 17:10 • 0 commentsI think we are at final revision for the seats. What had happened was the tensioning on the upholstery straps, perhaps 80 pounds each or so, was enough to either warp the bottom, warp the side, and even both. So a two-pronged approach was decided: make the seat so strong it won't warp, and add cross woven straps so each strap does not require so much tension. Also, switch from stapled straps on the wood side to proper metal clips in a thin dado. This are sometimes known as Pirelli Clips. Below is a diagram.
![]()
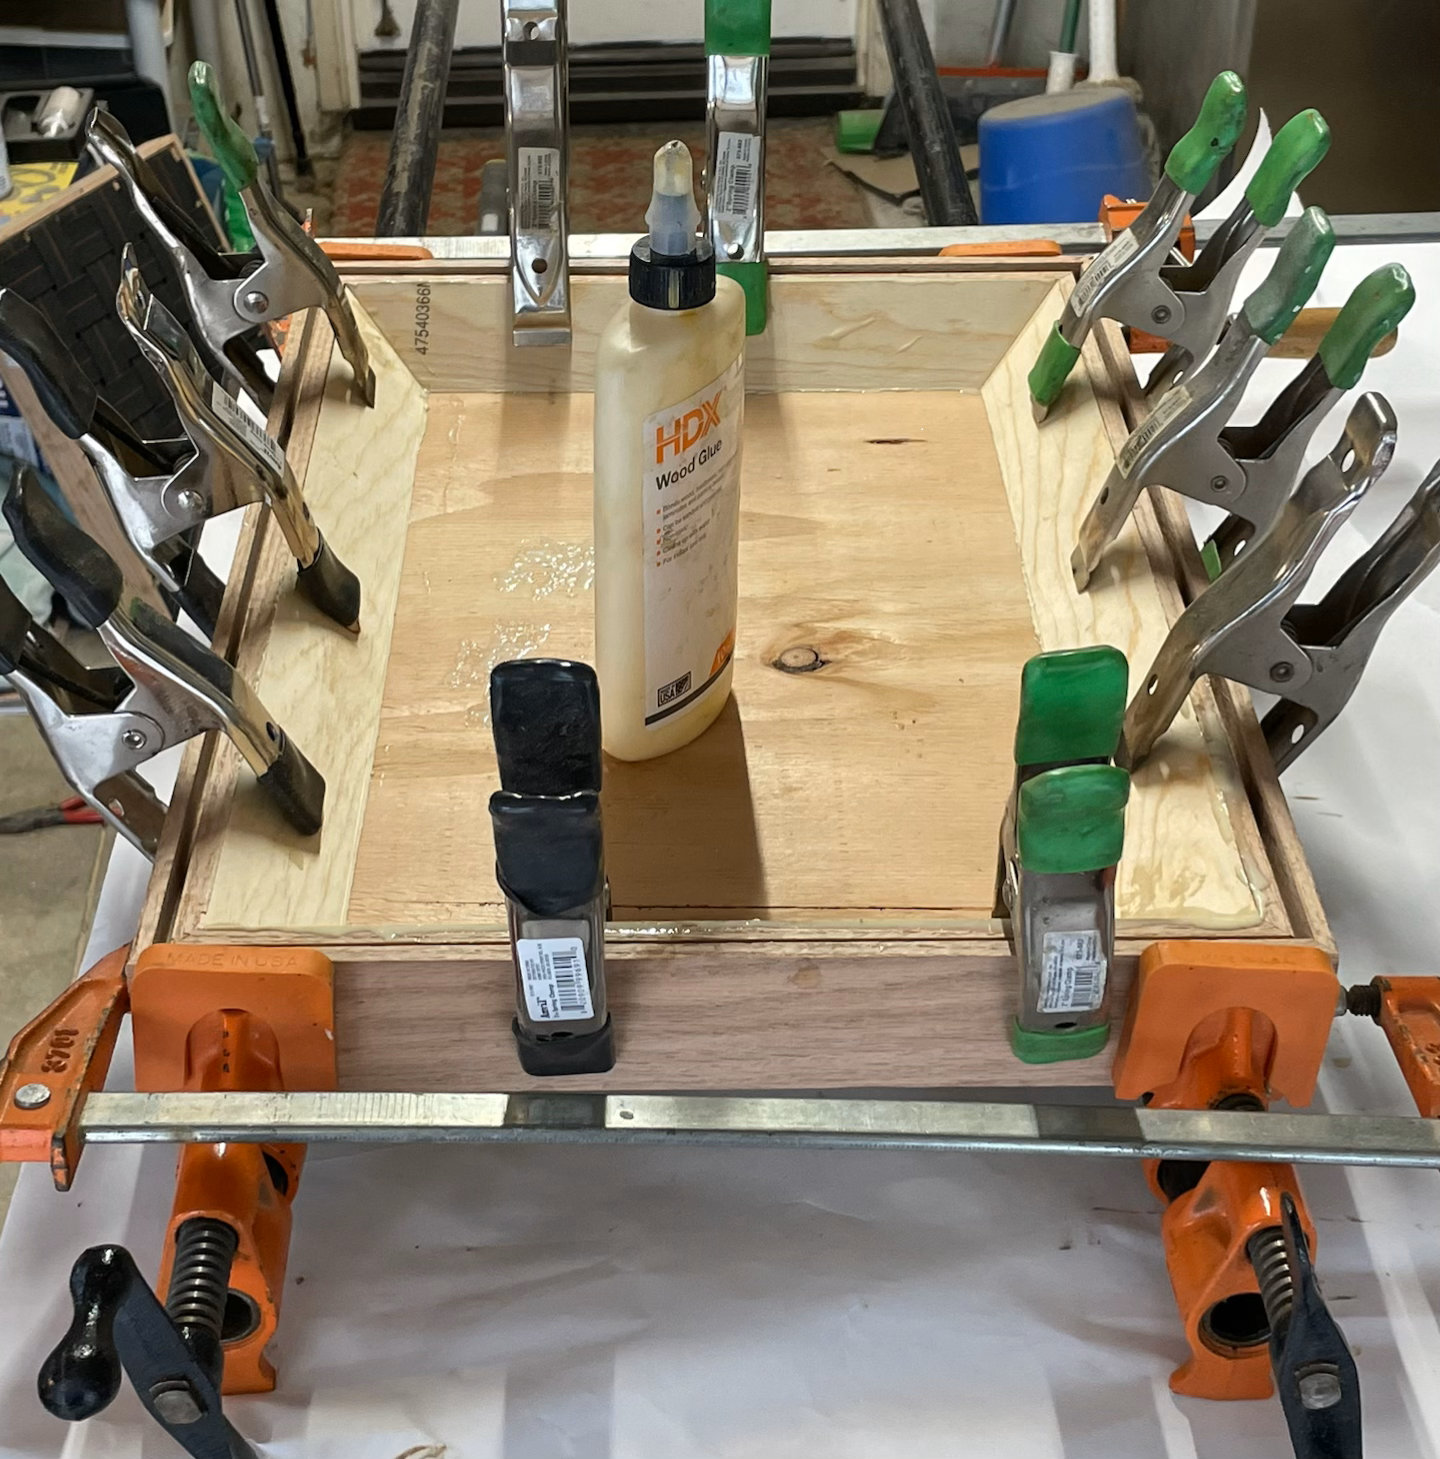
This is the glue up of one of the seats. It's nice that the spring clamps did a good job of pulling the cleats in diagonally. the cleats were cut after the frame was installed, each trimmed to the right length.
![]()
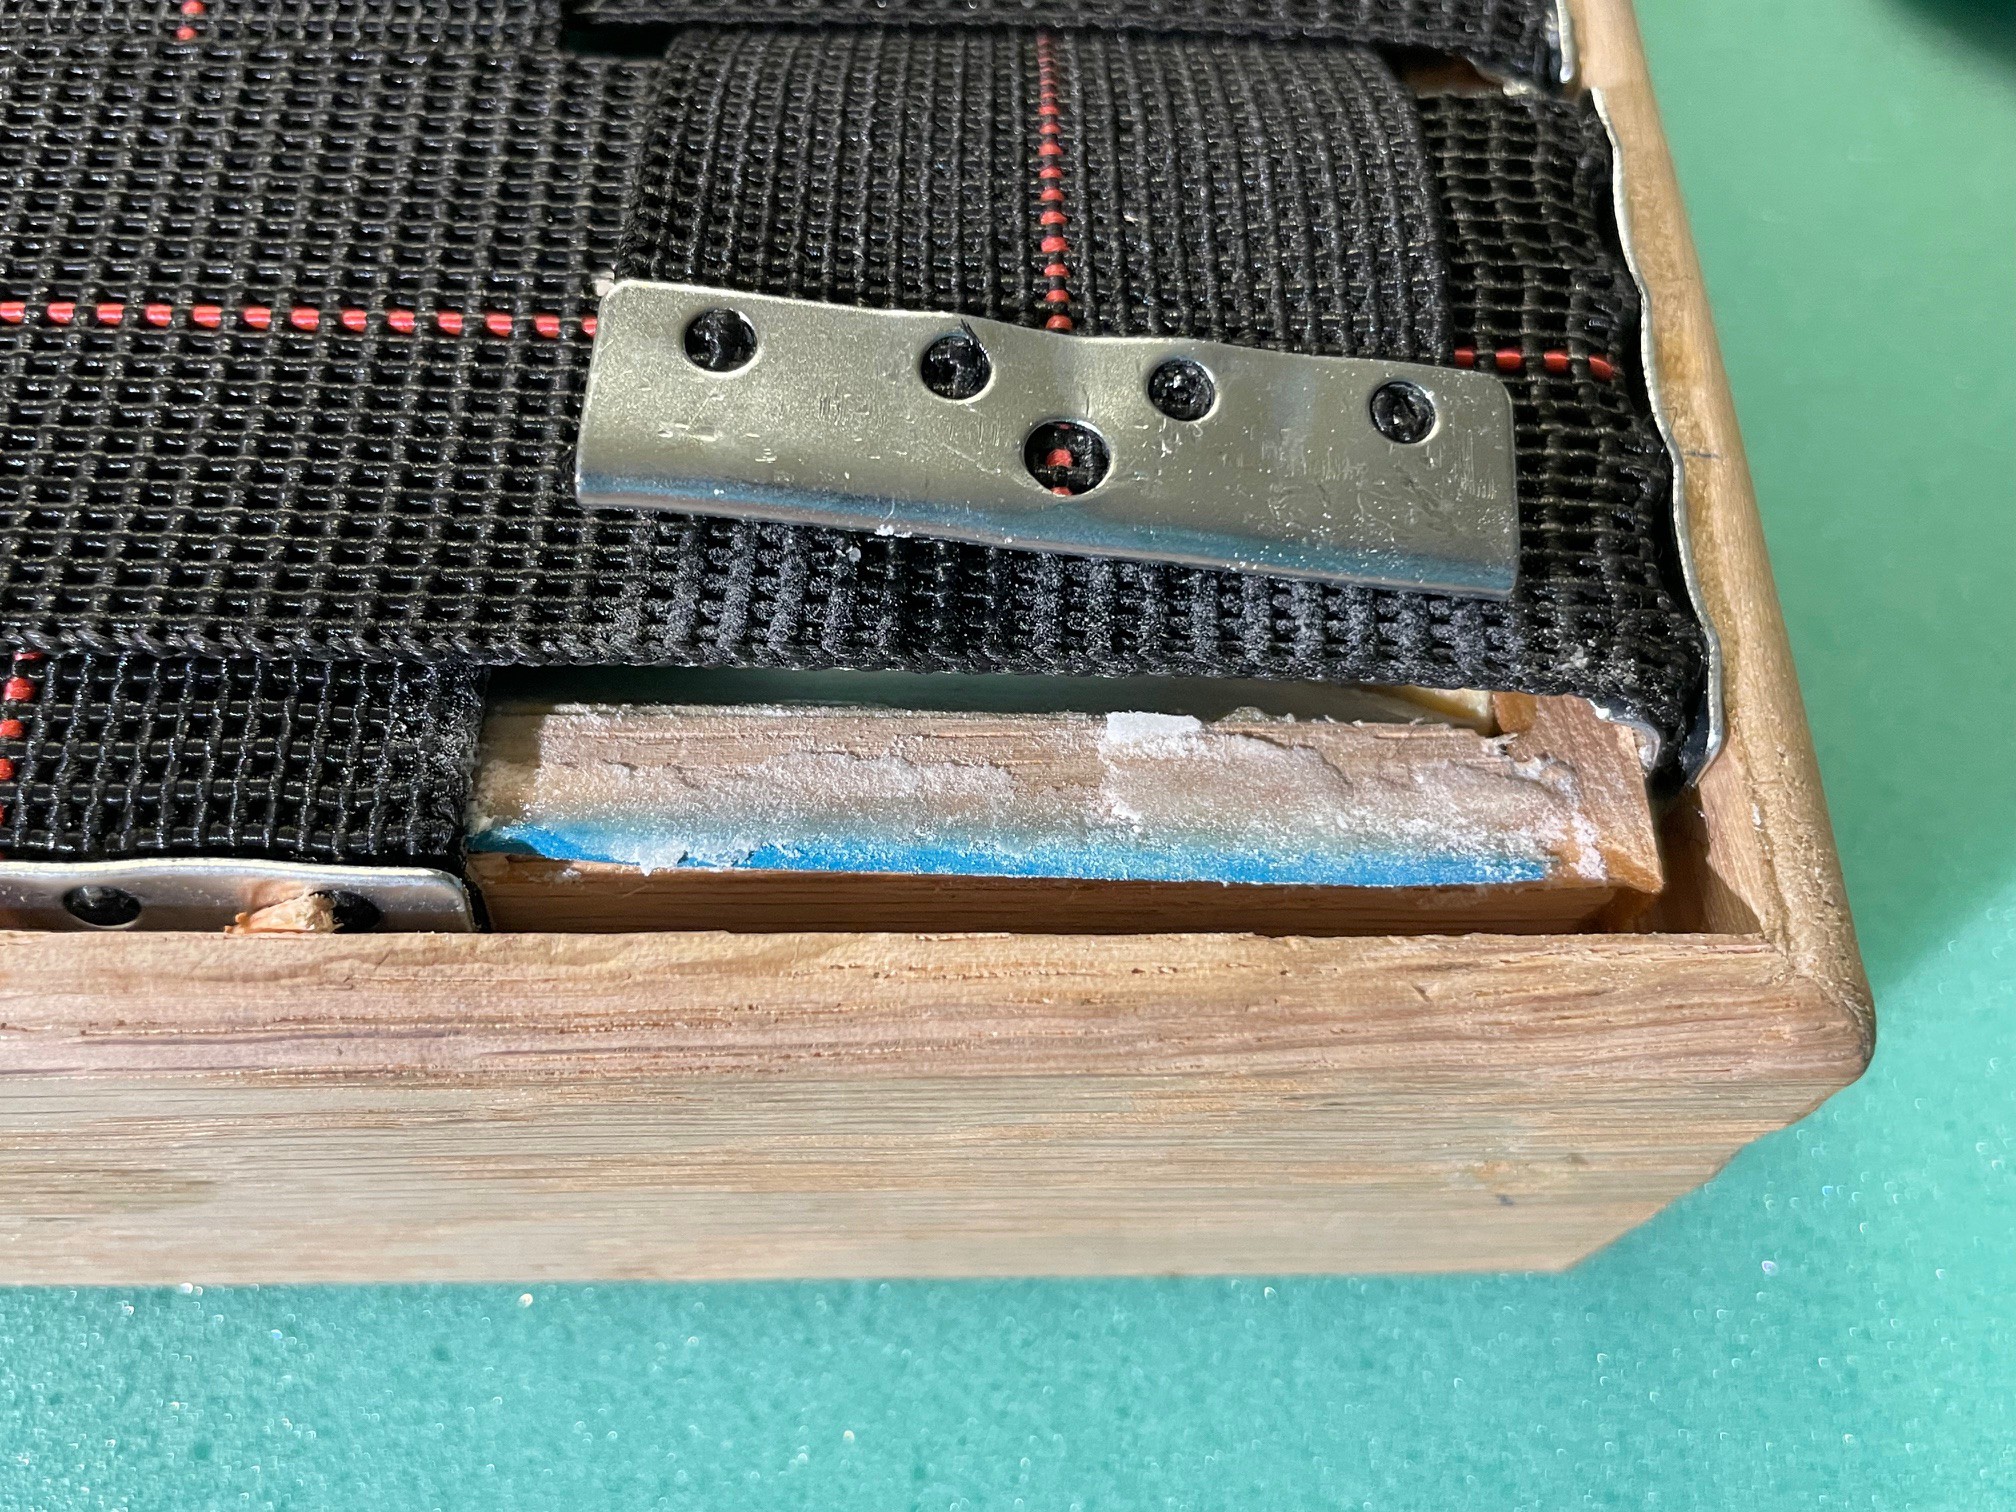
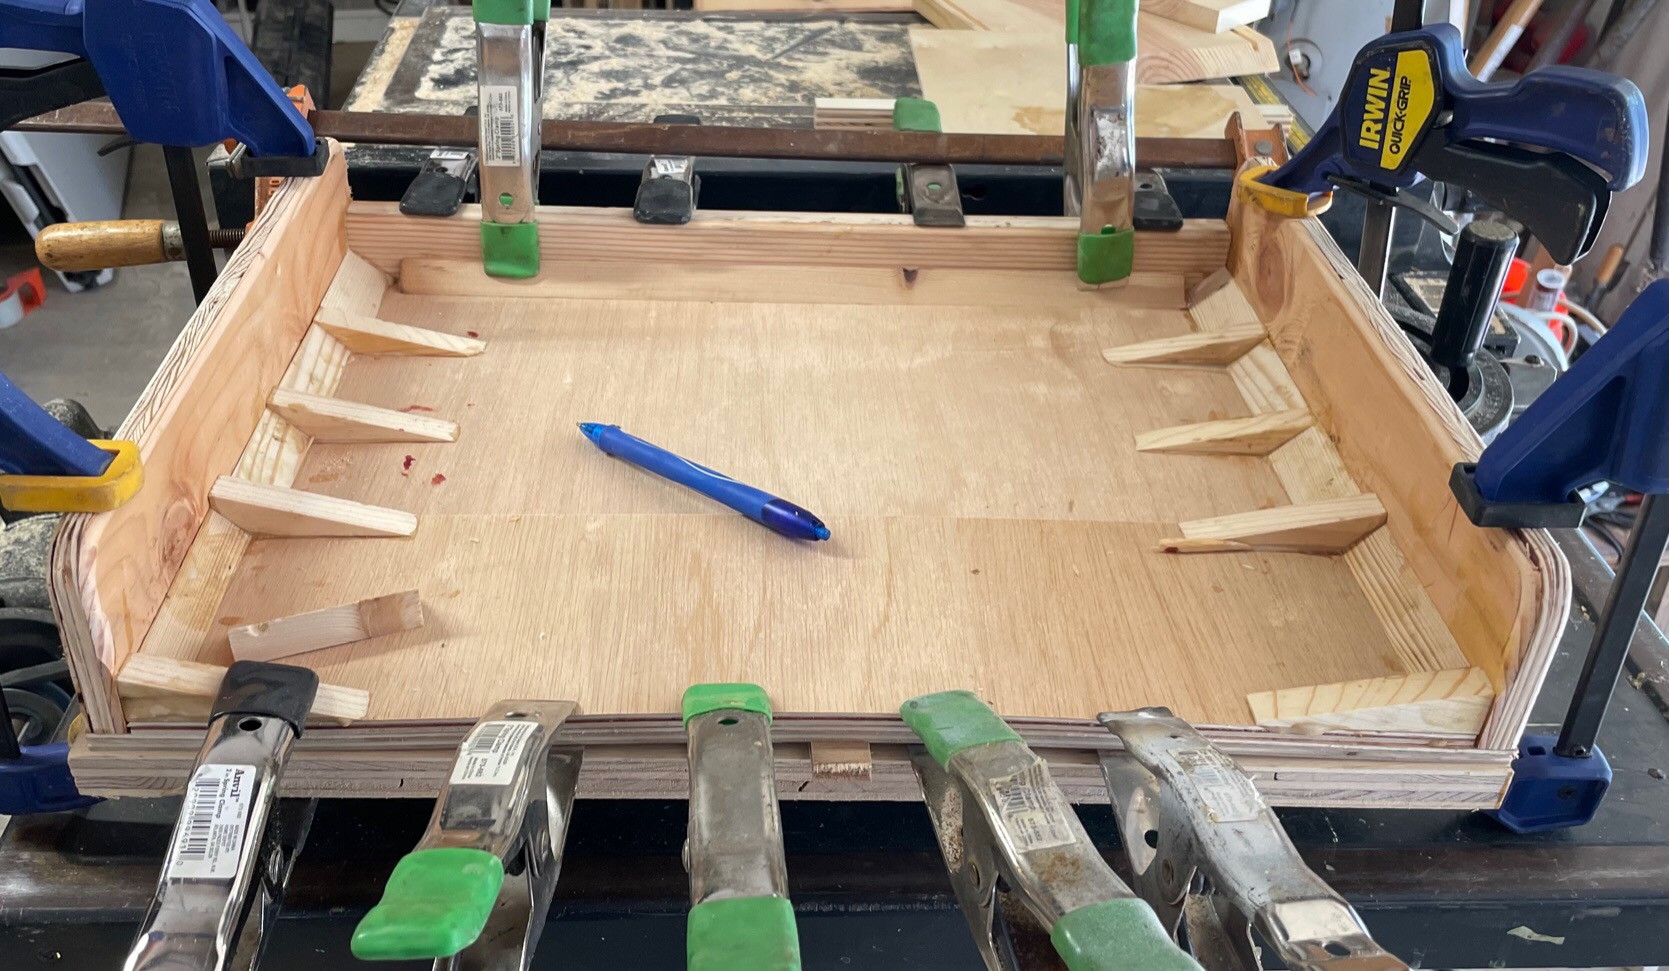
One of the pieces I had chamferred a bit for clearance, whcih I thought was good. No bueno. In a couple places where the chamfer was a bit deep (due to slightly warped wood) the clips tended to pop out. That was fixed by trimming a toothpick to 2", and using CYA (crazy glue) to adhere it to the chamfer. Then I added more glue and used baking soda as a filler. This took just a couple minutes, saving many hours of rework.
![]()
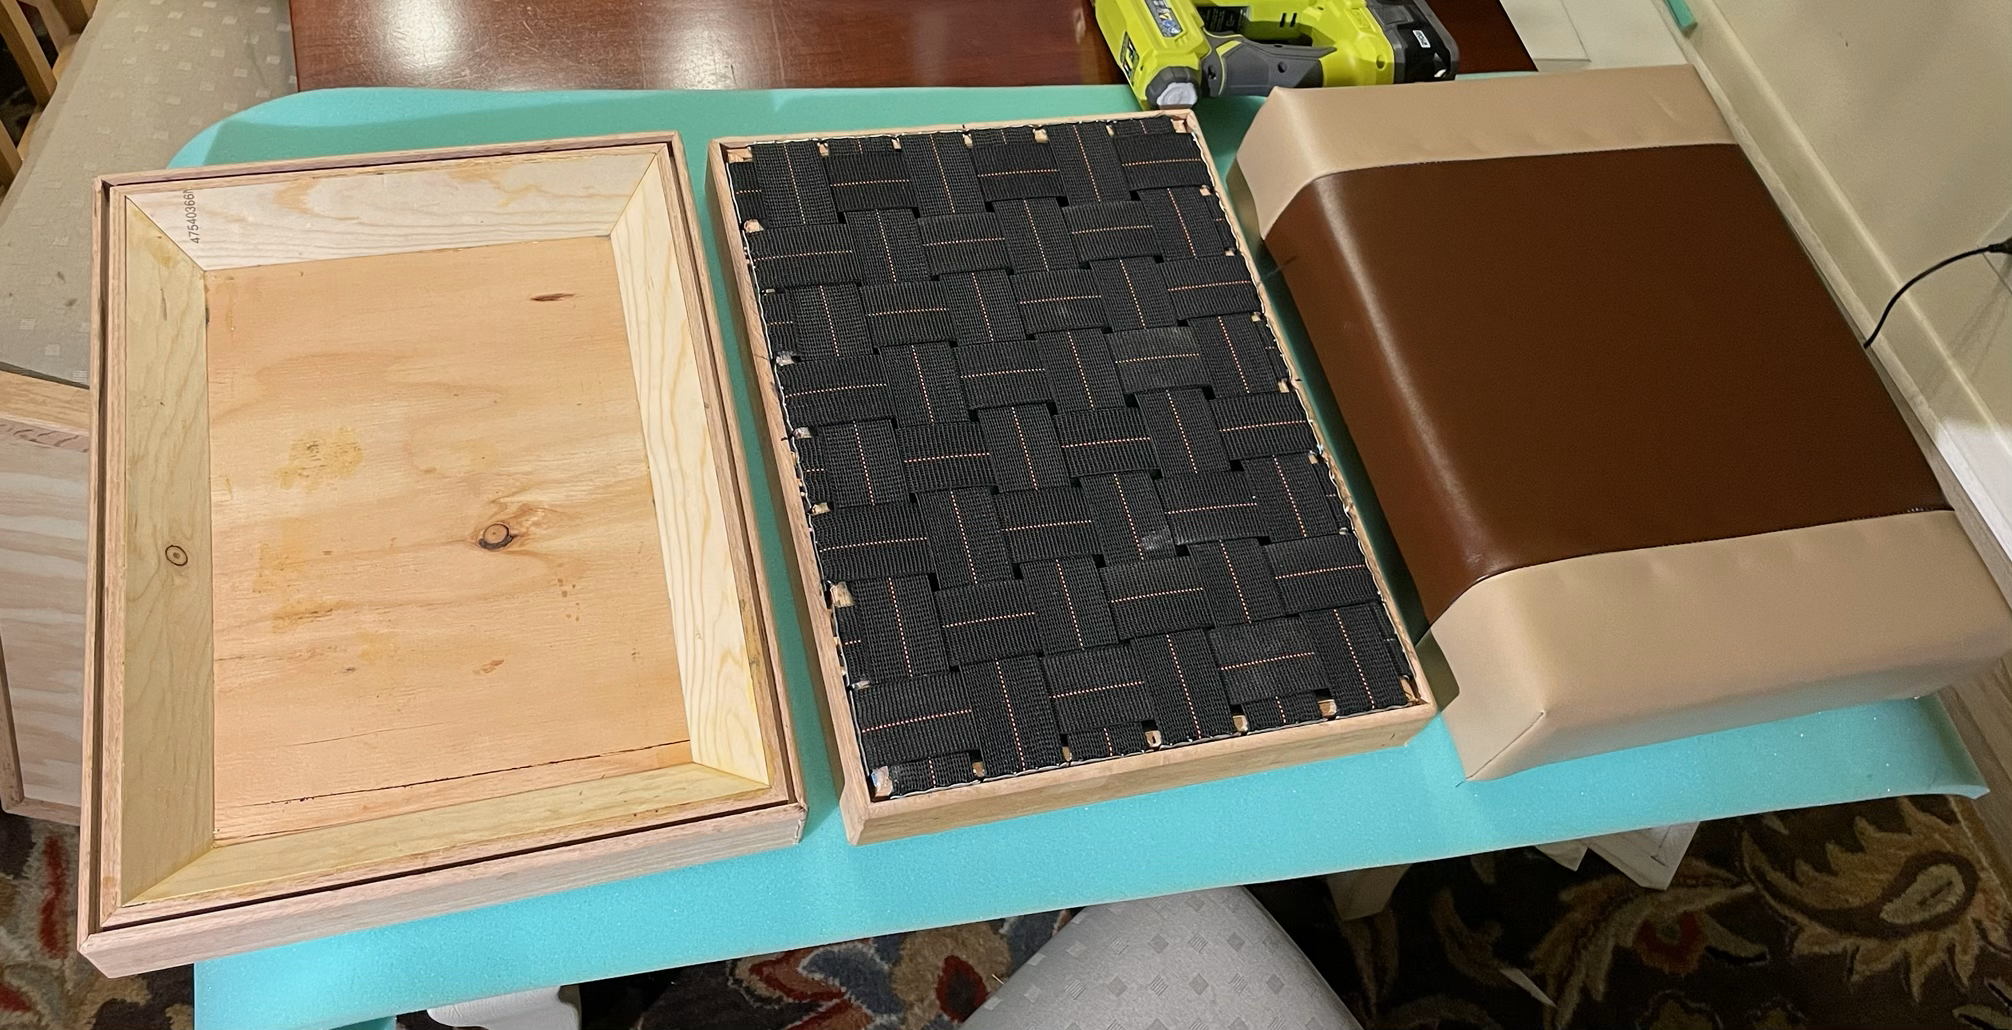
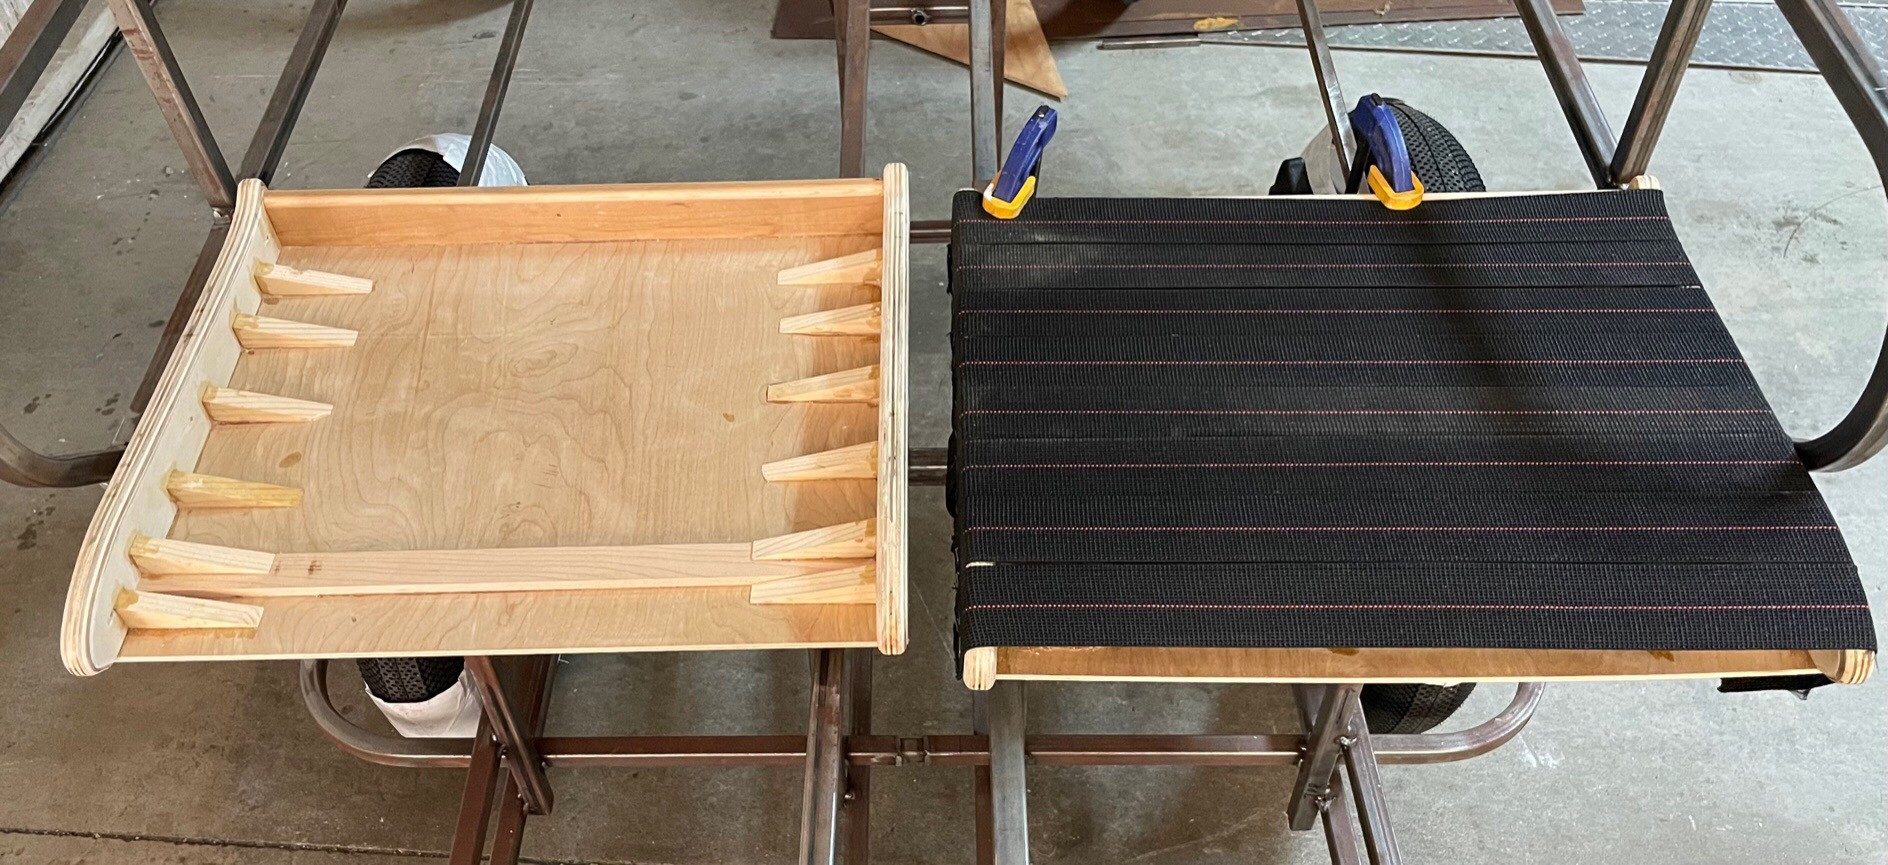
The open frame, frame with webbing, and finished seat with 2" foam and marine vinyl is shown below.
![]()
-
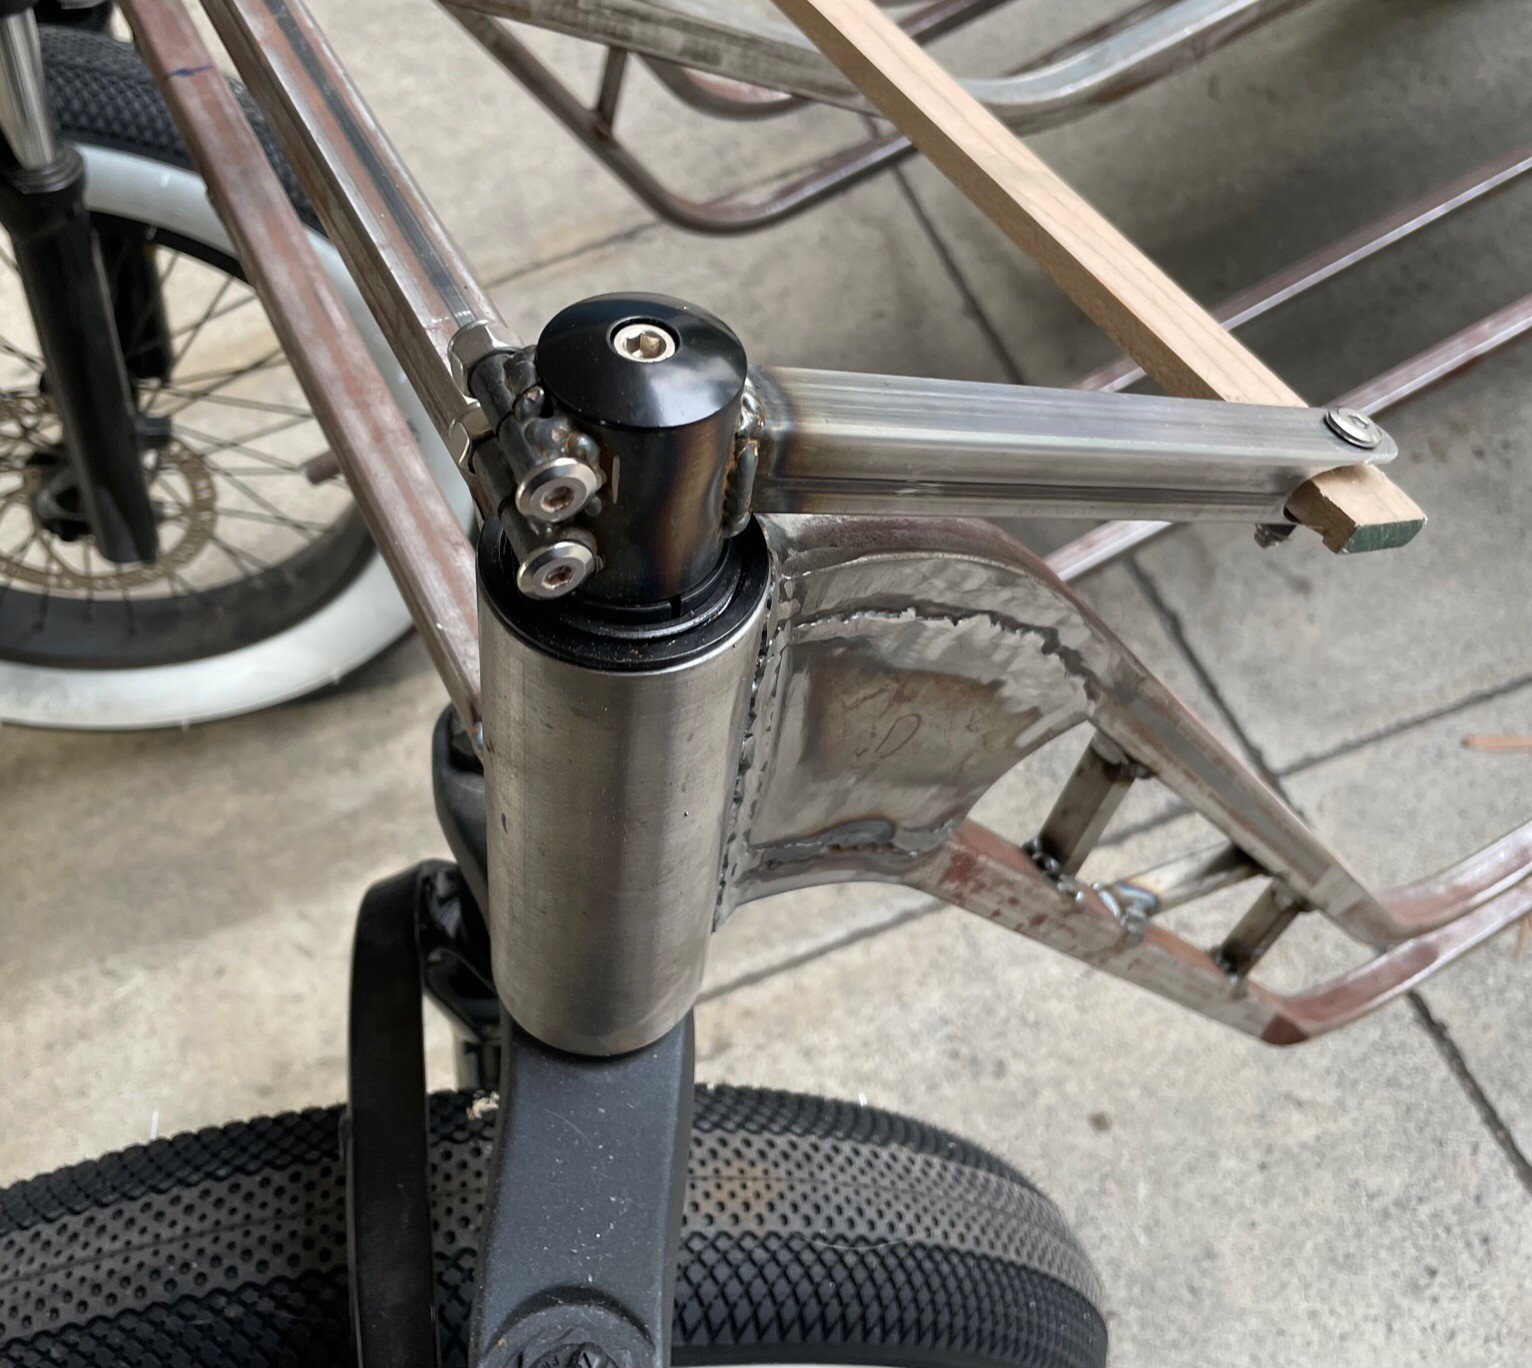
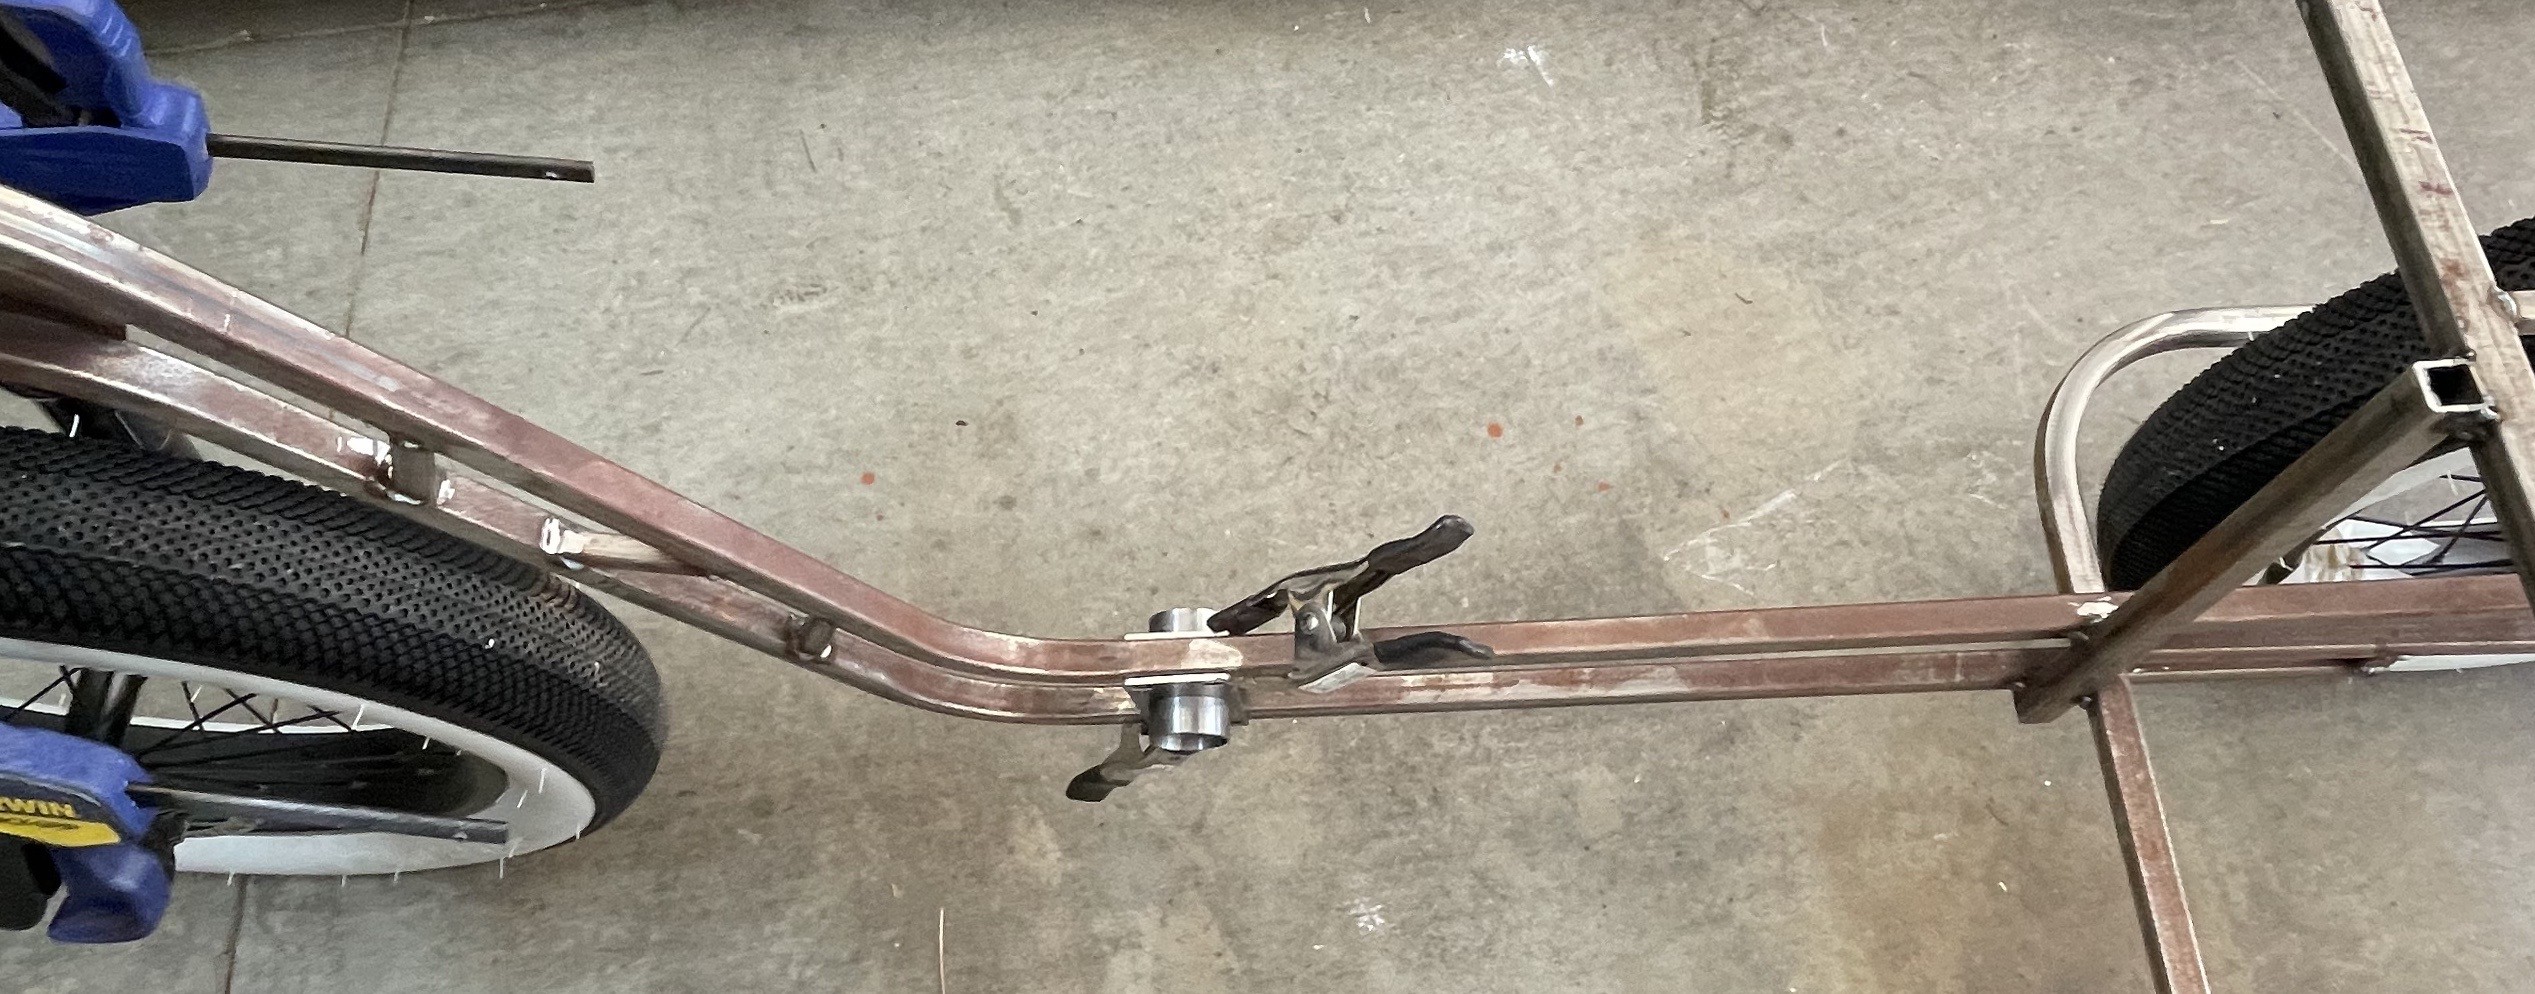
Steering, Part Trois
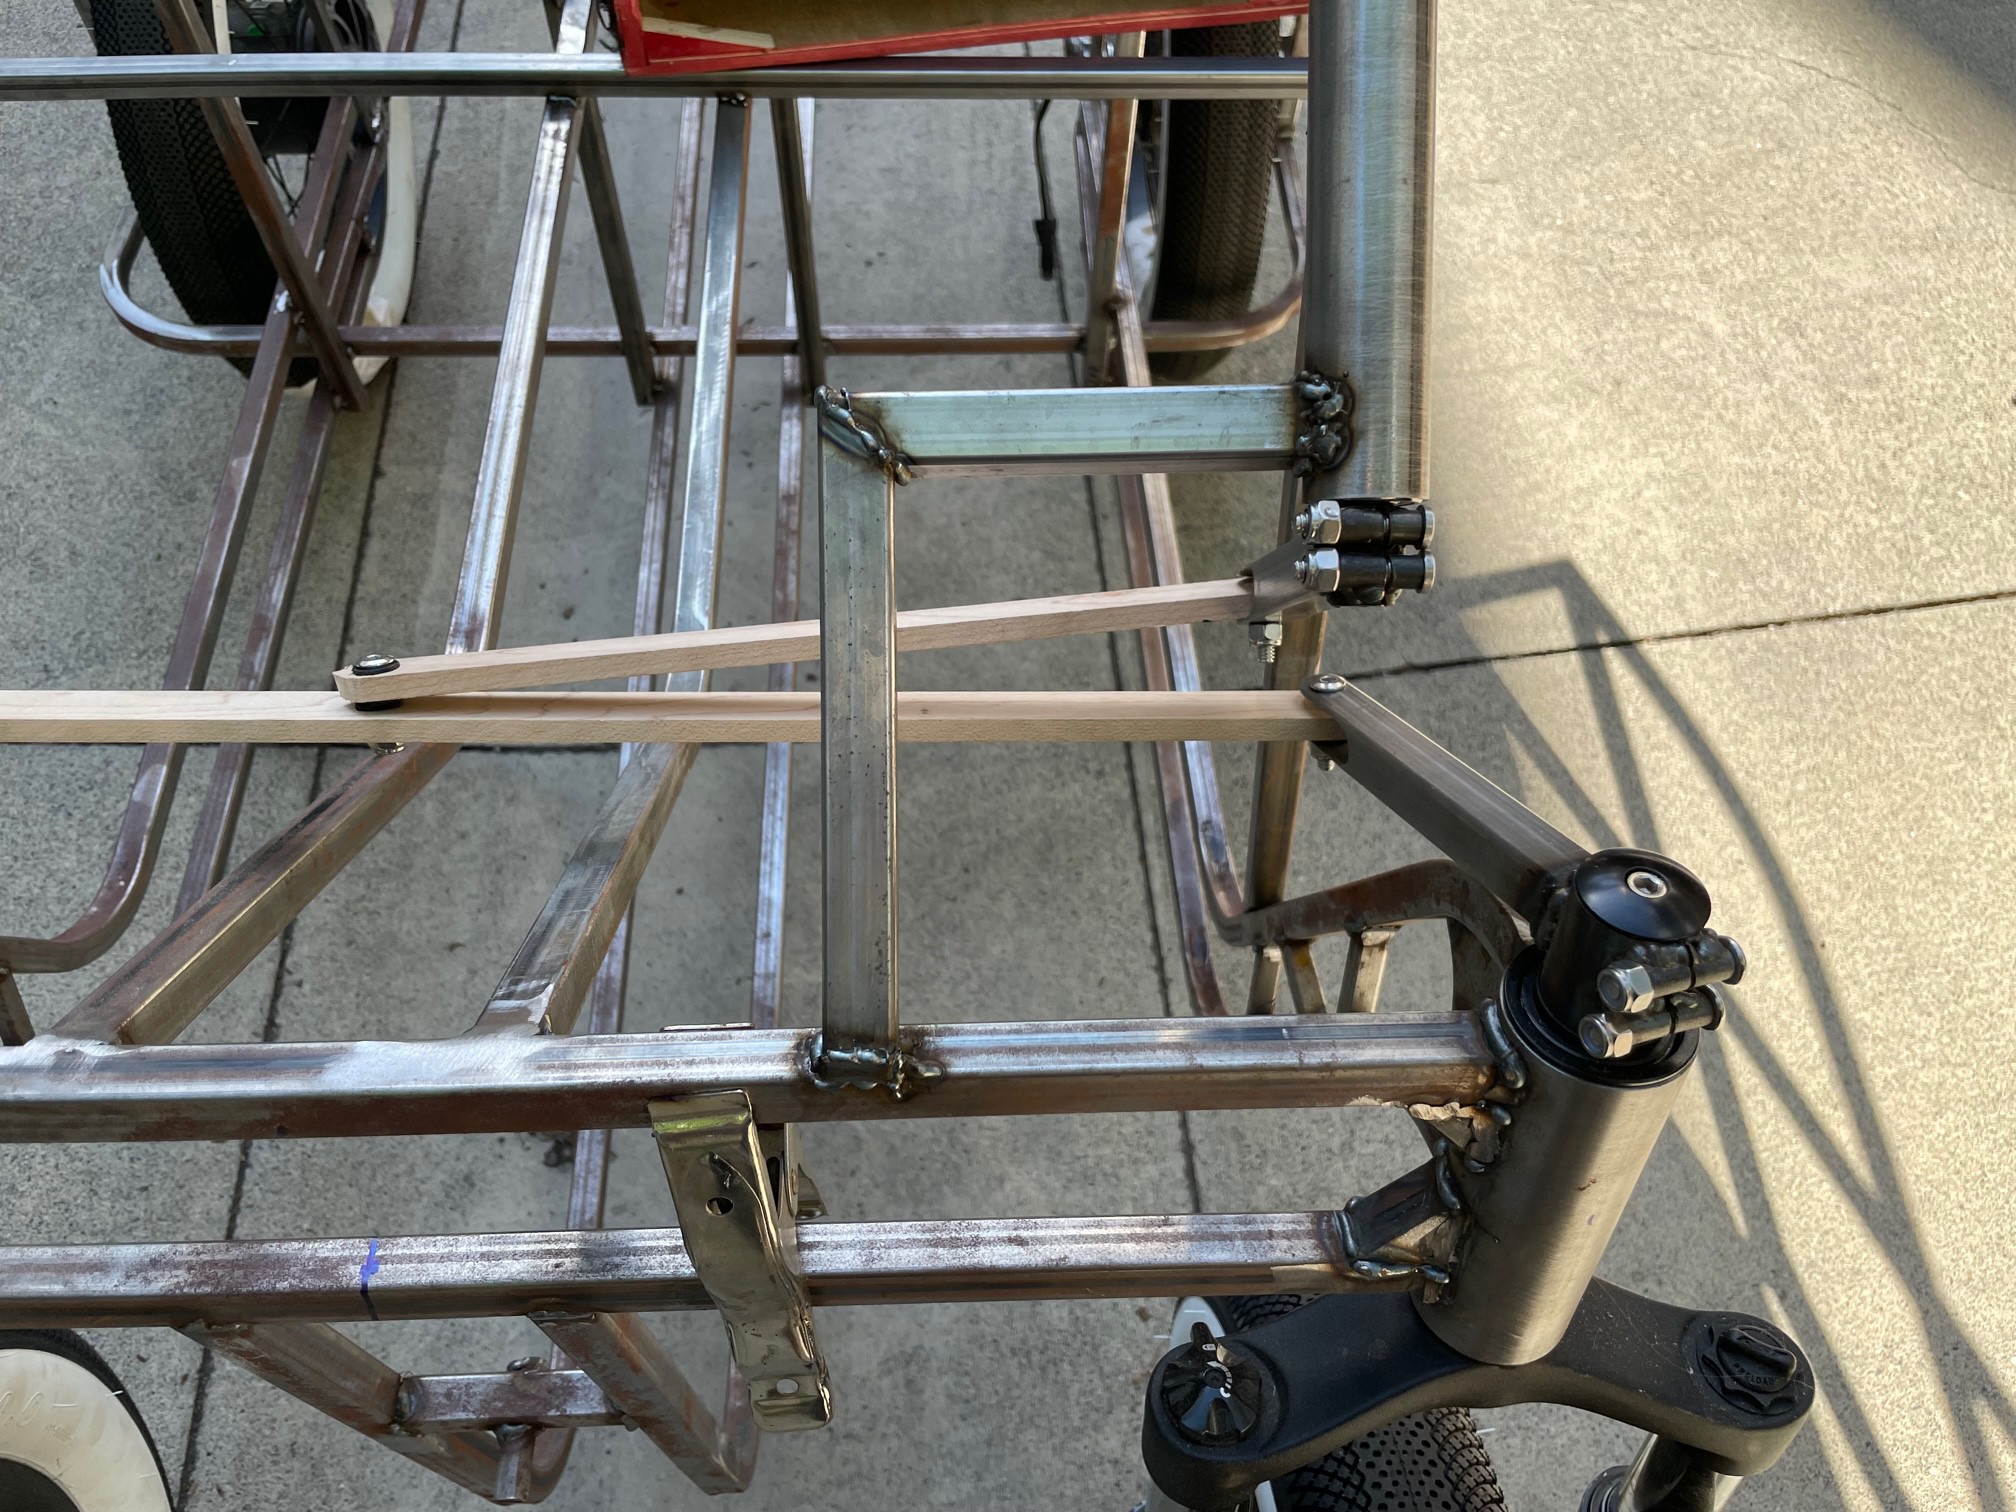
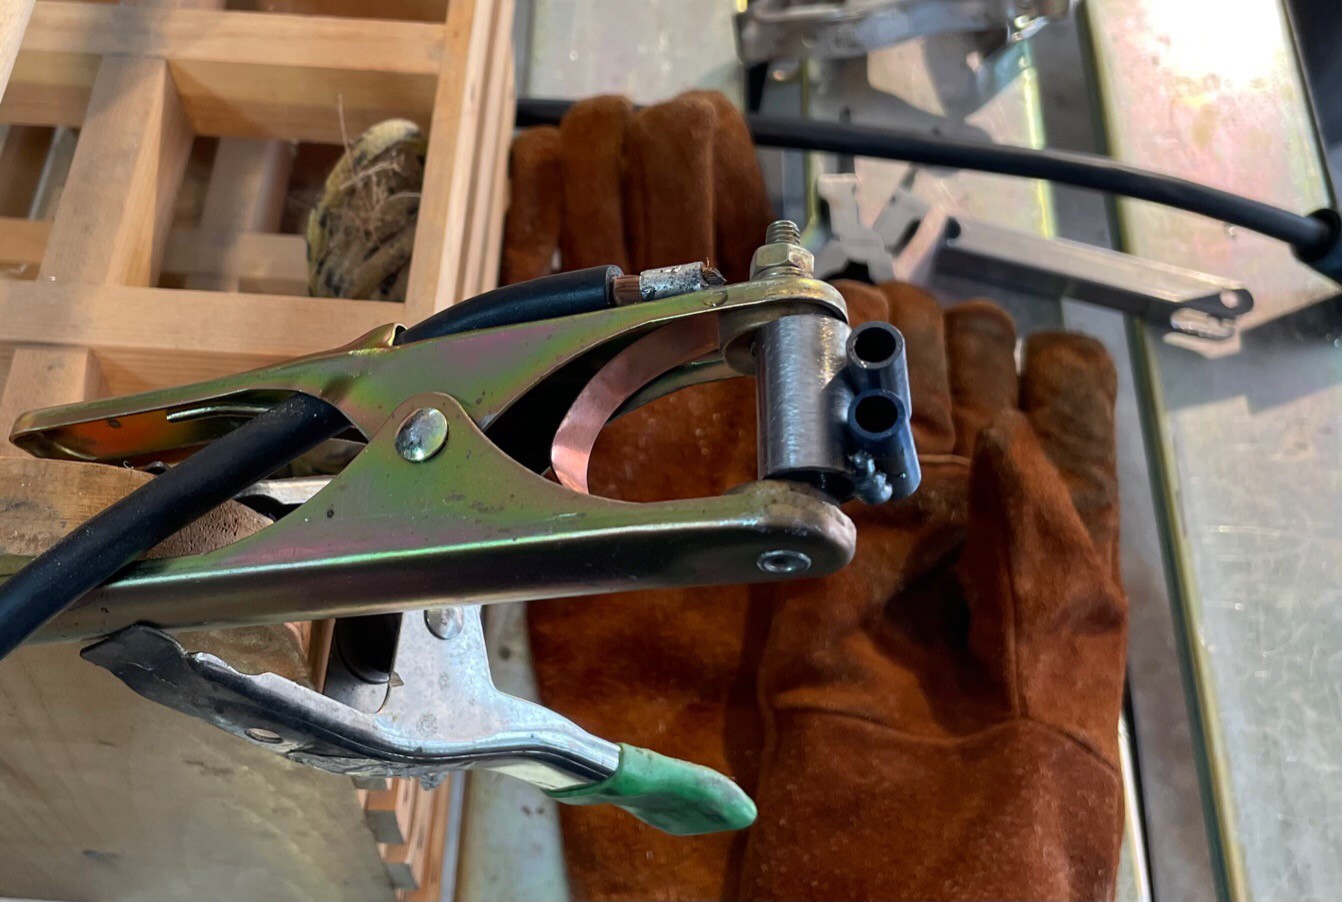
09/21/2023 at 16:53 • 0 commentsThe steering is finished (except I need to disassemble and add jam nuts).
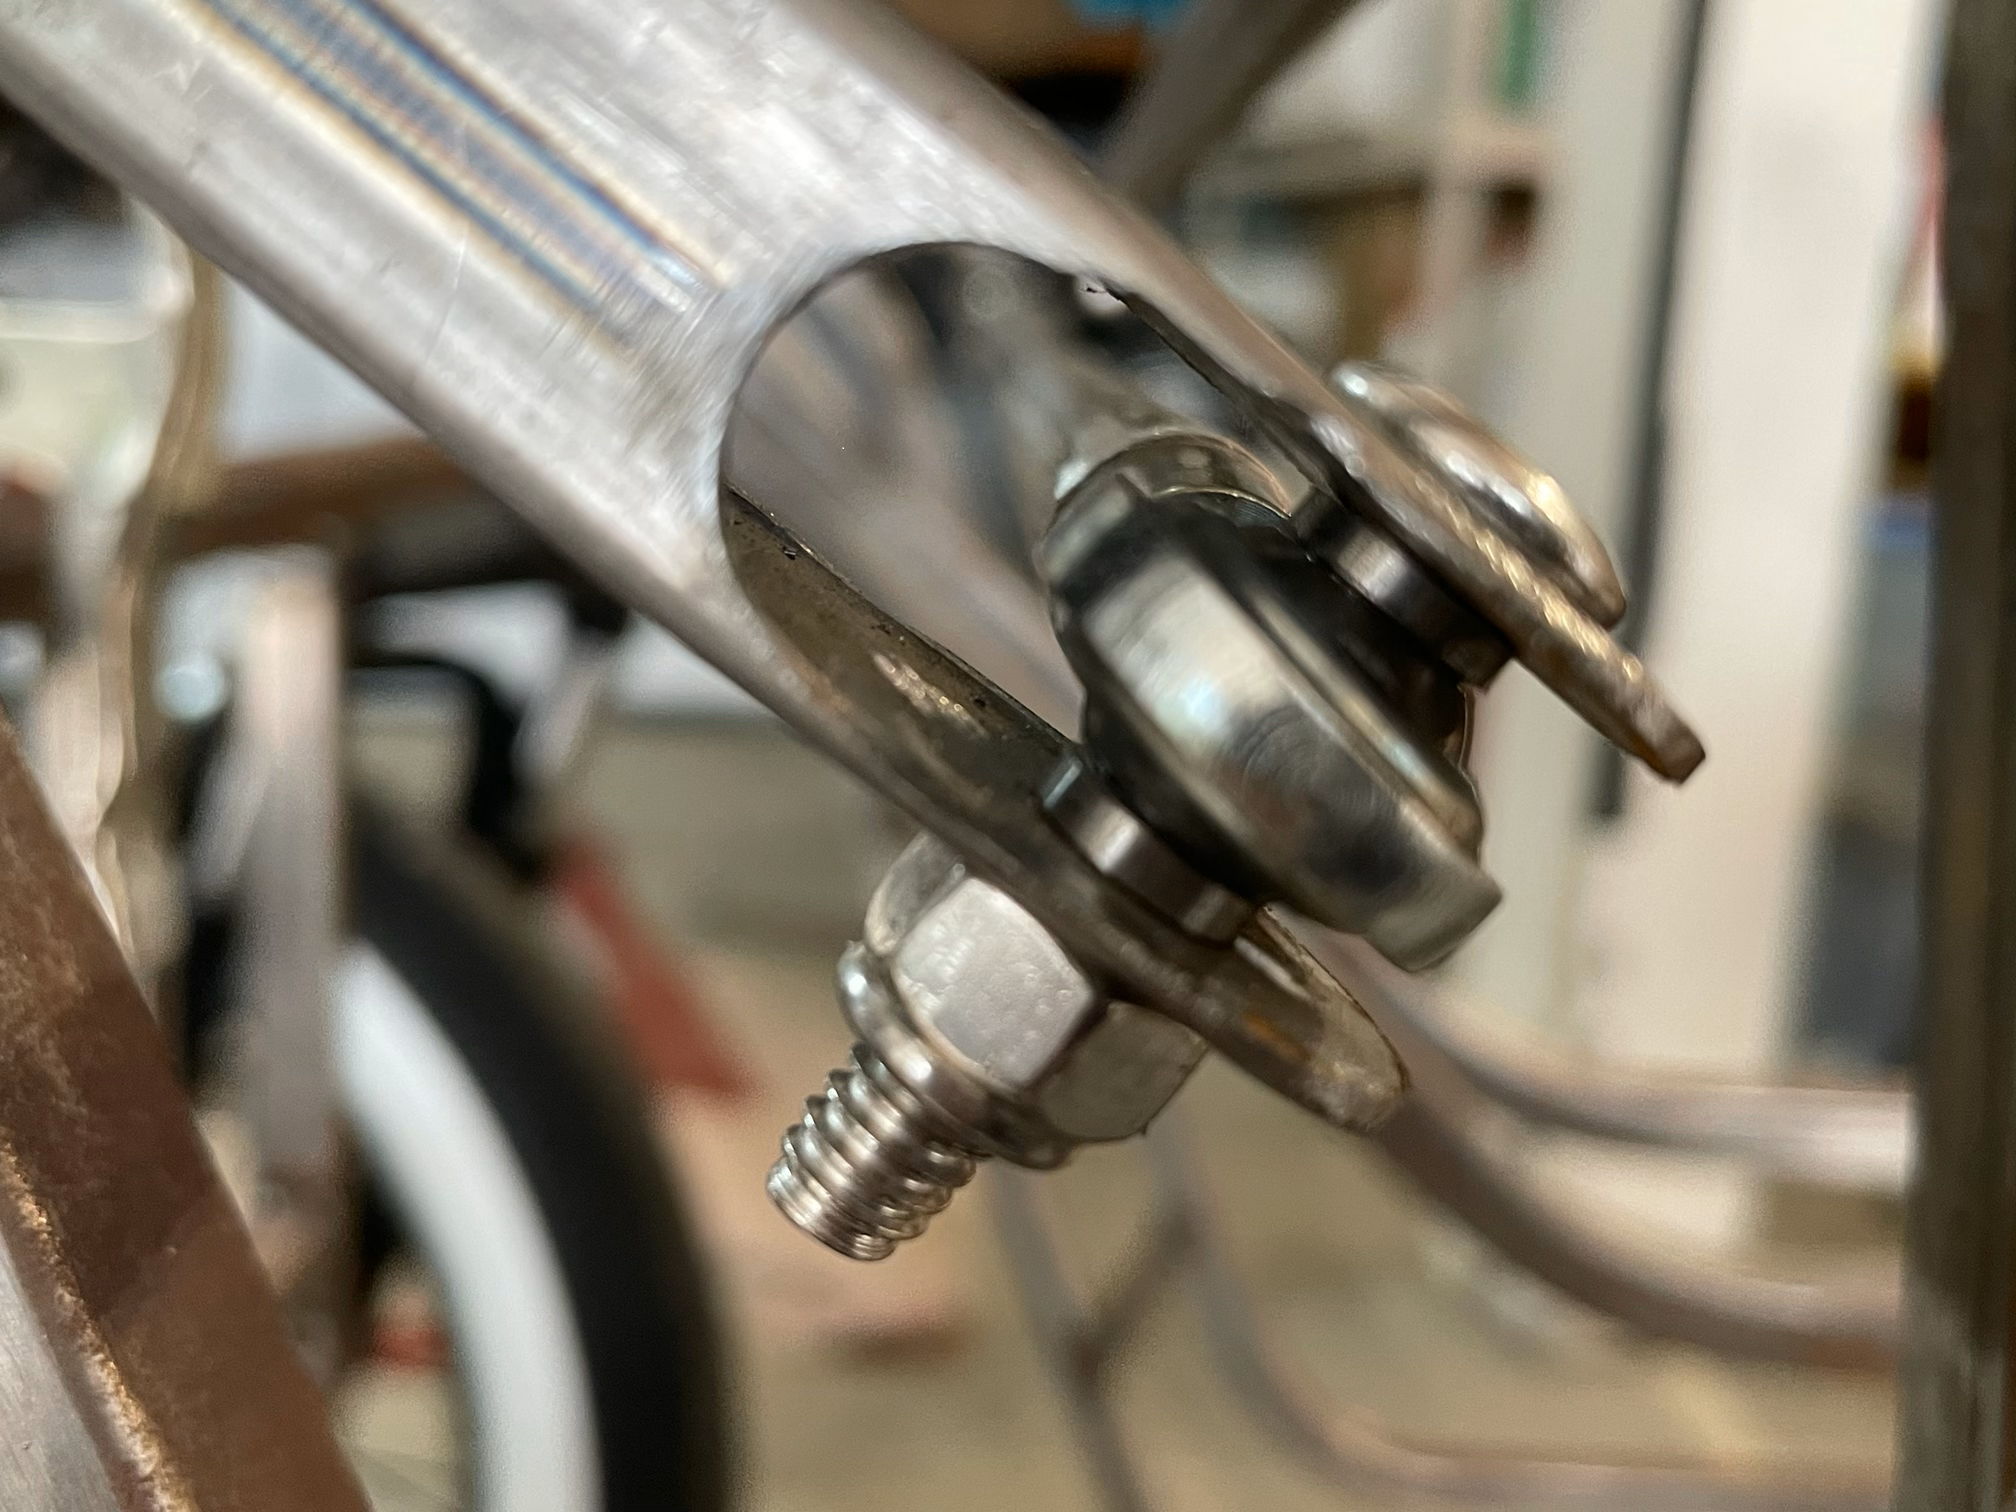
The temporary wood tie rods were removed, and new ones made from 0.5" 16g round tube, weld in rod ends, and 1/4 28 TPI spherical rod ends (Heim joints).
An issue I had was standard 1/4" washers used to space the heim joint to the 3/4" 16g square tubing used as a clevis was the washers obstructed the spherical bearing from its full range of motion.
So I took a small piece of tube on the lather, and drilled the inside to 1/4", and milled the outside to 0.35" or so, and the parted these below washers off. 8 pieces needed, took about 1 hour. But they work great.
![]()
![]()
-
Steering, Part Deux
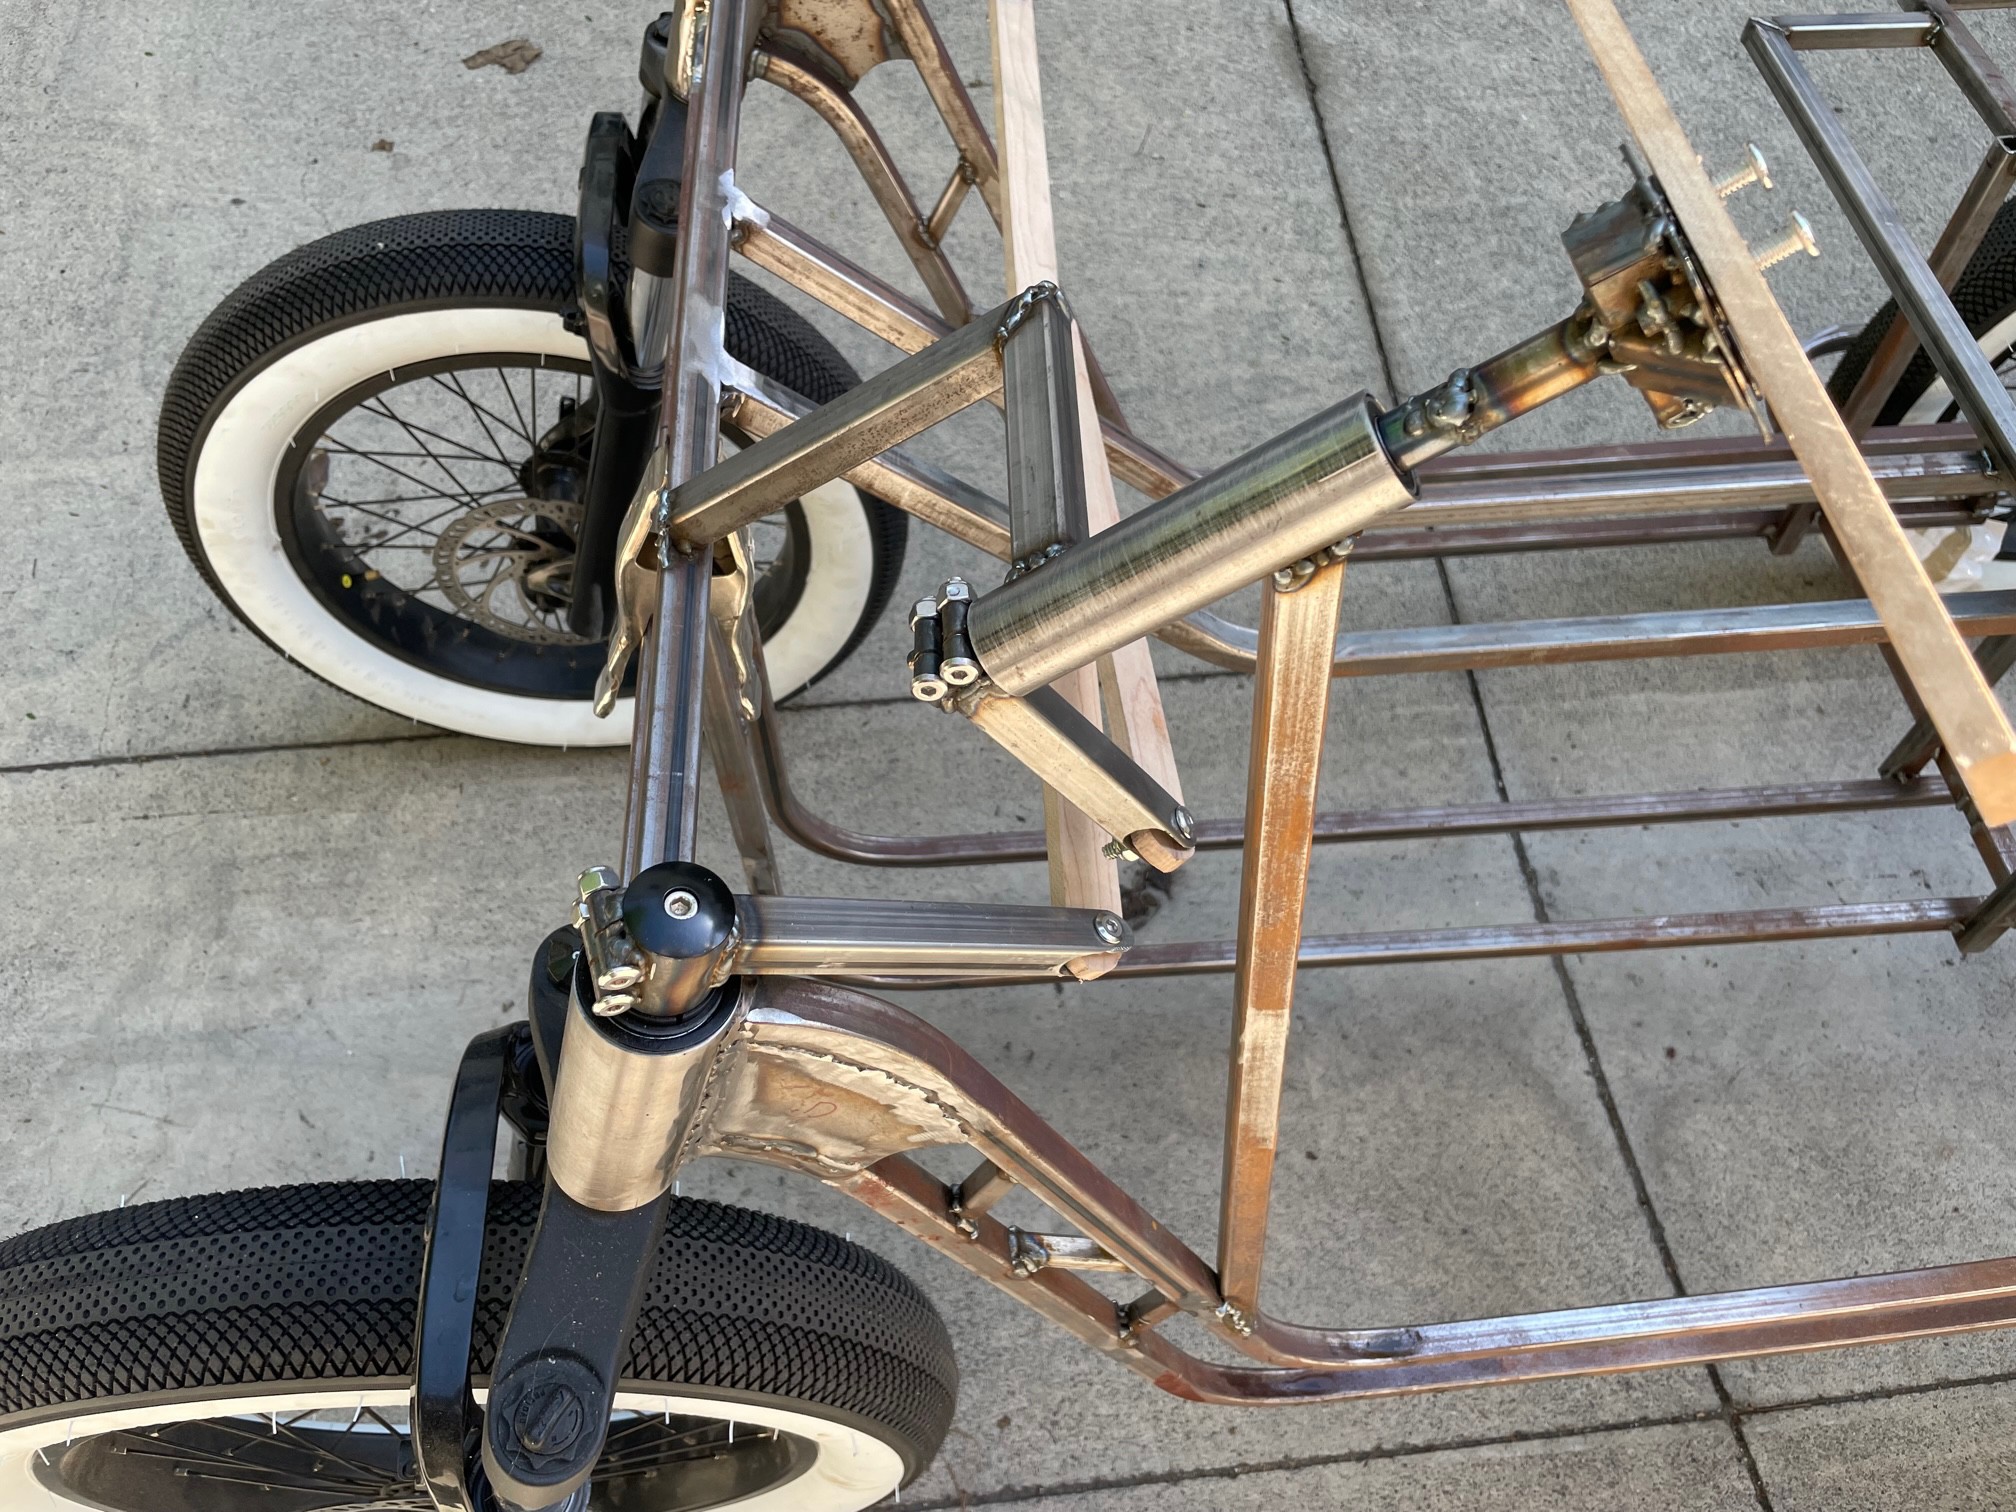
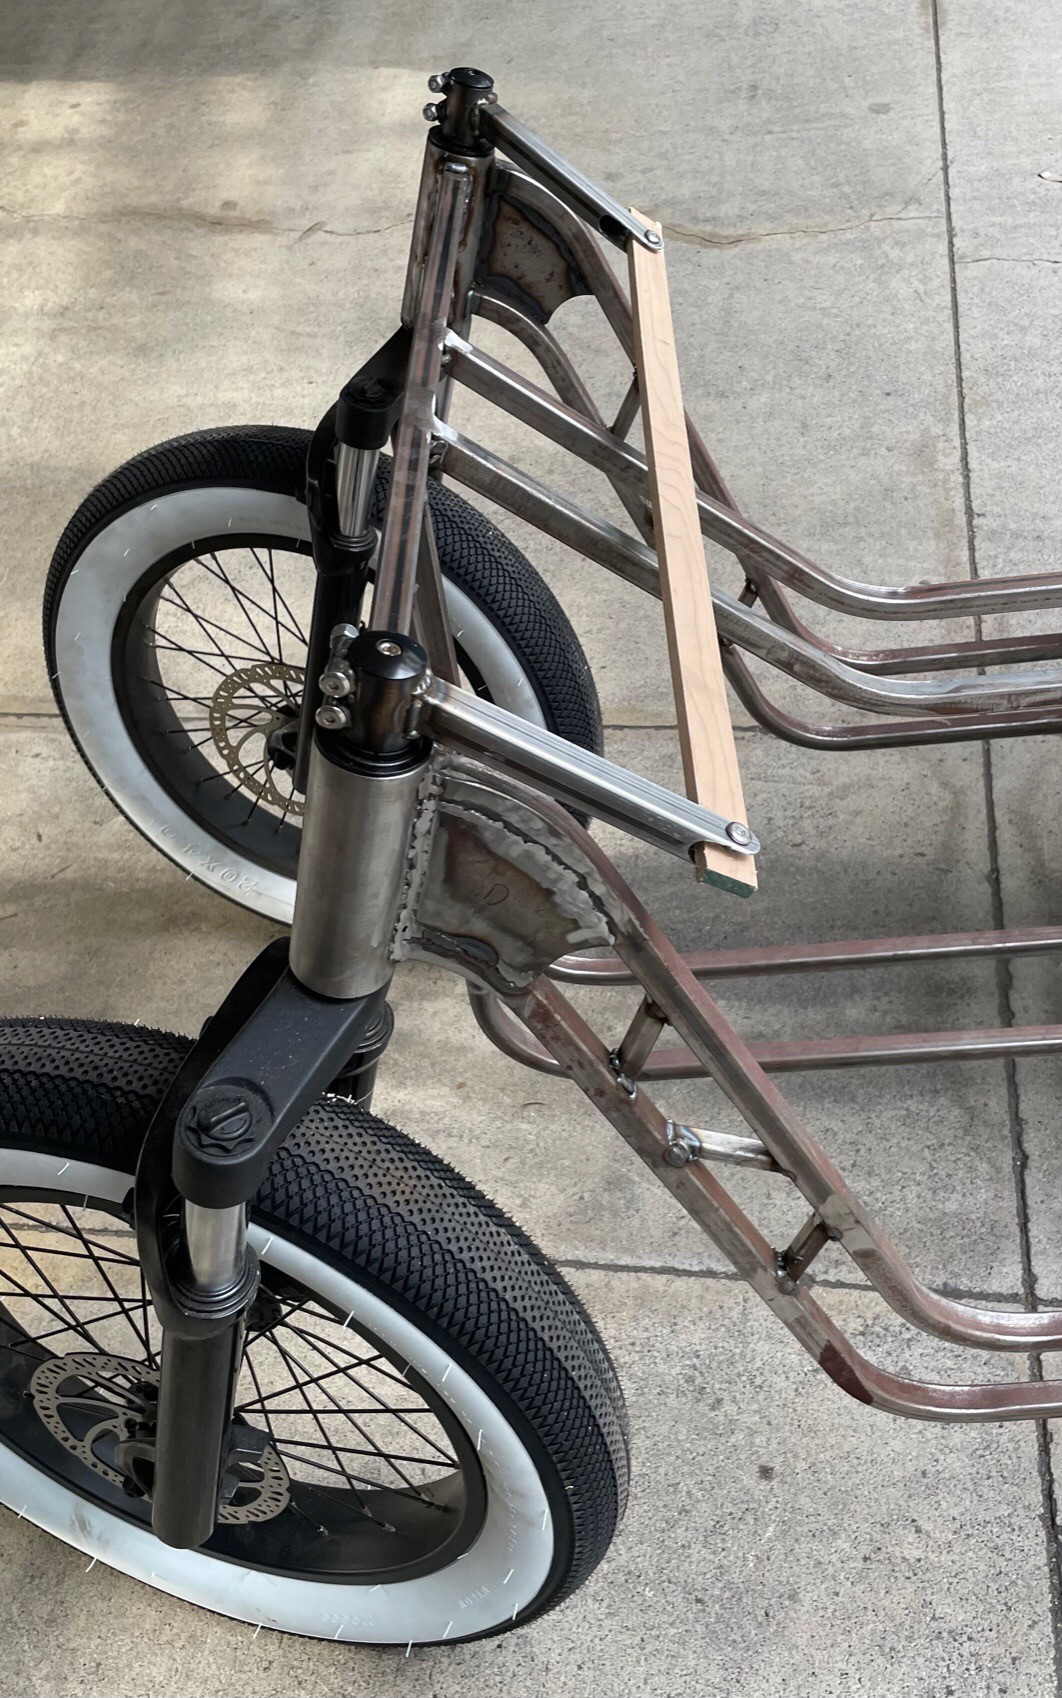
09/12/2023 at 18:33 • 0 commentsSo on to the steering column and its linkage.
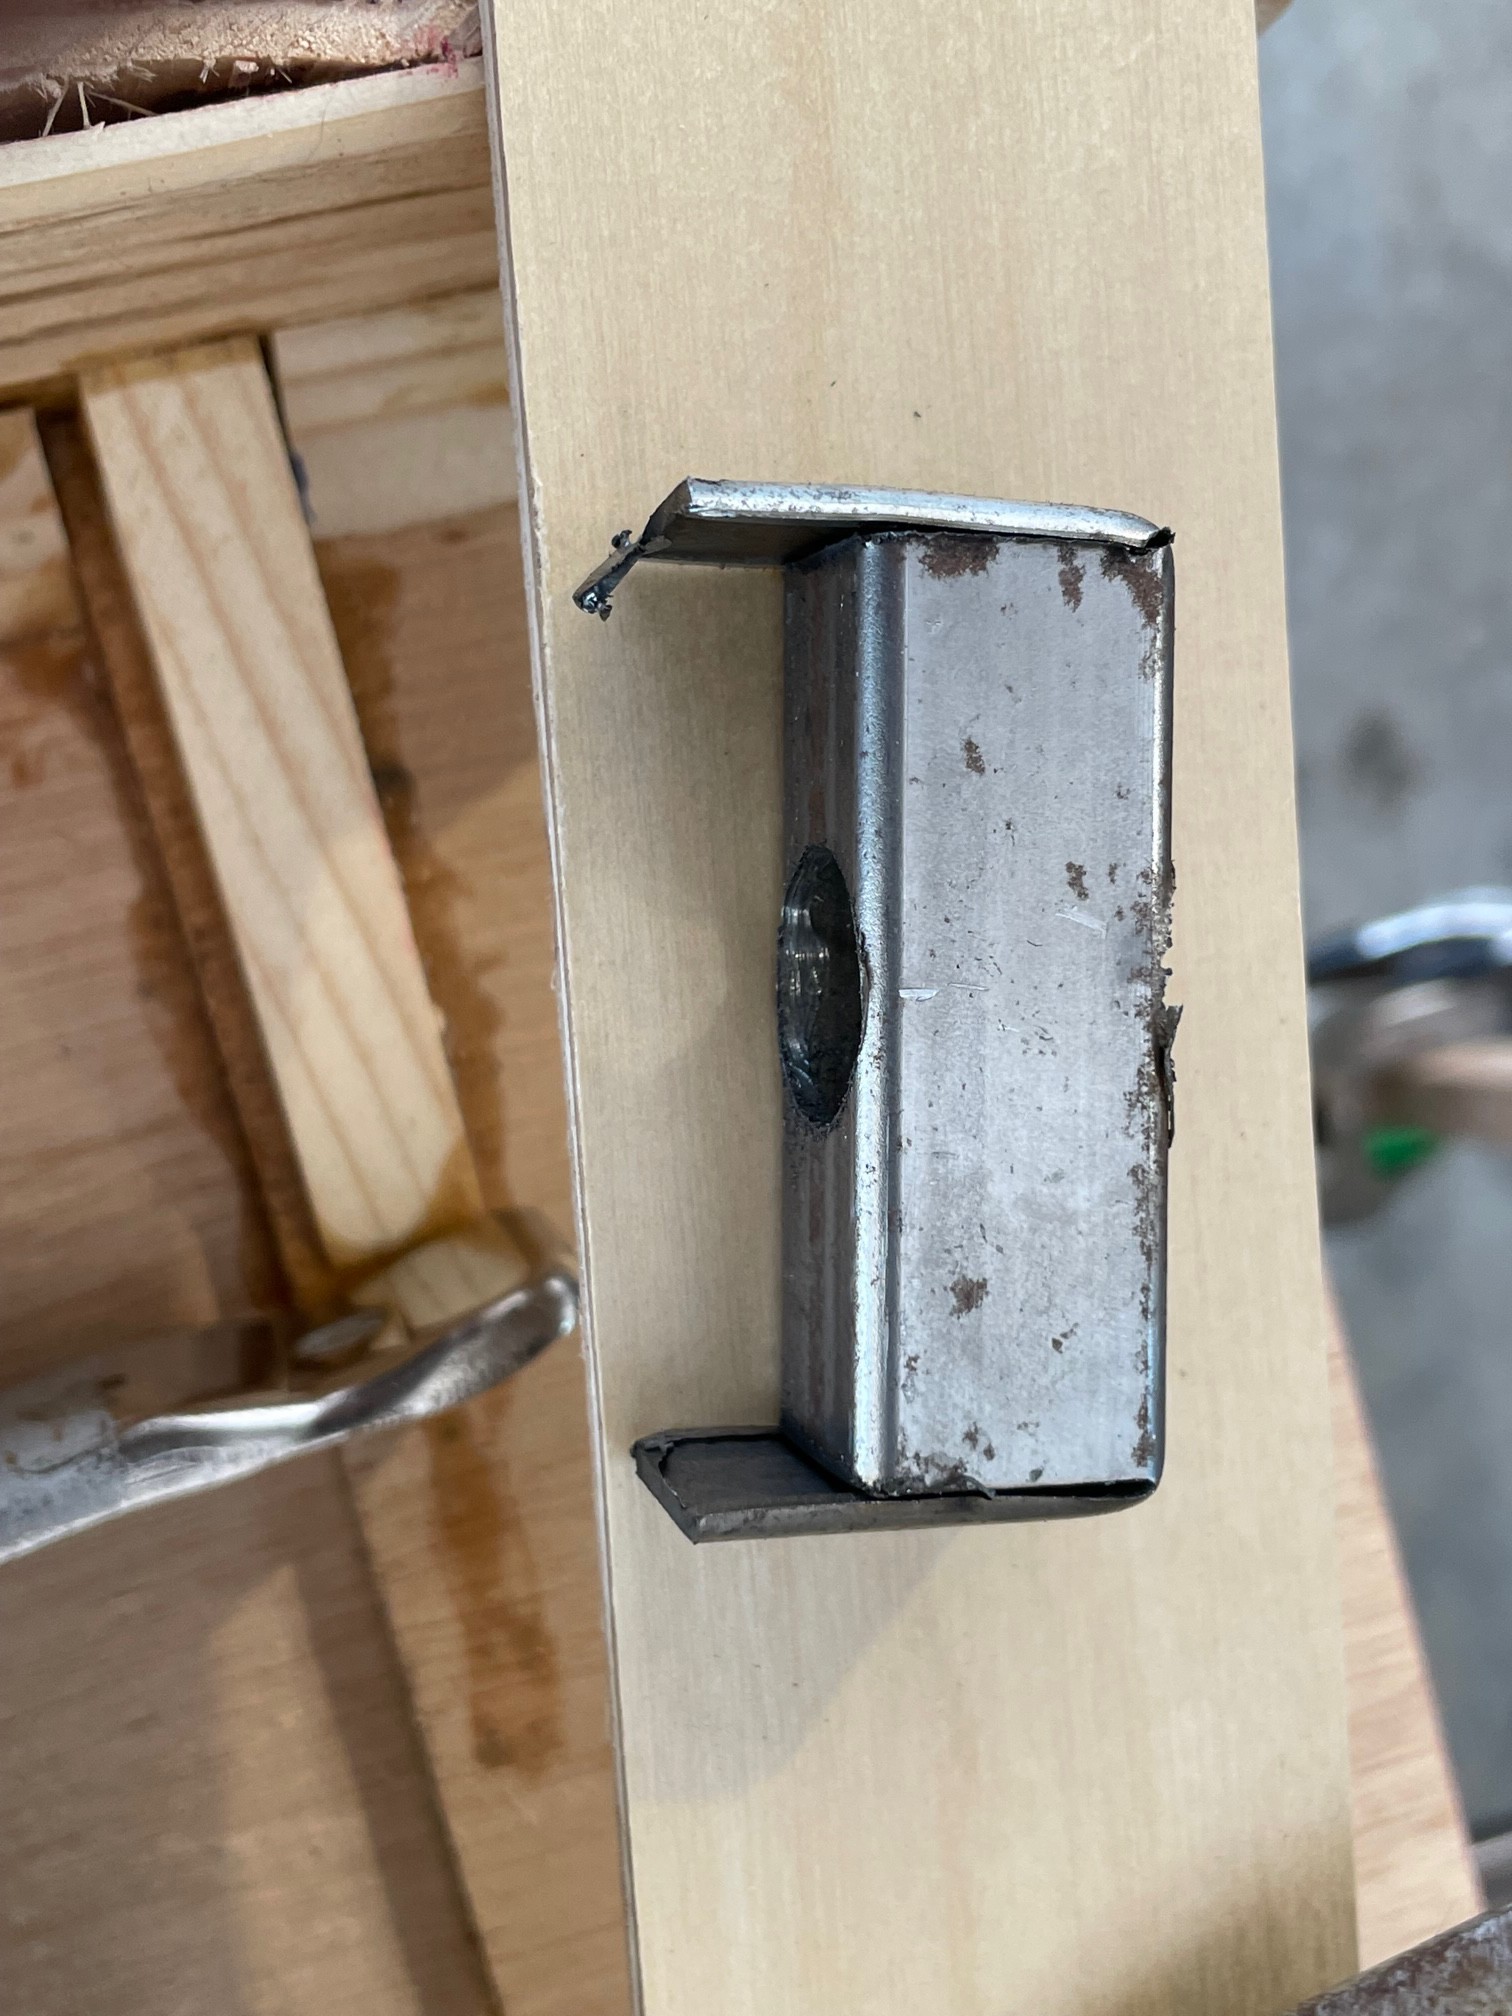
This is a small brace, I show it here because I was quite happy with how this turned out. The hole is a bit larger than 5/8", so I had to use a die grinder a bit.
![]()
Here is the side view of the steering column
![]()
And here is the view from the front. I'm not too happy with how clunky it looks though.
![]()
![]()
-
Steering, phase one.
09/10/2023 at 01:08 • 0 commentsseats are back burnered as I need to get some good hardwood.
So on to the steering.
![]()
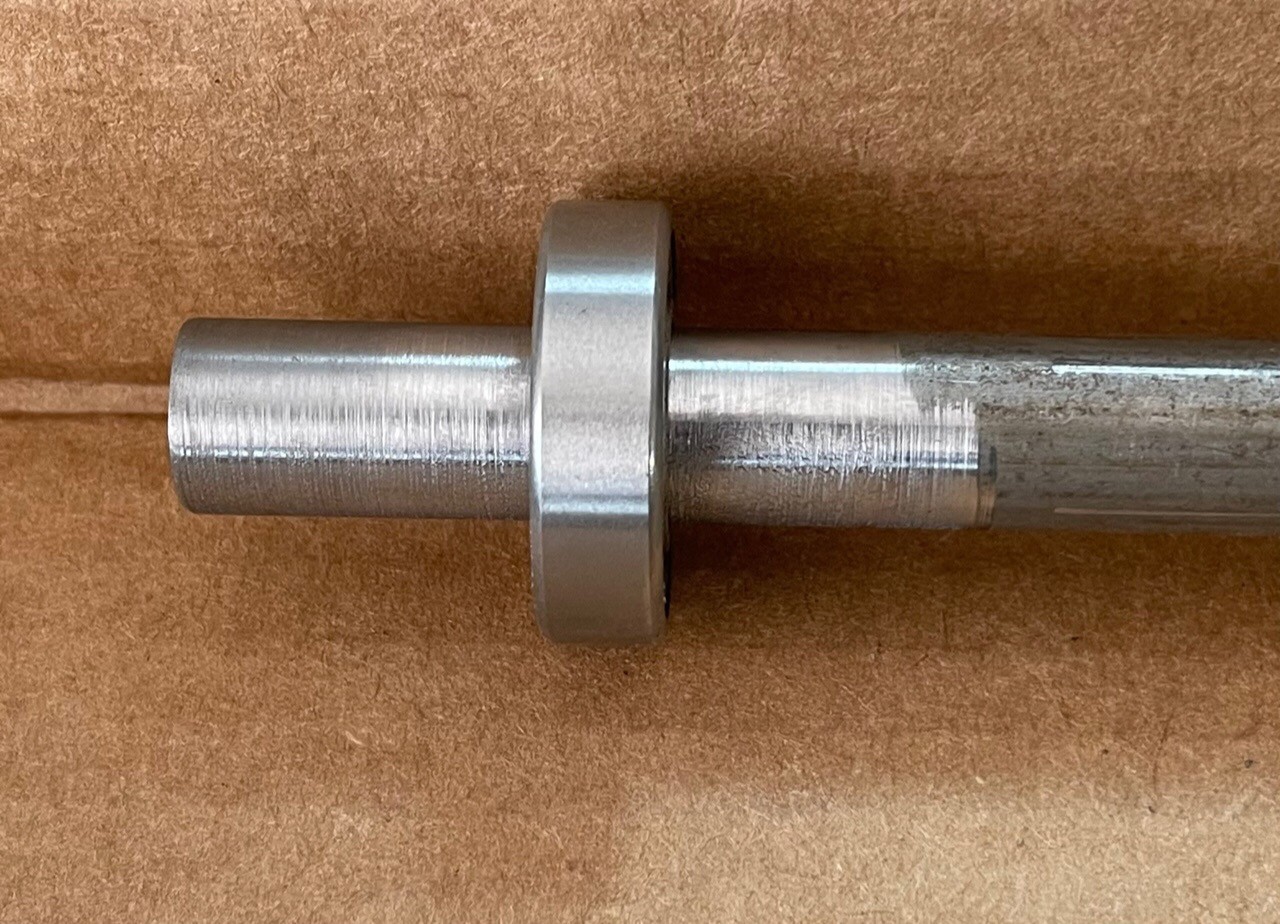
I needed to chase the OD of 0.5” tubing on the lathe to fit 0.5” ID bearing. Who knew?
![]()
This is the steering column.
![]()
![]()
![]()
![]()
![]()
-
Updated seats
09/01/2023 at 03:56 • 0 commentsI noticed that after a while the seat bottoms had warped extensively due to the tension of the upholstery webbing. so I redid the seat bottoms.
I laminated two pieces for the bottom with a predistortion and added two additional laminations at the front edge. Cleats now line the wholes sides, and the height was increased from 2.25 to 3”
![]()
![]()
-
After a couple months, Woody now has some woodworking!
08/31/2023 at 03:54 • 0 commentswell, the work table was woodworking too, but that doesn’t count. These are the frames for the seat.
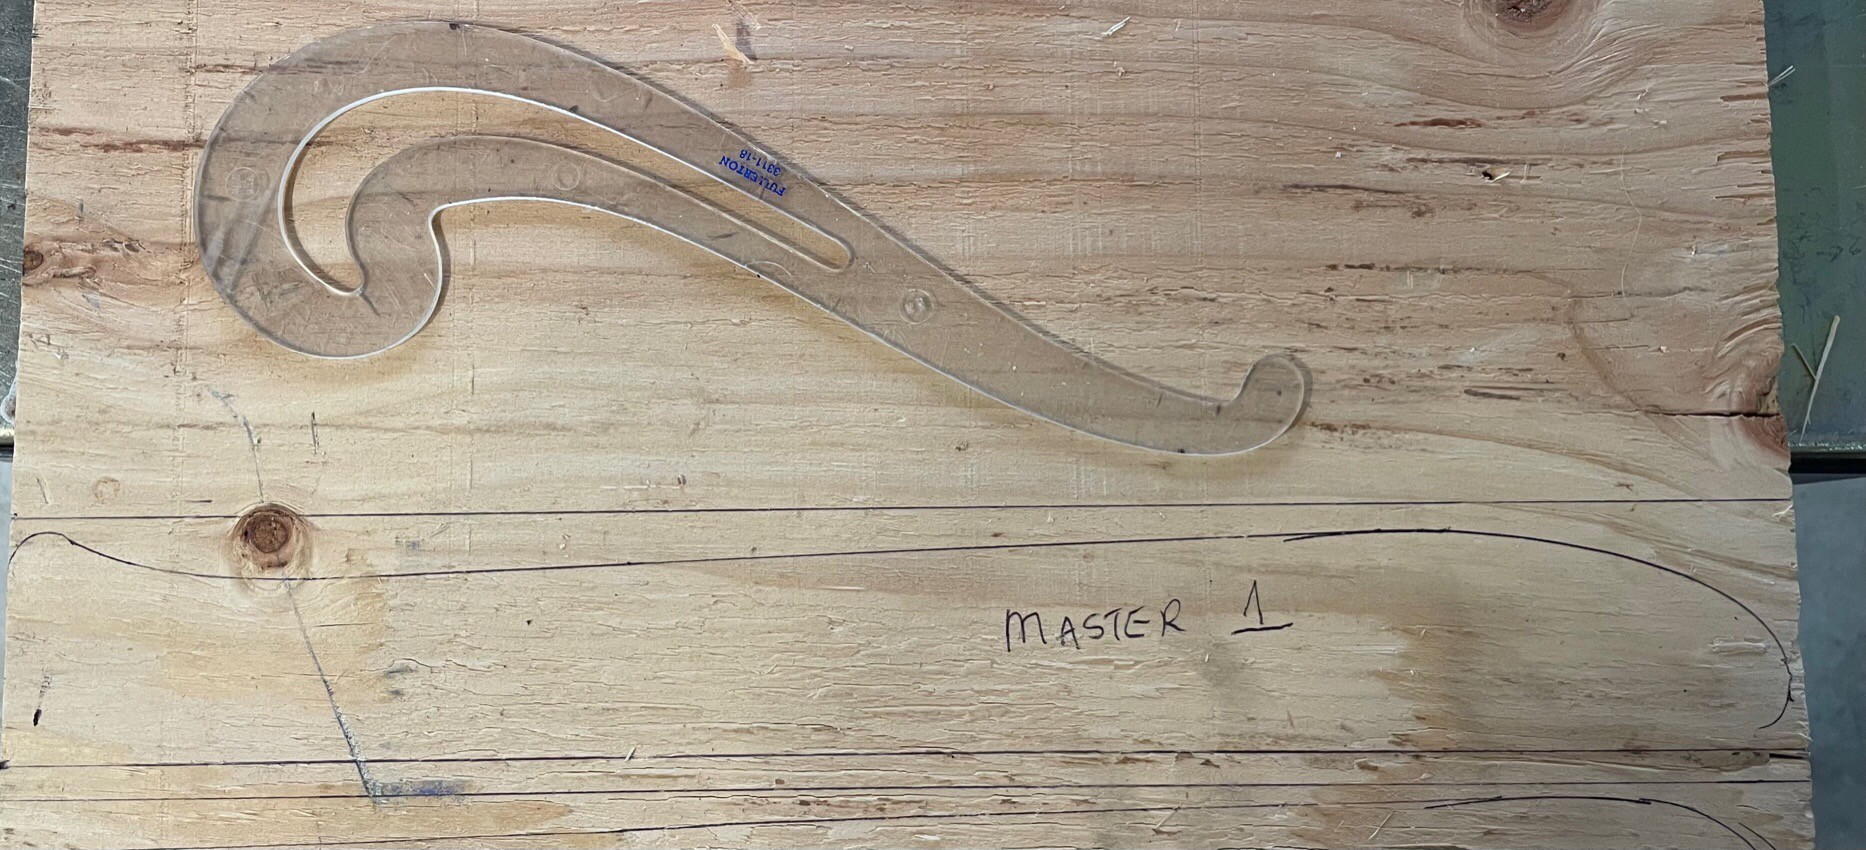
start off with a trusty French Curve.![]()
The seat overall leans back a bit, but drops at the nose for thigh clearance when pedaling, and rises at the back to hold one’s butt steady. That French curve is about 4k years old!
The part labeled master was used to make a router template.
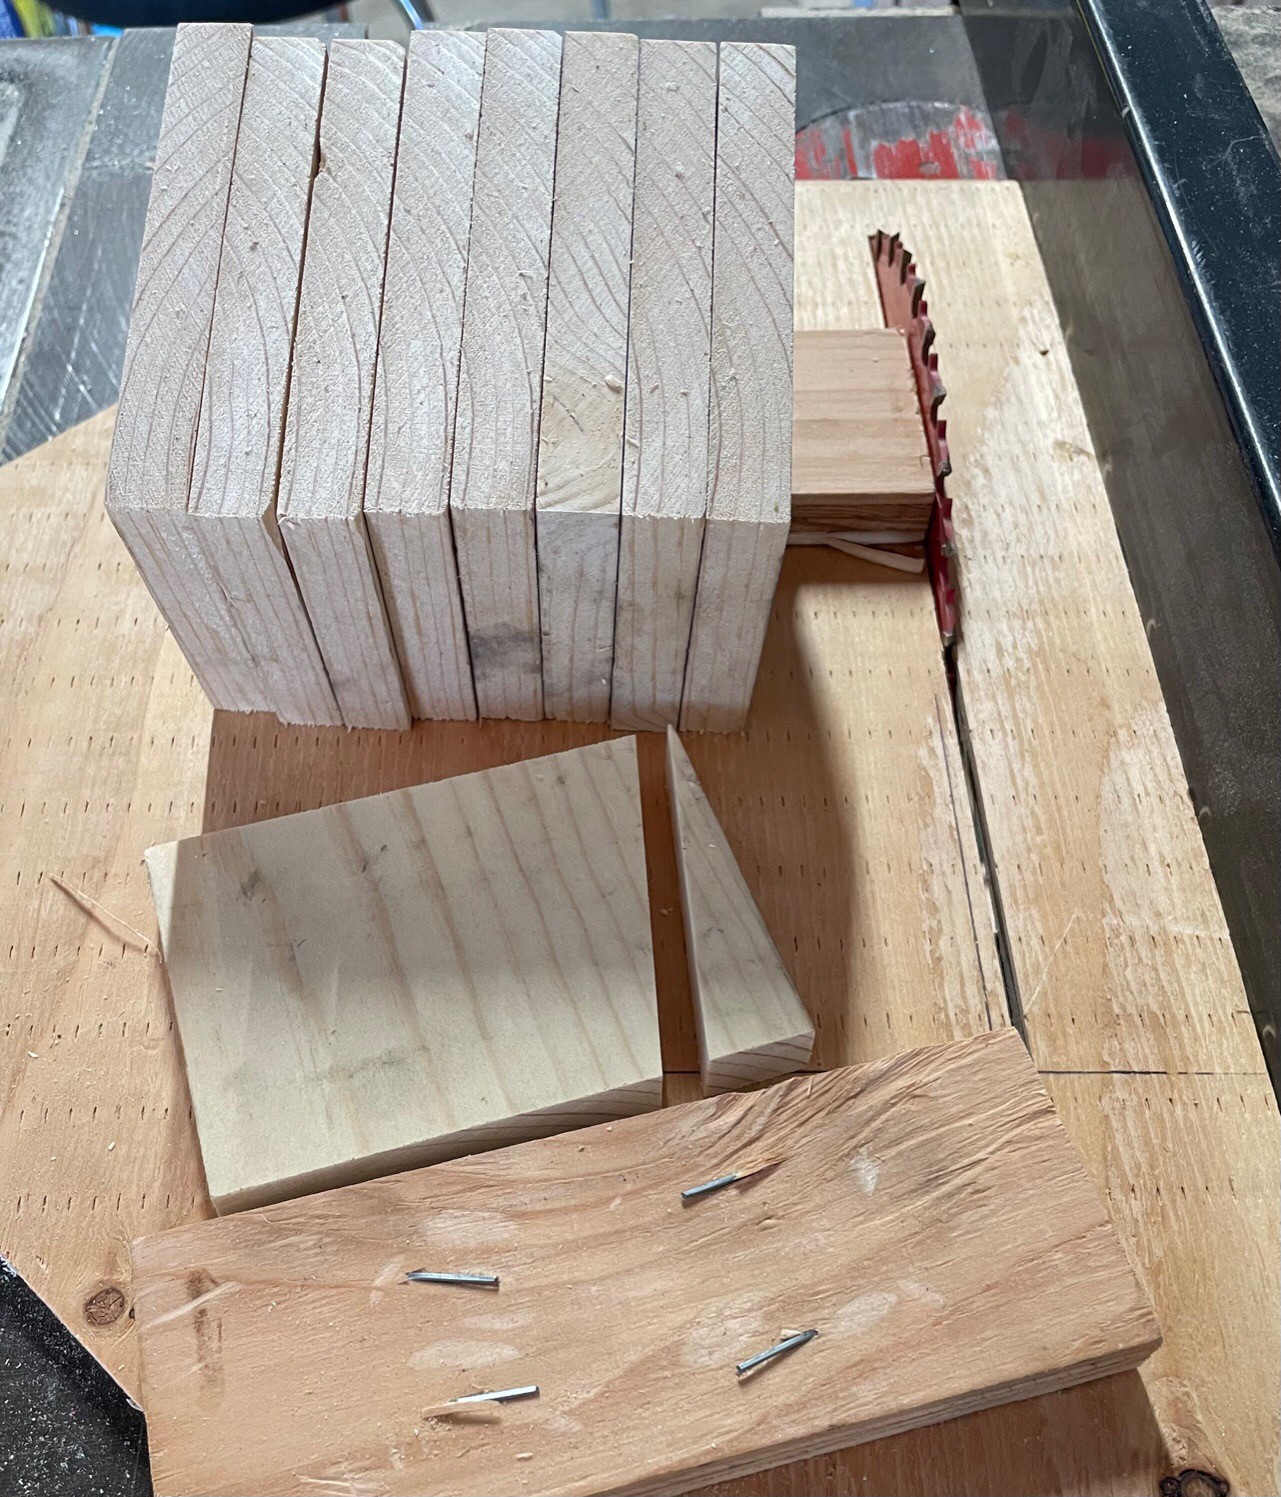
Next was some braces, triangular, about 3” x 3/4”, usage shown later. A quick n dirty jig helps here.
![]()
![]()
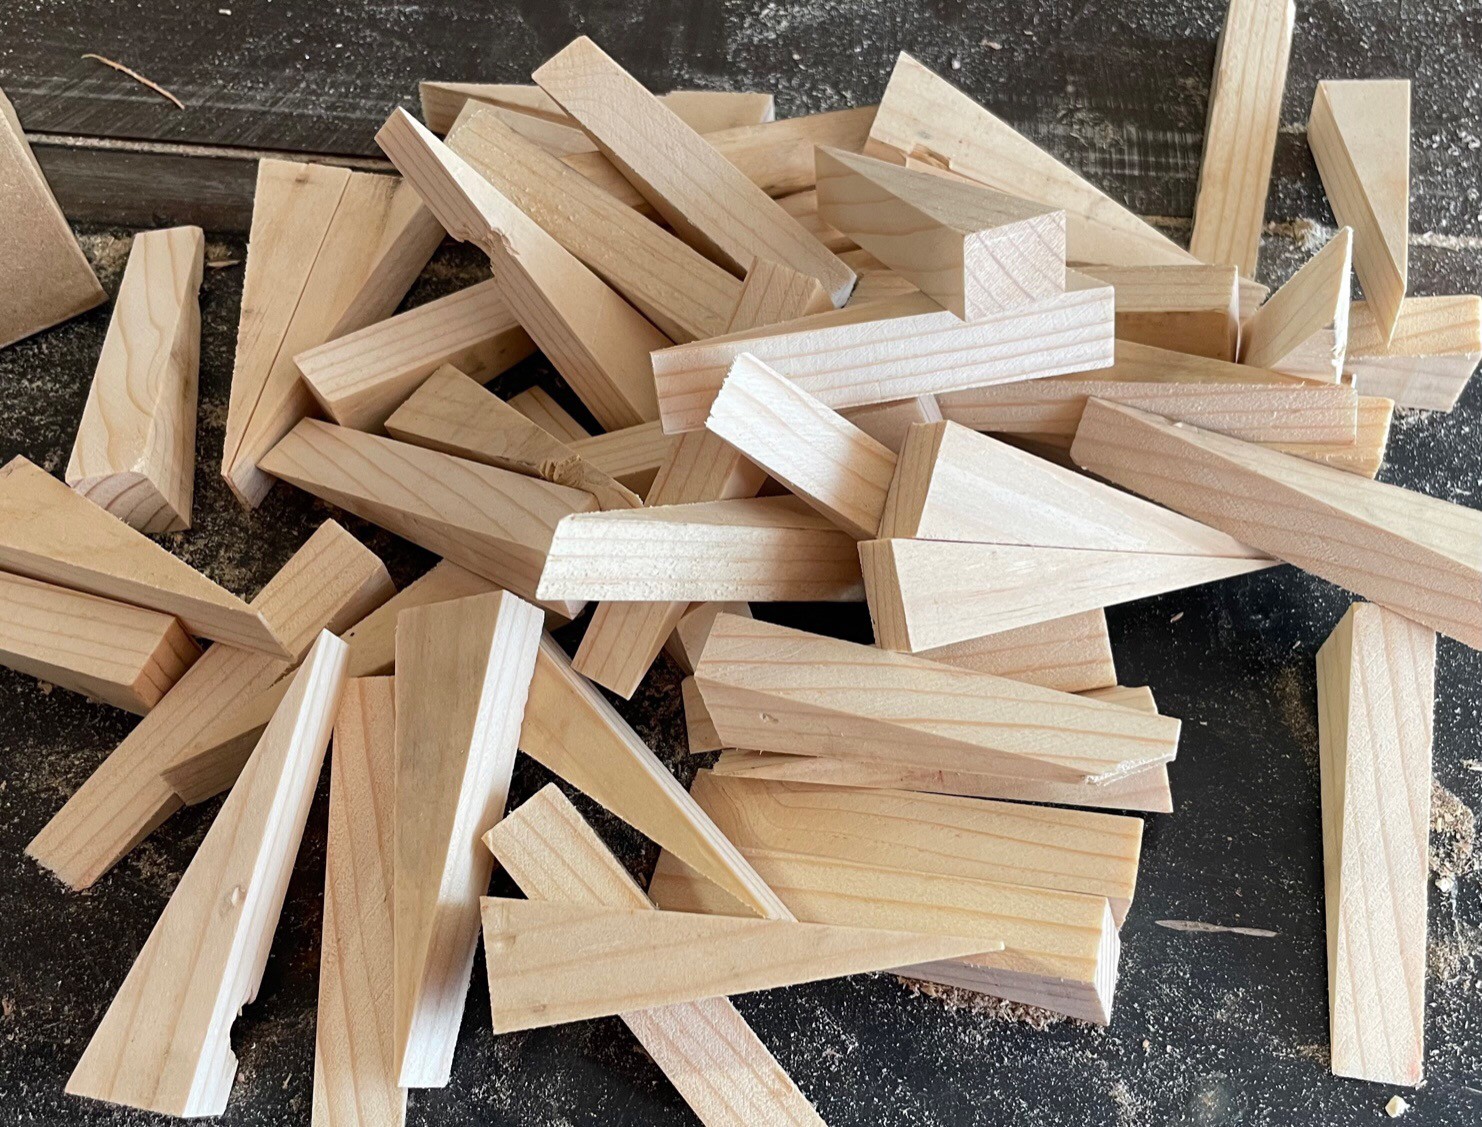
the seat bottoms are glued up with the triangular braces to help offset the tension of the elastic webbing.![]()
![]()
-
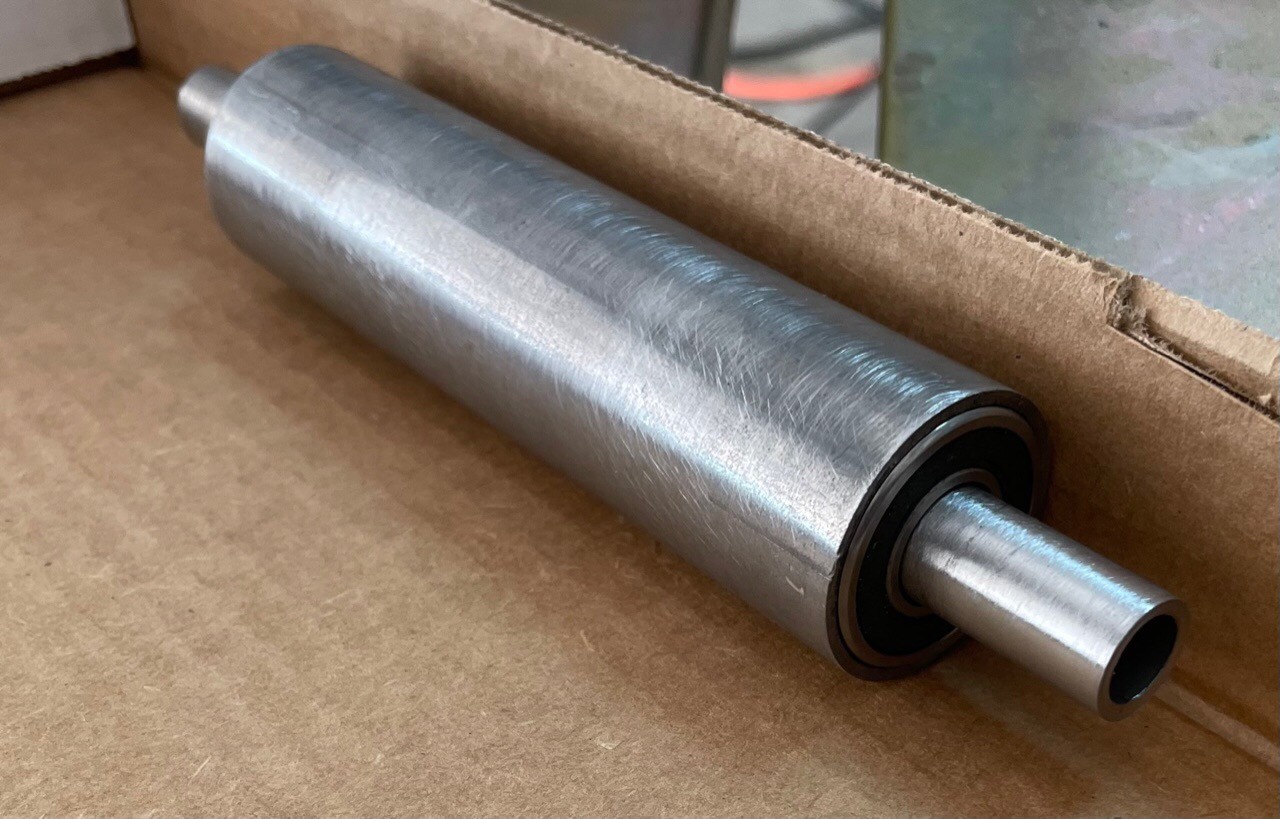
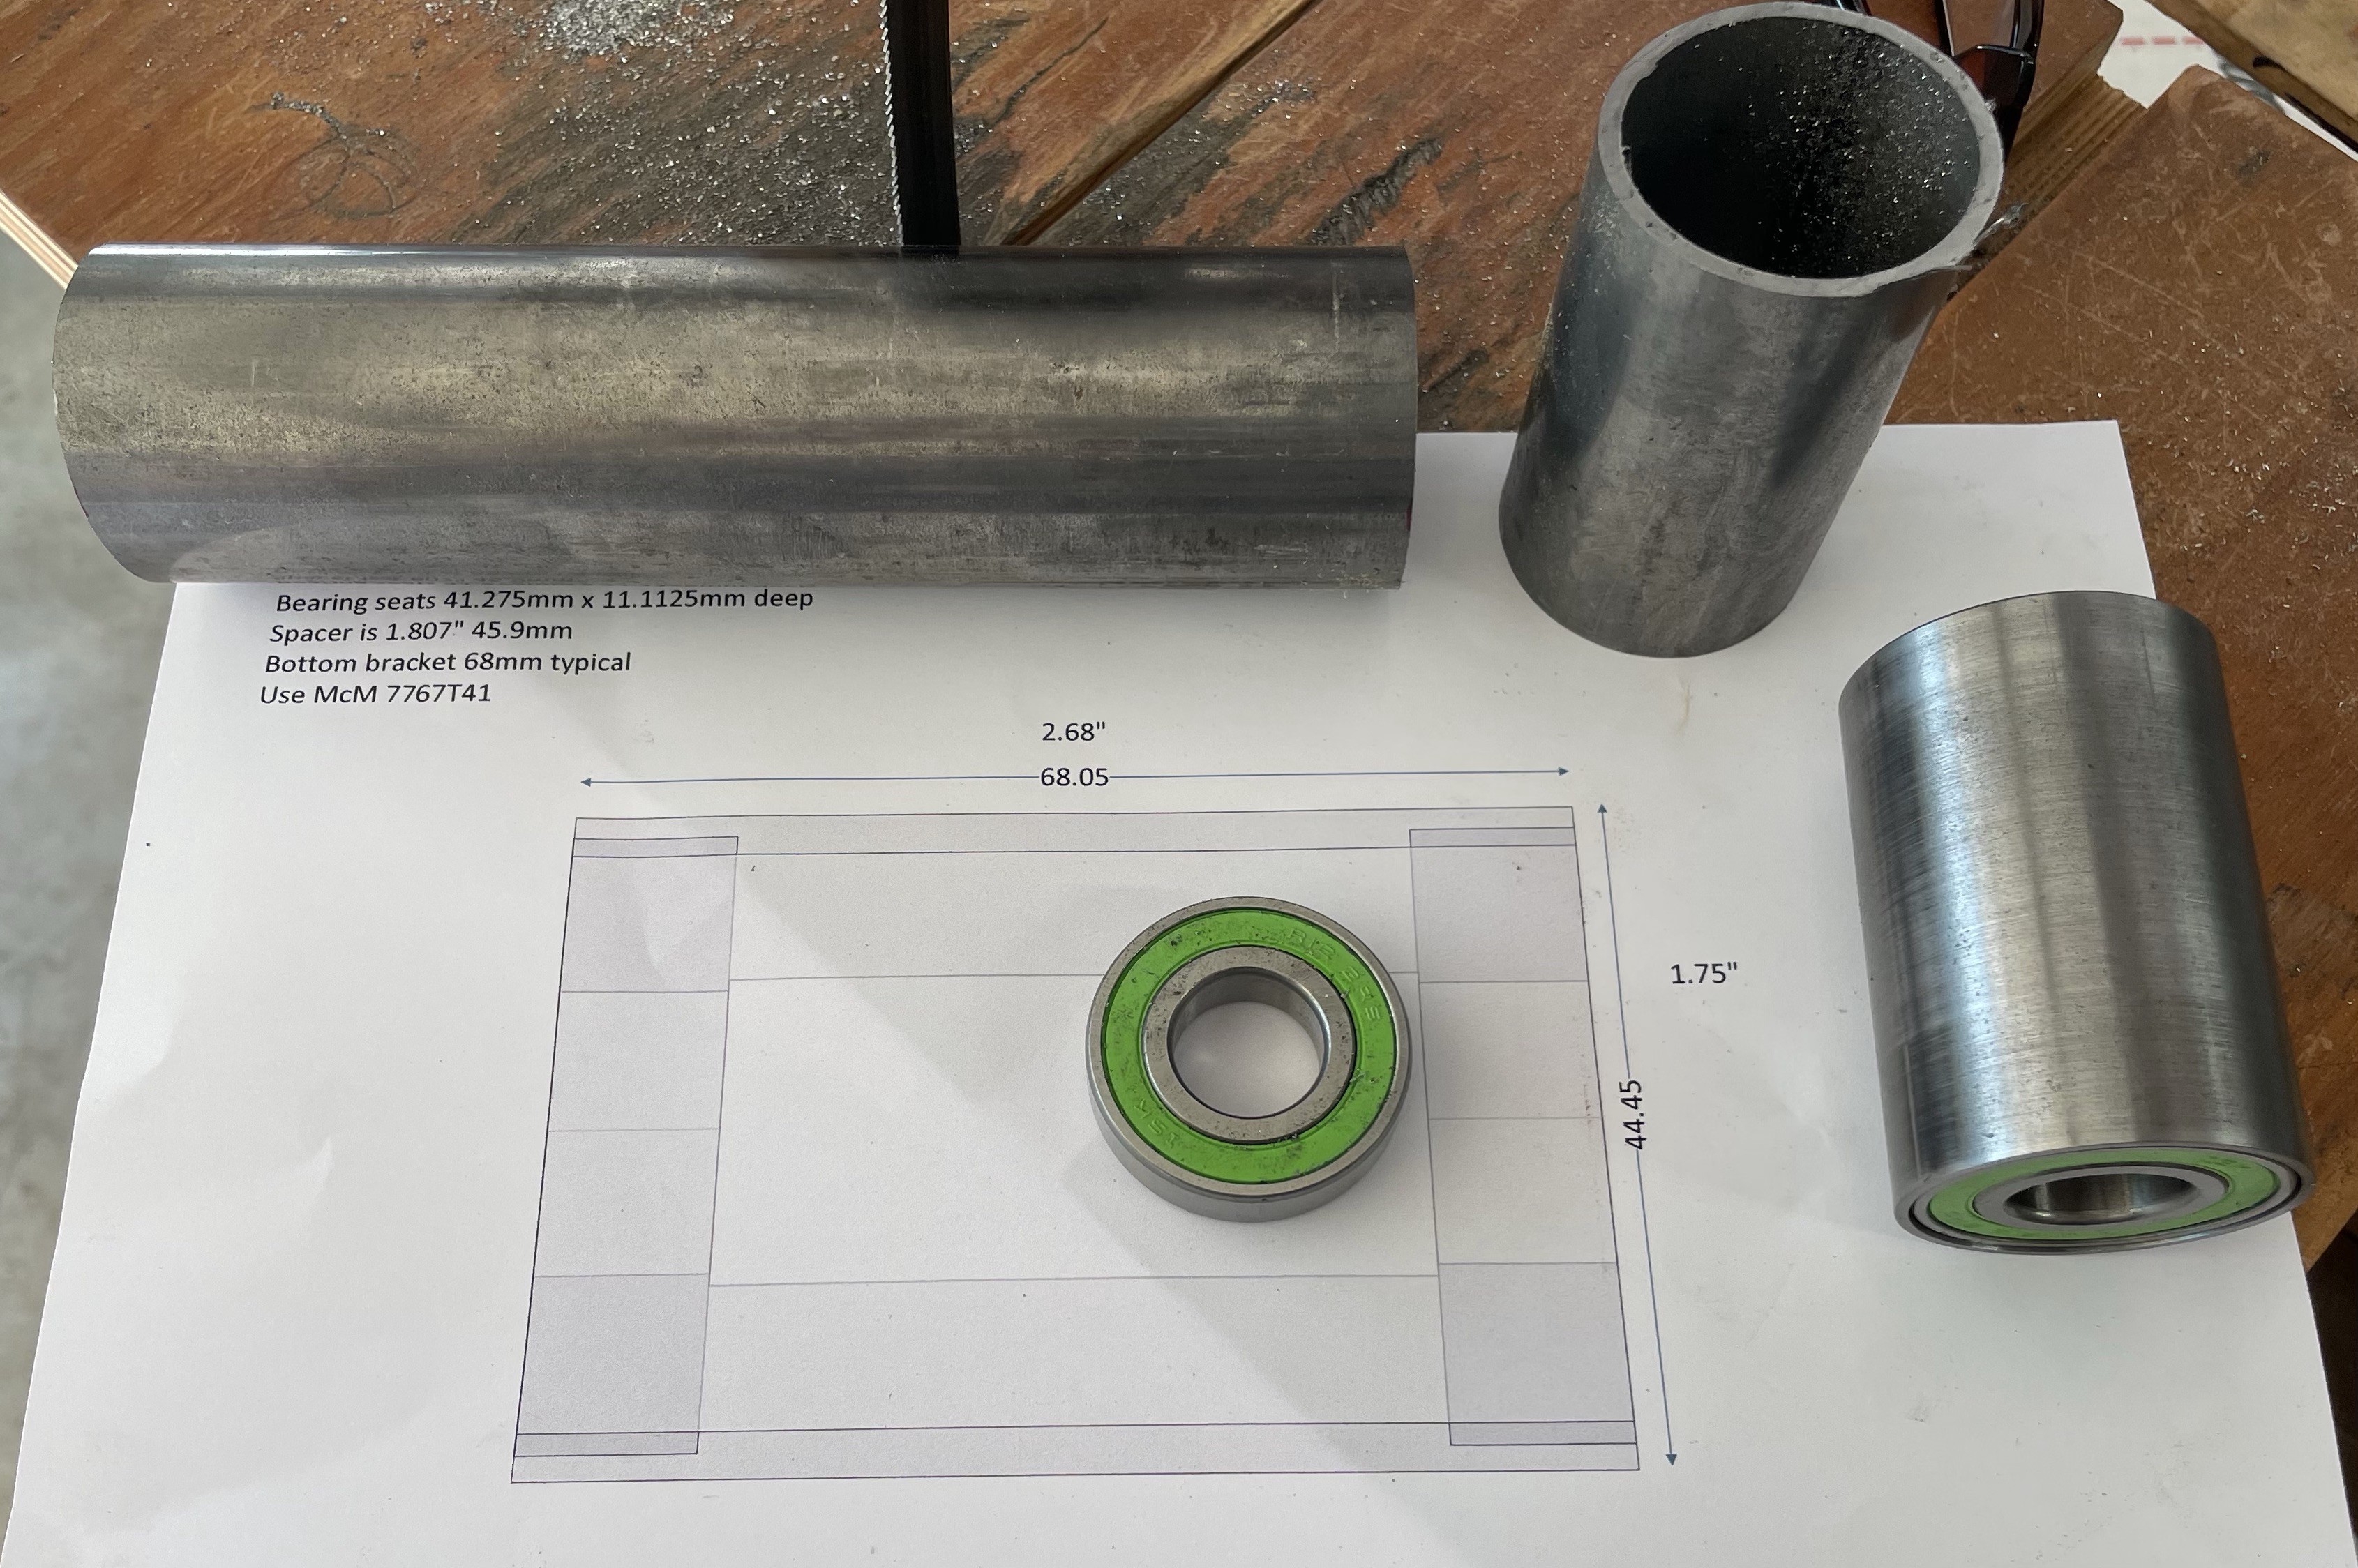
Back to the Lathe…
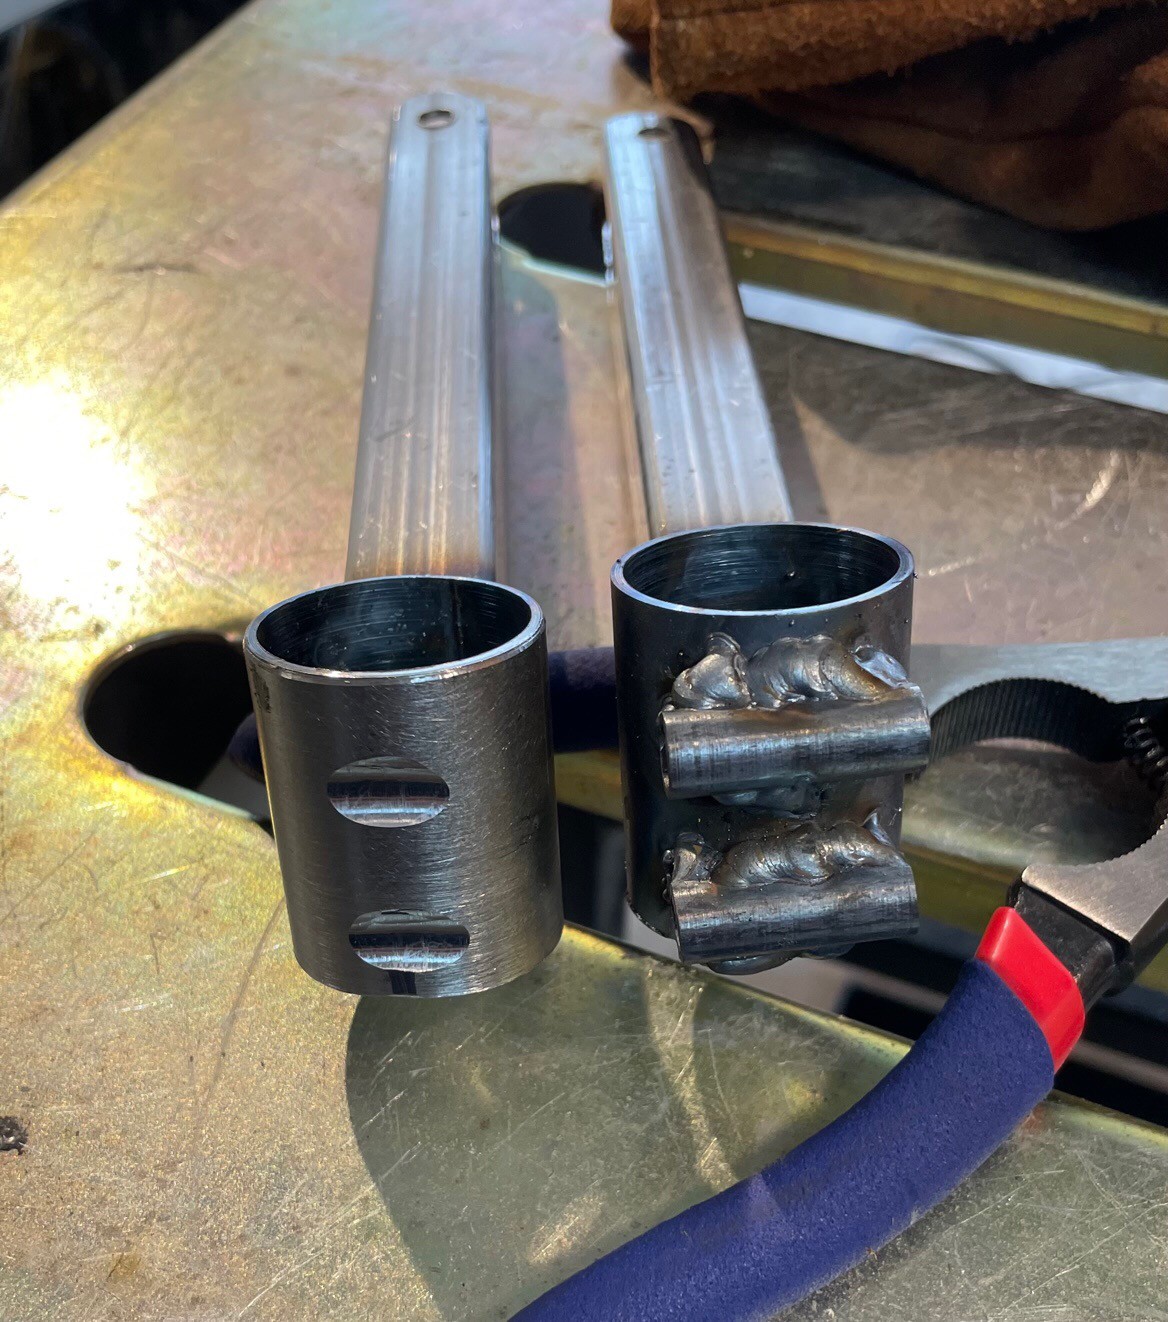
08/29/2023 at 03:55 • 0 commentsSo, on to the bottom brackets. Start with a piece of 1.75” OD tubing, and cut off two pieces a bit proud of 68mm. Squared the ends, cut bearing seats, and gave the edges a bit of sanding. Repeat for second. These use bmx bottom brackets.
![]()
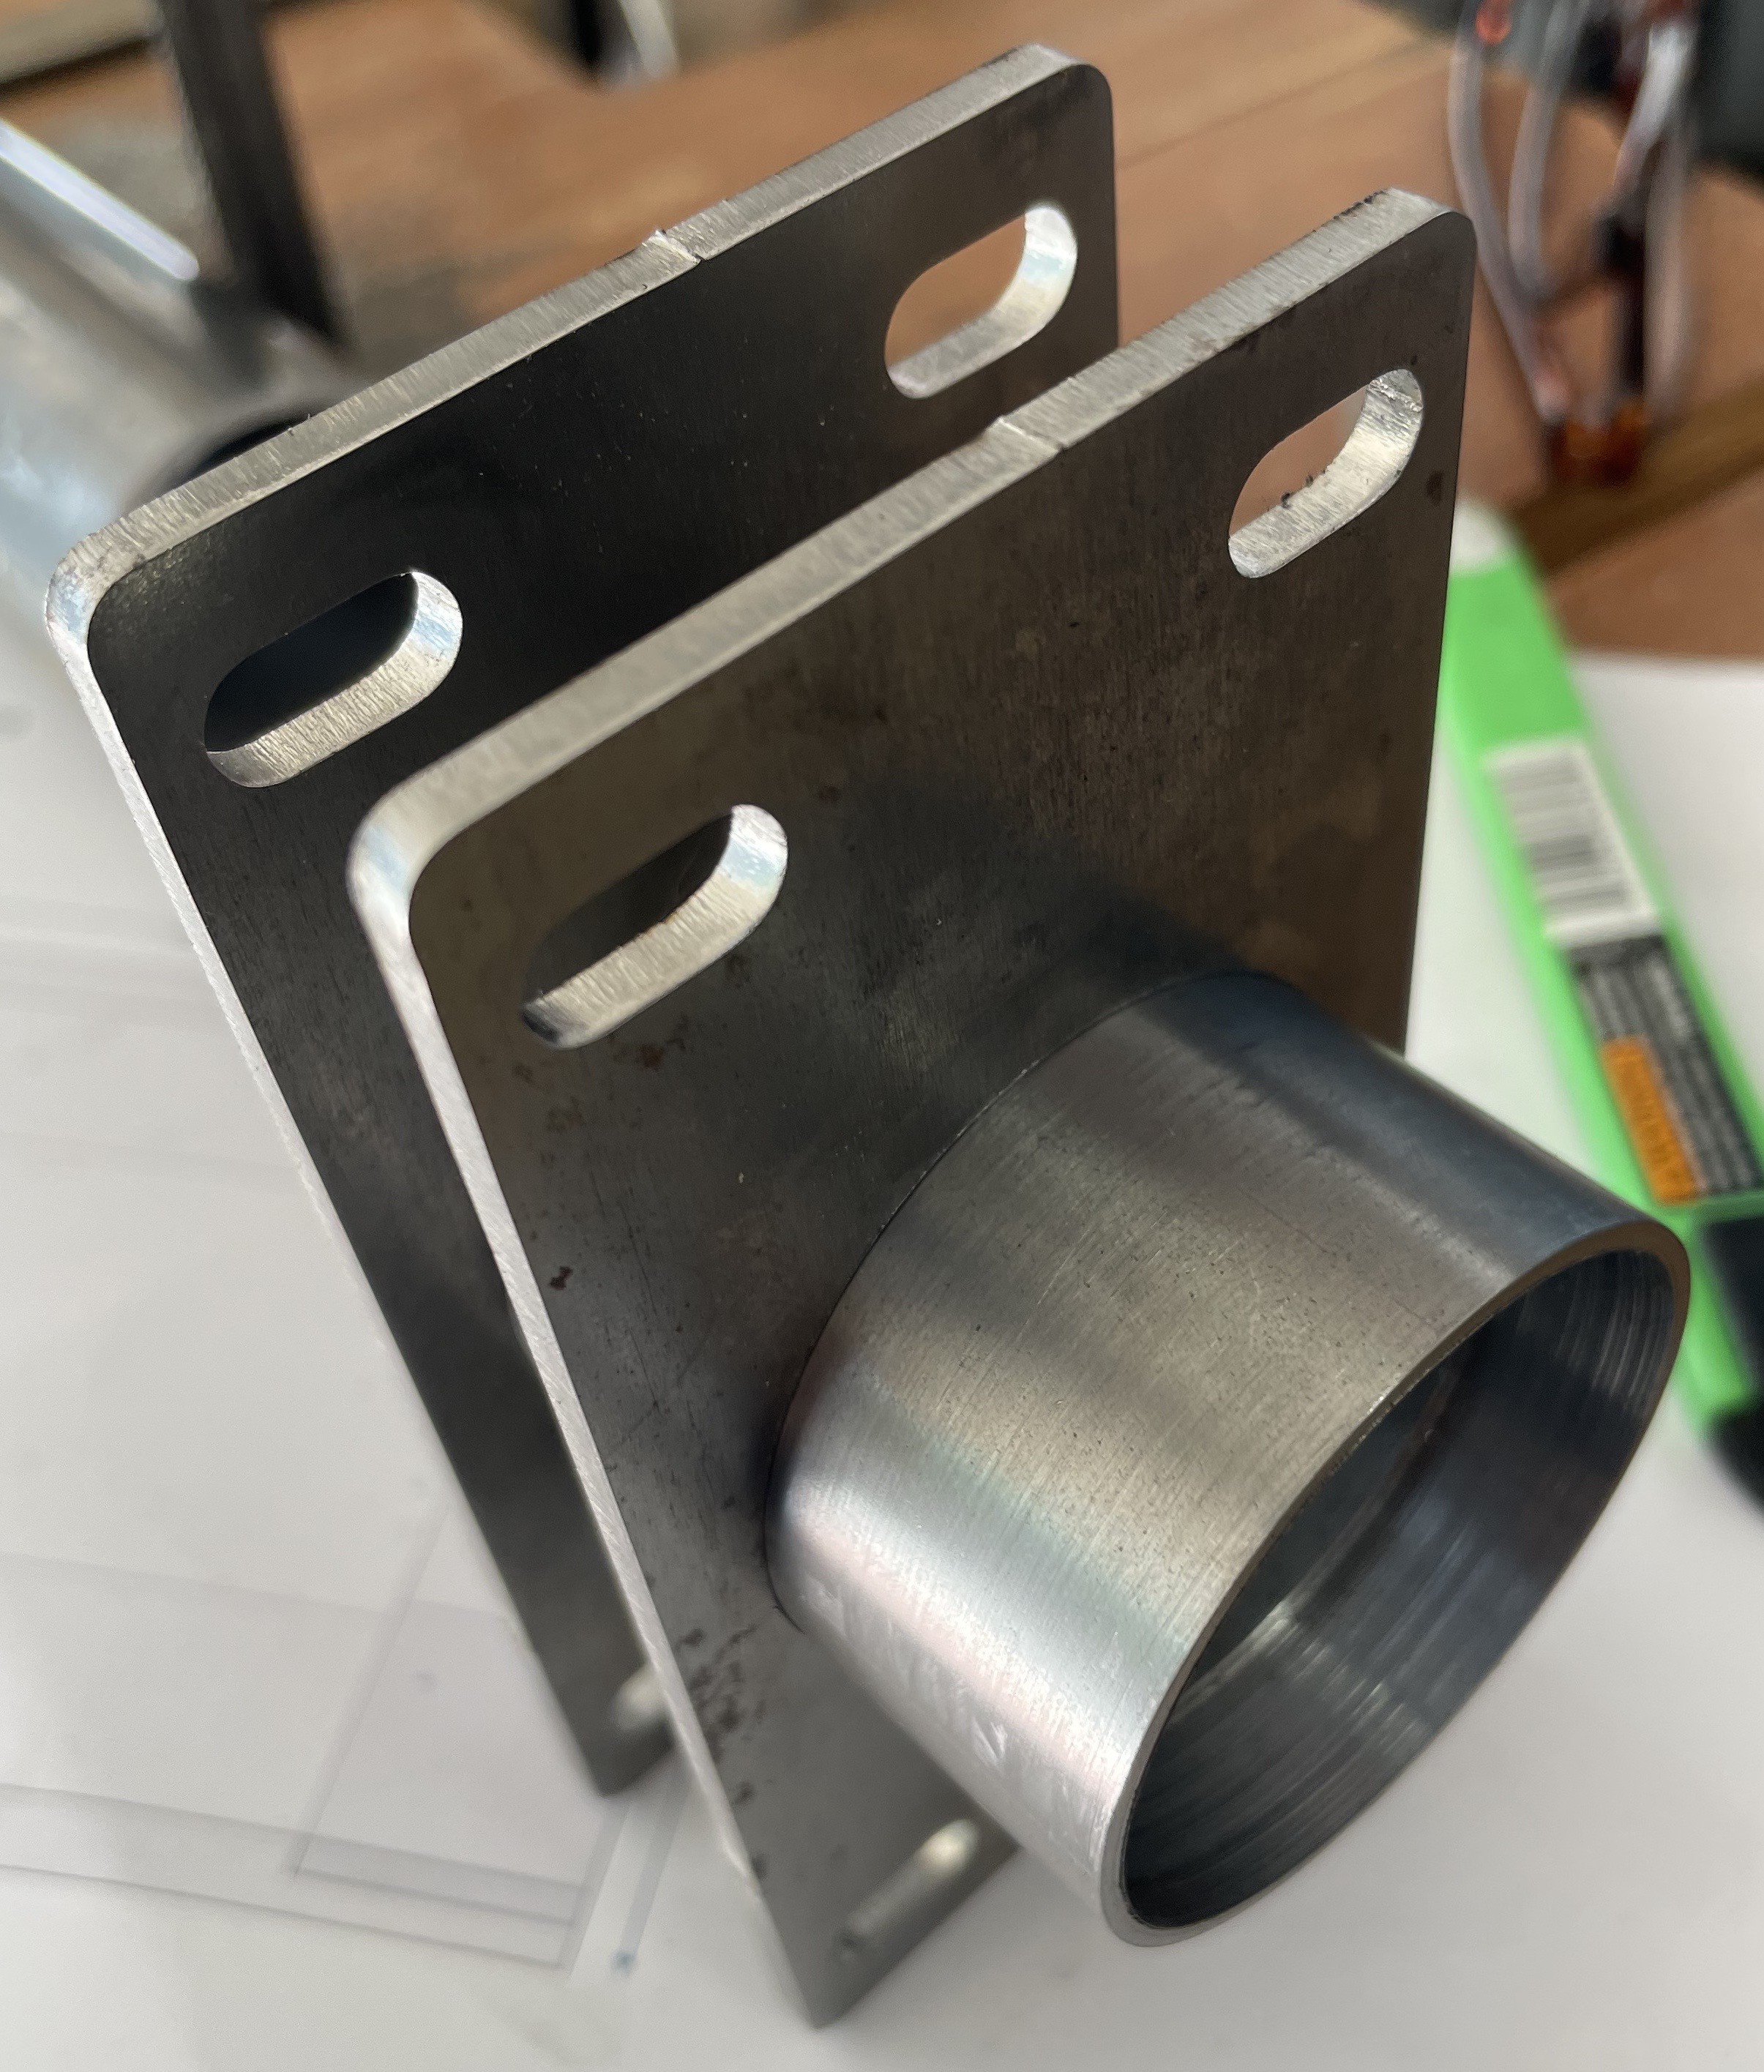
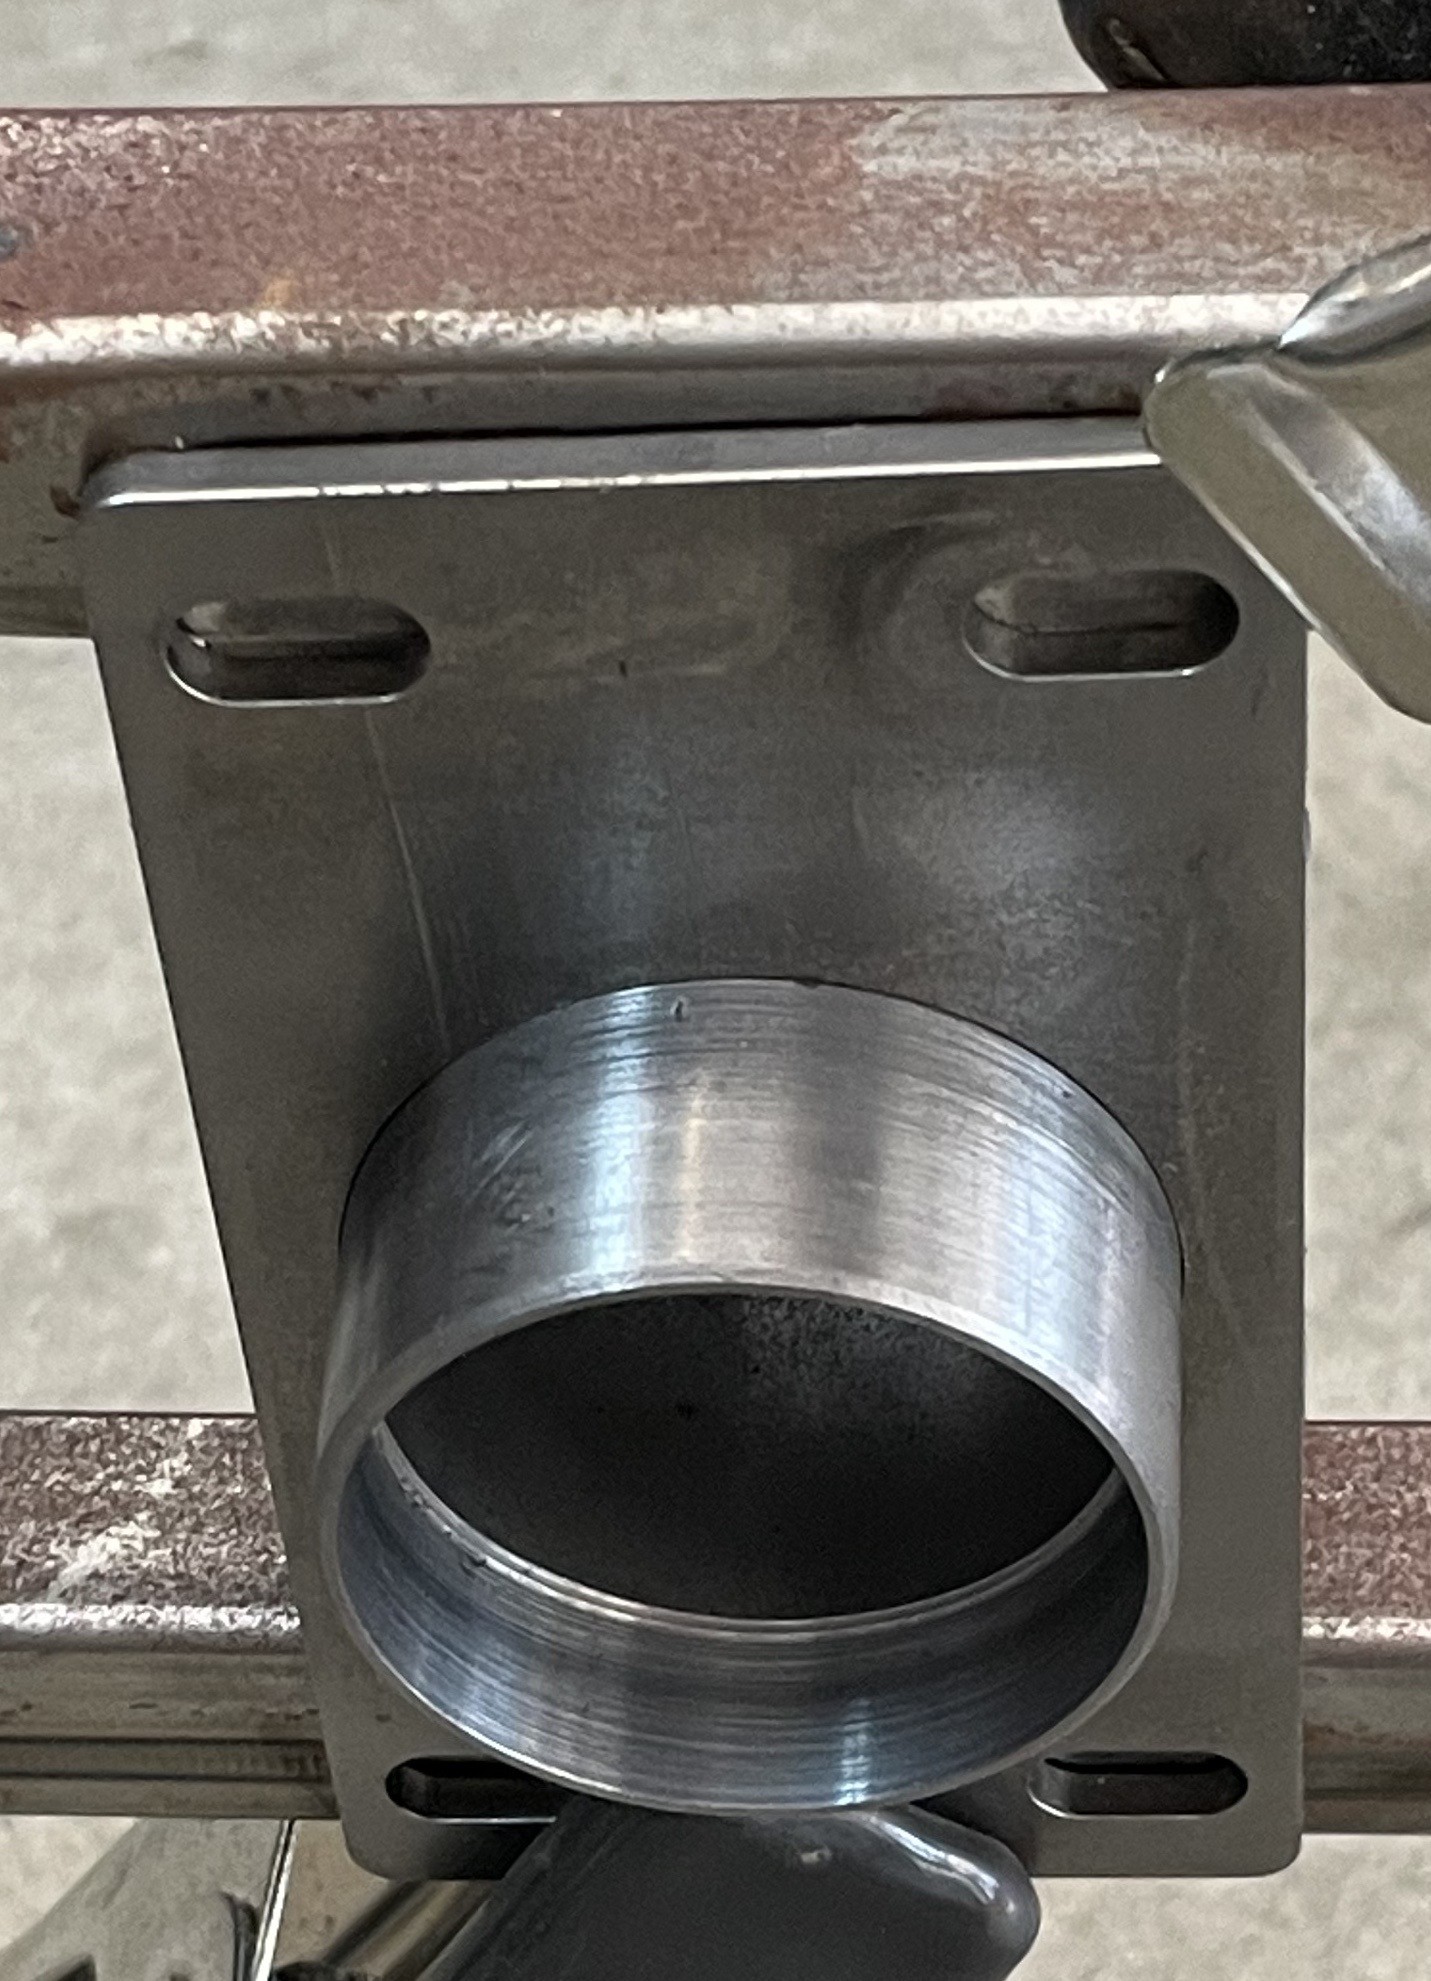
Added to the BB are two plates from sendcutsend.com . These needed just a quick touch with a 1.5” drum sander in a cordless drill and voila!![]()
These allow 0.6” of fore and aft adjustment for chain tensioning. They clamp to a TBD place on the frame per below.
![]()
![]()
-
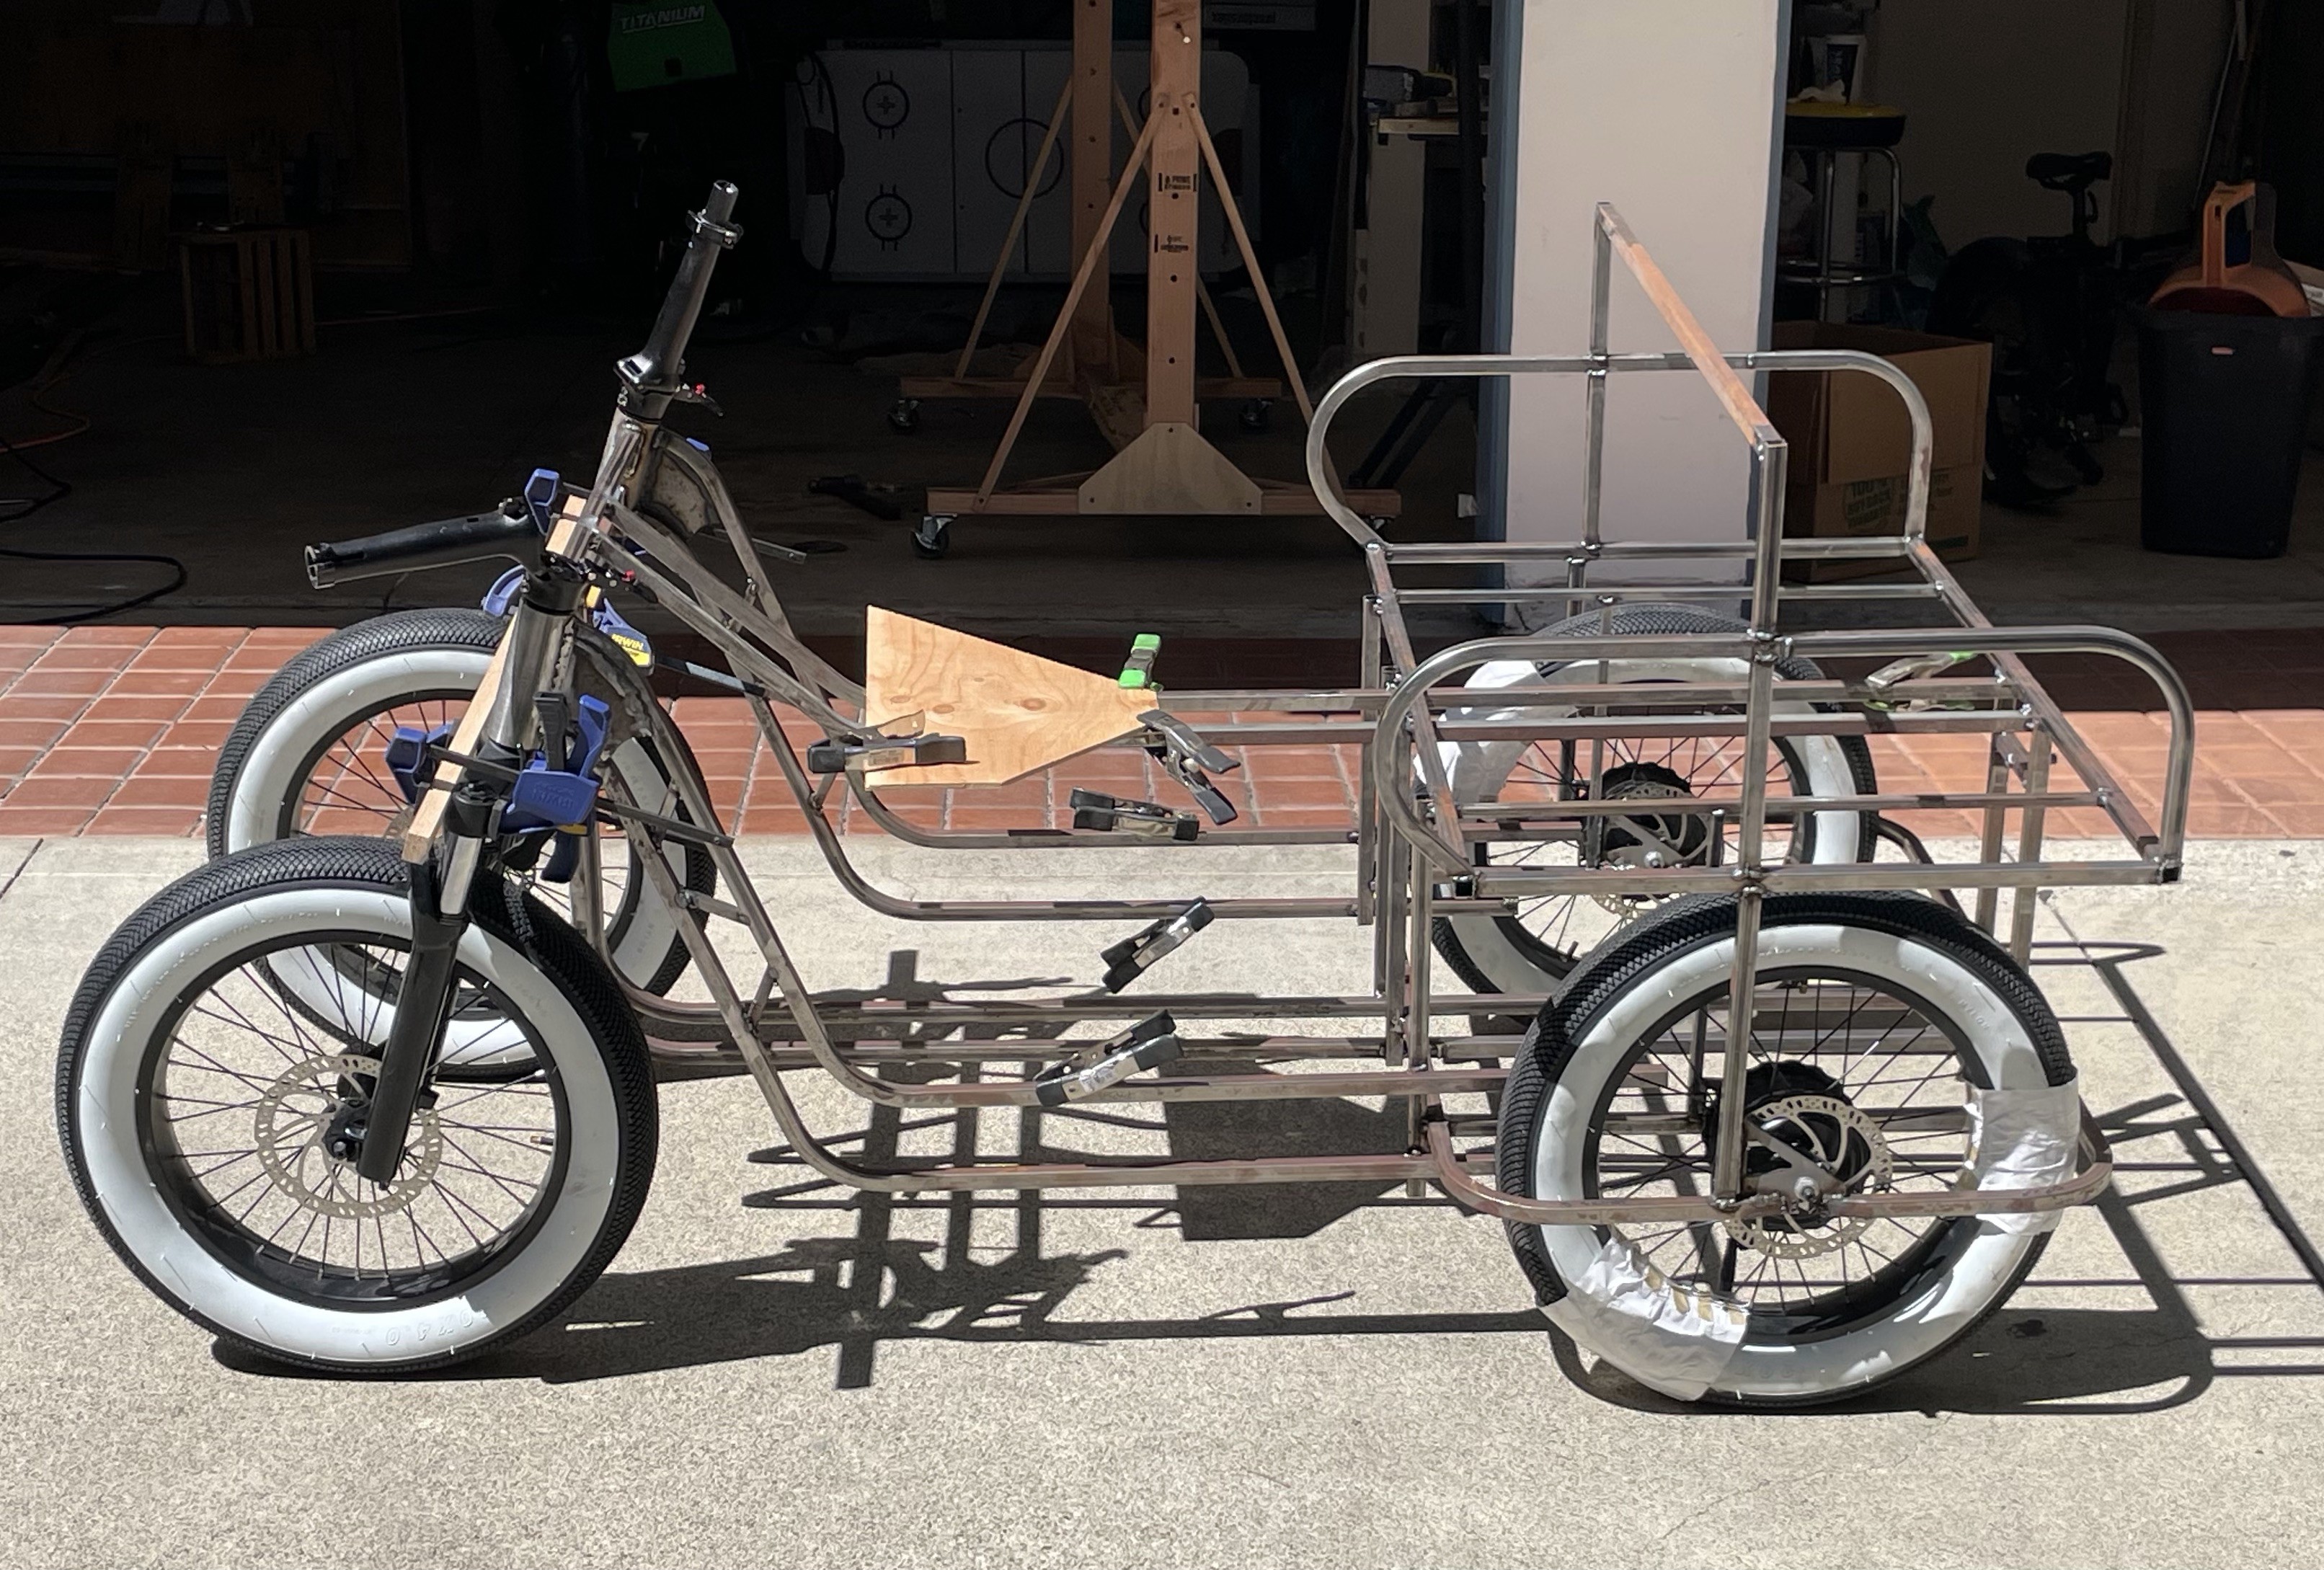
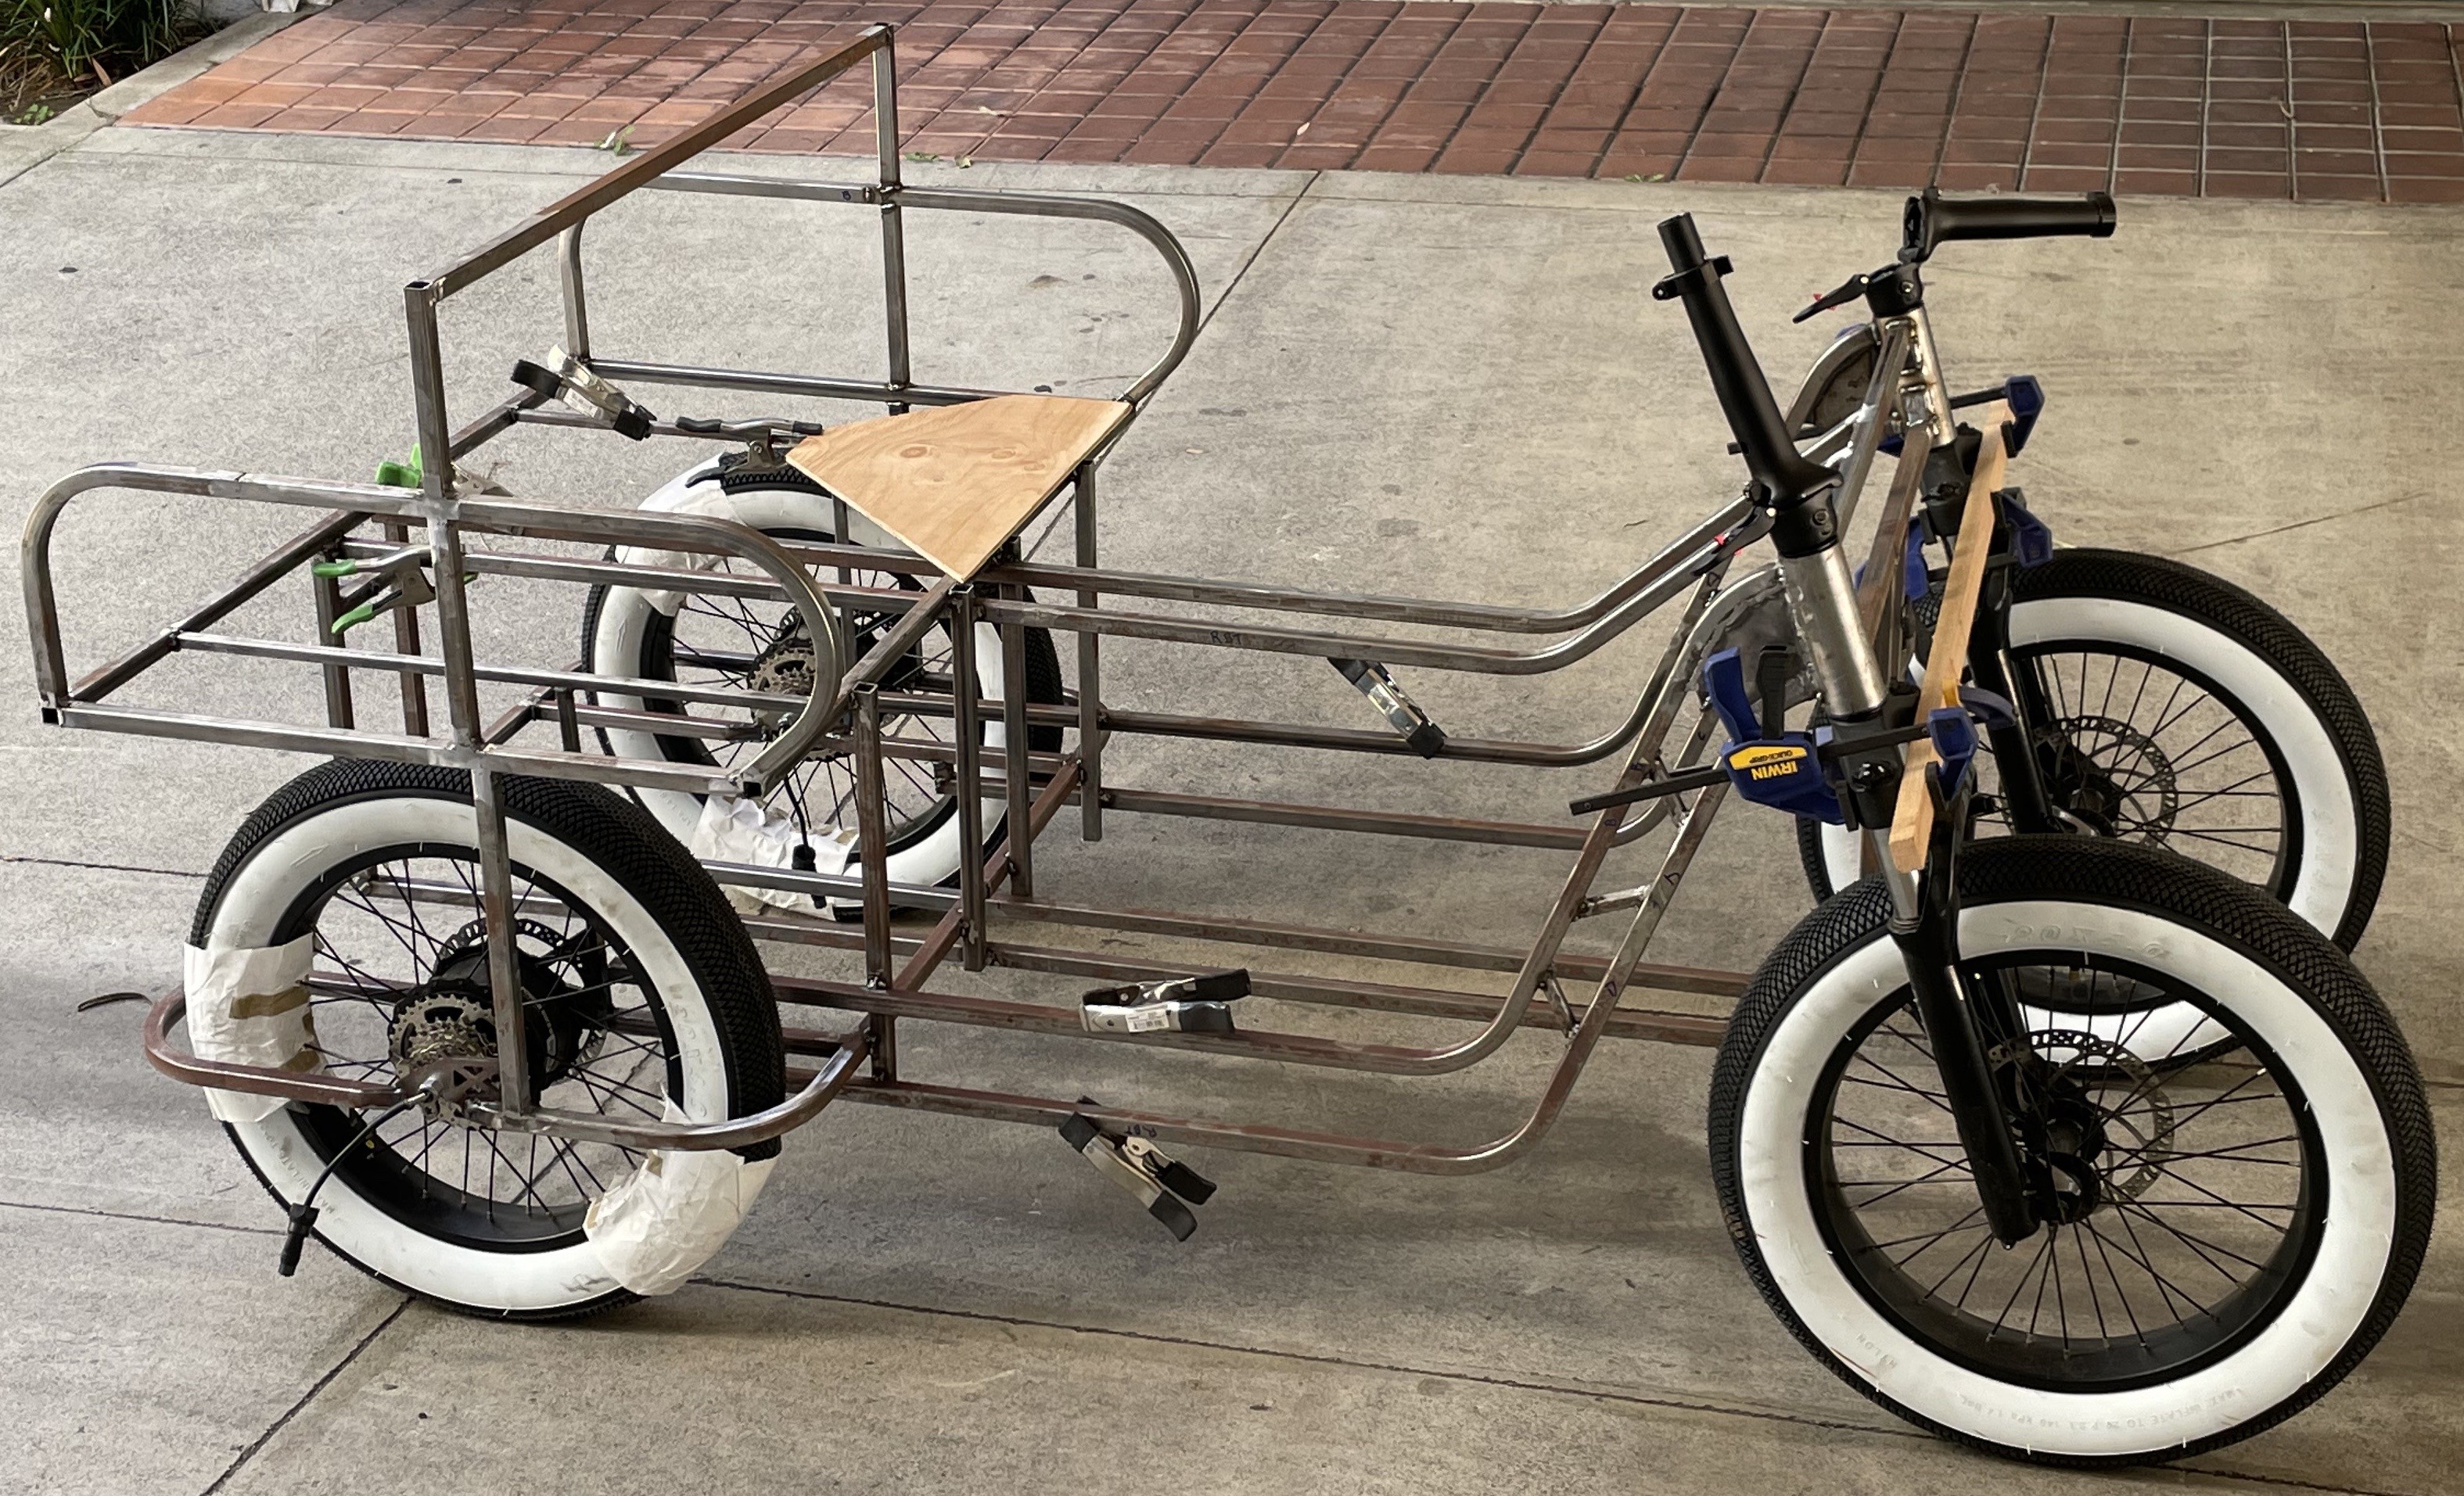
They see me rolling…..
08/27/2023 at 05:27 • 0 commentsToday the wheels are on! However, this is not as done as it seems. I need the wheels on to determine seating angles, pedal position, and location of the handle bar.
![]()
![]()
Oh, and I’ve upped my welding game. I got a new wide view/side view welding helmet with a cheater lens, and two clamp on spot slights to improve visibility. Two welds below, on left done a few weeks back, on the right was today. These are both simple seams where the narrowed tubing is seamed back up.
![]()
-
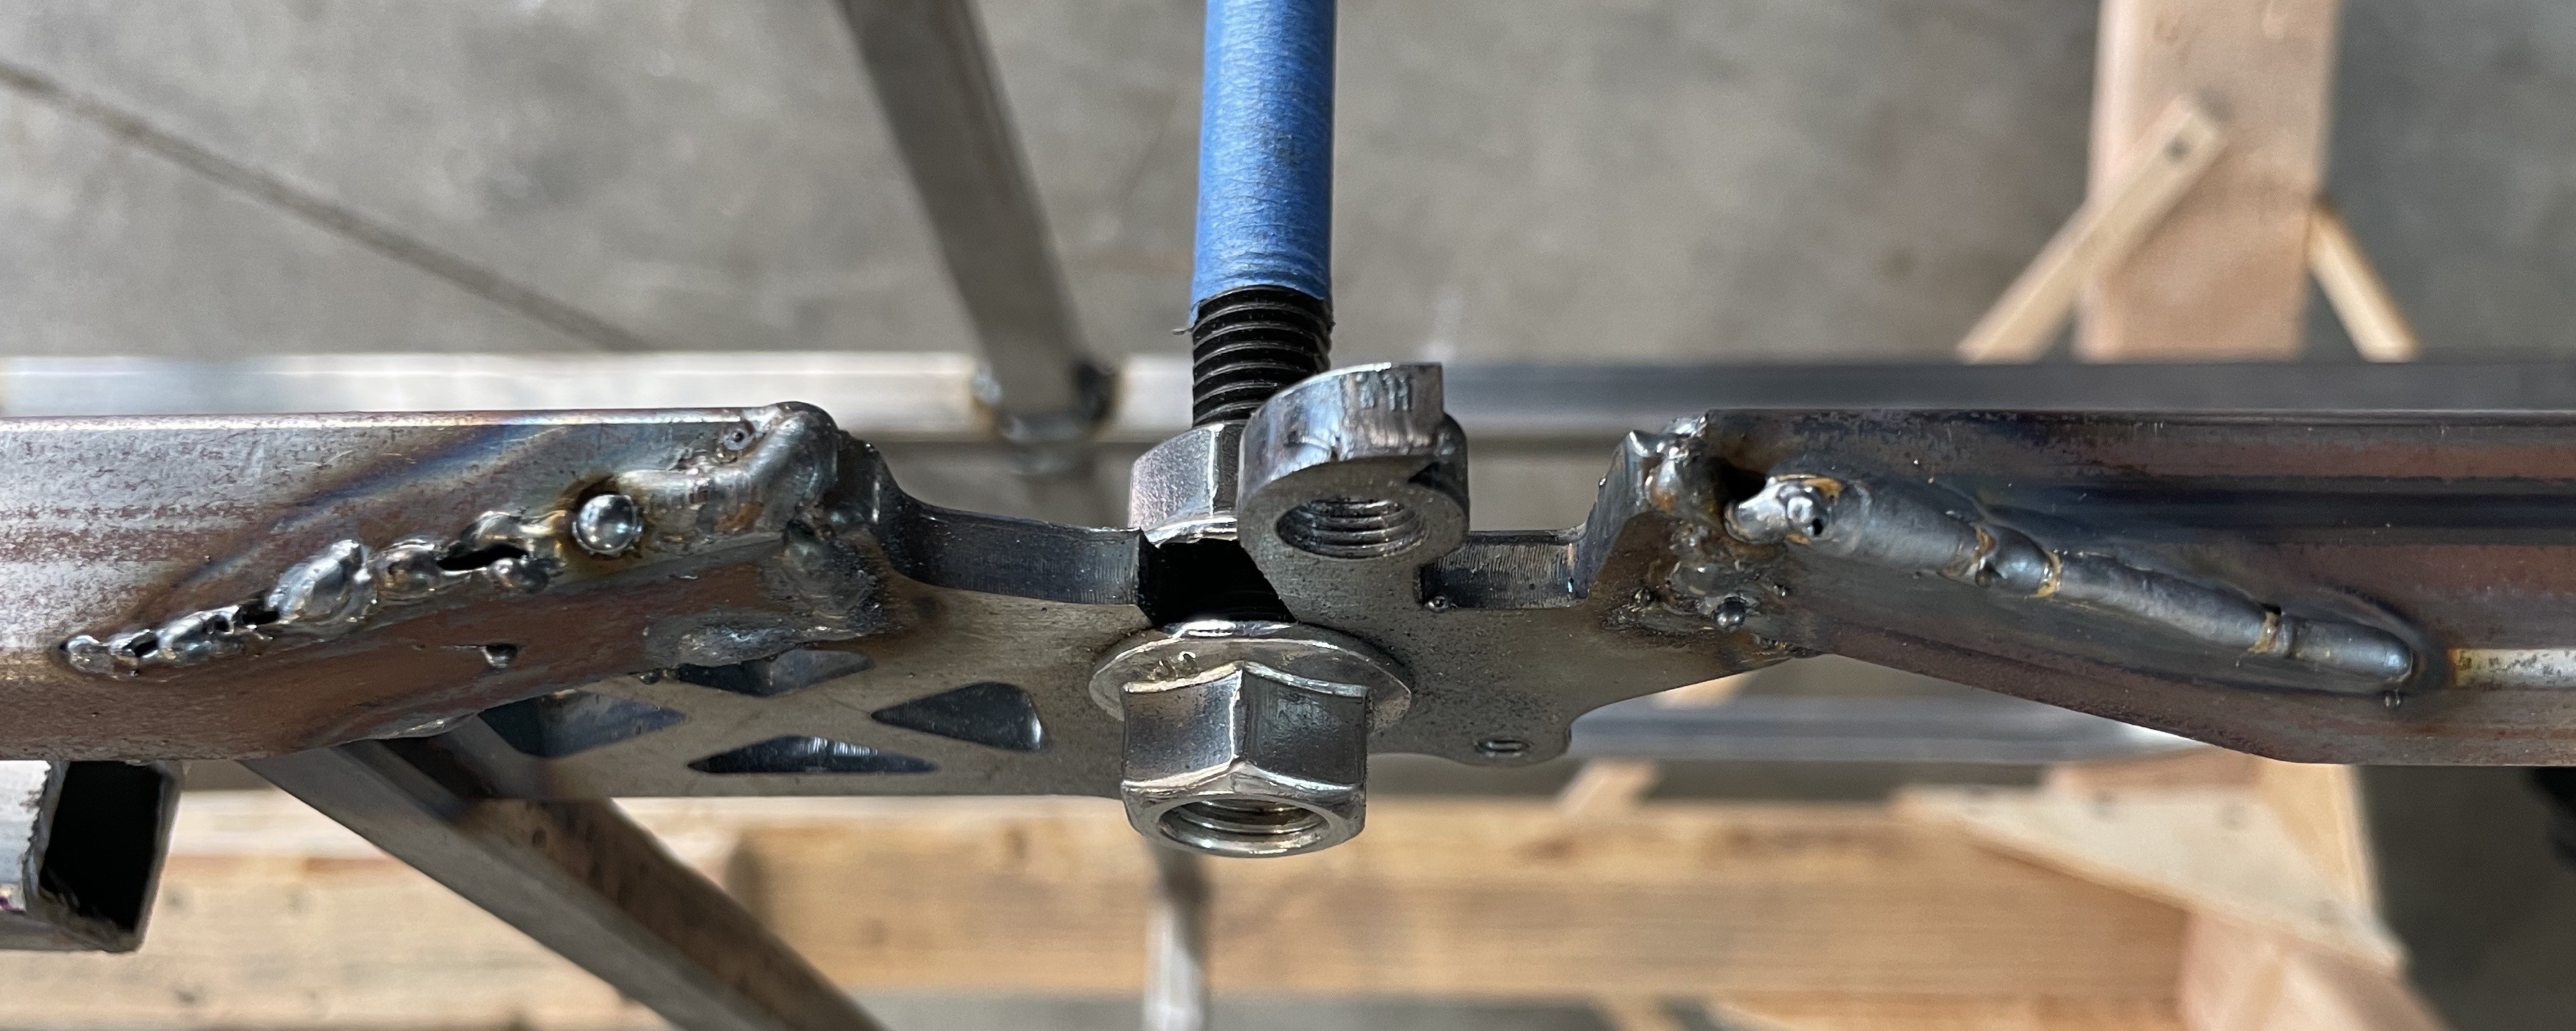
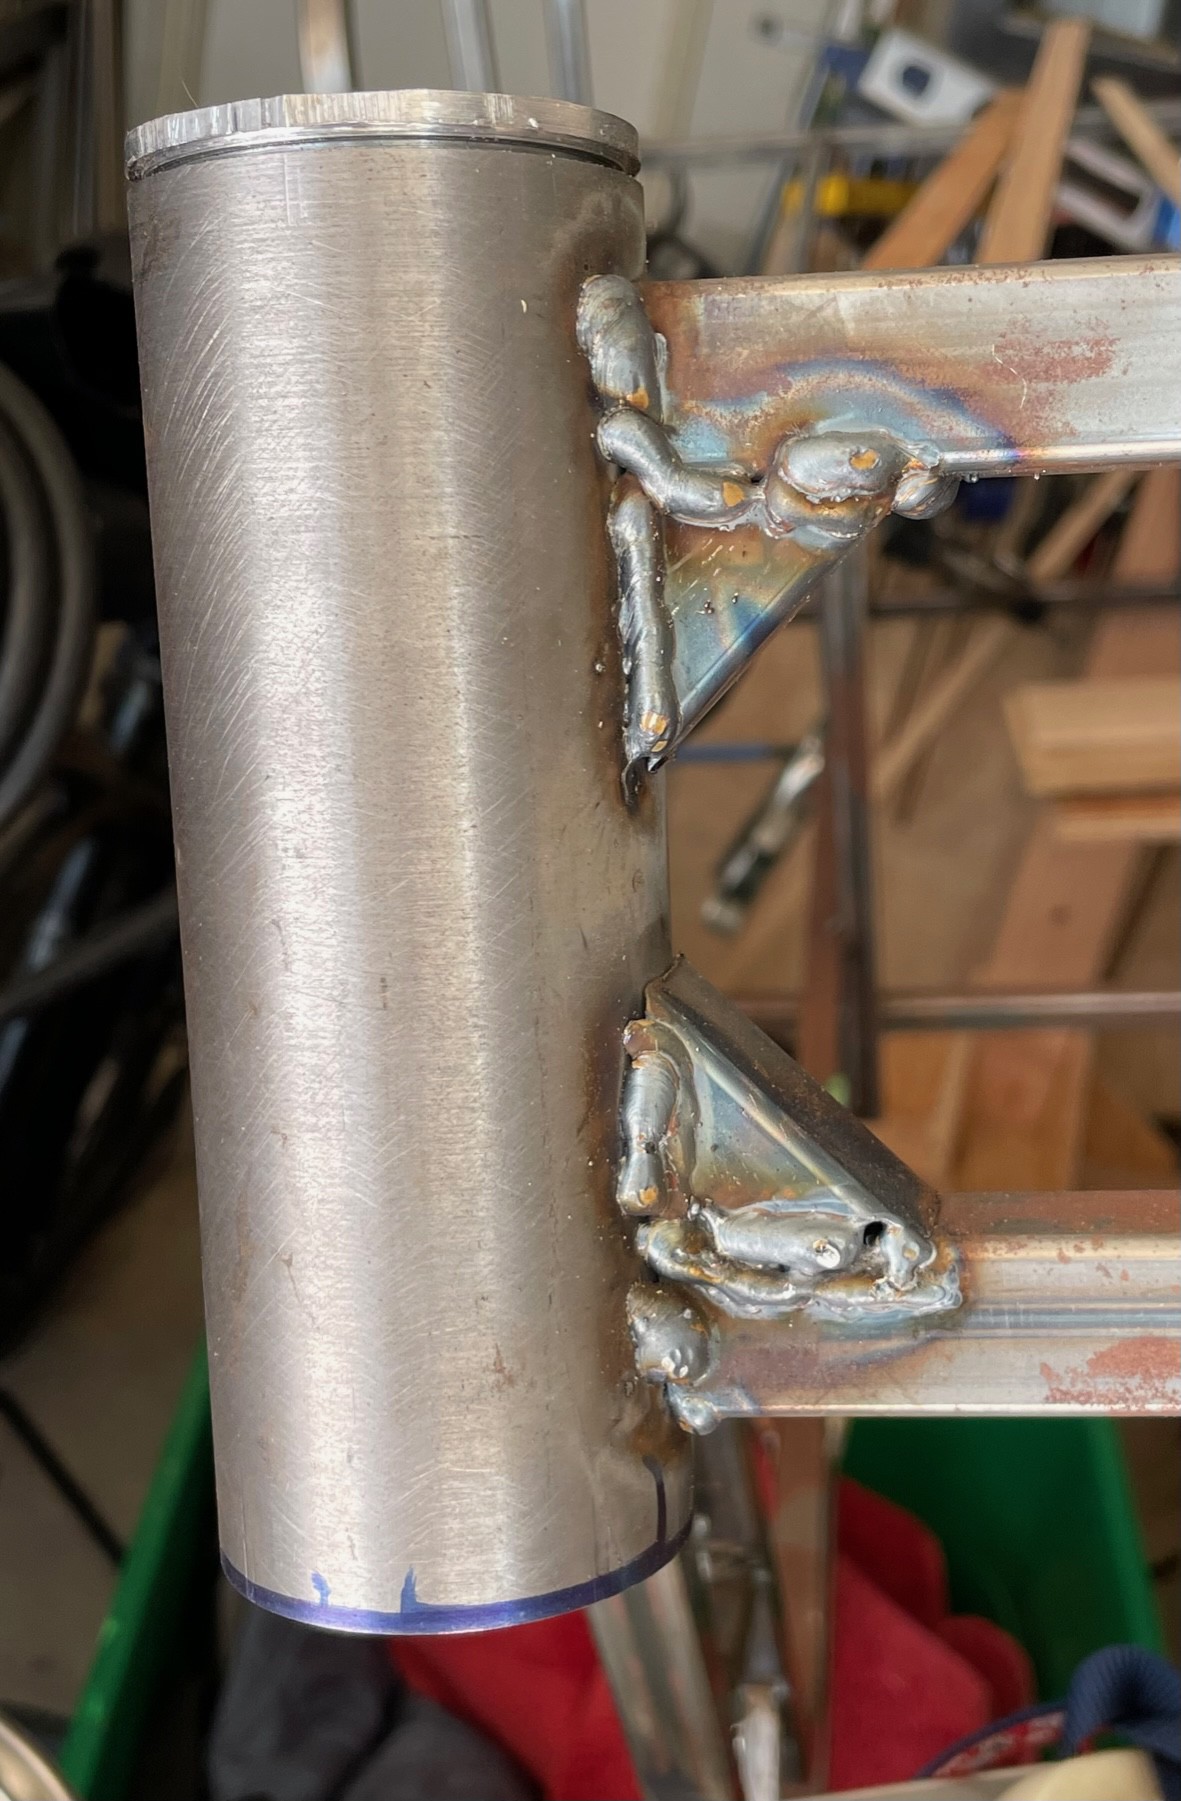
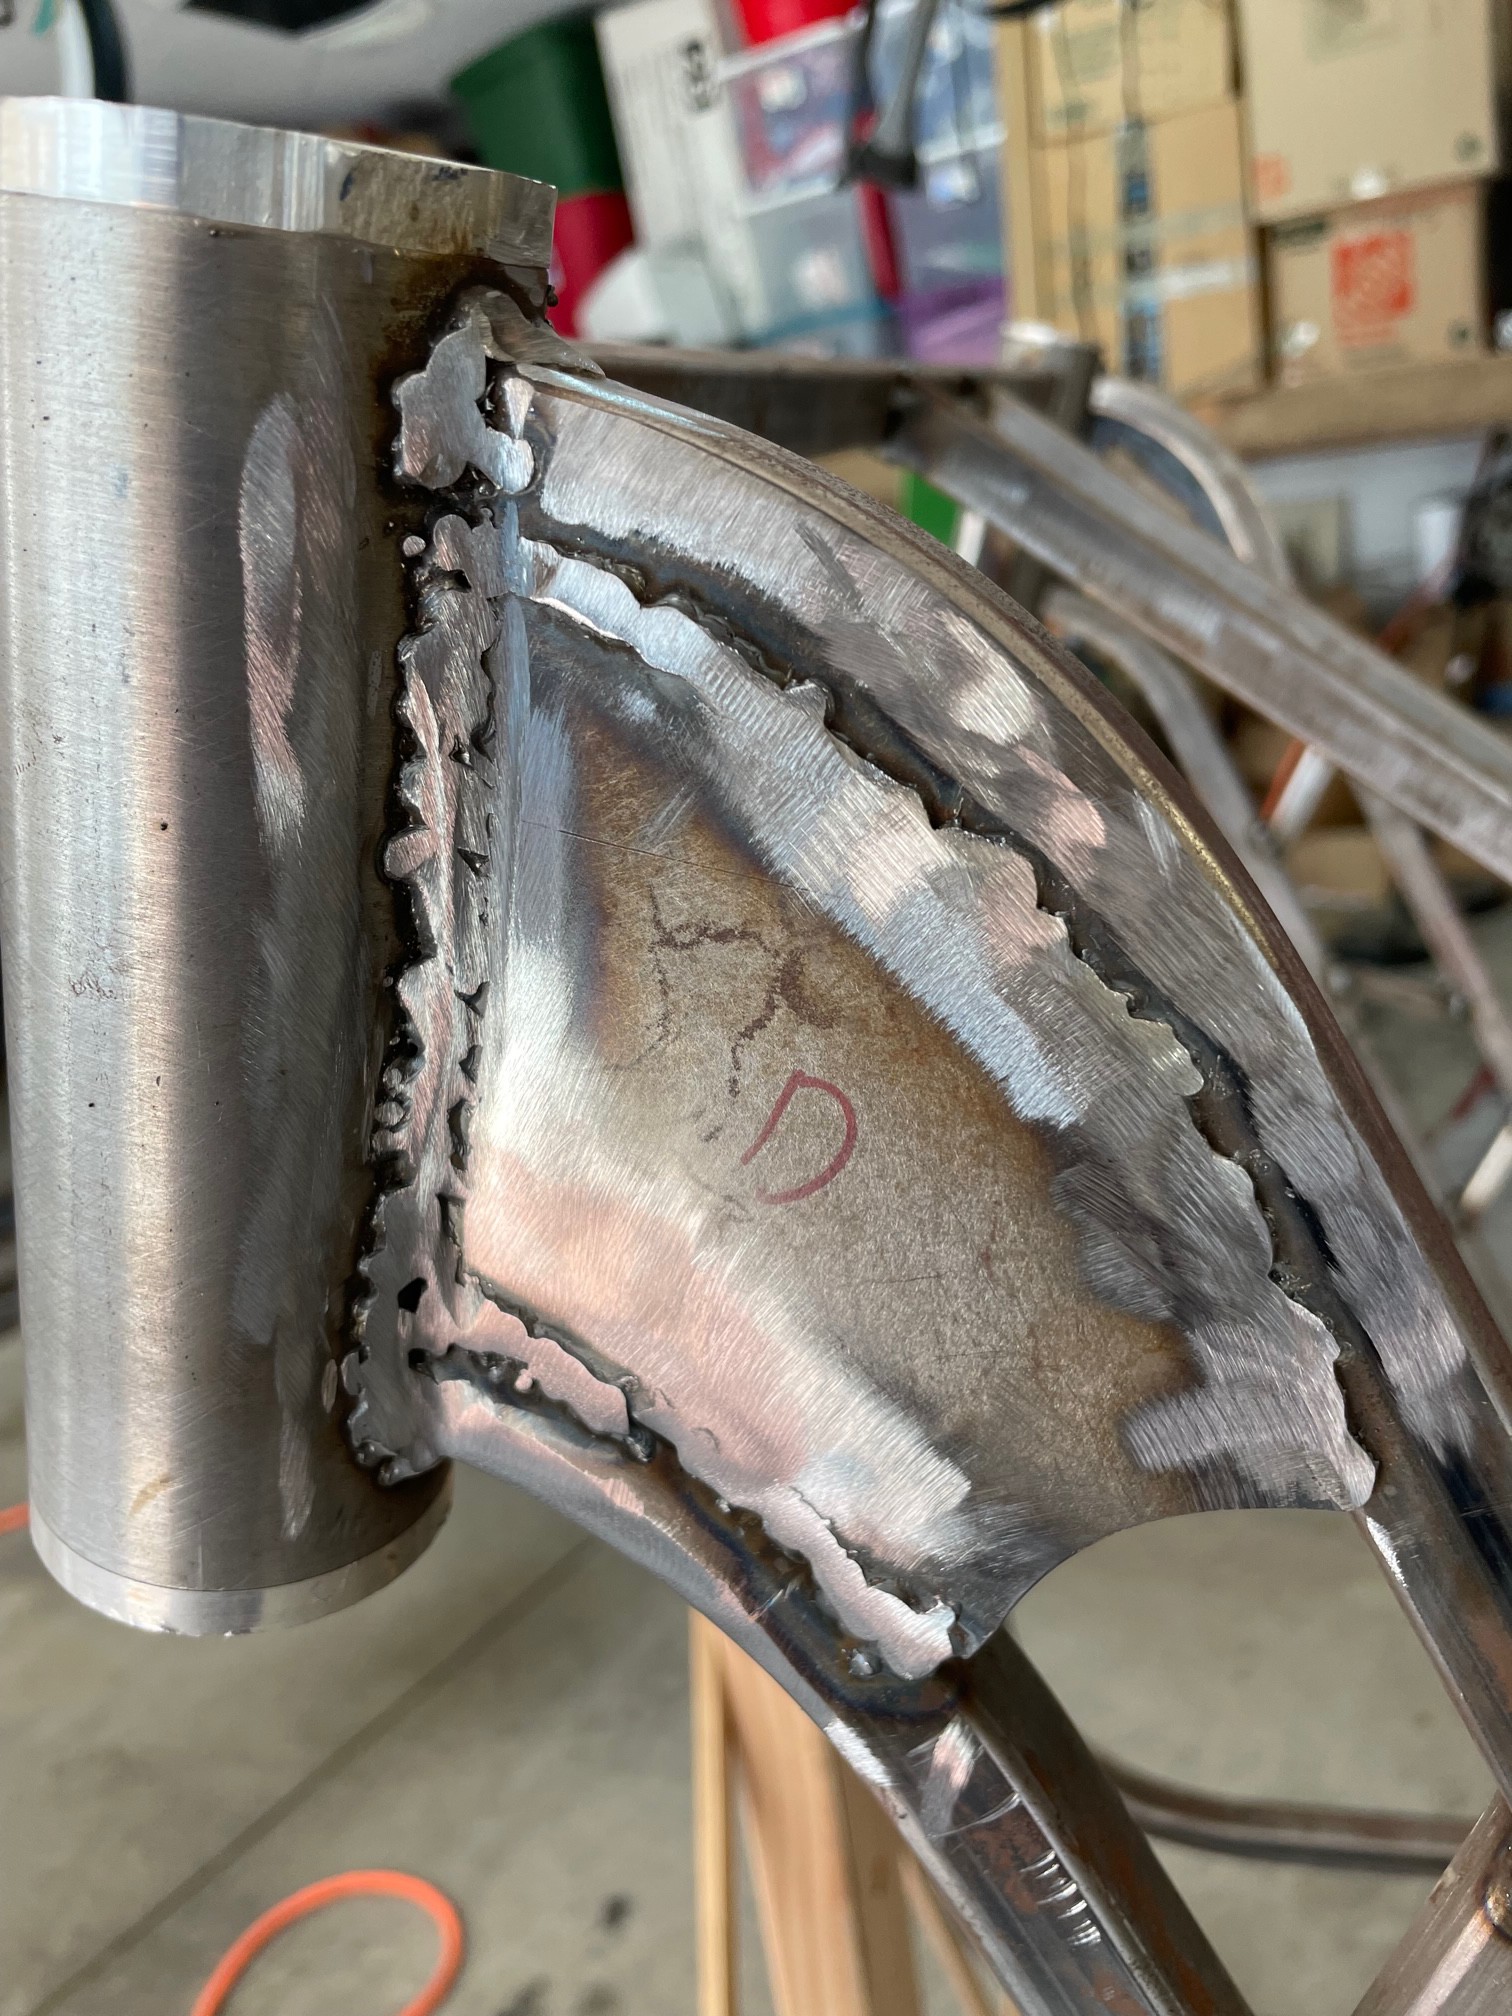
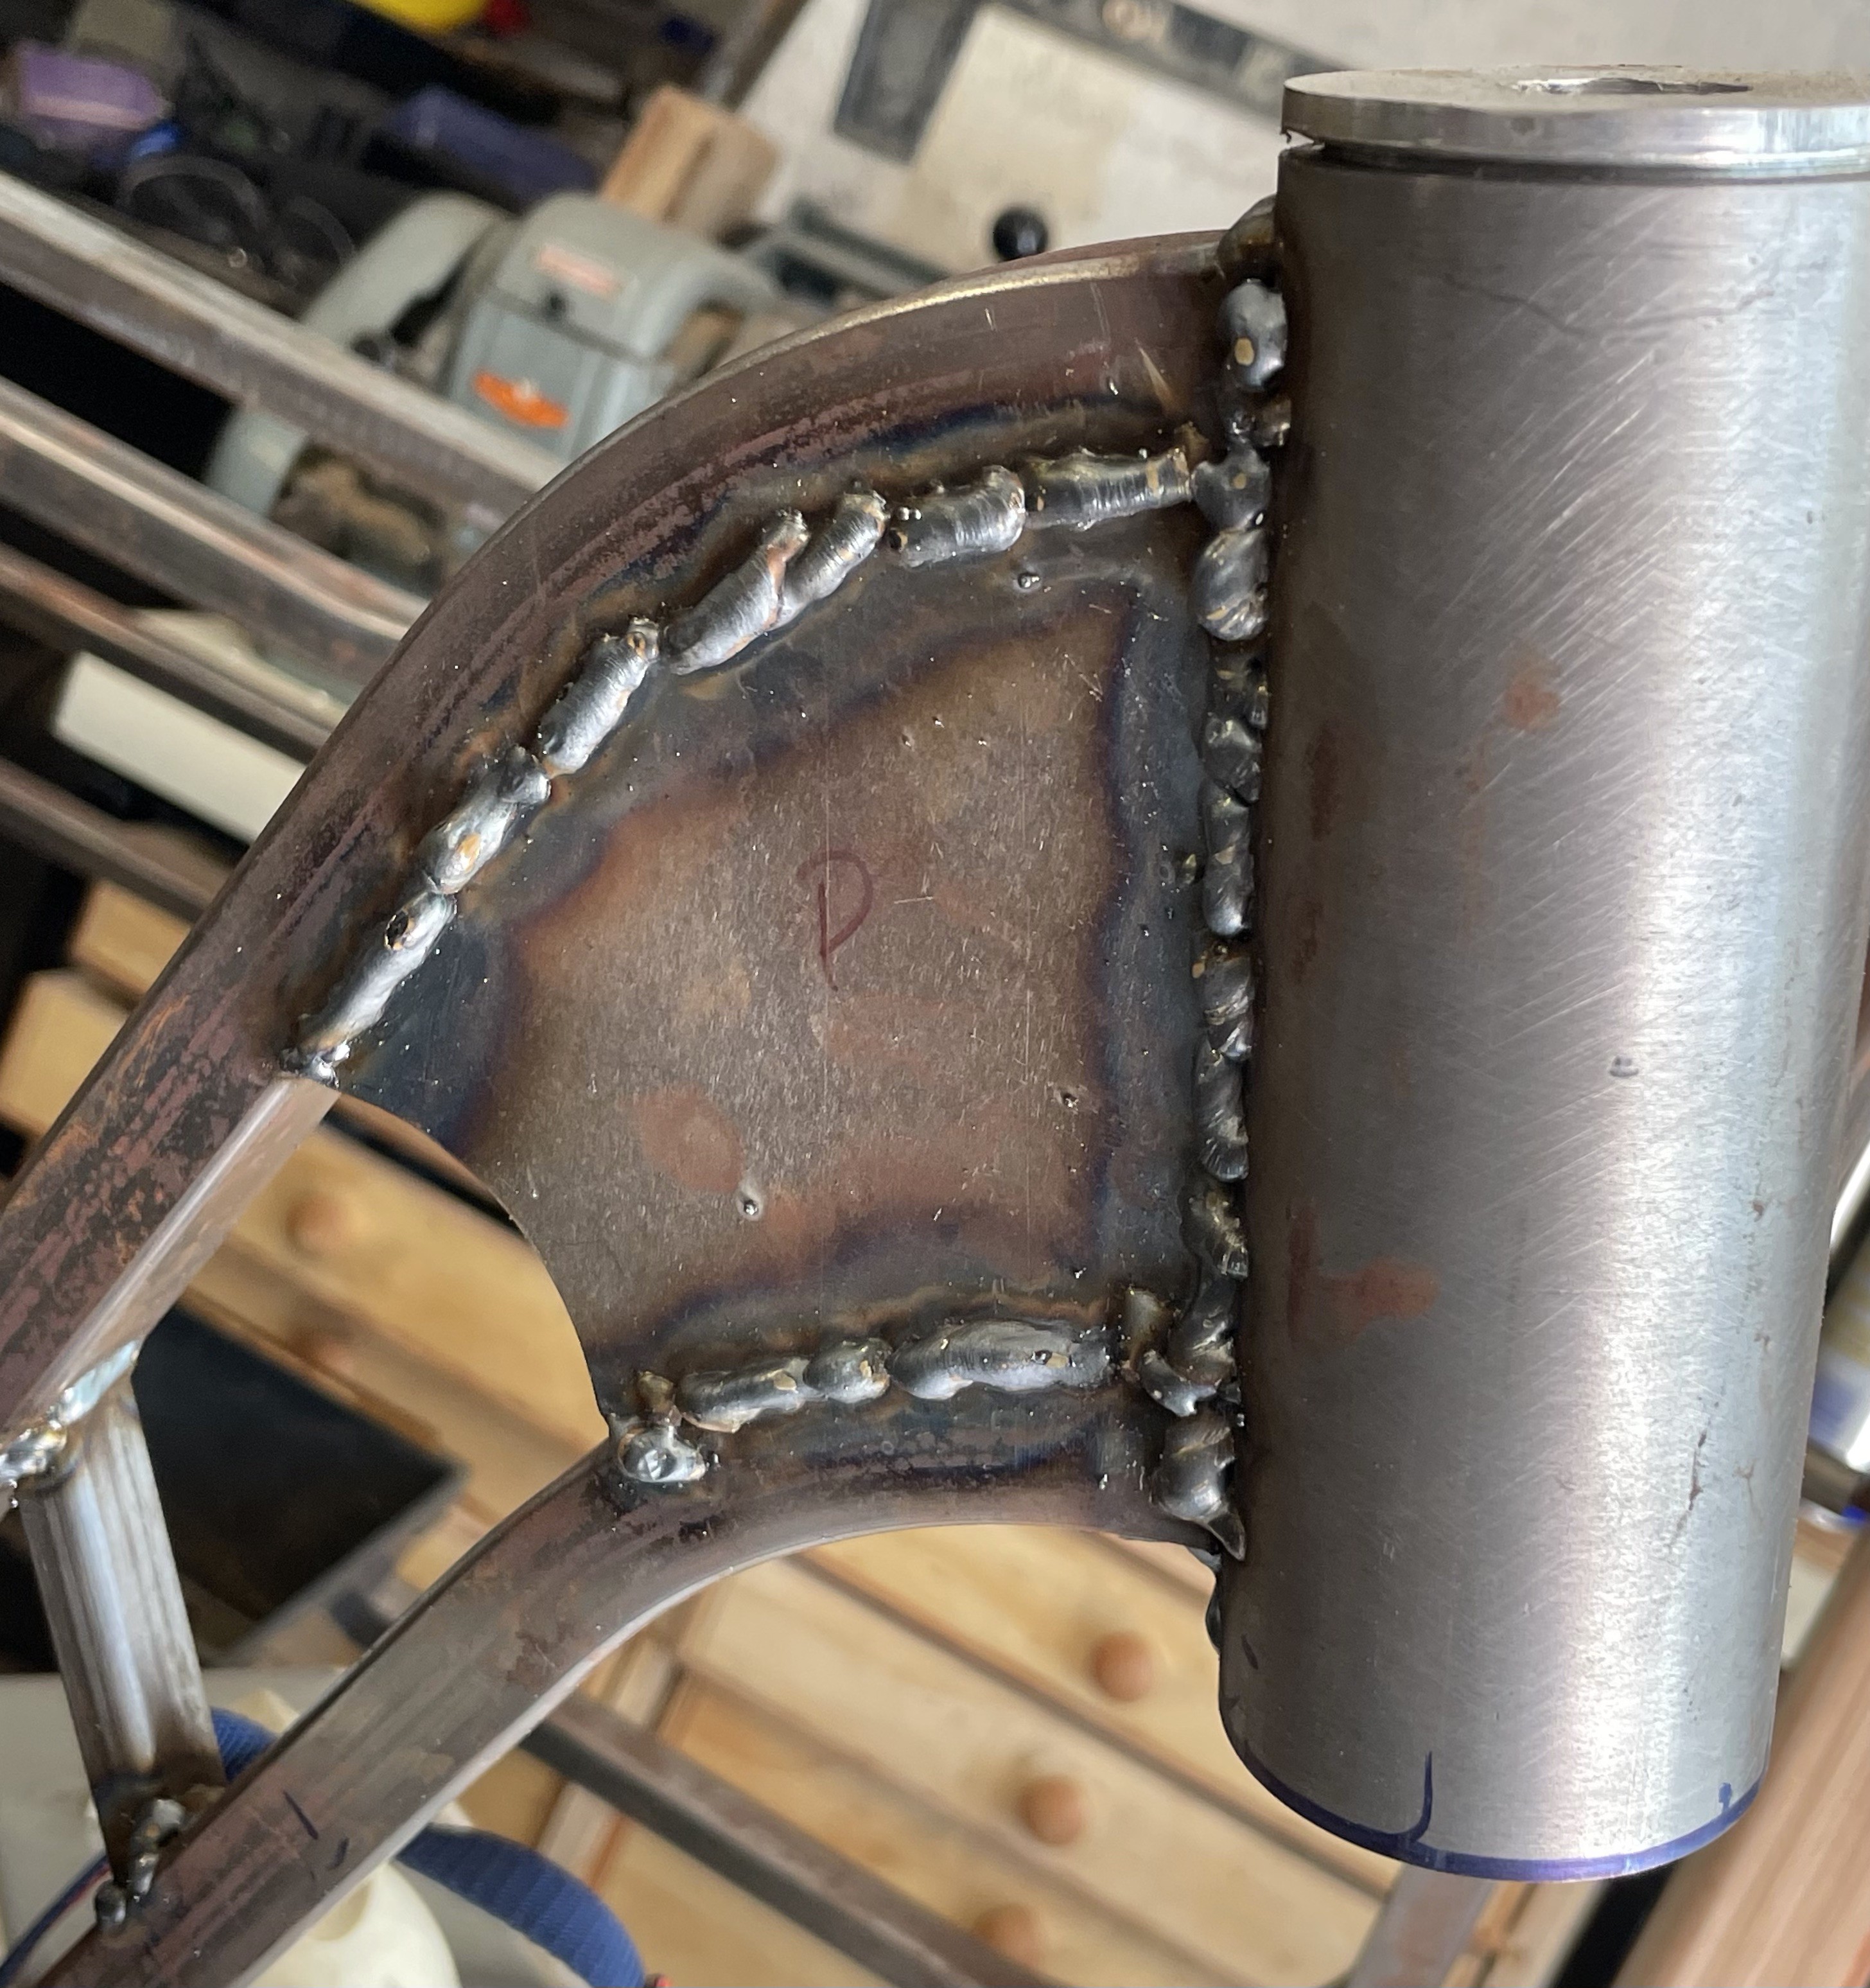
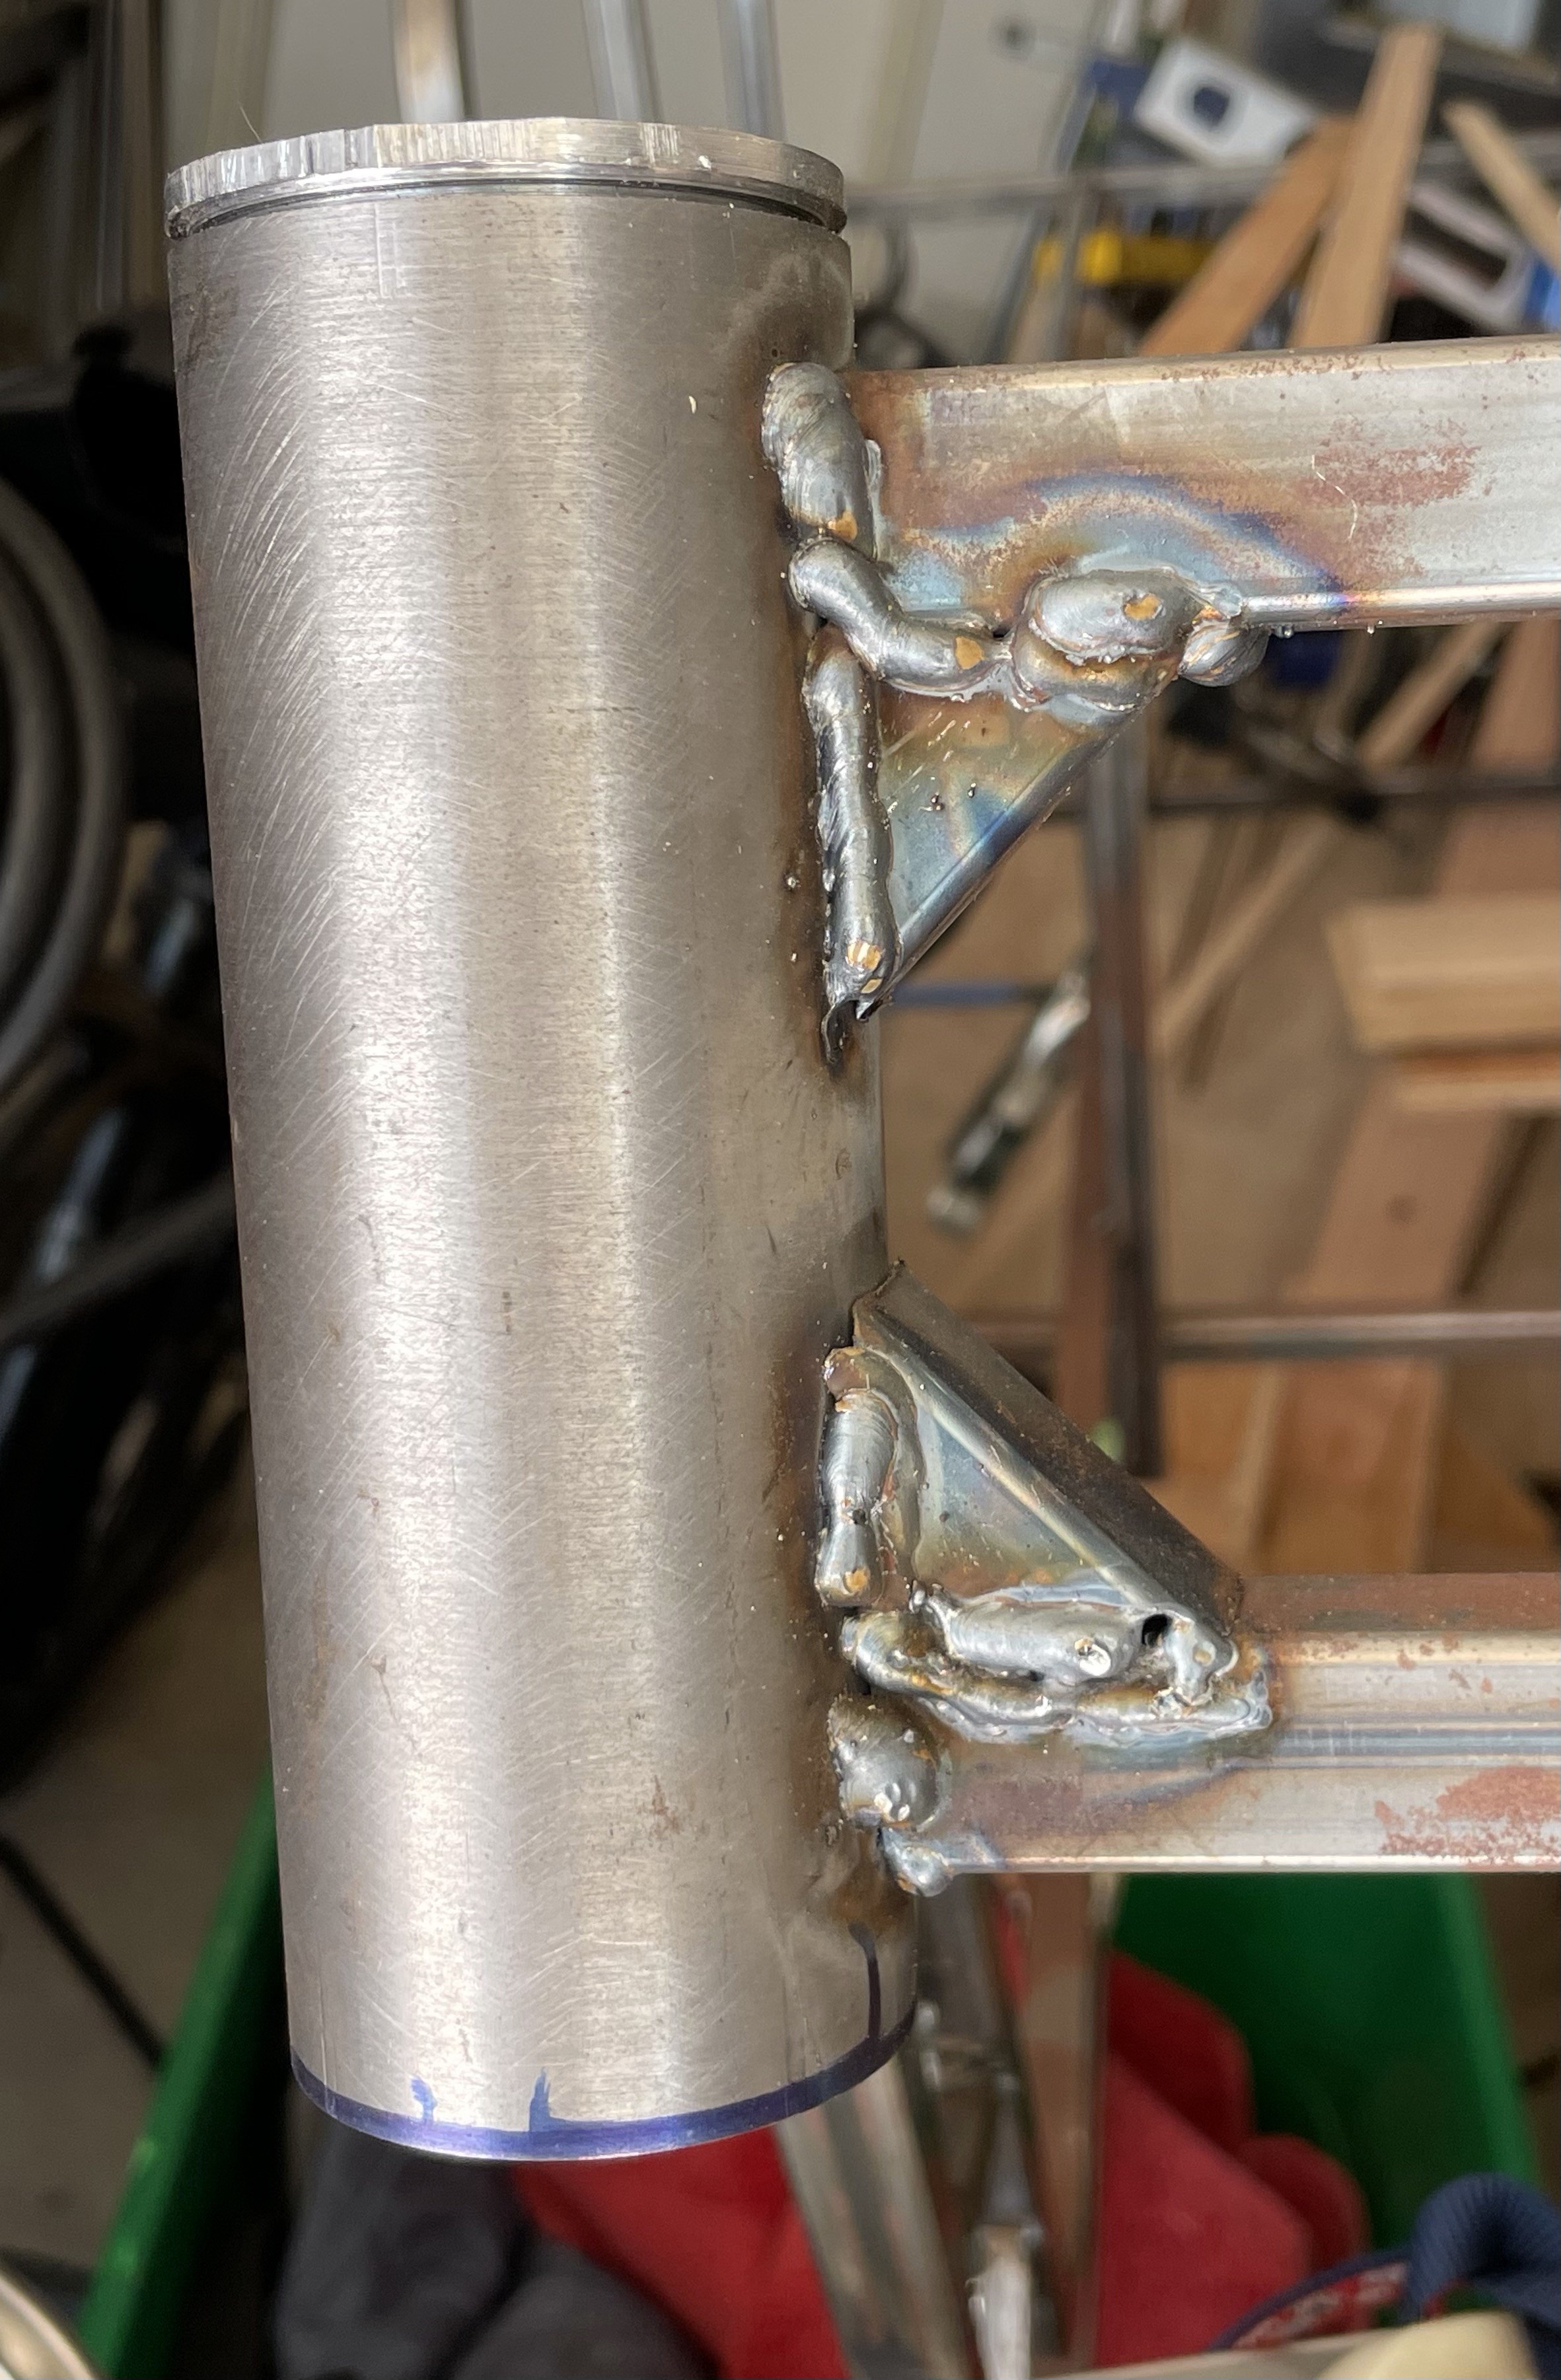
Am I a Welder or a Grinder
08/21/2023 at 19:28 • 0 commentsMy skills as a welder are improving, but I likely will spend more time grinding than welding due to poor weld quality. A couple examples of welds:
![]()
![]()
And how these look after significant work grinding:
![]()
![]()
And here is the latest picture of the whole thing:
![]()
-
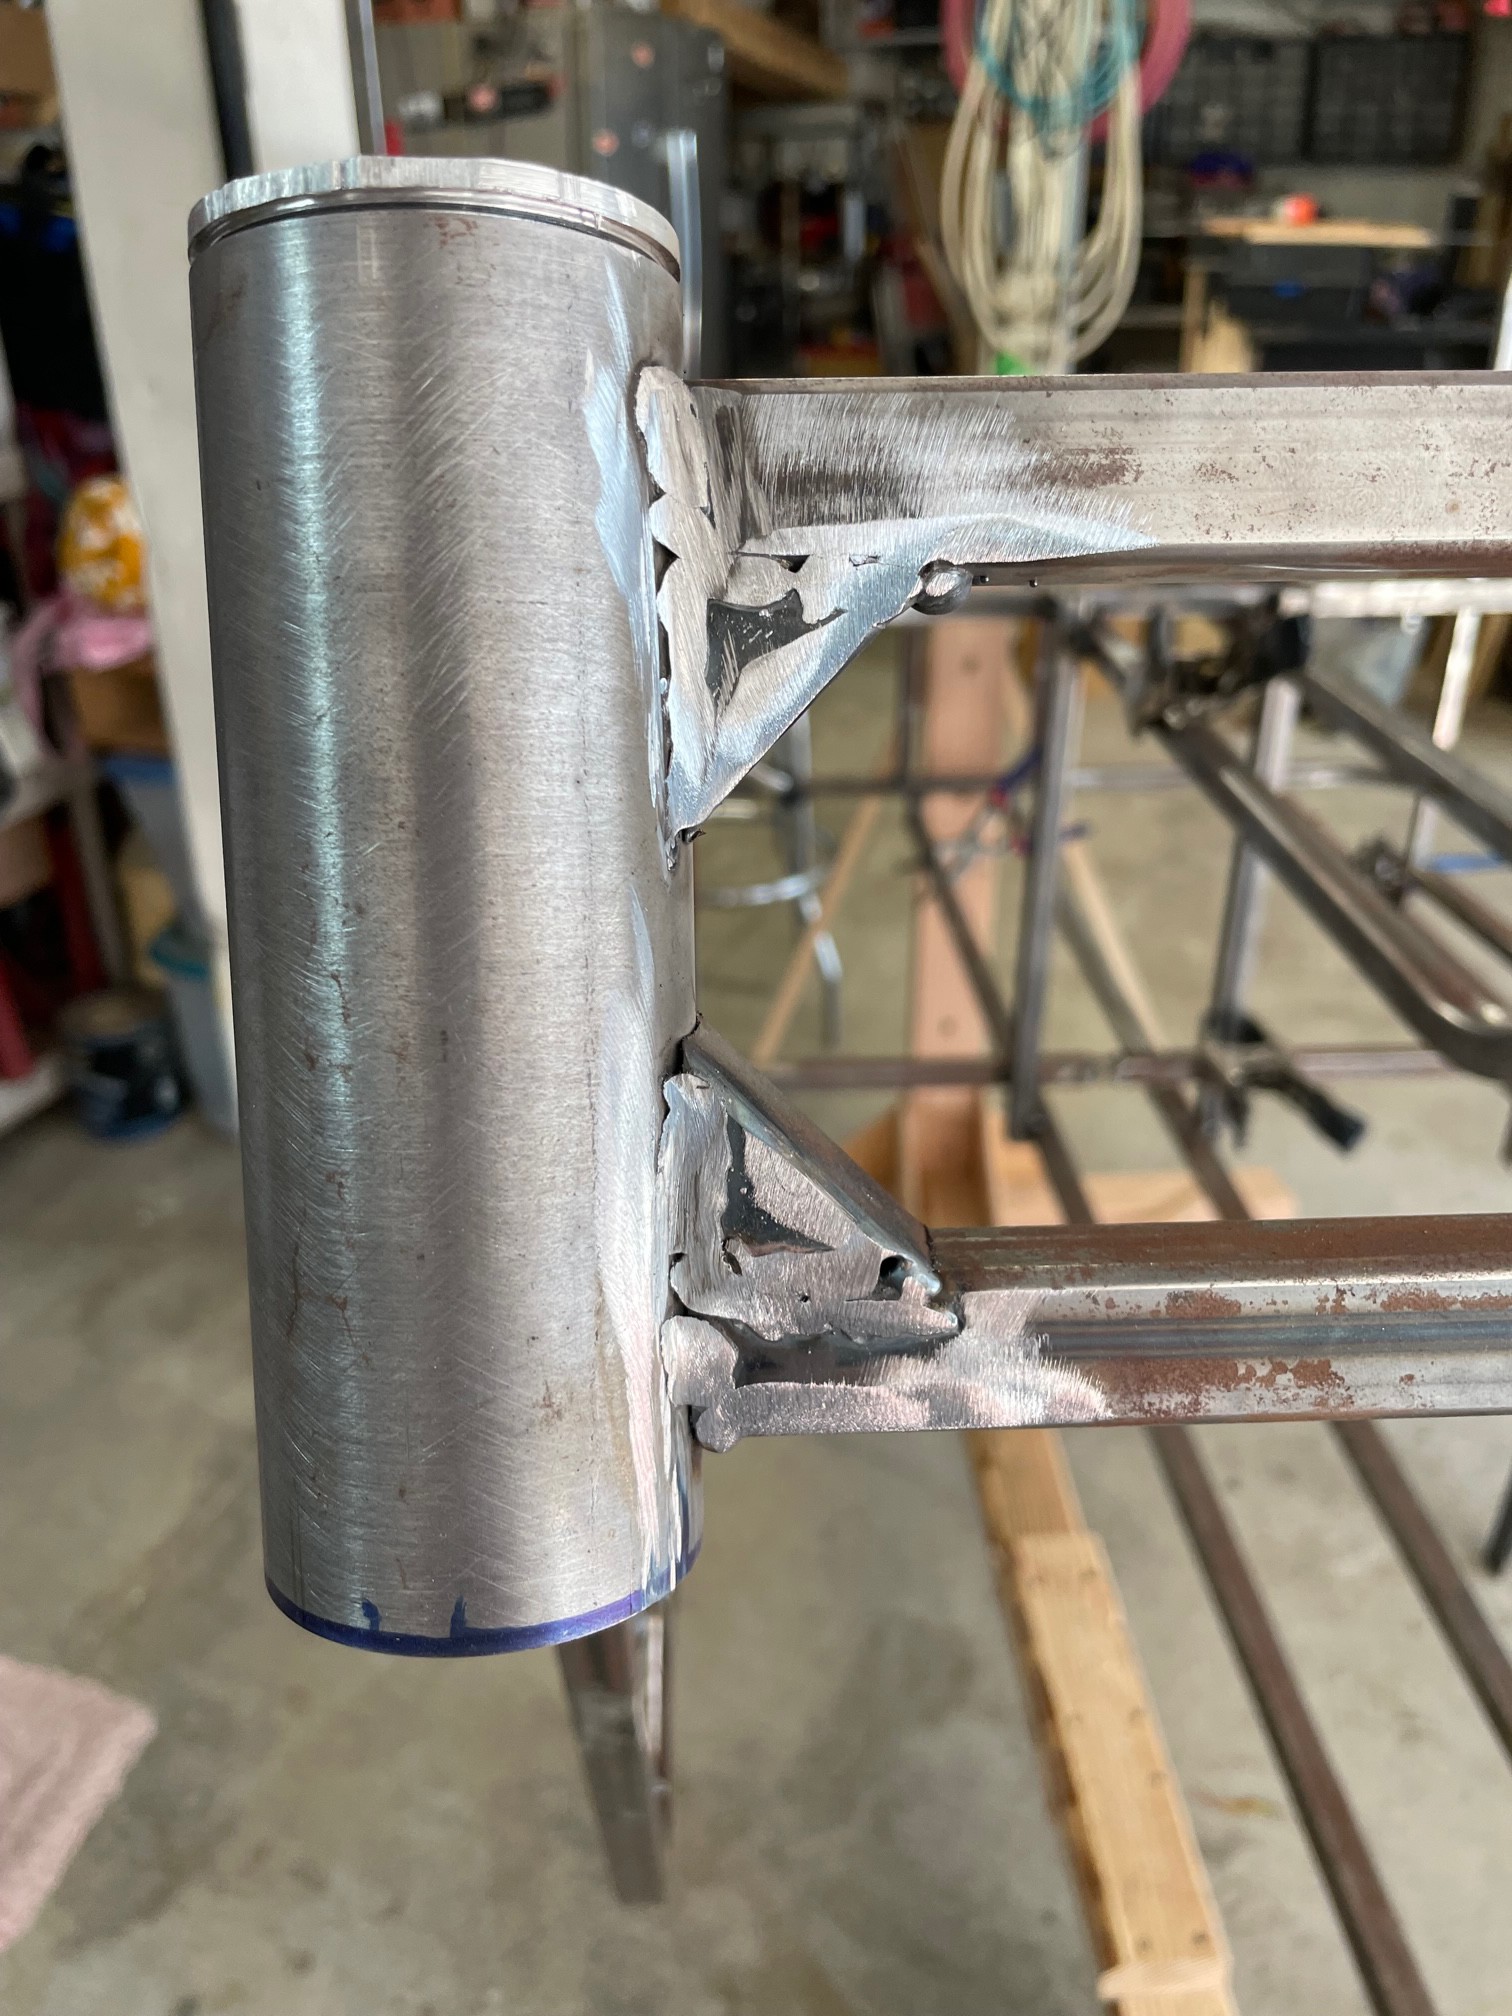
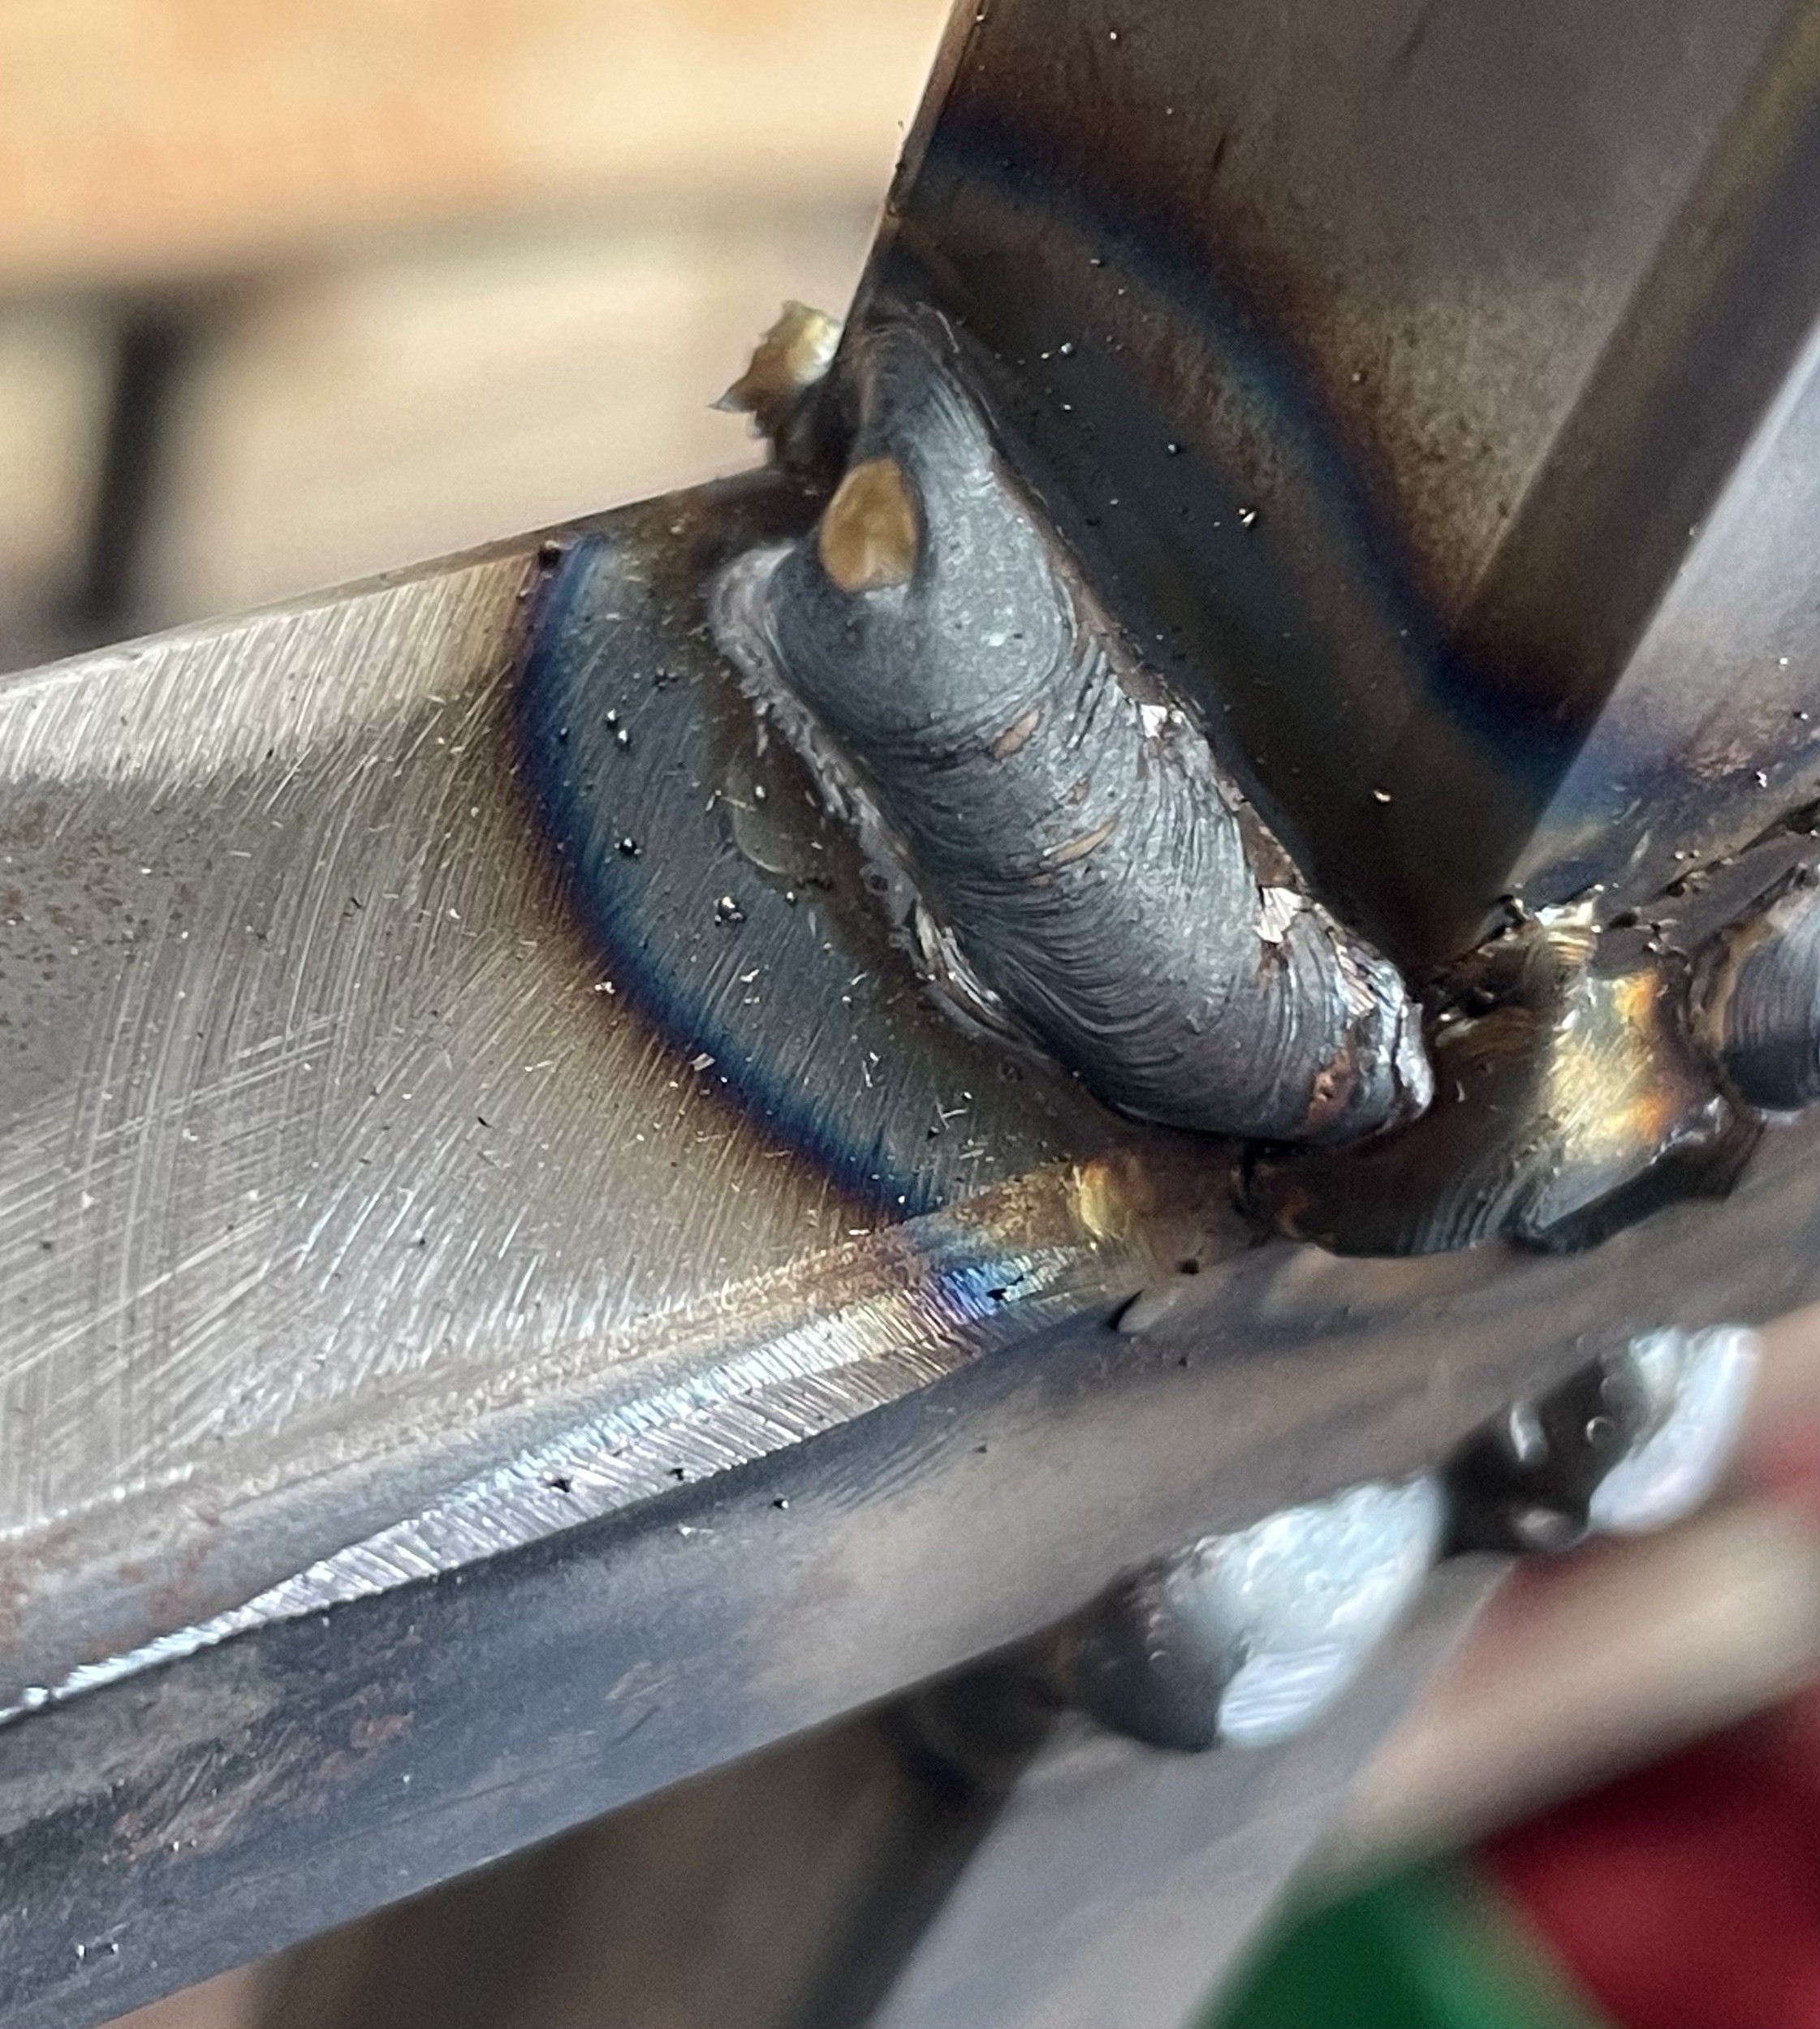
Many hours of welding, but not as much visible progress.
08/17/2023 at 15:16 • 0 commentsin the past week I was able to get in some time. My skills with a MIG welder are improving but still suspect.
![]()
This weld for example is straight with very consistent penetration on both pieces. Perhaps a bit thick, maybe.
But below welds on the front gusset look like the path of a drunk caterpillar.
![]()
I will grind these and determine if I need to touch them up.
![]()
Here is another view with more gussets, again some good some bad welds.
Woody the Electric Four Passenger Bicycle
Woody is a scratch built quad wheel bicycle with four passenger capacity, with electric power to assist pedaling.