-
Progress
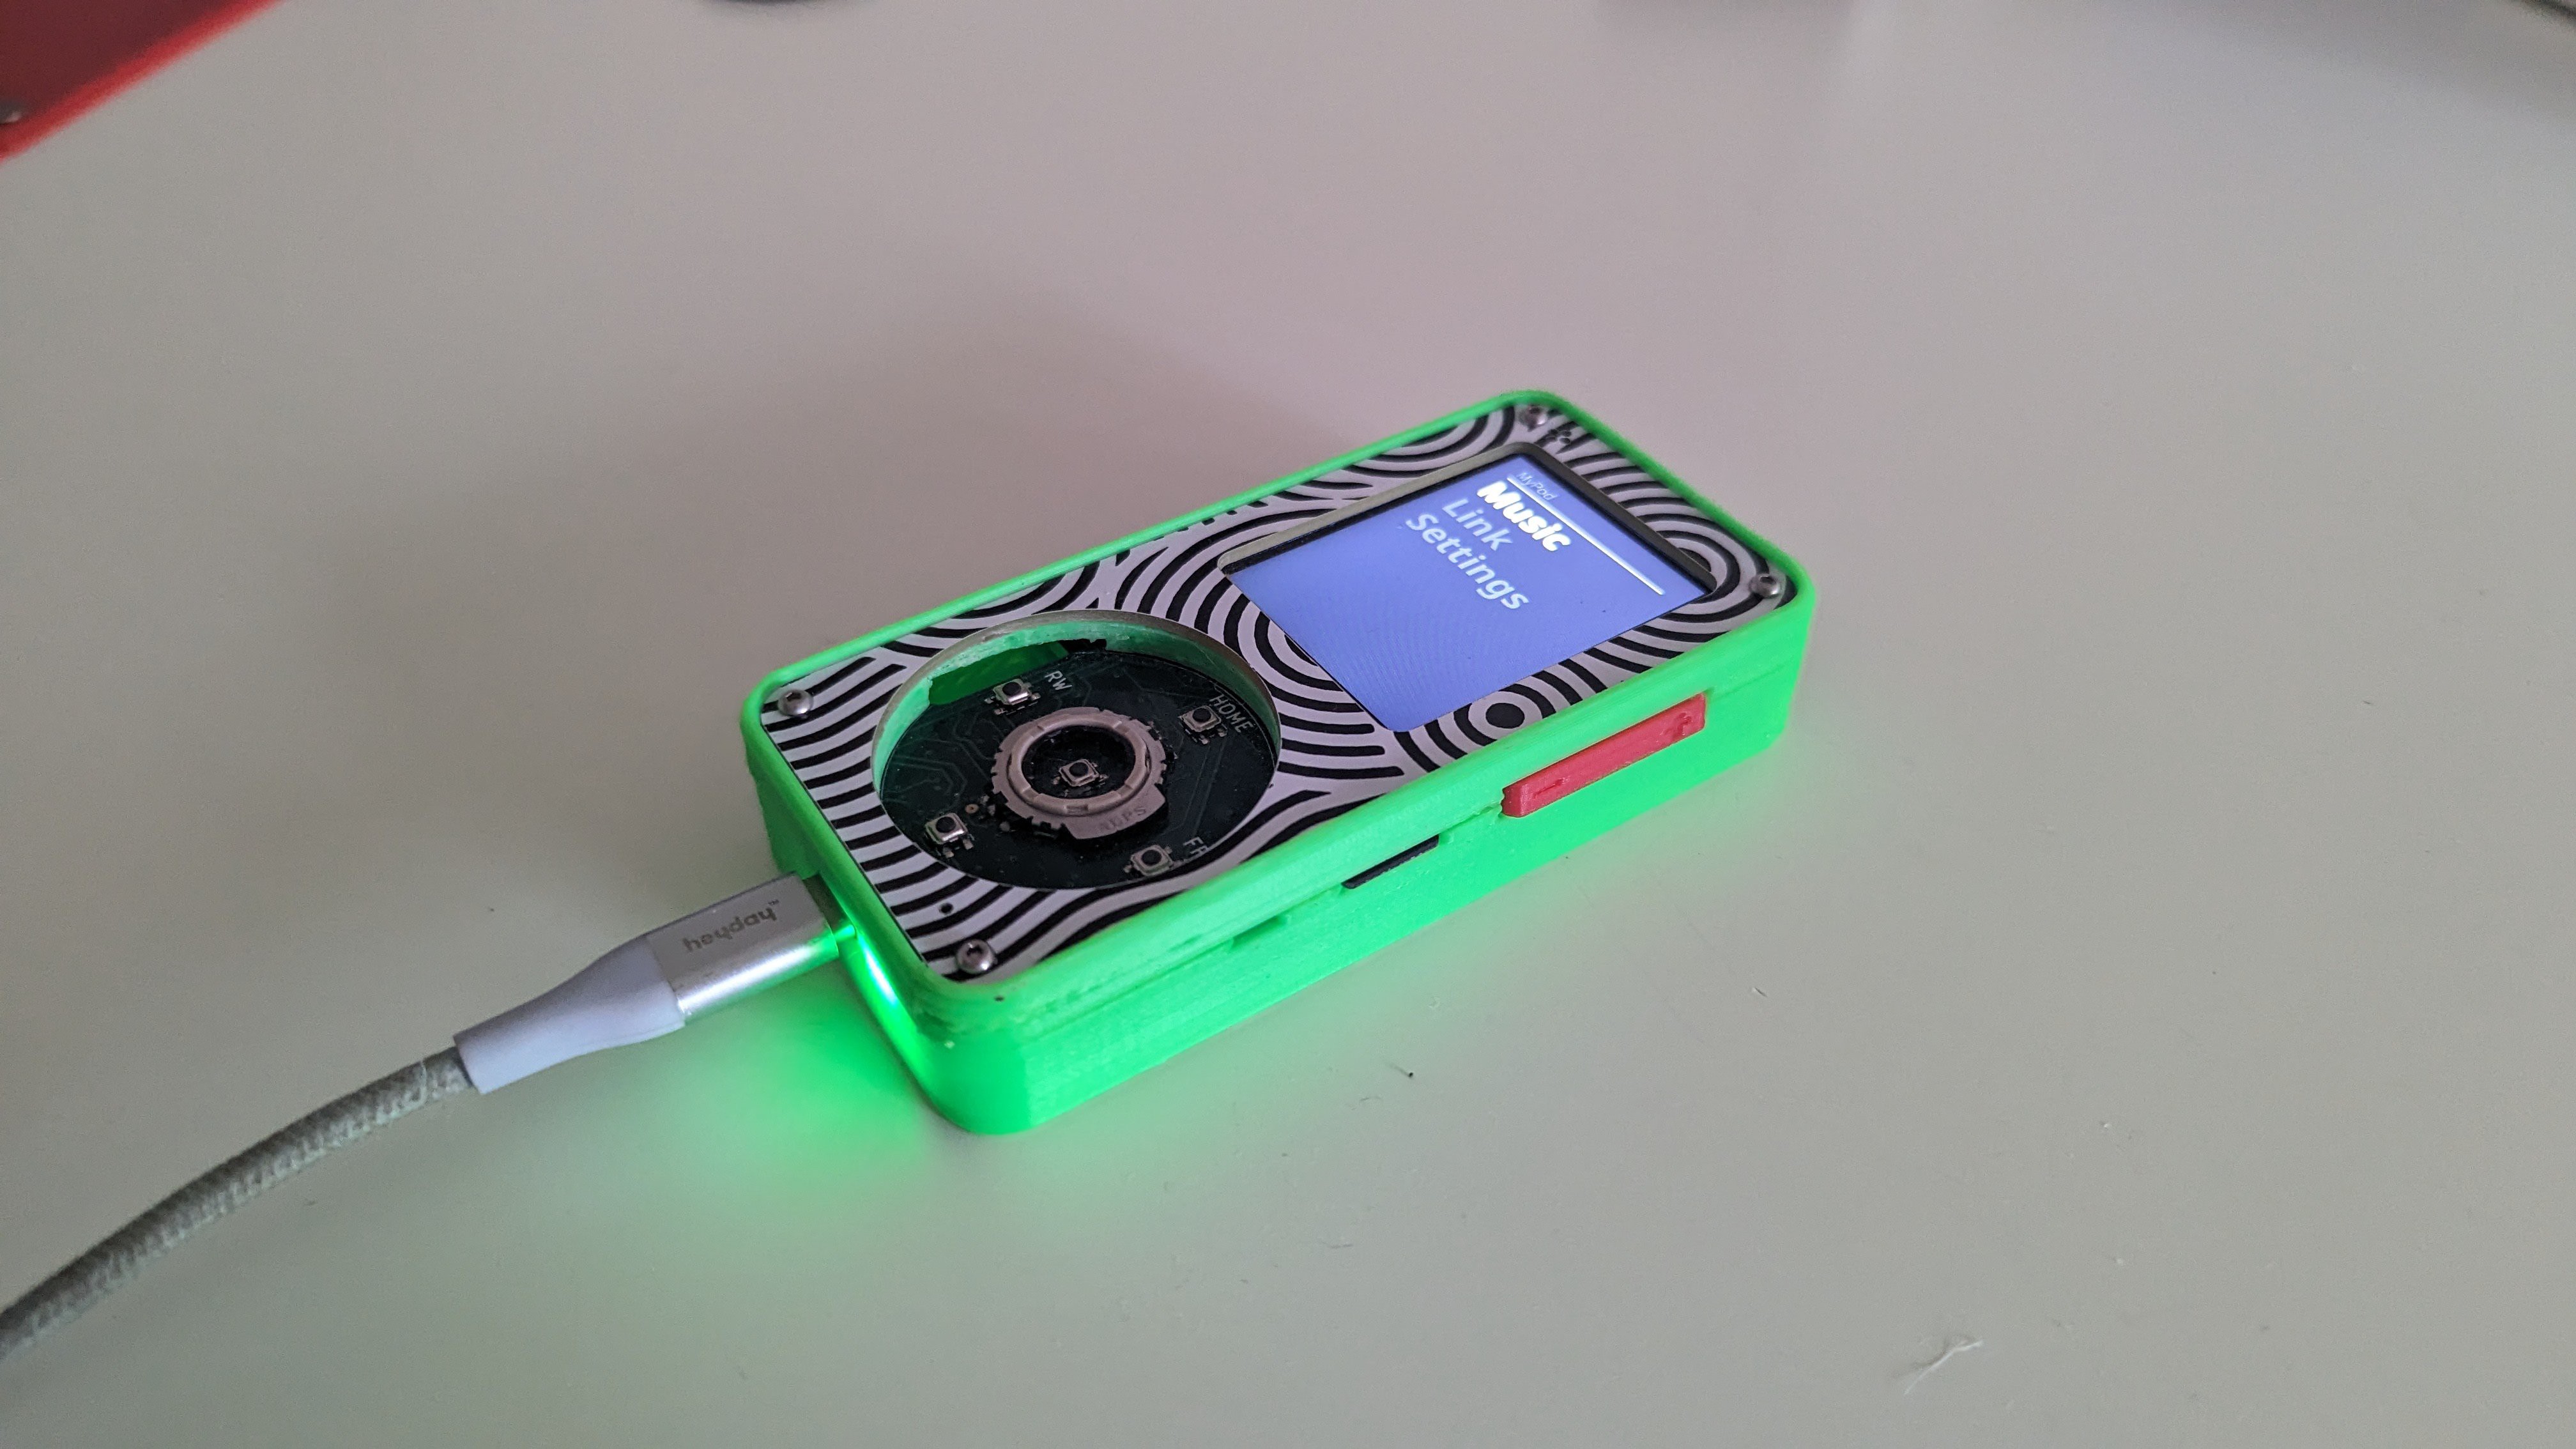
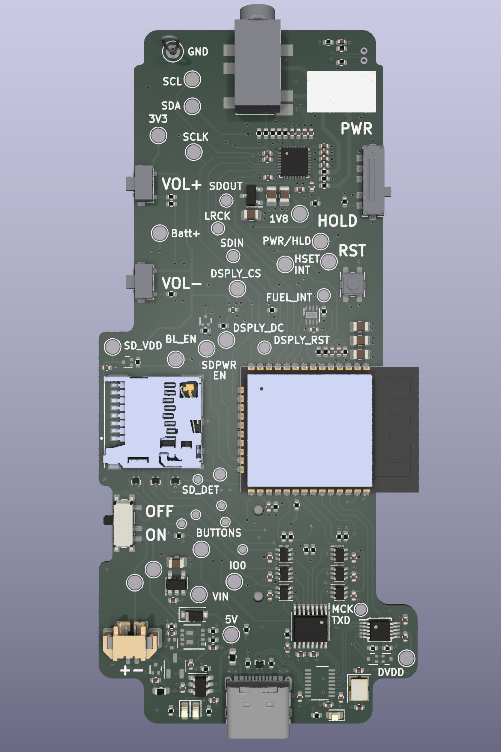
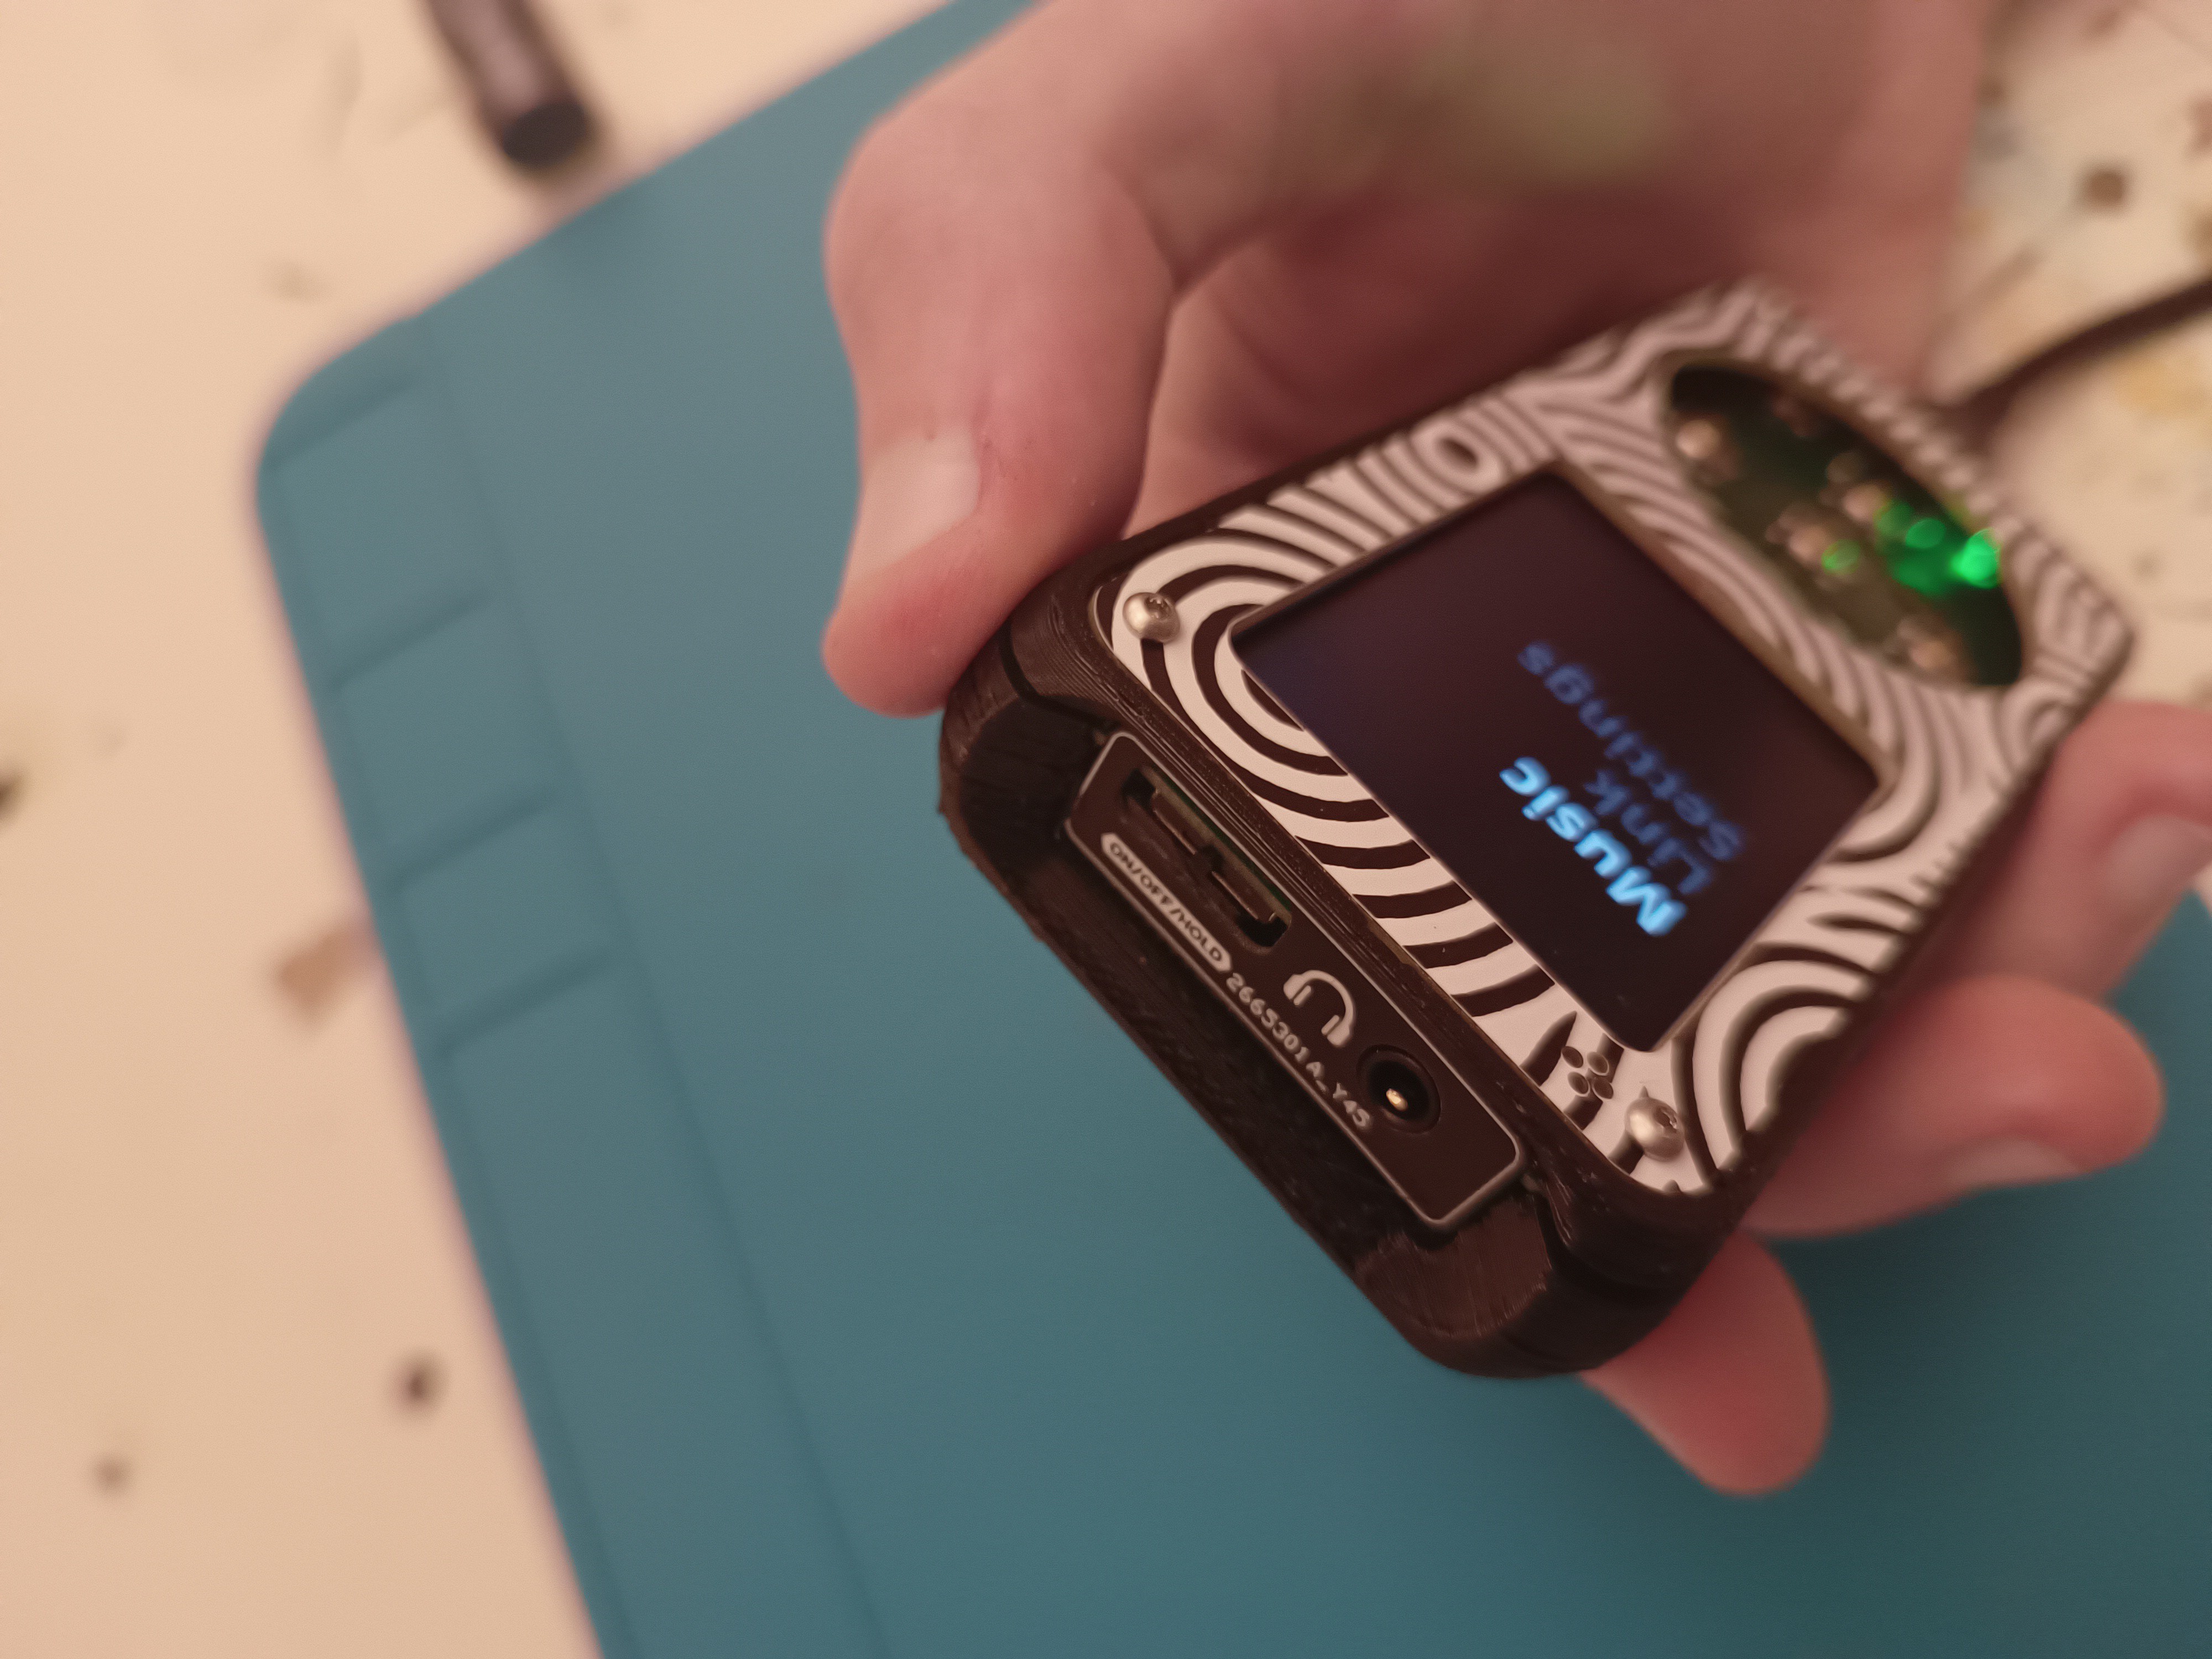
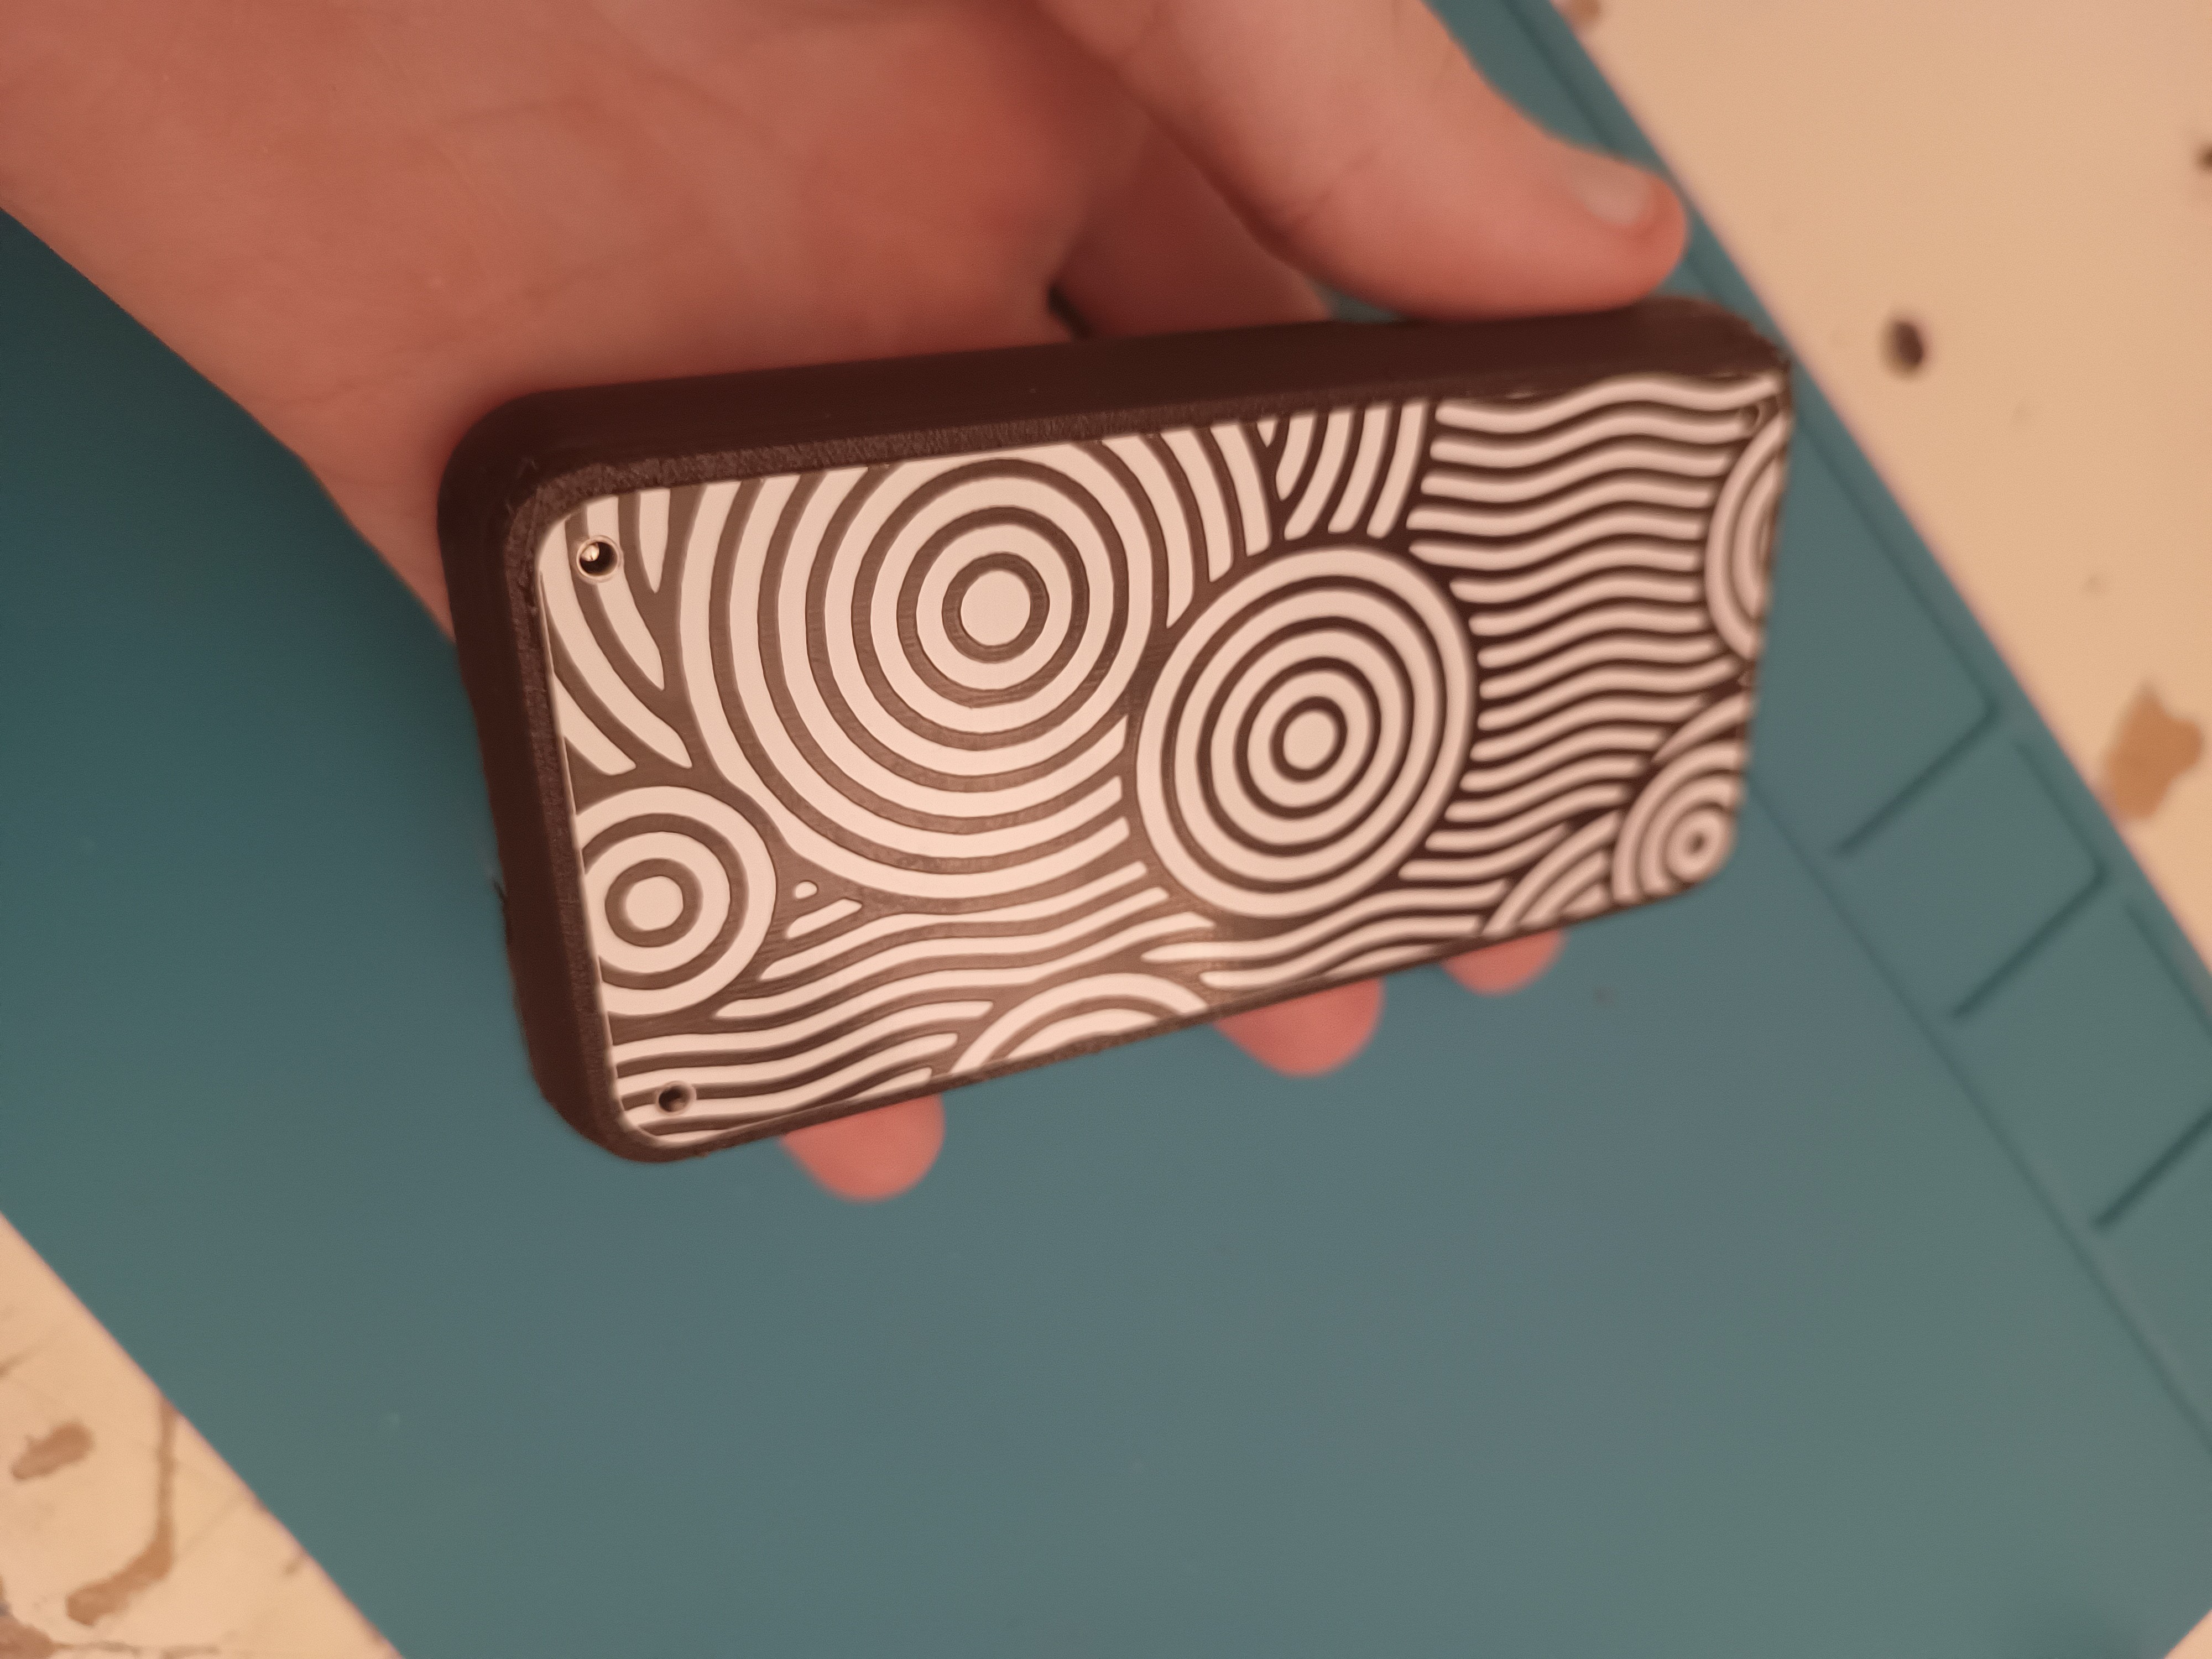
02/24/2024 at 10:46 • 0 commentsHi everyone, just another quick update to show this project isn't dead yet. Ive now properly implemented the link functionality, allowing the sd card to seamlessly connect to a computer. Using a V30 sd card I was able to get 30MB/s easily, definitely fast enough for what I need at least. I also put together a simple case to make development easier but it needs a bit of refinement.
You can see the slot for the master battery power switch, the sd card slot and volume rocker
![]()
This is the clickwheel design, its got two little hooks to clip on to the encoder and a gimbal mechanism that allows all the buttons to be pressed without stress on the encoder. The axles are just the legs of 1/4W resistors. It does work but the tolerance is a bit too loose so its a bit clumsy. Ive been testing a couple different resins to find one that has the right properties for the job and each has different tolerances. This means clickwheel is resin printed, I did try a lot with many designs trying to make fdm work but the scale is just impossible.
![]()
Currently I am occupied with life but the next things on the list are:
- Comprehensive file explorer and playlist configurations stored on sd card
- Handling switching between audio decoders, audio playback logic
- Clickwheel tolerances and resin selection
Currently verified as working:
- Display
- Esp32
- Usb hub
- Sd card reader
- Codec audio out and microphone
- Sd card data and power switches
- All buttons and switches can be read
- Programming circuitry
- Encoder
- SD card detection
Unverified
- Battery power operation
- Battery undervoltage cutoff
- Battery isolation switch
- Fuel guage (the library is unreliable)
-
PCBS are here
12/19/2023 at 15:17 • 0 commentsPCBs have just arrived from PCBway, huge thanks to them for supporting this project by supplying the PCB's. They have come out looking great, everything is very sharp and the finish is wonderful. Their customer service was very helpful and responsive which was great.
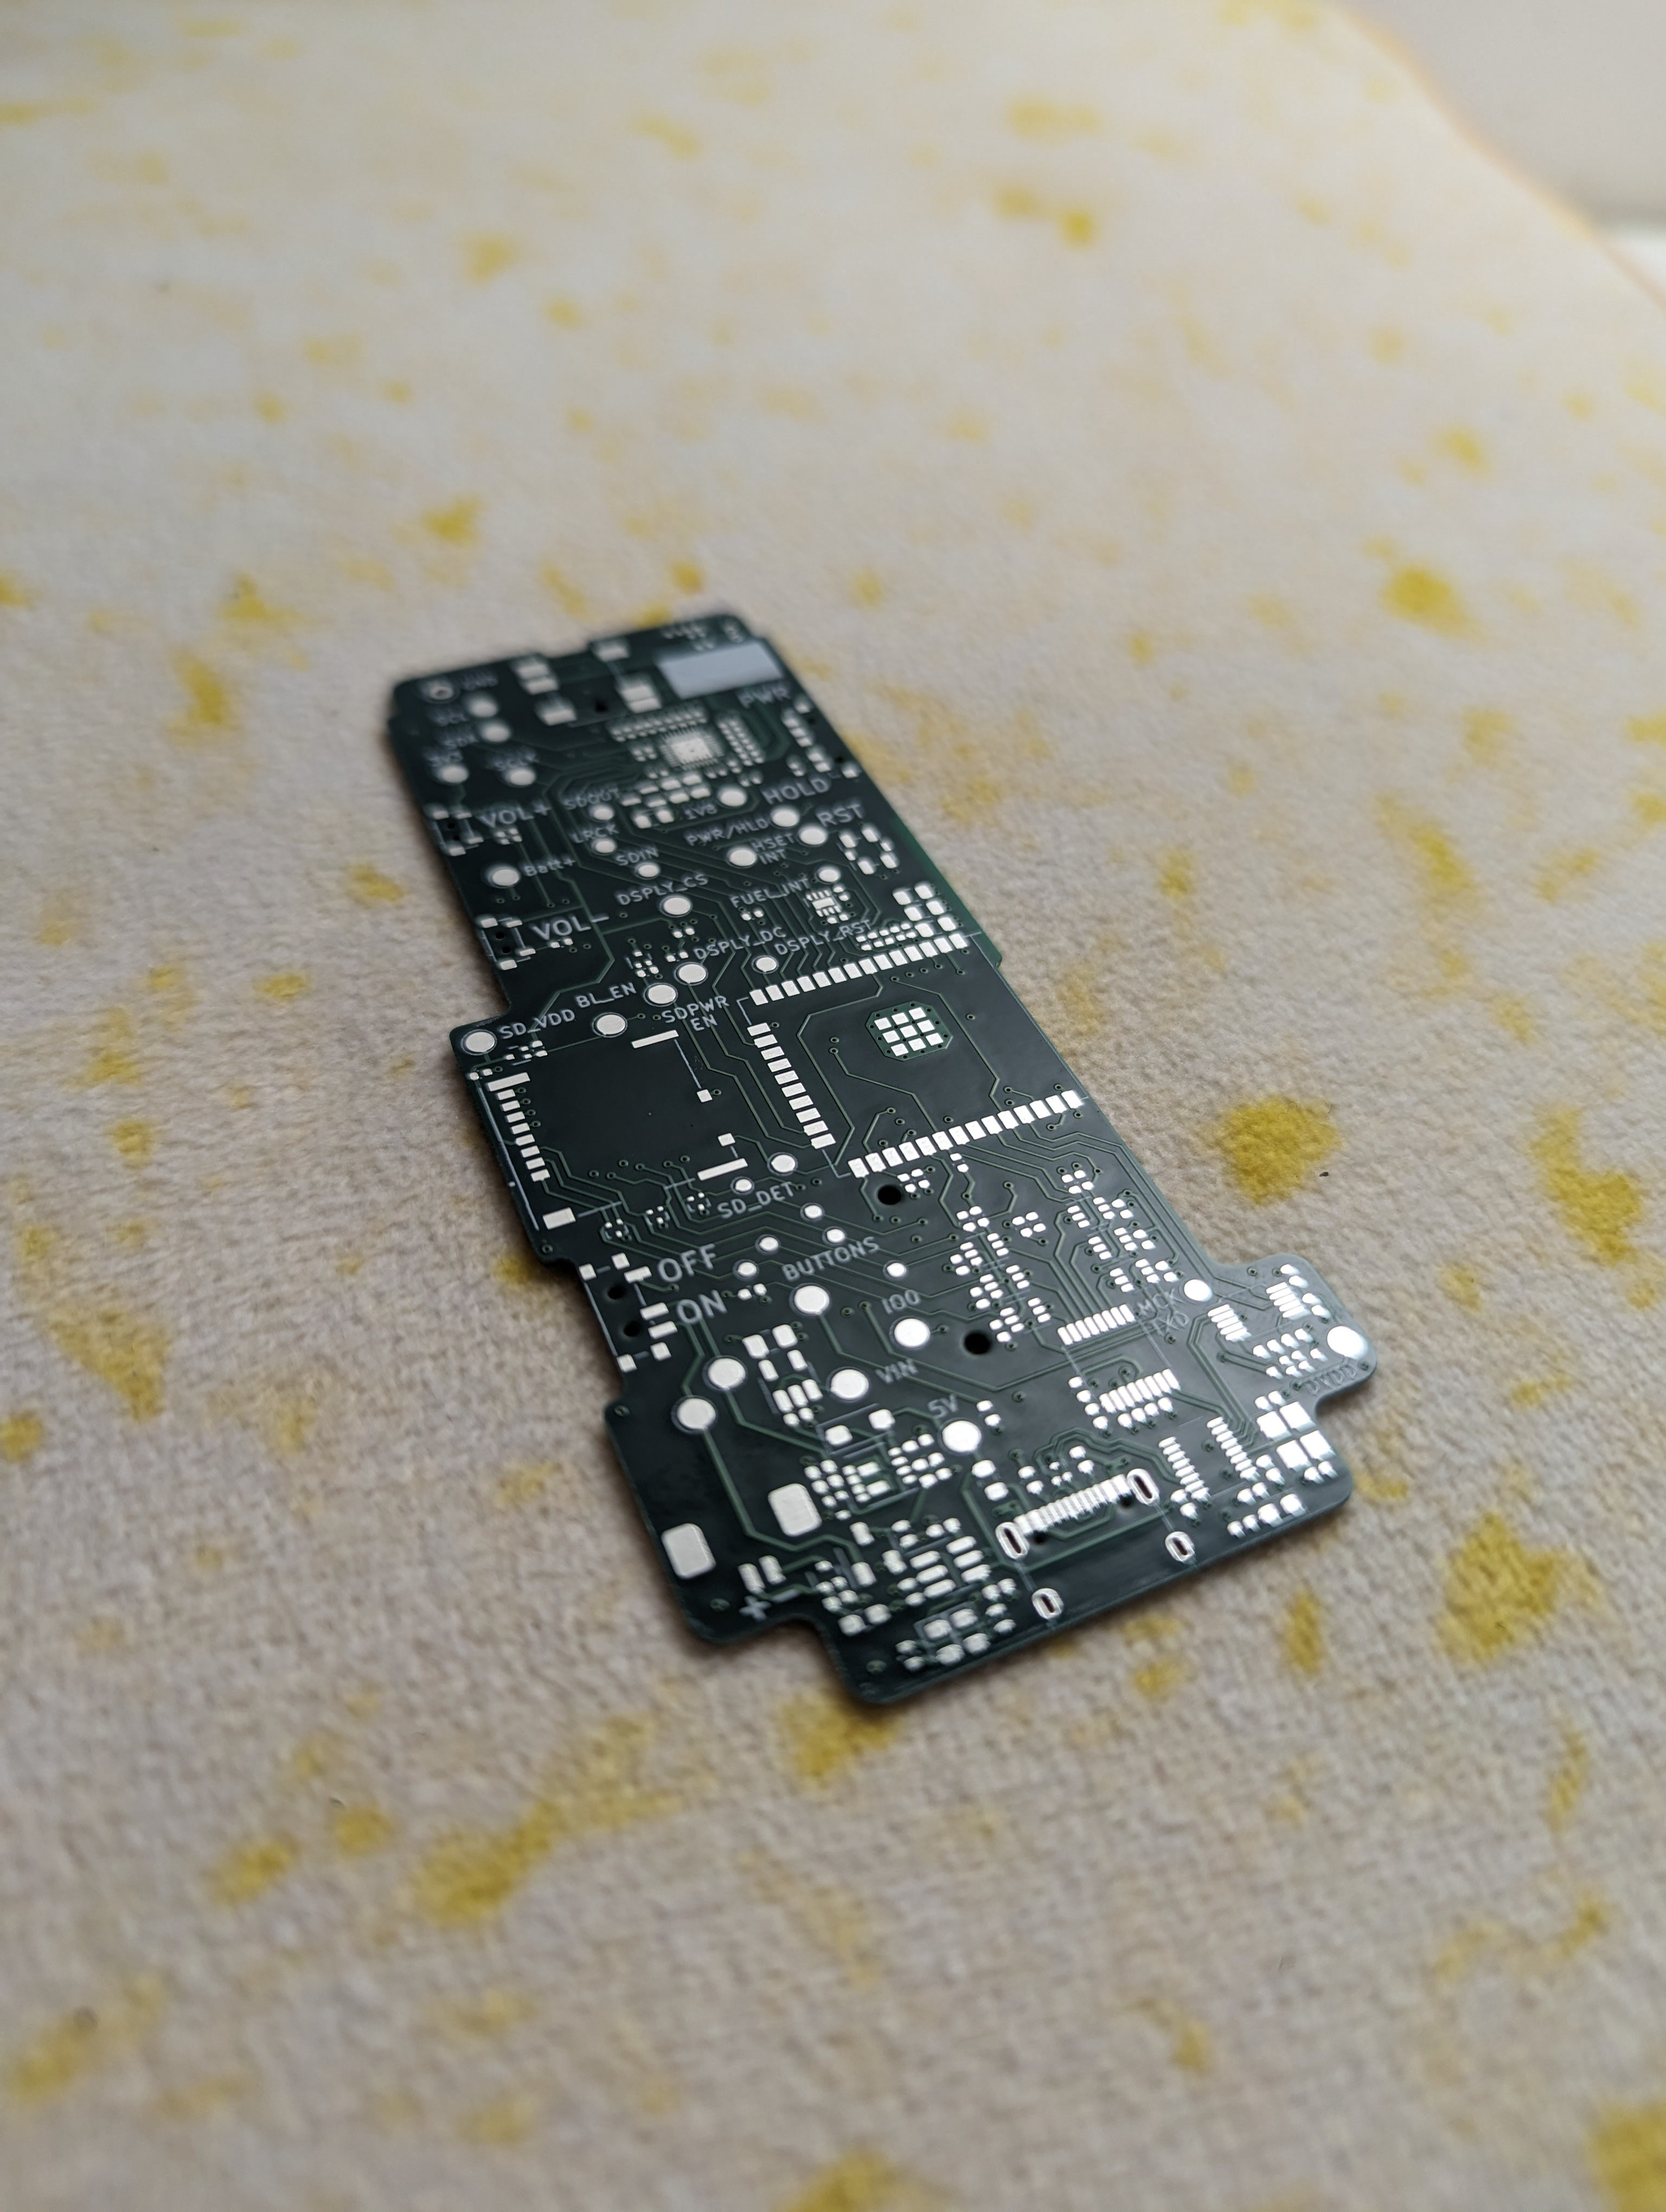
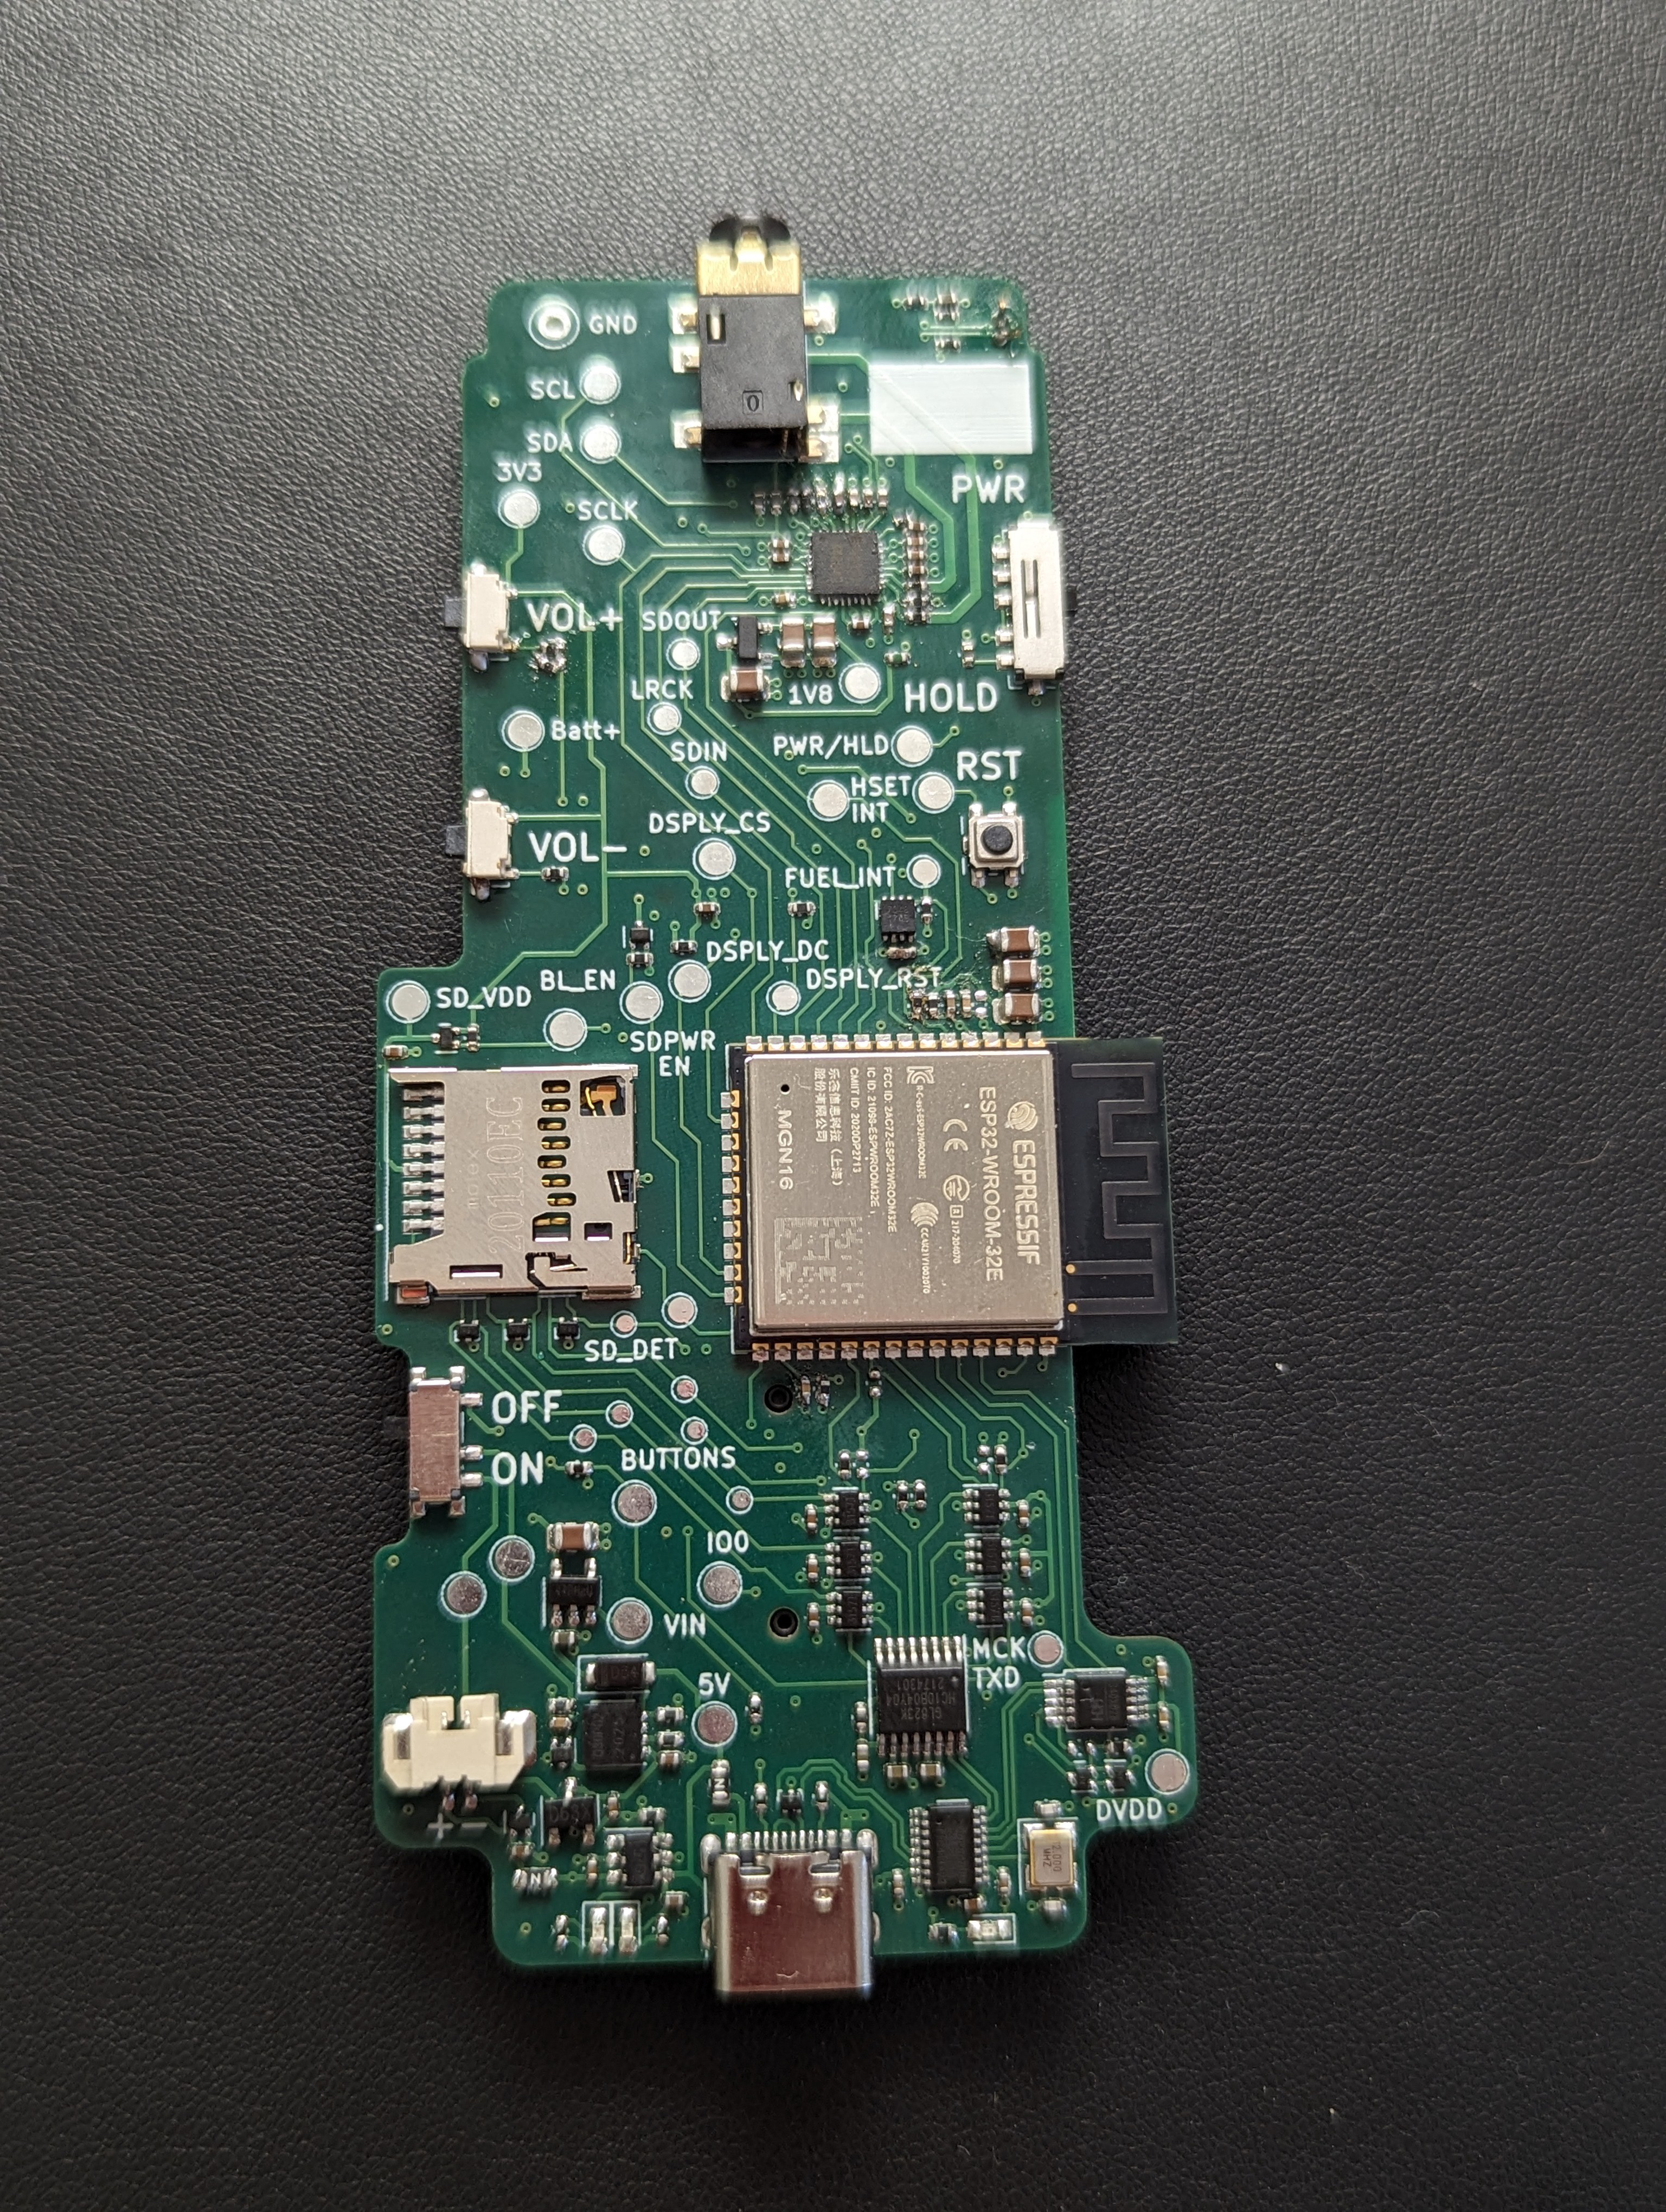
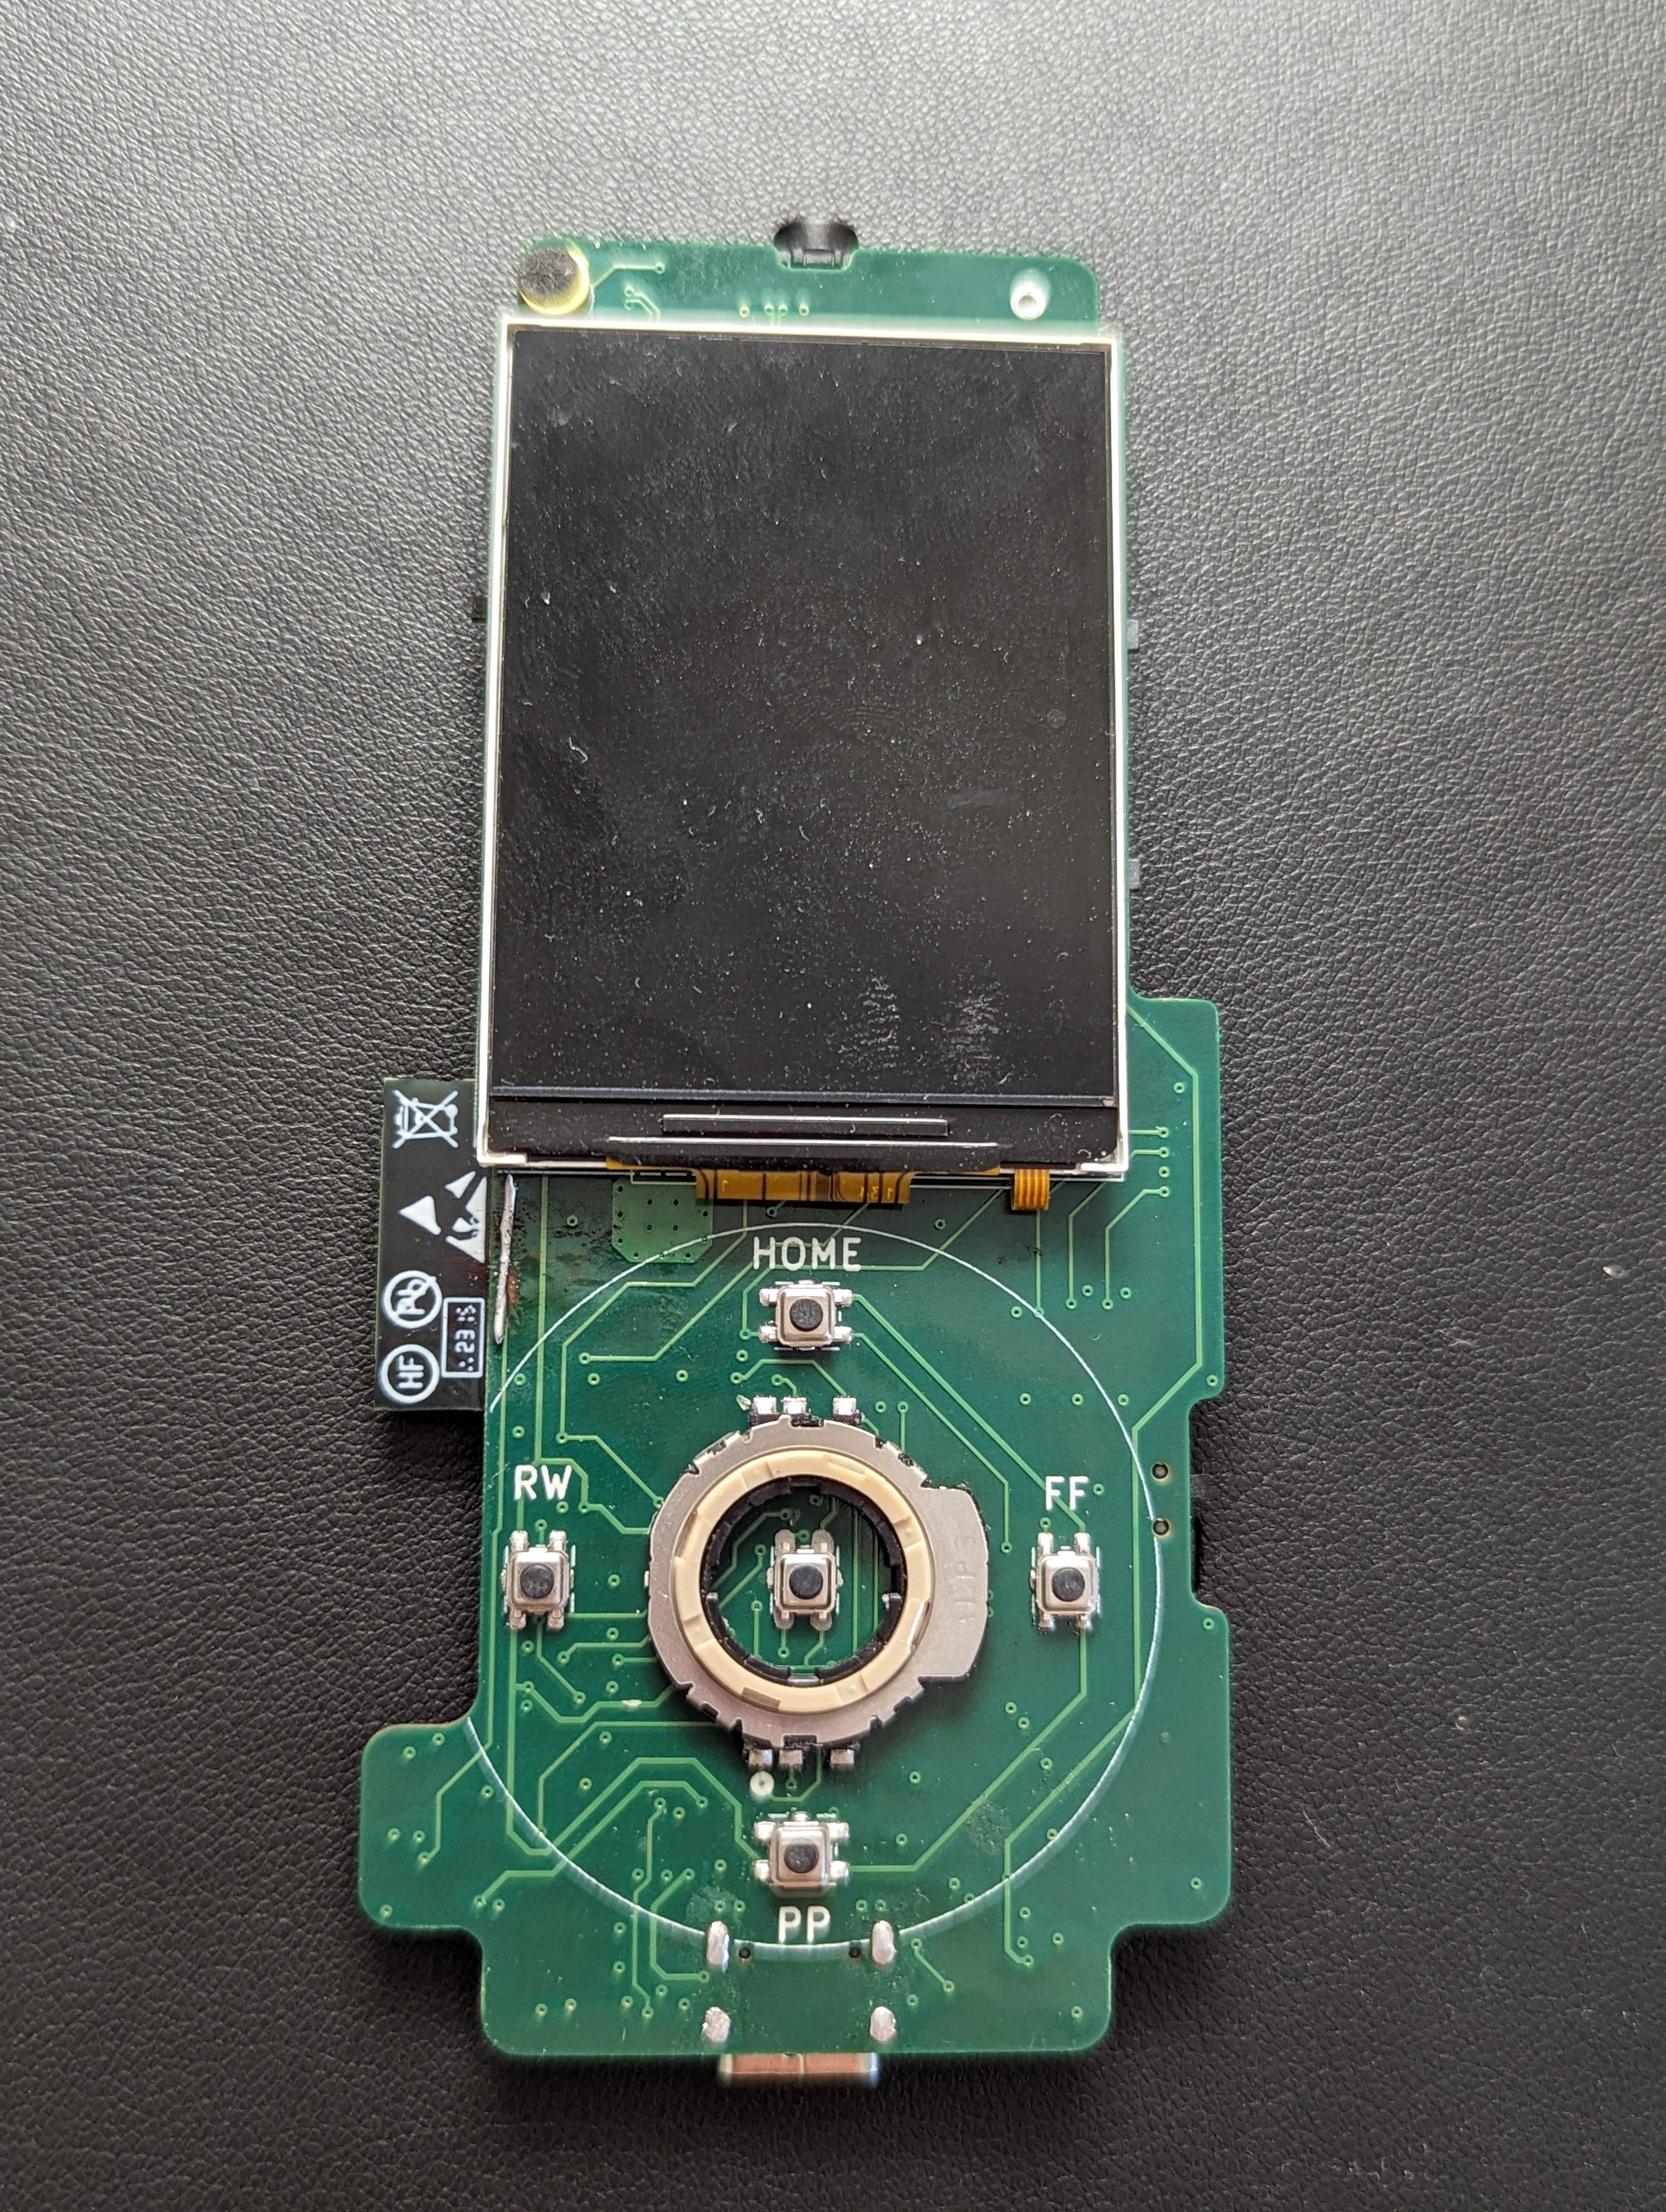
The boards got solderpaste applied with a stencil also from PCBway, then loaded up with components and cooked on a hotplate. First things I noticed while assembling was that the side buttons werent exactly the right ones, but I just bent the support pins to make them full smd. Another thing was that when doing the side with the buttons and encoder its best to do the buttons then place the encoder on and solder it as the hot air has a hard time getting into the middle of the encoder.
The board worked as soon as I plugged it in (though I needed to remove a stray 0.2 ohm resistor), I could see the CH340 and SD card reader pop up. Which means the hub was working perfectly. So far ive tested the codec, which performs even better then the last version, the display, buttons, encoder and SD card reader. For the reader I wrote a short program to switch the analog switches to connect the reader and sd card and power on the sd card. Immediately a flash device appeared on my computer and I could drag and drop easily. Im only using a speed class 10 micro sd so I got 12MB/s write and 30MB/s read but I suspect it can go much higher with the correct sd cards, the chip itself can handle up to 2TB micro sd cards. Evenly this comparatively slow speed was enough to transfer 170 .m4a songs over in about a minute which I was quite happy with. Of course the sd card also works fine with the ESP32, I even got exfat working so big capacity cards can now be supported.
Other then that I don't really have much else to report, everything works and its been a great success, I couldn't have hoped for a better outcome so far. Now im just back to writing software which is going to take forever for me. If someone has 10s of hours of free time on their hands give me a ring because the 1s and 0s scare me. Thanks again to PCBway for supplying pcbs for this project, I do really appreciate it.
![]()
![]()
![]()
![]()
![]()
If your wondering that thing below the screen left is a bodge solder reconnection of a trace because I cut it to find that pesky 0.2 ohm resistor that snuck in to my 10KS -
V3 PCB is designed
12/03/2023 at 03:40 • 0 commentsJust an update that the V3 is happening, here are some pics of the pcb
![]()
![]()
-
Input mechanism for the V3
11/01/2023 at 11:46 • 5 commentsIve been thinking about potential input devices for the V3 design.
Previously the plan was to use an external capacitive sensing chip, because the ESP32 doesnt have enough gpio to handle everything and touch sensing is the most sensible to allocate to another chip. This would then run an improved clickwheel design in a similar manner to the current system.
However, I recently decided I wasn't really a fan of the capacitive clickwheel. Don't get me wrong it works quite well. It just takes a lot of processing code and now id need to handle fetching data from an external sensor as well. It also takes power to run the chip and its haptic feedback and still doesn't feel as nice as the real thing.
So I started looking for other input methods and to cut to the chase Ive looked at magnetic, horizontal mechanical, vertical mechanical and optical. None of these really ended up being a good fit for the job, with all of them having at least one big flaw with how they had to be used in this situation. This situation doesnt just mean a clickwheel or similar either, just a rotary input method that was convenient and comfortable to use.
There is one exception though, which was a wonderful and very small smd hollow shaft mechanical encoder. It is also only about 2cm wide and 2mm tall, which is extremely manageable and easy to work around. So I was thinking, why not just recreate the original ipod wheel, but better and easier to use? The encoders hollow shaft can easily accomodate a button and theres no other spacing issues, even the vertical height of the player wont be impacted at all.
So now my plan is to make the original ipod clickwheel, with my own spin of course (get it?). I wanted the buttons to still be under the wheel which should be no problem and I want to 3d print the parts for the clickwheel, keeping it as simple as possible.
Let me know if you've got any ideas
-
Handling the SD card and fonts
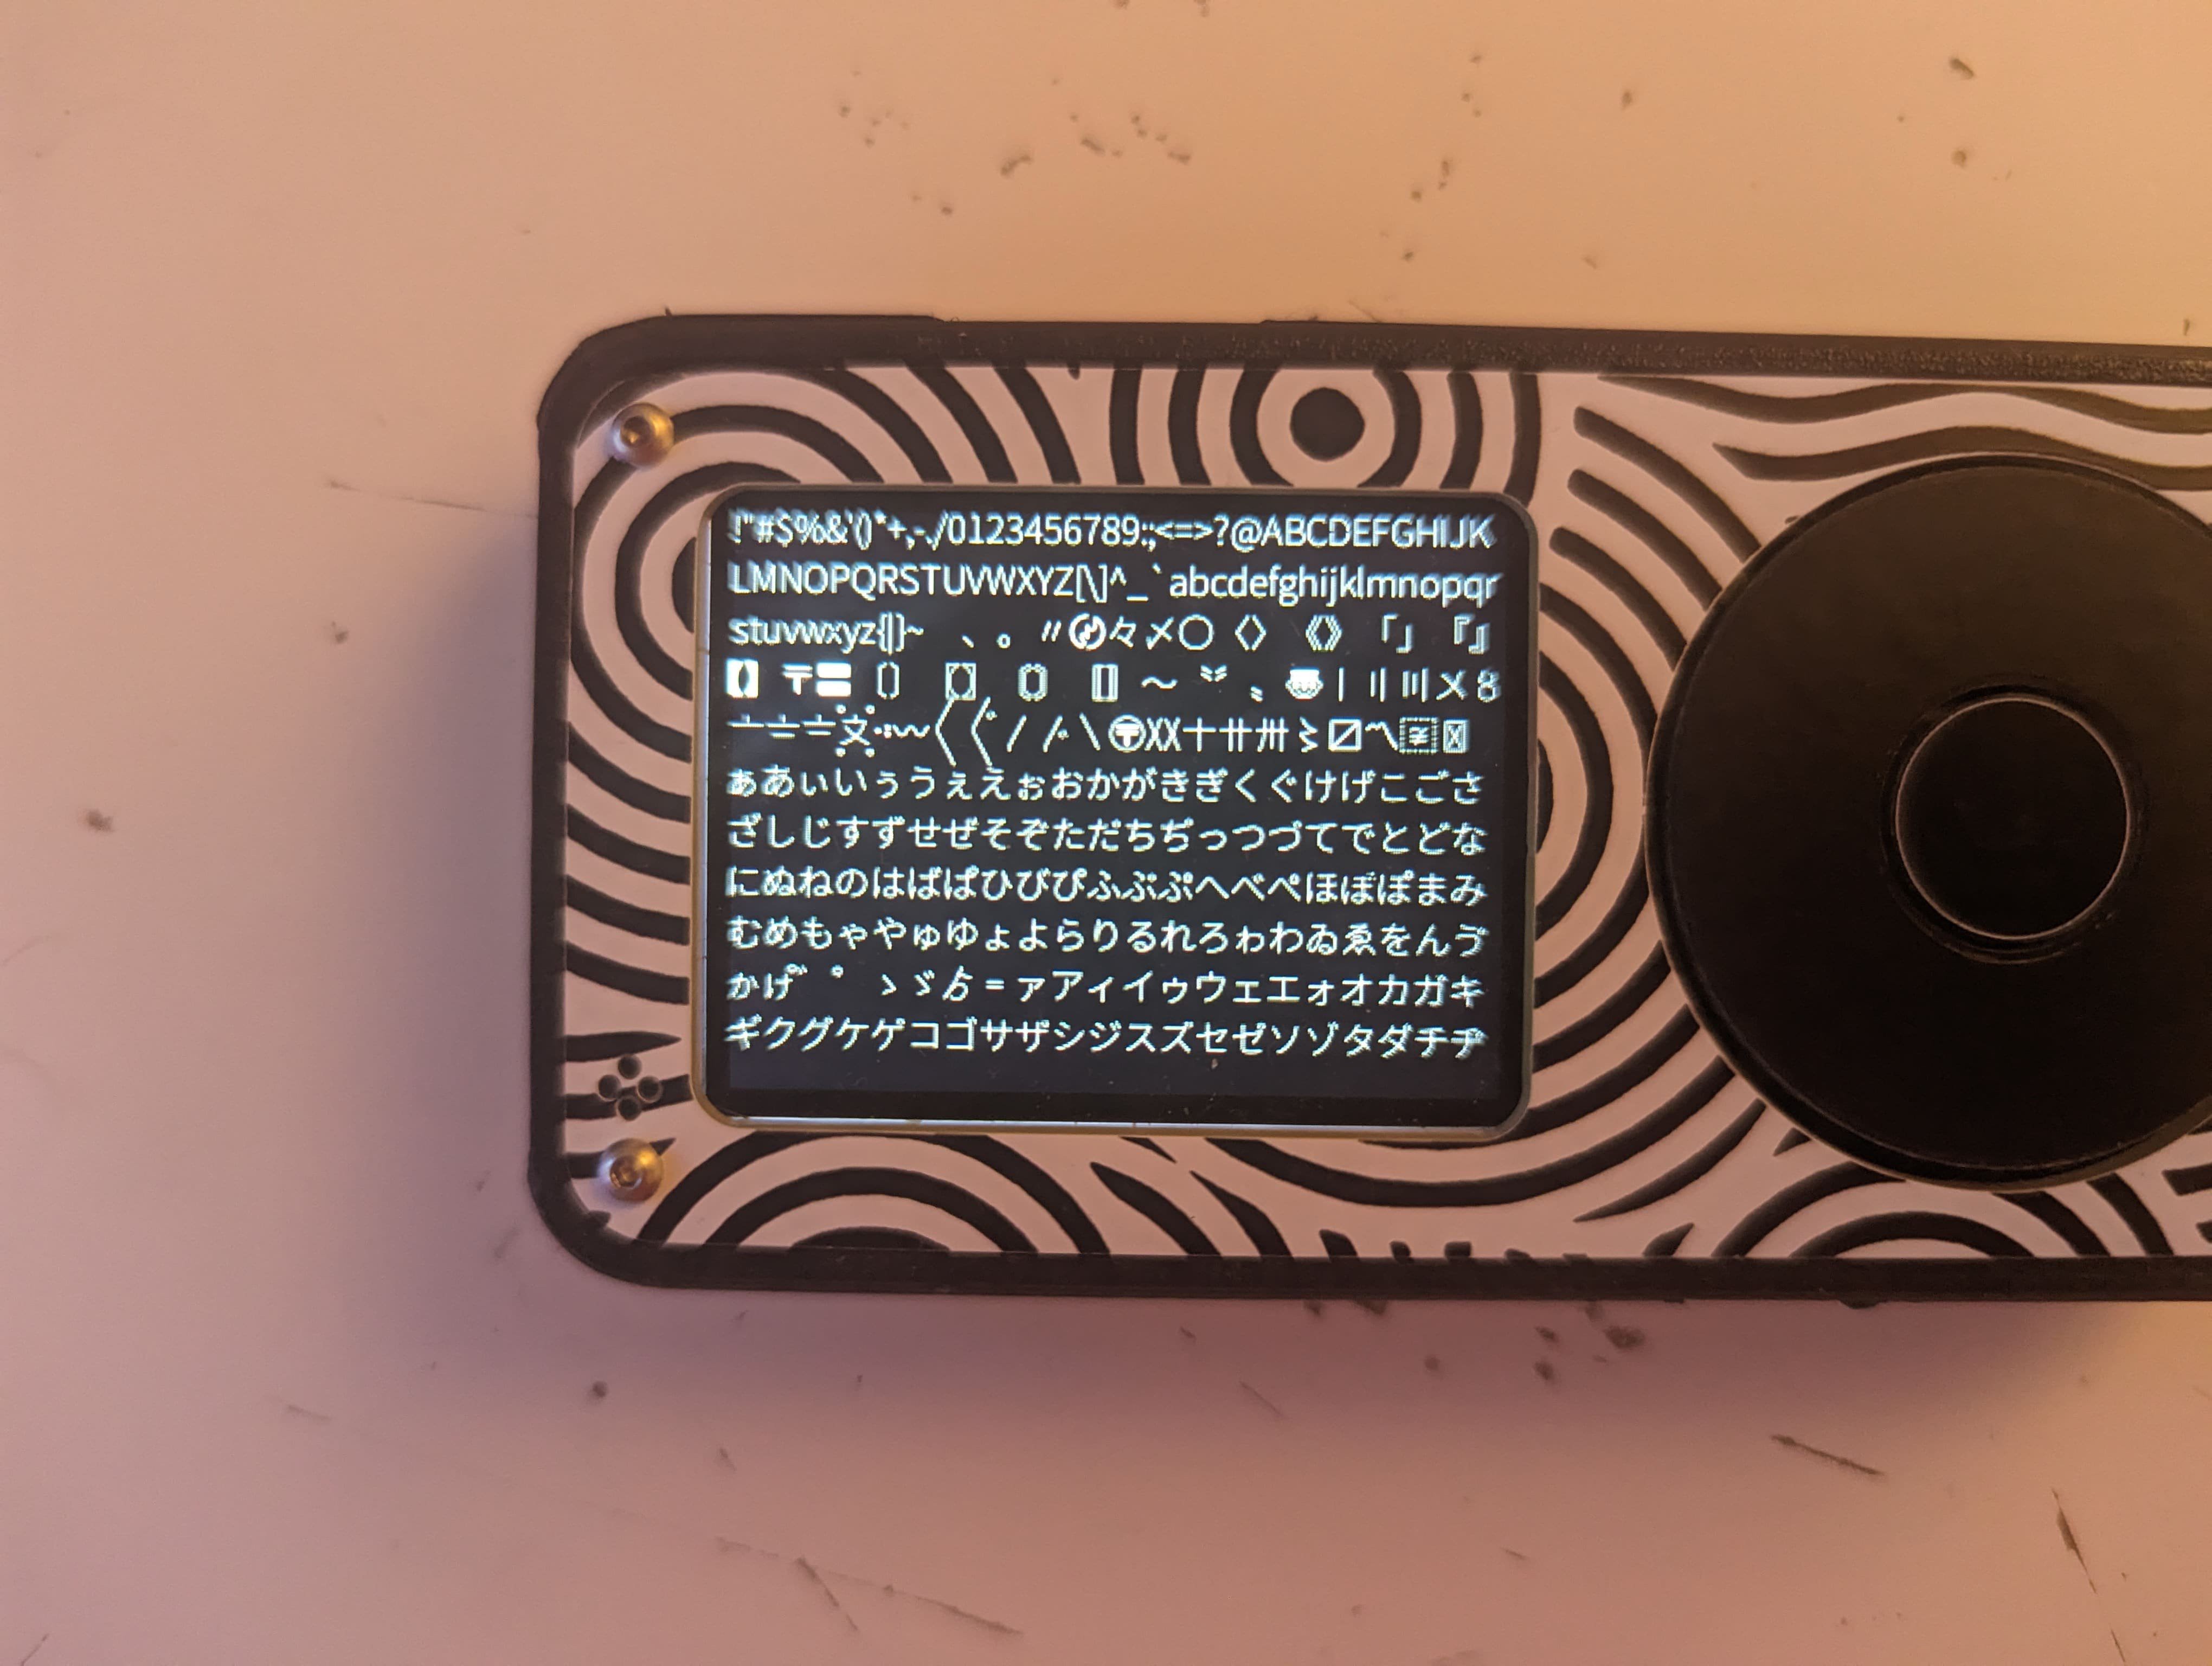
10/14/2023 at 06:27 • 4 commentsFirstly, I've been trying out new fonts in order to support new characters and languages. Here is an example of a google font that supports Japanese characters.
![]()
Since the fonts are much too big to reasonably store on the flash they must be stored on the SD card. The flash still carries a basic antialiased latin alphabet font which is used if the font file cannot be found on the SD card or there is no SD card present. Also, now if there is no SD card present on boot the homescreen will display a "No SD card" message momentarily every time you enter the homescreen.
![]()
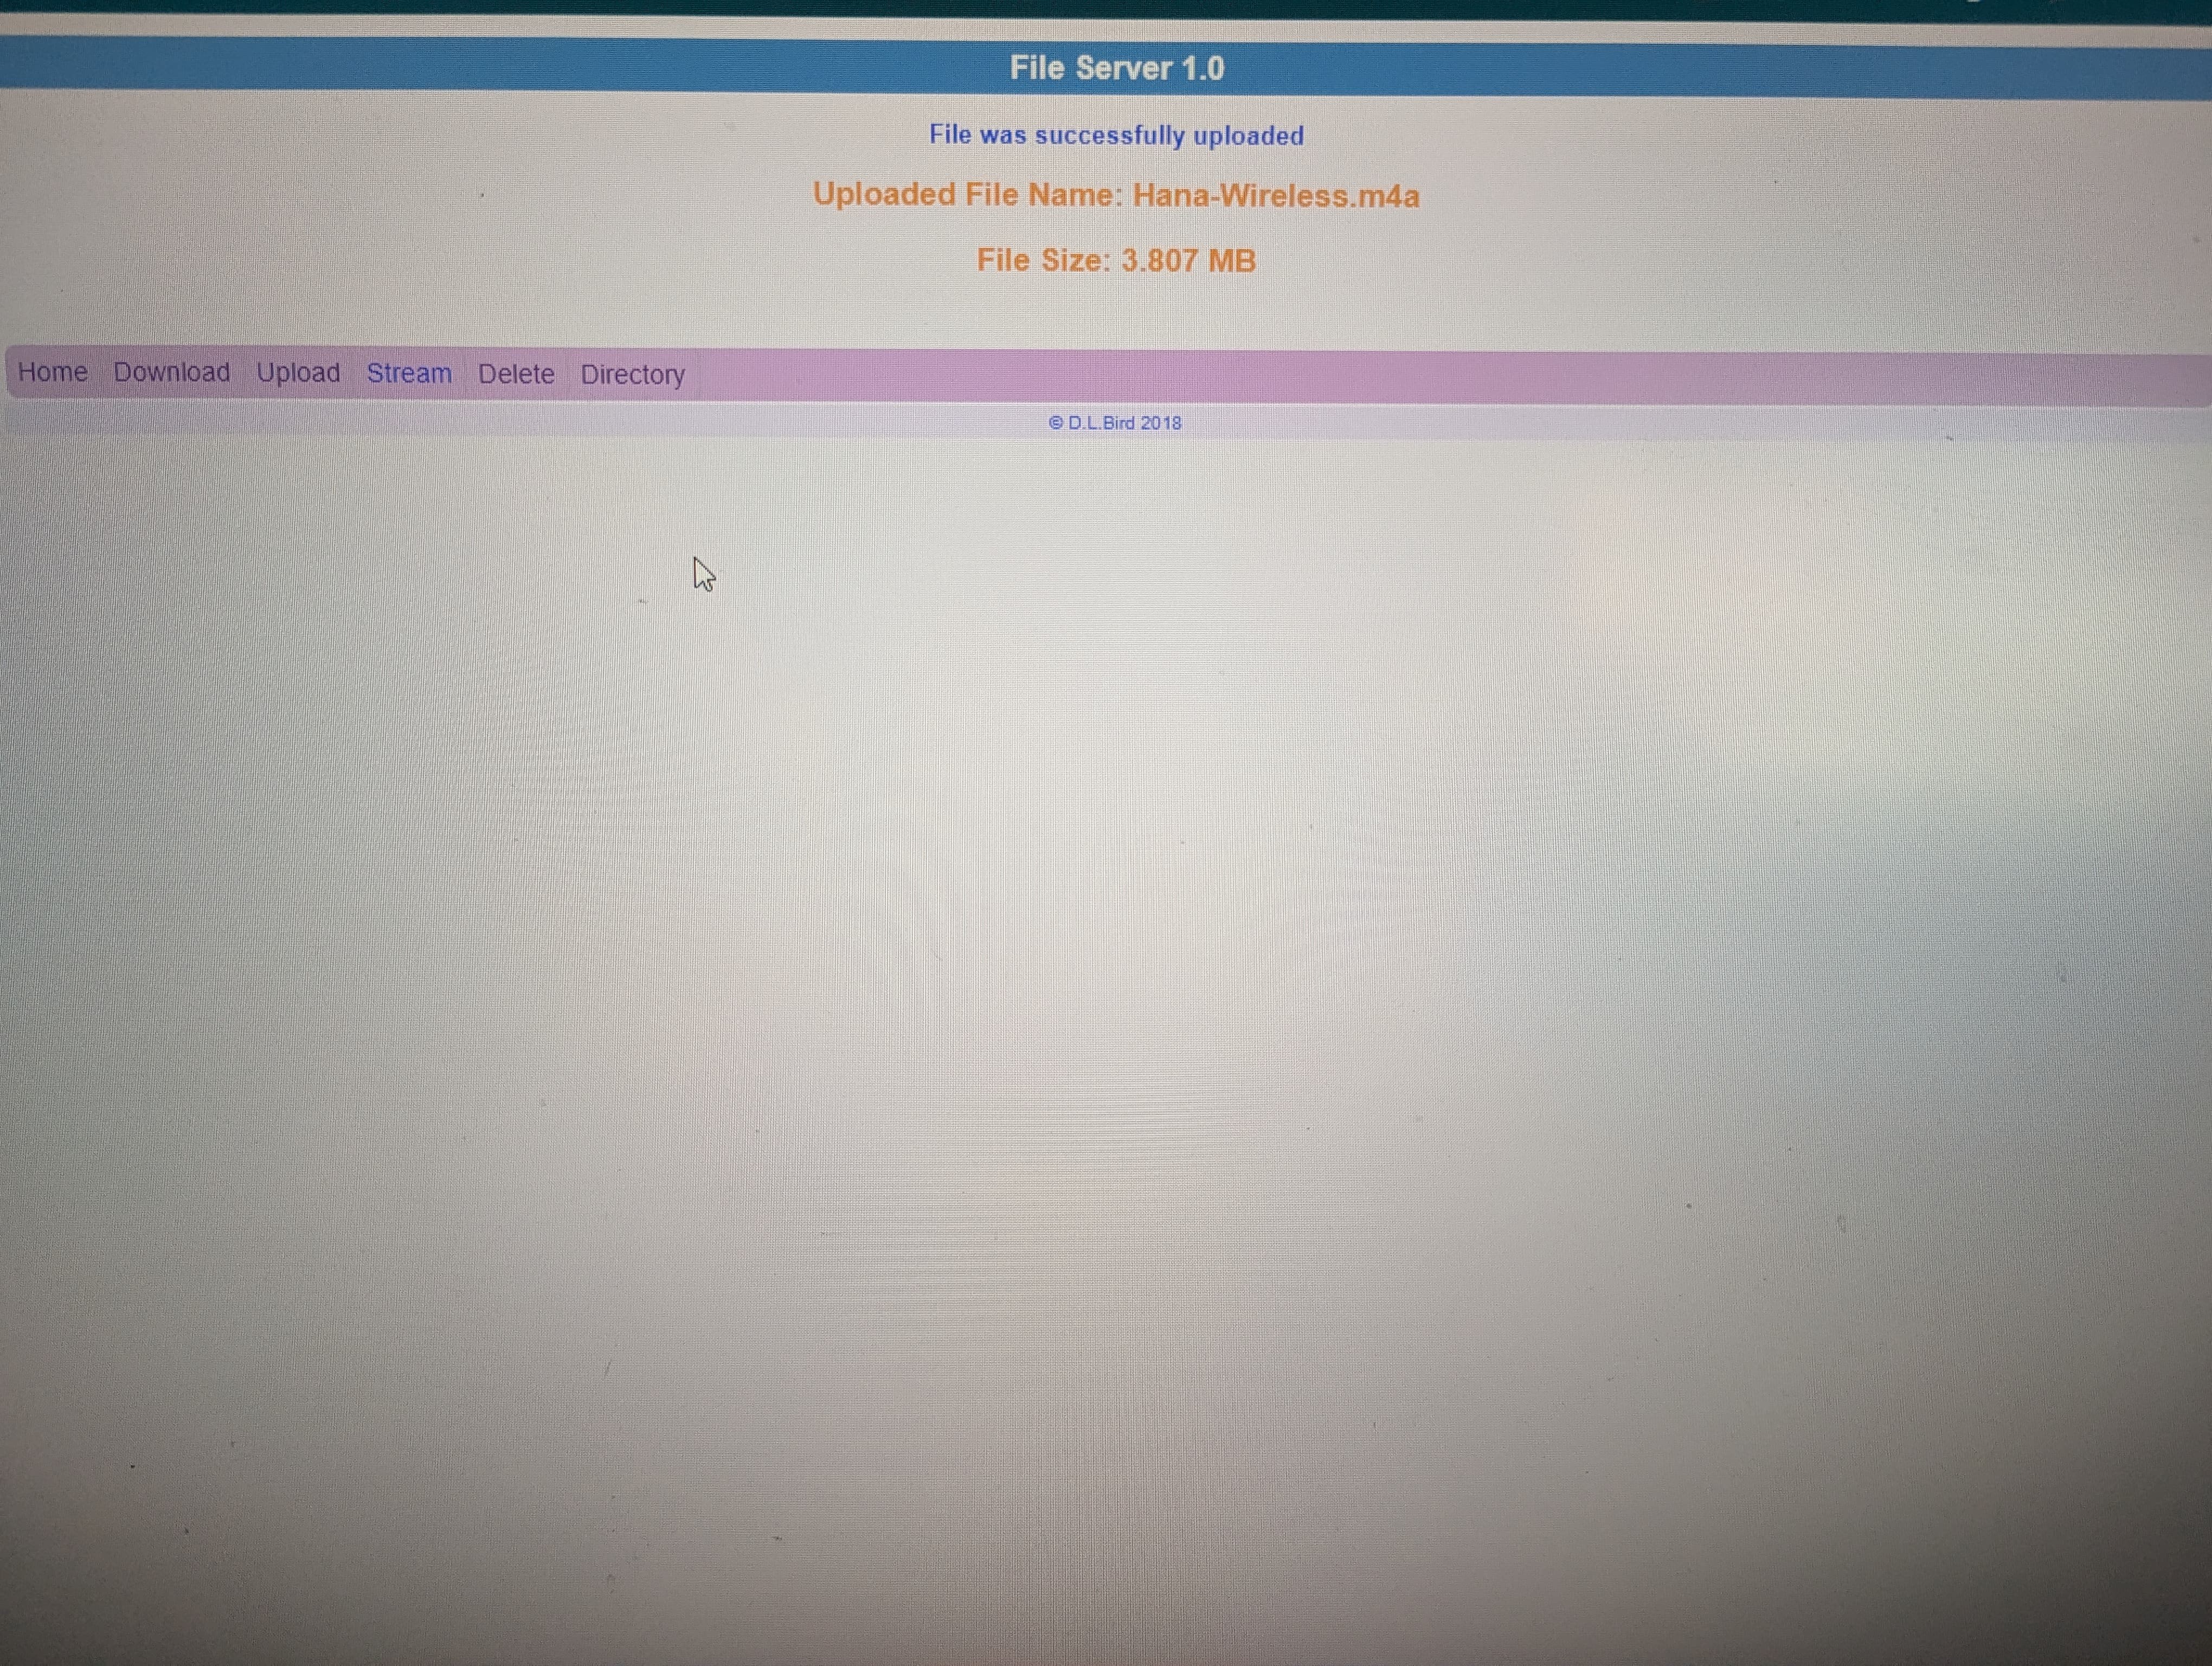
Ive also been experimenting with wireless file transfer with the excellent code from
G6EJD (https://github.com/G6EJD/ESP32-ESP8266-File-Download-Upload-Delete-Stream-and-Directory/tree/master). My test reveals that this system can transfer files at a speed of about 0.5 megabits per second. This is a very low speed for file transfers especially when you get into bigger music files. This system as it is would take an hour to send across 60 4 minute long compressed music files. I think i'm starting push the speeds of 1-bit SPI mode. An obvious solution to this is to go into 4-bit mode but I am not really comfortable on the software side. Even if I was im starting to dislike the wireless approach, having an sd card reader built into the board costs about a dollar in parts and means I can sidestep all wireless and 4-bit business. Simple usb mass storage drag and drop is really what I want, so I might as well built what I actually want instead of trying to make the cleanest most perfect solution. Also the wireless transfer is pretty inconvenient even if it was was faster and it only works when you have access to wifi.![]()
That makes the plan for the V3 as follows:
-Add SD card reader chip with USB switch to switch between programming and SD card
-When using card reader set the SPI pins as high impedance on ESP32
-No wireless file transfer
Id love to hear some opinions
-
Sprites are pretty handy
09/23/2023 at 12:36 • 0 commentsSpent 8 hours today on sprites with tft espi. Definitely worth it though as now there is no flickering when drawing lots of text items on the screen because they are all drawn at once. It also allowed me to add a text scrolling feature, so then when the file name is larger then a threshold it scrolls through it to display the whole file name. Then to wrap it up I added a file scroll thing on the side to display where you are in the list, looks pretty goo with antialiased graphics.
Heres a quick demo:
-
Basic file explorer and music playback
09/16/2023 at 12:29 • 0 commentsAfter quite a lot of coding there is some basic functions going, so far ive implemented:
-file filter for non music or directory files, identify directory files with a /
-scrolling main directory with auto adjusting scroll limits
-playing files from main directory
-current and end times for music
-local file name storage to reduce sd card reads
-music playing screen, when exiting it stops playback
-temporary volume controls on fast forward and rewind buttons
-All of the initialisation and button handling code
-Antialiasing
-Clickwheel functionality
To do
-Directory navigation and treating directories like playlists
-Checking files are playable before entering music player screen
-Find out why current play time sometimes starts at 17 seconds
-File name scroll for files that are bigger then max width (Had this working before but it slows down everything)
-Volume with clickwheel
-Hold switch
-Other basic music player functions
-Metadata from music files
-Settings
Heres the demo video of what i've coded so far:
Im happy with how im starting to progress with the coding (Which I must mention is here https://github.com/Thecactusman0/Music32-OS), i'm really starting to make progress. I do feel that right now im holding back the potential of this device by being a hardware guy but I hope I can change this and learn enough to fully realise what I want to achieve with this project.
On another note, being with this device for a week now, i've realised how much of an impact haptic feedback has on the functionality of a clickwheel. You are scrolling a smooth surface with only visual feedback and it feels a bit weird, I think im going to wire in a haptic motor at some point and definitely include one for the next version. Big oversight to not include one on this version but thats part of the development process, learning from mistakes to make it better for the next version.
If I had to rate it, id say the audio quality is pretty damn good. Im listening through kb ear ks1 in ear headphones and cannot tell the difference playing through this vs any other device. Then again I don't have any high quality audio devices and don't listen to uncompressed music so I don't know. Im no audiophile but its definitely good for me. Ill have to figure out a way to record directly from it so I can send some files here side by side.
Finally, don't judge the music files that are on that SD card.
-
Coding is hard but im making progress
09/11/2023 at 06:49 • 0 commentsEncountered a couple coding issues which you can see below. Had problems with a for loop which was drawing the text but fixed it by replacing it with a while loop.
Now i've got the text all displaying correctly and it is scrollable with the clickwheel. However every time it has to draw the screen it needs to read the SD card again so there can be quite a bit of lag if you scroll fast which can cause it to skip items. To counter this I plan to store the displayed file names temporarily so the code can just read from an array instead of the sd card when it needs to update the screen, hopefully getting rid of that lag. A file filter also needs to be in place to only display music files. Then some more code to handle navigating folders and treating them as playlists. Once I figure out handling SD cards ill pretty it up and make it how I want it to be, obviously it shouldn't just dump the contents into a big list of music files. I think my next goal however is adding the battery and clock information and maybe some basic settings because I want an easy success, handling the SD card and making a gui is hard work.
-
Pretty hard for some 1s and 0s
09/10/2023 at 03:31 • 0 commentsSoftware is always the most difficult part of a project for me as my coding skills are not the best. After a lot of figuring things out I have it displaying the file name from the sd card and playing it using arduino audio tools player class.
Ive also combined it with my menu code, here it is playing a 1khz test tone from the sd card
Now comes the problems, I have no idea how to display all the filenames in a list. Ive tried it with the SD library for Arduino but it only gave parts of the filenames. I couldn't get sdfat to initialise the SD card either. Another issue is that anytime you refresh the display it will interrupt the audio playback. Im trying to get the audio working on one core and the display checks on the other core but it just doesn't work, at the end of the day they are both sharing the same SPI bus. It will either not work at all or the audio playback will be interrupted by display updates.
Ive optimised the display code and adjusted the audio buffers but can't get it to work nicely together. So i'm stuck here for now until I can find a solution. Any help would be greatly appreciated.
-
Case and basic menu
09/07/2023 at 14:00 • 0 commentsSo I quickly designed a new case and it's working quite well. Feels really nice in the hand and fits all the components really nicely. I also coded up a basic menu that can be scrolled through with the capacitive touch wheel using the interpolated values. So it's now taking that degrees value that made the awesome wheel spin demo and running it through some logic to divide it into 12 interpolated segments. Unfortunately I don't have a video to share as the clickwheel connector broke so it needs replacing. Should have a video up by tomorrow hopefully.
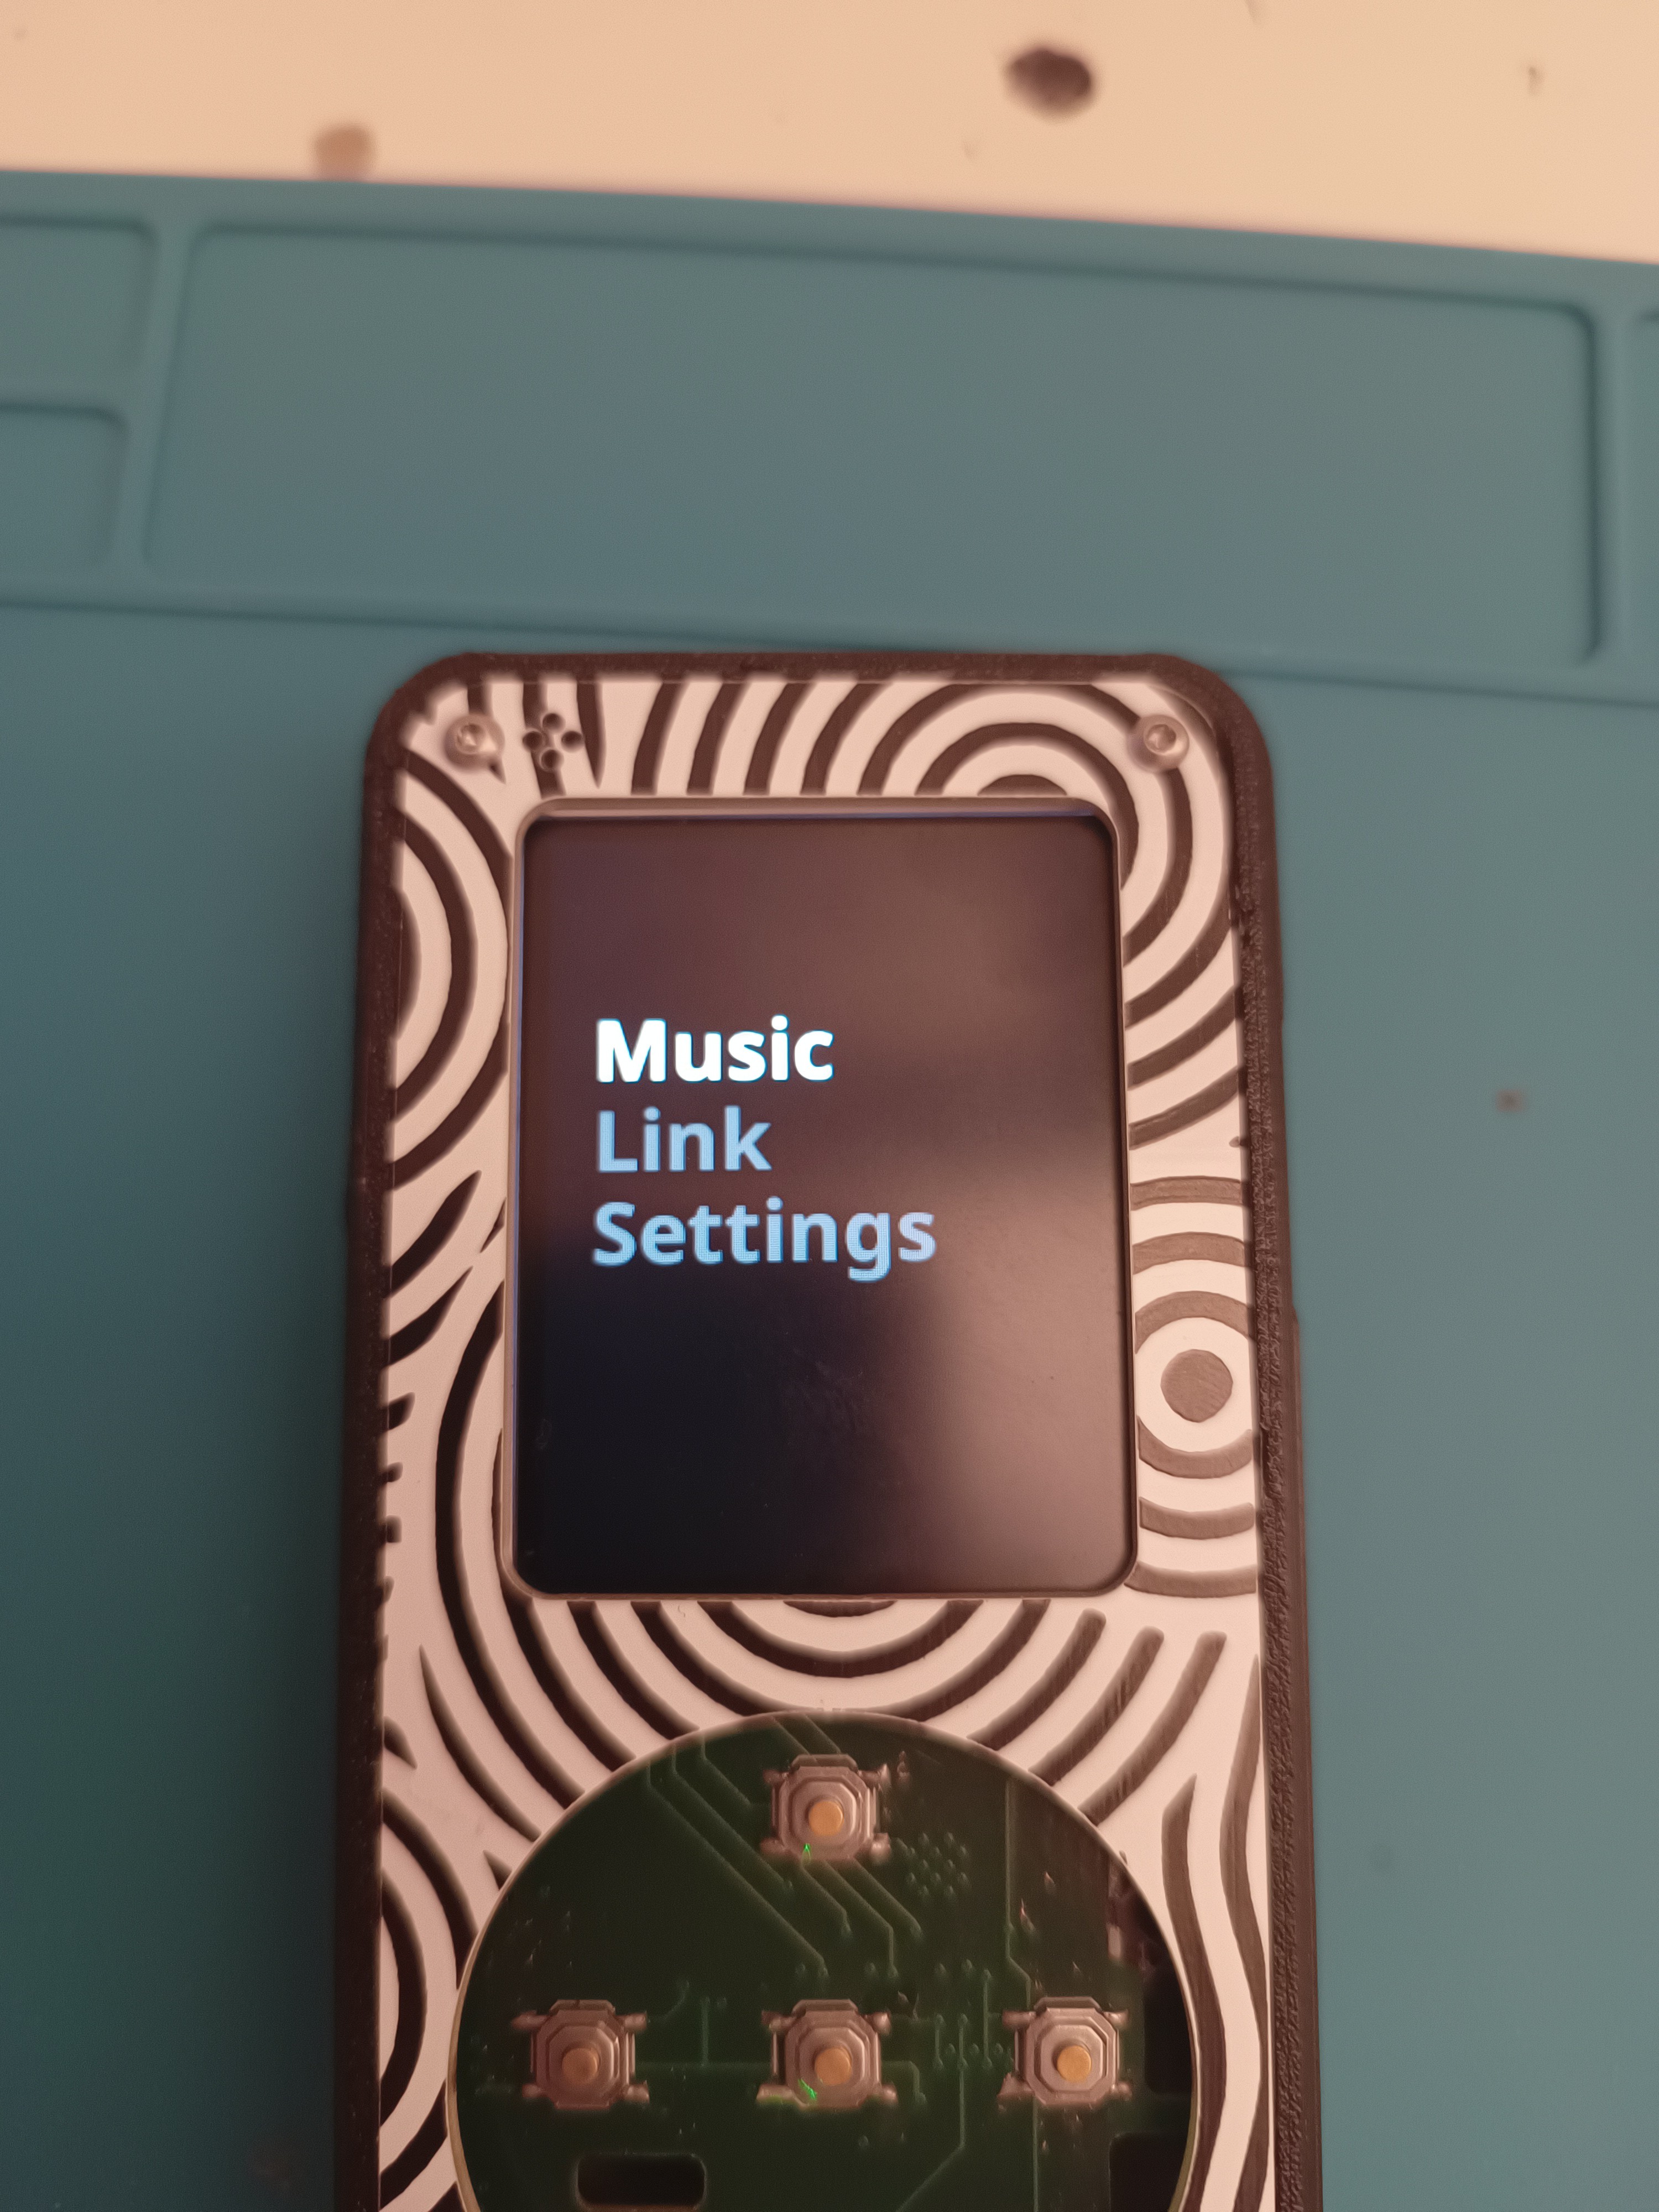
In the meantime have this photo of the basic main menu, still needs some work and the battery percentage and time but I think it looks alright so far. Hoping to get a thinner text on there too. Although this text has anti aliasing so it looks amazing in person. The selected item is white and the others are a dark Gray though the camera screws it up, this is actually at 25% brightness just to get a clear picture.
![]()
![]()
![]()
![]()
![]()
I think overall it's really coming together nicely. Now some people may not like the Zuney way the UI is going but that's a matter of personal taste and I sure don't have the software skills to be recreating an iPods software and UI. I think once I get some thinner text (segoe ui?) It will look really clean. I want to get the time and battery percent on the home screen too but making it a basic music player will come first. Let me know your opinions.
Music32-V2 - Portable music player
Recreating the ipod with Bluetooth and an SD card slot, without losing the headphone jack